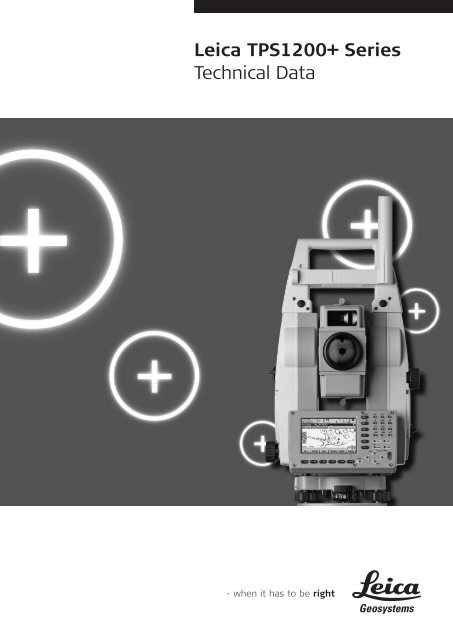
Leica TPS1200+ Series Technical Data
Leica TPS1200+ Series Technical Data
Leica TPS1200+ Series Technical Data
You also want an ePaper? Increase the reach of your titles
YUMPU automatically turns print PDFs into web optimized ePapers that Google loves.
<strong>Leica</strong> <strong>TPS1200+</strong> <strong>Series</strong><strong>Technical</strong> <strong>Data</strong>
<strong>TPS1200+</strong> <strong>Technical</strong> <strong>Data</strong>Models and OptionsAngle measurementDist. meas. with Reflector (IR-Mode)Dist. meas. without Reflector (RL-Mode)Distance measurement – Long RangeMotorizedAutomatic Target Recognition (ATR)PowerSearch (PS)Guide Light (EGL)Remote Control Unit (RX1220)Laser Guide GUS74SmartStation (ATX1230, ATX1230GG)TC TCR TCRM TCA TCP TCRA TCRPStandardOptionalAngle measurementDescriptionThe highly accurate and reliable angle measurement system consists of a static line-coded glass circle, which is read by a linearCCD array. A special algorithm determines the exact position of the code lines on the array and determines the precisemeasurement instantly. As the code on the glass circle is absolute and continuous, no initialization of the instrument is requiredprior to measurements.A dual axis compensator constantly monitors both axes of the vertical axis tilt. The compensator consists of an illuminated linepattern on a prism, which is reflected twice by a liquid mirror forming the reference horizon. The reflected image of the linepattern is read by a linear CCD array and then used to mathematically determine both tilt components. These components arethen used to immediately correct all angle measurements.Type 1201+ Type 1202+ Type 1203+ Type 1205+Accuracy (std. dev. ISO 17123-3)Hz, V: 1“ (0.3 mgon) 2“ (0.6 mgon) 3“ (1 mgon) 5“ (1.5 mgon)Display least count: 0.1“ (0.1 mgon) 0.1“ (0.1 mgon) 0.1“ (0.5 mgon) 0.1“ (0.5 mgon)Methodabsolute, continuous, diametricalCompensatorWorking range:4’ (0.07 gon)Setting accuracy: 0.5“ (0.2 mgon) 0.5“ (0.2 mgon) 1.0” (0.3 gon) 1.5” (0.5 mgon)Method:centralized dual axis compensator3
Distance measurement with Reflector (IR-mode)DescriptionThe IR mode EDM transmits an visible laser beam to specular targets such as prisms or reflector tapes. The reflected light isdetected by a sensitive photo receiver and converted into an electrical signal. After digitizing and accumulating the signal, thedistance is determined by means of modern phase measurement techniques. A modulation frequency of 100 MHz is the timebase for the high distance accuracy. The coaxiality and the divergence angle of the laser beam together with the automatictarget recognition (ATR), allo w dynamic tracking of targets quickly and accurately in 3 dimensions.RangeA B CStandard prism (GPR1): 1800 m (6000 ft) 3000 m (10000 ft) 3500 m (12000 ft)3 standard prisms (GPR1): 2300 m (7500 ft) 4500 m (14700 ft) 5400 m (17700 ft)360° prism (GRZ4, GRZ122): 800 m (2600 ft) 1500 m (5000 ft) 2000 m (7000 ft)360° mini prism (GRZ101): 450 m (1500 ft) 800 m (2600 ft) 1000 m (3300 ft)Mini prism (GMP101): 800 m (2600 ft) 1200 m (4000 ft) 2000 m (7000 ft)Reflector tape (60 mm x 60mm): 150 m (500 ft) 250 m (800 ft) 250 m (800 ft)Shortest measuring distance:1.5 mAtmospheric conditions:A: Strong haze, visibility 5 km; or strong sunlight, severe heat shimmerB: Light haze, visibility about 20 km; or moderate sunlight, slight heat shimmerC: Overcast, no haze, visibility about 40 km; no heat shimmerAccuracy (standard deviation ISO 17123-4) / Measure timeStandard mode:1 mm + 1.5 ppm / typ. 2.4 sFast mode:3 mm + 1.5 ppm / typ. 0.8 sTracking mode:3 mm + 1.5 ppm / typ. < 0.15 sAveraging mode:1 mm + 1.5 ppmDisplay resolution:0.1 mmMethodPrinciple:Type:Carrier wave:Measuring system:Phase measurementCoaxial, visible red laser660 nmSpecial phase shift analyzer ~ 100 MHzDistance measurement without ReflectorDescriptionThe reflectorless EDM PinPoint R400 transmits an accurately collimated visible red laser beam to the target. The distance ismeasured by an optimally designed System Analyzer technique that allows measuring to targets at distances more than400 m. The coaxiality of the measurement beam and its extremely small “diffraction limited” spot size allow the highest degreeof pointing and measurement accuracy.The reflectorless EDM PinPoint R1000 measures to targets more than 1000 m away. To measure to targets at such longdistances with high measurement accuracy, a new measurement technology was developed. The main component of the EDMis a system analyzer, which uses modulation frequencies in the range of 100 MHz. The system analyzer properties are definedfor each individual measurement for both the EDM beam and the target qualities. As a result of the system analysis, theparameters for every individual measurement are now known. The distance is calculated using modern signal processing basedon the principle of maximum-likelihood. Besides the drastically increased sensitivity which leads to a sensational increase inreflectorless measurement range, the new EDM system provides many other advantages such as a very high measurementquality and reliability even when measuring in rain, fog, dust or snow. In addition the measurement system helps to preventerrors, by detecting if there are multiple targets within the measurement beam.4
D E FRange PinPoint R400Kodak Gray Card, 90% reflective: 200 m (660 ft) 300 m (990 ft) > 400 m (1310 ft)Kodak Gray Card, 18% reflective: 100 m (330 ft) 150 m (490 ft) > 200 m (660 ft)Range PinPoint R1000Kodak Gray Card, 90% reflective: 600 m (1970 ft) 800 m (2630 ft) > 1000 m (3280 ft)Kodak Gray Card, 18% reflective: 300 m (990 ft) 400 m (1310 ft) > 500 m (1640 ft)Range of measurement:1.5 m to 1200 mDisplay unambiguous:up to 1200 mAtmospheric conditions:D: Object in strong sunlight, severe heat shimmerE: Object in shade, or sky overcastF: Underground, night and twilightAccuracy / Measure timeStandard mode (standard deviation ISO 17123-4)0 m - 500 m: 2 mm + 2 ppm / typ. 3-6 s, max. 12 s> 500 m: 4 mm + 2 ppm / typ. 3-6 s, max. 12 sAtmospheric conditions:Object in shade, sky overcast (E)Display resolution:0.1 mmTracking mode*)5 mm + 3 ppm typ. 0.25 s*) Accuracy and measure time depend on atmospheric conditions, target object and observation situation.Laser dot sizeAt 30 m:At 50 m:At 200 m:MethodType:Carrier wave:Measuring system PinPoint R400/R1000:7 mm x 10 mm8 mm x 20 mm25 mm x 80 mmCoaxial, visible red laser660 nmSystem analyzer basis 100 MHz - 150 MHzDistance measurement – Long RangeDescriptionThe highly collimated red laser beam of the PinPoint R400 can also be used to measure to prism targets at distances between1000 m and 12000 m or reflector tape at extended ranges. The visibility of the laser beam simplifies the search of far distantreflectors, because the reflected light is even visible at distances more than 5000 m. The distance is measured by the samephase measurement technique as for the infrared beam.The accurately collimated red laser beam of the PinPoint R1000 is similar to that of the PinPoint R400, the ambiguity range isalso 12000 m. The main module of the long range EDM is again a system analyzer (similar to the system analyzer used forreflectorless measurements) but with a reduced frequency set between 100 MHz and 150 MHz. The distance is calculated by anestimation method using modern signal processing incorporating the advantages such as high measurement quality andreliability when measuring in rain or snow positive and the detection of multiple targets within the measurement beam.A B CRangeStandard prism (GPR1): 2200 m (7300 ft) 7500 m (24600 ft) > 10000 m (> 32800 ft)Reflector tape (60 mm x 60mm): 600 m (2000 ft) 1000 m (3300 ft) > 1300 m (> 4300 ft)Range of measurement to prism:1000 m to 12000 mDisplay unambiguous:up to 12000 mAtmospheric conditions:A: Strong haze, visibility 5 km; or strong sunlight, severe heat shimmerB: Light haze, visibility about 20 km; or moderate sunlight, slight heat shimmerC: Overcast, no haze, visibility about 40 km; no heat shimmer5
Accuracy (standard deviation ISO 17123-4) / Measure timeEntire measurement range:5 mm + 2 ppm/ typ. 2.5 s, max. 12 sDisplay resolution:0.1 mmMethodPrinciple:System analyzerType:Coaxial, visible red laserCarrier wave:660 nmMotorizedMaximum speedRotating speed:45° / sAutomatic Target Recognition (ATR)DescriptionThe ATR sensor transmits an invisible laser beam, which is reflected by any standard prism (no active prisms emitting specialsignals are required) and is received by an internal high-resolution CMOS camera. The intensity and the “spot” characteristicsof the reflected light are calculated in respect to the CMOS camera center. The offset components from this reference arecomputed in both the vertical and horizontal planes. These offsets are then used to control the motors of the telescope axes,which react immediately to position the instrument’s crosshairs onto the prism. To minimize measurement time the crosshairsare only positioned within a 5 mgon tolerance (EDM mode IR-Fine) of the actual prism center. The remaining offsets are thenmathematically applied to the Hz and V angles.RangeATR modeLock modeStandard prism (GPR1): 1000 m (3300 ft) 800 m (2600 ft)360° prism (GRZ4, GRZ122): 600 m (2000 ft) 500 m (1600 ft)360° mini prism (GRZ101): 350 m (1150 ft) 300 m (1000 ft)Mini prism (GMP101): 500 m (1600 ft) 400 m (1300 ft)Reflector tape (60 mm x 60mm): 55 m (175ft) -Shortest measuring distance: 1.5 m 5 mAccuracy (std. dev. ISO 17123-3) / Measure timeATR angle accuracy Hz, V:1“ (0.3 mgon)Base Positioning accuracy:± 1 mmMeasure time for GPR1:3-4 sThe accuracy with which the position of a prism can be determined with Automatic Target Recognition (ATR) depends on severalfactors such as internal ATR accuracy, instrument angle accuracy, prism type, selected EDM measuring program andthe external measuring conditions. The ATR has a basic standard deviation level of ± 1 mm. Above a certain distance, theinstrument angle accuracy predominates and takes over the standard deviation of the ATR.The following graph shows the ATR standard deviation based on two different prism types, distances and instrument accuracies.mm201816141210864205”3”2”1.5”1”<strong>Leica</strong> 360° prism<strong>Leica</strong> circular prismmm ATR accuracy [mm]m Distance measurement [m]" Instrument angle accuracy ["]0100200300400500600700800mMaximum speed (LOCK mode)Tangential (standard mode):Radial (tracking mode):5 m / s at 20 m, 25 m / s at 100 m5 m / sSearchingSearch time in field of view:Field of view:Definable search windows:Typ. 1.5 s1° 30’ (1.66 gon)YesMethodPrinciple:Type:Digital image processinginfrared laser6
PowerSearch (PS)DescriptionThis fast and reliable prism search uses a sender / receiver couple to detect prisms by means of digital signal processingalgorithms. An invisible, vertical laser fan sized 40 gon in height and 0.025 gon in width is sent out while the instrumentrotates around its standing axis. Once this fan comes across a prism, the reflected signal is evaluated on thefly to verify the target. If the specified signal patterns are matched, the horizontal position of the prism is determinedand the rotation is stopped. Now an ATR search limited to the vertical line of the fan is launched, which precisely positionsto the prism center. With this technique any standard prism (no active prisms emitting special signals are required)can be used.RangeStandard prism (GPR1):300 m (650 ft)360° prism (GRZ4, GRZ122): 300 m (650 ft) (perfectly aligned to the instrument)Mini prism (GMP101):100 m (330 ft)Shortest measuring distance:1.5 mSearchingSearch time:Default search area:Definable search windows:MethodPrinciple:Type:Typ. < 10 sHz: 400 gon V: 40 gonYesDigital signal processinginfrared laserGuide Light (EGL)RangeWorking range:5 m - 150 mAccuracyPositioning accuracy:5 cm at 100 mGeneral dataTelescopeMagnification:Free objective aperture:Field of view:Focusing range:30 x40 mm1°30’ (1.66 gon) / 2.7 m at 100 m1.7 m to infinityKeyboard and DisplayDisplay:1/4 VGA (320*240 pixels), graphic LCD, colour, illumination, touch screenKeyboard:34 keys (12 function keys, 12 alphanumeric keys), illuminationAngle display: 360° ’ “, 360° decimal, 400 gon, 6400 mil, V%Distance display:meter, int. ft, int. ft/inch, US ft, US ft/inchPosition:face I standard / face II optional<strong>Data</strong> storageInternal memory:Memory card:Number of data records:Interface:Laser plummetCentering accuracy:Laser dot diameter:Endless drivesNumber of drives:256 MB (optional)CompactFlash cards (64 MB and 256 MB)1750 / MBRS232, Bluetooth TM (optional)1 mm at 1.5 m (deviation from plumb line)2 mm at 1.5 m1 horizontal / 1 vertical7
Circular levelSensitivity:Internal Battery (GEB221)Type:Voltage:Capacity:Operating time:DimensionsTilting axis height:Height:Width:Length:WeightsTotal station:Battery (GEB221):Tribrach (GDF121):Environmental specificationsWorking temperature range:Storage temperature range:Dust / water (IEC 60529):Humidity:6’ / 2 mmLithium-Ion7.4 V3.8 AhTyp. 5 - 8 h196 mm above tribrach345 mm226 mm203 mm4.8 - 5.5 kg (depending on type and options)0.2 kg0.8 kg-20°C to +50°C-40°C to +70°CIP5495%, non-condensingOnboard SoftwareUser InterfaceGraphics:Icons:Quick settings menu:Function keys:User menu:Graphical representation of points, lines and areasApplication result plotsIcons indicating the current status of measure modes, settings, battery etc.Quick settings menu for toggling reflectorless EDM, ATR, LOCK, EDM Tracking etc.on and offDirect function keys for quick and easy operation.User menu for quick access of the most important functions and settingsConfigurationConfiguration sets:Displays masks:User menu:Hot keys:CodingFree Coding:Thematical Coding:Quick Coding:Smart Coding:Line Work:<strong>Data</strong> ManagementJobs:Points, lines, areas:Functions:Ability to store and transfer all instrument and application configuration settingsfor different operators, survey tasks etc.User definable measurement displayUser definable menu for quick access to specific functionsUser configurable hot keys for quick access to specific functionsRecording codes with optional attributes in between of measurementsManual code entry or selection from a user defined codelistCoding points, lines and areas with optional attributes when measuringManual code entry or selection from a user defined codelistRecording a measurement with a point, line, area or free code by entering analphanumerical or a numerical quick code from a user defined codelist.Line and area quick codes automatically create line and area objects.Provides another quick and easy way of selecting a code and measuring a point.Simply use the touch screen to select the code from a user defined listing. Thisfeature is integrated with all existing coding, linework and point measurementfunctionalities.Recording additional point information which effects creating lines, curves,splines, areas.User definable jobs containing measurements, points, lines, areas and codesDirectly transferable to LEICA Geo Office softwareCreating, viewing, editing, and deleting points, lines and areas and codesSorting and filtering of points, lines and areasAveraging of multiple points within user defined averaging limits8
Optional application programsReference Line:Defining lines and arcs, which can be stored and used for other tasks, usingvarious methods: Measuring to a line / arc where the coordinates of a target point arecalculated from its current position relative to the defined reference line /arc. Staking to a line / arc where a target point is known and instructions tolocate the point are given relative to the reference line / arc. Gridstaking to a line / arc where a grid can be staked relative to areference line / arc. Defining and staking slopes along defined lines and arcs.DTM Stakeout: Staking out a Digital Terrain Model. Comparing actual and design height and displaying height differences.RoadRunner:Stake-out and as-built check of roads and any type of alignment relateddesign (e.g. pipeline, cable, earthworks) Handles any combination of geometric elements in the horizontalalignment, from simple straights to different types of partial spirals Vertical alignment supports straights, arcs and parabolas Covers all working tasks including stake-out/check of lines, grades/slopes(e.g. road surface, cut & fill), DTMs and many more Visualization of cross-sections and planar view of design Graphical selection of elements to stake-out/check Smart project management of design data Support of multiple road layers (construction phases) Enhanced station equation capabilities Comprehensive, user definable log files and cut sheets Seamless data flow from all major design packages via PC conversion tool.RoadRunner Rail:Version of RoadRunner to stake-out and as-built check for rail constructionand maintenance Stake-out of rails As-built checks of rails Superelevation (cant) supported Clearance (gauge) control View design data ReportingRoadRunner Tunnel:Version of RoadRunner to stake-out and as-built check for Tunnel constructionand maintenance Stake-out of Tunnel Faces allows setting out at the point of excarvation(e.g. for Drill and Blast or excarvation using a roadheader) Stake-out of Tunnel Profiles for any point of the tunnel at the givenchainage (e.g. after excavation to indicate the position of tunnel designelements or services such as lightning or ventilation. As-built checks of Tunnels by measuring profiles perpendicular to thecentre line (Scan profile) As-built checks by measuring any point in the Tunnel and comparingthe meassured point with the theoretical design point (Check profile) Support of multiple Tunnel layers (construction phases) View and edit design data ReportingSets of Angles:Measuring directions and distances to targets in one or two faces in variousmeasurement routines. Calculating the average directions and distances of all sets. Calculating the standard deviations for single directions / distance andaverage directions / distances.Monitoring option to repeat measurements at given time intervals.Traverse:Measuring a traverse with unlimited number of legs: Measuring sets to angles to backsight and multiple foresights. Measuring topographic points from any station. Using known points during traverse to validate quality of traverse. Calculating traverse closure results for field checking.Reference Plane:Stake-out or measure points relative to a reference plane: Defining a plane by either measuring or selecting points. Calculate the perpendicular distance and height difference from ameasured point to the plane. Scanning of points on a defined plane.Cross Section Survey:Survey cross sections (such as highway profiles, river profiles, beach profiles)using code templates. The appropriate code for the next point on the profile isalways correctly suggested Also shows distance from last cross section Free, point, line or area codes can be used10
Area DivisionArea Division as an optional add on functionality of COGO Application Divide areas into smaller areas using a variety of methods Full graphical supportVolume Calculation Defining and Editing of surfaces and boundaries Calculating of Digital Terrain Models Computation of Volumes of defined surfaces in relation of a definedreference heightHidden Point:Easily measures points that are not directly visibly by using a hidden point rodwith 2 to 3 reflectors attached. The rod can be held at any angle and thespacing between reflectors is configurable. The program calculates themeasurements to the hidden points as if they were observed directly.Monitoring:Monitoring is designed to assist you by automatically repeating measurementsto defined targets at pre-defined measurement intervals. It is ideal for smallscale monitoring applications without the need of a fixed PC set-up at thereference.Remote Control Unit (RX1250T, or RX1250Tc with colour display)DescriptionThe RX1250T / Tc is a WinCE controller which uses the latest in spread spectrum 2.4 GHz radio technology to permitting totalremote control of the <strong>TPS1200+</strong> total station and GNSS Smart Antenna while at the Smart Pole. The RX1250 can be orderedwith a next generation colour screen for bright, high contrast visibility in all conditions. Two different ways of remote controllinga <strong>TPS1200+</strong> can be selected: the traditional concept mirrors the user interface of the <strong>TPS1200+</strong> on the RX1250. This easy tolearn and simple to use concept ensures that no valuable measurement data is relayed over the radio link totally eliminating therisk of data loss. With the second concept, the RX1250 takes over the master role. All applications are running on the RX1250,and all data are recorded into the database of the RX1250. Further more, the RX1250 is completely interchangeable with boththe <strong>TPS1200+</strong> and the GPS1200 giving the user an efficient and economic solution to all sensor control needs. Such featuresresult in a system, which offers total remote data flexibility. The full QWERTY keyboard of the RX1250 makes it easy and fast toenter alphanumeric point numbers, select or enter codes or even short descriptions. The encrypted protocol and frequency bandhopping technology used in the data transmission greatly reduce the cases of interference from any other 2.4 GHz transmitters.In addition, a number of user selectable ‘link numbers’ can be configured easily in cases where more than one RX1250 is beingused in the same area.CommunicationCommunication:Control unitDisplay:Keyboard:Interface:Internal Battery (GEB211)Type:Voltage:Capacity:Operating time:WeightsRX1250T/Tc:Battery (GEB211):Reflector pole adapter:via integrated radio modem1/4 VGA (320*240 pixels), graphic LCD, touch screen, illumination, grey scaleor colour62 keys (12 function keys, 40 alphanumeric keys), illuminationRS232Lithium-Ion7.4 V1.9 AhRX1250T: typ. 9hRX1250Tc: typ. 8h0.8 kg0.1 kg0.25 kgEnvironmental specifications RX1250T RX1250TcWorking temperature range: -30°C to +65°C -30°C to +50°CStorage temperature range: -40°C to +80°C -40°C to +80°CDust / water (IEC 60529): IP67 IP67Waterproof (MIL-STD-810F): temporary submersion to 1m temporary submersion to 1m11
<strong>Leica</strong> Geo Office SoftwareDescriptionEasy, fast and comprehensive, automated suite of programs for TPS, GNSS and Level data. View and manage TPS, GNSS andLevel data in an integrated way. Process independently or combine data – including post processing and support of real-timeGNSS measurements.Manages all data in an integrated manner. Project management, data transfer, import/export, processing, viewing data, editingdata, adjustment, coordinate systems, transformations, codelists, reporting etc.Consistent operating concepts for handling GNSS, TPS and level data, based on Windows standards. An embedded help systemincludes tutorials with additional information.Runs on Windows 2000 and XP platforms.User InterfaceIntuitive graphical interface with standard Windows operating procedures. Customizable built-in configuration options allowusers to set up the software exactly to suit their specific needs and preferences.Standard components<strong>Data</strong> and Project Management:Import & Export:ASCII Import & Export:View & Edit:TPS Processing:Codelist Manager:Reporting:Tools:Fast, powerful database manages automatically all points and measurementswithin projects according to well-defined rules to ensure data integrity isalways maintained.Projects, coordinate systems, antennas, report templates and codelists all havetheir own management.Numerous transformations, ellipsoids and projections, as well as user-definedgeoid models and country specific coordinate systems which are based on agrid of correction values are supported. Six different transformation types aresupported, giving the flexibility to select the approach which suits the projectneeds best.Antenna management system for offsets and correction values.Codelist management for code groups / code / attributes.Import data from compact-flash cards, directly from receivers, total stationsand digital levels, or from reference stations and other sources via theInternet.Import of real-time (RTK), DGPS coordinates.Import coordinate lists as user-defined ASCII files using the import wizard.Export results in any format to any software using the ASCII export function.Transfer point, line, area, coordinate, code and attribute data to GIS, CADand mapping systems.The various graphical displays form the basis for visualizing data and giving aninstant overview of the data contained within a project. Point, line and areainformation may be viewed in View/Edit together with coding and attributeinformation. Editing functionality is embedded allowing to query and clean upthe data before processing or exporting it further.Re-calculate TPS setups to update station coordinates and orientationsDefine setups and traverses and process with preferred parametersDisplay traverse results in HTML-based reportsGeneration of codelists with code groups, codes, and attributes.Management of codelists.HTML-based reporting provides the basis for generating modern, professionalreports. Measurement logs in field book format, reports on averagedcoordinates, various processing log files and other information can beprepared and output. Configure reports to contain the information that arerequired and define templates to determine the presentation style.Powerful Tools like Codelist Manager, <strong>Data</strong> Exchange Manager, Format Managerand Software Upload are common tools for GNSS receivers, total stationsand also for digital levels.GNSS OptionsL1 data processing:Graphical interface for baseline selection, processing commands etc.Automatic or manual selection of baselines and definition of processingsequence.Single baseline or multi-baseline batch processing.Wide range of processing parameters.Automatic screening, cycle-slip fixing, outlier detection etc. Automatedprocessing or user-controlled processing.13
L1 / L2 data processing:GLONASS data processing:RINEX Import:Level OptionsLevel data processing:Design & Adjustment 1D:General OptionsDatum & Map:Design & Adjustment 3D:GIS / CAD Export:Surfaces & Volumes:System requirementsRecommended PC configuration:Graphical interface for baseline selection, processing commands etc.Automatic or manual selection of baselines and definition of processingsequence.Single baseline or multi-baseline batch processing.Wide range of processing parameters.Automatic screening, cycle-slip fixing, outlier detection etc.Automated processing or user-controlled processing.Allows processing of GLONASS data in addition to GPS data processing.Import of data in RINEX format.View the data collected from the <strong>Leica</strong> digital level in the Geo Office levelbooking sheet. Select the preferred processing settings and process the levellines. Processing runs quickly and automatically. Use Results Manager toinspect and analyze the leveling results and generate a report. Finally, storethe results and/or export them as required.Powerful MOVE3 Kernel with rigorous algorithms for 1D adjustment.Furthermore, network design and analysis is supported.LEICA Geo Office supports numerous transformations, ellipsoids andprojections, as well as user-defined geoid models and country specificcoordinate systems, which are based on a grid of correction values. Theoptional Datum/Map component supports the determination of transformationparameters. Six different transformation types are supported, giving theflexibility to select the approach which suits the project needs best.Combine all measurements in a least-squares network adjustment to obtainthe best possible set of consistent coordinates and check that themeasurements fit with the known coordinates. Use adjustment to helpidentify blunders and outliers based upon the extensive statistical testing.Using the powerful MOVE3 Kernel, the algorithms are rigorous and the usercan choose between whether a 3D, 2D or 1D adjustment is computed.Furthermore, the component supports network design – allowing to designand analyze a network before actually going into the field.Permits export to GIS/CAD systems such as AutoCAD (DXF / DWG), MicroStationAssign measured points of surfaces and calculate Digital Terrain ModelsUse automatic boundary creation or define boundaries manuallyIntroducing breaklines will automatically update the modelVisualize the surface in a 2D or 3DviewCalculate volumes above the reference heights or between surfacesPentium ® 1GHz processor or higher512 MB RAM or moreMicrosoft ® Windows 2000 or XPMicrosoft ® Internet Explorer 5.5 or higher14
Whether you want to survey a parcel of land or a construction site, afacade or indoors to create as-built plans or carry out high-precisionmeasurements of bridge and tunnel constructions – <strong>Leica</strong> Geosystems’surveying instruments provide the right solution for all measuringtasks.The System 1200 <strong>Series</strong> instruments as well as the software aredesigned to meet the daily challenges of modern surveying. They allhave outstanding, easy to read and user-friendly interfaces. Theirstraightforward menu structures, their clearly outlined scope offunctions and high technology perfectly mate GNSS and TPSapplications in the field. Whether you use the advantages of bothtechnologies combined or each separately – due to the exceptionalflexibility of <strong>Leica</strong> Geosystems instruments, reliable and productivesurveying is assured.When it has to be right.Illustrations, descriptions and technical specifications are not binding and may change.Printed in Switzerland – Copyright <strong>Leica</strong> Geosystems AG, Heerbrugg, Switzerland, 2009.738601en – V.09 – RVATotal Quality Management –our commitment to totalcustomer satisfaction.Ask your local <strong>Leica</strong> Geosystemsdealer for more informationabout our TQM program.Distance meter (Prism),ATR and PowerSearch:Laser class 1 in accordancewith IEC 60825-1 resp.EN 60825-1Laser plummet:Laser class 2 in accordancewith IEC 60825-1 resp.EN 60825-1Distance meter (Non-Prism):Laser class 3R in accordancewith IEC 60825-1 resp.EN 60825-1The Bluetooth ® word mark andlogos are owned by BluetoothSIG, Inc. and any use of suchmarks by <strong>Leica</strong> Geosystems AG isunder license. Other trademarksand trade names are those oftheir respective owners.<strong>Leica</strong> Geosystems AGHeerbrugg, Switzerlandwww.leica-geosystems.com


