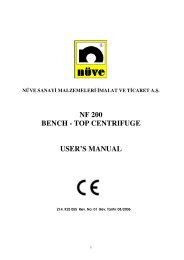
NF 048 BENCH - TOP CENTRIFUGE USER'S MANUAL - Frederiksen
NF 048 BENCH - TOP CENTRIFUGE USER'S MANUAL - Frederiksen
NF 048 BENCH - TOP CENTRIFUGE USER'S MANUAL - Frederiksen

Create successful ePaper yourself
Turn your PDF publications into a flip-book with our unique Google optimized e-Paper software.
NÜVE SANAYİ MALZEMELERİ İMALAT VE TİCARET A.Ş.<strong>NF</strong> <strong>048</strong><strong>BENCH</strong> - <strong>TOP</strong> <strong>CENTRIFUGE</strong>USER’S <strong>MANUAL</strong>1
NÜVE SANAYİ MALZEMELERİ İMALAT VE TİCARET A.Ş.Esenboğa Yolu 22 kmAkyurt - ANKARA / TURKEYTel : (312) 399 24 87 - 399 28 30 ( 3 lines )Fax : (312) 399 21 97e-mail : sales@nuve.com.trWARRANTY CERTIFICATE1. Nüve warrants that the equipment delivered is free from defects in material andworkmanship. This warranty is given for a period of two years. The warranty period beginsfrom the delivery date.2. Warranty does not apply to parts normally consumed during operationor generalmaintenance or any adjustments described in the operating instructions provided with theequipment.3. The warranty period starts from the delivery date.4. Nüve does not accept any liability in the case where the goods are not used in accordancewith their proper intent.5. The warranty may not be claimed for damages incurred during the shipment, for damagesresulting from improper handling or use, from the defects in maintenance, negligence, badfunctioning of auxiliary equipment, in the case of force majeure or accident and incorrectpower supply.6. In the event of failure, Nüve shall be under no liability for any injury, or any loss or damageas the result of the failure other than the guarantee conditions.BEFORE OPERATING THE INSTRUMENT THIS <strong>MANUAL</strong> SHOULD BE READCAREFULLY.I<strong>NF</strong>ORMATION CONTAINED IN THIS DOCUMENT IS THE PROPERTY OF NÜVE. IT MAYNOT BE DUPLICATED OR DISTRIBUTED WITHOUT THE PERMISSION.THE VALIDITY OF THE GUARANTEE IS SUBJECT TO THE OBSERVATION OF THEINSTRUCTIONS AND PRECAUTIONS DESCRIBED IN THIS <strong>MANUAL</strong>.2
TABLE OF CONTENTS1. INTRODUCTION1.1. Use and FunctionPAGE442. TECHNICAL SPECIFICATIONS 52.1. Technical Specifications Table52.2. General Presentation52.3. Control Panel 63. INSTALLATION3.1. Lifting and Transport3.2. Unpacking3.3. Mains Supply3.4. Environmental Conditions3.5. Positioning3.6. Prior to Operation3.7. Precautions and Limitations of Use777778884. OPERATING PRINCIPLES 84.1. Programming4.2. Loading4.3. Selecting the Program and Running4.4. Manual Lid Opening8910105. CLEANING AND PERIODIC MAINTENANCE 106. TROUBLESHOOTING7. ELECTRICAL CIRCUIT DIAGRAM11123
1. INTRODUCTION1.1 Use and Function<strong>NF</strong> <strong>048</strong> Bench Top Centrifuge is especially designed for the separation of blood samples,urine particles sedimentation and for carrying out the other routine applications in themicrobiology laboratories.<strong>NF</strong> <strong>048</strong> is a compact centrifuge that can be used both as microlitre and heamatocrit centrifuge.With its microlitre rotor accepting small capacity tubes up to 2 ml, <strong>NF</strong> <strong>048</strong> is ideal for hospitaland research laboratories and for applications such as pelleting of DNA and protein, DNAamplification, enzyme tests, centrifugation of cells, yeast and microorganisms at high speed.When <strong>NF</strong> <strong>048</strong> is operated with it is haematocrit rotor, it can be used for determining thehaematocrit volume by means of the centrifugation of blood samples in capillary tubes.The body, lid and chamber of <strong>NF</strong> <strong>048</strong> is made of epoxy-polyester painted steel which meansthat the centrifuge is resistant to external and internal effects.By means of the programmable microprocessor control system speed and time could beprogrammed and the ‘pulse’ function provides the operator to run the programs of shortduration.It ensures safe processes by means of the locking system which does not allow the centrifugeto operate if the lid is open and which does not allow the rotor to spin if the lid is not closed.The lid locking system which does not allow the centrifuge to operate if the lid is open, whichalso does not allow the lid to be opened while the rotor is spinning and the possibility to openthe lid by pushing only one key when the program ends, provide safe and easy workingconditions. There are audible and visible alarms to inform the operator when the lid is open,when the program ends and when any error conditions occur. In case of a power failure, the lidcould be opened manually by using a manual lid opening tool. There is also an observationhole at the top of the instrument to check the speed of the centrifuge by a tachometer.<strong>NF</strong> <strong>048</strong> Bench Top Centrifuges are manufactured according to the following standards,EN 61010-1, EN 50081-1, EN 61010-2-0204
2.3. Control Panel1. Speed Display :This display shows the speed values during programming. It also indicates acceleratingcondition, braking condition, power failure condition, open lid condition and the condition thatoccurs when Start is pressed while the lid is open by the expressions Acc, br, E oFF, oPEn,cLoSE Lid, respectively. The error codes that occur in case of any failure condition are alsoshown on this display.2. Time Display :This display shows the time during programming and the run.3. Lid Key and Led :This key opens the lid if the led is on. It is active before starting the centrifugation and at theend of the centrifugation when the audible alarm sounds.4. Set Key:This key is used to set the speed and time during programming and to check the RCF valueduring the operation.5. Pulse Key:The motor increases to the maximum value of the chosen rotor type and continues to spin onthat speed as long as this key is pressed.6. Value Increasing Key :This key is used to increase the parameter values during programming.6
7. Start Key and Led:This key starts the centrifugation operation and the led turns on. The led turns off if theprogram is stopped manually or the lid is opened at the end of the program.8. Value Decreasing Key :This key is used to decrease the parameter values during programming.9. Stop key :This key is used to stop the operation manually.3. INSTALLATION3.1. Lifting And TransportAll lifting and transport must be carried out by using proper handling equipment. Theinstrument must be supported from underneath and never turned over.3.2. UnpackingRemove the packing cardboard box and the second nylon packing around the centrifuge. Thebelow written are provided with the instrument, please check them;• 1 ea. user’s manual• 1 ea. power cable• 1 ea. manual lid opening tool3.3. Mains SupplyThe centrifuges require 230 V, 50 Hz.Please make sure that the supplied mains matches the required power ratings.Always plug the centrifuges into correctly grounded sockets.A supply fitted with a circuit breaker should be used for protection against indirectcontact in case of an insulation fault.3.4. Environmental ConditionsThe centrifuges are designed to operate safely under the following conditions:• Indoor use only• Ambient temperature: 5 ° C to 25 ° C.• Maximum relative humidity of 80% for temperature up to 22 °C.• Maximum altitude: 2000 m.7
• Temperature for maximum performance: 15 °C / 25 °C.3.5. Positioning• Check that no damage has occurred during transport.• Check that the positioning is suitable for users.• Lift the centrifuge underneath and carry it to its place carefully. Check that the centrifuge isstable on its four pads.• Leave sufficient free space on each side of the centrifuge.• Make sure that the centrifuge does not do harm to nearby equipment.3.6. Prior to Operation1. Open the lid and check that no substance has been left in the chamber.2. Connect the centrifuge to a correctly grounded power supply.3. Switch on the centrifuge and see that the On/Off switch led turns on.3.7. Precautions and Limitation of UsePlease pay special attention to the followings,• Not attempting to open the lid while the rotor is spinning• The position of the centrifuge (the bench should be rigid enough to support the centrifuge’sweight. There should be around 30 cm free space on the sides of the centrifuge)• Handling of the rotor and tube inserts• Fitting the rotor• Cleanliness of the chamber, rotor and tube inserts• The quality and dimensions of the tubes to be centrifuged• Proper loading and balancing• Precautions against corrosion if corrosive materials are centrifuged4. OPERATING PRINCIPLES4.1. ProgrammingAt stand-by position,• Push the Set key. The rotor type starts to flash on the speed display.• Choose the rotor type by using the Value Increase and Decrease keys (nC for the microlitrerotor, HE for the haematocrit rotor).• Push the Set key again. The speed value on the speed display starts to flash.• Adjust the speed by pushing the Value Increase and Decrease keys.• Push the Set key again. The time value on the time display starts to flash.• Adjust the time by pushing the Value Increase and Decrease keys.• Push the Set key again to save the settings to memory.8
4.2. LoadingEach tube insert must be at the same weight as the one diametrically opposite for balancing.CAUTION: Imbalance of the rotor may cause major damage to the rotor and centrifuge.Never attempt to introduce liquids into the tube inserts.In case the number of tubes which will be centrifuged is less than the capacity of the rotor, thetubes must be placed in opposite inserts. If the number of tubes that will be centrifuged is anodd number, use a water-filled tube at the same weight for balancing.RIGHT LOADINGWRONG LOADINGFigure 3ATTENTION !!Always use tubes which can withstand to the set speeds.ATTENTION !!Balance the rotor with glass tubes if you use glass tubes for centrifugation.Balance the rotor with plastic tubes if you use plastic tubes for centrifugation.9
4.3. Selecting Program and RunningAfter loading,• Push START to run the program.• The program starts. ‘Acc’ is seen on the speed display until the set speed and the setspeed is seen when it reaches to the set speed.• The program continues to operate until the time display shows “00”.• At the end of the adjusted time the motor stats to slow down and ‘br’ is seen on the speeddisplay.• When the motor stops ‘End’ is seen on the speed display and audible alarm sounds. (IfHold position is selected, the program will stop when the S<strong>TOP</strong> button is pushed)• Push the LID key and open the lid to take out the samples.Note: Set key is pushed to see the RCF (relative centrifugal force) value during the run.ATTENTION !! The centrifuge can not be re-started if you do not open the lid after thecentrifugation has finished!! Please open the lid to start the next centrifugation.4.4. Manual Lid OpeningIn case of a power cut or any defects, the instrument would be opened manually to be able toget the samples.To open the lid manually :– Power off the instrument– Insert the manual lid opening tool into the hole at the front side of the instrument.– Push the tool while keeping it vertically until the lid is opened.WARNING : Before opening the lid manually, be sure that the rotor is completely stopped.Observe the rotor upon opening while the lid is hold by hand, if the rotor is still rotating, closethe lid and wait approximately 10 minutes before repeating the operation. This operation mustbe carried by someone who is informed of the danger and of the precautions which must beundertaken.5. CLEANING AND PERIODIC MAINTENANCEIdeally, rotors should be washed after every use, especially if a spillage has occurred, in warmwater containing a few drops of liquid soap. (a mild washing liquid is ideal as a cleaner).ROTORS AND OTHER ACCESSORIES MUST BE CLEANED IF ANY SPILLAGE,SPECIALLY CHEMICALS, OCCURS .Please do not forget to clean the part of the rotor which fits on the motor shaft. Every part ofthe rotor should be cleaned with a soft nylon brush.10
Do not use metallic brushes.Dry the rotor with a piece of soft absorber cloth. Please make sure that the buckets and insertsare well dried, you may use hair dryer.Make sure that the bottoms of the tube inserts are dried well.Cleaning:Disconnect the centrifuge before cleaning.There is no need of daily cleaning unless a tube breakage occurs or any liquid spills.6. TROUBLESHOOTINGIf the centrifuge fails to operate, check the following:• the on/off switch is on,• the mains supply is present,• the plug is plugged-in properly,• the plug is not defective,• the fuses are sound,• the installation of the plug is not defective.Error CodesIn case of below written failures, related error codes shown on the speed display, motor startsbraking.Err 3 : The communication between the display & main PCB and the motor driver PCBfails.Err 4 : Motor overheat failure. Please wait for the motor to cool down and start the centrifugeagain.Err 6 : Motor driver PCB is defective.Lid open : This failure occurs when lid is opened during the centrifugation. Please close the lidproperly and start the centrifuge again.Eoff : It occurs in case of a power failure during the run. It dissapears if you wait for 2 minutesor open and close the lid again.PLEASE CONTACT TO AN AUTHORIZED NUVE AGENT TO SEEK TECHNICAL HELP IFAN ERROR OCCURS.11
7. ELECTRICAL CIRCUIT DIAGRAM12