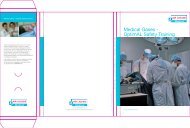
Home Oxygen Therapy for Babies and Children - Air Liquide UK
Home Oxygen Therapy for Babies and Children - Air Liquide UK
Home Oxygen Therapy for Babies and Children - Air Liquide UK
- No tags were found...

Create successful ePaper yourself
Turn your PDF publications into a flip-book with our unique Google optimized e-Paper software.
<strong>Home</strong> <strong>Oxygen</strong> <strong>Therapy</strong><strong>for</strong> <strong>Babies</strong> & <strong>Children</strong>www.uk.airliquide.com
Section 1: SafetySection 2: ConcentratorsSection 3: Medical <strong>Oxygen</strong> CylindersSection 4: Medical Liquid <strong>Oxygen</strong>You can contact the Customer Services Team on24/7 Customer Helpline 0808 143 9999 Freephone(Normal working hours are Monday to Friday 8:30am - 5:00pm)2
Be<strong>for</strong>e You StartBe<strong>for</strong>e you use any of your oxygen equipment there are a few simple safety rulesthat you must follow. If you are unsure about them after reading this, please speakto your <strong>Home</strong>care Technician or a Customer Services Representative who will beonly too pleased to explain these safety rules to you.GeneralIn<strong>for</strong>mation -<strong>Oxygen</strong> <strong>for</strong>Medical use<strong>Oxygen</strong> is a colourless <strong>and</strong>odourless gas, so thenormal human sensescannot detect it if there ismore oxygen than normalin the surrounding air.<strong>Oxygen</strong> can build upunnoticed on your clothing<strong>and</strong> in your hair as youbreathe it, even while yousleep <strong>and</strong> use oxygen, yourbedding can becomesaturated. For this reason,home oxygen users arealways at risk from theirclothing, bedding, furniture<strong>and</strong> their hair catching fireas a result of smoking orothers in close proximity tothem smoking.Higher <strong>Oxygen</strong>ConcentrationsMean GreaterRisk<strong>Oxygen</strong> can build up <strong>and</strong>concentrate in a closedroom or a confined space,but it can easily bedispersed in a wellventilated room.<strong>Oxygen</strong> makes up 21% ofthe air that we breathe,oxygen is an oxidizingagent which means that ithelps things burn moreeasily <strong>and</strong> more fiercely.Fire TriangleTo start a fire, three thingsare needed, something toburn (fuel), something to setit alight (heat or a spark)<strong>and</strong> oxygen to support thefire <strong>and</strong> keep it going.NEVER smoke or allowothers to smoke when yourbaby or child’s oxygen isbeing used.In oxygen enrichedatmospheres, fabrics,wood, paper <strong>and</strong> othermaterials, which normallydo not burn easily in airmay suddenly catch fire oncontact with a small spark,cigarette or naked flame.Fatty substances, oils <strong>and</strong>greases may spontaneouslyignite in oxygen.<strong>Home</strong> <strong>Oxygen</strong> Users MUST NOTsmoke or allow others to smokewhere oxygen is being used.3
Section 2: ConcentratorsParts of theConcentratorMain Flow Control (lpm)<strong>Oxygen</strong> OutletPurity Warning LightHour MeterOn/Off SwitchUsing your Low Flow ConcentratorBe<strong>for</strong>e you use your concentrator you should become familiarwith its parts. Refer to the following pages <strong>and</strong> ‘Your Guide to<strong>Oxygen</strong> Concentrators’.ONFig. 2Fig. 1OFFAs your concentrator is being used <strong>for</strong> a baby or child with alow flow rate, a special flow meter has been attached (Refer toFig. 2).1. The flow rate will be set to the prescribed rate by your<strong>Home</strong>care Technician. Any further adjustments should onlybe made on the recommendation of your Doctor orHealthcare Professional.2. To turn your concentrator ON press the button up (I) (Referto Fig. 1).103. To Turn your concentrator OFF press the button down (O)(Refer to Fig. 1).
Section 2: Concentrators4. When your concentrator is turned on allow it to run <strong>for</strong> five(5) minutes to warm up, <strong>and</strong> the oxygen reaches the correctpurity <strong>for</strong> your child to breathe, check the ball in the flowmeter is centred on the line marking the prescribed flow(Refer to Fig. 2).5. Fit the cannula to your child.6. When not using your concentrator switch the power switchto the OFF (O) position (Refer to Fig. 1).7. In the event of a power failure, you have been provided witha back-up cylinder which should be used only <strong>for</strong> thispurpose. The back-up cylinder should not be used as amain medical oxygen supply <strong>for</strong> your child. How to use thiscylinder is dealt with in the next section on Medical <strong>Oxygen</strong>Cylinders.8. The flow of oxygen is very low. If at any time you areconcerned that the concentrator is not delivering anyoxygen, place the end of the supply hose, NOT the cannula,into a glass of water <strong>and</strong> check <strong>for</strong> bubbles.Test <strong>for</strong> <strong>Oxygen</strong> Flow11
Section 2: ConcentratorsFig. 3OFFAfter using your Concentrator1. When not using your concentrator flick the power switch tothe OFF (O) (Refer to Fig. 3) position.2. If you are not going to use your concentrator <strong>for</strong> an extendedperiod of time, you are advised to switch your unit off at themains socket.Looking after your ConcentratorBe<strong>for</strong>e carrying out any of the following maintenance tasks onyour concentrator, PLEASE READ THE SAFETYINFORMATION IN SECTION 1 OF THIS GUIDE.1. Clean the cabinet occasionally with a damp cloth <strong>and</strong> thenwipe it dry. Avoid letting water into the internals of yourconcentrator. DO NOT use any detergents or abrasiveswhen cleaning the unit.2. Wash the filter from the unit at least once a week.● Remove the filter <strong>and</strong> replace it with the spare filter● H<strong>and</strong> wash the filter in warm soapy water● Rinse it thoroughly <strong>and</strong> remove any excesswater with a clean absorbent towel● Allow the filter to dry naturally, <strong>and</strong> put it in a safe placeuntil you change the filter again3. If you have a humidifier fitted you must change the wateron a daily basis.4. Wash the humidifier bottle once a week.● Wash the bottle with warm soapy water● Rinse thoroughly with clean water● Dry the outside of the bottle with a clean absorbent cloth● Refill the bottle with distilled waterIf you run out of distilled water, use boiled water that has beenkept in a covered container <strong>and</strong> allowed to cool.12
Section 2: ConcentratorsServicingThe concentrator that you have been provided with will give youa constant supply of oxygen 24 hours per day every single dayof the year. Your <strong>Home</strong>care Technician will visit every six (6)months to carry out maintenance on your concentrator.A member of our Customer Services Team will contact you inadvance to advise you when this routine maintenance will takeplace.During a maintenance visit the <strong>Home</strong>care Technician will:– check that the tubing is in good condition,– check that your back-up cylinder(s) are full <strong>and</strong> workingproperly,– supply you with new cannulae <strong>and</strong> any other consumablesthat you may need.HumidificationFew home oxygen users require humidification. However, if ithas been prescribed <strong>for</strong> you, there are a few simple steps <strong>for</strong>you to follow:1. Unscrew the top of your humidifier bottle <strong>and</strong> fill with distilledwater. NEVER fill the bottle above the line indicated.2. Screw the top of your humidifier bottle back on.3. On the top of the humidifier bottle you will see a threadednut. Screw the humidifier onto the concentrator <strong>and</strong> securetightly. Make sure you do not cross thread or over tightenyour humidifier bottle.4. Attach your short tube to the oxygen outlet on the humidifierbottle (Refer to Fig. 4). Attach the water trap to the other end(Refer to Fig. 5). Place it lower than the humidifier bottle.ConcentratorAttachmentFig. 4<strong>Oxygen</strong> OutletFig. 5 Attaching theWater Trap13
Section 2: ConcentratorsHourMeterElectricity RebatesWe will make a payment to you every three (3) months estimatingthe costs of running your concentrator according to theprescription supplied by your Doctor or Healthcare Professional.Every six (6) months during the routine maintenance visit, the<strong>Home</strong>care Technician will take a reading <strong>and</strong> record the hoursthat your concentrator has been used. This reading will enableus to calculate the electricity that has been used to run yourconcentrator <strong>and</strong> we will send you a payment to cover thesecosts. We will take into account any under or over payment thathas been made to you as a result of the three monthly estimate.Payments are usually issued in the patient’s name, but we canchange this, especially when patients are babies or children. Youwill need to advise us by completing an Electricity ApplicationForm <strong>and</strong> return it to us in the Pre-Paid Envelope provided.If you are concerned about your electricity reading, you cantake a reading <strong>for</strong> yourself <strong>and</strong> call the Customer Helpline <strong>and</strong>speak to our Accounts Team who will gladly discuss yourreading with you.The meter is located on the front of the concentrator, just belowthe serial number. (Refer to Fig. 6)To read your meter on the concentrator turn your head so that ittouches your left shoulder. You can now read the numbercorrectly: this number is the number of hours that yourconcentrator has been operating (32 hours shown in Fig. 6).On/OffSwitch14Fig. 6
Section 2: ConcentratorsMinor Troubleshooting Guide <strong>for</strong> ConcentratorsThe following guide will assist you to correct any minor problems that you may experience with yourchild’s equipment.You may also wish to refer to your individual guide book that was provided by your <strong>Home</strong>careTechnician, these booklets will give you further advice on basic troubleshooting.If after carrying out any of the following steps you find that your child’s equipment is still not workingthen please call theCustomer Services Team on24/7 Customer Helpline 0808 143 9999 Freephone(Normal working hours are Monday to Friday 8:30am - 5:00pm)PROBLEM PROBABLE CAUSE SOLUTIONBack-up cylinder is on but oxygendoes not flow.Tubing trapped.Blocked cannula.Cylinder is empty.Check that the tubing has notbecome trapped by a cot frame,chair, door or furniture st<strong>and</strong>ingon it.Replace the cannula with a newone as the old one may havesecretions in the fine tubing.Check the contents indicatorgauge <strong>and</strong> replace if needed.Compressor does not run.Constant audio alarm with powerswitch in the On position.Compressor shuts downintermittently.No power to the unit.Restricted airflow through unit.Unit overheating due to improperlocation.Check wall outlet <strong>for</strong> power.Clean the inlet filter or removethe obstruction.Relocate unit away from heatingsource, provide adequateventilation on all sides.Alarm does not sound. Dead battery. Call Customer Services.Limited or low flow.Low oxygen concentration/low purity.Restriction in tubing or humidifierif fitted.Blocked internal air filter.Replace tubing or humidifier.Check the filter.Call Customer Services toarrange replacement filter.15
Section 3: Medical <strong>Oxygen</strong> CylindersF Flow Rate IndicatorB <strong>Oxygen</strong> OutletUsing a Cylinder with a Micro Flow/LowFlow MeterPortable oxygen cylinders are filled with medical oxygen <strong>and</strong> willhelp your baby or child go out <strong>and</strong> do everyday things.To reduce the flow of medical oxygen from the cylinder so thatthe pressure <strong>and</strong> flow are not too high <strong>for</strong> your child, you havebeen supplied a micro flow or low flow meter (Refer to Fig. 7)depending upon the prescribed flow rate your Doctor requested.1. Check that the flow meter is plugged into the outlet socket(A) of the main cylinder valve. Once you have pushed it intoplace, gently tug on the device to make sure it does notcome away (Refer to Fig. 8).E Flow Rate SelectorFig. 7BAC15 metresmax.Connecting your TubingFig. 8Connecting your tubing to a oxygen supply system is easy <strong>and</strong>very simple.Tubing over 15 metres long MUST NOT be used as this willreduce the flow. Take care with any tubing laying on the floor<strong>and</strong> ensure that it is not trapped under doors, chairs, or heavyitems of furniture, <strong>and</strong> that it is not allowed to kink.2. Attach the medical oxygen supply tube to the outlet (B)making sure that the tube is not trapped or kinked in anyway as this could restrict or stop the flow.16
Section 3: Medical <strong>Oxygen</strong> Cylinders3. Turn the ON/OFF valve (C) on your cylinder anti-clockwise tothe ‘ON’ position.4. Turn the low/micro flow meter ON by slowly turning the valve(E) anti-clockwise. Make sure that it is set to the prescribedflow rate number. It is important that the number is in themiddle of the viewing window (F) (Refer to Fig. 7).5. Check to see if there is a flow through the tubing <strong>and</strong>cannula.The flow of medical oxygen is very low. If at any time youare concerned that the equipment is not delivering anymedical oxygen, place the end of the supply hose, NOTthe cannula, into a glass of water <strong>and</strong> check <strong>for</strong> bubbles.6. When you are satisfied that there is a medical oxygen flowput the cannula or mask on your child.Test <strong>for</strong> <strong>Oxygen</strong> Flow7. To turn the low flow/micro flow meter OFF turn the valve (E)clockwise until you see 0 in the viewing window. Then turnoff the cylinder by turning the ON/OFF valve (C) clockwise tothe OFF position.8. After use, check the remaining medical oxygen in thecylinder by looking at the contents gauge (D). If it is in thered zone it is time to re-order (Refer to Fig. 9).CDRe-ordering Cylinders:When your child starts using his/her last cylinderREMEMBER to order a new supply <strong>and</strong> to allowthree (3) working days <strong>for</strong> a normal delivery. Call0808 143 9999 between 8:30am <strong>and</strong> 5:00pmMonday to Friday <strong>for</strong> normal deliveries. Thisnumber is available outside of normal workinghours <strong>for</strong> EMERGENCIES ONLY.Fig. 9CYLINDER INFORMATION:Weight Full2.9 kgHeight405 mmDiameter340 mmCapacity690 LitresAccessoriesBAG17
Section 3: Medical <strong>Oxygen</strong> CylindersCalculating the Duration of your CylinderThe following tables will show you how long your child’s cylinder will last based on the flow rate <strong>and</strong>type of flow meter supplied.Cylinder Type: Paediatric 2 Litre 300 BARThis is a high capacity filled cylinder which allows you to fit the micro or low flow device selected <strong>for</strong>you child’s prescription.816 MICRO FLOW METER:Flow Rate Duration Duration(LPM) (HOURS) (DAYS)0.01 1150 48.950.02 575 23.950.03 383 15.950.04 287 11.950.05 230 9.580.06 191 7.950.07 164 6.830.08 143 5.950.09 127 5.290.1 115 4.79817 LOW FLOW METER:Flow Rate Duration Duration(LPM) (HOURS) (DAYS)0.1 115.0 4.790.2 57.5 2.390.3 38.3 1.590.4 28.7 1.190.5 23.0 N/A0.6 19.1 N/A0.7 16.4 N/A0.8 14.3 N/A0.9 12.7 N/A1.0 11.5 N/A1.5 7.6 N/AAll of the above figures are based on a 24 hours continual use. For flow rates above those givenabove please contact your <strong>Home</strong>care Customer Services Representative on:0808 143 9999 Freephone18
Section 4: Medical Liquid <strong>Oxygen</strong>How to use your Medical Liquid <strong>Oxygen</strong>System:If your child’s doctor has requested medical liquid oxygen youwill be supplied with a base unit from which you will be able tofill your portable unit (Refer to Fig. 10).Medical liquid oxygen is stored in a base unit, which is aninsulated stainless steel container, <strong>and</strong> is similar to a thermosflask. The medical liquid oxygen is stored at a very lowtemperature, <strong>and</strong> its quantity amounts to the equivalent of35,260 litres of oxygen gas.7. ALWAYS store your base unit <strong>and</strong> portable unit in an uprightposition. Both units will continue to produce medical oxygengas even if they are not being used.8. NEVER cover your base unit or portable unit with clothing orany other items <strong>and</strong> never carry your portable unit underyour coat.Keepequipmentupright19
Section 4: Medical Liquid <strong>Oxygen</strong>Useful In<strong>for</strong>mation:● 1 litre of medical liquid oxygen will ‘evaporate’ as it warmsup to provide 860 litres of oxygen gas.● A typical portable 0.6 litre paediatric medical oxygen unitcontains about 516 litres of oxygen gas.● A typical base unit will hold approximately 25,800 litres ofoxygen gas. That is the equivalent of having 52 portablecylinders ‘on tap’. Lighter medical liquid oxygen portableunits provide you with excellent mobility.● A medical liquid oxygen base unit takes up less floor spacethan 4 st<strong>and</strong>ard 10 litre medical oxygen cylinders. Thismakes it a highly efficient method of storage <strong>and</strong> supply.● <strong>Home</strong> oxygen users / their carers may refill the portable unitsdirectly from the base unit as <strong>and</strong> when required.● Portable medical liquid oxygen units may be carried over theshoulder or worn across the chest using the strap provided.IMPORTANT!Safety in<strong>for</strong>mation <strong>for</strong> medical liquid oxygenIn the unlikely event of a leak from the base unit, wheel thebase unit outside. If possible, open the doors <strong>and</strong> windows<strong>for</strong> ventilation <strong>and</strong> allow the oxygen to disperse.In the event of accidental contact with the skin● DO NOT rub● Remove any clothing if necessary <strong>and</strong> gently applyslightly warm water <strong>for</strong> at least 15 minutes● Call your Doctor20
Section 4: Medical Liquid <strong>Oxygen</strong>What is Medical Liquid <strong>Oxygen</strong>?Medical liquid oxygen is stored in an insulated stainless steelcontainer similar to a thermos flask. These storage containersare referred to as base units <strong>and</strong> they hold the medical liquidoxygen at an extremely low temperature.Medical liquid oxygen base units are low pressure storagecontainers designed to safely store more oxygen than gascylinders can.The temperature of liquid oxygen is -183°C <strong>and</strong> can causeserious ‘cold’ burns if it should ever come into contact withyour skin.A medical liquid oxygen system that is installed in your homewill generally consist of a base unit mounted on a roller basewith a separate portable unit similar to the ones shown (Refer toFig. 10).Medical liquid oxygen systems are installed to meet portableoxygen requirements outside the home. If you have beensupplied with an oxygen concentrator <strong>for</strong> use in the home, youMUST NOT use your medical liquid oxygen system <strong>for</strong> thispurpose.In the event of a power or concentrator failure, the medical liquidoxygen base unit, in conjunction with the portable unit, may beused as a temporary back-up supply until the concentrator orelectricity supply has been repaired or restored.Fig. 1021
Section 4: Medical Liquid <strong>Oxygen</strong>How to use your Medical Liquid <strong>Oxygen</strong>Your portable medical liquid oxygen unit should only be used<strong>for</strong> active use <strong>and</strong> not <strong>for</strong> storage. You should fill the portableunit about 15 minutes be<strong>for</strong>e you intend to use it, this willmaximise the time available when you do go out.1. Wash your h<strong>and</strong>s be<strong>for</strong>e h<strong>and</strong>ling any medical oxygenequipment.2. Wipe both blue filling connections with a dry lint free cloth.The blue connections are located as follows, one on top ofthe base unit <strong>and</strong> the other on the base of your portableunit. These two connections must be clean <strong>and</strong> dry toprevent ice <strong>for</strong>mation during filling.3. NEVER try to fill your portable unit if your base unit isempty.4. Turn the flow rate selector to (0).5a5c5e5b5d5f5a. Hold the portable unit in both h<strong>and</strong>s.5b. Position the two blue quick release connectors together,one is on the base unit <strong>and</strong> the other is on the bottom ofthe portable <strong>and</strong> press down firmly with two h<strong>and</strong>s.5c. Begin filling the portable unit by simply pulling the blackvent valve h<strong>and</strong>le into the open position while continuing toapply downward pressure on the portable unit to maintaina connection.5d. When the portable unit starts to let out vapour, it is full <strong>and</strong>you should close the vent valve immediately.5e. When disconnecting the portable unit, simply depress orpush the grey disconnect plunger on the liberator base unit,this will disengage your portable unit from the base unit.5f. If the portable unit freezes to the liberator base unit,simply close the vent valve h<strong>and</strong>le <strong>and</strong> leave it attached.Once the connections have thawed out in about 10–15minutes the units can be easily disengaged.22
Section 4: Medical Liquid <strong>Oxygen</strong>6. Never touch the blue quick release connectors after filling,as they are very cold <strong>and</strong> will cause freeze burns.7. Connect the cannula to the medical oxygen outlet.8. Using the flow rate selector (red knob) on the top of theportable unit set this to your prescribed number (litres perminute). This is the flow rate prescribed by your HealthcareProfessional.Take care that the flow rate selector has been set properly<strong>and</strong> is not set in between two correct settings, if this is thecase then your medical oxygen will not be able to flow.The above filling guide is only a quick reference guide, <strong>for</strong>further in<strong>for</strong>mation regarding your particular medical liquidoxygen system, please refer to the ‘Manufacturers PatientH<strong>and</strong>book’ that your <strong>Home</strong>care Technician has providedyou with.Taking care of your child’s mask orcannulaYour child’s oxygen cannula or mask are important pieces ofequipment.A cannula can easily become blocked by nasal secretion <strong>and</strong>mucus. Both cannula <strong>and</strong> masks should there<strong>for</strong>e be kept asclean as possible.You should also check the oxygen tubing daily <strong>for</strong> any obvioussigns of damage such as kinking, flattening or splitting. If younotice any damage you must replace the tubing immediately.It is important that you keep a spare cannula or mask to h<strong>and</strong>at all times.CAUTION:Take care that tubing does not become trapped in itemssuch as furniture, doors, babies’ cots, infants’ high chairs etc;as this will restrict or even stop the flow of medical oxygen.23
Important In<strong>for</strong>mationElectricity CompanyWe recommend that you in<strong>for</strong>m your electricityprovider that you are using an oxygenconcentrator <strong>for</strong> medical purposes so that inthe event of a power supply failure they areaware of your special needs.Insurance CompanyWhilst it should not affect your insurancepremium, it is advisable that you in<strong>for</strong>m your<strong>Home</strong> Insurance company to ensure that youare fully covered should you ever have the needto make a claim.Moving House/Changing TelephoneNumbersPlease remember to in<strong>for</strong>m us if you aremoving house or if you have changed yourtelephone number. It is very important that youtell us this in<strong>for</strong>mation so that we can maintaina regular medical oxygen supply to you.ContactsGeneral enquiries:Customer Services Department8:30am - 5:00pm Monday to Friday0808 143 9999For emergencies:Outside of normal working hours, 24/70808 143 9999Data ProtectionFor us to supply you with all of your oxygenrequirements <strong>and</strong> reimburse you <strong>for</strong> electricitypayments, it is important that we keep personaldata about your oxygen needs.This in<strong>for</strong>mation will be kept securely within ourdatabase <strong>and</strong> we will only disclose thisin<strong>for</strong>mation to those Healthcare Professionalswho are directly involved in your care or in theadministration of your care.You have the right under the Data ProtectionAct to see the personal data that we hold <strong>and</strong>process. If you wish a copy of this in<strong>for</strong>mation,an application must be made in writing <strong>and</strong>sent to:The Business Manager,<strong>Air</strong> <strong>Liquide</strong> Limited,Unit 2, Tyne Dock - East Side,South Shields,Tyne <strong>and</strong> Wear,NE33 5SPUseful NumbersBritish Lung FoundationHelpline: 08458 50 50 20Email: enquiries@blf-uk.orgWebsite: www.lunguk.orgwww.uk.airliquide.com<strong>Air</strong> <strong>Liquide</strong> Limited. Unit 2, Tyne Dock - East Side, South Shields, Tyne <strong>and</strong> Wear, NE33 5SP.South West - Version 1 Dec 08