

2015 Tahoe 9C1 4WD Specification Guide - Final
2015 Tahoe 9C1 4WD Specification Guide - Final
2015 Tahoe 9C1 4WD Specification Guide - Final

You also want an ePaper? Increase the reach of your titles
YUMPU automatically turns print PDFs into web optimized ePapers that Google loves.
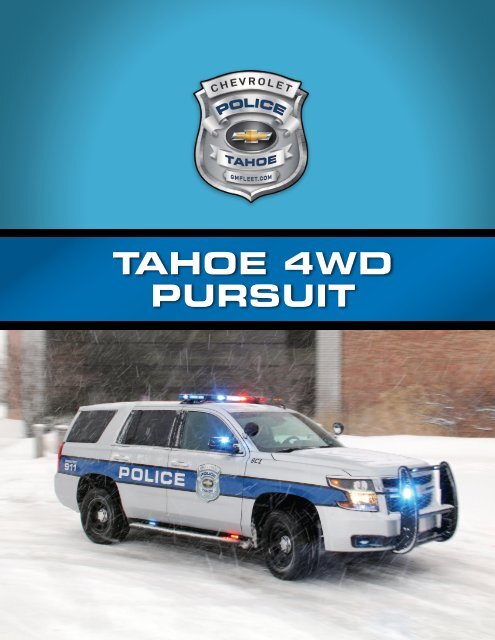
TAHOE <strong>4WD</strong>PURSUIT
<strong>2015</strong> <strong>Tahoe</strong> <strong>4WD</strong> Police Package <strong>9C1</strong>5Assist stepsSTANDARD EXTERIOR FEATURESBlack, mounted between front and rear wheelsBody Side Moldings Optional (see option RWK on page 12)DefoggerDoor handlesDoor locksFascia, frontFascia, rearFog LampsHeadlampsHORNSKEYLESS ENTRY REMOTESLuggage rackElectric, rear windowBody colorPower, programmable with lockout protection and automatic locking/unlocking. Door locks can be programed via radio settings menu(see page 11). Lock cylinder not available on passenger front door or rear liftgate. Child safety door and window locks individuallycontrolled electronically by driver door mounted switches. Includes 2 remote transmitters.Body color with police specific lower extension for increased brake cooling and ground clearanceBody color with step padNot availableDual halogen composite with flash-to-pass feature, automatic exterior lamp control and daytime running lamps. Daytime runninglamps are low beam lamps and operate at a reduced intensity (to delete automatic lamp control see option 9G8 on page 12).Dual noteKeys Two-sided, random code, for ignition, driver door, and glove box (Fleet keyed-a-like is available; see option 6E2 and 6E8 on page 12).Six additional keys available; see option 5HP on page 12.MirrorsRear liftgateREAR VISION CAMERAIncludes two extended-range transmitters with non-functional panic button; stealth mode feature includes exterior lamps and horndisable; if remote start Option AP3 is included, running lamps will remain illuminated(additional transmitters are available; see option AMF on page 12)Not availableOutside heated power-adjustable, manual-folding, body color with driver side spotter mirrorManual open/close with liftgate/liftglass latch exterior release switch or release via remote fobAudible warning with rear camera view radio screen display (see page 22 for description)REAR PARK ASSIST Sensors on rear bumper to assist with parking and avoiding objects while in reverse. (See page 22)Under Hood LampWindshieldWindshield wipersNot availableSolar absorbing shaded upper with acoustic laminated glassIntermittent, with rain sensingSTANDARD <strong>9C1</strong> ELECTRICAL FEATURESAuxiliary power, 170-amp ignition and main power supply wiring at lower center of instrument panel: 120-amp ignition controlled relay power andfront 50-amp battery power (see wiring provisions for 12-volt battery power supply on page 27)Auxiliary power, rear 100-amp cargo area (auxiliary battery powered) (see page 19)Lock-out protectionPower outletsWiring diagramsPrevents the power door locks from locking the driver’s door if the keys are left in the ignition(manually lockable with engine running)4 auxiliary, 12-volt outlets including one on the instrument panel, one in the center, fold-down seat storage, and two in the cargoarea. Battery power is present at all times. Also has a 3-prong, 110-volt outlet located in the lower center stack. A 110 volt ac, 150watt, outlet is adjacent to the 12 volt dc auxiliary power outlet in the lower center instrument panelSee Wiring Section for description (pages 26-30); also see <strong>Tahoe</strong> Police Package owner’s manual supplement(located in glove box folder with standard owner’s manual)V7714
6 <strong>2015</strong> <strong>Tahoe</strong> <strong>4WD</strong> Police Package <strong>9C1</strong> <strong>2015</strong> <strong>Tahoe</strong> <strong>4WD</strong> Police Package <strong>9C1</strong>6Air cleanerAlternatorAXLEBATTERIESBrakesCoolingEngineFrameFuel tank capacityHill Start AssistOil coolersProp shaftRadio suppressionRear DifferentialSpark plugsStabilitrakSuspension, frontSuspension, rearSTANDARD <strong>9C1</strong> CHASSIS FEATURESHigh-capacity170-amp high output with idle boost (transmission in park or neutral) based on battery energy level (see page 16 for alternator output graph)3.08 Ratio with heavy-duty locking differentialPrimary 660 CCA, 80 amp-hour rating with battery rundown protection (may be configured to protect customer installed equipment).Auxiliary 730 CCA, 80 amp-hour battery without battery run-down protection for customer installed equipment.(see page 15 for specifications)Heavy-duty 4-wheel anti-lock front and rear disc with vacuum boost power assistHeavy-duty high-capacity radiator, electric fans and extended life coolant; coolant hoses are EPDM (ethylene-propylene-dienemonomer) rubber; silicone hoses are not required (coolant is DEX-COOL good for 5 years/150,000 miles, protects from -34° F to +265° Fand against rust and corrosion)5.3L EcoTec3 V8 with direct injection, variable valve timing (VVT), Active Fuel Management (AFM), aluminum block, and FlexFuelcapability (gasoline or E85 1 ethanol); top speed fuel cut-off at 121 mph; includes air conditioning wide open throttle cut off (see page 7for powertrain description and emissions, see page 16 for specifications)Full perimeter, modular with hydroformed rails (includes ground straps)26 gallon (98 liters)This feature is designed to prevent the vehicle from rolling, either forward or rearward, during vehicle drive off. After the drivercompletely stops and holds the vehicle in a complete standstill on a grade, HSA will be automatically activated. During the transitionperiod between when the driver releases the brake pedal and starts to accelerate to drive off on a grade, HSA holds the braking pressurefor a maximum of two seconds to ensure that there is no rolling. Brakes will automatically release when the accelerator pedal is appliedwithin the two-second window.Engine oil, oil-to-coolant heat exchanger in passenger side of coolant radiator. Transmission oil, oil-to-coolant heat exchanger in driverside of coolant radiator with auxiliary transmission air-to-oil cooler in upper portion of the AC condenser (see page 21 for illustration)4 inch diameter aluminumGrounding straps, at five locations (see page 20 for locations).Heavy-duty lockingExtended life - iridium tipAn advanced computer controlled stability enhancement system assists the driver with directional control of the vehicle in difficult drivingconditions. (see page 38 for details)Steering Electric power-assisted rack and pinion (for illustration see page 21)TiresTire pressure monitorTire, spareTrailering equipmentTransmissionTransfer caseUnder Body Shield, FrontHeavy-duty, police-rated. Includes specific spring rates, ride height, shock tuning and stabilizer bar.Multi-link, coil springs and stabilizer barGoodyear P265/60R17 all-season, V-rated, blackwall, (see page 8) includes matching spare tireCheck tire pressure will display in driver message center (displays individual tire pressure); spare tire includes sensor; must beprogrammed when mounted (for illustration see page 19)Full-size spare, lockable with outside winch-type carrier mounted under frame at rear (includes TPM sensor - not programed)SAE Class II hitch with 2 inch (51 mm) square receiver. Trailer may weigh up to 4,000 pounds (1,844 kg) with proper hitch selection.See the Owners Manual for additional information.Enhanced calibration 6-speed automatic with overdrive and tow/haul mode. Electronically-controlled transmission provides protectionagainst over-revving the engine in low gear and a mechanical low gear blockout is not required; if a driver manually selects low gearand fails to manually upshift to high gear, the powertrain control module automatically protects the drivetrain.Autotrac, 2-speed electronic with rotary control, includes neutral position for dinghy towing (2HI, 4AUTO, 4HI, 4LO, and Neutral setting)Two-piece, heavy-duty aluminum front underbody shield starting behind front bumper and running to 2nd cross-member protectingfront underbody and oil pan (for illustration see page 21)WARRANTY Maintenance and Warranty information (see page 39)WheelsWheel center cap17" x 8" heavy-duty black steel (includes matching full-size spare)Polished finish bolt-on metal1. E85 is 85% ethanol and 15% gasoline.V7714
8 <strong>2015</strong> <strong>Tahoe</strong> <strong>4WD</strong> Police Package <strong>9C1</strong> <strong>2015</strong> <strong>Tahoe</strong> <strong>4WD</strong> Police Package <strong>9C1</strong>8TIRES v-sPEED RATEDMANUFACTURER QUANTITY SIZE SPEED RATING TYPEGOODYEAR 5 P265/60R17 V All season BWNOTE: Due to specific requirements for performance durability and safety, GM recommends only the original equipment tires for replacementTire Plys = Tread: 2 Polyester, 2 Steel, 2 Nylon Sidewall: 2 Polyster Total 8 PlyTire chains may be used with caution. See your owner's manual for specific recommendations regarding conditions. If the vehicle is equipped with aP265/60R17 tire size use tire chains only where legal and only when necessary. Use low profile chains that add no more than 12 mm thickness to thetire tread and inner sidewall. Use chains that are the proper size for the tires. Install them on the tires of the rear axle. Don't use chains on the tires ofthe front axle. Tighten them as tightly as possible with the ends securely fastened. Drive slowly and follow the chain manufacturer's instructions. Ifthe chains contact the vehicle, stop and retighten them. If the contact continues, slow down until it stops. Driving too fast or spinning the wheels withchains on will damage the vehicle.AVAILABLE EXTERIOR COLOR Actual colors may varyGWTGANGBAGXGGAZGBEG7UChampagneSilver MetallicSilver IceMetallicBlackTungstenMetallicSummit WhiteCrystal RedTintcoat*Sable Metallic**Requires additional chargeSEO Paint AvailableCOLOR DESCRIPTION SEO CODE WA#Blue 1 9V2 WA-5665Woodland Green 9V5 WA-9015Victory Red 2 5T4 WA-9260Yellow — WA-9414Wheatland Yellow 9W3 WA-253ADark Toreador Red — WA-334DDark Blue Metallic 1 9V7 WA-722J1 – Includes two openings in front fascia. Recovery hooks (V76) recommended for customers not installing after-market push bars.2 – Extra Cost (Requires SEO 5T4 exterior body colored parts and Optional V76 Recovery Hooks)AVAILABLE INTERIOR COLOR Actual colors may varyHOU5T5Black ClothBlack Vinyl
<strong>2015</strong> <strong>Tahoe</strong> <strong>4WD</strong> Police Package <strong>9C1</strong>9FRONT SEATS AND INTERIOR TRIMSTANDARDCloth front 40/20/40 Individual Seats (AZ3) 3-Occupant, Center seat can be unbolted for removal. Center fold-down armrest with USB/SD input andlockable seat cushion storage. STANDARD 10-way power driver seat, includes power lumbar and power recline. STANDARD 6-way power front passenger seat.Outboard seat back thoracic-pelvic airbags.Seat Code Seat Trim Color Color CodeAZ3 Cloth Jet Black HOU• Front cloth and vinyl rear seat combination is availableby ordering option 5T5 and requires Jet Black (HOU)• Center seat can be unbolted for removal• OPTIONAL Safety Alert Driver's Seat (PCW)OPTIONAL - SEO 9U3 20% SEAT DELETECloth Front 40/40 Individual Seats (AZ3 & Option 9U3) Deletes center seat to provide 15" of open space between Driver and Passenger Seat.STANDARD 10-way power driver seat, includes power lumbar and power recline. Outboard seat back thoracic-pelvic airbags.STANDARD 6-way power front passenger seat.Seat Code Seat Trim Color Color CodeAZ3 & 9U3 Cloth Jet Black HOU• Front cloth and vinyl rear seat combination is availableby ordering option 5T5 and requires Jet Black (HOU)• OPTIONAL Safety Alert Driver's Seat (PCW)OPTIONAL - A95 BUCKET SEATSCloth Bucket Seats with Console (Option A95) Driver and Passenger Front Bucket Cloth Seats, with integrated retail console.10-way Power Driver and Passenger Seats with Outboard-Seat Back Pelvic Airbag and driver seat-mounted Front Center Airbag.Not recommend for vehicles intended to be up-fitted with aftermarket equipment.Seat Code Seat Trim Color Color CodeA95 Cloth Jet Black HOU• Front cloth and vinyl rear seat combination is availableby ordering option 5T5 and requires Jet Black (HOU)• Console cannot be deleted• OPTIONAL Safety Alert Driver's Seat (PCW)REAR SEATS AND INTERIOR TRIMSTANDARDCloth Second Row 60/40 Split-folding Bench Seat (AT6) Includes folding center armrest with cup holderSeat Code Seat Trim Color Color CodeAT6 Cloth Jet Black HOU• Color is based on front seat choiceOPTIONAL - SEO 5T5 VINYL REAR SEATVinyl Second Row 60/40 Split-folding Bench Seat Seat (Option 5T5)Seat Code Seat Trim Color Color Code5T5 Vinyl Jet Black HOU• Front cloth and vinyl rear seat combination isavailable by ordering option 5T5 and requiresJet Black (HOU)NOTE: Third row seating is not available and roof rail air bags extend into cargo area (see page 35).V7714
10 <strong>2015</strong> <strong>Tahoe</strong> <strong>4WD</strong> Police Package <strong>9C1</strong> <strong>2015</strong> <strong>Tahoe</strong> <strong>4WD</strong> Police Package <strong>9C1</strong>10United States Certified Speedometer/cluster (CANADIAN SIMILAR)914160 210 1/219260 EF0408023RPMx100041 5OFF0 6PRNDM1PSpeed0MPH659 mi NW302070 8060504010CERTIFIED90100110120130140150TRANSMISSION POSITIONCOMPASSDRIVER INFORMATION CENTERAccess DIC Menu Items via Trip Odometer Reset StemDigital SpeedometerTripFuel RangeAverage Fuel Economytire PressureRemaining Oil LIfeReLearn Remote KeysTransmission Fluid TemperatureEngine HoursUnitCertification is Displayed on Instrument ClusterSPEEDOMETER CERTIFICATION<strong>2015</strong> <strong>Tahoe</strong> police vehicle certified speedometer calibration. <strong>Specification</strong>sat ambient temperature of -10 to 120 degrees F ( -23 to 49 Celsius ).Inaccuracies due to vehicle speed sensing are included.Actual vehicle speedIndicated speed0 to 120 MPH +/- 2 MPH0 to 193 KPH +/- 3 KPHThe speedometer calibration is for the 5.3L engine, automatic transmission with a 3.08axle and P265/60R17 V-rated tiresV7714
Master’s Programhttp://www.grips.ac.jp/pstudents/inter_programs/finance.htmlPublic Finance Program (PFP)Fosters the skills needed to be leaders in taxation and customsMasako KurosawaProgram DirectorProfessorThe Public Finance Program started in 2000 and is operated under the full support of the World Bank(WB) and the World Customs Organization (WCO). The major objective of the Public Finance Programis to provide students with the conceptual understanding and technical competence to become leadersin taxation and customs. The program is comprised of two segments: an academic segment common tocustoms and tax scholars, and a practicum segment which is divided into tax and customs depending onthe scholar’s stream.TARGET GROUPGovernment officials from developing countries worldwide who are currently working in tax or customsadministration or equivalent departments, with 2-3 years of work experience in the relevant field.PROGRAM DESIGNThe academic segment of the program provides rigorous economics-oriented training aimed atdeveloping an understanding of the theoretical, empirical, and institutional aspects of tax and customspolicy implementation and administration in the context of developing countries’ economic and socialdevelopment. A practicum at the National Tax Agency or the Customs Training Institute provides anopportunity for students to enhance their learning with hands-on experience in a tax/customs-relatedwork environment and to integrate this experience with their formal education.Curriculum: Public Finance ProgramDegrees OfferedMaster of Public FinanceLanguage of InstructionEnglishTime ScheduleProgram durationEnrollmentGraduation13 monthsSeptemberSeptemberScholarshipFor International Students Only:• Joint Japan/World Bank GraduateScholarship Program (for Tax Course)• Japan-World Customs OrganizationHuman Resource DevelopmentProgramme Scholarship(for Customs Course)See p.24-25 for conditions of applicationand further informationCategory Course Name(For Tax Course) International Taxation of Japan; Practicum at the National Tax Agency(For Customs Course) Customs Law; Practicum in Customs Administration I- III;Required CoursesIntellectual Property Rights Enforcement at Border(For both Courses) Microeconomics I; Theory of Public Finance; Workshop in Public Finance; Public Finance and Fiscal PolicyHighlyRecommendedElective CoursesOtherElective CoursesMacroeconomics I & II; Microeconomics II; Government and Market; Introduction to Applied Econometrics;Local Public Finance; Economic and Fiscal Reform in Japan; International Trade; Development Economics;Human Resources ManagementMonetary Economics (Money and Banking); Finance and Economic Growth;Applied Time Series Analysis for Macroeconomics; Poverty Alleviation; Trade and Industrial Development;Game Theory; Mathematics for Economic Analysis; Public Economics; Labor Economics;Economics of Education and Labor; Economics of Law; Urban Economics; Transportation Economics;Urban Development and Real Estate Policy; Economic Analysis of Urban and Regional Policy; International Finance;Empirics of Macroeconomic Policies and International Finance; Environmental Economics;Resource and Energy Economics; Japanese Economy; Japanese Financial System;Econometrics/ Quantitative Methods; Time Series Analysis; Economic Modeling for Policy Simulations;Economic Development of Japan; Advanced Microeconomics I & II; Advanced Econometrics I & II;State Building and Development; International Political Economy of Money and Finance;Quantitative Social Systems Analysis; Accounting and Financial Management I;Development Assistance by International Organizations; Foreign Direct Investment; Seminar in Industry and Trade Policy;Global Governance: Leadership and Negotiation; Fiscal and Monetary Policies in Japan;Public Expenditure Management; Policy Design and Implementation in Developing Countries;Local Government System; Local Government Financehttp://gsys.grips.ac.jp/syllabus/CAREER DESTINATIONSGraduates from this program are expected to return to their host organizations to become fiscal leaders in taxationand customs. In fact, more than 95% of the graduates are still working at the tax and customs bureau in their homecountries. To give a few examples of their current positions:Tax Course• Deputy Director, State Tax Bureau of Shantou Bonded Zone, Guangdong Province (China, 2005)• Executive Director, National Statistics Office (Georgia, 2003)• Directorate General of Taxes, Ministry of Finance (Indonesia, 2001)• Principal Assistant Director, Inland Revenue Board Malaysia (Malaysia, 2001)• Assistant Director, Zambia Revenue Authority (Zambia, 1999)Customs Course• Deputy Commissioner, Ministry of Finance (India, 2008)• Deputy Commissioner, Ministry of Finance (Bhutan, 2006)• Deputy Director, Pakistan Customs, Central Board of Revenue (Pakistan, 2006)• Director, Intelligence and Special Operations, Maldives Customs Service (Maldives, 2004)• Assistant to Director General, Customs and Excise Department (Cambodia, 2003)Public Finance Program (PFP) | Degree Programs9
12 <strong>2015</strong> <strong>Tahoe</strong> <strong>4WD</strong> Police Package <strong>9C1</strong> <strong>2015</strong> <strong>Tahoe</strong> <strong>4WD</strong> Police Package <strong>9C1</strong>12Available optionsRWK body-side Moldings - Body color, not available in GAN-Silver Ice Metallic and GXG-Tungsten Metallic (Dealer Installed)1LR Brake System, City - Uses base friction material that wears better at lower temperatures and city service. The city brakes are not optimal for track performance. The frontrotors are Duralife but do not have the radial drilled holes. The parts are physically interchangeable for service, however the parts should be substituted as complete four wheel setsUtq content theft alarm disable - Flashing lamps and horn warning disable (To avoid inadvertent alarm activation this option is recommended for customers that do notintend on using keyless entry remote fobs)9g8 delete daytime running lamps and automatic headlamps - Exterior lamps are operated manually (see Interior/Exterior Lamps Control page 20)PCW Driver Alert Package - Includes Forward Collision Alert (UEU), Lane Departure Warning and Safety Alert Seat (UFL), and Power-adjustable pedals (JF4). (See page 23)5t49V79V2Exterior body color parts - Victory Red special painted exterior body parts in lieu of glossy Black color normally installed with special painted bodies. Victory Red paintedparts applied to front fascia, rear bumper fascia, rear liftgate license plate appliqué and rear liftgate handle, door handles and body side moldings. Mirrors, rear D-pillar appliqueand liftgate spoiler will remain Black. Requires SEO TGK special paint and special paint color WA9260 Victory Red. Also requires (V76) Recovery Hooks.Exterior body color parts - Dark Blue Metallic, special paint WA-722J applied to front fascia, rear bumper fascia, rear liftgate handle and lifgate appliqué above licenseplate. Door Handles, Mirrors, rear D-pillar appliqué and lifgate spoiler will remain Black. Includes opening in front fascia without recovery hooks (requires TGK special paint solid)Recovery hooks (V76) optional.Exterior body colored parts - Blue WA-5665 applied to font and rear fascia. All other non-metal body parts will remain the same as (TGK) special paint solid. Includesopening in front fascia without recovery hooks (requires TGK special paint solid) Recovery hooks (V76) optional.6j7 flasher system headlamps and tail lamps - drl compatible, headlamp flasher module with control wire to permit separate front and rear lamp flashingR9Y Fleet Free Maintenance Credit - This option code provides a credit in lieu of the free oil changes, tire rotations and inspections (4 maximum), during the first 24 monthsand 24,000 miles period for this ordered vehicle. The invoice will detail the applicable credit. The Customer will be responsible for all oil changes, tire rotations and inspectionscost for this vehicle. NOTE: Dealer is unable to credit customer on vehicles not originally ordered with (R9Y) option.B30 floor covering - Color keyed carpeting (includes rear cargo floor)B58 floor mats - Color keyed carpeted front and 2nd row included and only available with B30 Floor Covering (not available with vinyl floor covering)VAV Floor Mats - All weather (Dealer Installed) Note: Not available with standard black rubberized vinyl floor coveringAKP Glass - NON-TINTED GLASS- Solar absorbing (replaces deep-tinted glass on rear doors and cargo area)UT7 Ground Studs - Two located in rear compartment near bottom of liftgate openingK05 heater - Engine block<strong>9C1</strong> identifier - Police Package6e2 key common - All vehicles in fleet, provides a single key cut with a specific code that is common to the door lock and ignition of all the vehicles in the vehicle fleet; this keycode is an alternate to SEO 6E8 key common, complete vehicle fleet; not compatible with Caprice or Impala. Not compatible with 2014 or older <strong>Tahoe</strong>.6e8 key common - All vehicles in fleet, provides a single key cut with a specific code that is common to the door lock and ignition of all the vehicles in the vehicle fleet; this keycode is an alternate to SEO 6E2 key common, complete vehicle fleet; not compatible with Caprice or Impala. Not compatible with 2014 or older <strong>Tahoe</strong>.AMF Keyless entry transmitters - Fleet Package includes 6 additional transmitters. Transmitters are not programmed. Each transmitter, including the two standard with thevehicle, must be programmed together by a dealer at customer expense. Transmitter programming is not a warranty item See page 26 for description. See your owner's manualsupplement for programming remote key transmitter instructions. Vehicle specific, common fleet transmitter frequency is not available5HP KEYS - 6 additional (see page 26 for description)6C7 LAMP, AUXILIARY DOME - Red and white auxiliary dome lamp is located on the headliner between front row seats (red is LED, white is INCANDESCENT)(wired independently from standard dome lamp)VK3 License plate - Front mounting package (included on orders with ship-to states that require front license plate)VLI Mat - Rear cargo (Dealer Installed)W2D Net - Rear cargo (Dealer Installed)V7714
<strong>2015</strong> <strong>Tahoe</strong> <strong>4WD</strong> Police Package <strong>9C1</strong>13Available options CONTINUEDUE0 ONSTAR DELETe - BLUETOOTH CELL PHONE CONNECTIVITY AND COMPASS ARE ALSO DELETED WHEN ORDERED (not recommended)JF4 Pedals - Power-adjustable for accelerator and brake, included with PCW Driver Alert Package6n6 Rear door LockS and handles inoperative - Rear power locks are inoperable at rear door but operate from drivers position, rear doors can be opened only from outside6n5 rear Door window switches inoperative - Rear windows only operate from drivers positionV76Recovery Hooks - Two front frame-mounted, recommended if front push bumper is to be installed(required on all models sold to Alaska, Guam, Hawaii, Puerto Rico and Virgin Islands)BTV remote vehicle starter system - Includes remote keyless entryA95SEAT & CENTER CONSOLE - Driver and Passenger Front Bucket Cloth Seats, with integrated retail console. 10-way Power Driver and Passenger Seats with Outboard-Seat BackPelvic Airbag and Driver Inboard Seat Back Airbag. Not recommend for vehicles intended to be up-fitted with aftermarket equipment. (see page 9)5t5 seat - Front cloth with vinyl rear seat (see seating options on page 9)VRS Shade - Rear cargo (Dealer Installed)TGK SPECIAL PAINT SOLID - One color all normally body-colored non-sheet metal parts will be gloss Black. This includes front and rear facias, liftgate handle and applique,D-pillars and upper liftgate applique. Mirrors and door handles will be grained Black parts. B85 body-side moldings are not available except with SEO option 5T4 exterior bodycoloredparts. Required with any SEO paint selection (may require extended lead time)VQK Splash Guards - Front and rear (Dealer Installed)7x6 spotlamp - Left hand, separately fused7x7 spotlamps - Left and right hand, separately fusedWx7 wiring - For customer connection to front door and windshield pillar speakers. Front speakers are not connected to the vehicle radio; radio audio signals are routed tothe rear speakers6j3 wiring - For grille lamps and siren speaker6j4 wiring - For horn/siren circuit, in-line connection for customer furnished switchSFV WIRELESS NETWORK INTERFACE MODULE (Dealer Installed)S6N TRAILER HITCH INSERT - Black rubber square with a logo that closes out the receiver see page 24 for illustration (Dealer installed)Note: Factory installation of spotlamps are recommended. Special tooling is used to locate and drill the spotlamp shaft hole in the pillars. (Interior trim coversprovided with factory installed lamps are not available as service parts). Field installation of spotlamps must not interfere with proper deployment of theroof rail airbag in the event of a crash.V7714
16 <strong>2015</strong> <strong>Tahoe</strong> <strong>4WD</strong> Police Package <strong>9C1</strong> <strong>2015</strong> <strong>Tahoe</strong> <strong>4WD</strong> Police Package <strong>9C1</strong>16SPECIFICATIONSENGINESTDTypeECOTEC V8Displacement: liters/cu. in. 5.3/325Horsepower/rpm 355 @ 5600Torque lb.-ft./rpm 383 @ 4100Induction systemDirect InjectionCompression ratio 11.0:1ExhaustSingleMinimum recommended fuel octane 87Fuel tank capacity (gallons/liters) 26/98Oil with filter (quarts/liters) 6.0/5.7Cooling capacity (quarts/liters) 18.3/17.3TRANSMISSIONAutomatic electronic with overdrive6-speedFluid pan removed and filter replaced (quarts/liters) 6.0/5.7AXLERatio 3.08CHASSISFrameFull perimeter steelFront suspensionSLA (Short Long Arm)with coil over shock and stabilizer barRear suspensionMulti-link, coil springs and stabilizer barSteering typeElectric power-assisted rack and pinionSteering ratio 17.75:1BATTERIES PRIMARY AUXILIARYType Maintenance free Maintenance freeBCI group size LN3 LN3Volts 12 12Amp hour rating 80 80Cold cranking-amps @ 0°F (-18°C) 660 730Reserve capacity @ 80°F (27°C) 135 minutes 110 minutesALTERNATORTypeREMY DR44MAmps 77°F (25°C) 170BRAKESABS with vacuum-boostDisc/DiscFront-swept area (sq. in./sq. cm) 256.6/1655Rear-swept area (sq. in./sq. cm) 248/1600Total front and rear swept area (sq. in./sq. cm) 504.6/3255Front rotor diameter (in./mm) 13.0/330Rear rotor diameter (in./mm) 13.5/343Front rotor thickness (in./mm) 1.2/30Rear rotor thickness (in./mm) .79/20200190180170160150140130120110<strong>Tahoe</strong> POLICE ALTERNATOR OUTPUT31, 277 o F (25 o C)221 o F (105 o C)257 o F (125 o C)TIRESTypeGoodyear V-rated all-seasonSizeP265/60R17WHEELSTypeSteelSize 17" x 8"1001000 2000BOOST LEVEL PARK/NEUTRAL DRIVENormal Idle 550 5001 800 6502 800 7253 1000 800V7714
<strong>2015</strong> <strong>Tahoe</strong> <strong>4WD</strong> Police Package <strong>9C1</strong>17VEHICLE LOAD LIMITSThis information is intended for those who intend to install additional equipment on the police vehicle after it has left the factory, and for thosewho will be driving and loading the vehicle with passengers and/or cargo. Two labels on your vehicle show how much weight it was designedto carry, the Tire and Loading Information label and the Certification/Tire label. These labels are attached to your vehicle and give you themaximum load capacity, the Gross Vehicle Weight Rating (GVWR) and the Gross Axle Weight Rating (GAWR) for your vehicle. See "Vehicle LoadLimits" in the owner manual Index for additional loading information.The following guidelines can help you with proper loading and load distribution when installing additional equipment on the <strong>Tahoe</strong>PolicePackage.WARNINGDo not load the vehicle any heavier than the Gross Vehicle Weight Rating (GVWR), Nor either the maximum frontor rear Gross Axle Weight Rating (GAWR). This can cause systems to break and change the way the vehicle handles.This could cause loss of control and a crash. Overloading can also shorten the life of the vehicle.Adding Equipment to Your VehicleBefore adding accessories or equipment to your police vehicle, there are some things you need to know• The police vehicle's maximum capacity weight (payload). The weight of your police vehicle, including a full tank of fuel but withouta driver and passengers.• The weight of items you plan on adding to your police vehicle, like roof mounted light bar(s), push bumpers, security barrier(s), rearstorage organizer, highway flares, fire extinguishers, weapons, ammunition, radios, and video equipment.• The weight and number of passengers you intend to carry in your vehicle.• The total weight of any additional cargo you intend to carry in your vehicle.When planning your vehicle equipment installation remember not to exceed the Gross Vehicle Weight Rating (GVWR) or the Gross Axle WeightRating (GAWR) of the front or rear axles. To keep the available load weight less than the vehicle capacity weight, you may need to limitthe number of passengers you carry in your vehicle or change your choice of additional equipment. Towing a trailer may change the vehiclepayload capacity.Center of Gravity (CG)A vehicle's center of gravity is an imaginary location inside the vehicle and is a balance point for the vehicle mass as it moves down the road. Thepolice vehicle's center of gravity, before you add a load and passengers, is approximately midway between the center of the axles, up from theground to just below the front window, and between the driver and passenger. Equipment location and weight on the vehicle's center of gravityis important to keep in mind when planning an installation. Heavy equipment should be positioned as low and as far forward in the rear loadcompartment as possible. Try to mount the equipment below the bottom of the side windows. Refer to the Loading Zone chart and diagram tohelp with your installation plan.A procedure to make the necessary measurements and formulas to calculate the vehicle longitudinal, lateral and vertical position of the centerof gravity can be found in the GM Coachbuilders Manual.Equipment required to conduct the measurements for calculating the center of gravity are:• Weight scales of sufficient capacity to measure the vehicle weight at each wheel.• A post type hoist or other means to safely elevate the front of the vehicle to at least an angle of 20 degrees above horizontal.See your GM dealer to get more information about this coachbuilder procedure.Keeping the center of gravity midway between the axles is also important to provide proper braking performance. About half the total vehicleweight on each axle is recommended.Weigh your vehicle after the additional equipment has been installed to determine the actual weight of your vehicle. Weigh the vehicle with afull tank of fuel and without passengers. You may need to put a limit on how many people or other equipment you can carry inside your vehicleafter the additional equipment has been installed.Note: See loading zone weight chart and diagramV7714
18 <strong>2015</strong> <strong>Tahoe</strong> <strong>4WD</strong> Police Package <strong>9C1</strong> <strong>2015</strong> <strong>Tahoe</strong> <strong>4WD</strong> Police Package <strong>9C1</strong>18Loading ZOnesLoading zones for customer installed equipment and cargo with six occupantsRefer to your vehicle tire placard for Vehicle seating Capacity and Payload Capacity (Occupants + Cargo) WeightBCDAEA. Front Floor to Roof Zone AreaB. Front Roof Zone AreaC. Back of Front DoorD. Rear Roof Zone AreaE. Rear Floor to Roof Zone AreaF. GroundFLoading zone weight chart tahoe police package 4wd 9c1loading zones front axle weight rear axle weight totalroof 27 lbs (12 kg) 38 lbs (17 kg) 65 lbs (29 kg)Floor to roof 99 lbs (45 kg) 394 lbs (179 kg) 493 lbs (224 kg)TOtal 126 lbs (57 kg) 432 lbs (196 kg) 558 lbs (253 kg)NOTE:Cargo weight can be greater with fewer occupants. Towing a trailer may change vehicle payloadrefer to your owner's manual supplement for determining maximum cargo loading and positioning.Using heavier suspension components to get added durability might not change your weight ratings.Ask your dealer to help you load your vehicle the right way.V7714
<strong>2015</strong> <strong>Tahoe</strong> <strong>4WD</strong> Police Package <strong>9C1</strong>19STANDARD EQUIPMENTWiring Provisions for 12-volt battery power supplyThe vehicle is equipped with wiring provisions for connecting 12-volt battery power to customer installedequipment. Refer to the following information when adding electrical accessories that will use the 12-voltpower supply circuits connected to the vehicle’s electrical system. A wiring harness is located below theinstrument panel (IP) near the center of the vehicle and another connection point is located in the left rear ofthe cargo area.The 12-volt battery power for customer connection is supplied from the Primary vehicle battery via controlrelays to four blunt cut 30-amp circuit wires and from an Auxiliary battery via one blunt cut 50 -amp circuitwire in the harness under the center IP. A blunt cut ground wire is also included in the front harness.A 100-amp Rear Electrical Center (REC) stud is located in the left rear cargo area.The Primary battery is located at the right rear of the engine compartment and the Auxiliary Battery islocated at the left front of the engine compartment. The Auxiliary Battery is connected to the vehiclecharging system via a relay which is closed when the ignition is ON.Four 30-amp control relays and 30-amp fuses are located in the Underhood Electrical Center (UEC).Also in the UEC are two 5-amp fuses which connect control relay coils 1 and 2 and control relay coils 3 and 4to the UEC Primary battery power bus. The fuses can be re-positioned to connect the relays to the UECprimary battery Ignition Power (Run/Crank) bus. Refer to the UEC label showing the 5-amp fuse locations.The fuse positions are labeled “Vbat” for the primary battery power and “R/C” for the Run/Crank power.The 5-amp fuses can be positioned to have all four control relay coils powered by the Primary bus or all fourpowered by the Run/Crank bus. Alternatively, one pair of relay coils (e.g., 1 & 2) can be connected to thePrimary bus and the other pair of relay coils (e.g., 3 & 4) connected to the Run/Crank bus.The four control relays are operated via separate blunt-cut wires located in the harness under theinstrument panel and are intended to be connected via customer switching to vehicle ground.The auxiliary power control relay control wires and the relay contact 30-amp load side wires forcustomer connection are identified as follows:Blunt cut ignition control and signal wires are also included in the front harness under the center IP:Control Relay Ground control wires: 12-volt, 30-amp load wires:• Red/White…Control relay 1• Blue…Control relay 1• Yellow/White…Control relay 2• Grey/Black…Control relay 2• Green/Grey…Control relay 3• Yellow/Brown…Control relay 3• White/Blue…Control relay 4• Red/Green…Control relay 4• A Violet/Yellow circuit wire, hot in ACCESSORY/RUN. This circuit is also provided in a coil in thecargo area near the REC.• A Violet/White circuit wire, Hot in RUN/CRANK. This circuit is also provided in a coil in thecargo area near the REC.• A Yellow/Black circuit wire, transmission in Park signal. The circuit provides switched 12-voltpower when the transmission control is in Park and the engine is running. The circuit is at 0volts when the transmission control is in any other position, i.e., R, N, D, L. Note that thecircuit is at 12-volts when the transmission is in Park and the ignition is in LOCK/OFF. To avoidthe possibility of undesired parasitic electrical load when the ignition is OFF, it isrecommended that the Park Signal circuit be isolated by a customer furnished ignitioncontrol relay.• A Green/Gray circuit wire for Vehicle Speed signal providing 4000 pulses per mile.• A White/Blue circuit wire for 12-volts when the Service Brakes are applied.• Blue/White wire provides a pulsating 12 volt signal when a left turn is selected• A Yellow/Gray wire provides a pulsating 12 volt signal when a right turn is selected• All automatic lighting can be disabled when a ground is applied via a customer-furnishedwire terminated in BCM connector X2, terminal 18A 100-amp battery voltage stud for customer connection is located in the REC at the left rear ofthe cargo area. The ACCESSORY/RUN (Violet/Yellow) and RUN/CRANK (Violet/White) circuits arecoiled near the REC.AUXILIARY BATTERY POWERREAR ELECTRICAL CENTERTire Pressure MonitorA 100-amp battery voltage stud is located in the Rear Electrical Center (REC) at the left rear of thecargo area. Removal of the vented trim cover in the lower left quarter trim panel provides accessto the REC, located to the rear of the jack stowage compartment. A blunt cut ACCESSORY/RUN(Violet/Yellow) circuit wire and a blunt cut RUN/CRANK (Violet/White) circuit wire are coiled nearthe REC. The nut on the power stud must be torqued to 9Nm+0.5 when attaching other wires tothe stud. The stud adjacent to the rear of the 100 amp power stud is inactive.The <strong>Tahoe</strong> Police Package is equipped with Tire Pressure Monitor System (TPMS)which warns of low tire pressure. The <strong>Tahoe</strong> Police Package has a full size spare tirewith a TPMS sensor which does not read spare tire pressure. When the spare tire fromyour vehicle or an unused spare tire from another Police Package is placed in use as aroad wheel, the system will not read the presence of the new TPM sensor and mustbe calibrated. Refer to your owner’s manual for additional information the TirePressure Monitor System Programming. The Special Service Package 5W4 does nothave a TPM sensor in the spare tire.V7714
20 <strong>2015</strong> <strong>Tahoe</strong> <strong>4WD</strong> Police Package <strong>9C1</strong> <strong>2015</strong> <strong>Tahoe</strong> <strong>4WD</strong> Police Package <strong>9C1</strong>20STANDARD EQUIPMENTRadio Suppression Ground StrapsSURVEILLANCE FEATUREMANUAL LAMP CONTROL AND 9G84 3 51 2Police Package is equipped with additional grounding in the followinglocations:1. Left hand front frame body mount bracket to underbody2. Left hand rear frame body mount bracket to rear underbody3. Right hand rear frame body mount bracket to rear underbody4. Right hand front frame body mount bracket to underbody5. Exhaust pipe hanger rod to rear frame hangerService parts identification labelSERVICE PARTS IDENTIFICATION1GNLC2E0BR8152140DO NOT REMOVEPDBJCH CC10706AGK AG2 AL0 AMF AP3 AR9 AT8 AXJ AY0 A75 A76BDR B3B B42 B86 B9V C67 DK2 EF7 E2C FE9 FR9IPG JA9 JL9 KD1 KG4 LGD MX0 M15 NK5 NT7 N99OST QPP R7V R9N R9Z SLM T53 UH8 UJM UN9 UT7UW6 UIC U77 VT7 V8D WL9 ZFH 1SZ 19C 41U 1913FL 6A3 6E2 6HP 6J1 6J3 6J4 6J7 7B3 7HP 7M97X6 8MZ PPV 9MZBC/CC U 636RSAMPLEThe headlamp control on the driver’s side of the instrument panel operates the exterior lamps. If your<strong>Tahoe</strong> does not have option 9G8, DELETE DAYTIME RUNNING LAMPS and AUTOMATIC HEADLAMPS, theDaytime Running Lamps and Automatic Headlamps can be turned OFF for one ignition cycle by rotating theheadlamp control knob momentarily counter-clockwise. See also Section 3 of your <strong>Tahoe</strong> Owner’s Manual.Surveillance Feature – The Body Control Module (BCM) has been calibrated to provide disabling of theexterior and interior automatic lighting. The BCM is located under the instrument panel to the left side ofthe steering column.The Surveillance Feature can be connected by installing a terminated wire in cavity 18 of the Light Bluecolored BCM connector, X2. The wire and terminal part number to be installed is GM #13582297. When acustomer-provided terminated wire is properly installed in X2-18 and the wire is connected via a customerprovidedswitch to vehicle ground, all automatic lighting is disabled. The feature functions with andwithout SEO 9G8. See the wiring diagram on page 30.Option SEO 9G8 – Delete Daytime Running Lamps and Automatic Headlamps. This option disables theDaytime Running Lamps and Automatic Headlamps control feature. Exterior lamps are only manuallycontrolled (Option 9G8 is not available in Canada).When the headlamp switch is in Auto with 9G8 installed, the instrument cluster, radio display and airconditioning illumination remains at daytime intensity and are dimmable only when the headlamp switchis rotated to the Parking Lamps or Headlamps positions. If SEO 9G8 is not installed, the displays aredimmable with the Headlamp switch in the AUTO position.Interior courtesy lamps, including dome lamps, can be turned OFF with a three-position switch located inthe front overhead console. The interior lamp control positions are: OFF – DOOR – ONWhen the switch is in the OFF position, all interior lighting remains off whenever the doors or liftgate areopened.CAVITY 18A Service Parts Identification (SPID) Label provides Vehicle Identification Number (VIN)-specific Option Code content list, Engineering Model Number (Nameplate, body style),Exterior paint system, Exterior paint color code and Interior trim level and color. The SPIDlabel for the <strong>Tahoe</strong> is located on the inner surface of the instrument panel storagecompartment (glove box).Stabilitrak controlUSB/SD Connector LocationPThe Stabilitrak Stability Control System control button is located to the left of steeringcolumn on the instrument panel. See your Owner's Manual for an operation descriptionof the stability control system. (shown with optional power adjustable pedals)V7714Connectors are located under the front center armrest. Note that vehicles ordered with option (9U3)center seat delete will arrive with loose harness and receiver for customer furnished mounting.
<strong>2015</strong> <strong>Tahoe</strong> <strong>4WD</strong> Police Package <strong>9C1</strong>21STANDARD EQUIPMENTCovering - FloorEngine Oil CoolerVIEW FROM ENGINEEngine Oil and Transmission Oil are cooled by passing the fluids through separate coolerslocated in the engine radiator assembly end tanks and the air conditioning condenserEngine oil is pumped by the engine oil pump from the right side of the engine blockthrough piping to an oil-to-coolant heat exchanger located within the right side endtankof the coolant radiator and returned to the engine.Black heavy-duty two piece vinylELECTRIC POWER STEERING SYSTEMTransmission Oil coolerThe Electric Power Steering System consists of a Rack-and-Pinion steering gearassisted by an electronically controlled power steering motor and drive assembly.The steering gear is mechanically connected to the steering wheel system.FRONTUNDERBODY SHIELD, FRONTTransmission oil is pumped from the transmission through piping to an oil-to-coolantheat exchanger within the left side end-tank of the engine coolant radiator. From theengine radiator heat exchanger, the transmission oil flows through an oil-to-air heatexchanger in the upper portion of the air conditioning condenser tubing and returnsto the transmission. The air conditioning condenser is located in front of the enginecoolant radiator as part of the Cooling Fan and Radiator Module (CFRM) assembly.Two piece aluminum front underbody shield staring behind the front bumper andrunning to the 2nd cross-member protecting front underbody and oil pan.V7714
<strong>2015</strong> <strong>Tahoe</strong> <strong>4WD</strong> Police Package <strong>9C1</strong>OPTIONAL EQUIPMENTPCW - DRIVER ALERT PACKAGE (includes the following)14160 210 1/219260 ESafety features are no substitute for the driver’s responsibility to operate the vehicle in a9safe manner. The driver should remain attentive to traffic, surroundings and road conditions atall times. Read the vehicle’s owner’s manual for more important safety information.F040802323UEU - ForwardCollision Alert RPM(FCA)x100041 5FCA may help avoid or reduce OFF the harm caused by frontendcrashes. FAC provides a green indicato, when a vehicleis detected ahead. This indicator displays amber if youfollow another vehicle much too closely. Whenapproaching a vehicle ahead too quickly, FAC provides ared flashing alert on the windshield, rapid audible beeps,and/or pulses the driver seat.0 6Forward CollisionAlert ButtonRESSETAlert TimingSelectorThe Collision Alert control is on the steering wheel. Pressthe Forward Collision Alert Button to set the FCA timing toFar, Medium, Near, or on some vehicles, Off. The firstbutton press shows the current setting on the DIC.Additional button presses will change this setting. Thechosen setting will remain until it is changed and willaffect the timing of both the Collision Alert and theTailgating Alert features. The timing of both alerts willvary based on vehicle speed. The faster the vehicle speed,the farther away the alert will occur. Consider traffic andweather conditions when selecting the alert timing. Therange of selectable alert timing may not be appropriate forall drivers and driving conditions.Note: The Safety Alert button is still present evenwithout Forward Collision option.Park Assist ButtonPRPSpeedND 0MMPH1P 659 mi NWThe Park Assist button to the left of the steering wheel isused to turn the Rear Parking Assist ON or OFF. Theindicator light on the button comes on when the feature isON and is OFF when the feature is disabled.Lane DepartureWarning ButtonOptional Safety Alert Seat. Drivers get feedbacktransmitted as a vibration through the surface of thedrivers seat bottom cushion. When the Lane DepartureWarning system’s camera detects the vehicle is leaving alane without a turn signal active in that direction, avibration in the left or right seat bolster directs the driver’sattention to the side of the lane encroachment. When apotential collision is detected ahead by the ForwardCollision Alert system, both sides of the seat vibrate.JF4 - PowerAdjustable PedalsPPUFL - Lane Departure 70 8060 90Warning 50 (LDW)10040110301202013010CERTIFIEDLDW may help avoid crashes due to unintentional lanedepartures. It may provide a warning if the vehicle iscrossing a detected lane marking without using a turn signalin the lane departure direction. LDW uses a camera sensor todetect the lane markings. It only operates at speeds of 35mph (56 km/h) or greater. When the vehicle crosses adetected lane marking, the LDW indicator will flash andeither three beeps will be sounded from the left or rightside, or three Safety Alert Seat pulses will occur on the left orright side of the seat, depending on the lane departuredirection. LDW will not warn if the turn signal is on in thedeparture direction, or if a sharp maneuver is made.Safety Alert SeatThe Safety Alert Seat is part of the Lane Departure Warning(LDW) system and will provide three vibration pulses to theleft seat side or right seat side, depending upon the side ofthe driving lane that the vehicle is moving toward. Alsoactivated in reverse when objects are detected.140150The position of the throttle and brake pedals can bechanged. No adjustment to the pedals can be made whenthe vehicle is in R (Reverse) or while using cruise control.The switch used to adjust the pedals is to the left of thesteering wheel. Press the switch to the left to move thepedals closer to your body. Press the switch to the right tomove the pedals away.V7714
24 <strong>2015</strong> <strong>Tahoe</strong> <strong>4WD</strong> Police Package <strong>9C1</strong> <strong>2015</strong> <strong>Tahoe</strong> <strong>4WD</strong> Police Package <strong>9C1</strong>24OPTIONAL EQUIPMENT6N5 SWITCHES – REar WindowInoperative6j7 – Exterior lamps EmergencyFlashing SystemRear door window switches are inoperable. Rear door power regulators are operableonly from driver position switches.6N6 – Rear Door Locks andhandles InoperativeRear door locking rods are disabled. Rear door locks are inoperable at rear doors, butoperate from driver position. Inside rear door handles are disconnected. Rear doorscan only be opened from the outside.S6N TRAILER HITCH INSERTOption 6J7 provides a headlamps high beam flashing module, rear lamps flashing viathe Body Control Module (BCM) and a control wire for customer-furnished switchingto turn the module on and off. The flasher control wire is part of the blunt-cut upfitterharness coiled under the instrument panel in the front passenger side foot well. Theflashing module is located on the rear edge of the right hand upper radiator support.The headlamp flashing module is activated by the application of 12 volts to a darkgreen wire in the upfitter harness. When activated, the headlamp high beams and thehigh beam instrument cluster indicator will flash alternately at 2.4 flashes per second.When the flashing module is turned on, the module sends a signal to the BCM whichalternately flashes the stop lamps and backup lamps at the same flash rate as theheadlamps. Depressing the brake pedal will override the stop lamp flashing andplacing the transmission in Reverse will override the backup lamps flashing.During daylight conditions, the Daytime Running Lamps (DRL) are automaticallyturned off whenever the headlamps flashing module is activated. During night timeconditions, the low beam headlamps automatically turn on while the high beamlamps flash. Turning on the high beam headlamps manually will override the flashingmodule and the high beam headlamps will operate continuously. During night timeconditions the tail lamps will turn on automatically. If Option 9G8 is present the lowbeam headlamps and tail lamps will not come on automatically. The Center MountedStop Lamp will operate only when the service brakes are applied.A 10-amp fuse labeled POLICE UPFITTER protects the flasher module circuit. The fuseis located in the Underhood Electrical Center in the engine compartment on the driverside of the vehicle. See also the Owner Manual for more information.Activation of the headlamps flashing and rear lamps flashing can be separated by openingthe blue/green BCM circuit at the flasher module connector, C196-F, and applying acustomer-switched ground to the blue/green wire in the upfitter harness coiled under theinstrument panel. Power to the green wire must be off to flash rear only.Warning:BCM will be damaged if 12V power is connected to the dark-blue/yellow wire.NOTE: For wiring diagram Wiring SectionBlack rubber square with a logo that closes out the receiver (Dealer installed)V7714
<strong>2015</strong> <strong>Tahoe</strong> <strong>4WD</strong> Police Package <strong>9C1</strong>25OPTIONAL EQUIPMENT6j3 – Wiring Provisions for VehicleGrille Lamps and Speaker/SirenWX7 – WIRING PROVISIONFOR FRONT SPEAKERSBAA. Blunt cut ends for the customer-furnished grille lamps and customer-furnishedsiren/speakerB. Control wires from in-line connector in forward lamp harness for customerfurnishedgrille lamps and speakerThe SEO 6J3 wiring provision has a 5-foot (1.5 m) harness coiled underneath theinstrument panel on the passenger side. The wiring circuits are routed from under theinstrument panel to a 1-foot (30 cm) coil secured in the area behind the grille. Thereare four 16-gauge (1.0 mm2) wires for connecting to the grille lamps (GRY, TAN) andsiren speaker (LT BU, LT GN)The SEO 6J3 wiring provision also includes one 18-gauge (0.8 mm2) control wire forthe SEO 6J7 Exterior Lamps Emergency Flashing System.When Option 6J7 is installed without Option 6J3, only the green control wire and theblue/green Separation of Function wires are provided for customer furnishedswitching to operate the Emergency Flashing System.Note: For wiring diagram see Wiring SectionApproximately 60 inches (1.5 m) of auxiliary speaker wiring is routed from the front door and windshieldpillar speakers and coiled under the instrument panel. The wiring permits connection of the front speakerpairs to customer-installed communication equipment. Vehicle radio front speaker outputs are re-routedto the rear speakers to maintain the required open door/key-in-ignition audible warning.NOTE: For wiring diagram see Wiring SectionUT7 Ground Studs6J4 – WIRING PROVISIONFOR horn siren circuitThis provision permits customer connection of a switch to select either horn of siren operation whenthe horn pad is pressed.Studs are located on the left and right of the liftgate opening abovethe tie-down ringsA 22-gauge (0.35 mm2) wire is connected to an in-line connector in the horn circuit of the instrumentpanel harness under the instrument panel. The end of this harness extension is a 5-foot (1.5 m) loopof wire coiled under the center of the instrument panel. NOTE: For wiring diagram see Wiring SectionV7714
26 <strong>2015</strong> <strong>Tahoe</strong> <strong>4WD</strong> Police Package <strong>9C1</strong> <strong>2015</strong> <strong>Tahoe</strong> <strong>4WD</strong> Police Package <strong>9C1</strong>26OPTIONAL EQUIPMENT7X6 and 7X7 – SpotLamps7X6 Spotlamp left hand, pillar-mounted unity, 6-inch with replaceable H3 halogenbulb; independently fused7X7 Spotlamps left and right hand, pillar-mounted unity, 6-inch with replaceable H3halogen bulb; independently fusedNOTE: • Lamp bulbs are halogen 12 volt 100 watt H-3 rated at 245,000 candle power• For fuse location see Wiring Section• Customer furnished spotlamp assembly must be installed to avoid interferencewith deploying passenger airbag•Factory installation of spotlamps is recommended. Special tooling is used tolocate and drill the spotlamp shaft hole in the windshield pillars. Fieldinstallation of spotlamps must not interfere with proper deployment of the roofrail airbag in the event of a crash.AMF - Package of 6 transmittersx2x2With RemoteStart andREMOTERELEASELiftglassWithoutRemote StartWith REMOTERELEASELiftglassx2Remote Keyless Entry - TransmitterProgramming - SEO AMF - Fleet Package of SixUnprogrammed Remote UnitsDo not operate or program the transmitters in the vicinity of other vehicles thatare in the keyless entry program mode. This prevents the programming of thetransmitters to the incorrect vehicle.When programming SEO AMF transmitters, the original two transmittersdelivered with the vehicle must also be programmed at the same time or theywill not function with the vehicle.Up to eight transmitters may be programmed to the RKE on Police and SpecialService Package equipped vehicles.Verify that the proper transmitters are learned to the vehicle. Do not learn atransmitter with a remote start button to a vehicle that does not have remote start.To access this DIC display, the vehicle must be in P (Park). To match an RKEtransmitter to the vehicle:1. Press the trip odometer reset stem until RELEARN REMOTE KEYdisplays.2. Press and hold the trip reset stem for three seconds. The messageREMOTE KEY LEARNING ACTIVE will display.3. At the same time, press and hold the lock icon and unlock icon on thefirst transmitter for approximately 15 seconds. A beep will soundindicating the transmitter is matched to the vehicle.4. Repeat Step 3 to match up to five more transmitters. A total of eighttransmitters can be matched per vehicle.5. To exit the programming mode, turn the ignition key to LOCK/OFF.5HP-KEYProgramming KeysFollow these procedures to program up to eight keys to thevehicle.Programming with a Recognized KeyTo program a new key:1. Insert the original, already programmed key in theignition and turn the key to the ON/RUN position.2. Turn the key to LOCK/OFF, and remove the key.3. Insert the new key to be programmed and turn it to theON/RUN position within five seconds.The security light will turn off once the key has beenprogrammed.4. Repeat Steps 1–3 if additional keys are to beprogrammed.Programming without aRecognized KeyProgram a new key to the vehicle when a recognized key isnot available. Canadian regulations require that Canadianowners see their dealer. If there are no currently recognizedkeys available, follow this procedure to program the first key.This procedure will take approximately 30 minutes tocomplete for the first key. The vehicle must be off and allof the keys must be with you.1. Insert the new vehicle key into the ignition.2. Turn to ON/RUN. The security light will come on.3. Wait 10 minutes until the security light turns off.4. Turn the ignition to LOCK/OFF.5. Repeat Steps 2–4 two more times. After the third time,turn to ON/RUN; the key is learned and all previouslyknown keys will no longer work with the vehicle.Remaining keys can be learned byfollowing the procedure in“Programming with aRecognized Key.”The key has a bar-coded key tag that thedealer or qualified locksmith can use tomake new keys. Store this information ina safe place, not in the vehicle. See yourdealer if a replacement key or additionalkey is needed. If it becomes difficult toturn a key, inspect the key blade fordebris. Periodically clean with a brush orpick. With an active OnStar subscription,an OnStar Advisor may remotely unlockthe vehicle. See OnStar.comV7714
<strong>2015</strong> <strong>Tahoe</strong> <strong>4WD</strong> Police Package <strong>9C1</strong>27WiringWiring Diagram for 12-volt battery power supplyWIRING PROVISIONS FOR 12 VOLT POWERAUXILIARY BATTERY PREFUSE ASSEMBLYUEC IGNITIONRUN/CRANK BUSPRIMARY BATTERYUBEC BUS 1ENGINECOMPARTMENT2 2X FUSEX FUSEMEGAMEGA100REC_POLICE50 IP_POLICEMEGA100aMEGA50aYY54425442PRIMARYBATTERYUBEC BUS 15940 940FUSES IN UEC CAN BE POSITIONED939 939TO PROVIDE PRIMARY BATTERYPOWER (LABELED VBATT) ORX FuseXMicroIGNITION CONTROLLEDUPFIT_SW_1_25micro5a RUN/CRANK POWER (LABELED R/C)YYFuseMicroUPFIT_SW_3_4micro5aX86 AUXBATT 1X86 AUXBATT <strong>9C1</strong>X86 AUXBATT 2POSG1 AUXILIARYBATTERYA A A901902903904742RD/GN10.05442YE/BU10.05542YE/VT4.0NEG350BK358586308742K0 UPFIT1RELAY4085 3086 8742K0 UPFIT2RELAY4085 3086 8742K0 UPFIT3RELAY4085 3086 8742K0 UPFIT4RELAY40TO IGNITIONCONTROLLEDAUXILIARYBATTERYCHARGING RELAYAUXILIARY BATTERYLOCATED AT LEFTFRONT OF ENGINEM596130X FuseXFuseXFuseXMicroMicroMicroUPFIT_130UPFIT_230UPFIT_330micro30amicro30amicro30aYYYY962 963 964905 905 905 905X102 M7 X102 F3 X102 G2 X101 L6 X101 K5 X101 L1 X101 K2 X101FuseMicroUPFIT_4micro30aUECM5M7F3G2L6K5L1K2BODYSTUDX632961RD/WH0.5965BU2.5962YE/WH0.5966GY/BK2.5963GN/GY0.5967YE/BN2.5964WH/BU0.5968RD/GN2.521 X2792116 X2791634 X2793431 X2793130 X2793035 X279353838X2794848X2791010961X2712020965X2751717962X27199614 X27514111196344967X2752323964X27111968X275IECM2550BK10.0961RD/WH0.5965BU2.5962YE/WH0.5966GY/BK2.5963GN/GY0.5967YE/BN2.5964WH/BU0.5968RD/GN2.5XB6100 AMP STUDLH REAR QUARTERRECBLUNT CUT WIRING LOCATED BELOW CENTER OF INSTRUMENT PANELELECTRICAL COMPONENT IDENTIFICATION:UEC-UNDERHOOD ELECTRICAL CENTERIECM-INTERMEDIATE ELECTIRICAL CENTER-MIDDLEREC-REAR ELECTRICAL CENTER, LEFT REARNOTE: Wiring diagrams for these options are shown in the Police Package owner’s manual supplement (shipped in glove box).V7714
28 <strong>2015</strong> <strong>Tahoe</strong> <strong>4WD</strong> Police Package <strong>9C1</strong> <strong>2015</strong> <strong>Tahoe</strong> <strong>4WD</strong> Police Package <strong>9C1</strong>28WiringWiring provisions ignition power and signal circuitsWIRING PROVISIONS IGNITION POWER AND SIGNAL CIRCUITSM8M8UECXFuse10MicroMISC_IGNmicro10aYIECLXFuse10 MicroSEO_RAP15micro10aY4350 X28046XFuseMicroSEO_ALCmicro15aY1939X279PARK ENABLERELAY - K144 X26030X26034X2604430345813YE/BK0.5MODULEELECTRONICBRAKINGCONTROLX1 33817GN/GY0.540X18040817GN/GY0.547 X280MODULEBODYCONTROLX5 126311WH/BU0.35SP6311MODULEBODYCONTROLX5 85186BU/WH0.35SP5186MODULEBODYCONTROLX5 175187YE/GY0.35SP5187MODULEBODYCONTROLX2 18SURVEILLANCECONNECT CUSTOMERFURNISHED GROUNDTO DISABLE ALLAUTOMATIC LIGHTINGSEE PAGE 2150IECM4647IECM8X27511X27519X2758111943VT/YE0.51939VT/WH0.55813YE/BK0.5817GN/GY0.56311WH/BU0.355186BU/WH0.355187YE/GY0.35239VT/WH0.543VT/YE0.35IGNITIONACCY/RUNIGNITIONRUN/CRANKPARK-ENABLEHOT OUT-OF-PKVEHICLESPEEDBRAKEAPPLIEDLEFTTURNRIGHTTURNIGNITIONRUN/CRANKIGNITIONACCY/RUNBLUNT CUT WIRES NEARREAR ELECTRICAL CENTERBLUNT CUT WIRING LOCATED BELOW CENTER OF INSTRUMENT PANELELECTRICAL COMPONENT IDENTIFICATION:UEC-UNDERHOOD ELECTRICAL CENTERIECL-INTERMEDIATE ELECTRICAL CENTER-LEFTIECM-INTERMEDIATE ELECTRICAL CENTER-MIDDLEREC-REAR ELECTRICAL CENTERNOTE: Wiring diagrams for these options are shown in the Police Package owner’s manual supplement (shipped in glove box).
<strong>2015</strong> <strong>Tahoe</strong> <strong>4WD</strong> Police Package <strong>9C1</strong>29WiringWiring diagram for option 6j3WIRING PROVISION FOR OPTION 6J3VEHICLE GRILLE LAMPS AND SPEAKER/SIRENWiring Diagram for WINDSHIELDPILLAR-MOUNTED SPOTLAMP- OPTION 7X6 and 7X7WINDSHIELD PILLAR-MOUNTED SPOTLAMPSOPTION 7X6 LH ONLY / OPTION 7X7 LH AND RH6837BU/GN1.06836GN/YE1.06838GY/VT1.06835YE/GN1.0IECL2121842XDual fuse labeledTILT_COL_SEOBBX290CCX290DDX290EEX29015 15Microdualmicro 15aYZ6837BU/GN0.756836GN/YE0.756838GY/VT0.756835YE/GN0.75272714143737X2903838X2903939X2904040X2906837BU/GN1.06836GN/YE1.06838GY/VT1.06835YE/GN1.04640RD/VT0.54140RD/GY0.5AAX195BBX195CCX195DDX195PWRLHLAMPPWRRHLAMP6837BU/GN1.06836GN/YE1.06838GY/VT1.06835YE/GN1.0CASECASEIECL - INTERMEDIATE ELECTRICAL CENTER-LEFTPACKAGED UNDERHOOD BY RIGHT REAR BATTERYLAMP BULBS - HALOGEN H7635WIRES FOR SIRENWIRES FOR GRILL LAMPSNOTE: Wiring diagrams for these options are shown in the Police Package owner’s manual supplement (shipped in glove box).V7714
30 <strong>2015</strong> <strong>Tahoe</strong> <strong>4WD</strong> Police Package <strong>9C1</strong> <strong>2015</strong> <strong>Tahoe</strong> <strong>4WD</strong> Police Package <strong>9C1</strong>30WiringWIRING PROVISION FOR OPTION 6J7EXTERIOR LAMPS EMERGENCYFLASHING SYSTEMWIRING PROVISION FOR OPTION 6J7EXTERIOR LAMPS EMERGENCY FLASHING SYSTEMSEPARATION OF FRONTAND REAR FLASHINGAPPLY 12 VOLTS FORMODULE ONBODYCONTROLMODULEX1 15X290AAX290TO UNDERHOOD BATTERYELECTRICAL CENTER6841BU/GN0.756841BU/GN0.756820GN0.7510 amp fusePOLICE UPFITTERSP_68416841BU/GN0.753434X2093636X2096841BU/GN0.756820GN0.751818X1261919X1266841BU/GN0.756820GN0.753940RD/BU0.75250BKFFX196EEX196DDX196CCX196BBX196AAX196X196 CONNECTOR IS LOCATEDUNDERHOOD BY RIGHT HEADLAMP311WH0.75711WH0.75LF HIGH BEAMRF HIGH BEAMNOTE: Wiring diagrams for these options are shown in the Police Package owner’s manual supplement (shipped in glove box).
<strong>2015</strong> <strong>Tahoe</strong> <strong>4WD</strong> Police Package <strong>9C1</strong>31WiringWiring diagram for option 6j4 in-line connectorWIRING PROVISION FOR OPTION 6J4, HORN - SIREN CIRCUITUNDERHOODELECTRICALCENTERHORN - SIRENINLINE UNDERCENTER OFINSTRUMENTPANELHORNRELAYL6L6X102AA28BN/WH0.35X25128BN/WH0.35X5 19X3 18A15MODULEBODY CONTROLHORN3287GN/WH0.35X1 10COILSPRINGSPRINGCOILX2 1X1 13287GN/WH0.35STEERINGCOLUMNAND WHEELBCM-TO-HORN CIRCUIT SHOWN FOR INFORMATIONONLY. DO NOT MAKE HORN-SIREN CONNECTIONBETWEEN HORN AND BCM.X1 2Wiring diagram for OPTION WX7 in-line connectorWIRING PROVISION FOR OPTION WX7, FRONT SPEAKERS CONNECTIONLEFT FRONTOUTPUTRIGHT FRONTOUTPUTLEFT REAROUTPUTRIGHT REAROUTPUTRADIOLFOUTOUTAFLFOUTOUTAFRFOUTOUTAFRFOUTOUTAFLROUTOUTAFLROUTOUTAFRROUTOUTAFRROUTOUTAFX3 9X3 1X3 10 X3 2X3 11 X3 3X3 12 X3 4118BN/BU0.75201BU0.75117YE/BK0.75200YE0.75116GN/BK0.5199GN0.5115BU/BK0.546WH0.511X286118BN/BU0.7555X286201BU0.7522X286117YE/BK0.7566X286200YE0.7533X286116GN/BK0.577X286199GN0.544X286115BU/BK0.588X28646WH0.5OPTION WX7 HARNESSADDED HERE TO SENDLF AND RF RADIOOUTPUTS TO LR AND RRSPEAKERS.BLUNT-CUT CIRCUITSFOR FRONT SPEAKERSARE COILED UNDER THEINSTRUMENT PANELTO FRONT DOOR ANDWINDSHIELD PILLAR SPEAKERSTO REAR SPEAKERSNOTE: Wiring diagrams for these options are shown in the Police Package owner’s manual supplement (shipped in glove box).V7714
32 <strong>2015</strong> <strong>Tahoe</strong> <strong>4WD</strong> Police Package <strong>9C1</strong> <strong>2015</strong> <strong>Tahoe</strong> <strong>4WD</strong> Police Package <strong>9C1</strong>32AIR BAG FAQCan specialty vehicle equipment (e.g. radar devices, videocameras, computers, meters, radio trees, shotguns, etc.) stillbe mounted in cars with passenger side air bags?Yes, but care must be taken to mount the equipment outside of the deploymentzone. Air bags inflate with great force and will interact with any object in thedeployment zone. Therefore, to reduce the risk of injury to vehicle occupants,GM recommends that the air deployment zone be kept free of any equipment. Ifa piece of equipment were to become dislodged it could strike an occupant inthe vehicle and result in injury. The likelihood of an object becoming dislodgedis influenced by many factors, including the proximity of the object to theinflatable restraint, the size and shape of the object, and the means by whichthe object is secured to the vehicle. In addition to these factors, the trajectoryand velocity of a dislodged object can be influenced by the type and severity ofvehicle crash.Objects that are in the deployment zone, but do not become dislodged by aninflating air bag can still affect the performance of the air bag. For example,such objects could tear the fabric or affect the shape of the air bag, thus reducingthe ability of the bag to provide restraint.Is it possible to shield equipment that is installed in thepassenger side frontal air bag deployment zone in a mannerthat will allow full and safe air bag deployment?Due to the complexity of influencing variables, GM is unable to evaluate thepotential for shielding expected equipment configurations in all accidentscenarios in order to assure that the air bag performance would be unaffected.While shielding may protect certain equipment from being damaged ordislodged, it may also negatively affect the inflation characteristics of the airbag. The air bag’s shape, inflation angle, fold pattern, and inflation rate andpressure are developed to maximize the protection capability of the inflatablerestraint system. Therefore, GM cannot recommend the placement of anyequipment in the deployment zone, even if it is shielded to protect it fromdamage.Front air bag systems and instrument panel mountedequipment.Passenger air bags in GM vehicles deploy in different ways depending upon thetype of vehicle and the particular instrument panel design.In some vehicles, the passenger air bag deploys through a discrete door locatedon the top surface of the instrument panel (top-mount air bag systems). Inother vehicles, such as the Chevrolet <strong>Tahoe</strong>, the passenger air bag deploysthrough a discrete door mounted on the vertical rearward surface of theinstrument panel, above the glove box door (mid-mount air bag system). Withthese types of top-mount and mid-mount passenger air bag systems, the toppad of the instrument panel remains in place during deployment.Some GM passenger air bag systems, like the system in the Chevrolet Impala,deploy from beneath the instrument panel top pad. These are considered 3/4-mount air bag systems with a “deployable top pad.” The entire instrumentpanel top pad is the “deployment door” from under which the inflating air bagemerges. When an air bag deployment is commanded, the forces from theinflating passenger air bag push up on the instrument panel top pad, releasingspecial fasteners across the rearward edge of the top pad. This allows the toppad to rotate upward so that the passenger air bag may emerge. The top padrotates upward to open widest at the right hand side, and is usually forcedupward into contact with the windshield on the right hand side of the vehicleduring a deployment.Instrument panel top mounted special equipment, such as a radar antenna andcontrol unit or video camera must be positioned to the left of the vehicle centerline. This equipment must be mounted as low as possible and securely fastenedto the top pad to avoid being dislodged in the event of a crash and possible airbag deployment. In the process of securely fastening special equipment to thetop, DO NOT fasten down the top pad itself to any other vehicle component suchas the cluster trim plate. As described above, the top pad rotates upward duringa deployment. In order to enable the proper deployment of the passenger airbag, specialty equipment installation MUST NOT PREVENT the top pad fromrotating upward during deployment. Location and attachment of specialequipment should minimize added resistance or interference to upward rotationof the top pad during deployment.Side-Impact Air Bags for crashes to the vehicle sides.The air bag system in your police vehicle includes roof rail mounted Head Curtainside air bags. The vehicle is also equipped with seat back mounted upper bodyair bags located on the outboard side of the driver and front passenger seatbacks. Together the Head Curtain and seat-mounted side air bags are intendedto protect the head and upper body in the event of a side crash. Some vehiclesmay also be equipped with an optional air bag, mounted on the inboard side ofthe driver seat back.Can Specialty Vehicle Security Barriers be mounted within theside air bag deployment zones?No. The side air bags inflate extremely fast because of the nature of side crashesto the vehicle. Mounting a security barrier behind the front seats with the endsplaced within the side air bag deployment zones will result in unintendedinteraction between the barrier and the inflating side air bags. To reduce the riskof injury to the vehicle occupants, GM recommends that the side air bag zonesbe kept free of any customer installed equipment.Customer furnished equipment installed to the vehicle roof.Your police vehicle is designed with an interior roof cover system which includesinternal components for the interior lamps and wiring. The roof system may alsoinclude side air bag components. Inflation devices may be mounted on thevehicle roof side behind the rear doors as well as air bag tethers retained to thewindshield pillars. Care must be taken to avoid damage to these componentsor interference with their operation when installing roof mounted equipmentsuch as emergency lamps and communication antennas.Recommended GM service procedures must be followed toremove and re-install the instrument panel top pad to ensurethat the top pad will release properly in the event of apassenger air bag deployment.On the right half of the top pad closest to the passenger air bag module,GM recommends that no equipment be mounted. When mounting equipmenton the driver side of the top pad, GM recommends that the total mass of the toppad mounted special equipment not exceed 8 pounds (3.6 kilograms), sincesome top pads tend to rotate about the left end.Fasteners used to secure special equipment to the instrument panel top pad, thewindshield glass, or to the windshield upper frame (header), should be selectedto ensure that these devices will remain attached during a vehicle crash andpossible air bag deployment.Head curtain side air bags are designed to help reduce the risk of head and neck injuries to front and rear seat occupants on the near side of certain side-impact collisions. Always use safety beltsand the correct child restraints for your child’s age and size, even in vehicles equipped with air bags. Children are safer when properly secured in a rear seat. See your vehicle Owner’s Manual andchild safety seat instructions for more information.V7714
<strong>2015</strong> <strong>Tahoe</strong> <strong>4WD</strong> Police Package <strong>9C1</strong>33Can the installation of push bumpers on the front end of thevehicle affect the deployment of the air bag?General Motors is not aware of adverse effects during crash events from themany push bumpers that have been installed on GM police vehicles. Becausethere are many styles of push bumpers available with varying crashcharacteristics, installation of push bumpers may or may not affect deploymenttiming of the air bags. Push bumpers should be mounted to avoid modifying thevehicle structure and interfering with the front air bag sensors mounted on theupper radiator support cross member.Two front impact sensors are installed in General Motors vehicles. Do notrelocate or disconnect the front sensors. The location and orientation of the frontsensors are critical for correct operation of the air bag system. Avoid mountingcomponents on or near the sensors. Push bumper styles with vertical pushingmembers that are in foreaft alignment with the front air bag sensors are notrecommended.When should an air bag inflate?The driver's and right-front passenger's frontal air bags are designed to inflatein moderate to severe frontal or near-frontal crashes. But they are designed toinflate only if the impact speed is above the system's designed "thresholdlevel."In addition, your vehicle has “dual stage” frontal air bags which tailor the theamount of restraint according to crash severity. For moderate frontal impacts,the air bags inflate at a level less than full deployment. For more severe frontalimpacts, "dual stage" frontal air bags deploy at full levels.If the front of your vehicle goes straight into a wall that doesn't move or deform,the threshold level of the reduced deployment is about 12 to 16mph (19 to 15km/h), and the threshold level for a full deployment is about 18 to 24 mph (29to 28.5 km/h). The threshold level can vary, however, with specific vehicledesign, so that it can be somewhat above or below this range.If your vehicle strikes something that will move or deform such as a parked car,the threshold level will be higher. The driver's and right-front passenger'sfrontal air bags are not designed to inflate in rollover, side impacts, or rearimpacts, because inflation would not help the occupant.Seat mounted side impact air bags are designed to inflate in moderate to severeside crashes. The side impact air bags will inflate if the crash severity is above thedesigned "threshold level." The threshold level can vary with specific vehiclesdesign. The side impact air bags are not designed to inflate on frontal or nearfrontalimpacts or rear impacts, because inflation would not help the occupant.Roof rail mounted head-curtain air bags are designed to inflate in moderate tosevere side crashes. In addition, certain vehicles have head-curtain air bagswhich are also designed to inflate in situations where an impending rollovercondition is identified by the vehicle's rollover sensing system and/or frontal ornear-frontal impacts if the crash severity is above the designed "thresholdlevel."Safety belt pretensioners at the driver and front passenger seat positions aredesigned to deploy in frontal, near-frontal, side, and rear crashes that exceedthe "threshold level" of crash severity to help reduce slack in the safety belt.Safety belt pretensioners will also deploy in impending rollover situations.How long will the air bag remain inflated?It takes approximately 1/20th of a second to fully inflate the frontal air bags. Thisis faster than the blink of an eye. The air bags begin to deflate immediately,helping to stop the occupants more gradually.I've heard that a deployed air bag produces what appears to besmoke, is the air bag hot?After the bag has deployed in a crash, the air bag itself will not be hot to touch.Some components within the air bag module will be hot for a short time. Asmall amount of smoke coming from a deployed air bag module is normal andshould not be cause for concern.Also, when the nitrogen gas is vented out of the air bag, small particles frominside the bag are also vented into passenger compartment. These airborneparticles look like smoke and some particles are deposited as residue on andaround the air bag.I've heard that the dusts that are released into the passengercompartment from the air bag are harmful, is this true?For most people, the only effect the dusts will produce is some irritation of thethroat and eyes, and that is only if the occupant remains in the vehicle for manyminutes after the air bag deployment with no ventilation and windows closed.However, some people with asthma may develop an asthmatic attack frominhaling the dusts. If this happens, they should first treat themselves the sameway their doctor has advised them to treat any other asthma attack, and thenimmediately seek medical treatment.Can the air bag system be re-used?No, The air bags are designed to inflate only once. After inflation some new partswill be required. These will include the air bag module and possibly other parts.(A competent service technician with access to the vehicle's service manual andthe required tools should replace the required components after a deploymentcrash.)If my vehicle has air bags, why should I have to wear my safetybelt?Air bags are in many vehicles today and will be in most of them in the future.But they are supplemental systems only; so they work with safety belts notinstead of them. Every air bag system ever offered for sale has required the useof safety belts. Even if you're in a vehicle that has air bags, you still have tobuckle up to get the most protection. That's true not only in frontal collisions butespecially in side and other collisions.AIR BAG FAQV7714
34 <strong>2015</strong> <strong>Tahoe</strong> <strong>4WD</strong> Police Package <strong>9C1</strong> <strong>2015</strong> <strong>Tahoe</strong> <strong>4WD</strong> Police Package <strong>9C1</strong>34Top View of Instrument Panel and APproximateDeployment Area of the Air bag ZoneAIR BAG DIMENSIONS1. Passenger Side Instrument Panel Top Surface Zone2. Passenger Frontal Airbag Module Trim Panel – Rear Edge3. Passenger Side Door4. Approximate Dimensions of Inflated Airbag5. Passenger Frontal Airbag Deployment Zone6. Passenger Centerline7. Inside Rearview Mirror8. Vehicle Centerline9. Driver Centerline10. Driver Frontal Airbag Deployment Zone11. Front of Steering Wheel12. Driver Side Door13. Shift Selector ArcAir bag inflation can cause severe injury or death to anyone too close to the bag when it deploys. Be sure every occupant is properly restrained.V7714
<strong>2015</strong> <strong>Tahoe</strong> <strong>4WD</strong> Police Package <strong>9C1</strong>35Side View of Driver Frontal Airbag Deployment Zone1. Top of Instrument Panel2. Top Edge of Windshield3. Inflated Airbag – Steering Wheel4. Centerline of Steering Column at Mid-Tilt5. Driver Frontal Airbag Deployment Zone6. Front of Steering WheelSide View of Passenger Frontal Airbag Deployment Zone1. Top Edge of Windshield2. Inside Rearview Mirror3. Instrument Panel Top Surface Zone4. Passenger Frontal Airbag Module Trim Panel – Rear Edge5. Inflated Airbag – Horizontal Dimension, approximately 18.1 in(460 mm)6. Inflated Airbag – Vertical Dimension (from Top of Occupant’s Lapto Headliner)7. Inflated Airbag – Instrument Panel8. Passenger Frontal Airbag Deployment ZoneAIR BAG DIMENSIONSAir bag inflation can cause severe injury or death to anyone too close to the bag when it deploys. Be sure every occupant is properly restrained.V7714
36 <strong>2015</strong> <strong>Tahoe</strong> <strong>4WD</strong> Police Package <strong>9C1</strong> <strong>2015</strong> <strong>Tahoe</strong> <strong>4WD</strong> Police Package <strong>9C1</strong>36Roof-rail and Seat-mounted Side Impact Airbag DeploymentZones - Passenger Side Shown, Driver Side SimilarAIR BAG DIMENSIONS1. Front of Deployment Zone at Bottom of Windshield Pillar Trim2. A-Pillar Trim with Grab Handle (Passenger Side)3. Sun Visor4. Deployment Zone - Seat Rows 1 and 2 and Cargo Area5. Top of Deployment Zone - Along Roof-rail at Edge of Headliner6. C-Pillar Upper Trim7. Rear Quarter Window8. D·Piliar Upper Trim9. Rear of Cargo Area Zone at Back Corner of Headliner10. Rear of Vehicle at liftgate Opening11. Bottom of Cargo Area Zone at Rear Side Trim Cupholders12. Top Edge of Rear Door Trim13. Bottom of Deployment Zone at Top of Side Door Armrests14. Top Surface of Front Seat Cushion (with Seal Fully lowered)15. Seat-Mounted Side Impact Airbag Deployment Zone 3.9 in (100mm) to Rearward of Back Edge of B-Pillar Trim Grab Handle)16. Lower Part of Front Seat Deployment Zone (With Seat Fully Lowered)17. Bottom of Seat-Mounted Side Impact Airbag Zone 2.0 in (50 mm)Below Top of Seat Cushion with Seat Fully lowered)18. Rear of Front Door Trim Armrest Handle19. Top Edge of Front Door TrimThe roof-rail airbag deploys in the cargo area. Third-row seating is notavailable on the police package (RPO 9Cl) or the special service package(RPO 5W4).Roof-rail and Seat-mounted Side Impact Airbag Driver andPassenger Deployment Zones – View from Rear Cargo Area1. Roof-rail Airbag Deployment Zone2, Underside of Headliner3. Edge of Headliner4. Inner Center and Rear Pillar Trim5. Inner Front and Rear Door6. Side Door Upper Armrests and Rear Quarter Trim Armrests7. Seat-Mounted Side Impact Airbag Deployment Zone 2.0 in (50 mm)Below Top Surface of Outboard Front Seat Cushion with Seat FullyLowered.8. Front Seatback Side Deployment Zone9. Front Seat Head Restraint10. Seat Centerline11. Top of Seat CushionThe driver and passenger seat-mounted side impact airbag deploymentzones move up, down, fore, aft, as the seat is adjusted by the occupant.The deployment zones also move as the seatback is reclined and raised.Air bag inflation can cause severe injury or death to anyone too close to the bag when it deploys. Be sure every occupant is properly restrained.V7714
<strong>2015</strong> <strong>Tahoe</strong> <strong>4WD</strong> Police Package <strong>9C1</strong>37Optional Driver Seatback Front Center Airbag (RPO AYQ and D07)Included with A95 Bucket Seats – View from Passenger Side100mm11. Driver Seatback Front Center Airbag2. Front Center Console3. Driver Seat and Head Restraint325mmThe deployment zones for the driver seatback front centerairbag and the driver and passenger seat-mounted side impactairbags move up, down, fore, and aft as the seat is adjusted bythe occupant.25mm2Optional Driver Seatback Front Center Airbag DeploymentZone (RPO AYQ and D07) – View from Rear Cargo Area43314The driver seatback front center airbag (RPO AYQ) requires frontbucket seats (RPO A95) and the front center console (RPO D07).Do not remove the front center console to install customerequipment or install customer equipment between the frontbucket seats. The equipment may interfere with thedeployment of the driver seatback front center airbag.1. Driver Seatback Front Center Airbag (RPO AYQ)2. Front Center Console (RPO D07)3. Front Seat Head Restraint4. Seat CenterlineAIR BAG DIMENSIONS2Air bag inflation can cause severe injury or death to anyone too close to the bag when it deploys. Be sure every occupant is properly restrained.V7714
38 <strong>2015</strong> <strong>Tahoe</strong> <strong>4WD</strong> Police Package <strong>9C1</strong> <strong>2015</strong> <strong>Tahoe</strong> <strong>4WD</strong> Police Package <strong>9C1</strong>38StabilitrakElectronic Stability Control systems (StabiliTrak)StabiliTrak systems help drivers maintain control oftheir vehicles, especially during emergency lane changesor avoidance maneuvers. StabiliTrak uses varioussensors, such as steering wheel angle, wheel speed, yawvelocity, etc., to detect any difference between the pathrequested by the steering wheel position and vehicle’sactual path. When appropriate, the system selectivelycontrols brakes, engine power, and even suspensionsettings to enhance control of the vehicle’s directionand help keep it on course.Independent studies conducted by the National HighwayTraffic Safety Administration, the Insurance Institutefor Highway Safety, and others have found StabiliTrakto be highly effective in reducing vehicle crashes.General Motors offers StabiliTrak systems on many of itspassenger car and light truck models.See your owner's manual for additional informationabout the operation of StabiliTrak.Q. How do I use StabiliTrak?A. StabiliTrak operates independently of the driver. You should continue todrive your StabiliTrak equipped vehicle with caution and care. GM’sStabiliTrak system, StabiliTrak is designed to be as seamless as possiblein operation, and part of the overall vehicle response to make a goodvehicle betterQ. How does StabiliTrak work?A. StabiliTrak has the ability to apply control forces to the vehicle independentof the driver. StabiliTrak uses sensors to continuously compare the pathindicated by the steering wheel position to the vehicle’s actual path. If adiscrepancy is detected, StabiliTrak selectively controls vehicle brakes andengine torque to create a yaw moment that helps restore the vehicle’sactual path to the path indicated by the steering wheel position. StabiliTrakhas the ability to help correct both understeer (where the vehicle is notturning as much as the steering wheel position indicates) and oversteer(where the vehicle is turning more than the steering wheel positionindicates).Q. Will a tire change affect StabiliTrak?A. Use of tires other than original equipment may affect StabiliTrakperformance. StabiliTrak is designed to make the best use of availabletraction. The performance characteristics of the original equipment tiresare part of the overall system effectiveness. When you replace tires checkthe recommendations in your owner's manual. On GM vehicles, theoriginal equipment tires have a “TPC” (Tire Performance Criteria) code onthe sidewall. Replacing the tires with the same “TPC” code will help assureproper StabiliTrak performance.DRIVER OPERATED STABILITRAK BUTTONAn advanced computer controlled stability enhancement system assists the driver with directional control of thevehicle in difficult driving conditions. Each time the vehicle is started, the StabiliTrak system is fully on. StabiliTrakcan be controlled by a button located on the left side of instrument panel. The condition system is displayed by aStabiliTrak indicator light and Driver Information Center (DIC) Message. Push once to disable Traction Control.Push and hold to disable both Traction Control and StabiliTrak. In this condition, StabiliTrak will automaticallyturn ON when the vehicle speed exceeds 35 mph (56km/hr) while the Traction Control remains OFF. Push again toenable Traction Control and StabiliTrak.V7714
<strong>2015</strong> <strong>Tahoe</strong> <strong>4WD</strong> Police Package <strong>9C1</strong>39MAINTENANCEWarrantySheet MetalPowertraineNgineTransmission/TransaxleTransfer CaseDrive SystemsTiresMAINTENANCE/WARRANTY2-year/24,000-mile of scheduled maintenance that includes oil and filter changes, tire rotations and multipoint vehicle inspections.Covers only scheduled oil changes with filter and tire rotations according to your new vehicle’s recommended maintenance schedulefor up to 2 years or 24,000 miles, whichever comes first. Does not include air filters. Maximum of four service events. See participatingdealer for other restrictions and complete details.Bumper-to-Bumper (including tires): Coverage is for the first 3 years or 36,000 miles, whichever comes first. All body and sheet metal components are warranted against corrosion for 3 years or 36,000 miles, whichever comes first. Plus you’reprotected even further from rust-through corrosion for a minimum of 6 years/100,000 miles (whichever comes first). Application ofadditional rust-inhibiting materials is not required under the corrosion coverage and none is recommended. See your GM dealer forterms of this limited warranty. Covered for 3 years/36,000 Miles GM is committed to ensuring satisfaction with your new vehicle. Yourdealer also wants you to be completely satisfied and invites you to return for all your service needs, both during and after the warrantyperiod. To help keep things in proper working order, Chevrolet will warrant each 2012 model year Chevrolet passenger car, light-dutytruck, crossover or van for 3 years or 36,000 miles (whichever comes first; see dealer for details) with no deductible, from the originalin-service date of the vehicle, for warrantable repairs that are required as a result of defects due to material and/or workmanship to thepowertrain components.In addition to the 3-year/36,000 mile protection, many of your powertrain components are protected even further with coverageextending to 5 years or 100,000 miles, whichever comes first.Engine coverage includes all internally lubricated parts, engine oil cooling hoses, and lines. Also included are all actuators andelectrical components internal to the engine (e.g., Active Fuel Management valve, lifter and oil manifold) cylinder head, block, timinggears, timing chain, timing cover, oil pump/oil pump housing, OHC carriers, valve covers, oil pan, seals, gaskets, manifolds, flywheel,water pump, harmonic balancer, engine mount, turbocharger, and supercharger. Timing belts are covered until the first scheduledmaintenance interval. Exclusions: Excluded from the powertrain coverage are sensors, wiring, connectors, engine radiator, coolanthoses, coolant, and heater core. Coverage on the engine cooling system begins at the inlet to the water pump and ends with thethermostat housing and/or outlet that attaches to the return hose. Also excluded is the starter motor, entire pressurized fuel system(in-tank fuel pump, pressure lines, fuel rail(s), regulator, injectors, and return line), as well as the Engine/ Powertrain Control Moduleand/or module programming.Transmission and transaxle coverage includes all internally lubricated parts, case, torque converter, mounts, seals and gaskets, as wellas any electrical components internal to the transmission/transaxle. Also covered are any actuators directly connected to thetransmission (slave cylinder, etc.). Exclusions: Exclusions from the powertrain coverage include cooling lines, hoses, radiator, sensors,wiring, and electrical connectors. Also excluded are the clutch and pressure plate, as well as any Transmission Control Module and/ormodule programming.Transfer case coverage includes all internally lubricated parts, case, mounts, seals and gaskets, as well as any electrical componentsinternal to the transfer case. Also covered are any actuators directly connected to the transfer case, as well as the encoder motor.Exclusions: Excluded from the powertrain coverage are transfer case cooling lines, hoses, radiator, sensors, wiring, and electricalconnectors, as well as the transfer case control module and/or module programming.Drive system coverage includes all internally lubricated parts, final drive housings, axle shafts and bearings, constant velocity joints,propeller shafts and universal joints. All mounts, supports, seals, and gaskets, as well as any electrical components internal to thedrive axle. Also covered are any actuators directly connected to the drive axle (e.g., front differential actuator). Exclusions: Excludedfrom the powertrain coverage are all wheel bearings, drive wheel front and rear hub bearings, locking hubs, drive system cooling,lines, hoses, radiator, sensors, wiring, and electrical connectors related to drive systems, as well as any drive system control moduleand/or module programming.The tires supplied with your vehicle are covered by General Motors against defects in material or workmanship under the Bumper-to-Bumper Limited Warranty coverage. Wear-out is not considered a defect, and it may occur before the vehicle warranty expires. In thiscase, the owner is responsible for purchasing replacement tires, or seeking coverage solely from the tire manufacturer. For vehicleswithin the Bumper-to-Bumper Limited Warranty coverage, defective tires will be replaced on a prorated adjustment basis according tothe mileage-based schedule in your Warranty and Owner Assistance Information booklet. After your New-Vehicle Limited Warrantyexpires, you may still have prorated warranty coverage on your original equipment tires by the tire manufacturer.V7714
40 <strong>2015</strong> <strong>Tahoe</strong> <strong>4WD</strong> Police Package <strong>9C1</strong> <strong>2015</strong> <strong>Tahoe</strong> <strong>4WD</strong> Police Package <strong>9C1</strong>40Emission ControlSystemsTowingAdditional CoveragecourtesyTransportationProgramroadsideaSSistanceProgramWhat Is Not CoveredALTERATIONS ANDWARRANTIESMAINTENANCE/WARRANTY (continued)Defects and performance for car and light-duty truck emission control systems are covered for the first 2 years or 24,000 miles,whichever comes first. From the first 2 years or 24,000 miles to 3 years or 36,000 miles defects in material or workmanship continue tobe covered under the New Vehicle Limited Bumper-to-Bumper Warranty coverage. Specified major components are covered for thefirst 8 years or 80,000 miles, whichever comes first. Defects and performance for heavy duty truck emission control systems includingthose found in 6.6L Duramax® Diesel Engines are covered for the first 5 years or 50,000 miles, whichever comes first. - Refer to yourWarranty and Owner Assistance Information booklet for California emission control system warranty details.Towing is covered to the nearest Chevrolet dealer if your vehicle cannot be driven because of a warranted defect.Chevrolet 2-Year Scheduled MaintenanceChevrolet 2-Year Scheduled Maintenance coverage is included with the purchase or lease of new 2014 Chevrolet models.Chevrolet 2-Year Scheduled Maintenance includes only the following:2-year/24,000-mile Scheduled Maintenance (whichever comes first; up to a total of four service events):ACDelco dexos1®Oil and ACDelco Oil Filter Change (excludes Spark EV)4-wheel Tire Rotation (excludes dual rear wheel vehicles, all Corvette models and select Camaro models - ZL1 model and 1LE packagecars – due to their unidirectional tires; see Owner’s Manual for details)27-Point Vehicle Inspection (MPVI)If your vehicle requires warranty repairs during the 5-year/100,000-mile coverage period (8 years/100,000 miles for the Volt, <strong>Tahoe</strong>Hybrid, and the Silverado Hybrid vehicles), alternate transportation and/or reimbursement of certain transportation expenses may beavailable under the Courtesy Transportation Program. Several transportation options are available. Consult your dealer or refer to theOwner’s Manual for details. Courtesy Transportation is not part of or included in the coverage provided by the New-Vehicle LimitedWarranty. General Motors reserves the right to make any changes or discontinue the Courtesy Transportation program at any timewithout notification.Chevrolet is proud to offer the response, security and convenience of the 24-Hour Roadside Assistance Program for a period of 5 yearsor 100,000 miles, whichever comes first. The program provides you with the following services during the New-Vehicle LimitedWarranty period: Emergency Towing (to closest Chevy dealer from a legal roadway)Lockout Service (keys locked inside vehicle)Flat Tire Changes (spare installed)Fuel Delivery ($5 worth of fuel delivered on the road)Jump-Starts (at home or on the road)Refer to your Owner’s Manual for details, including reservation of rights, or consult your dealer/retailer. --For specific terms andconditions, please contact your Chevrolet Roadside Assistance Program advisor at 1-800-243-8872.All the above items are not covered for damage due to accident, misuse, alteration, insufficient or improper maintenance,contaminated or poor-quality fuel or environmental and chemical exposure. Medium-duty trucks, including the C4500, are excludedfrom this powertrain coverage. For complete details, refer to your Warranty and Owner Assistance Information booklet.This is a supplement to the express conditions and warranties described in the Warranty and Owner Assistance Information booklet.Other coverages are not extended or altered due to this supplement.Passenger car, light-duty truck, crossover and van ownersrequiring a more comprehensive coverage than what is provided with the New-Vehicle Limited Warranty are encouraged to consider aChevrolet Protection Plan. This plan is available through Chevrolet dealerships. For more information, see the Extended Protectionsection on - http://www.chevrolet.com/owners/warranty.html.AN IMPORTANT NOTE ABOUT ALTERATIONS AND WARRANTIES. Installations or alterations to the original GM-equipped vehicle (orchassis) are not covered by the General Motors New Vehicle Limited Warranty. The special body company, assembler, equipmentinstaller or upfitter is solely responsible for warranties on the body or equipment and any alterations (or any effect of the alterations)to any of the parts, components, systems or assemblies installed by GM. General Motors is not responsible for the safety or quality ofdesign features, materials or workmanship of any alterations by such suppliers.V7714
<strong>2015</strong> <strong>Tahoe</strong> <strong>4WD</strong> Police Package <strong>9C1</strong>41• Care must be taken during customer installation of equipment andwiring to ensure that all holes drilled in the body are corrosionprotected, properly sealed and that vehicle wiring harnesses, pipingor other components have not been displaced or damaged.Aftermarket equipment installers must be mindful of applicableFederal Motor Vehicle Safety Standards. This information can beobtained directly from the National Highway Traffic SafetyAdministration.• These vehicles are equipped with an air bag system. The air bagsystem in your police vehicle includes front seat back, front kneeand side curtain air bags. Customer installed equipment such assecurity barriers behind the front seats should not be mounted sothat the barrier ends are within the side air bag deployment zones.The sensors and other components for the air bag system must notbe relocated to accommodate the installation of customer furnishedequipment; please refer to the service manual for sensor and othercomponent locations. For information concerning instrument paneltop pad mounted equipment and air bag system deployment zones,see the air bag information section in this catalog.• This catalog is not updated during the model year and should not beused for ordering purposes. It is intended as a source of basicinformation. All illustrations and specifications in this literature arebased on the latest product information available at the time ofpublication. General Motors reserves the right to make changes atany time without notice. For further details, consult your localdealer.ABOUT THIS PUBLICATION• A note about vehicle alterations by independent suppliers: Thiscatalog shows pictures of vehicles that have been altered or upfittedwith equipment or components supplied to Chevrolet or its dealersby independent suppliers. Chevrolet is not responsible for the safetyor quality of design features, materials or workmanship of anyalterations by a supplier.V7714