
Create successful ePaper yourself
Turn your PDF publications into a flip-book with our unique Google optimized e-Paper software.
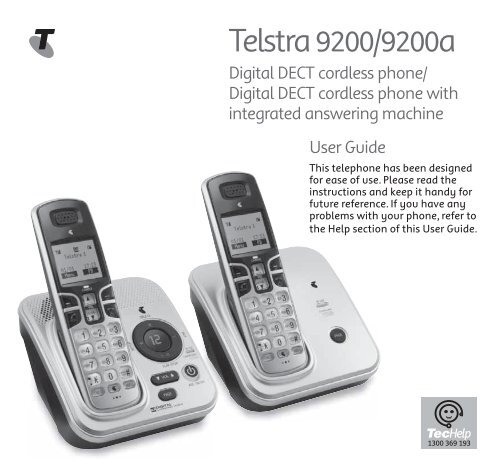
<strong>Telstra</strong> <strong>9200</strong>/<strong>9200</strong>aDigital DECT cordless phone/Digital DECT cordless phone withintegrated answering machineUser GuideThis telephone has been designedfor ease of use. Please read theinstructions and keep it handy forfuture reference. If you have anyproblems with your phone, refer tothe Help section of this User Guide.
IntroductionTo your <strong>Telstra</strong> <strong>9200</strong> Digital DECT Cordless Telephone /<strong>Telstra</strong> <strong>9200</strong>a Digital DECT Cordless Telephone with Answering Machine• Phonebook – lets you store up to 100contact numbers for easy dialling.• Store a phonebook entry then copy it – orthe entire phonebook – to another <strong>Telstra</strong>handset.• Quick access to a range of <strong>Telstra</strong> NetworkFeatures including Call Waiting and CallForward.• <strong>Telstra</strong> Calling Number Display* lets you seewho’s calling. Your phone stores details ofthe last 30 callers in a Calls list.• Answering machine, with up to 15 minutesdigital recording time and helpful voiceprompts(<strong>Telstra</strong> <strong>9200</strong>a answering machineversion only).Call features and charges may apply.* IMPORTANT You need to subscribe to<strong>Telstra</strong>’s Calling Number Display service tobe able to see the caller’s number or namewhen called, or in the Calls list. See page 35for more details.IMPORTANTThis equipment requires electricityto work. You will not be able to makeany telephone calls when the powerfails. Alternative arrangementsshould be made to access emergencyservices in times of power failure.As a Digitally Enhanced CordlessTelecommunications (DECT) product, your<strong>Telstra</strong> <strong>9200</strong> / <strong>9200</strong>a provides:• Digital clarity• Digital range• Digital securityThis product has been designed and testedfor Australian conditions for use with <strong>Telstra</strong>’snetwork.This User Guide provides you with all theinformation you need to get the most fromyour phone. Before you make your first call,you will need to set up your phone. Followthe simple instructions on the next few pages.Some <strong>Telstra</strong> features such as SMS, MessageBank® and Calling Number Display mayattract feature and usage charges. Please visit<strong>Telstra</strong>.com for details.Need help?PLEASE LOOK IN THE HELP SECTION AT THEEND OF THE USER GUIDE IF YOU EXPERIENCEANY OPERATIONAL DIFFICULTIES WITH YOURTELSTRA PRODUCT, OR PLEASE CONTACT THETECHELP INFORMATION LINE 1300 369 193OR CONTACT US BY EMAIL AT:tcpsupport_au@vtech.comHearing aid?Please note that the <strong>Telstra</strong> <strong>9200</strong> / <strong>9200</strong>aworks by sending radio signals betweenthe base and handset. These signals mayinterfere with some hearing aids, causing ahumming noise.Got everything?The package contains the following items:• <strong>Telstra</strong> <strong>9200</strong> / <strong>9200</strong>a handset• <strong>Telstra</strong> <strong>9200</strong> base unit or <strong>Telstra</strong> <strong>9200</strong>aanswering machine base unit (<strong>Telstra</strong> <strong>9200</strong>aanswering machine version only).• AC power adapter• Telephone line cord• 1 NiMH rechargeable battery• Wall mount bracket• 1 User manualIf you have purchased a <strong>Telstra</strong> <strong>9200</strong> / <strong>9200</strong>amulti handset pack you will also have thefollowing for each additional handset:• <strong>Telstra</strong> <strong>9200</strong> / <strong>9200</strong>a handset• <strong>Telstra</strong> <strong>9200</strong> charger• 1 NiMH rechargeable battery• AC power adaptor (for the charger)2 3
In this guideImportant Safety Instructions 8Getting started 10Location 10Setting up 10Wall mounting 11Setting up for multiple packs 12Using your <strong>Telstra</strong> <strong>9200</strong> / <strong>9200</strong>a on aBroadband line? 12Date and time 13Set date manually 13Set time manually 13Getting to know your phone 14Handset buttons 14Handset display 16Display icons 16Answering machine base 18Base (Non answering machine) 19Navigating the menus 20Option buttons 20Menu Layout 21Using the phone 22Switch handset on or off 22Make an external call 22Pre-dialling 22End a call 22Receive a call 22Earpiece / handsfree volume 22Mute 23Silent 23Handsfree 23Make a handsfree call 23Answer a call handsfree 23Switch to handsfree during a call 23Redial 23Redial the last number called 23Delete a redial number 24Delete all redial numbers 24Keypad lock 24To lock the keypad 24To unlock the keypad 24Find handset (Paging) 24In this guidePhonebook 25Store a name and number 25View an entry 25View phonebook capacity 26Dial an entry 26Edit a name and number 26Copy all entries 26Delete an entry 27Delete entire phonebook 27Settings 28Handset settings 28Display contrast 28Handset name 28Auto answer 28Handset reset 28Select Base Station 29Sounds 29Audio Volume 29Internal Ringer Melody 29External Ringer Melody 29Ringer Volume 30Alert Tones 30Base settings 30Ringer (<strong>9200</strong>a only) 30Ringer Volume (<strong>9200</strong>a only) 30Change Recall (Flash) Time 31System PIN 31System reset 32Deregister a handset 32Registration 32Date/Time/Alarm 33Date Format 33Time Format 33Set date manually 33Set time manually 33Set and turn on the alarm 34Turn off the alarm 34Select alarm melody 34Stop alarm ring 344 5
In this guideIn this guide<strong>Telstra</strong> Network Features 35Calling Number Display 35Call list 35View call details 36Dial from the Calls list 36Store a Call list number into thephonebook 36Delete an entry 37Delete entire call list 37Flashing Message Indicator (FMI) 37<strong>Telstra</strong> Home Messages 101® 37To call <strong>Telstra</strong> Home Messages 101® 37Call Waiting 383-Way Chat 38Pre-stored <strong>Telstra</strong> Network Features 38To use Feature Assistant 38To check or turn Call Waiting on/off 39To use Call Return 39To check Call Forward Immediate 39To check Call Forward on Busy 39To check Call Forward on No Answer 39To turn Call Back off 39Answering machine(<strong>Telstra</strong> <strong>9200</strong>a version only) 40Using the answering machine from thehandset 40Switch the answering machineon / off 40Outgoing messages 41Record your own outgoing message(OGM) 41Check your outgoing message 41Restore your outgoing message todefault 42Answer settings 42Set Answer Delay 43Set Recording Time of IncomingMessage 43Call screening 44Message playback 44Delete all old messages 45Using the answering machine at thebase 45Switch on/off 45Message playback 45Remote access 45To enable/disable remote access 45Change the 4-Digit Remote Access PIN 46If you forget to switch on youranswering machine 46Operating your answeringmachine remotely 47Memo 47Record Memo 47Additional handsets(multi handset packs only) 48Call another handset 48Transfer a call 483-Way conference call 48De-register a handset 48Registering an additional handset 49Select base 49Help 50General Information 53Replacing the handset batteries 53Safety 53Cleaning 54Environmental 54<strong>Telstra</strong> accessories and replacementitems 54How many telephones can you have? 54Product warranty & Customer service 55To call the TecHelp Helpdesk 396 7
Important safety instructionsWhen using your telephone equipment,basic safety precautions should alwaysbe followed to reduce the risk of fire,electric shock and injury, including thefollowing:1 Read and understand all theinstructions.2 Follow all warnings and instructionsmarked on the product.3 Unplug this product from the walloutlet before cleaning. Do not useliquid or aerosol cleaners. Use a dampcloth for cleaning.4 Do not use this product near water (forexample, near a bath tub, kitchen sink,swimming pool) or humid areas.5 Do not overload wall outlets andextension cords as this can result inthe risk of fire or electric shock.6 Unplug this product from the walloutlet and contact TecHelp on1300 369 193 under the followingconditions:• When the power supply cord or plugis damaged or frayed.• If the product does not operatenormally by following the operatinginstructions.• If the product has been dropped andthe outer casing has been damaged.• If the product exhibits a distinctchange in performance.7 Avoid using a telephone during anelectrical storm. There may be aremote risk of electric shock fromlightning.8 Do not use the telephone to report agas leak in the vicinity of the leak.9 Use only the supplied NiMH (NickelMetal Hydride) battery. The operationperiods for the handsets are onlyapplicable with the default batterycapacityImportant safety instructions10 The use of other battery types ornon rechargeable battery/primarycell can be dangerous. These maycause interference and/or unitdamage. <strong>Telstra</strong> will not be heldliable for damage arising from suchnoncompliance.11 Use only the AC power adaptorssupplied with this product. Pleasecontact TecHelp on 1300 369 193 forreplacement adaptors.12 Please ensure that the polarity plug isinserted correctly.13 Do not immerse the battery in water,and do not place it in a fire.14 Telephone receivers produce magneticfields that can attract small metallicobjects such as pins or staples. Toavoid injury, do not place the handsetwhere such objects can be picked up.8 9
Getting startedLocationPlace your <strong>Telstra</strong> <strong>9200</strong> / <strong>9200</strong>a within 2metres of the mains power socket andtelephone socket so that the cables will reach.Make sure it is at least 1 metre awayfrom other electrical appliances to avoidinterference. Your <strong>Telstra</strong> <strong>9200</strong> / <strong>9200</strong>a worksby sending radio signals between the handsetand base. The strength of the signal dependsLine Cord<strong>9200</strong>/<strong>9200</strong>a BaseUse Only SuppliedAdapteron where you locate the base. Putting it ashigh as possible ensures the best signal.Setting up1. Plug the mains power cable into the basestation, plug the other end into the mainspower wall socket and switch the poweron. The base indicator will light up and theanswering machine will be switched on.TEL. LINEGetting started2. To fit the NiMH battery into the handset,remove the battery compartment coverby sliding it out. Place the battery pack asindicated, following the polarity. Slide thebattery compartment cover back on until itclicks into place.3. Place the handset on the base to charge forat least 14 hours. When the handset is fullycharged the will be displayed.A beep indicates that the handset isproperly placed on the base or charger.4. When the battery is fully charged, plugone end of the telephone line cord into thebase station and the other end into thetelephone wall socket.Wall mountingYour <strong>Telstra</strong> <strong>9200</strong>/<strong>9200</strong>a is designed to mounton a standard wall mounting plate. Attachthe wall mount bracket to your <strong>9200</strong>/<strong>9200</strong>abase and attach to your wall mount plate.Battery low warningIf the flashes in the handset display youwill need to recharge the handset before youcan use it again. During charging, thewill appear to be filling in the display.Battery performanceIn ideal conditions, a fully charged batteryshould give up to 10 hours talk time, or 100hours standby time, on a single charge.Note that a new battery will not reach fullcapacity until it has been in normal use forseveral days.To keep the battery in the best condition,leave the handset off the base for a few hoursat a time.Running the battery right down at least oncea week will help it last as long as possible.The charge capacity of the rechargeablebattery will reduce with time as it wears out,giving the handset less talk/standby time.Eventually it will need to be replaced. Areplacement battery pack can be obtained bycontacting TecHelp on 1300 369 193 or fromyour local electrical retailer.IMPORTANTThe base station must be plugged intothe mains power socket at all times. Donot connect the telephone line until thehandset is fully charged. Only use the power,telephone cables and NiMH battery pack10supplied with the product.11
Getting startedGetting startedAfter charging your handset for the firsttime, subsequent charging time is about 6–8hours a day. The battery and handset maybecome warm during charging, however, thisis normal.Setting up for multiple packsIf you have purchased a <strong>Telstra</strong> <strong>9200</strong> / <strong>9200</strong>amultiple pack, you will need to prepareadditional handsets and chargers for use.For each additional handset and charger1.Plug the mains power cable into the powersocket on the charger base, plug the otherend into the mains power wall socket andswitch the power on.<strong>9200</strong>/<strong>9200</strong>aExtension ChargerUse Only SuppliedAdapterDC 6V2. To fit the NiMH battery into the handset,remove the battery compartment coverby sliding it out. Place the battery pack asindicated, following the polarity. Slide thebattery compartment cover back on until itclicks into place.3. Place the handset on the base to charge forat least 14 hours. When the handset is fullycharged the will be displayed.Using your <strong>Telstra</strong> <strong>9200</strong> / <strong>9200</strong>a on aBroadband ADSL line?If this product is to be used on a broadbandADSL line, then you must ensure that itis connected via an ADSL filter. Using thisproduct on a Broadband line without an ADSLfilter may cause problems with this productand your Broadband service.Date and timeIf you have subscribed to <strong>Telstra</strong>’s CallingNumber Display service, the date and timeis set automatically for all handsets whenyou receive your first call. The date and timeis recorded with each answering machinemessage you receive. If you have notsubscribed to <strong>Telstra</strong> Calling Number Displayyou can set the date and time manually.Set date manually1. Choose Menu and press to selectCLOCK/ALARM. Choose Select.2. Press to select DATE & TIME.Choose Select.3. Press to select SET DATE. ChooseSelect.4. Enter the date according to DD-MM-YYYYor MM-DD-YYYY format. (To change dateformat, see page 33)5. Choose OK to confirm.6. Press to return to standby.Set time manually1. Choose Menu and press to selectCLOCK/ALARM. Choose Select.2. Press to select DATE & TIME.Choose Select.2. Press to select SET TIME. ChooseSelect.3. Enter the date according to 12 Hours or 24Hours format. (To change time format, seepage 33)4. Press to select AM OR PM. (If time format isset to 12 hours)5. Choose OK to confirm.6. Press to return to standby.If you have entered incorrectly, an error tonewill be emitted and the cursor will stop at theincorrect input.12 13
Getting to know your phoneGetting to know your phone5. DOWN / Redial list10. ALPHANUMERIC KEYPAD,Handset buttonsIn standby mode, press to access the redial * (STAR), # (HASH)1. Earpiecelist.Press to insert a digit / character / * / #2. UP/ Call listWhen on a call, press to decrease volume. * key in standby mode: Press and hold to turn1In standby mode, press to open and moveIn menu mode, press to scroll down through the keypad lock on/off.through the Call list.the options displayed on-screen.* key in editing mode: Press and hold to switchWhen on a call, press to increase volume.In Phonebook list / Redial list / Call List, press character set.In menu mode, press to scroll up.to scroll down the list.# key in editing mode: Press and hold to togglethrough the options displayed on-screen.6. INTERCOMbetween uppercase or lowercase character3. Option button (Right)In menu mode, press to access the intercom input.13Press to select options displayed on thelist to make an internal call.# key in standby mode: Press and hold to turn2screen above the right option button.When in an external call, press and hold to the ringer on / off.In standby mode, press to access theinitiate conference between the external call 0 key in standby / pre-dialling /number123In sub-menu mode, press to go back to7. MICROPHONE11. TALK ONphonebook.and the internal call.editing mode: Press and hold to insert a pause.8. TELSTRAIn standby / pre-dialling mode, press to make11RECALL4previous level.In editing / pre-dialling mode, press to clear aPress to open a list of <strong>Telstra</strong> networka call5character / digit; press and hold to delete allfeatures.When a Redial list / Call List/ Phonebookcharacters / digits.9. SPEAKERPHONEentry is selected, press to make a call to the104. TALK OFFWhen on a call, press to turn theselected entry.When on a call, press to end a call and gospeakerphone on / off.When the phone rings, press to answer a call.back to standby screen.When a Call List / Phonebook entry is selected, Press to intercept the call during callIn menu / editing mode, press to return topress to make a call using speakerphone. screening.standby.When the phone rings, press to answer a call Press during a call to activate Recall for use96In standby mode, press and hold to switch thewith speakerphone.with <strong>Telstra</strong> Network Features such as Callhandset off/on.Press to play a message via speaker during Waiting.87answering machine message playback / call14screening.15
Getting to know your phoneGetting to know your phone12. Option button (Left)Press to select options displayed on thescreen above the left option button.In standby mode, press to access the mainmenu.In sub-menu mode, press to confirm theselection.When on a call, press to mute/unmute themicrophone.Press to intercept the call during callscreening.13. CHARGE LEDHandset displayDisplay iconsIcons can be On (visible),Flashing or Off (not visible):On - Indicates a call is in progress.Flashing – handset is ringing duringincoming call.On – handsfree speaker isswitched on.On – handset ringer is switched off.On - a new <strong>Telstra</strong> Home Messages101® message has been received.On – the keypad is locked.Battery is fully charged.(<strong>9200</strong>a only)On - answering machine isswitched on.Off – answering machine isswitched off.Flashing - answering machinememory is full.On – indicates the handset is withinthe range of the base. More barsindicates stronger signal.Battery is 1/3 charged.Battery is 2/3 charged.Flashing – indicates that you aremoving out of range or when thehandset is not registered to thebase.Flashing – battery needs charging.Battery is chargingOn – alarm is set.Flashing - alarm time has reached.Off – alarm off.On - an intercom is in progress.16 17
Getting to know your phoneBase (<strong>Telstra</strong> <strong>9200</strong>a answering machineversion)PAGE123108 9 7 61. DELETEIn standby mode, press and hold to delete allold messages.During answering message playback, press todelete the current playing message.452. REPEAT/ SKIP BACKWARDDuring answering message playback, pressto repeat the message. Press twice to play theprevious message.3. SKIP FORWARDDuring answering message playback, press toplay the next message.4. IN USE LightTurn ON when the handset has answered acall or is making a call.5. CHARGING Light6. ANSWER ON/OFFPress to switch answering machine on or off.7. PAGEPress to ring all registered handsets. Thisis helpful for finding a missing handset.(see page 24) Also used during registrationprocess. (see page 49)8. CHARGING CRADLE9. VOLUME +/-Press to increase or decrease the speakervolume during message playback or callscreening.10. PLAY/STOPPress to play messages or stop playback.Getting to know your phoneBase (<strong>Telstra</strong> <strong>9200</strong> non answeringmachine version)18 19PAGE1. ChargingLights up when handset is charging.2. PagePress to ring all registered handsets, helpfulfor finding a missing handset (see page 24).Also used during the registration process (seepage 49).31243. IN USE LightTurn ON when the handset has answered acall or is making a call.4. CHARGING CRADLE
Getting to know your phoneGetting to know your phoneNavigating the menusYour <strong>Telstra</strong> <strong>9200</strong> / <strong>9200</strong>a has an easy to usemenu system. Each menu has a list of options,as outlined on the following page. When thehandset is switched on and in standby:1. Choose Menu to open the main menu.2. Then press buttons to movethrough the available options.3. Choose the OK or Select option button toselect a Menu option or the Back optionbutton to return to the previous screen. Toexit a menu and return to standby, press.Option buttonsPress or to select the option shownon the screen. If no buttons are pressed for30 seconds, the handset returns to standbyautomatically.OkRECALLBackMenu layoutCalls ListReceived CallDialed Call(List Empty)OR(Display Call ListEntries)Add to PBDeleteDelete AllPhonebookViewAddEditDeleteDelete AllPB StatusPB TransferOR(List Empty)AddPB StatusClock/AlarmDate & TimeAlarmHS SettingsAudio SetupRing SetupTone SetupRename HSContrastAuto AnswerSelect BaseHS DefaultBase SettingsDelete HSRing Setup*Flash TimeModify PINBS Default* <strong>9200</strong>a onlyRegistrationSee page 49Info ServicesFeat. AssistC.W. OnC.W. OffChk Call WaitCall ReturnChk CF Imm.Chk CF BusyChk CF No AnsC.B. OffTecHelp LineAns. Machine(<strong>9200</strong>a only)PlaybackDelete AllMemoTAM On/OffTAM SettingsNote: Phonebook transfer will function on theMulti-handset version only20 21
Using the phoneSwitch handset on or offTo switch the handset off:1. Press and hold .To switch the handset on:1. Press and hold again.Make an external call1. Press. or . to access the line.2. When you hear the dial tone, dial thenumber.Pre-dialling1. Enter the number. If you make a mistake,choose CLEAR to delete the last digit.2. Press to dial.End a call1. Press or put the handset back on thebase station.Call timerYour handset will automatically time the duration ofall external calls. The handset display shows the callduration both during and for a few seconds after yourcall is terminated.Out of range warningWhen the handset goes out of range of the base, theantenna icon flashes. If you are on a call, the linewill hang up. When you move back within range thehandset will automatically reconnect to the base.Receive a callWhen you receive a call, the phone rings.The display will show the caller’s number ifavailable or the caller’s name if it matchesan entry in the phonebook. If you do notsubscribe to <strong>Telstra</strong> Calling Number Display,the screen shows INCOMING CALL.1. Press , or choose ACCEPT to answerthe incoming call.Auto answerAs long as you have auto answer set to ON you cananswer a call by lifting the handset off the base. If youhave switched auto answer off, you will need to pressas well. Auto answer ON is the default setting. Seepage 28.Using the phoneMuteDuring a call, you can talk to someone nearbywithout your caller hearing.1. Choose MUTE/ while in the call. Thedisplay shows CALL MUTED and your callercannot hear you.2. Choose UNMUTE/ again to unmute themicrophone.SilentIn standby mode, press and hold to turnoff the ringer. The display shows .HandsfreeHandsfree lets you talk to your caller withoutholding the handset to your ear. It alsoenables other people in the room to join inthe conversation over the loudspeaker.Make a handsfree call1. Dial the number then press on thehandset. is displayed. You will then hearAnswer a call in handsfree modeWhen the phone rings:1. Press on the handset. The call istransferred to the handset loudspeaker.Switch to handsfree mode during a call1. When in a call, press on the handset toput the call on the loudspeaker. To switchhandsfree off and return the call to theearpiece, press again.RedialUp to 20 of the last telephone numbers calledare saved in the redial list. You can select anyof the numbers to redial, delete or copy to thephonebook.Redial the last number called1. Press . The last number you called willbe displayed.2. Press to dial the number displayedEarpiece / handsfree volumeyour call over the handset loudspeaker. Save a number from the redial list to theDuring a call, you can adjust the volumePress to switch the call between the phonebookof the earpiece or loudspeaker. There are 5earpiece and the loudspeaker.1. Press then press to move tovolume levels.2. Press to end the call.the number you want to save.1. Press to increase or decrease the2. Choose Select to select the redial number.volume level while in a call.During a handsfree call, pressto adjust thevolume.3. Choose Menu and press to selectADD TO PB. Choose Select.22 23
Using the phone4. Use the keypad to enter the name. ChooseOK.5. Edit the number (if required). Choose OK.6. Press to select the melody.Choose OK.7. The entry is saved.If the phonebook is full, the display shows MEMORYFULL and the number will not be saved. You will needto delete a number in the phonebook first (see page 27).Delete a redial number1. Press then press to move tothe number you want to delete.2. Choose Select to select the redial number.3. Choose Menu and press to selectDelete.4. Choose OK to confirm.Delete all redial numbers1. Press . The last number dialed will bedisplayed.2. Choose Select to select the redial number.3. Choose Menu and press to selectDELETE ALL.4. Choose OK to confirm.5. Press to exit and return to standbymode.Keypad lockYou can lock the keypad so that it cannot beused accidentally while carrying it around.To lock the keypad:1. Press and hold while in standby mode.The is displayed onscreen.To unlock the keypad:1. Press and hold while in standby mode.The disappears.WARNINGIf the keypad is locked you will still be able to dial theemergency numbers 000 and 106. When the keypad islocked you can still answer incoming calls and operatethe handset as normal during those calls. When the callends, the keypad lock comes on again.Find handset (Paging)You can ring a handset to help locate it.1. Press on the base. All handsets registeredto the base will ring for up to 60 seconds.The display shows --PAGING--2. Press on the base again to stop thepaging, or press a button on any handset(except SILENT/ ).Note - If there is an incoming call during paging, pagingwill cease and the phone will ring with the incomingcall insteadPhonebookYou can store up to 100 names and numbersin the phonebook. Names can be up to 12characters long and numbers up to 24 digits.Store a name and number1. In standby mode, choose Menu and pressto select PHONEBOOK.2. Choose Select to access the Phonebookmenu.3. Press to select ADD.Choose Select.4. Enter the name and choose OK.5. Enter the number and choose OK.6. Press to select a melody andchoose OK to save the phonebook entry.You must enter a name to go with a numberin order to save the entry.Entering namesUse the keypad letters to enter names, e.g. to storeTom:Press once to enter T.Press three times to enter o.Press once to enter m.Writing tipsPress Clear to delete the last character or digit.Press and hold Clear to delete all characters or digits.Pressto move backward or forward throughthe characters/digits. Press and hold to switchbetween upper and lower case. Press and hold toswitch among different character sets.To enter a pause in a phonebook numberWhen storing a number press and hold and a P willbe displayed.View an entry1. In standby mode, press . The first entryin the phonebook will be displayed.2. Press to select the phonebookentry that you want.3. Choose Select to view the phonebookentry.OR1. Choose Menu and press to selectPHONEBOOK.2. Choose Select to access the Phonebookmenu.3. Choose Select to select VIEW.4. Press to select the phonebookentry that you want.5. Choose Select to confirm.24 25
PhonebookView Phonebook capacity1. In standby mode, choose Menu and pressto select Phonebook.2. Choose Select to access the Phonebookmenu.3. Press to select PB STATUS.4. Choose Select to display the numberof entries remaining in the phonebookmemory.Dial an entry1. In standby mode, press to access thePhonebook.2. Press to select the entry youwant, or search alphabetically using thealphanumeric keypad (see tip below).3. Press or to dial the desired number..Edit a name and number1. In standby mode, choose Menu and pressto select Phonebook.2. Choose Select to access the Phonebookmenu then choose Select.3. Press to select the entry that youwant. Choose Select.4. Choose Menu, then press toselect Edit. Choose Select.5. Use the keypad to enter a new name andphone number and then select the melody.6. Choose OK to save.When editing a name or number, choose CLEAR todelete characters and digitsPhonebookhandset, the additional handset will beselected automatically)At the receiving handset:5. The handset will sound a tone and youwill be prompted to accept the phonebooktransfer.6. Choose OK to start or choose BACK to abort.7. If the transfer is successful, the display willshow FINISHED on both handsets.You can copy the entire phonebook to another handsetregistered to the base.If the phonebook becomes full during copying, thedisplay shows “MEMORY FULL” on the receivinghandset and ABORTED in the sending handset.If copying is interrupted, the display showsABORTED.If you copy an entry that already exists in the receivingHandset, a duplicate entry will be created.Delete entire phonebook1. In standby mode, choose Menu and pressto select PHONEBOOK.2. Choose Select to access the Phonebookmenu.3. Press to select DELETE ALL.Choose Select.4. Choose OK to reconfirm or choose BACK tocancel.Copy all entries1. In standby mode, choose Menu and pressto select Phonebook.Delete an entryTo search alphabeticallyPress the relevant keypad button, e.g. for the entries 2. Choose Select to access the Phonebook1. In standby mode, choose Menu and pressbeginning with T press once then press tomenu.to select PHONEBOOK.scroll through the entries.3. Press to select PB TRANSFER.2. Choose Select to access the PhonebookChoose Select. (Note: if you only have onemenu.handset registered to the base station, PB3. Press to select DELETE. ChooseTransfer menu will not appear)Select.4. Press to select the handset that4. Press to select the entry that youyou want to copy to and choose Select.want to delete. Choose Select to delete.(Note: if you only have one additional26 27
SettingsHandset settingsDisplay contrast1. In standby mode, choose Menu and pressto select HS SETTINGS. ChooseSelect.2. Press to select CONTRAST. ChooseSelect.3. Press to select the contrastsetting. (Note: There are 5 contrast levelsand the contrast effect will display whileyou are selecting them)4. Choose Select to confirm.Handset name1. In standby mode, choose Menu and pressto select HS SETTINGS. ChooseSelect.2. Press to select RENAME HS. ChooseSelect.3. Enter the handset name with the keypad.(Note: Press CLEAR to delete one characteror press and hold CLEAR to clear the entireentry. You can enter a maximum of 12characters)4. Choose OK to confirm.Auto answer1. In standby mode, choose Menu and pressto select HS SETTINGS. ChooseSelect.2. Press to select AUTO ANSWER.Choose Select.3. Press to turn the Auto Answerfeature On or Off.4. Choose Select to confirm.As long as you have auto answer set to ON you cananswer a call by lifting the handset off the base. If youhave switched auto answer off, you will need to presswhen you lift up the handset. Auto answer ON is thedefault setting.Handset reset1. In standby mode, choose Menu and pressto select HS SETTINGS. ChooseSelect.2. Press to select HS DEFAULT. ChooseSelect.3. Enter the 4-digit system PIN. (Default4-digit system PIN is 0000)4. Choose OK to confirm.5. Choose OK to reconfirm.SettingsIf you restore your handset to its original factorysettings, this will not affect:• The phonebookSelect Base Station1. In standby mode, choose Menu and pressto select HS SETTINGS. ChooseSelect.2. Press to select SELECT BASE.Choose Select.3. Press to select the base stationthat you want. (Note: The currently usedbase is indicated with an *)4. Choose Select to confirm.SoundsAudio Volume1. In standby mode, choose Menu and pressto select HS SETTINGS. ChooseSelect.2. Press to select AUDIO SETUP.Choose Select.3. Press to select SPEAKER VOLUME orEAR VOLUME. Choose Select.4. Press to select the volume levelthat you want. (Level 1 to Level 5)5. Choose OK to confirm.Internal Ringer Melody1. In standby mode, choose Menu and pressto select HS SETTINGS. ChooseSelect.2. Press to select RING SETUP. ChooseSelect.3. Press to select INTERNAL RING.Choose Select.4. Press to select the internal ringermelody that you want. (10 ringer melodiesand 5 standard tones)5. Choose Select to confirm.External Ringer Melody1. In standby mode, choose Menu and pressto select HS SETTINGS. ChooseSelect.2. Press to select RING SETUP. ChooseSelect.3. Press to select EXTERNAL RING.Choose Select.4. Press to select the external ringermelody that you want. (10 ringer melodiesand 5 standard tones)5. Choose Select to confirm.28 29
SettingsRinger Volume1. In standby mode, choose Menu and pressto select HS SETTINGS. ChooseSelect.2. Press to select RING SETUP. ChooseSelect.3. Press to select RING VOLUME.Choose Select.4. Press to select the ringer volumethat you want. (Level 1 to Level 5 or RingerOff)5. Choose OK to confirm.You can set different ringtones for external calls andinternal calls.Choose from 10 ringer melodies and 5 standard tones.The handset also has 5 ringer volume settings plus Off.You can also switch the handset ringer off by pressingand holding .4. Press to turn these tones on oroff.5. Choose Select to confirm.Your handset can give alert tones when you are goingout of range and when the battery is low.It can also beep every time you press a button.You can switch these tones on or off individually as setout above.Base settingsRinger (<strong>9200</strong>a only)1. In standby mode, choose Menu and pressto select BASE SETTINGS. ChooseSelect.2. Press to select RING SETUP. ChooseSelect.3. Press to select RING MELODY.Choose Select.4. Press to select the ringer melodythat you want.5. Choose Select to confirm.Settings3. Press to select RING VOLUME.Choose Select.4. Press to select the ringer volumethat you want.5. Choose Select to confirm.Choose from 5 base melodies. There are 5 volume levelsincluding Volume Off.Change Recall (Flash) TimeThe default Recall Time is 100msec.1. In standby mode, choose Menu and pressto select BASE SETTINGS. ChooseSelect.2. Press to select FLASH TIME. ChooseSelect.3. Press to select the recall (flash)time that you want (Short, Medium, Long)4. Choose Select to confirm.System PIN1. In standby mode, choose Menu and pressto select BASE SETTINGS. ChooseSelect.2. Press to select MODIFY PIN. ChooseSelect.3. You will be prompted to enter the 4-digitsystem PIN.4. Enter the old system PIN and choose OK.(Default 4-digit system PIN is 0000)5. Enter the new system PIN and choose OK.6. Re-enter the new system PIN and choose OK.7. Choose OK to confirm.The System PIN is used when changing certain settingsand registration / deregistration.The default setting is 0000. You can change this to yourown preferred 4-digit number.If you make a mistake, choose Clear to delete digits.Alert Tones1. In standby mode, choose Menu and pressThe recall time should not normally need to beadjusted from the default 100msec unless you areto select HS SETTINGS. Chooseadvised to do so.Select.Ringer Volume (<strong>9200</strong>a only)2. Press to select TONE SETUP.The Recall button is used to access certain <strong>Telstra</strong>1. In standby mode, choose Menu and pressNetwork Features such as Call Waiting.Choose Select.to select BASE SETTINGS. Choose3. Press to select KEY TONE /Select.BATTERY LOW / OUT OF RANGE. Choose 2. Press to select RING SETUP. ChooseSelect.Select.30 31
SettingsSystem resetThis resets your <strong>Telstra</strong> <strong>9200</strong> / <strong>9200</strong>a to itsoriginal settings. (But does not delete thePhonebook)1. In standby mode, choose Menu and pressto select BASE SETTINGS. ChooseSelect.2. Press to select BS DEFAULT. ChooseSelect.3. Enter the 4-digit system PIN. (Default4-digit system PIN is 0000)4. Choose OK to confirm.5. Choose OK to reconfirm.Deregister a handset1. In standby mode, choose Menu and pressto select BASE SETTINGS. ChooseSelect.2. Press to select DELETE HS. ChooseSelect.3. Enter the 4-digit system PIN. (Default4-digit system PIN is 0000)4. Choose OK and press to select thehandset that you want to de-register.5. Choose Select to confirm.You cannot deregister the handset that you arecurrently using. If de-registration is successful, thede-registered handset will display UN-REGISTEREDRegistrationYour handset and base station is preregistered.Up to five handsets can beregistered to a single base station.If for some reason, the handset is notregistered to the base station ( flashes),register your handset according to thefollowing procedure1. Press and hold on the base station forabout five seconds. The base station entersregistration mode.2. Choose Menu and press to selectRegistration. Choose Select.3. Press to select the base station.Choose Select.4. Enter the 4-digit system PIN. (Default4-digit system PIN is 0000)5. Choose OK to confirm.SettingsDate/Time/AlarmSet date and timeIf you have subscribed to <strong>Telstra</strong>’s CallingNumber Display service, the date and time isset automatically when you receive your firstcall.Date Format1. In standby mode, choose Menu and pressto select CLOCK/ALARM. ChooseSelect.2. Press to select DATE & TIME.Choose Select.3. Press to select DATE FORMAT.Choose Select.4. Press to select the date formatthat you want. (DD-MM-YYYY or MM-DD-YYYY)5. Choose Select to confirm.4. Press to select the date formatthat you want. (12 Hours or 24 Hours)5. Choose Select to confirm.Set date manually1. Choose Menu and press to selectCLOCK/ALARM. Choose Select.2. Press to select DATE & TIME.Choose Select.2. Press to select SET DATE. ChooseSelect.3. Enter the date according to DD-MM-YYYYor MM-DD-YYYY format.4. Choose OK to confirm.Set time manually1. Choose Menu and press to selectCLOCK/ALARM. Choose Select.2. Press to select DATE & TIME.Choose Select.3. Press to select SET TIME. ChooseSelect.Time Format1. In standby mode, choose Menu and pressIf the handset registration is successful, you will hearto select CLOCK/ALARM. Choose4. Enter the time according to time format.a confirmation tone and will return to idle screen. TheSelect.will stop flashing. The handset will automaticallyPress to select AM OR PM. (If time format is2. Press to select DATE & TIME.be allocated the next available handset number. Thisset to 12 hours).handset number is shown in the handset display inChoose Select.5. Press to select AM OR PM.standby mode. The base station that is successfully3. Press to select TIME FORMAT.registered is bold in the Registration menu.6. Choose OK to confirm.Choose Select.32 33
SettingsSet and turn on the alarm1. In standby mode, choose Menu and pressto select CLOCK/ALARM. ChooseSelect.2. Press to select ALARM.Choose Select.3. Press to select ALARM ON. ChooseSelect.4. Enter the alarm time. (Using 12 hour formator 24 hour format, depends on the timeformat setting)5. Choose OK to confirm the alarm time.6. Press to select SNOOZE ON ORSNOOZE OFF.7. Choose Select to confirm.Turn off the alarm1. In standby mode, choose Menu and pressto select CLOCK/ALARM. ChooseSelect.2. Press to select ALARM.Choose Select.3. Press to select ALARM OFF.4. Choose Select to confirm.Select alarm melody1. In standby mode, choose Menu and pressto select CLOCK/ALARM. ChooseSelect.2. Press to select ALARM.Choose Select.3. Press to select ALARM MELODY.Choose Select.4. Select the alarm melody that you want.5. Choose Select to confirm.Stop alarm ringWhen the alarm rings, the and ALARM ON flashon the screen. The alarm rings for 45 seconds. You canpress any key to disable the alarm. If snooze functionis activated, the alarm will sound again at the end ofthe snooze period of two minutes. When the alarm timeis reached, you can choose OFF or to disable thealarm or choose SNOOZE to activate the snooze.<strong>Telstra</strong> Network FeaturesCalling Number Display*If you have subscribed to <strong>Telstra</strong>’s CallingNumber Display service, you will be able tosee your caller’s number on your handsetdisplay (provided it is not blocked) prior toanswering the call. If your caller’s name isstored in the phonebook and a number matchis found, you will see the caller’s name on thedisplay instead.*Call features and charges may applyCall listWhen <strong>Telstra</strong> Calling Number Display is activeon your service, dialled numbers will be savedin the telephone’s Calls list. Your phone canstore up to 30 answered calls and unansweredwith date/time information in the call list. Thenumber will be shown on the display whenthe phone is ringing. If the number, includingarea code, matches with one of the entriesin your phonebook, the caller’s name storedin the phonebook will be displayed with thenumber.Missed calls are marked with an “*” at thebeginning of the missed call entry. Once themissed call has been read, the “*” will beremoved.If the caller number is withheld,“PRIVATE” will display.If the caller number is unavailable,“UNAVAILABLE” will display.When the list is full, and a new call isreceived, the oldest entry will be deletedautomatically. The Calls list can holdnumbers up to 24 digits and names up to 12characters.IMPORTANTTo use <strong>Telstra</strong> Calling Number Display youmust first subscribe to the service from<strong>Telstra</strong>. For more information on <strong>Telstra</strong>Network Features call <strong>Telstra</strong> on 13 22 00. Toensure the caller’s name is displayed, makesure you have stored the full telephonenumber, including the area code, in thephonebook.34 35
<strong>Telstra</strong> Network FeaturesView call details1. Press to access the call list.OR1. In standby mode, choose Menu and pressto select CALL LIST. ChooseSelect.2. Select RECEIVED CALL3. Press to select the entry that youwant.4. Choose Select to view the details of the calllist entry.Dial from the Calls list1. Press to access the call list.OR1. In standby mode, choose Menu and pressto select CALL LIST. ChooseSelect.2. Select RECEIVED CALL3. Press to select the entry that youwant.4. Press to call the number.Store a Call list number into thephonebook1. Press to access the call list.OR1. In standby mode, choose Menu and pressto select CALL LIST. ChooseSelect.2. Select RECEIVED CALL3. Press to select the entry that youwant.4. Choose Menu and press to selectAdd to PB. Choose Select.5. Enter the name and choose OK.Note: You can press and hold to toggle betweenuppercase and lowercase letters. When editing thename, you can also press and hold to toggle amongdifferent character sets.6. Edit the number if necessary and chooseOK.7. Press to select the melody andchoose OK to confirm.When the Call list is opened, press to move from thenewest call to the oldest, or press to move from theoldest call to the newest.If you need to edit the number or name, choose CLEARto delete any unwanted characters, then enter newones using the keypad.<strong>Telstra</strong> Network FeaturesDelete an Entry in the Call List1. Press to access the call list.OR1. In standby mode, choose Menu and pressto select CALL LIST. ChooseSelect.2. Select RECEIVED CALL3. Press to select the entry that youwant.4. Choose Menu and press to selectDELETE.5. Choose Select to confirm.Delete the Entire Call List1. Press to access the call list.OR1. In standby mode, choose Menu and pressto select CALL LIST. Choose Select.2. Select RECEIVED CALL3. Choose Menu and press to selectDELETE ALL.4.Choose Select to confirm.5.Choose OK to reconfirm.Flashing Message Indicator (FMI)The <strong>Telstra</strong> <strong>9200</strong> / <strong>9200</strong>a is designed to providevisual indication when a new message isleft in your <strong>Telstra</strong> Home Messages 101® orMessageBank® service. To arrange connectionof the Flashing Message Indicator service,simply call <strong>Telstra</strong> on 13 2200. When a newmessage is left, the will be displayed onthe handset. After you have listened to yourmessage(s) the will disappear.<strong>Telstra</strong> Home Messages 101®You can get messages from your <strong>Telstra</strong> fixedhome phone when you are away from thephone, busy on another call or using theInternet. Callers will hear a standard greetinginviting them to leave a message.To call <strong>Telstra</strong> Home Messages 101®Press and dial 101.ORWhen the handset is in standby mode,press and hold the key.The handset will dial 125101.ORPress and then press and hold the key.The handset will dial 125101.By pressing the <strong>Telstra</strong> Network Features key, you canaccess a range of useful pre-stored <strong>Telstra</strong> NetworkFeatures. You can also access the TecHelp number.36 37
<strong>Telstra</strong> Network Features<strong>Telstra</strong> Network FeaturesCall WaitingCall Waiting tells you if a new caller is tryingto contact you when you are already onthe phone. A discreet tone alerts you to thenew caller, so you can answer your secondincoming call by putting the first caller onhold.1. Press and hold the button.Your first caller is put on hold and you cantalk to your second caller.2. To revert back to the original caller, pressand hold the button again.3-Way ChatThis service is available on most lines readyfor you to use! If you are already on a call,you can add another person and then have a3-Way Chat.To put existing call on hold and make anew call then to 3-Way Chat1. Press2. Dial the second phone number3. Long pressTo split a 3-Way Chat or switch betweencallers1. Long pressPre-stored <strong>Telstra</strong> Network Features:Feat. Assist. (To call Feature Assist)C.W. On (Turn Call Waiting On)C.W. Off (Turn Call Waiting Off)Chk Call Wait (To check Call Waiting status)Call Return (To use Call Return)Chk CF Imm. (To check Call Forward Immediate)Chk CF Busy (To check Call Forward Busy)Chk CF No Ans (To check Call forward No Answer)C.B. Off (To turn Call Back off)TecHelp Line (To call TecHelp Line)To use Feature Assistant1. Press to select FEAT. ASSIST.2. Choose Select to call. Listen for voiceinstructions.To check or turn Call Waiting on/off1. Press .2. Press to select C. W. ON, C. W. OFF ORCHK CALL WAIT.3. Choose Select to call. Follow the spokeninstructions, or listen for confirmation/status of your instructions.To use Call Return1. Press .2. Press to select CALL RETURN.3. Choose Select to call. Listen for voiceinstructions.To check Call Forward Immediate1. Press .2. Press to select CHK CF IMM.3. Choose Select to call. Listen forconfirmation/status of your instructions.To check Call Forward on Busy1. Press .2. Press to select CHK CF BUSY.3. Choose Select to call. Listen forconfirmation/status of your instructions.To check Call Forward on No Answer1. Press .2. Press to select CHK CF NO ANS.3. Choose Select to call. Listen forconfirmation/status of your instructions.To turn Call Back offIf you have activated the Call Back featureusing Recall * 3 7 # after you hear busy tone,you can turn the feature off as follows:1. Press .2. Press to select C.B. OFF.3. Choose Select to call. Listen forconfirmation/status of your instructions.To call the TecHelp Helpdesk1. Press .2. Press to select TECHELP LINE.3. Choose Select to call. Listen forconfirmation/status of your instructions.38 39
Answering machine (<strong>Telstra</strong> <strong>9200</strong>a answering machine version only)Your <strong>Telstra</strong> <strong>9200</strong>a can digitally record up to59 individual messages within the maximumrecording time of approximately 15 minutes.Each incoming message can last up to amaximum of 2 minutes. You can operate youranswering machine from:• the handset.• the base.• remotely, from any other Touchtonetelephone (see page 45).Your <strong>Telstra</strong> <strong>9200</strong>a comes with two prerecordedoutgoing messages, Answer andRecord or Answer Only, alternatively you canrecord your own message.Your answering machine is designed to answer callsafter 14 rings when it is switched off. This is to enableyou to operate the remote access functions of youranswering machine in the event your answeringmachine is switched off.You will need to set the day, date and time(if you have not already done so) so that youwill know when each message was received.If you have subscribed to <strong>Telstra</strong> CallingNumber Display, the date and time is setautomatically when you receive your firstcall. To set the date and time manually, seepage 33.Using the answering machinefrom the handsetSwitch the answering machine on / off1. In standby mode, choose Menu and pressto select ANSWER MACHINE. ChooseSelect.2. Press to select TAM ON/OFF. ChooseSelect.3. Press to select ON OR OFF.4. Choose OK to confirm. When set to On, thehandset display shows .Answering machineOutgoing messagesThe outgoing message is the message a callerfirst hears when the answering machineanswers their call. There are 2 pre-recordedoutgoing messages to choose from or you canrecord your own.Record Your Own Outgoing Message(OGM)1. In standby mode, choose Menu and pressto select ANSWER MACHINE. ChooseSelect.2. Press to select TAM SETTINGS.Choose Select.3. Press to select OGM SETTINGS.Choose Select.4. Press to select ANSWER & RECORDOR ANSWER ONLY. Choose Select.5. Press to select RECORD.6. Choose Select to start recording yourpersonalized OGM and “RECORDING” isdisplayed on the screen.7. Choose OK to stop and save yourpersonalized OGM or choose Cancel toreturn to previous screen without savingthe personalized OGM.Any subsequent newly recorded OGM will overwritethe previously recorded OGM.After the recorded OGMis saved, the phone will playback the newly recordedOGM automatically.Check your outgoing message1. In standby mode, choose Menu and pressto select ANSWER MACHINE. ChooseSelect.2. Press to select TAM SETTINGS.Choose Select.3. Press to select OGM SETTINGS.Choose Select.4. Press to select ANSWER & RECORDor ANSWER ONLY. Choose Select.5. Press to select PLAYBACK.6..Choose Select to playback yourpersonalized OGM (if you have recorded apersonalized OGM before) and “PLAYING” isdisplayed on the screen.7. Choose Back to stop the OGM playback andreturn to the previous menu.If a personalized OGM has not been recorded, the presetOGM will be played.40 41
Answering machineAnswering machineRestore your outgoing message todefault1. In standby mode, choose Menu and pressto select ANSWER MACHINE. ChooseSelect.2. Press to select TAM SETTINGS.Choose Select.3. Press to select OGM SETTINGS.Choose Select.4. Press to select ANSWER & RECORDor ANSWER ONLY. Choose Select.5. Press to select DEFAULT. ChooseSelect.6.Press OK to confirm restoring to defaultOGM.Answer and RecordThe pre-set Answer and Record outgoing message,which allows your caller to leave a message, is“Hello, your call cannot be taken at the moment, so pleaseleave your message after the tone”.Your Answer and Record outgoing message can beup to 1 minute long and will replace the pre-recordedmessage.Answer OnlyThe pre-set Answer Only outgoing message, wherecallers hear an announcement but cannot leave amessage, is “Hello, your call cannot be taken at themoment and you cannot leave a message, so please calllater”.When recording your Answer Only message, rememberto advise your caller that they will not be able to leavea message. Your own Answer Only message can beup to 1 minute long and will replace the pre-recordedmessage. To reinstate the pre-recorded messages,restore your outgoing message to default.When your answering machine memory is full andthe answer mode is in Answer & Record, the answermode will change to Answer Only automatically. It willchange back to Answer & Record mode automaticallyafter some messages have been deleted.Answer Settings1. In standby mode, choose Menu and pressto select ANSWER MACHINE. ChooseSelect.2. Press to select TAM SETTINGS.Choose Select.3. Press to select ANSWER MODE.Choose Select.4. Press to select the outgoingmessage type, ANSWER & RECORD or ANSWERONLY.5. Choose Select to confirm.Set Answer Delay1. In standby mode, choose Menu and pressto select ANSWER MACHINE. ChooseSelect.2. Press to select TAM SETTINGS.Choose Select.3. Press to select ANSWER DELAY.Choose Select.4.Choose Select and pressto selectthe answer delay that you want. (2 Rings to9 Rings or Time Saver).5. Choose Select to confirm.Set Recording Time of IncomingMessage1. In standby mode, choose Menu and pressto select ANSWER MACHINE. ChooseSelect.2. Press to select TAM SETTINGS.Choose Select.3. Press to select RECORDING TIME.Choose Select.4.Choose Select and pressto selectthe recording time that you want. (60 Sec,120 Sec, 180 Sec, or Unlimited).5.Choose Select to confirm.Answer and RecordYou cannot delete a pre-recorded message. If you deleteyour personal outgoing message the pre-recordedoutgoing message will be automatically reinstated asyour outgoing message.Answer modeChoose which outgoing message you want played tocallers.Answer delayAnswer delay sets the number of times your <strong>Telstra</strong><strong>9200</strong>a will ring before the answering machine answersyour call and starts playing the outgoing message. Youcan choose a Answer Delay setting from 2 to 9 rings orTime Saver.Time SaverWhen you ring in to access your messages remotely, ifyour answering machine is set to Time Saver and youhave new messages it will answer after 2 rings. If youdo not have any new messages, it will answer after 4rings. This means you can hang up knowing you haveno new messages, saving you time and the cost of thecall.Recording timeSet the maximum message length: 60, 120 or 180seconds or unlimited.42 43
Answering machineAnswering machineCall ScreeningWhen the answering machine is on and takesa call, you can listen to the caller leaving amessage. You can then identify the caller anddecide whether to take the call in person.The call can be heard through the basespeaker, or the handset as follows:1. When your <strong>Telstra</strong> <strong>9200</strong>a rings, wait forthe answering machine to answer the call.When the caller begins leaving a message,the display shows SCREEN? Choose OK tohear the caller.Press to stop screening without talkingto the caller.2. To interrupt and speak to the caller directly,press .During call screening, you can adjust the volume bypressing .Message playback1. In standby mode, choose Menu and pressto select ANSWER MACHINE. ChooseSelect.2. Press to select PLAYBACK.3. Choose Select to start new messageplayback.The handset displays the date and time the messagewas received.During playback you have the followingoptions:1. Press to adjust the volume.2. Press once to repeat the message3. Press to play the next message.4. Press to stop message playback.5. Press to delete the current messageplayback.6. Press to cancel playback and return tostandby mode. At the end of playback thehandset will return to standby mode.New (unplayed) messages cannot be deleted.Delete All old messages1. In standby mode, choose Menu and pressto select ANSWER MACHINE. ChooseSelect.2. Press to select DELETE ALL.3. Choose Select to confirm.4. Choose OK to delete all old messages.Using the answering machine atthe baseSwitch on/off1. Press .Message playbackPress . New messages are played first.During playback:Press to delete the current message.Press to repeat the message. Press twice toplay the previous message.Press to play the next message.Press to stop playback.Press to adjust the speaker volume upor down during playback.In standby mode, press and hold to deleteall old messages.Answering machine messages that are not deleted areautomatically saved.Memory fullIf the caller is still talking when the memory becomesfull the caller hears “Thank you for calling” and themachine will hang up. You must delete messagesbefore your machine will be able to record new ones. Todelete old (played) messages, see page opposite.Remote accessYou can operate your answering machinefrom most Touchtone phones by callingyour <strong>Telstra</strong> <strong>9200</strong>a and entering a 4 digitsecurity code.To enable/disable remote access1. In standby mode, choose Menu and pressto select ANSWER MACHINE. ChooseSelect.2. Press to select TAM SETTINGS.Choose Select.3. Press to select REMOTE ACCESS.Choose Select.4. Press to select ON OR OFF to turnthe remote access on or off respectively.5. Choose Select to confirm.Remote accessWhen enabled, you can call in from another phone tolisten to your messages and operate your answeringmachine. You are asked to set a Remote Access PIN sothat other people cannot ring up and listen to yourmessages.44 45
Answering machineAnswering machineChange the 4-Digit Remote Access PIN1. In standby mode, choose Menu and pressto select ANSWER MACHINE. ChooseSelect.2. Press to select TAM SETTINGS.Choose OK.3. Press to select CHG REMOTE PIN.Choose Select.4. Enter the Old remote access PIN (DefaultRemote Access PIN is 0000).5. Press to enter the new remote accessPIN.6. Press to enter the new remote accessPIN again.7. Choose OK to confirm.If you forget to switch on youranswering machine1. Call your number from another phone andlet it ring. After 14 rings, the machine willswitch on and answer your call.2. Enter your Remote Access PIN. Playback your messages as shown belowin ‘Operating your answering machineremotely’. If you do not choose to switchyour answering machine On, it will switchoff when the call has ended.IMPORTANTYou must change the security PIN from the originalsetting of 0000 to enable this feature. It is advisableto make a note of your new PIN code and keep itsomewhere safe.Operating your answering machineremotely1. Dial your phone number. When you hearyour outgoing message, press .2. Enter your 4 digit Remote Access PIN.If you press key after OGM has finished playing,you will not be able to access your answering machineremotely.If the 4-digit Remote Access PIN is entered incorrectlythree times consecutively, the line will be releasedautomatically.When you have remotely accessed your<strong>Telstra</strong> <strong>9200</strong>a, you can use the keypad tooperate your answering machine.Press to delete the current messageplayback.Press once to repeat the message or twiceto play the previous message.Press to play the message or stop thecurrent message playback.Press to play the next message.Press to turn on the answering machine.Press to turn off the answering machine.Press to enter the 4-digit remote accessPIN.MemoRecord MemoYou can record your memo message foranother user. When you record a memo, themessage counter will increase by one andthe message can be played back in the sameway as answering machine messages. Memorecording can still function even when theanswering machine is turned off.1. In standby mode, choose Menu and pressto select ANSWER MACHINE. ChooseSelect.2. Press to select MEMO.3. Choose Select to start memo recording andRECORDING is displayed.4. Choose OK to stop memo recording andsave the memo.OR4. Choose Cancel to stop memo recordingwithout saving and return to the AnswerMachine menu.46 47
Additional handsets (multi handset packs only)If you have purchased a multi handset packyou are able to make internal calls, transferexternal calls from one handset to anotherand use the conference option.Call another handsetYou can make internal calls between twohandsets.1. Press and if you have only one otherhandset, it will ring. If you have extrahandsets, enter the handset number orpress to select the handset (1-5)you want to call, then choose Select.Pressto call all the registered handsets.Transfer a callYou can transfer an external call to anotherhandset registered to the base.1. During your call, press . Your externalcaller is put on hold.2. If you have only one other handset it willring. If you have extra handsets, enterthe handset number or pressto select the handset (1-5) you want totransfer to, then choose Select.the call.4. When the called handset answers, you canannounce the caller.5. Press on the calling handset to transferthe external call to the called handset.3-Way conference callYou can hold a 3-way conference callbetween 2 internal callers and 1 externalcaller. No subscription is required.1. During your call, press . Your externalcaller is put on hold.2. If you have only one other handset it willring. If you have extra handsets, enterthe handset number or presstoselect the handset (1-5) you want, thenchoose Select.3. Press on the called handset to answerthe call.4. When the other handset answers, you canannounce the call. Then press and holdto join all callers.Additional handsets2. Press to select DELETE HS. ChooseSelect.3. Enter the 4-digit system PIN. (Default4-digit system PIN is 0000)4. Choose OK and press to select thehandset that you want to de-register.5. Choose Select to confirm.You cannot deregister the handset that you arecurrently using. If de-registration is successful, thede-registered handset will display UN-REGISTEREDRegistering an additional handsetYour additional handset(s) will come preregisteredbut should you need to register ahandset, follow these steps.1. Press and hold on the base station forabout five seconds. The base station entersregistration mode.2. Choose Menu and press to selectREGISTRATION. Choose Select.3. Press to select the base station.Choose Select.4. Enter the 4-digit system PIN.5. Choose OK to confirm.If the handset registration is successful, you will heara confirmation tone and will return to idle screen. Thewill stop flashing. The handset will automaticallybe allocated the next available handset number. Thishandset number is shown in the handset display instandby mode. The base station that is successfullyregistered is bold in the Registration menu.Select Base1. In standby mode, choose Menu and pressto select HS SETTINGS. ChooseSelect.2. Press to select SELECT BASE.Choose.Select.3. Press to select the base stationthat you want.(Note: The currently used base is indicatedwith an *)If registration is not successful first time, pleaserepeat the process again in case the base registrationperiod ran out of time. If there are already 5 handsetsregistered to the base, the registration will fail. Youmust de-register another handset before you canregister the new one. If your <strong>Telstra</strong> <strong>9200</strong> / <strong>9200</strong>ahandset is registered to more than one base, youcan select which base to use. If you have a handsetregistered to more than one base and then deregisterit from one of them, you will need to re-select whichbase to use.Deregister a handset1. In standby mode, choose Menu and pressto select BASE SETTINGS. Choose3. Press on the called handset to answer Select.48 49
HelpPhone does not work• Have you installed the battery correctly?See page 11.• Check that the mains power is correctlyconnected.• Is the handset switched off? To switch thehandset on, see page 22.No dial tone• Is the telephone cord of the base pluggedinto the phone socket?• Check that the mains power is switched onat the power point.• Only use the telephone cord supplied withthe phone.You have a dial tone, but the phone willnot dial out• If you are connected to a PABX, checkwhether you need to dial an access code.Handset does not ring• The ringer volume may be switched off. Seepage 29.• Check that the mains power is correctlyconnected.• Make sure the handset is registered to thebase. See page 49.No display• The battery may be flat, dead or incorrectlyinserted.• Recharge or replace the batteryHelpbattery icon does not appear to befilling• Try cleaning the charging contacts.• Check that the mains power is correctlyconnected.You hear the busy tone whenyou press• Make sure the handset is in range of thebase.• Another handset registered to your <strong>Telstra</strong><strong>9200</strong> / <strong>9200</strong>a base may be on the line.Answering machine does not record anymessages• The memory may be full. Play and deleteold messages. See page 45.• Check answering machine is switched on.See page 45.• Make sure answering machine is set to“Answer and record”. See page 42.Cannot access your messages fromanother phone• Have you changed the remote accesssecurity PIN code? See page 46. Alwayskeep a note of the new PIN code in a safeplace.• Has remote access been disabled? To enableremote access, see page 45.No Calling Number Display number/name displayed• Have you subscribed to <strong>Telstra</strong> CallingNumber Display? See page 35.• The caller may have blocked their number.• An exact name/number match was notfound in your phonebook. Check that youhave stored the complete number includingarea code.Cannot dial out or receive calls• Check that the mains power is correctlyAntenna icon flashesconnected.Base unit does not ring, but the lights• Is the handset registered correctly to the• The battery may need recharging.are onbase? See page 49.• Has there been a power cut? If so, place the• Have you connected the telephone line• Check that the mains power is correctlyAnswering machine messages have thehandset back on the base for 10 secondscorrectly?connected.wrong date and timeand try again. If it still does not work• Is the base ringer set to off?• Check that the handset is within range of• Have you manually set the date and time?disconnect the battery and mains power for• You may have a faulty line or socket. Trythe base.See page 33.10 minutes, then reconnect and try again.using another socket.• Is the battery low? Place the handset on thebase/charger to recharge.50 51
HelpBuzzing noise on my phone or on otherelectrical equipment nearby• Sometimes your <strong>Telstra</strong> <strong>9200</strong> / <strong>9200</strong>a caninterfere with other electrical equipmentif it is placed too close. It is recommendedthat you place your <strong>Telstra</strong> <strong>9200</strong> / <strong>9200</strong>aat least one metre away from electricalappliances or metal obstructions to avoidany risk of interference.• If you have an ADSL internet service ensurecorrect filters are installed to preventinterference.Customer HelplineIf you are still experiencing difficultiesplease call TecHelp on 1300 369 193 or emailtcpsupport_au@vtech.comGeneral informationReplacing the handset batteriesAfter a time, you may find that the handsetbattery is running out of charge more quickly.This is a standard sign of wear and thebattery will need replacing. A replacementrechargeable Nickel Metal Hydride (NiMH)battery can be purchased from TecHelpline on 1300 369 193 or your local electricalretailer. Slide off the battery compartmentcover and remove existing battery. Insert thenew battery and replace the compartmentcover until it clicks into place.IMPORTANTThis equipment requires electricity to work.You will not be able to make any telephonecalls when the power fails.Alternative arrangements should be madefor access to emergency services in times ofpower failure.Safety• Only use the power supply included withthe product. Using an unauthorised powersupply will invalidate your guarantee andmay damage the telephone.• Use only the approved rechargeable batterysupplied. A spare rechargeable battery can bepurchased from TecHelp Information Line on1300 369 193 or your local electrical retailer.• Do not open the handset (except to replacethe handset battery) or the base. This couldexpose you to high voltages or other risks.Contact TecHelp Information Line on1300 369 193 for all repairs.• Radio signal transmitted between thehandset and base may cause interference tohearing aids.• It is recommended that advice from aqualified expert be sought before using thisproduct in the vicinity of emergency/intensivecare medical equipment.• Your product may interfere with otherelectrical equipment, e.g. TV and radio sets,clock/ alarms and computers if placed tooclose. It is recommended that you placeyour product at least one metre away fromsuch appliances to minimise any risk ofinterference.• Never dispose of batteries in a fire. There is aserious risk of explosion and/or the release ofhighly toxic chemicals.• Dispose of batteries as per local/staterequirements.52 53
General informationCleaningSimply clean the handset and base with adamp (not wet cloth, or an anti-static wipe).Never use household polish as this willdamage the product. Never use a dry cloth asthis may cause a static shock.Environmental• Do not expose to direct sunlight.• The product may heat up when thebatteries are being recharged or duringprolonged periods of use. This is normal.However, we recommend that to avoiddamage you do not place the product onantique/veneered wood.• Do not stand your product on carpets orother surfaces which generate fibres, or placeit in locations preventing the free flow of airover its surface.• Do not submerge any part of your productin water and do not use it in damp or humidconditions, such as bathrooms.• Do not expose your product to fire,explosive or other hazardous conditions.• There is a slight chance that your phonecould be damaged by an electrical storm.We recommend that you unplug the powerand telephone line cord from the base for theduration of the storm.<strong>Telstra</strong> accessories and replacementitemsFor a full range of accessories andreplacement items for <strong>Telstra</strong> products,please call TecHelp Information Line on1300 369 193.How many telephones can you have?All items of telephone equipment have aRinger Equivalence Number (REN), which isused to calculate the number of items whichmay be connected to any other telephoneline. Your <strong>Telstra</strong> <strong>9200</strong>/<strong>9200</strong>a has a REN of 0.1.A total REN of 3 is allowed, if the total RENof 3 is exceeded, the telephone may not ring.With different telephone types there is notguarantee of ringing, even when the REN isless than 3.Customer service & Product warrantyIMPORTANTPlease retain this booklet with your salesreceipt as proof of the date of purchaseCustomer ServiceIf you require assistance in operating thisproduct please call the TecHelp InformationLine on 1300 369 193 or contact us by e-mailat: tcpsupport_au@vtech.comIf you are trying to access a <strong>Telstra</strong> NetworkFeature and require assistance specificallyrelated to the network feature or would liketo subscribe to the feature, contact <strong>Telstra</strong> on132200 for residential customers or 132000 forbusiness customers.Product WarrantySubject to the conditions below, <strong>Telstra</strong>guarantees this product against any defect inmaterials or workmanship under conditionsof normal use for a period of 24 months fromdate of purchase. The benefits conferredby this warranty are in addition to otherwarranties and remedies that are impliedunder the Trade Practices Act and similarState and Territory laws (Statutory Rights).Subject to your Statutory Rights, the goodswill not be eligible for service under thiswarranty if:b. The defect was caused by an accident,misuse, abuse, improper installation oroperation, vermin infestation, lack ofreasonable care, unauthorised modification,loss of parts, tampering or attempted repairby a person not authorised by <strong>Telstra</strong>;orc. The product has been damaged bylightning or a mains power surge.To obtain service during the term of thiswarranty call the TecHelp Information Lineon 1300 369 193 or contact us by e-mail at:tcpsupport_au@vtech.comIf it is necessary to have the product serviced,the Customer Service Representative willinform you of the product return process.Please ensure that:a. You provide proof of purchase;b. Your product is suitably packaged;andc. You have included all components from theoriginal purchase.Subject to your Statutory Rights:a. Any claim under this warranty is limitedto the cost of repair or replacement of theproduct; anda. Proof of purchase cannot be provided; b. If the goods are found to be in sound54 55
Customer service & Product warrantyworking order by the authorised servicecentre, you may be charged a fee for serviceand for any other direct costs associated withhaving the product delivered for service.For your recordsDate of purchase:______________________________Place of purchase:______________________________Serial number:______________________________For guarantee purposes proof of purchase isrequired so please keep your receipt.56 57
58 59
www.telstra.com© COPYRIGHT 2009 <strong>Telstra</strong> Corporation LimitedThis work is copyright. All rights reserved. Other than forpurposes and subject to conditions prescribed under theCopyright Act, no part of it may in any form or by any means(electronic, mechanical, photo copying, microcopying,scanning, recording or otherwise) be reproduced, stored in aretrieval system or transmitted without prior permission from<strong>Telstra</strong> Corporation Limited ABN 33 051 775 556. Trade Mark of <strong>Telstra</strong> Corporation Limited® Registered Trade Mark of <strong>Telstra</strong> Corporation Limited