MOTIF-RACK CONTROL SETS and Beyond - Keyfax
MOTIF-RACK CONTROL SETS and Beyond - Keyfax
MOTIF-RACK CONTROL SETS and Beyond - Keyfax
You also want an ePaper? Increase the reach of your titles
YUMPU automatically turns print PDFs into web optimized ePapers that Google loves.
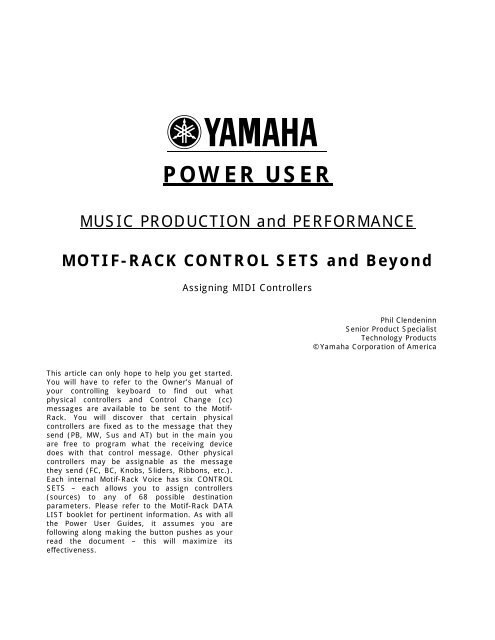
POWER USERMUSIC PRODUCTION <strong>and</strong> PERFORMANCE<strong>MOTIF</strong>-<strong>RACK</strong> <strong>CONTROL</strong> <strong>SETS</strong> <strong>and</strong> <strong>Beyond</strong>Assigning MIDI ControllersPhil ClendeninnSenior Product SpecialistTechnology Products©Yamaha Corporation of AmericaThis article can only hope to help you get started.You will have to refer to the Owner’s Manual ofyour controlling keyboard to find out whatphysical controllers <strong>and</strong> Control Change (cc)messages are available to be sent to the Motif-Rack. You will discover that certain physicalcontrollers are fixed as to the message that theysend (PB, MW, Sus <strong>and</strong> AT) but in the main youare free to program what the receiving devicedoes with that control message. Other physicalcontrollers may be assignable as the messagethey send (FC, BC, Knobs, Sliders, Ribbons, etc.).Each internal Motif-Rack Voice has six <strong>CONTROL</strong><strong>SETS</strong> – each allows you to assign controllers(sources) to any of 68 possible destinationparameters. Please refer to the Motif-Rack DATALIST booklet for pertinent information. As with allthe Power User Guides, it assumes you arefollowing along making the button pushes as yourread the document – this will maximize itseffectiveness.
have a send level control. When you highlight aprocessor you can hit the EFFECT button again todrop down a level <strong>and</strong> edit its parameters. Referto the DATA LIST booklet for a complete listing<strong>and</strong> translation of the Effect parameters. If youplan on mastering the Motif-Rack take the timefor familiarize yourself with the abbreviations (seethe Motif-Rack Glossary Power User).Now, on to the <strong>CONTROL</strong> <strong>SETS</strong>, which are foundin the EDIT area:• Press [EDIT]• If COMMON is not showing on the top lineof the screen, press [SHIFT]+[COMMON]to select VOICE COMMON parameters.• PAGE [] to the “CtrlSet” screenExplanation: “Set1ElmSw = (----)” translates intoControl Set number 1 Element Switch. You canactivate items per Element – an Element is asingle part of a Voice – a multi-sample in the caseof the internal sounds. In this particular B3 soundthere are 4 Elements. You can isolate an Elementby turning them on <strong>and</strong> off via the MUTE button –when the [MUTE/SEL] LED is lit, the lightedbuttons a row under it represent the Elements inthis Voice. You can isolate them to determine:Element 1 represents the 16-foot organ flute,Element 2 represents the Percussion sound,Element 3 represents the 5&1/3 organ flute(musical 5 th ), <strong>and</strong> Element 4 represents the 8-footorgan flute (Jimmy Smith’s favorite setting). Thefour dashes in parenthesis (----) next to theElement Switch means the parameter that isselected is not a “per Element” parameter but onethat will effect all Elements together. If noparenthesis appear you will be able to selectwhich of the Elements is to respond by turning theElement number on…it all depends on theparameter you select to control. When you look atthe list of available parameters in the DATA LISTbooklet you will see that some parameters are“ELM” (Element) parameters <strong>and</strong> others are “C”(COMMON) parameters. This happens to be aparameter all Elements will share in Common.“MW(01)” Modulation Wheel is assigned controller01 by convention. This is the SOURCE. SOURCEmeans the actual physical Controller. TheDESTINATION is the parameter being changed bythe Mod Wheel: “EF2:SpCtl” which translates toINSERTION EFFECT 2, Speed Control. The DEPTH3parameter determines the range of control thatthe MW will apply. A range set at +63 is themaximum. This affects how far you have to movea controller to get the desired effect <strong>and</strong> it effectsthe direction of effectiveness. In this case it is aswitch, i.e., FAST/SLOW – once you pass half wayyou flip the switch. The full scope of the Depthparameter is minus 64 through plus 63 (128steps). A positive number will determine thedirection of movement of the controller, with “+”numbers being the normal direction of movement.A Depth setting of +0 will negate all otherparameters in the Control Set. On most keyboardsthe modulation controller is a wheel <strong>and</strong> it is atminimum when down <strong>and</strong> at maximum whenmoved upward. Some keyboards have a springloadedmodulation controller, however. You willhave to determine what controller “gets the jobdone” for you. In this assignment a ModulationWheel makes sense because you can move it up<strong>and</strong> speed up the rotary speaker – this would beproblematic for a spring-loaded modulationcontroller because you would have to hold it therefor the ‘fast Leslie’ effect. 1What all this translates into is when you move theModulation Wheel or send Control Changemessage 001 from your sequencer, this particularorgan Voice will change the Speed Control ofINSERTION EFFECT 2 - which is the Dual RotarySpeaker2 effect type. Cool. If your controllersends Aftertouch, change the MW(01) to AT <strong>and</strong>press down on the keys. You have reassigned theSPEED <strong>CONTROL</strong> to Aftertouch (key pressure).This is how controller assignments are made.Again it is your choice as to whether or not thisworks for you as a player. You may find it difficultto maintain pressure on the keys to maintain the‘fast Leslie’ effect. If you have an assignable footcontroller you can select FC(04) as the speedswitch. If you highlight the SOURCE parameteryou can see that your choices are as follows:PB Pitch BendMW(01) Modulation WheelAT AftertouchFC2(04) Foot Control 2FS(88) Foot SwitchFC1(11) Foot Control 1BC(02) Breath ControlAS1(16) General Purpose Control 1AS2(17) General Purpose Control 2The numbers in parenthesis denote the currentassignment for that controller. These control1If your controlling keyboard has a spring-loadedcontroller, you may want to make a new assignment forthis function.
change (cc) numbers are customizable globally forVOICE mode. Pitch Bend <strong>and</strong> Aftertouch are theirown category of MIDI control message. The othercontrollers shown above are in their default (orfactory) settings. If, for whatever reason, youneed to change these you will find the parametersfor this in UTILITY. You must enter UTILITY fromVOICE mode:• Press UTILITY• Use the PAGE [] buttons to selectthe VOICE screenThe FS (Foot Switch) is a global assignment. Itwill apply for VOICE mode <strong>and</strong> MULTI mode. Youcan assign the Foot Switch to any controllernumber between 0~95 (except 0 <strong>and</strong> 32 whichare reserved for Bank Select). You can view thesetruly global assignments by paging to the rightone screen to the “CtrlAsn” screen. This is whereyou find the assignment for the arpeggiatorswitch, arpeggiator hold, ASA, ASB, <strong>and</strong> the FootSwitch. You can change the assignment as youlike.If you scroll DOWN on this screen you can viewthe assignments for Arpeggiator Output, AS1,AS2, BC, FC1 <strong>and</strong> FC2:Assignments made on this “VOICE” screen applyto VOICE mode. You can change the assignmentfor these according to the available controllers onyour keyboard controller. If, for example, youhave a Motif or S90 keyboard as a controller,these numbers <strong>and</strong> assignments conform to theavailable controllers.The Voice Mode “Arp Output Switch” will allow youto transmit the result of the arpeggiator to theMIDI output <strong>and</strong> you can select a MIDI channel forthe output of the arpeggiator. Remember anArpeggiator is set of prerecorded note <strong>and</strong>/orcontroller information that, when engaged,triggers a musical phrase without requiring thatthe player actually perform the phrase in realtime. Arpeggios can be up <strong>and</strong> down noteflourishes, finger picked guitar gestures, drumgrooves, flute trills, Cuban montuno pianogrooves, synth bass lines with filter sweeps, etc.In the Motif-Rack, the arpeggiator is not a just asimple note flourish: It can be a complete musicalgesture. Data generated in conjunction with theArpeggiator can be divided into the note data thatis input <strong>and</strong> the note data that is output. Thesecan be sent on different MIDI channels to theMIDI out.4If you do not have a physical control for each ofthese items do not worry. Some of these you canuse from within your sequence data. You don’tneed to change everything in real time with acontroller. Select those things that are importantfor your particular needs.What are ASA <strong>and</strong> ASB? And what are AS1 <strong>and</strong>AS2? They st<strong>and</strong> for Assignable A, Assignable B,Assignable 1 <strong>and</strong> Assignable 2. These are controldevices. You can select a control change number<strong>and</strong> a ‘destination’ parameter that will becontrolled by this number. The A <strong>and</strong> B are globalfor the Motif-Rack. How they are assigned will betrue in each program you recall. The Assignable 1<strong>and</strong> 2 devices are assignable to differentdestinations per program. By default (from thefactory) these are set as follows:ASA is set to control change number 18 (GeneralPurpose Control 3) <strong>and</strong> is set to change the “AEG-Dcy” or Amplitude Envelope Generator Decayparameter. When you assign a controller on yourcontrolling keyboard to send Control Change (cc)message #018 it can change a particular targetparameter in the Motif-Rack. The programmer’sselected the Decay portion of the AmplitudeEnvelope – the D in the ADSR (attack-decaysustain-release).Refer to the DATA LIST bookletfor other ASSIGN A/B DESTINATIONS.ASB is set to control change number 19 (GeneralPurpose Control 4) <strong>and</strong> is set to change the “AEG-
A similar scenario occurs when you assign a Voiceto Breath Control. You want the Voice to only payattention to (be biased to) input from the BreathController (cc #002). In such a case you will wantto reduce the overall volume of the Voice to 0 orthe Element level to 0. Which one you use willdepend on what it is you are trying to accomplish.This way the volume will be entirely determinedby the amount of breath pressure applied to theBC3. Note-ons do not turn the sound on alone.They must be accompanied by a burst of breath(air) pressure (cc #002) applied to themouthpiece. To use a Breath Controller with theMotif-Rack you controller keyboard must have aBC input.Note: It must be stated here that Breath Control worksbest of all on VL physical modeled voices (optionalPLG150-VL board). The Virtual Acoustic technology ismeant to respond perfectly with breath control input. Inthe technology there is an acoustically accurate changein timbre, pitch <strong>and</strong> amplitude in response to BC‘pressure’ control. The sound of VL will mimic the‘behavior’ of acoustic instruments. When controllingnon-VL type voices you might try assigning breathcontrol (BC) to vary the cutoff frequency of the filter. Insuch a case you may want to program the initial value ofthe filter to something other than zero – set to taste.This would require you to go into the Voice element level<strong>and</strong> set the cutoff frequency of the filter for eachelement you want to control. Each element can have adifferent filter type <strong>and</strong> cutoff/resonance. Each elementthat you add can have its own filter <strong>and</strong> filter settings.Note 2: When using Breath Control on sampled-basedVoices you may find it easier to just reassign the BC toExpression (cc011). Here’s how: from Voice mode press[UTILITY]/ PAGE to the VOICE screen/ Cursor down <strong>and</strong>set ‘BC Assign’ = 11[Expression]. This will allow you toimmediately control any internal sound with BC -without any further programming.After any <strong>and</strong> all Voice edit procedures you shouldSTORE your data (if it is worthy of keeping). Ifyou started editing a Preset or you started editingan USER Voice, simply point the Store proceduretowards a desirable USER location.• Press [ENTER] + [STORE]• Select a location in USER 1 or USER 2 <strong>and</strong>then press [SHIFT] + [ENTER] twice toexecute.Control Sets Summary: Each AWM2 (samplebased)Motif-Rack Voice has six Control Setupswhere a physical controller, called the Source, isassigned a specific controllable parameter, calledthe Destination (DEST) <strong>and</strong> a Depth value thatdetermines how much effect the controller willhave. This flexible system will enable the user totailor the sensitivity of each controller’smovement. Sensitivity or Depth refers to how faryou move the controller to get a desired result.This is an important setting because you want tobe comfortable working the controller while youperform.The destinations are listed in detail on page 68 ofthe Data List booklet that comes with your Motif-Rack. They include Voice volume, reverb send,chorus send, <strong>and</strong> some 26 Insertion Effectparameters (not all Insertion Effect parametersare real time controllable). And if you are dealingwith the internal sample-based Voices, an array ofCommon <strong>and</strong> individual Element parameters likefilter cutoff, resonance, LFO speed <strong>and</strong> depth,tuning, key on delay, Pan position, Pitch, Filter<strong>and</strong> Amplitude envelopes, etc., etc., can beprogrammed. PLG1, PLG2 <strong>and</strong> PLG3 Voices will beable to be assigned to volume, reverb send,chorus send <strong>and</strong> the 26 possible Insertion Effectparameters, only. Each PLG-series board mayhave controller sets of their own, depending onthe technology involved – these will beprogrammed in the PLG Voice Editor software.Note: PLG150-series Plug-in Voices will have adifferent set of Controller Set parameters in theMotif-Rack (explained below). Also, look in theVoice Editors for each PLUG-IN board foradditional assignable controller routings. Forexample, the PLG150-AN has some 8 AC(assignable control devices) <strong>and</strong> 15 Control Setsavailable. The PLG150-AN is based on the AN1xkeyboard synth, which had 8 front panelassignable knobs AC1-AC8. You can reassign asmany as you wish to your available physicalcontrollers. Each board will have a differentcontroller setup arrangement depending on thetechnology involved.PLG150 Series boards are single PARTboards <strong>and</strong> have two kinds of Voices: PLUG-IN<strong>and</strong> BOARD. PLUG-IN Voices are those that havebeen integrated with Motif-Rack Effects <strong>and</strong>Controller routings (discussed below). BOARDVoices are resident on the Board itself <strong>and</strong> havenot yet been integrated with the host parameters(hopefully you will customize them to your liking).Each board comes with a different amount ofBoard Voices for you to build PLUG-IN Voices <strong>and</strong>the Motif gives you 64 blank USER locations foryou to place them.Plug-in Voices will have two Control Setsthat allow you to route real time control toVolume, Reverb Send, Chorus Send <strong>and</strong> the realtime controllable Insertion Effect parameters. ThePLG150 Voices will have the following additionalController (CTL) screens that will let you routecontrollers to the following areas in addition totwo Control Set setups:8


