1 Basic conversion - P+S TECHNIK
1 Basic conversion - P+S TECHNIK
1 Basic conversion - P+S TECHNIK
You also want an ePaper? Increase the reach of your titles
YUMPU automatically turns print PDFs into web optimized ePapers that Google loves.
Art. Nr. # 26596 Version 1006<br />
Image Converter<br />
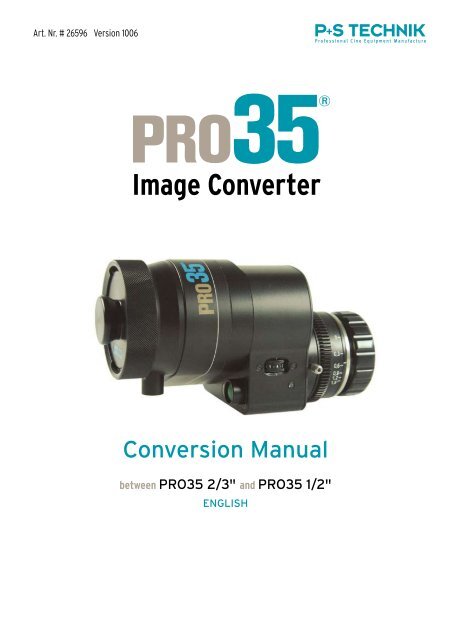
Conversion Manual<br />
between PRO35 2/3" and PRO35 1/2"<br />
ENGLISH
PRO 5 basic <strong>conversion</strong><br />
Conversion has to be done in a clean workspace for optic service by a trained technician.<br />
<strong>P+S</strong> Technik is not liable for damages from inappropriate handling. Professional optical service<br />
is offered by <strong>P+S</strong> Technik on request.<br />
1. Compare and check delivery content of the <strong>conversion</strong> kit with the drawings below<br />
#26597 - Lens adapter assembly (1/2" to 2/3")<br />
#26594<br />
Protection cover<br />
#19162<br />
Prism assembly<br />
*)<br />
#19161<br />
Cover<br />
#19040<br />
Lens adapter 2/3" #105330<br />
DIN84 cylinder head screw M2,5x6 (7x)<br />
#26593 - Lens adapter assembly (2/3" to 1/2")<br />
#26594<br />
Protection cover<br />
#19162<br />
Prism assembly<br />
#19040<br />
Lens adapter 1/2"<br />
*) #26595 - plastic plug (x3)<br />
For older units use plastic plugs for covering the screw hole (superglue)<br />
*)<br />
#19161<br />
Cover<br />
#105330<br />
DIN84 cylinder head screw M2,5x6 (7x)<br />
1<br />
<strong>Basic</strong> <strong>conversion</strong>
#26598 - Complete kit (1/2" to 2/3")<br />
#19186<br />
Lightweight support<br />
#22612<br />
Power supply cable<br />
#26597<br />
Lens adapter<br />
assembly 2/3"<br />
#26599 - Complete kit (2/3" to 1/2") #26593<br />
Lens adapter<br />
assembly 1/2"<br />
#25103<br />
Mounting kit Sony EX3
2. To prepare the new rear lens module remove 6 screws from the back cover plate. Leave the<br />
module in the cover to save it from dust and dirt.<br />
3. Remove 6 screws from the back cover plate of the PRO35. Remove the existing rear lens<br />
module and exchange it with the new one carefully.<br />
4. Fix the new rear module with 6 screws onto the PRO35. Fix the previous rear lens module<br />
with 6 screws in the cover to save it from dust and damage during storage<br />
5. Check the newly assembled PRO35 for correct flange focal distance and no cache shades.<br />
NOTE:<br />
For early units of the PRO35 2/3”, a thicker threaded ring was used to keep the cover glass of<br />
the target in place. This thicker ring might produce cache shades when used in ½” configuration.<br />
If you recognize oscillating cache shades after the <strong>conversion</strong> to PRO35 ½”, the following<br />
steps need to be do to exchange the thread ring against the thinner one in the delivery content<br />
of the ½” <strong>conversion</strong> kit. <strong>P+S</strong> <strong>TECHNIK</strong> strongly recommend that this service is done by a<br />
<strong>P+S</strong> <strong>TECHNIK</strong> trained technician and special tools are needed.<br />
5<br />
1<br />
<strong>Basic</strong> <strong>conversion</strong>
Exchange of threaded ring<br />
<strong>P+S</strong> <strong>TECHNIK</strong> strongly recommend that this service is done by a <strong>P+S</strong> <strong>TECHNIK</strong> trained technician<br />
and special tools are needed.<br />
1. Removal of the PL-Mount<br />
Remove PL-Mount stop screw and five more screws to remove the PL bayonet ring<br />
2. Remove the 6 PL Mount screws and remove the upper, metal ring<br />
3. Removal of the PL-Intermediate-Ring<br />
Remove the 4 screws from the PL-mount holder and slide PL-Mount upwards<br />
6
4. Removal of the threaded ring for the cover glass<br />
Unscrew the threaded ring with a special tool and remove the cover glass carefully (images<br />
show removed target module, removal is neither necessary nor recommended for the exchange<br />
of the threaded ring, to avoid dust and dirt coming inside the PRO35)<br />
5. Removal of the threaded ring for the ground glass<br />
Use the special tool (by <strong>P+S</strong> <strong>TECHNIK</strong>) and carefully remove the threaded ring<br />
ATTENTION! The ground glass is still in the in oscillating module!!! Take care to not<br />
scratch it and to not fall out!<br />
6. Screw the new threaded ring for the ground glass in using the special tool<br />
(by <strong>P+S</strong> <strong>TECHNIK</strong>)<br />
2<br />
Exchange of threaded ring
7. The cover glass and the front side of the ground glass can be cleaned now.<br />
If there is any dirt on the rear side of the ground glass, the complete movement (oscillating<br />
module) has to be removed, in this case continue with step 9.)<br />
8.) To re-assemble the adapter, please follow the steps 7. to 1. backwards<br />
[ 7. � 6. � 5. … � 1.)]<br />
9. Remove 6 screws from the back cover plate of the PRO35.<br />
Remove the existing rear lens module and safely store it until reassembling the PRO35.<br />
10. Disconnect the motor cable (the 4 pin-McMurdo-Connector).<br />
Be careful not to break the 2 side clamps<br />
11. Removing of the movement (oscillating module)<br />
If not happen already, follow step 1. till 3., then take of the belt (65mm) before opening the housing. It is<br />
not screwed on, but may be held tightly in position, therefore light toggling is necessary to remove it.
12. Remove the three Allen screws of the movement and take out the complete<br />
movement<br />
13. Take out the field lens by removing the four flat headed screws<br />
14. To re-assemble, please follow the steps backwards<br />
9<br />
2<br />
Exchange of threaded ring
<strong>P+S</strong> <strong>TECHNIK</strong> GmbH<br />
Professional Cine Equipment Manufacturer<br />
Postal address:<br />
Siemensstraße 12<br />
85521 Ottobrunn<br />
GERMANY<br />
Phone: +49 (0)89 45 09 82 30<br />
Fax: +49 (0)89 45 09 82 40<br />
Email contact:<br />
info@pstechnik.de<br />
Website:<br />
www.pstechnik.de<br />
+++ For an up to date listing of your local distributor or service centre please visit our<br />
website www.pstechnik.de. +++


