Advanced Navi Station INE-S900R - Alpine
Advanced Navi Station INE-S900R - Alpine
Advanced Navi Station INE-S900R - Alpine

You also want an ePaper? Increase the reach of your titles
YUMPU automatically turns print PDFs into web optimized ePapers that Google loves.
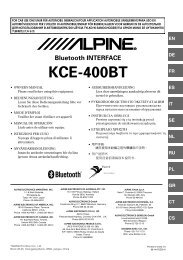
FOR CAR USE ONLY/NUR FÜR AUTOMOBIL GEBRAUCH/POUR APPLICATIONAUTOMOBILE UNIQUEMENT/PARA USO EN AUTOMÓVILES/SOLO PER L'UTILIZZO INAUTOMOBILE/ENDAST FÖR BILBRUK/ALLEEN VOOR GEBRUIK IN DE AUTO/ТОЛЬКО ДЛЯИСПОЛЬЗОВАНИЯ В АВТОМОБИЛЯХ/KUN TIL BRUG I BILEN<strong>Advanced</strong> <strong>Navi</strong> <strong>Station</strong><strong>INE</strong>-<strong>S900R</strong>QUICK REFERENCE GUIDEKurzanleitungGUIDE DE RÉFÉRENCE RAPIDEGUÍA DE REFERENCIA RÁPIDAGUIDA RAPIDASNABBGUIDESNELSTARTGIDSКРАТКОЕ СПРАВОЧНОЕ РУКОВОДСТВОLYNGUIDEENDEFRESITSENLRUDA
ContentsWARNING ...................................................................................................EN-2CAUTION ....................................................................................................EN-2Basic Operation...........................................................................................EN-3Menu screen Operation...............................................................................EN-4How to View a <strong>Navi</strong>gation Screen ...............................................................EN-5Find a Destination and Start Route Guidance.............................................EN-6TMC Operation............................................................................................EN-7Radio Operation ..........................................................................................EN-8DVD Operation ............................................................................................EN-8iPod/iPhone Operation (Optional) ...............................................................EN-9Hands-Free Phone Control .......................................................................EN-10Installation .................................................................................................EN-11Connections ..............................................................................................EN-13Specifi cations ............................................................................................EN-15ENIMPORTANTPlease record the serial number of your unit in the space provided below and keep it as apermanent record.STANDARD SERIAL NUMBER:ISO SERIAL NUMBER: ALINSTALLATION DATE:INSTALLATION TECHNICIAN:PLACE OF PURCHASE:WFor details on all functions, refer to the Owner’s Manual stored in the suppliedCD-ROM. (As it is data CD, the CD cannot be used for playing back music andimages on the player.) If required, an ALP<strong>INE</strong> dealer will readily provide youwith a print out of the Owner’s Manual contained in the CD-ROM.EN-1
Owner’s manualBasic OperationTouch operation, Location of Controls, Turning Power On or OffTouch operationYou can operate the system by using the touch panel on the screen.e Common touch switches: Returns to the previous screen. Depending on the function, this switch may canceloperations performed on the screen.: Closes the window.ENLocation of ControlsbuttonEjects a disc.Disc SlotRemote sensor / Dimmer sensor• Point the optional remote control transmitter(RUE-4202) towards the remote sensorwithin a range of 2 meters. Some operationsare possible in Audio/Visual mode.• Senses the brightness of the car interior./ (VOL.)Adjust the volume of theaudio/visual mode. buttonDisplays the Audio/Visualscreen. If the Audio/Visualscreen is already displayed,changes the source. buttonDisplays the currentposition screen.RESET switchThe system of this unit is reset.Front AUX Input TerminalConnects a portable music player,etc., to the system. buttonDisplays the Menu screen. buttonActivating this function will instantlylower the volume level by 20 dB.Turning Power On or Off1 Turn the ignition key to the ACC or ON position.The system is automatically turning on. After turning on, the opening screen appears fi rst, andthen the mode screen (map screen, radio screen, etc.) appears.2 To turn off the system, press and hold the button for more than 3seconds.The system is turned off.EN-3
Owner’s manualMenu screen OperationChanging between the NAVIGATION menu and the AUDIO/VISUAL menuPressing the button displays the Menu screen. You can perform various operationsfrom this screen, such as for navigating a destination search, displaying the AUDIO/VISUALmode main menu screen, or setting up the system.1 Press .The NAVIGATION menu screen or the AUDIO/VISUALmenu screen appears.2 To change to the NAVIGATION menu screen, touch the [NAVIGATION] tab. Tochange to the AUDIO/VISUAL menu screen, touch the [AUDIO/VISUAL] tab.Or, press to switch the MENU screen.For clock display setup andScreen off operation<strong>Navi</strong>gation switchesDisplays Setup screenDisplays Phone menuscreenNAVIGATION tabDisplays the Audio/Visual mode main menuAudio/Visual source isturned offDisplays Sound setupscreenDisplays Visual Setupscreen.AUDIO/VISUAL tabEN-4• The display of the AUDIO/VISUAL menu screen may differ, depending on the connected device or thesetting.
Owner’s manual How to View a <strong>Navi</strong>gation Screen, Guidance DisplayHow to View a <strong>Navi</strong>gation ScreenCurrent Vehicle Position MapNext street name displayManeuver arrowguidanceWindow displayFor simplifi ed operationsin the Audio/Visual mode.ENChanges map scaleCompass IconChanges map orientation.The Resize switchChanges the Windowdisplay to mini size andmagnifi es the Map to fullscreen.Destination information switchToggles between the Map screenand Maneuver list screen.Street name displayThe Destination switchDisplays the Destinationscreen.TMC indicatorPOI icon switchDisplays/hides the POI icons.Maneuver list screen3D Map screenGuidance Displaye Intersection guidancee Motorway junction guidance• Other than the screens above, the Roundabout guidance or Border guidance, etc. will be displayed.EN-5
Owner’s manualDisplaying the Destination Menu Screen, Finding by AddressFind a Destination and Start Route GuidanceThe following operation is an example that shows how to search the address and start routeguidance.1-1 Touch [ ] on the Map screen.The Destination screen is displayed.---------------------- or ----------------------1-2 Press and touch[Destination].The Destination screen is displayed.2 Touch [Address search].4 Touch the desired country (area) toselect, and then touch [OK].The Address search screen is displayed.5 The street/city name input table forthe destination appears. Input thecity (locality) name.When you touch [Street], input thestreet name.The Address search screen is displayed.3 Touch the Country switch on theSearch screen.6 Touch [OK].A list of street names will be displayed.7 Touch the desired street name.• If two or more addresses are found, theyare displayed in the list.• If the house number input table appears,input the house number.The Confi rm destination screen appears.8 Touch [OK].Country switchThe country (area) selection screenappears.The system will begin calculating theroute.9 The system starts the routeguidance.EN-6
TMC OperationOwner’s manualTMC Operation, RDS-TMC SetupSetting for the TMC pay serviceTMC pay services are available. Registrationwill be required for V-Trafi c (France) and RTL(Italy).Visit the <strong>Alpine</strong> Website (http://www.alpineeurope.com/)and select your country. On thewebsite, select “Support” and then follow theinstructions to complete the registration. Anactivate key will be issued. Input the activatekey on this system as follows:• For Traffi c Master (GB), the system has alreadybeen activated when it is shipped, so you do notneed to perform this operation.1 Press .2 Touch [Setup].3 Touch the [<strong>Navi</strong>] tab.4 Touch [TMC].5 Touch [Input] of V-Trafic (F) / RTL(I).7 Touch [OK].Activation is performed, and the systemreturns to the previous screen.TMC Information displaye TMC event icon map displayTMC event iconThe lines display the distancebetween traffic eventse Traffic Event informationdisplay1 Press .The NAVIGATION Menu screen isdisplayed.2 Touch [Traffic events].The Traffi c events screen is displayed.3 Touch an event in the list.EN6 Enter the activate key.The detailed information of the selectedevent is displayed.EN-7
Radio OperationOwner’s manualRadio, RDS OperationProgramme type displayChanging to next station in the PTYBand displayChanging to Radio Text modeFrequency/station namedisplayDisplays Select PTYscreenPreset switchDisplays the preset stationswith a short touch.Touch for at least 2 secondsto memorise the currentstation as a preset station.Decreases frequencyChanges tuning modeIncreases frequencyAF mode On/OffWindow displayFor displays in <strong>Navi</strong>gationmode.RDS indicatorSwitches bandMemorises stations automaticallyTraffic Information mode On/OffPRIORITY NEWS mode On/OffDVD OperationOwner’s manualDVDWhen you touch the DVD playback screen, the DVD operation screen is displayed. Thefollowing is an example of the DVD-VIDEO operation screen.Operation switch 1/2Hiding DVD operationscreenFinds the beginningof the current chapter/Finds a previous chapterwithin one second afterplayback starts/Fastreverseswhen touchedfor at least 2 secondsPause and PlaybackFinds the beginning of next chapter/Fast-forwards when touched for atleast 2 secondsStop PlaybackDVD information displayChanges operation switchDisplays Top Menu screenDisplays Menu screenOperation switch 2/2EN-8Switches Display ModesSwitches Audio TracksSwitches SubtitlesSwitches AngleChanges operation switchRepeat PlaybackDisplays Menu control screenDisplays numeric keypad inputmode screen
Owner’s manualiPod/iPhone Operation (Optional)iPod/iPhone (Optional)An iPod/iPhone can be connected to this unit by using the cable (KCU-451iV) (soldseparately). You can connect a video-capable iPod to enjoy not only Music but also Video fi les.Artwork displayFinds the beginning ofthe current file/Finds aprevious file within onesecond after playbackstarts/Fast-reverseswhen touched for atleast 2 secondsPause and PlaybackFinds the beginning of the nextfile/Fast-forwards when touchedfor at least 2 secondsFinds beginning of previous Playlist/Artist/Album/Podcast/Genre/ComposeriPod/iPhone informationdisplayWindow displayFor displays in <strong>Navi</strong>gationmode.Search screen display• Search for a desired fi le• Random Play (Shuffl eSongs)Repeat PlaybackRandom Play (Shuffle)Finds beginning of next Playlist/Artist/Album/Podcast/Genre/ComposerDirect switch mode iconENSearching for a desired MusicFileFor example: Searching by Artist name.4 Touch the desired album.1 Touch [ (Search)] duringplayback.2 Touch [Artists].3 Touch the desired artist.The Song search screen of the selectedalbum is displayed.Touching the desired album for at least2 seconds will play back all songs of theselected album.5 Touch the desired song.The selected song is played back.• Touching [All] will play back all songs inthe list.The Album search screen of the selectedartist is displayed.Touching the desired artist for at least 2seconds will play back all songs of theselected artist.EN-9
Hands-Free Phone ControlOwner’s manualHands-Free Phone ControlHands-free calls are possible when using an HFP (Hands-Free Profi le) compatible mobilephone with the <strong>INE</strong>-<strong>S900R</strong>.How to connect to a BLUETOOTHcompatible device (Pairing)1 Press .2 Touch [Phone].3 Touch [Device list].4 Touch [ (Search)].The system searches for nearbyBLUETOOTH compatible device andshows them in a list.5 Touch the mobile phone in the listyou intend to connect to.The system shows the product name anddevice passcode, and waits for the mobilephone to connect to the system. Proceedto step 7 with the system displaying theabove screen. For details on how tooperate the mobile phone, refer to theOwner’s Manual of the mobile phone.7 Operate the mobile phone to searchfor the device name of the system,then authenticate it.8 Enter the device passcode of thesystem into the mobile phone toregister the system.A message appears on the screen of thesystem, and the BLUETOOTH connectionis completed.• When you connect the mobile phonefor the fi rst time, the phone book issynchronised automatically.Answering a Call1 When you get an incoming call, thesystem rings the ringtone and theincoming call message appears.6 Touch [Connect].2 Touch [ ].The call starts.Hanging up the Telephone1 Touch [ ].The call fi nishes.EN-10
InstallationOwner’s manualInstallation• When making connections to the vehicle’selectrical system, be aware of the factory installedcomponents (e.g. on-board computer). Do nottap into these leads to provide power for thisunit. When connecting the <strong>INE</strong>-<strong>S900R</strong> to the fusebox, make sure the fuse for the intended circuitof the <strong>INE</strong>-<strong>S900R</strong> has the appropriate amperage.Failure to do so may result in damage to the unitand/or the vehicle. When in doubt, consult your<strong>Alpine</strong> dealer.• The main unit must be mounted within 40 degreesof the horizontal plane, back to front.0 - 40°2 Mount the GPS Antenna on the roof.Clean dust and oil at the mountinglocation and mount the GPS Antenna.eGPS AntennaMounting the GPS Antenna insidethe vehicle.1 Clean the mounting location.2 Put on the GPS Antenna mounting plate.3 Mount the GPS Antenna.EN1 Check accessory parts.GPS AntennaGPS Antenna(5 m)×5Cable clamp(for GPSantenna)AUX/PRE OUTconnector cableWaterproof pad(for GPSantenna)Microphone(3.5 m)External Interfaceconnector cableAntennamounting platePower cableUSB cableAntenna mounting plate3 Routing the GPS Antenna cable.1 Route the cable using the provided cableclamps to take up the cable’s slack.2 Use the waterproof pad when running thecable under one of the vehicle’s rubbergaskets.3 Attach the cable at several points usingthe remaining cable clamps.Waterproof padCable clampFace plate Mounting sleeve Rubber cap×6×2Hex bolt Bracket key Flush head screwScrew×8EN-11
4 Mounting the Microphone.MicrophoneCable clamp(Sold separately)5 Remove the mounting sleeve fromthe main unit.This unit6 When your vehicle has the Bracket,mount the long hex bolt onto therear panel of the <strong>INE</strong>-<strong>S900R</strong> andput the Rubber Cap on the hex bolt.If your vehicle does not have theMounting Support, reinforce thehead unit with the metal mountingstrap (not supplied). Secure theground lead of the unit to a cleanmetal spot using a screw (*1)already attached to the vehicle’schassis. Connect all the leads ofthe <strong>INE</strong>-<strong>S900R</strong> according to detailsdescribed in the CONNECTIONsection.ScrewHex Nut (M5)Bracket keys(Included)Slide the mounting sleeve into thedashboard and fix it with the metalshackles.MetalMountingStrap* 1 * 2Bolt StudMounting Sleeve(Included)DashboardGround LeadChassisThis unitBracketRubber Cap(Included)This unit• For the screw marked “*2”, use an appropriatescrew for the chosen mounting location.PressurePlates* 1Hex Bolt(Included)7 Slide the <strong>INE</strong>-<strong>S900R</strong> into thedashboard until it clicks. Thisensures that the unit is properlylocked and will not accidentallycome out from the dashboard.Face Plate* 2(Included)*1 If the installed mounting sleeve is loose inthe dashboard, the pressure plates may bebent slightly to remedy the problem.*2 The supplied face plate may be mounted.EN-12
ConnectionsOwner’s manualConnectionsConnections 1/2EN(Orange/White)(Yellow/Blue)(Green/White)ILLM(Orange)ACC(Red)(Black) GNDPOWER ANT(Blue)BATTERY(Yellow)15AREVERSPARKING BRAKESPEED SENSOR(Green)(Green/Black)(White)(White/Black)(Grey/Black)(Grey)(Violet/Black)(Violet)To plus side of the back lampsignal lead of the carTo the parking brake signalleadTo the vehicle speed pulselineTo the instrument clusterillumination leadTo power antennaIgnition keySpeakersRear LeftFront leftFront rightRear rightBattery(White/Brown)(Pink/Black)(Blue/White)(Black)(Black)REMOTE OUTIN-INTREMOS-CONTROL INMIC INTo remote input leadTo external unitTo amplifi erTo steering remote controlinterface boxTo MicrophoneAntennaISO Antenna PlugJASO Antenna Plug(Sold separately)To Vehicle Display InterfaceEN-13
Connections 2/2AUX OUTPUT(Yellow)(Red)(White)To Video Input terminalTo Audio Input terminals (R, L)AUX INPUT(Yellow)(Red)(White)To Video Output terminalTo Audio Output terminals (R, L)REAR OUTRCA Extension Cable(Sold separately)Amplifi erRear LeftRear RightFRONT OUTAmplifi erFront LeftFront RightSWLREAR CAMERASWRAmplifi erTo Rear cameraSubwoofersGPS AntennaiPod/iPhone(Sold separately)USB cable (Included)Connection kitKCU-451iV(Sold separately)EN-14
ALP<strong>INE</strong> ELECTRONICS MARKETING, INC.1-1-8 Nishi Gotanda,Shinagawa-ku, Tokyo 141-0031, JapanPhone 03-5496-8231ALP<strong>INE</strong> ELECTRONICS OF AMERICA, INC.19145 Gramercy Place, Torrance,California 90501, U.S.A.Phone 1-800-ALP<strong>INE</strong>-1 (1-800-257-4631)1-888-NAV-HELP (1-888-628-4357)ALP<strong>INE</strong> ELECTRONICS OF CANADA, INC.777 Supertest Road, Toronto,Ontario M3J 2M9, CanadaPhone 1-800-ALP<strong>INE</strong>-1 (1-800-257-4631)1-888-NAV-HELP (1-888-628-4357)ALP<strong>INE</strong> ELECTRONICS OF AUSTRALIA PTY. LTD.161-165 Princes Highway,Hallam Victoria 3803, AustraliaPhone 03-8787-1200ALP<strong>INE</strong> ELECTRONICS GmbHWilhelm-Wagenfeld-Str. 1-3,80807 München, GermanyPhone 089-32 42 640ALP<strong>INE</strong> ELECTRONICS OF U.K. LTD.<strong>Alpine</strong> House Fletchamstead Highway,Coventry CV4 9TW, U.K.Phone 0870-33 33 763ALP<strong>INE</strong> ELECTRONICS FRANCE S.A.R.L.(RCS PONTOISE B 338 101 280)98, Rue de la Belle Etoile, Z.I. Paris Nord Il,B.P. 50016, 95945 Roissy Charles de Gaulle Cedex,FrancePhone 01-48638989ALP<strong>INE</strong> ITALIA S.p.A.Viale C. Colombo 8, 20090 TrezzanoSul <strong>Navi</strong>glio (MI), ItalyPhone 02-484781ALP<strong>INE</strong> ELECTRONICS DE ESPANA, S.A.Portal de Gamarra 36, Pabellon, 3201013 Vitoria (Alava)-APDO 133, SpainPhone 945-283588ALP<strong>INE</strong> ELECTRONICS (BENELUX) GmbHLeuvensesteenweg 510-B6,1930 Zaventem, BelgiumPhone 02-725-13 15S/NO. LABELYAMAGATA (Wuxi) Co., Ltd.Block 28-25, Changjiang Nanlu, WND, jiangsu,ChinaDesigned by ALP<strong>INE</strong> JapanPrinted in China68-13530Z27-A (Y)