Delta HD Spindle Cartridge Rebuild Kit Installation Instructions
Delta HD Spindle Cartridge Rebuild Kit Installation Instructions
Delta HD Spindle Cartridge Rebuild Kit Installation Instructions
Create successful ePaper yourself
Turn your PDF publications into a flip-book with our unique Google optimized e-Paper software.
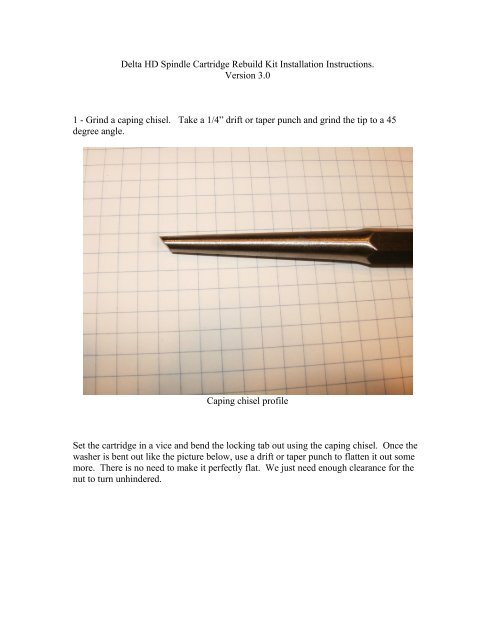
<strong>Delta</strong> <strong>HD</strong> <strong>Spindle</strong> <strong>Cartridge</strong> <strong>Rebuild</strong> <strong>Kit</strong> <strong>Installation</strong> <strong>Instructions</strong>.Version 3.01 - Grind a caping chisel. Take a 1/4” drift or taper punch and grind the tip to a 45degree angle.Caping chisel profileSet the cartridge in a vice and bend the locking tab out using the caping chisel. Once thewasher is bent out like the picture below, use a drift or taper punch to flatten it out somemore. There is no need to make it perfectly flat. We just need enough clearance for thenut to turn unhindered.
Caping chisel bending down the locking washer.Next clamp the pulley in a vice are remove the arbor nut.
Caping chisel in position to loosen woodruff keyRemove the spacer and clamp the cartridge body in the vice. Using a dowel rod andhammer, or bearing puller, remove the arbor from the cartridge.Now remove the bearing retaining nut using your caping chisel. Give the nut a goodsolid rap with a 1lb ball peen hammer. There is no reason to wail on it. Having said that,the nut is usually on there pretty tight so a good follow-through with the hammer isneeded. Don’t allow the caping chisel to touch the cartridge threads.
.Chisel in place to loosen retaining nutRemove the old bearings and spacers from the body. Take all of the pieces except the oldbearings and clean them using your favorite solvent. Mineral spirits is good as is naptha.Make sure all resin deposits are removed. .Identify the spacers in the kit.There are two new inter-bearing spacers, and two thin spacers. NOTE: The thin spacersare only used if your cartridge had extended race bearings.
The kitInstall one of the thin small spacer on the arbor and set it to one side.
Thin spacer installed on the arborRemove the new NTN 6204 bearings from their packaging and assemble the cartridge asfollows:Bearing, the two inter-bearing spacers, the second bearing, and lastly, the bearingretaining nut. In short, you put it together the same way it came apart.NOTE: When installing the bearings make sure that the “C3” etched into the race isfacing the threaded end.Below is a picture to help you find the C3 etching.
Place the assembly in the vise and tighten the retaining nut using the caping chisel. Makesure that the inner spacer is roughly centered before you tighten the retaining nut.Install the arbor and small spacer. It should be a light press fit in the new bearings. Alight press fit means you can push it in by hand. I have had to, on occasion, resort tolightly tapping the arbor in place using a piece of dowel rod and a 6oz hammer. Don’tforget to center the small inter-bearing spacer.
Assemble the remaining parts as follows:The arbor with spacer going in the cartridge.Narrow spacer then the original pulley spacer. Then install the woodruff key, pulley,locking washer, and arbor nut.
The spacers and woodruff key installed.Tighten the arbor nut and bend the locking washer over.


