Performing Uterine Evacuation with the Ipas MVA Plus ... - IAWG
Performing Uterine Evacuation with the Ipas MVA Plus ... - IAWG
Performing Uterine Evacuation with the Ipas MVA Plus ... - IAWG
- No tags were found...

You also want an ePaper? Increase the reach of your titles
YUMPU automatically turns print PDFs into web optimized ePapers that Google loves.
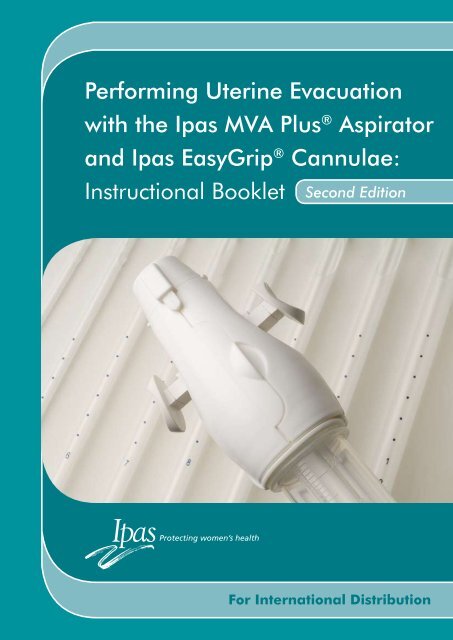
<strong>Performing</strong> <strong>Uterine</strong> <strong>Evacuation</strong><strong>with</strong> <strong>the</strong> <strong>Ipas</strong> <strong>MVA</strong> <strong>Plus</strong> ® Aspiratorand <strong>Ipas</strong> EasyGrip ® Cannulae:Instructional BookletSecond EditionProtecting women’s healthFor International Distribution
This booklet was prepared by <strong>the</strong> following <strong>Ipas</strong> staff and colleagues:Editors: Nina Frankel, Marian AbernathyReviewers: Joan Healy, Teresa McInerney, Laura CastlemanIllustrations adapted by Steve Edgerton from: <strong>Ipas</strong>. 1993. Manual vacuum aspiration guide for clinicians. Chapel Hill,NC, <strong>Ipas</strong>.Copyeditor: Kezia ScalesGraphic Designer: Rachel GoodwinThis booklet has been adapted from <strong>the</strong> <strong>Ipas</strong> instructional CD-ROM, <strong>Performing</strong> <strong>Uterine</strong> <strong>Evacuation</strong> <strong>with</strong> <strong>the</strong> <strong>Ipas</strong> <strong>MVA</strong><strong>Plus</strong> ® Aspirator and <strong>Ipas</strong> EasyGrip ® Cannulae: Instructional CD-ROM. To receive a copy of <strong>the</strong> CD-ROM, please contact<strong>Ipas</strong> Customer Service at <strong>the</strong> address found in <strong>the</strong> back of this booklet.Copyright 2004, 2007. <strong>Ipas</strong>. This publication may be reproduced in whole or in part, <strong>with</strong>out permission, provided <strong>the</strong>material is distributed free of charge and <strong>the</strong> publisher is acknowledged.Suggested citation: Frankel, Nina and Marian Abernathy, eds. 2007. <strong>Performing</strong> uterine evacuation <strong>with</strong> <strong>the</strong> <strong>Ipas</strong> <strong>MVA</strong><strong>Plus</strong> ® aspirator and <strong>Ipas</strong> EasyGrip ® cannulae: Instructional booklet, second edition. Chapel Hill, NC, <strong>Ipas</strong>.ISBN: 1-933095-21-0In <strong>the</strong> United States and a number of o<strong>the</strong>r countries, <strong>Ipas</strong> EasyGrip ® cannulae are labeled for singleuseand should be discarded after use. Where regulations allow, <strong>the</strong>se cannulae are reusable afterundergoing sterilization or high-level disinfection.
<strong>Performing</strong> <strong>Uterine</strong> <strong>Evacuation</strong><strong>with</strong> <strong>the</strong> <strong>Ipas</strong> <strong>MVA</strong> <strong>Plus</strong> ® Aspiratorand <strong>Ipas</strong> EasyGrip ® Cannulae:Instructional BookletProtecting women’s health<strong>Ipas</strong> is an international nongovernmental organization that has worked for over threedecades to reduce abortion-related deaths and injuries; increase women’s ability to exercise<strong>the</strong>ir sexual and reproductive rights; and improve access to reproductive health services,including safe abortion care. <strong>Ipas</strong>’s global and country programs include training,research, advocacy, distribution of reproductive health technologies and informationdissemination.<strong>Ipas</strong> manual vacuum aspiration (<strong>MVA</strong>) instruments are intended for use only by or under <strong>the</strong> supervisionof a physician. This booklet provides information and directions on <strong>the</strong> use of <strong>MVA</strong> for uterine evacuation. It isdesigned for clinicians who have current knowledge, skills and familiarity <strong>with</strong> intrauterine procedures as outlinedin <strong>the</strong> prerequisites. The information provided in this booklet, when used in conjunction <strong>with</strong> simulated practice andclinical practice <strong>with</strong> patients under <strong>the</strong> supervision of an experienced provider, prepares a clinician to perform uterineevacuation using <strong>MVA</strong>.This project has been supported, in part, by grants from <strong>the</strong> Program on Reproductive Health and Rights of <strong>the</strong> Open SocietyInstitute, <strong>the</strong> David and Lucile Packard Foundation, <strong>the</strong> Wallace Alexander Gerbode Foundation, <strong>the</strong> Mildred Wohlford Fund, <strong>the</strong>John D. and Ca<strong>the</strong>rine T. MacArthur Foundation, and <strong>the</strong> United Kingdom (UK) Department for International Development (DFID).<strong>Performing</strong> <strong>Uterine</strong> <strong>Evacuation</strong> <strong>with</strong> <strong>the</strong> <strong>Ipas</strong> <strong>MVA</strong> <strong>Plus</strong> ® Aspirator and <strong>Ipas</strong> EasyGrip ® Cannulae: Instructional Booklet
Table of ContentsSection A: The <strong>Ipas</strong> <strong>MVA</strong> <strong>Plus</strong> ® Aspirator and <strong>Ipas</strong> EasyGrip ® Cannulae . . . . . . . . . . . . . 3Section B: The <strong>MVA</strong> Procedure . . . . . . . . . . . . . . . . . . . . . . . . . . . . . . . . . . . . . . . . . . . 7Section C: Processing <strong>the</strong> <strong>Ipas</strong> <strong>MVA</strong> <strong>Plus</strong> ® Aspirator and <strong>Ipas</strong> EasyGrip ® Cannulae . . . 19Prerequisite skillsThis booklet is intended for use by clinicians knowledgeable about <strong>the</strong> anatomy,physiology and medical procedures of <strong>the</strong> uterus and skilled in transvaginal intrauterineprocedures such as sharp curettage, electric vacuum aspiration, IUD insertion,hysteroscopy and endometrial biopsy. Fur<strong>the</strong>r, users of this manual need to possess<strong>the</strong> following skills:e <strong>the</strong> ability to perform a pelvic examinatione <strong>the</strong> ability to accurately assess <strong>the</strong> size and position of a uterus, including assessingabnormalities and <strong>the</strong> duration of gestation in first-trimester pregnanciese <strong>the</strong> ability to diagnose and manage pregnancy-related conditions and <strong>the</strong> stagesof miscarriagee demonstrated knowledge of infection-prevention techniques including standard/universal precautions, no-touch technique and processing of medical instrumentse <strong>the</strong> ability to assess <strong>the</strong> need for and provide appropriate pain managemente <strong>the</strong> ability to diagnose, stabilize and refer patients <strong>with</strong> ectopic pregnancye <strong>the</strong> ability to manage complications of uterine evacuation and pain medications,including incomplete evacuation, cervical and abdominal injury, uterine perforation,uterine atony, infection, failed abortion, and medication-related reactions; or <strong>the</strong>ability to stabilize <strong>the</strong> patient and establish a mechanism for referral<strong>Performing</strong> <strong>Uterine</strong> <strong>Evacuation</strong> <strong>with</strong> <strong>the</strong> <strong>Ipas</strong> <strong>MVA</strong> <strong>Plus</strong> ® Aspirator and <strong>Ipas</strong> EasyGrip ® Cannulae: Instructional Booklet
Section A<strong>MVA</strong> InstrumentsThe <strong>Ipas</strong> <strong>MVA</strong> <strong>Plus</strong> ® Aspiratorand <strong>Ipas</strong> EasyGrip ® CannulaeManual vacuum aspiration,or <strong>MVA</strong>, is a safe andeffective technique for uterineevacuation whose low cost,simplicity and portability make it an especially valuable reproductive health technology. Morethan 30 years of clinical and programmatic research in over 100 countries has shown vacuumaspiration for uterine evacuation to be safer than, and as effective as, sharp curettage, alsoknown as dilatation and curettage, or D&C. Fur<strong>the</strong>r, <strong>MVA</strong> offered in outpatient settings has beenshown to reduce <strong>the</strong> cost and length of stay related to <strong>the</strong> procedure, when compared to sharpcurettage performed in an operating <strong>the</strong>atre. <strong>MVA</strong> is also an excellent alternative to electric suction,producing an equivalent vacuum (Greenslade et al., 1993; Baird & Flynn, 2001). The World HealthOrganization (WHO) recommends <strong>MVA</strong> as a preferred method for uterine evacuation, includingfor treatment of incomplete abortion and induced abortion in early pregnancy (WHO, 2003).Additionally, <strong>the</strong>re is substantial evidence that mid-level providers (for example, midwives, clinicalofficers, nurse practitioners, physician assistants) can perform <strong>MVA</strong> procedures safely and effectivelyin a range of health-care settings (Goldman, 2004; Warriner et al., 2006).This booklet provides an overview of <strong>the</strong> <strong>Ipas</strong> <strong>MVA</strong> <strong>Plus</strong> ® aspirator and <strong>Ipas</strong> EasyGrip ® cannulae.For information on o<strong>the</strong>r <strong>Ipas</strong> <strong>MVA</strong> instruments, such as <strong>the</strong> <strong>Ipas</strong> Single-Valve aspirator, please seeo<strong>the</strong>r <strong>Ipas</strong> instructional materials.<strong>Ipas</strong> <strong>MVA</strong> <strong>Plus</strong> ® aspiratorThe <strong>Ipas</strong> <strong>MVA</strong> <strong>Plus</strong> ® aspiratorprovides between 24-26 inches,or 609.6-660.4 millimeters, ofmercury. It is composed of <strong>the</strong>following parts:eeeea valve <strong>with</strong> a pair of buttonsthat control <strong>the</strong> vacuum, acap and a removable linera plunger <strong>with</strong> a plungerhandle and O-ringa 60cc cylinder for holdingevacuated uterine contents,<strong>with</strong> a retaining clip for <strong>the</strong>collar stopa collar stop<strong>Performing</strong> <strong>Uterine</strong> <strong>Evacuation</strong> <strong>with</strong> <strong>the</strong> <strong>Ipas</strong> <strong>MVA</strong> <strong>Plus</strong> ® Aspirator and <strong>Ipas</strong> EasyGrip ® Cannulae: Instructional Booklet
<strong>Ipas</strong> EasyGrip ® cannulae are available in sizes 4, 5, 6, 7, 8, 9, 10 and 12mm.• The smaller cannulae (4mm-8mm) have two opposing apertures.• The larger cannulae (9, 10 and 12mm) have a larger single scoop aperture.<strong>Ipas</strong> EasyGrip ® cannulae• Dots imprinted on each cannulaindicate <strong>the</strong> location of <strong>the</strong> mainaperture; <strong>the</strong> first dot is 6cmfrom <strong>the</strong> cannula tip and dots<strong>the</strong>reafter are spaced at <strong>the</strong>1cm interval.• Cannulae are semi-rigid andhave permanently attachedcolor-coded bases; separateadapters are not necessary.Wings on <strong>the</strong> bases aid inconnection to and disconnectionfrom <strong>the</strong> aspirator.Assembly and charging of <strong>the</strong> <strong>Ipas</strong> <strong>MVA</strong> <strong>Plus</strong> ® aspiratorIn preparation for use, <strong>the</strong> <strong>Ipas</strong> <strong>MVA</strong> <strong>Plus</strong> ® aspirator must first be charged <strong>with</strong> vacuum, as follows.12Open <strong>the</strong> valve andput <strong>the</strong> liner in placeby aligning <strong>the</strong> internalridges. Then close <strong>the</strong>valve until it snaps intoplace. Snap <strong>the</strong> cap intoplace on <strong>the</strong> end of <strong>the</strong>valve.Check <strong>the</strong> O-ring. Ensure that <strong>the</strong>O-ring is in <strong>the</strong> groove at <strong>the</strong> tip of<strong>the</strong> plunger. Lubricate it <strong>with</strong> a singledrop of lubricant, such as silicone,glycerol or liquid detergent. Never usepetroleum-based products, such aspetroleum jelly, on <strong>the</strong> O-ring as <strong>the</strong>ycan deteriorate <strong>the</strong> rubber. Take carenot to over-lubricate <strong>the</strong> O-ring.<strong>Performing</strong> <strong>Uterine</strong> <strong>Evacuation</strong> <strong>with</strong> <strong>the</strong> <strong>Ipas</strong> <strong>MVA</strong> <strong>Plus</strong> ® Aspirator and <strong>Ipas</strong> EasyGrip ® Cannulae: Instructional Booklet
34Assemble <strong>the</strong> aspirator by pushing <strong>the</strong>cylinder into <strong>the</strong> valve, making sure that <strong>the</strong>buttons are not engaged while doing so. Push<strong>the</strong> cylinder straight into <strong>the</strong> valve. Do not twist<strong>the</strong> cylinder or valve when assembling, as thiswill cause <strong>the</strong> liner to dislodge and may leadto device failure. Insert <strong>the</strong> plunger all <strong>the</strong> wayinto <strong>the</strong> cylinder. Make sure that <strong>the</strong> buttons,<strong>the</strong> wide side of <strong>the</strong> cylinder base and <strong>the</strong>plunger handle are in alignment. Then affix <strong>the</strong>collar stop by sliding it under <strong>the</strong> retaining clip andpushing its tabs into <strong>the</strong> holes at <strong>the</strong> base of<strong>the</strong> cylinder.Create <strong>the</strong> vacuum. First, push<strong>the</strong> buttons down and forwarduntil you feel <strong>the</strong>m snap into place.Then charge <strong>the</strong> aspirator bypulling back on <strong>the</strong> plunger until itsarms snap outward and catch on<strong>the</strong> wide sides of <strong>the</strong> cylinder base.With <strong>the</strong> arms in this position, <strong>the</strong>plunger will not move forward andvacuum is maintained. Incorrectpositioning of <strong>the</strong> arms could allow<strong>the</strong>m to slip back into <strong>the</strong> cylinder,possibly injecting <strong>the</strong> contents of<strong>the</strong> aspirator into <strong>the</strong> uterus. Nevergrasp <strong>the</strong> aspirator by <strong>the</strong> plungerarms.5Check<strong>the</strong> aspirator for vacuum retention before use. After establishing <strong>the</strong>vacuum, leave <strong>the</strong> aspirator for several minutes, <strong>the</strong>n release <strong>the</strong> buttons. You should heara rush of air into <strong>the</strong> aspirator, indicating <strong>the</strong>re is a vacuum. If you do not hear a rush ofair, displace <strong>the</strong> collar stop, <strong>with</strong>draw <strong>the</strong> plunger and check that <strong>the</strong> O-ring is properlyplaced, lubricated and free of damage and foreign bodies. Also check that <strong>the</strong> cylinder isfirmly placed in <strong>the</strong> valve. Then reinsert <strong>the</strong> plunger, reposition <strong>the</strong> collar stop and retest<strong>the</strong> aspirator. If vacuum is still not retained, <strong>the</strong> aspirator cannot be used. Discard it anduse ano<strong>the</strong>r aspirator.For more information on resolving loss of vacuum, see <strong>the</strong> <strong>Ipas</strong> instructional CD-ROM, <strong>Performing</strong> <strong>Uterine</strong><strong>Evacuation</strong> <strong>with</strong> <strong>the</strong> <strong>Ipas</strong> <strong>MVA</strong> <strong>Plus</strong> ® Aspirator and <strong>Ipas</strong> EasyGrip ® Cannulae.<strong>Performing</strong> <strong>Uterine</strong> <strong>Evacuation</strong> <strong>with</strong> <strong>the</strong> <strong>Ipas</strong> <strong>MVA</strong> <strong>Plus</strong> ® Aspirator and <strong>Ipas</strong> EasyGrip ® Cannulae: Instructional Booklet
Reuse of <strong>Ipas</strong> <strong>MVA</strong> instrumentsThe <strong>Ipas</strong> <strong>MVA</strong> <strong>Plus</strong> ® is a multiple-use device that requires high-level disinfection orsterilization prior to initial use and between patients. The aspirator does not need to be highleveldisinfected or sterile at <strong>the</strong> time of use. Cannulae must be high-level disinfected or sterileat <strong>the</strong> time of use.<strong>Ipas</strong> EasyGrip ® cannulae are sterilized <strong>with</strong> ethylene oxide after packaging and remain sterileuntil <strong>the</strong> stated expiration date, as long as <strong>the</strong> package is intact. Where regulations allow, <strong>Ipas</strong>EasyGrip ® cannulae are multiple-use devices.For step-by-step instrument processing information, see Section C.Replacement of <strong>Ipas</strong> <strong>MVA</strong> instrumentsThe <strong>Ipas</strong> <strong>MVA</strong> <strong>Plus</strong> ® aspirator should be discarded and replaced for any of <strong>the</strong> followingreasons:• The cylinder is brittle or cracked or mineral deposits inhibit plunger movement.• The valve parts are cracked, bent or broken.• The buttons are broken.• The plunger arms do not lock.• The aspirator no longer holds a vacuum.<strong>Ipas</strong> EasyGrip ® cannulae should be discarded and replaced for any of <strong>the</strong> following reasons:• The cannula has become brittle.• The cannula is cracked, twisted or bent, particularly at <strong>the</strong> aperture.• Cleaning <strong>the</strong> cannula does not completely remove tissue.<strong>Performing</strong> <strong>Uterine</strong> <strong>Evacuation</strong> <strong>with</strong> <strong>the</strong> <strong>Ipas</strong> <strong>MVA</strong> <strong>Plus</strong> ® Aspirator and <strong>Ipas</strong> EasyGrip ® Cannulae: Instructional Booklet
Section B<strong>Uterine</strong> evacuation <strong>with</strong> <strong>MVA</strong>Vacuum aspiration of uterine contents is a safe and effective clinical procedure. Studies reporteffectiveness rates of <strong>MVA</strong> procedures in excess of 98% <strong>with</strong> extremely low complication rates.O<strong>the</strong>r studies demonstrate that <strong>MVA</strong> achieves greater safety than sharp curettage. Fur<strong>the</strong>r, <strong>MVA</strong> canresult in cost savings when compared to sharp curettage (Greenslade et al., 1993; Baird & Flynn, 2001).Intended use/indicationsThe <strong>Ipas</strong> <strong>MVA</strong> <strong>Plus</strong> ® aspirator and <strong>Ipas</strong> EasyGrip ® cannulae up to 12mm are intended for uterineaspiration/uterine evacuation in obstetrics and gynecology patients. Clinical indications for uterineevacuation <strong>with</strong> this product include:• treatment of incomplete abortion for uterine sizes up to 12 weeks from <strong>the</strong> last menstrualperiod (LMP)• first-trimester abortion (menstrual regulation)• endometrial biopsyContraindicationsEndometrial biopsy should not be performed in cases of suspected pregnancy. There are no knowncontraindications for treatment of incomplete abortion for uterine sizes up to 12 weeks LMP or firsttrimesterabortion (menstrual regulation).PrecautionsBefore performing uterine evacuation or endometrial biopsy, any serious medical conditions thatare present should be addressed immediately. These include: shock, hemorrhage, cervical or pelvicinfection, sepsis, perforation, or abdominal injury, as may occur <strong>with</strong> incomplete or clandestineabortion. <strong>Uterine</strong> aspiration/uterine evacuation is often an important component of definitivemanagement in <strong>the</strong>se cases and once <strong>the</strong> patient is stabilized, <strong>the</strong> procedure should notbe delayed.History of blood dyscrasia may be a factor in <strong>the</strong> woman’s care. In cases where <strong>the</strong> woman has ahistory of a blood-clotting disorder, <strong>Ipas</strong> cannulae and aspirators should be used only <strong>with</strong> extremecaution and only in facilities where full emergency back-up care is available.WarningsThe <strong>MVA</strong> ProcedureAs <strong>with</strong> any invasive procedure, <strong>the</strong>re is a risk of infection to providers, patients and support staffthrough contact <strong>with</strong> contaminants. To minimize risk, universal precautions must be observed atall times. These include using appropriate barriers (such as gloves and masks), handling wastecarefully and taking precautions to prevent injuries.<strong>Uterine</strong> aspiration/uterine evacuation are procedures that involve minimal trauma to <strong>the</strong> uterusand cervix. However, in a small percentage of cases, one or more of <strong>the</strong> following complicationsmay occur during or after procedures: uterine or cervical injury or perforation, pelvic infection,vagal reaction, incomplete evacuation or acute hematometra. Some of <strong>the</strong>se conditions can lead tosecondary infertility, o<strong>the</strong>r serious injury or death.<strong>Performing</strong> <strong>Uterine</strong> <strong>Evacuation</strong> <strong>with</strong> <strong>the</strong> <strong>Ipas</strong> <strong>MVA</strong> <strong>Plus</strong> ® Aspirator and <strong>Ipas</strong> EasyGrip ® Cannulae: Instructional Booklet
Before <strong>the</strong> procedureBefore beginning <strong>the</strong> <strong>MVA</strong> procedure, <strong>the</strong> provider must address <strong>the</strong> following aspects of patientcare: clinical assessment, counseling, pain management, voluntary informed consent, infectionprevention and a management plan for complications.Clinical assessmentA complete clinical assessment, including general history, pelvic exam, sizing and positioning of<strong>the</strong> uterus and a psycho-social assessment, should be conducted. It is more likely that a woman<strong>with</strong> an incomplete abortion will present <strong>with</strong> existing complications than will a woman comingin for an induced abortion. Therefore, women presenting for treatment of incomplete abortionor abortion complications (postabortion care) need to be assessed <strong>with</strong> particular care before<strong>the</strong> <strong>MVA</strong> procedure is performed. If signs of infection, trauma, foreign bodies or laceration areseen, <strong>the</strong>y should be managed according to facility protocols and local medical standards.CounselingHigh-quality counseling provides <strong>the</strong> woman <strong>with</strong> emotional support while contributing to <strong>the</strong>effectiveness of <strong>the</strong> procedure.Pain managementMedication for pain management should always be offered (WHO, 2003). Generally,paracervical block, analgesia and/or mild sedation and verbal reassurance are sufficient for <strong>the</strong>woman’s comfort during <strong>the</strong> procedure.Voluntary informed consentObtained in writing or verbally, voluntary informed consent ensures that <strong>the</strong> womanunderstands, and is in agreement <strong>with</strong>, her proposed treatment plan, including its benefits, risksand alternatives.Infection preventionWhen providing uterine-evacuation procedures, measures should be taken to prevent <strong>the</strong>introduction or spread of infection and disease.Basics of infection prevention• Wash hands immediately before and after every patient contact.• Consider all blood and body fluids from all patients to be potentially infectious.• Use personal protective barriers (gloves, gowns, face protection, shoes) when contact<strong>with</strong> blood or o<strong>the</strong>r body fluids is expected.• Avoid skin punctures, especially when handling needles.• Use No-Touch Technique: The tip of <strong>the</strong> cannula, or tip of any o<strong>the</strong>r instrument thatenters <strong>the</strong> uterus, should never touch nonsterile surfaces (including <strong>the</strong> vaginal walls)prior to insertion.Complications managementWhile rare, complications are possible <strong>with</strong> <strong>MVA</strong> procedures and back-up plans formanagement or referral are necessary.For step-by-step information on <strong>the</strong>se topics, see <strong>the</strong> <strong>Ipas</strong> instructional CD-ROM, <strong>Performing</strong> <strong>Uterine</strong> <strong>Evacuation</strong><strong>with</strong> <strong>the</strong> <strong>Ipas</strong> <strong>MVA</strong> <strong>Plus</strong>® Aspirator and <strong>Ipas</strong> EasyGrip ® Cannulae.<strong>Performing</strong> <strong>Uterine</strong> <strong>Evacuation</strong> <strong>with</strong> <strong>the</strong> <strong>Ipas</strong> <strong>MVA</strong> <strong>Plus</strong> ® Aspirator and <strong>Ipas</strong> EasyGrip ® Cannulae: Instructional Booklet
Preparing for <strong>the</strong> procedure1Ensure that all necessaryequipment and supplies areavailable.2Select appropriate <strong>Ipas</strong> EasyGrip ®cannulae. It is advisable to havecannulae of several sizes available.Using a cannula that is too small may result inretained tissue or loss of suction. While <strong>the</strong> sizeof cannula used depends, to some extent, onprovider preference, <strong>the</strong> range of suggestedsizes relative to uterine size is listed in Table 1.Table 1Range of cannula size relative to uterine size<strong>Uterine</strong> size inweeks LMPSuggestedcannula sizes4–6 weeks 4–7mm7–9 weeks 5–10mm9–12 weeks 8–12mm3Inspect instruments. Ensure that<strong>the</strong> aspirator holds a vacuum. Discardaspirators <strong>with</strong> visible cracks or defectsand those that do not hold a vacuum.For more information, see Section A.4Charge <strong>the</strong> aspirator. For step-bystepinstructions on creating a vacuum,see Section A. If vacuum is not retained,check <strong>the</strong> O-ring and lubricate ifnecessary. If vacuum is still not retained, discardand use ano<strong>the</strong>r aspirator.No-Touch TechniqueThe parts of instruments that enter <strong>the</strong> uterusshould not touch objects or surfaces that arenot sterile, including vaginal walls, before beinginserted. This is known as no-touch technique.Recommended equipment and supplies:• Private area in which to providecounseling and procedure• Procedure table• Strong light• Chair/stool• Covering for patient privacy• Clean water• Detergent or soap• Cotton swabs• <strong>MVA</strong> instruments: aspirator, cannulaeof various sizes, and silicone or o<strong>the</strong>rsuitable lubricant• Tenaculum• Speculum• Sponge forceps or uterine-packingforceps• Mechanical dilators (if not usingcannulae for this purpose)• Personal protective barriers, such asgloves and face protection• Betadine® or o<strong>the</strong>r nonalcoholantiseptic• Pain medications: analgesics andanxiolytics• Paracervical block supplies: anes<strong>the</strong>tic(0.5% or 1.0% Lidocaine) <strong>with</strong>outepinephrine and a 5, 10 or 20mlsyringe <strong>with</strong> 21- or 22-gauge (or finer)regular or spinal needle• Tissue inspection supplies: strainer,clear bowl, light source, forceps andwater• Agents and equipment for sterilizationor HLD for instrument processing• Supplies and equipment for <strong>the</strong>management of emergencies:intravenous infusion set and fluids(or a mechanism for stabilizationand referral)<strong>Performing</strong> <strong>Uterine</strong> <strong>Evacuation</strong> <strong>with</strong> <strong>the</strong> <strong>Ipas</strong> <strong>MVA</strong> <strong>Plus</strong> ® Aspirator and <strong>Ipas</strong> EasyGrip ® Cannulae: Instructional Booklet
<strong>Performing</strong> <strong>the</strong> procedureThe <strong>MVA</strong> procedure can be started once all instruments and supplies are ready and <strong>the</strong> woman isprepared and has given her consent to start.For detailed information on each of <strong>the</strong> following steps, see <strong>the</strong> <strong>Ipas</strong> instructional CD-ROM, <strong>Performing</strong> <strong>Uterine</strong><strong>Evacuation</strong> <strong>with</strong> <strong>the</strong> <strong>Ipas</strong> <strong>MVA</strong> <strong>Plus</strong> ® Aspirator and <strong>Ipas</strong> EasyGrip ® Cannulae.1Confirm findings of initial examination through bimanual exam, watching for anysigns of infection and treating promptly according to protocols.234Implement pain-management plan.Perform cervical antiseptic prep.Perform paracervical block, if necessary.5Place tenaculum and apply gentle traction if not already done <strong>with</strong> paracervicalblock.6Dilate cervix, if necessary.• Cervical dilatation is necessary when <strong>the</strong> cervical canal will not allow passage of acannula appropriate to <strong>the</strong> uterine size.• When required, dilatation should be done gently <strong>with</strong> progressively larger cannulae ortapered mechanical dilators, taking care not to traumatize <strong>the</strong> cervix.• Misoprostol can also be used to ripen <strong>the</strong> cervix.10 <strong>Performing</strong> <strong>Uterine</strong> <strong>Evacuation</strong> <strong>with</strong> <strong>the</strong> <strong>Ipas</strong> <strong>MVA</strong> <strong>Plus</strong> ® Aspirator and <strong>Ipas</strong> EasyGrip ® Cannulae: Instructional Booklet
7Suction uterine contents.• Gently introduce cannula just past <strong>the</strong> internal os. Alternatively, slowly push <strong>the</strong>cannula into <strong>the</strong> uterine cavity until it touches <strong>the</strong> fundus, <strong>the</strong>n <strong>with</strong>draw it slightly.Rotate <strong>the</strong> cannula <strong>with</strong> gentle pressure to help ease insertion.• Do not insert <strong>the</strong> cannula forcefully, as forceful movements may cause uterineperforation or damage to <strong>the</strong> cervix, pelvic organs or blood vessels.• Remain alert to signals that may indicate perforation throughout <strong>the</strong> procedureand stop suction immediately if <strong>the</strong>y appear.• Attach cannula to aspirator, holding <strong>the</strong> tenaculum and end of <strong>the</strong> cannula in onehand and <strong>the</strong> aspirator in <strong>the</strong> o<strong>the</strong>r. Take care not to push <strong>the</strong> cannula fur<strong>the</strong>r into<strong>the</strong> uterus.• Release vacuum by pressing <strong>the</strong> buttons in; suction will begin immediately.<strong>Performing</strong> <strong>Uterine</strong> <strong>Evacuation</strong> <strong>with</strong> <strong>the</strong> <strong>Ipas</strong> <strong>MVA</strong> <strong>Plus</strong> ® Aspirator and <strong>Ipas</strong> EasyGrip ® Cannulae: Instructional Booklet 11
• Evacuate by slowly and gently rotating cannula and aspirator 180 degrees in eachdirection while using an in-and-out motion. Take care not to <strong>with</strong>draw <strong>the</strong> apertureof <strong>the</strong> cannula beyond <strong>the</strong> cervical os, as this will cause a loss of vacuum.• Blood and tissue will be visible through <strong>the</strong> cannula and in <strong>the</strong> aspirator cylinder.• If aspirator becomes full or vacuum is lost, disconnect it from <strong>the</strong> cannula and ei<strong>the</strong>rreplace it <strong>with</strong> ano<strong>the</strong>r aspirator or empty its contents into a receptacle and reattachit to <strong>the</strong> cannula. Never push aspirated contents through <strong>the</strong> cannula into<strong>the</strong> uterus.• If cannula removal is necessary during <strong>the</strong> procedure: Stabilize <strong>the</strong> cannula bygrasping it at <strong>the</strong> base <strong>with</strong> one hand and holding it steady; <strong>with</strong> <strong>the</strong> o<strong>the</strong>r hand,hold <strong>the</strong> aspirator by <strong>the</strong> valve body, rotate <strong>the</strong> aspirator and gently separate it from<strong>the</strong> cannula. To insert <strong>the</strong> cannula, hold <strong>the</strong> aspirator by <strong>the</strong> valve body (not <strong>the</strong>cylinder), push <strong>the</strong> cannula base in firmly, twisting slightly if necessary.• Check for signs of completion:• Red or pink foam <strong>with</strong>out tissue passes through <strong>the</strong> cannula;• Gritty sensation as <strong>the</strong> cannula passes over <strong>the</strong> surface of <strong>the</strong> evacuated uterus;• The uterus contracts around <strong>the</strong> cannula;• The woman feels increased cramping when <strong>the</strong> uterus is empty, indicatingcontraction.12 <strong>Performing</strong> <strong>Uterine</strong> <strong>Evacuation</strong> <strong>with</strong> <strong>the</strong> <strong>Ipas</strong> <strong>MVA</strong> <strong>Plus</strong> ® Aspirator and <strong>Ipas</strong> EasyGrip ® Cannulae: Instructional Booklet
• When <strong>the</strong> procedure is finished, depress <strong>the</strong> buttons and disconnect <strong>the</strong> cannulafrom <strong>the</strong> aspirator. Alternatively, <strong>with</strong>draw <strong>the</strong> cannula and aspirator toge<strong>the</strong>r<strong>with</strong>out depressing <strong>the</strong> buttons.8Inspect aspirated tissue for quantity and presence or absence of products ofconception (POC). Empty <strong>the</strong> contents of <strong>the</strong> aspirator into an appropriate container byensuring <strong>the</strong> cannula is detached, releasing <strong>the</strong> buttons, squeezing <strong>the</strong> plunger armsand pushing <strong>the</strong> plunger fully into <strong>the</strong> cylinder. Keep instruments available in casere-aspiration is necessary. Inspecting aspirated tissue is extremely important since itindicates whe<strong>the</strong>r <strong>the</strong> evacuation was complete or whe<strong>the</strong>r <strong>the</strong>re is <strong>the</strong> possibility of anectopic or molar pregnancy.If no POC are seen, <strong>the</strong> possibility of ectopic pregnancy, incomplete abortion or acomplete spontaneous abortion should be considered.• If retained tissue is suspected, repeat <strong>the</strong> aspiration.• After determining that <strong>the</strong> procedure is complete, wipe away excess blood from <strong>the</strong>os and assess <strong>the</strong> quantity still coming from <strong>the</strong> uterus or elsewhere.• Ensure that bleeding is minimal.• Proceed <strong>with</strong> any concurrent procedures such as IUD insertion or tubal ligation,provided that prior informed consent was obtained and counseling was given.• Soak instruments. Until <strong>the</strong>y can be cleaned, all instruments that are to be reusedshould be kept wet. A solution such as 0.5% chlorine can be used.Post-procedure careMonitor <strong>the</strong> woman’s recovery. Have <strong>the</strong> woman rest in a comfortable position.Assess and respond sensitively to her emotional state. Monitor her until she has:• pulse and blood pressure that is normal for her• <strong>the</strong> ability to walk and drink fluids• normal bleeding and cramping<strong>Performing</strong> <strong>Uterine</strong> <strong>Evacuation</strong> <strong>with</strong> <strong>the</strong> <strong>Ipas</strong> <strong>MVA</strong> <strong>Plus</strong> ® Aspirator and <strong>Ipas</strong> EasyGrip ® Cannulae: Instructional Booklet 13
Provide post-procedure counseling and information. The postabortion period provides acritical opportunity to provide information on contraception, recovery, follow-up care, and o<strong>the</strong>rsexual and reproductive health issues. Women should be given detailed information regarding <strong>the</strong>following:Postabortion contraception• Women can become pregnant as soon as 10 days after <strong>the</strong> procedure.• Contraception can help prevent pregnancy.• Contraceptive counseling and <strong>the</strong> woman’s method of choice should ideally be providedbefore she leaves <strong>the</strong> clinic.HIV• Unprotected sex may have exposed her to HIV infection.• The earlier a woman knows her HIV status <strong>the</strong> better; if a woman is HIV-positive, she couldaccess care and support services that can prolong and increase <strong>the</strong> quality of her life.• Safer sexual practices, such as condom use, may reduce <strong>the</strong> risk of receiving ortransmitting HIV as well as o<strong>the</strong>r sexually transmitted infections.• Offer voluntary HIV counseling and testing, as well as referrals to local HIV/AIDS supportgroups.Instructions for care• instructions for taking medications• information about routine hygiene• information about resumption of sexual activity and contraception• signs and symptoms requiring emergency attention• where to seek emergency care, if needed• list of counseling and o<strong>the</strong>r available services• date, time and location of follow-up visitSigns of a normal recovery• Some uterine cramping can be expected over <strong>the</strong> next few days, similar to that of a normalmenstrual period.• Discomfort may be eased by mild analgesics, warm compress or bath.• Spotting and bleeding should not exceed normal menses.• A normal period should begin <strong>with</strong>in four to eight weeks.14 <strong>Performing</strong> <strong>Uterine</strong> <strong>Evacuation</strong> <strong>with</strong> <strong>the</strong> <strong>Ipas</strong> <strong>MVA</strong> <strong>Plus</strong> ® Aspirator and <strong>Ipas</strong> EasyGrip ® Cannulae: Instructional Booklet
Signs and symptoms requiring immediate care• fever, chills, nausea or vomiting for more than 24 hours• cramping for more than a few days• tenderness, pain or distention of <strong>the</strong> abdomen• heavy bleeding (more than normal menstrual bleeding)• foul-smelling vaginal discharge• delay in resumption of menstrual period by more than eight weeks• fainting or dizzinessSchedule follow-up care according to local protocols.For more information on post-procedure care, postabortion contraception and follow-up care, see <strong>the</strong> <strong>Ipas</strong> instructionalCD-ROM, <strong>Performing</strong> <strong>Uterine</strong> <strong>Evacuation</strong> <strong>with</strong> <strong>the</strong> <strong>Ipas</strong> <strong>MVA</strong> <strong>Plus</strong> ® Aspirator and <strong>Ipas</strong> EasyGrip ® Cannulae, or o<strong>the</strong>r<strong>Ipas</strong> training materials.Technical difficulties during <strong>the</strong> <strong>MVA</strong> procedureThe most common technical problem seen <strong>with</strong> <strong>MVA</strong> instruments is loss of vacuum. During most<strong>MVA</strong> procedures, <strong>the</strong> vacuum remains constant until <strong>the</strong> aspirator is approximately 80% or 50mlfull. However, a decrease in vacuum may occur before <strong>the</strong> aspiration is complete for severalreasons. There include:• The aspirator is full.• The cannula is <strong>with</strong>drawn past <strong>the</strong> external os.• The cannula becomes clogged.If <strong>the</strong> cylinder fills so that suction stops:• Depress <strong>the</strong> buttons.• Disconnect <strong>the</strong> aspirator from <strong>the</strong> cannula, leaving <strong>the</strong> cannula in place inside <strong>the</strong> uterus.• Empty <strong>the</strong> aspirator into a container by pressing <strong>the</strong> buttons and pushing <strong>the</strong> plunger into<strong>the</strong> cylinder.• Re-establish vacuum in <strong>the</strong> aspirator, reconnect to <strong>the</strong> cannula and resume <strong>the</strong> aspiration.Note: Many clinicians keep a second prepared aspirator on hand during <strong>the</strong> procedure andswitch aspirators if one becomes full.If <strong>the</strong> aperture of <strong>the</strong> cannula is <strong>with</strong>drawn from <strong>the</strong> uterus beyond <strong>the</strong> external os, remove<strong>the</strong> cannula, taking care not to contaminate it through contact <strong>with</strong> <strong>the</strong> vaginal walls or o<strong>the</strong>rnonsterile surfaces:• Detach <strong>the</strong> aspirator from <strong>the</strong> cannula, empty <strong>the</strong> aspirator, <strong>the</strong>n re-establish vacuum.• Reinsert <strong>the</strong> cannula if is has not been contaminated.• If contamination has occurred, insert ano<strong>the</strong>r sterile or HLD cannula.<strong>Performing</strong> <strong>Uterine</strong> <strong>Evacuation</strong> <strong>with</strong> <strong>the</strong> <strong>Ipas</strong> <strong>MVA</strong> <strong>Plus</strong> ® Aspirator and <strong>Ipas</strong> EasyGrip ® Cannulae: Instructional Booklet 15
• Reconnect <strong>the</strong> aspirator, release <strong>the</strong> vacuum and continue aspiration.If <strong>the</strong> cannula becomes clogged, a lack of tissue or bubbles flowing into <strong>the</strong> aspirator will benoted:• Ease <strong>the</strong> cannula back toward, but not through, <strong>the</strong> cervical os.If this does not unclog <strong>the</strong> cannula:• Depress <strong>the</strong> buttons and disconnect <strong>the</strong> cannula from <strong>the</strong> aspirator before removing from<strong>the</strong> uterus, or <strong>with</strong>draw <strong>the</strong> cannula <strong>with</strong>out depressing <strong>the</strong> buttons.• Remove tissue from <strong>the</strong> opening in <strong>the</strong> cannula using sterile/HLD forceps, taking care notto contaminate <strong>the</strong> cannula.• Reinsert <strong>the</strong> cannula using no-touch technique.• Reattach <strong>the</strong> aspirator and continue <strong>the</strong> procedure.Note: Never try to unclog <strong>the</strong> cannula by pushing <strong>the</strong> plunger back into <strong>the</strong> cylinder.O<strong>the</strong>r reasons why <strong>the</strong> aspirator might not hold a vacuum are:• incorrect assembly• a defective aspirator• <strong>the</strong> need for a larger cannula to create a tighter seal in <strong>the</strong> cervixWhat happens if…Buttons won’t engage• Check that <strong>the</strong> liner is not twisted.• Make sure that you push <strong>the</strong> buttons down and forward toward <strong>the</strong> lip of <strong>the</strong> aspirator.• Use enough force to click buttons into place.• Buttons must be pressed at <strong>the</strong> same time.Valve body won’t close• Make sure that <strong>the</strong> liner is in <strong>the</strong> correct position — that <strong>the</strong> internal ridges are aligned and<strong>the</strong> liner tabs fit into <strong>the</strong> notches of <strong>the</strong> valve body.• Make sure autoclaving temperature is 121°C/250°F.Plunger is hard to pull• Lubricate <strong>the</strong> O-ring <strong>with</strong> one drop of silicone or nonpetroleum-based oil, such asvegetable oil; rub <strong>the</strong> oil around <strong>the</strong> O-ring and move <strong>the</strong> plunger back and forth in <strong>the</strong>barrel.• Check for mineral deposits.oIf so, rinse <strong>with</strong> vinegar or soak in water and wash well to remove <strong>the</strong> mineraldeposits.16 <strong>Performing</strong> <strong>Uterine</strong> <strong>Evacuation</strong> <strong>with</strong> <strong>the</strong> <strong>Ipas</strong> <strong>MVA</strong> <strong>Plus</strong> ® Aspirator and <strong>Ipas</strong> EasyGrip ® Cannulae: Instructional Booklet
oBrush <strong>with</strong> a soft brush, if needed.• Check for build-up of debris on <strong>the</strong> O-ring and head of plunger from insufficient cleaning.ooIf so, use warm water and a residue-free detergent to remove build-up.A nonabrasive brush can be used to aid in build-up removal.• Check for worn or deteriorated O-ring. If condition is questionable, replace.• Check for use of a non-<strong>Ipas</strong> replacement O-ring.• Make sure autoclaving is not performed <strong>with</strong> plunger inside cylinder.• Make sure autoclave is set at 121°C/250°F. If condition persists, cold processing isrecommended.Plunger pulls out of <strong>the</strong> cylinder• Make sure that <strong>the</strong> collar stop is in place and <strong>the</strong> pins are fully engaged.Vacuum is not established• Remove <strong>the</strong> collar stop, <strong>with</strong>draw <strong>the</strong> plunger and check that <strong>the</strong> O-ring is free of damageor foreign material.• Make sure that <strong>the</strong> O-ring is properly lubricated and properly positioned in <strong>the</strong> groove on<strong>the</strong> plunger head.• Make sure <strong>the</strong> cylinder is firmly placed in <strong>the</strong> valve.• Make sure that <strong>the</strong> liner is not torn or damaged.• Make sure that <strong>the</strong> valve closes completely and is not warped.• Make sure O-ring was not replaced <strong>with</strong> one from a source o<strong>the</strong>r than <strong>Ipas</strong>.• Make sure that <strong>the</strong> buttons are locked into place before pulling <strong>the</strong> plunger back.Fluid path appears blocked• Open <strong>the</strong> valve body and check that <strong>the</strong> valve liner is not twisted.• Remove <strong>the</strong> valve liner and ensure that it is clean and intact.Mineral deposits appear to be building up in <strong>the</strong> cylinder or on <strong>the</strong> valve hinges• Soak <strong>the</strong> instrument briefly in vinegar and brush <strong>with</strong> a soft brush as needed; rinse <strong>with</strong>clean water.• If you cannot remove <strong>the</strong> deposits, replace <strong>the</strong> aspirator.The device becomes misshapen in <strong>the</strong> autoclave• Check that <strong>the</strong> temperature setting on <strong>the</strong> steam autoclave is at 121°C (250°F) and that <strong>the</strong>instrument is in <strong>the</strong> autoclave for 30 minutes at 106kPa (15lbs/in 2 ).• Do not use a “flash” (higher settings for shorter periods of time) setting.• Replace <strong>the</strong> aspirator is it has become misshapen.<strong>Performing</strong> <strong>Uterine</strong> <strong>Evacuation</strong> <strong>with</strong> <strong>the</strong> <strong>Ipas</strong> <strong>MVA</strong> <strong>Plus</strong> ® Aspirator and <strong>Ipas</strong> EasyGrip ® Cannulae: Instructional Booklet 17
Possible complicationsComplications are rare <strong>with</strong> <strong>MVA</strong> procedures on uterine sizes of less than 12 weeks LMP, particularlywhen performed by trained providers. Risks <strong>with</strong> <strong>MVA</strong> are significantly lower than those <strong>with</strong> sharpcurettage procedures and full-term delivery.Table 2 lists complications that may be seen during or after an <strong>MVA</strong> procedure. The risk ofcomplications increases <strong>with</strong> greater uterine size, although complications are rare. Some of <strong>the</strong>seconditions can lead to secondary infertility, serious injury or death. Providers of <strong>MVA</strong> proceduresshould also be aware that a vagal reaction (fainting) may occur.Table 2Possible complications in women undergoing <strong>MVA</strong> proceduresSigns and symptomsVaginal bleeding; uterus smaller than expected;less tissue than expected; abdominal pain; signsof infectionTorn or lacerated cervix; heavy vaginal bleeding;vaginal bleeding after evacuation; sudden excessivepain; rapid heart rate; falling blood pressure;instruments pass fur<strong>the</strong>r than expected; fat,bowel or omentum in aspirateVaginal bleeding; large, soft uterusFever; chills; foul-smelling discharge; lowerabdominal pain; prolonged vaginal bleeding;uterine tendernessPositive pregnancy test; continued signs ofpregnancy; no POC upon tissue inspectionRespiratory distress; rash; swollen face; metallictaste; ringing in ears; disorientation; seizures;slurred speechHard, enlarged, blood-filled uterus hours/daysafter <strong>the</strong> procedure; pelvic pain; scant vaginalbleedingInability of blood to clot; serosanguinous bleedingLess tissue than expected; difficult dilatationand cannula insertionDiagnosisIncomplete evacuation, retained tissueCervical or abdominal injury, uterineperforation<strong>Uterine</strong> atonyPelvic infectionFailed abortionMedication-related reactionAcute hematometraDisseminated intravascular coagulation (DIC)Asherman’s SyndromeFor more information, see <strong>the</strong> <strong>Ipas</strong> instructional CD-ROM, <strong>Performing</strong> <strong>Uterine</strong> <strong>Evacuation</strong> <strong>with</strong> <strong>the</strong> <strong>Ipas</strong> <strong>MVA</strong> <strong>Plus</strong>®Aspirator and <strong>Ipas</strong> EasyGrip ® Cannulae.18 <strong>Performing</strong> <strong>Uterine</strong> <strong>Evacuation</strong> <strong>with</strong> <strong>the</strong> <strong>Ipas</strong> <strong>MVA</strong> <strong>Plus</strong> ® Aspirator and <strong>Ipas</strong> EasyGrip ® Cannulae: Instructional Booklet
Section CThe removal of microorganismsfrom instruments to make <strong>the</strong>msafe for use on patients is known asinstrument processing. Standard (oruniversal) precautions for infectionprevention must always be followedwhen processing <strong>MVA</strong> and o<strong>the</strong>r medicalinstruments. This section covers <strong>the</strong> steps for processing <strong>the</strong> <strong>Ipas</strong> <strong>MVA</strong> <strong>Plus</strong> ® aspirator and <strong>Ipas</strong>EasyGrip ® cannulae: decontamination, soak, cleaning, sterilization or high-level disinfection (HLD),and storage.Decontamination soakFollowing <strong>the</strong> procedure, all <strong>MVA</strong> instrumentsthat are to be reused should be kept wetuntil cleaning; letting <strong>the</strong>m dry may makeit impossible to completely remove allcontaminants. A disinfectant, such as 0.5%chlorine solution can be used. Immerse <strong>the</strong>instruments completely, making sure to draw<strong>the</strong> solution inside both <strong>the</strong> cannula and <strong>the</strong>aspirator. Aspirators and adapters arenot safe to handle <strong>with</strong> bare hands untilclean.CleaningAfter <strong>the</strong> decontamination soak, <strong>the</strong> aspiratormust be disassembled for cleaning:• Pull <strong>the</strong> cylinder out of <strong>the</strong> valve.• Disassemble <strong>the</strong> valve by pressingdown on <strong>the</strong> cap-release tabs, <strong>with</strong><strong>the</strong> o<strong>the</strong>r hand, pull <strong>the</strong> cap off.• Place right thumb alongside <strong>the</strong> rightvalve button and left thumb on <strong>the</strong> valvelatch. With <strong>the</strong> left thumb, pull up and to <strong>the</strong>left on <strong>the</strong> valve latch while pushing downand out on <strong>the</strong> valve body <strong>with</strong> <strong>the</strong> rightthumb.• Disengage <strong>the</strong> collar stop by sliding itsideways under <strong>the</strong> retaining clip or removeProcessing <strong>the</strong> <strong>Ipas</strong> <strong>MVA</strong><strong>Plus</strong> ® aspirator and <strong>Ipas</strong>EasyGrip ® cannulae<strong>Performing</strong> <strong>Uterine</strong> <strong>Evacuation</strong> <strong>with</strong> <strong>the</strong> <strong>Ipas</strong> <strong>MVA</strong> <strong>Plus</strong> ® Aspirator and <strong>Ipas</strong> EasyGrip ® Cannulae: Instructional Booklet 19
it completely.• Pull <strong>the</strong> plunger completely out of <strong>the</strong> cylinder.• Displace <strong>the</strong> O-ring by squeezing its sides androlling it down into <strong>the</strong> groove below. Do not useany pointed or sharp objects to remove <strong>the</strong> O-ring.This could cause damage and prevent <strong>the</strong> devicefrom maintaining a vacuum.• Do not attempt to remove <strong>the</strong> base from <strong>Ipas</strong>EasyGrip ® cannulae.• Wash all instrument surfaces thoroughly in warm,water and detergent. Detergent is preferable to soap, which may leave a residue.• If tissue or dried bloodis trapped inside <strong>the</strong>cannula, flush it <strong>with</strong>water repeatedly or usea cotton-tipped probe orsoft cloth to remove it.• Ascertain that <strong>the</strong>apertures are clear ofvisible material.• If you are unable toremove all visible matterfrom inside <strong>the</strong> cannula,discard and replace it.• Clean <strong>the</strong> cylinder, plunger and valve pieces using a soft bristle brush. Do not use sharpobjects as <strong>the</strong>se can cause damage, preventing <strong>the</strong> instrument from maintaining vacuum.• Clean each piece until, upon careful inspection, no tissue or blood is visible. Holding <strong>the</strong>instrument parts up to a light source can help <strong>with</strong> this inspection.• Rinse each part thoroughly in clean water.20 <strong>Performing</strong> <strong>Uterine</strong> <strong>Evacuation</strong> <strong>with</strong> <strong>the</strong> <strong>Ipas</strong> <strong>MVA</strong> <strong>Plus</strong> ® Aspirator and <strong>Ipas</strong> EasyGrip ® Cannulae: Instructional Booklet
HLD or SterilizationAfter cleaning, <strong>the</strong> <strong>Ipas</strong> <strong>MVA</strong> <strong>Plus</strong> ® and <strong>Ipas</strong> EasyGrip ® cannulae must undergo high-leveldisinfection or sterilization between patients to remove contaminants. Devices are <strong>the</strong>n safe to usefor <strong>the</strong> next procedure. Aspirators do not need to remain high-level disinfected or sterile for <strong>the</strong> nextuse. Cannulae must be high-level disinfected or sterile at <strong>the</strong> time of use. The following is a list ofprocessing methods our devices will <strong>with</strong>stand.HLD in a 0.5% chlorine solution• After cleaning, items must be soaked for 20 minutes.• Completely immerse disassembled parts in a nonmetal container.• After processing, rinse all parts <strong>with</strong> boiled water.HLD by boiling• After cleaning, items must be boiled for 20 minutes.• Disassembled parts do not need to be fully immersed.• Cannulae may discolor <strong>with</strong>out affecting function.• Grasping hot cannulae may cause flattening. Let water cool before removing cannulaeand handle by <strong>the</strong> adapter/base end.HLD in Cidex ® OPA• After cleaning, items must be soaked for 12 minutes.• Completely immerse disassembled parts.• Discard solution 14 days or sooner as indicated by Cidex ® OPA solution test strips.• After processing, rinse all parts <strong>with</strong> boiled water.HLD or sterilize in Sporox ® II• After cleaning, items must be soaked for 30 minutes for HLD or 6 hours for sterilization.• Completely immerse disassembled parts.• Discard solution 21 days or sooner as indicated by results from Sporox ® test vials.• After processing, rinse all parts <strong>with</strong> boiled water for HLD or sterile water for sterilization.HLD or sterilization in a 2% glutaraldehyde solution, such as Cidex ®• After cleaning, items must be soaked for 20 minutes for HLD or 10 hours for sterilization.• Completely immerse disassembled parts.• Usually discard solution 14 days after mixing or sooner if solution becomes cloudy.• After processing, rinse all parts <strong>with</strong> boiled water for HLD or sterile water for sterilization.• For o<strong>the</strong>r glutaraldehyde solutions, follow manufacturers’ instructions<strong>Performing</strong> <strong>Uterine</strong> <strong>Evacuation</strong> <strong>with</strong> <strong>the</strong> <strong>Ipas</strong> <strong>MVA</strong> <strong>Plus</strong> ® Aspirator and <strong>Ipas</strong> EasyGrip ® Cannulae: Instructional Booklet 21
Sterilization using a steam autoclave121°C at 106 kPa · 250°F at 15 lbs/in² · 30 minutes• Package disassembled instruments by wrapping in paper or linen, and lay <strong>the</strong> packageflat along <strong>the</strong> side or bottom of <strong>the</strong> autoclave. <strong>Ipas</strong> EasyGrip ® cannulae, particularly <strong>the</strong>smaller sizes, may curve in steam autoclaves.• Steam must penetrate all surfaces. Parts should not touch and should be arranged soopenings are not obstructed, permitting drainage. The collar stop must be completelyremoved.• Do not use o<strong>the</strong>r autoclave settings. Specifically, do not use higher settings for shorterperiods of time (also known as “flash autoclaving”).• Bring to room temperature before use.Sterilization using <strong>the</strong> STERRAD ® 100S processor• <strong>Ipas</strong> <strong>MVA</strong> <strong>Plus</strong> ® aspirator only• Place disassembled instruments along <strong>with</strong> a chemical indicator strip in an approved trayor peel pouch.• Processing time is 55 minutes.Processing tips• When processing <strong>the</strong> aspirator <strong>with</strong> liquid agents, make sure <strong>the</strong> parts are rinsed thoroughlyin boiled/sterile water. When processing agents are allowed to dry on <strong>the</strong> devices, <strong>the</strong> plungerdoes not move easily in <strong>the</strong> cylinder. When chlorine is not rinsed sufficiently, it may also cause<strong>the</strong> valve hinges to wear prematurely.• When <strong>the</strong> cylinder becomes cloudy or pitted due to processing, soak <strong>the</strong> cylinder for a fewminutes in vinegar, <strong>the</strong>n clean <strong>the</strong> inside <strong>with</strong> a soft brush. Rinse in clean water.• Devices must be completely disassembled prior to cleaning. It is important to remove <strong>the</strong> O-ring from <strong>the</strong> plunger prior to cleaning and make sure lubricants are removed during cleaning.22 <strong>Performing</strong> <strong>Uterine</strong> <strong>Evacuation</strong> <strong>with</strong> <strong>the</strong> <strong>Ipas</strong> <strong>MVA</strong> <strong>Plus</strong> ® Aspirator and <strong>Ipas</strong> EasyGrip ® Cannulae: Instructional Booklet
Table 3Common methods of high-level disinfecting(HLD) or sterilizing <strong>the</strong> <strong>Ipas</strong> <strong>MVA</strong> <strong>Plus</strong> ®aspirator and <strong>Ipas</strong> EasyGrip ® cannulae<strong>Ipas</strong> <strong>MVA</strong> <strong>Plus</strong> ®aspirator<strong>Ipas</strong> EasyGrip ®cannulaeH I G H -L E V E L D I S I N F E C TS T E R I L I Z EChlorineYESYESBoilingYESYESCidex ® OPA YES YESGlutaraldehydeYESYESSporox ® IIYES YESSTERRAD ® YESNOSteam autoclaveYESYESGlutaraldehyde YES YESSporox ® II YES YES<strong>Performing</strong> <strong>Uterine</strong> <strong>Evacuation</strong> <strong>with</strong> <strong>the</strong> <strong>Ipas</strong> <strong>MVA</strong> <strong>Plus</strong> ® Aspirator and <strong>Ipas</strong> EasyGrip ® Cannulae: Instructional Booklet 23
Table 4Instructions for processing <strong>the</strong><strong>Ipas</strong> <strong>MVA</strong> <strong>Plus</strong> ® aspirator and<strong>Ipas</strong> EasyGrip ® cannulaeNOTE: After cleaning, <strong>the</strong> <strong>Ipas</strong> <strong>MVA</strong> <strong>Plus</strong> ® and<strong>Ipas</strong> EasyGrip ® cannulae must undergo highleveldisinfection or sterilization between patientsto remove contaminants. Devices are <strong>the</strong>n safeto use for <strong>the</strong> next procedure. Aspirators do notneed to remain high-level disinfected or sterilefor <strong>the</strong> next use. <strong>Ipas</strong> EasyGrip ® cannulae arereusable after processing where regulations allow.Cannulae must be high-level disinfected or sterileat <strong>the</strong> time of use.M E T H O D A G E N T T I M E P R E C A U T I O N SH I G H - L E V E L D I S I N F E C TChlorine*Dilute to 0.5%20 minutes Items must be fully immersed.Discard solution daily or soonerif solution becomes cloudy. Afterprocessing, rinse all parts <strong>with</strong>boiled water.Boiling water 20 minutes Items do not need to be fullyimmersed. Cannulae may discolor<strong>with</strong>out affecting function. Graspinghot cannulae may cause flattening.Let water cool before removingcannulae and handle by <strong>the</strong>adapter/base end.2% Glutaraldehyde*(Cidex ® )Follow manufacturer’sinstructions for mixingGlutaraldehyde*(o<strong>the</strong>r solutions)Follow manufacturer’sinstructions for mixingCidex ® OPA*Sporox ® II*20 minutes Items must be fully immersed.Discard solution 14 days aftermixing or sooner if solutionbecomes cloudy. Do not use below25ºC (77ºF). After processing, rinseall parts <strong>with</strong> boiled water.Followmanufacturer'sinstructionsItems must be fully immersed.Usually discard solution 14 daysafter mixing or sooner if solutionbecomes cloudy. After processing,rinse all parts <strong>with</strong> boiled water.12 minutes Items must be fully immersed.Discard solution 14 days or sooneras indicated by Cidex ® OPAsolution test strips. After processing,rinse all parts <strong>with</strong> boiled water.30 minutes Items must be fully immersed.Discard solution 21 days orsooner as indicated by results fromSporox ® test vials. After processing,rinse all parts <strong>with</strong> boiled water.24 <strong>Performing</strong> <strong>Uterine</strong> <strong>Evacuation</strong> <strong>with</strong> <strong>the</strong> <strong>Ipas</strong> <strong>MVA</strong> <strong>Plus</strong> ® Aspirator and <strong>Ipas</strong> EasyGrip ® Cannulae: Instructional Booklet
M E T H O D A G E N T T I M E P R E C A U T I O N SS T E R I L I Z ESteam autoclave*2% Glutaraldehyde*(Cidex ® )Follow manufacturer’sinstructions for mixing.Glutaraldehyde*(o<strong>the</strong>r solutions)Follow manufacturer’sinstructions for mixing.STERRAD ® 100Sprocessor(<strong>Ipas</strong> <strong>MVA</strong> <strong>Plus</strong> ®aspirator only)Sterility isachieved at121ºC (250ºF)for 30 minutes<strong>with</strong> pressure of106kPa(15lbs/in²).Do not useo<strong>the</strong>r autoclavesettings.Specifically,do not usehigher settingsfor shorterperiods of time(known as “flashautoclaving”).Steam must penetrate all surfaces.Parts should not touch and shouldbe arranged so openings are notobstructed, permitting drainage.<strong>Ipas</strong> EasyGrip ® cannulae,particularly <strong>the</strong> smaller sizes, maycurve in steam autoclaves. Tominimize this, package <strong>the</strong>m and<strong>the</strong> disassembled aspirators bywrapping in paper or linen and layflat.The <strong>Ipas</strong> <strong>MVA</strong> <strong>Plus</strong> ® collar stopmust be completely removed (no<strong>the</strong>ld <strong>with</strong> <strong>the</strong> retaining clip).Bring to room temperature beforeuse.10 hours Items must be fully immersed.Discard solution 14 days aftermixing or sooner if solutionbecomes cloudy. Do not use below25ºC (77ºF). After processing, rinseall parts <strong>with</strong> sterile waterFollowmanufacturer’sinstructionsItems must be fully immersed.Usually discard solution 14 daysafter mixing or sooner if solutionbecomes cloudy. After processing,rinse all parts <strong>with</strong> sterile water.55 minutes Place <strong>the</strong> disassembled aspiratoralong <strong>with</strong> a chemical indicatorstrip in an approved tray or peelpack.Sporox ® II 6 hours Items must be fully immersed.Discard solution 21 days orsooner as indicated by results fromSporox ® test vials. After processing,rinse all parts <strong>with</strong> sterile water.* Liquid processing agents are hazardous substances. When processing instruments, take necessary precautions, suchas using personal protective equipment. Refer to <strong>the</strong> manufacturer’s safety instructions to establish safe use.<strong>Performing</strong> <strong>Uterine</strong> <strong>Evacuation</strong> <strong>with</strong> <strong>the</strong> <strong>Ipas</strong> <strong>MVA</strong> <strong>Plus</strong> ® Aspirator and <strong>Ipas</strong> EasyGrip ® Cannulae: Instructional Booklet 25
Storage of <strong>Ipas</strong> EasyGrip ® cannulaeOnce <strong>Ipas</strong> cannulae have been HLD or sterilized, this status must be maintained until <strong>the</strong>y are used,as cannulae must be HLD or sterile when inserted into <strong>the</strong> uterus. Cannulae should be kept in dry,HLD or sterile containers <strong>with</strong> tight-fitting lids and protectedfrom dust and o<strong>the</strong>r contaminants. Ideally, cannulae thathave been processed by wet methods like glutaraldehyde,chlorine or boiling should be reprocessed daily.• Keep only a small number of cannulae in eachcontainer.• Reprocess if not used <strong>with</strong>in two days.• Use HLD or sterile forceps to remove cannulae by<strong>the</strong>ir base ends.• Avoid touching o<strong>the</strong>r cannulae in <strong>the</strong> container.• Clean and process <strong>the</strong> transfer forceps and storagecontainer every day or two.Reassembly and storage of <strong>the</strong> <strong>Ipas</strong><strong>MVA</strong> <strong>Plus</strong> ® aspiratorThe <strong>Ipas</strong> <strong>MVA</strong> <strong>Plus</strong> ® aspirator must be HLD or sterilizedprior to first use and after each procedure. Aspirators do notneed to remain HLD or sterile for <strong>the</strong> next use. The <strong>Ipas</strong> <strong>MVA</strong><strong>Plus</strong> ® aspirator should be stored assembled, lubricated andready for use.• Reposition <strong>the</strong> O-ring.• Place one drop of silicone (or o<strong>the</strong>r nonpetroleumbasedlubricant) on <strong>the</strong> O-ring,spreading it <strong>with</strong> a fingertip.• Reassemble <strong>the</strong> valve by putting <strong>the</strong>liner in place, closing <strong>the</strong> valve andsnapping <strong>the</strong> cap into place.• Reassemble <strong>the</strong> aspirator and lubricateit by pushing <strong>the</strong> plunger in and outseveral times.• Keep in dry container <strong>with</strong> a tightfittinglid, protected from dust ando<strong>the</strong>r contaminants, in an environmentthat preserves <strong>the</strong> level of processingdesired.• Check <strong>the</strong> vacuum before each use.26 <strong>Performing</strong> <strong>Uterine</strong> <strong>Evacuation</strong> <strong>with</strong> <strong>the</strong> <strong>Ipas</strong> <strong>MVA</strong> <strong>Plus</strong> ® Aspirator and <strong>Ipas</strong> EasyGrip ® Cannulae: Instructional Booklet
ReferencesAbernathy, Marian and Nina Frankel, eds. 2003. <strong>Performing</strong> uterine evacuation <strong>with</strong> <strong>Ipas</strong> manualvacuum aspiration (<strong>MVA</strong>) instruments: Instructional booklet. Chapel Hill, NC, <strong>Ipas</strong>.Baird, Traci L. and Susan K. Flinn. 2001. Manual vacuum aspiration: Expanding women’s access tosafe abortion services. Chapel Hill, NC, <strong>Ipas</strong>.Frankel, Nina. 2004. <strong>Performing</strong> uterine evacuation <strong>with</strong> <strong>the</strong> <strong>Ipas</strong> <strong>MVA</strong> <strong>Plus</strong> ® aspirator and <strong>Ipas</strong>EasyGrip ® cannulae: Instructional CD-ROM. Chapel Hill, NC, <strong>Ipas</strong>.Frankel, Nina. 2003. <strong>Performing</strong> uterine evacuation <strong>with</strong> <strong>Ipas</strong> manual vacuum aspiration (<strong>MVA</strong>)instruments: Instructional CD-ROM. Chapel Hill, NC, <strong>Ipas</strong>.Goldman, Marlene B., Jane S. Occhiuto, Laura E. Peterson, Jane G. Zapka, and R. Hea<strong>the</strong>r Palmer.2004. Physician assistants as providers of surgically induced abortion services. American Journal ofPublic Health, 94(8).Greenslade, Forrest C., Ann H. Leonard, Janie Benson, Judith Winkler and Victoria L. Henderson.1993. Manual vacuum aspiration: A summary of clinical and programmatic experience worldwide.Carrboro, NC, <strong>Ipas</strong>.Warriner, I.K., O. Meirik, M. Hoffman, C. Morroni, J. Harries, N.T. My Huong, N.D. Vy, and A.H.Seuc. 2006. Rates of complications in first-trimester manual vacuum aspiration abortion done bydoctors and mid-level providers in South Africa and Vietnam: a randomized controlled equivalencetrial. Lancet, 368:1965-72.World Health Organization (WHO). 2003. Safe abortion: Technical and policy guidance for healthsystems. Geneva, WHO.Join <strong>the</strong> <strong>Ipas</strong> Trainers’ ForumThe <strong>Ipas</strong> Trainers’ Forum email distribution list is a means of facilitating communication andinformation-sharing between <strong>Ipas</strong> staff and trainers worldwide on relevant clinical and traininginformation, events and materials. To join this forum, please send your name, title, organization,country and preferred email address to training@ipas.org.Coming in 2008: <strong>Ipas</strong> will launch an e-learning site, <strong>Ipas</strong>University or www.<strong>Ipas</strong>U.org. Coursesrelating to <strong>the</strong> <strong>Ipas</strong> <strong>MVA</strong> <strong>Plus</strong> ® and its safe use will be available to learners to take at <strong>the</strong>irconvenience.<strong>Ipas</strong> quality and safety<strong>Ipas</strong> is committed to producing <strong>the</strong> highest-quality <strong>MVA</strong> instruments available. All <strong>Ipas</strong> <strong>MVA</strong>instruments (aspirators, cannulae and Denniston dilators) are listed <strong>with</strong> <strong>the</strong> United States Food andDrug Administration (USFDA). Our facility is registered <strong>with</strong> <strong>the</strong> FDA.<strong>Ipas</strong>’s quality system has been certified compliant for ISO 13485 (International Standards forMedical Devices) by <strong>the</strong> British Standards Institute (BSI). <strong>Ipas</strong> <strong>MVA</strong> instruments were awarded <strong>the</strong> CE<strong>Performing</strong> <strong>Uterine</strong> <strong>Evacuation</strong> <strong>with</strong> <strong>the</strong> <strong>Ipas</strong> <strong>MVA</strong> <strong>Plus</strong> ® Aspirator and <strong>Ipas</strong> EasyGrip ® Cannulae: Instructional Booklet 27
Mark per <strong>the</strong> Medical Device Directive 93/42/EEC. This certification is required for sale of productsin member countries of <strong>the</strong> European Union.<strong>Ipas</strong> will replace or repair, free of charge, ei<strong>the</strong>r directly or through its distributors worldwide, anyof our products that are found to be faulty by reason of poor craftsmanship or materials. Thisguarantee does not cover defects arising from accident, neglect or misuse.How to order <strong>Ipas</strong> productsIn addition to <strong>MVA</strong> aspirators and cannulae, <strong>Ipas</strong> products include Denniston plastic cervicaldilators and anatomical pelvic models for training.For information about ordering <strong>MVA</strong> instruments or o<strong>the</strong>r <strong>Ipas</strong> products, to receive informationabout <strong>the</strong> <strong>MVA</strong> distributor in your area or to become a distributor, please contact:<strong>Ipas</strong> Customer ServiceP.O. Box 5027Chapel Hill, NC 27514 USATel: 919.960.6453Fax: 919.918.2094Email: customerservice@ipas.orgwww.ipas.org
Printed on recycled paper.UTEEVAC+2-E08E-07-<strong>MVA</strong>-003Rev. 2 10/07