The complete book of self sufficiency by John Seymour - Survival ...
The complete book of self sufficiency by John Seymour - Survival ...
The complete book of self sufficiency by John Seymour - Survival ...

Create successful ePaper yourself
Turn your PDF publications into a flip-book with our unique Google optimized e-Paper software.
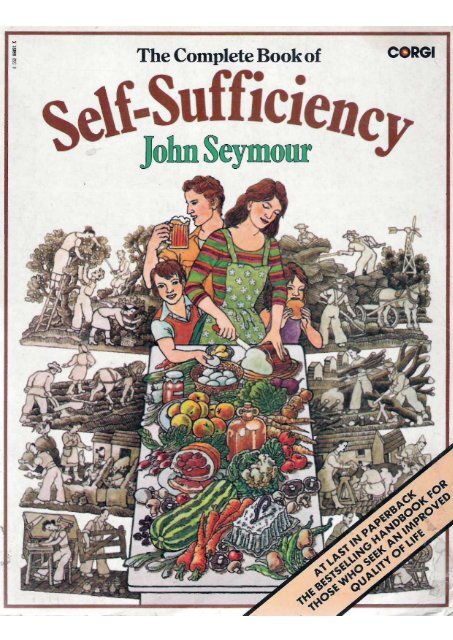
<strong>The</strong> Complete Book <strong>of</strong> Self-Sufficiency is a<strong>book</strong> for all seasons. Whether you live in townor country, on a farm or in a cottage, in a housewith a garden or a flat with a window-box,this <strong>book</strong> has something for you.If you want tobake your own bread, brew your own beer, make yourown cheese, pickle your own onions, this <strong>book</strong> willshow you how.If you want tomake hay, milk a cow, smoke a ham, design a dairy,convert to solar energy, this <strong>book</strong> will show you how.If you just want togrow your own vegetables, bottle your own fruit,dry your own herbs, this <strong>book</strong> will demonstrateexactly what to do.<strong>John</strong> <strong>Seymour</strong> was educated in England and Switzerland.After studying at an agricultural college, he worked on farmsin England for two years and then spent some ten years inAfrica where, among other things, he managed a sheep andcattle farm and acted as a livestock <strong>of</strong>ficer for a governmentveterinary department. After service in the King's AfricanRifles in the war, he travelled widely, lived on a fishing boat,wrote, broadcast, and studied the way <strong>of</strong> lite <strong>of</strong> rural people.<strong>The</strong>n, with his wife Sally, he settled down to running a <strong>self</strong>sufficientsmallholding in Suffolk, where he developed many,<strong>of</strong> the skills described in this <strong>book</strong>. Alter eight years in Suffolkthey moved to Pembrokeshire, and a 62-acre farm.<strong>John</strong> <strong>Seymour</strong> has now remarried, and the farm is beingdeveloped as a school in the arts <strong>of</strong> <strong>self</strong>-<strong>sufficiency</strong>. <strong>The</strong> aim<strong>of</strong> the people on the farm is to endeavour to bring <strong>self</strong>reliance,<strong>self</strong>-respect, people, culture and fun back to thecountryside.<strong>The</strong> Complete Book <strong>of</strong> Self Sufficiency is aninvaluable manual, packed with illustrations, andevery illustration tells its own story, shows youwhat you need and how to do it.<strong>John</strong> <strong>Seymour</strong> is everywhere recognised as theexpert in <strong>self</strong>-<strong>sufficiency</strong>. He has lived the life fortwenty years, and here he gathers all the expertisehe has acquired into one authoritative volume.<strong>The</strong> Complete Book <strong>of</strong> Self Sufficiency covers thewhole range <strong>of</strong> the <strong>self</strong>-sufficient spectrum. Itdescribes how, according to the size <strong>of</strong> your plot,you can plan to support your<strong>self</strong>, grow your owncrops, keep your own livestock. It helps you over allthe hurdles <strong>of</strong> growing and preserving your own food,whether you harvest straight from the field orfrom the garden, from animals or from the wild.<strong>John</strong> <strong>Seymour</strong> guides you through every stage <strong>of</strong>the cycle. He shows you how to plant your crop,tend it, harvest it, preserve it, process it, andfinally, how to cook it - in a variety <strong>of</strong> ways.He also includes chapters on how you canproduce your own energy, and how you can helpto re-vitalise many <strong>of</strong> the near-forgotten crafts.This is the first totally comprehensive <strong>book</strong> onsupporting your<strong>self</strong>. It is an encyclopaedia <strong>of</strong>practical advice on how to attain the skills andenjoy the fruits <strong>of</strong> the <strong>self</strong>-sufficient way <strong>of</strong> life.See inside back coverfor press comments about this <strong>book</strong>.
Caring for Fruit Trees 180Storing Fruit &. Vegetables 182Preserving 184Bottling 186Making Pickles & Chutneys 188Making Jams &. Syrups 190Making Wine 192Making Cider &. Vinegar 196Food from Animals<strong>The</strong> Living Farmyard 90<strong>The</strong> Cow 92Making Butter & Cream 98Making Cheese 102Beef 106Goats 108Pigs 110Sheep 118Rabbits 123Poultry 124Bees & Honey 130Food from the WildGame 198Fish &L Sea Foods 202Plants, Nuts &. Berries 208Crafts & SkillsBasketry 220Pottery 222Spinning Wool &. Cotton 226Dyeing &. Weaving 228Spinning Flax 230Curing & Tanning 231Making Bricks & Tiles 232Working in Stone 234Working in Metal 238Building & Thatching 240Working in Wood 242Wells, Ponds 6k Fish Farming 244Household Items 246<strong>The</strong> Ail-Purpose Furnace 248Food from the Garden<strong>The</strong> Food-Producing Garden 134<strong>The</strong> Gardener's Tools 138Sowing &L Planting 140Growing under Cover 142Protecting from Pests 144Vegetables 146Herbs 155Vegetables through the Year 160Winter 162Spring 164Early Summer 166Late Summer 168Autumn 170<strong>The</strong> Greenhouse 172S<strong>of</strong>t Fruit 174Tree Fruit 177Natural EnergySaving Energy 210Power from Water 212Heat from the Sun 214Power from the Wind 216Fuel from Waste 218Useful Addresses 250Useful Reading 251Index 252Acknowledgments 256
FOREWORDWe can do things for ourselves or we can pay others to do them for us. <strong>The</strong>se are the two "systems" that supportus; we might call them the "<strong>self</strong>-reliance system" and the "organization system". <strong>The</strong> former tends to breed <strong>self</strong>reliantmen and women; the latter tends to produce organization men and women. All existing societiessupport themselves <strong>by</strong> a mixture <strong>of</strong> the two systems; but the proportions Vary.In the modern world, during the last hundred years or so, there has been an enormous and historicallyunique shift: away from <strong>self</strong>-reliance and towards organization. As a result people are becoming less <strong>self</strong>-reliantand more dependent than has ever been seen in history. <strong>The</strong>y may claim to be more highly educated than anygeneration before them; but the fact remains that they cannot really do anything for themselves. <strong>The</strong>y dependutterly on vastly complex organizations, on fantastic machinery, on larger and larger money incomes. What ifthere is a hold-up, a breakdown, a strike, or unemployment? Does the state provide all that is needed? In somecases, yes; in other cases, no. Many people fall through the meshes <strong>of</strong> the safety net; and what then? <strong>The</strong>y suffer;they become dispirited, even despondent. Why can't they help themselves? Generally, the answer is onlytoo obvious: they would not know how to; they have never done it before and would not even knowwhere to begin.<strong>John</strong> <strong>Seymour</strong> can tell us how to help ourselves, and in this <strong>book</strong> he does tell us. He is one <strong>of</strong> the greatpioneers <strong>of</strong> <strong>self</strong>-<strong>sufficiency</strong>. Pioneers are not for imitation but for learning from. Should we all do what <strong>John</strong><strong>Seymour</strong> has done and is doing? Of course not. Total <strong>self</strong>-<strong>sufficiency</strong> is as unbalanced and ultimately stultifyingas total organization. <strong>The</strong> pioneers show us what can be done, and it is for every one <strong>of</strong> us to decide what shouldbe done, that is to say, what we should do to restore some kind <strong>of</strong> balance to our existence.Should I try to grow all the food my family and I require? If I tried to do so, I probably could do littleelse. And what about all the other things we need? Should I try to become a Jack <strong>of</strong> all trades? At most <strong>of</strong> thesetrades I would be pretty incompetent and horribly inefficient. But to grow or make some things <strong>by</strong> my<strong>self</strong>, formy<strong>self</strong>: what fun, what exhilaration, what liberation from any feelings <strong>of</strong> utter dependence on organizations!What is perhaps even more: what an education <strong>of</strong> the real person! To be in touch with actual processes <strong>of</strong>creation. <strong>The</strong> inborn creativity <strong>of</strong> people is no mean or accidental thing; neglect or disregard it, and it becomesan inner source <strong>of</strong> poison. It can destroy you and all your human relationships; on a mass scale, it can - nay, itinevitably will - destroy society.Contrariwise, nothing can stop the flowering <strong>of</strong> a society that manages to give free rein to the creativity<strong>of</strong> its people - all its people. This cannot be ordered and organized from the top. We cannot look to government,but only to ourselves, to bring about such a state <strong>of</strong> affairs. Nor should anyone <strong>of</strong> us go on "waiting forGodot" because Godot never comes. It is interesting to think <strong>of</strong> all the "Godots" modern humanity is waitingfor: this or that fantastic technical breakthrough; colossal new discoveries <strong>of</strong> oil and gasfields; automation sothat nobody - or hardly anybody - will have to lift a finger any more; government policies to solve all problemsonce and for all: multinational companies to make massive investments in the latest and best technology; orsimply "the next upturn <strong>of</strong> the economy".<strong>John</strong> <strong>Seymour</strong> has never been found "waiting for Godot". It is the essence <strong>of</strong> <strong>self</strong>-reliance that you startnow and don't wait for something to turn up.<strong>The</strong> technology behind <strong>John</strong> <strong>Seymour</strong>'s <strong>self</strong>-<strong>sufficiency</strong> is still quite rudimentary and can <strong>of</strong> coursebe improved. <strong>The</strong> greater the number <strong>of</strong> practitioners the faster will be the rate <strong>of</strong> improvement, that is, thecreation <strong>of</strong> technologies designed to lead people to <strong>self</strong>-reliance, work-enjoyment, creativity, and therefore:the good life. This <strong>book</strong> is a major step along that road, and I wholeheartedly commend it to you,DR. E.F. SCHUMACHER, CBE
<strong>The</strong> Way to Self - Sufficiency<strong>The</strong> first questions we must answer are: What is this <strong>book</strong>about? What is <strong>self</strong>-<strong>sufficiency</strong>, and why do it?Now <strong>self</strong>-<strong>sufficiency</strong> is not "going back" to some idealizedpast in which people grubbed for their food with primitiveimplements and burned each other for witchcraft. It is goingforward to a new and better sort <strong>of</strong> life, a life which ismore fun than the over-specialized round <strong>of</strong> <strong>of</strong>fice or factory,a life that brings challenge and the use <strong>of</strong> daily initiativeback to work, and variety, and occasional great success andoccasional a<strong>by</strong>smal failure. It means the acceptance <strong>of</strong><strong>complete</strong> responsibility for what you do or what you do notdo, and one <strong>of</strong> its greatest rewards is the joy that comesfrom seeing each job right through - from sowing your ownwheat to eating your own bread, from planting a field <strong>of</strong>pig food to slicing a side <strong>of</strong> bacon.Self-<strong>sufficiency</strong> does not mean "going back" to theacceptance <strong>of</strong> a lower standard <strong>of</strong> living. On the contrary,it is the striving for a higher standard <strong>of</strong> living, for foodwhich is fresh and organically-grown and good, for the goodlife in pleasant surroundings, for the health <strong>of</strong> body andpeace <strong>of</strong> mind which come with hard varied work in the openair, and for the satisfaction that comes from doing difficultand intricate jobs well and successfully.A further preoccupation <strong>of</strong> the <strong>self</strong>-sufficient personshould be the correct attitude to the land. If it ever comes topass that we have used up all, or most <strong>of</strong>, the oil on thisplanet, we will have to reconsider our attitude to our onlyreal and abiding asset - the land it<strong>self</strong>. We will one day haveto derive our sustenance from what the land, unaided <strong>by</strong> oilderivedchemicals, can produce. We may not wish in thefuture to maintain a standard <strong>of</strong> living that depends entirelyon elaborate and expensive equipment and machinery butwe will always want to maintain a high standard <strong>of</strong> livingin the things that really matter-good food, clothing, shelter,health, happiness, and fun with other people. <strong>The</strong> landcan support us, and it can do it without huge applications <strong>of</strong>artificial chemicals and manures and the use <strong>of</strong> expensivemachinery. But everyone who owns a piece <strong>of</strong> land shouldhusband that land as wisely, knowledgeably, and intensivelyas possible. <strong>The</strong> so-called-"<strong>self</strong>-supporter" sitting among ariot <strong>of</strong> docks and thistles talking philosophy ought to go backto town. He is not doing any good at all, and is occupyingland which should be occupied <strong>by</strong> somebody who canreally use it.Other forms <strong>of</strong> life, too, besides our own, should meritour consideration. Man should be a husbandman, not anexploiter. This planet is not exclusively for our own use.To destroy every form <strong>of</strong> life except such forms as areobviously directly <strong>of</strong> use to us is immoral, and ultimatelyquite possibly, will contribute to our own destruction. <strong>The</strong>kind <strong>of</strong> varied, carefully thought-out, husbandry <strong>of</strong> the <strong>self</strong>supportingholding fosters a great variety <strong>of</strong> life forms, andevery <strong>self</strong>-supporter will wish to leave some areas <strong>of</strong> truewilderness on his holding, where wild forms <strong>of</strong> life cancontinue to flourish undisturbed and in peace.And then there is the question <strong>of</strong> our relations withother people. Many people move from the cities back to theland precisely because they find city life, surrounded <strong>by</strong>people, too lonely. A <strong>self</strong>-supporter, living alone surrounded<strong>by</strong> giant commercial farms, may be lonely too; but if he hasother <strong>self</strong>-supporters near him he will be forced intocooperation with them and find him<strong>self</strong>, very quickly, part<strong>of</strong> a living and warm community. <strong>The</strong>re will be shared workin the fields, there will be relief milking and animal feedingduties when other people go on holiday, the sharing <strong>of</strong> childminding duties, there will be barn-raisings and cornshuckingsand celebrations <strong>of</strong> all kinds. This kind <strong>of</strong> sociallife is already beginning in those parts <strong>of</strong> Europe and NorthAmerica w-here <strong>self</strong>-supporting individuals, or communities,are becoming common.Good relations with the old indigenous population <strong>of</strong> thecountryside are important too. In my area, the old countrypeople are very sympathetic to the new "drop-ins'.' <strong>The</strong>yrejoice to see us reviving and preserving the old skills theypractised in their youth and they take pleasure in impartingthem to us. <strong>The</strong>y wax eloquent when they see the hams andflitches <strong>of</strong> bacon hung up in my chimney. "That's real bacon!"they say. "Better than the stuff we get in the shops. Mymother used to make that when I was a boy - we grew allour own food then" "Why don't you grow it now?" I ask."Ah - times have changed'.' Well, they are changing again.Self-<strong>sufficiency</strong> is not only for those who have five acres<strong>of</strong> their own country. <strong>The</strong> man in a city apartment wholearns how 7 to mend his own shoes is becoming, to someextent, <strong>self</strong>-sufficient. Not only does he save money, heincreases his own satisfaction and <strong>self</strong>-respect too. Man wasnot meant to be a one-job animal. We do not thrive as parts<strong>of</strong> a machine. We are intended <strong>by</strong> nature to be diverse, todo diverse things, to have many skills. <strong>The</strong> city person whobuys a sack <strong>of</strong> wheat from a farmer on a visit to the countrysideand grinds his own flour to make his own bread cutsout a lot <strong>of</strong> middle men and furthermore gets better bread.He gets good exercise turning the handle <strong>of</strong> the grindingmachine too. And any suburban gardener can dig up some <strong>of</strong>that useless lawn and put some <strong>of</strong> those dreary hardyperennials on the compost heap and grow his own cabbages.A good sized suburban garden can practically keep a family.I knew a woman who grew the finest outdoor tomatoes Iever saw in a window-box twelve storeys up in a tower-block.<strong>The</strong>y were too high up to get the blight.So good luck and long life to all <strong>self</strong> supporters! And ifevery reader <strong>of</strong> this <strong>book</strong> learns something useful to him thathe did not know before, and could not very easily find out,then I shall be happy and feel that the hard work that not onlyI as author have put into it, but also the hard-working anddedicated people who have done the very arduous anddifficult work <strong>of</strong> putting it together, and illustrating it, havenot worked in vain.
<strong>The</strong> Way to Self-SufficiencyMan & his Environment<strong>The</strong> true homesteader will seekto husband his land, not exploitit. He will wish to improve andmaintain the "heart" <strong>of</strong> his land,its fertility. He will learn <strong>by</strong>observing nature that growingone crop only, or keeping onespecies <strong>of</strong> animal only, on thesame piece <strong>of</strong> land is not in thenatural order <strong>of</strong> things. He willtherefore wish to nurture theanimals and plants on his landto ensure the survival <strong>of</strong> thewidest possible variety <strong>of</strong>natural forms. He will understandand encourage the interactionbetween them. He willeven leave some areas <strong>of</strong> wildernesson his land, where wildforms <strong>of</strong> life can flourish.Where he cultivates he willalways keep in mind the needs<strong>of</strong> his soil, considering eachanimal and each plant for whatbeneficial effect it might have onthe land. Above all, he willrealize that if he interferes withthe chain <strong>of</strong> life (<strong>of</strong> which he is apart) he does so at his peril, forhe cannot avoid disturbing anatural balance.
<strong>The</strong> Way to Self-Sufficiency
<strong>The</strong> Way to Self-SufficiencyTHE FIRST PRINCIPLES OFSELF-SUFFICIENCY<strong>The</strong> only way that the homesteader can farm his piece <strong>of</strong>land as well and intensively as possible is to institute somevariant <strong>of</strong> what was called "High Farming" in Europe in thelast century. This was a carefully worked out balance betweenanimals and plants, so that each fed the other: the plantsfeeding the animals directly, the animals feeding the soilwith their manure and the land feeding the plants. A variety<strong>of</strong> both animals and plants were rotated about the same landso that each species took what it needed out and put what ithad to contribute back, and the needs <strong>of</strong> the soil were keptuppermost always in the husbandman's mind. Each animaland crop was considered for what beneficial effect it mighthave on the soil.If the same crop is grown on a piece <strong>of</strong> land year afteryear the disease organisms that attack that crop will buildup in the area until they become uncontrollable. Natureabhors monoculture: any cursory inspection <strong>of</strong> a naturalplant and animal environment will reveal a great variety <strong>of</strong>species. If one species becomes too predominant some pestor disease is sure to develop to strike it down. Man hasmanaged to defy this law, to date, <strong>by</strong> the application <strong>of</strong>stronger and stronger chemical controls, but the pests(particularly the fast-evolving viruses) adapt very quicklyto withstand each new chemical and to date the chemisthas managed to keep only a short jump ahead <strong>of</strong> the disease.<strong>The</strong> new homesteader will wish to husband his land inaccordance with the principles <strong>of</strong> High Farming. He willhave to substitute the labour <strong>of</strong> his hands for importedchemicals and sophisticated machinery. He will have to usehis brain and his cunning to save the work <strong>of</strong> his hands.For instance, if he can get his animals to go out into hisfields and consume their share <strong>of</strong> his crops there, then hewill save him<strong>self</strong> the work <strong>of</strong> harvesting the crops for themand carrying them in. In other words, take the animals tothe crops, not the crops to the animals. So also, if he canget the animals to deposit their dung on his land, thenthis will save him the labour <strong>of</strong> carrying the dung outhim<strong>self</strong>. Thus the keeping <strong>of</strong> animals on limited free rangewill appeal to him: sheep can be "folded" on arable land(folding means penning animals on a small area <strong>of</strong> somefodder crop and moving the pen from time to time), chickenscan be housed in arks that can be moved over the landso as to distribute the hens' manure while allowing thehens to graze fresh grass, and pigs can be kept behindelectric fences which can also be easily moved. Thus thepigs harvest their food for themselves and also distributetheir own manure. (To say nothing <strong>of</strong> the fact that pigsare the finest free cultivators that were ever invented! <strong>The</strong>ywill clear your land, and plough it, and dung it, and harrowit, and leave it nearly ready for you to put your seed in,with no more labour to you than the occasional shifting <strong>of</strong>an electric fence.)Now the true husbandman will not keep the same species<strong>of</strong> animal on a piece <strong>of</strong> land too long, just as he will notgrow the same crop year after year in the same place. Hewill follow his young calves with his older cattle, his cattlewith sheep, his sheep with horses, while geese and otherpoultry either run free or are progressively moved over hisgrassland and arable (arable means land that gets ploughedand planted with crops as opposed to land that is grassall the time). All animals suffer from parasites and if youkeep one species on one piece <strong>of</strong> land for too long therewill be a build-up <strong>of</strong> parasites and disease organisms. As arule the parasites <strong>of</strong> one animal do not affect another andtherefore following one species with another over the landwill eliminate parasites.Also, the true husbandman will find that every enterpriseon his holding, if it is correctly planned, will interactbeneficially with every other. If he keeps cows their dungwill manure the land which will provide food, not only forthe cows, but for the humans and pigs also. <strong>The</strong> <strong>by</strong>-products<strong>of</strong> the milk <strong>of</strong> the cows (skimmed milk from butter makingand whey from cheese making) are a marvellous whole foodfor pigs and poultry. <strong>The</strong> dung from the pigs and poultryhelps grow the food for the cows. Chickens will scratchabout in the dung <strong>of</strong> other animals and will salvage anyundigested grain.All crop residues help to feed the appropriate animals -and such residues as not even the pigs can eat they willtread into the ground, and activate with their manure, andturn into the finest in situ compost without the husbandmanlifting a spade. All residues from slaughtered birds oranimals go either to feed the pigs, .or the sheep dogs, or toactivate the compost heap. Nothing is wasted. Nothing is anexpensive embarrassment to be taken away to pollute theenvironment. <strong>The</strong>re should be no need <strong>of</strong> a dustman on the<strong>self</strong>-sufficient holding. Even old newspapers can make litterfor pigs, or be composted. Anything that has to be burntmakes good potash for the land. Nothing is wasted- there isno "rubbish'.'But before the potential <strong>self</strong>-supporter embarks on thepursuit <strong>of</strong> "true husbandry" he should acquaint him<strong>self</strong>with some <strong>of</strong> the basic laws <strong>of</strong> nature, so that he can betterunderstand why certain things will happen on his holdingand why other things will not.THE FOOD CHAINLife on this planet has been likened to a pyramid: a pyramidwith an unbelievably wide base and a small apex.All life needs nitrogen, for it is one <strong>of</strong> the most essentialconstituents <strong>of</strong> living matter, but most creatures cannot usethe free, uncombined, nitrogen which makes up a great part<strong>of</strong> our atmosphere. <strong>The</strong> base <strong>of</strong> our biotic pyramid, therefore,is made up <strong>of</strong> the bacteria that live in the soil, sometimesin symbiosis with higher plants, and have the power <strong>of</strong> fixingnitrogen from the air. <strong>The</strong> number <strong>of</strong> these organisms in10
<strong>The</strong> Way to Self-Sufficiencythe soil is unimaginably great: suffice it to say that there aremillions in a speck <strong>of</strong> soil as big as a pin-head.On these, the basic and most essential <strong>of</strong> all forms <strong>of</strong> life,lives a vast host <strong>of</strong> microscopic animals. As we work up thepyramid, or the food chain whichever way we like to considerit, we find that each superimposed layer is far less in numberthan the layer it preys upon. On the higher plants grazethe herbivores. Every antelope, for example, must havemillions <strong>of</strong> grass plants to support him. On the herbivores"graze" the carnivores. And every lion must have hundreds<strong>of</strong> antelopes to support him. <strong>The</strong> true carnivores are rightat the apex <strong>of</strong> the biotic pyramid. Man is somewhere nearthe top but not at the top because he is an omnivore. He isone <strong>of</strong> those lucky animals that can subsist on a wide range<strong>of</strong> food: vegetable and animal.Up and down the chain, or up and down between thelayers <strong>of</strong> the pyramid, there is a vast complexity <strong>of</strong> interrelationships.<strong>The</strong>re are, for example, purely carnivorousmicro-organisms. <strong>The</strong>re are all kinds <strong>of</strong> parasitic andsaprophitic organisms: the former live on their hosts andsap their strength, the latter live in symbiosis, or in friendlycooperation, with other organisms, animal or vegetable.We have said that the carnivores are at the apex <strong>of</strong> the foodchain. Where in it stands a flea on a lion's back? Or a parasitein a lion's gut?And what about the bacterium that is specialised (and youcan bet there is one) to live inside the body <strong>of</strong> the lionflea? A system <strong>of</strong> such gargantuan complexity can best,perhaps, be understood <strong>by</strong> the utter simplification <strong>of</strong> thefamous verse:Little bugs have lesser bugs upon their backs to bite 'em,And lesser bugs have lesser bugs and so ad infinitum!This refers to parasitism alone <strong>of</strong> course, but it is noteworthythat all up and -down the pyramid everything isconsumed, eventually, <strong>by</strong> something else. And that includesus, unless we break the chain <strong>of</strong> life <strong>by</strong> the purely destructiveprocess <strong>of</strong> cremation.Now Man, the thinking monkey, has to interfere with thissystem (<strong>of</strong> which he should never forget that he is a part)but he does so at his peril. If we eliminate many carnivoresamong the larger mammals, the herbivores on which thesecarnivores preyed become overcrowded, overgraze, andcreate deserts. If, on the other hand, we eliminate too manyherbivores the herbage grows rank and out <strong>of</strong> control andgood pasture goes back to scrub and cannot, unless it iscleared, support many herbivores. If we eliminate everyspecies <strong>of</strong> herbivore except one the grazing is less efficientlygrazed. Thus sheep graze very close to the ground (they bitethe grass <strong>of</strong>f with their front teeth) while cows, which ripgrass up <strong>by</strong> wrapping their tongues round it, like long grass.<strong>The</strong> hills produce more and better sheep if cattle graze onthem too. It is up to Man the Husbandman to considervery carefully, and act very wisely, before he uses his powersto interfere with the rest <strong>of</strong> the biotic pyramid.Plants, too, exist in great variety in natural environmentsand for very good reasons. Different plants take differentthings out <strong>of</strong> the soil, and put different things back. Members<strong>of</strong> the pea-bean-and-clover family for example, have nitrogen-fixingbacteria in nodules on their roots. Thus they canfix their own nitrogen. But you can wipe the clovers out <strong>of</strong> apasture <strong>by</strong> applying artificial nitrogen. It is not that theclovers do not like the artificial nitrogen, but that you removethe "unfair advantage" that they had over the grasses (whichare not nitrogen-fixing) <strong>by</strong> supplying the latter with plenty<strong>of</strong> free nitrogen and, being naturally more vigorous than theclovers, they smother them out.It is obvious from observing nature that monoculture isnot in the natural order <strong>of</strong> things. We can only sustain aone-crop-only system <strong>by</strong> adding the elements that the cropneeds from the fertilizer bag and destroying all the crop'srivals and enemies with chemicals. If we wish to farm morein accordance with the laws and customs <strong>of</strong> nature we mustdiversify as much as we can, both with plants and animals.THE SOIL<strong>The</strong> basis <strong>of</strong> all life on Earth is, <strong>of</strong> course, the soil. But the soilthat we terrestrial animals have to draw our subsistence fromis the powdered rock that covers, fortunately for us, much<strong>of</strong> the land surface <strong>of</strong> the Earth. Some <strong>of</strong> this powder, orearth, was derived from the rock directly below it, some hasbeen carried down <strong>by</strong> water from rock somewhere above it,some (such as the famous loess soil <strong>of</strong> North America andChina) has been blown there <strong>by</strong> wind, and some draggedinto its present position <strong>by</strong> glaciers in one or other <strong>of</strong> theice ages. But however the soil got to where it is now, it wasoriginally pulverized from the rock <strong>by</strong> agencies <strong>of</strong> weather.Frost splits rock, so does alternate intense heat and cold,water wears it, wind erodes it, and it is now known thatbacteria and certain algae actually eat it; the hardest rockin the world will be ground down and eroded in time if itcomes to the surface.Newly-formed soil will have all the plant foods that werein the original rock, but it will <strong>complete</strong>ly lack one essentialelement - humus. It will not contain humus until life it<strong>self</strong>- that is, things that were living and have died and are indecay-puts it there. Only then does it become real <strong>complete</strong>soil, fit to grow the vegetation that sustains all animal lifeon land.Because soil derives from many kinds <strong>of</strong> rock there aremany varieties <strong>of</strong> soil. As we cannot always get exactly thekind <strong>of</strong> soil that we require, the husbandman must learn tomake the best <strong>of</strong> the soil that he has. Depending on the size<strong>of</strong> their particles soils are classified as light or heavy, withan infinite range <strong>of</strong> gradations in between. Light meanscomposed <strong>of</strong> large particles. Heavy means composed <strong>of</strong>small particles. Gravel can hardly be called soil but sandcan, and pure sand is the lightest soil you can get. <strong>The</strong> kind <strong>of</strong>clay which is made <strong>of</strong> the very smallest particles is the
<strong>The</strong> Way to Self-Sufficiencyheaviest. <strong>The</strong> terms "light" and "heavy" in this context havenothing to do with weight but with the ease <strong>of</strong> working <strong>of</strong>the soil. You can dig sand, or otherwise work with it, nomatter how wet it is, and do it no harm. Heavy clay is veryhard to dig or plough, gets very puddingy and sticky, and iseasily damaged <strong>by</strong> working it when it is wet.What we call soil generally has a thickness to be measuredin inches rather than feet. It merges below with the subsoilwhich is generally pretty humus-free but may be rich inmineral foods needed <strong>by</strong> plants. Deep-rooting plants suchas some trees, lucerne or alfalfa, comfrey, and many herbs,send their roots right down into the subsoil, and extractthese nutriments from it. <strong>The</strong> nature <strong>of</strong> the subsoil is veryimportant because <strong>of</strong> its influence on drainage. If it is heavyclay, for example, then the drainage will be bad and the fieldwill be wet. If it is sand, gravel, decayed chalk or limestone,then the field will probably be dry. Below the subsoil liesrock, and rock goes on down to the centre <strong>of</strong> the Earth. <strong>The</strong>rock, too, can affect drainage: chalk, limestone, sandstoneand other pervious rocks make for good drainage: clay(geologists consider this a rock too), slate, mudstone, someshales, granite and other igneous rocks generally make forpoor drainage. Badly-drained soils can always be drained -provided enough expenditure <strong>of</strong> labour and capital is putto doing it.Let us now consider various types <strong>of</strong> soil:Heavy clay This, if it can be drained and if it is worked withgreat care and knowledge, can be very fertile soil, at least formany crops. Wheat, oak trees, field beans, potatoes, andmany other crops, do superbly on well-farmed clay. Farmers<strong>of</strong>ten refer to it as strong land. But great experience is neededto farm it effectively. This is because <strong>of</strong> the propensity <strong>of</strong> clayto "flocculate" - that is, the microscopic particles whichmake up clay gather together in larger particles. When thishappens the clay is more easily worked, drains better, allowsair to get down into it (an essential condition for plantgrowth), and allows the roots <strong>of</strong> plants to penetrate it moreeasily. In other words it becomes good soil. When it doesthe opposite <strong>of</strong> flocculate it "puddles" - that is, it forms asticky mass, such as the potter uses to make his pots, becomesalmost impossible to cultivate, and gets as hard as brick whenit dries out. When it is in this condition the land forms bigcracks and is useless.Factors which cause clay to flocculate are alkalinity ratherthan acidity, exposure to air and frost, incorporation <strong>of</strong>humus, and good drainage. Acidity causes it to puddle, sodoes working it while wet. Heavy machines tend to puddleit. Clay must be ploughed or dug when in exactly the rightcondition <strong>of</strong> humidity, and left strictly alone when wet.Clay can always be improved <strong>by</strong> the addition <strong>of</strong> humus(compost, "muck" or farmyard manure, leaf-mould, greenmanuring: any vegetable or animal residue), <strong>by</strong> drainage,<strong>by</strong> ploughing it up at the right time and letting the air andfrost get to it (frost separates the particles <strong>by</strong> forcing themapart), <strong>by</strong> liming if acid, even, in extreme cases, <strong>by</strong> incorporatingsand with the clay. Clay soil is "late" soil, whichmeans it will not produce crops early in the year. It isdifficult soil. It is not "hungry" soil -that is, if you put humusin it the humus will last a long time. It tends to be rich inpotash and is <strong>of</strong>ten naturally alkaline in which case it doesnot need liming.Loam Loam is intermediate between clay and sand, andhas many gradations <strong>of</strong> heaviness or lightness. You can havea very heavy loam and a very light loam. A medium loam isperhaps the perfect soil for most kinds <strong>of</strong> farming. Mostloam is a mixture <strong>of</strong> clay and sand, although some loamsprobably have particles all <strong>of</strong> the same size. If loam (or anyother soil) lies on a limestone or chalk rock it will probablybe alkaline and will not need liming, although this is notalways the case: there are limestone soils which, surprisingly,do need liming. Loam, like every other kind <strong>of</strong> soil, willalways benefit <strong>by</strong> humus addition.Sand Sandy soil, or the lighter end <strong>of</strong> the spectrum <strong>of</strong> heavylightsoils, is generally well-drained, <strong>of</strong>ten acid (in whichcase it will need liming) and <strong>of</strong>ten deficient in potash andphosphates. It is "early" soil - that is, it warms up very quicklyafter the winter and produces crops early in the year. It isalso "hungry" soil; when you put humus into it the humusdoes not last long. In fact, to make sandy soil productiveyou must put large quantities <strong>of</strong> organic manure into it andinorganic manure gets quickly washed away from it. Sandysoils are favoured for market gardening, being early andeasy to work and very responsive to heavy dressings <strong>of</strong>manure. <strong>The</strong>y are good soils for such techniques as foldingsheep or pigs or other animals on the land. <strong>The</strong>y are goodfor wintering cattle on because they do not "poach" likeheavy soils do (i.e. turn into a quagmire when trodden).<strong>The</strong>y recover quickly from treading when under grass. Butthey won't grow as heavy crops <strong>of</strong> grass or other crops asheavier land. <strong>The</strong>y dry out very quickly and suffer fromdrought more than clay soils do.Peat Peat soils are in a class <strong>of</strong> their own but unfortunately 'are fairly rare. Peat is formed <strong>of</strong> vegetable matter which hasbeen compressed in unaerobic conditions (i.e. under water)and has not rotted away. Sour wet peatland is not much goodfor farming, although such soil, if drained, will grow potatoes,oats, celery and certain other crops. But naturally drainedpeatlands are, quite simply, the best soils in the world. <strong>The</strong>ywill grow anything, and grow it better than any other soil.<strong>The</strong>y don't need manure, they are manure. Happy is the<strong>self</strong>-supporter who can get hold <strong>of</strong> such land for his crops aremost unlikely to fail.MANURINGPlants require traces <strong>of</strong> almost all the elements, but theelements that they need in large quantities are: nitrogen,phosphorus, potassium and calcium.Nitrogen, as we have seen, can be fixed from the14
<strong>The</strong> Way to Self-Sufficiencyatmosphere <strong>by</strong> nitrogen-fixing bacteria, and the organicgrower is most apt to rely on this source. However, to ensure areally good supply, animal dung should be added to the soiland this will release nitrogen as it decays.Phosphorus is probably present in the soil, but perhapsit is not being released in sufficient quantities. If analysisshows a serious phosphate deficiency then phosphorusshould be added. Phosphorus deficiency may be seensometimes <strong>by</strong> a purplish discoloration in seedlings, followed<strong>by</strong> yellowing as the plant gets older, stunted growth andlateness in coming to maturity. "Basic slag" is a commonphosphatic fertilizer: it is the ground-up limestone lining<strong>of</strong> blast-furnaces and is thus a <strong>by</strong>-product <strong>of</strong> the steelindustry. <strong>The</strong> word "basic" here means alkaline - it helps tocorrect acidity as lime does. Unfortunately new methods<strong>of</strong> steel making are reducing the supply. Ground rockphosphate is slower acting than slag, but it is longer lasting,and many organic growers think better. Superphosphate isrock phosphate (or bones) that have been dissolved insulphuric acid; it is quick-acting but expensive and it mayharm the soil organisms.Potassium deficiency may show it<strong>self</strong> <strong>by</strong> yellowing <strong>of</strong> leaftips,and <strong>by</strong> a weakness in the stems <strong>of</strong> cereals - they falldown in wind or rain. <strong>The</strong>re are huge rock-potash depositsin many parts <strong>of</strong> the world and until these are exhausted wecan correct potassium deficiency <strong>by</strong> applying this material.Clay soil is seldom deficient in potassium.Calcium deficiency causes acid soil and can lead to malformation<strong>of</strong> plants. In any case Time in some form or anotherwill probably be added <strong>by</strong> the husbandman to soils whichare acid, and calcium deficiency will then not occur. Limecan be added as lumps <strong>of</strong> lime or chalk (very slow acting),as ground lime or chalk (fairly slow acting), as quick limeor chalk (quick acting), and as slaked lime or chalk (quickacting). Quick lime, however, will burn plants and soilorganisms; slaked lime is benign.<strong>The</strong>re are other elements in which your soil may bedeficient. If, despite the addition <strong>of</strong> the elements listedabove, you find that plants or animals are still sickly thenyou may suspect such things as boron deficiency, ordeficiencies <strong>of</strong> other <strong>of</strong> these so-called "trace elements',' andyou should call in expert advice.But if your land has had proper additions <strong>of</strong> compost,or farmyard manure or the dung <strong>of</strong> animals added direct,or seaweed (which has in it every element), it is most unlikelyto be deficient in anything. By getting your soil analysedwhen you take it over, and adding once and for all whateverclement the analysis shows the soil to be deficient in, andthereafter farming in a sound organic way, the "heart"(fertility) <strong>of</strong> your land should increase continually until itis at a very high level. <strong>The</strong>re should be no need to spendany further money at all on "fertilizers". And, very <strong>of</strong>ten, ifland is virgin, or if it has been properly farmed in the past,you may not even need to get it analysed.THE ECOLOGICALLY SOUND HOLDINGOne <strong>of</strong> the chief features <strong>of</strong> the High Farming era <strong>of</strong>eighteenth-century England was the famous "Norfolk FourCourse Rotation'.' It was an ecologically sound system <strong>of</strong>husbandry, and it still remains a model for the productivegrowing <strong>of</strong> a variety <strong>of</strong> crops in both large and small-scalefarming. <strong>The</strong> Norfolk Four Course Rotation worked like this:1 One-year Ley A Ley is grass-and-clover sown for atemporary period. <strong>The</strong> grass-and-clover was grazed <strong>of</strong>f <strong>by</strong>stock and the purpose <strong>of</strong> it was to increase the fertility <strong>of</strong>the land <strong>by</strong> the nitrogen fixed in the root nodules o( theclover, <strong>by</strong> the dung <strong>of</strong> the grazing animals, and ultimately<strong>by</strong> the mass <strong>of</strong> vegetation ploughed into the land when theLey was ploughed up.2 Root Break <strong>The</strong> crops in the Root Break might havebeen turnips or swedes to be fed to cattle, sheep or pigs,potatoes to be fed mostly to humans, mangolds for cattle,and various kinds <strong>of</strong> kale - the latter not actually "roots"<strong>of</strong> course but taking the same place in the Root Break. <strong>The</strong>effect <strong>of</strong> the Root Break was to increase the fertility <strong>of</strong> thesoil, because nearly all the farmyard manure produced onthe farm was applied to the root crop, and to "clean" (makeweed-free) the land. Root crops are "cleaning-crops" because,<strong>by</strong> being planted in rows, they have to be hoed severaltimes. <strong>The</strong> third effect <strong>of</strong> the Root Break was to producecrops which stored the summer's growth for winter feeding.3 Winter Cereal Break This was wheat, beans, barley,oats or rye sown in the autumn. It "cashed" the fertility putinto the land <strong>by</strong> the Ley and the Roots, benefited from thecleanlines's <strong>of</strong> the land after Roots, and was the farmer'schief "cash crop" - the crop from which he made his money.<strong>The</strong> beans, however, were for feeding to horses and cattle.4 Spring Cereal Break This was possibly spring-sownwheat but it was more likely to be barley. After the barleyhad been drilled, grass-and-clover seed was undersown - thatis, broadcast on the ground along with the cereal seed. Asthe barley grew, the grass-and-clover grew and when thebarley was harvested a good growth <strong>of</strong> grass-and-clover wasleft to be grazed <strong>of</strong>f next spring and summer, or to be cutfor hay and grazed the following winter too. <strong>The</strong> barley wentprincipally to feed stock but the best <strong>of</strong> it went to be maltedfor beer. <strong>The</strong> oats and barley straw was fed to the cattle,the wheat straw went under their feet to provide all thatvast tonnage <strong>of</strong> farmyard manure (the best compost thatever was invented), rye straw was used for thatching, theroots were mostly fed to the cattle or to the sheep, andwheat, malting barley, beef, and wool went <strong>of</strong>f to be sold tothe city man. In the late eighteenth and nineteenthcenturies, land properly managed in this way <strong>of</strong>ten grew twotons <strong>of</strong> wheat to the acre and this with no input <strong>of</strong> oil-derivedchemicals whatever. <strong>The</strong>re weren't any.Now we can emulate this ecologically sound system,changing it to suit our different needs. We may not wish tolive primarily on the bread, beef and beer <strong>of</strong> the eighteenth-15
<strong>The</strong> Way to Self-Sufficiency<strong>The</strong> SeasonsEarly springPlough your land when the winter'sfrosts have broken up the soil.Prepare the fields to be sown withspring crops <strong>by</strong> harrowing with discsand spikes, and add lime orphosphate if your soil needs it.Make the most <strong>of</strong> shooting gamebefore the close seasons begin. Beready for lambing to begin; earlyspring is the ideal time for then thelambs can grow with the grass.Late springBroadcast your seed or drill it intothe earth, and be ready to combatthe weeds that will race the youngshoots to meet the sun. Plant yourearly potatoes under glass to forcethem- on, and use cloches to protectmelons and other squashes from latefrosts. This is a good time forbrewing beer in preparation for suchthirsty jobs as shearing andhaymaking later on. Mill somegrain every month <strong>of</strong> the year sothat you always have fresh flour.Early summerIn early summer you have thedelightful job <strong>of</strong> shearing your sheep.Wool from five <strong>of</strong> them will clothe alarge family. With the summer flush<strong>of</strong> grass your cows will pour outmilk and you should make butternearly every day. Store some <strong>of</strong> yourmilk for the winter <strong>by</strong> making plenty<strong>of</strong> cheese. In midsummer comes theback-breaking, but satisfying,business <strong>of</strong> haymaking. You willneed help from your friends andneighbours and you will all needplenty <strong>of</strong> home brew.16
<strong>The</strong> Way to Self-SufficiencyLate summer<strong>The</strong> wheat harvest in late summer isthe crown <strong>of</strong> the year. Again youwill need help from your friends,and again you will deserve to celebratefor you should have earnedyour<strong>self</strong> a year's supply <strong>of</strong> bread.Orchard fruit, s<strong>of</strong>t fruit, nuts,mushrooms and wild berries aregathered, and go into pots or picklejars to be stored against winterscarcity. Wine-making continuesthrough this time, and the last <strong>of</strong> thegreen tomatoes go for chutney.AutumnAutumn is the time to harvest rootcrops, and clamp them or store themin root cellars. Plant winter wheat,broad and field beans. <strong>The</strong> sap isdown in the trees which makes thisan ideal time to fell those whichhave reached maturity. At the sametime haul out wood which hasfallen before it gets wet and use itfor firewood. In the late autumnyour barley is ready for malting,and you should have time to spinwool and the year's harvest <strong>of</strong> flaxas well.WinterIn midwinter, when the leaves are<strong>of</strong>f the trees, you can build newhedgesand rebuild old ones, makeand repair fences, gates and hurdles,sharpen and restore the implementson your holding. <strong>The</strong> weather willbe cold enough for killing andhanging beef and mutton, and earlyin the New Year is the best time forslaughtering your baconers. Baconand ham can be salt-pickled inbrine, sweet-pickled, or dry saltedand carried to the smokehouse.Above all, this is the time <strong>of</strong> yearfor you to enjoy the fruits <strong>of</strong> yourlabours.17
<strong>The</strong> Way to Self-Sumciencycentury Englishman. We may need more dairy products:butter, cheese and milk, more vegetables, a greater variety<strong>of</strong> food altogether. Also we have new techniques: new cropssuch as Jerusalem artichokes, fodder radish, fodder beet,maize in nothern climates, and devices such as the electricfence, which widen our possible courses <strong>of</strong> action.Now whether our would-be <strong>self</strong>-supporter has nothingmore than a back garden, or perhaps a city allotment, orwhether he has say a hundred acre farm, or whether he is part<strong>of</strong> a community owning a thousand acres, the principles heshould follow are the same. He should try to work withNature, not against her, and he should, as far as he can whilestill serving his own ends, emulate Nature in his methods.Thus if he is to improve and maintain the heart <strong>of</strong> his landhe should remember:1 Monoculture, or the growing <strong>of</strong> the same crop on landyear after year should be avoided. Disease organisms whichattack any particular crop always build up in land on whichthat crop is grown year after year. Also each crop has differentrequirements from the soil and its residues return differentmaterials to the soil.2 <strong>The</strong> keeping <strong>of</strong> one species <strong>of</strong> animal on the soil and oneonly should be avoided, for much the same reasons as thereasons against crop monoculture. <strong>The</strong> old High Farmingpractitioners in England used to say:"A full bullock yardmakes a full stack yard." In other words, the dung from theanimals is good for the soil. Mixed stocking is always betterthan mono-stocking, and rotational grazing is the best <strong>of</strong> all:the penning or folding <strong>of</strong> a species <strong>of</strong> animal over the landso that the animals leave their droppings (and the inevitableeggs <strong>of</strong> parasites) behind and so break the lifecycle <strong>of</strong> theparasites. Following one species with another in such arotation should be practised wherever possible.3 To grow "leys," graze them, and ultimately plough them in.4 To practise "green manuring." That is, if you don't want togrow some crop to graze <strong>of</strong>f or feed <strong>of</strong>f to animals, growthe crop anyway and then plough it in, or, better still, workit in with discs or other instruments.5 To avoid ploughing too much or too deep. To bury thetopsoil and bring the subsoil to the surface is not good.On the other hand, chisel ploughing-the cutting <strong>of</strong>furrowsin the soil <strong>by</strong> dragging knives through it - does not invertthe soil, helps drainage, breaks "pans" (hard layers under thesurface) and can only do good.6 To suffer not his land to remain bare and exposed to theweather more than absolutely necessary. When it is coveredwith vegetation, even with "weeds," it will not erode ordeteriorate. If left bare, it will. A growing crop will take upand store the nitrogen and other elements <strong>of</strong> the soil andrelease them when it rots down. In bare soil many solubleplant-foods are "leached-out," or washed away.7 To attend to drainage. Waterlogged soil is no-good soiland will deteriorate unless, <strong>of</strong> course, you are growing rice,or keeping water-buffalo.8 To observe, at all times, the Law <strong>of</strong> Return. All crop andanimal residues should be returned to the soil. If you sellanything <strong>of</strong>f the holding then you should import something<strong>of</strong> equal manurial value back on to it. <strong>The</strong> Law <strong>of</strong>Return should apply to human excrement too.Now if the Law <strong>of</strong> Return is properly observed it istheoretically possible to maintain, if not increase, thefertility <strong>of</strong> a piece <strong>of</strong> land without animals at all. Carefulcomposting <strong>of</strong> vegetable residue is necessary, but it is noteworthythat on holdings where no animals are kept, but ahigh standard <strong>of</strong> fertility is maintained, almost alwaysvegetable matter is brought in from outside the holding,and very <strong>of</strong>ten other high-energy substances, such ascompost-activator, too. Seaweed, leaf-mould from woods,dead leaves from city street cleaning services, wastevegetables from greengrocers, straw or spoiled hay, nettlesor bracken mown on common ground or waste ground orneighbours' land: all such inputs <strong>of</strong> vegetable residues arepossible, and will keep up the fertility <strong>of</strong> land which hasno animals. It is difficult to see why putting vegetable matterinto animals and then returning it to the land as shit shouldbe better than putting it direct on to the land, but it isdemonstrably so. <strong>The</strong>re is no doubt about it, as anyhusbandman with any experience knows, but there is somepotent magic that transmutes vegetable residues intomanure <strong>of</strong> extraordinary value <strong>by</strong> putting it through theguts <strong>of</strong> an animal. But when it is realized that animals andplants have evolved together on this planet perhaps this isnot surprising. Nature does not seem to show any examples<strong>of</strong> an animal-free vegetable environment. Even the gasesinhaled and exhaled <strong>by</strong> these two different orders <strong>of</strong> lifeseem to be complementary: plants inhale carbon-dioxideand exhale oxygen, animals do the opposite.VEGETARIAN OR NON-VEGETARIANTo be or not to be vegetarian: this is the argument thatcould (but mustn't) split the Organic Movement. Now thereis not the slightest reason why vegetarians and nonvegetariansshould not live perfectly happily side <strong>by</strong> side.<strong>The</strong> vegetarians say, on their side, that it takes so many units<strong>of</strong> vegetable protein fed to an animal to produce one unit<strong>of</strong> protein in the form <strong>of</strong> meat. <strong>The</strong>refore it would be betterfor humans to eliminate animals and eat the vegetableprotein direct. <strong>The</strong> non-vegetarians point out that the units<strong>of</strong> protein that are not directly turned into meat are notwasted: they are returned to the soil again in a transmutedform to improve its fertility and grow more crops. <strong>The</strong>vegetarians point out that it is cruel to kill animals. <strong>The</strong>non-vegetarians point out that some factor has got to controlthe population-increase rate <strong>of</strong> every species: eitherpredators (such as non-vegetarians!), disease, or famine, and<strong>of</strong> these, predators are possibly the most humane.Vegetarianism seems to be almost wholly an urban, or bigcity,phenomenon, and is possibly due to people having18
<strong>The</strong> Way to Self-Sufficiencybeen cut <strong>of</strong>f from animals for so long that they tend toanthropomorphism. <strong>The</strong> humane non-vegetarian says (andI am one) that animals should be kept in the conditions mostnearly approaching those for which they were evolved aspossible, treated humanely and subjected to no crueltiesand indignities, and, when their time comes, killed instantlyand with no long journeys to far-away markets or abattoirs.This is perfectly possible on the <strong>self</strong>-supporting holding,and the animal need have no inkling that anything is goingto happen to it.Having said all this I will now say that it is perfectlypossible to live a <strong>self</strong>-sufficient existence on an animalfreeholding, and that it is perfectly possible to live healthilyon a meat-free diet. It is also possible to do the opposite.THE ONE ACRE HOLDINGEveryone will have an entirely different approach tohusbanding his land, and it is unlikely that any two smallholderswith one acre each will adopt the same plan ormethods. Some people like cows, other people are afraid <strong>of</strong>them. Some people like goats, other people cannot keepthem out <strong>of</strong> the garden (I never could and I don't knowmany people who can). Some people will not kill animalsand have to sell their surplus stock <strong>of</strong>f to people who willkill them, others will not sell surplus stock <strong>of</strong>f at all becausethey know that the animals will be killed. Some people arehappy to keep more stock than their land can support andto buy in fodder from outside, while other people regardthis as contrary to the principles <strong>of</strong> <strong>self</strong>-<strong>sufficiency</strong>.My<strong>self</strong>, if I had an acre <strong>of</strong> good well-drained land I thinkI would keep a cow and a goat, a few pigs and maybe adozen hens. <strong>The</strong> goat would provide me with milk whenthe cow was dry. I might keep two or more goats in fact.-1would have the cow (a Jersey) to provide me and the pigswith milk, but more important I would keep her to provideme with heaps and heaps <strong>of</strong> lovely manure. For if I was toderive any sort <strong>of</strong> living from that one acre, without theapplication <strong>of</strong> a lot <strong>of</strong> artificial fertilizer, it would have to beheavily manured.Now the acre would only just support the cow and donothing else, so I would, quite shamelessly buy in most <strong>of</strong>my food for the cow from outside. I would buy all my hay,plenty <strong>of</strong> straw (unless I could cut bracken on a near<strong>by</strong>common), all my barley meal and some wheat meal, andmaybe some high protein in the form <strong>of</strong> bean meal or fishmeal (although I would aim to grow beans).It will be argued that it is ridiculous to say you are <strong>self</strong>supportingwhen you have to buy in all this food. True, youwould grow much <strong>of</strong> the food for cows, pigs, and poultry:fodder beet, mangolds, kale, "chat" (small) potatoes,comfrey, lucerne or alfalfa, and all garden produce notactually eaten <strong>by</strong> people. But you would still have to buysay a ton or a ton and a half <strong>of</strong> hay a year and say a ton ayear <strong>of</strong> grain <strong>of</strong> different sorts including your own breadwheat, and a ton or two <strong>of</strong> straw. For I would not envisagegrowing wheat or barley on such a small area as an acre,preferring to concentrate on dearer things than cereals,and things that it was more important to have fresh. Alsothe growing o{ cereals on very small acreages is <strong>of</strong>tenimpossible because <strong>of</strong> excessive bird damage, although Ihave grown wheat successfully on a garden scale.<strong>The</strong> big question here is - a cow or no cow? <strong>The</strong> pros andcons are many and various. In favour <strong>of</strong> having a cow is thefact that nothing keeps the health <strong>of</strong> a family - and a holding- at a high level better than a cow. If you and your childrenhave ample good, fresh, unpasteurized, unadulterated milk,butter, butter-milk, s<strong>of</strong>t cheese, hard cheese, yoghourt, sourmilk and whey, you will simply be a healthy family and thatis an end to it. A cow will give you the <strong>complete</strong> basis <strong>of</strong>good health. If your pigs and poultry, also, get their share<strong>of</strong> the milk <strong>by</strong>-products, they too will be healthy and willthrive. If your garden gets plenty <strong>of</strong> cow manure, that toowill be healthy and thrive. This cow will be the mainspring<strong>of</strong> all your health and well-being.On the other hand, the food that you buy in for this cowwill cost you perhaps two hundred pounds a year. Againstthis you can set whatever money you would pay for dairyproduce in that year for your<strong>self</strong> and your family (and ifyou work that out you will find it to be quite substantial),plus the increased value <strong>of</strong> the eggs, poultry-meat and pigmeatthat you will get (you can probably say that, in value,a quarter <strong>of</strong> your pig meat will be creditable to the cow),plus the ever-growing fertility <strong>of</strong> your land. But a seriouscontra consideration is that you will have to milk the cow.Twice a day for at least ten months <strong>of</strong> the year you will haveto milk the cow. It doesn't take very long to milk a cow(perhaps eight minutes), it is very pleasant when you reallyknow how 7 to do it and if she is a quiet nice cow, but youwill have to do it. So the buying <strong>of</strong> a cow is a very importantstep, and you shouldn't do it unless you do not intend togo away very much, or you can make arrangements forsomebody else to relieve you with milking. Of course, if youonly have a budgerigar somebody has got to feed it.So let us plan our one acre holding on the assumptionthat we are going to keep a cow.One acre holding with a cowHalf the land will be put down to grass, leaving half an acrearable (I am not allowing for the land on which the houseand buildings stand). Now the grass half could remainpermanent pasture and never be ploughed up at all, or itcould be rotated <strong>by</strong> ploughing it up say every four years.If the latter is done it were better done in strips <strong>of</strong> a quarter<strong>of</strong> the half acre each, so each year you grass down an eighthot an acre <strong>of</strong> your land. Thus there is some freshly-sownpasture every year, some two year-old ley, some three-yearoldley and some four-year-old ley. <strong>The</strong> holding will be moreproductive if you rotate your pasture thus every four years.19
<strong>The</strong> Way to Self-Sufficiency<strong>The</strong> One Acre HoldingIf you had one acre <strong>of</strong> good well-drained land, you might choose to use all<strong>of</strong> it to grow fruit and vegetables. My<strong>self</strong>, 1 would divide it in half and puthalf an acre down to grass on which I would graze a cow, and perhaps agoat to give milk during the short periods when the cow would be dry, a sowfor breeding and a dozen chickens. I would admittedly have to buy in foodfrom outside to feed these animals through the winter, but this is preferable tobuying in dairy products and meat, which would be the alternative. Mjremaining half-acre I would divide into four plots for intensive vegetableproduction, devoting a plot each to potatoes, pulses (peas and beans),brassica (cabbage family) and roots. 1 would divide the grass half-acre int<strong>of</strong>our plots as well and rotate the whole holding every year. This means Iwould be planting a grass plot every year and it would stay grass until Iploughed it up four years later. I would build a cowshed for the cow, becauseI would not have enough grass to keep her outdoors all year. I would have agreenhouse for tomatoes and hives for bees and 1 would plant a vegetablepatch with extra household vegetables, herbs and s<strong>of</strong>t fruit.Peas and beansGrow at least three kinds <strong>of</strong> beans,say, French, runners and broad, andplenty <strong>of</strong> peas. Plant brassica on thisplot next year.BrassicaOn your brassica plot grow avariety <strong>of</strong> cabbages, cauliflower,broccoli and sprouts for your<strong>self</strong>.Grow kale, and turnips and swedeswhich are roots but also brassica, t<strong>of</strong>eed to your animals. Next year thisplot should be planted with rootsCabbagesBroccoli20PotatoesEach year plant your potatoes in the plot which hasjust been ploughed up from grass.
<strong>The</strong> Way to Self-Sufficiency
<strong>The</strong> Way to Self-Sufficiency<strong>The</strong> holding may break naturally into half: for example,an easily-worked half acre <strong>of</strong> garden, and a half acre <strong>of</strong>roughish pasture. You will begin then <strong>by</strong> ploughing up orpigging (allowing pigs to root it up behind an electric fence)or rotovating half <strong>of</strong> your holding. This land you will putdown to a grass-and-clover-and-herb mixture. If you sowthe seed in the autumn you can winter your cow indoorson bought hay and hope for grazing next spring. If yourtimetable favours your sowing in the spring, and if you live ina moist enough climate to do so, then you will be able to doa little light grazing that summer. It is better not to cut haythe first summer after spring-sowing <strong>of</strong> grass, so just grazeit lightly with your little cow; at the first sign <strong>of</strong> "poaching"(destruction <strong>of</strong> grass <strong>by</strong> treading) take her away. Better still,tether your cow, or strip-graze behind an electric fence.Just allow the cow to have, say, a sixth part <strong>of</strong> the grass atone time, leave her on that for perhaps a week, then moveher to the next strip. <strong>The</strong> length <strong>of</strong> time she stays on onestrip must be left to your common sense (which you mustdevelop if you are to become a <strong>self</strong>-supporter). <strong>The</strong> pointabout strip-grazing is that grass grows better and producesmore if it is allowed to grow for as long as possible beforebeing grazed or cut, then grazed or cut right down, thenrested again. If it is grazed down all the time it never reallyhas a chance to develop its root system. In such superintensivehusbandry as we are envisaging now it is essentialto graze as carefully as possible.Tether-grazing, on such a small area, might well be betterthan electric fencing. A little Jersey quickly gets used tobeing tethered and this was, indeed, the system that theywere developed for on the island <strong>of</strong> Jersey, where they werefirst bred. I so unequivocably recommend a Jersey to theone acre man, incidentally, because I am convinced that forthis sort <strong>of</strong> purpose she is without any peer. I have triedDexters, with <strong>complete</strong> lack <strong>of</strong> success, but if you reallyknow <strong>of</strong> a Dexter that gives anything like a decent amount<strong>of</strong> milk (my two gave less than a goat), is quiet and amenable,then go ahead and get a Dexter and good luck to you. Butremember, a well-bred-Jersey gives plenty <strong>of</strong> milk which isquite simply the richest in butter-fat <strong>of</strong> any milk in theworld, she is small, so docile that you will have troubleresisting taking her into the house with you, moderate inher eating demands, pretty, lovable, healthy, and very hardy.Now your half acre <strong>of</strong> grass, once established, shouldprovide your cow with nearly all the food she needs forthe summer months. You are unlikely to get any hay <strong>of</strong>f itas well, but if you did find that the grass grew away fromthe cow then you could cut some <strong>of</strong> it for hay.<strong>The</strong> remaining half <strong>of</strong> your holding- the arable half-willthen be farmed as a highly intensive garden. It will be divided,ideally, into four plots, around which all the annual cropsthat you want to grow, will follow each other in strictrotation. (I will discuss this rotation in detail in the sectionFood from the Garden, pp 160-171). <strong>The</strong> only differencethat you will have to make in this rotation is that everyyear you will have to grass a quarter down, and every yearplough a quarter <strong>of</strong> your grassland up. I suggest that yourpotatoes come after the newly-ploughed bit. <strong>The</strong> rotationwill thus be: grass (for four years) - potatoes - pea-and-beanfamily - brassica (cabbage family) - roots - grass again (forfour years).To sow autumn-sown grass after your roots, you will haveto lift them early. In a temperate climate it would be quitepracticable to do this; in countries with more severe wintersit might be necessary to wait until the following spring.In areas with dry summers, unless you have irrigation, itwould probably be better to sow in the autumn. In someclimates (dry summers and cold winters) it might be foundbest to sow your grass in the late summer after the pea- andbeanbreak instead <strong>of</strong> after the root break, for the peas-andbeansare <strong>of</strong>f the ground earlier than the roots. It mightthen pay you to follow the grass with potatoes, and yoursuccession could be like this: grass (for four years) -potatoes- brassica (cabbage family) -roots-pea-and-bean family -grass (for four years).A disadvantage <strong>of</strong> this might be that the brassica,following main-crop potatoes, might have to wait until thesummer following the autumn in which the potatoes werelifted before they could be planted. When brassica areplanted after pea-and-bean family they can go in immediately,because the brassica plants have been reared in a nurserybedand it is not too late in the summer to transplant themafter the peas and beans have been cleared. But potatoescannot be lifted (main crop can't anyway) until the autumn,when it is too late to plant brassica. Actually, with thisregime you will be able to plant some <strong>of</strong> your brassica thatfirst summer, after early potatoes. Or if you grow onlyearlies, you may get the lot in. One possibility would be t<strong>of</strong>ollow the potatoes immediately with brassica (thus savinga year) <strong>by</strong> lifting some earlies very early and plantingimmediately with the earliest brassica, then following eachlifting <strong>of</strong> potatoes with more brassica, ending with springcabbages after the main crop have come out. This wouldonly be possible in fairly temperate climates though.All this sounds complicated, but it is easier to understandwhen you do it than when you talk about it. And considerthe advantages <strong>of</strong> this sort <strong>of</strong> rotation. It means that a quarter<strong>of</strong> your arable land is newly-ploughed-up four-year-ley everyyear: intensely fertile because <strong>of</strong> the stored-up fertility <strong>of</strong>all that grass, clover, and herbs that have just been ploughedin to rot, plus the dung <strong>of</strong> your cow for four summers. Itmeans that because your cow is inwintered, on bought-inhay, and treading and dunging on bought-in straw, you willhave an enormous quantity <strong>of</strong> marvellous muck to put onyour arable land. It means that all the crop residues that youcannot consume go to help feed the cow, or the pigs orpoultry, and I would be very surprised if, after followingthis regime for a few years, you did not find that your acre22
<strong>The</strong> Way to Self-Sufficiency<strong>The</strong> holding may break naturally into half: for example,an easily-worked half acre <strong>of</strong> garden, and a half acre <strong>of</strong>roughish pasture. You will begin then <strong>by</strong> ploughing up orpigging (allowing pigs to root it up behind an electric fence)or rotovating half <strong>of</strong> your holding. This land you will putdown to a grass-and-clover-and-herb mixture. If you sowthe seed in the autumn you can winter your cow indoorson bought hay and hope for grazing next spring. If yourtimetable favours your sowing in the spring, and if you live ina moist enough climate to do so, then you will be able to doa little light grazing that summer. It is better not to cut haythe first summer after spring-sowing <strong>of</strong> grass, so just grazeit lightly with your little cow; at the first sign <strong>of</strong> "poaching"(destruction <strong>of</strong> grass <strong>by</strong> treading) take her away. Better still,tether your cow, or strip-graze behind an electric fence.Just allow the cow to have, say, a sixth part <strong>of</strong> the grass atone time, leave her on that for perhaps a week, then moveher to the next strip. <strong>The</strong> length <strong>of</strong> time she stays on onestrip must be left to your common sense (which you mustdevelop if you are to become a <strong>self</strong>-supporter). <strong>The</strong> pointabout strip-grazing is that grass grows better and producesmore if it is allowed to grow for as long as possible beforebeing grazed or cut, then grazed or cut right down, thenrested again. If it is grazed down all the time it never reallyhas a chance to develop its root system. In such superintensivehusbandry as we are envisaging now it is essentialto graze as carefully as possible.Tether-grazing, on such a small area, might well be betterthan electric fencing. A little Jersey quickly gets used tobeing tethered and this was, indeed, the system that theywere developed for on the island <strong>of</strong> Jersey, where they werefirst bred. I so unequivocably recommend a Jersey to theone acre man, incidentally, because I am convinced that forthis sort <strong>of</strong> purpose she is without any peer. I have triedDexters, with <strong>complete</strong> lack <strong>of</strong> success, but if you reallyknow <strong>of</strong> a Dexter that gives anything like a decent amount<strong>of</strong> milk (my two gave less than a goat), is quiet and amenable,then go ahead and get a Dexter and good luck to you. Butremember, a well-bred-Jersey gives plenty <strong>of</strong> milk which isquite simply the richest in butter-fat <strong>of</strong> any milk in theworld, she is small, so docile that you will have troubleresisting taking her into the house with you, moderate inher eating demands, pretty, lovable, healthy, and very hardy.Now your half acre <strong>of</strong> grass, once established, shouldprovide your cow with nearly all the food she needs forthe summer months. You are unlikely to get any hay <strong>of</strong>f itas well, but if you did find that the grass grew away fromthe cow then you could cut some <strong>of</strong> it for hay.<strong>The</strong> remaining half <strong>of</strong> your holding - the arable half-willthen be farmed as a highly intensive garden. It will be divided,ideally, into four plots, around which all the annual cropsthat you want to grow, will follow each other in strictrotation. (I will discuss this rotation in detail in the sectionFood from the Garden, pp 160-171)- <strong>The</strong> only differencethat you will have to make in this rotation is that everyyear you will have to grass a quarter down, and every yearplough a quarter <strong>of</strong> your grassland up. I suggest that yourpotatoes come after the newly-ploughed bit. <strong>The</strong> rotationwill thus be: grass (for four years) - potatoes - pea-and-beanfamily - brassica (cabbage family) - roots - grass again (forfour years).To sow autumn-sown grass after your roots, you will haveto lift them early. In a temperate climate it would be quitepracticable to do this; in countries with more severe wintersit might be necessary to wait until the following spring.In areas with dry summers, unless you have irrigation, itwould probably be better to sow in the autumn. In someclimates (dry summers and cold winters) it might be foundbest to sow your grass in the late summer after the pea- andbeanbreak instead <strong>of</strong> after the root break, for the peas-andbeansare <strong>of</strong>f the ground earlier than the roots. It mightthen pay you to follow the grass with potatoes, and yoursuccession could be like this: grass (for four years) -potatoes- brassica (cabbage family) -roots-pea-and-bean family -grass (for four years).A disadvantage <strong>of</strong> this might be that the brassica,following main-crop potatoes, might have to wait until thesummer following the autumn in which the potatoes werelifted before they could be planted. When brassica areplanted after pea-and-bean family they can go in immediately,because the brassica plants have been reared in a nurserybedand it is not too late in the summer to transplant themafter the peas and beans have been cleared. But potatoescannot be lifted (main crop can't anyway) until the autumn,when it is too late to plant brassica. Actually with thisregime you will be able to plant some <strong>of</strong> your brassica thatfirst summer, after early potatoes. Or if you grow onlyearlies, you may get the lot in. One possibility would be t<strong>of</strong>ollow the potatoes immediately with brassica (thus savinga year) <strong>by</strong> lifting some earlies very early and plantingimmediately with the earliest brassica, then following eachlifting <strong>of</strong> potatoes with more brassica, ending with springcabbages after the main crop have come out. This wouldonly be possible in fairly temperate climates though.All this sounds complicated, but it is easier to understandwhen you do it than when you talk about it. And considerthe advantages <strong>of</strong> this sort <strong>of</strong> rotation. It means that a quarter<strong>of</strong> your arable land is newly-ploughed-up four-year-ley everyyear: intensely fertile because <strong>of</strong> the stored-up fertility <strong>of</strong>all that grass, clover, and herbs that have just been ploughedin to rot, plus the dung <strong>of</strong> your cow for four summers. Itmeans that because your cow is inwintered, on bought-inhay, and treading and dunging on bought-in straw, you willhave an enormous quantity <strong>of</strong> marvellous muck to put onyour arable land. It means that all the crop residues that youcannot consume go to help feed the cow, or the pigs orpoultry, and I would be very surprised if, after followingthis regime for a few years, you did not find that your acre22
<strong>The</strong> Way to Self-Sufficiency<strong>of</strong> land increased enormously in fertility, and that it wasproducing more food, for humans, than many a ten acresfarmed on ordinary commercial lines.You may complain that <strong>by</strong> having half your acre downto grass you thus confine your gardening activities to a merehalf-acre. But actually half an acre is quite a lot, and if yougarden it really well it will grow more food for you than ifyou "scratch" over a whole acre. And the effect <strong>of</strong> beingunder grass, and grazed and dunged, for half its life, willenormously increase the fertility <strong>of</strong> it. I believe you will growmore actual vegetables than you would on the whole acreif you had no cow, or grass break.We will discuss the treatment <strong>of</strong> the various kinds <strong>of</strong>stock, and <strong>of</strong> the crops, in the appropriate sections <strong>of</strong> this<strong>book</strong>, but there are a few general remarks to make aboutthis particular situation. First, the cow will not be able tobe out <strong>of</strong> doors all the year. On such a small acreage shewould poach it horribly. She should spend most <strong>of</strong> the winterindoors, only being turned out during the daytime in dryweather to get a little exercise and fresh air. Cows do notreally benefit <strong>by</strong> being out in all weathers in the wintertime, although they put up with it. <strong>The</strong>y are better for themost part kept in, where they make lovely manure for you,and your cow will have plenty <strong>of</strong> greenstuffs and roots thatyou will grow for her in the garden. In the summer you willlet her out, night and day for as long as you find the pasturestands up to it. You could keep the cow on "deep litter":that is, straw which she would Hung on and turn into goodmanure, and you would put more clean straw on it everyday. I have milked a cow for years like this and the'milk wasperfect, made good butter and cheese, and kept well.Or you could keep the cow on a concrete floor (insulatedif possible), giving her a good bed <strong>of</strong> straw every day andremoving the soiled straw, and putting it carefully on themuck-heap - that fount <strong>of</strong> fertility for everything on youracre - every day. You would probably find that your cow didnot need hay at all during the summer, but she would beentirely dependent on it right throughout the winter, andyou could reckon on having to buy her at least a ton. If youwished to rear her yearly calf until he reached some valueyou would need perhaps half a ton more hay too.Pigs you would have to be prepared to confine in a housefor at least part <strong>of</strong> the year (and you would need straw forthem). This is because on a one acre holding you areunlikely to have enough fresh land to keep them healthy.<strong>The</strong> best thing you could have for them would be a movablehouse with a strong movable fence outside it, or you couldhave a permanent pig-sty as well. But the pigs would havea lot <strong>of</strong> outdoor work to do: they would spend part <strong>of</strong> theirtime ploughing up your eighth <strong>of</strong> an acre <strong>of</strong> grassland; theycould run over your potato land after you had lifted the crop;they could clear up after you had lifted your roots, or afteryou had lifted any crop. But they could only do this if youhad time to let them do it. Sometimes you would be in toomuch <strong>of</strong> a hurry to get the next crop in. As for their food,you would have to buy in some corn, barley, or maize. This,supplemented with the skimmed milk and whey you wouldhave from your cow, plus a share <strong>of</strong> the garden produce andsuch specially grown fodder crops as you could spare theland for, would keep them excellently. If you could find aneighbour who would let you use his boar I wouldrecommend that you kept a sow and bred from her. Shemight well give you twenty piglets a year. Two or three <strong>of</strong>these you would keep to fatten for your bacon and hamsupply, the rest you would sell as "weaners" (piglets fromeight to twelve weeks old, depending on the requirements<strong>of</strong> your particular market), and they would probably fetchenough money to pay for every scrap <strong>of</strong> food you had tobuy for them, the poultry, and the cow too. If you couldnot get the service <strong>of</strong> a boar you would probably buy weanersyour<strong>self</strong> - just enough for your own use - and fatten them.Poultry could be kept on the Balfour method (describedon p. 126), in which case they would stay for years in the samecorner <strong>of</strong> your garden. Or better in my opinion, they couldbe kept in movable arks on the land. <strong>The</strong>y could then bemoved over the grassland, where <strong>by</strong> their scratching anddunging they would do it good. I would not recommendkeeping very "many. A dozen hens should give you enougheggs for a small family, with a few occasionally to sell or giveaway in the summer time. You would have to buy a little cornfor them, and in the winter some protein supplement unlessyou could grow enough beans. You might try growing sunflowers,buck-wheat, or other food specially for them. Youmight consider confining them in a small permanent house,with two outdoor runs a la Balfour system, during the worstmonths <strong>of</strong> the winter, with electric light on in the eveningsto fool them that it was the time <strong>of</strong> the year to lay and thusget enough winter eggs.Crops would be all the ordinary garden crops, plus asmuch land as you could spare for fodder crops for theanimals. But you would bear in mind that practically anygarden crop that you grew for your<strong>self</strong> would be good forthe animals too, so everything surplus to your requirementswould go to them. You would not have a "compost heap?Your animals would be your compost heap.If you decided to keep goats instead <strong>of</strong> a cow (and whoam I to say this would not be a sensible decision?) you couldmanage things in much the same way. You would only get asmall fraction <strong>of</strong> the manure from goats, but on the otherhand you would not have to buy anything like so much hayand straw, indeed perhaps not any. You would have nothinglike so much whey and skimmed milk to rear pigs and poultryon, and you would not build up the fertility <strong>of</strong> your land asquickly as you would with a cow.If you kept no animals at all, or maybe only some poultry,you might well try farming half an acre as garden and growingwheat in the other half acre. You would then rotate yourland as we described above but substituting wheat for the
<strong>The</strong> Way to Self-Sufficiency<strong>The</strong> Five Acre HoldingIf you had five acres <strong>of</strong> good well-drained land, you could support a family<strong>of</strong>, say, six people and have occasional surpluses to sell. Of course, no tw<strong>of</strong>ive acre plots are ever the same, but in an ideal situation I would set asideone <strong>of</strong> my acres for the house, farm buildings, kitchen garden and orchard,and the other four acres I would divide into eight half-acre plots. Three <strong>of</strong>them I would put down to grass every year, and there I would run: two cowsfor dairy produce; four sows, a boar, some sheep and some geese for meat;and some chickens for eggs. As well as these animals I would keep ducks,rabbits, pigeons and bees wherever I could fit them in. Now, on the fiveremaining plots I would sow: wheat; roots; Jerusalem artichokes orpotatoes; peas and beans; oats, and barley undersown with grass and clover.I would rotate all eight plots every year so no plot ever grew the same croptwo years running, unless it was grass. A grass plot would stay grass forthree years before being ploughed.PastureYour pasture can cover one and ahalf acres. Here you can graze cows,sheep, geese and chickens, andwhen you want to plough up some<strong>of</strong> your grassland, you can bringyour pigs back from the woods andfold them on small areas at a time.<strong>The</strong> top end <strong>of</strong> the field has not yetbeen cut for hay.24
<strong>The</strong> Way to Self-Sufficiencygrass-and-clover ley. If you were a vegetarian this might bequite a good solution. But you could not hope to increasethe fertility, and thus the productiveness, <strong>of</strong> your land likethis as much as you would do with animals.THE FIVE ACRE HOLDING<strong>The</strong> basic principles I have described for running a one acreholding will also broadly apply to larger acreages. <strong>The</strong> maindifference would be that if you had say five acres <strong>of</strong> mediumto good land in a temperate climate, and the knowledge,you could grow all the food necessary for a large familyexcept such things as tea and c<strong>of</strong>fee, which can only begrown in the tropics. And you could, <strong>of</strong> course, do withoutsuch things. You could grow wheat for bread, barley for beer,every kind <strong>of</strong> vegetable, every kind <strong>of</strong> meat, eggs, and honey.Just as every person in the world is different, so is everyfive acre plot, but here is a possible pattern:-Assuming one acre was set aside for house and buildings,orchard and kitchen garden, the remainder could be dividedup into eight half-acre plots. It would be necessary to fencethem permanently: electric fencing would do. Or, if youare a tetherer, you might tether your cows, and your pigs,and your goats if you have any, and not have any fencing atall. I tried tethering a sheep once but the poor thing died <strong>of</strong> abroken heart so I wouldn't recommend it.<strong>The</strong> rotation could be something like this: grass (for threeyears) -wheat-roots-potatoes-peas and beans-barley, undersownwith grass-and-clover-grass (for three years).This would only leave you, <strong>of</strong> course, one and a half acres<strong>of</strong> grassland, but it would be very productive grassland, andin a good year it could be supplemented with somethinglike: a ton <strong>of</strong> wheat; twenty tons <strong>of</strong> roots; four tons <strong>of</strong>potatoes; half a ton <strong>of</strong> peas or beans; three quarters <strong>of</strong> aton <strong>of</strong> barley.You might well manage to get two tons <strong>of</strong> hay <strong>of</strong>f yourgrassland, and then have enough "aftermath" (grass whichgrows after you have cut the hay) to give grazing to your cowsuntil well into the autumn.<strong>The</strong>re are a thousand possible variations <strong>of</strong> this plan, <strong>of</strong>course. Flexibility is the essence <strong>of</strong> good husbandry. Youcould, for example, take potatoes after your ploughed-upgrassland, and follow that with wheat. You could grow oatsas well as barley, or oats as well as wheat. You could growsome rye: very useful if you have dry light land, or wantgood thatching straw, or like rye bread. You could grow lesspeas and beans. You could try to grow all your arable cropsin four half-acre plots instead <strong>of</strong> five and thus leave twoacres for grassland instead <strong>of</strong> one and a half. You might findyou had some grassland to spare in your "home acre" - inyour orchard, for example, if your trees were standards andtherefore too high to be damaged <strong>by</strong> the stock. Of courseif you were in maize growing country you would grow maize,certainly instead <strong>of</strong> barley, maybe instead <strong>of</strong> roots orpotatoes. A good tip is to seek out farming neighbours,and ask them which crops grow best in your area.As for stock - you might well consider keeping a horseto help you do all that cultivating, or you might have a smallgarden tractor instead. Your ploughing could be done withpigs. With five acres you might well consider keeping enoughsows to justify a boar. Four is probably the minimum: wekept six sows and a boar for many years and they wereastonishingly pr<strong>of</strong>itable. Indeed, in good years and bad,they paid all our bills for us: the Irish call the pig "the gentlemanwho pays the rent" and one can see why. But pigswon't pay you very well unless you can grow a great deal<strong>of</strong> their food for them. You could look upon your pig herd,whether large or small, as your pioneers: they would ploughup your half acre <strong>of</strong> grass every year for you, plough yourstubbles after corn, clean up your potato and root land afterharvest, and generally act as rooters-up and scavengers.Poultry, too, would be rotated about the holding as muchas possible. Put on wheat or barley stubble they will feedthemselves for some time on spilled grain, besides doinggreat good scrapping out leatherjackets and wireworm.Following the pigs after the latter have rooted up a piece<strong>of</strong> land they will also do good <strong>by</strong> eating pests and will dothemselves good too. Ducks, geese, turkeys, tame rabbits,pigeons: your five acres will provide enough food and spacefor them all, and they will vary your diet.I would recommend keeping two cows, so you would haveample milk all the year, you would have enough milk to makedecent hard cheese during the summer to last you throughthe winter, and enough whey and skimmed milk tosupplement pig and poultry feed. If you reared one calf a year,and kept him eighteen months or two years, and thenslaughtered him, you would have enough beef for familyuse. That is, if you had a deep freeze. If you did not, thenyou could sell your bullock and use that money for buyingbeef from the butcher, or, much better, you could make anarrangement with several small-holder neighbours that youeach took turns to slaughter a beast, then divided the meatup amongst you so it could all be eaten before it went bad.• In a cold winter you can keep beef at least a month.Sheep, on such a small acreage, are a more doubtfulproposition because they need very good fencing and alsoit is uneconomic to keep a ram for less than say six sheep.But you could keep some pet ewes, get them mated witha neighbouring ram, rear the lambs and keep your<strong>self</strong> inmutton and wool.<strong>The</strong> above is only an introductory outline <strong>of</strong> how aprospective <strong>self</strong>-supporter might organize a five acreholding. Each person will wish to adapt according to hiscircumstances, the size <strong>of</strong> his family or his community, andthe nature <strong>of</strong> his land. But the main body <strong>of</strong> this <strong>book</strong> isaimed at providing him with as much practical help aspossible in selecting and managing his acreage, his cropsand his livestock, and in making them the productive agentsin his search for the good life.26
Food from the FieldsClearing LandUnless your holding is big and you plan to farm a proportion<strong>of</strong> it on the "dog and walking stick" principle, one <strong>of</strong> your firstpriorities will be to see if you can gain any extra usable land <strong>by</strong>clearing overgrown wood and bush land. Such land is worthclearing as long as it is not on a ridiculously steep slope, or isirretrievably boggy or is covered in boulders. Clearing land ishard but rewarding work, although it can be extremelyexpensive and time consuming.Pigs and goatsYour pig is your best pioneer. If you concentrate pigs in bushland they will clear it for you with no effort on your part at all.<strong>The</strong>y won't, <strong>of</strong> course, remove trees, but all brambles, gorseand undergrowth generally will yield to their snouts and theywill manure the land at the same time. If there are any stubbornareas <strong>of</strong> thicket try throwing some corn into them andthe pigs will soon root them out.Goats will kill small trees, and big ones too if they are concentrated,<strong>by</strong> barking.them, and they will prevent trees fromcoming back. <strong>The</strong>y will not <strong>of</strong> course get the trees out, anymore than pigs will. You will have to do that.Clearing woodlandStumping woodland may well cost you more than buyingnew land unless you happen to live in a country that has alarge government subsidy for this work. But if you can spendthe time and the vast effort needed, you can stump old woodland,and to produce fertile land where no cultivatable landwas before is a worthy endeavour. Consider first, though,whether it would not be better to replant old woodland asnew woodland and farm it as forest (see p. 33).<strong>The</strong> most expensive method <strong>of</strong> stumping is to hire a mechanicalexcavator. One <strong>of</strong> these, plus a driver, costs a lot to hirebut undoubtedly does a lot <strong>of</strong> work in an hour. It leaves thetrees pulled out, higgledy-piggledy, one on top <strong>of</strong> the other.You are then left with the formidable job <strong>of</strong> slashing out theusable timber and burning the "slash", as the small branchesare called. And to do the latter operation when the wood isgreen is a much harder j ob than you might think, but you havegot to do it before you can cultivate the land.It is cheaper to haul stumps out with a tree-jack or monkeywinch.You might hire or borrow one <strong>of</strong> these, or buy one ifyou had a lot <strong>of</strong> land to clear but they cost several hundredpounds. <strong>The</strong>re are many varieties <strong>of</strong> them. Alternatively youcan dig stumps out with spade and mattock, but this is verylaborious. Or you can blow them out with gunpowder, gelignite,or other explosive. This involves driving a hole as deepdown under the stump as you can get it and pushing yourcharge down there. A lifting explosive is the best thing to use:black gunpowder is fine if you use enough <strong>of</strong> it. AmmonolHand toolsIf you haven't got pigs or machinesto clear your land, you can do it <strong>by</strong>hand, but you need the right took.SlashersMattock Auger Gloves Wheelbarrow28
Food from the Fieldsis excellent or any "high-expansion-ratio" explosive. Thus itis better to use "open-cast" gelignite than ordinary rockbreakinggelignite. As for quantities - this is entirely a matter<strong>of</strong> judgment and trial and error. Two pounds (0.9kg) <strong>of</strong>ammonol might lift a big oak right out <strong>of</strong> the ground; it wouldtake ten pounds (4.5kg) <strong>of</strong> black gunpowder to do the samething. But get somebody who has used explosives before tohelp you.A more accessible method for most <strong>of</strong> us is sodium chlorate,which is a common weed killer, much used <strong>by</strong> terroristsfor the manufacture <strong>of</strong> their infernal machines. If you drillholes in the stump and fill them with sodium chlorate, putsome cover over the holes to stop the rain from getting in, andwait a month, you will find that the stump has becomehighly inflammable. Build a small fire on the stump and it willburn right away.Removing rocksRocks can be very obstructive, particularly on boulder-clayor glacial till in which boulders havebeenleft <strong>by</strong> theretreatingice in a <strong>complete</strong>ly random fashion. Again, the mechanicalexcavator can deal with these if they are not too big, haulingthem out and dozing them to the side <strong>of</strong> the field.You can lift quite large rocks, <strong>of</strong> several tons or more, withlevers. Dig down around the rock, establish a secure fulcrumat one side <strong>of</strong> it - a railway sleeper will do, or another rock -insert a long beam <strong>of</strong> wood or steel girder - a length <strong>of</strong> railwayline is ideal - and raise that side <strong>of</strong> the rock a few inches. Nowpack small rocks under the big rock, let the latter subside, andapply your lever to the other side. Do the same there. Continueto work your way round the rock, raising it again andagain the few inches made possible <strong>by</strong> your lever and packingsmall stones under it each time you have gained a bit. You willeventually work your rock to a point above the surface <strong>of</strong> thesurrounding ground.Once you have got a boulder out you may be able to roll itto the side <strong>of</strong> the field, again using levers. If it is too big for thisyou can try lighting a big fire under it, heating it right through,and then throwing cold water on it. This should crack it.Breaking rocksIf you can get them explosives are the easiest way <strong>of</strong> breakingrock. Plastic high explosive is the best <strong>of</strong> the lot, but any fairlyfast gelignite is fine. Drill a hole in the rock and put in yourexplosive. An ounce (28g) <strong>of</strong> gelignite splits a huge rock. Youcan drill rock with a compressor and rock drill, or you can doit <strong>by</strong> hand with a jumper - a steel bit like a long cold chisel -and a heavy hammer. You drive the jumper into the rock withthe hammer, turning the jumper after every blow, and pouringwater into the hole you are making from time to time. Wrap arag round the jumper to stop the rock paste thus formed fromsplashing up in your face. But, as I said before, if you havenever used explosives I strongly advise you to get somebodywho has used them to come and help you the first time.Blowing up a stumpPut your charge in a hole deepunder the stump and retreat.Use a rock or a chunk <strong>of</strong> wood as afulcrum. Work a lever down besidethe boulder.Repeat the process over and over,gaining a few inches each time.Burning a stumpDrill holes, fill with sodiumchlorate and cover over. Wait amonth, then build a fire on top.Raise the boulder as far as possible,Prop up with stones. Take lever andfulcrum to the other side.Once the boulder is out, roll or leverit <strong>of</strong>f your field.
Food from the FieldsDraining LandIf you are lucky your land will not need draining at all. Muchland has porous subsoil and possibly rock through whichwater can percolate, perhaps has a gentle slope, and isobviously dry. But land with an impervious subsoil, veryheavy land, land that is so level that water'cannot run awayfrom it, or land with springs issuing out in it, may well needdraining. Badly-drained land is late land, meaning it will notproduce plants early in the year. It is cold land and it is hard towork. You cannot cultivate it when it is wet - particularly if ithas clay in it. In short, it will not grow good crops.You can tell wet land even in a dry summer <strong>by</strong> the plantsgrowing in it. Such things as flag irises, sedges, rushes andreeds, all give away the fact that, although dry in the summer,it will be wet and waterlogged in the winter time and shouldbe drained.Cut-<strong>of</strong>f drainsOften, on sloping land, you can drain a field <strong>by</strong> digging a ditchalong the contour above it (see illustration). <strong>The</strong> effect <strong>of</strong> thisditch is to cut <strong>of</strong>f and take away the water that is percolatingdown from above. <strong>The</strong> rain that actually falls on the field isnot enough to cause it to become waterlogged: it is the waterthat drains down from above that does the damage.SpringsYou can drain springs <strong>by</strong> connecting them <strong>by</strong> ditch or landdrain (see illustration) to a stream that will carry the wateraway. You can see where springs are <strong>by</strong> wet patches or <strong>by</strong>water-loving plants. Ifthere is a large waterlogged area aroundthe spring common sense might tell you to make a larger holearound the mouth <strong>of</strong> your pipe and fill it with stones.Land drainsLevel land can be drained simply <strong>by</strong> lowering the water table.<strong>The</strong> water table is the level at which the surface <strong>of</strong> the undergroundwater lies. It will be higher in the winter than it is in thesummer, and in severe cases may be above the surface. Youlower it <strong>by</strong> digging ditches, or putting in land drains, to takethe water away. You can even do this with land below sealevel,<strong>by</strong> pumping water from the deepest ditches up into thesea, or to raised-up rivers that carry it to the sea.Obviously heavy soils (soils with a big clay content) needmore draining than light soils, but even sand, the lightest <strong>of</strong> allsoils, can be waterlogged and will then grow nothing until it isdrained. <strong>The</strong> heavier the soil is the closer together yourdrains will need to be, for the less is the distance water canpercolate. A very few drains will suffice to drain light or sandysoil. If you have had no experience it will pay you to get theadvice <strong>of</strong> somebody who has: in countries with governmentdrainage <strong>of</strong>ficers these are the obvious choice. <strong>The</strong>re can<strong>of</strong>ten be heavy grants for draining, too.<strong>The</strong>re are three main types <strong>of</strong> land drain: open ditches,underground drains and mole drains. An open ditch is justwhat it says. You dig, or get dug <strong>by</strong> machine, a ditch withThree situations where you need drainsA- Water runs downhill through porous soil or rock before hitting animpervious layer. This forces it, generally sideways, to the surface where itemerges as a spring. B. An impervious subsoil prevents rain sinking.C- Absolutely flat land has no slope to allow drainage.<strong>The</strong> plants on the right are sure signs <strong>of</strong> wet land: (left to right) marshorchid, marsh violet, flag iris, marsh marigold, jointed rush, wood sedge,common rush and bulrush.Porous rock30
Food from the Fields<strong>The</strong> mole drainerA torpedo-shaped steel object at thebottom <strong>of</strong> a narrow blade is draggedthrough the soil. <strong>The</strong> narrow slotmade <strong>by</strong> the blade fills in but thedrain remains. <strong>The</strong> drain lasts muchlonger in clay than in s<strong>of</strong>t sandy soil.<strong>The</strong> chisel ploughTv; chisel plough, or subsoiler, cuts- s€-.~s <strong>of</strong> deep, evenly spaced--—:=.i < in the soil. This works very•-•£- u ith heavy clay, where the-»~; u 5 last and ensure freebattered (sloping) sides. On light land (sandy soil) the batterwants to be much less steep than on heavy land becauseheavy land supports it<strong>self</strong> better. Common sense will tell youhow much to batter. If the sides fall in it is too steep.Depth too is a matter <strong>of</strong> reasoned judgment. If the ditchis deep enough to lower the water table sufficiently for thecrops to grow happily it is deep enough. You certainly don'twant standing water in the soil at less than 18 inches (46 cm)from the surface: better if you can lower the water table t<strong>of</strong>our feet (1.2m). If you are having to dig the ditch <strong>by</strong> handyou won't want it too deep. And remember open ditchesneed flashing-out (clearing <strong>of</strong> scrub and weeds) every yearor two and cleaning with a spade every five to ten years. <strong>The</strong>yalso need fencing.Underground drains are <strong>of</strong> many types (see illustrations).As long as they are deep enough not to be affected <strong>by</strong> deepploughing or cultivating, and their slope is continuous to theoutfall so that they don't silt up in the dips, they will requireno maintenance and should last for centuries. Mole drains(see illustration) do not last for more than five to ten years -less in sandy land.But draining is simple common sense. Imagine what isgoing on down there. Dig try-holes to find how deep thewater table is and where the springs, are. Arrange to drain thatwater away to the nearest stream or river or whatever, or evenlet it debouch into waste-land below your land, and you willhave well-drained productive land.<strong>The</strong> uses <strong>of</strong> drains and ditchesA cut-<strong>of</strong>f ditch will intercept water draining downhill, and lead it round yourfield to a receiving ditch at the bottom. An underground drain can be used todrain a spring, and a series <strong>of</strong> underground drains ~ herring bone pattern isideal - can take sufficient water away to lower your water table. You want toget the water table at least 18 inches (46 cm) below the surface. Four feetis ideal.Cut-<strong>of</strong>f ditchI Underground drainslowering the watertablePlasticpipe drainSemi-circulartile drainD raining a springDig down to the spring. Lay a pipeor dig a ditch to carry the wateraway. If the spring covers a largearea fill. in around your pipe withsome stones.-^ \ Underground\ drain\ capturing\ spring waterStoneculvert drainBush drainUnderground drainsStone culvert drains and tile drainsare naturally porous. Plastic pipedrains have slits in them to let thewater in. <strong>The</strong> Roman bush drain,simply bushes covered with earth,can be reinforced with a piece <strong>of</strong>perforated corrugated iron.31
Food from the FieldsIrrigating LandAlmost wherever you live your crops will benefit <strong>by</strong> irrigation,and in some countries they just won't grow withoutit. <strong>The</strong> luckiest cultivators in the world are those who live ina hot dry climate but have plenty <strong>of</strong> water for irrigation.<strong>The</strong>y have far better control over their husbandry thanpeople who live in high rainfall areas-. <strong>The</strong>y need have noserious weed problem: they simply kill their weeds <strong>by</strong> withholdingwater from them when the land is fallow. <strong>The</strong>y candrill their seed in dry dust before they water it, and thenimmediately flood the land to make the seed grow. <strong>The</strong>y cangive the crop exactly enough water for its needs throughoutits growing time, and then withhold water when it comes toharvest and there<strong>by</strong> harvest in perfect conditions. <strong>The</strong>yhave it made.But the rest <strong>of</strong> us can also use irrigation to advantage. Ittakes 22,650 gallons <strong>of</strong> water to apply an inch depth <strong>of</strong> waterto an acre (an "acre-inch"). If there is no rain during the rainyseason it is nice to apply an inch (2.5 cm) a week during theperiod <strong>of</strong> hardest growth <strong>of</strong> the crop. In temperate climateswith a fair rainfall like most <strong>of</strong> Northern Europe, and theEastern United States, the addition <strong>of</strong> from two inches upto six (5-15 cm) during the growing season will probably beenough. In any case the irrigator cuts his coat according tohis cloth. Anything is better than nothing.If you are lucky you may be able to tap a stream above theland you wish to irrigate and lead the water down in a pipe,but unless your source is much higher than your land youwon't get much pressure. On the other hand, contrary topopular Western belief, you don't really need a lot <strong>of</strong> pressure:you only need the water. By the simple means <strong>of</strong> layinga hose on the ground and moving it about from time to time,as patch after patch gets flooded, you can do a great deal <strong>of</strong>good. You can do more good <strong>by</strong> letting water run downfurrows between your rows <strong>of</strong> crops, moving the hose eachtime the water reaches the bottom <strong>of</strong> another furrow.Sprinkle irrigationBroadly there are two kinds <strong>of</strong> irrigation: sprinkle irrigationand flood irrigation. Western farmers tend to go in for theFlood irrigationSloping beds, previously levelled, with a water channel at their head, areseparated <strong>by</strong> little earth bunds. You make a dam across the channel at thefirst bed, break the bund separating channel from bed, close the gap once thebed is flooded, destroy the dam and repeat the process.former. <strong>The</strong>y use pumps and either "rainers," rotary sprinklers,or oscillating spray lines, all <strong>of</strong> which need considerablepressure to make them operate. This is fine if you can affordthe equipment, afford the fuel and have the water, whichdoes not have to be above the field. But all this is expensive,and not for the ordinary <strong>self</strong>-supporter. Personally I couldnever see the point <strong>of</strong> squirting water up in the air at someexpense just to have it fall down again, and have alwayspractised some form or other <strong>of</strong> flood irrigation.Flood irrigationIn countries where irrigation is really understood, and theseare the countries where it is really needed, flood irrigationis what is used. If you have a stream running next to a field,it is not difficult to get a little petrol pump and a hose, andto move the pump along the bank <strong>of</strong> the stream as onestretch <strong>of</strong> the field after another is irrigated. Alternatively,you may have a stream at a higher level than the field.Ideally the land should be either terraced in perfectly levelbeds, or, if the field has a natural gentle slope, levelled intogently sloping beds with bunds separating each bed from thenext. (A bund is a small earth bank not more than a foot high.)You can grass these bunds, in which case they are permanent,or level them down each year and build them up again. If youare working with tractors you will probably level them,because it gives you more room to manoeuvre. At the head<strong>of</strong> all the sloping beds is a water channel. To irrigate youbuild with a spade a little dam <strong>of</strong> earth about a foot highacross this channel at the first bed, and break the bundwhich separates the channel from the bed with the spade.You sit there, in the sunshine watching the butterflies, untilthe water has meandered down the bed, covered all <strong>of</strong> it andhas got to the botttom. If your bed is not properly levelled,and has no crop in it, you can use your spade to level it so asto spread the water evenly. On a hot day this is a delightful job.Now you will have already built small dams level witheach <strong>of</strong> the other beds. When the first bed is watered youclose the gap in its bund, break its dam down, break a hole inthe bund <strong>of</strong> the second bed, and let the water run into there.And so you go on.Of course this pre-supposes that the water in your headchannelis higher than your beds. What if it is lower? <strong>The</strong>nyou must do what many a Chinese or Egyptian does: justraise it that few inches. You can do this with a bucket, verylaboriously or a hundred other devices that ingenuity willlead you to. A small petrol pump might be one <strong>of</strong> them, atiny windmill another.If your field is very steep it is obvious that beds slopingdown it will not do for flood irrigation. You will have toterrace it. This will involve stone or at least turf retainingwalls and is a tremendous job. And if you have a very big fieldyou may need two or more head channels on different contours,because the water won't be able to meander down fromthe top <strong>of</strong> each bed to the bottom.32
Food from the FieldsMaking Use <strong>of</strong> Woodland<strong>The</strong> most useful trees for the <strong>self</strong>-supporter are, in order <strong>of</strong>importance, sweet chestnut (the best tree in the world fortimber), oak, ash, and larch. In North America you would•add hickory, sugar maple and black cherry. If you have asaw bench capable <strong>of</strong> ripping down trees, then s<strong>of</strong>twoodsor any <strong>of</strong> the timber hardwoods are useful too.Hardwoods and s<strong>of</strong>twoodsWhen considering timber for purposes other than fuel,points you should look out for are: a fairly quick rate <strong>of</strong>growth, hardness and resistance to rot, and what I will call"cleavability" or "splittability."For very many farm and estate uses it is better to cleavewood rather than rip-saw it (saw it along the grain). Cleavingis quicker, cheaper, the resulting wood is stronger, and lastslonger. Why? Because when you rip-saw you inevitablycut across certain <strong>of</strong> the grain, or wood-fibres. When youcleave, your cleavage always runs between the grain, whichavoids "cross-graining" and leaves undamaged grain to resistthe weather.Sweet chestnut cleaves beautifully. It is fast growing,straight, hard and strong. It also resists rot better than anyother tree. Oak cleaves well too, but not as well as chestnut.<strong>The</strong> heart <strong>of</strong> oak is as hard and lasts as long, but the whitesap-wood on the outside - most <strong>of</strong> a small tree - is useless.Oak is extremely slow growing and needs good soil to growat all. Ash on the other hand is tough, and resilient, but willrot if put in the ground. It is straight, grows fast, and splits<strong>The</strong> forester's essential toolsFell your tree with axe and saw. Use hammer and wedge, or club and froefor splitting. Adze and draw-knife are for stripping and shaping.well. Above the ground, but exposed to the weather, it willlast a long time if you oil or creosote it every now and then.It makes good gates or hurdles. Larch is unusual in that itis a conifer but not an evergreen. It is very fast growing andthe best <strong>of</strong> the conifers for lasting in the ground providingit is creosoted. All the other conifers, or s<strong>of</strong>twoods, that Iknow are hopeless in the ground if not pressure-creosoted,and then they don't last many years.Cherry and all other fruit woods are hard, and make finefirewood. <strong>The</strong>y are good for making hard things like cogteeth in water mills, for example. It is a pity to use them forposts. Hickory is the best wood for tool handles. It doesn'tgrow in Europe (why I don't know), and so is either importedor else ash is used, a pretty good substitute. Elm - alas nowbeing killed <strong>of</strong>f <strong>by</strong> Dutch elm disease - is good for anypurpose where you want a non-splittable wood, such as forwheel hubs, chopping blocks, and butcher's blocks. It is greatunder water. Maple and sycamore are good for turning ona lathe, and making treen (carved objects). Walnut is a kingamong fine woods, and fit to harvest in a mere 150 years,though 350 is better if you have the patience to wait for it!FirewoodTrees are your most likely source <strong>of</strong> fuel. If you have evenan acre or two <strong>of</strong> woodland, you will find that, with propermanagement, the trees in it will grow faster than you cancut them down for your fire. A piece <strong>of</strong> woodland is themost efficient solar heat collector in the world.Draw-knife33
Making Use <strong>of</strong> WoodlandAsh is the best <strong>of</strong> all firewoods. "Seer or green it's fit for aqueen!" <strong>The</strong> loppings <strong>of</strong> felled ash are excellent. It burns aswell when newly cut as when mature. Oak, when seasoned,is a fine and long-burning firewood, but it grows far tooslowly to be planted for this purpose. Silver birch is goodfor firewood, though not for much else. It burns very hotlywhen seasoned, and it grows fast. Conifers aren't much goodfor firewood. <strong>The</strong>y split a lot and burn very quickly, but inthe frozen north, where there's nothing else, that's whatpeople have to use. Birch is better as firewood, and it will growfurther north than any other tree. All the weed woods, likealder and goat-willow, are very sluggish when green, but canbeburned when dry, though even then they don't burn well orgive out prolonged heat. But what else is there to do withthem? Any wood in the world will burn. But if you areplanting trees especially for firewood plant ash, andthen coppice it.Coppicing means cutting down all your trees when theyare about nine inches (23 cm) in diameter, and then lettingthem grow again. <strong>The</strong>y will "coppice" <strong>by</strong> putting up severalshoots from each bole. Cut these down again in abouttwelve years and they will grow once more. This twelveyearlyharvesting can go on for hundreds <strong>of</strong> years, and inthis way you will harvest the greatest possible quantity <strong>of</strong>firewood from your wood-lot.Planting treesPlant trees very close together and they will grow up straightand tall, reaching for the light. Five foot (1.6m) <strong>by</strong> five is fine.When they become crowded you thin them and get a smallpreliminary harvest. In winter plant trees at least three yearsold. You can buy them from a nursery, or the Forestry Commission,or you can grow them your<strong>self</strong> from seed. Keep thegrass and rubbish down every summer for three or fouryears, so the trees don't get smothered. Saw <strong>of</strong>f low branchesfrom the growing trees to achieve clean timber withoutknots. Feed with phosphate, potash, and lime if needed.Muck or compost will make them grow faster.In existing woodlands uproot the weed trees (alder,goat-willow, thorn) to give the other trees a better chance.Wet land favours weed trees, so drain if you can. Keep outsheep, cattle and goats to give seedlings a chance. Cut outundergrowth if you have time, or try running pigs in thewood for a limited period. <strong>The</strong>y will clear and manure itand they won't hurt established trees. <strong>The</strong>y will also livefor months in the autumn on acorns or beech mast.Seasoning woodStack the planks as they come out <strong>of</strong> the log, with billets <strong>of</strong>wood in between to let the air through. Kiln-drying is aquick way <strong>of</strong> seasoning, but time is better. Some wood (e.g.ash) can be laid in a stream for a few weeks to drive the sapout. This speeds seasoning, but some trees do take years toseason. If you want woods for cabinet-making, for example,there must not be any subsequent movement. But for roughwork, gates, or even timbers for rough buildings, seasoningis not so important.Always remember to treat trees as a crop. Don't hesitateto cut mature trees when they are ripe, but always plantmore trees than you cut down.Trees to plant<strong>The</strong>se trees are among the mostuseful that you could grow on yourland: 1 Ash 2 Larch 3 Silver birch4 Elm 5 Walnut 6 Sweet chestnut7 Shagbark hickory 8 Oak.34
Food from the Fieldsout your saw, bang the wedgefurther in and over she goes. Ajagged piece <strong>of</strong> wood, called the"sloven" will be left sticking upfrom the stump. Trim it <strong>of</strong>f withyour axe.Riving with wedge and sledgehammerWedges and a sledgehammer arethe best tools for "riving", or splitring,large logs. Use the sledgemadeuntil the log splits rightdown its length. Never use an axe asa wedge. <strong>The</strong> handle will break.Riving with froe and clubFor riving smaller wood the idealtool is a froe. Whack the blade intothe end grain with a club or mallet.Work the blade further into theFelling a treeTrim <strong>of</strong>f all roots and buttresseswith your axe. <strong>The</strong>n use the axe tocut a "face" (forester's term for adeep V-shaped notch) in the sidetowards which you want the tree t<strong>of</strong>all. <strong>The</strong>n begin sawing from theother side, making your cut a fewinches above the deepest part or theface. When the tree "sits on" yourblade so you can't move it use yourhammer to drive a wedge into theend grain <strong>of</strong> the log. <strong>The</strong>n drivemore wedges into the cleft thuswood <strong>by</strong> levering sideways with thehandle. You won't have got farbefore the wood splits down itsSawing planksA pit-saw is a time-honoured toolfor sawing logs into planks. Oneman stands on the log; the other isdown a pit dodging the sawdust.Band saws and circular saws areeasier but more expensive.Mrsledgehammer to drive a wedge inbehind your saw. Carry on sawinguntil you are close to the "face" andthe tree is about to fall. <strong>The</strong>n, pulllength. This is much quicker thanusing wedges.~~M7Seasoning planksStack planks as they leave the logwith spacers to let the air through.Leave for at least 18 months.35
Food from the FieldsHedging & FencingDomestic animals can be herded: that means kept wherethey are supposed to be <strong>by</strong> human beings. But the <strong>self</strong>supporterwill <strong>of</strong> necessity be a busy man. Fences will not onlyrelieve him and his wife and children from the timeconsumingtask <strong>of</strong> herding, but will give him a useful tool forthe better husbanding <strong>of</strong> his land. Without the fence youcannot fold sheep or cattle on fodder crops; you cannotconcentrate pigs on rooting; you cannot even keep goatsand chickens out <strong>of</strong> your garden.Quickthorn hedge<strong>The</strong> cheapest and most natural barrier you can build is aquickthorn hedge. Quick means alive, and such a hedge isestablished <strong>by</strong> planting thorn bushes, generally whitethorn(may), close enough together in a long line. Seedling thorns,about six inches (15 cm) high, can be planted in two lines,staggered, nine inches (23 cm) between the two rows buteighteen inches (46 cm) between the plants in the rows.You can buy the plants from nurseries or grow them your<strong>self</strong>from haws, the seeds <strong>of</strong> the hawthorn. But the hedge mustbe protected from stock for at least four years, and this is whatmakes a quickthorn hedge so difficult to establish. Animals,particularly sheep and even more particularly goats, will eat ayoung quickthorn hedge. <strong>The</strong>refore some other sort <strong>of</strong>fence- probably barbed wire - must be established on both sides <strong>of</strong>a new quickthorn hedge: an expensive business.Laying a hedgeBut once the quickthorn hedge is established it is there, if youlook after it, for centuries. You look after it <strong>by</strong> laying it. That is,every five years or so, cutting most <strong>of</strong> the bushes' trunks halfway through and breaking them over. <strong>The</strong> trunks are all laidthe same way - always uphill. <strong>The</strong>y are pushed down on top<strong>of</strong> each other, or intertwined where possible, and <strong>of</strong>ten held<strong>by</strong> "dead" stakes driven in at right angles to them. Sometimesthe tops <strong>of</strong> these are pleached with hazel or willow wandstwisted through like basketry. In due course the pleaching andthe dead stakes rot and disappear, but the hedge puts out newgrowth and can be very stock-pro<strong>of</strong>.<strong>The</strong> quickthorn hedge is a labour intensive way <strong>of</strong> fencing,but labour is all it uses, and it lasts indefinitely. Also it looksnice, gives haven to birds and small animals, and serves as awindbreak: very important in windy countries. In days <strong>of</strong> oldit supplied, with no extra work, faggot-wood, used for heatingbread ovens and other purposes, to say nothing <strong>of</strong> blackberries.You can <strong>of</strong>ten restore old hedges to efficiency on anew holding <strong>by</strong> laying them, judiciously planting here andthere an odd thorn bush to fill in a gap.Dry-stone wallIf there is freestone (stone that cleaves out <strong>of</strong> the quarry easilyin fairly even slabs) in your district you have probably alreadygot dry-stone walls. Dry means without mortar in this context.If you have them you will need to maintain them. If youhaven't but you have the stone on your land you can buildsome. It is backbreaking but costs nothing. You need tons <strong>of</strong>stone - much more than you think you are going to need -and a good hand and eye. Dig a level foundation trench first,then lay the stones carefully, breaking all joints, keeping sidesvertical, and fitting the stones in as snugly as you can. Drystonewalls can be quite stock-pro<strong>of</strong>. <strong>The</strong>y are enormouslyexpensive in labour and need repairing from time to time.Stone-hedgeIt is possible to build a cross between a wall and a hedge. Youfind these in districts where the natural stone is rounded orboulder-shaped, not the rectangular slabs which are foundparticularly in limestone country. Two stone walls are builtwith a pronounced batter - that is they lean inwards towardseach other. <strong>The</strong> gaps between the stones are filled in withturf, and the space between the two walls is filled with earth.A quickthorn hedge is then planted on top. After a year ortwo grass, weeds and scrub grow from the earth and the turf.<strong>The</strong> wall is quite green and not, to be quite frank, very stockpro<strong>of</strong>.If you look at a hundred such hedges I'll warrant you'llfind a discreet length <strong>of</strong> barbed wire or two, or even sheepnetting,along ninety <strong>of</strong> them. <strong>The</strong>se wall-hedges aren't reallymuch good. So if you have them, fortify them with barbedwire to keep your animals in.Wattle-hurdleIf you can get stakes from your own trees a wattle-hurdlefence is free except for labour, and fairly quick to erect, but itdoesn't last long. You drive sharpened stakes into the groundat intervals <strong>of</strong> about nine inches (23 cm) and pleach, orweave, pliable withies (willow branches), hazel branches,holly, ivy, blackberry or other creepers between the stakes soas to make a continuous fence. <strong>The</strong> weaving material soondries out and cracks and gets rotten and you have to ram morein and the stakes themselves, unless <strong>of</strong> chestnut or heart-<strong>of</strong>oakor other resistant wood, rot after a few years and break <strong>of</strong>f.Where stakes or posts are expensive or hard to come <strong>by</strong> it is anextravagant form <strong>of</strong> fencing.Post-and-railA post-and-rail fence is stronger and, unless you are able togrow your own wood, more economical. It consists <strong>of</strong> strongstakes, either <strong>of</strong> resistant wood or else s<strong>of</strong>t-wood impregnatedwith creosote, driven well into the ground, with rails <strong>of</strong>split timber nailed on to them. Abraham Lincoln, we are told,started his life as a "rail-splitter". <strong>The</strong> rails he split would havebeen for post-and-rail fences, for in his day that wonderfulinvention wire had not begun to encompass the world, andyet the new settlers spreading over North America had tohave fences on a large scale. Post-and-rail was their answer.A variant <strong>of</strong> it was the zig-zag fence, the posts <strong>of</strong> which formeda zig-zag pattern. This added lateral strength. It took up morewood <strong>of</strong> course.36
Food from the FieldsBuilding or repairing a hedgeCut stakes out <strong>of</strong> your hedge so as to leave strong bushes at intervals <strong>of</strong> about afoot. Wear a leather hedging glove on your left hand. Bend each trunk overand half-cut through it near the base with a bill-hook.Force the half-cut trunk down to nearly horizontal and try to push the endunder its neighbour so as to hold it in position. Be sure not to break it <strong>of</strong>f.Take the stakes you have just cut and drive them in roughly at right angles tothe trunks, interweaving them with the trunks. Pleach tops <strong>of</strong> stakes withsome pliable growth such as hazel or willow. By the time the stakes haverotted the living hedge will be secure.Overgrown hedgesRunaway hedges can be tamed witha slasher (left). Clear surroundingundergrowth with a bagging hook(above), but use a stick in your lefthand. Otherwise you might lose afinger or thumb.Steel wire<strong>The</strong> invention <strong>of</strong> galvanized steel wire was the answer to thefencer's dream. It can be plain wire (<strong>of</strong>ten high-tensile),barbed wire, or netting. Plain wire is effective only if strained.Barbed wire is more effective if it is strained, but <strong>of</strong>ten astrand or two attached somewhat haphazardly to an oldunlaid hedge is all there is between animals and somebody'svaluable crop. Netting is very effective but nowadays terriblyexpensive. Square-meshed netting is strongest for a permanentsituation, but is awkward to move very <strong>of</strong>ten: diamondmeshednetting is much weaker but stands being repeatedlyrolled up and moved and is therefore ideal for folding sheep.Straining wireIf you buy a wire strainer you can see easily enough how to useit, but there are several very effective ways <strong>of</strong> improvising one.Using stoneA well maintained dry-stone wall iseven more stock-pro<strong>of</strong> than anestablished hedge. You need stonethat comes in even, flattish slabs.Dig down about nine inches (23 an)and make a level foundation trench.Lay the stones, neatly fitting themtogether. Make sure the sides arevertical and all joints are broken.If you have large round stones onyour land, you can make a sort <strong>of</strong>stone hedge. Build two stone wallsleaning towards each other about afoot (30 cm) apart. Plug the gapsbetween the stones with turf and thespace between the walls with earth,and plant a hedge on top. You willprobably find sheep will walkstraight over it, at least until thehedge is mature. So to be reallystock-pro<strong>of</strong> the whole thing needsto be reinforced with barbed wire.A tool much used in Africa consists <strong>of</strong> a forked stick two feet(61 cm) long, with a six-inch (15 cm) nail fastened with staplesalong its length just below the fork. <strong>The</strong> wire to be strained isinserted under the nail and then wrapped twice round it forfirmness. You then take up the slack <strong>by</strong> twisting the stick,using the fork like the handle on a tap. <strong>The</strong>n you put the finalstress on <strong>by</strong> turning the stick round the corner post, using thestick as a lever. You can get short lengths <strong>of</strong> wire quite tightenough like this, although if you are straining extremely longlengths at a time you will need a proper wire strainer, unlessyou pull the wire taut with a tractor.If you strain wires on a post on a cold winter's day you maywell have to strain them on a hot day next summer. Heatmakes metal expand. Often, in practice, you can apply strainto wire <strong>by</strong> hauling it sideways - out <strong>of</strong> the line <strong>of</strong> the fence -to a suitable tree with another snatch <strong>of</strong> wire. This is looked37
Hedging & Fencingupon as very infra-dig <strong>by</strong> estate managers but is <strong>of</strong>ten usefuljust the same, especially when you are trying to make a fencestock-pro<strong>of</strong> down in the depths <strong>of</strong> the woods on a pouringwet day. If you can't get a wire strainer you can exert quite alittle strain <strong>by</strong> using a post as a lever, or <strong>by</strong> using a block-tackle,or even <strong>by</strong> using a horse or a tractor. Many farmers use thetractor method. But do not strain wire too much. It breaks thegalvanizing and takes the strength out <strong>of</strong> the wire: alwaysuse common sense.Anchoring fencesA strained fence is as good as its anchor posts. A wire strainer,such as you can buy or borrow from a neighbour, can exert apull <strong>of</strong> two tons, and this multiplied <strong>by</strong> the number <strong>of</strong> wiresyou have in your fence will pull any corner post out <strong>of</strong> theground unless it is securely anchored. You can anchor a fencewith a kicking post, a post placed diagonally against thecorner post in such a way as to take the strain. <strong>The</strong> kickingpost it<strong>self</strong> is secured in the ground against a rock or short post.Alternatively the strain can be taken <strong>by</strong> a wire stretched tautround a rock buried in the ground. A refinement <strong>of</strong> this, thebox anchor, is the most efficient <strong>of</strong> all (see illustration).Remember if you anchor wire to any tree that is not fullymature, the tree will gradually lean over and the fence willslacken. It is bad practice to fasten wire to trees anyway: thestaples and lengths <strong>of</strong> wire get swallowed up <strong>by</strong> the growingtree and ultimately break some poor devil's saw blade. Notthat many <strong>of</strong> us are quite innocent in that respect.Electric fencingYou can get battery fencers, which work <strong>of</strong>f six-volt drybatteries or twelve-volt accumulators, or mains fencers thatwork <strong>of</strong>f the mains and will activate up to twenty miles <strong>of</strong>fencing! One strand <strong>of</strong> hot wire will keep cattle in - it shouldbe at hip height - and one wire a foot (30 cm) from the groundwill keep pigs in if they are used to it. Until they are, use twowires. <strong>The</strong> wires needn't be strong, or strained, just whippedround insulators carried on light stakes, and the whole thingcan be put up or moved in minutes.<strong>The</strong> electric fence gives the husbandman marvellouscontrol over his stock and his land, making possible a newlevel <strong>of</strong> efficiency in farming.HurdlesExcept for electrified wire-netting, which is expensive andhard to come <strong>by</strong>, sheep won't respect an electric fence. Sowhen we wish to fold sheep on fodder fields we make hurdles(see illustration). It's cheaper than buying wire netting. Somewood that rives (splits) is necessary: ash or chestnut is fine. Ifyou use ash you should creosote it. To erect hurdles drive astake in at the point where the ends <strong>of</strong> two hurdles meet andtie the hurdles to the stake with a loop <strong>of</strong> binder twine. Tocarry hurdl es put as many as you can manage together, shove astake through them, and get your shoulder under the stake.A fold-pritch is the traditional implement for erectinghurdles, and you can hardly do the job without it.You can make wattle-hurdles out <strong>of</strong> woven withies or otherflexible timber. <strong>The</strong>se are light, not very strong, don't lastlong, but good for wind-breaks at lambing time. To makethem you place a piece <strong>of</strong> timber on the ground with holesdrilled in it. Put the upright stakes <strong>of</strong> your hurdle in the holesand then weave the withies in. It is simply basket-work.<strong>The</strong> box anchorA fence is only really secure if its wires are strained, which means they cantake a pull <strong>of</strong> two tons. Half a dozen strained wires will pull your comerposts straight out <strong>of</strong> the ground unless they have good anchors. <strong>The</strong> boxanchor is the best <strong>of</strong> all. Heavy s<strong>of</strong>t wire (generally No. 8 gauge) goes fromthe buried rocks to the second post. A cross-piece morticed in this supportsthe two corner-posts on which the wires are held.Ten anchors in a fieldEvery stretch <strong>of</strong> strained wire fenceneeds an anchor, and one anchorcan only take a strain in onedirection. Thus each corner <strong>of</strong> yourfield will need two anchors, and youwill need one each side <strong>of</strong> the gate.38
Food from the FieldsA farm gateA cattle-pro<strong>of</strong> gate for a field orfarjnyard is best built <strong>of</strong> split ash orchestnut. Use bolts to join the fourmain timbers which make up theframe, and also bolt the hinges on.Use clenched six-inch (15 cm) naibfor the other joints. Drill holes for thenails as well as the bolts and pourcreosote through all holes. If youhave a forked timber you can usethe fork as the bottom hinge, butyou must put a bolt through thethroat to stop it splitting. <strong>The</strong>diagonal timbers are compressionmembers which hold the thing inshape and should be fined as shown.HurdlesHurdles are movable fences, whichyou can easily make your<strong>self</strong> fromany wood that splits. Use morticesto join the horizontals to the pointeduprights. Be sure that the ends <strong>of</strong> thehorizontals are tapered in such away that they apply pressure up anddown and not sideways. Otherwisethe uprights will split. You can drivethick nails through the joints to holdthem or else use wooden dowels.Nail the cross-braces. Drill all yournail holes or you will split thetimber. To erect your hurdles,drive stakes into the ground andfasten the hurdles to them with string.Wattle-hurdlesWattle-hurdles can be made 0} splithazel or willow withies woven ontouprights. Put a baulk <strong>of</strong> timber withappropriate holes drilled in it on theground to hold the uprights whileyou are weaving.Post-and-rail fencingStrong uprights must be welltamped into the ground. Drive allnails right through and clenchthem.Wire nettingWire netting is <strong>of</strong>ten convenient butalways expensive. Square-meshed,or pig, netting (right) makes anexcellent permanent jence, andcoupled with a strand <strong>of</strong> barbedwire is <strong>complete</strong>ly stock-pro<strong>of</strong>.Diamond-meshed, or sheep, netting(below) is weaker, but it can berolled up and re-erected, which iswhat you need for folding sheep.39
Food from the FieldsHorse or Tractor Power<strong>The</strong>re are three practical methods <strong>of</strong> powering instrumentsthat have to be dragged over the land: farm tractors, gardentractors and animals.Farm tractors are very large, enormously expensive unlessthey are very old, cost a lot to up-keep, and are not suitable forsmall plots <strong>of</strong> land or small gardens, because in twisting andturning in a small space the tractor wheels compact the soil toa damaging extent. I have sometimes been forced <strong>by</strong> circumstancesto use a farm tractor in a garden and have alwaysregretted it.A small, or garden, tractor is another matter altogether. It islight - lighter than a horse - you can even pick it up if it is nottoo big, it does not compact the soil, it is fairly cheap to buyand to maintain. It will work comfortably in small corners andbetween row crops. It can <strong>of</strong>ten be adapted to many uses: onecommon type will mow grass, either <strong>by</strong> a reciprocating knifeor a rotary knife, it will saw wood, drive all sorts <strong>of</strong> small barnmachinery, rotovate, plough (rather inefficiently and veryslowly), row crop cultivate, pull a small barrow and scrapethe snow <strong>of</strong>f your garden path. Many <strong>of</strong> these jobs you coulddo as quickly or quicker <strong>by</strong> hand, and compared with a largetractor or a horse, a garden tractor is extremely slow.You can plough three acres a day with a small farm tractor:five with a large one, and it doesn't matter how rough the 1 andis. With a horse you can plough perhaps half an acre: withtwo horses an acre. But one horse will only pull a smallplough and plough arable land. To plough grassland you needtwo good horses. With a garden tractor it would take youdays to plough an acre and drive you mad with noise andboredom. It will rotovate old grassland but it will make prettyheavy weather <strong>of</strong> it.Tractors have two major advantages. <strong>The</strong>y are not eatingor drinking when they are not being worked and they do notuse up your land in their search for food. But you do have topay for their food, even though a garden tractor uses a tinyamount. On the other hand a horse - the best example <strong>of</strong>animal power - has the advantage that it does not use fuelfrom <strong>of</strong>f the farm, that you have to buy: it can be fuelledentirely from your land. And a horse has another advantage:it can have another horse. It is unlikely that the tractor willFarm tractors and garden tractorsIf you don't have horses a farm tractor is essential for any holding <strong>of</strong> morethan ten acres. And a garden tractor makes running a garden <strong>of</strong> any size alot easier. <strong>The</strong>re are two types, those that run on wheels and those that dragthemselves forward <strong>by</strong> the action <strong>of</strong> their tines. Both do a good job, but theformer, if big enough, is quicker and more versatile.40
Food from the Fields<strong>The</strong> sources <strong>of</strong> traction<strong>The</strong> most powerful source <strong>of</strong> traction,the farm tractor, is predictably themost expensive, both to buy and torun. And the cheapest, the haplessdonkey, provides less traction and isslower than everything else. For the<strong>self</strong>-supporter the horse is the obviouscompromise. It need cost only atenth <strong>of</strong> the price <strong>of</strong> a tractor, andwill very likely last longer. In anycase if you are lucky and managethings properly it will reproduceit<strong>self</strong> before it wears out. It worksquickly and provides good traction,and you can run it on fuel whichyou grow your<strong>self</strong>. Your childrenwill fall over themselves in theirefforts to look after it, while you canbe fairly certain you'll be the onewho keeps the tractor going. <strong>The</strong>sources <strong>of</strong> traction compared hereare (from left to right): a farmtractor, a garden tractor, a horse,a mule, a donkey and an ox.ever be invented that can have another tractor. But a farmtractor will drive a really effective saw bench, or any barnmachinery (such as mills, chaff-cutters, and the like), it can befitted with a powerful winch for hauling trees out, or down, itwill pull a large trailer or cart, it will dig post-holes, it willoperate a digging arm that will dig ditches for you (but onlyjust). So it is versatile.Maybe we can sum the whole complicated subject up <strong>by</strong>saying: if you have only a garden probably a garden cultivatorwill be valuable - at least if you don't want to do everything<strong>by</strong> hand which you perfectly easily could do if you had thetime. Don't think a garden cultivator is necessarily light work- some <strong>of</strong> them can be very arduous things to manage.If you have anything over four acres - and like horses - alight horse might suit you very well. Once you have got yourland broken up, either with pigs or with a borrowed farmtractor, a small horse will keep it that way, keep your landclean, and give you a lot <strong>of</strong> pleasure besides. But on the otherhand one <strong>of</strong> the larger garden tractors would do the workequally well if not as pleasantly. A horse will eat the produce <strong>of</strong> anacre <strong>of</strong> very good land in a year, or two or three acres <strong>of</strong> poorerland. Do not be put <strong>of</strong>f <strong>by</strong> people who tell you that a horseonly converts such and such a percentage <strong>of</strong> the food it eatsinto energy. A horse wastes not an ounce <strong>of</strong> its food: what itdoesn't convert into energy it puts back into the land asmagnificent manure. On a very small holding you might wellconsider keeping a horse and buying in hay and oats, or maize,for him or her. You are thus buying-in fertility for your hoi ding.If you have ten or fifteen acres or over - and can pick up acheap farm tractor in good condition - and know how to keepit going - it might well save you a lot <strong>of</strong> work. On the otherhand two good horses will do the job as well, but take threetimes as long.Other animals <strong>of</strong> draught include oxen, mules, donkeys,elephants, water buffalo, llamas, yaks, camels, and reindeer.I have had experience with all <strong>of</strong> these except yaks and reindeer,but the only ones that are likely to concern the <strong>self</strong>supporterin Europe or North America are oxen, mules andperhaps donkeys.Oxen are very good draught animals. <strong>The</strong>y are muchslower than horses but exert a strong steady pull. Somehorses are inclined to "snatch" with a heavy load and breakthings -1 have seen oxen sink to their knees in hauling a heavywagon out <strong>of</strong> the sand or mud and exert tremendous traction.Oxen are growing into meat during their working lives:horses are depreciating in value, but oxen require two peopleto work them - horses only one. To bring things down to asmaller scale: two oxen will just about do the work <strong>of</strong> onehorse, pull a very small single-furrow plough, or a row cropcultivator, or a small cart. Four oxen will pull these thingsmuch better.Mules are very hardy, particularly for hot and dry climates(they hate mud and constant wet). <strong>The</strong>y walk fast, will pullhard, can live on worse food than a horse, and I find them<strong>complete</strong>ly unlovable. <strong>The</strong>y will not exert so much tractionas a heavy horse and are inclined to snatch, kick, bite, andgenerally misbehave. And I don't want to have hundreds <strong>of</strong>letters from mule-lovers.Asses, or donkeys, can exert some traction, but walk veryslowly, and it is very hard to make most <strong>of</strong> them trot. <strong>The</strong>y canbe used (as indeed mules and ponies can) for carrying packsover ground too rough for a sled or a cart. One donkey won'tpull very much at all - maybe a small row crop cultivator atbest. My own feeling about donkeys - and I have travelledmany hundreds <strong>of</strong> miles with them - is that you can havethem, but I concede they have their uses.41
Food from the Fields<strong>The</strong> Working Horse<strong>The</strong>re is great nobility about a working horse, and greatbeauty too. If you want to plough your acre a day for monthafter month with a pair <strong>of</strong> horses you will need big horsessuch as the Shire, Suffolk Punch, Clydesdale, Percheron:great creatures weighing a ton and consuming an awful lot<strong>of</strong> oats and needing very good looking after. But as a <strong>self</strong>supporteryou will probably only have to plough half anacre in a day, and that occasionally. You may also wish todrive to market in a cart, perhaps go for a ride now andagain, and teach your kids to ride. If this is so, somethingmore in the nature <strong>of</strong> a Welsh Cob will suit you better,or one <strong>of</strong> those fine cob-type animals from Denmark, orBelgium. If you have very little heavy farm work to do -just pulling a light pony-plough in already arable land forexample, or pulling a horse-hoe, then a light cob, or a Daleor Fell pony will do. <strong>The</strong>y are fun to ride and drive, andmake a pet <strong>of</strong> too.FeedingHorses, like other herbivorous animals, need to be fed<strong>of</strong>ten: they need a feed at least three times a day while theyare working and must be given at least an hour to eat eachmeal. Also, they should have some hay to mumble at nightif they are in the stable, or else be put out on grass.For working horses "good hay hath no fellow" as Bottomsaid in A Midsummer Night's Dream, but it must be good hay;dusty hay makes horses broken winded, mouldy hay upsetsthem, and too much clover hay, if too fresh, will cause them toscour (have diarrhoea).During the summer, when grass is good, working horsesmay be run on grass. <strong>The</strong>y graze very close to the groundand should be put on pasture after cows have eaten <strong>of</strong>f thelong, lush grass, or else rationed severely as to how longthey have on the pasture. Do not expect a horse to workhard, or get hard, on grass alone. For grass makes horses fatand s<strong>of</strong>t. Take it that a horse on grass should have six pounds(2.7kg) <strong>of</strong> oats a day for every half day that he works.In the winter, or when grass is short, a horse is best keptin a stable and could eat: sixteen pounds (7.2kg) <strong>of</strong> hay,twelve pounds (5.4kg) <strong>of</strong> oats, and maybe some swedes orcarrots or even fodder beet as well, while on medium work.A large horse on very heavy work might well have moreRemoving a horseshoeFirst, calm your horse <strong>by</strong> givinghim some food. Face away from him,and pick up his ho<strong>of</strong> in your lefthand, gently sliding your hand downhis leg as you do so. Use a bufferdriven in with a hammer to lift theclenched nails round the ho<strong>of</strong>.Scrape the ho<strong>of</strong> clean with a ho<strong>of</strong>pick. <strong>The</strong>n lever the shoe up allround with pincers, before finallypulling it <strong>of</strong>f.oats: perhaps up to twenty pounds (9.0kg) and twentypounds (9.0kg) <strong>of</strong> hay But whatever you do, do not overfeeda horse. If you do you will kill him. A heavy horse doingonly half a day's work should never get a whole day's ration.Hay will never hurt him but grain will. A horse on a highration, working hard and continuously, may be killed <strong>by</strong> adisease called haemoglobin urea (he pisses blood) if yousuddenly knock his work <strong>of</strong>f but go on feeding him thesame. <strong>The</strong> old practice was, on Friday night before theweekend, to give a horse a bran mash (bran is the coarsehusk that is taken <strong>of</strong>f wheat to leave white flour, and branmash is bran soaked in water) instead <strong>of</strong> the corn feed, andthen to feed nothing but plenty <strong>of</strong> good hay over the weekend:to keep up the corn ration while the horse was idlecould be fatal. Similarly it is not fair to expect a s<strong>of</strong>t horse -that is a horse that has lived for weeks out on grass - to doimmediate heavy work. You will find that if you try to dothis he will sweat a lot, and puff and blow, and show signs<strong>of</strong> distress. Give him a little work each day, and feed a littlemore grain, and gradually harden him up.Beans make a good feed for horses, but don't let themmake up more than a sixth <strong>of</strong> the grain ration. It is very niceif you can get chaff (straw or hay cut up small <strong>by</strong> a chaffcutter).Mix it with grain to make it last longer.FoalingFillies can be put to the "horse" (horseman's word forstallion) at two years old (three might be better), and a coltcan serve a mare when he is two years old. Pregnancy isslightly over eleven months. A filly or mare may work atregular work for six or seven months <strong>of</strong> her pregnancy andthereafter can do progressively lighter work "in chains"(pulling an implement with chains) until she foals. Sheshould not work "in shafts" when far gone in pregnancy -the pressure <strong>of</strong> the shafts might harm her. A mare will probablyhave less trouble in foaling if she is kept working thanif she is not, because she will be in harder condition. If the<strong>The</strong> stableIn temperate climates you can leave your horse out all the year round. Butyou will almost certainly want to bring him indoors in cold weather, andsometimes to feed him or groom him. <strong>The</strong> ideal stable has a loose box foreach horse. This keeps him away from other horses and from all the harness,grooming equipment and feed which you will keep for him.42
<strong>The</strong> Working Horsemare is out on grass in the winter, and not working, sheshould be given a small ration <strong>of</strong> hay and maybe a little oats(not more than four pounds or 1.8kg a day), as well as wintergrass. In summer grass should be enough.After foaling, a mare should not be asked to work for atleast six weeks: suckling the foal is enough for her. <strong>The</strong> maremight do very light work after six weeks. But wait until fourmonths - preferably six-before weaning the foal. Once thefoal is weaned - taken right away from his mother and keptout <strong>of</strong> hearing - the mother should be put into work immediatelyin order to dry <strong>of</strong>f her milk. If you don't want towork the mare you can leave the foal on as long as you like.If you do wean the foal he should be given say four pounds(1.8 kg) <strong>of</strong> oats a day and four pounds (1.8 kg) <strong>of</strong> hay.Breaking a foalColt foals should be castrated <strong>by</strong> a vet at about a year old,but this should never be done in the summer when the fliesare about, nor in frosty weather. A foal can be broken(trained) at about two and a half ^ears old. But it is nevertoo soon to get a halter on a foal (the first day is OK) toteach him to be led about. Foals have a great sense <strong>of</strong>humour and can be great fun. If you make a fuss <strong>of</strong> a foaland get him really tame he is far less trouble to break. Andthe foal's feet should be lifted <strong>of</strong>ten, to accustom him tothis necessary procedure.To break him, get a bit into his mouth and drive him infront <strong>of</strong> you with a whip and long reins. After a few lessonsget a collar on him. When he gets used to this, hitch him tosome not too heavy object like a log or a set <strong>of</strong> harrows andget him to pull. <strong>The</strong>n put him next to an older horse andget them both to pull, say, a plough. Wait until he is prettycalmbefore trying him in shafts: the experience <strong>of</strong> beingconfined in shafts and having a rattling cart behind himmay be too much for him.Kindness and firmness and common sense are the qualitiesneeded for breaking horses, and it is absolutely essentialthat you should not be frightened <strong>of</strong> the horse, for if youare the horse will sense it immediately and you will neverbreak him. If you have great trouble breaking a horse trykeeping him away from other horses in a loose box (a roomin which he is kept loose) for a week or so, and spend sometime each day with him, talking to him, feeding him, handlinghim and getting to know him. He will then get used to you.ShoeingIf a horse is to be worked at all hard he must be shod,perhaps every six weeks. <strong>The</strong> hooves grow under the shoes.If the latter have not worn too much they can be taken <strong>of</strong>f,the feet trimmed and the shoes nailed on again. Shoeing isa highly skilled job, but any horseman should be able to pullshoes <strong>of</strong>f a horse's feet. Nailing on, though, should only bedone <strong>by</strong> a skilled man: it is easy to lame a horse-perhaps forlife - <strong>by</strong> driving a nail in the wrong place.44
Food from the Fields4 Fit the saddle, or ridge pad, andtighten the girth, but not so muchthat the horse's wind is constricted.Sometimes the britchin will be keptfastened to the girth.3 Slide on the bridle. To get the bitin the horse's mouth you may haveto force his teeth apart <strong>by</strong> pushingyour fingers in at the side. It takespractice.5 Here the britchin is being put onseparately. <strong>The</strong> crupper, a loop <strong>of</strong>leather that goes round the tail,must go on when the britchin isright back. It is then eased forwardand strapped on to the saddle, if it isnot already so strapped.Ridge padRidge chainHip strap<strong>The</strong> fully harnessed horse<strong>The</strong> horse is now taken to the cartor implement and shut in. In otherwords he is backed between theshafts and the tugs are hooked tothe harness. <strong>The</strong>n the ridge chainwhich holds the shafts up isfastened and lastly the britchinchains. <strong>The</strong> tugs pull the implementor cart forward. <strong>The</strong> britchinchains hold it back if it tries to gotoo fast. A belly chain is passedfrom shaft to shaft under thehorse's belly to prevent the shaftsfrom skying if the cart or implementis back-loaded.See that all is well adjusted beforeyou move <strong>of</strong>f. <strong>The</strong> shafts must notpinch the horse, the britchin mustindeed take the weight <strong>of</strong> the cartgoing downhill, and the tugs, notthe ridge chain, must exert the forwardpull on the shafts.45
Food from the FieldsPreparing LandIf you threw some seeds on grassland, or in a wood, all thatwould happen is that the birds would eat them. In order tosow seeds with any hope <strong>of</strong> success you have got to do twothings: eliminate the competition <strong>of</strong> existing plants, anddisturb the soil so that the seed can get into it. If possible,in fact, bury the seed, although <strong>of</strong> course not too deep.<strong>The</strong> most usual method <strong>of</strong> preparing grassland or otherland with an indigenous vegetation on it is <strong>by</strong> ploughingor digging. But if you have pigs, use them. <strong>The</strong>y will do thejob even better than a plough. If I plough old pasture to sowa grain crop I plough it so as to turn it over as <strong>complete</strong>lyas possible, although it still stands up in ridges. <strong>The</strong>n I dragdisc harrows up and down the furrows for two passes, soas not to knock the ridges back again. At this stage I wouldadd any fertilizer, such as lime or phosphate, that the landmight require. <strong>The</strong>n I would disc again across the furrows.<strong>The</strong> reason for using a disc harrow at this juncture is that itcuts the hard turf furrows <strong>of</strong> the old grassland to pieces -instead <strong>of</strong> dragging it out as a spike harrow would do.A pass or two with the spike harrow works the landdown to a fine seed bed. It must not be too fine for wintersowncorn, nor even for spring-sown if it is wheat or oats.Barley needs a much finer tilth than either. I then broadcastthe seed, that is sow it <strong>by</strong> hand, but if I had a seed drill Iwould drill it. Remember if you drill seed too deep it willbecome exhausted before its shoots can get to the surfaceand it will die. So the smaller the seed the shallower it shouldbe. Three times the diameter <strong>of</strong> the seed is quite far enough.I would then harrow once again. A pass with a roller,<strong>complete</strong>s the sowing process. With row crops hoe betweenthe rows when the seedlings are about six inches (15 cm) highand then the gate can be shut until harvest time.& Sowing1 Use pigs or a plough 2 <strong>The</strong>n use a harrowFor bringing grassland into cultiva- Disc harrow first up and down thetion the pig's snout is unbeatable. furrows, then across. Next use aAnd a pig does something a plough spike harrow to produce the rightcan't. He manures the land as he tilth for your seed,digs it. Otherwise plough.No-ploughing and no-digging<strong>The</strong> no-ploughing or no-digging theory is now very popular.<strong>The</strong> adherents <strong>of</strong> this theory claim that the land shouldnever be ploughed or dug because it is bad to invert the soil.Inverting the soil upsets the soil life, putting surface bacteriadown so deep that they die, bringing deeper organisms tothe surface where they die.No-diggers and no-ploughers have great success, providedthey have very large quantities <strong>of</strong> compost, or farmyardmanure, with which to mulch their land. <strong>The</strong> seeds arevirtually sown under a covering <strong>of</strong> compost.My own experience shows that for bringing grasslandinto cultivation either the plough, or the pig's snout, isessential. <strong>The</strong> next year, if you still wish to keep that landarable, you can <strong>of</strong>ten get away with cultivating only, or evenharrowing or other shallow cultivations. <strong>The</strong> idea <strong>of</strong> veryheavy mulches <strong>of</strong> compost is fine - providing you can getthe compost. But the land it<strong>self</strong> will never produce enoughvegetable material to make enough compost to cover it<strong>self</strong>sufficiently deeply and therefore you will have to bringvegetable matter in from outside.46
Food from the Fields4 Harrow againThis time harrow lightly, justenough to cover the seeds. Usediscs if you broadcasted. Dragspikes across the rows if you drilled.5 Go over with a rollerRolling presses the seed into closercontact with the earth andincreases the capillary attractionwhich brings moisture up from thedepths below.6 Hoe the seedlingsHoeing the growing crop kills theweeds and creates a mulch <strong>of</strong> looseearth which conserves the moistureround the growing roots.7 Shut the gateOnce established a field <strong>of</strong> corngrows dense enough to smother allweeds. <strong>The</strong>n you can shut the gate,go home and wait for harvest.47
Preparing Land & SowingPloughing<strong>The</strong> plough that Western Man has used since Iron Agetimes has three main working elements: the coulter, theshare, and the mould-board or breast (see illustration). InAfrica, Australia, and parts <strong>of</strong> America, a similar plough,the disc plough, is much used. This is not to be confusedwith the disc harrow. It is a large, very dished, steel disc,• dragged through the soil at a certain angle. <strong>The</strong> angle issuch that the leading-edge <strong>of</strong> the disc acts as a coulter, thebottom edge acts as a share and the belly <strong>of</strong> the disc acts asa mould-board. It is very good on trashy land.Using the fixed-furrow ploughNow if you consider what happens when you actuallytake a fixed-furrow plough out into a field and begin toplough, you will realize that the operation is not so simpleas you might think. Suppose you go into the middle <strong>of</strong> oneside <strong>of</strong> the field and plough one furrow. <strong>The</strong>n what do youdo? If you turn your horse or tractor round, face the otherway and go back, you will either simply plough the slice youhave ploughed out back into its furrows so you are backwhere you started from, or you will plough the other side<strong>of</strong> it and build up a ridge <strong>of</strong> two slices bundled up againstA horse or oxen-drawn fixed-furrow ploughThis is the classic plough <strong>of</strong> which all others are mere variations. <strong>The</strong>essential parts are: the coulter, which is a vertical or slightly sloping knifewhich goes through the soil in front and cuts a vertical slot; the share, a bladewhich cuts a horizontal slice underneath the furrow to be ploughed; and themould-board, or breast, which is that beautifully curving blade <strong>of</strong> wood ormetal which takes the slice <strong>of</strong> earth cut out <strong>by</strong> the other two members andturns it over and lays it against the slice already turned. <strong>The</strong> plough's bigwheel goes along the furrow, the small one stays on "land". <strong>The</strong> two hakesadjust depth and position. <strong>The</strong> coulter is sometimes a sharp steel disc and onsome ploughs used on light crumbling land does not exist at all. Some ploughsalso have a skim coulter, or skimmer, a sort <strong>of</strong> miniature plough which goesahead <strong>of</strong> the main one turning over the vegetation on top <strong>of</strong> the soil.each other, and under the ridge will be unploughed ground.<strong>The</strong> way to avoid the piece <strong>of</strong> unploughed ground is toplough your first furrow, then turn round and plough itback again with the piece <strong>of</strong> ground underneath it too.<strong>The</strong>n turn round again and plough the next furrow upagainst the first two. You have then made a ridge. You thensimply go round and round this ridge, every time ploughingyour furrow towards the ridge. It will be seen that, when youdo this, you get further and further away from the ridge, andeach time you have to go right round it. You soon findyour<strong>self</strong> having to travel a huge distance along the headlandto get to where you are to start the furrows going back again.So what do you do then?You go even further along the headland, and plough outanother "setting-out" furrow as the first furrow <strong>of</strong> a stetch<strong>of</strong> land is called, and make another ridge. (A stetch is thearea <strong>of</strong> ploughed land around a single ridge.) You thenplough round that one. As soon as you come to the lastfurrow <strong>of</strong> the first stetch you go back and travel on furtherbeyond your second stetch and "set-out" a third stetch. Andso on. <strong>The</strong> ridges are traditionally 22 yards (20 m) apart.It will be seen now that you will end up with a field withparallel furrows running down it, and in between each pairHow the plough cutsA properly adjusted plough will cut a roughly rectangular slice out <strong>of</strong> thesoil, and turn it almost upsidedown so that it rests on its predecessor, asshown right.Key1 Mould board2 Share3 Coulter4 Land wheel5 Furrow whee6 Vertical hake7 Horizontal hake48
Food from the Fields<strong>of</strong> furrows parallel ridges. In other words you have gatheredthe soil at the ridges and robbed it out <strong>of</strong> the furrows. If yougo on doing this year after year you will end up with thetypical "ridge-and-furrow" land <strong>of</strong> parts <strong>of</strong> the EnglishMidlands. On wettish heavy land this pattern <strong>of</strong> field hasan advantage: the furrows, running up and down the slope,serve to carry the surface water away, and crops growing onthe ridge part are well above the water table. In most parts<strong>of</strong> Southern Europe and America, though, it would becriminal thus to plough up and down the slopes. It wouldlead to gully-erosion.Turnwrest ploughNow if you want a simple life, and don't want your soilgathered into ridges, there is another kind <strong>of</strong> plough thatwill suit your needs and that is the turnwrest, or two-wayplough. This has two ploughing bodies, one in the groundand the other up in the air. One turns the furrow to the right,the other to the left. With this you simply plough one furrow,turn round, swing the two bodies over so they change placesand plough back again. And when you do this both furrowsare laid the same way. You a^oid all the complications <strong>of</strong>"setting-out," "gathering-up" and all the rest <strong>of</strong> it and whenyou have finished your field is quite level, with no "lands"or stetches at all. Many tractor ploughs are <strong>of</strong> this typenowadays, and the famous Brabant plough, widely used inEurope and drawn <strong>by</strong> horses or oxen, is also a turnwrest.<strong>The</strong> Brabant is a marvellous instrument. I have a tiny, onehorseone and it is worth its weight in gold.Incidentally the ancient belief in the necessity <strong>of</strong> turningthe soil deeply enough to bury all rubbish <strong>complete</strong>ly isbecoming more and more discredited. Organic farmers,even in England and the Eastern States <strong>of</strong> the USA, preferto leave their compost or manure on top <strong>of</strong> the soil ratherthan to plough it in. It is a fact that the enormous earthwormpopulation in soil that has been organically farmedfor some time drags all vegetable matter down into the soilwithout our help. Except for my potato field, I am tendingmore and more to leave manure on the surface and todisturb the soil deeply as little as possible. But, whatever histheories in this respect, the practical grower finds him<strong>self</strong>forced, occasionally, to plough or to dig.Sowing<strong>The</strong>re is no rule <strong>of</strong> thumb in farming, particularly when itcomes to sowing seed. Examine the soil after every operationPloughing with fixed-furrow and turnwrest ploughsWith a fixed-furrow plough (see above left), plough your first furrow, thenturn round and come back the other way ploughing the piece <strong>of</strong> groundunderneath your first furrow. This will turn your first furrow over again withthe second one on top <strong>of</strong> it. Turn round again and plough the piece <strong>of</strong> groundon the other side <strong>of</strong> the hole left <strong>by</strong> your first furrow, piling it up against thefirst two forming a ridge. Plough round and round the ridge, going up oneside and down the other so that the furrows all face in towards the ridge,resting on each other. Make a new ridge, a sensible distance from the firstone - about 22 yards (20 m) away - and start again. <strong>The</strong> turnwrest plough(above right) avoids these complications. By turning the blade over each timeyou turn round to go back the other way, you can plough from one side <strong>of</strong>your field to the other, and have all your furrows leaning the same way.49
Preparing Land & Sowing- remember the needs <strong>of</strong> the seed and the plant. If the seedis too shallow the birds will get it or it will dry out, that isif the soil is dry and dusty on top. If it is too deep it will useall its energy pushing its shoot up to the light and will diebefore the life-giving sun's rays can give it more energy. Ifthe land is too wet the seed will drown. If it is too sticky theseed will not be able to push out its roots and shoots. <strong>The</strong>plant it<strong>self</strong> needs open soil, which permits the air to circulateand the water to rise.Don't forget that temperature is most important for seedgermination. I knew an old farmer in Suffolk who used todrop his trousers in the spring and sit on his soil to see ifit was warm enough to sow spring barley He could sensethe temperature, humidity and so on with his bare backsidemore sensitively than he could with his hand. To drill hisseed in too-cold ground was only to have it rot, or the birdsget it, or the hardier weeds grow away from it and smotherit. To plant it too late was to have a late and not very heavycrop <strong>of</strong> barley. To get it just right he had to use his buttocks.He grew very good barley.Spring-tined harrowSpring-tined harrows are excellentfarm implements. You can adjustthe depth at which the tines go downinto the soil, loosen the ground atthe chosen level, and the turf buried<strong>by</strong> the plough will stay buried.HoeingHaving sown or planted your crop, you may have to "keepit cleanj' which is the farmer's way <strong>of</strong> saying suppress theweeds among it. Some crops don't need this because theygrow quickly and densely and smother the weeds <strong>by</strong> denyingthem light and soil space. You can <strong>of</strong>ten get away withouthoeing cereals. But row crops (see pp. 82-88) do need hoeing.<strong>The</strong>re are two kinds <strong>of</strong> hoeing: hand hoeing and mechanicalhoeing. <strong>The</strong> hand hoe is simply a blade on a stick with whichyou cut through the surface <strong>of</strong> the soil. Mechanical hoeingis the pulling <strong>of</strong> mounted hoe blades along between therows <strong>of</strong> the crop <strong>by</strong> animal or tractor power. This only cleansthe ground between the rows. It cannot do it in the rowsbut between the plants, because no machine has yet beeninvented which can tell the difference between a weed anda crop plant. It takes the eye <strong>of</strong> man, or woman, to do that.<strong>The</strong>refore, even if you horse or tractor hoe, you will stillhave to hand hoe as well, at least once.<strong>The</strong>re is another consideration about hoeing. Not onlydoes it kill the weeds but it also creates a mulch <strong>of</strong> looseSpike harrow<strong>The</strong> first harrow was a spiky bushpulled over the land probably <strong>by</strong>womanpower. Its modem successoris made <strong>of</strong> steel and can be drawn<strong>by</strong> horse or tractor.50
Food from the Fieldsearth. This mulch conserves the moisture in the land, for itbreaks the capillary crevices up which water can creep tothe surface. It is very nice to see loose, broken-up soil on thesurface rather than a hard pavement. It is true that somecrops - onions are one, brassica, or cabbage-tribe, plants areanother - like firm soil, but once they have got their roots in,it is best to shake up the surface around them. This lets therain and air in and stops the moisture coming to the surfaceand evaporating too quickly. In Suffolk old countrymen say:"a hoeing is as good as a shower <strong>of</strong> rain." Experience showsthat it is, too, and you cannot hoe too much.WeedsSelective weed sprays, or pre-emergence weed sprays, arethe agribusinessman's answer to weed suppression in rowcrops. We organic farmers don't use them, because wecannot believe that it is good to douse our soils year afteryear and decade after decade in what are, after all, nothingmore nor less than poisons. Also the hoe can do it, not onlyjust as well but much better.Weeds have been defined as "plants in the wrong place."Wrong, that is, from the husbandman's point <strong>of</strong> view. Fromtheir point <strong>of</strong> view they might be in the right place. But donot become paranoiac about them. Weed competition, it istrue, can ruin a crop. <strong>The</strong> weeds are so much more vigorous,and fitted for their environment, than our artificially inducedcrops can be. But also, under other circumstances, they dono harm and <strong>of</strong>ten do good. Bare, naked soil, with no cropon it, should be anathema to the husbandman. A goodcovering <strong>of</strong> weeds is as good as a crop <strong>of</strong> green manure.Green manure is any crop that we plant merely in order toplough in again. A good crop <strong>of</strong> chick-weed, fat-hen, or manyanother annual weed, is just as good. And, in the summerwhen weeds are rampant no matter how many times we hoe,when you go along the rows and either hoe weeds out, orpull them up, and let them lie down between the crop rowsto rot, you realize that they do a lot <strong>of</strong> good. <strong>The</strong>y form amulch, which covers the soil and stops the drying windsfrom getting at it, and eventually they rot and the earthwormsdrag them down and turn them into humus.
Food from the FieldsHarvesting<strong>The</strong> crown <strong>of</strong> the year is harvest time, and if a man cannotenjoy that he is unlikely to enjoy anything. He sweats andtoils, along with his friends and neighbours, to gather in andmake secure the fruit <strong>of</strong> his year's labours. <strong>The</strong> work is hard,hot, sometimes boisterous, always fun, and each day <strong>of</strong> itshould be rewarded with several pints <strong>of</strong> home-brewed beer.All the cereals with the exception <strong>of</strong> maize are harvested inexactly the same way When the crop is ripe, but not so ripethat it will shed its grain prematurely, the straw is cut. Thismay be done <strong>by</strong> sickle, scythe, mower (reaper), reaper-andbinder,or combine harvester.Sickling a field full <strong>of</strong> corn is unbelievably tedious. Ascythe used <strong>by</strong> a skilled man will cut two acres in a day, and ifyou can fit a cradle to it (see illustration), it will dump the cutcorn in sheaf-sized piles. Wet the blade at regular intervalswith a rough stone.A grass mower, whether horse or tractor drawn, will covera field fairly quickly leaving cut corn all over the place. It mustthen be gathered into sheaves. A reaper-and-binder ties thesheaves for you, but it is a dirty great cumbersome machineand needs three horses to pull it for any length <strong>of</strong> time. If youare growing corn for your own and your family's consumption,you should not need to grow much more than an acre. Itis certainly not worth owning a reaper-and-binder to harvestsuch a small area, and it's hardly worth borrowing one either.1 Cut the cornIf you cut corn <strong>by</strong> hand it is quickerand easier to use a scythe ratherthan a sickle.2 Tie it into sheavesTake an armful <strong>of</strong> corn and tie ittightly round with string or ahandful <strong>of</strong> corn.SheafSheaves are bundles <strong>of</strong> a size you can conveniently grab, tiedaround the belly either with string, or with a fistful <strong>of</strong> the cornit<strong>self</strong>. To tie a sheaf with corn rub both ends <strong>of</strong> the fistful tomake it pliable, put it round the bundle which is grippedbetweeen your legs, twist the two ends together tightly, thentuck the twisted bit under the part round the sheaf (see illustration).<strong>The</strong> reaper-and-binder, <strong>of</strong> course, ties its ownsheaves, with string.StookYou then walk along the field and stand the sheaves up intostooks or traives. Six or eight in a stook is normal. Take twosheaves and bang the heads together so that they lean intoeach other at an angle and do not fall down. Lean two or threemore pairs against the first two. Leave them like that for aweek or two so that the corn can dry out in the sun and wind,and the grain can become dead ripe.3 Make stooksLean six or eight sheaves togetherto form a stook. Leave for a week ormore to dry.MowIn wet climates the practice is then to form a mow, which isintermediate between a stook and a stack, or rick. To make amow stand about twenty sheaves up on their butts leaninginwards in a solid circle. <strong>The</strong>n start building another solidcircle on top <strong>of</strong> the first lot starting from the middle. You canbuild in a spiral if you like. Lay the sheaves <strong>of</strong> this secondlayercloser to the horizontal, with the ears inwards towards themiddle. To stop these sheaves slipping snatch a handful <strong>of</strong>52
Food from the Fields4 Build a rickGet your corn into a rick before thebad weather comes: it can becircular or rectangular. Thatch thetop, or cover to protect against rain.7 Store the grainYou can keep grain in sacks, bins,jars, or on a special grain floor:anywhere as long as it is absolutelydry and pro<strong>of</strong> against vermin.6 Winnow the grainTo separate the grain from the chaff,you can use the time-honouredmethod <strong>of</strong> throwing the whole lotinto the wind. <strong>The</strong> lighter chaff willblow further than the heavier grain.5 Thresh your cornThreshing <strong>by</strong> hand is best donewith a flail, two sticks <strong>of</strong> differentlengths joined <strong>by</strong> a piece <strong>of</strong> leather.But you can beat your corn againstany hard surface to get the grain out<strong>of</strong> the ears.53
Harvestingcorn from each sheaf and tuck it under the band (string orcorn tie) <strong>of</strong> the next sheaf.Arrange all the time that the centre <strong>of</strong> the mow shall behigher than the outside edges. Put layer after layer on like this,drawing each layer in a little so that the mowrises steeply to apoint. It will then be crowned <strong>by</strong>, say, four sheaves with theirears upwards waving in the wind like flags. Very pretty. Anyrain that blows into it will run downhill along the slopingstraws and onto the ground.RickBut before the stupendous gales <strong>of</strong> winter blow up youshould get the corn out <strong>of</strong>the mows and into ricks or stacks,in your stackyard. When working on a fairly small scale stacksare better circular. You lay the sheaves horizontally, earsinwards, layer after layer, always keeping your centre firm andScythehigh. Work from the centre out this time, and do not pull in asyou did with the mow until the eaves are reached. <strong>The</strong>n pullinwards sharply until the apex is reached. You must thenthatch this rick (see p. 241), or provide it with some waterpro<strong>of</strong>cover, just on top. Corn will keep well in such a rick foryears, as long as the rats don't get into it. To keep rats awayyou can build a raised platform on staddle stones.Grain in the stook, mow and rick is maturing naturally allthe time, slowly ripening and drying out, and it is better grainthan grain cut and threshed with a combine harvester.Threshing<strong>The</strong>n you must thresh your grain. This is the business <strong>of</strong>knocking the grain out <strong>of</strong>the ears. You can do this <strong>by</strong> bashingthe ears on the back <strong>of</strong> a chair, putting them through a threshingdrum, beating them with a flail, or driving horses or oxenabout on them. Paddy is <strong>of</strong>ten threshed in Sri Lanka <strong>by</strong>men trampling it with their feet, all holding on to a horizontalbar to steady themselves, and singing like hell as they do it.A threshing drum is a drum revolving round which knocksout the grain. A flail is two sticks linked together: the longerstick, which you hold, maybe anything - ash or hickory is fine;the short stick, with which you wallop the grain, is <strong>of</strong>ten holly.<strong>The</strong> link which joins them can be leather, and eel-skin was atraditional thing for this, being very tough. (Eel-skin is excellentfor "leather" hinges as well.) You try to lay the short stickflat on the ears <strong>of</strong>the corn.WinnowingAfter you have threshed, or knocked out, the grain, you mustwinnow it. Traditionally this is done <strong>by</strong> throwing the grain,which is mixed up with chaff, broken bits <strong>of</strong> ear and straw,Hand toolsTime-honoured equipment works well and is adequate for the homesteader.Cutting with sickle or scythe is arduous and time consuming, but it producesbetter grain than that cut and threshed with a combine harvester.Winnowing trayCorn scoop54
Food from the Fieldsthistle seeds and all the rest <strong>of</strong> it, up into the air in a strongbreeze. <strong>The</strong> light rubbish blows away, and the grain falls in aheap on the ground. Common sense suggests you do thison a clean floor, or else have a sheet <strong>of</strong> canvas or somethingsimilar on the floor to catch the grain. <strong>The</strong> chaff - the stuffthat blows away- can be mixed with corn and fed to animals.A winnowing machine, though, is a machine that has arotating fan in it which produces an artificial wind to winnowthe grain. It also has a number <strong>of</strong> reciprocating sieves. <strong>The</strong>seextract weed seeds, separate small ("tail") corn from large("head") corn, and thoroughly clean the grain. <strong>The</strong>y can beturned <strong>by</strong> hand or power.StoringWhen grain has been harvested naturally <strong>by</strong> the ab ove meansit will keep indefinitely provided it is kept dry and away fromvermin. Tou can store naturally-dried com in bins, on a grainfloor, in big Alibaba jars, in sacks: anything will do providedrats and mice and other vermin cannot get to it.<strong>The</strong> processes described above are just the same for wheat,barley, oats, rye, field beans, rice, buckwheat, sorghum, millet,linseed, oil-seed rape, and many other seed crops.CombiningHarvesting <strong>by</strong> combine is another kettle <strong>of</strong> fish. Here themachine cuts the corn and threshes and winnows the grain inone operation, while moving round the field. It saves an awfullot <strong>of</strong> labour. In countries with dry summers, like Canada, thegrain comes straight <strong>of</strong>f the combine dry enough to store, butin damper climates it either has to be dried artificially, orstored hermetically while still moist, in agrain silo or sealed ina polythene bag.StooksGet your sheaves into stooks quickly;or the grain will sprout and rot. Rubtwo sheaves' heads together so theystick firmly and don't blow down.A thatched corn stackIf your stack is out <strong>of</strong> doors,a thatch is the most effectiveprotection you can give it. A goodthatch will easily last the winter,whereas even strong plastic maytear in a gale. Thatching isdescribed on pp. 240-241.A circular corn stackLay a base <strong>of</strong> sheaves with theirbutts outwards, and build on upkeeping the centre high. Pullinwards when you reach the leavesand let them overhang slightly so therain runs <strong>of</strong>f. Use rat-pro<strong>of</strong> staddlestones to keep your stack <strong>of</strong>f theground, and you will keep outdamp as well as rats.55
Food from the FieldsCereals are the staff <strong>of</strong> life for most <strong>of</strong> mankind. Even ourmilk and our meat derive largely from them. <strong>The</strong>y are grassesnurtured and bred <strong>by</strong> man so that their grain is large andnourishing. Except in parts <strong>of</strong> the tropics where such rootsas tapioca and yams are the staple carbohydrate, and in wetcold places where the potato plugs the gap, wheat, barleyoats, rye, rice, maize and sorghum are what keep us all aliveand kicking.<strong>The</strong> cereals have all been bred from wild grasses, and bredso far away from their parent stocks that they are now distinctspecies. In fact it is sometimes difficult to guess which wildgrass a particular cereal is derived from, and, in some cases,maize for example, the wild species is now probably extinct.It was inevitable that the seeds <strong>of</strong> the grasses shouldbecome mankind's staple food. After all - grass is the mostwidespread <strong>of</strong> plants, its seeds copious and nourishing andeasily stored. When the Bushmen <strong>of</strong> the Kalahari find a hoard<strong>of</strong> grass seed in an ants' nest, stored there <strong>by</strong> the industriousinsects for their future supplies, the Bushmen steal this seed,roast it on a hot stone, and eat it themselves. Our stone ageancestors no doubt did the same. And it is but a short step toharvesting the grass one<strong>self</strong> and threshing the seed out <strong>of</strong> it.<strong>The</strong>n it was found that if you put some <strong>of</strong> the seed into theground, in the right conditions, it would grow where youwanted it to. Agriculture was born and with it civilization,made possible <strong>by</strong> the ability <strong>of</strong> Man to grow and store thefood he has grown reliably.Many smallholders feel that grain growing is not for them:it requires expensive machinery, is difficult, and cannot bedone effectively on a small scale. This is just not so. Anyonecan grow grain, on no matter how small a scale, provided hecan keep the birds <strong>of</strong>f it. Harvesting can be done quitesimply with the sickle or even an ordinary carving knife.Threshing can be done over the back <strong>of</strong> a chair and winnowingoutdoors in the wind. Grinding can be done with a c<strong>of</strong>feegrinder or a small hand-mill. Baking can be done in anyhousehold oven. It is very satisfying to eat your own breadbaked from grain you have grown and milled your<strong>self</strong>, fromyour own seed.When the Roman armies wanted to conquer Britain theywaited until harvest time, so that their soldiers could spreadout over the country, reap the native wheat, take it back tocamp and make bread out <strong>of</strong> it. If the Roman legionariescould do it with such apparent nonchalance, there is noreason why we cannot do it too.It is fortunate that the grasses are widespread: they growin practically any climate our Earth affords, and thereforeMan has been able to find, and adapt, one particular grassto suit each area. Thus, if we live in the wet tropics, we maychoose rice; the dry tropics, sorghum; temperate heavy lands,wheat; temperate dry and sandy lands, rye; cold and rainylands, oats; temperate light land, barley; and so on. <strong>The</strong>re isan improved grass for practically every area and climate inwhich Man can survive.56
Food from the Fields57
Food from the FieldsWheatEver since Stone Age man found that he could bang thegrass seeds collected <strong>by</strong> seed-collecting ants between twostones and eat them, men have used cereals for food, andin all those parts <strong>of</strong> the world where wheat will grow, wheatis the favourite.Hard and s<strong>of</strong>t wheatHard wheat grows only in fairly hot and dry climates,although there are some varieties that are fairly hard evenif grown in a colder climate. It is much beloved <strong>by</strong> commercialbakers because it makes spongy bread full <strong>of</strong> holes.It holds more water than s<strong>of</strong>t wheat and a sack <strong>of</strong> it thereforemakes more bread. In temperate climates s<strong>of</strong>t wheat growsmore readily and makes magnificent bread: a dense breadperhaps, not full <strong>of</strong> huge holes, not half water and wind -but bread such as the battle <strong>of</strong> Agincourt was won on.SowingWheat grows best on heavy loam or even clay soil. You cangrow it on light land, and you will get good quality grainbut a poor yield. It will also grow on very rich land, but itmust have land in very good heart.In temperate climates wheat - and it will be one <strong>of</strong> thevarieties called winter wheat - is <strong>of</strong>ten sown in the autumn.Winter wheat grows quite fast in the autumn, in the summerwarmedsoil, then lies dormant throughout the winter, toshoot up quickly in the spring and make an early crop. Incountries, such as Canada, where the winter is too severespring wheat is grown and this is planted in the spring. Itneeds a good hot summer to ripen it, and will come toharvest much later than winter wheat. If you can growwinter wheat do so. You will get a heavier crop and anearlier harvest.I prefer to get winter wheat in very early: even early inSeptember in Britain, because it gets <strong>of</strong>f to a quick start,beats the rooks more effectively (rooks love seed wheat andwill eat the last seed if they get the chance), and makesplenty <strong>of</strong> growth before the frosts set in. Frost may destroyvery young wheat <strong>by</strong> dislodging the soil about its roots. Ifthe early-sown wheat is then "winter-proud" as farmers say,meaning too long, graze it <strong>of</strong>f with sheep. Graze it <strong>of</strong>f eitherin November or in February or March. This will do the sheepgood and will also cause the wheat to tiller-put out severalshoots - and you will get a heavier crop. You can sow winterwheat in October and sometimes even in November. <strong>The</strong>later you sow it the more seed you should use.Spring wheat should be sown as early as you can get theland ready and you feel the soil is warm enough. I wouldsay not before the beginning <strong>of</strong> March although some peoplesow it in February. <strong>The</strong> earlier you sow it the more you willlose from rooks, who have little other food at that time <strong>of</strong>the year, and the longer it will take to get established. Butwheat needs a long growing season and therefore, the earlieryou sow it the better. In other words, if you don't want avery late harvest, as always in farming, you have got to finda compromise between tricky alternatives.Wheat needs a fairly coarse seed bed, that is, it is betterto have the soil in small clods rather than fine powder. Forautumn-sown wheat the seed bed should be even coarserthan for spring-sown. This is so that the clods will deflect thewinter rain and prevent the seed from being washed out andthe land becoming like pudding.So plough, if you have to plough, shalowly, and then donot work your land down too fine. In other words, do notcultivate or harrow it too much. Aim at a field <strong>of</strong> clodsabout as big as a small child's fist. If you are planting wheatafterold grassland, plough carefully so as to invert the sodsas <strong>complete</strong>ly as you can, and then do not bring them upagain. Disc the surface, if you have discs, or harrow it witha spring-tined harrow, or ordinary harrow if you haven't gotthat. But do not harrow too much. <strong>The</strong>n drill or sow intothat. <strong>The</strong> earlier you can plough the land before you put thewheat in the better, so as to give the land a chance to settle.You can either drill wheat, at a rate <strong>of</strong> about three bushels<strong>of</strong> seed to the acre, or else broadcast it at about four bushelsto the acre. Whichever you do it is a good thing to harrowit after seeding and also to roll it - that is if you don't thinkthe rolling will break down the clods too much. If it is wetdon't roll it. Discing is quite good after broadcasting seed -but only do it once - if you do it twice you will bring theseed up again.Care <strong>of</strong> growing cropYou can harrow wheat quite hard when it has started tocome up but is not more than six inches (15 cm) tall. After youhave harrowed it may look as if you have ruined it, but youhaven't. You will have killed several weeds but not the wheat,and the harrowing does good <strong>by</strong> opening up the surface <strong>of</strong>the ground. If frosts look as if they have lifted the surface<strong>of</strong> the ground in the early spring you can roll, preferablywith a ring roller, but only if the ground is pretty dry.Jethro Tull invented a seed drill and developed "horsehoe-husbandry."His idea was to drill wheat and othercereals in rows a foot (30 cm) apart (there was much experimentationwith distances) and then keep the horse-hoegoing up and down between the rows. Very good resultswere achieved. <strong>The</strong> practice has been discontinued becausedevelopments in husbandry have enabled the farmer toclean his land, meaning free it from weeds, more thoroughly.It is therefore not so necessary to weed the wheat. In anycase, a good crop <strong>of</strong> wheat that "gets away" quickly willsmother most weeds on reasonably cleanland. Agribusinessmen<strong>of</strong> course use selective weed poisons to kill weeds inwheat. I used them only once and have seldom had a crop<strong>of</strong> any cereal that has suffered badly from weed competition.Selective weed poisons are only necessary to cover up theeffects <strong>of</strong> bad husbandry.Wheat is harvested in the way pictured on pp. 52-53.58
Food from the FieldsMilling GrainModern industrial grain milling is enormously complicated,and aims to remove even-thing from the flour that is ultimatelyused for bread except just the pure starch. <strong>The</strong> milling<strong>of</strong> wholemeal, on the other hand, is vers 7 simple: all you do isgrind the grain: nothing is taken out and nothing is put in.Wholemeal flour also has more <strong>of</strong> every beneficial thing,except pure starch (carbohydrate) than white flour has. Andwholemeal bread is better for the digestion than white breadbecause it has roughage. Here is a percentage comparison:<strong>The</strong>re are four types <strong>of</strong> mill for grinding grain. Two <strong>of</strong> themare <strong>of</strong> little use to the <strong>self</strong>-supporter: the hammer mill, whichwill smash anything up, even feathers, but does notmake verygood flour; and the roller mill, as used in huge industrial mills,where steel rollers roll against each other and the grainpassesbetween. <strong>The</strong> other two types - the stone mill and the platemill - are both suitable for anyone who wants to make hisown bread.Stone milling<strong>The</strong> stone mill is one <strong>of</strong> the oldest and most basic types <strong>of</strong>mill. It consists <strong>of</strong> two stones, one <strong>of</strong> which turns on the otherwhich remains stationary. <strong>The</strong> grain is passed between thetwo, generally being dropped down a hole in the top, orrunner stone. <strong>The</strong> art <strong>of</strong> milling with stones, and particularlythat <strong>of</strong> making stone mills, has nearly died out. <strong>The</strong> sooner itis revived the better. However, in response to the newdemand for such devices, several firms have put miniaturestone mills on the market, both hand and electrically driven.<strong>The</strong>se make very good flour, and they will grind very fine orcoarsely as desired; the finer you grind the longer it will take.Plate milling<strong>The</strong>re are also some good hand-driven plate mills available.A steel plate with grooves cut in it revolves, generally vertically,against a stationary steel plate. Flour ground slowly withone <strong>of</strong> these seems just as good as stone-ground flour. If youhave a tractor or a stationary engine, the ordinary bam platemill found on nearly every conventional farm is quite satisfactoryfor grinding bread flour provided you don't drive ittoo fast. If it goes too fast it heats the flour (you can feel itcoming hot out <strong>of</strong> the spout). Heating the flour like this spoilsthe flavour.<strong>The</strong>re is one thing to remember that makes the milling <strong>of</strong>all grain much easier. That is - dry the grain first. In a warm,dry climate this may not be necessary, but in a damp climateit makes a great difference. When you are nearly ready toA plate millThis little hand plate mill is perfectly adequate for a small family, andgrinds fine flour. Stone mills may be marginally better, but take skill to dressand operate.grind your wheat, keep it in a jute bag over your stove, orfurnace, or dry the day's supply on a tray over the stove, or in awarm oven: anything to get the grain quite dry. Don't cook it<strong>of</strong> course. If you mill grain in larger quantities a kiln is not abad idea, and it is also useful for kilning malt which I describein detail on p. 69.<strong>The</strong>re is no reason why anybody, even somebody living ina tenth floor apartment, shouldn't buy a small stone or platemill and a sack <strong>of</strong> wheat from a friendly farmer, and grind hisown flour and make his own bread. Do not believe it whenpeople tell you to do so does not pay. Whenever we have keptaccounts about bread-making we have found it pays verywell. You get your bread for considerably less than half <strong>of</strong>what you would pay in a shop and it is much better bread.Bread made from freshly ground wheat and baked <strong>by</strong>home baking methods is superb bread. You are not interestedin trying to sell as much holes and water as you can, as is thecommercial baker. Your bread will be alot denser thanboughtloaves, but well leavened nevertheless, and, if your oven washot enough, well cooked. It will take far less <strong>of</strong> it to feed a hungryman than it takes <strong>of</strong> shop bread, and if you consistently eatyour own good bread you, and your family, will stay healthyand your visits to the dentist will be mere formalities.59
Food from the FieldsMaking Bread<strong>The</strong>re is white bread and wholemeal bread, and manygradations between the two, and there is leavened breadand unleavened bread, and again many gradations. <strong>The</strong>re issourdough and soda bread, pitta bread and flat bread, butthe great thing for the <strong>self</strong>-supporter to remember is thatwhatever kind <strong>of</strong> bread he chooses to make, and whateverkind <strong>of</strong> grain he makes it from, the process is simple. It is als<strong>of</strong>un, and even the most ham-fisted cook can take pleasureand pride in his efforts.Undoubtedly the first breads were unleavened andundoubtedly the first person who discovered yeast discoveredit <strong>by</strong> accident. If you make a dough with flour andwater without yeast or baking powder and then bake it,you will be left with something very like a brick. Peoplegot over this <strong>by</strong> rolling the dough out very thinly andcooking it that way. (In Baghdad to this day you will seebakers putting great sheets <strong>of</strong> thin dough - as big as smallblankets - into enormous cylindrical ovens.) But no doubtone day someone mixed up some dough, didn't cook itimmediately and found the stuff began to ferment. Whathad happened was that wild yeasts had got into it and wereconverting the sugar (in the flour) into alcohol and carbonicacid gas. <strong>The</strong> alcohol evaporated, but the carbon dioxideblew the glutinous dough up into bubbles. This unknownancient took up the bubbling doughy mass and placed itupon his hot stone or maybe into a little hollowed-out stoneoven and made the first leavened bread.It was then found that bread could be made not in thinsheets but in thick loaves, and was still good to eat. Furthermore,it was discovered that leavened bread stays palatablelonger than unleavened bread: good home-baked wholemealbread can taste fine for five days or more, while unleavenedbread tastes very dreary unless you eat it when it is stillabsolutely fresh.YeastHow long it took mankind (or womankind) to suss out thetrue nature <strong>of</strong> that lovely stuff yeast, we will never know.But certainly they must have found that if they were luckyenough to get a good strain <strong>of</strong> wild yeast in their doughthey could go on breeding it - simply <strong>by</strong> keeping a littleraw dough back from each baking to mix in with the nextbatch <strong>of</strong> bread. <strong>The</strong> old pioneers in the Wild West werecalled "sourdoughs" because they made their bread thus.And even today, people out <strong>of</strong> touch with bakers' shopsand yeast suppliers commonly make bread with sourdough(see p. 64).If you live near a baker always buy your yeast fresh. Itshould be a creamy putty colour, cool to the touch and easyto break, with a nice yeasty smell. Don't buy any that iscrumbly or has dark patches. It will keep for one week toten days in a screwtop jar in the fridge. Or cut it into oneinch cubes and freeze it. Both yeast and bread freeze well.If you cannot obtain fresh yeast, you can still make aperfectly good bread with dried yeast. This is widely availablein packets, and it will keep for up to three months. But it isa good idea to test dried yeast if you have had it around forsome time. Drop a few grains into a little warm liquid doughmix; if it is still "live" it will froth in under ten minutes.If you are using fresh yeast for any recipe specifying driedyeast, always double the quantity Or halve it if the recipeasks for fresh yeast and you are using it dried.Yeast flourishes in a warm atmosphere in temperaturesbetween 48-95°F (9-35°C), but strong heat - over 140°F(60°C) - will kill it. Set your dough to rise in a warm place:on top <strong>of</strong> the stove, in the airing cupboard, even under theeiderdown on the bed.If you are brewing beer, you can use your beer yeast foryour bread-making. Conversely, you can use your breadyeast in your beer-making. Neither is ideal because they aretwo different sorts <strong>of</strong> yeast but we have done it <strong>of</strong>ten andwe get surprisingly good beer and good bread.KneadingA word about kneading. Kneading is important because itreleases the gluten and distributes the yeast right throughthe dough. Don't be afraid to treat your dough fiercelywhen you knead it. Push and pull it about until it seems totake on a life <strong>of</strong> its own, becomes silky and springy in yourhands. <strong>The</strong>n leave it alone to rise. When it has risen enoughit should jump back at the touch <strong>of</strong> a finger.KeepingIf you don't have a freezer keep bread in a dry, cool, wellventilatedbin. Don't put it in an airtight container or it willgo mouldy. Make sure the bread is quite cool before youstow it away or the steam in a warm loaf will make it turnsoggy. Keep your flour in a dry, dark, cool cupboard.<strong>The</strong>re's much more to bread than white sliced or wholemeal.And we should all be thankful for that. Bread can bemade from soya, rye, wheat, corn, sorghum or oats. If youvary your grain, you vary your bread. It's as simple as that.Have it leavened or unleavened, plain or fancy, or try amixture <strong>of</strong> flours. Bread at its most basic, as we have justseen, is simply yeast, flour, salt and water. Add milk, butter,eggs, sugar, honey, bananas, carrots, nuts and currantsand you will enrich your bread, change its taste and texture.Roll it in wholewheat grain, or poppyseed, sesame, dill,celery, caraway, sunflower or aniseed as you please. Brushit with milk, paint it with egg yolk, shine a currant loaf withsugar syrup. Knot it, nvist it, plait it. Experiment, and youwill find that being your own baker is one <strong>of</strong> the great joys<strong>of</strong> the <strong>self</strong>-sufficient way <strong>of</strong> life.On the following pages a variety <strong>of</strong> breads you can makein your own home are described.<strong>The</strong> home bakeryBaking bread is one <strong>of</strong> the most satisfying processes <strong>of</strong> the <strong>self</strong>-sufficient life.Simple ingredients, traditional equipment and common sense are all you need.60
Food from the Fields
Making BreadBread made with different floursFor people who grow rye, barley, oats, marie, rice, sorghumand the rest, it is useful and interesting to try some breadsmade with these grains, or with them mixed with wheat flour.It must be remembered that <strong>of</strong> all the grains only wheat hasenough gluten to sustain the gas generated <strong>by</strong> the livingyeast sufficiently to make fairly light, or risen, bread.You can try a combination <strong>of</strong> two or three different flours,but it is usually worth adding some wheat flour. And alwaysadd salt. Oil, butter, lard or margarine help to keep breadmoist. Water absorption varies with the sort <strong>of</strong> flour. Here isa rundown <strong>of</strong> the different flours:Cornmeal Bread made from commeal has a crumblytexture. Try 1/2 cornmeal and 1/2 wheat flour.Ground rice Ground rice bread is a lot better if the rice ismixed half and half with wheat flour.Cooked brown rice Like the whole cooked grains <strong>of</strong> anyothercereal, cooked brown rice can be mixed with wheatflour to make an unusual bread.Sorghum By it<strong>self</strong> sorghum (or millet) flour makes a drybread. Add wheat flour and you will get nice crunchy bread.Wheat flour Wheat flour is rich in gluten, which makesthe dough stretch and, as it cooks, fixes it firmly round theair bubbles caused <strong>by</strong> the leavening.Rye flour Rye flour gives bread a nice sour taste, and canbe used on its own, although a lighter bread will result if1/2 or 1/3 <strong>of</strong> the flour is wheat flour. Maslin, flour made from ryeand wheat grown together and ground together, was thestaple English flour <strong>of</strong> the Middle Ages. Only the rich atepure wheaten bread.Barley flour Barley flour alone makes very sweet tastingbread. A proportion <strong>of</strong> 1/3 barley flour to 2/3 wheat producesgood bread. If you toast the barley flour first your bread willbe extra delicious.Oatmeal Oatmeal is also sweet and makes very chewydamp bread, which fills you up nicely. Use 1/2 oat and 1/2 wheatflour for a good balance.Soya flour Soya flour too is better mixed with wheat. <strong>The</strong>soya flour adds a lot <strong>of</strong> nourishment.Bread made without yeastUnyeasted bread is really solid stuff, quite unlike yeastedbread which is, after all, half full <strong>of</strong> nothing but air. To mymind it can only be eaten cut very thin. Warm or even boilingwater helps to start s<strong>of</strong>tening the starch in the flour. Kneadinghelps to release the gluten. If unyeasted dough is allowedto rest overnight the bread you make will be lighter, as thestarch will s<strong>of</strong>ten more and a little fermentation will begin.<strong>The</strong> carbon dioxide released will provide a few air holes.I suggest the same proportions <strong>of</strong> whole wheat to otherflours as with yeasted bread. Other ingredients need benothing but salt and water, and perhaps oil to brush thetops <strong>of</strong> loaves. Knead well, and leave to prove overnight.Unyeasted bread may need longer and slower cookingthan yeasted bread. It will also need good teeth.Here are some recipes for different breads:Standard wholemeal breadI never measure my flour because what mattersis getting the dough to the right consistencyand flour absorbs more or less water according toits fineness, quality, etc. But for people who musthave exact quantities <strong>of</strong> everything this is whatSam Mayall, an experienced English baker, whogrows and mills his own wheat, uses:2 1/2 lbs (1.1 kg) <strong>of</strong> wholemeal flour1 oz (28 g) salt1/2 oz (14 g) dried yeast2 teaspoons s<strong>of</strong>t brown sugar1 1/4 pints (0.7 litres) waterPut the flour and salt in a basin. Put the yeastin a bowl, add the sugar and some warm water.Leave in a warm place to rise.When the yeast is fermenting well add it to theflour and the rest <strong>of</strong> the water, and knead it till it iss<strong>of</strong>t and silky in texture. Return it to the basinand leave it to stand in a warm place until it hasabout doubled its size. Knead it again for a fewminutes and mould into loaves. Place in warmedgreased and floured tins, and, if it is s<strong>of</strong>t wheatflour, leave it to rise for five minutes. If it is hardwheat flour, allow longer, up to 20 minutes. Put inan oven <strong>of</strong> 425°F (218°C) for 45 minutes.Make breadMaize bread tastes good. It is crunchy and rathergritty and should have a nice brown crust. Youwill need:1 1/2 pints (0.8 litre) boiling water2 lbs (0.9 kg) maize flour2 teaspoons baking powder3 eggs (optional)1/2 pint (0.3 litre) buttermilk (optional)Mix the maize meal with the baking powder andpour on the boiling water. Adding eggs and/orbuttermilk improves the bread. Bake in a greasedtin at 400°F (205°C) for about 40 minutes.Sorghum breadThis is a rather dry bread, and only really worthmaking if sorghum is all you've got. Sorghum ismuch better mixed with wheat flour. You need:12 oz (340 g) sorghum flour1 teaspoon baking powder1 teaspoon saltMix the ingredients and wet with warm water tomake a stiffish dough. Bake for about 50 minutesin a moderately hot oven at 350°F (177°C).Oat breadIn those damp parts <strong>of</strong> the world where nothingelse will grow, oat bread is common. It is heavyand sweet-tasting. To make it you will need thefollowing ingredients:1 lb (0.5 kg) rolled oats or oatflour3 oz (84 g) sugar or honey1 tablespoon salt4 oz (114 g) butter1 pint (0.5 litre) boiling water (a little less if youuse honey)1 oz (28 g) yeast or 1/2 oz (14 g) dried yeastMix the dry ingredients well, rub in the butter andadd the boiling water. Dissolve the yeast in a littletepid water. When it begins to froth mix it wellin with the other mixture. Leave to rise for a fewhours. <strong>The</strong>n dump dough on a floured board andknead for about ten minutes. Cut and shape intorounded loaf-sized lumps, and allow for someexpansion. Put on a baking tray in a warm placeand allow to expand for about an hour. <strong>The</strong>nbung in a very hot oven <strong>of</strong> 450°F (232°C) for45 minutes. Test as usual <strong>by</strong> tapping the bottoms<strong>of</strong> the loaves to see if they are hollow.Stand tocool on a wire tray so that the air can circulateall round them.62
Food from the FieldsMaking breadIf you can boil an egg, you can bakebread. <strong>The</strong>re is absolutely nothingdifficult about it. To make sixmedium loaves, take 4 1/2 pints (2.3litres) <strong>of</strong> water, warmed to bloodheat, 2 ounces (56 g) <strong>of</strong> salt,2 ounces (56 g) <strong>of</strong> brown sugar, 1tablespoon <strong>of</strong> fresh yeast (or halfthis amount <strong>of</strong> dried yeast). Youcan even use yeast from the bottom<strong>of</strong> your beer kive.table and dump the dough into themiddle <strong>of</strong> all this.Now take up your bread tins verycarefully. If you jog them they willcollapse and you will have solidbread, so gently ease them into a hotoven 425°F (218°C). Half an hourlater take a look to see if they arecooking evenly. Change themround if necessary. Wait another 15minutes and they should be done.Sprinkle dry flour on top <strong>of</strong> thedough and it is ready for kneading.Start <strong>by</strong> mixing the dry flour withthe wet dough.Divide the dough into six equalportions. Grease the baking tinsand shape your dough. Fill the tinsjust three-quarters full. Scorepatterns on top with a knife andleave covered about 1 hour in awarm place.Put all the ingtedients into a largemixing bowl. When the yeast hasdissolved pour in enough flour tomake a fine sticky mash. Stir, thiswell with a wooden spoon until thespoon will just about stand upright.Cover with a cloth and leave it overnight in a warm place where it willbe free from draughts.Come morning the yeast will havethe dough spilling over with enthusiasm.Heap some dry flour on to a<strong>The</strong> aim is to make a fairly stiffdough, dry on the outside. You dothis <strong>by</strong> pushing the dough awayfrom you with the palms <strong>of</strong> yourhands (above) and then pulling ittowards you again (below). This iskneading and it is a verv stickyprocess. When the dough sticks toyour hands — and it will - fling onsome flour. Whenever it feels sticky,sprinkle flour. Push and pull andfling on the flour until you have adry, satisfying little ball. Roll itabout to your heart's content.After 10 minutes the fun has tostop. It is nearly ready for baking.If you want to be more decorativemake a plaited loaf. Divide thedough into three, make eachsausage-shaped and plait. Just likethat. If you want to, brush the topwith milk to make it shiny andsprinkle with poppy seeds.Shape little rolls with the left-overdough. Put them on a baking trayand leave on top <strong>of</strong> the stove to rise.After half an hour put them in avery hot oven 450°F (232°C). Inten minutes you will have a taste <strong>of</strong>things to come - and magnificentrolls for breakfast.To test them tap the bottoms. Ifthey sound hollow they are done.Or push in a skewer - it shouldcome out clean. If it doesn't it is nota disaster; put them back for a fewmore minutes.When you are sure your loaves aregood and ready take them out andstand on top <strong>of</strong> their tins to air.Bread rises (and yeast ferments)best at 80°F (27°C). Yeast will dieat any temperature much over 95°F(35°C) and it won't multiply under48°F (9°C). So the place where youset the bread to rise must fall withinthese temperatures. Usually thetop <strong>of</strong> the stove is ideal. <strong>The</strong> ovenshould be - well, hot. Not countingthe time you spend waiting forthings to happen you probablydon't spend more than half an hourworking at it, and the result is sixbeautiful wholemeal loaves.63
Making BreadRye breadRye bread, which is black bread, is fine when youget used to it, but it is pretty solid stuff. You need:3 1/2 lbs (1.6 kg) rye flour1 oz (28 g) yeast (or 1/2 oz dried yeast)1 tablespoon sugar1 tablespoon melted butter2 teaspoons salt1 1/2 pints (0.8 litre) warm waterMix flour, sugar and salt. To the water addyeast and butter and stir the whole into the flour.Knead well, cover closely and leave in a warmplace for 8 hours, perhaps in the airing cupboardovernight. <strong>The</strong>n shape into loaves and leave torise until they have doubled in size. Bake at350°F (177°C) for Hi hours.SourdoughSourdough uses a baking system which, oncestarted, means you never need to buy yeast.You have to bake once every week however, tokeep the sourdough going. It was very handy forthe pioneers and goldminers <strong>of</strong> the old WildWest, who managed to have fresh leavened breadevery day without having any yeast.Rye flour is good to use in sourdough, bothbecause it is naturally sour, and because bacteriathat help to make sourdough find rye very encouraging.Use all rye flour or all wheat flour, orelse mix rye, or any other flour, with wheat flour.Begin <strong>by</strong> saving a fair sized lump <strong>of</strong> dough,about the size <strong>of</strong> a large fist, from an ordinarybatch <strong>of</strong> bread dough. This is your "first starter".Keep it covered with a cloth in a warm place for 3or 4 days. After this it should begin to smellpleasantly but definitely sour.Now mix this starter with 1 lb (0.5 kg) flour(one <strong>of</strong> the sorts described above) and 3/4 pint (0.4litre) <strong>of</strong>warm water. This will make a sloppy batter.Leave it in the bowl, covered with a cloth in awarm place overnight. Next day, it should bebubbly. At this point, if you are going to makemore sourdough bread in the future, put <strong>by</strong> your"regular starter", say enough to fill a jam jar. Keepit in a cool place, firmly covered until you needit again. It will keep at least a week.Now to make sourdough bread, add to thespongy mixture:3 tablespoons honey2 teaspoons salt1/2 pint (0.3 litre) milk (sour if you have it)2 lbs (0.9 kg) flour (rye or otherwise)Knead until the dough is really smooth andelastic. Shape two loaves and place them onbaking sheets. Oil them, and leave them to proveuntil they have doubled in size. This takes longerthan for ordinary dough, as the yeast is wild.Heat oven to 400°F (205°C). Bake the loaves for30 minutes then reduce the heat to 375°F(190°C) until the bread is done.Very good sourdough pancakes can also bemade, using some <strong>of</strong> your starter to make thesame sloppy dough as for the bread. <strong>The</strong>n instead<strong>of</strong> making bread, next morning add one egg, alittle oil, enough milk to make the batter creamy,a pinch <strong>of</strong> bicarbonate <strong>of</strong> soda and some honeyor brown sugar to sweeten. Make the pancakes inthe usual way.SodabreadThis is another bread which needs no yeast, andit takes no time to rise, as it does it in the oven.1 lb (0.5 kg) flour1 level teaspoon bicarbonate <strong>of</strong> soda2 levelteaspoons cream<strong>of</strong> tartar on oz(14g) bakingpowder1 knob <strong>of</strong> butter or margarineabout 1/2 pint (0.3 litre) sour milk, butterniilk, orfresh milk1/2 teaspoon saltMix the dry ingredients, rub in the butter, and mixin the milk lightly with a knife until you have astiff broken-looking dough. Form it into a round,slightly domed shape, and put on a floured tin.Brush with milk, and make a cross on top with aknife. Bake in a hot oven 400°F (205° C) for 20 ro30 minutes.Optional extras: 1-2 teaspoons sugar and 1 or2 eggs beaten into the milk, to make a special,deluxeversion.MaltloafThis is a sweer, darkbro wn, delicious sticky bread.You can add dried fruit or not as you like. If youdo, use about 2 oz (56 g). Sultanas are best.1 lb (0.5 kg) flour (wholemeal)Pinch saltloz(28 g) yeast or 1/2 (14 g) dried yeastabout 1/2 pint (0.3 litre) milk and water, milk alone orwater2 tablespoons malt extract2 tablespoons black treacle or golden syrup2 oz (56 g) butterPut flour and salt in a basin. Cream the yeast in alittle <strong>of</strong> the milk or water, which should be warm,and add it to the flour. Add treacle, malt, butterand then enough milk or milk and water to makea firm breadlike dough. Knead until it all lookswell mixed together (it will be rather sticky).Leave in a bowl covered with a damp cloth, torise until it's doubled in size. Put the dough intoloaf tins, so that they are half filled. Leave toprove until the dough reaches the tops <strong>of</strong> the tins.Bake at375°F (190°C) for 45-50 minutes. To givea proper finish paint the tops with a hot milk andsugar syrup as soon as they come out <strong>of</strong> the oven.This keeps well. Some say it's even better aftera day or two.Norwegian flat bread (Flat bred)Flat breads are a sort <strong>of</strong> cross between a potatocrisp and an Indian papadum. <strong>The</strong>y taste prettygood. This recipe will make 12 large flat breads:3 lbs (1.4 kg) potatoes1 lb (0.5 kg) rye flourBefore you go to bed boil the spuds and mashthem. <strong>The</strong>n knead the rye flour and warmmashed potatoes together until you have asmooth dough. Go to bed. In the morning kneadagain with more flour if the dough seems sticky,then roll it out, as thinly as possible, into bigcircles which will fit a large frying pan. Bakethem over a gentle heat and turn several timesuntil they are quite dry. Cool on paper. <strong>The</strong>yshould then be quite crisp.S<strong>of</strong>t cakes (Lefser)<strong>The</strong>se are a variation on flat breads. Cook asabove but before they become quite hard, (afteronly 2 or 3 turns) wrap them up in a cloth to keepwarm. Eat them with sour cream, something youare always likely to have plenty <strong>of</strong>. Sprinkle themwith sugar if you want them to look pretty, foldthem over and cut them in triangles. Keep warmuntil they are eaten.Greek pitta breadThis is the bread you get in Greek restaurants thatlooks like flat slippers.Use ordinary bread dough made from wheatflour, water, salt and yeast, and work in some oilit you like s<strong>of</strong>t pittas. When the dough hasdoubled in size after the first kneading, divide itup into lumps about the size <strong>of</strong> tennis balls. Workthem into nice smooth balls, then sprinkle flouron the table and with a rolling pin, or an oldbottle, roll each one in one direction only so thatit flattens into an oval shape, about i inch thick.Leave them to prove (rise again) in a warmplace lying between two floured cloths. Heatyour oven and some greased baking sheets to450°F (232°C) - really hot. <strong>The</strong>n splash eachpitta with cold water just before you bake it.Bake for 5 to 10 minutes. <strong>The</strong>y should just bestarting to colour and puff up, but they mustn'tgo brown or they will get too hard.Cool them and wrap them in cloths to keepthem s<strong>of</strong>t. Reheat them in the oven. <strong>The</strong>y weredesigned to go with kebabs, humus, and taramasalata,but they are equally good with rollmops(see p. 207), pickled onions (see p. 188), or justplain butter (see p. 101) and jam (see p. 190).DoughnutsYou won't eat a shop doughnut again after youhave made your own. <strong>The</strong> problem is you need alot <strong>of</strong> very clean fresh oil.<strong>The</strong>y are made from a normal bread dough butas well as this, include the following ingredientsduring the mixing:2 oz (56 g) melted butter1 egg2 oz (56 g) sugarmilk instead <strong>of</strong> waterpinch <strong>of</strong> salt1 lb (0.5 kg) flour1 oz (28 g) yeast or 1/2 oz (14 g) dried yeast<strong>The</strong> dough should be smooth and s<strong>of</strong>t, but notsticky. It doesn't have to be kneaded at this stage.Leave it to rise, covered with a cloth, in a warmplace for about one hour.Knead it vigorously, till it feels right (about4-5 minutes). Make it into pieces about the size <strong>of</strong>a large walnut, or roll it out on a floured boardand cut rings using a large glass for the outsideand a bottle top for the inside. Don't worry if theylook small, they more than double in size duringcooking. Once again, leave them in a warm placeto prove for 20 minutes. Cover them with a clothto keep the warmth in and the dust out.Fry them both sides a few at a time in deepboiling fat. <strong>The</strong> spherical ones turn themselvesover at half time, leaving a pale ring round theequator. Drain them then roll in caster sugar. Eatthem at once. You can push jam into them if youwant some extra flavour.64
Food from the FieldsMaking pastaA <strong>book</strong> I have seen lists sixty-eight distinctive kinds <strong>of</strong> what Iwould call, simply, spaghetti, with splendid names like:amorini (little cupids), agnolotti (fatlittlelambs),mostaccioli(little grooved moustaches) and vermicelli, which means,horribly, little worms. But it is all the same thing: whitewheat flour, preferably from durum wheat, a hard wheatthat grows in Italy and North America. This is kneadedinto a stiff dough, forced through an appropriate mould <strong>by</strong> amachine, or rolled thin and cut <strong>by</strong> hand, and then dried readyfor cooking. <strong>The</strong> stuff you buy has been dried first <strong>by</strong> a fan,and then in an oven.You can make perfectly good pasta <strong>by</strong> kneading somewhite flour with a little water very thoroughly into a stiffdough. Roll it out very thin with a rolling pin, adding moredry flour whenever the dough sticks to either table or roller.<strong>The</strong>n gently roll the thin sheet into a Swiss-roll shape and cutthin slices <strong>of</strong>f across the grain. Dry these carefully over a fire,or very gently in a slow oven. Cook exactly like spaghettiyou buy in a shop.Making chapatisChapatis are thin sheets <strong>of</strong> unleavened bread which form thestaple diet <strong>of</strong> most <strong>of</strong> the people <strong>of</strong> West Pakistan and NorthIndia. <strong>The</strong>y make one wonder if yeast is such a good idea afterall. <strong>The</strong>y are delicious, and don't forget that the healthiestand most long-lived people on Earth live on a diet <strong>of</strong> unleavenedwholemeal bread, yoghourt, beer, vegetables andspices, and a little meat. Chapatis go well with spicy or sharptastingfood but are also good spread with butter and eatenhot <strong>by</strong> themselves. <strong>The</strong> only argument against chapatisas a staff <strong>of</strong> life is that you have to make them fresh for eachmeal, and they are a little trouble. But if you are used to doingthem, and have what is needed at hand, they don't take long.You need: wholemeal wheat flour, salt, water, an open fire,a rolling pin or an old bottle and a cast iron plate. <strong>The</strong> hubcap<strong>of</strong>f a motor car does at a pinch which is why so few carsin North India have hub-caps. In some regions <strong>of</strong> India,chapatis are made with different flours. Millet, barley andchick-pea flours are all commonly used and have veryinteresting flavours.Egg noodlesEgg noodles are a richer form <strong>of</strong>pasta, but they are also easier tomake. Make a well in the top <strong>of</strong> amound <strong>of</strong> flour and break an egg, oreggs, into it. One egg to 8 oz:228 g) <strong>of</strong> flour is the norm.<strong>The</strong>n knead together with yourhands, adding a tiny bit <strong>of</strong> water if itis too dry or else another egg.Dust well with dry flour. Roll outvery thin, adding more flour if thedough sticks. As with ordinarypasta toll the dough up like a Swissrolland cut thin slices across thegrain. Just hang up to dry.ChapatisMix an ounce (28 g) <strong>of</strong> salt with4 lbs (1.8 kg) <strong>of</strong> flour. Mix the flourinto a stiff dough, divide it into eggsizedlumps, take a lump and roll itout quite flat, very thin, and round.Indians, and you when you getexperienced, can do it without therolling pin. <strong>The</strong>y just pat it flatbetween their hands.Turn the chapati over as soon as thefirst side is brown. When thesecond side is done, throw thechapation the embers <strong>of</strong> the fire withthe first side you cooked downwards.It will puff up like a balloon.Put a little olive oil in and roll thedry flour over the top <strong>of</strong> the egg.Permutations with pastaOf course you can make pasta anyshape you like, and you don't haveto boil it. You can make smallshapes and cook them in soup; youcan make large flat slices and bakethem with ahuge variery <strong>of</strong> differentflavoured sauces; or you can makecontainers and stuff them withmeat, cheese, fish, vegetables orwhat vou will.As you finish rolling each onethrow it on the hot grid-iron, whichmust be so hot that spit sizzles on it,but not red-hot.Immediately flip it upside down,leave it like that for a few seconds,pull if <strong>of</strong>f, blow the air out <strong>of</strong> it <strong>by</strong>pressing it, smear it all over with alittle butter or ghee, and eat quickly.65
Food from the FieldsOats & RyeOATSOats will grow in a damper climate than wheat or barley,and on wetter and more acid land. Thus it is a staple humanfood in Scotland, which led Dr <strong>John</strong>son to rib his friendBoswell about how in Scotland men lived on what inEngland was only thought fit to feed to horses. Boswellreplied: "Yes - better men, better horses!' In North Americaand Europe oats tend to be grown in damper, colder places,and <strong>of</strong>ten on glacial drift, where the land may be heavy,acid and not very well drained. Oats and potatoes haveenabled people to live in areas where no other crop wouldhave grown.SowingIn wetter areas it is most usual to sow spring oats: in drierand warmer areas winter oats are preferred and give a heavieryield and also are less attacked <strong>by</strong> frit fly, a common pest <strong>of</strong>oats. <strong>The</strong> only trouble with winter-sown oats is that it islikely to be eaten <strong>by</strong> birds. If it is possible to sow while otherpeople are harvesting their spring-sown crops, it stands abetter chance <strong>of</strong> survival because the birds are tempted <strong>by</strong>seeds dropped elsewhere. <strong>The</strong> cultivation <strong>of</strong> oats is exactlythe same as that <strong>of</strong> wheat (see p. 58).HarvestingBut whereas barley should be allowed to get <strong>complete</strong>lyripe and dry before harvesting, oats should not. <strong>The</strong>re shouldstill be a bit <strong>of</strong> green in the straw. Oats are far better cutand tied into sheaves with sickle, scythe, reaper, or reaperand-binder,than they are combined, for combining knocksout and wastes a lot <strong>of</strong> the grain. When cut and bound itshould be stooked and then "churched" three times.Churching is the old farmers' way <strong>of</strong> saying that it shouldbe left standing in the stook for at least three Sundays. <strong>The</strong>purpose <strong>of</strong> this is to dry the straw thoroughly, and any grassgrowing among it, and to dry the grain it<strong>self</strong>, so that thegrain will not go mouldy in the stack.Many old-fashioned farmers, including me, feed oats tohorses and cattle "in the sheaf. In other words we do notthresh the grain out but simply throw animals <strong>complete</strong>sheaves. One per beast per day during the winter, plus grass,will keep bullocks and dry cows looking fine. <strong>The</strong> animalseat straw and all. Oat straw, whether threshed or not, is thebest <strong>of</strong> all the straws for feeding: good oat straw is betterfeed than poor hay. But <strong>of</strong> course working horses should befed on the grain alone as well. You will find more details aboutfeeding horses on p. 42.Milling<strong>The</strong> Scots, and other sensible people, mill oats thus. <strong>The</strong>ykiln it, that is put it in a kiln (see p. 69) until it is quite dry.It must be <strong>complete</strong>ly dried, so they kiln it at quite a hightemperature: this is the most important part <strong>of</strong> the operation.<strong>The</strong>y then pass it between two millstones set at quite adistance apart. This gently cracks the skin <strong>of</strong> the oats <strong>of</strong>f.<strong>The</strong>y then winnow it (see p. 54). This blows the skins awayand leaves the grain. Finally they pass it through the stonesagain, but this time set them closer to grind it roughly, nottoo fine. This is oatmeal, and it has fed some <strong>of</strong> the bestraces <strong>of</strong> men in the world.<strong>The</strong>re are two ways <strong>of</strong> making porridge with it, verydifferent but both equally efficacious. One is: sprinkle themeal into boiling water, stirring the while, and the momentthe porridge is thick enough for your taste take it <strong>of</strong>f the fireand eat it. <strong>The</strong> other is: do this but then put the closed potin a hay-box and leave it overnight. (A hay-box is a box withhay in it. You bury the pot in the hay when the porridge isboiling and, because <strong>of</strong> the insulation, it cooks all night.)Eat it in the morning. Eat porridge with milk or cream, andsalt: never with sugar, which is a beastly habit, and not whatporridge is about at all.RYERye is the grain crop for dry, cold countries with lightsandy soil. It will grow on much poorer, lighter land thanthe other cereals, and if you live on rough, heathy land ryemight be your best bet. It will thrive in colder winters thanother cereals and stands acid conditions.You might well grow rye to mix with wheat for bread:a mixture ot rye and wheat makes very good bread. Ryealone makes a dense, dark, rather bitter bread, very nutritiousand eaten in large quantities <strong>by</strong> the peoples <strong>of</strong> EasternEurope. It seems to do them good.SowingYou can treat rye in exactly the same way as the othercereals (see p. 58). If you plant it in the autumn and it growsvery quickly, which it <strong>of</strong>ten does, it is very advantageous tograze it <strong>of</strong>f with sheep or cows in the winter when othergreen feed is scarce. It will grow very quickly again and stillgive you a good crop. It doesn't yield anything like as wellas wheat, though, whatever you do. Rye is <strong>of</strong>ten used forgrazing <strong>of</strong>f with sheep and cattle only. A "catch crop" issown, say after potatoes have been lifted in the autumn.This is grazed <strong>of</strong>f green in the spring during the "hungry gap"when a green bite is very welcome. <strong>The</strong>n the land is ploughedup and a spring crop put in. Its ability to grow well in thewinter is thus utilized. One advantage <strong>of</strong> rye as a wintersowncrop is that it does not seem to be so palatable tobirds as other grains. Wheat and oats both suffer badlyfrom members <strong>of</strong> the crow family: rye seems to escape thesethieving birds.HarvestingRye ripens earlier than other grains. Cut it when it is deadripe, and it will not shed much. <strong>The</strong> straw is good for beddingand is a very good thatching straw. This year I am growingrye specifically for thatching.66
Food from the FieldsOatcakesOatcakes are thin savoury biscuits, good <strong>by</strong>themselves and especially good with cheese orhome-cured ham. You need:4 oz (114g) fine or medium oatmealI teaspoon melted dripping1/2 teaspoon salt1/2 teaspoon bicarbonate sodahot waterMix the oatmeal, the soda and the salt. Make awell in the centre, add the melted dripping andenough hot water to make a s<strong>of</strong>t mixture. Turnout on to a pastry 7 board well dusted with mealand form into a smooth ball. Knead and rollout as thinly as possible. Rub with meal towhiten cakes. Put on a hot griddle or greasedbaking sheet and cut into four or eight pieces.Bake at 350°F (177°G) until the edges curl.Toast until slightly brown under the grill.Porridge<strong>The</strong> very best breakfast food for cold wintermornings, warming, nourishing and quick tomake. For two or three people use:4 oz (114g) porridge oats(if you use ordinary oats you must soakthem overnight)3/4 pint (0.4 litres) cold water or milk and watersalt to tastePut water, or better still, milk and water into asaucepan and add oats and salt. Bring to the boiland simmer for 3-4 minutes stirring all the time.This quantity gives two helpings.MuesliThis <strong>of</strong> all things can be made to everyone'sindividual taste. Mix oats, or any flaked cereal,dried nuts, sugar and any fresh fruit you fancy.Some people like to soak it in milk overnight.Personally I like it fresh and crunchy and coveredin fresh cream.Water biscuitsI've always found water biscuits a bit bleak, butthe women in the family seem to like them andthey are wholesome: the biscuits as well asthe women. You need:oatmeal (or any flour, but oatmeal is best)salt to tastewaterMix the ingredients to a firm, reliable dough.Roll out thinly (about i inch or 6 mm). Cut intosquares or circles, any size you like. Prick thesurface in a pattern, and bake on greased sheetsat 350°F (177°C) until crisp.Roasted or toasted flakesYou can make them with any flaked grains. Oats,barley and millet flakes are the most common.<strong>The</strong>y are very simple to cook. All you need is afire, and a clean, dry frying pan. Simply put theflakes in a pan and heat them until they just turncolour. <strong>The</strong>y go nice and crisp and taste nutty,and are mouthwateringly good served withstewed fruit and cream.PancakesOatmeal pancakes are very good, but you canmake pancakes from any flour or from flakedgrains. <strong>The</strong> principle is the same. To make abouta dozen oatmeal pancakes you will need thefollowing ingredients:8 oz: (228g) oatmeal2 eggs3/4 pint (0.4 litres) milk and watersalt or sugara little butter or oilMake a creamy batter from oatmeal, egg, milkand water. Season with salt or sugar, dependingon whether the pancakes are to be savouryor sweet. Leave the batter to stand for twohours before cooking. Grease a frying panand heat it well. Pour enough batter into thefrying pan to just cover the base and fry untilthe surface is no longer shiny. <strong>The</strong>n flip it over.If you are brave toss it, otherwise turn with apalette knife. Fry the other side until the pancakecan be slid out dry and rustling. It only takes acouple <strong>of</strong> minutes to make.Serve up filled with chopped meat, fish,vegetables, jam or just plain with lemon juiceand/or sugar.You can make a more interesting lighterpancake if you add yeast to your mixture andleave it to go foamy. Another variationis to usebeer as your liquid.Oat flake loafThis is a vegetarian form <strong>of</strong> meat loaf and makesa <strong>complete</strong> meal in it<strong>self</strong>. Eat it hot with a darksoya sauce thickened with com or soya flour.Otherwise it is good with a spicy tomato sauce,or it goes down nicely with a meat stew. Youwill need:3 measures oat flakes(9 oz or 255 g will make a loaf for 4 or 5 people.Instead <strong>of</strong> oats you can use barley or milletflakes.)3 measures water1 or 2 sliced leeks, onions or both1 clove garlicchopped parsleyoilsaltFry the onions, leeks and garlic slowly in a littlevegetable oil until they are just beginning to gobrown. Put them aside and fry the flakes in a littleoil. Let them start to burn, but do not let themburn too much. Stir in the water when the flakesare nicely coated with oil. Add salt and stir overa medium heat, until it thickens and becomesfairly solid. Stir in the onions and leeks and dumpthe lot in a greased earthenware casserole. Leavethe top slightly rough and splash it with a littlewater. Bake it at 400°F (205°C) for 1 hour. <strong>The</strong>top should be slightly brown and the inside s<strong>of</strong>tand moist.Rye grain and vegetablesIf you can, soak the rye grain overnight, or atleast for two hours before cooking. If you can't,don't worry, but the cooking will take longer.Boil the grain with at least 4 times its volume<strong>of</strong> water. Cook it until each grain has swollen tosplitting point. Drain <strong>of</strong>f the surplus water,which is very good for soup, and mix the cookedgrain with some lightly fried vegetables, such ascarrots, onions, turnips, cabbage or whateveryou have. Add salt after cooking, not before.Eat the mixture on its own as a vegetarian mealor as an accompaniment to meat.Rye toastThis is excellent for parties, and goes down wellwith cheeses, rollmops, pickled cucumbers andso on. You need:1 loaf rye breadbutterlemon juiceassorted fresh herbsCut the loaf <strong>of</strong> bread into very thin slices, andbake it in a low oven, 250°F (121°C), until it isreally dry and crisp. This should take about onehour. Meanwhile, chop up a handful <strong>of</strong> freshgreen herbs very finely and mix them with meltedbutter and lemon juice. Paint this mixture on thetoast with a pastry brush. (You can make a pastrybrush with a short piece <strong>of</strong> dowel, some pig'sbristles and a length <strong>of</strong> cotton.) Put the breadback in the oven for ten minutes to allow the herband butter mixture to penetrate the toast.You can store rye toast for several days in acool, dry place and then reheat it in the ovenwhen you want to use it.Rye dropscones<strong>The</strong>se really are mouthwatering, and if you, oryour lady, can make them when your kids havetheir friends round, so much the better. Youneed for about ten scones:4 oz (114g) rye flour2 eggspinch <strong>of</strong> saltsome milkMix the flour, the yolks <strong>of</strong> the eggs and the saltwith enough milk to make a creamy batter. Beatthe two egg whites stiffly and mix them in. Heatand grease a griddle and make drop scones inthe usual way <strong>by</strong> dropping a spoonful <strong>of</strong> themixture on the griddle and letting it sizzle fora few seconds on each side. Serve up hot spreadwith butter.Rye and honey biscuitsYou can have these thick and doughy, or thinand crisp. Either way the taste is unusually good.You need:8 oz (228g) rye flour2 tablespoons honeywater1 oz (28g) yeast or1/2 oz (I4g) dried yeastDissolve the yeast in water. <strong>The</strong>n add this liquidto the flour and honey to make a thick dough.Leave this overnight to rise. Next day roll out thedough and press out biscuit shapes. Bake for15. minutes in an oven at 425°F (218°C) tomake well-risen scone-like biscuits. To makethin, crisp biscuits roll thinner and then bakethem on a griddle.67
Food from the FieldsBarleyBarley has two principal purposes: one is feeding animalsand the other is making beer. It doesn't make good breadbecause the protein in the grain is not in the form <strong>of</strong> gluten,as it is in wheat, but is soluble in water. It will not thereforehold the gases <strong>of</strong> yeast fermentation and so will not rise likewheat flour will. You can mix barley flour with wheat flourthough, say three to one wheat to barley, and make aninteresting bread.Barley will grow on much lighter and worse soil thanwheat, and it will also stand a colder and wetter climate,although the best malting barley is generally grown in a fairlydry climate.Sowing<strong>The</strong> old saying goes: "sow wheat in mud and barley in dust!"My neighbour says that the farmhands used to come to hisold father and say: "Boss, we must get in the barley seed.<strong>The</strong> farmer over the valley is doing it." "Can you see whathorses he's using?" said the old man, who couldn't see verywell. "<strong>The</strong> roan and the grey gelding." "<strong>The</strong>n don't sow thebarley" said the farmer. A few days later the same exchangetook place, but when the farmer asked what horses hisneighbour was using the men answered: "I can't see them fordust!' "<strong>The</strong>n sow 7 the barley," said the farmer.Don't take this too literally, but barley does need a muchfiner seed bed than wheat. <strong>The</strong>re is such a thing as wintersownbarley, but most barley is spring-sown, for it has amuch shorter growing season than wheat. It grows so quicklythat it will come to the sickle even if you plant it as late asMay, but any time from the beginning <strong>of</strong> March onwardsis fine, so long as the soil is warm and sufficiently dry. AsI explained before, a certain Suffolk farmer used to drop histrousers and sit on the land before he drilled his barley, tosee if the land felt warm and dry enough. Where I live wehave a festival, in the town <strong>of</strong> Cardigan, called BarleySaturday. This is the last Saturday in April, We are allsupposed to have got our barley in <strong>by</strong> then, and to celebratethere is a splendid parade <strong>of</strong> stallions through the streets<strong>of</strong> Cardigan and the pubs are open all day.Barley, particularly for malting for beer, should not havetoo much nitrogen, but needs plenty <strong>of</strong> phosphorus, potashand lime. I broadcast barley seed at the rate <strong>of</strong> four bushels,about 2 cwt (101 kg) to the acre. If I drilled it I would useless: about three bushels, or 1 1/2. cwt (76.2 kg). Drilling itwould probably be better but we haven't got a drill, and infact we get very good results <strong>by</strong> broadcasting. Of courseafter drilling or broadcasting you harrow and roll just as youdo for wheat. Excepting that the seed bed should be finerthe treatment is exactly the same as for wheat, but one tendsto sow barley on poorer ground.HarvestingHarvesting is the same as for wheat (see pp. 52-53). If youharvest it with a combine harvester it must be dead ripe.<strong>The</strong>y say around here: wait until you think it is dead ripeand then forget all about it for a fortnight. An old method <strong>of</strong>harvesting barley is to treat it like hay which isn't tied intosheaves but left loose. You turn it about until it is quite dry,then cart it and stack it loose just like hay. You can then justfork it into the threshing machine.If you do bind it into sheaves, you should leave it in thestook for at least a week. But however you cut it do not doso until the ears have all bent over, the grains are hard andpale yellow 7 and shed easily in your hand, and the straw is dry.You can then put it into mows (see p. 52) and the straw canbe fed to livestock. It is better for feeding than wheat strawwhich is useless, but not so good as oats. It is no good forthatching, and not as good as wheat straw for litter oranimal bedding.<strong>The</strong> grain is the beer-grain par excellence, but most <strong>of</strong> thegrain gets fed to pigs and cattle. It can be ground (best forpigs) or rolled (best for cattle). If you haven't got a mill,just soak it for 24 hours. If you want to eat it, try:Barley soupThis is one <strong>of</strong> the <strong>self</strong>-supporter's staple meals, not just a soup. It's warm ^and nourishing. You can vary the vegetables according to what you'vegot. Add more carrots if you haven't got a turnip and so on. You need:2 oz (56g) washed husked barley1 lb (0.5kg) stewing mutton2 quarts (2.3 litres) water1 teaspoon salt3 or 4 carrots2 or 3 leeks3 or 4 onions1 big turnip or1 big swedePut the whole lot in a stewing pot. Season slightly, cover and simmerfor three hours. Stir occasionally to make sure nothing is sticking to the"bottom. Take out the meat at the end <strong>of</strong> the cooking time, temove thebones and chop into mouthsized lumps. Put them back in the soup. Addchopped parsley if you've got it.Northumberland barley cakesIf you haven't got a deep freeze, these will keep a lot longer than bread.<strong>The</strong>y are like huge thick biscuits and make a very good between-mealsnack. You need:1 lb (0.5kg) barley flour1 teaspoon salt1/2 teaspoon bicarbonate <strong>of</strong> soda4 teaspoon cream <strong>of</strong> tartar1/2 pint (0.3 litres) buttermilk or skim milkBung all the ingredients in a mixing bowl and stir into a s<strong>of</strong>t dough. Makethis into balls and press them out until they are about 10 inches (25cm)across and 3/4 <strong>of</strong> an inch (2cm) thick. Bake on a griddle until the cakes arebrown on one side. Turn over and brown the other side. Serve up cold,cut in pieces and spread with butter.Barley pastryThis is very light and crumbly and good for fruit pies and flans, and forthe dentist's nightmate and child's delight, treacle tart. Take any shortcrustpastry recipe, substitute barley flour for wholewheat flour and slightlyreduce the amount <strong>of</strong> fat. For example, with 8 oz (228g) <strong>of</strong> barley flouruse 3 oz (84g) <strong>of</strong> fat instead <strong>of</strong> 4 oz (114g). Roll out and cook in thesame way as you would pastry made with wheat flour.68
Food from the FieldsSomething that has contributed over the millennia tokeeping humans human, even if it sometimes gives themheadaches, is the invention <strong>of</strong> malt. One imagines that verysoon after men discovered grain, they also discovered that ifyou left it lying about in water the water would ferment, andif you drank enough <strong>of</strong> it, it would make you drunk. In factyou can make beer out <strong>of</strong> any farinaceous grain whatever.During the war we had a Company Brewer in every company<strong>of</strong> the King's African Rifles. He brewed once a week, andwould brew beer out <strong>of</strong> absolutely any kind <strong>of</strong> grain or grainmeal that he could lay his hands on. Most <strong>of</strong> it was prettyhorrible stuff but it kept us sane.Later on in history some genius discovered that if yousprouted the grain first, it made better beer and made youeven more drunk. He didn't know the reason for this <strong>of</strong>course, but we do. It is because alcohol is made from sugar.Yeast, which is a microscopic mould or fungus, eats sugarand turns it into alcohol. It can also do the same, in a muchmore limited way, with starch. Now grain is mostly starch,or carbohydrate, and you can make an inferior sort <strong>of</strong> beerout <strong>of</strong> it before it sprouts <strong>by</strong> fermenting it with yeast. But,if you cause the grain to sprout, that is start to grow, thestarch gets turned, <strong>by</strong> certain enzymes, into sugar. It thenmakes much better, stronger beer much more quickly. Thus,to make beer, we civilized people sprout our barley beforewe ferment it. This process is known as malting, and thesprouted grain is known as malt. You can malt any grain,but barley, being highest in starch, makes the best malt.Malting barleyPut your barley, inside a porous sack if you like, into someslightly warm water and leave it for four days. Pull it out andheap it on a floor and take its temperature even,' day. If thelatter goes below 63°F (17°C) pile it up in a much thickerheap. In the trade this is called "couching" it. If the temperaturegoes above 68°F (20°C) spread it out more thinly andturn it <strong>of</strong>ten. Turning cools it. Keep it moist but not sodden:sprinkle warmish water on it occasionally. Remember youwant to make it grow. After about ten days <strong>of</strong> this the acrospire,or shoot <strong>of</strong> the grain (not the root, which will also begrowing), should have grown about two-thirds the length <strong>of</strong>the grain. <strong>The</strong> acrospire is to be seen growing below the skin<strong>of</strong> the grain. Couch it for twelve hours when you think ithas grown enough.or the other <strong>by</strong> the extent <strong>of</strong> the kilning <strong>of</strong> the malt after ithas been sprouted. This kilning is necessary to kill the grain.If you didn't kill it it would go on growing into long ganglyshoots. Kilning also makes it keep, and you almost alwayshave to keep it before you use it. If you just put it, wet andgrowing, in a bag it would rot. Not only would it be useless,it would also smell nasty.A light kilning makes a light-coloured malt and consequentlya light-coloured beer, while heavier kilning makesdarker malt and darker beer. If you want to make lager, keepthe temperature down to slightly under 120°F (50°C). If youwant dark ale take it up as high as 140°F (60°C), but not over.Why not over? Because over would kill the enzymes whichare to go on turning even more starch into sugar when youmash the malt.<strong>The</strong> maltster watches his malt in the kiln, constantlyturning it and looking at it, and he stops the kilning at theright stage for the kind <strong>of</strong> beer he intends to make. You canstop kilning when you can bite a grain and it cracks betweenthe teeth, but if you want a darker beer you simply go onkilning until the grains turn browner. If you want stout youactually go on kilning until the grain turns nearly black -but do not allow the grain in the kiln to go over 140°F (60°C).Just give it longer, that's all.When you have kilned enough just crush the grain in amill: don't grind it fine. Now you have malt and you are readyto start brewing your beer.Malting barleySoak the grain for four days. Pile it in a heap on the floor and <strong>by</strong> alternatelyspreading it out and piling it up again, or "couching" it, keep it at atemperature between 63°F (17°C) and 68°F (20 C). You will need to do thisfor about ten days, until a shoot about two thirds the length <strong>of</strong> the grain canbe seen growing beneath the skin <strong>of</strong> the grain. Dry the grain <strong>complete</strong>ly in akiln (below right), crush it in a mill and you have malt.Kilning the maltAfter this you must kiln the grain. This means bringing it toa temperature <strong>of</strong> 120°F (50°C) either over a fire or stove, orin an oven with the door open to keep the hot air movingthrough the grain. Keep it moving in the kiln, which is simplya perforated steel plate over a fire, until it is dry.Kilning for different beersNow the colour and nature <strong>of</strong> beer can be altered one way69
Food from the FieldsMaking BeerBefore Tudor times there were no hops in Britain and thestuff people drank, fermented malt, was called ale. At aboutthat time hops were introduced from the Continent andused for flavouring and preserving ale, and the resultantdrink was called beer. Beer is bitterer than ale was and, whenyou get used to it, much nicer. Nowadays the nomenclaturehas got confused and the words beer and ale are used indiscriminately.However, it is well worth growing your own hops.Soil for hopsHops like a deep, heavy, well-drained loam and liberalmanuring, preferably with farmyard manure. But they willproduce some sort <strong>of</strong> a crop on most land, provided theyare well dunged and the land is not waterlogged, and if yougrow your own hops for your own beer some sort <strong>of</strong> a cropis all you need: you need pounds, not tons.stuff you brew from the malt you have made your<strong>self</strong>(see p. 69). But you can also buy malt in sacks, and this ispreferable to malt extract. <strong>The</strong> difference between beerbrewed from malt and beer brewed from malt extract is greatand unmistakable, and if you once get used to beer brewedfrom malt you will not be content to go back to extractbeer - nor to the liquid you buy from the pub.Brewing beerIn the evening, before you go to bed, boil ten gallons (45.5litres) <strong>of</strong> water. While it is boiling make a strainer for yourmash-tub, kive, brewing vat or whatever you call it. This isa tub holding twenty gallons, but with the top cut <strong>of</strong>f. Youcan make the strainer <strong>by</strong> tying a bundle <strong>of</strong> straw, or hay, orgorse leaves with a piece <strong>of</strong> string, poking the string throughPlanting hopsClean your piece <strong>of</strong> land thoroughly first. Make sure youget out all perennial weed roots and grass. Beg, borrow, orsteal a dozen bits <strong>of</strong> hop root. Bits <strong>of</strong> root about a foot inlength are fine. Hops produce an enormous mass <strong>of</strong> rootsevery year and an established hop plant just won't miss afoot or two <strong>of</strong> root.Plant these bits <strong>of</strong> root at intervals <strong>of</strong> two or three feet(61 cm), with plenty <strong>of</strong> farmyard manure or compost. Arrangehorizontal wires, some high and others down near theground. Put vertical strings between the wires for the hopsto climb up: three or four strings for each bit <strong>of</strong> root.When the hops begin to grow they will race each other upthe strings and you can place bets with your family on thewinner - they grow so fast you can almost see them move.Watch for aphids. If you get them spray with derris, nicotine,pyrethrum or other non-persistent insecticide.Harvesting hopsPick the flowers when they are in full bloom, and full <strong>of</strong> thatbitterly-fragrant yellow powder which is the virtue <strong>of</strong> thehop. Dry the flowers gently. If you put them on a wire,hessian, or other perforated surface over a stove, that willdo. When they are quite dry store them, preferably inwoven sacks.<strong>The</strong> above directions are for a homesteader to growenough hops for his beer. <strong>The</strong>y are not instructions for acommercial hop-grower. <strong>The</strong> growing <strong>of</strong> hops on a commercialscale is quite different, and is, therefore, a highlyspecialized pr<strong>of</strong>ession.Malt and malt extractYou can brew beer from malt extract, which you can buyfrom the chemist, or in "brewing kits" from various enterprises.<strong>The</strong> beer you brew will be strong (or can be), willtaste quite good (or can do), but it will not be the same asreal beer brewed from real malt. <strong>The</strong> best beer will be thethe tap-hole <strong>of</strong> the kive, pulling it tight so as to haul thebundle hard up against the hole inside, and banging the tapin. <strong>The</strong> tap then holds the piece <strong>of</strong> string. Or, if you like, youcan have a hole in the bottom <strong>of</strong> your kive with an ashstick pushed down into it to close it. When you pull theash stick out, <strong>of</strong> course, it opens the hole. If you lay a layer<strong>of</strong> gorse then in the bottom <strong>of</strong> your kive, some straw on top<strong>of</strong> this, then a flat stone with a hole in the middle <strong>of</strong> it, andthen poke your ash stick through this hole, you have amagnificent strainer.Beermaking implementsBrewing your own beer gives you an excuse to collect a lot <strong>of</strong> beautifulimplements. <strong>The</strong>re's nothing better than barrels and stone jars for storing beer,and a barrel with the top sawn <strong>of</strong>f makes the best kive or brewing vat. Hopsare vital unless you want to make old-fashioned ale. And you'll need athermometer, weighing scales and a kettle for sparging.70
Food from the Fields
Making BeerWhen the water has boiled let it cool to 150°F (66°C).<strong>The</strong>n dump one bushel (about half a hundredweight or25.4kg) <strong>of</strong> cracked malt into it and stir until the malt is wetthrough. This is called "mashing" and the malt is now the"mash." It is most important that the water should not behotter than 150°F (66°C) because if it is it will kill theenzymes. Cover the kive up with a blanket and go to bed.Early in the morning get up and open the cock, or drawthe ash stick, to allow the wort, as the liquid is now called,to run out into buckets. Pour it from the buckets into theboiler, together with a pound (0.5 kg) <strong>of</strong> dried hops tied in apillowcase, and boil it. While the wort is dribbling out,"sparge" (brewer's word for sprinkle) the mash with boilingwater. (You don't care about the enzymes now - they havedone their work and converted the rest <strong>of</strong> the starch intosugar.) Go on sparging until ten gallons (45.5 litres) <strong>of</strong> worthave drained out. Much <strong>of</strong> the original ten gallons has beenabsorbed <strong>by</strong> the mash.Boil the ten gallons <strong>of</strong> wort, and the hops in the pillowcase, for an hour. If you want the beer to be very strong addsay six pounds (2.7kg) <strong>of</strong> sugar now, or honey if you can spareit. Or, another way <strong>of</strong> cheating, is to add six pounds (2.7 kg)<strong>of</strong> malt extract. But you needn't add anything at all. You willstill get very strong beer. Clean the mash out <strong>of</strong> the kive andset it aside for the pigs or cows.Transfer the boiling wort back into the clean kive. Takea jugful <strong>of</strong> wort out and cool it <strong>by</strong> standing it in cold water.When it is hand hot, say about 60°F (16°C), dump someyeast into it. This can be yeast from a previous fermentation,or yeast you have bought especially for beer. Bread yeastwill do but beer yeast is better. Bread yeast is a "bottomfermenting"yeast; it sinks to the bottom in beer. Beer yeastis "top-fermenting" and is marginally better.<strong>The</strong> faster your bulk <strong>of</strong> wort cools now the better. An"in-churn" milk cooler put into the wort with cold waterrunning through it is very helpful. If you haven't got thisyou can lower in buckets <strong>of</strong> cold water, but be sure no waterspills out and that the outside <strong>of</strong> the bucket is clean. Quickcooling allows less time for disease organisms to get intothe wort before it is cool enough to take the yeast.When the main body <strong>of</strong> the wort has cooled to 60°F(16°C) dump your jugful <strong>of</strong> yeasty wort into it and stir.This is the time when you should pray. Cover up verycarefully to keep out all vinegar flies and dust.Try to keep away from the stuff for at least three days.<strong>The</strong>n skim the floating yeast <strong>of</strong>f. Otherwise it will sink whichis bad. When it has stopped fermenting, after five to eightdays, "rack" it. That means pour it gently, without stirringup the sediment in the bottom, into the vessels in whichyou intend to keep it and cover these securely. From nowon no air must get in. You have made beer.You can use plastic dustbins instead <strong>of</strong> wooden orearthenware vessels, but I don't like them. If you use woodenvessels though, you must keep them scrupulously clean.If you do want your beer windy, like the stuff you buy in pubs,bottle it in screw-top bottles just before it has finishedfermenting in the kive.Small beerWhen we read <strong>of</strong> our ancestors always drinking beer forbreakfast, and drinking it pretty consistently throughout therest <strong>of</strong> the day too, we must remember that they were notdrinking the kind <strong>of</strong> stingo that Ihave described the making <strong>of</strong>in the last few pages, but small beer. Small beer is a pleasant,slightly alcoholic malt drink. Nobody is going to get drunk onit, but it is very good for you. And it comes as a natural <strong>by</strong>product<strong>of</strong> ordinary beer.Brewing small beerMake beer in the way described above, but do not sparge themash with boiling water and draw the resultant brew out <strong>of</strong>the bottom <strong>of</strong> the kive. Instead, after you have drained theten gallons (45.5 litres) <strong>of</strong> wort to boil up for your real beer,you pour ten gallons <strong>of</strong> boiling water on your mash. You letthis ten gallons stand in the mash while you finish your workwith the first lot <strong>of</strong> beer.But you will realize that you will need two kives to makesmallbeer, foryourfirstkiveisnowoccupied<strong>by</strong>yourmashandten gallons <strong>of</strong> water. You have got to have another kive readyfor the wort <strong>of</strong>yourfirstbeer,nowbusily bubbling in theboilerwith a pillow-case <strong>of</strong> hops in it. So you transfer the first beerto the new kive, then drain the small-beer wort out <strong>of</strong> thefirst kive, and boil it for an hour in the boiler with the hops init. Meanwhile, you clean the spent mash out <strong>of</strong> the first kiveto give to the animals and return the boiled small-beer wortto it. <strong>The</strong>n wait until it gets cool enough to take yeast, anddump a pint or two <strong>of</strong> the first batch <strong>of</strong> wort into it to start it.Cover it up and leave it to ferment like the other lot.But remember, it won't keep like real beer. What keeps b eeris its alcohol content, and small beer is weak stuff. You mustdrink it up within a fortnight or it will go <strong>of</strong>f. But you candrink it in fairly large quantities, and you will get plenty <strong>of</strong>help from your neighbours.DistillingIf you get a big copper with a fire under it, half fill it with beer,float a basin on the beer, and place a shallow dish wider thanthe copper on the top <strong>of</strong> the copper, you will get whisky.Alcohol will evaporate from thebeer, condense on the undersurface<strong>of</strong> the big dish, run down to the lowest point <strong>of</strong> it anddrip down into the basin. It is an advantage if you can runcold water into, and out <strong>of</strong>, the top dish to cool it. This speedsup condensation.If distilling is illegal in your part <strong>of</strong> the world and someinquisitive fellow comes down the drive, it doesn't take asecond to be boiling clothes in the copper, making porridge inthe floating basin, and bathing the ba<strong>by</strong> in the big flat dish.And what could be more innocent than that?72
Food from the FieldsBeer makingTo make consistently good homebrewyou must start <strong>of</strong>f with scrupulouslyclean kives and barrels.<strong>The</strong>y should be scrubbed, scaldedand then disinfected <strong>by</strong> exposure towind and sunlight. Choose a quietevening and boil up 10 gallons (45.5litres) <strong>of</strong> water in your copper.<strong>The</strong>n tuck the kive up for the night.Cover with a clean sheet and ablanket. <strong>The</strong> enzymes in the maltplus the water will then go to workextracting the malt sugar.While you are waiting for the waterto boil make a strainer for the kive.Tie a small bundle <strong>of</strong> gorse, hay orstraw with apiece <strong>of</strong> string and dropit in the kive, poke the loose endthrough the bung-hole and pullhard. <strong>The</strong>n bang in the tap(wooden cock).Next morning, open the cock anddrain the "wort" (liquid) into abucket, or even better into an"underbuck," the traditionalPack 1 lb (0.5 kg) <strong>of</strong> hops into apillowcase and plunge it into thewort. If you want to cheat <strong>by</strong> stirringin sugar, honey or malt extract(7 lbs or 3.2 kg to 10 gallons or45.5 litres <strong>of</strong> wort) now is the timeto do it. Boil for at least one hour.Meanwhile get on with cleaningout the kive. <strong>The</strong> mash makessplendid food for pigs or cows.Cool the bulk <strong>of</strong> the wort as fast asyou can <strong>by</strong> lowering bucket afterbucket <strong>of</strong> cold water into it, butdon't spill a drop if you want yourbeer to be worth drinking.As soon as the bulk <strong>of</strong> the wort hascooled to being hand-hot, 60°F(16°C), pour in the "starter", thejugful <strong>of</strong> foaming yeasty wort andstir. Cover with blankets to keepout vinegar flies andleave for 3 days.When the water boils let it cool to150°F (66° C) and pour half intothe kive.Now "sparge" (sprinkle) the spentmalt with kettle after kettle <strong>of</strong> boilingwater to remove all sugar, until10 gallons <strong>of</strong> wort have drained outinto the bucket. And thence intothe boiler.Draw a jugful <strong>of</strong> boiling wort andcool quickly <strong>by</strong> immersing in icywater. When it has cooled to 60°F(16° C), plop in your yeast. Eitherpacket beer yeast (about 1 oz or 28 gwill do) or a couple <strong>of</strong> tablespoons<strong>of</strong> "barm" which you have strained<strong>of</strong>f the top <strong>of</strong> your last brew andkept covered in a cool place. <strong>The</strong>ntransfer the rest <strong>of</strong> the boiling wortback into the kive.Dump in 1 bushel (1/2 cwt or 25.4 kg)malt, the rest <strong>of</strong> the hot water andstir thoroughly.<strong>The</strong>n skin <strong>of</strong>f the "barm." When ithas stopped fermenting (5-8 days)"rack" it. In other words pour <strong>of</strong>f,without stirring up the sediment,into your storage vessels. Cork.73
Food from the FieldsMaizeBesides the potato, and that horrible stuff tobacco, the mostimportant contribution the New World has made to theOld is maize. <strong>The</strong> first white settlers in America called itIndian corn, and this was shortened to corn, and corn it nowis. In England it is maize, although gardeners also refer to itas sweet corn.Maize is grown for several purposes. First, for harvestingwhen the grain is quite ripe, and ready to be ground to makehuman or cattle food. Secondly, for harvesting before theears are ripe to be eaten, boiled and with lashings <strong>of</strong> butter,as "corn-on-the-cob." <strong>The</strong> grain in the unripe cobs is stills<strong>of</strong>t and high in sugar, because the sugar has not yet turnedinto starch for storage, but is still in soluble form so that itcan move about the plant. Thirdly, maize is grown for feeding<strong>of</strong>f green to cattle in the summer time, long before the grainis ripe, just as if it were grass. Fourthly it is grown for makingsilage. This is done when the grain is at what is called the"cheesey," or "s<strong>of</strong>t dough" stage. To make silage the stemsmust be well cut up or crushed, in order that they can besufficiently consolidated.Maize will grow to the "corn-on-the-cob" stage in quitenortherly latitudes, but it will not ripen into hard ripe grain(the grain is nearly as hard as flintstones) except in warmishclimates. It is always planted in the spring and likes a warm,sunny summer but not one that is too dry. It will standconsiderable drought, and the hotter the sun the better,but in dry climates it needs some rain or irrigation.SowingMaize likes good but light soil: heavy clays are not suitable.It must be sown after the last danger <strong>of</strong> frost as it is not atall frost-hardy. So plant one or two weeks after the lastprobable killing frost. You will need 35 lbs (15.8 kg) <strong>of</strong> seedfor an acre, sown about three inches (8 cm) deep. Spacebetween rows can be from 14 inches (36 cm) to 30 inches(76 cm): do what your neighbours do in this respect andyou will not go far wrong. <strong>The</strong>re should be about nineplants to a square yard.Care <strong>of</strong> cropBirds are a terrible nuisance, particularly rooks, and will,if allowed, dig up all your seed. Threads stretched aboutfour feet (1.2 m) above the ground on posts hinder the rooks(so they do you when you want to hoe), and shooting theodd rook and strewing its feathers and it<strong>self</strong> about the landputs them <strong>of</strong>f for a short time. Rooks are a menace and thereare far too many <strong>of</strong> them: the idea put about <strong>by</strong> rook-loversthat they are not after your seed but after leatherjacketsis arrant nonsense, as the most cursory examination <strong>of</strong> adead rook's crop will show.HarvestingHarvesting ripe cobs <strong>by</strong> hand, as the homesteader is mostlikely to do, is delightful work. You walk along the rows, ina line if there are several <strong>of</strong> you, rip out the ears and dropthem in a sack slung over your shoulder. <strong>The</strong>n tread thestraw down with your foot so you can see where you havebeen (the straw is as high as you are). When you get hungrylight a fire <strong>of</strong> dried maize straw, or sticks, throw some cobson it, without removing their sheaths, and when the sheathshave burnt <strong>of</strong>f and the grain is slightly blackened, eat them.<strong>The</strong>y are quite unlike the admittedly delicious "sweet corn"or "corn-on-the-cob" and are food for a king - or a hungryharvester (who has presumably got good teeth).Maize in the gardenIn cold latitudes you can grow maize for "sweet corn" in yourgarden. Plant it under cloches or else plant it in peat potsindoors and then carefully plant out pots and all after thelast frost. Or you can plant direct into the ground after thelastfrost, say with two seeds inastation, stations afoot (30 cm)apart and two feet (61 cm) between rows. Plant in blocksrather than long thin lines because this helps pollination.Maize likes well-dunged ground. Water it if the weather isreally dry. Pick it when the silk tassels on the ears go fromgold to brown.Cooking maizeBoil in the sheaths (at least I do) for perhaps a quarter <strong>of</strong> anhour. Eat it <strong>of</strong>f the cob with salt and oodles <strong>of</strong> butter. Thisis food that I challenge anybody to get tired <strong>of</strong>. For years we<strong>Seymour</strong>s ate tons <strong>of</strong> it. It was our staple diet for the whole<strong>of</strong> the autumn. It is a crop that must be eaten as soon aspossible after harvesting: if it is kept, the sugars begin toharden into starch and the fragrant elements <strong>of</strong> the succulentgrains disappear.Polenta or cornmeal mushThis can be made with ground maize or ground sorghum. It comes fromnorth Italy and is rather stodgy unless well buttered and cheesed aftercooking, but it is quite delicious. You need for six people:8 oz (228 g) cornmeal2 teaspoons salt2 1/2 pints (1.4 litres) water3 teaspoons grated cheese and butterBoil the water in a large pan with salt. <strong>The</strong>n sprinkle in the cornmeal,stirring all the time to prevent lumps. Keep on stirring. After 30 minutesit is so thick it is leaving the sides <strong>of</strong> the pan. Mind it doesn't brown onthe bottom. Stop cooking and spread it out on a dish. Cover it with blobs<strong>of</strong> butter and grated cheese, and push it under the grill for a few minutes.It's very good <strong>by</strong> it<strong>self</strong>, and even better served up with fried spicy Italiansausages and plenty <strong>of</strong> tomato sauce.Polenta gnocchiCook polenta as in the recipe above, but at the end <strong>of</strong> cooking stirin two beaten eggs and some grated cheese, and, if you want to makeit more exotic add 4 02 (114g) <strong>of</strong> chopped ham as well. Turn it allon to a flat wetted dish and spread it out so that it is about i inch(1 cm) thick.Next day cut it into squares, lozenges or circles about 1 1/2 inches(4cm) across. Lay these overlapping in a thickly buttered, ovenpro<strong>of</strong>dish. Dot with mote buttet, heat in the oven or under the grill andserve sprinkled with more cheese.74
Food from the FieldsRiceRice, before it is milled, is called "paddy" <strong>by</strong> English-speakingpeople in Asia. <strong>The</strong>re are for practical purposes two sorts:rice that grows in water or "wet" rice, and "upland" rice. <strong>The</strong>latter grows on open hillsides, but only in places with avery high rainfall such as the Chin Hills <strong>of</strong> Burma. Ordinary,or wet rice is grown on a large scale in the United States andin southern Europe, and there is no doubt that its cultivationcould be extended to more northern latitudes. It will growand ripen in summer temperatures <strong>of</strong> over 68°F (20°C), butthese must cover much <strong>of</strong> the four to five months that thecrop takes to grow and ripen.It might well be that some <strong>of</strong> the upland rice varietieswould grow in northern latitudes. <strong>The</strong> reason why we <strong>of</strong> thenorthern latitudes do not attempt to cultivate them may bebecause we are congenital wheat-eaters and do very wellwithout rice. <strong>The</strong> wheat-eating peoples <strong>of</strong> India have a strongsense <strong>of</strong> superiority over the rice-eaters and look upon riceas food fit only for invalids!Sowing<strong>The</strong> best way to grow rice on a small scale is to sow the seedbroadcast on a dry seed bed when the ground has warmedup in the spring, rake it well in, and then flood the seed bedbut only just. As the shoots grow, always try to keep the waterlevel below the tops <strong>of</strong> the plants. Rice survives in water <strong>by</strong>virtue <strong>of</strong> its hollow stem, which takes oxygen down to therest <strong>of</strong> the plant.When the plants are about eight inches (20 cm) tall pullthem out in bunches and transplant them in to shallowstanding water in an irrigated field. Simply dab each plantinto the s<strong>of</strong>t mud four inches (10 cm) away from its neighbours.Billions <strong>of</strong> paddy plants are planted like this every yearin India and China. Keep the paddy field flooded (never let itget dry) until about a fortnight before you judge the grain ripeenough to harvest. <strong>The</strong>n drain the field and let the grain ripenin the dry field.HarvestingHarvest with the sickle, thresh as you would other corn (seepp. 52-53), "hull" (separate grain from husk) <strong>by</strong> passingthrough a plate mill or stone mill with the plates or stonesopen enough to hull the grain without cracking it, and you areleft with "brown rice," that magical perfect food <strong>of</strong> the yin-yanadherents. It is in fact a good grain, very rich in starch butlower in protein and also in several other qualities than wheat.If you mill the brown rice more closely you get pearled rice,which is generally and wrongly called polished rice. This isalmost pure starch and a very in<strong>complete</strong> foodstuff, evenless nutritious than white wheat flour which is saying a lot.A further process, called polishing, produces true polishedrice which is what most <strong>of</strong> us buy in the shops. If you live onpractically nothing else but pearled or polished rice you getberi-beri. So the sensible thing to do, if you live on rice, is toeat brown rice and not go to the trouble <strong>of</strong> removing thebran, which is the most nutritious part <strong>of</strong> it, and feeding itto the pigs.Cooking riceUnlike most other grains rice does not need grinding beforeit is cooked. <strong>The</strong> Western way to cook your own home-milledrice is to wash the grain well in cold water and strain, thenbring 1 pint (0.6 litres) <strong>of</strong> water to the boil, add a teaspoonful<strong>of</strong> salt, and throw in 6 oz (170 g) <strong>of</strong> rice. Bring this to the boilagain and then allow it to simmer <strong>by</strong> reducing the heat.Cover the pan and simmer for fifteen minutes. When therice is tender, eat it. It will have absorbed all the water.I personally use the Indian method which is to bring muchmore water than you really need to the boil, throw the rice in,bring to the boil again, allow to simmer until the grain istender (but not reduced to that horrible stuff: rice pudding!)which will be in about a quarter <strong>of</strong> an hour, strain the waterout, toss the rice up a few times in the strainer, and eat it. Eachgrain will be separate if you do this properly and the rice willbe perfect.You can colour and flavour rice very nicely <strong>by</strong> tossing apinch <strong>of</strong> saffron into the rice while it is cooking. For brownrice, you need to allow forty to fifty minutes cooking time.INDIAN RICENorth American wild rice (Zizania aquatica), or Indian rice,can be harvested when it is ripe, and dried in hot sun or else"parched" <strong>by</strong> heating over a fire or kilning. This can be boiledor steamed and eaten, preferably with meat. It is very nutritious,but very laborious to harvest.RisottoThis is usually made with rice, as the name implies, but it is very goodmade with whole millet or with pearl barley. You need:1 measure grain (1 lb or 0.5 kg should feed 8-10 people)2 measures hot water or good clear stocka little oil, salt and peppera variety <strong>of</strong> firm vegetables, such as onions, green peppers, peas, carrots etc.Use a solid pan with a lid (earthenware is good). Slice the vegetables andlightly fry them in a litde oil. Put them aside in a separate dish when theyare s<strong>of</strong>t and slightly brown. Put some more oil in the pan and tip in thedry 7 grains. Stir them until they are well-oiled and start to turn colour.Put the cooked vegetables back in the pan with half the hot wateror stock. Season well. Turn the heat low, or put the pan in a moderate oven,closely covered, for 15-30 minutes. <strong>The</strong>n, add the rest <strong>of</strong> the broth, stirand cook another 15-30 minutes until all the liquid is absorbed, and thegrains are s<strong>of</strong>t and tender, but separate. Times vary with the hardness<strong>of</strong> the grain.Rice griddle cakesA good way <strong>of</strong> using up left over boiled rice or rice pudding.1/2 pint (0.3 litres) milk4 oz (114 g) warm cooked rice1 tablespoon melted butter or oil2 eggs, separated4 oz (114 g) wheat flour and a pinch <strong>of</strong> saltMix the milk, rice and salt. Add the egg yolks, the butter and the flour,and then, stiffly beaten egg whites. Heat a griddle and drop the mixturein spoonfuls onto it. Cook both sides.75
Food from the FieldsSorghumSORGHUMSorghum is a very complicated matter: there are many differentvarieties, and hybrids, and at least four distinct species. Ofthe four main types <strong>of</strong> sorghum, sweet sorghum, which cangrow as high as 14 feet (4-2 m), is grown for sugar, much assugar cane is; grass sorghum is grown for grazing, silage, hay,and so on; grain sorghum is grown for grain; and broomsorghum is grown for making brooms.Grain and grass sorghum are grown extensively in theUnited States in the Great Plain areas, both as livestock feedsand for industrial purposes. <strong>The</strong>y are not crops commonlygrown <strong>by</strong> the <strong>self</strong>-supporter, but they could be, and grainsorghum, unthreshed, is magnificent for feeding to poultry.It is sometimes used <strong>by</strong> African villagers for this purpose, theheads being thrown down in the straw for the hens to scratchout. Sorghum porridge, as anyone who has lived in CentralAfrica can testify, is far superior in flavour to "mealie pap", orwhatever the local name might be <strong>of</strong> the maize meal porridgewhich is the staple diet <strong>of</strong> many Africans.Grain sorghum is a healthy grain and many people believethat the Africans who live on sorghum are healthier thanthose that live on maize; but wherever maize will grow, it isgrown in preference to sorghum. This is because where therainfall is high enough for it, mai-e produces more grain.Furthermore where alfalfa, clover, and so on will grow,sorghum is not grown for fodder crops.Sowing grain sorghum<strong>The</strong> seed bed for sorghum must be fine, weed-free and not tootrashy. In higher rainfall areas land is generally prepared forsorghum <strong>by</strong> ploughing in the fall, and discing and harrowingthe next spring. In drier areas spring cultivation is kept to aminimum to avoid loss <strong>of</strong> water. Seed is drilled, for grain production,in rows from 20-40 inches (51-102 cm) apart: thegreater distances being in the drier climates. You sow it abouta fortnight after you would maize.Sorghum likes hot weather. It is no good trying to growit in cool climates, for it won't germinate at all under 45°F(7°C) and won't really get going under 60°F (16°C). <strong>The</strong>ideal temperatures for sorghum are 75°F to 80°F (24°C to27°C). It is a hardy crop under these conditions, and is moreresistant to insect pests like grasshoppers than other cereals.In drier areas drill about three pounds (1.4 kg) <strong>of</strong>seedtotheacre: in wetter areas perhaps about five (2.3 kg).Sowing grass sorghumIf you want to grow grass sorghum, and it does make goodhay, you can broadcast the seed at a rate <strong>of</strong> 40 lbs (18.1 kg) toevery acre.Care <strong>of</strong> cropWhen any sorghum is sown in rows you should hoe it to stopweed competition. Once the plants have grown plenty <strong>of</strong>foliage the weeds will be kept down naturally.HarvestingHarvest sorghum when it is dead ripe (you can leave it untilthe first frost). Thresh and winnow grain sorghum just likeother grains.Stock grazing sorghum grass can get prussic acid poisoning,so don't let them graze it until the plants are eighteeninches (46 cm) high when the acid content is lower.And don'tgraze for three days after a frost.PEANUTSPeanuts are a tropical American legume but they can begrown as far north as Massachusetts. <strong>The</strong>y are an extremelyvaluable food plant, being very rich in many <strong>of</strong> the B vitaminsthat are hard to obtain from vegetable sources. <strong>The</strong>y are alsorich in oil and are, in fact, grown for its production on a largescale in the Americas, China, and Africa.What they like is a growing season <strong>of</strong> at least four monthswith hot weather and about twenty inches (51 cm) <strong>of</strong> raindistributed throughout the period. <strong>The</strong>y need an acid soil,and a sandy one, and it is fortunate that these things <strong>of</strong>ten gotogether. So never lime for peanuts.SowingSeed from plants grown in a cold climate gives better resultsthan seed from plants grown in the tropics, and many growerssave their own seed. You can plant shells and all, or you canshell and plant the separate nuts.If you plant unhulled nuts plant them eight inches (20 cm)apart in rows thirty inches (76 cm) apart. In the colder Northplant only an inch and a half (4 cm) deep: in the warm Southfour inches (10 cm) deep. In northern climates you must plantthe seed at about the time <strong>of</strong> the last frost so as to give themas long a growing season as possible but between April 10and May 10 is considered about right." It is a hard crop tokeep clean, so hoe and weed frequently.HarvestingHarvest before the first frost kills the vines, but after theleaves have started to yellow and the inside <strong>of</strong> the shells havebegun to colour. Dry <strong>by</strong> hanging the vines in an airy shed or <strong>by</strong>spreading out on wire netting.Save seed from the best plants. Thresh the nuts out <strong>of</strong> thevines, but don't husk them. Store in old oil drums that havesome holes punched in them to allow for ventilation.Peanut butterYou can make peanut butter <strong>by</strong> roasting the nuts at 300°F(149°C) to 325°F (163°C) for twenty minutes, turningoccasionally. <strong>The</strong>n put them through a mincing machine or ameat grinder. You may have to do this several times. Itdepends how crunchy you like your peanut butter. Add alittle salt and a dessert spoonful <strong>of</strong> honey per pound (0.5 kg).<strong>The</strong>n mix in peanut oil (or any other vegetable oil) until itreaches a spreadable consistency.76
Food from the FieldsGrowing Crops for OilIf you have a small piece <strong>of</strong> land not taken up with growingfood it is well worth planting some crop which will producevegetable oil.OIL SEED RAPEOil seed rape will grow in temperate climates. You plant itlike kale (see pp. 84-85) and harvest it when it is still fairlygreen. Pull the plant out <strong>of</strong> the ground, dry it in a stack, threshit and then crush the seeds to get the oil out. <strong>The</strong> residual"cake" can be fed to stock, but only in small quantities, as itcan upset their stomachs.FLAX<strong>The</strong> seed <strong>of</strong> the flax plant is linseed which is very rich in oil,and a good feed for livestock in it<strong>self</strong>. It is high in proteinas well as in fat. If you crush the seed in a mill or else scaldit in hot water, you will have an excellent food for youngcalves, a good replacement for milk. This is good for mostsick animals, and is fairly laxative. Linseed, mixed with wheator mixed corn, makes a perfect ration for hens. As you cangrow half a ton to the acre it is a crop well worth growing.It can be crushed for oil, but the oil is not very edible and ischiefly used in the manufacture <strong>of</strong> sundry products such assoap, paint and printer's ink.I shall deal with the production <strong>of</strong> flax for cloth andfibre on p. 230.SUNFLOWERSThirty-five percent <strong>of</strong> sunflower seed is edible oil, which isgood for margarine, if you must have the stuff, and for cookingoil. Sow the seed one week before the last likely frost.Plant a foot (30 cm) apart in rows three feet (91 cm) apart.Harvest the crop when about half the yellow petals havefallen <strong>of</strong>f the flowers. Cut so that you leave a foot (30 cm) <strong>of</strong>the stem on, and hang the flowers downwards in bunchesunder a ro<strong>of</strong>To get the oil out you will have to crush the seed. Or youcan feed the seed direct to poultry at a rate <strong>of</strong> one (28 g) totwo ounces (56 g) a day, and it is very good for them. Youneedn't even take the seed from the flowers. Just chuck themthe <strong>complete</strong> flowers. You can sprout sunflow T er seed, thenremove the husks and eat them.POPPIESPoppies can be grown for oil seed, as well as for more nefariouspurposes, and up to 40 gallons (182 litres) <strong>of</strong> oil can be got<strong>of</strong>f an acre. It is good cooking oil, burns in lamps with a clearsmokeless flame, and the residual "cake," after the oil has beenremoved, makes excellent stock feed.In a temperate climate sow the seed in a fine seed bed inApril. Sow it fairly thinly, say three inches (8 cm) apart inrows one foot (30 cm) apart. Harvest <strong>by</strong> going along with asheet, laying it on the ground, and pouring the seed into thesheet from the heads. Go along about a week later and do itCrack the seeds and wrap them in cloth to make "cheeses", which are cheeseshapedbundles. Pile them into the press, clamp down and turn the handle.again. Or you can thresh the seed out in the barn with a flail.I grew two long rows <strong>of</strong> poppies once and harvested abouta bushel <strong>of</strong> seed from it, but the kids ate the lot. Whether theygot high on it I never found out. My kids seemed to be highmost <strong>of</strong> the time anyway.Olives and walnuts both make fine oil. You will finddetails about growing olives on pp. 178-179.Extracting the oilOne method used <strong>by</strong> primitive men in hot climates to get theoil out <strong>of</strong> olives, oil-palm and other oleaginous fruits is topile the fruit in hot sunlight on absorbent cloth. <strong>The</strong> oilexudes and is caught <strong>by</strong> the cloths which are thereafter wrungout. <strong>The</strong> process sounds most insanitary but is effective.<strong>The</strong> other non-technological method is pressing. Beforepressing, the seed must be cracked in a mill (plate or stone),or with a pestle and mortar. <strong>The</strong> cracked seeds are then putin what cider-makers call "cheeses"- packs <strong>of</strong> crushed seedslapped round with cloth. <strong>The</strong> cheeses are piled one on top <strong>of</strong>the other in a press. <strong>The</strong> whole lot is then pressed and theoil is exuded. If you haven't got a press you can rig one upwith a car jack. If the cracked seeds are pressed cold, the oilis <strong>of</strong> better quality than if they are heated first, but there isslightly less <strong>of</strong> it. <strong>The</strong> pressed residue is good for stock feed.77
Food from the FieldsGrass & HayBy far the most important, and the most widespread, cropgrown in the world, is grass. Its ubiquitousness is amazing:it grows from the coldest tundra to the hottest tropic, fromthe wettest swampland to all but the driest desert. In areaswhere it only rains once every five or ten years, grass willspring up within days <strong>of</strong> a rainstorm and an apparentlybarren and lifeless land will be green. This is why grass hasbeen called "the forgiveness <strong>of</strong> nature?All the cereals are <strong>of</strong> course grasses: just grasses thathave been bred for heavy seed yields. Sugar cane is grassand so is bamboo, but when a farmer speaks <strong>of</strong> grass hemeans the grass that grows on land and provides grazingfor animals, and can be stored in the form <strong>of</strong> hay and silage.Now the confusion here is that what the farmer calls"grass" is actually a mixture <strong>of</strong> all sorts <strong>of</strong> plants as well asgrass. Clover is the most obvious and important one, andmost "grassland" supports a mixture <strong>of</strong> grass and clover,and very <strong>of</strong>ten clover predominates over grass. <strong>The</strong>reforewhenever I write <strong>of</strong> "grass" I would ask the reader to knowthat I mean "grass and clover." Grass it<strong>self</strong>, too, is not justgrass. <strong>The</strong>re are many species <strong>of</strong> grass, and many varietiesamong the species, and it is <strong>of</strong> the utmost importancewhich species you grow.Managing grasslandYou can influence the make-up <strong>of</strong> the grass and cloverspecies on your grassland <strong>by</strong> many means. For example,you can plough land up and re-seed with a chosen mixture<strong>of</strong> grass and clover seeds. But these will not permanentlygovern the pasture. According to how you manage thatgrassland so some species will die out, others will flourishand what the farmer calls "volunteer" grasses - wild grassesfrom outside - will come in and colonize. But essentiallythe management <strong>of</strong> the grassland will decide what specieswill reign.If you apply heavy dressings <strong>of</strong> nitrogen to grasslandyou will encourage the grass at the expense <strong>of</strong> the clover.If you go on doing this long enough you will eventuallydestroy the clover altogether. <strong>The</strong> reason for this is that,normally, the clover only survives because it has an unfairadvantage over the grasses. This advantage is conferred <strong>by</strong>the fact that the clover has nodules containing nitrogenfixingbacteria on its roots and can thus fix its own nitrogen.<strong>The</strong> grasses cannot. So, in a nitrogen-poor pasture theclovers tend to predominate. Apply a lot <strong>of</strong> nitrogen andthe grasses leap ahead and smother the clover. Alternatively,if you put a lot <strong>of</strong> phosphate on land you will encouragethe clovers at the expense <strong>of</strong> the grass. Clover needsphosphate: grass nothing like so much. Clover-rich pastureis very good pasture and it also gives you free nitrogen.If you constantly cut grassland for hay, year after year,and only graze the "aftermath" (what is left after you havecut the field for hay) you will encourage the coarse, large,vigorous grasses like perennial ryegrass and cocksfoot, andyou will ultimately suppress the finer grasses and clover,because these tall coarse grasses will shade them out. On theother hand if you graze grassland fairly hard, you willencourage clover and the short tender grasses at the expense<strong>of</strong> the tall coarse ones. If your land is acid you will get grasseslike bent, Yorkshire fog, mat grass and wavy hair grass thatare poor feeding value. Lime that land heavily and putphosphate on it and you will, with the help <strong>of</strong> mechanicalmethods too and perhaps a bit <strong>of</strong> re-seeding, get rid <strong>of</strong> thesepoor grasses and establish better ones. If land is wet andbadly drained you will get tussock grasses, rushes andsedges. Drain it and lime it, and you will get rid <strong>of</strong> these.Vigorous and drastic harrowing improves grass. It is goodto do it every year.Improving old pastureYou may inherit grass in the form <strong>of</strong> permanent pasturewhich has been pasture since time immemorial. Often thisis extremely productive, and it would be a crime to ploughit up. But you can <strong>of</strong>ten improve it <strong>by</strong> such means as liming,phosphating, adding other elements that happen to be short,<strong>by</strong> drastic harrowing (really ripping it to pieces with heavyspiked harrows), subsoiling, draining if necessary, heavystocking and then <strong>complete</strong> resting, alternately grazing itand haying it for a season, and so on.Now if you inherit a rough old piece <strong>of</strong> pasture, orpasture which because <strong>of</strong> bad management in the past isless than productive, the best thing to do may be to ploughit up and re-seed it. You can do this in several ways. Youcan "direct re-seed it" that is plough it and work it down toa fine seed bed, sprinkle grass and clover seed on it, harrowit, roll it, and let it get on with it. You can do this, accordingto the climate in your locality, in spring, summer or autumn.What you need is cool, moist weather for the seed togerminate and the plants to get established. Or you canplough up, sow a "nurse crop',' and sprinkle your grassseed in with it. <strong>The</strong> nurse crop can be any kind <strong>of</strong> corn or,in some cases, rape. When you harvest the corn you willbe left with a good strong plant <strong>of</strong> grass and clover.Seed mixtureAs for what "seed mixture" to use when establishingeither a temporary ley, which is grassland laid down foronly a year or so, or permanent pasture, go to yourneighbours and find what they use. Be sure to get as varieda mixture as you can, and also include, no matter what yourneighbours and advisers say about this, some deep-rootingherbs such as ribgrass, plantain, chicory, yarrow, alfalfa and<strong>The</strong> balanced pastureSome <strong>of</strong> these plants are almost certain to be found in a good pasture.Left to right, top row. Meadow fescue (Festuca pratensis);Perennial rye-grass (Lolium perenne); Cocksfoot (Dactylis glomerata);Timothy (Phleum pratense); Italian rye-grass (Lolium multiflorum).Bottom row.Burnet (Sanguisorba <strong>of</strong>ficinalis); Lucerne (Medicago sativa);Red dower (Trifolium pratense); Ribwort plantain (Plantago lanceolata).78
Food from the Fields79
Grass & Hayburnet. You can rely on them to bring fertility up from downbelow, to feed your stock in droughts when the shallowerrootinggrasses and clovers don't grow at all, and to providestock with the minerals and vitality they need. On deep,lightish land, alfalfa <strong>by</strong> it<strong>self</strong>, or else mixed with grassesand clovers, is splendid for it sends its roots deep downbelow. What if it does die out after a few years? It has doneits good <strong>by</strong> bringing nutriments up from the subsoil and <strong>by</strong>opening and aerating the soil with its deep-searching roots.HAYGrass grows enormously vigorously in the first months <strong>of</strong>the summer, goes to seed if you don't eat it or cut it, thendies down and becomes pretty useless. In the winter, innorthern climates, it hardly grows at all. In more temperateclimates though, it may grow pretty well for ten months<strong>of</strong> the year provided it is not allowed to go to seed.Now there are two ways <strong>of</strong> dealing with this vigoroussummer spurt: you can crowd stock on the grass to eat itright down, or you can cut the grass and conserve it. <strong>The</strong>way to conserve it is to turn it into hay or into silage.You can then feed it to stock in the winter.Hay is a more practical proposition for the average <strong>self</strong>supporter.You should get two tons <strong>of</strong> good hay <strong>of</strong>f an acre<strong>of</strong> good grass. <strong>The</strong> younger you cut grass for hay the lessyou will have <strong>of</strong> it but the better it will be. Personally Igenerally cut hay before my neighbours, have less, feed less,but the cattle do better on it. In France and in places wherea very labour-intensive but highly productive peasantagriculture prevails, grass is cut very young, made into hayvery quickly, and then the grass is cut again, maybe threeor four times, during the season. <strong>The</strong> resulting hay is superb:better than any silage, but the labour requirement is high.HaymakingTo make hay: cut the grass before, or just after, it reachesthe flowering stage. If it has begun to go to seed you will getinferior hay. <strong>The</strong>n pull it about. Fluff it up and keep turningit. Let the wind get through it and the sun get at it. If youare very lucky it may be dry enough to bale, or, if you aremaking it loose, to cock, in three days. <strong>The</strong>n bale it or cockit and thank God. <strong>The</strong> chances are, in any uncertainclimate, that you will get rain on it, which is always badfor it, and then you have the job <strong>of</strong> turning it about againto get it dry again. In bad years you may have to go ondoing this for weeks, and your hay will be practicallyuseless for feed when you finally get it in.CockingA cock is a pointed-topped dome <strong>of</strong> hay that you buildwith a fork. It sheds most <strong>of</strong> the rain and allows a certainamount <strong>of</strong> in-cock drying, but if the grass is too green, orwet from rain, you may have to pull the cocks open againand spread the hay about to dry. <strong>The</strong>n, if rain threatens,throw it up in the cock again. If you are worried about toomuch moisture in hay that you have cocked, thrust yourhand deep inside. If the hay in there is hot, or feels wet andclammy, you must spread that hay about and dry it again.You can only stack it when it is dry enough - that is whenit is no longer bright green and feels <strong>complete</strong>ly dry.BalingA bale is a compact block <strong>of</strong> hay which has been rammedtight and tied with string <strong>by</strong> a machine called a baler. Youmustn't bale hay until you are sure it is dry 7 enough. If youbale when it isn't dry it will heat in the bale and the hay will bespoiled. Once the hay is baled there is nothing you can dowith it. Just get those bales inside as soon as you can: theywill shed a certain amount <strong>of</strong> light rain. But once rain getsright into them you have had it. You will have spoiled hay.<strong>The</strong>re is a great armoury <strong>of</strong> machines, both tractor andanimal-drawn, for dealing with hay. <strong>The</strong>re are machinesHaycocks and tripodsA haycock (far right) is a pile <strong>of</strong>hay, solid but loose enough to allowair to circulate. Another method <strong>of</strong>drying, which is particularly usefulin wet climates, is the tripod. Takethree light poles, say six foot (1.8 m)high each. Hold them together and tiea loop <strong>of</strong> string or cord very looselyround them near one end. Standthem up and make a tripod <strong>of</strong> them.Tie two or three strands <strong>of</strong> string orwire right round the tripod to holdthe hay. Pile hay up round the sides,starting from a small circular base,keeping the outside walls as verticalas you can, and then bury thetripod <strong>complete</strong>ly with grass,rounding <strong>of</strong>f the top nicely. Use benttin to make air vents at ground level.<strong>The</strong>re must be at least one on thewindward side.80
Food from the Fieldsfor tedding (fluffng-up), windrowing (gathering togetherinto long loose rows), turning (turning the windrows over)and raking. But all you need if you don't have too muchhay, or have enough labour, are some wooden handledrakes and some pitch forks. You can make the best hay inthe world with just these. You can ted the hay with thepitch forks, rake it into windrows, then rake three or fourwindrows together, cock these with the forks, load thecocks on to a cart with the forks, and ultimately stack it.Haymaking in summer-wet climates is always a gamble; atriumph if you win, and something to put up with if you lose.TripodingIn wet climates the tripod (see illustration) is a usefulmeans <strong>of</strong> drying wet hay. Grass that has only had maybe acouple <strong>of</strong> days <strong>of</strong> air drying can be tripoded, even if it looksquite green, for the air continues to get through it in thetripod. I have seen hay left on the tripods in bad weatherfor a month, but it does not necessarily make very goodhay after that sort <strong>of</strong> treatment.SILAGEIf you take grass, clover, lucerne, crushed green maize,kale, or many other green things, and press them downtight in a heap from which you exclude the air, it will notgo bad, as you might think, but will ferment into a foodvery nourishing to animals. In fact good silage is as goodas the very best <strong>of</strong> hay. And <strong>of</strong> course, because you can cutyour green crop at any stage <strong>of</strong> growth you can cut it youngwhen its protein-content is highest, so it makes good feed.Grass you can cut again and again during the season,instead <strong>of</strong> waiting until it is fully grown as most peopledo when they make hay.Making silageTo make your silage you need some machinery. At its mostbasic, a mower and a buck-rake. You mow the grass whenit is quite young and green, haul it together with the buckrake,load it in a cart or on a trailer, take it and dump it onyour silage heap. Ideally, though, you need a forage harvester,which, towed behind a tractor, cuts the grass and blowsit into an accompanying trailer, pulled <strong>by</strong> another tractor(so you need two tractors). You then take it to the heap.Most small-scale <strong>self</strong>-supporters will not consider silage,because it is rather a. large-scale enterprise. Further, thebigger the silage heap the less surface area there is comparedto volume and therefore the less spoilage there is to thesilage. If you do decide to make it on a small scale, youmust enclose the heap pretty <strong>complete</strong>ly: walls all roundit and a ro<strong>of</strong> on top, for air spoils silage.Consolidate your heap after every day's cut <strong>by</strong> drivinga tractor up on top <strong>of</strong> it or leading a horse across, andultimately cover the <strong>complete</strong> heap over with a plasticsheet weighted down with tons <strong>of</strong> straw bales, hay bales,or old motor-car tyres. If you can, build your heap in a shedto keep the rain <strong>of</strong>f. But you can make silage out <strong>of</strong> doors,<strong>by</strong> enclosing the stuff in a bag, like a huge balloon, <strong>of</strong> plastic,and again weight that down, probably with old motor tyres.You can make marvellous silage <strong>by</strong> stuffing lawn clippingstight into plastic fertilizer bags, sealing them and leaving themfor a while to ferment.Feeding silageYou then feed it, come winter, <strong>by</strong> exposing the open endand letting the animals feed from a "face." You control theanimals, to stop them from trampling on the stuff, eitherwith "tomb-stones" which are a row <strong>of</strong> posts or concreteblocks through which they can poke their heads and getat the silage in a controlled manner, or with an electricfence. You give them another slice every day. Nobody cansay that any aesthetic pleasure can be derived from silage,but cows like it.SilageIf you compress green vegetationinto a tight heap, provided that thesugar content is high it will not rotbut will ferment and become silage,a nutritious animal food. It is bestmade on a large scale, as the lesssurface area there is in relation tovolume the less waste there will be.Young grass is ideal but any greencrop will do. Build up a pileenclosed within three walls andpreferably with a ro<strong>of</strong>. Each timeyou add to your heap consolidateit <strong>by</strong> running it over with a tractoror horse. When the heap is <strong>complete</strong>cover it with a plastic sheet, weighit down and leave it until winterwhen you can feed it to animals<strong>by</strong> exposing one end.Pile in greenstuffMake sure that the greenery istightly compressed so that all air isexcluded from the silo.Cover and weigh downWeigh down the <strong>complete</strong>d pile withheavy objects on top <strong>of</strong> a plastic sheetto keep out air and rain.Open up for feedingExpose the open end to the animals,but limit them to a daily ration<strong>by</strong> erecting a row <strong>of</strong> "tomb-stones'.'
Food from the FieldsRow CropsIn Europe in the Middle Ages there was an annual holocaust<strong>of</strong> animals every autumn. It was impossible to feed all theseextra animals during the winter, so most <strong>of</strong> them were killed<strong>of</strong>f in the autumn and either eaten then or salted down. Saltmeat was about all that medieval man had in the winter or,indeed, until the first lambs could be killed in the earlysummer. And milk, too, was in very short supply.<strong>The</strong> introduction <strong>of</strong> the turnip changed all this. If a proportion<strong>of</strong> your land was put down to turnips you could continueto feed and fatten animals all through the winter, andalso keep up the milk yield <strong>of</strong> your cows. And the turnip wasfollowed <strong>by</strong> all the other root crops.With "roots" I am including all those crops known asfodder crops, such as kale, cow cabbages and kohl-rabi, as wellas those crops <strong>of</strong> which the actual roots are the part <strong>of</strong> theplant that we grow to eat or to feed to our stock. This simplificationis justified because all these crops can take the sameplace in our rotation, and serve the same purpose which is,broadly, to feed our animals in the winter time when there isvery little grass. And we can eat some <strong>of</strong> the roots as well.<strong>The</strong>se plants all have this in common: they store up energyin the summer so that they can lie dormant during the winter,and then release this energy early in the spring to flower andproduce seed before other, annual, plants are able to do so.<strong>The</strong>y are in fact biennials. We use them <strong>by</strong> making use <strong>of</strong> thisstored nourishment for our winter feeding.TURNIPS AND SWEDESSwedes have a neck, are more frost-hardy than turnips, andstore better, being less prone to disease. Turnips yield slightlymore. Both these closely related plants are members <strong>of</strong> thebrassica family, and thus are liable to club-root, a fungusdisease, sometimes called "finger-and-toe" in turnips andswedes. This is a killer and can reduce your yield very drasticallyand even to nothing. If your land is infected with it don'tgrow turnips and swedes.SowingTurnips and swedes are sown quite late: swedes in Mayperhaps, and turnips about a fortnight later. In very dry andwarm areas it is better to sow later still, for with early sowingin such areas there is a tendency for "bolting" to occur.Bolting is when the plant skips a year and goes to seed at once,when it becomes useless. But turnips and swedes are <strong>of</strong> mostuse in the wetter, colder areas.<strong>The</strong> seeds are small and therefore want a fine seed bed. Getit <strong>by</strong> ploughing in the autumn and cross ploughing as early asyou can in the spring. Or, if you can't plough in the autumn,then plough for the first time as early as you can in the springand plough again, or rotovate, cultivate and "pull your landabout" with whatever tines or discs you may have or canborrow. <strong>The</strong>n drill in rows, preferably with a precision drill.This will drop seed in one <strong>by</strong> one at a set interval. If you drillwith such a drill at the rate <strong>of</strong> a pound (0.5 kg) an acre this will82
Food from the FieldsCow cabbage9A
Row Cropsbe about right, but to do this you must use graded seed. Youcan buy such seed at a seed merchant: it is much more expensivethan ordinary seed, which you can grow your<strong>self</strong>, but as itgoes much further it is cheaper in the end. In wet climates it isan advantage to sow on raised ridges which can be made witha "double Tom" or ridging plough.SinglingIf you haven't got a precision drill, then drill the seed in rowsas thinly as you can and rely on "singling" when the crop hasdeclared it<strong>self</strong>. Singling means cutting out with a hoe all thelittle seedlings except one every nine inches (23 cm). Youcan't go along with a ruler so, as the plants are at all sorts <strong>of</strong>intervals, you will end up with some closer than nine inchesand some further apart, but broadly speaking it doesn'tmatter that much. This singling <strong>of</strong> course cuts out the weedsas well as the surplus plants. You will then have to hand-hoeat least once more, possibly twice, during the growth <strong>of</strong> thecrop, to cut the weeds out in the rows, and you will savelabour if you can horse-hoe, or tractor-hoe, several times aswell. Horse-hoeing is a very quick operation and does anenormous amount <strong>of</strong> good in a short time, but <strong>of</strong> course, inthe end, you will always have to hand-hoe as well because thehorse-hoe can't get the weeds between the plants in the rows.HarvestingYou can leave turnips and swedes out in the field until afterChristmas if you like, except in countries which have deepsnow or very heavy frost. You can feed the roots <strong>of</strong>f to sheep<strong>by</strong> "folding", moving the sheep over the crop, every day givingthem just enough to eat <strong>of</strong>f in a day <strong>by</strong> confining them behindhurdles or wire netting. You will have to go along, however,either before the sheep have had a go at them, or afterwards,and lift the turnips out <strong>of</strong> the ground with a light mattock.Otherwise the sheep leave half the roots in the ground andthey are wasted.You lift the crop pulling <strong>by</strong> hand and twisting the tops <strong>of</strong>f.<strong>The</strong>n you can clamp (see p. 182) or you can put them in a rootcellar. Swedes are more nutritious than turnips and I thinkare the better crop to grow. <strong>The</strong>y are also sweeter and pleasanterfor you to eat.MANGOLDSMangolds are like huge beet and crops <strong>of</strong> fifty tons <strong>of</strong> them tothe acre are perfectly possible. Scientists say "they are nearlyall water", but experienced farmers answer to this: "yes - butwhat water!" For they know that the moment you start feedingmangolds to cows the yields <strong>of</strong> milk go up. <strong>The</strong>y are notsuitable for humans to eat but make good wine. <strong>The</strong>y aregrown more in warmer, drier places than turnips are, but theyare pretty hardy.SowingIt is best, especially on heavy land, to plough for mangoldsthe previous autumn. You must then work the land down to agood seed bed in the spring, and then drill at the rate <strong>of</strong> 10 lbs(4.5 kg) <strong>of</strong> seed to the acre as near the first <strong>of</strong> April as you areable. If it is a cold wet season you may not be able to get a seedbed till May, but it is not much good sowing the crop after theend <strong>of</strong> May: better sow turnips instead. Drill in rows about 22inches (56 cm) apart and single out to about 10 inches (25cm) apart in the rows. <strong>The</strong>n hoe and horse-hoe as for turnips.HarvestingLift in the autumn before heavy frosts set in, top, put in littleheaps covered with their own leaves until you can cart andclamp. In the old days farmers used to slice the mangolds inmachines. Now we know that cattle can do it just as well withtheir teeth. Don't feed mangolds too soon: not until afterNew Year's Day. <strong>The</strong>y are slightly poisonous until mature.FODDER BEETFodder beets are very like mangolds, but smaller and far morenutritious. <strong>The</strong>y are very high in protein, and are excellentfor pigs, cows, or even horses. Personally I think they are abetter grow. Sow and thin exactly like mangolds, but thin toeight inches (20 cm). To harvest - break the tap-roots with abeet-lifter or break out with a fork before you pull. Top with aknife, put in small piles, cover with leaves against frost, andcart to clamp when ready.CARROTSSowingCarrots need a fine seed bed just like turnips, and not toomuch fresh muck: it makes them fork. Carrots will not thriveon an acid soil, so you may have to lime. Sow them in rowsa foot (30 cm) apart, or up to 18 inches (46 cm) if you intendto horse-hoe a lot, and sow the seed as thinly as you can. Youmay then avoid singling, but the crop takes a great deal <strong>of</strong>labour in hand-weeding, as it grows very slowly, far slowerthan the weeds in fact.HarvestingIn places with mild winters you can leave the crop in theground until you want it, but if you fear hard frosts lift it <strong>by</strong>easing out with a fork and then pulling. Twist the tops <strong>of</strong>f;don't cut them. <strong>The</strong>n clamp or store in sand. It is really toolaborious a crop to grow for stock feeding, but it does makevery good stock feed, particularly for pigs. You can fatten pigson raw carrots and a very little high protein supplement aswell, and they will live on just raw carrots. And, <strong>of</strong> course,they are an excellent human food: very rich in vitamin A.KALE<strong>The</strong> most common <strong>of</strong> the myriad kales are: Marrowstem,Thousand-headed, Rape kale, Hungry-gap kale and Kohlrabi,and there are lots <strong>of</strong> other curious kales in different parts<strong>of</strong> the world.
Food from the FieldsSowingDrill in rows about 20 inches (51 cm) apart, or broadcast, butdrilling gives a better yield and if you have a precision drill youcan save seed. Sow from two to four pounds (0.9 -1.8 kg) <strong>of</strong>seed per acre. Drill most kales early in April, although drillMarrowstem in May so that it does not get too woody. Thinand hoe in rows and you will get a heavier crop, particularly <strong>of</strong>Marrowstem kale. Kale likes plenty <strong>of</strong> manure.HarvestingYou can fold kale <strong>of</strong>f in the winter. It is more used for foldingto cows than to sheep - it is a marvellous winter feed for milkingcows. Let the cows on to it a strip at a time behind anelectric fence. Or you can cut it with a sickle and cart it to feedto cows indoors. Use Marrowstem first and leave hardierkales like Hungry-gap until after the New Year. After you havecut, or grazed <strong>of</strong>f, a field <strong>of</strong> kale the pigs will enjoy digging upthe roots. Alternatively you can just plough in.RAPERape is like a swede but has no bulb forms. It is good for foldingto sheep or dairy cows. It canbe sown (generally broadcast- not drilled) in April for grazing <strong>of</strong>f in August, or can be sownas a "catch crop" after an early cereal harvest to be grazed <strong>of</strong>f inthe winter but then it won't be a very heavy crop. Rape is toohot a taste for humans, so you can't eat it as a vegetable,although a little might flavour a stew.COW CABBAGES<strong>The</strong>se are very similar to ordinary cabbages. Establish themlike kale, or if you have plenty <strong>of</strong> labour you can grow them ina seed bed and transplant them out <strong>by</strong> hand in the summer.This has the advantage that you can put them in after, say,peas or beans or early potatoes, and thus get two crops in ayear: a big consideration for the smallholder. You can get avery heavy crop but remember cow cabbages like good landand plenty <strong>of</strong> manure.You can clamp cabbages. All the above brassica crops aresubject to club-root, and must not be grown too <strong>of</strong>ten on thesame land. Cow cabbages make splendid human food too,and are fine for sauerkraut (see p. 187).MUSTARD<strong>The</strong>re are two species: Brassica alba and Brassica juncea,white and black mustard. <strong>The</strong>y can be grown mixed with rapefor grazing <strong>of</strong>f with sheep; or grown alone for the samepurpose; or grown as a green manure to be ploughed into theland to do it good; or harvested for seed, which you can grind,mix with a little white wheat flour and moisten as required toproduce the mustard that goes so well with sausages.Remember that mustard is cabbage-tribe though, and istherefore no good for resting the land from club-root. Iwould never grow it as green manure for that reason. It is notfrost-hardy.Cleaning cropsIt must be understood that all the above crops, exceptingrape and mustard when these are broadcast and not drilled inrows, are cleaning crops, and thus <strong>of</strong> great value for your husbandry.Being grown in rows it is possible to horse-hoe andhand-hoe, and this gives the husbandman a real chance to getrid <strong>of</strong> weeds. So, although you may think that the growing<strong>of</strong> these row crops is very hard work, remember that it is hardwork that benefits even 7 other crop that you grow, and Iwould suggest that you should grow a crop in every four years<strong>of</strong> your arable rotation.POTATOESWhere potatoes grow well they can be, with wheat, one<strong>of</strong> the mainstays <strong>of</strong> your diet, and if you have enough <strong>of</strong>them you will never starve. <strong>The</strong>y are our best source <strong>of</strong>storable vitamin C, but most <strong>of</strong> this is in the skins so don'tpeel them. You can even mash them without peeling them.Seed potatoesFor practical purposes, and unless we are trying to producea new variety <strong>of</strong> spud and therefore wish to propagate fromtrue seed, potatoes are always grown from potatoes. Inother words we simply plant the potatoes themselves.This is known as vegetative reproduction, and all thepotatoes in the world from one variety are actually thesame plant. <strong>The</strong>y aren't just related to each other: they areeach other.We can keep our own "seed" therefore, from one year tothe next, but there is a catch here. <strong>The</strong> potato is a plantfrom the High Andes, and grown at sea level in normalclimates it is heir to various insect-borne virus diseases.After we have planted our potato "seed" (tubers) year afteryear for several "generations" there will be a build-up <strong>of</strong>virus infections and our potatoes will lose in vitality.Hence we must buy seed potatoes from people who growit at high altitudes, or on wind-swept sea-islands, or inother places where the aphids do not live that spread thesediseases. An altitude <strong>of</strong> over 800 ft (244 m) is enough inBritain for growing seed potatoes: in India most seed comesfrom Himachayal Pradesh, from altitudes <strong>of</strong> over 6000 ft(1829 m). <strong>The</strong> cost <strong>of</strong> seed potatoes now is enormous, andanybody who has land over 800 ft (244 m) would be welladvised to use some <strong>of</strong> it for growing seed. In any case, manymore <strong>of</strong> us ought to save the smallest <strong>of</strong> our tubers for "oncegrownseed" or even "twice-grown seed". After we havecarried on our own stock for three years, however, it willprobably pay to import fresh seed from seed-growing areasrather than risk the spread <strong>of</strong> disease.EARLY POTATOESPotatoes that grow quickly and are eaten straight from theground and not stored are called "early potatoes'.' To growthem you should chit, or sprout, them. <strong>The</strong>y should be laid85
Row Cropsin shallow boxes, in weak light (at any rate not in totaldarkness for that makes them put out weak gangly sprouts)at a temperature between 40°F (4°C) and 50°F (10°C). Acold greenhouse is generally all right. It is an advantage togive them artificial light to prolong their "day" to 16 hoursout <strong>of</strong> the 24- This keeps the "chits" green and strong andless likely to break <strong>of</strong>f when you plant the spuds.PlantingBeware <strong>of</strong> planting too early, for potatoes are not frosthardy,and if they appear above the ground before the lastfrost it will nip them <strong>of</strong>f. On a small garden scale you canguard against this to some extent <strong>by</strong> covering them withstraw, or muck, or compost, or cloches. If they do get frostedone night go out early in the morning and water or hosethe frost <strong>of</strong>f with cold water. This will <strong>of</strong>ten save them.Plant earlies <strong>by</strong> digging trenches nine inches (23 cm) deepand two foot (61 cm) apart, and putting any muck, compostor green manure that you might have in the trenches. Plantthe spuds on top a foot (30 cm) apart, and bury them.Actually you will get the earliest early new potatoes if youj ust lay the seed on the ground and then ridge earth over them(about five inches or 13 cm deep is ideal). You couldn'tdo this with main crop because the spuds grow so largeand numerous that they would burst out <strong>of</strong> the sides <strong>of</strong>the ridges and go green. Spuds go green if the light falls onthem for more than a day or two and then becomepoisonous: green potatoes should never be eaten nor fedto stock. <strong>The</strong> fruit <strong>of</strong> the potato plant, and the leaves, arehighly poisonous, being rich in prussic acid.Potatoes are usually planted <strong>by</strong> dropping them straighton muck, then earthing them up. But more people are nowploughing the muck in the previous autumn. Twenty tons<strong>of</strong> muck per acre is not too much. And always rememberpotatoes are potash-hungry Non-organic farmers use"artificial" potash: organic ones use compost, seaweed,' ora thick layer'<strong>of</strong> freshly-cut comfrey leaves. Plant the spudson top <strong>of</strong> the comfrey; as the leaves rot, the potato plantshelp themselves to the potash that they contain.HarvestingYou might get a modest five tons to the acre <strong>of</strong> earlypotatoes, increasing the longer you leave them in theground: but if they make part <strong>of</strong> your income the earlieryou lift them the better. You can fork potatoes out, ploughthem out, or lift them with a potato-lifter.MAIN CROP POTATOES<strong>The</strong> potato plant has a limited growing season, and whenthis stops it will stop growing. So it is best to let your maincrop potatoes grow in the most favourable time <strong>of</strong> theyear. This means the summer, and it is inadvisable to plantthem too early. Plant them in April and you won't go farwrong. Easter is the traditional time in England.PlantingIf you use bought seed you can be a bit sparing with theamount: perhaps a ton an acre. Where you are using your ownseed perhaps a ton and a half. Main crop potatoes should beplanted 14 inches (36 cm) apart, in rows 28 inches (71 cm)apart if the seed averages 2+ ounces (70 g). If the seed issmaller, plant it closer: if it is bigger, plant it further apart.You will get the same yield either way If you plant <strong>by</strong> handyou can control this very accurately. Ideally seed potatoesshould go through a IT-inch (5 cm) riddle and be stopped <strong>by</strong>a l+-inch (4 cm) one. Anything that goes through the latter is a"chat," and goes to the pigs.If you have a ridging plough, horse-drawn or tractordrawn,put the land up into ridges. Put muck or compostbetween the ridges if you have it to put, although it wouldbe better if you had spread it on the land the previousautumn. Plant your seed in the furrows <strong>by</strong> hand and, if youlack the skill or equipment to split the ridges, and <strong>by</strong> Godit takes some skill, do not despair. Simply harrow or roll theridges down flat. This will bury the potatoes. After about afortnight take your ridging plough along again, and thistime take it along what were, before you harrowed themflat, your ridges. So you make what were your ridgesfurrows, and what were your furrows ridges.If you haven't got a ridging plough use an ordinaryplough. Plough a furrow, plough another one next to itand drop your spuds in that. Plough another furrow, thusburying your spuds, and plough another furrow and dropspuds in that. In other words plant every other furrow.Don't worn- if your planted rows aren't exactly 28 inches(71 cm) apart. Potatoes know nothing <strong>of</strong> mathematics.Care <strong>of</strong> cropDrag the ridger through once or twice more whenever theweeds are getting established. This not only kills the weeds,it earths up the spuds, gives them more earth to grow inand stops them getting exposed and going green. If youhaven't got a ridging plough, and are skilful, you can ridgeup with a single-furrow plough.Go through the spuds with the hand-hoe at least onceto kill the weeds in the rows, but after you have done this,and thus pulled down the ridges, ridge them up again. Upto ten days after planting you can harrow your potat<strong>of</strong>ield to great advantage to kill weed seedlings, but afterthat be careful because you might damage the delicateshoots <strong>of</strong> the spuds,It is all a matter <strong>of</strong> common sense. Youwant to suppress the weeds and spare the spuds. When thepotatoes meet over the rows they will suppress the weedsfor you and you can relax, but not <strong>complete</strong>ly. You areafraid <strong>of</strong> blight.BlightBlight is the disease that, helped <strong>by</strong> absentee landlords,killed two million Irishmen in 1846, and you can be as86
Food from the Fieldsorganic as all get-out and if it is a blight year you will stillget blight. Now if you do get blight, don't despair; you willstill get a crop. <strong>The</strong> virulent strain that killed the Irishmen,<strong>by</strong> killing their only source <strong>of</strong> food, has passed <strong>by</strong> now.But your crop won't be such a big one.You will know you have blight if you see dark green,water-soaked patches on the tips and margins <strong>of</strong> the leaves.If you see that, spray immediately, for although you cannotcure a blighted plant <strong>by</strong> spraying, you can at least preventhealthy plants being infected. <strong>The</strong>se patches soon turndark brown and get bigger, and then you can see whitemould on them. Within a fortnight, if you do nothingabout it, your whole field will be blighted and the tops willsimply die and turn slimey. Now the better you haveearthed up your ridges the fewer tubers will be affected, forthe blight does not travel down inside the plant to thepotatoes but is washed down into them <strong>by</strong> rain.Commercial farmers spray the blighted tops with 14gallons (63.6 litres) <strong>of</strong> BOV sulphuric acid to 85 gallons(386.4 litres) <strong>of</strong> water, or else some <strong>of</strong> the newer chemicals.This burns them <strong>of</strong>f and the blight spores do not get downto your spuds. I cut my tops <strong>of</strong>f with a sharp sickle (it hasto be sharp, else you simply drag the spuds out <strong>of</strong> theground when you cut) and burn them. Don't lift yourspuds for at least a fortnight, preferably longer, after thetops have been removed. This is so that they don't come incontact with blighted soil.But, <strong>of</strong> course, you will never get blight, for you will havesprayed your "haulms" (tops) with Bordeaux or BurgundyMixture, or one <strong>of</strong> the modern equivalents, before the firstblight spore settled on your field, won't you? To make aBordeaux Mixture, dissolve four pounds (1.8 kg) coppersulphate in 35 gallons (159.1 litres) <strong>of</strong> water in a woodenbarrel, or in plastic dustbins. <strong>The</strong>n slowly slake two pounds(0.9 kg) freshly burned quicklime with water and makeit into five gallons (22.7 litres) <strong>of</strong> "cream." Slowly pour the"cream" through a sieve into the copper sulphate solution.Make sure that all your copper has been precipitated <strong>by</strong>putting a polished knife blade in the liquid. If it comes outcoated with a thin film <strong>of</strong> copper you must add more lime.Burgundy Mixture is stronger and more drastic-It has12 1/2 pounds (5.7kg) washing soda instead <strong>of</strong> lime. <strong>The</strong>semixtures must be used fresh, because they won't keep long.Spray with a fine spray very thoroughly. Soak the leavesabove and below too. All the spray does is prevent sporesgetting in. Do it just before the haulms meet over the rowsand again, perhaps a week later. An alternative is to dustwith a copper lime dust when the dew is on.Blight attacks vary in date: it needs warm, moist, muggyweather, and in some countries agricultural departmentsgive blight warnings over the radio. If you do get muggyweatherwhen your spuds are pretty 7 well grown, spray forblight. You will get half as big a crop again as if you didn't.You can help prevent blight <strong>by</strong> not allowing "rogue" potatoesto grow: in other words lift even- single potato from yourfields after harvest, for it is these rogues that are therepositories <strong>of</strong> blight. Pigs will do this job for you better thananything else in the world, they will enjoy doing it and theywill fertilize the land too.HarvestingHarvest as late as you can before the first frosts, but try todo it in fine weather. Fork them out, plough them out,spin them out or get them out with an elevator digger,but get them out. Leave them a day or half a day in the sunafter lifting for the skins to set. Don't give them more thana day and a half or they will begin to green.StoringClamping (see p. 182) is fine. Stacking in a dark shed, or adark root cellar, is OK. <strong>The</strong> advantage <strong>of</strong> clamping is thatif there is blight in your spuds, or any other spud disease,you don't get a build-up <strong>of</strong> the organisms as you wouldin a permanent building. Do what your neighbours do.In intensely cold winters clamping may not be possible:no clamp will stop the frost, and potatoes cannot standmuch frost or they will rot. On the other hand, if they aretoo warm they will sprout. If possible they want it justabove freezing.JERUSALEM ARTICHOKESAs a very few plants <strong>of</strong> these would give us more tubers thanwe would care to eat, they are seldom grown on a fieldscale except <strong>by</strong> a few wise people who grow them to be dugup and eaten <strong>by</strong> pigs. <strong>The</strong>y are wonderful for this purpose,and provided the pigs have enough <strong>of</strong> them they will dovery well on artichokes alone and a little skimmed milk orother concentrated food. Half a pound (0.2 kg) a day <strong>of</strong> "pignuts," plus unrestricted rooting on artichokes should beenough for a dry sow.SowingDrop them in plough furrows 12 inches (30 cm) from eachother, and the furrows should be three feet (91 cm) apart. Putthem in any time after Christmas, if the land is not frozen andnot too wet, and any time up to April. It doesn't muchmatter when, in fact. <strong>The</strong>y won't grow until the warmerweather comes anyway and then they will grow like mad.<strong>The</strong>y will smother every imaginable weed and after thepigs have rooted them up the land will be quite clean andwell dunged too. But beware: the pigs will never get thevery last one, and next year you will have plenty <strong>of</strong> "rogues"or "volunteers'.' In fact, if you leave them, you will have asheavy a crop as you had the year before. I sometimes do,but never for more than two years running. <strong>The</strong>y will growin practically any soil and don't need special feeding,although they like potash. If you just put them into theground and leave them they will grow whatever you do.87
Row CropsBeans are distinguished from peas and the other legumesbecause they have a square hollow stem instead <strong>of</strong> a roundsolid one. <strong>The</strong>re are hundreds <strong>of</strong> kinds and varieties <strong>of</strong> beansthroughout the world. <strong>The</strong> various kinds <strong>of</strong> "runner" beans:scarlet runners, french beans, snap beans and so on, areseldom grown on a field scale, so I will deal with them asgarden vegetables (see pp. 149-152).FIELD BEANS<strong>The</strong> crop which supplied most <strong>of</strong> the vegetable proteinfor the livestock <strong>of</strong> northern Europe and North America forcenturies, and which should still do so today, is the fieldbean, tic bean, horse bean, or cattle bean: Vicia vulgaris.This is a most valuable crop, and it is only neglected nowadaysbecause vast quantities <strong>of</strong> cheap protein have floodedinto the temperate zones from the Third World. As thepeople <strong>of</strong> the latter decide to use their own protein, whichthey sadly need, temperate-zone farmers will have to discoverthe good old field bean again.It produces very high yields <strong>of</strong> very valuable grain, and itenriches the soil in two ways: it is a legume, and thereforetakes nitrogen from the air, and it forms deep tap roots whichgo well down and bring up nutrients, and themselves rotdown afterwards to make magnificent humus. It is a mostbeneficial crop to grow, good for the land, and gives excellentyields <strong>of</strong> high-protein grain.As with other grains, there are two sorts <strong>of</strong> field bean -winter and spring. However, farmers classify' beans as "grain"or "corn".SoilBeans don't want nitrogen added, but they do benefit greatly<strong>by</strong> a good dressing <strong>of</strong> farmyard manure (muck) ploughed in assoon as possible after the previous crop has been harvested.In land already in good heart they will grow without this.<strong>The</strong>y need lime though, as do all the legumes, and if your landneeds it you must apply it. <strong>The</strong>y need potash very badly andphosphates to a lesser degree. Non-organic farmers frequentlyapply 80 units <strong>of</strong> phosphorus and 60 units <strong>of</strong> potash, butwe are more likely to rely on good farming and plenty <strong>of</strong> muck.<strong>The</strong> seed bed need not be too fine, particularly for wintersownbeans. In fact a coarse seed bed is better for the latterbecause the clods help to shelter the young plants from thewind throughout the winter. In very cold climates you cannotgrow winter beans because very hard frost will kill them. Youwill get heavier crops from winter beans than from springones, less trouble from aphids, a common pest <strong>of</strong> the crop,but possibly more trouble from chocolate-spot, a nastyfungus disease.SowingYou can sow with a drill, if you have one, provided it isadapted to handle a seed as big as the bean, or you can dropthe seed in <strong>by</strong> hand behind the plough. Plough shallowly(four inches or 10 cm) and drop the seed in even" otherfurrow, allowing the next one you plough to cover them over.I find this method very satisfactory as the seed is deepenough to defy the birds. Jays will play havoc with newlysown beans, simply pulling the young plants out <strong>of</strong> the ground.Care <strong>of</strong> cropBy all means hoe beans. Horse-hoe or tractor-hoe betweenthe rows and try, if you can, to hand-hoe at least once in therows. <strong>The</strong>y are a crop that can easily suffer from weeds.HarvestingWait until the leaves have fallen from the plants and thehilum, or point <strong>of</strong> attachment <strong>of</strong> the pods to the plant, hasturned black. Cut and tie the crop with a binder if you haveone. If not, cut with the sickle and tie into sheaves. Youhave to use string for this because bean straw is difficult totie with. Stook and leave in the stook until the crop feelsperfectly dry (maybe a week or two). <strong>The</strong>n stack and coverthe stack immediately, either <strong>by</strong> thatching it or with a rickcover,or else stack it indoors. A bean stack without a coverwill not keep the rain out, and if it gets wet inside the beanswill be no good to you.ThreshingDo not thresh until the beans have been in the stack at leastfour months. Many farmers like to leave the stack rightthrough to the next winter before they thresh it, becausebeans are better for stock after they are a year old. Threshjust as you would wheat, with a flail or in a threshing drum.Feeding to animalsGrind or crack the beans before feeding. Mix them as theprotein part <strong>of</strong> your ration. Horses, cattle, pigs, sheep andpoultry all benefit from beans. Cattle will pick over thestraw and eat some <strong>of</strong> it. What they leave makes marvellouslitter (bedding) and subsequently splendid manure.SOYABEANSSoya beans, or soybeans, are grown in vast acreages in Chinaand the United States in the warmer latitudes. <strong>The</strong>y don't,as we all discovered a year or two ago, do much good in theclimate <strong>of</strong> southern England and we must wait until a hardiervariety is bred, if it can be, before we can grow them. Inclimates where they can be grown, sow or drill them well afterthe last possible frost about an inch (2.5 cm) deep, 10 inches(25 cm) apart in the rows and with the rows three feet (91 cm)apart. Keep them well hoed because they grow very slowlyat first. <strong>The</strong>ir maturing time can be anything from three t<strong>of</strong>ive months depending on the climate. If you need to, youcan extend the season <strong>by</strong> covering them with glass or plastic.If you pick them young you can eat the pods whole. Otherwiseshell them for the three or four beans inside. <strong>The</strong> sameinstructions apply to Lima beans.88
Food from Animals<strong>The</strong> Living FarmyardJust as I advise against monoculture when it comes to plantingcrops, so I would urge you not to specialize in one animalbut to keep a wide variety This is the only way to make thebest use <strong>of</strong> your land's resources and to take advantage <strong>of</strong> thenatural ways in which your animals help each other. Yourcows will eat your long grass, and then your horses, sheep andgeese can crop your short grass. After that your pigs will eatthe roots and at the same time plough the field ready forsowing with a grain crop, which all the animals, especially thehens, can eat. Pigs <strong>of</strong> course thrive on skimmed cow's milk leftover from cheesemaking, and cow's milk can be used to rearorphan foals or lambs. Your different animals will protecteach other from disease as well, for organisms which causedisease in one species die when eaten <strong>by</strong> another.Cows, horses, sheep and goatsRuminants - cows, sheep and goats - are the animals best equipped to turnthat basic substance, grass, into food in the form <strong>of</strong> meat and milk. Horses,I hope, will not be exploited for meat or milk, but for their unique ability toturn greenstuff into power. Amongst themselves these animals divide up theavailable food very efficiently, and in so doing they work to each other'sbenefit. A lot <strong>of</strong> horses kept on a pasture with no other animals will notthrive; with other animals they will. It has been said that if you can keeptwenty cows on a given piece <strong>of</strong> pasture, you can keep twenty cows andtwenty sheep just as well. Cows will eat the long, coarser grass and the sheepand horses will clean up after them <strong>by</strong> nibbling what they leave close to theground. Goats, which are browsers rather than grazers, fill a useful nichebecause they will eat bark, leaves, brambles and bushes, and if you wantyour land deforested they will do that as well.GeeseGeese will compete directly with theruminants for grass, but, like theruminants, though less efficiently,they will turn grass into food in theform <strong>of</strong> meat. At the same time theywill improve your pasture. It is wellworth keeping a few, for the moreyou diversify your grazing speciesthe better.on
Food from AnimalsDucksYour ducks will eat a lot <strong>of</strong> food which willotherwise yield you no benefit: water plants,frogs and other aquatic creatures. And they willpatrol your garden and eat that unmitigatednuisance, the slug.Pigs<strong>The</strong> pig is a magnificent animal and really the pioneer on your holding.He will eat anything, and in his efforts to find food he will plough land, clearundergrowth and devour all surpluses, even your washing-up water.As William Cobhett wrote in his Cottage Economy: "In short, without hogsfarming could not go on; and it never has gone on in any country in theworld. <strong>The</strong> hogs are the great stay <strong>of</strong> the whole concern. <strong>The</strong>y are much insmall space; they make no show, as flocks and herds do; but without themcultivation <strong>of</strong> the land would be a poor, a miserably barren concern."ChickensChickens are essentially graminivorous, or at least they prefer to live on seed.<strong>The</strong>y will pick up all spilled grain in your harvest fields, eat the "tail corn",the grains which are too small to grind, and eat weed seeds. <strong>The</strong>y will followthe pig, when that splendid animal is rooting away in the ground, and snapup any worms, wireworms, leatherjackets or whatever else he turns up.And they will keep the rats away <strong>by</strong> pecking up spilled seed from corn ricks.91
Food from Animals<strong>The</strong> Cow<strong>The</strong>re are four classes <strong>of</strong> cows: dairy cows, beef cows, dualpurpose cows and just cows. Fifty years ago there were somemagnificent dual purpose breeds in Europe and America buteconomic circumstances caused them to die out as the puredairy and pure beef animals took over. This is sad, from thepoint <strong>of</strong> view <strong>of</strong> the <strong>self</strong>-supporter, and from every otherpoint <strong>of</strong> view in fact, because beef should be a <strong>by</strong>-product<strong>of</strong> the dairy herd and not an end in it<strong>self</strong>.One cow produces one calf every year, and she's got to dothat if she is to give milk. If she is a beef cow all she can do issuckle this one calf, unless she has twins <strong>of</strong> course, until it isold enough to be weaned. But if she is a dual purpose cow shecan have a good beef calf, provide him with enough milk, andprovide you with enough milk as well. And if she is a puredairy cow she will have a calf a year and provide enough milkfor it and more than enough for you, but the calf won't be avery good one for beef.Now, half the calves you have are likely to be male, and, <strong>of</strong>the other half that are female, only half will be needed asreplacements for the dairy herd. <strong>The</strong>refore ultimately youwill be forced, whatever you do, either to sell the threequartersthat are not wanted for beef, or to kill them for beefyour<strong>self</strong>. Otherwise your ox population will build up on yourpiece <strong>of</strong> land until there is no room for you or anybody else.What breed?But we can and do eat dairy cattle. Most <strong>of</strong> Britain's beef nowcomes from the Dutch Friesian, called the Holstein in theUS.<strong>The</strong>se cattle are large, bony and give an awful lot <strong>of</strong> poor milk,meaning milk low in butter-fat. <strong>The</strong>y are hardy and theircalves, although from dairy animals, give good beef.<strong>The</strong>n at the opposite end <strong>of</strong> the scale there are the ChannelIsland breeds. Of these the Jersey makes the best house-cow.<strong>The</strong>y are small, don't give as much milk as the Friesian,but it is the richest milk there is. <strong>The</strong>ir calves make poor beef<strong>The</strong> Friesian<strong>The</strong> archetypal dairy coir. Big,heavy-yielding, hardy, and giventhe right bull will produce finebeef calves.and are practically unsaleable, but they are good to eat all thesame. I've had them.If you can get a good old-fashioned dual purpose breed Iwould say get it even' time. <strong>The</strong> Danish Red is fine, the oldRed Poll is too, or the dual-purpose Shorthorn. From theseyou will get good milk and good beef. But there is no cowmore tractable, or indeed loveable, than the little Jersey, and ifyou want a friend as well as a milk supply I stronglyrecommend her.Buying your cowHow do you get a cow in the first place? Nothing can be moredifficult. You see, if a person who owns a herd <strong>of</strong> cows wishesto sell one <strong>of</strong> them you can be sure <strong>of</strong> one thing. It is theworst cow in his herd. It may just be that a farmer wants tosell a cow or two because he has too many, and wishes toreduce his herd, but even if he does it for this reason, andhis herd is a good one, you can still be sure that the ones heculls will be the worst in the herd. Generally, if a farmer sellsa cow, it is because there is something wrong with her.<strong>The</strong>re are a fewlet-outs from this Catch 22 situation. Oneis the farmer who for some reason (maybe because he hasbeen translated to another world) is selling up. His wholeherd will be put up for auction and the good cows will be soldalong with the bad. Another is the person (maybe a fellow<strong>self</strong>-supporting freak?) who has reared one or more heifercalves with the object <strong>of</strong> selling them "down calving". Downcalving means that the cow has just calved and is therefore(another cowman's term) "in full pr<strong>of</strong>it", in other words givinga lot <strong>of</strong> milk. In this case you can buy a cow which has justcalyed for the first time, and she is just as likely to be a goodcow as any other cow you might buy. <strong>The</strong> person selling her isnot selling her for the usual reason, because she is bad, butbecause he has bred her up especially to sell.Apart from carefully examining the heifer her<strong>self</strong> in such<strong>The</strong> Jersey<strong>The</strong> classic house-cow. Affectionate,hardy, with the richest milk in theworld, but not so good for beef.v.V-^-2n i92
Food from Animalscases, also examine the mum. It always pays to examine aprospective future mother-in-law before proposing to a girl.You get an idea <strong>of</strong>how your beloved is likely to turn out in hermaturer years. <strong>The</strong> same applies to heifers.<strong>The</strong>re is one disadvantage about thus buying a first-calver,at least there is if you are new to cows. You will both belearners. She will be nervous and flighty, and may kick. Youwill be the same. She will have tiny teats, and you may not geton very well together.So if you are a learner maybe you had better get some dearold duck with teats like champagne bottles, kind eyes, and aplacid nature. What does it matter if she is not the world'schampion milker? What does it matter if she only has threegood "quarters"? (Each teat draws milk from one quarter <strong>of</strong>the udder). Provided her owner is honest, and he says she ishealthy, and doesn't kick, she will probably do for you.Now here are a few points to consider when you buy a cow:1 Feel the udder very carefully and if there are any hardlumps in it don't buy her, because it probably means that shehas, or has had and is likely to get again, ''mastitis" very badly.(Mastitis is an extremely common complaint. One or moreteats gets blocked, and the milk you get is useless). But if youare getting a cow very cheaply because she has got a "blindquarter" (one quarter <strong>of</strong> her udder with no milk in it) thenthat is a different matter. As long as you know about it.2 Make sure she it TT (tuberculosis tested) and has beentested, and found free from, a disease called brucellosis. Inmany countries both these tests are obligators- and it is illegalto sell milk from cows found infected with either. In any case,it is damned foolish.3 If the cow is "in milk", in other words has any milk in herudders, try milking her. Try each teat fairly carefully Makesure she doesn't kick when you milk her and handle her, although<strong>of</strong> course common sense will tell you that, becauseyou are a stranger, and because maybe she has been carted to<strong>The</strong> Red PollA good old-fashioned dual-purposecow, producing plenty <strong>of</strong> good milkand good beef too.some strange market or sales place, she will be more than usuallynervous. Make sure she has some milk in each quarter. Ifyou are buying her from her home ask the vendor if you canmilk her right out (save the vendor the trouble!) and thenyou will really know how much milk she gives.4 Look at her teeth because they will tell you how old she is.5 See that she is quiet enough and tame enough to let you putyour arms round her neck and stroke her behind the ears.6 Make sure she has that indefinable but nevertheless veryreal "bloom <strong>of</strong> health" about her.7 If you are a real beginner, ask some kindly cow-knowingneighbour to go with you and advise you. If the neighbour isreally into cows do what he says.Having got your cow get her home and make her comfortable.Spoil her a little. Tie her up in your cowshed, give hersome good hay, some oats or barley meal or cow-cake: give hertime to calm down. In the evening milk her.Feeding"Agriculturalists" work out the feeding <strong>of</strong> cows <strong>by</strong> saying thata cow needs a certain amount <strong>of</strong> food for her "maintenanceration" and a certain amount more for her "productionration". That is, we work out what it will take to maintain thecow healthily if she is giving no milk and then add someaccording to how much milk she is giving.Maintenance rationTwenty pounds (9.0 kg) a day <strong>of</strong> good hay will maintain alarge cow during the winter. Twelve pounds (5.4 kg) wouldmaintain a small cow like a Jersey. You can take it that, if youfeed a cow nothing else but fair quality hay for her maintenanceration she will need 33 cwt (1676 kg) <strong>of</strong> hay for thewinter if she is a big girl like a Friesian, or 21 cwt (1167 kg) <strong>of</strong>hay if she is a Jersey. Now, if we want to feed other thingsbesides hay for maintenance, these are the hay equivalents:<strong>The</strong> HerefordRecognised all over the world as afine beef animal, good for crossingwith other breeds for beef.93
<strong>The</strong> CowA ton <strong>of</strong> fairly good hay is equivalent to:1 ton <strong>of</strong> very good hay4 tons <strong>of</strong> kale or other greens5 tons mangolds3 tons fodder beetProduction rationNow to give "maintenance plus one gallon" the winter'sration should increase to: 45 cwt (2286 kg) for a Friesian and33 cwt (1676kg) for a Jersey. <strong>The</strong> daily ration therefore goesup to 27 lbs (12.9 kg) hay or its equivalent for a Friesian, and20 lbs (9.0 kg) for a Jersey.Now you can reckon that if you feed 3 1/2 lbs (1.6 kg) <strong>of</strong> amixed "concentrate" ration for each gallon (4.5 litres) thatthe cow produces over the first gallon, that will do. And theconcentrate could be:2 parts barley (rolled)1 part oats (rolled)1 part beans (broken or kibbled)To each ton <strong>of</strong> concentrates you can add if required:20 lbs (9.0 kg) limestone20 lbs (9.0 kg) steamed bone flour20 lbs (9.0 kg) saltCows kept naturally on organically-farmed pastures and hayareunlikely to suffer from mineral deficiencies, but if you everdid get "grass-staggers" or hypo-magnasemia, or any otherdiseases that your vet told you were due to mineral deficiencythen you would have to add the missing element either to thediet <strong>of</strong> the cows or to the land. Seaweed meal is an excellentsource <strong>of</strong> all minerals. You can just dump some seaweed onyour pasture from time to time, and allow the cows to nibbleit and lick it if they want to. <strong>The</strong>y will not suffer from mineraldeficiency if they do this.All this means that if, in an average winter situation, youfeed your cows, say, 30 lbs (13.6 kg) <strong>of</strong> kale or other greens aday and 12 lbs (5.4 kg) <strong>of</strong> hay for her maintenance plus onegallon, and, say, 3 1/2 lbs (1.6 kg) <strong>of</strong> the above suggested "concentrate"for her production ration for even- gallon over thefirst, you will not go far wrong. But, use what food you've got.Use common sense and watch the milk bucket. If the milkgoes down feed more and you should be all right.Summer feedingIn the summer, if you have plenty <strong>of</strong> good grass, grass aloneshould give maintenance plus up to four gallons (18 litres).A cow yielding over this would have to have 3 1/2 lbs (1.6 kg)concentrate per gallon over four gallons, but I hope youwouldn't try to keep such a cow. You don't want a ridiculouslot <strong>of</strong> milk, and very high yielders need a vet in almost constantattendance and have to be cared for like invalids. Butgrass varies enormously in value, and, if you suddenly find hermilk yield dropping <strong>of</strong>f, give her a little concentrate (even a-pound or two) and see what happens.Stockmanship is a matter <strong>of</strong> constant keen observationand common sense. Look at your animals: learn what the"bloom <strong>of</strong> health" means. Watch their condition. Are theygetting fatter or thinner? Watch their milk yield, watch howhungry they seem to be. <strong>The</strong> "stockman's eye" may not begiven to everyone but it can usually be acquired.MilkingMilk your cow twice a day, ideally at twelve hourly intervals.Wash the cow's udder and teats in warmish water. Thoroughlywash your own hands. <strong>The</strong>n dry well with a towel. <strong>The</strong> moreyou massage the udder in doing so the better. Clean therear end <strong>of</strong> the cow generally so that no dung or dirt will fallinto your pail. Give the cow something nice to eat. Sit downbeside her on a stool and grasp the two front teats in yourhands.Or, if you are an absolute beginner, grasp one teat withone hand. S queeze high up the teat with your thumb and forefingerso that the milk that is in the teat cannot get back into<strong>The</strong> cowshed<strong>The</strong> modem cowshed has a concrete manger in front <strong>of</strong> the cows, a concretestanding area for the cows to stand or lie on, and a dunging passage behindthe cows. <strong>The</strong>re must be a drain somewhere in the dunging passage to takeliquids away. Any food-bins in the cowshed should be securely latched incase a cow slips her tie.Milking a cowSit down on the right-side <strong>of</strong> thecow, grip the bucket at an anglebetween your knees, and grasp thetwo front teats in your hands. Tomilk, squeeze the top <strong>of</strong> the teatwith the thumb and forefinger tostop the milk from going back up tothe udder, then squeeze progressivelydownwards with the rest <strong>of</strong> thefingers to expel the milk.QA.
Food from Animals
<strong>The</strong> Cowthe "bag", as farmers call the udder. Common sense will tellyou how hard to squeeze. Next, keep holding on with yourthumb and finger, and squeeze the teat successively withyour second, third, and little fingers, so as to expel the milkdownwards out <strong>of</strong> the teat. Release the teat and repeat theoperation. It sounds easy but it is difficult.It is as well to practise on a dummy teat so as to get thenecessary rhythmic motion. It takes a week to learn to milk.It is much the best to begin on an old cow who is used tobeing milked and who won't mind if you fumble.Housing<strong>The</strong> modern milking shed is a concrete-floored buildingarranged so that the cow canbe tied up to a vertical post. Thishas a ring on it that can slide up and down so that the cow canlie down if she likes. She is supposed to dung in the "dungingpassage" and you are supposed to clean it every dayBut in my view all this is bowing down too far to the greatgod "hygiene". If you keep your cowin a house for all or part <strong>of</strong>the time and throw in plenty <strong>of</strong> dry straw, bracken or otherbedding, every day, the dung wall slowly build up and you willhave the most magnificent muck. Your local Dairying Officerwill excommunicate you if you milk cows in such a house andyou would certainly not be allowed to sell milk or any milkproduct in any so-called civilized country; but in fact the milkyou get from a cow milked on "deep litter" will be as clean asany milk in the world, provided you observe the other rules <strong>of</strong>hygiene. We milked our cows for eight years like this, cleaningthe muck out about once a year, and the cows were indoors atnight in the winter. Our milk, butter and cheese were perfect.A refinement is to have a house for milking the cow or cowsand another house for them to sleep, eat and rest in. This canbe cleaned out regularly or it canbe strawed even' day and thedung left for months. It will be warmer and pleasanter for thecows than the milking stall, and they can be left free. If youhave silage (see p. 81) the "silage face" can be one end <strong>of</strong> it sothe cows feed themselves.As to when to house: our cows onlv come into the cowshedto be milked, and to finish their hay. Winter and summer,night and day, they are out on the bare hillside except for anhour morning and evening when they come in to be milkedand to eat. In the summer they don't want to come in. <strong>The</strong>ywant to stay out and eat grass. We don't feed them in thesummer - except maybe a pound or two <strong>of</strong> rolled barley tomake them contented. If there is plenty <strong>of</strong> grass, grass isenough for them. We don't go in for very high yielders, norshould any <strong>self</strong>-supporter.In the winter they come in eagerly because the grass is <strong>of</strong>little value and they are hungry. In bad weather I would preferto leave them in all night and only turn them out in the daytime,and then, when the weather is really foul, keep them insome days too. But to do this I would need an awful lot <strong>of</strong> istraw. In really cold climates cows have to be housed allwinter. Do what your neighbours do. But don't keep them inhalf the winter and then turn them out. And when you doturn them out in the spring be careful about it. Wait for fineweather, and only push them out for short periods at first.Too much grass may upset stomachs not used to it, andsudden exposure to weather can give cattle a chill. And if youcan keep cows out all winter, that is if any <strong>of</strong> your neighboursdo, it is far less trouble.MatingA small cow might be mated at 15 months: a large cow at 20months. A cow will only take the bull, or the artificial inseminator,when she is "bulling" or on heat. This conditionoccurs at intervals <strong>of</strong> 21 days in a non-pregnant heifer or cow,and continues each time for about 18 hours. You must watchfor signs <strong>of</strong> bulling and then get the cow to a bull or have herartificially inseminated immediately certainly <strong>by</strong> the nextday at the latest.Signs <strong>of</strong> bulling are: she mounts other cattle or other cattlemount her; she stands about mooing and looking amorous;she swells slightly at the vulva; she will let you put all yourweight on her back and apparently enjoy it. It may be a goodthing to miss the first bulling period after calving, so as to giveTeaching a calf to suck1/ you try and milk a cow incompetition with a calf, the calf willwin and you will lose. Many peopletherefore milk the cow themselvesand feed the calf out <strong>of</strong> a bucket. Toteach a calf to suck -put! fingers,slightly apart, in the calfs mouth.Get him to suck them, then loweryour fingers and his nose down intothe milk. He may start to drown, orhe may find he likes it and start tosuck avidly. If he sucks, after a timegently remove your fingers and hewill just suck the milk. You willneed great patience.96
Food from Animalsthe cow a rest, but make sure you don't miss the second one.If there is a bull running with the cows there is no trouble.He knows what to do and when to do it. But if there is no bullyou will just have to use your eyes, that is all. <strong>The</strong>n, you maytake her to a neighbour's bull, or bring him to her, or, incountries which have "AI" (artificial insemination) simplytelephone the relevant authority.CalvingLeave her alone, out <strong>of</strong> doors, and you will probably find herone day licking a little calf that has just been born quite easilyand naturally. Outdoor cows very seldom have trouble withcalving. But watch the two for a few hours until you are quitesure that the calf has got up and sucked. If the calf doesn'tsuck within an hour, be worried. Get it up and hold it to theteat and make it suck, and if necessary tie the cow up.Cows calve up in the bare mountains in winter and reartheir calves perfectly happily in the snow. As long as the calfruns out with the cow, and the cow has enough to eat, and theweather isn't too awful, he is all right. But as soon as you bringhim indoors - and if you want the cow's milk you will have to- you have upset the ordinary workings <strong>of</strong> nature and youmust keep the calf warm and out <strong>of</strong> draughts. He must suckfrom his mother for at least three days, because this first milkhas colostrum, or beestings, a mixture <strong>of</strong> chemicals, organismsand antibodies which are essential for the health, naysurvival, <strong>of</strong> the calf.<strong>The</strong>n you can either take the calf right away from the cow,and keep him out <strong>of</strong> earshot if possible, or at least ina separatebuilding, or you can keep him close to the cow's head so thatshe can see him, while you milk the cow. <strong>The</strong> easiest way foryou to get your milk is to take the calf right away, milk hismother your<strong>self</strong>, and she, after perhaps a night <strong>of</strong> bellowingfor her calf, accepts the situation. She is not a human, and hasa very short memory, and very soon accepts you as her calfsubstitute.I have ended up with a wet shirt many a timebecause I could not stop an old cow from licking me while Imilked her!Meanwhile what do you feed the calf on? Well, if you haveenough milk, feed the calf on the following mixture: themother's milk, at a rate <strong>of</strong> 10% <strong>of</strong> weight <strong>of</strong> calf (if the calfweighs 50 lbs give him 5 lbs <strong>of</strong> milk), plus added warm water(one part water to three parts milk). Feed him this mixturetwice a day out <strong>of</strong> a bucket (see illustrations opposite) andserve it at blood heat.After about a week or two see that the calf has got sometop-quality hay to nibble if he feels like it. After a month tryhim with "cake," rolled barley or other concentrates, andalways have clean water available for him. After four monthswean him <strong>of</strong>f milk altogether and feed him 4 lbs (1.8 kg) hayand 3 lbs (1.4 kg) concentrates, or let him out on a little cleangrazing. By six months he should be getting 6 lbs (2.7 kg) hayand 3 lbs (1.4 kg) concentrates, unless <strong>by</strong> then he is on goodclean grazing.A cow's teeth reveal her ageA mature cow has 32 teeth <strong>of</strong> whicheight are incisors. All eight are on thelower jaw, and munch against ahard layer <strong>of</strong> palate called the dentalpad. Within a month <strong>of</strong> birth a calfhas grown eight temporary incisors.<strong>The</strong>se will slowly be replaced, until atage five the mature cow has eightpermanent incisors. Age can thereforebe determined <strong>by</strong> the number <strong>of</strong>temporary and permanent incisorspresent in a cow's jaw. <strong>The</strong> age <strong>of</strong>cows over five can be gauged fry thewear on their teeth (<strong>by</strong> the age <strong>of</strong>twelve only stumps remain), and <strong>by</strong>the roughness <strong>of</strong> their horns. Butbeware cattle dealers whosandpaper cows' horns to make themlook -voung."Husk" is a killer disease and a calf who has grown upoutdoors with his mum will be naturally immune. But beforeyou put a calf reared indoors out to graze you must injecthim with an anti-husk serum got from the vet, and feed himvery well, on hay and concentrates as well as grass, untilhe has built up an immunity to husk. Don't turn motherlesscalves out in the winter time anyway, whatever you do.<strong>The</strong>re are other ways <strong>of</strong> rearing small calves and still gettingsome milk for your<strong>self</strong>. If you are very lucky you can findanother cow who has her own calf at heel and fool her intothinking she has had twins. <strong>The</strong>n you can turn her, her calf andyour new calf all out together to pasture. This is the ideal solutionbecause the new calf is absolutely no more trouble andwill thrive exceedingly. But such cows are rare. So anothersolution is to select a foster mother, tie her up twice a day andforce her to give milk to the new calf as well as her own. Manycows are pretty complacent about this, others fight like hell.If she fights you may have to tie her legs up to stop her hurtingthe calf. To get a young calf to suck a cow, put two fingers inhis mouth and gently lead him up to the teat. Don't try toheave him forward from behind: that's useless.Another way <strong>of</strong> getting milk for your<strong>self</strong> and keeping thecalf happy is to milk some milk out <strong>of</strong> the mother and let thecalf suck the rest. Or, you can let the calf run with his mumin the day, keep him away at night, and milk the cow in themorning. <strong>The</strong>re are many ways <strong>of</strong> playing this game.<strong>The</strong> whole subject <strong>of</strong> cows may seem to the beginner tobe very complicated. Well, it is complicated, and there isabsolutely no substitute for making friends with a knowledgeableneighbour and asking him for help and advice. Asfor diseases <strong>of</strong> cows, these are many and various, and if yourcows suffer from disease you must send for the vet. But cowsthat are not unnaturally heavy yielders, and that are kept asnaturally as possible (not over-fed but not under-fed andallowed out as much as climate permits) will very seldombecome ill.97
Food from AnimalsMaking Butter & Cream<strong>The</strong> dairy is not where you milk cows, but where you processmilk. Most homesteaders have to make do with the kitchen.We made butter, cheese, yoghourt and so on in ours for twenty 7years, pretty successfully. But it is a messy and difficult businessdoing dairy work in the kitchen, and a special room is agreat convenience and luxury.<strong>The</strong> dairy should be as cool as possible and very airy.Working surfaces should be marble, slate or dowels (roundwooden rods). Ideally the dairy should have a concrete ortiled floor, with a drain for taking the water away. You must beable to swill it down with plenty <strong>of</strong> cold water and sweep thewater out. Concrete rendering requires a very fine finish. Usefour parts <strong>of</strong> sand to one <strong>of</strong> cement on the floor, and five toone on the walls. Smooth it <strong>of</strong>f very carefully with a steeltrowel. It is better not to whitewash or paint it. <strong>The</strong> ceilingshould not have any cracks in it, or it will let down the dust.<strong>The</strong>re should be hot and cold water, with the hot preferablyboiling, as sterilization is the most important thing.<strong>The</strong>re should be a big sink and I prefer a draining board madewith dowels. <strong>The</strong> water then drains straight down on to thefloor through the gaps between the dowels, and the air comesup into the utensils.Dairy hygieneDon't go to a lot <strong>of</strong> trouble to get milk, and then let it go badbecause <strong>of</strong> lack <strong>of</strong> hygiene. Always avoid keeping anything inthe dairy that is not absolutely necessary, because everythingcatches or retains dust. Wear clean white overalls when youare working. <strong>The</strong> other rules are simple. <strong>The</strong>y apply to all milkcontainers and are as follows:1 Physically remove any cream, milk, dirt etc., which may beadhering to the vessel either inside or out, with water andsome sort <strong>of</strong> brush. It doesn't matter whether the water'shot or cold.2 Scald the vessel inside with boiling water.3 Rinse the vessel well with cold water to cool it down.4 Turn the vessel upside down somewhere where it can drainand where the air can get into it.5 Leave it upside down until you want it. Never wipe anydairy utensil with a cloth or rag, no matter how clean youthink the cloth is.Always clean dairy utensils the moment they are empty,but if you do have to leave them for some time before washingthem, fill them with clean cold water. Never leave utensils wetwith milk. Remember that milk is the perfect food for calves,babies, and bacteria! <strong>The</strong> moment milk leaves the teat <strong>of</strong> theanimal, bacteria attack it and it begins to go sour. If they arethe wrong sort <strong>of</strong> bacteria it will not go sour but bad. Sourtastes nice, but sour. Bad tastes horrible. Enough bacteria <strong>of</strong>the sort that you need (chiefly Bacillus lacticus) will occurnaturally in any dairy.Dairy equipmentA cream separator or settling pans are a great advantage.Mount the separator on a strong bench. You will need abutterchurn (any device for swishing cream about), and a butterworker(see opposite) or a flat clean table, ideally marble orslate for working butter.A cheese vat is a great labour-saving device. It is an oblong,box, ideally lined with a stainless steel jacket. <strong>The</strong> cheeseinside the vat can be heated or cooled <strong>by</strong> running hot or coldwater through the jacket. <strong>The</strong>re should be a tap at one endand it should be easy to lift the vat so that the liquid wheywhich accumulates during cheese-making can be drained <strong>of</strong>f.You will also need a cheese press, a chessit and a follower,unless you are going to make nothing but Stilton, whichdoesn't need pressing. <strong>The</strong> chessit is a cylinder open at thetop and full <strong>of</strong> holes to let out the whey. <strong>The</strong> follower is a -piston which goes down into it and presses the cheese. Andthe press it<strong>self</strong> is a complex combination <strong>of</strong> weights, leversand gears which can put pressure on the follower, and thereforethe cheese, inside the chessit.Cheese presses are now hard to come <strong>by</strong> but you canimprovise. Drill holes in the bottom <strong>of</strong> an empty food can oran old saucepan. This is your chessit. Cut out a metal disc t<strong>of</strong>it inside it. This is your follower. Your pressing will have to bedone with weights, which can be bricks, rocks, encyclopedias- anything that is heavy.Other requirements will be a dust-pro<strong>of</strong> cupboard forkeeping thermometers, an acidimeter, and a fly-pro<strong>of</strong> safe foryour butter and cream cheese. Hard cheese should not bestored in the dairy, because it is generally stored over longperiods and it would get in the way.CREAMIf you leave milk alone the cream will rise to the surface andyou can skim it <strong>of</strong>f. You do this with a skimmer, which is aslightly dished metal disc with holes in it to let the milk runout but retain the cream. Or if you leave the milk in a shallowdish with a plug hole in the bottom, you can release the milkand leave the cream sticking to the dish. <strong>The</strong>n you simplyscrape the cream <strong>of</strong>f.Alternatively, you can use a separator: a centrifuge whichspins out the heavier milk, leaves the lighter cream and releasesthem through separate spouts. Cream put through aseparator is 35 percent butter fat (15 percent more thanskimmed cream). Milk should be warm to separate.<strong>The</strong> colder the milk is the quicker the cream will rise to thesurface. It is a very good thing to cool milk anyway, as soon asit comes from the cow. Cooling it slows up the action <strong>of</strong> thesouring organisms. And <strong>of</strong> course the wider and shallowerthe pan that you settle the milk in, the faster the cream willrise to the surface.Devonshire or clotted creamLeave fresh milk for twelve hours, then heat it to 187°F(92° C), and immediately allow it to cool. Leave for 24 hours,then skim. What you skim is Devonshire cream.98
Food from Animals<strong>The</strong> dairyButter and cheese can be made inthe kitchen, but if you have a roomor outhouse you don't know what todo with, it is well worth equippingit as a dairy. If possible the floorshould be made <strong>of</strong> tiles, or concrete,with a drain. Install plenty <strong>of</strong> tapsfor hot and cold water, a large sinkand draining boards made <strong>of</strong>spaced dowels.BUTTERButter is made <strong>by</strong> bashing cream about. But it will not workuntil the cream has "ripened": in other words, until lactic acidbacteria have converted some <strong>of</strong> the lactose, or milk sugar,into lactic acid.Commercially, cream is pasteurized to kill all bacteria,lactic acid included, and then inoculated with a pure culture<strong>of</strong> bacteria. We can't, and don't want to be, so scientific, butwe make equally good butter <strong>by</strong> keeping our cream until theoldest <strong>of</strong> it is at least 24 hours old. It can be kept twice as longas this if everything is clean enough. We add more cream to itat every milking, at a temperature <strong>of</strong> more or less 68°F(20° C). <strong>The</strong>n we make sure the last lot <strong>of</strong> cream has gone in atleast twelve hours before we start churning it.Dairy equipment1 Cheese vat2 In-churn cooler3 Milk chum4 Cheese press5 Butter chum6 Cream separator7 Butter-worker8 Vertical curd knife9 Horizontal curd knife.<strong>The</strong> best-known churn is simply a barrel in which the creamis turned over and over so it flops from one end to the otherand bashes it<strong>self</strong>. But there are churns, like the blow churn,which have paddles that whirl round to beat the cream.You can make butter on a tiny scale <strong>by</strong> beating it witha wooden spoon or paddle, plunging a plunger up and downin a cylinder or using an egg-beater. Anything, in fact, whichgives the cream a good bashing. If the cream is more or less atthe right stage <strong>of</strong> acidity, and at the right temperature, it will"come", meaning suddenly turn into little butter globules, inas little as two or three minutes. If it hasn't come in tenminutes, take its temperature and if it is wrong bring it to68°F (20°C). <strong>The</strong>n try again.99
Making Butter & CreamIt doesn't matter how sour the cream is when you churn it,provided it's not bad. Taste it. If it's bad, it's useless. When thebutter has "come", drain the butter milk out. (If your creamhas been kept right it's the most delicious drink in the world.)<strong>The</strong>n you must wash the butter. Washing should be continueduntil every trace <strong>of</strong> cream or butter milk or water hasbeen removed.<strong>The</strong>re is a fine thing called a butter-worker, which is aserrated wooden roller in a wooden trough. This squodgesthe water out. Keep putting more cool, clean water on andsquodging until the water that you squodge out is absolutelyclean and clear without a trace <strong>of</strong> milk in it. Your butter ismade when the last drop <strong>of</strong> water has been pressed orsqueezed out <strong>of</strong> it. From now on, don't expose it to the lightor the air too much, and if you keep it wrapped it will lastmuch longer.If you want salty butter, you can use brine for the last washing,or you can sprinkle dry salt on the butter and work it inthoroughly. If, on tasting, you find the butter is too salty, youcan wash some <strong>of</strong> the salt out. If you wash too much out youcan put some more back. It's as simple as that.If you haven't got a butter-worker don't despair. Do yourwashing and squodging on a clean board with a "Scotchhand" or a wooden paddle. Very few beginners at butter makingever wash the butter enough, and so their butter generallyhas a rancid taste, particularly after a week or so. Squodge,squodge and squodge again.To keep butter, incorporate 2 1/2 percent <strong>of</strong> its own weight <strong>of</strong>salt in it, and do it in this way: scald out an earthenware crock,tub or barrel. Dry it outside in the wind and sun. <strong>The</strong>n throwa handful <strong>of</strong> butter into the bottom <strong>of</strong> the vessel as hard asyou can, in order to drive all the air out <strong>of</strong> the butter. Keep ondoing this, sprinkling more salt in after each layer and pummellingthe butter down with your fist to drive out the air.When your crock is full, or you have no more butter, coverthe butter with a sprinkling <strong>of</strong> salt and some grease-pro<strong>of</strong>paper or other covering. It will keep for months. If it is toosalty, simply wash some salt out before you eat it. It will be justas good as fresh butter. But remember that it must always bewell washed in the first place.GheeGhee is a great Indian stand<strong>by</strong>. Put butter in a pot and let itsimmer gently over a slow stove for an hour. Skim <strong>of</strong>f thescum. Pour the molten butter into a sterilized container,cover from the air, and it will keep for months. It won't tastelike butter. It will taste like ghee. It's very good for cooking,and helps to give real curries that particular taste.YOGHOURTYoghourt is milk that has been soured <strong>by</strong> Bacillus hulgaricuminstead <strong>of</strong> the more usual Bacillus lacticus. To make two pints(1.1 litres) <strong>of</strong> yoghourt, put two pints <strong>of</strong> milk in a bowl. <strong>The</strong>bacteria need a warm climate. So if it's too cold for them, youshould warm your milk to about blood heat. Stir in two tablespoons<strong>of</strong> a good live yoghourt that you have bought in ashop, and at this point mix in any fruit and nuts that youwant for flavouring, though to my mind nothing beats a bowl<strong>of</strong> natural yoghourt served up with a spoonful <strong>of</strong> honey. .Cover the mixture, and keep it at blood heat for two orthree days. A good method <strong>of</strong> keeping it warm is to bury it instraw. When it has gone thick it is yoghourt.Take some out even* day to use, and put the same amount<strong>of</strong> fresh milk back and so keep it going. But the milk should bevery clean and fresh, the vessel should be sterile, and youmust keep it covered. It may go bad after a while. If it does,start again.Thick milk or curds and wheyIf you leave clean milk alone in the summer it will curdle, andbecome "curds and whey" such as Miss Muffett was eatingwhen she had that unfortunate experience with the spider.Curds and whey are slightly sour and delicious to eat.Sprinkle cinnamon on, or a little salt.ICE CREAMIce cream made with cream is very different from the stuff youbuy from itinerant vendors and is really worth eating.Pure frozen cream is pointless. Ice cream should be sweetand fruity; white <strong>of</strong> egg, gelatine, and even egg yolks canbe used to enrich the texture. A typical recipe is: 1 lb (0.5 kg)strawberries, 4 oz (114 g) sugar, 4 pint (0.2 litres) water,4 pint (0.4 litres) single cream or 1/2 pint (0.3 litres) doublecream. Use the following method.Make a syrup <strong>of</strong> the sugar and water. Mash up the strawberriesand strain the pips out, and when the syrup has cooledpour it into the strawberry mash. Add the single cream as it is,or if you use double cream beat it first and fold it in. <strong>The</strong>nyou have to freeze it.This can be done with a deep freeze, a refrigerator, or evenwith just ice. If you do it with ice you must mix the ice withsalt, because salt makes the ice colder. Two pounds (0.9 kg)<strong>of</strong> ice to one (0.5 kg) <strong>of</strong> salt is about right. William Cobbett,in his marvellous Cottage Economy, described how to preserveice from the winter right through the summer in asemi-subterranean ice house, insulated with a great thickness<strong>of</strong> straw, and with a provision for draining <strong>of</strong>f the water frommelting ice.To freeze ice cream with ice you need a metal container,with a good cover on it for the ice cream and some means <strong>of</strong>stirring it when it is inside the container. This container mustbe buried in a larger container filled with the ice/salt mixture.<strong>The</strong> latter must be well insulated from the outside air.To freeze ice cream in your fridge set the fridge at its coldestand put the ice cream mixture in the ice compartment. Openit up and stir it from time to time to prevent large ice crystalsforming. A deep freeze can be treated just like the ice compartment<strong>of</strong> a fridge.100
Food from AnimalsMaking CheeseA pound (0.5 kg) <strong>of</strong> cheese has 2000 calories <strong>of</strong> energy in it.Meat from the forequarters <strong>of</strong> an ox has a mere 1100. Andcheese, hard cheese at any rate, is easy to store and, withincertain limitations, improves with age. Cheese is made frommilk whose acidity has been increased either <strong>by</strong> an additive,or <strong>by</strong> simply being left in the warm so that it does it it<strong>self</strong>.<strong>The</strong> extra acid causes the formation <strong>of</strong> curds and whey.Cheese is made from the curds. <strong>The</strong> whey is drained <strong>of</strong>f andcan be given to the pigs.SOFT CHEESES<strong>of</strong>t cheese is made <strong>by</strong> allowing milk to curdle, either justnaturally which it does anyway in the summertime, or <strong>by</strong>adding rennet. Rennet is a chemical which occurs in thestomachs <strong>of</strong> calves and has the property <strong>of</strong> curdling milk.Milk curdled with rennet is called junket. Milk which curdlesnaturally forms curds and whey.If you simply hang up some curds and whey in a muslin b ag,the whey will drip out and the curds will turn to s<strong>of</strong>t cheese.This is tasteless without flavouring, but seasoned with saltand herbs, or garlic, or chives, it is delicious. Eat it quicklybecause it won't keep long and is therefore no good for preservingthe summer glut <strong>of</strong> milk for the winter.Cream cheeseCream cheese is simply s<strong>of</strong>t cheese made with curdled creaminstead <strong>of</strong> curdled milk. <strong>The</strong> result is smoother, richer andmore buttery.Poor man's cheesePoor man's cheese got its name because it couldbe made fromthe milk <strong>of</strong> one cow. A lot <strong>of</strong> it was eaten in England in theMiddle Ages.Warm some milk slowly in a pot and let it curdle. Leave thecurds in the whey overnight and drain the whey <strong>of</strong>f in themorning. <strong>The</strong>n cut up the curd, salt it, tie it up tightly in alinen cloth and leave it all day to drip. Re-tie it more tightly inthe evening and leave it to hang for a month. You can eat it atthe end <strong>of</strong> the month and it will taste even better if you worksome butter into the curd and leave it for three or fourmonths to mature.HARD CHEESEHard cheese is important as a method <strong>of</strong> preserving thesummer flush <strong>of</strong> milk for the winter and also as a very valuablesource <strong>of</strong> protein and a marvellous food. Everyone needscheese and lacto-vegetarians can scarcely do without it. Hardcheese is difficult to make and better cheese is made from themilk <strong>of</strong> many cows than from the milk <strong>of</strong> but one cow. <strong>The</strong>reason for this is that, for bacteriological reasons, the bestcheese is made from the milk from two milkings only: theevening's milking and the following morning's. If you have tosave up more than those two milkings to get enough milkto make a cheese you will almost certainly run into troublewith such things as over-acidity and "<strong>of</strong>f' flavours - thecheese will have a nasty taste.CheddarIf you make cheese on a fairly large scale, say from the milk <strong>of</strong>six or seven cows, you should have certain equipment anddo the job scientifically. Over the page I describe how tomake hard cheese if you have approximately five gallons(22.7 litres) <strong>of</strong> milk from two milkings and don't feel the needto be too scientific. A marvellous cheddar cheese can bemade in this way, but luck, as well as skill, and common sensecome into it. If you don't make good cheese using the methodoverleaf you will have to try using starter (see p. 104).CaerphillyOnce you have made cheddar successfully, you might enjoytrying to make other cheeses. Caerphilly originated as a semihardcheese made <strong>by</strong> the wives <strong>of</strong> South Wales coal miners,for their husbands to take down the pit. It is an easy cheese tomake, but will not keep as long as cheddar.To make C aerphilly, strain the evening's milk into a vat andcool it if the weather is hot. Next morning skim <strong>of</strong>f the creamand add a starter to the milk at a rate <strong>of</strong> about i percent <strong>of</strong> themilk. Warm the cream <strong>of</strong> last night's milk and pour it in togetherwith that morning's milk. <strong>The</strong> purpose <strong>of</strong> skimminglast night's cream <strong>of</strong>f and warming it up and putting it backagain is that only in this way will you get it to mix back withthe milk and enrich the cheese.Heat the vat to 68°F (20° C). Measure the acidity with anacidimeter. When it reaches 0.18 percent add a teaspoon <strong>of</strong>rennet extract to every fivegallons (22.7 litres) <strong>of</strong> milk. Aboutforty-five minutes after rennetting the curd will be ready forcutting. Cut both ways with the vertical knife but only oneway with the horizontal knife. After cutting leave for tenminutes, gradually raising the temperature <strong>of</strong> the vat to88°F (31°C): the "scalding". When this is <strong>complete</strong>, andthere is 0.16 percent acidity, draw the whey <strong>of</strong>f, scoop the curdinto coarse cloths and leave it in a dry vat to drain. After halfan hour cut the curd into three inch (8 cm) cubes, tie againin the cloths, and allow to drain another half hour.Mill the curd (break it up into small pieces) and add 1 ozsalt (28 g) to every 3 lbs (1.4 kg) curd, mix well, and put it incloth-lined chessits or moulds. About 10 lb (4.5 kg) <strong>of</strong> curdgo into each chessit and the chessits are traditionally fairlysmall and <strong>of</strong> flattish section: not the huge half-hundredweightcheddar ones. Two hours later apply pressure <strong>of</strong> four hundredweight(203 kg). Next morning take the cheeses out, turnand put on fresh cloths, put back in the press and give themfive hundredweight (254 kg). That afternoon turn again,put on more clean cloths, and apply 15 hundredweight (762kg) for the night. Next day take out and store it for a monthat as near 65°F (19°C) as you can get, turning it two or threetimes a week and wiping it with a cloth dipped in salt water.After that it is ready to eat.102
Food from AnimalsCheese implements1 hese are the simple hand implementsyou need to make that pureand superb substance - cheese. <strong>The</strong>larger items, such as the cheese vatand cheese press, will be found inme dairy.KeyRennetSkimmerCurd knife<strong>The</strong>rmometerChessitFollowerMuslinMouldCooking panStraw matSettling panStiltonStilton is a blue-moulded cheese, and it is not pressed.Properly made it is one <strong>of</strong> the finest cheeses in existence,but made in a commercial factory as most <strong>of</strong> it is nowadays,it is pretty boring stuff. It can be eaten fresh, in which caseit is not blue, or it can be matured to make that rich bluecheese beloved <strong>of</strong> the gourmet at about Christmas time.A Stilton cheese should be made from about fifteengallons (68 litres) <strong>of</strong> milk. You can make it either with theone curd system (with just one batch <strong>of</strong> curds), or withthe two curd system. If you don't get fifteen gallons <strong>of</strong> milkwith one milking use the two curd system. Let the evening'smilk curdle, and let the morning's do the same. Mix the twotogether and the rest <strong>of</strong> the process is the same.With the one curd system take fifteen gallons (68 litres)<strong>of</strong> milk straight from the cow and put it in a tub or vat.Get the temperature to 85°F (30°C) or thereabouts. Addone teaspoon <strong>of</strong> rennet extract to every five gallons(22.7 litres) <strong>of</strong> milk. Dilute the rennet with i pint (0.3 litre)<strong>of</strong> cold water before adding it to milk. After an hour and a halftry dragging the dairy thermometer upwards through thecurd. If it leaves a clean cut and no curd sticks to it then thecurd is ready for cutting. But don r t cut it. Ladle it out intovessels lined with coarse cheese cloth so that the whey candrain through the cloths but not away <strong>complete</strong>ly, becauseyou have left the plug in the vessel or sink. About three anda half gallons (15.9 litres) <strong>of</strong> curd should go into each cloth,and the curd should be ladled out in fairly thin slabs. Afterladling the curd should be left there, soaking in its ownwhey for an hour and a half.<strong>The</strong>n pull out the plugs and let the whey run away, anddraw the corners <strong>of</strong> the cloths tighter around the curds.Replace the plugs and let the curds have a second drainingfor half an hour. If the curd feels s<strong>of</strong>t leave it longer in thewhey: if it is firm draw the plugs and drain the whey <strong>of</strong>f.Now keep tightening the cloth round the curd - hauling103
Making Cheeseone corner <strong>of</strong> the cloth around the other three corners andpulling tight. Each time you do this you gently expel somewhey. Do it five or six times. When the curd contains0 • 18 percent acidity turn it out <strong>of</strong> the cloths. Pile the bundles<strong>of</strong> curd up on top <strong>of</strong> each other, then cut into cubes aboutthree inches (7.6 cm) square.Keep turning the pile every half hour until the acidityreaches 0.14 or 0.15 percent. This may take from two to fourhours. If you haven't got an acidimeter just go on until thecurd is fairly solid but still moist and has a nice flaky lookabout it when it's cut.Now break the curd up into small pieces as for othercheeses, add an ounce (28 g) <strong>of</strong> salt to every three pounds(1.4 kg) <strong>of</strong> curd and mix well. Place the curd in hoops, ormoulds. Your fifteen gallons (68 litres) <strong>of</strong> milk should haveproduced about twenty-six pounds (11.8 kg) <strong>of</strong> curd. <strong>The</strong>mould should hold this amount. Place it on a wooden board.By now the curd should be cool, not more than 65°F (19°C).Don't press, just let it sink down.Take the cheese out and turn it twice during the first twohours, then once a day for seven days.When the cheese has shrunk away from the sides <strong>of</strong> themould take it out and scrape the surface <strong>of</strong> the cheese witha knife to smooth it. <strong>The</strong>n bandage it tightly with calico.Put it back in the hoop and mould. Take it out <strong>of</strong> the mouldand re-bandage it every day for three days. <strong>The</strong>n take it tothe drying room which should have a good draught and beabout 60°F (16°C). Take the bandage <strong>of</strong>f once or twice tohelp drying, and leave it <strong>of</strong>f for a day. <strong>The</strong>n put it on again.After fourteen days remove the cheese to a cellar, againabout 60°F (16°C), but with not too much draught, andplenty <strong>of</strong> humidity. Leave it there for four months beforeeating it. Many Stilton makers pierce the cheese all overwith copper needles at some stage during this ripeningprocess to get the famous blue mould to grow inside it.It is all a long and involved process, but the resulting cheeseis one <strong>of</strong> the great gastronomic experiences, not to beconfused in any way with eating "stilton" bought fromthe supermarket.SEMI-SOFT CHEESESemi-s<strong>of</strong>t cheese is another sort <strong>of</strong> thing altogether, and asfar as I know native to the Continent <strong>of</strong> Europe. Pontl'Evequeis one <strong>of</strong> the best. To make it take six pints(3.4 litres) <strong>of</strong> 12 hour-old milk. Heat to 90°F (32°C) andadd a teaspoonful <strong>of</strong> cheese-maker's rennet diluted withthree times its own volume <strong>of</strong> water. Leave for half an hourto curdle. When the curd seems firm enough, which is whenit comes cleanly away from the side <strong>of</strong> the vat, cut it bothways with a curd knife as for hard cheese. Spread a cheesecloth over a wooden draining rack and ladle the curd on tothe cloth. Fold the corners <strong>of</strong> the cloth over the curd andgently squeeze. Progressively increase the pressure until youget a lot <strong>of</strong> the whey out.Place a mould, which is just a collar IT inches (4 cm) deepand about 6 inches (15 cm) square (Pont-1'Eveque is traditionallysquare but the shape doesn't matter), on a strawmat on a draining board. After your curd has been drainingabout an hour in the cloth break the curd up and put it inthe mould in three layers, with a layer <strong>of</strong> salt between each.Use two ounces (56 g) <strong>of</strong> salt for the six pints (3.4 litres).Pack the curd well down and into the comers.When the mould is full turn it upside down on to anotherstraw mat on another board. Both mats and boards shouldhave been washed in boiling water. Repeat this turningprocess every ten minutes for an hour.Turn the mould upside down again once a day for threedays. <strong>The</strong>n take the cheese out <strong>of</strong> the mould and scrape thesurface gently with a knife.You can eat it there and then, but it is far better if you cankeep it at a temperature <strong>of</strong> more or less 58°F (15°C) for twoweeks, turning it on to a clean mat daily. <strong>The</strong> outside <strong>of</strong> thecheese will be covered with mould.Wrap the cheese in waxed paper and keep for anothermonth, turning it over each day. Before eating or sellingscrape the mould from the surface. <strong>The</strong> outside should thenbe quite firm but the centre should be s<strong>of</strong>t and buttery andutterly delicious.StartersStarters, which are batches <strong>of</strong> milk rich in lactic acid bacteria,can be bought, but you can also make them at home.Take a quart (1.1 litres) <strong>of</strong> milk from a healthy cow andallow it to get sour in a clean well-ventilated dairy. Don'tinclude the very first milk to come from the cow. See thatthe udder, and you, are washed thoroughly before milking.Strain the milk straight from the milking bucket into asterilized container. Leave this fresh milk in the dairy for24 hours. It is best if the temperature <strong>of</strong> the dairy is about70°F (21°C). This quart <strong>of</strong> milk becomes almost a pureculture <strong>of</strong> Bacillus lacticus.<strong>The</strong>n put some fresh milk through your separator, if youhave one (don't worry if you haven't got one). Heat thismilk to exactly 185°F'(85°C) and cool it quickly to 70°F(21°C). This pasteurizes it. Skim the top <strong>of</strong>f your first quart<strong>of</strong> milk and give it to the cat. Pour the rest <strong>of</strong> the first quartinto the new, now pasteurized, milk. This inoculated milkmust be covered with a cloth and kept for 24 hours at about70°F (21°C). This is then your starter. By adding a pint(0.6 litres) <strong>of</strong> this every day to a new lot <strong>of</strong> pasteurizedmilk you can keep the culture going'for months.You will get better results with your cheese-making ifyou do use starter, for it starts the lactic acid bacteria workingmuch more quickly and enables them to defy competitionfrom unworthier organisms. After a few weeks, however, itmay be best to give your current starter to the pigs and makea new batch as described above, for too many other bugswill have got into it.104
Food from AnimalsMaking a hard cheeseStir with your hand for about fiveminutes. As soon as the milk beginsto cling to your fingers stop stirring.Warm the milk - now "curds andwhey" - very slowly, not quickerthan one degree F in three minutes,to 100°F (38°C). If you haven't gota cheese vat the best way is to scoopa saucepanful <strong>of</strong> whey out, heat itand pour it back again. As you dothis stir very gently with your hand.Line your chessit with cheese cloth,put your bits <strong>of</strong> curd into it, coverwith the cloth, put on your follower,and apply pressure.Put the evening's milk in a settlingpan and leave it overnight. In themorning skim the cream <strong>of</strong>f with askimmer, put it in a separate panand heat it to 85°F (30°C). Pour itback into the milk and stir it in.Now add the morning's milk. Thisis the time to put in starter if youhave any Gently heat the milk to atemperature <strong>of</strong> SOT (32°C).Immediately start stroking the top<strong>of</strong> the milk with the fleeter. Thisstops the cream rising to the surface.Stroke gently for about fiveminutes. After this the curd shouldbe set enough to trap the cream.When the curd feels firm to yourhand (about fifty minutes after youhave stopped stirring), cut it withcurd knives or a long-bladedkitchen knife, into cubes about+ inch square.Pitching raises the acidity <strong>of</strong> thecurd. You simply leave the curds tosoak in the whey, and test everynow and then for acidity. If youhaven't got an acidimeter use thehot iron test. Take a bit <strong>of</strong> curd,touch it on a hot iron so that itsticks and draw it away. If the threadis less than half an inch long when itbreaks leave the stuff to go onpitching. When the thread breaksat just about half an inch the acidityis right (0.17 to 0.18), and you candrain <strong>of</strong>f the whey./ ,If you have a cheese press apply thepressure with this, otherwise improvise.For the first six hourstwenty to thirty pounds (9.0-13.6kg) <strong>of</strong> pressure is enough, then pullthe cheese out, wash the cheesecloth in warm water and wring itout, wrap again and replace thecheese upside down. Put on half ahundredweight (25.4 kg) pressure.After a day turn the cheese and replaceit. After another day turn itand give it half a ton pressure fortwo days, turning it once.Put one teaspoonful <strong>of</strong> rennet in acupful <strong>of</strong> cold water and pour it in.A cheese-mill is two spiked rollersworking against each other, to breakthe curd into small pieces. If youhaven't got a mill you must laboriouslybreak the curd up into smallpieces (about the size <strong>of</strong> walnuts)with your fingers. Mix an ounce(28 g) <strong>of</strong> fine salt into every fourpounds (1.8 kg) <strong>of</strong> curd.Paste with flour and water, andwrap with calico or clean cloth.Store at about 55-60°F (13-16°C).Turn every day for a week andthereafter about twice a week.105
Food from AnimalsBeefIf you have a big enough deep freeze you can kill an ox andstow it away for future use. But don't make the mistake <strong>of</strong>putting all the meat in the deep freeze. Keep plenty <strong>of</strong> it out toeat unfrozen. You will only kill beef in the autumn or winter <strong>of</strong>course, because there are too many flies about in thesummer. Good beef needs a week <strong>of</strong> hanging in a cold, airylarder to mature before you eat it anyway, and a fortnight incold weather. So keep quite a lot out <strong>of</strong> the deep freeze. Ifyou haven't got a deep freeze, you have several options.If you kill a calf, say six months old (it is a terrible waste <strong>of</strong>resources to kill a very small calf), you will get an immaturebut nevertheless very tender and delicious "ba<strong>by</strong>-beef". If youdo it in a cold winter and you are a fair-sized family, you maywell be able to eat the whole animal. If you have another <strong>self</strong>supporternear<strong>by</strong>, your problem is immediately halved. Lethim have half your calf and he will let you have half his threemonths later.But the longer you keep a bullock, up to three years old, themore meat you will get for the food that you put into him. Sohow can you kill adult cattle for beef, when you aren't a largecommunity, and you don't have a deep freeze?Well, there is such a thing as the salting tub. You can saltdown the lot, just leaving out what you want to eat fresh.Plenty <strong>of</strong> people have sailed round the world on a diet <strong>of</strong>almost nothing but salt beef, and lived to tell the tale. You willfind salt beef is delicious. An occasional silverside, forexample, boiled and eaten with carrots, parsnips and othergew-gaws, is beyond compare. But to eat your way through anentire salt ox would be a heavy task, to say the least. So thereare several options open to you.One is to rear and fatten your bullock, and sell him.Another is to rear him to what is known as "store" condition(adult but not fat), then sell him to someone who will fattenhim. With the money you get you can buy small j oints <strong>of</strong> b eeffrom the butcher as you want it. But you will find you arepaying at least twice as much for your meat as you got for it,and you soon discover who makes the money in farming.<strong>The</strong> other alternative is to be the butcher your<strong>self</strong>. Kill theox, or take him to a slaughterhouse, and sell him <strong>of</strong>f in jointsto your neighbours.Slaughtering an oxBefore killing an ox you should really starve him for twelvehours, but it's not the end <strong>of</strong> the world if you don't. Bring theox quietly into where you are going to kill him. <strong>The</strong>n eithershoot him with a small bore rifle (which almost always meansa .22) or with a humane killer. If you shoot him, he neverknows anything is going to happen to him. Shoot just abovethe point at which imaginary lines from alternate eyes andhorns cross.<strong>The</strong> ox will fall immediately and lie on its side. Beware, allanimals have violent death throes and those hooves can bedangerous. Once he's fallen stand under his chin with one legpushing the chin up so as to stretch the head upwards, and theother leg in front <strong>of</strong> and against the forelegs. If the animalstarts to lash out with his forelegs now he cannot hurt you.With the throat thus stretched, stick a pointed knifethrough the skin at the breastbone and make a cut a foot (30cm) long to expose the windpipe. <strong>The</strong>n stick your knife rightback to the breastbone, pointing it at an angle <strong>of</strong> about 45degrees towards the back <strong>of</strong> the animal. Make a deep cut forwardsas long as your other incision. Your knife will now bealong one side <strong>of</strong> the windpipe. This cut will sever severalmain veins and arteries and the animal will bleed. If you have ablock-tackle you should haul the animal up <strong>by</strong> the hind legs atthis juncture to assist bleeding.Catch the blood and, if youdon't like black pudding, add it to the pigs' mash or dump iton your compost heap.Skinning an oxSkinning is the most difficult part <strong>of</strong> the whole process, andyou will wish you had seen an expert on the job. Lower theanimal to the ground to skin it.Skin the head first. You can do this with it lying flat on theground, but it makes it easier if you cut through the nostrils,push a hook through the hole, and haul the head just <strong>of</strong>f thefloor with the block-tackle. Slit the head down the back, fromthe poll to one nostril <strong>by</strong> way <strong>of</strong> the eye and simply skin awayuntil you have skinned it. I am not going to pretend this is aneasy j ob, nor a very pleasant one, but there is a lot <strong>of</strong> very goodmeat on an ox's head and you can't just throw it away.When you've skinned it, grab the lower jaw and stick yourknife in the neck close to the head. Cut just behind the jawsfirst, then disjoint the atlas bone, the top bone <strong>of</strong> the vertebralcolumn, and take the head <strong>of</strong>f.Lay the carcass straight on its back with some wedges.Sever the tendons <strong>of</strong> the forelegs, cutting from the back, justbelow the dew claws. Slit the hide <strong>of</strong> the leg from this pointto just above the knee. Skin the shank. Cut through the lowerj oint or, if you can't find it, saw through the bone. Skin all thelegs out to the mid-line <strong>of</strong> the body. Slit the skin right downthe belly, and haul as much <strong>of</strong> the skin <strong>of</strong>f as you can. Use asharp, round-pointed knife for this and incline the bladeslightly so the edge is against the skin and not the meat. Holdthe skin as taut as you can while you use the knife. Skin bothsides as far as you can like this.Open the belly now, putting the knife in just behind thebreastbone and protecting the knife with the hand so youdon't pierce the paunch. Slit the abdominal wall right downthe centre line to the cod or udder. Don't puncture thepaunch! <strong>The</strong>n cut along the breastbone and saw along itscentre. Saw through the pelvic bone at the other end.Now cut the tendons <strong>of</strong> the hindlegs and the hock-bone,make loops <strong>of</strong> the tendons, and push the ends <strong>of</strong> your gambrel,which is a wooden or steel spreader, through them. Haulthe hind quarters clear <strong>of</strong> the ground with the tackle.Slit the hide along the underside <strong>of</strong> the tail, sever the tailnear the arse and haul the tail out <strong>of</strong> its skin. Ox-tail soup.106
Food from AnimalsNow skin out the rump. This is easier to write than to do.Remember not to stick your knife into the meat, or nick theskin. Both meat and skin are very valuable. Leave the fell, themembrane under the skin, on the meat to protect it. Difficult.Hoist the rear quarters higher as you find it convenient. Ripthe skin <strong>of</strong>f where it will rip - spare the knife.Gutting an oxWith a pointed knife cut right round the rectum (bung) so asto separate it from the rest <strong>of</strong> the animal. After it is free, tie apiece <strong>of</strong> binder twine round it, tight, so that nothing can fallout <strong>of</strong> it. <strong>The</strong>n cut it free from the backbone. Now haul thebeast up fairly high and pull the rectum and other guts forwardsand downwards so they flop out. Cut the liver outcarefully, and remove the gall bladder from it. Hang the liveron a hook, wash it, and hang it up in the meat safe.Pull out the paunch, or lung and stomach, and all themachinery, and let it flop into a huge dish. You can clean thestomach thoroughly <strong>by</strong> putting it in brine, and then use it fortripe. <strong>The</strong> intestines make good sausage skins. But don't eatthe reticulum or "bible" stomach (it looks like the leaves <strong>of</strong> a<strong>book</strong> inside).Haul the carcass right clear <strong>of</strong> the groundnow. Cut out thediaphragm, the wall between chest cavity and abdomen.Heave out the heart and lungs, and hang them up. <strong>The</strong> lungs(lights) are for the dogs, but the heart is for you.Rip the hide right <strong>of</strong>f the shoulders and fling a fewbuckets<strong>of</strong> cold water into the carcass. Go to bed, after a hefty meal <strong>of</strong>fried liver; only the <strong>of</strong>fal is fit to eat at this stage. In the morning,split the carcass right down the backbone with a cleaver ifyou have faith in your<strong>self</strong>, with a sawif you haven't. Wash thetwo halves <strong>of</strong> the carcass well with tepid water and trim tomake it look tidy.At this point I would strongly advise most people to enlistthe aid <strong>of</strong> a butcher. Jointing is a complicated process, andthere is no substitute for watching an expert do it. If the meatis for your<strong>self</strong> and not for sale to the public, you could say thatit doesn't matter how you cut it up. On the other hand, youwant to make the best use <strong>of</strong> the animal you have spent threeor four years fattening for this moment. And you can't reallyimprove upon the recognized butcher's cuts.Salting beef<strong>The</strong> traditional salting tub has a loose round board with holesin it beneath the meat, and another such board on top <strong>of</strong> themeat. You can put a stone on the top board to keep the meatdown, but never use a metal weight.To make your brine, boil salted water and allow to cool.Test the brine for strength; if a potato will not float in it, addsalt until it does.For silverside, prick all over with a needle, rub with brownsugar and saltpetre, and stand for 24 hours. <strong>The</strong>n immerse inthe salting tub for eight to ten days.You can pickle tongue <strong>by</strong> spicing the brine with, say, parsley,thyme, celery, cloves, a lemon and an onion or two, andthen soaking the tongue in it for six days.107
Food from AnimalsGoatsIn some dry countries the goat is called the "desert-maker"because it destroys what scrub there is and prevents morefrom growing. But where the goat is controlled it can fill aplace in a mixed ecology, and if you want to discouragere-afforestation it has a very useful part to play. In cut-overwoodland, for example, the goat can go ahead <strong>of</strong> the otheranimals as a pioneer, suppress the brambles and briars,prevent the trees from coming back, and prepare the way,perhaps, for the pig to come and <strong>complete</strong> the process <strong>of</strong>clearing the old forest for agriculture.Goats will thrive in deciduous woodland (perhaps oneto an acre), and give plenty <strong>of</strong> milk, but they will, have nodoubt <strong>of</strong> it, prevent any regeneration <strong>of</strong> trees. In coniferouswoodland goats will find very- little sustenance, but onheather or gorse-covered mountainsides they will thrive,and there is no doubt that a mixture <strong>of</strong> goats and sheep insuch situations would make better use <strong>of</strong> the grazing thansheep alone. Goats, concentrated enough, will clear land <strong>of</strong>many weeds, and they will eat vegetation unsuitable forsheep and leave the grass for the sheep.For the <strong>self</strong>-supporting smallholder the goat can quiteeasily be the perfect dairy animal. For the person with onlya garden the goat may be the only possible dairy animal.This is because goats are very efficient at convertingroughage into milk and meat. Goat's milk is not only asgood as cow's milk, in many respects it is better. For peoplewho are allergic to cow's milk it is much better. For babiesit is very good. It makes magnificent cheese because its fatglobules are much smaller than those <strong>of</strong> cow's milk andtherefore do not rise so quickly and get lost in the whey. It isharder to make into butter, because the cream does not risewithin a reasonable time, but with a separator butter canbe made and is excellent. On the other hand, milking goatstakes more labour per gallon <strong>of</strong> milk than milking cows,however you do it, and so does herding, or fencing, goats.ToggenburgA fairly small Swiss goat. Yields welland can live on grass.Anglo-NubianGives very rich milk, but inrelatively low quantities.Fencing and tetheringRestraining goats is the goat keeper's chief problem, and weall know goat keepers who also try to be gardeners and who,year after year, moan that the goats have-yet again-bust intothe garden and in a few hours <strong>complete</strong>ly ruined it. Youngfruit trees that have taken years to grow are killed and thevegetables absolutely ravaged. But this annual experiencehas no effect whatever on the beliefs <strong>of</strong> the true goat keeper.Next year he will win the battle to keep goats out <strong>of</strong> hisgarden. What he forgets is that the goats have twenty-fourhours a day to plan to get into his garden, and he doesn't.Three strands <strong>of</strong> electric fence, with three wires at 15 inches(38cm), 27 inches (69cm) and 40 inches (102cm) aboveground level, will restrain goats, and so will a 4-foot (1.2m) •high fence <strong>of</strong> chain link with a support wire at 4-foot 6inches (1.4m) and another support wire lower down. Wirenetting will hardly deter goats at all.Tethering is the other answer. Where you can pickettether goats along road verges, on commons, and so on,and thus use grazing where you could use no grazing before,you must be winning. But it is unfair to tether any animalunless you move it frequently; above all, don't keep puttingit back on the place where it has been tethered before exceptafter a long interval. Goats, like sheep, soon become infestedwith internal parasites if they are confined too long on thesame ground. By tethering you are denying the animal theright to range and search for clean, parasite-free pasture.Picket tethering is very labour-intensive, but for the cottagerwith a couple <strong>of</strong> goats and plenty <strong>of</strong> time it is an obviousway to" get free pasture.Another form <strong>of</strong> tethering is the running tether. A wire isstretched between two posts and the tether can run alongthe wire. This is an obvious way for strip-grazing a field, andalso a good way <strong>of</strong> getting rid <strong>of</strong> weeds that other animalswill not touch.SaanenA large goat <strong>of</strong> Swiss origin capable<strong>of</strong> high yields, if given good grazing.108
Food from AnimalsFeedingA kid should have a quart (1.1 litres) <strong>of</strong> milk a day for at leasttwo months, but as he gets older some <strong>of</strong> this may beskimmed milk. A reasonable doe should give from threeto six pints (1.7 to 3.4 litres) <strong>of</strong> milk a day In the winter a doein milk should have about two pounds (0.9kg) a day <strong>of</strong> verygood hay (you should be able to raise this - about 750 lbsor 340 kg a year - on a quarter <strong>of</strong> an acre) one or twopounds (0.5-0.9kg) <strong>of</strong> roots or other succulents, fromone to two pounds (0.5-0.9kg) <strong>of</strong> grain depending on milkYield. Goats should have salt licks available. It is a mistaketo think that goats will give a lot <strong>of</strong> milk on grazing alone:milking goats need good feeding. <strong>The</strong>y will, for example,thrive on the silage you can make <strong>by</strong> sealing grass clippingsin fertilizer bags (see pp. 80-81). As for the grain you feed toyour goats: a good mixture, such as you might feed to dairycows, is fine, or you can buy "cake," or "dairy nuts" from amerchant (and pay for it too). All debris from the marketgarden or vegetable garden can go to goats, but it is better tocrush, or split, tough brassica stems first. Feed them theirconcentrates individually or they rob each other.HousingGoats are not as winter-hardy as cows and cannot be left outall the time in north-European or North American wintersand expected to give any milk. <strong>The</strong>y don't like cold and haterain. High-yielding goats (which personally I should avoid)need very high feeding and warm housing, but mediumyielding ones must have shelter from the rain, and an airybut fairly draught-pro<strong>of</strong> shed to sleep in o'nights. Givingthem a table to lie on, with low sides to exclude draughts,is a good idea and if they are lying in a fierce down-draught<strong>of</strong> cold air adjust the ventilation until they are not. Maybe aboard ro<strong>of</strong> over the table to stop down-draughts would be agood idea.Otherwise you can treat milking goats much the same asyou treat cows. Dry them <strong>of</strong>f eight weeks before kidding.But a goat may milk for two or three years after kiddingwithout kidding again.Rearing orphansOne possible good use for goats is rearing orphans <strong>of</strong> manykinds. Goats are excellent for suckling other animals: calvesthrive better on goat's milk than they do on their mother's,and it would be reasonable, if you kept cows, but had somewilderness or waste land on which cows could not thrive,to keep a flock <strong>of</strong> goats on the bad lands and use them forsuckling the calves so that you can milk their mothers. Goatmilk is very digestible, and pretty good milk anyway, andorphan piglets, for example, which don't take very kindly tocow's milk, will thrive on goat's. Calves will suck straightfrom the nanny. Lambs will too but don't let them-they maydamage her teats and give her mastitis. Milk her your<strong>self</strong>and bucket feed the lambs. Milk the nanny and feed theMilking a goatYou can milk a goat that is standing on the ground, just as you would milk acow (see p. 94). But because goats are so much smaller a stand helps.Coax her into position with some hay or grain.milk to piglets through a bottle. You can rear foals on goats.<strong>The</strong> suggestion has been made that a suitable person couldmake a living - or half a living - <strong>by</strong> running a goat-orphanage- not for orphan goats but for other animals. Neighbourssoon get to know such things, and orphan lambs are ten apenny in the lambing season in sheep districts and very <strong>of</strong>tena sow has too many piglets.Billy kidsBilly kids come whether you want them or not, and in the endyou have to find something to do with them. What you cando is castrate them and then eat them. <strong>The</strong> most humaneway to castrate a goat or anything else is to use rubber rings,put on with an "Elastrator," which you can buy from anyagricultural suppliers. A billy becomes very male at threemonths, whereas a lamb does not develop specific malecharacteristics until about six months. <strong>The</strong>refore many <strong>of</strong>us who produce fat lamb don't bother to castrate, but malegoat kids should be castrated unless you intend to eat thembefore three months or they will become strong tasting.In my opinion, a goat wether (castrated billy goat) tastes asgood as any mutton, particularly if you lard it well, or marinateit in oil and vinegar, or oil and wine, for it is short <strong>of</strong> fat comparedto sheep. Up to six months old, it lends it<strong>self</strong> very wellto roasting with various herbs or spicy sauces. If the billy goathas not been castrated, the meat has a strong gamey taste, andit is best to marinate it for three days in wine and vinegar andthen curry it. Cooked in this way it is delicious. As a generalrule though, it is better to castrate if you are going to eat it.109
Food from Animals<strong>The</strong> pig fits so well into the <strong>self</strong>-supporter's economy thatthe animal almost seems designed with that in mind. It isprobably the most omnivorous animal in the world and willthrive on practically anything. It is even more omnivorousthan man, because a pig can eat and digest grass while wecannot. A pig will not thrive on grass alone, but it can makeit a substantial part <strong>of</strong> its diet. And it will convert virtuallyanything that you grow or produce on the farm into goodmeat. Throw any vegetable matter, <strong>of</strong> whatever kind, to apig, and he will either eat it - converting it within hours togood meat and the best compost in the world - or he willtread it into the ground, dung on it, and turn it into compostthat way. Put a pig on rough grassland, or scrubland, thatyou wish to bring into cultivation, and he will plough it foryou, and root it up for you, and manure it for you, and atthe same time extract sustenance from it to live and grow on.Feeding<strong>The</strong> <strong>self</strong>-supporter should aim to produce all the food heneeds to feed his pigs from <strong>of</strong>f his farm. Barley meal, maizemeal, potatoes, Jerusalem artichokes, carrots, fodder beet,parsnips, turnips or swedes: these are all crops that may begrown to feed pigs, and if supplemented with skimmed milkor whey you have a pretty good diet. I have fattened pigsvery successfully on boiled potatoes and skimmed milk, andthey will fatten on raw potatoes too. I have fattened themon raw carrots and separated milk. Wheat "<strong>of</strong>fals", such asbran and middlings, are good too, but there is no doubt thateither barley meal or maize meal have no peers when it comesto fattening pigs. Even then they must have a "proteinsupplement" which may well be -whey or separated milk,though any other high protein food wall do: meat meal orfish meal, cooked meat or fish, bean meal or any other highproteingrain. Soya is excellent for fattening pigs. If pigs areout <strong>of</strong> doors they don't want mineral supplements. If theyget some fresh greens, some milk <strong>by</strong>-products, scraps, theydon't want vitamin supplements. Let sows run out overplenty- <strong>of</strong> land, and in summer they will get nearly half theirsustenance from grass, if they are not in milk Keep sowsor growing pigs on artichokes, or a field <strong>of</strong> potatoes, or afield from which potatoes have been harvested, or any othercrop, and they wall get half their food from that.But for milking sows, or sows in late pregnancy, animalprotein is absolutely essential, as it is the only source <strong>of</strong>vitamin B 12. A good rule for rations is that breeding sows,out <strong>of</strong> doors on grass and with access to scraps, surplusvegetables, and so on, will need two pounds (0.9kg) a day <strong>of</strong>concentrate such as barley meal and some protein, but sixpounds (2.7kg) a day when they farrow. If they are indoorsor having concentrates only, you can double these amounts.When the ba<strong>by</strong> pigs are three weeks old or so you can start"creep feeding" them: that is, allowing them through holesin a fence too small for the sow to where they can eatconcentrates unrestricted. Fattening pigs can be given asmuch as they can eat until they are about lOOlbs (45.0kg)in weight (half grown) after which their ration should berestricted or they wall get too fat. Restrict them to what theywill finish in a quarter <strong>of</strong> an hour. If they take longer thanthat, give them less next day; if they wolf it all in five minutesand squeal for more, increase their ration. Feed them likethis twice a day Do not restrict their intake <strong>of</strong> roots, vegetables,and suchlike, but only <strong>of</strong> concentrates. At all timeswatch your pigs, and if they look too thin, or too hungry,feed them more.I have kept pigs successfully for over twenty years withnothing more elaborate than some rolled barley, skimmedmilk, maybe at a push some fish meal, some bran, plenty <strong>of</strong>roots and vegetables and whatever else there is to give away.<strong>The</strong> pig bucketAnd now I must touch on the high art <strong>of</strong> the pig bucket.For the man with a thousand sows the pig bucket is irrelevant,but for the <strong>self</strong>-supporting family fattening a pig or two inthe garden to kill, or with one or two dear old breedingGloucester Old SpotA fine and beautiful English, breedevolved originally for living in appleorchards and woodlands. It is hardy,prolific, and a fine baconer.Wessex SaddlebackAlso known as the British Saddleback,this is a hardy out-door breedpopular for crossbreeding.WelshA popular commercial breedbecause it's white, long, and lean.It is a reasonable outdoor breed.110
Food from AnimalsPig housingA pig house should be very strong, either movable or else easily dismantledand re-erected, and, if possible, free. Mine are made <strong>of</strong> scrap corrugatediron nailed to bush timber. Walk and ro<strong>of</strong> can be double iron sheets withinsulation (old paper bags or bracken, for example) stuffed between. Whenpiglets are three weeks old, make a gap in the fencing that is too small for thesow but large enough for the piglets to get through and "creep feed" onconcentrates.HurdlesTwo hurdles lashed together withstraw 1 between, and covered withnetting, make good pig house walls.Farrowing railPiglets sometimes get squashed <strong>by</strong>their mothers. But if you fix afarrowing rail, 10 inches (25 cm)jrom the floor and 10 inches(25 cm) from the walls, your pigletscan sleep under it, protected fromthe sow's bulk <strong>by</strong> the rail.sows who become almost part <strong>of</strong> the family themselves, thepig bucket is very relevant indeed.Nothing should be wasted on the <strong>self</strong>-sufficient holding.<strong>The</strong> dustman should never have to call. Under the kitchensink there should be a bucket, and into it should go all thehousehold scraps except such as are earmarked for the dog orthe cats. When you wash up develop the "pig bucket technique!'This means scraping all scraps first into the sacredbucket; then dribble - rather than run - hot water from thetap over each plate and dish so that the water carries all greaseand other nutriments into a bowl (helped <strong>by</strong> a brush). Throwthis rich and concentrated washing-up water into the pigbucket. <strong>The</strong>n finish washing the dishes any way you likeand let that water run down the sink. <strong>The</strong> concentratedwashing-up water from the first wash is most excellent food,and should not be wasted on any account.Housing and farrowingExcept when sows are actually farrowing or have recentlyfarrowed, they can live very rough. If they have plenty <strong>of</strong>straw or bracken and are kept dry, with no through draughts,and if possible with well insulated walls and ro<strong>of</strong> in coldclimates, they will do very well. Several sows together are,generally speaking, much happier than one sow alone.However when a sow farrows she must have a hut toher<strong>self</strong>. It needs to be big enough for her to' turn round incomfort. If you like, you can have a farrowing rail, whichprevents the sow from lying on the piglets, but we kept sixsows for eight years and only lost two piglets during all thattime from crushing. <strong>The</strong> <strong>book</strong>s say the sow should have nolitter when she farrows. All I can say is we give our sowsaccess to litter, and they carry as much as they want <strong>of</strong> itindoors and make an elaborate nest. What they don't wantthey chuck out. It is delightful to watch a sow making hernest, and there is no doubt that she is most unlikely tohave any trouble if she is able to go through all her ritualsbefore farrowing, and is then left alone in peace to farrow,with no other pigs jostling her, and no over-anxious ownerfussing her like an old hen. Sows eating their piglets, orlying on them, are generally products <strong>of</strong> an artificiallyorganized system. If you break the chain <strong>of</strong> instinct here youdo so at your own risk.Heat, the period when the sow wants the boar, occurs attwenty-one day intervals, as in the cow. I do not like to put agilt, or young female pig, to the boar until she is nearly ayear old. Gestation is 116 days. Where do you get the boar?El
PigsIf you keep six sows or more you can afford the keep <strong>of</strong> aboar so you can buy one, and let him run with the sows.If you have fewer sows you can take a sow to a neighbour'sboar when she needs it.Litters can vary from six piglets to twenty'; ten is aboutaverage but we used to have twelves (and rear twelves) withmonotonous regularity when we kept sows out <strong>of</strong> doors. Weare keeping them again now after an interval <strong>of</strong> ten yearswhen we preferred to buy weaners from neighbours to fatten.If you buy weaners (piglets from eight to twelve weeks old),you won't have to have a sow at all. We have <strong>of</strong>ten boughtand fattened three weaners, sold one and eaten two, and theone we sold paid for the two we ate.Slaughtering<strong>The</strong> traditional way to kill a pig is to stickit in the throat, but Idon't recommend this. Although I see nothing wrong withkilling animals for meat, I see everything wrong with makingthem suffer in any way If we kill an animal we should do' soinstantaneously, and the animal should have no inkling thatanything nasty is about to happen to it.Lure your pig into the killing room, put a little food on thefloor, and shoot the pig in the brain with a .22 rifle. You canuse an humane killer (captive bolt pistol), but then you mustb e very quick and skilful, b ecause the killer must be in contactwith the pig's head when you fire it, and the pig may, andprobably will, move away. With a rifle you can stand wellback, aim at the pig's brain, and the animal has no idea thatanything is going to happen before it is stone dead.Immediately the pig has dropped stickit. Squat squarely infront <strong>of</strong> the recumbent pig while someone else holds it on itsback, stick the knife just in front <strong>of</strong> the breastbone, and whenyou feel the bone let the knife slip forward to go under it.<strong>The</strong>n push the knife in a couple <strong>of</strong> inches and slice forwardswith the point <strong>of</strong> the knife towards the head. This severs theartery. Now look out: a nervous reaction takes place. <strong>The</strong> pigappears to come to life and thrashes about, so take care not tobe cut <strong>by</strong> its hooves. If you want to catch the blood to makeblack pudding you have got to be quick. Some people get astrop on one <strong>of</strong> the pig's hind-legs after they have shot it andhaul it up with a block-tackle before sticking it. This enablesyou to catch the blood more easily and makes the pig drainbetter. Personally I am not a lover <strong>of</strong> black pudding so theblood falls into abed <strong>of</strong> straw or spoiled hay which ultimatelygoes on the compost heap. Waste not want not, and yourblood is a fine activator <strong>of</strong> your compost.ScrapingNow you have got to scrape your pig. To do this you mustscald him, and this is a ticklish operation. You can either dipyour animal right into hot water, or you can lie him on thefloor or a scraping bench, and baste him with hot water. If youdip him, leave him in water <strong>of</strong> 145°F (63°C) for five minutesand then haul him out and scrape him. You can only do this if112
Food from Animals4 Sling him up on the gambrel. 5 Cut the head <strong>of</strong>t in order to severthe windpipe and gullet.6 Cut round and tie <strong>of</strong>f the rectumto prevent it leaking.8 Haul out the innards. Keep thepluck (heart, pancreas and lungsseparate. Throw a bucket <strong>of</strong> coldwater inside the carcass.9 Saw down the back-bone so asto cut the pig <strong>complete</strong>ly in half.Leave him to hang in an airy placeovernight.7 Slit along the line <strong>of</strong> the abdomenwithout cutting the guts. Have alarge receptacle on the floor.113
Pigsyou know your water is going to stay at this temperature(pretty well exactly). If it is a few degrees too cold it won'tloosen the bristles. If the water is going to start cooling assoon as you put the pig in then you should have it at 150°F(65°C) to start <strong>of</strong>f with, but if you have it this hot then youmust keep moving your pig around, and from time to timepull him out. Why? Because for some reason if the water istoo hot it sets the bristles, and once they are set they are hellto get out at all. <strong>The</strong> way to tell if they are ready is to keep tryingthem: pull at a few and when they come out easily then isthe time to scrape.<strong>The</strong> other method - which we use, not having a bath bigenough to immerse a whole hog in - is to lay the pig on its sideand carefully and slowly to pour hot water over a small part <strong>of</strong>him. This water should be 150°F (65°C) when it comes fromthe jug, so it should be slightly above this when it goes into it.<strong>The</strong> joints <strong>of</strong> a pigBackA large pig's backcan be cured asbacon. On a smallerpig it may go forchops. On a largebaconer it can be cutinto good roastingjoints.Spare ribs<strong>The</strong> spare ribs can beroast, or cut intochops. <strong>The</strong> shouldercan make a joint, orit can be cured tomake second-ratebacon.Jowl<strong>The</strong> jowl is used forsausage meat.TrottersTrotters can be cookedup for brawn, orboiled separately andeaten with vegetables.Ham<strong>The</strong> ham makes a hugejoint <strong>of</strong> prime roast pork,or it can be salted andsmoked to make a curedham.BellyA baconer's belly canbe salted whole forbacon. <strong>The</strong> thin endis sometimes pickledin brine. <strong>The</strong> thickend makes primebacon. On a porkerthe belly makes chops.Hands<strong>The</strong> hands canbe roasted, or cutup for sausagemeat.Keep pouring gently, and from time to time try some bristlewith the thumb and forefinger. When the bristle begins to lift,scrape. Scrape furiously. It is better not to use a knife. Asharpened hoe-head, or a metal saucepan lid is sharp enough.Off comes the bristle, <strong>of</strong>f also comes the outermost skin <strong>of</strong> thepig, and no matter what colour your pig started <strong>of</strong>f as, he willbecome white as snow.Keep working until the pig is absolutely clean. Put the legsright into the j ug <strong>of</strong> hot water; then take them out and pull thehorny toes <strong>of</strong>f with a hook. You really need two or three goodmen and true to scrape a big hog, with one boy to bring on thehot water and another to fetch the home-brewed beer (vitalon this occasion). <strong>The</strong> head is difficult: if necessary set fire tosome straw with methylated spirits, hold the head over theflame to singe it, and scrub with a wire brush. When finisheddouse the pig with cold water to get rid <strong>of</strong> all the loose skinand bristles and any blood.Hanging<strong>The</strong>n hang the pig. An inch or two above the foot on the back<strong>of</strong> the hind leg is a tendon. Cut down each side <strong>of</strong> this with avertical slit through the skin and then raise the tendon outwith your fingers. Don't cut the leg above the hock as beginnersdo; this is barbarous and spoils good meat. Insert eachend <strong>of</strong> your gambrel (see illustration) through the twotendons in the legs.Now, don't haul that pig <strong>of</strong>f the ground until you havesawTi through the breastbone or sternum! Cut down to thebreastbone with a clean knife, then split it, right down themiddle, with a saw. If you try to do this after you have hung upthe pig all the guts will come flopping out and make the operationvery difficult. <strong>The</strong>n lay on to the fall <strong>of</strong> that tackle andheave away! Up goes your pig. Cut <strong>of</strong>f the head. Cut it justbehind the ears, at the first spinal bone (the atlas) and youshouldn't have to use the saw. Put the head straight into brine(salt and water).Before you have hauled the pig up too high, cut round thebung, which is the anus. Cut right round it so as to sever itfrom the pig, but so as not to pierce the rectum. Tie a stringround it to prevent the shit coming out. Now, haul the pig upfurther to a convenient height, and score a light cut rightdown from between the hams (haunches or hind legs) to thestick-cut in the throat. D on't cut through the abdominal wall!Cut right down it, keeping the guts back from the knife withyour hand. You don't want to pierce the guts or stomach. Cutthrough the H-bone that joins the two hams, if necessary withthe saw, but don't cut the bladder. <strong>The</strong>n gently haul out therectum, the penis if it's male, the bladder, and all the guts, andflop the lot out into a huge basin. <strong>The</strong> penis and rectum canbe thrown away, or to the dogs, but the rest is all edible oruseful stuff.Do not waste the guts. <strong>The</strong>y need a good wash, after whichyou should turn the intestines inside out. You can do this <strong>by</strong>inverting them on a smooth piece <strong>of</strong> bamboo or other wood.114
Food from AnimalsJointing a pigThis pig is a baconer, because it'stoo large for eating entirely as freshpork. <strong>The</strong>refore most <strong>of</strong> it will becured and preserved as bacon, ham,sausages, and so on. You will <strong>of</strong>course take a joint or two to eat asfresh pork, and if you have a deepfreeze, this may be a larger proportion.But remember that abaconer is a fat animal and his meatis not so suitable for eating fresh asis that <strong>of</strong> a little porker.<strong>The</strong> ham must be trimmed so that aclean surface is left for salt to penetrate.It is important to work saltinto every crevice.! V<strong>The</strong> tenderloin lies inside the backbone.It is delicious wrapped in the"caul", stuffed and roasted. <strong>The</strong>caul is that white, fatty membranewhich supports the intestines.Next saw <strong>of</strong>f the chine, or backbone,and joint it.Split the carcass right down thebackbone. A butcher might use acleaver all the way, but amateurswill probably do better with a saw.You can leave the ribs in the saltedflitch. I like to cut them out and usethem for soup. <strong>The</strong> rest <strong>of</strong> the sideis salted for bacon.<strong>The</strong> leaf fat comes away very easily.It makes the best and purest lard.Next take out the kidneys.one half <strong>of</strong> aball and socket joint, toleave a clean, uncut joint.Cut between the fifth and sixth ribsto part the shoulder from the side,or flitch. <strong>The</strong> shoulders can be saltedwhole, or else boned and usedfor sausages.You can salt the whole shoulder, oryou can halve it. Roast the top andsalt the bottom.115
Pigs<strong>The</strong>n scrape their mucus lining <strong>of</strong>f" with the back <strong>of</strong> a knifeagainst a board. Get them quite clean and transparent. Laythem down in dry salt now and they will come in, in duecourse, for sausage skins or "casings". <strong>The</strong> bladder can befilled through a funnel with melted lard, which will hardenagain and keep for months.<strong>The</strong> stomach is edible as well as the intestines; togetherthey are called "chitlings" or "chitterlings" and are quitenice. Turn the stomach inside out, wash it and put it down indry salt until you want it. Don't waste the head or the feet, forthey make excellent brawn (see p. 117).Rescue the liver, which you can eat the same night, andpeel out the gall bladder, which you can throw away. <strong>The</strong>heart should come away with the lights (lungs), and this iscalled the "pluck". Hang it on a hook. Carefully remove thecaul - a beautiful filmy membrane that adheres to thestomach - and throw this over the pluck. <strong>The</strong> lungs are anextra treat for the dogs, while you can eat the heart. Throwseveral buckets <strong>of</strong> cold water inside and outside the carcass,prop the belly open with some sticks pointed at both ends,eat some fried liver, finish the home-brew, and go to bed.In the morning the carcass will be "set" (stiff) if the weatheris cold enough (and if : it isn't you shouldn't be killing abaconer) and you can split it right down the backbone. Abutcher does this with a cleaver - if you are a beginner, youmay like to do it with a saw. Take each half <strong>of</strong>f, lay it on thetable, and cut it up, as per illustrations.In the United States people cut up the pig the night theykill it much more than we are accustomed to in Britain: theysplit the carcass, haul out the leaf fat, and even trim much <strong>of</strong>the fat <strong>of</strong>f the hams, while the hog is still hot. This is said togive the carcass a better chance to cool. I find that carcassescool easily enough in the British climate and that they areeasier to handle when set.BACON AND HAMMost <strong>of</strong> a big pig should be turned into bacon and ham, forthere is no better way known to mankind <strong>of</strong> preserving largequantities <strong>of</strong> meat. <strong>The</strong> ham is the thick part <strong>of</strong> the pig's hindleg - the rump in fact. Bacon is the side <strong>of</strong> the pig. <strong>The</strong>shoulder can be cured too, or used for joints or sausage meat.But <strong>by</strong> far the most valuable parts <strong>of</strong> the pig are the two hams.<strong>The</strong>re are two main methods <strong>of</strong> salting pig meat - brinecuring and dry curing.Dry curingWe have a slap-happy method <strong>of</strong>simply sprinkling a pinch <strong>of</strong>saltpetre on the meat, then rubbing in salt and sugar, thenburying it in salt and leaving bacon sides for two weeks andhams for three. It is better to do it more scientifically, becauseyou save salt and the meat is not so salty when you eat it. Weget over the problem <strong>of</strong> excess salt <strong>by</strong> slicing our bacon first,then soaking the thin slices for ten minutes or so in warmwater before frying them.<strong>The</strong> proper way to do it is to use the following mixture forevery 100 lbs (45.0kg) <strong>of</strong> meat:8 lbs (3.6 kg) salt2 lbs (0.9 kg) sugar2 oz (56 g) saltpetrePrepare this mixture with extreme care. Take half <strong>of</strong> it and putthe rest aside. Use the half you have taken to rub the meatvery thoroughly all over, rind-sides as well. Stuff salt hard intothe holes where the bones come out in the hams andshoulders, and into any cavities. Success lies in getting saltinto the meat quickly: it's a race between salt and bacteria. Ifthe latter win you may lose an awful lot <strong>of</strong> very valuable meat.Unless the weather is too warm (36°F or 2°C is an idealtemperature, but don't let the meat freeze), if you followthese instructions the bacteria won't win. Cover all surfaceswith the salt and leave on a salting tray, or a shelf, or in a box(but if in a box there must be holes in it to allow the "pickle" -juice drawn out <strong>of</strong> the meat <strong>by</strong> the salt - to drain away), withall the joints carefully packed on top <strong>of</strong> each other. Be carefulwhen you do this first salting to put roughly the right amounts<strong>of</strong> salt on each piece: not too much on the thinner bacon sidesbut plenty- on the thick hams. • -.--After three days give another good rubbing with half theremainder <strong>of</strong> the salt (i.e. a quarter <strong>of</strong> the whole). Put the meatback in a different order to ensure even distribution <strong>of</strong> the saltall round. After another week haul out again and rub wellwith the last <strong>of</strong> the salt mixture. Put it back. Now leave it inthe salt for two days per lb for big joints such as hams and lidays per lb for small joints and bacon. If you say that roughly abig side <strong>of</strong> bacon should cure for a fortnight and a large hamfor three weeks you won't be far wrong.Take the joints out at the allotted time, scrub them lightlywith warm water to get the loose salt <strong>of</strong>f, string them, andhang them up for a week or a fortnight in a cool dry place.<strong>The</strong>n either smoke them or don't smoke them as the fancytakes you. Unsmoked or "green" ham and bacon taste verygood, although personally I like them smoked. It's really all amatter <strong>of</strong> taste.Brine curingFor every 100 lbs (45.0 kg) meat you should mix:8 lbs (3.6 kg) salt2 lbs (0.9 kg) sugar2 oz (56 g) saltpetre5 gallons (22.7 litres) boiled but cooled waterIn theory thicker joints, like hams, should have a strongerbrine - the above mixture with 4T gallons (20.4 litres) <strong>of</strong>water - and the thinner joints, like bacon and bath-chapswhich are the jowls <strong>of</strong> the-pig, should have the mixture in 6gallons (27.3 litres) <strong>of</strong> water. Put the meat in the brine, makesure there are no air pockets, put a scrubbed board on top anda big stone on top <strong>of</strong> this to keep the meat down (don't use aniron weight), and leave in the brine for four days per pound <strong>of</strong>each big joint. Thus you ought to weigh each joint before116
Food from Animalsputting it in, and pull each one out at its appointed date. Baconand small joints should only be left for two days per pound.After four or five days turn the joints round in the brine, andagain every so <strong>of</strong>ten. If, in hot weather, the brine becomes"ropey" (viscous when you drip it <strong>of</strong>f your hand) haul themeat out, scrub it in clean water, and put into fresh brine.When you have hauled the meat out <strong>of</strong> the brine wash it infresh water, hang it up for a week in a cool dry place to dry,then, if you want to, smoke it. You can eat it "green", i.e. notsmoked at all. It should keep indefinitely, but use small jointsand bacon sides before hams. Hams improve with maturing: Ihave kept them for two years and they have been delicious.Bacon is best eaten within a few months.Cured hams and shoulders should be carefully wrapped ingrease-pro<strong>of</strong> paper and then sewn up in muslin bags and hungin a fairly cool dry place, preferably at a constant temperature.If you paint the outside <strong>of</strong> the muslin bags with a thick paste<strong>of</strong> lime and water so much the better. Like this they will keepfor a year or two and improve all the time in flavour until theyare delectable. Bacon can be hung up "naked" but shouldthen be used within a few months. Light turns bacon rancid,so keep it in the dark. Keep flies and other creepies <strong>of</strong>f allcured meat. Some country people wrap hams and bacon well,then bun,' them in bran, oats, or wood ashes which are said tokeep them moist and improve the flavour.SmokingSmoking helps to preserve the meat, helps it dry out, andprobably helps it mature quicker. It is also much easier thanpeople seem to think. If you have a big open chimney, simplyhang the meat high up in it well out <strong>of</strong> reach <strong>of</strong> the fire, andleave it there for about a week, keeping a wood fire going thewhile. <strong>The</strong>re is a lot <strong>of</strong> mysticism about which wood to use forsmoking: the Americans swear <strong>by</strong> hickory, the British willhear <strong>of</strong> nothing but oak. In my experience it matters very littleprovided you use hard woods and not pine.Whatever you use don't let the temperature go above120°F (50°C): 100°F to 110°F (39°C to 43°C) is fine. Buildinga smoke-house is a matter <strong>of</strong> common sense and a littleingenuity. For years we used a brick out-door lavatory, tybach,jakes, or loo. (We didn't use it for its original purpose <strong>of</strong>course.) We had a slow-combustion wood-burning stoveoutside, with the chimney pipe poking through the wall <strong>of</strong> thejakes, and we hung up the meat from lengths <strong>of</strong> angle-ironunder the ro<strong>of</strong>. It does seem a pity though not to make use <strong>of</strong>the heat generated <strong>by</strong> the smoking fuel, so surely it is better tohave your burning unit inside a building, even if the smokechamber it<strong>self</strong> is outside. Often a slow-combustion woodburningstove can heat a house and, with no increase in fuelconsumption, it will automatically smoke whatever you like.<strong>The</strong>re are two kinds <strong>of</strong> smoking: cold-smoking and cookedsmoking.<strong>The</strong> latter is common in America and Germany butalmost unknown in Britain. It consists <strong>of</strong> smoking at a highertemperature, from 150°F to 200°F (65°C to 93°C), so thatthe meat is cooked as well as smoked. Meat thus smoked mustbe eaten within a few days because it will not keep as coldsmokedmeat will.BrawnWhat to do with that head, those feet, and all the other oddbits and bobs such as the tongue and j owls if they are not to besmoked? Brawn is the answer, or pork-cheese as it is called insome countries, just put all meat - bones, skin and all - into apan (although it is a good idea to put the bits <strong>of</strong> skin in amuslin bag so you can draw them out after all the goodnesshas been extracted from them) and boil and boil. Let it cool,break it into small pieces, boil again and add salt, pepper, andas many spices as your taste-buds suggest (marjoram, coriander,allspice, cloves, caraway are all acceptable). Boil up again,and pour into moulds such as pudding basins. <strong>The</strong> fat will riseto the top and form a protective covering and the brawn willkeep a long time. Eat sliced cold. In a deep freeze <strong>of</strong> course itwill keep indefinitely You can pour it straight into plastic bagsbefore freezing.SausagesSausages that won't keep are subjects for a cookery <strong>book</strong>.Sausages that keep, however, are very much the <strong>self</strong>supporter'sinterest.Take two parts <strong>of</strong> lean meat (say pork, or half pork and halfbeef) and one part <strong>of</strong> pork fat. You can even use salt bacon fat.Mince the lean meat finely and the fat less so. Marinate thismeat in wine or vinegar overnight if you like. For 3 lbs (1.4 kg)<strong>of</strong> this mixture add:1 oz (28 g) salt2 teaspoons pepper3 cloves garlic crushed upany spice you particularly like (I suggest paprika, or groundchilli powder)a big pinch <strong>of</strong> saltpetrea glassful <strong>of</strong> red wine or vinegar (if you haven'tmarinated thethe meat)Mix all this up well and stuff it into your casing (cleaned pigs'or oxes' guts, or other sausage casing bought from a butcher).To my mind the bigger the casing the better. Hang it in a cool,dry place; if you want to smoke it do so for say twelve hours,but this isn't vital. <strong>The</strong>n hang it up again in a cool, dry place -60°F (16°C) is ideal, but never more than 70°F (21°C) - andit will keep for months. Eat it raw, sliced. It is better after it hascured for a month or two at least; you can eat it fresh but it isnot so good. Do not be worried at eating "raw meat": allsalami and other "continental sausages" you buy are rawmeat.<strong>The</strong>re are a hundred recipes such as the above for makingsausages that keep. But the principle is always the same.Observe it and you will get successful sausage. <strong>The</strong>re is oneserious disadvantage: although it is alleged to keep you cannever keep it. People find it far too delicious and they will eatthe lot in no time.117
Food from AnimalsSheepSheep have a great advantage for the lone <strong>self</strong>-supporterwithout a deep-freeze. In the winter time, a family can getthrough a fat lamb or a small sheep without it going bad.It is not that it keeps better than other meat but just thatthe animal is smaller and you can eat it more quickly. However,I have kept mutton for a month, and in a climate wherethe day temperatures rose to over 100°F (39°C) in theshade. But the days were dry and the nights were cold. Atnight I hung the mutton outside, in a tree - though out <strong>of</strong>reach <strong>of</strong> four-legged prowlers - and then, very early in themorning, brought it in and wrapped it in several thicknesses<strong>of</strong> newspaper to keep out the heat. <strong>The</strong> mutton was perfectlyedible. You could do this in any climate where the nightsare cold enough and the days are not muggy - and you coulddo it with any meat.Sheep have two other advantages: they provide wool, andin various parts <strong>of</strong> the world they provide milk too. I havemilked sheep, very <strong>of</strong>ten, and it is a very fiddly job. <strong>The</strong> milktastes no better, and no worse, than cows' or goats' milk.<strong>The</strong> chief disadvantage about keeping sheep on a verysmall scale is the problem <strong>of</strong> getting them tupped (mated).It doesn't pay to provide grazing for a ram if you have fewerthan say half a dozen sheep. If you buy a ram to serve yoursheep you pay quite a high price for him, and when you sellhim after he has served them, or next year say, you only get"scrap price": very little. And if you eat him you will find himvery tough. I have just eaten a three-year old ram and I know.So tupping is a problem with very small flocks <strong>of</strong> sheep.Broadly, there are two quite sensible things you can do.You can keep some pet ewes and take them to a kindlyfarmer's ram to get them tupped in the autumn, or you mightbe able to borrow a ram. If you put a chest-pad on the ramwith some marking fluid on it", or - in the old-fashioned way -rub some reddle (any coloured earth or dry colouring matter)on the ram's chest you can see when all your ewes are servedand then return the ram. Alternatively, you can buy "store"lambs. Most hill farmers cannot fatten their lambs <strong>of</strong>f in theirfirst summer sufficiently to get them ready to sell, and so theysell them as "stores". <strong>The</strong>re are huge store marts in most hillsheepcountries. If you buy say 20 store lambs in the autumn,and keep them either on good winter grass or on rape, turnipsor other winter fodder crops, maybe allowing five lambs tothe acre, you will probably find that you not only get yoursheep meat for nothing but you make a pr<strong>of</strong>it too. You canachieve this <strong>by</strong> killing one whenever you want some lamb toeat, and selling the fat lambs you haven't killed in the veryearly spring. If you also feed the store lambs a little concentrate(say 1 lb or 0-5 kg a day <strong>of</strong> crushed barley and oats, oralternatively 2 lbs or 0.9 kg a day <strong>of</strong> maize and hay) they willfatten very readily.FeedingSheep do well on pasture that has not had sheep on it for sixmonths or so, because such pasture is free from sheepparasites. Five sheep will eat as much grass as a bullock, so anacre <strong>of</strong> good grass in the summer will easily support fivesheep, but the stocking rate should be very considerablyless in the winter for the grass doesn't grow. Sheep are verygood for grass in the winter time - they "clean it up" aftercows have been grazing on it all summer, because they grazemuch closer than cows. Sometimes you can fold sheep togreat advantage on a "catch crop" <strong>of</strong> winter greens, turnip,rape or hardy-greens. This would be put in after a cropharvested fairly early in the summer. But you may decide youwant this fodder for your cows.During the winter the pregnant ewes need surprisinglylittle food, and if you have even a little grass they should doon that. In very cold climates <strong>of</strong> course they need hay, andpossibly corn, as well. People in very cold countries <strong>of</strong>tenwinter ewes indoors and feed them entirely on hay, corn, andpossibly roots. If you feed sheep, and they have no grass, aewe will need about 4lbs (1.8kg) hay daily if there is nothingDorset HornA uniquely useful breed because itcan lamb twice a year.Border LeicesterA classic English sheep, a prolificbreeder and good for mutton andwool.SouthdownA very small sheep, and thereforeuseful for the small <strong>self</strong>-supportingfamily.
Food from AnimalsLambing<strong>The</strong> shepherd should not have tointerfere at all, but if there is toolong a delay in a birth the lamb orIf you see the forefeet, but the ewecannot give birth after an hour, tiea s<strong>of</strong>t cord round the feet and pullgently when she strains.Lay the ewe on her back, and pre- If you can't see anything introduceferably prop her up with a large bale the hand carefully while the ewe<strong>of</strong> straw.. is not straining.Wash your hands and the ewe'shind quarters. Lubricate your handand her vulva with boiled linseedoil or carbolized oil.If the presentation is normal, grabthe forelegs and pull the lamb outbut with care.else, or say Mb to lib (0.2-0.5kg) a day plus 15 to 201bs(6.8-9.0kg) roots. <strong>The</strong>y will do on this without any corn orconcentrates at all. <strong>The</strong>y must not be too fat when theylamb, else they will have lambing difficulties, but also theymust not be half-starved.In the spring, as soon as the ewes have lambed, put themon the best grass you have got, and preferably on clean grass:that is grass that has not had sheep on it for some time. <strong>The</strong>grass is very nourishing at this time <strong>of</strong> the year and the lambsshould thrive and come on apace. Within four months most<strong>of</strong> them will be fat enough either to eat or to sell to thebutcher as "fat lamb".TuppingIn cold climates sheep are generally tupped, or mated, in theautumn. If you have a flock <strong>of</strong> ewes it is best to cull thembefore mating: that is pull any out that are so old that theirteeth have gone. A full-mouth ewe, which has eight incisorteeth up, is four years old and should already have had threelambs. She may go for another year or two, or she may not,depending on the state <strong>of</strong> wear <strong>of</strong> her teeth.Before putting the ram in with the ewes you should flushthe flock. This means keeping them on very' poor pasture fora few weeks, then putting them on very good pasture. <strong>The</strong>nput the ram in. All the ewes will take the ram then in fairlyquick succession and you will not have a very drawn-outlambing season. A ram can serve up to sixty ewes in thetupping season. <strong>The</strong> gestation period is 147 days. Somepeople try to get ewes to lamb very early so as to catch theearly lamb market, but unless you intend to lamb indoors,and with very high feeding, I would not recommend this.I like to see lambs coming in late February 7 or March, and Ifind the later ones soon catch the poor little half-frozenwinter lambs up and pass them.119
SheepLambingWatch them carefully when they start to lamb. Leave themalone to get on with it: they generally can. But if a ewe is inlabour for more than an hour and obviously cannot void herlamb give her help. Get the ewe into a small pen where youcan catch her. Lay her down (if she is not already down).Wash your hand very well in carbolic oil or boiled linseedoil. See if the lamb's forefeet are just showing. If so work themgently out, only pulling when the ewe strains. <strong>The</strong> feet arevery slippery, so put a s<strong>of</strong>t cord around them - a scarf ora necktie will do - and haul gently when the ewe strains: haulslightly downwards. If you are not winning, insert your handvery gently into the vagina, feeling along the forelegs, andmake sure that the head is not bent backwards. If it is, pushthe lamb back gently and try to pull the head forwards. <strong>The</strong>lamb should then come out.<strong>The</strong> ideal presentation is forefeet first, then nose. <strong>The</strong>reare many bad presentations possibl e, made more complicatedif there are twins, but with experience you learn to tell what'sgoing on in there. You can get your hand right inside and feelabout, but it is difficult because the uterus exerts greatpressure on your hand.But, if you only have a few ewes, and they are healthy, thechances are that you will have to do nothing with them at all.Switching lambsNow if a single lamb dies and you have another ewe withtwins it is a good thing to fob one <strong>of</strong> the twins <strong>of</strong>f on thebereaved ewe. Put the bereaved ewe in a small pen, rub thetwin lamb with the dead body <strong>of</strong> her lamb, and try to see ifshe will accept the new lamb. If she won't, skin the deadlamb, keeping the skin rather like a jersey, and pull the skinover the live lamb. Almost invariably the foster mother ewewill accept him then. <strong>The</strong> advantage <strong>of</strong> this is that the mother<strong>of</strong> the twins "does" (feeds) one lamb much better than shewould do two, and also the bereaved ewe does not getmastitis and have trouble drying up her milk. She is happy,the twins are happy, the twin-mother is happy, and youare happy.Orphan lambs"Poddy lambs" are one answer for the smallholder. Farmerswill <strong>of</strong>ten let you have orphan lambs for nothing, or nearlynothing, and you can bring them up on the bottle, with ateat on it. You can give them warm cow's milk, diluted withwater at first, later neat. Goat's milk is better than cow's milk,but don't let them suck the goat direct - milk her and feedfrom the bottle. Keep the lambs warm. <strong>The</strong>y will grow upthinking they are humans.ShearingI start shearing at the beginning <strong>of</strong> July, but people furthersouth start earlier. So see what your neighbours do. Mostpeople don't shear the new lambs, but only the ram, theewes, and any wethers (castrated males) left over fromthe previous year.If you shear <strong>by</strong> hand you will find it much easier to sit thesheep up on a bench, or a large box. Hold her with her backtowards you and practise holding her firmly with your knees,thus leaving your hands free. Clip the wool <strong>of</strong>f her tummy.<strong>The</strong>n clip up the throat and take blow after blow (a blow isthe shearer's term for one row <strong>of</strong> wool clipped) down theleft side <strong>of</strong> the neck, shoulder, flank, and right down as faras you can get it, rolling the sheep around as you clip. Whenyou can get no further on that side, roll the sheep over andstart down the right side, hoping to meet the shorn part fromthe other side as you roll the sheep that way. <strong>The</strong> last bitinvolves laying the sheep almost right over to clip the woolnear the tail. <strong>The</strong> sheep should then leap away leaving herfleece in one entire blanket.Lay the fleece, body-side down, on a clean sheet or floorand cut away any bits <strong>of</strong> dunged wool. Fold the edges overtowards the middle, roll up from the head end, twist thetail end into a rope and wrap round the tight bundle andtuck the rope under it<strong>self</strong>. If the wool is for sale, pack thefleeces tight into a "pocket" (big sack). Put the dunged bitsin a separate sack and mark it "daggings". We will discuss thepreparation <strong>of</strong> wool for spinning on pp. 226-227.If people tell you hand shearing is easy, you can tell themthey lie. It is back-breaking, hand shears make your wrist achelike hell, and it is extremely difficult. Keep your shears sharpand cut as close to the sheep as you can without nicking her.If you do nick her, dab some Stockholm tar on the wound.Beware <strong>of</strong> her teats. Of course mechanical clippers makethe job much quicker, but it is still very hard work. Butshearing is fun: if several <strong>of</strong> you are doing it there is a greatsense <strong>of</strong> camaraderie, and you have a sense <strong>of</strong> achievementwhen you get good at it. At first it seems quite impossiblydifficult but don't give up - just persevere. You'll win in theend, if you don't bust a gut. Home-brew helps.Sheep diseaseExcept on mountains, sheep suffer from a bright green blowflywhich "strikes" them, i.e. lays eggs on them, particularlyon any dunged parts. It is good practice to cut this wool <strong>of</strong>fthem before shearing. This is called "clatting" or "dagging".But if about a fortnight after shearing you either spray or dipyour sheep in some proprietary sheep dip you will protectthem from fly strike for at least two or three months: in fact,probably until the cold weather comes and does away withthe flies. If you don't protect them they will get struck andthe maggots will eat right into the sheep and eventually killit in the most unpleasant manner possible.<strong>The</strong>re are two other very common sheep diseases. Flukeis one <strong>of</strong> them. When sheep graze in wet places they pick uplarge worms from a certain minute fresh-water snail. <strong>The</strong>seworms live in the gall ducts <strong>of</strong> the liver. So drain your land,or keep sheep from wet places. <strong>The</strong>re are injections that120
Food from AnimalsSheep shearingSheep are shorn in the summerwhen the weather is warm enoughfor the sheep not to suffer from thewinter cold.Rolling a fleeceTo roll the fleece lay it body-sidedown on a clean surface. Pick outany thorns, straw, etc. Turn thesides inwards and begin to rolltightly from the tail end. Twist theneck end into a rope. Tie it roundthe fleece and tuck under it<strong>self</strong>.Open the wool up her throat andstart shearing around the left side <strong>of</strong>her neck. Shear her head.Lay the sheep flat on the groundand put your left foot over her tohold her between your legs. Finishtaking fleece <strong>of</strong>f the hind quarters.Grab the sheep <strong>by</strong> the wool on herflanks, not <strong>by</strong> the wool on her back.Pick her up and sit her down on herrump for ease oi handling.Keep on down the left side <strong>of</strong> theshoulder and flank as far as you canreach in that position. If you canhold the sheep with your kneesyour hands will be free. Hold herskin tight with your left hand. Shearas close to it as you can get withthe other.Clip all the wool <strong>of</strong> her stomachdown as far as the udder. Avoidcutting the udder in a ewe or thepenis in a ram or wether.Roll the sheep over and clip downher right side. <strong>The</strong> fleece shouldcome right <strong>of</strong>f her body except atthe hind quarter.Trim her tail and hind legs separatelyfor appearance. Keep the woolfrom these parts separate from themain fleece.Dipping sheepAbout a fortnight after shearing,sheep should either be dipped orsprayed with a proprietary mixture.Dipping is better because it reallysoaks in. This is for various purposes.In countries where scab is present itis <strong>of</strong>ten compulsory, but in mostcountries it is necessary to guardagainst "strike", or blow-fly maggotinfestation. It also kills keds andother parasites.121
Sheepprotect against fluke too. You wall know if you have it whenyou kill a sheep and see these worms wriggling about in theliver. <strong>The</strong> other disease is foot-rot, likewise a scourge <strong>of</strong> sheepin damp lowlands: sheep on mountains seldom get it. Toprotect against foot-rot trim the feet occasionally (betterwith sharp pincers than with a knife) to remove excess horn.But if your sheep have it, the best cure <strong>of</strong> all is to walk themthrough a foot-bath <strong>of</strong> formalin.Mutton and lambYou stick a sheep <strong>by</strong> shoving the knife into the side <strong>of</strong> theneck as close to the backbone and the head as you can get it.Keep the sharp edge away from the backbone and pull theknife out towards the throat. This cuts all the veins andarteries in the neck and the windpipe too. But I would nevernever do this until I had stunned or killed the sheep witheither a .22 bullet, .an humane killer, or, in want <strong>of</strong> these, ablow on the head from the back <strong>of</strong> an axe.SkinningWith the sheep on the ground or on a bench, slice a narrowstrip <strong>of</strong> skin <strong>of</strong>f the front <strong>of</strong> the forelegs and the back <strong>of</strong> theJointing a sheep<strong>The</strong>re are a vast number <strong>of</strong> ways <strong>of</strong> cutting up any carcass, but whicheverway you follow, you still end up with-meat. So it doesn't really matter muchwhich way you do it, provided you do it neatly and cleanly.BreastUsed for stewing.<strong>The</strong> fore-quartersCan be retained as onebig joint, or can bedivided as shown tomake smaller joints. <strong>The</strong>for equarter joints aresweet meat but harder tocarve than the hind legs.Neck, and other odd bits,go for stew or soup.LegBe5c cooked as a primejoint to feed quite anumber <strong>of</strong> people.SirloinVery prime meat andan excellent smalljoint.LoinCan make cutlets, orcan be boned, rolledand stuffed.RackThis is the ribs.<strong>The</strong>y are nearlyalways used forchops.hind legs. Grasp the foreleg between your knees and raisethis strip <strong>of</strong> skin <strong>of</strong>f, right down into the brisket (chest).Keep the knife edge against the skin rather than the meat soas not to cut the latter. Hold the strip <strong>of</strong> skin tight away fromthe leg with the left hand. Do the same with the hind legs(along the back <strong>of</strong> them) as far as the anus. <strong>The</strong>n skin outthe legs, still holding each leg in turn between your knees.Don't tear or cut the meat. Cut the feet <strong>of</strong>f at the lowestjoint, and raise the tendons <strong>of</strong> the hind legs for sticking thegambrel (hook) through. Pull the flap <strong>of</strong> skin you have raisedbetween the hind legs <strong>of</strong>f the carcass as far as it will go.Fisting<strong>The</strong>n "fist" the skin away from the belly. (Fisting is the forcing<strong>of</strong> your fist in between skin and sheep). Use the knife aslittle as possible. Keep your hand washed when you fist,and don't soil the meat. Cleanliness is essential in all butcheryoperations. When you are fisting a sheep skin <strong>of</strong>f, make surethat you leave the "fell", or thin tough membrane, on themeat and don't take it <strong>of</strong>f on the skin. On the skin it is anuisance; on the meat it is a useful protection. Fist the skin<strong>of</strong>f both rear end and brisket as far as you can. <strong>The</strong>n insertthe gambrel and hoist the sheep up.Slit the skin right down the belly, and then fist the skin<strong>of</strong>f the sheep as high and low as you can. It will stick on therump - fist here from below as well as above. Try to avoidusing the knife as much as possible. If it's a nice fat lamb theskin will come <strong>of</strong>f easily, but if it's a skinny old ewe, or a toughold ram, you've got problems. Free the skin with the knifefrom anus and tail. <strong>The</strong>n you can <strong>of</strong>ten pull the skin right<strong>of</strong>f the sheep, down towards the shoulders, like taking a jersey<strong>of</strong>f. Use the knife to take the skin <strong>of</strong>f face and head. <strong>The</strong>n cutthe head <strong>of</strong>f at the atlas bone - right next to the skull.DisembowellingCut around the anus. Pull several inches <strong>of</strong> the rectum outand tie a string round it and drop it back. Now rip the bellyright down as you would do with an ox or pig (see p. 113).Protect the knife point with your finger to stop it piercingthe guts or paunch. Pull the rectum down with the rest <strong>of</strong>the guts. Take the bladder out without spilling its contents,and carefully hoist out the paunch and guts and othermachinery. Carefully haul the liver free from the back, andthen haul the whole mass up and out <strong>of</strong> the sheep. You willhave to cut the gullet to do this, and you should tie thegullet above the cut so the food doesn't drop out. Removethe liver carefully, and drop the guts into a big bowl. You canclean the guts and use all but the third stomach for tripe.Cut down the breastbone. With a lamb you can do thiswith a knife, with an older sheep you may have to saw.Pull the pluck (heart and lungs) out and hang them up.Finally, wash the carcass down with cold water and go to bed.Next morning, early, split the carcass and cut it up. Youcan use the small intestine for sausage casings.122
Food from AnimalsRabbitsRabbits are a very good stock for the <strong>self</strong>-supporting familyto keep. <strong>The</strong>y can be fed largely on weeds that would otherwisebe wasted and they make excellent eating.BreedsNew Zealand Whites are a good breed because their skinswhen cured are very beautiful and the rabbits themselvesare good meat. Californians are also excellent rabbits. <strong>The</strong>semedium breeds are probably more economical than verylarge rabbits such as, for example, Flemish Giants, which eatan awful lot and don't produce much more meat. If you gettwo does and a buck, these should provide you with up totwo hundred pounds <strong>of</strong> meat a year.ShelterDuring the summer rabbits will feed themselves perfectlywell on grass alone, if you either move them about on grasslandin arks, or else let them run loose in adequate fencedpaddocks. <strong>The</strong> wire netting <strong>of</strong> the paddocks should be dugsix inches (15 cm) into the ground to prevent them burrowing;if you have foxes you have problems. You can keep themin hutches all the year round: they can stand cold but not wet,don't like too much heat but need a cosy nest box.BreedingYou can leave young rabbits on the mother for eight weeks,at which age they are ready to be killed. If you do this youshould remove the mother six weeks after she has kindledand put her to the buck. After she has been served return herto her young. Remove the latter when they are eight weeksold and the doe will kindle again seventeen days after thelitter has been removed, gestation being about thirty days.If you keep some young for breeding replacements youmust separate does and bucks at three months. Sexing rabbitsis easy enough: lay the rabbit on its back, head towards you:press the fingers gently each side <strong>of</strong> where its equipmentseems to be and this will force out and expose the relevantpart. It will appear as an orifice in the female and a slightrounded protrusion in the male. When a rabbit the size <strong>of</strong> aNew Zealand White is ready for mating she weighs 8 lbs(3.6 kg): don't keep her until she gets much heavier than thisor she will fail to conceive. Always take the doe to the buck,never the buck to the doe, or there will be fighting, and alwaysput a doe <strong>by</strong> her<strong>self</strong> when she is going to kindle. A doe shouldrear from seven to nine rabbits a litter, so if the litters are overtwelve it is best to remove and kill a few, or else foster them onanother doe that has just kindled with a smaller litter. If youdo this rub the young with the new doe's dung and urinebefore you give them to her, to confuse her smell.FeedingRabbits will eat any greens or edible roots. <strong>The</strong>y like a supplement<strong>of</strong> meal: any kind <strong>of</strong> ground grain will do, but apregnant doe should not have more than 4 oz (114 g) <strong>of</strong> meala day or she will get fat. Assuming that rabbits are not on grassand that you are not giving them a great quantity <strong>of</strong> greenstuff,feeding should then be in the order <strong>of</strong> 3 oz (84 g) <strong>of</strong>concentrates a day for young rabbits over eight weeks old,plus hay ad lib. Eighteen days after mating the doe should begiven no more hay but fed on concentrates. She should havethese until her eight-week-old litter is removed from her, andat this time will eat up to 8 oz (228 g) a day. Young rabbits canhave meal as soon as they are two weeks old.KillingTo kill a rabbit hold it <strong>by</strong> its hind legs, in your left hand, grabits head in your right hand and twist it backwards; at the sametime force your hand downwards to stretch its neck. <strong>The</strong>neckbone breaks and death is instantaneous. Before thecarcass has cooled nick the hind legs just above the footjoint and hang up on two hooks. Make a light cut just abovethe hock joint on the inside <strong>of</strong> each rear leg and cut up to thevent (anus). Peel the skin <strong>of</strong>f the rear legs and then just rip it<strong>of</strong>f the body. Gut the rabbit <strong>by</strong> cutting down the belly andremoving everything except liver and kidneys. This is knownas hulking. Remove the gall bladder from the liver.New Zealand WhiteAnother good meat rabbit,and popular, with breedersfor its fur which dyes well.123
Food from AnimalsPoultryCHICKENSAll hens should be allowed access to the great outdoorsexcept in the winter in very cold climates. Not only is itinhumane to keep chickens indoors all the time, it leads toall the diseases that commercial flocks <strong>of</strong> poultry now sufferfrom. Some poultry keepers go to such extremes <strong>of</strong> cruelty askeeping hens shut up in wire cages all their lives. Sunshine isthe best source <strong>of</strong> vitamin D for poultry, as it is for us. Henswere evolved to scratch the earth for their living, and to denythem the right to do this is cruel. <strong>The</strong>y can get up to a quarter<strong>of</strong> their food and all their protein from freshly growing grassand derive great benefit from running in woods and wildplaces. <strong>The</strong>y crave, and badly need, dust-baths to wallow inand fluff up their feathers to get rid <strong>of</strong> the mites. In twentyyears <strong>of</strong> keeping hens running out <strong>of</strong> doors I have yet to findwhat poultry disease is, with the exception <strong>of</strong> blackhead inturkeys. Our old hens go on laying year after year until I getfed up with seeing them, and put them in the pot.FeedingHens running free out <strong>of</strong> doors on good grass will do very wellin the summer time if you just throw some grain. In the winter,when the grass is not growing, they will want a protein supplement.You can buy this from a corn merchant, or you can feedthem fish meal, meat meal, soya meal, other bean meal or fish<strong>of</strong>fal. I would recommend soya meal most <strong>of</strong> all, because soyais the best balanced <strong>of</strong> any vegetable protein. So if you live ina region where soya beans can be grown successfully, theproblem <strong>of</strong> your protein supplement is easily solved.But soya must be cooked, for it contains a substancewhich, when raw, is slightly poisonous. Sunflowers are goodtoo, particularly if you can husk the seed and grind it, butthey're quite good just fed as they are. You can also feed thehens lupin seed (either ground or whole), rape seed (althoughnot too much <strong>of</strong> it), linseed, groundnut or cotton seed (butthis must be cooked first), crushed or ground peas or beans,lucerne or alfalfa, or alfalfa meal. <strong>The</strong>se all contain protein.From ten days old onwards, all chickens should haveaccess to fresh vegetables, and after all, this is one thing wecan grow. So give them plenty <strong>of</strong> vegetables whether they runout on grass or not. My method <strong>of</strong> feeding hens is to let themrun outdoors, give them a handful each <strong>of</strong> whatever highprotein meal or grain I have in the morning, and scatter ahandful each <strong>of</strong> whole grain in the evening. Wheat is best, orkibbled maize. Barley is very good, but it should be hummelled- banged about until the awns (spikes) are broken <strong>of</strong>f.An equally good method is to let them feed both protein andgrain from <strong>self</strong>-feed containers (illustrated). <strong>The</strong>se should beplaced out <strong>of</strong> the reach <strong>of</strong> rats.If you allow hens to run out <strong>of</strong> doors, or to have access toa good variety <strong>of</strong> foods, they will balance their own rationsand not eat more than they need anyway. But if hens areconfined indoors, you can balance their rations like this:Laying mash1 cwt (50.1 kg) wheat meal1 cwt (50.1 kg) maize meal (preferably yellow maize)1 cwt (50.1 kg) other grain meal (oats or barley or rye)1 cwt (50.1 kg) fish meal30 lbs (13.6 kg) dried milk20 lbs (9.0 kg) ground sea shells5 lbs (2.3 kg) saltGive them free access to this, and a handful each <strong>of</strong> wholegrains to scratch out <strong>of</strong> their straw or litter.Fattening mash for cockerels or caponsBarley meal is the best fattener for any poultry, but can bereplaced <strong>by</strong> boiled potatoes. Skimmed milk is also ideal. Feedthe mash ad-lib:3 cwt (150.3 kg) barley meal1 cwt (50.1 kg) wheat meal2 cwt (25.0 kg) fish or meat meal30 lbs (13.6 kg) dried milkplus some lime (ground sea shells) and saltChicken breedsAs a <strong>self</strong>-supporter you will wantold-fashioned broody hens, and theyare hard to find nowadays becausecommercial breeders breed hybridsfor egg production and nothing ebe.So you will have to search for thosemarvellous traditional breeds whichcan live outdoors, lay plenty <strong>of</strong> eggs,go broody and hatch their eggs,rear their chicks and make goodtable birds as well. You want breedslike: the Rhode Island Red, a gooddual purpose hen, meaning it is agood layer and a good table bird;the Light Sussex, an old Englishbreed, again dual purpose; or theCuckoo Maran which is very hardyand lays large, deep-brown, veryhigh quality eggs, but not in prolificquantities.Cuckoo Maran Rhode Island Red Light Sussex124
Food from AnimalsTraditional arkThis is made <strong>of</strong> sawn timber andweather-boarding, is well creosoted,has a night-house with perches, arow <strong>of</strong> nesting-boxes accessible fromoutside <strong>by</strong> a door, and a run. It isstrong but easily movable <strong>by</strong>handles at each end.Home-made ark<strong>The</strong> homesteader should try to makehis gear for nothing, and usedjertilizer bags are free. We made this•irk for nearly nothing. Thatchwould work as well, and wouldlook better.Broody coopIndividual sitting hens need abroody coop. It must have a ratpro<strong>of</strong>floor and slats in front toconfine the hen if needed, but toadmit her chicks.Self-feed hopperYou can buy galvanized hoppers,but you can make them your<strong>self</strong>, forfree, <strong>by</strong> hanging up an old oil-drum,bashing holes round its base to letthe hens peck food out, and hangthe cut-<strong>of</strong>f base <strong>of</strong> a larger oil-drumunderneath to catch spilled food.Hang above rat-reach.Little chick mash30 lbs (13.6 kg) meal (preferably a mixture <strong>of</strong> wheat, maizeand oats)12 lbs (5.4 kg) fish meal or meat meal12 lbs (5.4 kg) alfalfa (lucerne) meal2 lbs (0.9 kg) ground sea shelb1 lb (0.5 kg) cod liver oil1 lb (0.5 kg) saltplus a "scratch" <strong>of</strong> finely-cracked cerealsIf you give them plenty <strong>of</strong> milk (skimmed is nearly as good)you can forget all but a little <strong>of</strong> the cod liver oil, the alfalfameal, and half, if not all, the fish meal or meat meal. If youhave food that is free to you, or a <strong>by</strong>-product <strong>of</strong> somethingelse, it is better to use that (even if the <strong>book</strong>s say it is notperfect) than something you have to pay for. I am a greatbeliever in making the best <strong>of</strong> what is available.Free range"Fertilber-bag" arkA layer <strong>of</strong> wire-netting over theoverlapping bags keeps them fromflapping. <strong>The</strong> bags can be supportedunderneath <strong>by</strong> closely-spacedhorizontal rods <strong>of</strong> hazel, willow, etc:An inspection door for nesting boxescan be made <strong>by</strong> hanging up fertilizerbags weighted with a heavy battenacross their bottoms.If hens run <strong>complete</strong>ly free range, it is <strong>of</strong>ten better to keepthem in their houses until midday. <strong>The</strong>y generally lay theireggs before that time, so you get the eggs before you let themout instead <strong>of</strong> losing them in the hedges where the rats getthem. Hens will do pasture good if they are not too concentratedon it, and if their houses or arks are moved from time totime over the pasture. <strong>The</strong> chicken is a woodland bird, andhens always thrive in woodland if the foxes don't get them.Keep them out <strong>of</strong> the garden or you will rue the day.Obviously hens can be run very advantageously on stubble(land from which cereals have just been harvested).Limited grassDon't put more than a hundred hens on an acre <strong>of</strong> grassland,unless you intend to keep moving them every six months or125
Poultryso on to fresh grassland. If you stock more heavily you willdamage the grassland, and your hens may have a build-up <strong>of</strong>parasites. It is a great advantage if you can divide your grassland,into two "(a strip each side <strong>of</strong> a line <strong>of</strong> hen houses forexample), and let the hens run on each strip in turn. As soonas they have really eaten the grass down on one strip let themrun on the other. In the summer, when the grass grows soquickly they can't cope with it, let them run on one strip longenough to let you cut the other strip for hay. Or alternate henswith sheep, goats, cows or geese. Poultry will eat any grassprovided it is kept short, but ideally it should be <strong>of</strong> the tendervarieties like Timothy or the Meadow grasses. <strong>The</strong>re can beclover with it, although the hens will provide enoughnitrogen in their droppings.<strong>The</strong> Balfour methodThis is suitable for the "backyard poultry keeper" or theperson who only has a small or limited garden. You have a penaround your hen house in which you dump plenty <strong>of</strong> straw,bracken or whatever vegetation you can get. In addition youhave two (or three if you have the space) pens which aregrassed down, and which can be approached <strong>by</strong> the hens fromthe straw yard. <strong>The</strong> hens will scratch in the straw yard and sosatisfy their scratching instincts and spare the grass. Now letthe hens run into one <strong>of</strong> the grass pens. Change them intoanother pen after, say, a fortnight or three weeks. <strong>The</strong>y will geta bite <strong>of</strong> grass from this, and the grass in the first pen will berested and have a chance to grow. <strong>The</strong> straw yard will providehalf a ton <strong>of</strong> good manure a year from each hen. <strong>The</strong> old"backyard poultry yard" which is a wilderness <strong>of</strong> scratchedbare earth, coarse clumps <strong>of</strong> nettles, rat holes, and old tincans, is not a good place to keep hens or anything else.Housing<strong>The</strong> ordinary commercially-produced hen house, provided itis mobile, works perfectly well. If used in the Balfour orlimited grassland methods described above, it doesn't evenhave to be mobile, unless you intend to move it from time totime into another field. Utter simplicity is fine for a henhouse. Hens need shelter from rain and wind, some insulationin very cold climates and perches to sit on. Make sure theperches are not right up against the ro<strong>of</strong>, and are placed sotheir droppings have a clear fall to the floor. <strong>The</strong> nestingboxes should be dark, designed to discourage hens fromroosting in them and ro<strong>of</strong>ed so hens don't leave droppings inthem. You should be able to reach in and get the eggs easily.<strong>The</strong>re are patent nesting boxes which allow the eggs to falldown to another compartment. I think these are a very goodidea; they prevent the eggs getting dirty. We now have movablehen arks (as illustrated), with an enclosed sleeping areaand a wire-netted open run. <strong>The</strong>y hold twenty-five hens eachand cost nothing but a handful <strong>of</strong> nails, some old torn wirenetting and some free plastic fertilizer bags.In countries which have heavy snow in the winter the birdswill have to be kept in during the snow period. It is not a badidea to confine some birds in a house in which there is electriclight if you want eggs in the depth <strong>of</strong> winter. Give the birdssay twelve hours <strong>of</strong> light and they will think it is summer timeand lay a lot <strong>of</strong> eggs; otherwise they will go <strong>of</strong>f laying as soon asthe days get really short.Rearing chickensIt is always a good idea to keep a rooster among your hens,and not just to wake you up in the morning. <strong>The</strong> hens will layjust as many eggs without a rooster but the eggs won't befertile. Also if each batch <strong>of</strong> hens has a cockerel to marshalthem and keep them together out <strong>of</strong> doors, they fare betterand are less likely to come to harm.If you leave a hen alone, and the fox doesn't get her, she willwander <strong>of</strong>f into the hedgerows and wander back again in a fewweeks with a dozen little chicks clucking at her heels. <strong>The</strong>sechicks, being utterly naturally reared, will be the healthiestlittle chicks you will ever see. Alternatively you can watchyour hens for broodiness. You can tell when a hen is broody<strong>by</strong> the way she squats tight on her eggs and makes a broodyclucking noise when you try to lift her <strong>of</strong>f. Help her <strong>by</strong>enclosing her in a broody coop (a little house with slats infront <strong>of</strong> it that ba<strong>by</strong> chicks can get through and the mothercan't). Give her nice s<strong>of</strong>t hay or something as a nest, and put adozen fertile eggs under her. (<strong>The</strong>y can be any kind <strong>of</strong> poultryegg you like). See that she always has water and food (she willeat very- little). Let her out once a day for a short walk, but gether in within half an hour or the eggs will get cold. Eggs shouldhatch out in 21 days from start <strong>of</strong> brooding. As soon as thechicks are a few days old you can let the hen out and she willlead them around and teach them how to look for food. Thisis <strong>by</strong> far the best way to raise poultry, and beats any incubator.If you are just starting with hens, you can either order "dayoldchicks" or "point-<strong>of</strong>-lay pullets" which are young femalesjust about to lay. When chickens are only a day old theydon't need to eat and can be packed into parcels and sentabout the country with impunity. A day or two older and theywould die.Keep such pullets as you need for your flock replacementsand fatten the cocks for the table. Feed all little chicks on afairly rich diet <strong>of</strong> high protein and finely ground meal. For thefirst few days add ground-up hard boiled eggs and milk <strong>by</strong>productsto their ration. Wheat meal mixed with milk is also aperfect food.Always make sure that chickens have access to enoughlime, in the form, perhaps, <strong>of</strong> ground sea shells, and to insolublegrit like crushed flint. Hens running out <strong>of</strong> doors arenot so dependent on artificial supplies.Cockerels should weigh two or three pounds (0.9-1.4 kg)at eight to 12 weeks and are called "broilers". Birds or tablebreeds should weigh more. At 12 or 14 weeks they shouldweigh three or four pounds (1.4-1-8 kg), and in America are called"fryers". After this you may call them "roasters". At six or nine126
Food from AnimalsSever the neckbone at the bottomend with secateurs or a knife.Cross the thread behind the hocksand tie around the parson's nose.127
Poultrymonths old they are called "boilers", so are old hens culledfrom your laying flock. An old hen can make good eating.Hens in lay if good layers, will have these characteristics:bright eyes, large red healthy-looking combs and wattles, wideapart pelvic bones (fairly loose so eggs can get out) and a white,large, moist, vent. If they have the opposite, wring their necks.<strong>The</strong>y won't lay you many eggs and you should certainly notbreed from them. Don't stop hens from going broody.EggsEggs are much better eaten fresh, and it is quite possible tohave new-laid eggs throughout the year. If you want to storeeggs, clean them first and drop them into water-glass, whichyou can buy from the chemist.TURKEYS<strong>The</strong>se are very delicate birds compared to other poultry. Ifthey associate in any way with chickens, they will get a fataldisease called blackhead unless you medicate their water ortheir food. If you want to keep them without medicatingthem, you must keep them well away from all chicken-kind,and even be careful about walking from the hen run to theturkey run without changing your boots and disinfectingyour<strong>self</strong>. It's hardly worth it. Turkeys do not seem to me to bea very suitable bird for the <strong>self</strong>-supporter, unless he wants totrade them. In this case he can rear them intensively in incubatorsand brooders, or buy them reared from another breeder.GEESE<strong>The</strong>se are the most excellent birds for the <strong>self</strong>-supporter.<strong>The</strong>y are hardy, tough, <strong>self</strong>-reliant grazing birds and they makegood mothers. <strong>The</strong> best way to start breeding geese is to buyeggs from somebody and put them under a broody hen. A henwill sit on five or six goose eggs and bring them <strong>of</strong>f, but youwant to make sure that she hasn't been sitting too long whenyou put the goose eggs under her, for goose eggs take longer tohatch than hens' do (up to thirty days or even more). Duringthe last week <strong>of</strong> the sitting take the eggs out from under thehen every day and wet them with lukewarm water (goosemothersget wet but hen foster mothers don't). On the daywhen the eggs start to pip, wet them well. Some peopleremove the first goslings that hatch so that the foster motherdoesn't think she's done her job, and then they replace themwhen the last egg has hatched. I have never bothered andhave always had good results.Feed the goslings well for the first two or three weeks onbread soaked in milk (or skimmed milk). If they are fairly safewhere they are, let the hen run around with them. If you fearthey will get lost, confine the hen in a broody coop. I preferthe hen to run loose. When the young birds no longer needthe foster mother she will leave them and start laying again.. But geese, although such fierce and strong birds, are vulnerableto two enemies: rats and foxes. Rats will pull gooseeggs out from under a sitting hen or goose, and they will killba<strong>by</strong> geese whenever they get a chance. So poison them, denythem cover, gas their holes: do anything to get rid <strong>of</strong> them.<strong>The</strong>y are the enemy <strong>of</strong> everything wholesome on your farm.Foxes just love geese. <strong>The</strong>y will snatch a sitting goose <strong>of</strong>fher eggs whenever they can. So they cannot really co-existwith the <strong>self</strong>-sufficient husbandman. Shoot them with a shotgunor a .22 at night. Use one <strong>of</strong> those powerful electrictorches which illuminates the sights <strong>of</strong> the gun as well as thefox. If there are foxes in the area you must confine sitting geesein a fox-pro<strong>of</strong>place. Adult geese, running out loose, can <strong>of</strong>tenprotect themselves from foxes, but even so you will alwayslose a few.If you start reducing the goslings' food after three weeks,they will live on grass. As adults, they don't need any foodexcept grass, but it is a good idea to chuck them some corn inJanuary andFebruary when you want to feed thegooseupabitto get her to lay well. Three weeks before you intend to killthem (generally Christmas), you should confine them, andfeed them liberally with barley meal, maize meal and milk ifyou have it to spare. <strong>The</strong>y will fatten on this, and one <strong>of</strong> themwill provide the best Christmas dinner in the world.Geese pair for life, so I prefer to keep one goose and onegander together as a breeding pair, although many peoplekeep a gander to two or threegeese. <strong>The</strong>y lay early: inFebruaryor March. If you leave them alone they will sit on a dozen ormore <strong>of</strong> their own eggs and bring them <strong>of</strong>f with no trouble atall, but if you are greedy you can keep stealing their eggs andputting them under broody hens. But hens aren't alwaysbroody as early in the year as that.Killing a goose or turkeyGrab the bird <strong>by</strong> its legs with both hands. Keep the back <strong>of</strong>the bird away from you. Lower the head to the floor, and getsomeone else to lay a broomstick across the neck, just behindthe head. Tread on both ends <strong>of</strong> the broomstick, and pull thelegs upwards until you feel the neck break. If you hold the tips<strong>of</strong> the wings as well as the two legs the bird will not flap after itis dead. <strong>The</strong>n treat like a chicken.DUCKSTo say that ducks don't need water is nonsense. Ducks doneed water and cannot possibly be happy without it. It is inhumaneto keep animals in conditions grossly different fromthe ones their species has been evolved to livein. So give themaccess to water, but keep your ducklings away from it>for theirfirst week or two until they have the natural protection <strong>of</strong> oilon their feathers. "You must give them drinking water, however.Swimming water for ducks is better if it is flowing, andrenews it<strong>self</strong>. A stagnant pond is less healthy. Many eggs getlaid in the water, or on the edge, and if the water is dirty theeggs, which have porous shells, can be dangerous to eat. Sodon't eat eggs that have been lying in filthy water, no matterhow much you superficially clean them. If there is no naturalwater on your holding, my advice is not to keep ducks. You128
Food from Animalscan, <strong>of</strong> course, create an artificial pond, either out <strong>of</strong> concrete,puddled clay, or plastic sheeting buried in earth, but if you do,make sure the water is renewable and does not becomestale and stagnant.One drake will look after half a dozen ducks and enjoy it,but ducks make rotten mothers. If you let them bring <strong>of</strong>f theirown eggs you must confine them in a broody coop, or theywill kill the little ducklings <strong>by</strong> dragging them all over theplace. Hens are much better duck-mothers than ducks are.Duck eggs hatch in 28 days.Ba<strong>by</strong> ducks need careful feeding. From hatching to tenweeks feed them as much barley or other meal as they will eat,and add milk if you have it. Feed ducks about the same as youwould hens when you are not fattening them. <strong>The</strong> duckis nota grazing bird to the extent that the goose is, but ducks will getquite a lot <strong>of</strong> food if they have access to water, or mud, or areallowed to roam around. <strong>The</strong>y are partly carnivorous, and eatslugs, snails, frogs, worms and insects. Don't let breedingducks get too fat, or they will produce infertile eggs. <strong>The</strong>y likea mash in the morning <strong>of</strong> such things as boiled vegetables,flaked maize, pea or bean meal, wheat meal and a little barleymeal. Give them about half a handful each for breakfast, andhalf a handful <strong>of</strong> grain in the evening. If you find they get fat,give them less. If you find they get thin, give them more.<strong>The</strong>re are ducks (such as the Indian Runner) with verylittle meat on them that lay plenty <strong>of</strong> eggs, and table ducks(such as the Aylesbury) with plenty <strong>of</strong> meat but not manyeggs. <strong>The</strong>n there's the Muscovy, a heavy, far too intelligent,very hardy bird, that's good to eat but has dark flesh.You should kill your young ducks at exactly ten weeks.<strong>The</strong>y are full <strong>of</strong> bristles before and after that time. <strong>The</strong>y won'tput on weight afterwards anyway. At ten weeks they are easyto pluck and are at their prime. You can <strong>of</strong> course eat oldAylesbury* drake<strong>The</strong> best British table breed. It islarge, heavy and very hardy, and itsducklings grow exceptionally fast.Embden gander<strong>The</strong> Embden is a good table breed.Its feathers and down are purewhite and ideal for stuffing cushionsand eiderdowns.ducks if you want to, but they are tougher and much fattier.Housing for ducks can be extremely simple, but this doesnot mean that it should be reach-me-down. Ducks like a dry,draught-free but well-ventilated house. If it's mobile, so muchthe better, because otherwise the immediate surroundings getin a mess. It must also be fox and rat pro<strong>of</strong>.PIGEONSIn America squabs are a great dish. <strong>The</strong>y are young pigeonskilled at about four and a half weeks. <strong>The</strong> parent birds aresometimes reared intensively, in a special house with a wirerun or "fly" for the birds to flap about in. Kept like this thebirds should be fed on grain, with some peas included as theymust have some protein. A pair <strong>of</strong> pigeons might eat up to ahundredweight <strong>of</strong> grain a year and raise up to fourteen squabsa year, so if you had a dozen pairs you would be eating squabsuntil you were sick <strong>of</strong> them. If they are confined in this manneryou must give them grit, as well as water for drinking andbathing in, and you must attend to hygiene <strong>by</strong> having somesort <strong>of</strong> litter on the floor which you can change.Personally I would object strongly to keeping pigeons likethat and would always let them fly free. Have a pigeon l<strong>of</strong>t,get a few pairs <strong>of</strong> adult pigeons (already mated) from somebodyelse, and before letting them loose keep them for threeweeks in some sort <strong>of</strong> cage in the l<strong>of</strong>t, where they can see out(this is important). <strong>The</strong>n let them out, chuck them a littlegrain every day, and let them get on with it. Kept like this theyare no work and little expense, and in fact do very littledamage to crops, although you hope they eat your neighbour'sand not yours. If he shoots a few, well, that won't breakyou. Harvest the squabs when the underside <strong>of</strong> the wing isfully feathered. Kill, pluck, draw, and truss, as if they werechickens (see p. 127).White turkey<strong>The</strong>se can grow up to 38 lbs(17.2 kg). <strong>The</strong>re is a small quickmaturingform <strong>of</strong> this breed calledthe BeltsviUe White.129
Food from AnimalsBees & HoneyBees will provide you with all the sugar you need and as a<strong>self</strong>-supporter you shouldn't need much. A little sugar (or,preferably, honey) improves beer,.and sugar is necessary ifyou want to make "country wines" (which I shall discuss onpp. 193-194), but otherwise the part that sugarplays in the dietis wholly deleterious. It is such an accessible source <strong>of</strong> energythat we satisfy our energy requirements too easily, and are notinduced to turn to coarser foods, whose valuable constituentsare less concentrated and less refined. <strong>The</strong> ideal quantity<strong>of</strong> refined sugar in the diet is: nil.Now honey will do anything that sugar can do and do itmuch better. Not only is it a healthier food, for beekeepers itis also free. It is sweeter than sugar, so if you use it for cookingor wine-making purposes use about two thirds as much asyou would sugar. Before the sugar-cane countries wereopened up to the western world honey was the only source<strong>of</strong> sugar, and for years I lived in central Africa consuming nosugar excepting that produced <strong>by</strong> bees. <strong>The</strong>se bees were wildones <strong>of</strong> course; all Africans know how to chop open a hollowtree with bees inside it and get out the honey. Many also hanghollowed-out logs in trees in the hope-generally realized -that bees will hive in them.Beekeeping is really a way <strong>of</strong> getting something for nothing.It is a way <strong>of</strong> farming with no land, or at least with otherpeople's land. You can keep bees in the suburbs <strong>of</strong> the city,even in the centre <strong>of</strong> the city, and they will make plenty <strong>of</strong>excellent honey<strong>The</strong> medieval skep<strong>The</strong> medieval method <strong>of</strong> keeping bees was in the straw skep.You plaited straw or other fibres into ropes, twisted the ropesinto a spiral, lashing each turn to the next, until you formeda conical skep. You placed this in a cavity left in a wall, so asto protect it from being blown over or soaked from above <strong>by</strong>rain. In the autumn, if you wanted the honey, you eitherdestroyed the bees you had in the skep <strong>by</strong> burning a piece <strong>of</strong>sulphur under them, or you could save the bees <strong>by</strong> turningtheir skep upside down and standing another empty skep ontop <strong>of</strong> it. <strong>The</strong> bees in the inverted skep could crawl up intothe upper skep. More sensibly, you could stand an empty skepon top <strong>of</strong> a full one, with a hole connecting them, and thebees would climb up. When they had done so you removedthe old skep which was full <strong>of</strong> honey and comb. If you dug thiscomb out you could wring the honey out <strong>of</strong> it <strong>by</strong> putting itin some sort <strong>of</strong> strainer (muslin would do), squeezing it, andletting it drip.If the skep-inversion method worked without killing thebees, then this would be quite a good way <strong>of</strong> keeping them.You need no equipment save some straw, a bee-veil, gloves,and a smoker. You get nothing like so much honey out <strong>of</strong> askep as you do out <strong>of</strong> a modern hive, but then you couldkeep a dozen skeps with practically no expenditure, whereasa modern hive, at its most basic, is a fairly costly item. Whenhundreds <strong>of</strong> people kept bees in skeps, and probably everyfarm had half a dozen or more, there were a great many morebees about the countryside, and swarms were much morecommon than they are now. It was easy.to find them and notso necessary to conserve the bees that one had.Langstroth's methodIn 1851, a Philadelphian named Langstroth discovered thekey secret about bees, which was what he called the "beespace." This is the exact space between two vertical planes onwhich bees build their honey-comb without filling the spacein between, yet still remaining able to creep through. Thisdiscovery made possible an entirely different method <strong>of</strong>keeping bees, and turned beekeeping from a hunting activityinto a farming one.<strong>The</strong> method Langstroth developed was to hang verticalsheets <strong>of</strong> wax down at the correct space apart. <strong>The</strong> bees,instead <strong>of</strong> building their comb in a random fashion, wouldbuild it on these sheets <strong>of</strong> wax. <strong>The</strong>n, with the invention <strong>of</strong>the queen excluder, which is a metal sheet with holes just bigenough for the workers but not the queen to get through,the queen was kept down below in a special chamber (thebrood chamber) so that she could not lay eggs in the cellsabove, which as a result were full <strong>of</strong> clean honey with nogrubs in them. You could then remove the frames, as thevertical sheets <strong>of</strong> wax were called, with their honey, extractthe honey without killing any bees or bee larvae, afterwardsreplacing the emptied frames for the bees to build up and fillonce more.<strong>The</strong> modern hiveLangstroth's discovery has affected the construction <strong>of</strong> themodem hive. This has a base to raise it, and an alightingboard, with a narrow slit for the bees to enter. On top <strong>of</strong> thebase is the brood chamber, with its vertically slung "deep" or"brood" frames. <strong>The</strong>se wooden frames have foundationinside them, like canvas inside a picture frame. <strong>The</strong> foundationis sheets <strong>of</strong> wax that have been embossed <strong>by</strong> a machinewith exactly the pattern made <strong>by</strong> comb-making bees. Abovethe brood chamber is a super, which is shallower. <strong>The</strong> queenexcluder divides the two chambers. You may have two orthree supers, all <strong>complete</strong> with frames fitted with foundation,one on top <strong>of</strong> the other. On the very top is a ro<strong>of</strong>. <strong>The</strong> ro<strong>of</strong>has a bee-escape in it, through which bees can get out but notin. <strong>The</strong>re should also be a clearer-board, which is a boardwith a bee-valve in it. This will let bees through one way butnot the other. <strong>The</strong>n you should have a bee-veil, gloves, asmoker, and an extractor, which you may be able to borrow.<strong>The</strong> extractor is a centrifuge. You put your sections full <strong>of</strong>honey into it and spin them round at great speed, whichflings the honey out <strong>of</strong> the comb on the the sides <strong>of</strong> theextractor. It then dribbles down and can be drawn <strong>of</strong>f.Capturing a swarmIf you are lucky enough to come across a swarm, what you will130
Food from AnimalsCollecting honeyTake the honey-loaded super outand bang, shake and brush the beesout <strong>of</strong> it. Or else insert a clearingboard the day before under thesuper, or supers, from which youwish to extract honey <strong>The</strong> superswill then be free <strong>of</strong> bees when youwant to take them out.DecappingTo remove the honey cut the waxcapping from the comb with a hotknife. Use two knives - heat onewhile you use the other.FeedingIf you take all the honey from a beehivein the late autumn you willhave to feed the bees sugar or syrup.<strong>The</strong> feeder allows the bees to lickthe syrup without getting drowned.<strong>The</strong> hive1 Waterpro<strong>of</strong> ro<strong>of</strong>2 Ventilator and bee-esc3 Shallow honey frame4 Super5 Queen excluder6 Brood chamber7 Deep brood frame8 Entrance9 Alighting board10 Base blocksExtractingPut the decapped frames in theextractor. Spin very fast until thehoney is all out <strong>of</strong> one side, turn theframes round and spin again.<strong>The</strong> skep<strong>The</strong> original beehive, or skep, ismade <strong>of</strong> twisted straw or rope sewntogether into a conical shape withstraw. If you use a skep your honeywill be full <strong>of</strong> brood, or immaturebees, because the queen can layeggs in every cell. <strong>The</strong>re is no queenexcluder as there is in a modernhive. You can strain the brood out,but you kill a lot <strong>of</strong> bees. It is alsoimpossible for the bee inspector tocheck a skep to see whether yourbees have any diseases.RobbingSmoke, which is best applied with aspecial "smoker", quietens bees,makes them fill with honey andsting less readily. Use a screwdriverto break the top super <strong>of</strong>f.<strong>The</strong> honey tankThis is useful if you have a largenumber <strong>of</strong> bees. Pour the extractedhoney carefully through thestrainer and let it settle before drawingit <strong>of</strong>f into jars or containers.131
Bees & Honeyfind will be a cluster <strong>of</strong> bees about the size <strong>of</strong> a football hangingon to a tree, or something similar. If it is a tree you just holda big, empty, cardboard box under the swarm, give the brancha sharp jerk, and the swarm will fall kerplomp into the box.When this happens, turn the box upside down, put a stickunder one side to keep it just <strong>of</strong>f the ground, and leave themuntil evening. This is to let the scouts, out searching for anew home, come back to the swarm. Some ruthless peoplesimply take the swarm away immediately. Swarming bees areunlikely to sting you, as they are loaded with honey and don'tlike stinging in this condition, but I'm not going to say theywill never sting you.To get a swarm into your hive, lay a white sheet in front <strong>of</strong>the hive sloping up to the entrance, and dump the swarm outon to the sheet. <strong>The</strong>y should all crawl up into the hive. Makesure the queen, who is bigger and longer than the others,crawls into the hive too: without her you won't have any bees.Bees in a colony<strong>The</strong> fine South African scientist Marais proved conclusivelythat a colony <strong>of</strong> bees, for all practical purposes, is oneindividual. Apart from the queen, the separate bees are morelike cells <strong>of</strong> an organism than like individuals. One colonymates with another and produces a swarm, the bee-equivalent<strong>of</strong> a child. <strong>The</strong> queen lays the eggs, and exerts a stronghold over the rest <strong>of</strong> the colony; kill her and if the workerscan't rear another queen quickly enough from an existinggrub, the colony will just die. <strong>The</strong> drones are as expendableas spermatozoa. Each one tries to mate with a young queen <strong>of</strong>another colony; whether mating is successful or not, either" way the drone is killed <strong>by</strong> the workers as he is <strong>of</strong> no further use.<strong>The</strong>re are about 20,000 workers in a mature colony, andthey spend their lives working: gathering nectar, building cellsfor storing the honey, feeding the queen, nursing the youngbees, ventilating and cleaning the nest, guarding it, and generallydoing everything to be done. If a worker stings you shedies. Her death is unimportant, for she is not an individual,but merely a cell. Her sacrifice means nothing.<strong>The</strong> organism survives at the expense <strong>of</strong> the individual,so if you capture a swarm you can just leave the bees to geton with it, and they will establish themselves.A swarm <strong>of</strong> bees in May is worth a load <strong>of</strong> hay,A swarm <strong>of</strong> bees in June is worth a silver spoon,A swarm <strong>of</strong> bees in July is not worth a fly.Which means that you won't reap much honey from a swarm<strong>of</strong> bees in July, but all the same do not despise one: hive it andit will establish it<strong>self</strong> and give you honey the next year.Buying and feeding a nucleusIf you can't find swarms you can buy nuclei <strong>of</strong> bees from otherbeekeepers or dealers, who are fairly common in most countries;then just follow the instructions on the box. If you dothis you should feed the nucleus for a while. You can do this<strong>by</strong> giving them two parts sugar to one part water in a feeder,which you can buy and put in your hive on top <strong>of</strong> the broodchamber. In the case <strong>of</strong> a nucleus don't have a super: confinethem in one brood chamber until that is full <strong>of</strong> honey andgrubs before adding any supers on top.Gathering the honeyAs the frames get built up and filled with honey, and thebrood chambers below with bee grubs, you may add a super,then a second super, and you may decide to take some honey.To do this take out one super, insert the clearer-board underit, and replace it. Next day go and remove the super whichshould be full <strong>of</strong> honey but empty <strong>of</strong> bees. Put the frames inthe extractor and spin the honey out <strong>of</strong> them. You must firstcut the capping <strong>of</strong>f the combs with a hot knife. Each frameshould be turned once to extract both sides. <strong>The</strong>n put theempty frames back in the super and return it to the bees sothat they can start building on it again. Always work quietlyand calmly when you work with bees. <strong>The</strong>re is no substitutefor joining a local beekeepers' group, or for making friendswith a knowledgeable beekeeper and learning from him.You should leave at least 35 lbs (15.8kg) <strong>of</strong> honey in thehive for the winter. I rob my bees only once: in early August.After that I leave them alone, with one empty super, and theymake enough honey to last themselves the winter. My onehive gives me from 20 to 40 lbs (9.0T8.1kg). This late honeyin our case is heather honey which I could not extract anyway,because it will not come out in the extractor: it has to bepressed out. People who rob all the honey from their beeshave to feed them heavily all winter on syrup or candy. Infact, some commercial honey nowadays is little more thansugar turned into honey <strong>by</strong> the bees. <strong>The</strong> honey you buyfrom small beekeepers is generally flower honey though, andis much nicer as a result.Wax<strong>The</strong> cappings which you cut <strong>of</strong>f the combs are beeswax,which is a very valuable substance: it makes polish, candles(the best in the world), and is good for waxing leatherworkand other purposes. Gentle heat melts the wax and it will rundow r n a slope for you to collect, minus most <strong>of</strong> its impurities,in a container. <strong>The</strong> heat can be supplied <strong>by</strong> the sun, shiningthrough a glass pane into an inclined box. It has been saidthat the reason why the monks <strong>of</strong> the Middle Ages were sucha jolly drunken lot was that they had to keep lots <strong>of</strong> bees toprovide the wax for their ecclesiastical candles; what couldthey do with the honey except-make mead <strong>of</strong> it?AddressesIn Britain, bees can be obtained from:BIBBA or <strong>The</strong> Brother ApiaristB. A. Cooper Buckfast AbbeyWhitegatesDevonThulstonDer<strong>by</strong>132
Food from the Garden<strong>The</strong> Food-Producing Garden<strong>The</strong> countryman's garden <strong>of</strong> my childhood was a mixture<strong>of</strong> vegetables, flowers, s<strong>of</strong>t fruit, top fruit (oh thosegreengages!) and very <strong>of</strong>ten tame rabbits, almost certainlya hen run, <strong>of</strong>ten pigeons and <strong>of</strong>ten ferrets. It was a verybeautiful place indeed. Now alas it has disappeared undera useless velvety lawn and a lot <strong>of</strong> silly bedding plants andhardy perennials, but ot course the owner is constrainedto keep up with the people next door.But how can we best reproduce the old cottage garden,which was one ot the most productive places on Earth?We are best to divide our garden area into six parts: sevenif we insist on having a small lawn-and-flower area in whichto sit among the fragrance <strong>of</strong> flowers.One <strong>of</strong> the areas we will set aside for perennial food plants:that is plants that go on growing for year after year such asasparagus, globe artichokes, horse radish, hops perhaps (butthey are very hungry and shading), comfrey, and herbs <strong>of</strong>many kinds. Another will be used for fruit canes, s<strong>of</strong>t-fruitbushes, and a few top fruit trees (but remember a fruit treereally does shade and sterilize a large area <strong>of</strong> soil).We should then divide the rest <strong>of</strong> the garden up into fourparts, which can be cropped on a four year rotation.Each yearly crop on each plot is called a "break'.' <strong>The</strong> fourbreaks are essentially: pea and bean family; cabbage family(brassica) but including swedes and turnips; roots meaningcarrots, parsnips, onions, beet, celery and so on; and spuds,which means potatoes and is a very good word. More aboutrotation and the four plot garden will be found on p. 160.LimingIf your land is acid it will need lime. You can test for this witha very simple device bought from any garden shop - or <strong>by</strong>asking a neighbour. You should lime before the pea andbean break. <strong>The</strong> peas and beans like the lime and the cabbagetribe that follow them like what is left <strong>of</strong> it. Lime has moretime to combat the dreaded club-root disease, which iscarried <strong>by</strong> brassica, if it is in the soil for a few months beforethe brassica are planted.MuckingIf you have muck - farmyard manure - and I hope you have,or if you have compost, concentrate this on your potatobreak. <strong>The</strong> potatoes benefit enormously <strong>by</strong> it. In fact youwon't grow very many without it. It is better not to put iton the root break because some roots, carrots and turnipsin particular, are apt to "fork" if they have too much freshmuck. It is better not to put muck on the pea and beanbreak, because you lime that and lime and muck don't govery well together in the same year.MulchingIt is quite advantageous to put a mulch, a covering <strong>of</strong> somedead greenstuff, on the surface <strong>of</strong> the soil between thecabbage-tribe plants, but only after you have hoed themtwo or three times to suppress the weeds. If you mulch ontop <strong>of</strong> weeds the weeds will simply grow through the mulchand the mulch will then impede the hoe.Organic gardening<strong>The</strong> aim <strong>of</strong> the organic gardener should be to get as muchhumus into his land as possible. Muck, compost, seaweed,leaf-mould, human excrement, spoiled hay, nettles, roadsidecuttings, anything or vegetable or animal origin: compostit (see p. 136) and put it on the land, or just put it on theland. If you dig it in well, you dig it in. If you just leave it ontop, the worms will dig it in for you.Unless you keep animals on your garden, you will haveto bring organic matter, or inorganic matter if you are not"organically minded}' in from outside if you want a reallyproductive garden. I subsidise my garden with manure made<strong>by</strong> animals that eat grass, hay and crops grown on the rest<strong>of</strong> the farm. <strong>The</strong>re is much wild talk <strong>by</strong> would-be organicgardeners who think a garden will produce enough compostmaterial to provide for it<strong>self</strong>. Well, let them try it. Let themtake a rood <strong>of</strong> land, grow the bulkiest compost-making cropthey can on it, compost it, and then see how far the compostit has made goes. It will not go very far.Percentage values <strong>of</strong> organic fertilizersAverage farm yardmanurePure pig dungPure cow dungCompostDeep litter on peatDeep litter on strawFresh poultry dungPigeon dungN itrogen Phosphorus Potash Calcium0.640.480.440.504.400.801.665.840.230.580.120.271.900.550.912.100.320.360.040.811.900.480.481.77nilnilnilnil*2.20nilnilnil*Unless lime has been addedTrue, deep-rooting plants, such as comfrey and lucerne(alfalfa), can do great work in bringing up minerals, andphosphates and potash as well, from the subsoil to add toyour soil. Trees do an even better job. But the land that isdevoted to growing the comfrey or the trees is out <strong>of</strong> usefor growing food crops.Of course if your own sewage goes back, in one form oranother, into the soil <strong>of</strong> your garden, one big leakage <strong>of</strong>Organizing the <strong>self</strong>-supporting gardenHowever limited the space available, you only need the determination toabandon your space-wasting lawn and flowerbeds in exchange for a schemeoj planned crop rotation for everv inch <strong>of</strong> your garden to become a pwductiveunit. You will save money, your end products will be fresh, and your gardenwill be a fine example <strong>of</strong> a dying breed: the cottage garden <strong>of</strong> yesteryear.134
<strong>The</strong> Food-Producing Gardenplant nutriments is stemmed. <strong>The</strong> old cottage gardens <strong>of</strong>the past had all their sewage returned, because the sewagesystem was a bucket and the contents <strong>of</strong> that were buriedin the garden. Provided the ground in which they were buriedwas left undisturbed for a time any pathogens in the sewagewould die a natural death. <strong>The</strong>se country gardens owedtheir phenomenal fertility to the fact that the inhabitantswere importing food from outside all the time, as well aseating their garden's own produce, and both lots <strong>of</strong> matterended up in the soil.But if you annually extract large amounts <strong>of</strong> producefrom a piece <strong>of</strong> soil, and either export it or eat it and exportthe resulting sewage, and don't import any manure orfertilizer, the laws <strong>of</strong> nature are such that you will ultimatelyexhaust that soil.It is vital that your garden be well drained, and it is anadvantage if the land beneath it is not too heavy. A welldrained medium loam is most desirable, but sandy soil,provided you muck it well, is very good too. Heavy clayis difficult to manage, but will grow good brassica crops.Whatever your soil is, you can scarcely give it too muchmuck, or other humus or humus-forming material.Making compostIf you pile vegetable matter up in a heap it will rot and turninto compost. But to make good compost, and to make itquickly, you have to do more than this.You can make the best compost in the world in twelvehours <strong>by</strong> putting vegetable matter through the guts <strong>of</strong> ananimal. To make it any other way will take you months,whatever you do. But the principle <strong>of</strong> compost-making isthis. <strong>The</strong> vegetation should be broken down <strong>by</strong> aerobicorganisms. <strong>The</strong>se are bacteria and fungi, which requireoxygen to live. <strong>The</strong> bacteria which break down cellulose inplant matter need available nitrogen to do it. If they getplenty <strong>of</strong> available nitrogen they break down the vegetablematter very quickly, and in doing so they generate a lot <strong>of</strong>heat. <strong>The</strong> heat kills the weed seeds and disease organismsMaking a compost heapin the compost. If there is a shortage <strong>of</strong> available nitrogenit takes the organisms a very long time to break the vegetablematter down. So in order to speed the process up as muchas you can, you try to provide the things that the compostmakingorganisms need: air, moisture, and nitrogen.You can provide the air <strong>by</strong> having rows <strong>of</strong> bricks withgaps between them underneath the compost and, if you like,<strong>by</strong> leaving a few posts in the heap as you build it, so youcan pull them out to leave "chimneys!' You can providethe moisture either <strong>by</strong> letting rain fall on the heap, or <strong>by</strong>throwing enough water on it to moisten it well. And youcan provide the nitrogen <strong>by</strong> adding animal manure, urine,fish meal, inorganic nitrogen, blood, blood meal, or anythingyou can get that has a fairly high nitrogen content.<strong>The</strong> natural, and traditional, way to make compost is tothrow your vegetable matter (generally straw) at the feet <strong>of</strong>yarded cattle, pigs, or other animals. <strong>The</strong> available nitrogenin the form <strong>of</strong> the animal's dung and urine "activates" thecompost. <strong>The</strong> urine also provides moisture and enough airgets between the straw. After a month or two, you dig theheap out and stack it carefully out <strong>of</strong> doors. More air getsinto it and makes it rot down further. <strong>The</strong>n, after a fewmonths, you cart it out and spread it on the land as fertilizer.But if you don't have any animals your best bet is tobuild compost heaps <strong>by</strong> putting down a layer <strong>of</strong> bricks orconcrete blocks with gaps in them, and laying coarse woodymaterial on these to let the air through. <strong>The</strong>n put downseveral layers <strong>of</strong> vegetable matter, sprinkling a dusting<strong>of</strong> some substance with a high nitrogen content betweenthem. Ten inches <strong>of</strong> vegetable matter and a couple <strong>of</strong> inches<strong>of</strong> chicken dung, or a thick sprinkling <strong>of</strong> a high-nitrogeninorganic fertilizer, would be ideal. Some people alternatelime with the nitrogen. Keep the sides vertical using walls<strong>of</strong> either wood, brick or concrete, and keep it decently moistbut not sopping. When it begins to heat, keep most <strong>of</strong> therain <strong>of</strong>f it, either <strong>by</strong> shaping the top, <strong>by</strong> building a ro<strong>of</strong>, or<strong>by</strong> covering it with old carpets. After a month or two, turn it,putting what was the top and the sides into the middle.If space is no problem, make an open-layered compost KJj"heap - the larger the better, so that heat can build up 'inside without too much escaping. But an enclosedheap is probably more practical: you build up layers<strong>of</strong> animal and vegetable matter in a confined space,on bricks covered with twigs and small branches,and between walls. Keep the compost damp andleave gaps between the bricks for air to get through.136
Food from the GardenAfter another month or two, it will be fit to put on thegarden. Every possible object <strong>of</strong> vegetable or animal originshould go in the compost heap.Green manuringGreen manuring is the process <strong>of</strong> growing a crop and thendigging or ploughing it in to the soil, or else just cutting orpulling the crop, and throwing it down on top <strong>of</strong> the soil.This latter form <strong>of</strong> green manuring is "mulching." Ultimately,the green matter will rot and the earthworms will drag itdown into the soil in their indefatigable manner. If you digin green manure crops you should do it at least three weeksbefore you sow the next crop on top <strong>of</strong> them. <strong>The</strong> only wayround this is to add plenty <strong>of</strong> available nitrogen to help torot down the green manure without it robbing the soil.Green manuring improves the quality <strong>of</strong> the soil becausethe vegetable matter rots down into humus. <strong>The</strong> amount <strong>of</strong>humus added <strong>by</strong> an apparently heavy crop <strong>of</strong> green manureis smaller than you might think, but the great value <strong>of</strong> suchcrops is that they take up the free nitrogen in the soil. Baresoil would lose this nitrogen to the air, whereas the greencrop retains nitrogen and only releases it when it has rotted,<strong>by</strong> which time the subsequent crop should be ready to use it.It should be the aim <strong>of</strong> the organic gardener to keep asmuch <strong>of</strong> his land as possible covered with plants. Bare soilshould be anathema unless for a very good reason it hasto be bare temporarily. <strong>The</strong> old gardener's idea <strong>of</strong> "turningup land rough in the autumn to let the frosts get in it inthe winter" has not proved a very good one.Using weedsEven weeds can be a green manure crop. If weeds grow, pullthem out and let them rot, either on the surface or dug in.But don't let them seed. For one thing, "one year's seedingis seven years weeding," and for another, all green manurecrops should be cut or pulled at the flowering stage, orearlier, when their growth is young, succulent, and high inprotein. <strong>The</strong>y then have enough nitrogen in them to providefor their own rotting down.So look upon annual weeds as friends provided you cankeep them under control. Perennial weeds (weeds that goon from year to year) should not be tolerated at any cost.<strong>The</strong>y will do you nothing but harm, and will ultimately beatyou if you don't beat them. I would make an exception withnettles, and also bracken. If you grow these two crops onotherwise waste land you can cut them and add them to thecompost heap. <strong>The</strong>y will do great good, as they are both deeprooting and thus full <strong>of</strong> material they have brought upfrom below.Planting green manureGreen manure crops can be divided into winter and summercrops, and legumes and non-legumes. People with smallgardens will find winter crops more useful than summerones, for the simple reason that they will need every inch<strong>of</strong> space in summer for growing food crops. Legumes makebetter green manure than non-legumes, because they havebacteria at their roots which take nitrogen from the air, andthis is added to the soil when they rot.Grazing ryeOf winter green manuring crops grazing rye is probably thebest. It can be broadcast at a rate <strong>of</strong> 2 oz (56g) <strong>of</strong> seed persquare yard (0.8 square metre) after early potatoes havebeen lifted. Rake the seed in, leave it to grow all winter andthen dig it in during spring. You can plant grazing rye as lateas October, although you won't get such a heavy crop.ComfreyComfrey is a fine perennial to grow for either green manuringor compost. Plant root cuttings from existing plants tw<strong>of</strong>eet (0.6m) apart in really weed-clear land in spring andjust let it grow. <strong>The</strong> roots will go down into the soil as far asthere is soil for them to penetrate and they will exist for adecade giving heavy yields <strong>of</strong> highly nitrogenous material,rich in potash, phosphate, and other minerals too. Oversixty tons an acre <strong>of</strong> greenstuff has been achieved, althoughthis was probably in response to heavy manuring. Still, youmight well get forty tons, and forty tons <strong>of</strong> comfrey yieldsabout four tons <strong>of</strong> good compost, and when dug in, it makesmagnificent green manure.Other green manure and compost cropsTares are legumes and winter crops and are therefore doublyvaluable. <strong>The</strong>y can be sown from August to October, anddug in next spring. As a summer crop, they can be sown anytime in the spring and dug in when in flower. Mustard isa much-used green manure crop, which is sown after earlypotatoes are lifted. Give the dug-over ground a good raking,broadcast the seed lightly and rake it in. Dig the crop intothe ground as soon as the first flowers appear. Red cloverseeds are expensive but it is a fine bulky nitrogen-rich legume,which can be sown after early potatoes and dug in in theautumn. If you plant some in the spring for the purpose <strong>of</strong>keeping seed you will save having to buy any. Lupins are alarge legume. Put the seeds in at six inch (15cm) intervalsboth ways in the spring or early summer. Here again youcan save your own seed. Tagetes minuta is a kind <strong>of</strong> giantmarigold, and is an interesting crop to plant for compostmaterial. It grows ten feet (3m) high and has two marvellouseffects. It kills eel-worm, and it wipes out ground elder andbindweed. It even suppresses to some extent the hideouscouch grass or spear grass, which is the scourge <strong>of</strong> manygardens. It is too tough to be dug in as green manure andshould be composted. Sunflowers make bulky compostmaterial. <strong>The</strong> seed is planted half an inch (1cm) deep andone foot (30cm) apart both ways in the spring, and cut whenit is in flower.137
Food from the Garden<strong>The</strong> Gardener's ToolsSpade A good spade, kept clean and put away after use, isessential for inverting the soil and digging in manure.Fork <strong>The</strong> garden fork is a marvellous instrument, and manyexperienced gardeners use it more <strong>of</strong>ten than the spade.With it you can loosen up the soil, very quickly, withoutinverting it, incorporate compost or manure with the firstfew inches and fork out roots <strong>of</strong> creeping weeds like couchgrass. It is also essential for digging up spuds.Hoe <strong>The</strong>re are two main types <strong>of</strong> hoe. <strong>The</strong>re is the ordinaryhoe, and what the English call the Dutch hoe. <strong>The</strong> formeris for pulling through the soil and the latter is for pushing.<strong>The</strong> ordinary hoe is much faster, goes deeper and can tackletougher weeds. <strong>The</strong> Dutch hoe has the advantage that youwalk backwards when you use it, and so leave the ground free<strong>of</strong> footprints. For people who really have some hoeing todo, and must get on with it, I would always recommend theordinary hoe.Rake A rake, preferably a large steel one, is essential forraking down fine seed beds and for covering seed.Wheelbarrow A wheelbarrow is necessary in anythingbigger than a very small town garden. <strong>The</strong> old-fashionedwooden wheelbarrow, with a wooden wheel and a removabletop on which light bulky loads could be carried, was asplendid and beautiful vehicle, and much better than thelow steel builder's wheelbarrow sold everywhere nowadays.Watering can Get a big galvanized iron watering can andnot a streamlined plastic one that wont last five minutes.Trowel You will need a trowel for setting out plants.Dibber A dibber can be made <strong>by</strong> cutting down a brokenspade or fork handle. You will need it for setting out smallerplants and seedlings.Secateurs Secateurs are very useful for pruning. <strong>The</strong>y aremuch quicker and also kinder to the plants than a knife,and they are also useful for severing chickens' neckboneswhen you are gutting them.Garden line A garden line which is a light cord, ratherthan a string which gets tangled up, should be kept on aniron or wooden reel on which it can be wound up. This mayseem a luxury, but it is very useful for getting your rows<strong>of</strong> vegetables straight.Wheel-hoe Small wheeled tools can be a real help. Awheel-hoe is most useful; it is the equivalent <strong>of</strong> the horsehoein the fields. You push it up and down between the rows.This means, <strong>of</strong> course, that you still have to hand-hoe in138
Food from the GardenDiggingDig a furrow at one end <strong>of</strong> your bed, and fill it with soil from the furrowyou dig next. Proceed in this way to the end; then fill the last furrow withthe spare soil from the first. Or split your bed and dig down one side andback the other. You then have spare soil near the empty furrow.Before you start digging, mark <strong>of</strong>f When digging break up the earththe plot to be dug with a garden line. properly, don't just turn it over onScore a light furrow along the line it<strong>self</strong>. Thrust your spade verticallyand then dig your trench a foot into the ground, and with a neat(30 cm) wide and a spade's depth twist flick the soil over into the(or spit) deep.next trench.the rows, between the plants. <strong>The</strong>re is a technique <strong>of</strong> plantingsuch things as the larger brassica (Brussels sprouts etc),maize, and potatoes in squares, so that you can wheel-hoeboth ways, at right angles. Don't be misled into thinkingthat you can really plough with the "plough" attachment <strong>of</strong>these instruments. It is just for scoring a small furrow todrop seeds in and it is very useful.Drills <strong>The</strong>re is a great variety <strong>of</strong> small wheeled drills onthe market. Most <strong>of</strong> them just agitate the seed until it fallsdown through a spout which drops it below the surface <strong>of</strong>the ground. <strong>The</strong>re are precision drills, however, which pickseeds up one at a time and drop them at exactly the rightintervals. <strong>The</strong>se are expensive, and not justified in a smallgarden, but on a market garden scale are well worthwhile.<strong>The</strong>y save seed, and also save work thinning later. However,they won't handle all seed, -and some kinds have to be"pelleted". You can buy seed already pelleted so it can bepicked out <strong>by</strong> the selector mechanism <strong>of</strong> a precision drill.This seed is expensive, but you save if you use a lot.iw
Food from the GardenSowing & PlantingSome people are said to have "green fingers" meaning thatwhen they plant a seed or a plant or a tree, it grows. I suspectthat this mysterious power is merely common sense andsympathy. Sympathy for the new life that you are helping tonurture. After all what does a seed want? Moisture, warmthand soil friable enough for its shoot to grow upwards and itsroots downwards. This soil should be in close contact withthe seed, and there shouldn't be too much soil between theseed and the light, as the plants growth depends on theenergy collected from the sun <strong>by</strong> photo-synthesis in itsgreen leaves. This energy takes over from the energy stored inthe seed when that is exhausted, and helps to protect theplant from its enemies.Plants vary in their requirements, <strong>of</strong> course, but broadlyspeaking, there are two ways to establish vegetables. One is <strong>by</strong>sowing the seed direct into the ground where it is going tostay. <strong>The</strong> other is <strong>by</strong> sowing it somewhere else, and then indue course transplanting. And there are even occasions whenwe transplant the plants from where we sowed the seed intoanother bed, leave them there to grow for a while, and thentransplant them again into their final bed. <strong>The</strong>re are twoquite sensible reasons for this seemingly laborious and timeconsumingprocedure.First, <strong>by</strong> crowding the seed in a seed bed, we release theland that the plants will ultimately take up, and can use it foranother, earlier crop. So nearly all our brassica (cabbagetribe),our leeks, and those other plants that will growthrough the autumn and possibly part <strong>of</strong> the winter, occupyvery little ground for the first half <strong>of</strong> the summer. <strong>The</strong>n we putthem in ground vacated <strong>by</strong> earlier crops, such as early spudsor peas, and so we get two crops <strong>of</strong>f the land in one year. <strong>The</strong>second reason for transplanting is to give seeds a good start.This is done <strong>by</strong> sowing seeds in a seed bed, but under glass,plastic or some other covering. This way we who live intemperate climates can start them earlier and give them aninitial boost, so that thev will come to harvest during ourshort summer. After all, manv <strong>of</strong> our vegetable crops wereevolved for warmer climes than the ones we grow them in.Peat pots<strong>The</strong>re are certain crops which respond far better to beinggrown in peat pots before they are transplanted, rather thanin flats or seed boxes. <strong>The</strong>se are crops which don't like havingtheir roots interfered with. When you plant the peat potdirect in the ground the roots will simply drive their waythrough the wet peat and the plant won't suffer. Maize,melons, squashes, and manv other semi-hardy plants benefitfrom this treatment.Soil for seed boxes<strong>The</strong> sort <strong>of</strong> soil you put in your flats, or seed boxes, or pots, orwhatever, is very important. If you just put ordinary topsoilin it will tend to crack, and dry out, and it will have insects anddisease organisms in it that may flourish in the hot air <strong>of</strong> thegreenhouse. This won't give you very good results.If you can get, and afford, prepared potting composts suchas the <strong>John</strong> Innes range, then get them. <strong>The</strong> expense isjustified <strong>by</strong> results. <strong>The</strong>se composts are carefully blendedand well sterilized. If vou can't, or don't want to buy them,you will have to manufacture potting composts <strong>of</strong> your own.<strong>The</strong> fundamental ingredients <strong>of</strong> the <strong>John</strong> Innes compostsare loam, peat and sand. You can make the loam <strong>by</strong> diggingtop quality meadow turves and stacking them, grass-sidedown, with a sprinkling <strong>of</strong> good compost or farmyard manureSowingFork over the ground. Mark out therows, and stretch a garden linealong each one. Drive a drill with adraw hoe at a suitable depth.Sprinkle tiny seeds thinly. Largeseeds like peas and beans should heplanted at regular intervals, usuallyrecommended <strong>by</strong> the seedsman,Water them gently.When you have finished sowing,rake the bed all over, so that theentire'surface becomes a fine tilth.This top layer <strong>of</strong> crumbly soil is themost important feature.After you have raked the soil, treadit firmly with your feet or with thebase <strong>of</strong> the rake. This ensures thatthe seeds are in close contact withthe earth.140
Food from the Gardenin between each layer <strong>of</strong> turves. Stack them in six foot layers,and leave them for from six months to a year. <strong>The</strong> loamshould be sterilized. This is best done <strong>by</strong> passing steamthrough it. Put the loam in any container with holes in thebottom and place it over a vessel <strong>of</strong> boiling water. This willsterilize it.Peat can be bought in bales, or it can be dug from a peatbog, and then sterilized <strong>by</strong> simply boiling it in water.<strong>John</strong> Innes seed compost, for putting in flats or seed boxes,is, <strong>by</strong> volume: 2 parts sterilized loam; 1 part sterilized peat;1 part coarse sand. To each bushel (25.4 kg) <strong>of</strong> the above addl 1/2 oz (42 g) superphosphate <strong>of</strong> lime and 3/4 oz (21 g) <strong>of</strong> groundchalk or ground limestone.<strong>John</strong> Innes potting compost is <strong>by</strong> volume: 7 parts sterilizedloam; 3 parts sterilized peat; 2 parts coarse sand. To eachbushel (25.4 kg) add 1/4 lb (114 g) <strong>of</strong> <strong>John</strong> Innes base fertilizerand 4 oz (21 g) ground chalk or limestone.And <strong>John</strong> Innes base fertilizer is <strong>by</strong> weight: 2 parts ho<strong>of</strong>and horn meal; 2 parts superphosphate <strong>of</strong> lime; 1 partsulphate <strong>of</strong> potash.Transplanting<strong>The</strong> same qualities are needed for transplanting a growingplant successfully as are needed for sowing seed: sympathyand common sense. Consider what a trauma transplantationmust be for a plant, which is a life form evolved for growing allits life in one place. It is wrenched out <strong>of</strong> the ground, and most<strong>of</strong> the friendly earth is shaken from its tender roots whichthemselves are probably severely damaged. <strong>The</strong>n it is shovedroughly into some alien soil, possibly with much <strong>of</strong> its rootsystem not in contact with the soil at all and the rest jammedtogether into a matted ball. It is quite amazing that trans-planted seedlings ever survive, let alone grow into mature plants.So dig plants out gently and be sure that as much soiladheres to their roots as possible. Transplant them as gentlyas possible into friable soil with their roots spread naturally asthey were before. Make sure the soil is well firmed, but notroughly trampled so as to break <strong>of</strong>f tender roots. <strong>The</strong>n waterthem well. "Puddling" transplants, which means <strong>complete</strong>lysaturating them, is nearly always a good idea. It is drying outthat kills most transplants. Of course, if we have hundreds orthousands <strong>of</strong> brassica to plant, we can't be too particular. Weare forced <strong>by</strong> sheer pressure to bang them in pretty quickly,but even then it is surprising how one person will have ahundred percent success with his plantings, while anotherhas many failures.Putting the plant inPlant when it is raining if you can, or when rain is promised.Put large plants in with a trowel and smaller ones with adibber, which is basically a pointed stick. Farm labourerstransplanting thousands <strong>of</strong> brassica plants go along at a slowwalking pace, jabbing the dibber in beside the plant and thenmoving the dibber over towards it to jam the earth tightaround its roots. Ifa moderate tug on the plant doesn't pull itout, it will be all right.With larger or more delicate plants, such as tomatoes,broad beans (if you really have to transplant them) orsweet corn, keep a ball <strong>of</strong> soil on the roots and very carefullyplace them in a hole dug with a trowel. <strong>The</strong>n firm the soilaround them. If you have grown them in pots, carry them inthe pots to their planting station. Water them well, then takethem gently out <strong>of</strong> the pots immediately before you placethem in the ground.PlantingCrowd seeds into a seed box, sothat the land where they willeventually grow can bear anotherearly crop in the meantime.Alternatively you can plant yourseeds in pots. As the seedlings growthin them out to allow the strongestseedlings more room for their rootsto develop.When the seedlings <strong>of</strong> your firstseed box look overcrowded, it istime to prick them out. This meansthinning and removing to a box orbed where they have room to grow.Give your seeds a good start <strong>by</strong>putting them, in pots or seed boxes,under glass. <strong>The</strong>y will grow andthrive earlier than they would if leftin the open air.141
Food from the GardenGrowing under CoverYou can get a greenhouse which has an interior like a spacemodule about to make a landing on the moon, withthermostats, propagators, electric fumigators and hell knowswhat. But if you buy this sort <strong>of</strong> equipment you arespending the money that would buy you out-<strong>of</strong>-seasonvegetables at the nearest greengrocers for many decades.Consider: is it really worthwhile going to great trouble andexpense in order to have some vegetable or fruit ready afortnight earlier than you would otherwise? If you aregrowing for market, the answer is yes.Greenhouse production-or intensive cloche production-for sale is a very sensible and valid way <strong>of</strong> making the smallamount <strong>of</strong> money that every <strong>self</strong>-supporter must have toconduct his limited trade with the rest <strong>of</strong> the world. I write<strong>book</strong>s, my neighbour gives piano lessons, another makeswooden articles. If anyone wants to make under-glasscultivation his money-spinning enterprise he must get somegood specialist <strong>book</strong>s on the subject, which is a very complexone, and requires a great deal <strong>of</strong> knowledge to make thedifference between success and <strong>complete</strong>, expensive failure.But unless the <strong>self</strong>-supporter intends to make greenhouseproduction a main item <strong>of</strong> foreign exchange or moneyearning,only the simplest <strong>of</strong> greenhouses is justified, withmaybe some cold frames, "hot frames," or a variety <strong>of</strong> cloches.You can buy your greenhouse ready-made or build ityour<strong>self</strong>. Buying the frames with glass in them is <strong>of</strong>ten thebest thing, for you can then build your own lean-to greenhouse.See pp. 172-173 for more details.spring, and so as the hot bed cools the spring advances,and the heat <strong>of</strong> the sun replaces the heat <strong>of</strong> the manure,which will have gone <strong>by</strong> the time you no longer need it.You will then have lovely well-rotted horse manure.Growing in a hot frame is not as easy as it sounds, but ifyou get the procedure right it is highly effective. It is sad thatit is not used more <strong>of</strong>ten. Maybe as heating greenhouseswith oil and electricity becomes more expensive it will be.Of course - you must first find your horse. A well-madecompost heap with some activator will work too.Cloches<strong>The</strong> first cloches were bell-shaped glass bowls, and weremuch used in France. <strong>The</strong>y were simply inverted over theplants to be forced. <strong>The</strong>se were replaced <strong>by</strong> continuouscloches, which are tent or barn-shaped glass sheds placedend to end to form long tunnels. <strong>The</strong>se are much cheaper,which is a good thing, because if you are half as clumsy asHot frameEnough heat to last from late winter right through spring comes from a thicklayer <strong>of</strong> decomposing manure or compost. Cover with a layer <strong>of</strong> soil.Cold framesIf you make four low walls and put a pane <strong>of</strong> glass on them,sloping to face the sun, you have a frame. <strong>The</strong> walls can bemade <strong>of</strong> wood, bricks, concrete blocks, rammed earth, whatyou will. <strong>The</strong> glass must be set in wooden frames so that itcan be raised or lowered. Frames are fine for forcing on earlylettuces and cabbages, for growing cucumbers later in thesummer, or for melons and all sorts <strong>of</strong> other things. Most<strong>of</strong> them are too low for tomatoes.Hot frames<strong>The</strong>se are much used <strong>by</strong> the skilful French market gardeners,and are a fine and economical way to force on early plants,but they do need skill. You make a "hot bed." This is a pile <strong>of</strong>partly-rotted farmyard manure or compost. <strong>The</strong> best isstable manure: horse shit mixed with straw, mixed with anequal part <strong>of</strong> leaves or other composting material so it won'tbe too hot. Turn this a couple <strong>of</strong> times until the first intenseheat <strong>of</strong> fermenting has gone <strong>of</strong>f along with the strong smell<strong>of</strong> ammonia, then lay it down in your frame with a shallowerlayer <strong>of</strong> earth on top. Manure two and a half feet (76cm)deep with a foot (30cm) <strong>of</strong> soil over it is appropriate. <strong>The</strong>seed should be put in when the temperature falls to about80°F (27°C). You can transplant plants into the bed. Youwould <strong>of</strong> course be doing this in the late winter or earlyCardboard boxA cardboard box painted blackabsorbs the sun's heat and aidsgermination.Plastic sheetingA transparent plastic sheet willhelp germination and force on earlyvegetables.142
Food from the GardenI am your cloche-managing career will be incessantlypunctuated <strong>by</strong> the mem" tinkling sound <strong>of</strong> breaking glass.If I just look at a glass cloche it falls to pieces, so when youreflect that you have got to hoe round crops, hand-weed,water (very necessary for crops under cloches as they donot get the rain), thin, inspect and harvest, and that thecloches have to keep coming <strong>of</strong>f and going back on everytime you do one <strong>of</strong> these operations, you will realize thatcloche-mortality can be very high.Polythene tunnels supported <strong>by</strong> inverted U-shaped wireswere the next development. <strong>The</strong>y don't shatter, but can veryeasily be blown away in a gale, and blown to pieces. However,they do work, and many people use them now; many marketgardeners have them on a large scale. Getting them on and<strong>of</strong>f enormously increases the labour involved in growing acrop, but harvesting a fortnight early may well make thedifference between pr<strong>of</strong>it and loss. PVC <strong>by</strong> the way retainsthe heat more efficiently than polythene, but is more expen-Cloches and a cold frameFour walls with glass across them make a cold frame (top right). Cloches areportable and there are innumerable types: (left to right) hard plastic cloche;glass bam cloche; s<strong>of</strong>t plastic tunnel cloche; simple corrugated plastic cloche;glass tent cloche.sive. And don't neglect the humble jam-jar! One <strong>of</strong> theseinverted over an early-sown seed or plant <strong>of</strong> some tenderspecies will protect it as well as any cloche. A sheet <strong>of</strong> anytransparent plastic spread on the ground and weighted downon the edges with earth is fine for forcing on early potatoesand so on. When you do this sort <strong>of</strong> thing you must becareful to "harden <strong>of</strong>f" the plants sensibly and gradually.PropagatorsYou can use a propagator to get very early seeds going. Thisis an enclosed glass box with soil in it and under-soil electricheating. It produces the condition known as "warm feet butcold head" which many plants like. Tomato seed can begerminated in one <strong>of</strong> these in January in a temperate climate,but the air above it must be kept at 45°F (7°C) at least,as well as the soil being warm. A propagator is probably aworthwhile investment if you have electricity, and the timeand skill to grow your OWTI tomato plants from seed.143
Food from the GardenProtecting from Pests<strong>The</strong> weeds that grow so merrily in our gardens, in defiance<strong>of</strong> all our efforts to wipe them out, are tough organisms,and well adapted to protect themselves from most enemiesand diseases. <strong>The</strong>y wouldn't be there otherwise. But ourcrops have evolved gradually through artificial selection soas to be succulent, good to eat, and productive <strong>of</strong> highyields. As a result, their natural toughness and immunityagainst pests and diseases have <strong>of</strong>ten been sacrificed toother qualities. We must therefore protect them instead.However, avoiding attack <strong>by</strong> pests and diseases is not soeasy. In fact it presents a great problem.If you observe the principles <strong>of</strong> good husbandry, <strong>by</strong>putting plenty <strong>of</strong> animal manure or compost on the land,and <strong>by</strong> keeping to strict crop rotations (never grow thesame annual crop on a piece <strong>of</strong> land two years running,and always leave the longest possible gap between twocrops <strong>of</strong> the same plant), you will avoid many troubles.Work with nature, not against it.Nasturtiums repel cucumber Toads will eat nasties such ass beetle and Mexican bean beetle. slugs, aphids and mosquitoes.You will always get pests and diseases but they will not reachserious proportions. An organic farmer I know who farmsa thousand acres with never an ounce <strong>of</strong> chemicals, andwhose yields for every crop he grows are well above thenational average, says that in his wheat he can show youexamples <strong>of</strong> even- wheat disease there is, but never enough<strong>of</strong> any one for it to make the slightest difference to his yield.A highly diversified floral and faunal environment makesfor balance between species: plenty <strong>of</strong> predators <strong>of</strong> varioussorts kill the pests before they get out <strong>of</strong> hand. Destroy allforms <strong>of</strong> life with poisonous chemicals and you will destroyall the predators too, so that when you do get a plague <strong>of</strong>some pest there will be no natural control, and you will beforced to use chemicals again. All the same, no matter howorganically you farm, there are times when some pest ordisease gets the upper hand, and when something must bedone if you are not to lose the crop.Thrushes eat snails which wouldotherwise damage your plants.Hedgehogs eat pests includingmillipedes that like potatoes.144Mint with its smell keepswhite fly from beans.Lacewings and their larvaedestroy aphids.Centipedes eat slugs' eggs andare the gardener's friend.Ladybirds aren't just pretty. <strong>The</strong>y\ consume aphids <strong>by</strong> the thousand.
Food from the GardenChemical pest controlOrthodox gardeners will say use poison. You can indeeduse some poison, and maybe sometimes you will have to;but surely it is far better and more skilful gardening practiceto save your crops without using poison? Any fool can keepdisease at bay simply <strong>by</strong> dousing his crop with chemicals,but what <strong>of</strong> the effect on other, benign, forms <strong>of</strong> life? If achemical is poisonous to one thing you can be certain itwill be poisonous to other forms <strong>of</strong> life too, and that includeshuman life: it will do damage even if it doesn't kill.<strong>The</strong> only chemicals I use are Bordeaux Mixture (seep. 87) against blight in potatoes, various poisoned baitsagainst slugs, and derris or pyrethrum or a mixture <strong>of</strong> bothagainst caterpillars and green or black fly. Derris andpyrethrum are both derived from plants, are non-persistent,and harmless to any non-insect. I have tried calamine(mercuric chloride) against club-root but it was ineffective.Simple methods <strong>of</strong> protectionYoung plants and bushes need protection from birds. Four sticks and somes<strong>of</strong>t netting can cage in a growing bush. Cover seedlings with wire nettingstretched across hoops, or with a mesh <strong>of</strong> string wound on wooden pegs.Biological pest controlVery little research has so far been done into natural, orbiological, means <strong>of</strong> defence, simply because there is nomoney to be made out <strong>of</strong> doing such research. No bigcompany will look into ways <strong>of</strong> controlling pests anddiseases which aren't going to make it any pr<strong>of</strong>it, and whichwill even operate against the pr<strong>of</strong>its it already makes <strong>by</strong>selling poisonous chemicals.Lawrence D. Hills <strong>of</strong> the Henry Doubleday Associationin Bocking, Braintree, Essex, England, with voluntaryassistants all over the world, has in fact done some researchinto biological methods <strong>of</strong> pest and disease control. Many<strong>of</strong> these are merely confirmations <strong>of</strong> old and tried methodsthat have been used <strong>by</strong> countrymen for centuries, but someare quite new. <strong>The</strong> Association sells a little <strong>book</strong> calledPest Control without Poisons which is very useful. Here aresome tips from it (and from other sources):Tie sacking strips or corrugated cardboard round fruittrees in late summer and then burn <strong>complete</strong> with weevils,codling moth grubs and other nasties.Put a very good old-fashioned grease-band around treeboles to catch nasties coming up. Most predators fly.Cut <strong>of</strong>f all dead wood from stone fruits in early summerand burn as a guard against silverleaf and die-back.Spray winter wash on fruit trees in winter. This shouldonly be done if needed, for it kills useful predators as well asnasties. <strong>The</strong>re are many proprietary brands <strong>of</strong> winter oru tar" wash.Use plenty <strong>of</strong> potash to prevent chocolate-spot in beans.Grow winter-sown broad beans instead <strong>of</strong> spring-sown toavoid blackfly. Pick out (and cook and eat!) the tips <strong>of</strong>broad-bean plants at the first sign <strong>of</strong> aphis attack.Avoid carrot fly <strong>by</strong> interplanting with onions. <strong>The</strong> smell<strong>of</strong> the one is said to "jam" the smell <strong>of</strong> the other; thus youavoid both carrot and onion fly. Putting sand soaked withparaffin around carrot or onion rows is probably a betterpreventative. Onions from "sets" are less likely to get flythan onions from seed.Rigorously get rid <strong>of</strong> every brassica weed such as charlockand shepherd's purse so as not to harbour club-root.Drop bits <strong>of</strong> rhubarb down each hole before you plantout brassica seedlings, or better still, water seed beds andseedlings with rhubarb-water. <strong>The</strong> smell <strong>of</strong> the rhubarb issaid to deter the club-root organism. This is an old remedybut I have never tried it.Sink basins full <strong>of</strong> beer into the ground to trap slugs.Or save the beer and use milk and water instead.My own experience with pests and diseases is that,except for potato blight if you don't spray occasional plagues<strong>of</strong> caterpillars on brassicas, and occasional aphis or greenflyand blackfly attacks, there is no need to worry as long asyou obey the laws <strong>of</strong> good organic husbandry which arenature's laws. A few pests on healthy crops do very littleharm - certainly not enough to worry about.145
Food from the GardenVegetablesIf you grow just a few <strong>of</strong> the vegetables listed below you caneat your own fresh vegetables from early spring to lateautumn. And if you grow the right things and store them (seep. 182), or if you set your<strong>self</strong> up with a greenhouse (seep. 172)you can have your own vegetables the year round, and neednever again suffer a flab<strong>by</strong> bought lettuce or a tastelesstomato in your own home.ARTICHOKESGlobe artichokesUse Globe artichokes are perennialsand therefore a long-termproposition. I would not recommendthem as the crop to feed ahungry world, but the object <strong>of</strong> the<strong>self</strong>-supporter should be to live arich and varied life and part <strong>of</strong> thismust be a rich and varied diet.Basically globe artichokes are hugethistles, and what we eat are theflower heads, and not even all <strong>of</strong>these, but just the little bit at thebase <strong>of</strong> each prickly petal, and theheart, which lies under the tuft <strong>of</strong>prickles that are immature petals,and is delicious beyond description.Boil the whole flowers and eatwith butter or oil and vinegar.Sowing In spring plant suckersfrom an existing plant, each with apiece <strong>of</strong> heel <strong>of</strong> the old plantattached. Plant them four inches(10 cm) deep in good well-manuredwell-drained soil at three foot(91 cm) intervals.After care Keep them well hoed.Harvesting Spare the first year,pluck the heads the second andeach ensuing year. After five or sixyears dig out and plant a new rowsomewhere else. If you plant a newrow every year and scrap an old oneyou will never have a gap with noartichokes. Muck well every yearand cover in the winter with a thickmulch <strong>of</strong> straw.CardoonsUse Cardoons are exactly likeglobe artichokes, except that theyare annuals and they have slightlysmaller flowers. <strong>The</strong> flowers can beeaten like globe artichoke flowersbut cardoons are really grown forearthing up in the spring so thatyoucan eat the stems like celery.Planting Plant from seed, which isgenerally sown in a greenhouse inspring and then pricked out a fortnightafter the last frost.Jerusalem artichokesUse A useful stand<strong>by</strong> in wintertime as a substitute for potato.<strong>The</strong>y can be lightly boiled or friedin slices. <strong>The</strong>y have absolutelynothing to do with globe artichokesor Jerusalem.Planting Like potatoes, theJerusalem artichoke grows fromtubers planted in early spring. <strong>The</strong>yare very easy to grow, and need onlya little extra lime if your soil requiresit. <strong>The</strong>y are rarely attacked <strong>by</strong> pests.After care Hoe until the foliage isdense enough to suppress weeds.Harvesting Dig them up as youneed them. <strong>The</strong>y can be left in theground throughout the winter.Save a few mature tubers to plantnext year.ASPARAGUSUse Asparagus are perennial vegetables,so once they are plantedthey can't be moved each year.<strong>The</strong>y take three years to get established,but it is well worth waiting.<strong>The</strong>y come very early - justwhen you need them - and aredelicious and nutritious, perhapsone <strong>of</strong> the most valuable crops youcan grow. Do not be put <strong>of</strong>f <strong>by</strong> anystupid puritanical ideas that this isa luxury crop and therefore somehowsinful. It is nourishing, delicious,and comes just when youdon't have anything else.Soil <strong>The</strong>y like a deep light loamyfertile soil but above all it must bewell drained. <strong>The</strong>y will grow onsand as long as it has plenty <strong>of</strong>muck. Make absolutely sure theteare no perennial weeds in yourfuture asparagus bed: couch grassor ground-elder can ruin a bed, becausethey cannot be eliminatedonce the asparagus begins to grow.<strong>The</strong> roots get inextricably intertwined.People always used to haveraised beds for asparagus, butnowadays some people plant insingle or double rows. It doesn'treally matter. I like a raised bed withthree rows <strong>of</strong> plants, and as theyears go on the bed tends to gethigher because I put so much stuffon it. It is a good plan to cover itthickly with seaweed in theautumn. If it hasn't rotted down <strong>by</strong>spring take it <strong>of</strong>f and compost it.S owing K luck really heavily in theautumn, buy or beg three-year oldplants in spring and plant themeighteen inches (46 cm) apartmeasuring from their middles. <strong>The</strong>plants look like large spiders. Don'tlet them dry out before you plantthem, and most important, pile afew inches <strong>of</strong> soil on top <strong>of</strong> them.Make sure the soil does not dry out,and keep weeding the bed. Don'tlet any weed live.Treatment Don't cut any aspatagusthe first year: not a single stick.In late autumn cut the ferns downto the ground, and muck well again.<strong>The</strong> following spring you can feedwell with fish meal, mature chickendung, seaweed, or salt (yes salt —asparagus is a sea-plant), and weedagain. That second year you mayjust have a feed or two but delaycutting until June. Muck again inthe late autumn, and feed again inthe spring.Harvesting <strong>The</strong> third year whenthe shoots look like asparagusshoots, cut them just below theground. You can cut away freshasparagus ready to eat every two orthree days. <strong>The</strong>y soon shoot upagain, and you can go on cuttinguntil the third week in June and thenstop. No more cutting, and <strong>by</strong> thenyou will have plenty <strong>of</strong> other greenthings to eat anyway. Let the tallferns come up again, cut themdown in the late autumn to confoundthe asparagus beetle <strong>by</strong> destroyingtheir eggs. <strong>The</strong>n, muckthem, or feed them, or both, forthese are lime and phosphate-hungryplants and like plenty <strong>of</strong> humus.AUBERGINE OR EGGPLANTUse Aubergines have, in recentyears, become more popular inBritain. <strong>The</strong>y can be used for exoticdishes like moussaka and ratatouille.Sowing Sow aubergine seeds indoorsin early spring. Sow them incompost and try to keep the temperatureclose to 60°F (16°C). Potout into peat pots or soil blocksabout a month later.Planting Plant them out in theopen in early summer. Protect themwith cloches if you live in a coolclimate. When you plant thempinch out the growing points tomake them branch. Or you can sowseeds out in your garden undercloches in late spring and still get alate crop.Harvesting Pick them when theyare a deep purple and glossy. Pickbefore frost sets in.BEETROOTUse Beetroot is a very rich source<strong>of</strong> betain, which is one <strong>of</strong> the Bvitamins. Beetroot therefore keepsyou healthy, particularly if yougrate it and eat it raw, but it tastes ahell <strong>of</strong> a lot better cooked, althoughtiny immature beet are good raw.Soil Beetroot likes light deeploam, but most soil will do.Treatment It doesn't like freshlymanured land, and wants a goodfine seed bed.Sowing Sow the main-crop inearly summer, very thinly, a couple<strong>of</strong> seeds every six inches (15 cm)!<strong>The</strong> seeds are multiple ones andyou will have to thin anyway. Sowan inch deep (2.5 cm) in rows a foot(30 cm) apart.Aftercare Thin andhoe. You caneat the thinnings raw in salads.146
Food from the GardenHarvesting You can leave them inthe ground until they are needed,or else until the heavy frosts set in.Or you can lift them in autumn.Twist (don't cut) the tops <strong>of</strong>f, andnot too near the roots, or they willbleed. Clamp, or store in sand in acool cellar.BROAD BEANSUse You can pick <strong>of</strong>f the tops <strong>of</strong>autumn-sown broad beans andcook them. You can eat the seedswhen they are green, which is theirmain use. Or you can dry them forwinter. It is best to rub the skins <strong>of</strong>fwinter-dried beans to make themmore tender.Harvesting Pick them as they areready. Go on picking as hard as youcan, and dry any that are left afterthe summer.BROCCOLIHearting broccoli or wintercauliflowerUse Hearting broccoli are likecauliflower. <strong>The</strong>y are a damnedgood winter and early spring stand<strong>by</strong>,and you can have heads fromlate summer one year until earlysummer the next if you plant successionallyand use a number <strong>of</strong>different varieties.and don't boil, just steam lightly.(Don't "steam launder" anybrassica as hospital kitchens andprivate schools do. This boils thelife out <strong>of</strong> them.) Steam lightlyuntil s<strong>of</strong>t but still firm.Sprouting broccoli, purpleor green.Use <strong>The</strong>se are quite different fromhearting broccoli. Purple sproutingbroccoli is very hardy and thereforethe great stand<strong>by</strong> in late winter andearly spring when there is not muchelse about. Green broccoli or calabreseis a delicious vegetable forautumn use.Treatment This is the same as forhearting broccoli (see above),except that green broccoli is plantedin midsummer. You pick and eatthe purple or green shoots whenthey appear. Leave the leaves untilthe very last and then eat them too.useful, especially in windy places,to give each plant a stake so that itcan be supported and kept straightwhen it grows taller.After care Hoe when required."Intercrop" (plant in alternaterows) if you like with lettuce oranother quick-growing catch-crop,because the spaces are wide. Keepfree <strong>of</strong> slugs and caterpillars. If youdidn't stake the plants in spring, inautumn earth up the stems to givesupport and to encourage thegrowth <strong>of</strong> new roots.Harvesting Early sprouts are readyin late summer.but look on them, ifyou live in a reasonably temperateclimate, as a winter stand<strong>by</strong>. Christmasdinner without sprouts is atravesty, and they should keep yougoing until spring. Pick <strong>of</strong>f theleaves only after they have goneyellow. Use the tops <strong>of</strong> the plantsafter you have picked the sprouts.BRUSSELS SPROUTSUse Sprouts are the most usefuland delicious winter green vegetable.You simply cannot have toomany <strong>of</strong> them.CABBAGEUse Cabbage is the most reliable<strong>of</strong> all the brassica. It is not fussyabout soil and treatment, yields aheavy crop per acre and some varietiescan be stored in clamp, cellar,or sauerkraut vat. What we shoulddo without cabbages I cannotthink. <strong>The</strong>re are three sorts: spring,summer and autumn, and winter.Soil <strong>The</strong>y will grow in most soil.Treatment Treat the same as youwould peas (see below). Lime welland use plenty <strong>of</strong> mulch.Sowing 1 like to sow broad beansin late autumn, but then the climatehere is fairly moderate. If theweather got intensely cold it mightnip them <strong>of</strong>f but it never has yet,although once or twice in severefrost they have looked pretty 7 sick.<strong>The</strong>y perk up again though. Ifwinter is too severe, or if youhaven't been able to get seed in inthe autumn, you can plant in earlyspring on light well-drained soil.<strong>The</strong> later you sow the more troubleyou are likely to have from black-fly.Sow three inches (8 cm) deep, eachseed eight inches (20 cm) from thenext, in two rows eight inches (20cm) apart. Common sense will tellyou to stagger the seed in the rows.Each pair <strong>of</strong> rows should be at leasttwo foot six (76 cm) away from thenext pair.After care In the spring, just assoon as the black-fly attack, as theyinevitably will, pick the tender tops<strong>of</strong>f and eat them. Hoe <strong>of</strong> course.Soil <strong>The</strong>y like good, heavy, firmsoil, but will grow in most soil aslong as it is well manured.Treatment Like all brassica,broccoli needs lime and doesn'tlike acid soil. It likes deeply cultivated,but very firm soil.Sowing Start sowing in seed bedsin late spring and go on for fouror five weeks.Planting Plant out as soon as theplants are ready and you have theground. Seedlings are ready whenthey are a few inches high and havemade at least four leaves. Planttwo feet (61 cm) apart in rows tw<strong>of</strong>eet six inches (76 cm) apart.Aftercare Hoe regularly until theweeds stop growing in the autumn.Harvesting Autumn varietiescan be cut in September andOctober; winter varieties fromJanuary 7 to March; spring varietiesup to April. To get late heads protectthe curds (the white cauliflowerheads) <strong>by</strong> bending leavesover them. Always cut when ripe,Treatment Put on compost ormuck the previous autumn, orplant after a well-mucked crop. Ifyour soil is lime deficient, plantafter a limed crop.Sowing Sow in the open in seedbeds during early spring, if youwant late sprouts sow again in a fewweeks time.Planting Plant out in earlysummer three feet (91 cm) apart inrows three feet apart (91 cm). It isSpring cabbageSoil Light soil is ideal.Treatment <strong>The</strong>y like fertile soilwhich is not acid, and it needn't beparticularly firm.Sowing Sow during the summerin a seed bed.Planting Plant in autumn, a foot(30 cm) apart in rows 18 inches(46 cm) apart.Aftercare Hoe regularly, and youcan top-dress with nitrogen if youwant to.Harvesting Use as spring greens147
Vegetablesin the hungry gap - early spring - orleave a few to heart for eating in latespring and early summer.Summer and autumncabbageSoil <strong>The</strong>y are not very fussy.Treatment See Spring cabbage.Sowing Sow in late winter in acold frame or in spring outdoors.Planting Plant a few where thereis room in early summer.After care See Spring cabbage.Harvesting You don't need manycabbages in summer anyway, butpick when you feel like a change.Winter cabbageSoil <strong>The</strong>y like a heavy loam.Treatment See Spring cabbage.Sowing Sow in seed beds in Apriland May.Planting Plant two feet (61 cm)apart in rows two feet (61 cm) apartin midsummer.After care Hoe regularly. Don'tbother to top-dress.Harvesting Where winters are nottoo severe leave them in the grounduntil you want them. Where there'slots <strong>of</strong> snow and ice, cut in autumnand clamp or make sauerkraut.Red cabbageTreat the same as Winter cabbage.Pickle or cook in oil and vinegarwith spices. Cook it for some timebecause it is tough stuff.CARROTSUse Carrots have more vitamin Athan anything else we are likely togrow, and in World War II it was putabout that the uncanny success <strong>of</strong>British night fighter pilots was dueto their huge consumption <strong>of</strong> carrotswhich helped them see in thedark. In fact, it was. all due toradar, which the Germans knewnothing about. Carrots store wellthrough the winter and are a mostuseful source <strong>of</strong> good food for the<strong>self</strong>-supporter. <strong>The</strong>y can be eatenraw in salads or cooked with absolutelyanything. .«Soil Carrots like a deep, wellcultivatedsandy loam. <strong>The</strong>y growwell in very light soil, almost sandin fact.Treatment Like most roots theyfork if planted in soil which hasrecently been heavily manuredwith muck or compost, although infact well-matured compost doesn'tseem to affect them so much.Shakespeare compared Man to aforked carrot. So don't plant themafter fresh muck.<strong>The</strong>y don't likesour ground (a pH <strong>of</strong> about 6 isfine). <strong>The</strong> land must have beendeeply dug and then worked downinto a fine tilth.Sowing <strong>The</strong>re is no point in sowingcarrots until the ground is dryand warm, say in the late spring.Sow very shallowly, as thinly as youcan, and tamp down rows with theback <strong>of</strong> the rake afterwards. Somepeople sow a few radishes in withthem to show where the rows arebefore the slower carrots emerge.<strong>The</strong>n they pull the radishes for eatingwhen they are ready. Somepeople intercrop with onions, inthe belief that the carrot fly are put<strong>of</strong>f <strong>by</strong> the onions, and the onion flyareput <strong>of</strong>f <strong>by</strong> the carrots.After care If you sow in dryweather,it is good to water the rowsto start germination. Hoe frequentlyand carefully so as not to damagethe carrors, and hand-weed as well.Suffer not weeds to exist in yourcarrot rows. To get a heavy cropthin to about three inches (8 cm)apart, then harvest every other carrotso as to leave them six inches(15 cm) apart. This is best for bigtough 'carrots for winter storing,but for summer and autumn usedon't bother to thin at all. Whenyou do thin try to do it when it israining (to thwart the carrot fly),or if it's not raining sprinkle derrisdust around the plants. After thinningdraw the soil around theplants and then tamp down so thescent <strong>of</strong> bruised carrots will notattract the beastly carrot fly.Harvesting Pull them young andtender whenever you feel like it. Liftthe main crop with a fork before thefirst severe frost <strong>of</strong> winter, and storein sand in a cool place such as a rootcellar. You can clamp (see p. 183)them but they sometimes go rortenin the clamp. Washed carrots won'tkeep at all whatever you do. <strong>The</strong>yrot almost immediately.CAULIFLOWERUse Eat them in summer andautumn. Hearting broccoli are aptto take over in winter. Cauliflowersyield well, but you need skill andgood land to grow rhem successfully.<strong>The</strong>y are not a beginner's crop.Treatment <strong>The</strong>y must have nonacidconditions, like all brassicawhich means you must lime ifnecessary. A fortnight before plantingfork on or harrow in a gooddressing <strong>of</strong> fish manure or the like.<strong>The</strong>y also need some potash.Sowing <strong>The</strong>y can be sown undercold glass in September or in awarm greenhouse in January orFebruary. Sow outdoors in latespring. Plant two feet (61 cm) apartin rows two feet six (76 cm) apart.Planting Autumn and wintersown plants go out in spring. Springsown ones in summer.After care Hoe <strong>of</strong> course. Makesure there is always plenty <strong>of</strong>moisture for they can't standdroughr. Top-dress with nitrogenif you have any. Keep them moving,in other w-ords, don't let them stopgrowing.Harvesting Cut them when theyare ready, early in the morning ifpossible. Don'r boil them to death.<strong>The</strong>y are nice boiled, then dippedin batter, fried and eaten cold.CELERIACSowing Sow, prick out and plantout just like white celery.After care When you hoe drawthe soil away from the plantsinstead <strong>of</strong> earthing them up as youwould for celery.Harvesting Begin harvesting inautumn. Earth them up in themiddle <strong>of</strong> November for protectionagainst winter frost.CELERYWhite celeryUse It is said that celery is bestafter the first frost has been on it.If you are lucky it will keep goinguntil a few weeks after Christmasas long as you ridge it well. It is amost delicious and useful wintervegetable whether eaten raw, as theblanched stems should be, orcooked in stews as the tops should be.Soil It loves deep fertile soil, verymoist but not sw-ampy. <strong>The</strong> verybest celery is grown in soil which ishigh in organic matter and retainsmoisture. Don't ler the soil dry out.Treatment Celery- prefers acid toalkaline conditions, so never give itlime. It needs plenty <strong>of</strong> humus sodig in muck orw'ell-rotted compostwhere ir is going to grow.Sowing Sow under glass at atemperature <strong>of</strong> between 60°F and65°F (16°C and 19°C) in spring, orbuy plants from a nursery. <strong>The</strong>seedlings must be kept moist. Spravthem with water at least twice a day.Planting Early summer is theusual time to plant. Plant very carefullya foot (30 cm) apart in trencheswith muck underneath. Soak wellwith water.After care You can grow catchcropssuch as lettuce or radish onridges between the furrows. Wher.these catch-crops have beer.harvested, earth up the celery. Cut<strong>of</strong>f the side shoots. <strong>The</strong>n hold theplants in a tight bunch and earth148
Food from the Gardenup so only the tops <strong>of</strong> the leavesare above the new ridges. Alwayskeep ground moist. Never let it dryout.To prevent leaf blight spraywith Bordeaux Mixture (see p. 87)once or twice as you would spuds.If you want to extend the eatingseason in the winter protect theplants with straw, bracken, cloches,or what you will. Or you can heelthem into dry ground in a protectedposition if you fear very hard frost.It makes harvesting difficult.Harvesting Dig them out wheneveryou want them and eat themfresh.Self blanching celeryYou can grow this on the flat, inthe same conditions as ordinary orwhite celery (see above). But youdon't need to earth it up. It getsused before the white celery andmust be finished before hard frostsbegin as it is not frost-hardy. It isnot as good to eat as white celery,but is a good stand<strong>by</strong> in the autumnbefore white celery is readv.Sowing Sow the Witlo<strong>of</strong> type inearly summer in a fine tilth, andthin to a foot (30 cm) apart in rows18 inches (46 cm) apart.After care Cut down to just abovethe crown in November. Lift andplant in pots and keep in the darkat 50°F (10°C) or thereabouts.<strong>The</strong>y will then shoot.Harvesting Break the shoots <strong>of</strong>fjust before you need them. <strong>The</strong>yshould grow again every four weeksor so. Keep picking.CORN SALADUse If you like eating salad in thewintet this is an ideal crop for you.It produces leaves like tenderyoung lettuce leaves.Sowing Sow in drills one foot(30 cm) apart in late summer.Harvesting Cut it when the plantis short with just three or fourleaves. Don't let it get too lanky.CUCUMBERS ANDGHERKINSSoil Cucumbers will grow on lightsoil if it has plenty <strong>of</strong> manure in it.<strong>The</strong>y must have plenty <strong>of</strong> moisture,and they don't like acid soil.Treatment Dig plenty <strong>of</strong> mulchin during the previous autumn.Sowing Frame cucumbers can besown, under cover, in early spring.It is ideal if you can start them <strong>of</strong>fin a heated greenhouse, keepingthe temperature at about 60°F(16°C). Outdoor types can't besown until early summer unlessthey are protected for the firstmonth. In wet climates plant sixseeds <strong>of</strong> an outdoor variety- on asmall hill, four inches (10 cm) highand later thin out to the three bestplants on each hill. In dry climatesuse the same technique, but plantin a small depression that has hadplenty" <strong>of</strong> muck or compost dugbelow it the previous autumn.Planting Outdoor cucumbersjust continue to grow where youplant them. Frame cucumbers canbe hardened <strong>of</strong>f in early summer.If you grow cucumbers in a greenhouse,pot them in peat pots asthey grow big enough to handle,then plant them, pot and all, inthe greenhouse soil when they areabout to outgrow the pot. Alwayswater them with warm water, keepthe greenhouse humid andwell ventilated.After care <strong>The</strong>y must have plenty<strong>of</strong> water and never be allowed toget dry It helps to soak muck inthe water. Ridge cucumbers shouldhave all the male flowers pinched<strong>of</strong>f them, so that the female flowerswhich produce the cucumbersdon't get fertilized. If they do thefruit will be bitter. And ridge cucumbersshould also have the growingpoints nipped out when the planthas seven true leaves.Harvesting Pick them regularlywhile they ate young and they willgo on cropping. Pickle the last lotbefore the first frosts.ENDP7ESUse A vegetable which can beeaten in winter instead <strong>of</strong> lettuce,in summer to complement it.Sowing Sow in mid summer andput cloches over in late summer.Whitewash the cloches so as tokeep out the light and the endiveswill blanch and make good wintersalading. Blanching also helps toreduce the bitter flavour. Forsummer endives sow in the openfrom spring onwards and eat, green,in salads.FRENCH BEANS ANDDRIED BEANSUse Haricots are ripe Frenchbeans that have been dried forwinter use. Butter beans and Limabeans are specifically for drying andusing in the winter. For vegetarianssuch dried beans are really necessary,because they are about the onlysource <strong>of</strong> protein readily availableto them in winter time. Frenchbeans can be eaten green, pods andall, just like runner beans.Soil <strong>The</strong>y all like lightish welldrained,warm soil. It's no goodtrying to grow them in heavy clayor on sour land.Treatment Like all the legumes,thev grow best after a heavilymucked crop. Lime well if necessary.Sowing Sow in early summer ina temperate climate. <strong>The</strong>y are allvery frost-tender, and will notthrive if sown in cold damp ground.Sow in a wide drill, about twoinches (5 cm) deep, in two staggeredrow"S, so the beans are about sixinches (15 -cm) apart.After care Hoe well, and draw thesoil around the plants. Dwarfvarieties don't need sticking buthigh varieties do. Any arrangement<strong>of</strong> sticks, or wire and string supportedon poles, will do.Harvesting If the beans are fordrying for the winter let them getquite ripe, then pull the plantsintact and hang them upside downfrom the ro<strong>of</strong> <strong>of</strong> an airy shed. Threshthem as required. If you are eatingthem green pull them and pullagain. <strong>The</strong> secret <strong>of</strong> having plenty<strong>of</strong> them, young and fresh, is to keepon picking.KALEUse Kale is very hardy and thereforean excellent winter greenstand<strong>by</strong>. It will grow in cold andwet climates where there is littleother greenstuff in wintet and earlyspring. In the highlands <strong>of</strong> Scotlandthe "kale-yard" has <strong>of</strong>ten been theonly source <strong>of</strong> greenstuff in winter.Soil Kale is not at all fussy, but thericher the soil the better the crop.Treatment See Spring cabbage.Sowing Sow during late April and149
Vegetablesearly May in colder climes and inearly April in warmer ones.Planting It is a good idea to sowthe seed in situ and not transplantit, but thin it instead. But you cantransplant it if you need the land.After care See Spring Cabbage.Harvesting Leave kale until youreally need it, that is after theBrussels sprouts have rotted, thecabbages are finished, the slugshave had the rest <strong>of</strong> the celery, andthe ground is two-feet deep insnow and only your kale plantsstand above it like ship-wreckedschooners.LEEKUse In cold wet areas this is one<strong>of</strong> the most useful plants, for itstands the winter and providesgood food and vitamins in themonths when perhaps little elsehassurvived except kale. Onions arehard to grow and to keep, but leeksare an easy substitute. <strong>The</strong> Welshare very sensible to have thisexcellent plant as an emblem andnot some silly inedible flower ora damned thistle.plant leeks is to chop the bottoms<strong>of</strong>f the roots and the tops <strong>of</strong>f theleaves <strong>of</strong> the little plants, and justdrop the plants in small holes andleave them. If you do this theygrow and make leeks, but I havecome to believe that this is a sillyidea, and it is better not to mutilatethe plants and also better to plantthem properly. Why not try bothmethods and compare them?Draw drills three inches (8 cm)deep with a hand-hoe or a wheelhoeand plant the leeks five inches(13 cm) apart in the furrows. Makea biggish hole for each leek andplant carefully making sure'that thelittle roots are not doubled up.Don't press down as you wouldonions. Just water them in and thiswill wash a little loose earth intothe hole round the roots.After care Hoe them <strong>of</strong> courseand ridge them, raising the ridgesfrom time to time so as to blanchthe lower parts <strong>of</strong> the stems.Harvesting Leave them until youreally need them and then, towardsthe end <strong>of</strong> the winter, dig them outand "heel them in" on anothersmall piece <strong>of</strong> ground. Heeling inmeans opening a slot in the groundwith a spade, putting the leeks inquite thickly, and heeling the earthback on their roots. <strong>The</strong>y won'tgrow any more like this, but theywill keep alive and fresh until youneed them. <strong>The</strong>y are very hardyand don't mind frost.LETTUCEUse Lettuce is the firm base <strong>of</strong>salads throughout all the fairmonths <strong>of</strong> the year, and with a littleglass protection we can even havethem through the winter if we feelwe must. <strong>The</strong>y are not a brassicaso we needn't worn" about clubroot.Try growing different types<strong>of</strong> lettuce - some are much crisperthan others.is richly manured. Lettuce likes itcool and will stand shade but willnot grow well near trees. <strong>The</strong>y like amoist climate.Treatment Dig in well rottedmuck or compost tor summerlettuce, but not for winter, as winterlettuce doesn't like too much freshmanure: it gets botrytis. Workdown to a fine seed bed.Winter lettuceSowing and planting Sow aboutan inch (2 cm) deep in late summerand then expect to protect themwith cloches or something overthe winter. Of course in very coldclimates winter lettuce is out. Youcan sow wintet lettuce in seed bedswith the intention <strong>of</strong> planting themout in early spring to get an earlycrop. And <strong>of</strong> course, you can getlettuces all winter in a heatedgreenhouse.Summer lettuceSowing and planting Sowthinlystarting in the spring with afoot and half (46 cm) betweenrows. Thin the plants out to over afoot apart, and transplant the thinningselsewhere because theytransplant easily. Don't sow toomuch at one time, but keep onsowing throughout the summer.After care Hoe and hoe and waterwhenevet necessary. Keep eating.MARROWS, SQUASHESAND PUMPKINSUse <strong>The</strong>y can be kept for thewintet, and are rich in vitaminsand very nutritious.wise sow in soil blocks or peat potsunder glass. Harden plants <strong>of</strong>fgradually in early summer, <strong>by</strong>propping the jam jars up in the day,for example, and putting themdown again at night. Remove theglass, or plant the potted plants outin the open, a few weeks later Plantthree seeds to a station and havethe stations six feet (1.8 m) apartbecause these things like to straggle.After care Hoe <strong>of</strong> course, waterwhen necessary, mulch if vou canand beware <strong>of</strong> slugs.Harvesting Keep cutting themwhen they are young and tenderand you will get more. Youngmarrows, or courgettes, are particularlygood. In late summer leavesome to ripen, and store them out<strong>of</strong> the frost in a cool place, preferablyhung up in a net. In southernAfrica, where you don't get toomuch frost, pumpkins are thrownup on corrugated iron ro<strong>of</strong>s andleft there all winter. <strong>The</strong>y dry outin the winter sun, become deliciousand form the chief wintet vegetable<strong>of</strong> that part <strong>of</strong> the world.MELONSUse Melons grow outdoors inwarm climates, and can be grownoutdoors in cool climates as longas you start them <strong>of</strong>f under clochesafter the last frost. But they are bestgrown under protective frames incooler climates.Soil Leeks grow on pretty well anysoil as long as it is not watetlogged.Treatment Heavy manuring isadvantageous. Most people plantleeks out on land from which earlypotatoes have been harvested andwhich has been heavily mucked forthat purpose. If you can't lift yourearlies before mid summer however,this is too late. You must planton other ground, which should bewell dug and manured.Sowing Sow the seed in thegeneral seed bed, an inch (2 cm)deep in rows a foot (30 cm) apart,in spring.Planting <strong>The</strong> traditional way toSoil <strong>The</strong>y like good soil, but willgrow on most soil, especially if itSoil Nothing is better for thesethan to grow 7 them on an old muckheap,and that is what we <strong>of</strong>ten do.<strong>The</strong>y love a heavy soil.Treatment If you don't plant ona muck heap dig in plenty <strong>of</strong> muckor compost in the autumn.Sowing Sow seeds in situ in latespring under cloches or, better still,under upturned jam jars. OtherTreatment Treat them exactlylike cucumbers, but don't removethe male flowers. Plant them onsmall hills six feet (1.8 m) apart.ONIONSUse Good food is inconceivablewithout onions.Soil <strong>The</strong>y like medium loam welldrained, deeply dug and richlycomposted. Onions are a demandingplant.Treatment <strong>The</strong> soil must not beacid, so if necessary lime it in theautumn. Dig deeply in the autumnand incorporate manure or compost.Get it down to a fine tilth in thespring and then get it teally firm,150
Food from the Gardenbecause firm soil is a necessity foronions to grow well.Sowing You can sow in midsummer,and leave in the seed beduntil spring. Or you can sow inearly spring, or as early as theground is dry enough to walk onwithout it caking. Sow veryshallowly, very thinly in rows teninches (25 cm) apart, if you intendto thin the onions and grow themin situ. But you can have the rowsmuch closer together if you intendto plant them all out. Rake the seedin very lightly and firm the soil withthe head <strong>of</strong> the rake.You will get smaller onions but theywill keep better.Harvesting When the tops beginto droop bend them all over to theground. This is said to start theonions ripening, and possibly italso stops them growing up andgoing to seed. After a few days pullthe onions and lay them down onbare soil or, better still, on a wirenetting frame to keep them clear<strong>of</strong> the ground. Turn them occasionally.<strong>The</strong> more hot sun that fallson them the better. Before theautumn string them and hangthem up, or hang them in net bags,or lay them on wire netting in acool and draughty place. <strong>The</strong> airmust be able to get between them.<strong>The</strong>y don't mind some frost, butcan't stand lack <strong>of</strong> ventilation.Soil <strong>The</strong>y grow on any soil providedit is deep and not too stony.As with all root vegetables, don'tuse fresh manure.Treatment If you want a bumpercrop dig a trench in the autumn,fill it with muck, compost, or anyold thing so long as it's organic,and bun- it. Lime the soil well.Plant in what is left <strong>of</strong> the trenchin the spring. But this is verylaborious. Put your peas in afteryour spuds and your land shouldbe well mucked already.Planting Plant very firmly in firmsoil, but don't plant too deeply.Plant summer sown seedlings inearly spring - whenever the soil isdry enough. Inter-rowing withcarrots is said to help against onionfly, and I believe inter-rowing withparsley is even better.After care Growing onions means afight against weeds which seem tolove onions, and the onions haveno defence against them frombroad shading leaves as many cropshave. Now I know that some peoplesay onions will grow well in a mass<strong>of</strong> weeds, but my experience is thatyou must keep them free <strong>of</strong> weedsin the early months <strong>of</strong> their growth.It is true that if large annual weedsgrow among them for, say, the lastmonth they may still grow intogood onions. I like to keep themweed-free and mulch them wellwith pulled-out weeds in their laterstages. If you are growing onionsin situ in the seed-bed, single themto about four inches (10 cm) apart.If you have sown very thinly youmight like to try not thinning at all.ShallotsSow the bulbs in late winter andyou get lots <strong>of</strong> litde onions thatgrow around the first bulb nextsummer. You can then go on pickinguntil autumn. Keep some <strong>of</strong> thebest bulbs to plant next year.Tree onions<strong>The</strong>se onions are perennial so onceyou have planted them they willgrow year after year. Each year,when the plant grows, little onionswill form at the tips <strong>of</strong> the stems.When this happens you mustsupport the weight <strong>of</strong> the plant onsticks. Plant six inches (15 cm) apartin rows 18 inches (46 cm) apart.You can use the onions that formunderground as well as those onthe leaf tips.Pickling onions<strong>The</strong>se like poor soil. Broadcast theseed in spring and lightly rake it in.Hand weed but don't thin. Pulland pickle when ready.Salad onionsSow these like ordinary onions inlate summer and again if you like inearly spring. Don't thin, and pickto eat as required.Onion sets<strong>The</strong>se are the lazy man's way <strong>of</strong>planting onions. Sets are immaturebulbs, with their growth arrested<strong>by</strong> heat treatment. Plant them earlyin the spring very firmly, and replantany the birds pull out. <strong>The</strong>ntreat them like ordinary onions.<strong>The</strong>y are much easier to grow.PARSNIPSUse Parsnips make the best <strong>of</strong> theroot wines, and, properly cookedand not just boiled to death, are amagnificent vegetable, very rich invitamins A, B and C.Treatment <strong>The</strong>y like potash, andthe ground must be deeply dug.If you want to grow really big onesmake a hole with a fold pritch, orsteel bar, and fill the hole with peatand compost, or a potting compost,and sow on this.Sowing Drill anincfr(2.5 cm) deepand fourteen inches (36cm) apart,in early spring, or as soon as theland is open and dry enough. <strong>The</strong>ytake a long time to grow so sowsomeradish .with them, as thesedeclare themselves first and enableyou to side-hoe.After care You can intercrop withlettuces for one lettuce crop. <strong>The</strong>nhoe and keep clean.Harvesting Leave them in thegtound as long as you like. <strong>The</strong>yare far better after they have beenfrosted. If you want them duringhard frost, when it would bedifficult to dig them out, pull thembefore the frost and leave them ina heap outside or in a shed. Youcan boil them in stews, but theyare far better baked around a jointin fat, or partly boiled and thenfried in slices. <strong>The</strong>re are old boysin Worcestershire who devote halftheir gardens to rhubarb and halfto parsnips. And the whole lot <strong>of</strong>both crops go to make wine!PEASUse Eaten green, peas are deliciousand extremely nutritious. Allowedto dry they can be kept throughthe winter and cooked like lentils.It is better to have fresh green peasin their season, and only then, sothat you come to them every yearwith a fresh and unjaded palate.Freezing them is a bore.Soil <strong>The</strong>y like a medium loam butwill grow on most soils. Like alllegumes (and brassica) they don'tlike acid ground. <strong>The</strong>y like to bekept moist.Sowing I personally sow peasthick in a little trench dug aboutthree inches (8cm) deep with ahoe. And I eat a hell <strong>of</strong> a lot <strong>of</strong>peas. Plant each pea two or threeinches (5-8cm) from its neighbour.Cover and firm the soil over thepeas. It helps a lot to have soakedthe peas for two or three days firstto get them germinating so theysprout early. Also swill your seedin paraffin to deter mice. Birds tooare a menace; wire pea-guards arean answer, and so is a good cat.You can sow some round-seededpeas in November in mild climates,and some more in February. Forthis the land must be light and dry.Of course if you cloche them ithelps. You will thus get very earlypickings, but for most <strong>of</strong> your cropsow from mid-March onwards insuccessional sowings right intoJuly. For your last sowings use,paradoxically, "early" varieties.<strong>The</strong>y will ripen quickly before thefrosts cut them down.After care Hoe until the peavines themselves smother theweeds. And mulch does wonderswith peas for it keeps the groundcool and moist, which is just whatpeas like.Harvesting Pick them young toeat raw in salads, and then whenthe pods are tighter packed, pickfor cooking. Keep picking as hardas you like, and if you have morethan you can eat green, let themripen on the vines and harvestproperly. In other words, pull thevines when they are dead ripe (but151
Vegetablesbefore the autumn) and hang themup in the breeze but out <strong>of</strong> the rain.Thresh them in due course, stowthem in jars, and eat them in soup.PEPPERSUse <strong>The</strong> peppers we can growhave nothing to do with realpepper, which is grown on vinesin Malabar and marketed entirely<strong>by</strong> a strange lost race called theWhite Jews who have a monopoly<strong>of</strong> the trade.Sowing and planting Sow seedindoors in early spring, and plantout in the garden on well-muckedground at least a fortnight after thelast possible frost, under clochesif you have them in cold climates.Plant two feet (60cm) apart in rowsthree feet (91cm) apart. After theground has really warmed up,mulch. Peppers need moisture butnot too much or they will die <strong>of</strong>f.So in a wet climate plant them onthe tops <strong>of</strong> ridges.Harvesting Harvest them whenthey are green or leave them toturn red.POTATOESUse Quite simply one can live onthem. <strong>The</strong>y are one <strong>of</strong> the beststorable sources <strong>of</strong> energy we cangrow, and are our chief source <strong>of</strong>vitamin C during the winter.Soil Potatoes like good strongsoil. <strong>The</strong>y will grow in clayey loam,love peat and are one <strong>of</strong> the fewcrops that not only tolerate butlike acid soil. If you lime beforeplanting they will get scab<strong>by</strong>. <strong>The</strong>ywant plenty <strong>of</strong> muck.Treatment Better to dig deeplyin the autumn and dig again in thespring, this time making ridges andfurrows. <strong>The</strong>y don't want a finetilth but they want a deep one.Throw as much muck or compostas you can spate into the furrowsbefore planting. Plant the spudsstraight on top <strong>of</strong> it.Planting Put your first earlies inwhen other people in your localitydo, or a fortnight earlier undercloches or transparent plastic. <strong>The</strong>slightest touch <strong>of</strong> frost on theleaves blasts them and they haveto start growing all over again. Ifyou want early potatoes chit yourseed potatoes, that is lay your earlyseed in trays, on shelves, or on oldegg trays, in the light and not in thefrost. 40°F to 50°F (5°C to 10°C)is right. When you plant them becareful not to knock <strong>of</strong>f all theshoots. Leave two on each tuber.Don't chit the main crop. Bungthem straight in in the late spring,but not before. Plant earlies onlyabout three inches (8cm) deep, afoot (30cm) apart in rows eighteeninches apart. Plant main cropeighteen inches (46cm) apart inrows eighteen inches apart, butplant them about five inches(13cm) deep.After care As soon as leaves show,earth up. In other words bank earthlightly over the potatoes. Threeweeks later earth up some more,and with main crop earth up againin another couple <strong>of</strong> weeks. Hoebetween the rows. Spray withBordeaux Mixture (see p. 87) whenthe weather gets warm and muggyto prevent blight.Harvesting If you have plenty <strong>of</strong>early potatoes in, don't deny your<strong>self</strong>a feed or two when they arequite tiny: why should you? <strong>The</strong>ngo on digging earlies until they arefinished. If you have second earliesgo on to them. Your main crop willthen take over for immediateeating, but don't lift the bulk <strong>of</strong> themain crop until the haulms (tops)have <strong>complete</strong>ly withered away.<strong>The</strong>n fork them out carefully andlet them lie on the ground for a dayand a half to set their skins (morethan two days might start themgoing green in which case thevbecome poisonous). <strong>The</strong>n clampthem, or put them in a root storein the dark. <strong>The</strong>y must never beallowed to be affected <strong>by</strong> frost orthev will go bad.RADISHESUse Radishes grow just anywhere.Add them to salads for extraflavour, crunchiness and colour.Sowing Sow the large seeds indrills and pick them when theyare ripe after about six weeks. <strong>The</strong>yare brassicas, but grow so quicklythat they don't get, or perpetuate,club-root. Put in successionalsowings all through the spring andsummer so as to have a constantsupply <strong>of</strong> tender young ones. Don'tlet them get old and go to seed.RHUBARBUse Rhubarb is a perennial, andonce you have planted it, or inheritedit, you have got it for good.Soil Pretty well any soil is fine.Treatment Put on plenty <strong>of</strong> muck.Planting Buy or cadge crownsand plant them in late autumn.Leave three feet (91cm) betweenplants and four feet (1.2m) betweenrows and put some nitrogenousfertilizer on top to turn it into a<strong>self</strong>-activating compost heap. Putupturned pots or buckets oversome <strong>of</strong> the plants in spring t<strong>of</strong>orce them on early.After care Cover the beds withdeep straw in autumn.Harvesting Pull what you wantwhen the stems are thick and tall.Leave what common sense willsuggest, so as not to rob the plantstoo much.RUNNER BEANSUse <strong>The</strong>se come later than thedrying beans described earlier.<strong>The</strong>y yield very heavily, are tougherand have a coarser, and I thinkbetter, flavour. <strong>The</strong>y need morecare in planting and must have tallsticks. Salted they are a greatstand<strong>by</strong> for the winter.Soil <strong>The</strong>y like good rich deep soil.Treatment Double dig a deepditch in early spring and incorporateplenty <strong>of</strong> compost or muckin the bottom <strong>of</strong> it. If you havecomfrey leaves dig them in, becausethey are rich in potash which allbeans like. As they come in yourbean break you will already havelimed the ground, if you had to, theprevious autumn.Sowing Sow them in the earlysummer in a wide but shallowtrench two inches (5cm) deep intwo staggered rows with the seedsnine inches (23cm) apart. Leaveat least five feet (1.5m) betweenstands <strong>of</strong> beans. Put in tall sticksearly enough for the beans to get agood start. Otherwise you canpinch the growing tops out andlet the vines straggle on the ground,but you won't get much <strong>of</strong> a cropand in my opinion it's a poor way<strong>of</strong> growing these magnificentclimbing plants which can be aboutthe most beautiful and productivethings in your garden.After care Hoe <strong>of</strong> course andkeep well watered in dry seasons.When they start to flower makesure they have plenty <strong>of</strong> water.152
Food from the GardenMulch with compost if you can,and spray the flowers with wateroccasionally because this "sets"the flowers in the absence <strong>of</strong> rain.Harvesting Just keep on picking.If you can't cope with the supply,and you probably can't becausethey crop like hell, just pick anyway.String the beans, slice them (youcan buy a small gadget for this),and store them in salt (see p. 182).Pick them and give them to the pigsrather than let them get old andtough. Keep some though to getripe for seed for next year.spinach, spinach beet, perpetualspinach, seakale beet.Soil Like nearly even-thing elsespinach likes a good rich loam,so give it as much muck as you can.It will do well on clay but is aptto run to seed on sandy land unlessyou give it plenty <strong>of</strong> muck.Keep it well-drained, but not toodry. But turnips, particularly yourmain crop for storing, will growon most soils.milky, and the carbohydrate ismostly in the form <strong>of</strong> sugar, whichis soluble and can therefore moveabout the growing plant. As thecobs mature or when they arepicked, the sugar changes to starch.It will grow in the hottest climates,and in temperate climates if yougrow hardy varieties.SOYABEANSUse Soya beans have been grownin Asia for centuries. <strong>The</strong>y cameto the West less than 200 yearsago - and are now proving to be avery worthwhile crop to grow inwarm areas because <strong>of</strong> their highprotein value. <strong>The</strong>y do need a long,warm growing season though - atleast 100 days. <strong>The</strong>y can be eatengreen like peas or the beans can beleft to ripen and then dried for useall through the winter. <strong>The</strong> beanscan be ground into flour.Preparation Dig the ground inautumn and add plenty <strong>of</strong> lime.Sowing Sow in the late springabout an inch (2.5cm) deep, threeinches (8cm) apart in rows tw<strong>of</strong>eet (61cm) away from each other.Harvesting Pick the beans foreating green when they are young,certainly before they turn yellow.It is easier to remove the beansfrom the pods if they are boiledfor a few minutes first. If the beansare for drying or for flour, leavethem on the plants to ripen butthey must be picked before thepods burst and release the beans.Judge this carefully but be guided<strong>by</strong> the colour <strong>of</strong> the stems on theplant - they should still be green.SPINACHUse <strong>The</strong>re are several kinds <strong>of</strong>spinach, but treat them all as justspinach. <strong>The</strong>re is New ZealandSowing Sow an inch (2.5 cm) deepin drills a foot (30cm) apart. Laterthin the plants in their rows to sixinches (15 cm) apart.After care Hoe, mulch and waterduring the summer.Harvesting Pick the leaves whenthey are young and green, takingonly a few from each plant leavingthe smaller ones ro grow bigger.Don't boil spinach. Wash it in waterand put the wet leaves in asaucepan and heat over a fire.When you harvest seakale beetpull <strong>of</strong>f the stems as well as theleaves. Eat the stems like asparagus.SWEDES AND TURNIPSUse Swedes and turnips can beeaten young and tender in thesummer and autumn and clampedfor winter use. Turnips will survivein the ground until severe frostsbegin, maybe till Christmas intemperate climates. Swedes aremuch hardier and will live in theground all winter. All the same it ishandiet to pull them and clampthem so you have them where youneed them. <strong>The</strong>y are cruciferous,which means they are subject toclub-root, and should therefore bepart <strong>of</strong> the brassica break so thatthis disease is not perpetuated.You want to leave the longestpossible gap between crops thatare prone to club-root. Kohl-rabiis much like turnip and is grownin the same way.Soil Light fertile loam is best.Treatment In heaw rainfall areas,say over 35 inches (89cm) a year,it is a good thing to grow turnipsand swedes on the tops <strong>of</strong> ridgesto aid drainage. So ridge up yourland with a ridging plough, or on asmall scale with a spade, and drillon the ridges. If you want to growon the flat just treat the land asyou would for spring cabbages(see p. 147).Sowing Very early sowing can bedone in the early spring or a weekor two before the last probablefrosts, but you can sow turnipsand swedes right up until August.Sow the seed shallowly in drillsabout nine inches (23cm) apart.Cover and press down.After care Beware the flea-beetle.<strong>The</strong>se are little jumpers that nibbletiny holes in the leaves. You cankill them <strong>by</strong> dusting with aninsecticide, or you can trap themwith a special little two-wheeledarrangement. <strong>The</strong> sticky underside<strong>of</strong> a board goes along just over theplants and a wire brushes theplants. <strong>The</strong> beetles jump and getstuck to the board. It sounds sillybut it works. Thin to fout inches(10cm) apart in the rows whilethey are still quite small. Hoe atleast twice again afterwards.Harvesting Eat them when theyare ready (after about two months),or leave until early winter and pull,top, and clamp them.SWEET CORNUse Sweet corn is maize that hasnot been allowed to get ripe. <strong>The</strong>seeds are still fairly s<strong>of</strong>t and slightlySoil Sweet corn will grow in mostgood well-drained soils, but it isa greedy feeder, likes plenty <strong>of</strong>muck, and a pH <strong>of</strong> about 6.5.Sowing A long growing seasonis essential but sweet corn can'tstand frost, so if we plant it a weekor two befote the last likely frostunder upturned jam jars, or littletents <strong>of</strong> plastic, or cloches, somuch the better. In warm climatesyou can sow : it straight out in theopen in early summer, but if yoursummers are a long time comingyou would do bettet to sow it inpeat pots indoots in late springand then plant it out. Sow the seedan inch (2.5 cm) deep, fifteen inches(28 cm) apart in rows two and a halffeet (76cm) apart. And try to sowin blocks, nothing narrower thanfour rows for example, becausemake is wind-pollinated, and if itis sown in long thin lines manyplants will not get pollinated.Planting If you have grown it inpots plant it out very carefully,because it doesn't like beingdisturbed anyway. Plant out whenit is about five inches- (13 cm) highand preferably plant peat pot andall. Water well after planting, butit is a lot better if you can sow themin theit final position.After care Hoe and top dresswith nitrogen about a monthafter planting if your soil is not asrich as it should be, to keep theplants growing. Apparently the153
VegetablesAmerindians used to bun' a deadfish under each plant. This is avery good idea, for the nitrogenwould become available just whenit was needed. I know a vet whogave all the dogs he "put down"to a fruit farmer who buried themunder his newly planted appletrees for the same reason.Harvesting Break the cobs <strong>of</strong>f inthe milky stage after the tassel hasbegun to wither and turn brown.To test, pull the leaves <strong>of</strong>f part <strong>of</strong>a cob and press your thumb nailinto the gtain. It should be milky.<strong>The</strong>y say you can walk down thegarden to pick your corn, but youmust run back to cook it; it mustbe dead fresh. This is because thesugar starts turning into starch assoon as you pick it and it losesflavour. If you have too many cobs,you can dry them in the waydescribed on p. 182.<strong>The</strong> straw makes good feed forcows, litter for pigs, or material forthe compost heap, and it is avaluable crop for this teason alone.SWEET POTATOESUse Sweet potatoes can be yourstaple food in a dry warm climate,but you won't get much <strong>of</strong> a cropin a damp cool environment. <strong>The</strong>yare very frost-tender.Soil <strong>The</strong>y grow in sand, or sandyloam, and they don't like rich soil.Treatment Just dig deeply. Youneedn't add anything.Planting Plant tubers just likepotatoes (if you are sure theyhaven't been sprayed with agrowth-inhibitor). Plant them 16inches (41cm) apart in rows 2 feet.6 inches (76cm) apart. Don't plantthem anywhere in the world untiltwo weeks after the last frost.After care Just hoe.Harvesting Dig them up verycarefully at least a fortnight beforethe first frost. Cute them <strong>by</strong> layingthem carefully on hay and leavingthem out in the sun for about tendays. <strong>The</strong>y don't go green becausethey are no relation <strong>of</strong> realpotatoes. Turn them from time totime. If there isn't enough sun keepthem somewhere with 90 percenthumidity between 80°F (27°C)and 90°F (32°C) for ten days.Store them packed lightly in strawin an airy place at not less than50°F (10°C).TOMATOESOutdoor tomatoesUse Outdoor tomatoes are a diceybusiness in any cold wet climate.What they need is a warm dryripening season in late summer,and that is what, where I live, theydon't get. But green tomatoes makefamous chutney and if you storethem well they sometimes get ripein store, although they never tastelike sun-warmed fruit picked <strong>of</strong>fthe vine and eaten straightaway.But if you can grow them they arean enormously valuable crop forbottling to keep your familyhealthy during the dark days <strong>of</strong>winter. <strong>The</strong>y really are bottledsunshine.Treatment I ridge the land in theautumn, put well-rotted compostor muck in the trenches in earlyspring; split the ridges over it andthen plant the tomatoes on thenew ridges.Sowing <strong>The</strong> most luxurioustomatoes I ever saw" growing wereon the overspill <strong>of</strong> a sewage works,which leads one to think that itwould be better to eat the seedbefore we plant it. But failing suchextreme measures sow thinly underglass in <strong>John</strong> Innes seed compost,or in any equivalent seed compost,including the kind you makeyour<strong>self</strong>. If you sow in the late springin a temperate climate the plantswill grow even if you have no heatin your greenhouse, but if you dohave a little heat so much the better.It you have no heat put thicknewspapets over the seedlings atnight to keep them warm. 55°F(12°C) is right. Water diligentlywith luke-warm water but not toomuch. Don't drown them. Or you. can sow direct, in situ, a week ortwo later, under cloches in warmerclimates, or just out <strong>of</strong> doors inhot climates.Planting Most people plant twice.First, when they have thtee to fourtrue tomato-type leaves they plantin either soil blocks, or peat pots,or in compost in small flowerpots.<strong>The</strong>se pots can be put into coldframes and the plants graduallyhardened <strong>of</strong>f. <strong>The</strong>n plant out in thefirst fine warm weather in earlysummer. Plant very carefully,retaining as much <strong>of</strong> the composton the roots as you can, and planta little deepet than they werebefore. Plant on the mucked ridgesdescribed above. Give each planta tall stake for support as it growsbigger and heavier.After care Hoeing and mulching,within reason, help, and with lowfruitingvarieties it is commonsense to put clean straw on thegtouhd to protect the fruit. Pickout all side-shoots. <strong>The</strong>se are littleshoots that grow between thefruiting blanches and the mainstem, rather as if you had anotherlittle arm growing out <strong>of</strong> yourarm-pit.You cannot pamper tomatoes toomuch. Water them whenever theyneed it. Many gardeners soak muckin the water so that they feed theplants as they watet them. As theygrow taller tie them carefully to thestakes with raffia or string." Spraythem with Bordeaux Mixture toprotect them from potato blight.(<strong>The</strong> tomato is so closely relatedto the potato that it is almost thesame plant.) Don't touch themwith • tobacco-stained hands,because you can convey tobaccovirus disease to them. (<strong>The</strong>poisonous tobacco plant is alsoclosely related to the tomato.)Allow the plants to set about fourtrusses. To.ripen tomatoes in dullclimates it is <strong>of</strong>ten advantageousto lay them down flat on cleanstraw and place cloches over them.Some people pull leaves <strong>of</strong>f-"tolet the sun get to the fruit". I don'tthink this" is worth it.Harvesting Homegrown tornatoes are so good to eat(immeasurably better than boughttomatoes that are bred for "a longshelf life" and not fot flavour) thatyou will not be able to stop eatingthem as they ripen. But try to bottleas many as you can. We wallow invitamins in the summer: it is forthe winter and the hungry gapthat we need them.Indoor tomatoesUse If your greenhouse is heatedyou can sow seed in early winterand get ripe tomatoes in spring.If you don't want to eat them allyou can sell them at a good price.Sowing If you have an adequatelyheated greenhouse, sow seed inNovember at a temperature <strong>of</strong>70°F (21°C). Never let it fall below6C°F (16°C) during the winter. Ifyou can't raise a temperature <strong>of</strong>70°F (21°C), sow seed in Februaryand keep' the tempetatute at 60°F(16°C). Sow in compost made <strong>of</strong>two parts sifted loam, one part leafmouldand a little sand. Cover withglass to prevent evaporation. Keepthem moist.Planting When the plants haveformed two rough leaves pot theplants singly in 5 inch (13cm) pots.Use the same compost as beforebut add some well rotted muck.When the first truss <strong>of</strong> flowers isformed, move the plants into muchlarger pots (about twelve inchesor 30cm in diameter) or into thegteenhouse soil.After care Treat greenhousetomatoes in the same way as outdoortomatoes, but you can letthem set up to ten trusses.Harvesting Begin picking thetomatoes as soon as they are red.This will be much earlier in the yearthan outdoor tomatoes.WATERCRESSUse Watercress is one <strong>of</strong> the richestsources <strong>of</strong> vitamin C likely tocome your way. It makes a superbsalad, or it can be cooked.Sowing Sow seed or tooted cuttingsin a damp shady spot in late.spring or midsummer. Dig the soildeeply and work in some peat if youcan get it. Rake the bed, flood it andsow thickly when the water hasdrained away. You can grow it in anunpolluted stream.154
Food from the GardenJL JLS^JL fLFSHerbs are a very cheap and easy way <strong>of</strong> improving the flavour<strong>of</strong> food; they also make it more digestible and do you good atthe same time. In ancient times they were valued as much fortheir healing properties as for their culinary ones. <strong>The</strong> coming<strong>of</strong> the Industrial society saw a decline in the use <strong>of</strong> herbs, anduntil recently only parsley, mint and - in enlightened circles -horseradish were being much used in the North Americanand British kitchen. Now, the revival <strong>of</strong> a flourishing internationalcuisine has once more made people eager toexperiment with a variety <strong>of</strong> new tastes. Consequently, growingfresh herbs to add natural enhancement to food isbecoming an increasingly attractive proposition for everyone.Even people without gardens can grow them in pots.A drift <strong>of</strong> borage or a sea <strong>of</strong> thyme look splendid from thekitchen window. <strong>The</strong>re is really no reason why herbs shouldnot take the place <strong>of</strong> inedible flowers in beds near the houseinstead <strong>of</strong> being relegated to an inaccessible patch at the back<strong>of</strong> the garden. But unless you are planning to become a herbalistit is better to concentrate on a few herbs that will be usefulto you rather than cultivate scores <strong>of</strong> varieties, most <strong>of</strong> whichyou will neglect.Herbs divide fairly straightforwardly into two groups:perennial and annual, with just the odd biennial to complicatematters. Most herbs prefer a light, well-drained soil andplenty <strong>of</strong> sun, although a few prefer the shade. All respond toconstant picking.Drying herbsYou dry herbs in order to keep the colour and aroma <strong>of</strong> a freshherb in a dried one. It is a delicate operation as it requires bothspeed and care, but most herbs can be dried and stored.As a general rule harvest the leaves and stems just beforethe plant flowers, on the morning <strong>of</strong> a fine hot day after thedew has gone. If you are going to preserve the herbs takethem to a drying rack immediately. Do not over-handle them.<strong>The</strong>y bruise easily, and every minute you waste means the loss<strong>of</strong> more volatile oils. <strong>The</strong>se are what give herbs their flavourand quality.Tie the herbs in small bunches and hang them in an airyplace. Ideally you dry them at a temperature between 70°Fand 80° F (21° C and 27° C), in the strongest possible draught<strong>of</strong> air. You can leave them hanging up indefinitely, but theywill collect the dust. A better' thing to do is to rub leaves<strong>of</strong>f the stem when they are quite dry and brittle (butyouhopestill green), crumble them up and store in sealed glass orpottery jars in the dark. If the air is too damp to get them dry,lay them in a cool oven at 110°F (44°C) on sheets <strong>of</strong> paperovernight. Or you can hang them in a solar drier (see p. 214)which is ideal for drying herbs, but in that case watch thetemperature <strong>by</strong> using a thermometer.Below I describe some <strong>of</strong> the herbs that the <strong>self</strong>-supportermight find most useful for flavouring his food or fortifyinghis spirit or, even, banishing his ailments.ANGELICAAngelica archangelicaBiennialUses Angelica was once thoughtto cure the plague. <strong>The</strong> scentedleaves make a fine tisane. <strong>The</strong> rootsand stems can be candied or theycan be crystallized.Soil Angelica needs a rich, moistsoil and a shady position.Sowing Seeds should be absolutelyfresh or they won't germinate.Plant in midsummer immediatelythey are ripe, in drills one inch(2.5 cm) deep.Planting Transplant seedlings oryoung plants in the autumn andthin to 6 inches (15 cm) the firstyear, 2 feet (61 cm) the followingyear. In the third year distancethem 5 feet (1.5 m) apart. <strong>The</strong>ygrow very tall and their leaves arespreading.Harvesting Leaves should be cutin early summer while they are stilla good colour. Stalks and leavesare best picked in late spring orthey become too hard for candying.Roots should be dug up in the firstyear in the autumn before they gettoo woody. Wash thoroughly, thenplait and dry as quickly as possible.ANISEPimpinellaAnnualanisumUses Anise has valuable digestiveproperties. <strong>The</strong> fragrant seeds canbe used to impart a slight licoriceflavour to breads, cheeses andpuddings.Soil A moderately rich and fairlydry soil is best.Sowing Sow in situ in late spring,and thin later on to 8 inches (20 cm)apart. Take care when thinning, asthe herb is fragile and easily upset.Harvesting <strong>The</strong> seeds will maturethe first year after 120 days, as longas they are exposed to full sun.Harvest when the seedheads turngrey-brown, and thresh them whenthey have dried out thoroughly.BALMMelissa <strong>of</strong>ficinalisPerennialUses <strong>The</strong> leaves impart a freshlemony flavour to soups andsummer drinks.Soil Balm likes a fairly rich, moistsoil in a sunny, sheltered spot. If itis too shady, the aroma will bestifled; if too dry, the leaves willturn yellow.Sowing Grows easily from seedwhich it <strong>self</strong>-sows pr<strong>of</strong>usely. Sow inspring or early summer in a coldframe. It should germinate in 3-4weeks. Prick out and plant in thegarden when 4 inches (10cm) high.Or sow the seed in your garden inmidsummer and plant seedlingsout in the early summer <strong>of</strong> thefollowing year.Planting Keep 10 inches (25cm)between the rows and 12 inches(30cm) between the plants. Balm issusceptible to frost, so protect yourplants <strong>by</strong> earthing them up orgiving them a light cover <strong>of</strong> manure,peat or leafmould.Harvesting Don't expect toomuch the first yean Harvest justbefore the buds flower, and thenagain in the autumn. Balm bruiseseasily, so keep your hands <strong>of</strong>f it asmuch as possible. Dry in the darkwith plenty <strong>of</strong> ventilation, thenstore in stoppered jars in the dark.<strong>The</strong> temperature should never gobeyond 100°F (38°C) or it will loseits flavour.155
HerbsBASILOcimumAnnualbasilicumUses A fine pungent herb, basilis'superb in sausages, spaghetti, andstuffed tomatoes.Soil Basil needs dry; light, welldrainedsoil and a sunny, shelteredposition.Sowing A hardy perennial in hotcountries, basil is a delicate plantin colder climes where it has tobe grown annually from seed. Sowindoors in early summer.Planting Seedlings should not beplanted until the soil is warm.Plant 8 inches (20 cm) apart inrows a foot (30 cm) apart.Harvesting Basil needs plenty <strong>of</strong>water to keep the leaves succulent.<strong>The</strong> leaves can be picked <strong>of</strong>f assoon as they unfurl. Cut down fordrying in late summer or earlyautumn. Basil needs a longer dryingtime than most herbs; it is alsovery sensitive to light and heat,and it bruises easily - so handle aslittle as possible.BAYLaurus nobilisEvergreenUses Once used to crown poetsin ancient Greece, bay leaves arenow more <strong>of</strong>ten used in casseroles.Soil Bay is amenable to anvreasonable soil. Give it shelterfrom harsh winds; it will grow inthe shade, though it likes the sun.Intense frost will kill it; in colderclimates bay is almost alwaysgrown in tubs so that it can bemoved indoors in winter.Planting It propagates rapidlyfrom hardwood cuttings <strong>of</strong> halfripenedshoots. Don't let it dry out;feed manure occasionally.Harvesting <strong>The</strong> leaves can eitherbe dried (at a low temperature,which helps retain their naturalcolour) or picked all year fresh.BORAGEBorago <strong>of</strong>ficinalisAnnualUses Tradition has it that boragewill stimulate the mind and fortifythe spirit. Add a sprig or two toyour wine and you will certainlynotice a difference. <strong>The</strong> blueflowers can be used raw to garnishsalads, and the leaves can bechopped into soups and stews.Soil Borage needs sun and a welldrainedloamy or sandy soil.Sowing Seed is best sown inspring in drills 1 inch (2.5 cm) deep,3 feet (91 cm) apart, 3 seeds to astation. Later, thin to 1 plant perstation. Seeds will germinate earlyand thereafter sow themselves andneed only to be kept weeded.Harvesting Leaves are ready foruse in approximately 8 weeks andonly the young leaves should bepicked. <strong>The</strong> herb is ready forharvesting as soon as it flowets,but it needs quick-drying at a lowtemperature.BURNETPoterium sanguisorbaPerennialUses Young tender burnet leaveslend a cucumber flavour to iceddrinks or salads. <strong>The</strong>y provide theperfect accompaniment to creamor cottage cheese. <strong>The</strong> dried leavesmake a good burnet vinegar.Soil It grows well in dry, light,well-limed soil.Sowing Sow trom seed in earlyspring and thin to 12 inches (30 cm)apart. You can also grow burnetfrom cuttings. Full sun is essential;seed should be sown annually if aconstant supply <strong>of</strong> fresh leaves isrequired.Harvesting <strong>The</strong> plant is hardy inmost climates. Pick young leavesfrequently for salads, or for drying.CARAWAYCarum carviBiennialUses As well as using caraway seedfor cakes and breads, sprinkle theground seeds on liver or roast pork,or cook them with goulash andsauerkraut. Leaves can go intosalads, and the roots make a goodvegetable if you boil them and servethem like parsnips.Soil Caraway likes a fertile clayloam and a sheltered position. It iswinter-hardy, and thrives in cooltemperate climates.Sowing Sow from seed in midsummer,and it will flower and seedthe following year. Protect flowerstalks from the wind, to prevent theseedheads shattering before theseed is ripe.Harvesting Cut <strong>of</strong>f the flowerheads as the seed turns brown, anddry the seed in an airy place beforethreshing.CELAVIOMILEMatricaria charnomillaAnnualUses Sometimes used in flowerborders, this herb is grown chieflyfor medicinal purposes. Chamomiletea is a cleansing aid to digestion,and an infusion <strong>of</strong> twoteaspoons <strong>of</strong> flowers to a cup <strong>of</strong>boiling water makes a splendidgargle, or a soothing cute fortoothache.Soil Any goodgarden soil with fullsun suits chamomile admirably.Sowing Sow the very fine seedsmixed with sand or wood-ash, on ahumid day in early spring. Thinlater to 9 inches (22 cm) apart. <strong>The</strong>seeds <strong>self</strong>-sow easily. Watering isadvisable during germination.Harvesting Flowers appear andare ready for picking eight weeksafter sowing. Pick <strong>of</strong>ten but only onsunny days when the oil content <strong>of</strong>the flowers is highest. Try not totouch the flowers too much.CHERVILAnthriscus cerefoliumBiennialUses Chervil is famed for theflavouring it imparts to soups andsauces. It is well worth growing.Use it as a garnish, or make thatclassic dish - chervil soup.Soil Chervil will grow in mostsoils but it will not thrive in aheavy, badly-drained soil.Sowing Sow from seed in earlyspring out <strong>of</strong> doors and in thegreenhouse at over 45°F (7°C) allwinter. Sow in drills 1 foot (30 cm)apart. After that it will <strong>self</strong>-soweasily. Chervil does not transplantwell so sow where you want it togrow. Seedlings should be thinnedout when 2-3 inches (5-8 cm) high.Keep beds weeded and moist.Harvesting You can eat chervil6-8 weeks after sowing. Always pickleaves from the outside to enableit to go on growing from the centre.156
Food from the GardenDon't allow it to flower - it takesaway the flavour. Chervil is adifficult herb to dry, needing aconstant low temperature but as itis available fresh all year this shouldbe no problem.CHIVESAllium schoenoprasumPerennialtries. Use the seeds crushed orwhole in curried meats or stuffedvegetables; add some to marmaladeto make an exotic change. Seeds aresometimes sugar-coated and eatenas sweets.Soil Coriander needs a sunny, welldrained site in fairly rich soil.Sowing Sow in late spring in drillsa foot (30 cm) apart, and thin seedlingsto 6 inches (15 cm). <strong>The</strong>y willgrow rapidly to about 2 feet (61 cm).Harvesting Cut the seedheadswhen the pods are ripe, and allowthe seeds to dry thoroughly beforeusing, as they will taste bitter if theyare still green. Thresh and store inthe usual way.FENNELFoeniculumPerennialvulgarePlanting Plant individual clovesin spring just like onion sets to adepth <strong>of</strong> 2 inches (5 cm), 6 inches(15 cm) apart. <strong>The</strong>y will be readyfor eating in the autumn. Plantagain then and you will have garlicall year round.DILLAnethumAnnualgraveolensUses Chives add an onion flavourwith a green fresh difference tosalads, soups or any savoury dish.Snip into scrambled eggs andcream cheese. <strong>The</strong> bulbs can bepicked like small onions.Soil Chives like a warm, shadyposition, and will grow in almostany soil, but they must havehumidity. So plant them near apond or water tank if you can.Sowing Sow from seed in springin drills 1 foot (30 cm) apart. Chiveswill thrive on doses <strong>of</strong> stronghumus, and then need careful,frequent watering.Harvesting Chives are ready forcutting about 5 weeks after springplanting. Plants sown in a greenhousein winter at 80°F (27°C)will be ready in 2 weeks. Cut closeto the ground.CORIANDERCoriandum sativumAnnualUses An important ingredient inIndian cooking, coriander can begrown successfully in cold coun-Uses <strong>The</strong> name comes from theNorse "dilla" meaning to lull tosleep, and the seeds were oncecalled "meeting house" seeds forthey were taken to church to benibbled during endless sermons.While dill seed is the soporificingredient in gripe-water, the herbcan enliven your cooking. It is goodwith fish, roast chicken, vegetablesand chopped up raw into saladsand sauces.Soil Dill needs a well-drainedmedium soil in a sunny spot.Sowing Sow consecutivelythrough late spring and earlysummer in rows 1 foot (30 cm)apart and later thin to 9 inches(23 cm). Keep plants well watered.Harvesting Leaves can be usedfrom 6 weeks to 2 months afterplanting. Cut dill for drying when1 foot (30 cm) high, before theplant flowers. For pickling seed,cut when flower and seed are onthe head at the same time. If seedsare wanted for sowing or flavouringleave longer until they turn brown.Seedheads should be dried andthen shaken or threshed. Never drythe leaves in a temperature higherthan blood heat or you will cookthem and they will lose theirstrong flavour.Uses Fennel's sharp-sweet flavouris specially suited to the oilier seafish. Chop the leaves in sauces,salad dressings and marinades. <strong>The</strong>broad base can be sliced into saladsor cooked whole wirh a cheesesauce. <strong>The</strong> seeds can be put intosausages, btead or apple pie.Soil Fennel needs sun, a rich,chalky soil, and plenty <strong>of</strong> moisture.Sowing Seeds should be sown inspring in stations <strong>of</strong> 3-4 seeds18 inches (46 cm) apart. If you wantto get seed you will have to sow -earlier under glass and in heat. Ifpropagated <strong>by</strong> division, lift thetoots in spring, divide and replant1 foot (30 cm) apart in rows15 inches (38 cm) apart.Harvesting Leaves can be usedthrough the summer months andseedheads are ready for drying inthe autumn. Harvest the seedswhen they are still light green anddry in a very low temperature, neverin direct sunlight. Lay in thin layersand move <strong>of</strong>ten as they sweat.Harvest the whole fennel when ittakes on a grey-brown hue.GARLICAllium sativumPerennialUses Garlic is the basis <strong>of</strong> goodhealth and good cookery. Unhappyare the nations who have to dowithout it. Use it liberally anduse it <strong>of</strong>ten. Take no notice <strong>of</strong>foolish injunctions to "rub asuspicion" round the salad bowl.Chop a clove or two and put itin the salad.Soil Garlic needs a rich soil,plenty <strong>of</strong>sun, and a certain amount<strong>of</strong> moisture. If your soil is light,enrich it with manure.Harvesting When the leaves havedied down, lift the crop. Allow todry in the sun a few days, thenplait and hang in bunches undercover in a dry airy room.HORSERADISHCochlearia armoraciaPerennialUses Shred finely and use as it isor mix into a paste either with oiland a little vinegar, or grated applesand cream. Horseradish sauce istraditional with roast beef; it is alsogood with smoked trout and ham.Soil It needs a rich, moist soil anda fairly shady position.Sowing Horseradish growsfuriously and spreads large taproots with equal abandon. So giveit maximum space. Plant the rootsin early spring. Dig trenches 2-3 feet(61-91 cm) deep, throw about 15inches (38 cm) <strong>of</strong> topsoil in thebottom, dig in a layer <strong>of</strong> goodcompost on top <strong>of</strong> this and fillwith the rest <strong>of</strong> the soil. Take 3-inch (8 cm) pieces <strong>of</strong> root, plant157
Herbsroughly 1 foot (30 cm) apart. Andkeep it weeded. Seed can also besown in early spring and plantsthinned to 1 foot (30 cm) apart.Harvesting Roots are ready foreating 9 months after planting.Use the larger ones in your kitchenand the smaller roots forreplanting.HYSSOPHyssopus <strong>of</strong>ficinalisPerennialUses Mentioned in the Bible fotits purgative properties, monksnow use hyssop to make greenChartreuse. You can use sprigs <strong>of</strong> itin salads, or chop it into soups andstews. Its slightly minty flavour ispleasant in fruit pies. I like it with fatmackerel. But use it sparingly.Soil Hyssop prefers light, welllimedsoil and a sunny plot.Sowing Hyssop grows easily fromseed and <strong>of</strong>ten <strong>self</strong>-sows. It can alsobe propagated <strong>by</strong> division, fromcuttings taken either in the springbefore flowering or in the autumnafter it. Sow from seed in drills4 inch (0.5 cm) deep, and plant outseedlings 2 feet (61 cm) apart when6 inches (15 cm) high.Harvesting Cut back the tops <strong>of</strong>the plants <strong>of</strong>ten to keep leavesyoung and tender. Cut for dryingjust before flowering.MARJORAM (POT)Origanum onitesPerennialUses Pot marjoram has less flavourthan sweet marjoram; use it insausages and stuffings.Soil It prefers a dry, light soil, andit needs sun.Sowing. Grow it from seed inspring in shallow* inch (1 cm) drills8 inches (20 cm) apart. When theseedlings are big enough to handletransplant to 1 foot (30 cm) apart.Alternatively grow it under glassfrom cuttings taken in the earlysummer, and plant out later,allowing 2 feet (61 cm) betweenplants and between rows.Harvesting Harvest as for sweetmarjoram. Pot marjoram seedsripen' in late summer or earlyautumn. Cultivated pot marjoramcan last for years.MARJORAM (SWEET)Origanum majoranaUses Sweet marjoram lends a spicyflavour to sausages, and to gameand poultry stuffings.Soil It needs a medium rich soil,plenty <strong>of</strong> compost and a' warm,sheltered spot.Sowing Sow sweet marjoram inpots under glass in early spring andplant out in early summer 1 foot(30 cm) apart.Harvesting Leaves and flowersare best collected just before thebud opens towards the end <strong>of</strong>summer. Dry in thin layers, at temperaturesnot over 100°F (38°C).MARJORAM (WILD)Origanum vulgarePerennialUses Wild marjoram (oregano)turns up in many spicy dishes,which incorporate its overpoweringflavour With ease. In delicate dishesuse it in moderation.Soil It needs a warm dry place togrow, and prefers a chalky orgravelly soil.Sowing Sow from seed in earlyspring. <strong>The</strong> distance betweenplants should be as much as 20inches (51 cm); if you sow in drillsyou should thin to 8-12 inches(20-30 cm). Like pot marjoram,it can be grown from cuttings.Harvesting Harvest as for sweetmarjoram. Seeds ripen in earlyautumn.Uses <strong>The</strong>re are several kinds <strong>of</strong>mint, with different properties andflavours, but they can be treatedtogether. For mint sauce useBowles mint rather than gardenmint if you want a stronger flavour.A few sprigs <strong>of</strong> peppermint makea fine tisane. Mint added to anyfruit dish or drink peps it up.Soil Mint has a rampant rootsystem and is best planted awayfrom all other hetbs. Grow mintin the sun and it will have a fullerflavour, but it needs a moist, richsoil and plenty <strong>of</strong> water.Sowing Plant in autumn or springfrom roots or runners. Lavhorizontally in drills 2 inches(5 cm) deep, 1 foot (30 cm) apart.Hoe frequently during the firstweeks and compost liberally.Harvesting Mint for dryingshould be harvested at thebeginning <strong>of</strong> the flowering season(midsummer), but fresh leaves canbe cut any time. Ftequent cuttinghelps the plant to grow. Don't cutfor drying in damp, rainy weather,for the leaves will only blackenand go mouldy. Keep peppermintleaves whole when drying for tea.Rub them and they will have atotally different taste.NASTURTIUMTropaeolum major or minusAnnualUses <strong>The</strong> round, hot-flavouredleaves are delicious tossed in ricesalads. <strong>The</strong>y are a healthyalternative to pepper for peoplewho like spicy food. <strong>The</strong> flowersare good with cream cheese. <strong>The</strong>young green seeds can be pickledand used like capers. <strong>The</strong>y areexcellent with roast mutton.Soil Given a light, sandy soil andplenty <strong>of</strong> sun, nasturtiums willgrow almost anywhere. Plantsgrown for leaves need a groundrich in compost.Sowing Sow the seeds in situ inlate spring. If they are planted nearother plants, they are said toprotect them from pests.Harvesting <strong>The</strong> highest vitamincontent is found in the leavesbefore they flower in midsummer,so harvest then. Chop or dry, thenrub or shred. <strong>The</strong> leaves dry well,but the flowers should always beeaten fresh.PARSLEYCarum petroselinumBiennialUses <strong>The</strong>re are several varieties<strong>of</strong> parsley, but all are rich in vitaminC, iron and organic salts. Chop itup into tiny pieces and use lavishlyas a garnish.Soil Parsley needs rich soil witha fine tilth.Sowing Sow parsley fresh everyyear as it runs to seed. Sow in earlyspring and later in midsummer at adistance <strong>of</strong> 8-12 inches (20-30 cm)in drills i inch (1 cm) deep. Coverthinly and water well, especiallyduring the 5-8 week germinationperiod. When seedlings are 1 inch(2.5 cm) high, thin to 3 inches (8 cm)and finally to 8 inches (20 cm)when mature. Keep it well watered.Curly" parsley can <strong>of</strong>ten be sownthree times a year: in early springsow in a border, on open groundin early summer, and in a sheltetedspot in midsummer.Harvesting Pick a few leaves at atime. Bunches should not bepicked until the stem is 8 inches(20 cm) high. Pick for drying duringthe summer and dry quicHy. Plainparsley is the only herb requiringa high drying temperature; it mustbe crisp and brittle before you startrubbing it.158
Food from the GardenROSEMARYRosmarinus <strong>of</strong>ficinalisPerennialUses This evergreen shrub wasthought <strong>by</strong> the Greeks to stimulatethe mind. We use it to stimulatemeat, fish and game dishes.Soil Rosemary can grow to wellover 5 feet (1.5 m). It likes a light,dry soil in a sheltered position, andit needs plenty <strong>of</strong> lime.Sowing Sow seeds in early springin shallow drills 6 inches (15 cm)apart. Transplant seedlings to anursery bed when they are a fewinches high, keeping 6 inches(15 cm) distance between plants,and finally plant out 3 feet (91 cm)apart. Cut in midsummer so shootshave a chance to harden <strong>of</strong>f beforewinter sers in. <strong>The</strong>n cover the soilover rhe roots with leafmould andsacking for the winter.Harvesting Leaves can be pickedfrom the second year on, at any time<strong>of</strong> the year, although late summeris the best time for drying purposes.Rosemary flowers should bepickedjust before they are in full bloom.SAGESalvia <strong>of</strong>ficinalisPerennialUses Although now better knownfor its presence in stuffings, sage. was for centuries regarded as one<strong>of</strong> the most universal healingremedies. Narrow-leaved sage isbetter for cooking, while broadleavedsage is much more suitablefor drying.Soil Sage grows to around 2 feet(61 cm) and needs a light, drychalky" soil. It makes a good borderplant and loves the sun.SowingNarrow-leaved sage Sow seed inlate spring, in humid soil and coverlightly. Germination takes 10-14days. Transplant seedlings 15-20inches (38-50 cm) apart in theearly summer.Broad-leaved sage is alwayspropagated from cuttings taken invery late spring. When rooted,plant out 15-20 inches (38-50 cm)apart in rows 2 feet (61 cm) apart.Harvesting Second year.plantsare richer in oils and give a betterharvest. Broad-leaved sage is bestcut in midsummer and again amonrh later to prevent it becomingtoo woody. Don't expect it ever t<strong>of</strong>lower in a temperare climate. Cutnarrow-leaved sage in earlyautumn. Sage leaves are tough andneed a longer drying time thanmost herbs.SAVORY (SUMMER)SaturejaAnnualhortensiaUses Summer savory is known asthe "bean-herb" and brings out theinnate taste <strong>of</strong> all beans.Soil A bushy plant growing about12 inches (30 cm) high, it flourishesbest in a fairly rich, humid soil,wirhout compost.S owing Sow in late spring or earlysummer, in rows 1 foot (30 cm)apart. Thin seedlings to 6 inches(15 cm). You will get two cuts fromthis sowing, one in midsummer andanorher, smaller one in autumn.Harvesting Cut shoots for dryingshortly before flowering occurs(from midsummer through toautumn). Harvest seeds as soon asthey are brown.SAVORY (WINTER)Satureja montanaPerennialUses Winter savory- has a strongflavour and goes well with sausages,baked fish or lamb.Soil Winter savory makes an idealherb garden hedge, prefers a chalky,well-drained soil and plenty <strong>of</strong> sun.Sowing Winter savory isgerminated <strong>by</strong> light, so don't coverthe seed. Sow in late summer indrills 12-15 inches (30-38 cm)apart, or propagate <strong>by</strong> cuttings inspring, planted out 2 feet (61 cm)apart. Plants will continue to growhealthily year after year- in thesame place.Harvesting Cut shoots and tipsfrom early summer <strong>of</strong> the secondyear onwards. Cut befote floweringto get oils at their peak.SORRELRumex acetosaPerennialUses Pick young leaves and eatthem raw or cook like spinach.Sorrel's acid taste combines wellwith rich stews and fish. Sorrelsoup is a speciality <strong>of</strong> France.Soil Sorrel needs a light, rich soilin a sheltered, sunny spot.Planting <strong>The</strong> herb is best propagated<strong>by</strong> division <strong>of</strong> roots in spring orautumn. Plant out 15 inches(38 cm) apart. When the plantflowers in early summer, cut it backto prevent it from going to seed.Harvesting Pick 3-4 months aftetplanting when it has 4 ot 5 leaves.Harvest shoots and tips for dryingin the early 7 summer beforeflowering Starrs.TARRAGONArtemisia dracunculusPerennialUses An important cooking herb,tarragon is a classic for shellfish,and is also delicious with chickenand buttered vegetables (especiallycourgettes). <strong>The</strong> young leaves arefine in salads.Soil Drainage is important if youare ro grow tarragon well. Slightlysloping stony ground is ideal.Planting Tarragon is anothersun-loving herb and the roots• will spread out about 4 feet (1.2 cm)so give it growing room. <strong>The</strong> bestway to establish is to buy plantsfrom a nursery and plant out 2 feet(61 cm) apart after the last frost<strong>of</strong> winter. Pull undergroundrunners away from the main plantfot propagation in late spring.Transplant cuttings either in springor autumn.Harvesting Fresh leaves can bepicked continually all summer longand rhis will encourage new ones togrow. Harvest the leaves for dryingat the beginning <strong>of</strong> the floweringperiod.THYMEThymus vulgarisPerennialUses Garden thyme is a good herbto put in the pan with any roastmeat, or to use in stews and'stuffings. It should not be used to<strong>of</strong>reely as it can drown other tastes.Soil Thyme thrives in a dry, welldrainedposition, with light soil.Planting Seeds can be sown inlate spring i inch (0.5 cm) drills2 feet (61 cm) apart, but the herbis generally grown from cuttingstaken in early summer. Side shootscan be layered in spring. Transplantthe rooted cuttings or layers12 inches (30 cm) apart in rows2 feet (61 cm) apart. Keep beds wellwatered and free from weeds.Harvesting In the first year onlyone cutting should be made. Twocuttings can be taken from thesecond yeat on, the first in earlysummer, just before flowering, thesecond in midsummer. Don't cutstems from the base <strong>of</strong> the plant,cut shoots about 6 inches (15 cm)long. Trim the plant after floweringto prevent it growing leggy.159
Food from the GardenVegetables through the \earExactly the same principle <strong>of</strong> croprotation applies to the garden as t<strong>of</strong>ield crops, but in the garden thereare two main considerations to takeinto account: you want the biggestpossible gap (at least three years)between brassica crops to preventclub-root disease building up, andthe biggest possible gap betweenpotato crops to guard against eelworm.You should also take intoaccount that potatoes don't likefreshly limed ground, which makesthem scab<strong>by</strong>, whereas beans andpeas do. Brassica prefer limedground, but after the lime has beenin it a few months. <strong>The</strong> root cropsdon't like land too freshly muckedor dunged.You can pander to the needs <strong>of</strong>all these plants if you adopt a fouryear rotation something like this:Manure the land heavily andsow potatoes. After the potatoesare lifted, lime the land heavily andthe next year sow peas and beans.Once the peas and beans are lifted,set out brassica immediately fromtheir seed bed or their "holdingbed"(see below). <strong>The</strong> brassica willall have been eaten <strong>by</strong> the nextspring and it will be time to put inwhat I call mixed crops. <strong>The</strong>se willbe onions, tomatoes, lettuce,radishes, sweet corn, and all thegourd tribe (marrows, squash,courgettes, pumpkins, cucumbers).Follow these with root crops suchas carrots, parsnips, beet and celery.(Mixed crops and root crops can bevery interchangeable.) Don'tinclude turnips or swedes whichsuffer from club-root and thereforemust go in the brassica rotation, ifyou aren't already growing them ona field scale which suits them better.<strong>The</strong>n back to spuds again, which iswhere we started.This suggested rotation will suityou if you garden in a temperateclimate with a fairly open winter.(Snow doesn't hurt unless it isextremely deep, but intense froststops you having anything growingoutside in the winter at all.) Probablyno-one would stick to thisrotation, or any other, slavishly. Iknow that there are idiosyncrasiesin it, but I also know that it works.For example, I cram the brassicabreak in after the peas and beans,and clear the land <strong>of</strong> brassica thesubsequent spring: this may becrowding things a bit, but two maincrops are being produced in oneyear. Now to do this (and personallyI find it a very good thing to do)you must sow your brassica seed ina seed bed, preferably not on any <strong>of</strong>your four main growing plots at allbut in a fifth plot which is for otherthings such as perennials. <strong>The</strong>n you
must plant out the little plantsfrom your crowded seed bed to a"holding bed'.' This is a piece <strong>of</strong>clean, good land, in which thesesmall brassica plants can find roomto grow and develop, for it will belate in the summer before many <strong>of</strong>them can go in after the justharvestedpeas and beans, and itwould be fatal to leave themcrammed in their original seed beduntil that late. So cramming fivemain crops into four years requiresa holding-bed as well as a seed bed.We can then look upon suchquick-growing things as lettuces,radishes, and early peas (which areactually best sown late) as catchcrops,ready to be dropped in whereverthere is a spare bit <strong>of</strong> ground.Perhaps you think that radishesare brassica and therefore shouldonly go in the brassica break? Well,we pull and eat ours so young thatthey don't have time to get and perpetuateclub-root. But don't leavethem in to get too old and go toseed, or they will spread this rathernasty disease.<strong>The</strong>re are plenty <strong>of</strong> othet rotations,one <strong>of</strong> which might suit youbest, but provided you keep brassicacrops three years away fromeach other, you won't go far wrong.Climate <strong>of</strong> course is all-important,and for the seasonal plans onthe following pages I have taken asthe norm a temperate climate,which will support brassica out <strong>of</strong>doors all winter but which will notallow us to grow sub-tropical, oreven Mediterranean plants out <strong>of</strong>doors at all. In a climate with nowinter frosts we could get three orfour crops a year, provided we hadenough rain, or enough water fotirrigation. In climates too cold forwinter greens outside we wouldhave to devote the summer to oneplot <strong>of</strong> brassica for storage duringthe winter. But it goes without sayingthat the reader must make allowancesfor climatic differences.A vegetable calendar<strong>The</strong> chart shows the sowing, plantingout, hoeing and harvesting times forvegetables that you might grow ina temperate climate. But check withyour neighbours first; the climatewhere you live could make as muchas a month's difference.Key:161
Food from the GardenWinterWinter is a time for building and repairing, for felling timberand converting it, for laying hedges, digging drains andditches, building fences and stone walls. If the soil in thegarden is heavy clay, it is best to keep <strong>of</strong>f it as much as possible,because digging or working such soil in winter only doesharm to it. On lighter land the same inhibition does not applyIn cold climates the land may be deep under snow anyway,and all the crops that have been harvested will be safe inclamp or root cellar, or stored away in jars or bottles, crocksand barrels. <strong>The</strong> good husbandman should start the winterfeeling that his labours have secured him a store <strong>of</strong> good andvaried food, to keep him and his family through the darkmonths, and provide hospitality for his friends too. So for the<strong>self</strong>-supporter winter is also a time for feasting.Sow cucumber andtomato seedsMake hot bed with compostGreenhouse and perennialsIn the greenhouse, it is time to clearwinter lettuce, and the enriched soilthat grew tomatoes last year goesout to the garden, with fresh soilharrowed in and mixed with compostTomato and cucumber seedare sown in the heat <strong>of</strong> the greenhouse."Hot beds" can be built upin the cold frames. Mature compostis emptied on to the land intendedfor potatoes. Any remaining compostthen goes into an empty bin toaerate it, and a new compost heapis begun. Perennial plants protectedfrom the winter cold <strong>by</strong>strawand seaweed, are resting, preparingfor their spurt <strong>of</strong> growth inthe spring.Plot AThis plot will have been veryheavily mucked after the potatoeswere lifted last autumn. A smallproportion <strong>of</strong> it may well be wintersownbroad beans this year, if thewinter is mild. <strong>The</strong> rest will gounder winter rye or another wintergreen crop, which will stop the loss<strong>of</strong> nitrogen, and keep it ready to digin as early as the land is dry enoughto work in the spring. <strong>The</strong> plot waslimed last autumn, after the spudshad been lifted, and this will benefitthe peas and beans that are t<strong>of</strong>ollow and also the brassica cropwhich will come after them. A smallpart <strong>of</strong> this bed will have beenplanted with spring cabbage plantslast autumn, and there will be a bed<strong>of</strong> leeks, which will be ready to pull.Begin new compost heapPull leeks162Protect perennials withstraw and seaweed
Food from the GardenPlotBThis plot should be full <strong>of</strong> bigbrassica plants: Brussels sprouts,hearting broccoli ("winter cauliflower"),big hard-hearted wintercabbage, kale, red cabbage, and anyotherbrassica plant that canweather the winter. <strong>The</strong>re may wellbe a few rows <strong>of</strong> swedes if thesehaven't already been harvested andclamped. Turnips must be in theclamp orroot cellar <strong>by</strong> now, fortheycan't stand the winter as swedescan. This plot will provide most <strong>of</strong>the greenstuff during the winter,helped <strong>by</strong> the leeks in plot A. Intemperate climates, this helps toavoid much complicated canningand bottling. Shallots are plantedout, as this plot becomes the "miscellaneous"break next summer.PlotCThis plot is under green manuresuch as rye or some other wintercrop. Last year it bore the miscellaneous,short-lived crops. As soonas the land is dry enough to work,the green manure can be forkedinto the ground, so that it can beginto rot down. <strong>The</strong>re is no hum',because this plot is going to be"roots" this year, and most <strong>of</strong> thesewill not have to be planted outvery early.PlotDThis plot is fallow, or else undergreen manure, although if the rootswere harvested late last year, theremay not have been time to sow anygreen manure. It is time to barrowoutcompost or muck for the futurecrop <strong>of</strong> spuds. If harrowing is donein heavy frost, it is easier to push thebarrow. It also does the groundless damage. <strong>The</strong>re may be a row <strong>of</strong>celery left undug, and this can beremedied as the winter progresses.Spray and prune fruittrees if necessarvFruit plot<strong>The</strong> fruit trees only need sprayingwith a winter wash if pests haveafflicted them badly. Two-and-ahalfpounds (1.1 kg) <strong>of</strong> caustic sodadissolved in ten gallons (45.5 litres)<strong>of</strong> water was the old-fashionedremedy, but these days most peoplebuy proprietary winter washes.After the middle <strong>of</strong> February fruittrees, gooseberries, and otherbushes are pruned. <strong>The</strong> blackcurrantsmay well have beenpruned in the autumn. Muck orcompost is barrowed and dumpedaround trees and bushes, and theground between s<strong>of</strong>t fruit bushes isforked lightly. All prunings shouldbe burned.Grow winter rye forgreen manuring163
Food from the GardenSpring<strong>The</strong>re is so much to do in spring that it is difficult to get going•fast enough. For a start, the green manure crops are turned in(a rotovator is quite good for this), the seed beds preparedand seed sown. But it is no good being in too much <strong>of</strong> a hurryto sow seeds, because they can't grow in half-frozen ground,and wet ground is cold ground. It is better to sow a week ortwo later, in dry warm soil, than earlier, in wet cold soil. Somethings, like parsnips, need a very long growing season, and canbe put in early. Some others are best started <strong>of</strong>f early, butunder glass. Cloches are a great help at this time <strong>of</strong> year, towarm the soil for early sowing. In March I have a big sheet <strong>of</strong>transparent plastic over February-planted early potatoes.<strong>The</strong> soil under it feels warm to the touch, while the soiloutside is freezing.Sow cucumbers in hot bedGreenhouse and perennialsIn a heated greenhouse, sweet cornis sown in peat pots and greenpeppers in seed boxes. As thetomato and cucumber plantsbecome big enough they can beplanted out in pots or greenhousesoil. Cucumbers can be sown in thehot bed. In the herb garden it is timeto lift, divide, and replant perennialherbs such as mint, sage and thyme,if they need it. <strong>The</strong> seaweed coveringshould be removed from theasparagus bed, and the seaweed putin the compost heap. Rhubarb isforced under dark cover. Globeartichokes should be progressingwell. Seeds are sown in the seed bedready for planting out later: onion,all broccoli, cabbage, kale, cauliflower,Brussels sprouts and leeks.Lettuce can also be sown in theseed bed if there is a shortage <strong>of</strong>space in the main garden andlettuce plants are wanted ready forreplanring later when there is room.Plot A<strong>The</strong> leeks are cleared and eaten asthe spring advances. <strong>The</strong> wintersownbroad beans will be growingwell, but if there aren't enough <strong>of</strong>them spring-sown varieties may beplanted early in the season, whenearly peas will also go in. After this,peas will be sown in succession asthe year advances. However manyare grown, there will never beenough! Early turnips, soya beansand swedes should go in this plot,which will be brassica next winter.<strong>The</strong> row <strong>of</strong> spring cabbage will d<strong>of</strong>or fresh greens, and will get eatenas spring advances.Divide and replantperennial herbsRemove seaweedfrom asparagusForce rhubarbSow brassicas and onions in seed bedPlant out early turnips,swedes and soya beans164
Food from the GardenPlotBSpring is more <strong>of</strong> a hungry-gapthan winter, but the late hardybrassica, together with the leeks,tide things over. <strong>The</strong> brassica arenearly finished, but maybe a fewBrussels sprouts are still standing,with some kale, some sproutingbroccoli, and perhaps a few heartingbroccoli. As the plants arefinished, they must be pulled out,the stems smashed with an axe andthen put on the compost heap. <strong>The</strong>shallots should be growing well.PlotCBy now the winter rye sown lastyear as a green manure crop shouldbe dug in, to make way for the rootsto be sown later in the year. <strong>The</strong>only root crop sown early on isparsnip, but as spring progressesonion seed and carrots are sown inthe bed. It is time to plant outonion sets and autumn-sownonions. If there is no garlic in theherb garden, it must be put out hereearly in spring. As spring turns intoearly summer more and more cropsgo into this root break bed.PlotDA row <strong>of</strong> early potatoes could begrowing under cloches or transparentplastic. <strong>The</strong>se will have beenplanted towards the end <strong>of</strong>February in mild climates, or lateMarch in severer ones. <strong>The</strong> maincrop won't go in until mid-April.<strong>The</strong> earlies get planted shallowlybut the main crop go in deepfurrows, both with ample muck orcompost. <strong>The</strong>y are ridged up asthey grow.Fruit plotPrune gooseberries early in theseason. Some people set out strawberryplants in March or April. <strong>The</strong>ground around s<strong>of</strong>t fruit such asblackcurrants, gooseberries andraspberries should be kept hoedand cultivated to prevent grassfrom growing. Insect pests are to beavoided and something must bedone about them if they attack.Grease-bands put around fruit treeswill catch crawlies climbing up. It isimportant not to spray insecticideson flowering trees, as they kill thebeneficent bee.Keep planting and ridgingup main crop potatoesPull up brassicas and smashready for compostingDig in winter ryeGrow early potatoes under cloches j Prune gooseberries165
Food from the GardenEarly SummerSuccessional planting must go on unabated with many cropsduring April, May and June. A constant supply <strong>of</strong> fresh peas,lettuces, radishes and French beans can be maintained <strong>by</strong>planting these short-lived plants little and <strong>of</strong>ten. Fresh youngturnips should be available all summer too. Hoeing shouldnever be neglected during the early summer, as this is the timewhen the weeds are raring to get a foothold along with everythingelse. If they are allowed to get away with it, the crops willbe miserable or non-existent. Onions and carrots must bemeticulously hand-weeded. If some radish seed is sown alongwith the parsnips, radishes will be clearly visible before theslow-growing parsnips have declared themselves, and can beside-hoed with safety.Keep greenhouse humidand well ventilatedWhitewashgreenhouse iVentilate cold frameGreenhouse and perennialsAsparagus can be cut and eatenuntil the end <strong>of</strong> June, when it mustbe abandoned and allowed to grow.Herbs will thrive on frequent pickings.Artichokes are growing fast.<strong>The</strong> seed bed is kept weeded and ifflea-beetle appear on brassica seedlings,they can be dusted with derrisor pyrethrum dust. <strong>The</strong> ventilationin the greenhouse must be carefullyadjusted. <strong>The</strong> top glass should belightly shaded with whitewash. Agood airing is vital during the day,but cold air must be kept out atnight. <strong>The</strong> air is kept humid <strong>by</strong>spraying the floor and plants.Tomato plants are fed with water inwhich muck has been soaked, andas small cucumbers begin todevelop they too are fed. Brassicaplants are pricked out into a holdingbed. <strong>The</strong> lids on cucumberframes should be propped open.Forcing <strong>of</strong> rhubarb continues.Plot APeas are sown in succession andgiven sticks to twine around as theyneed it. More turnips and swedescan be sown. May, or June in laterdistricts, is the time to sow outFrench and runner beans on previouslyprepared, well-compostedbeds. <strong>The</strong>se need regular weedingand watering; all these legumeswant frequent watering in a dryseason. It is time to harvest broadbeans, and if there had been anysigns <strong>of</strong> black-fly earlier the tops <strong>of</strong>the broad beans should have beensnapped <strong>of</strong>f immediately andcooked. As soon as they arefinished cut them down and sowFrench beans in their place.Sow runner beansSow more turnips and swedes166Cut asparagus untilthe end <strong>of</strong> JuneContinue to force rhubarbHarvest broad beans
Food from the GardenPlotBNow cleared <strong>of</strong> last winters brassica,this plot becomes the new miscellaneousbed, for outdoor tomatoes,courgettes, melons, marrows,pumpkins, squashes, radishes,lettuce, ridge cucumbers, spinachand sweet corn. As all these things- some <strong>of</strong> them reared in greenhouseor cold frame - becomeready, and the weather is warmenough, they are planted out, andshould be watered and tended. Agood mulch <strong>of</strong> well-rotted muckor compost, if it can be spared,will do them all good. It revives thesoil, and shouldn't make next year'sroots "fork" too much, if put onwell in advance.PlotCOnions in the root break plotshould be growing well and willneed weeding and thinning. <strong>The</strong>carr.ots should be thinned if theyare wanted for winter storing butnot if intended for summer eating.<strong>The</strong> wily carrot fly must be avoided.Carrots should only be thinnedwhen it is raining, otherwise paraffin,or some other strong-smellingstuff, must be sprinkled on therow after thinning. Parsnips arethinned and weeded. Endive andbeet are sown. Celery should beplanted out before the end <strong>of</strong> Mayin a previously prepared celerytrench, and never allowed to dryout at all.PlotD<strong>The</strong> potatoes already plantedshould be earthed up as they grow.Very early morning, or late evening,is the best time to do this, becausethe leaves lie down and sprawlduring the day and make earthingup difficult. Turnips can be sown tocome up in the brassica break whenthe early potatoes are out. <strong>The</strong> trick<strong>of</strong> planting leeks after spuds havebeen lifted can only be done if thespuds are early ones. Earlies arebeing eaten <strong>by</strong> June, so leeks canbetransplanted into the ground whenit is clear.Fruit plotNets go over strawberries and strawunderneath them, and birds mustbe kept <strong>of</strong>f other s<strong>of</strong>t fruit too. S<strong>of</strong>tfruit such as gooseberries can nowbe picked, starting with the hardones for cooking, so as to give theyounger ones a chance. Insects andvarious blights must be kept at bay.<strong>The</strong> ground between s<strong>of</strong>t fruitbushes is hoed, and a mulch <strong>of</strong> •compost or anything else put on.It is vital on light land.Earth up potatoesSow endive and beet
Food from the GardenLate SummerEarlier labour will now start bearing fruit in earnest. <strong>The</strong>re isalmost an embarras de richesse <strong>of</strong> harvest, and it is time tothink <strong>of</strong> giving away, or trading, the surplus <strong>of</strong> many crops.<strong>The</strong> surplus <strong>of</strong> French or runner beans can be stored in salt,and the haricot beans and peas prepared for dry storage. Asfast as peas and beans are harvested and cleared the space isfilled with well-grown brassica plants. Fitting the mainbrassica crop in as a catch-crop after the peas and beanshave been cleared is made possible <strong>by</strong> the use <strong>of</strong> the"holding-bed", which comes into its own this season. Brassicaseems to benefit <strong>by</strong> the twice planting-out. Hand-weedingmust go on incessantly, for weeds that are too big to hoe mustbe pulled out before they have time to seed: one year's seedingis seven years weeding.Ventilate greenhouseKeep lid <strong>of</strong> cold frame raisedGreenhouse and perennialsWith the lid now taken <strong>of</strong>f the coldframes, the cucumbers will run riot.Tomatoes, cucumbers and peppersin the greenhouse will be bearing,and will want watering and feeding.<strong>The</strong>y now need plenty <strong>of</strong> ventilation.In the seed bed early springcabbage seed can be sown. <strong>The</strong>herb and asparagus beds are keptweeded and the rhubarb needs tobe regularly pulled. Soon theflowers <strong>of</strong> globe artichokes will beeaten; they should not be neglected,because uncut plants will notproduce any more. But it is fun toleave a few to burst out in brilliantblue flowers and add to the scenery.Plot A<strong>The</strong> peas and beans are watered ifthey need it, and the flowers <strong>of</strong>runner beans sprayed with watereven - evening, to help the flowersset. Peas, French beans, and runnerbeans galore are now ready to bepicked. So are the turnips. As eachrow passes its best, it must be ruthlesslycleared out <strong>of</strong> the way, andthe space planted up with wellgrownbrassica plants from theholding bed. When the tunnerbeans begin to yield, they must bepicked and picked again and neverallowed to get old and tough. Agreat many are salted for the darkdays <strong>of</strong> the winter. <strong>The</strong> truecountryman always bears thewinter in mind; it is easy enough toget plenty to eat in July.Set bean flowers <strong>by</strong>spraying with water168Sow earlyspring cabbageWater French beans
Food from the GardenPlotBAny straggling vines <strong>of</strong> melons,pumpkins and squashes must becropped. <strong>The</strong> tomatoes must bestaked, side-shoots picked out, andthe plants stopped when they havefour trusses. <strong>The</strong>y must be wellwatered if it is dry. In damp climates,it is a good idea to lay thetomatoes down at the end <strong>of</strong>August and put cloches over themso that more <strong>of</strong> them may ripen.Outdoor cucumbers are stoppedbefore they get out <strong>of</strong> hand, andthey must be picked hard and continuouslyso as not to get too bigand bitter. All male flowers must bepicked <strong>of</strong>f. Lettuce should be eatenwhen ready and not allowed to goto seed. Successional plantings <strong>of</strong>both lettuce and radishes continue.Sweet corn is now high, in a blockto facilitate wind-pollination. <strong>The</strong>shallots can now be harvested.PlotC<strong>The</strong>re is little to do now but hoeall root crops, keep weeds downand kill slugs. In fact, this is <strong>by</strong>far the best rime <strong>of</strong> the year to clearall the weeds in the garden. Celerycan be earthed up and sprayed witha Bordeaux Mixture in preferenceto leaf-spot. Start harvesting theonion tribe.PlotDBy now the early potatoes aregradually being eaten, and thesecond lot started on if there areany. <strong>The</strong> main crop must not belifted yet, but can be sprayed twicewith Bordeaux Mixture, if blight isfeared. Warm muggy weather is theenemy. <strong>The</strong> main crop must be wellearthed up, but when the tops meetacross the furrows it won't be possibleor necessary to hoe any more,though the big annual weedsshould still be hauled out. Turnipsand leeks should be establishingthemselves.Fruit plotAny superfluous suckers are cutout from the base <strong>of</strong> the raspberryplants. Immature apples are thinnedwhere they are too thick on thetree (although the "June drop" maydo this naturally) and fruit trees,particularly cordons and trainedtrees, are summer-pruned. Plumsand s<strong>of</strong>t fruit should be eaten now,while birds are eating the cherries. Ithink August is the time to plant anew strawberry bed, so root thestrawberry runners in small sunkenpots. Hoeing between s<strong>of</strong>t fruitscontinues, it keeps the grass downand also gives the birds a chance toeat creepies.
Food from the GardenAutumnAutumn is the season <strong>of</strong> mists and mellow truitfulnessaccording to Keats. It is also the real harvest time, when all themain crops have to be gathered in and stored for the winter.<strong>The</strong> good gardener will try to broadcast green manure seedwhereverbeds are left empty, although on very heavy soil oldfashionedgardeners are fond <strong>of</strong> leaving it "turned up rough"after digging so that frost can get at it. I prefer the greenmanure approach. After the first frost has touched celery andparsnips it is time to start eating them, and time to think <strong>of</strong>parsnip wine for Christmas (or the Christmas after next, aspurists would have it).Sow next year's brassicasin greenhouse and framesGreenhouse and perennialsFrames and greenhouse can besown with winter lettuce, springcabbage and summer cauliflower.<strong>The</strong> last two will be planted outnext spring. Asparagus ferns are cutdown and composted, thus defyingthe asparagus beetle. Potatoes maywell be clamped near the house, orput in the root cellar (or anywherecold, dark and frost-pro<strong>of</strong>). Globeartichokes are cut as long as thereare any left. <strong>The</strong>n they are abandoned,except for a covering <strong>of</strong>straw, as they die down, to protectthem against frost. It is a good ideanow to cover the asparagus bedwith seaweed, or manure, or both.All perennial crops want lavishmanuring.Plot ANow it is time to clear away all thepeas and beans, even the haricotbeans, soya beans and any othersintended for harvesting and dryingfor the winter. This bed will holdwinter and spring brassica, plantedlate perhaps, but none the worsefor that, as they have been growingaway happily in their holding bed.<strong>The</strong> cabbages will benefit from theresidual lime left <strong>by</strong> the peas andbeans and the residue <strong>of</strong> the heavymanuring given to the previousspuds. When all weeds are suppressedit is a good idea to mulchthe brassica with compost, butslugs must be kept down.Plant winter andspring brassicasCut and compost asparagus ferns ; Manure perennials Clamp potatoes Mulch brassicas well170
Food from the GardenPlotBAll the plants in this bed (which areplants with a short growing season)will have been harvested. After thebed has been cleared, it should belightly forked over, and winter ryeplanted for green manure. Unfortunately,it is not much good tryinga clover for this as it is too late inthe year; only a winter-growingcrop like rye will work.PlotCParsnips can stay in the groundindefinitely. Once earthed up,celery will also survive much <strong>of</strong> thewinter. <strong>The</strong> rest <strong>of</strong> the roots arelifted in September and put safely instore.' Red beet needs lifting carefully,as its roots bleed whendamaged. As the land is cleared ryecan be sown in it at least up until theend <strong>of</strong> September. This bed will bespuds next year, and manuring cannow begin.PlotD<strong>The</strong> main crop <strong>of</strong> potatoes is liftedquite late, just before the first frostsare expected. This way, the tuberswill harden in the ground and keepbetter, and if blight is present thereis less chance <strong>of</strong> the spores being onthe surface <strong>of</strong> the ground to infectthe tubers when they are lifted. <strong>The</strong>spuds should lie drying out on thesurface for a day or two, while theirskins set. <strong>The</strong>n they are clamped orstored away. <strong>The</strong> leeks are earthedup and will be a great winter stand<strong>by</strong>.As this plot will be the pea andbean break next year, broad beansare planted in October or Septemberif you have hard winters.Fruit plotRunners are cut away from thestrawberries, the ground clearedand given a good top-dressing <strong>of</strong>muck or compost. All fruit is harvestedas it becomes ripe, thenapples and pears are stored in a coolbut not a frosty place, so that theydon't touch each other. <strong>The</strong> oldfruiting canes <strong>of</strong> raspberries are cutout, leaving the young wood, andblackcurrants are pruned inNovember or December. New fruittrees can be planted in November ifthe ground is not too wet. As treeleaves fall, rake them up and compostthem, because they harbourtroublesome pests.Lift main crop potatoesTop-dress strawberriesPrepare land for winter rye
Food from the Garden<strong>The</strong> GreenhouseA greenhouse can be a very basic thing; it can consist <strong>of</strong> athree foot (91 cm) high foundation <strong>of</strong> brick, concrete or stone,a wooden framework containing the glass (heavy glass isbest), a door, and four ventilators (two at each end <strong>of</strong> thebuilding, one high up and another low down). Inside youneed staging for standing seed boxes on, and you should beable to remove this so that in the summer you can planttomatoes in its place.Unheated greenhousesIn countries where grapes and tomatoes will grow reliablyout <strong>of</strong> doors I personally would not bother to have a greenhouse,but would spend the money on other things. But incooler climates even an unheated greenhouse is enormouslyuseful for starting <strong>of</strong>f things like celery seed, sweet corn, earlysummer cabbage, and anything else you wish to get <strong>of</strong>f to aflying start out <strong>of</strong> doors as soon as the frosts are over. You canalso use it during the summer for growing that magnificentplant the tomato. Tomatoes are a most desirable crop for the<strong>self</strong>-supporter. <strong>The</strong>y are expensive to buy, but easy to grow;they bottle well, and having a store <strong>of</strong> them makes all thedifference between some possibly pretty dull food in thewinter and "la dolce vita". A couple <strong>of</strong> dozen large kilner jarsfilled with fine red tomatoes on the shelves come autumn area fine sight and give us hope for the future.And in summer your cold greenhouse may nurture suchluxury crops as aubergines, melons, green peppers whichturn into red ones if you leave them long enough, and <strong>of</strong>course cucumbers. <strong>The</strong> cucumbers you grow inside a greenhousetaste much better than frame or ridge cucumbersgrown out <strong>of</strong> doors. And you can have lettuce nearly all theyear round if you grow it in a greenhouse. In spite <strong>of</strong> this, acold greenhouse will not help you much in the winter time,except <strong>by</strong> bringing along some early cabbage or some winterlettuce, or something that is pretty hardy anyway, because thetemperature inside the greenhouse, when there is no wintersun, may go well below freezing point. So do not expectmarvels. Remember the limitations.<strong>The</strong> <strong>self</strong>-supporter will like the idea <strong>of</strong> heating his greenhousewithout buying fuel. This canbe done with a FachongleFurnace (see pp. 248-249), or possibly <strong>by</strong> water or windgeneratedelectricity. <strong>The</strong> former is likely to prove morereliable. Solar heating, properly used, has always beenadequate to heat greenhouses in the warmer months <strong>of</strong> the year.Greenhouse temperaturesIn the winter the temperature should be about 40°F (4°C) atnight. <strong>The</strong> sun should bring this to about 50°F (10°C) onbright days. <strong>The</strong> day temperature should not be allowed toget too high, but it must not be kept down <strong>by</strong> admitting freezingair into the place, as this will inevitably kill tender plants.S o cool the air <strong>by</strong> letting the boiler fire go out, but get it goingA lean-to greenhouseThis greenhouse is a practical way <strong>of</strong> getting such things as lemons, peppers,grapes and tomatoes <strong>of</strong>f to a flying start in a temperate climate.Heated greenhousesIf you can just manage - <strong>by</strong> hook or <strong>by</strong> crook, <strong>by</strong> oil orelectricity, or wood burning or coal - to keep the temperature<strong>of</strong> the air in your greenhouse above freezing all winter, andyour greenhouse is big enough, you can have peaches, pears,nectarines, grapes, and most Mediterranean climate fruitsevery year in any climate.If you want to heat your greenhouse, you can have waterpipes running through it. <strong>The</strong> pipes should slope gently upfrom the boiler as far as they go, since the hot water will tendto rise and the cold to sink back to the boiler. At the highestpoint <strong>of</strong> the pipes there must be a bleeder-valve to let out airor steam that may collect. If the masonry inside the greenhouseis painted black, heat is absorbed during the day and letout during the night to allay the frost.172
Food from the Gardenagain in the afternoon so that the temperature can be kept upat night. During the daytime in winter have the leeward topventilator open. <strong>The</strong>n, as spring gets into its stride, openbothtop ventilators a little more. Eventually, open one <strong>of</strong> thebottom ones as well, but arrange for the cold air coming inthrough this to go over the hot pipes. In spring and summersprinkle water on the floor occasionally to keep the air humid.It helps if you can arrange for the water from the ro<strong>of</strong> <strong>of</strong> yourhouse to go into a butt kept inside the greenhouse. This willbe easier if you have a lean-to greenhouse.Greenhouse soilGreenhouse space, whether heated ornot, is expensive, and itis therefore not practical to fill your greenhouse with any oldsoil. <strong>The</strong> better the soil in the greenhouse the better use youwill be making <strong>of</strong> this expensive space. If you mix very goodcompost, good topsoil and sharp sand in equal parts, and adda scattering <strong>of</strong> ground rock phosphate and a little lime, youwill have a very good soil for your greenhouse. You can putthis soil in raised beds, or straight on to the existing soil <strong>of</strong> thegreenhouse. <strong>The</strong> more you rotate crops inside the greenhousethe better, but if you are driven to growing the samecrop year after year then you may have to remove the old, orspent, soil bodily and replace it with new. Tomatoes particularlycan suffer from disease if grown too many years onthe same soil.Greenhouse cropsAs to what to grow in the greenhouse, we are all guided in this<strong>by</strong> what we can grow and what we want. A cold greenhouseenables you to grow a slightly greater range, more reliablythan you could outdoors. A hothouse enables you to growpractically anything that can be grown on earth. For my partthe main uses <strong>of</strong> the greenhouse are: winter lettuce and othersaladings; seed sowing in flats or seed boxes in the early spring<strong>of</strong> celery, tomatoes, peppers, melons, aubergines, sweetcorn, cucumbers; and my greenhouse crop is tomatoes whichgo on all through the summer. I know you are supposed to beable to grow tomatoes outdoors in a temperate climate butyou can't really, whereas a tiny greenhouse will produce areally impressive tonnage <strong>of</strong> ripe red tomatoes that can beeaten fresh until you are fed up with tomatoes. <strong>The</strong>n they canbe bottled to provide marvellous food and flavouring rightthrough the year. You simply cannot have too many tomatoes.As for cucumbers, they can be grown out <strong>of</strong> doors (theridge and frame varieties), but there is no reason why youshould not grow a few in the tomato greenhouse too. <strong>The</strong>conditions are not ideal for them though: the true cucumberhouse is much hotter and more humid than the good tomatohouse. My advice is to keep your house to suit tomatoes andlet the cucumbers take pot luck and do the best they can.And then there is no harm, when you live too far north togrow grapes reliably out <strong>of</strong> doors, in having a big old vinegrowing up the back (north) wall <strong>of</strong> the greenhouse, trainedunder the ro<strong>of</strong> so as to get the benefit <strong>of</strong> the sun withoutshading the precious tomato plants. A fan-trained peach tree,too, is a pleasing luxury in a fairly large greenhouse. And incountries with very cold winters it is quite useful to sow theseeds <strong>of</strong> temperate things like brassica in the greenhouse inthe very early spring.Whatever you do don't overcrowd your greenhouse. It isfar better to grow plenty <strong>of</strong> one really useful crop, liketomatoes, in the summer, and another really useful crop, likelettuces, in the winter than to fill your greenhouse withinnumerable exotic fruits and vegetables. Make all the useyou can <strong>of</strong> hot beds under cold frames, cloches, jam jarsand sheets <strong>of</strong> transparent plastic and the like, out <strong>of</strong> doors(see pp. 142-143).173
Food from the GardenS<strong>of</strong>t FruitIt takes courage to plant top fruit trees knowing that you havemany years to wait before you harvest any fruit, but unlessyou have one foot actually in the grave there is no excuse fornot planting s<strong>of</strong>t fruit. S<strong>of</strong>t fruit comes into bearing quicklyenough: strawberries planted one summer will give you a bigyield the next, and bush fruit does not take much longer. Ands<strong>of</strong>t fruit will give you, besides a lot <strong>of</strong> pleasure, a source <strong>of</strong>vitamins, easily storable, which will ensure the good health <strong>of</strong>you and your family.By far the best s<strong>of</strong>t fruit to plant, for my money, is blackcurrants.<strong>The</strong>y are hardy, prolific, extremely nourishing -about the richest source <strong>of</strong> vitamin C and other vitamins youcan grow - and easily preserved. With blackcurrants you canbe sure <strong>of</strong> an ample source <strong>of</strong> delicious fruit right throughthe winter and hungry-gap. Bottled they taste nearly as goodas fresh, and they very seldom seem to have a crop failure: infact, in twenty years <strong>of</strong> growing them I have never known one. -White currants and redcurrants are not nearly as heavyyielding as blackcurrants. One might grow a few for thenovelty, and for variety, but they won't really make muchdifference to whether you starve to death or not during thewinter months. Raspberries are a good grow - they can bevery prolific, and are fine for jam. <strong>The</strong>y are also hardy and willthrive in wet and cold latitudes. Raspberries are far easierto grow than strawberries and really just as good to eat. <strong>The</strong>yhave a long picking season and children can be turned out tograze on them.Blueberries and the many small berries <strong>of</strong> that ilk are grown<strong>by</strong> people who are hooked on their flavour. <strong>The</strong>y are solaborious to pick in any quantity that they must be lookedupon as a luxury. <strong>The</strong>y are useful, though, in cold climateswhere lusher fruit will not grow.BLACKBERRIES ORBRAMBLE FRUITUse I live in countryside wherebrambles are a blasted nuisance,and as we pick bushels <strong>of</strong> wild fruitfrom them, I wouldn't dream <strong>of</strong>planting blackberries. But cultivatedbrambles provide a heaviercrop <strong>of</strong> bigger, sweeter fruit, and arevery hardy. <strong>The</strong>y also make goodprickly hedges, although you mayprefer a thornless variety.perennial weeds such as couchgrass. Dig in muck or some phosphaticmanure, or both, then plantsmall plants every six feet (1.8 m).Each plant must have a bit <strong>of</strong> stemand a bit <strong>of</strong> root and each stem androot should have been shortenedBLACKCURRANTSUse Blackcurrants are <strong>by</strong> far themost important s<strong>of</strong>t fruit you cangrow. <strong>The</strong>y are the richest in vitaminC, and make the best wine <strong>of</strong>all the fruits.Planting If you want a hedge <strong>of</strong>tame blackberries make sure theground is <strong>complete</strong>ly clear <strong>of</strong>to about half its length. Providethem with a wire fence and they willclimb along it. In fact they willspread at an amazing rate, so keep aclose eye on where they are growing.Pruning If you inherit wildbrambles, and want to improvethem for fruiting, cut the bigpatches into blocks <strong>by</strong> clearingrides, or paths, through them. Cut alot <strong>of</strong> the dead wood from thebushes, clip the long straggling runnersand fling in some phosphaticmanure if you really want to make ameal <strong>of</strong> it.After care Keep the rides clear,and you will greatly improve boththe yield <strong>of</strong> that bramble patch andthe ease <strong>of</strong> picking the fruit. Do notforget to watch for stray shootsgrowing up near<strong>by</strong>.Soil <strong>The</strong>y thrive on a cool andrather heavy soil, even on clay.Preparation <strong>of</strong> soil <strong>The</strong> landshould be limed the previousautumn if it is under about pH6.Get rid <strong>of</strong> any perennial weeds anddig in plenty <strong>of</strong> muck.Planting Take your cuttings fromexisting bushes in late autumn. Dothis in the ordinary course <strong>of</strong> pruningand remove the tops andbottoms with a yery sharp knife.Cuttings should be about teninches (25 cm) long. <strong>The</strong> lower cutshould be just below a joint. Make aslot in the soil with a spade, put alittle sand in the bottom and if vouare a perfectionist, stick the cuttingsinto it with about a foot (30cm) between each. Cover themwith leaves or compost as protectionagainst the frost heaving thesoil up during the first winter.Nurserymen in cold climates makethe cuttings from prunings inNovember, tie them in bundles andheel them in until March. <strong>The</strong>nthey plant them as described above.Next November lift the youngrooted plants carefully and plantthem one foot (30 cm) apart inrows 18 inches (46 cm) apart. Atthe end <strong>of</strong> the second year, lift themand transfer them to their permanentquarters, six feet (1.8 m) apart.Don't plant them too deeply.Pruning Blackcurrants, unlikered or white currants, fruit on newwood, so, if you can, cut out all thewood that was fruited on last year.But you will <strong>of</strong>ten find that you arefaced with a long old branch with anew branch' growing on the end <strong>of</strong>it, so you will end up retaining174
Food from the Gardensome <strong>of</strong> the old wood. Do not worry;After care Give them plenty <strong>of</strong>muck every winter and keep theground clear <strong>of</strong> grass and weeds.Pests "Big-bud" is the worst pest.This is caused <strong>by</strong> a mite, and causesswollen buds. Pick <strong>of</strong>f all such budsand burn them. Another diseasethey can get is "reversion" when theleaves go a weird shape like nettleleaves. Pull these bushes right outand bum them, so the diseasedoesn't spread to other plants.Harvesting Some very lazypeople commit the awful atrocity<strong>of</strong> cutting the fruiting branches <strong>of</strong>f,taking them indoors, and strippingthe berries <strong>of</strong>f there! Well <strong>of</strong> course,it is easier to sit at the kitchen tableand pick berries <strong>of</strong>f a branch thanto stoop or kneel out in the garden,and you kill two birds with onestone because you should pruneout those already-fruited branchesthat winter anyway. I know peoplewho do it, and it seems to work. But1 have never been able to bringmy<strong>self</strong> to do it, because I know thatthere is still a lot <strong>of</strong> "nourishment"in that green branch, which will godown to the roots as winter comeson, and I feel it is a crime to cut it<strong>of</strong>f before this happens.BLUEBERRIESUse Blueberries aren't much goodin warm climates, but people livingin cold northern regions shouldconsider them vers' seriously, forthey are basically mountain fruit.plants, and plant them six feet(1.8 m) away from one another.After pruningPruning When the plant is fouryears old (the first year after plantingthree-year-olds), cut out most<strong>of</strong> the flower clusters and cut awaythe suckers, the shoots that comeup from the roots. Do this for twoyears. <strong>The</strong>n limit the suckers to twoor three for each bush. From thenon cut away old wood from time totime. Don't pick the berries untilthey come <strong>of</strong>f very easily, or theywill have little taste.CRANBERRIESUse <strong>The</strong>se fruits are most commonlyused to make cranberrysauce which is traditionally eatenwith turkey. <strong>The</strong>y will only growunder carefully controlled conditionsand for this reason they arerarely grown in gardens.Soil Cranberries grow in very acidsoil. <strong>The</strong>y must be well drained yetwell watered in summer, and thenflooded in winter.Planting Cuttings can be plantedin spring in a three inch (8 cm)layer <strong>of</strong> sand on top <strong>of</strong> peat.Harvesting After three years <strong>of</strong>weeding, watering, and protecting,the plants may begin to fruit. <strong>The</strong>fruits are hand-picked.GOOSEBERRIESUse Gooseberries are a very usefulsource <strong>of</strong> winter vitamins, and theybottle and cook well. You can'thave too many <strong>of</strong> them, and for mypart these and blackcurrants andraspberries are the only bush fruitreally worth bothering about.Soil <strong>The</strong>y like a good deep loam,but you can improve clay for them<strong>by</strong> digging sand in, and you canimprove sand <strong>by</strong> digging clay in,and you can improve all soils <strong>by</strong>heavy mucking.Propagation Just like blackcurrants(see above), except thatyou rub out, with your fingers, allthe lower buds on the cuttingleaving only four at the top. <strong>The</strong>yalso layer well - peg a low branch toany more. Always keep the middleopen so you can get your hand in topick the fruit. But never prunegooseberries in frosty weather.After care Muck or compostmulch every year. Bullfinches willdestroy every bud during the winterif they can, so build a fruit cage ifyou have to. Leave the cage open inthe summer until the fruit can formin order to let goody birds in to eatthe pests, but close it in the winterto keep baddy birds from eating thebuds. <strong>The</strong> bullfinch plague inEngland and other places is due togame-keepers. <strong>The</strong>y have destroyedall the predators, like owlsand hawks, and small birds havenow become a pest.Diseases A horrible aphis sometimeslives inside gooseberry leavesand makes them curl up. Pick thecurled leaves <strong>of</strong>f and burn them.American gooseberry mildew canbe sprayed with two ounces (56 g)<strong>of</strong> potassium sulphide dissolved infive gallons (23 litres) <strong>of</strong> water. Youcan recognize it <strong>by</strong> a white felt-likegrowth over leaves and fruit.Harvesting Just pick them whenthey are ready. You will find themgood for bottling or for wine.GRAPESUse Grapes don't mind how coldthe winter is, provided the summeris warm enough and there is enoughsunshine. <strong>The</strong>y will grow as farnorth as Suffolk, England. I grewninety outdoor vines there and gotplenty 7 <strong>of</strong> grapes. <strong>The</strong> pheasants ateall the grapes, but I ate all thepheasants, so that was all right./!Planting Blueberries prefer acidsoil to alkaline, so don't put lime onthem. <strong>The</strong>y stand up to intensecold and like a rather shallow watertable so their roots are near thewater. <strong>The</strong>y can't grow in a swampunless on a hummock. <strong>The</strong>y willgrow well on mountain peatlandand prefer a pH value <strong>of</strong> about 4.5,which is very acid. Propagate fromcuttings, or buy three-year-oldthe ground and it will root. Cut it<strong>of</strong>f and plant it.Pruning Prune hard the first yearor two to achieve a cup-shapedbush (open in the middle, but withno branches straggling down).<strong>The</strong>n shorten the stems to three orfour inches every winter, cuttingout all old branches that don't fruitSoil Grapes need a very welldrained,warm soil, rich in humus,and they want plenty <strong>of</strong> sun and air.A south-facing hillside is fine. A pH<strong>of</strong> 6 is good, so you may have tolime. <strong>The</strong>y can also be grown in agreenhouse and left to climb allover the place.Propagation <strong>The</strong>y grow well from175
S<strong>of</strong>t Fruitcuttings. Plant rooted cuttings outin lines six feet (1.8 m) apart in coldclimates, and maybe more in warm.Grapes will fruit better in cold climatesif you keep the vines small,and near the ground.Pruning Have two horizontalwires, one a foot (30 cm) from theground and the other two-foot six(76 cm). Vines fruit on this year'swood, so you can always prune lastyear's <strong>of</strong>f provided you leave two orthree buds which will produce thisyear's shoots. In cold damp climates,don't be too ambitious,leave three shoots to grow. One is aspare in case something happens toone <strong>of</strong> the others, and you cut it <strong>of</strong>fwhen the other two are established.regions better than most s<strong>of</strong>t fruit.<strong>The</strong>y tolerate shade anda northernaspect. Get rid <strong>of</strong> all perennialweeds and muck very heavily. <strong>The</strong>yare greedy feeders <strong>of</strong> muck and willthrive if you give them plenty.Propagation Either buy youngplants from a nursery, raise themfrom layers, or just dig them outfrom the ground near existingraspberries.Planting Plant them quiteshallow, two feet (61 cm) apart, inrows five feet (1.5 m) apart. Establisha fence for them to climb up, orto contain them. 1 just have threepairs <strong>of</strong> horizontal wires and make1 ITRED AND WHITECURRANTSUse <strong>The</strong>se are nothing like as usefulas blackcurrants, but I growthem for fun. <strong>The</strong>y are good formaking jelly.<strong>of</strong> vitamin C, rashes in some smallchildren, and income for homesteaders.Strawberries are verylabour-intensive, but they yieldabout the highest income per acre<strong>of</strong> anything you can grow. If yougrow different strains you canhave strawberries all summer.Train the two you leave in the samedirection along the two wires <strong>by</strong>tying them. In warmer climes, leavefive shoots. Train four along thewires, two each way, and keep onespare. Prune in late winter. Cut theshoots <strong>of</strong>f after they have madeabout six buds.After care Mulch heavily everyyear with compost. Keep downweeds, and spray with BordeauxMixture (see p. 87) in June.Harvesting Cut the bunches <strong>of</strong>fwith secateurs. Never tear them<strong>of</strong>f roughly.RASPBERRIES ANDLOGANBERRIESUse Both taste excellent withfresh cream, and store well as jam.Soil <strong>The</strong>y like a heavy, moist soiland will thrive in cold northernsure the canes grow between these,but some people tie them to thewires to give the canes extra supportand to keep them neater.Pruning Let them grow, but don'tlet the first shoots flower - cutthem down before they do that.<strong>The</strong> second generation <strong>of</strong> caneswill fruit. Cut the canes out afterthey have fruited, and just keepthree new canes to fruit next year.Cut out all the weak canes. As theyears go on leave more canes togrow, up to about a dozen. Suppresssuckers, or dig them up toplant elsewhere. Cut the tips atdifferent levels because they fruitat the tips and you want fruit at alllevels on the plant.Planting Propagate from cuttingsjust the same as you would withblackcurrants (seep. 174)-Pruning <strong>The</strong>y fruit, not on theleaders, like blackcurrants, but onspurs like apples. So cut back the, /7/first leaders, or new shoots, to halftheir length the first winter. <strong>The</strong>ncut all the main leaders back to halftheir length, and cut out all subsidiaryleaders to within half aninch (1 cm) <strong>of</strong> where they spring.Fruiting spurs will form at thesepoints. In fact, keep as much olderfruiting wood as possible, whilecutting out much <strong>of</strong> the new wood.After care Otherwise treat themjust the same as blackcurrants.<strong>The</strong>y don't get "big-bud" or"reversion".STRAWBERRIESUse ThisfruitisaverygoodsourceSoil <strong>The</strong>y are a woodland plantso they need tons <strong>of</strong> muck andslightly acid soil: no lime.Propagation Strawberries makerunners which root, and you candig these out <strong>of</strong> the ground. Or youcan make the runners root in littleburied flower-pots with compost inthem. <strong>The</strong>n when they are rootedyou can cut the runners, removethe pots, and plant them out.Planting Put little plants in duringAugust and then transplantthem a foot (30 cm) apart in rowseighteen inches (46 cm) apart.Don't plant them deep and spreadthe roots out shallow.After care Hoe and weed constantlyor your bed will become amess, and mulch heavily with peat,if you have it, or compost. Beware<strong>of</strong> slugs. If you haven't any peat,put straw below the plants to keepthe berries clean. If you get botrytis(grey mould), dust with flowers <strong>of</strong>sulphur.Harvesting It is best to let themfruit for three years, then scrapthem. Establish a new bed everyyear for a constant supply.V176
Food from the GardenTree FruitHappy is the homesteader who inherits a holding which has apples for cidermaking. So, to reap your reward quickly, putplenty <strong>of</strong> established fruit trees. Unfortunately farms that them in as soon as you possibly can.have previously been tenanted almost never have any. Why However, if you have a very small garden you had bettershould a tenant plant trees on another man's land? So it <strong>of</strong>ten not grow too much top fruit (that is fruit grown on large trees)happens that the newcomer finds no fruit at all, and has to because trees take up a lot <strong>of</strong> space and sterilize the groundwait several years before he picks even a solitary apple. <strong>The</strong> underneath them for some distance <strong>by</strong> drying out the soil,only thing you can do is plant fruit as soon as possible. extracting nutriments from it, and shading it from the sun.Plant: some standard or half-standard hard fruit trees; When you site your orchard you must consider drainage.some espalier or cordon hard fruit trees (especially if your This is very important because no fruit trees will thrive withspace is limited), or else dwarfed trees which generally yield a their feet in water. Air drainage is vital too. Frost runs downmuchheavier crop much more quickly than full-size trees; hill and therefore a basin is a "frost pocket". Thus you don'tand some s<strong>of</strong>t fruit. <strong>The</strong>latterwillgiveyoufruitinthreeyears, want a hedge below a sloping orchard because this willor less if you plant two-year old bushes. <strong>The</strong> big standards, impede the flow <strong>of</strong> cold air downhill, creating frost which willor half-standards, will eventually give you a great bulk <strong>of</strong> fruit, impair the quality <strong>of</strong> your soil. Apples, pears, plums and thepossibly for the rest <strong>of</strong> your life, and pro vide you with enough rest need good soil.APPLESUse Apples are quite simply themost useful fruit <strong>of</strong> all for cooland temperate climates. By havingboth early and late varieties, andlong-keeping varieties, you canhave prime apples nearly all theyear, with maybe a little gap insummer when you have plenty <strong>of</strong>s<strong>of</strong>t fruit anyway. A raw apple aday can be one <strong>of</strong> the most valuableitems <strong>of</strong> your diet.Soil <strong>The</strong>y like good deep loam butwill grow in most soils with plenty<strong>of</strong> muck. <strong>The</strong>y don't do well on acidsoil so you might have to lime.Land must be well drained and notin a frost pocket.Preparation Cultivate well andget rid <strong>of</strong> all perennial weeds. Digholes bigger than the tree-roots arelikely to be, and if you can get it,throw some lime builder's rubble inthe bottom <strong>of</strong> the hole (and plant adead dog down there too if youhave one).Planting If you buy trees from anursery get them to prune thembefore they send them. Three yearoldtrees are usual, but if you takeimmense care with the planting youcan have an almost ready-madeorchard <strong>by</strong> planting even sevenyear-oldtrees. Planting trees iscovered in detail on p. 180.Varieties <strong>The</strong>re are at least athousand varieties in Europe aloneso I cannot begin to deal with themhere. Get local advice on the bestvarieties to grow in your area, andmake absolutely sure that varietiesthat need other varieties to pollinatethem have their mates near<strong>by</strong>.Otherwise they will remain fruitlessold maids.Pruning Pruning is <strong>of</strong> vital importanceif you want large fruit,but don't prune until the middle<strong>of</strong> February (to guard against rotspores). If your apples are "tipbearers",and you must find this outfrom the nursery, the only pruningyou should do is cut out some mainbranches, and in fact cut out theodd <strong>complete</strong> branch to keep thetree open and not too denselycrowded.But most other apples you willhave to prune more scientifically.Cut all "leaders" (leaders are thelong shoots which you want toleave to form new branches) to athird <strong>of</strong> their length, and cut toabout half an inch beyond anoutward-facing bud. This is becausethe last bud you leave will turn intoa branch next year and you want thebranches to grow outwards, awayfrom the centre <strong>of</strong> the tree. Try toaim for a cup-shaped tree, open inthe middle with four or five nicelyshapedmain branches growing outfrom the trunk at about 45°. Don'tlet it get too crowded with minorbranches. So for the first year ortwo remove all young shoots thatare not required for leaders tocreate the final shape <strong>of</strong> the tree.Cut them <strong>of</strong>f half an inch (1 cm)from where they join the trunk.<strong>The</strong>n the aim should be to encouragefruiting spurs and discouragetoo much non-fruitingwood. If you cut <strong>of</strong>f young shootswithin half an inch (1 cm) <strong>of</strong> theirbase a fruiting spur will probablygrow in their place. So, on eachsmall branch, cut the middle, ormain, leadet back to half its lengthbut cut all the subsidiaries back towithin half an inch (1 cm) <strong>of</strong> theitbases so that they will formadditional fruiting spurs.Prune lightly in mid summertoo. Don't prune leaders, but cut allsubsidiary shoots that have grownthat year down to within about fourinches (10 cm) <strong>of</strong> theit base.In later years you may have toomany fruiting spurs. In this case youmust cut some out. And if a treebears a lot <strong>of</strong> small fruit one yearand none the next thin the flowersout. If, during a good year, your treeappears to be supporting an excessiveamount <strong>of</strong> fruit, thin out some<strong>of</strong> the tiny apples to make sure thatthe fruit left grows to a good size.Ptuning is very complicated andI would recommend that you findyour<strong>self</strong> an experienced adviser.After care Try to keep the grounddirectly around your trees free <strong>of</strong>weeds and grass; annual heavymulching with whatever wastevegetable matter you have, plusmuck or compost, helps this. However,don't put too much highlynitrogenous compost on. Pigeonand chicken dung are out forapples. <strong>The</strong>y cause too much rankgrowth and not enough apples.Grass the space in between thetrees if you don't want to intercropwith something else, but above allkeep the grass close-mown allsummer and don't remove the cutgrass. Leave it there to rot and forthe worms to pull down.Don't start spraying until youare hurt. If you obey all the <strong>book</strong>syou read you will swamp your treeswith deadly poisons (some growersspray a dozen times a year, drenchingtrees, fruit, and soil with persistenttoxins) and you will kill all thepredators, the insects and arachnidsthat feed on your insect-enemies,as well as your enemies themselves.If you don't spray at all you willprobably be all right.If you get "canker" (rottingpatches on the branches) cut out alldead wood and paint the affectedareas with white lead paint. If youget "scab" (brownish scabs on theapples) carefully collect all fallenleaves, pruned branches and so onand burn them every year. Spraywith Bordeaux Mixture (see p. 87),but add half as much again <strong>of</strong> wateras you would for potatoes. Sprayjust before the flower petals look asif they're going to open and againjust after the flower petals drop. Ifyou get "apple sawfly" (maggotsthat bore into the apples) sptaywith quassia, which kills the maggotsbut not the predators.Grease-banding really is a good oldsafeguard against many horrid177
Tree Fruitthings. Just stick bands <strong>of</strong> greasymaterial around the tree above theground. Many nasty things try toclimb up the trunk and get stuck inthe grease. I believe keeping a fewhensunder fruit trees is good, becausethe birds scrap out a lot <strong>of</strong>wicked insects. Planting buckwheatnear fruit trees is said to be good,for it attracts beneficial hover-flies.But you may well find you need donothing to protect your trees, andyou still get good apples.CITRUS FRUITUse Ifl could only grow one citrusfruit tree - in other words if I onlyhadroom for one tree in a greenhouse- I would grow a lemon,because you could not hope toproduce a significant amount <strong>of</strong>oranges <strong>of</strong>f one tree whereas onelemon tree would keep a family inlemons, and without lemons agood cook is lost. You can, <strong>of</strong>course, grow oranges or lemons intubs, kept indoors in the winter andput outside in the sunshine insummer, but you will get very littlefruit like this.many months. So obviously it isbest to leave them on the tree untilyou want them and then pick themwhile fresh.CHERRIESUse Two distinct species <strong>of</strong> cherry(Prunus avium and Primus cerasus)have given rise to the many varietiesnow cultivated. <strong>The</strong> former aresweet, the latter sour, but hybridbreeds are common. <strong>The</strong> vitamincontent <strong>of</strong> the fruit is high, andcherry juice has been used to helprelieve sufferers from acute arthritis.from it all the way up, not an opencup-shaped tree, which will bearless fruit. <strong>The</strong> birds will get all yourcherries if you just grow them inthe open so the answer is to growthem up a wall where they can beprotected <strong>by</strong> a hanging net. Or elsedon't have so many birds.If they get "die-back" (branchesthat are dying from the tips') prunethe dead wood away and bum it.If they get "leaf-curl" spray withBurgundy Mixture (see p. 87) beforethe leaves open in spring.Harvesting Picking cherries withtheir stems is not simple, for it iseasy to damage the fruiting twigs.<strong>The</strong> smallholder with the single treemay find it easier to pick his cherrieswithout stems, although the fruitmust then be used at once beforeany bacteria have time to enterthrough the break in the skin. <strong>The</strong>longer the fruit is allowed to hangwhen ripe the sweeter the juicewill become.FIGSUse <strong>The</strong> ancient Greeks called figsthe Fruit <strong>of</strong> the Philosophers andall one can add to this is that thephilosophers must have had verygoodtaste, for fresh figs, sunwarmed,are a unique experience.be best. In fact the fig is very mucha fruit <strong>of</strong> poor soils.Planting Figs grow well from cuttings.Take two to three year oldwood <strong>of</strong> under an inch (2.5 cm) indiameter in winter, cut to ten inch(25 cm) lengths, plant almost <strong>complete</strong>lyburied in the soil and keepmoist. In places where figs growwell a fig tree can do with about20 feet (6 m) <strong>of</strong> space. In colderclimates fan-train up against a wall.Aftercare Figs need little pruningunless fan-trained. If their roots arenot enclosed and they do not fruit,root-prune them severely. Aninteresting thing about some figs,particularly the Smyrna fig, isthat they can only be fertilized <strong>by</strong> acertain very slim wasp (Blastophagapsenes) which can crawl into thefig's neck. <strong>The</strong> fig is not a fruit, but apiece <strong>of</strong> hollow stem which hasboth male and female fruits insideit. When the Smyrna fig was takento America it w-as not understoodwhy it would not fruit until it wasdiscovered the fig wasp was needed,and these were imported in a certainwild fig called the Caprifig. <strong>The</strong>Brown Turkey fig which is the oneto grow in northern climates doesnot need Blastophaga to fertilize it.Figs can be dried, and make avery nutritious and easily storedfood for the winter.Soil and climate Citrus fruit willgrow well outdoors in subtropicalclimates. Lemons are slightly morefrost tender than oranges: 30°F(—1°C) will kill the young fruit and26°F (-3°C) may kill the tree.Oranges will put up with a degreeor two colder. <strong>The</strong> best soil is sandyloam, pH between 5.5 and 6.2, andgood drainage is essential.Planting Plant like any other topfruit trees (see p. 180).After care Keep the ground constantlymoist for several weeks afterplanting. Aftet the second year, ifyou are using irrigation, they shouldhave at least 20 gallons (90 litres)<strong>of</strong> water a month. <strong>The</strong>y don't needmuch pruning except for rootstocksuckers and diseased orinjured wood. <strong>The</strong>y like plenty <strong>of</strong>compost mulch, but keep it fromtouching the trunk's foot - if you donot, foot-rot may result.Harvesting Citrus fruits are harvestedduring the winter and can beleft on the trees quite safely for5 oil and climate Successful cultivation<strong>of</strong> cherries depends moreon a favourable climate than on anyother single factor. An unexpectedlate frost will kill the crop withoutfail. Good water and air drainage iscrucial. On well-drained soil treescan send their roots down as far as6 feet (1.8m), at which depth theyare not in danger <strong>of</strong> suddenly dryingout. Sweet cherries like a deniableloam; sour cherries prefera clay soil which is more retentive<strong>of</strong> moisture.Planting Cherries arebestplantedin autumn, and the first buds willappear early in spring. A thickmulch applied soon after plantingprotects the tree.Aftercare Cherry trees bear theircrop early in the season, so if agoodmulch is maintained, moistureother than natural spring andwinter rain will not be necessary.A young cherry tree should betrained in a way that creates acentral trunk with branches comingSoil and climate <strong>The</strong>y are trulya Mediterranean fruit but will bearfruit out <strong>of</strong> doors in cooler climates,including England and many parts<strong>of</strong> the northern USA. In such climatesthe Brown Turkey fig is theonly one to grow. <strong>The</strong>y are bestgrown against a south facing wall,and in rainy and fertile land theirroots should be confined in someway. A box a cubic yard in size isideal. <strong>The</strong> walls should be concreteand the floor should be soil withbroken stone on it. <strong>The</strong> reason forthis is that figs grown unconfined inmoist and fertile places put on toomuch leaf and branch growth andnot enough fruit. An eccentric parson<strong>of</strong> my acquaintance confinesthe roots <strong>of</strong> his fig trees with tombstones <strong>of</strong> the long deceased.<strong>The</strong> fig will thrive in most soils,but a light or sandy loam is held toOLIVESUse Where you can grow it theolive is the most valuable treeimaginable, for it produces quitesimply the best edible oil in theworld besides the most deliciousand nutritious fruit. In fact onecould live on good bread, olives,and wine, and many people havedone so. Olives and the locust beantree are among the most desirabletrees you can grow, for they drawtheir sustenance from the deep subsoil,and allow inter-cropping withgrass or other smaller herbage. Thisis true three-dimensional farming,which may well be the subsistencefarming <strong>of</strong> the future.178
Food from the Gardenthey are not suitable for coldclimates. But they don't worryabout late frosts above thesetemperatures because their flowersdon't come until late spring or earlysummer when such frosts will notoccur. <strong>The</strong>y will not grow at altitudesover 800 metres unless theyare very near the sea, but near thesea they suffer from "fumagine" (asooty mould disease). If you canmatch these conditions grow themon a slope if you can, because theycannot stand having their roots instagnant water. On the credit sidethey will put up with practicallyany soil at all. If on sandy soil in asemi-desert climate they will survivewith as little as 8 inches (20cm) <strong>of</strong> rain annually In clay soilsfurther north they will need 20inches (50 cm) or over. <strong>The</strong> bestsoil <strong>of</strong> all for olives is sandy soilinterspersed with clay layers. <strong>The</strong>yneed rain in the summer period,and if there is none you must irrigatepr<strong>of</strong>usely and regularly.Propagation If you take cuttingsin late summer and plant them in amist propagator you can grow treesfrom these. <strong>The</strong>re are three waysyou can do it: you can plant smallcuttings <strong>of</strong> 4 to IT inches (2 to 4 cm)diameter and 10 to 12 inches (25 to30 cm) long vertically in theground; you can plant larger cuttingsli inches <strong>by</strong> 10 inches (4 cm<strong>by</strong> 25 cm) below the groundhorizontally; or you can plant rootcuttings (taken from a tree growingon its own roots <strong>of</strong>course, not fromone grafted on a wild olive rootstock) either in a bed or in theposition you want your new tree.Pr<strong>of</strong>essionals grow trees fromseed, then graft them on wild olivestocks, but this is a very trickybusiness. If you are going to growolives on any scale you shouldplant about 250 trees to the acre.Plant them any time between lateautumn and early spring. Trees maybeginto produce at five or six yearsold, be producing heavily at ten t<strong>of</strong>ifteen years and go on for ahundred. Mature trees will givefrom 90 to 150 lbs (40-70 kgs) <strong>of</strong>fruit and about 18 pints (10 litres)<strong>of</strong> olive oil.After care Olives must be heavilypruned, but this is a complicatedjob which must be learnt fromsomeone with experience. Alternatively,you can find a pr<strong>of</strong>essionalwho will come and prune your trees.Harvesting You can harvest fromthe end <strong>of</strong> November right onthrough the winter. If you are goingto eat your olives you must carefullypick them <strong>by</strong> hand. If you wantthem for oil you should shake themdown into a sheet.PEACHES ANDAPRICOTSUse Peaches and apricots areperhaps most appreciated intemperate climates where they arenot so easy to grow. Increasinglythey are found frozen or tinned,so it is worth growing them fresh.i0iSoil and climate Paradoxicallypeaches and apricots need bothheat and cold. If they don't get coldin winter, say 40°F (4°C) or below,they don't have their winter sleepand exhaust themselves. On theother hand one late frost afterflowering will wipe the crop outand they need real heat and sunshinein summer. Most <strong>of</strong> thepeople who w-ere going to make afortune growing outdoor peachesin England after the war have givenit up. <strong>The</strong>y like light soil, sandy orgravelly loam.Planting <strong>The</strong> fruit is best plantedin spring except in climates wherethe winters are exceptionally mild.Aftercare Prune right back whenyou transplant the tree. Prunesensibly in the early stages to shapethe tree, and nip out half the fruitif it is too crowded. If they get leafcurldisease spray with BurgundyHarvesting Peaches and apricotsare ripe when all green in the skingives way to yellow. Be careful notto bruise the fruit when picking, asonce bruised they degenerate veryrapidly. You can store them for upto two weeks.PEARSTreat almost exactly the same asapples. Pears like a more shelteredspot than apples and are not quiteso hardy. Plant a succession <strong>of</strong>varieties. Give copious top dressings<strong>of</strong> manure, but see that itdoesn't touch the stem, or rootswill grow out from the scion instead<strong>of</strong> the stock. Incidentally - if yougraft pear scions on wild hawthornbushes they will grow and producepears! And remember pears won'tkeep as well as apples do.PLUMSUse A number <strong>of</strong> very differentspecies are all known as plums.<strong>The</strong>y range from sweet dessertplums to tart damsons exclusivelyused for jam. Prunes are varieties<strong>of</strong> plum which have so muchnatural sugar that they do notferment while drying out with thepit still inside the fruit.Varieties Plums are not always<strong>self</strong>-pollinating, so you must makesure that the varieties you plant arecapable <strong>of</strong> pollinating each otheror you won't get any fruit. If youonly want to plant one tree, findout if any <strong>of</strong> your neighbours haveplum trees and choose a varietywhich can be pollinated <strong>by</strong> any<strong>of</strong> them.Pruning Don't prune plums forthe first three years you have themand then don't prune them untilearly summer or disease might getinto them. <strong>The</strong>n take out any overcrowdedbranches, and if the tree istoo luxurious shorten leaders toa foot (30 cm) and side-shoots to sixinches (15 cm). This will slow themdown and make them fruit. Alwaysin early summer cut out any "dieback"(branches that are dying fromthe tips) and paint the wound withpaint. Never prune plums in winter.After care "Silverleaf disease" is abad disease <strong>of</strong> plums. If you get itthe leaves will turn silver and theinsides <strong>of</strong> the twigs brown. Cut <strong>of</strong>fthe twigs and branches until you getinto clean wood, and - an oldremedy - slit the bark with a kniferight from the cut you have madedown the trunk to the ground. Ofcourse bum all affected parts toprevent the disease spreading.Harvesting Plums for preservingcan be picked as soon as a bloomappears on the skin, but if they areto be eaten fresh they should beleft to hang for longer. <strong>The</strong>ir flavouris best when they look and feelover-s<strong>of</strong>t.179
Food from the GardenCaring for Fruit TreesPlantingAll fruit trees are planted in the same way It is best to plantduring the winter months when the sap is not movingaround the tree. Normally you would buy three-year-oldtrees to plant from a nursery, but get the nursery to prunethem before they deliver them.However, if you take enormous care with the planting,you can have almost an "instant orchard" <strong>by</strong> planting evenseven-year-old trees. But these trees would be considerablymore expensive, and you really need to know what youare doing when you plant them. You would have to put abag around the root ball to keep the soil in, dig right belowand all around the roots, plant with immense care, and keepwatered for a month. But I would recommend anyoneinexperienced in orchard growing to buy three-year-oldtrees. <strong>The</strong> techniques <strong>of</strong> planting are illustrated below.GraftingIf you buy trees from a nursery they will already be grafted:cuttings from the fruit tree that you think you are buyingwill have been grafted on to another kind <strong>of</strong> tree. <strong>The</strong> latterwill be some hardy, near-wild variety: for example it willbe a crab if the fruit tree is an apple. Thus you have theadvantage <strong>of</strong> a hardy variety for the all-important root andtrunk, and a highly-bred, high-yielding variety for the fruit.Very few amateur gardeners do much grafting, but there isno reason why they shouldn't, as it is easy enough.It is no good grafting on to an old diseased tree, or onethat is prone to, or has had, canker (rot in the bark or wood).A very useful exercise is the top-grafting <strong>of</strong> old establishedfruit trees, which are <strong>of</strong> a poor variety, or are neglected,badly pruned, otherwise inefficient, and in need <strong>of</strong> reviving.<strong>The</strong> growing tree you graft on to is called the stock, and thetree you graft on top <strong>of</strong> it is called the scion. Scions can bemade from winter cuttings. Heel in the cuttings (plantthem in a cool place) after you have cut them <strong>of</strong>f an existinghealthy young tree <strong>of</strong> the type you fancy, just as if theywere ordinary- cuttings. <strong>The</strong>n, in spring, cut all the branches<strong>of</strong> the old tree you wish to revive down to about a footfrom their point <strong>of</strong> union with the trunk, for top-grafting.Trim the edges <strong>of</strong> the saw cut with a super-sharp knife, andgo about grafting your scions on to each branch.<strong>The</strong>re are several methods <strong>of</strong> grafting, according to whatsort <strong>of</strong> branch you are grafting on, but the principle isalways the same, and involves bringing the cambium(under-bark) layers <strong>of</strong> stock and scion into close contact.It is in this layer just under the bark that growth and union<strong>of</strong> tissue start.Apples and pears are easily grafted; grafting plums ismuch more difficult because grafting lets in silver-leafdisease. So don't graft plums unless you have to, and thenonly with great care. You can, <strong>by</strong> the way, graft pears on towhite thorn or may trees, and get pears! If we had the timeand energy we could do this all along our hedges.Planting a treeWhen planting out a tree or a bushput your<strong>self</strong> in its place. Considerthe shock to the roots, accept thatthe tree is delicate and treat itaccordingly. Start <strong>by</strong> digging a holemuch bigger than the root ball <strong>of</strong>the tree.Drive a stake into the bottom <strong>of</strong> thehole before you put the tree in. Youtrain the tree up the stake. <strong>The</strong>nputthe tree in and prune <strong>of</strong>f any brokenroots or very long ones.As the tree grows it will need a goodsupply <strong>of</strong> nutriments below it. Sothe soil under the tree and all roundit must be firm; if the soil cavesaway under the roots and leaves acavity, the tree will die. You shouldfirm each layer <strong>of</strong> soil as you plant,making sure it is broken up finely.When you have installed the rootsto your satisfaction (and the trees),throw more soil in on top andstamp gently but firmly.A tree must have moisture after ithas been replanted. So water it well,and then put a good thick mulch <strong>of</strong>organic matter on the soil aroundthe tree to conserve the moisture.You will <strong>of</strong> course only be transplantingthe tree in winter when it isdormant, but even so minimize theshock. Put a heap <strong>of</strong> rich loam in themiddle <strong>of</strong> the hole and spread theroots round it. Make sure that youplant the tree at the same depth as itwas before. Sift in more loam roundthe roots with your fingers, and rubthe soil gently into them. Continuefilling the hole until the roots are inclose contact with the soil.Do not stamp heavily as this willtear delicate roots. When the holeis <strong>complete</strong>ly filled in, and the soilheaped up a little, you can stampharder.<strong>The</strong> stake ensures that nomovement disturbs the roots <strong>of</strong> thetree once growth begins.Tie the tree to the stake with aplastic strap and buckle. You can thenadjust this when the trunk thickens.ISO
Food from the GardenTree shapesTrain your young fruit trees into avariety <strong>of</strong> decorative shapes. Thiscan save space, and in some casescan considerably increase yields.FansTrain a "maiden" (a single-stemmed,one-year-old tree) along a wallor fence, with the help <strong>of</strong> canes tiedto wires 6 in (15 cm) apart (above).CordonsTrain a young fruit tree up a fence atan acute angle, and limit it to onestem and no long laterals (right).Whip graftingThis is a form <strong>of</strong> grafting which isused when the stock and the scionare approximately the same size.<strong>The</strong> stock is the branch on to whichyou graft the scion; the scion is ashoot that you have cut in winter,and then "heeled in" to a cool placeuntil needed for grafting.EspaliersStretch horizontal wires one foot(30 cm) apart between posts. Trainthe central stem vertically upwards,and the lateral shoots at 90°, tyingthem to canes fastened to the wires.Dwarf pyramids<strong>The</strong> advantages <strong>of</strong> dwarf trees arethat they take up less space thanfull-size stock, but their fruit yieldsare as heavy. Restrict the growth<strong>of</strong> a young tree to 7 feet (2.1 m).Keep side shoots short. Dwarf treesfruit earlier, but do not live as longas full-size stock.BuddingThis method <strong>of</strong> grafting is muchused <strong>by</strong> rose-growers, although itcan also be done with fruit trees.In summer select a strong healthyscion about a foot long and put itin water.Fit scion to stock, slipping onetongue down behind the other. <strong>The</strong>two cambium layers must be incontact with each other.Take your scion out <strong>of</strong> water andslice out a shield-shaped piece <strong>of</strong>bark which contains a bud withina leaf axil.Cut a T-shaped slit along the back<strong>of</strong> your stock.Prepare the scion <strong>by</strong> making a cutjust behind a bud at the lower end<strong>of</strong> the scion so that it slopes away tonothing at the base. <strong>The</strong> cut mightbe two inches (5 cm) long. Near thetop <strong>of</strong> this cut make another smallone upwards, without removingany wood, so that a small tongue isformed. Cut the tip <strong>of</strong>f the scionleaving from three to five buds.Now make cuts on top <strong>of</strong> the stockbranch to correspond with thosevou have made in the scion.Tie the two parts together withraffia (cotton will do) and cover thewhole joint with grafting wax.Peel back the two flaps <strong>of</strong> barkformed bv the cut.Insert the shield into the T-shapedcut. Remove any <strong>of</strong> the shield stickingout above the T-shaped cut,and put back the flaps on each side.Bind with raffia or tape after insertion.As the bud grows you can cut<strong>of</strong>f any stock above the bud-graft.181
Food from the GardenStoring Fruit & VegetablesVEGETABLESClampingClamping is the process <strong>of</strong> making a pyramidical pile <strong>of</strong>potatoes or any other root, covering this with a good layer<strong>of</strong> straw or bracken or any dry litter, and then coveringthis with a layer <strong>of</strong> earth about six inches (15 cm) thick.<strong>The</strong> earth must be beaten flat with the back <strong>of</strong> a spade. Inorder to allow air circulation there should be small tunnelsalong the bottom <strong>of</strong> the clamp where the straw has beenallowed to protrude through the earth, and small chimneysalong the top. Water should be kept out <strong>by</strong> the trench youhave dug to get the earth for the covering, but beware<strong>of</strong> thieving, destructive rats.All potatoes and roots can be clamped. <strong>The</strong> advantage<strong>of</strong> this is that if there is blight in your spuds, or any otherroot disease, you don't get a build-up <strong>of</strong> the organisms asyou would in a permanent building. In intensely cold wintersand in severely cold climates clamping may not be possible- no clamp would stop the frost, and potatoes cannot standmuch frost or they will rot. In these conditions they mustbe stored inside, ideally in a cellar although any frost-pro<strong>of</strong>building will do.Burying in sandCarrots are traditionally laid down in dry sand, each rootseparate from the others, and stored in a frost-pro<strong>of</strong> place.Lift them gently, trying not to damage them with the fork.If you wash them before storage they will just rot, and there'san end to it. <strong>The</strong>y can be clamped in larger quantities, butdon't expect them to last too long. <strong>The</strong>re are few thingsmore ugly than tons <strong>of</strong> slimy, putrescent, carrots. Beetrootand sweet potatoes can also be stored in this way.Heeling inJerusalem artichokes, celery and leeks are generally best leftin the ground until required, but if you fear hard frost, heelthem into dry ground nearer the house where they will derivesome protection from harsh weather.Hanging in netsAll manifold squashes, such as marrows or pumpkins,should be stored away from frost. <strong>The</strong>y will keep best ifhung in nets, although they can be stored on shelves, ifturned occasionally.StringingIt is a very good idea to string onions with baler or bindertwine. <strong>The</strong>n hang them in a cool airy place. In many peasantcommunities the tradition is to hang them against the wallunder the eaves <strong>of</strong> the house. Onions don't mind ordinaryfrost but must be dried thoroughly and not kept in a warmplace. Warmth makes them sprout and go bad. Dry themin the sun on wire netting or on the ground. If it rains theyshould be in the wind, but under cover.DryingBeans and peas should be dried and stored away in greatquantities every autumn. When they are thoroughly dried,threshed and winnowed, store them in crocks, barrels, binsor other mouse-pro<strong>of</strong> places.Mushrooms and most fungi can be treated in the sameway as apples (see below), but they dry out at an idealtemperature <strong>of</strong> 120°F (50° C). Crumble them afterwardsinto a powder and store them in closed jars. <strong>The</strong> powderis marvellous for flavouring soups, stews, and so on.Sweet corn is excellent dried: it really is a thing worthhaving. Boil it well on the cob, dry the cobs in a slow ovenovernight, cut the kernels <strong>of</strong>f the cobs and store them inclosed jars. When you want to eat them just boil them.FRUITWrapping and shelvingAs a rule the early-maturing varieties <strong>of</strong> apples and pearswill not store well. So eat them as you pick them, and storeonly late-ripening varieties. Leave these on the trees as longas possible and only pick them when they are so ripe thatthey come <strong>of</strong>f if vou lift them gently. Pick them and laythem carefully in a basket. <strong>The</strong>n spread them out gently inan airy place to let them dry overnight. Next day storethem in a dark, well-ventilated place at a temperature <strong>of</strong>35°-40°F (2°-4°C). Pears like it very slightly warmer.Ideally each fruit should be wrapped individually inpaper to isolate any moulds or bacteria. Only perfect fruitcan qualify for storing. So disqualify any with bruises, cuts,or missing stalks. It is better if the floor <strong>of</strong> the store is earth,stone or concrete, so you can throw water on it occasionallyto keep the air moist. Storing fruit in a hot dry attic issimply giving the pigs a treat.Apples may well keep until spring. Pears have a criticalmoment when they reach utter perfection. This lasts a fewdays.If they are not eaten then, they go sleepy and shouldbe given to the pigs. So gourmets need to be very selective.DryingIf you are afraid your stored apples won't keep long enough,vou can happily dry them. Core them, slice thinly, stringup the slices, and hang over a stove, or in a solar-heateddrier (see p. 214), at a temperature somewhere around 150°F(65°C) for five hours. When they are crisp and dry put theminto an airtight container and store in a cool place.Prunes can be made <strong>of</strong> plums or damsons, and are rich invitamin A. Plunge your plums in a lye, made <strong>of</strong> 1 oz (28g>caustic soda dissolved in a gallon (4-5 litres) <strong>of</strong> water, for afew minutes. This s<strong>of</strong>tens the skins. <strong>The</strong>n wash them verythoroughly in cold water. Dry them on trays over a stove,or in a solar drier, at 120°F (50°C) at first, raising it graduallyto 160°F (71°C); it must be raised gradually or the plumswill burst. Keep them in this heat for two days. When youwant to use them soak them first in water for twelve hours.182
Food from the GardenClampingClamping is a method <strong>of</strong> protectingroot crops in the open, wherediseases do not build up as they canin a cellar. But no clamp keeps outhard frost, so in very cold wintersyou must store indoors.gjgggjgljgjCover with a layer <strong>of</strong> straw orbracken. Allow a period for sweatingbefore covering with earth.Stringing onionsYou can store onions on trays withslats, on polythene netting, or on awooden stand. But the ideal way <strong>of</strong>keeping them is to string them up ina cool place with access to plenty<strong>of</strong> air. Before you store your onions,always remember to dry themthoroughly first, either <strong>by</strong> leavingthem on the ground in the sun, orcovered but in the wind if it is wet.Add onions one <strong>by</strong> one to theoriginal four. Twist their stalks andknot them tightly round the string.When you pick potatoes for clampingyou should let them dry' for 2 or3 hours first. Prepare the clamp <strong>by</strong>Cover with a layer <strong>of</strong> earth five orsix inches (13-15 cm) thick. Beat theearth flat with the back <strong>of</strong> a spade.Make sure that all the onions youwant to string have long stalks.Start <strong>by</strong> knotting four <strong>of</strong> themfirmly together.Continue adding individual onionsto the growing bunch, ensuring thateach one is securely tied on, andthat the bunch does not becomeunbalanced.Heap the potatoes (or other rootcrop) up on top <strong>of</strong> the straw in theshape <strong>of</strong> a pyramid so that when it isfinished, rain will drain <strong>of</strong>f.Make sure that bits <strong>of</strong> straw protrudefrom the clamp to admitsome air to the crop inside.Plait the knotted stalks round theend <strong>of</strong> a long piece <strong>of</strong> string so thatthe onions hang evenly when youhold them up.Hang the string up when youdecide that your bunch is <strong>complete</strong>.<strong>The</strong> onions should keep indefinitely.Other storing methodsLate-ripening apples last all winter if you keep them in a cool dark place, butbe sure that they aren't touching each other. Preferably wTap each one inpaper. Hang marrows and pumpkins in nets; store beetroot and carrots indry sand so that the roots don't touch. Keep all these safe from frost. If leeks,celery and artichokes are exposed to frost in the open, "heel" them into dry,sheltered ground.183
Food from the GardenPreservin:<strong>The</strong> harvest season is short for most things, although in atemperate climate it is possible to pick fresh green thingsevery day <strong>of</strong> the year. <strong>The</strong> urge to prolong unnaturally theseason <strong>of</strong> every mortal thing, <strong>by</strong> embalming them in deepfreezesand the like, should be resisted. Few things can equalthe pleasure <strong>of</strong> coming fresh to new green peas at thebeginning <strong>of</strong> their season after six months <strong>of</strong> pea-abstinence.<strong>The</strong> palate, jaded and corrupted <strong>by</strong> months <strong>of</strong> frozen peas,or quick-dried peas masquerading as fresh garden peas, doesnot find this fierce pleasure. True dried peas, cooked aspease pudding, or put in soups and stews, are quite anotherthing. <strong>The</strong>y are a traditional time-honoured way <strong>of</strong>preserving plant protein for the winter months, and eatingthem all winter does not jade the palate for the fresh gardenpea experience every June.At the same time there is, potentially a vitamin shortagein the dark winters, and those dark cold days should beenlivened <strong>by</strong> nice tastes and odours besides that <strong>of</strong> saltbacon. So the <strong>self</strong>-supporter will wish to preserve certainthings, preferably <strong>by</strong> a process which improves their naturalflavour, such as bottling, pickling, chutneying or winemaking.<strong>The</strong>re is nothing more encouraging in autumn thanthe sight <strong>of</strong> shelves heavily laden with full jars and crocks.More than anything they give you the feeling that you arelikely to survive the winter. This may sound like acontradiction but it isn't. You cannot improve any food <strong>by</strong>deep-freezing, but you actually improve fruit and vegetables<strong>by</strong> making them into chutney, jam and the like. Freezing' meat is another matter: unless you are very hungry youcannot eat a bullock before it goes bad. In more sensibletimes people killed meat and shared it. Now the wholeprinciple <strong>of</strong> sharing with neighbours is forgotten and thecold <strong>of</strong> the deep-freeze has replaced the warmth <strong>of</strong>neighbourly relations.WineWine-making, like beer-making (see pp. 70-73), turns sugarinto alcohol. Some fruits, such as grapes grown in a warmclimate, have so much natural sugar in them that you don'thave to add any. But many <strong>of</strong> the things you can make wine<strong>of</strong> are low on sugar. So you will have to add sugar if you wantalcohol <strong>of</strong> a decent strength. And remember that weak winewon't keep: it just goes bad. Some "wine" described in <strong>book</strong>s<strong>of</strong> wine recipes is simply sugar-water fermented andflavoured with some substance. Most flower wines (seep. 192) are made like this and people even make "wine" <strong>of</strong> tealeaves- that sugarless substance!Fruit wines have their own sugar, though generally notenough, so you must add some. <strong>The</strong> same goes for rootwines. Parsnip, which is <strong>by</strong> far the best, has quite a lot <strong>of</strong>sugar. What country wines do is to preserve and evenenhance the flavour and bouquet <strong>of</strong> the things they aremade <strong>of</strong>. <strong>The</strong>y cheer us up in the dark days <strong>of</strong> winter andare very good for us too.Chutneys and picklesYou make both chutneys and pickles <strong>by</strong> flavouring fruit orvegetables, or a combination <strong>of</strong> both, with spices andpreserving them in vinegar. <strong>The</strong> methods <strong>of</strong> preserving,however, do not resemble each other (see pp. 188-189).Chutneys are fruits or vegetables which have been cookedin vinegar, <strong>of</strong>ten heavily spiced and sweetened. <strong>The</strong>y arecooked until all excess liquid has evaporated, leaving athick pulp, the consistency <strong>of</strong> jam. <strong>The</strong> flavour is mellow.Pickles are put down w-hole or in large chunks in vinegar,but not heated in it. Anything which is to be pickled mustnot have too much moisture in it. So sometimes moisturemust be drawn out first with salt. <strong>The</strong> resulting flavour isfull and sharp.Both chutneys and pickles are an excellent way <strong>of</strong>preserving things for the winter and <strong>of</strong> enhancing their tasteas well. <strong>The</strong>y are delicious with cold meats and meat pies,and also <strong>of</strong>fset the taste <strong>of</strong> curries or cheeses.Ketchups and similar sauces are strained juices <strong>of</strong> fruitsor vegetables spiced and cooked in vinegar. <strong>The</strong>se too, ifwell made, can give a lift to plain food.Bottling<strong>The</strong> principle <strong>of</strong> bottling is very simple. Food is put in jars,the jars and their contents are heated to a temperaturewhich is maintained long enough to ensure that all bacteria,moulds and viruses are destroyed; at this point the jarsare <strong>complete</strong>ly sealed to prevent any further pathogensfrom getting in, and then allowed to cool. Thus the contents<strong>of</strong> the jars are sterilized <strong>by</strong> heat, and safe from attack <strong>by</strong>putrefactive organisms (see pp. 186-187).<strong>The</strong> same principle applies to tinning, or canning, exceptthat the product is preserved in an unattractive steel box.It is also a process that the <strong>self</strong>-supporter will findconsiderably less easy than bottling.Fruit bottles very well. Vegetables are far more difficult,because they are low r on acid, and acid makes food preservationeasier. My own feeling about the bottling <strong>of</strong> vegetablesis - don't do it. What with salted runner beans, sauerkraut,clamped or cellared roots or cabbages, and, in all but arcticclimates, quite a selection <strong>of</strong> the things that will grow and canbe picked fresh out <strong>of</strong> doors all winter, there is no need for therather tasteless, soggy matter that vegetables become whenthey have been bottled.On the other hand tomatoes, which aren't strictlyspeaking a vegetable, are a very good thing to bottle indeed.<strong>The</strong>y give a lift to otherwise dull winter dishes like nothingelse can. <strong>The</strong>y are easy to bottle, you can grow a big surplusduring their short growing season, they are rich in vitaminsand they taste delicious.Fruits <strong>of</strong> the yearIt is autumn, and you have a surfeit <strong>of</strong> all the crops you have been gatheringthrough the summer. What more fulfilling than to bottle, pickle and preservein all possible ways for the dark days <strong>of</strong> winter ahead?184
Food from the Garden185
Food from the GardenGlass jars for bottling must have airtight tops, capable <strong>of</strong>supporting a vacuum, and arranged so that no metal comesinto contact with the contents <strong>of</strong> the jar. If you examine thecommon "Kilner" jar, or any <strong>of</strong> its rivals, you will find quitea cunning arrangement ensuring that the above requirementsare met. A rubber ring compressed <strong>by</strong> a metal screw-capforms an airtight seal, and only the glass disc inside the screwcapcomes into contact with the jar's contents. Kilner andother proprietary jars need the metal parts smearing withvaseline to prevent them rusting, both when in use and whenstored away. Keep the rubber rings in the dark, tor lightperishes rubber.To bottle you also need a container in which jars can beboiled. If you buy one it should have a false bottom, sothat the jars are not too close to the source <strong>of</strong> heat.Alternatively, put a piece <strong>of</strong> board in the bottom, or elsejust a folded towel. When bottling fruit pack the jars astightly as you can; tapping the base <strong>of</strong> the jar on the tablehelps to settle the fruit, and drives air bubbles out.BOTTLING FRUITCold water bath methodPut the fruit into jars <strong>of</strong> cold brine or syrup and put thejars in cold water. Take an hour to bring water to 130°F(54°C), then another half hour to raise it to the temperaturegiven on the chart below.Oven methodFill the jars, not putting any syrup or brine in them yet,and covering them with loose saucers only Put them in alow oven at 250°F (121°C). Leave them for the time givenin the chart, take out and top up with fruit from a spare jarthat has undergone the same process, then fill up with boilingbrine or syrup, screw on the tops, and leave to cool.Hot water bath methodIf you have no thermometer, and no oven, use the hot watermethod. Fill packed jars with hot syrup or brine, put thelids on loosely, lower into warm water, bring to the boil,then simmer for the length <strong>of</strong> time shown on the chart.For fruit other than tomatoes, use a syrup <strong>of</strong> sugar andwater if you wish. Water alone will do, and if you pack thefruit tightly you won't need much. But if the fruit is sour aweak syrup does help.BOTTLING VEGETABLESI strongly advise against the bottling <strong>of</strong> vegetables, but ifyou insist upon doing it you must heat in a pressure-cooker,,as boiling at atmospheric pressure is not enough to make itsafe. Sweet corn can be bottled (although I prefer the ovendrying method I described on p. 182): husk your corn, removethe silk, wash well, and cut the corn <strong>of</strong>f the cob with aknife. If you force the cob on to a nail sticking up from aboard at an angle you will have it steady for slicing. Thiswill leave a little <strong>of</strong> each grain on the cob, but that's allthe better for the pigs. Pack the corn in the jar to withinan inch <strong>of</strong> the top, add half a teaspoonful <strong>of</strong> salt to eachpint <strong>of</strong> corn, fill up to half an inch from the top with boilingwater, put the lid on loosely and heat in a pressure-cookerat 240°F (115°C), at ten pounds pressure, for an hour.Remove the jars from the cooker and seal.Salting runner beansUse a pound (0.5kg) <strong>of</strong> salt to three pounds (1.4kg) <strong>of</strong> beans.Try to get "dairy" salt or block salt but vacuum salt will do.Put a layer <strong>of</strong> salt in the bottom <strong>of</strong> a crock, a layer <strong>of</strong> stringedand sliced beans (tender young French beans do not needmuch slicing, whereas runners always do) on top, anotherlayer <strong>of</strong> salt, and so on. Press down tightly. Add more layersdaily. When you have enough, or there are no more, coverthe crock with an airtight cover and leave in a cool place.<strong>The</strong> beans will be drowmed in their own brine so do notremove it. To use, wash some beans in water and then soakthem for no more than two hours.Cold water bathHot water bathSlow ovenBasic methodLiquid in bottlesTake 90 minutes to bring water fromcold to required temperature. <strong>The</strong>nfollow instructions given below.Put cold syrup or water in beforeprocessing.Start at 100°F (39°C) taking 25-30minutes to reach required temperature<strong>of</strong> 190°F (88°C). Follow instructions.Put hot liquid at 140°F (60°C) inbefore processing. For tomaroes, liquidis optional.Preheat to 250°F (121°C). Leavebottles according to times given below,Add boiling liquid at end <strong>of</strong> processing,TemperatureTimeTemperature Time Temperature TimeS<strong>of</strong>t fruit 165°F (74°C) 10 minsBlackberries, raspberries, currants etc.and apple slices.Stonelruit 180°F (83°C) 15 minsCherries, plums etc.Citrus fruitTomatoes I90°F (88°C) 30 mins190°F(88°C) 2 mins 250°F (121°C) 45-55 mins190°F(88°C) 10 mins Heat oven to 40-50 mins300°F (149°C)and put hot syrup inbefore processing them.190°F(88°C) 40 mins 250°F (121°C) 80-100 minsPurees and tight packsAllow 5-10 mins longer than times showiabove and raise temperature a little.18fi
Food from the GardenBottling tomatoesJars <strong>of</strong> bottled tomatoes on yourshelves in winter are a cheeringsight. <strong>The</strong>y are easy to bottle, and iteven improves their flavour.Remove the green tomato stalks,and nick the skins with a knife.Drain and cover with cold water.Don't leave them very long as theysoon go soggy.Pack tomatoes in jars very tightly.Push large fruit into place with thehandle <strong>of</strong> a wooden spoon.Put jars in a pan <strong>of</strong> water, or standon newspaper in the oven. Cook.Put the tomatoes in a bowl andpour over boiling water. Leave untilthe skins have loosened.With a sharp knife peel <strong>of</strong>f the skinscarefully so that the tomatoes retaintheir shape and do not looseany juice.If sterilizing in water, fill the jarswith brine, cover with sealing discsand screws lids on loosely; if in theoven, add brine after.When cool, try lifting bottle <strong>by</strong> disconly. <strong>The</strong> vacuum should hold.Making sauerkrautYou can clamp the, hearting cabbages you harvest in late autumn, but, ifgreens are scarce, sauerkraut is a noble winter stand<strong>by</strong>.Shred hard white cabbage heartsfinely, and estimate i 01 (14 g) saltfor each 1 lb (0.5 kg) <strong>of</strong> cabbage.Pack layers <strong>of</strong> shredded cabbageinto a stone crock or wooden tub;sprinkle salt between the layers.Spread one big cabbage leaf acrossthe top, put a cloth over it, andcover that with a plate.Weight down and leave in thewarm. In 3 weeks put it in jars andsterilize as described opposite.187
Food from the GardenMaking Pickles & ChutneysPickles and chutney are another way <strong>of</strong> preserving produce.<strong>The</strong>y add flavour to cold meats, meat pies, cheeses andcurries. <strong>The</strong> principle <strong>of</strong> both involves flavouring fruit andvegetables with spices, and then storing them in vinegar.Ideally you would make your own vinegar and I describehow to do this on p. 196. But if you cannot do this, and haveto buy it, you should note that there are vinegars <strong>of</strong> differentstrength, cost and flavour. Distilled or fortified vinegar ismuch the strongest (it is also the most expensive). Winevinegar is the strongest natural vinegar, and more expensivethan cider or malt vinegar. Remember that vinegar leaves itsflavour in chutney, and even more so in pickles, so if you wantto have the best-tasting accompaniments to your cold pies,you may find your<strong>self</strong> paying for your vinegar. And the bestflavouredvinegar is wine. However, when you make chutneymuch <strong>of</strong> the liquid is evaporated during the cooking, so a maltvinegar may prove to be a more economic proposition.PICKLES<strong>The</strong> vinegar is first steeped with spices and sometimescooked with sugar, to improve and mellow its sharpness. Tomake a spiced vinegar suitable for a variety <strong>of</strong> pickles, you canadd any spices you like. Ground spices make vinegar go cloudy,so if you want the pickle to be attractively presented, andclearly recognizable, you should use whole spices.<strong>The</strong> ideal way <strong>of</strong> making spiced vinegar is to steep all thespices in cold vinegar for a couple <strong>of</strong> months, after which timethe liquid is ready to be strained and used. Since this is notalways practicable, what follows is a speeded-up version.For 2 pints <strong>of</strong> vinegar take 2-3 oz (56-84 g) <strong>of</strong> spices and tiethem in a little muslin bag. Include:a piece <strong>of</strong> cinnamon barkslivers <strong>of</strong> macesome allspice6-7 cloves6-7 peppercorns2 teaspoon mustard seedIf you like the flavour <strong>of</strong> garlic, or <strong>of</strong> any particular herb, addit. If you like a hot taste add chilli, ginger or more mustard.Now put the vinegar and spices into a jug or heatpro<strong>of</strong> jarwhich can be covered with a lid or a plate. Stand it in a panful<strong>of</strong> water. Bring the water to the boil, then take it <strong>of</strong>f the heat.Leave the whole thing to cool down for two hours, <strong>by</strong> whichtime the spices should have thoroughly flavoured the vinegar.Remove the little bag and the vinegar is ready to use.You can pickle fish, eggs, fruit, and vegetables, and you canpickle them whole or in pieces. Moist vegetables and fish areusually salted first. This draws out some <strong>of</strong> their water. Crisppickles like cucumbers, beetroot, cabbage and onion are putstraight into cold vinegar. Others like plums, tomatoes andpears are cooked till s<strong>of</strong>t in spiced vinegar, which is thenreduced to a syrupy consistency before finishing. Whenadding sugar to sweet pickle, use white sugar - it keeps thepickle clear and light.Pickle jars need close sealing to prevent evaporation, andthe vinegar must not come into direct contact with metal lids.You should eat all pickles within sixmonths; after this theyare likely to s<strong>of</strong>ten.Pickled eggsHard boil as many new-laid eggs as you like: you need about aquart (1.1 litres) <strong>of</strong> vinegar for even" dozen. Shell them. Packthem in jars and cover them with spiced vinegar. Add a fewpieces <strong>of</strong> chilli if you like. Close tightly and begin to eat afterone month.Pickled onionsChoose small button onions. Don't skin them at once, butsoak them in a brine <strong>of</strong> salt and water using four ounces (114 g)<strong>of</strong> salt to each quart (1.1 litres) <strong>of</strong> w 7 ater. After 12 hours skinthem. Put them in a fresh brine for two to three days, with aplate on top so that they stay submerged. <strong>The</strong>n drain andpack in jars or bottles with spiced vinegar. A little sugar addedto the vinegar helps the flavour. <strong>The</strong>y are good to eat after twoor three months.Pickled applesThis is a sweet pickle. Use small apples (crab apples are good).For tw'o pounds (0.9 kg) <strong>of</strong> apples use two pounds (0.9 kg) <strong>of</strong>sugar and one pint (0.6 litres) <strong>of</strong> spiced vinegar.Cook the sugar and vinegar until the sugar is just dissolved.Prick the apples all over, using the prongs <strong>of</strong> a caning fork.If they are too big for the jar cut them in half. Simmer in thevinegar/sugar mixture until they are s<strong>of</strong>t but not falling apart.Put them gently in jars. Reduce the syrup to half a pint (0.3litres) <strong>by</strong> boiling. Pour it hot over the apples, but not so hotthat it cracks the glass.CHUTNEYSChutney is a concoction <strong>of</strong> almost any fruit or vegetable youlike, flavoured with spices and cooked with vinegar to a thickjam-like consistency. S<strong>of</strong>t, over-ripe fruit and vegetables aresuitable, as they turn into pulp quickly.Possible ingredients for chutney are marrows, pumpkins,swedes, turnips, peppers, onions, beetroot, carrots, celery,aubergines, mangoes, tomatoes, apples, rhubarb, blackberries,pears, bananas, lemons, damsons, gooseberries,plums, dried fruit, peaches, elderberries, cranberries, orangesand grapefruit.<strong>The</strong> herbs and spices can be any <strong>of</strong> these: bay leaves, chilli,cumin, coriander, cardamom, cinnamon, cloves, ginger,allspice, peppercorns, mustard seed, horseradish, paprika,cayenne, juniper and garlic.It is best to mince vegetables or fruit for chutney finelyand then cook them slowly for a long time to evaporate theliquid. Sugar plays a large part in chutney. Most chutneys godark as they are cooked, so if you want an even darker one usebrown sugar. Black treacle is a possible alternative.188
Food from the GardenMaking tomato chutney<strong>The</strong> secret <strong>of</strong> good chutney is to usecontrasting ingredients. In this particularcase the spice and gatlic<strong>of</strong>fset the tomatoes and apple.Simmer the onion in a small panwith a little water. Add the appleand the raisins, and cook gentlyuntil thev s<strong>of</strong>ten.Pour the s<strong>of</strong>tened ingredients intothe pan, then everything else.You need : 2 lbs (0.9 kg) tomatoes,2 onions, 1 cooking apple, raisins,2 cloves garlic, 1/2 oz: (14 g) freshginger, 2 oz (56 g) brown sugar,1/2 pt (0.3 litres) vinegar, salt andsome spic es. ,Skin the tomatoes, then chop themup roughly into chunks.Tie up in a little muslin bag: 1crushed bay leaf, 2-3 crushed driedchillies, r teaspoon mustard seed,4-5 cloves; add catdamoms, cinnamon,coriander, peppercorns asvou wish.Cook on a low heat for an hour orso, until the mixture thickens sothat when you draw a spoonthrough it you can see the pan.Skin the onions, peel and core theapple. <strong>The</strong>n chop them up finely.Crush the garlic and fresh ginger ina pestle and mortar with salt. If youare using dried ginger instead, addi oz (7 g) to the bag <strong>of</strong> spices.Tie the muslinbag to the handle <strong>of</strong> alarge saucepan, so as not to lose it inthe chutney.Pot at once in hot clean jars. Sealand label.Cooking chutneyUse aluminium, stainless steel or enamelled pans. Copper,brass or iron pans are not suitable as vinegar eats into them.Simmer hard ingredients such as apple and onion in a littlewater before mixing with s<strong>of</strong>ter ingredients such as marrow ortomato, and before adding salt, sugar and vinegar, which tendto harden fruit or vegetables.Put whole herbs and spices in a muslin bag, which you cantie to the handle <strong>of</strong> the pan so that you don't lose it in thechutney. If you prefer to use powdered spices they can beadded loose to the other ingredients. Crush garlic and freshginger in a pestle and mortar before adding to chutney. Soakdried fruit in water before cooking it.Use sufficient vinegar just to cover the ingredients. Cookuntil the consistency is <strong>of</strong> thick jam, and there is no freeliquid. Be careful it doesn't burn towards the end. Stir wellwhile it cooks. Pot while still hot, in clean hot jars, cover,label and store in a cool, dark place.Storing chutneyChutney improves with keeping, so store it in glass jars.Make sure they are tightly sealed or the vinegar will evaporate,leaving an unappetising dry shrunken mess. Cellophanepapers such as are sold for jam covers are not suitable. I usetwist-on metal caps from old jam or pickle jars. Check thatthe metal from the lid is well lacquered or protected with awaxed cardboard disc, otherwise the vinegar will corrode themetal. You can also use synthetic skins, or waxedpaper circlesunderneath a greasepro<strong>of</strong> paper tie-on cover. Cover the jarswith a cloth that has been dipped in melted candle-wax.189
Food from the GardenMaking Jams & SyrupsJams and conserves <strong>of</strong> all kinds are a very useful way <strong>of</strong>preserving fruit. Usually the fruit is cooked first withoutany sugar, to s<strong>of</strong>ten it and to release the pectin, which iswhat makes it set. Sugar is added next, and the whole thingboiled rapidly until setting point is reached. As long as jamsare properly made, well covered, and kept in a cool, dryplace, they keep for ages.Fruit should be under rather than over-ripe, and clean.Bruises on damaged fruit don't matter as long as they arecut out. It is important to weigh the fruit before you begincooking, otherwise you don't know how much sugar to add.Don't add more water than necessary to cook the fruit.<strong>The</strong> sugar should be preserving sugar as this dissolvesfastest. Brown sugars are OK but bear in mind that theyadd a flavour <strong>of</strong> their own and in some cases are damp,therefore adjust the weight.Some fruit has more acid and pectin in it than others.Fruit which is low in acid or pectin usually needs extra acidor pectin added to it (see below).In general, jam-making goes like this: clean, sort andprepare fruit. Weigh it. Cook it with sufficient water tomake it tender. Put it in a large wide pan, and when it isboiling add the required amount <strong>of</strong> sugar. Stir until all thesugar is dissolved. Bring to a rapid boil. Don't stir. Testfrom time to time to see if setting point (see below) isreached. Stop cooking when it is, allow to cool a little sothat pieces <strong>of</strong> fruit will not float to the top <strong>of</strong> the jam inthe jars. Fill hot clean jars to the brim with jam: cover,seal, label.Testing for pectinPut into a little glass a teaspoonful <strong>of</strong> strained cooled fruitjuice from the cooked fruit, before you add the sugar. Addthree teaspoons methylated spirits, and shake together.Wait a minute. Pour the mixture out into another glass.If the fruit juice has formed one solid blob, the pectin isgood. If it is several blobs, it is not so good, so add less sugar.If it is all fluid, it is useless, in which case boil fruit again.Even add commercial pectin at a pinch.Testing for setPut a little jam from the pan on a saucer to cool. If the surfacewrinkles when you push it with your finger, it is done.Examine the drips from the spoon: if a constant streamflows, it is no good; if large thick blobs form, it is OK.<strong>The</strong> temperature <strong>of</strong> the boiling jam should reach 222°F.(105°C). It is best to use all or at least two <strong>of</strong> these methodsto be absolutely sure your jam is ready.Potted fruits or conserves do not keep as long as jam, butbecause they are only cooked briefly the flavours are veryfresh. It is not so necessary to worry about pectin withconserves, so you can make them with low pectin fruit likeraspberries, strawberries, blackberries and rhubarb. Notethat there is more sugar per pound in conserves.Damson or plum jamMuch <strong>of</strong> the pectin in plums is found in the stones, so if you can, extractthe stones first, crack some <strong>of</strong> them and tie the kernels in a little bag.If this is difficult, never mind; they will float to the top when the jamcooks and you can skim them <strong>of</strong>f with a slotted spoon at the end.You will need:6 lbs (2.7kg) damsons or plums6+ lbs (3.0kg) sugar1/2 pint (0.3 litres) waterWash the plums, cut them in half. Simmer with the water until tender. Addthe sugar, stirring until dissolved, then boil hard until setting point.Remove floating stones, or if you put kernels in a bag, remove the bag.Leave the jam to cool a little before potting so that the fruit will not riseto the top <strong>of</strong> the jars. Pot, seal and label.Raspberry- conserve4 lbs (1.8kg) raspberries5 lbs (2.3kg) sugarYou can use damaged but not mouldy fruit. Warm the sugar in a bowl ina low oven. Butter a large pan, put in the fruit and cook over a very lowheat. As the fruit begins to give up its juice and bubble slowly add thewarm sugar. Beat hard until the sugar is quite dissolved. It should remaina lovely bright colour and taste <strong>of</strong> fresh raspberries. It should be quitethick. Pot and cover in the usual way, but examine for mould after afew months.Another way is to put sugar and raspberries in layers in a large bowl.Leave overnight, and bring just to the boil next day, before potting.Lemon curdThis is not a jam.but a good way <strong>of</strong> using up eggs.4 oz (lHg) butter1 lb (0.9kg) sugar4 eggs3-4 lemons depending on size and juicinessGrate the rind from the lemons, squeeze out their juice. Put rind, juice,butter and sugar into a small pan and heat until the butter melts and thesugar just dissolves. Let it cool. Beat up the eggs. Put them in a bowl whichwill just fit over a saucepan <strong>of</strong> simmering water, and stir in the juice. Beatover the saucepan <strong>of</strong> water, or use a double boiler, until the mixture thickensto curd consistency Pot and cover.Lemon curd doesn't keep long, so use it up quickly. Don't make toomuch at a time.Richer curds can be made using eight egg yolks instead <strong>of</strong> four eggs.Variations include using oranges or tangerines instead <strong>of</strong> lemons. Use lesssugar for sweeter fruit.Lemon and carrot marmalade5 oz (228g) thinly sliced lemon8 oz (22%) shredded carrot2 pints (1.1 litres) water1 lb (0.9kg) sugarMix the lemon, the carrot and the water. Cover and allow to stand overnight.Cook in a covered saucepan, bring to the boil, then simmer for abouthalf an hour, or until tender. <strong>The</strong>n add sugar, and simmer until it <strong>complete</strong>lydissolves; boil rapidly until setting point. Try a little on a cold plate tosee if it jells; it may take 15-30 minutes. Pour into clean, warm jars, coverwith waxed paper and seal.<strong>The</strong> flavour <strong>of</strong> canot and lemon is very fresh and fairly sweet. Eat withinthree months.Making fruit butters and cheesesFruit butters and cheeses are jams made from pureed orsieved fruit. Butters are s<strong>of</strong>ter than cheeses. Cheeses, if firmenough, can be turned out <strong>of</strong> their moulds as little "shapes".190
Food from the GardenTest for pectin <strong>by</strong> adding 3 teaspoonsmeths to 1 <strong>of</strong> juice. Shake.<strong>The</strong> juice should solidify.greasepro<strong>of</strong> paper and cellophane,seal and label. Start eating it as soonas you like.<strong>The</strong>y are delicious eaten as puddings with cream or evenspread on bread.Blackberry and apple cheeseYou will need equal amounts <strong>of</strong> blackberries and apples. Wash theapples but don't bother to peel or core them. Cut them up roughly. Pickover the blackberries, wash them if they are dusty. Put both fruits intoa pan, just cover with water and stew, stirring occasionally, until the appleshave gone mushy. Sieve the cooked fruit. You should have a fairly thickpulp. Weigh it. Add one pound (0.9kg) sugar to each pound <strong>of</strong> pulp.Boil together. Stir all the time, as this burns easily. When it thickensenough for you to see the bottom <strong>of</strong> the pan as you draw the spoonacross it, it is done. Pot and cover like jam. It sets quite firmly, like cheese,and will last for ages.Making jelliesJellies are simply jams which have had all the solids strainedfrom the cooked fruit. When the juice is boiled up withsugar it forms jelly which can be used in the same way as jam.Blackberry and apple jellyThis recipe will suit any high-pectin fruit, such as crab apples, redcurrants,citrus fruits, quinces, gooseberries, sloes, damsons, and rowanberries. Youcan also experiment with mixtures <strong>of</strong> fruits. Cook them separately if oneneeds more cooking than the other.Proceed as for blackberry and apple cheese to the point where thefruit is cooked and s<strong>of</strong>t. <strong>The</strong>n strain the juice through a cloth. Don'tsuccumb to the temptation <strong>of</strong> squeezing it to speed it up or the finishedjelly will be cloudy. Measure the juice and add one pound (0.9kg) sugarto each pint (0.6 litres) <strong>of</strong> juice. Cook until setting point is reached andpot and label in usual way.If you are very economically minded you can stew up the residue <strong>of</strong>fruit in the jelly bag with more water, then either extract more juice ormake a fruit cheese <strong>by</strong> sieving it. Follow the instructions given above ifyou want to do this.Fruit syrupsFruit syrups are made in the same way as fruit jellies, thoughyou don't need to add so much sugar to syrups. To preventspoiling <strong>by</strong> fermentation (when you would be on the wayto making wine) you have to sterilize syrups and keep themwell sealed. <strong>The</strong>y make very refreshing drinks and milkshakes in summer, or you can use them as sauces for puddingsand cereals.Extract the juice from any unsweetened cooked fruit youfancy, as for jelly, or, if you wish, extract it <strong>by</strong> pressing thenstraining. Measure the amount and then add about one.pound (0.9kg) sugar per pint <strong>of</strong> juice. Heat it until the sugaris just dissolved - no more or it will start to set like jelly.Let it cool. Sterilize the bottles and their lids, preferably thescrew-cap sort, <strong>by</strong> immersing in boiling water for 15 minutes.Drain, then fill with syrup. Screw up tightly then unscrew<strong>by</strong> half a turn, so that the heating syrup will be able to expand(leave a one inch or 2.5cm gap at the top <strong>of</strong> each bottle).Stand the bottles in a pan deep enough for the water tocome up to their tops. If possible use a pan like a pressurecooker,that has a false bottom. Bring slowly to the boil andkeep boiling for 20 to 30 minutes. Take out the bottles andscrew the lids on tightly as soon as they are cool enough.If you are doubtful about the tightness <strong>of</strong> the seal, coat withmelted candle wax.191
Food from the GardenMakingWineBooks about home-made wine-making have rolled <strong>of</strong>f thepresses in their regiments these last few years, each oneblinding us with science more effectively than the last. Youreally only need to remember a few essentials:You are unlikely to get more than three pounds (1.4 kg) <strong>of</strong>sugar to ferment in a gallon (4.5 litres) <strong>of</strong> water, so keep toapproximately this ratio if you want strong wine.You must keep all wine-making equipment scrupulouslyclean. Use boiling water whenever possible.You must ferment at the temperature most favourable tovital yeasts.You must give your special cultivated yeast every help andan unfair advantage over the wild yeasts and other organismsthat might ruin your brew.You must keep all contaminants out <strong>of</strong> your wine, especiallyvinegar flies, those little midges that hang round rottingfruit, carrying the bugs that turn wine to vinegar.You must "rack", or pour <strong>of</strong>f, the wine from the lees andsediments before the latter spoil its flavour.You must allow the wine to settle and clear in the cool afterthe yeast has done its work.Finally, having safely bottled your wine, you must try tokeep your mitts <strong>of</strong>f it for a year with red wine, if you can,and at least three months with white.Strict cleanliness is essential in wine-making, for wine ismade <strong>by</strong> a living organism (yeast) and if other livingorganisms (wild yeasts or other moulds or bacteria) getinto the act either the tame yeasts that you want to use foryour wine cannot do their job, or you get putrefaction, badtastes and odours.EquipmentYou need jars, barrels, or bottles for fermentation. You needfermentation locks (if you can get them). <strong>The</strong> purpose <strong>of</strong>these is to allow the gases produced <strong>by</strong> fermentation toescape while keeping out air, which is always germ-laden,and vinegar flies. Many a gallon <strong>of</strong> fine wine has been madewithout a fermentation lock and with just a plug <strong>of</strong>cotton wool stuffed in the neck <strong>of</strong> the vessel. Many a gallon<strong>of</strong> wine has been ruined this way too. A fermentation lockis a very useful thing. A thermometer is not to be despised.You also need a flexible tube - rubber or plastic - for"racking" or syphoning, a funnel or two, and bottles orflagons for the final bottling <strong>of</strong> the wine. A corking gun isvery good for driving in corks, which have to be driven indead tight or air gets in and the wine goes bad. Polythenesealers are quite a good substitute for corks if you do notwant to invest in a corking gun.MaterialsYou will need yeast. Old fashioned country wine makers,including my<strong>self</strong>, have used all kinds <strong>of</strong> yeasts -bread yeastsand beer yeasts and so on - but undoubtedly it is best tobuy wine yeasts from a shop. For very good and strongresults some people use yeast nutrients, also bought froma shop. Acid is another thing you may have to add. Lemonswill provide this, as will citric acid which you can buy.Tannin too can be bought, but tea or apples - particularlycrab apples - will provide it. <strong>The</strong> reader may say that it isnot being <strong>self</strong>-sufficient to buy all this stuff from a shop.True, but I would say that a trivial expenditure on this sort<strong>of</strong> thing is necessary if you are going to make a great deal<strong>of</strong> fine wine.GRAPE WINE<strong>The</strong>re is no wine like grape wine. Red grape wine is made <strong>by</strong>fermenting the grapeskins in with the wine. White wine ismade <strong>by</strong> taking the skins out. White wine is <strong>of</strong>ten made withred or black grapes, for all grapes are white inside. It is easierto make red or rose wine than white because the tanninin the skins helps the "must" (wine-to-be) to ferment better,and the quicker it ferments the less chance there is <strong>of</strong> badorganisms getting to work.CrushingCrush your grapes any way you like. Personally I could notdrink wine if I had seen somebody treading it with his barefeet, so I would use some sort <strong>of</strong> pestle and mortar for thisjob. If you want to make white wine, press the broken grapesin a press (a car jack will do), having first wrapped them instrong calico "cheeses", which I describe on p. 196. In thecase <strong>of</strong> red or rose press in the same way, but then add aproportion <strong>of</strong> the skins to the wine. <strong>The</strong> more you add thedeeper the red <strong>of</strong> the wine but, in cold climates at any rate,the deeper red ones may contain too much tannin and willbe a little bitter as a result. Now^ in real wine-growing climates(w 7 here you will not be reading instructions like this anywaysince your neighbours will initiate you), you don't needto add any sugar. In less sunny climates add between fourand six pounds (1.8-2.7kg) <strong>of</strong> sugar to even - ten gallons(45.5 litres) <strong>of</strong> wine. If there has been a hot season and thegrapes are sweet you need less, if a bad season, more.FermentingLet the juices and skins ferment in a vat. Grapes have theirown yeasts in the "bloom" on their skins but you had betteradd a wine yeast culture bought from a shop if you can getone. Warm a bottle <strong>of</strong> the must (juice) to 75°F (24°C),dump the yeast culture into it, and stand it in a warm placewith some cotton wool in the neck. Meanwhile try to getyour main body <strong>of</strong> must to 75°F (24°C). When the "starter"or culture in the bottle, has started to fizz pour it into themain body. If you keep the temperature at about 75°F(24°C) fermentation will be so active that there is nodanger <strong>of</strong> air getting to the must, for the carbon dioxidegiven <strong>of</strong>f will prevent this. Don't let the temperature riseabove 80°F (27°C) or some <strong>of</strong> your good yeast will bekilled. Don't let it fall below 70°F (21°C) if you can help192
Food from the GardenWine-making equipmentDon't attempt to make your own wine without arming your<strong>self</strong> beforehandwith plenty <strong>of</strong> containers, to hold the must at each <strong>of</strong> its many stages. Bottlesare only the end <strong>of</strong> a long fermentation process, during which you will at leastneed jugs and jars, and quite possibly vats and barrels too.Key1 Corking gun2 Jug3 Bottle4 Sieve5 Bottle hush6 Funnel7 Hydrometer8 Measuring cylinder9 Plastic or rubber syphon10 Earthenware vesse11 Barrel and tapped vat12 Fermentation jar and lock13 Cork and plastic seatit, or your yeast will get sleepy and foreign yeasts will havethe advantage. At all times keep the skins stirred into themust. <strong>The</strong>y will float on top, so don't let them form a dryfloating crust.RackingWhen the first violent fermentation has ceased, rack <strong>of</strong>f themust, squeeze the juice out <strong>of</strong> the skins so as not to wasteit, and pour the juice into a barrel or carboy, so that themust fills it <strong>complete</strong>ly. Do not leave an air space above it.Let the temperature fall now to ordinary room temperature<strong>of</strong> about 60°F (16°C). When you think most <strong>of</strong> thesediment has sunk to the bottom, rack the wine into anothercontainer. At this stage people in continental climates<strong>of</strong>ten put wine out <strong>of</strong> doors in winter so that it almostfreezes, as this hastens the settling down <strong>of</strong> sediment. Rackit again. After another month or two bottle it in the way I willnow describe.BottlingBottles must be <strong>complete</strong>ly cleaned and then sterilized. Itis no good "sterilizing" anything with dirt in it; the dirt mustfirst be removed. Sterilize <strong>by</strong> heating slowly so as not tocrack the bottles, in an oven if you like; then pour in boilingwater, or put in cold water and slowly bring to the boiland boil for five minutes. Hang the bottles upside downimmediately to let them drain and stop dust floating downinto them. Either use as soon as they are cool or cork untilyou want them. Boil the corks before you use them andw 7 ang them in with a special corker. Store bottled wine onits side so as to keep the corks wet. If they dry out they willshrink, and air and vinegar-bacillus will get in. Store winein the dark, at a cool even temperature. A cellar is ideal.COUNTRY WINESOverleaf are some recipes for "country wines" that work,as I know from long experience.! would not put anybody <strong>of</strong>f193
Making Wine"scientific wine-making", which is reliable and producesgood wines, but country people all over Europe and NorthAmerica have used the sort <strong>of</strong> recipes I give for centuries, andvery seldom have failures; indeed their wines are very good.One point worth noting is that the larger the bulk <strong>of</strong> wine youmake, the less likely you are to have a failure. My old friendsin a Worcestershire village who all brew rhubarb wine in thesummer and parsnip in the winter, in batches <strong>of</strong> sixty gallons(273 litres) stored in huge cider barrels, have never knownwhat a failure is. <strong>The</strong>ir wives cry in vain for them to growsomething else in their gardens, but their wine is superb.Flower winesPour a gallon (4.5 litres) <strong>of</strong> boiling water over an equivalentquantity <strong>of</strong> whatever flowers you wish to use, cool, and pressthe water from the flowers. Add four pounds (1.8kg) <strong>of</strong>sugar, half a pound (228g) <strong>of</strong> raisins (optional), and thejuice <strong>of</strong> three lemons. As the flowers don't give muchnutriment for the yeast, and sugar alone is not enough forit, add some yeast nutriment if you have some. A tablespoon<strong>of</strong> nutriment to a gallon <strong>of</strong> wine is about right.<strong>The</strong>n, when the temperature has fallen to 75°F (24°C),add yeast. A bought wine yeast is best. Put the wine in avessel with a fermentation lock, and leave it to ferment.Rack <strong>of</strong>f and bottle when ready I have made wines frombroom flowers, gorse flowers, elderflower (superb),cowslip, dandelion, and I have drunk good rose wine.MEADTo supply what in your estimation is about three pounds(1.4kg) <strong>of</strong> honey to a gallon (4.5 litres) <strong>of</strong> water you wantcomb cappings, odd bits <strong>of</strong> "wild comb" that you can't putthrough the extractor, and perhaps some pure honey stolenfrom the main storage pot when your wife isn't looking.Melt the honey in the water and ferment. Honey is deficientin acid, so put the juice <strong>of</strong> two or three lemons in a gallon,or some citric acid. Mead also likes some tannin to feedthe yeast, so some crushed crab apples are a good idea. Ihave heard <strong>of</strong> people putting tea in mead. I once dumpedsome rose hip syrup that the children decided they didn'tlike into my mead, which wasn't fermenting very well, and itstarted to ferment like blazes. Mead goes on fermenting fora long time, so don't hurry it, and if you can leave it in abottle for a few years so much the better. But can you?Here are some wine recipes to try for your<strong>self</strong>:Rhubarb wine15 lbs (6.8kg) rhubarb2 1/2 lbs (1.1kg) sugar1 gallon (4.5 litres) wateryeastChop up the rhubarb, pour boiling water over it, and mash. Don't boilit any further. Leave it to soak until the next day, strain <strong>of</strong>f your liquorand press the "fruit" to get as much out as you can. Stir in the sugar andbung in the yeast. Leave it to ferment, then rack it and bottle it.Nettle wine4 lbs (1.8kg) nettle tips4 lemons2 lbs (0.9kg) sugar (preferably brown)1 oz (28g) cream <strong>of</strong> tartar2 gallons (9.0 litres) water1 tablespoon dried yeast or brewer's yeastPut nettles and cut-up lemons in the water and boil for twenty minutes.Strain liquor out and add cream <strong>of</strong> tartar and sugar. When cool enoughadd yeast and ferment for three days in a warm place. <strong>The</strong>n let it settlefor a couple <strong>of</strong> days in a cooler place before bottling in screw-topbottles. You can drink it in a week and it doesn't keep long. It is extremelypleasant and refreshing. If you add some ginger to it, it is even better.Parsnip wine4 lbs (1.8kg) parsnips3 lbs (1.4kg) sugar1 gallon (4.5 litres) watersome lemons or citric acidyeastCut the parsnips up and boil them without letting them get too s<strong>of</strong>t. <strong>The</strong>yshould just be easily prickable with a fork. Boil a couple <strong>of</strong> lemons upwith them if you have them. Strain <strong>of</strong>f the liquor, and while it is still hot,stir in the sugar, so that it dissolves. Put in some lemon juice or citric acid,and some raisins if you like. <strong>The</strong> purpose <strong>of</strong> the lemon juice or citric acidis to give the yeast enough acidity to feed on, as parsnips are low in acid.Put even-thing in a vessel, wait until the temperature drops to blood heat,then add your yeast and allow to ferment. Like all other wine, fermentunder a fermentation lock, or-put a wodge <strong>of</strong> cotton wool in the neck <strong>of</strong>the vessel, to keep the vinegar flies out and let out the carbon dioxide.Rack it well a couple <strong>of</strong> times and then keep it as long as you can lay yourhands <strong>of</strong>f it.Elderberry- wine6 lbs (2.7kg) elderberries3 lbs (1.4kg) sugar1 gallon (4-5 litres) water2 oz (56g) citric acid or lemon juiceyeastYou are supposed to get all the berries <strong>of</strong>f the stalks, but I have shoved instalks and all and it has made no difference. After all, if you can save a lot<strong>of</strong> work <strong>by</strong> departing from slavish convention why not do so? Pour theboiling water on, mash hard with a potato masher, cover and leave tosoak for 24 hours. Put the sugar and yeast in and leave it alone. <strong>The</strong> longeryou leave it the better. When it has finished fermenting rack it into bottlesor other containers, so as to leave the sediment behind. You do this withall wines.<strong>The</strong> above recipe can be applied to any wine that is made from berriesor currants.Elderflower "champagne"This is nothing like champagne <strong>of</strong> course but it is a very refreshing summerdrink and it does not have to be kept long before you can drink it.12 heads <strong>of</strong> elderflowers (in full bloom and scent, picked on a hot day)1 1/2 lbs (0.7kg) sugar (white sugar is less obtrusive than brown in such adelicate drink)1 lemon2 tablespoons wine vinegarPut blooms in a bowl with the juice <strong>of</strong> the lemon. Cut up the rind <strong>of</strong> thelemon and put that in (minus the white pith). Add the sugar, vinegar,a gallon (4.5 litres) <strong>of</strong> water and leave for 24 hours. Strain liquor intoscrew-top bottles, cork up and leave for a fortnight. Don't add yeast - theweak yeasts on the flowers are enough. Drink before three weeks old.194
Food from the GardenMaking rose hip wine<strong>The</strong> principle <strong>of</strong> wine-making doesnot van - - much according to themain ingredient. <strong>The</strong> addition <strong>of</strong> awine yeast to your brew starts <strong>of</strong>fthe fermentation process whichcan take as long as three months.quarts (3.4 litres) <strong>of</strong> rosehips, clean them and chop them upfinely Crush with a wooden spoonor mallet.Stir in a teaspoon <strong>of</strong> fresh yeast.You can put this first into a bottle <strong>of</strong>"starter", which you add to the brewwhen it starts fermenting. Add oneteaspoon <strong>of</strong> citric acid and half ateaspoon <strong>of</strong> tannin.\JOr you can strain through a jellybag, suspended from two stools.Don't press it, or it will go cloudy.When fermentation stops rack thewine <strong>of</strong>f the lees into bottles. Usea rubber or a plastic tube for this.Cover the must to keep out vinegarflies and all other contaminants.Leave for 24 hours.Put the crushed nips into a deepbowl and pour h gallons (6.8 litres)<strong>of</strong> boiling water over them. If youlike you can add the rind and juice<strong>of</strong> an orange.Strain the must into fermentationjars. Use a funnel. Keeptemperature <strong>of</strong> 75If you have no tube, use a hand jugand a funnel. Leave an inch (2.5 cm)at the top fot corks when fillingthe bottles.wAdd 2 lbs (0.9 kg) <strong>of</strong> sugar to thebrew, and heat it to 75°F (24°C)-Strain the must from the hipsthrough a sieve or muslin cloth. Foreven clearer must use boththese methods.<strong>The</strong> fermentation lock keeps air outbut allows gases to escape.A corking gun is excellent for drivingcorks in tight, but a woodenmallet will do. Date, label, andleave for a year.195
Food from the GardenMaking Cider & VinegarCIDERCider should be made from a mixture <strong>of</strong> apples. <strong>The</strong> idealmixture is rich in acid, tannin and sugar, so a good combinationmixes very sweet apples with very sour ones, perhapswith some crab apples thrown in to provide the tannin. Cidercan be made with unripe apples but it is never very successful.Ideally the apples should be picked ripe and then allowed tolie in heaps for two or three days until they begin to s<strong>of</strong>ten alittle. A few bad or bruised apples in the press don't seem toaffect the quality <strong>of</strong> the cider at all. Apples vary greatly injuice content, so it is not possible to tell exactly how muchcider you will get from a given number <strong>of</strong> apples. As a roughestimate, 10-14 lbs <strong>of</strong> apples make one gallon (4.5 litres).CrushingYou then crush the apples. Traditionally this was done <strong>by</strong> ahorse or an ox pulling a huge round stone round a circularstone trough. You can crush apples in a cider mill, which is anexpensive item to buy, or you can just use any hard object,such as a wooden mallet, as long as it is not metal. Crushing isan arduous task. I did have one friend who used to put hisapples through a horizontal mangle, which reduced them topulp very effectively. Put the juice in a fermenting vat andwrap the pulp in hessian or coarse cloth to form "cheeses". _Pile the "cheeses" in a press one on top <strong>of</strong> the other and pressto extract the juice. After one pressing rearrange the"cheeses" and press again. <strong>The</strong> pressed pulp can be fed, instrict moderation, to pigs or cattle.FermentingTraditionally the juice is put in large vats, which are greathooped wooden structures. Commercial ones are enormousand hold thousands <strong>of</strong> gallons, but the <strong>self</strong>-supporter whomight make ten gallons at a time will find an ordinary woodenbarrel or an earthenware crock perfectly adequate. No yeastor other additive is put in: the stuff just ferments, and thereare stories <strong>of</strong> farmers putting lumps <strong>of</strong> beef in to add strength,and having them simply eaten up <strong>by</strong> the potent cider. As allthe sugar in the apples ferments out to alcohol the cider isterribly sharp, and is known as "rough" in cider circles. Only ahardened rough cider drinker can drink it without a shuddergoing down his spine.If you want to speed up the fermentation process, you canadd a culture <strong>of</strong>wine yeast when you have extracted the juicefrom the pulp. This should work faster than the wild yeasts,which may or may not be man enough for the j ob. If you wanta sweet cider rack the fermenting cider <strong>of</strong>f its lees (syphon it<strong>of</strong>f without disturbing the sediment) and add roughly sixpounds (2.7 kg) <strong>of</strong> sugar per ten gallons (45.5 litres); then,allow it to ferment once more and in about a week rack itagain. If you want to bottle it and have sparkling cider, it isbest to try bottling a small quantity first. Fill a screw-toppedflagon half full, screw it up, and put it in a warm place. Aftersix hours open it. If it is filled with gas, and has thrown a heavydeposit, the cider is not ready for bottling. It is only safe tobottle when you find just a little fizz <strong>of</strong> gas given <strong>of</strong>f, and noheavy sediment thrown.Cider improves with keeping, so you shouldn't drink thisautumn's cider until next summer.VINEGARVinegar is wine, beer or cider, in which the alcohol has beenturned into acetic acid <strong>by</strong> a species <strong>of</strong> bacteria. This bacilluscan only operate in the presence <strong>of</strong> oxygen, so you canprotect your wines, beers and ciders from turning to vinegar<strong>by</strong> keeping them from the air. Yeast produces carbon dioxidein large quantities, and this expels the air from the vessel thatthe beverage is stored in. But yeast cannot operate in morethan a certain strength <strong>of</strong> alcohol, so fermentation ceaseswhen so much sugar has been converted into alcohol that theyeast is killed or inhibited <strong>by</strong> its own action. This is themoment when the vinegar-forming bacillus, Acetobacter, getsactive, and the moment when your beverages need protectingmost rigorously from fresh air and bacterial infection.But if you want to make vinegar, then you must take yourwine, beer, or cider, and expose it to the air as much aspossible. If you just leave it in an open barrel it will turn intovinegar in a few weeks. But it is better to speed up the process,as smells from the surrounding atmosphere might give thevinegar a taste, and hostile bacteria have time to attack.To hasten the process, take a barrelful <strong>of</strong> beech shavings.Beech is traditional but any shavings will do as long as they donot come from a very resinous tree. Soak them well in a goodvinegar <strong>of</strong> the type you are trying to make. <strong>The</strong>n put a perforatedwooden plate in the barrel over the shavings and pouryour wine, beer or vinegar on to this plate. <strong>The</strong> liquid willthen drip slowly through the holes, which must be very small,mere pin-holes. <strong>The</strong> liquid drips slowly through the shavings,thus being well exposed to both air and Acetobacter, and at thebottom it is drawn <strong>of</strong>f through a cock. Leave it then in anopen cask and it will turn into vinegar within a week.Making vinegarFirst soak a barrelful <strong>of</strong> beech // \\shavings in vinegar <strong>of</strong> the sort you j \\are making. Put a wooden plate, . \lperforated with pin-sized holes, on j JSZHZz;CZZ3??^f^^i^i-BBMp3{HItop <strong>of</strong> the shavings in the barrel. \ |IPouryouraIcohoiontothepIate.lt j jwill drip slowly through the barrel,• • i iand be well exposed to air and the '•-. : ; .„.£.«•. ivinegar-forming bacillus. After a _ ,"""__ :.. '•'.:%::?' „-- -week in an open cask, it will turn ? ' j "-_-,'into vinegar. • ,"^\f _ 1\ HE mi\ / HEE H196
Food from the WildGameMan should be a husbandman, not a bandit. We have no rightto slaughter other animals just for fun or to assuage ourblood-lust. Nor have we the right to deplete the stock <strong>of</strong> anyspecies <strong>of</strong> animal so that it becomes scarce or extinct. Yet wehave a part to play in maintaining the balance <strong>of</strong> nature andif we fail to play it nature will very rightly shrug her shouldersand shake us <strong>of</strong>f.If man plays his proper part in husbanding nature he notonly helps to maintain a proper balance, he also supplementshis diet with good food (wild meat is a far better source<strong>of</strong> protein than the meat <strong>of</strong> domesticated animals), and heprotects his crops. <strong>The</strong> true husbandman will accept hisresponsibility in this matter. He will also accept responsibility 7in the way he hunts his game. It is unforgivable to wound ananimal instead <strong>of</strong> killing it outright, so don't go shooting untilyou are a good shot. And never take a shot unless you areabsolutely certain <strong>of</strong> a kill.GunsA shotgun is a smoothbore tube which fires a charge <strong>of</strong> shot.Shot consists <strong>of</strong> lead pellets. <strong>The</strong>se are traditionally made <strong>by</strong>pouring molten lead through a sieve at the top <strong>of</strong> a tall tower.<strong>The</strong> molten droplets fall, become quite spherical in theirdescent, solidify in the air, and land in water at the bottom sothat they are not disfigured. <strong>The</strong>y are then graded in screensfor size. <strong>The</strong> sizes are numbered according to what number<strong>of</strong> shot make up an ounce (28 g): thus no. 1 shot is very big (itis used, wrongfully in my opinion, for roe deer), no. 3 is aboutright for wild geese, no. 5 for duck, no. 6 for pheasants, rabbitsand small game, and nos. 8 or 9 for snipe or woodcock.Shotguns are graded according to the size <strong>of</strong> their bore(size <strong>of</strong> their barrel). <strong>The</strong> bore depends on the number <strong>of</strong>lead balls in a pound (0.5 kg) that exactly fit a barrel. Thus thebarrel <strong>of</strong> a twelve bore takes twelve balls to fit it, making up apound. <strong>The</strong> twelve bore is <strong>by</strong> far the commonest size all overthe world now and is a good all-purpose gun. Sixteen andtwenty bores are sometimes found: they hit as hard as atwelve but have a smaller "pattern" (area covered <strong>by</strong> the shotat a given distance from the barrel). <strong>The</strong>y are light and handybut to use one well you must be a good shot. <strong>The</strong> "four-ten"(.410 inch) is commonly used to start children <strong>of</strong>f. Ten andeight bores are heavy guns used for wildfowling, particularlyfor geese and wild duck. <strong>The</strong> four bore, almost extinct now,is a very heavy gun indeed, used for firing at mobs <strong>of</strong> birds onestuaries; the giant "punt guns" <strong>of</strong> yore could be "half-crown"bore (the barrel the size <strong>of</strong> the old British half-crown) or evenlarger, and would fire up to two pounds (0.9 kg) <strong>of</strong> shot.In Europe the double-barrelled shotgun is common; inAmerica pump action semi-automatics are usual, or elsefully <strong>self</strong>-loading automatics. It is all a matter <strong>of</strong> what peoplethink is "sporting". Cartridges are loaded with nitro-powder,which is smokeless and reliable, but some people load theirown brass-cased cartridges (with an apparatus bought from agun shop) and thus save alot <strong>of</strong> money. Modern cartridges arefired <strong>by</strong> a percussion cap (small brass cap containing fulminite<strong>of</strong> mercury) pressed into the base <strong>of</strong> the cartridge.<strong>The</strong> old muzzle loading guns, which are very good but needa longer time to load, used percussion caps put into a hole inthe breach <strong>of</strong> the barrel and hit <strong>by</strong> the hammer. Before thatinvention they had flint locks: a hammer with a piece <strong>of</strong> flintin it came down and struck a steel pad, sending a spark downinto some gunpowder in a pan which communicated with thecharge inside the barrel. <strong>The</strong>re was a slight delay when youfired one <strong>of</strong> these and some uncertainty as to whether itwouldgo <strong>of</strong>fatall.Butmuzzleloaders couldbe very effectiveweapons and may very well come back one day. It is perfectlypossible to fire a ball from a shotgun, but common sense willtell you that it must not be larger than the smallest part <strong>of</strong> thebarrel, otherwise you will kill, not the quarry, but your<strong>self</strong>.A ball, however, is not very accurate over more than a fewscore yards. To achieve great accuracy with firearms it wasfound necessary to make the projectile spin, so as to cancelany irregularities in it and give it a gyroscopic effect. Muzzleloadingrifles are possible, but slow to load.A rifle has a series <strong>of</strong> spiral grooves cut down inside thebarrel, and a single bullet <strong>of</strong> s<strong>of</strong>t metal, or coated with s<strong>of</strong>tmetal. When the bullet is propelled out <strong>of</strong> the chamber <strong>of</strong> thegun into the barrel, the metal around it conforms to the shape<strong>of</strong> the spirals and this gives the bullet a spin. Without thisspin the bullet will not travel accurately but will invariablyveer <strong>of</strong>f to one side or another. <strong>The</strong> "two-two" (.22 inch bore)is common all over the world and is perfect for small gamesuch as rabbits, hares, small deer or buck, and birds, or verminsuch as foxes, crows and other marauders. Its ammunition ischeap, light and small, and the rifle is very effective up toseveral hundred yards. I have shot kudu, reed-buck, andvarious other big game with a two-two, and have never oncemerely wounded one <strong>of</strong> them or failed to kill it; but then Iwould never use a two-two for such a purpose unless I wasvery close and quite sure <strong>of</strong> my target.For larger game, however, larger rifles are really muchbetter. Seven millimetre is a very common size (the 7 mmMauser has always been, in my opinion, the best small sportingrifle in the world; the 6.5 mm Manlicher is as good ballisticallybut has an inferior magazine). <strong>The</strong> 9 mm is fine forthick-skinned game. I used a .404 inch bolt-action rifle inAfrica; it gave me a certain sense <strong>of</strong> security when beingcharged <strong>by</strong> a buffalo but <strong>by</strong> God it kicked.RabbitsRabbits are temporarily being controlled in Europe <strong>by</strong>myxomatosis, a disease that originally came from America,where it is epizootic among the cottontails and does themvery little harm, whereas European rabbits had no resistanceto it. So at the moment they should be "given law" (spared, inhunters' parlance). When they come back in strength theymust be well controlled, or they will become the allpervadingmenace they once were, when no forester could198
Food from the WildHares and rabbitsDeerIf deer are not protected where youlive make the most <strong>of</strong> your huntingand live on venison for weeks.Game birdsplant a tree without enormous expense on extermination andrabbit-pro<strong>of</strong> fencing, and when twenty-five percent <strong>of</strong> thecrops in many areas went down the rabbits' throats. In anycase they are also very good food.<strong>The</strong> most humane way <strong>of</strong> taking rabbits (along with mostother small animals and birds) is to shoot them either with ashotgun or a two-two rifle. Very early in the morning is thebest time to "walk-up" rabbits with a shotgun, or to lie in waitfor them with a two-two.Long-netting is perhaps the second best way <strong>of</strong> killingrabbits. It is humane, quiet, cheap (no expenditure oncartridges) and properly done it can be very efficient. You setup the net between the rabbits' grazing ground and theirburrows in the day time at your leisure. Keep it folded upout <strong>of</strong> the way where the rabbits can get underneath it, witha release string to let it drop when you pull it. You then goalong at night, when the .rabbits are out in the field grazing,and the net is between the grazing ground and the rabbitwarren. You pull the string, down comes the net, youraccomplice gets behind the rabbits, makes a noise; they allrun <strong>of</strong>f into the net, get tangled, whereupon you kill them.If you are netting on land where it is better for you to remaininconspicuous, you creep out after dark, get between thegrazing rabbits and their burrows in absolute silence, set upthe net quickly (not folded up) and then get the rabbitschased into the net. I used to do this on heavily gamekeeperedland with an accomplice who was deaf. This made itvery difficult to communicate without alarming the wholecountryside. I have had a dozen rabbits with one setting <strong>of</strong> along net.Snaring is an effective way <strong>of</strong> getting a rabbit for the pot ifyou really need one and have no other way, but I don't like itfor it is somewhat cruel, in spite <strong>of</strong> the fact that a rabbitgenerally strangles it<strong>self</strong> very quickly in a snare. Brass picturewire is good for rabbit snares: unravel it and use threestrands or so. It is advisable to buy a snare first and copy it.<strong>The</strong> best places for snares are rabbit runs, entrances toburrows, or holes in fences..Ferreting is a good way <strong>of</strong> controlling rabbits. Furthermoreit is great fun. Keep ferrets in a hutch, keep them clean, feedthem sparingly on fresh meat, and handle them <strong>of</strong>ten to keepthem tame. Use deliberate steady movements when handlingthem, as they will sometimes bite your hand, thinking thatyou are giving them a piece <strong>of</strong> meat.You can work ferrets loose, on a line, or with a bell. Only areliable ferret can be worked loose; an unreliable one may killa rabbit down the hole and "lay up" with it. A line ferret has acollar round her neck with a long line on it. <strong>The</strong> disadvantage<strong>of</strong> this is that the line may get snagged around a tree root fardown a burrow, in which case you will have a lot <strong>of</strong> digging todo. We used to work them loose but keep one "liner" inreserve. If a ferret did lay up we would send the liner down andthen dig along the line and thus find the errant ferret. <strong>The</strong>point <strong>of</strong> a bell is that the ferret wearing a bell scares the rabbitsout without being able to kill them; also, if the ferret does layup, you can hear the bell and dig him out. Probably the bestthing is just to use loose ferrets and trust to luck.<strong>The</strong>re are ways and means <strong>of</strong> recapturing a ferret if he laysup. <strong>The</strong> best is probably a box trap, with a dead rabbit insideit, and a trap-door, so that when the ferret goes in the doorshuts behind him. Anyone with some ingenuity can deviseone <strong>of</strong> these.199
GameRabbits "bolted" <strong>by</strong> the ferret are best caught in purse nets.<strong>The</strong>se are simply small bags <strong>of</strong> nets staked around theentrances to the holes. You can shoot the rabbits with shotgunsas they bolt, but this has the disadvantage that the noise<strong>of</strong> the guns makes the rabbits still down the holes shy <strong>of</strong> bolting.Purse nets are far and away the best method. On a largerscale a warren can be ringed with long nets and the rabbitsdriven out <strong>by</strong> the ferrets and chased into the long nets <strong>by</strong> dogs.When you have caught your rabbits you must kill them. Ihave already described how to do this on page 123. "Hulk" or"paunch" rabbits as soon as you catch them: this meansremoving its guts. A countryman can hulk a rabbit withoutusing a knife: he uses the rabbit's own sharp claw instead.HaresHares can be snared, but it takes practice to know where toput the snare. If you examine a hare's run you will see wherethe hare commonly lands after each leap. Put the snare justbefore this spot. Purse nets can be set over gaps in fences orhedges where hares are known to go and the hare can bechased in <strong>by</strong> a dog. A good lurcher will run a hare down andkill it, but it has got to be a good lurcher, for the hare runs atenormous speed. You can train lurchers to keep out <strong>of</strong> sight,and never to come near you if a stranger is anywhere about.When you have caught your hares, hang them for at least aweek, because hares, unlike rabbits, are game. Only afterhanging should you hulk and skin the hare. This is an evilsmellingjob, but persevere. Hares make a wonderful meal.SnaringPlace a wire snare in a rabbit or hare run; the animal is caught <strong>by</strong> gettinghis head stuck in the wire ring, which tightens and traps him. Snaring is aneffective method, but a cruel one.Long-nettingPosition your net between burrows and grazing grounds. Erect it folded up,and pull the release string while the rabbits are feeding. Startle them backtowards the warren, and they will get caught in the net.Game birdsPheasants and partridge can legally be shot on your own land,always assuming that the previous owner did not reserve theright to shoot them when he sold the land. If there seem to beno pheasants actually on your own land, there is nothing tostop you attracting them from your next door neighbour'sland. Pheasants are incapable <strong>of</strong> resisting Jerusalem artichokes,and about a quarter <strong>of</strong> an acre <strong>of</strong> these will bring the birdsflocking from far and wide. Buckwheat and sunflowers arealso superb crops for attracting pheasants' attention. Maizeand kale are also useful.It is oi course unforgivable to take a hen bird from <strong>of</strong>f thenest, and, if ever this should chance to happen, as an honourablepoacher you would <strong>of</strong> course take the eggs and hatchthem out under a chicken hen. Chicken hens never seem tomind whose eggs they sit on when they are broodyPigeons are best shot over decoys, which are modelpigeons. Place them on a pigeon feeding ground: under an oakwith plenty <strong>of</strong> acorns dropping from it is ideal, but your cabbageswill do. Conceal your<strong>self</strong> well - pigeons have gimleteyes - and shoot them as they swoop in. If you have no decoysshoot a few and set them up as decoys on forked twigs.Always face your decoys up-wind.Wild ducks can be lured to decoys too.<strong>The</strong>y are magnificentfood, and, unlike the domestic duck, should be hung asgame. I stopped shooting wild geese when I discovered thatthey mate for life. Most other game birds are fine delicacies,but they are now almost all protected; the rarer the delicacythe more unlikely you are to be eating them legally.Big gameDeer, antelope and other big game are <strong>of</strong>ten shot in Europewith the shotgun. This, to my mind, is quite wrong, for deerundoubtedly get away with shotgun pellets inside them. <strong>The</strong>rifle is the only weapon for the humane killing <strong>of</strong> deer, unlessyou are really expert with the cross-bow or the bow and arrow.An effective way <strong>of</strong> shooting deer or antelope is at night witha "balala light". A balala light (the word is African) is a lightwith a powerful beam and you strap it to your forehead. <strong>The</strong>heavy battery is carried on your belt. <strong>The</strong> beam illuminatesboth the quarry and the sights <strong>of</strong> your rifle. <strong>The</strong> advantage <strong>of</strong>shooting at night is that the game are generally quietlygrazing, not expecting danger, and you can <strong>of</strong>ten walk right upto them; somehow, shooting down the beam <strong>of</strong> a light, itseems impossible to miss. In any case you get nothing but veryclose shots. I have shot hundreds <strong>of</strong> buck in Africa in thismanner (they were our only source <strong>of</strong> meat) and never missed,or only wounded, a single one. <strong>The</strong> method is against the lawin many countries, and as long as shooting is looked upon as"sport" this will be so. When it is looked upon, as it should belooked upon, as "work" - a legitimate way <strong>of</strong> harvesting a crop<strong>of</strong> meat - then such silly laws will be changed.Shooting in the daytime is a matter <strong>of</strong> walking very quietlyup or across wind if possible, keeping calm and cool, not200
Food from the WildSkinning a rabbitOnce you have killed your rabbit,you will need to prepare him for thepot. Before you skin him you must"paunch" him: that is, remove theguts. Skinning is not difficult; youwill find that the skin comes awayfrom the flesh very easily. And if thethought <strong>of</strong> preparing the animalstill appals you, just brace your<strong>self</strong>• and think hard <strong>of</strong> rabbit pie.Prise open the belly to expose theguts and remove them. "Paunching"is now <strong>complete</strong>.Invert the skin and fur, so that theflesh <strong>of</strong> first one hind leg, then theother, is exposed.Expose the front legs and cut awaythe last tendon joined on to them.Hold the rabbit between yourknees <strong>by</strong> its head, so that its tailhangs free and its belly facesupwards. Cut a hole in its belly.Cut <strong>of</strong>f all four paws <strong>of</strong> the rabbitwith a sharp knife.<strong>The</strong> hind quarters are now freefrom all skin and fur, and now is themoment to cut <strong>of</strong>f the tail.Pull the skin over the rabbit's neckand cut <strong>of</strong>f its head,Pull the skin apart at the cut, andinsert two fingers into the hole.Separate the skin and fur from theflesh <strong>of</strong> the rabbit, at the belly.Hold the hind legs in one hand andpull the skin down to the front legs.Split the hind legs from the bellyand cut out the anal passage. <strong>The</strong>nplace your knife in the rabbit'sbreast, and remove the "lights" andheart. You must also remove thegall from the liver.getting puffed or out <strong>of</strong> breath, observing closely, and seeingthe game before they see you. Shooting deer or wild pig innorthern woods is best done <strong>by</strong> sitting in a hide up a tree neara pool or some likely grazing place.If you do just wound a buck or a deer sit down and rest forat least half an hour. Don't follow the blood spore immediately.If you do, the animal, on the alert, will hear you beforeyou see him and get up and run away. Leave him for half anhour and he will lie down, get stiff- he is losing blood all thetime - and probably go to sleep. When you then walk quietlyup you will see him before he sees you and get another shot in.You will almost never kill a wounded buck if you follow theblood spore immediately.Hanging gameMost game should be "hung", that is hung up in a cool airylarder for some time before eating. Hang game birds up <strong>by</strong>the neck, not the feet as with tame birds. <strong>The</strong> reason for this isso the guts do not press against the meat <strong>of</strong> the breast. Do notgut the birds then. In the winter in a northern climate it is allright to hang a pheasant, or a wild duck for as much as tendays. At the end <strong>of</strong> this period pluck them and gut them.Game birds hung up with their feathers on look pretty, but, ifyou just want them to eat, it is quite a good plan to pluck themwhen you shoot them there and then (always assuming thatyou are not on somebody else's land), because the featherscome out easily when the birds are still warm.201
Food from the WildFish & Sea Foods<strong>The</strong> <strong>self</strong>-supporter ought to make the most <strong>of</strong> any opportunityhe gets, and fish should figure at the forefront <strong>of</strong> his healthy,varied, natural diet. <strong>The</strong> "sport" <strong>of</strong> angling, in my opinion, is a<strong>complete</strong> waste <strong>of</strong> time. Catching fish, weighing them andthrowing them back does no one any good. Many anglershold the misguided belief that freshwater fish are inedible orunpleasant, but this is quite untrue. Freshwater fish makewonderful food. People should be encouraged to take or farmfreshwater fish for food. <strong>The</strong> methods I describe are notnecessarily legal in every country, but all I can say is that theyought to be.FRESHWATER FISHTrout Plenty <strong>of</strong> people catch trout with their bare hands <strong>by</strong>"tickling". You lean over a bank and very gently introduceyour hand into a cavity underneath it, waggling your fingersin a tickling movement as you do so. When you feel a fishwith the tips <strong>of</strong> your fingers you just gently tickle its belly for aminute; then grab it and fling it on the bank. "Groping" isanother method: wade along in a shallow stream, walkingupstream, and grope with your hand under rocks, grabbingany fish you find there. You are quite liable to get bitten <strong>by</strong> aneel while you are doing it, though.Pike "Snaring" was a method much used in East Anglia whenI was a boy. You have a wire snare hanging from a stick, andwhen you see a large pike hanging in the water, as pike do, youvery carefully insert the snare in front <strong>of</strong> him and let it workslowly back to his point <strong>of</strong> balance. When you think it is thereyou haul him out. If the wire does just touch him as you workit over him he thinks it is a stick because it is going downstream.Salmon You can "gaff" salmon. To gaff a salmon first locatehim; you will find him resting in a pool or under an overhangingtree. You then take the head <strong>of</strong> a gaff, which can bemade from a big cod hook, out <strong>of</strong> your pocket, cut a light stickfrom a bush, and lash the gaff on to the stick. You have alanyard (light cord) running from the eye <strong>of</strong> the gaff to yourwrist where it is tied round. You drag the gaff'into the fishand then just let go <strong>of</strong> the stick. <strong>The</strong> line unwinds from thestick which falls away, and you haul the fish in with the line.If you try to haul him in with the stick he may well pull you in.Eel Sensible people, among whom I include the Dutch andthe Danes, account the eel the best fish there is, and indeed ifyou have ever eaten well-smoked gerookte palling in Hollandyou must agree. You can take eels in "grigs" or "eel-hives":these are conical or square baskets made <strong>of</strong> osiers, wirenetting or small mesh fish netting on a frame, with anadmission funnel like a very small lobster pot. Bait this withfresh fish or meat; whatever people say eels don't like badfish. Fresh meat or fresh chicken guts in a gunny sack, with theneck <strong>of</strong> the sack tied tight, and some stones inside it to sink it,will catch eels."Babbing" for eels is a good way <strong>of</strong> catching them. Get abunch <strong>of</strong> worms as big as your fist, thread wool yam throughthem, tie them in a bunch, and lower them into shallow wateron the end <strong>of</strong> a string, which is tied to a stick. After a whilehaul the "bab" gently out and eels may be found hanging to it,their teeth entangled in the yarn. Pull the bunch over yourboat, or over the bank, and give it a shake. I have caught ahundredweight <strong>of</strong> eels this way in an afternoon.I have not discussed conventional angling with rod andline, for this is done more as a sport than for food production,although good anglers can sometimes get a lot <strong>of</strong> food thisway too. But the fresh waters should be farmed for fish just asthe land is farmed for crops and animals. To reserve fish solelyfor sport is an indulgence that a hungry world cannot afford:they should be cropped, harvested and conserved, andlooked upon as a source <strong>of</strong> good food. If we have some funcatching them as well, then so much the better. I discuss thetechniques <strong>of</strong>fish farming on p. 246.SEA FISHCatching pelagic fishFrom the point <strong>of</strong> view <strong>of</strong> the person who wishes to catch seawater fish, they fall into two groups: pelagic and demersal.<strong>The</strong> former swim freely about the seas, independent <strong>of</strong> thebottom. <strong>The</strong> latter are confined to the bottom. Obviouslythe means <strong>of</strong> taking them are quite different.Hooks and feathers Sometimes you can catch hundredweightsin a few hours when hooking for pelagic fish.Mackerel in particular canbe caught productively in this way,though traditionally they were caught <strong>by</strong> a last. This was apiece <strong>of</strong> skin, about two inches (5 cm) long, cut from near thetail <strong>of</strong> a mackerel you had already caught. <strong>The</strong> method wasto move along at about two knots dragging the last on a hookastern. <strong>The</strong>n somebody discovered the "feathers". With thisnew invention you have perhaps a dozen hooks, on snoods(short branch lines), tied to a line with a w r eight on it. Eachhook has a white or coloured feather whipped to the shank(though almost anything will do: bits <strong>of</strong> white plastic, orshiny tin). You lower the tackle from a stationary boat, findthe depth at which the mackerel are biting, and plunge thefeathers up and down with a motion <strong>of</strong> your arm.Don't waste time trying to catch mackerel when therearen't any. Wait until other people report them in goodquantities, and then go and hit them hard. Often one day'sfishing, salted, will give you enough to last you a year. <strong>The</strong>rest <strong>of</strong> the time forget about it. Time is <strong>of</strong> great importanceto the <strong>self</strong>-supporter, and he can't afford to waste it.Drift net Herring cannot be caught on a hook. Unlikemackerel they don't hunt other fish, but live on small faunain the plankton, so their mouths are too small for hooks. <strong>The</strong>yare traditionally caught with a drift net. This fine net hangsdown vertically in the w r ater suspended from a float-line,which is a line with corks or plastic floats all along it. You canlet it drop to any depth you like <strong>by</strong> hanging it on longer orshorter pendants. <strong>The</strong> whole net must have positive buoyancy.It will catch more at night, and a fine night is the besttime for catching herring. "Shoot" (to shoot, in fishing terms,202
Food from the Wildmeans to put into the water) the net from a boat and hang onto one end <strong>of</strong> it for an hour or two, letting both boat and netdrift with the tide. Cast <strong>of</strong>f occasionally and row along thenet, and just lift a few yards <strong>of</strong> it to see if there are any fish. If ashoal hits the net haul it in. Don't bother to try getting thefish out <strong>of</strong> the net into theboat, justpay thenet down into thestem <strong>of</strong> the boat and go back to port. <strong>The</strong>n unload the net andshake the fish out into a piece <strong>of</strong> canvas, laid on the beach.Drift nets will take any pelagic fish if the mesh is the right size:mackerel, sprats, pilchards, salmon, sea-trout and many otherfish are all taken in drift nets.Catching demersal fishTrawl net B ottom fish can b e taken <strong>by</strong> a trawl net. <strong>The</strong>re arebasically two sorts: the beam trawl and the otter trawl. <strong>The</strong>beam trawl is a net bag with its mouth held open <strong>by</strong> a beamwhich is supported on two "heads" which are like the runners<strong>of</strong> a sled. <strong>The</strong> otter trawl has two "otter boards" holding itsmouth open: they swim through the water like kites, holdingthe trawl mouth open as they do so. Probably for the <strong>self</strong>supporterwith a small boat the beam is best, although manywould dispute this. You need considerable power to haul atrawl, particularly an otter trawl which takes a certain minimumspeed to keep the otter boards working. A small beamtrawl can be hauled <strong>by</strong> sail alone, especially if you work downtide.Often the tide is enough to pull the net. Always trawldown-tide anyway, as the fish face up-tide. A small-meshedbeam trawl also takes shrimps.Tangle net This is a recent invention made possible <strong>by</strong> verystrong, thin, man-made fibre. It is a very light, large-meshednet which sinks to the bottom <strong>of</strong> the sea, where some <strong>of</strong> itswidth is supported <strong>by</strong> a submerged cork line and the rest justlies in a heap on the bottom. Anything that walks or swimsnear the bottom is taken <strong>by</strong> it, getting inextricably tangled,and then you have the lovely job <strong>of</strong> clearing the net! That isthe disadvantage, for the net is hell to clear and always getsbadly torn, so that you have to repair it. But it catches a lot <strong>of</strong>fish and will take crabs and lobster along with everything else.Shore seine net This is another <strong>of</strong> the long wall nets. Youkeep one end <strong>of</strong> it on the beach while the other end is takenout in a boat which goes round in a half circle, coming back tothe beach again. Both ends <strong>of</strong> the net are then pulled in andany fish that were caught are dragged up on to the beach.Nylon drift net You can also catch salmon with nylon driftnets as they run up river from the sea. <strong>The</strong>se should be mistgreen mon<strong>of</strong>ilament, six meshes deep, with meshes 54 inches(13 cm) apart for medium fish and 5i inches (14 cm) for large.Four inches (10 cm) is fine for sea-trout. <strong>The</strong>se mon<strong>of</strong>ilamentnets are so invisible that you can fish for salmon <strong>by</strong> day withthem as well as <strong>by</strong> night. Your only trouble (apart from anystray fishery-law enforcement <strong>of</strong>ficers!) may be seals, whichpursue the fish into the nets and tear the latter to shreds.Long-line You can shoot this from a boat. <strong>The</strong> line can haveHooks, lines and sinkers1 Parlour pot, a type <strong>of</strong> lobster pot. 2 Bab, a tied bunch <strong>of</strong> worms for eels.3 Feathers, weighted line with snoods. 4 Feather (detail). 5 Barbless hook,for removing hook from fish. 6 Last, apiece <strong>of</strong> shiny skin. 7 Lug-worm bait.8 Treble hook for pike. 9 Hook for cod. 10 Hook for dabs.203
Fish & Sea Foodsany number <strong>of</strong> hooks on it, each one in a snood, and each onebaited. Coil the line down carefully in a basket, or tin bath, orplastic tub. As you coil the line down lay each hook in orderover the side <strong>of</strong> the receptacle, next to the following hook inthe line. <strong>The</strong> snoods are long enough to allow this. Bait eachhook. <strong>The</strong>n go up-tide from where you wish to shoot the line,throw out one anchor, and let the line whip overboard as thetide drives it inexorably down-tide. <strong>The</strong> baited hooks shouldfly over in their turn. Have a short piece <strong>of</strong> stick in your handto help them do this if they are reluctant. If you get in a"fangle" let the whole line go over; don't try to unfangle it oryou get a hook in your hand as sure as fate. If you work carefullyand keep cool it should go over clear. When you get tothe other end throw over the other anchor and the buoyand that is that. Come backnext day and haul against the tide,using oars or engine or the wind to carry the boat along at theright speed.<strong>The</strong> size <strong>of</strong> hooks will depend entirely on the kind <strong>of</strong>fishyou hope to catch. Size 6 or 8 hooks are fine for dabs, plaiceand so on, while size 4/0 to 8/0 may be needed for conger-eel,or large cod. Conger are a fish very apt to be caught on longlines: I once helped catch half a ton in a night. Mind you, therewere twelve hundred hooks. For such large fish, particularlyconger, it is an advantage to have a swivel on each snood, sothat the hook can turn as the conger turns.Getting a hook out <strong>of</strong> the throat <strong>of</strong> a large fish is very easywhen you know how to do it. You need a small barbless hooksecurely attached to a handle. Get the hand-hook, as I shallcall it, in the bite <strong>of</strong> the fish-hook, and yank the fish-hook outwith the hand-hook, holding the snood firmly with yourother hand so as to keep the two hooks engaged. You shouldcarry a "priest" (small wooden club, traditionally <strong>of</strong> boxwood).It is so called because it administers the last rites, andis more humane than letting fish drown to death in air whichis what happens otherwise.Hand-line Only in certain circumstances is hand-lining forbottom fish productive. Those lines <strong>of</strong> hopefuls who leanendlessly on the rails <strong>of</strong> piers spend far more on bait andtackle than they take home in fish. Only bother to hand-lineon the bottom when you know there are fish there. At certaintimes <strong>of</strong> the year you can sometimes find a good mark forwhiting, or codling, that makes hand-lining more than just away <strong>of</strong> passing the time. Enquire and observe closely whatlocals do before wasting a lot <strong>of</strong> time.THE SEASHOREYou do not need a boat to benefit from the riches <strong>of</strong> the sea.A visit to the seashore provides ample opportunity toaccumulate edible sea creatures <strong>of</strong> various sorts. Obviouslythe man who takes some equipment with him will be better<strong>of</strong>f than the one who takes a casual stroll, but a very littleknow-how means that anyone can return after a walk alongthe seashore with the makings <strong>of</strong> a snack if not a full meal.A man without a boat may catch fish quite effectively witha beach long-line. Go down to the bottom <strong>of</strong> a beach at lowtide and lay a long-line (as described earlier) along the sandnear the sea. As the tide comes back demersal fish will followthe water, intent on helping themselves to such small beachanimals as emerge from the sand to go about their businesswhen it is covered. You will catch some fish, perhaps notmany; you will be lucky to get a fish every twenty hooks, butafter all one fish is a meal and better than no fish at all. If youreally want to practise this fishery effectively put down a lot<strong>of</strong> hooks; a hundred is not too many<strong>The</strong> long-line must be anchored <strong>by</strong> a heavy weight at eachendandshouldhaveapennant (branchline) onitwithabuoyon top so as to make it easy to recover. Remember here thatthe tide is not the same every day. About the time <strong>of</strong> everyfull moon and about the time <strong>of</strong> even 7 new moon there is aspring tide, when the water goes both higher and lower thanin neap tides, which occur at half-moon periods. Even thesespring tides vary: some come up much higher and go downmuch lower than others. So you may lay your line out at thebottom <strong>of</strong> the beach on one tide only to find that the tidedoes not go out far enough to uncover it next day. If you havea buoy on a pennant you will be able to wade out and recoveryour line.As for bait, nearly everywhere on sandy beaches you willfind the reliable "lug-worm". This can be dug out at lowwater with a spade or fork. <strong>The</strong>re is a trick to this, and if youdo not know it you will not find many. <strong>The</strong> lug-wormthrows up a worm-shaped cast <strong>of</strong> sand. Do not dig underthis. Instead, look for a small hole which should be a footaway from the cast. This is the worm's blow-hole. Dig there,dig fast, throw the sand out quickly, and you will get yourlug-worm.Other forms <strong>of</strong> bait are limpets, mussels, slices <strong>of</strong> herringor mackerel, whelks and hermit crab tails. Limpets must beknocked <strong>of</strong>f the rocks with a hammer <strong>by</strong> surprise; once youhave warned them <strong>of</strong> your intentions they cling on - well -like limpets, and you can only get them <strong>of</strong>f <strong>by</strong> smashing themto pieces. Mussels are somewhat s<strong>of</strong>t and some people tiethem on to the hook with a piece <strong>of</strong> cotton.ShellfishMussels Pick these as low on the rocks as you can get at lowtide, preferably below the lowest tide mark although this isnot always possible. <strong>The</strong>y must be alive: if they are firmlyclosed it is a sign that they are. <strong>The</strong>y must not be taken fromwater in which there can possibly be any pollution fromsewage as they are natural filters and will filter any bacteriaout <strong>of</strong> the water and keep it in themselves. <strong>The</strong> advice commonlygiven to cook them only long enough to make themopen their shells is extremely dangerous: all mussels shouldbe boiled or steamed for at least twenty minutes otherwisefood poisoning can take place. What you do with them afterthat does not matter.Cockles Rake these out <strong>of</strong> the sand with a steel rake. You204
Food from the Wildsoon get good at spotting where they are under the sandwhich has a different look somehow. It is <strong>of</strong>ten greyer than thesurrounding area. <strong>The</strong>n rake them into small hand-nets andwash the sand out <strong>of</strong> them in shallow water. It is much easierto harvest cockles on the sand flats when shallow water stilllingers over the sand. Boil or steam them for twenty minutes.Razor fish <strong>The</strong>se betray themselves <strong>by</strong> squirting water out<strong>of</strong> the holes in the sand in which they live. <strong>The</strong>y do this whenyou tread on the sand near<strong>by</strong>. <strong>The</strong>y live very low down on thebeach, right down where the sand is only uncovered at lowspring tides. If you walk backwards over the sand you will seethe spurts <strong>of</strong> water after you have passed. <strong>The</strong> best way to getthem is with a razor spear. This is a pointed iron rod with smallbarbs near the point. You push it gently down the hole and therazor fish closes on it and is pulled out. Another method is todump a handful <strong>of</strong> salt on the hole. This makes the razor fishstick out and you grab it.Limpets Limpets are only just edible. If you are hungryenough you can eat them raw (provided you are sure they areunpolluted) but they are much better cooked and they makequite good soup.Oysters You should only eat oysters raw if you are sure theyare unpolluted. But they are delicious cooked and much saferto eat then. To open an oyster hold it in a cloth in your lefthand and plunge a short stiff blade into the hinged end. Youcan cheat <strong>by</strong> popping them in a hot oven (400°F or 204°C)for not more than four minutes, but if you intend to eat themraw this is desecration.Clams Clams are dug out <strong>of</strong> sand and are traditionally bakedin the United States on hot stones in a sand pit. Dig a pit, putlarge stones in the bottom, and keep a fire going on them forthree or four hours. Put some seaweed over the stones, andclams on top <strong>of</strong> it along with sweet corn or anything else youfancy. Add more seaweed, chuck some seawater over all <strong>of</strong> it,cover with a tarpaulin, and let the lot steam until the clamsbegin to open.Winkles <strong>The</strong>se can be picked up in small rock pools at lowtide. Boil them for a quarter <strong>of</strong> an hour in water. Pick them outwith a pin, sprinkle them with vinegar and eat with bread andbutter. <strong>The</strong>y are pretty dull.Whelks Whelks are a deep water shellfish and are caught inpots like lobster pots but smaller. Salt herring or mackerelmake a good bait. Boil them for half an hour, or steam them.<strong>The</strong>y taste rather like wet leather.Plants and creatures <strong>of</strong> the seashore1 Razor 2 Common whelk 3 Common limpet 4 Edible cockle 5 Commonoyster 6 Common mussel 7 Common winkle 8 Edible crab 9 Lobster10 Brown shrimp 11 Purple laver 12 Sea lettuce 13 Dulse205
Fish & Sea FoodsLobsters and crabs <strong>The</strong>se are normally caught in pots,which are cages with funnels into them so that the shellfishcan get in but not out. <strong>The</strong> pots can be made <strong>of</strong> willow, steelmesh or wire netting. A more sophisticated pot is the "parlourpot" which is longer than the usual pot with an entrance hallat each end and then net funnels into the "parlour" which is inthe middle. If you have to leave pots out for long because<strong>of</strong> bad weather the parlour pot is good, because the lobsters,on finding themselves confined in the entrance halls, try toget out, get into the parlour, and wait there. Meanwhile thebait is not eaten and attracts more lobsters.When trawling you may catch hermit crabs. If fishermen donot want the tails <strong>of</strong> these for bait they normally throw themoverboard. This is nonsense as the tails, boiled, are delicious.Spider crabs, too, are delicious to eat.SeaweedsMany seaweeds are edible, but there are two plants that areexcellent to eat: laver weed (Porphyra umbilicalis) andsamphire (Salicornia europaea).Laver weed has thin, translucent purple fronds and growson rocks on the beach. To cookityou soakit for afewhours infresh water, dry it in a slow oven and powder it in a mortar.<strong>The</strong>n boil it for four hours, changing the water. Drain it anddry it and you have made laver bread, the stuff that the SouthWales coal miners used to think was good for their chests. Eatit with bacon for breakfast. You can just wash laver weed welland boil it for several hours in water in a double saucepan.Beat this up with lemon or orange, and a little butter or oiland it makes a good sauce for mutton.<strong>The</strong> other really valuable seaweed, samphire, is not really aseaweed at all. It looks like a miniature cactus growing belowhigh-tide mark, and can be eaten on the spot raw as it is(provided the estuary is not polluted). It can be boiled andserved like asparagus with butter but if you eat it like this youmust draw the flesh <strong>of</strong>fbetween your teeth leaving the roughfibres behind. Samphire also makes a most magnificent pickle.To pickle, fill a jar with it, add peppercorns and a grated horseradish,if you like, then pour into the jar a boiling mixture <strong>of</strong>dry cider and vinegar in equal quantities, or else just vinegar.Some <strong>of</strong> the other more delicate seaweeds, such as sealettuce (Ulva lactuca) and dulse (Rhodymenia palmata) canbe treated in the same way as laver weed.Sea-kale is also edible but it is really a perennial vegetable.It is native to the sandy shores <strong>of</strong> the North Sea, Atlantic andMediterranean, but it can be cultivated in the garden where itshould be treated like rhubarb. <strong>The</strong> leaf shoots <strong>of</strong> sea-kale areblanched and eaten like asparagus, and you can cultivate it inany cool or temperate climate which is similar, to someextent, to its seashore origin.SMOKING AND PRESERVING FISHEel To smoke eel, gut the fish but do not skin them. Washthem and lay them in dry salt for twelve hours, then hangthem on sticks and dip theminboiling water for afewseconds.This makes the fish open out. Smoke over an open fire at140°F (60°C) for from two to four hours according to whatsize they are. Eat them like that, don't cook them. <strong>The</strong>y areprobably the most delicious food known to mankind.Salmon To smoke salmon, fillet the fish and remove the ribs.This is difficult, but you can trim the flesh away a little so thatyou can see the ribs and pull them out with a pair <strong>of</strong> pincers.String through the shoulders and carefully score the thickestpart <strong>of</strong> the head end <strong>of</strong> the fish so the salt can get in. Lie thefish on a layer <strong>of</strong> fine salt, put half an inch <strong>of</strong> salt on the thickend and taper the salt <strong>of</strong>f to nothing at the tail end. Leave thefish in salt for 12 hours for a IT to 2 pound (0.7 - 0.9 kg) fillet,18 hours for a 3 to 4 pound (1.4 -1.8 kg) fillet, and 24 hours fora fillet over 4 pounds (1.8 kg). If the underlying flesh still feelss<strong>of</strong>t at the end <strong>of</strong> the given period leave the fish a little longerin the salt. <strong>The</strong>n wash the salt well out, and smoke the fish for24 hours at 70°F (21°C) in heavy smoke, and for 12 hours at80°F (27°C) in lighter smoke. Olive oil rubbed on the fishduring the cooking is a good idea.Neither smoked eel nor smoked salmon will keep indefinitely.To deep freeze them should be an indictable <strong>of</strong>fence,although to deep freeze the fresh fish and then thaw andsmoke them is pardonable. Plenty <strong>of</strong> other fish, both freshwater and salt, can be smoked to advantage. <strong>The</strong> abovemethods are known as "cook-smoking", as opposed to the"cold-smoking" that produces kippers (and bacon).Kippers To make kippers, split your herrings, mackerel orpilchards down the back, running your knife alongside thebackbone. Soak in 70 to 80 percent brine for an hour or two,then smoke for 6 hours at 85°F (30°C). <strong>The</strong> harder yousmoke them the longer they will keep but even that is notvery long.Bloaters To make bloaters, do not head or gut your fish.Leave them buried in dry salt overnight, and smoke them forfour hours at 80°F(27°C).Imerely leave them in the big openchimney over a wood fire. <strong>The</strong>n if I come in hungry late atnight, I pull a few down, lay them on the hot ashes for a fewminutes, and eat them.Salting pelagic fishTo salt herrings, mackerel, pilchards and other pelagic fish,gut the fish and bury them, in barrels or crocks, in dry salt.You can soak the salt out when you want to eat them, andcook them with plenty <strong>of</strong> boiled potatoes as the WestHighlanders do; but the longer they have been in salt thelonger you have to soak them, and this <strong>of</strong>ten amounts t<strong>of</strong>orty-eight hours. And then they are still not very nice, atleast not for s<strong>of</strong>t southerners. Pickled herring is far morepleasant to eat.Pickling herringTo pickle herring soak the salt herring (or mackerel or whatever)for twenty-four hours, and lay it in vinegar for at least a206
Food from the WildMaking rollmopsRollmop herrings prepared athome are both cheap and delicious.Lay the fish on its opened belly.Press very hard and firmly along thebackbone <strong>of</strong> the herring with youtknuckles or thumbs to ease the ribsaway from the flesh. This processflattens the fish further.Cut the fish in half lengthwaysdown the middle.Take a sharpened matchstick or askewer, and pierce the centre <strong>of</strong>each fish to hold the onion in place.Remove your salted herrings fromtheir crock. Gut and decapitatethem, and soak them in water for 24hours to draw out the salt.•Slit the fish very carefully downthe belly.Draw out the ribs and backbone <strong>of</strong>the fish. You will probably find thatyou have to cut the bone away fromthe tail with a knife.Lay one or two pieces <strong>of</strong> peeled andchopped onion across the middle<strong>of</strong> the fish; then toll it up tightly,starting from the wide end. Tuck inpeppercorns and a chilli as well ifyou like.Pack the rollmops tightly into ajar,and fill the jar with spiced vinegar.Ease the fish from the sides <strong>of</strong> thejar with a wooden spoon to let outair bubbles.week, with onions, peppercorns, a chilli or two and any otherspice you fancy. It is best to split the fish first. To split it cut thehead <strong>of</strong>f, lay the fish on its opened belly and press very hardalong the backbone with your knuckles. This draws the ribsout, and you can then pull most <strong>of</strong> them out along with thebackbone. If you really want to go to town make "rollmops"(see illustration).Salting demersal fishYou can also salt cod and other demersal thick white fish.Split the bigger fish down the belly and rip out all <strong>of</strong> thebackbone except the tail, which you keep as a handle. Pilethem up with dry salt between each layer. Leave them forfifteen days if the fish are large, a week if small, letting thebrine drain away. <strong>The</strong>n expose them to dry on racks in thewind and sun, but not in rain.Preserving small fishTo preserve sprats, anchovies and other small oily fish, firstsoak the fish in 80 percent brine for fifteen minutes. Stick asharpened stick through their gills and hang them while stillwet, in smoke at 90°F (32°C) for half an hour and then180°F (83°C) for half an hour. You can eat them like this. Oryou can put them in sterilized jars and cover them with oliveoil or vegetable oil, sterilize them <strong>by</strong> heating them for half anhour, and seal. <strong>The</strong>y then keep for a long time and tasteabsolutely delicious.<strong>The</strong> Dutch way <strong>of</strong> eating salt herring or mackerel is to soakthe fish in fresh water overnight, then slice them into verythin slices. Soak them in vinegar for an hour, smoke them indense hot smoke for half an hour, and pack them in olive oil.<strong>The</strong>y keep for a couple <strong>of</strong> months in cool weather and tastemarvellous when you come to eat them.Potting mackerelDuring the annual mackerel campaign I generally potmackerel, thus copying the fishermen <strong>of</strong> north Norfolk. Cutthe fish up into sections about two inches (5 cm) long anddrop them into vinegar with onions, spices and all the rest <strong>of</strong>it. A chilli or two always helps on these occasions, as do bayleaves which are traditional. Put the earthenware crock, withthe fish and brine inside it, into a slow oven overnight. In themorning cover the pot with grease-pro<strong>of</strong> paper or somethingsimilar and put it away in a cool cupboard. Potted fish are anexcellent stand<strong>by</strong>, to be eaten just as they are, cold, say late atnight when you come home from the pub.207
Food from the WildPlants, Nuts & Berries<strong>The</strong>re are innumerable wild foods that you can find growingin the woods and fields and hedgerows, but my advice wouldalways be: find out what the local people consider good toeat in your locality and eat that. An enormous number <strong>of</strong>"weeds" can be eaten, so can all kinds <strong>of</strong> seeds, and <strong>of</strong> coursea great many wild fruits, berries, nuts and fungi.With fungi you really must know which ones are safe andfor this you need either a knowledgeable friend or the advice<strong>of</strong> local people. Beside the common field mushroom a fewfungi that are delicious to eat and easy to identify are: Shaggyink cap (try it boiled lightly in milk), Giant puff ball,Parasol, Shaggy parasol, Horse mushroom, Cep, Boletus(several species),Morel and Chanterelle.More "weeds" can be eaten than are a positive pleasure toeat, but a few that are excellent are: Nettles, Fat hen andGood king henry. Treat all three exactly as you wouldspinach: pick them in the spring when they are young andtender, cover with a lid and boil. Some other wild substitutesfor green vegetables are: Shepherd's purse, Yarrow, Groundelder and Lungwort. Common mallow can be pureed andturned into a good soup; Chickweed can be cooked andeaten like spinach or used in salads; Jack-<strong>by</strong>-the-hedge is amild substitute for garlic. You will find many other varietiesin your locality, and don't forget the dandelion - deliciousraw in a salad. But use it sparingly.Of the edible nuts, walnut is the king in temperateclimates. After picking, leave the nuts for some weeks untilthe husks come <strong>of</strong>f easily, then dry them well. You can pickhazel nuts green when they are nice to eat but won't keep,or you can pick them ripe and bury them, shells and all, indry salt. Sweet chestnuts are magnificent food. Pick themwhen they ripen in autumn. Shell the prickly covers <strong>of</strong>fthem, and store in a dry place. Of course the finest way toeat them is to roast them in the embers <strong>of</strong> a fire, but prickthem first to stop them exploding. Raw they are bitter.Pureed they taste marvellous, and turkey is unthinkablewithout chestnut stuffing. Beech nuts are tasty but fiddlyto eat; better to crush them in a mill, put the pulp in clothbags and press it. It yields a fine oil. Ash keys make quitegood pickle; boil them well and pickle in vinegar.Among the wild fruits the elderberry is perhaps the mostversatile. <strong>The</strong> berries can be used for cooking in a number<strong>of</strong> ways. Mixed with any other fruit they improve theflavour; boiled in spiced vinegar they make an excellentrelish or sauce which will keep well, if properly bottled whenhot. <strong>The</strong> berries also make an excellent wine as do the flowers(see pp. 192-195), and the flowers add flavour to cookedgooseberries and also gooseberry jam. If you find blueberries,or bilberries in the wild, do not ignore them: they make awonderful pie. And if you find cranberries you can preserve. them but their flavour is nowhere better captured than ina fresh cranberry sauce. Mulberries and rowan berries makevery good jam. And do not forget juniper berries, whichcan impart an agreeably tart flavour to all savoury dishes.Sloes make marvellous fruit wine. Take half a pound(228g) <strong>of</strong> sloes, prick them all over with a fork, and half fillabottle with them. Add an equal quantity <strong>of</strong> sugar, fill thebottle with gin, and in a few months you will have a liqueuras fine as you can buyCrab apples vie with sloes for the title <strong>of</strong> the sourestfruit. Some <strong>of</strong> their bitterness is caused <strong>by</strong> tannin, in whichthey are rich, and one <strong>of</strong> their good uses is as an additive totannin-poor wine. Mead ferments better if you put crabapple juice in it, but the best use for crab apples is jelly.Fruit1 Elderberries2 Juniper berries3 Sloe berries4 Rowan berries5 Mulberries6 Crab apple7 BilberriesNuts8 Sweet chestnuts9 Beech nuts10 Ash keys11 Walnuts12 HazelnutsFungi13 Field mushrooms14 Chanterelle15 Shaggy ink capWeeds16 Shepherd's purse17 Nettle18 Dandelion208
Natural EnergySaving EnergyTHE ALTERNATIVESThroughout this <strong>book</strong> I have advocated an integratedapproach to the land: the encouragement <strong>of</strong> organicbeneficial interaction <strong>of</strong> soil, crops and animals. Whenconsidering energy we must adopt this same approach.We should look upon our holding <strong>of</strong> land as having a certainenergy potential that we can use for our own good purposes,and we should aim to make our holding autonomous inthis respect, as we have aimed to make it for food. <strong>The</strong>re issomething wrong about burning coal to heat water on a hotsunny day, or burning oil to warm a house when there is afast, flowing stream next to it. Or, for that matter, usingmains electricity to drive a mill or a power loom, when thereis potential wind or water power near<strong>by</strong>.Water power is most available in hilly, rainy countriesand wind power in flat lands, but wind power should neverbe used where water power is available. <strong>The</strong> simple reasonfor this is that the wind is fickle while water is relativelyreliable and consistent. Where there is hot sun it is ridiculousnot to use it. It is obviously unproductive to feed cold waterinto your water boiler when the corrugated iron ro<strong>of</strong> overyour shed is so hot you can't hold your hand on it.A characteristic <strong>of</strong> natural sources <strong>of</strong> energy is that theylend themselves much more to small scale use than to largescale exploitation. For example more energy can be got out<strong>of</strong> a given river more cheaply <strong>by</strong> tapping it with a hundredsmall dams and waterwheels right down its length, than <strong>by</strong>building one enormous dam and driving one set <strong>of</strong> hugeturbines. <strong>The</strong> wind's energy can be tapped, but only <strong>by</strong> amyriad <strong>of</strong> small windmills: not <strong>by</strong> some gigantic windequivalent<strong>of</strong> a power station. Every house in a city couldhave a solar ro<strong>of</strong>, and derive a great part <strong>of</strong> its energyrequirements from it, but a solar collector big enough tosupply a city belongs to the realms <strong>of</strong> fantasy Scatteredfarmsteads can easily make their own methane gas, but tocart muck from a hundred farms to some central station,Heat lossA house built in the traditional wayloses vast amounts <strong>of</strong> heat through1 the ro<strong>of</strong>, 2 doors, 3 windows,4the floor, 5 outside walls. Use acombination <strong>of</strong> the methodsillustrated and, as shown in thediagram (left), you will find thatyou can save as much as two thirds<strong>of</strong> the annual domestic energyrequirement. Fire is still the cheapestway <strong>of</strong> producing heat where andwhen you need it. But an open firewastes as much as 90 percent <strong>of</strong> itsenergy, so controls are essential.Insulated windowshutters closed at nightin bad weatherDouble-glazed windowsL<strong>of</strong>t or under-ro<strong>of</strong> insulationFoam-filled cavity wall orinsulated cladding on exteriorI <strong>of</strong> solid brick wallDraught-pro<strong>of</strong>ed doorand window closuresAir-locked doorHeat exchanger ventilator210
Natural Energymake gas from it and then redistribute it would be madlyuneconomical. So these "alternative energy devices"commend themselves especially to the <strong>self</strong> supporter.Now it may well be that it is better for the <strong>self</strong>-supporterto combine several sources <strong>of</strong> energy instead <strong>of</strong> concentratingon just one. For example, you could have a bigwood-burning furnace (see p. 248) that does the cookingfor a large number <strong>of</strong> people, and heats water for dairy,kitchen, butchery, bathroom and laundry. If you preheatedthe water that went into it with solar panels on the ro<strong>of</strong>,you would need less wood to heat more water. <strong>The</strong>n if youhad a methane plant to utilize animal and human wasteand used the methane to bring the hot water from thefurnace to steam-heat, for sterilizing dairy equipment, betterstill. <strong>The</strong>n you could use a pumping windmill to pump upwater from the clear, pure well below your holding, instead<strong>of</strong> having to use the very slightly polluted water from thehill above. And what about lighting your buildings using thestream that runs near<strong>by</strong> to drive a small turbine? All thesethings are possible, would be fairly cheap, and would pay forthemselves <strong>by</strong> saving on energy 7 brought in from outside.SAVING ENERGY<strong>The</strong>re is little point devising elaborate systems for gettingheat from natural sources until you have plugged the leaks inthe systems you have already got.For keeping heat in a house there is nothing to beatvery thick walls <strong>of</strong> cob, stone, pise or brickwork with smallwindows and a thatched ro<strong>of</strong>. <strong>The</strong> thin cavity walls <strong>of</strong>modern brick or concrete block housing only insulate wellif plastic foam or some other insulating material is putbetween the walls and laid on the joists in the ro<strong>of</strong>. <strong>The</strong> big"picture windows" beloved <strong>of</strong> modern architects are terribleheat-losers. Double glazing may help but it is very expensive.<strong>The</strong> country man, working out <strong>of</strong> doors for most <strong>of</strong> the dayas people were designed to do, wants to feel, when he doesgo indoors, that he is indoors, he gets plenty <strong>of</strong> "view"when he is out in it and is part <strong>of</strong> the view him<strong>self</strong>. <strong>The</strong>refore,for country housing, big windows are a mistake.Huge chimneys, very romantic and fine when there aresimply tons <strong>of</strong> good dry firewood, send most <strong>of</strong> their heatup to heat the sky'. In a world short <strong>of</strong> fuel they are inexcusable.Long straggly houses are also great heat-wasters.A compact shape is more desirable. A round building willlose less heat than a square one, because it has a smallersurface area in comparison with its volume. A squarebuilding is obviously better than an oblong one. It is alwaysbest to have your primary heat source in the middle <strong>of</strong> thebuilding rather than against an outside wall.Most insulation nowadays is achieved with hightechnologyproducts, and these are very expensive. What wecan do is search for cheaper and more natural materials.Wherever the cork oak will grow it should be grown, for itprovides an excellent insulator and in large quantities.Using up newspaperMost wood stoves and ranges willburn almost anything combustible.You can turn old newspapers intouseful "logs" <strong>by</strong> wrapping themtightly round a length <strong>of</strong> wood andsoaking the centre <strong>of</strong> the "log" inold oil or fat. Dead wood and allother inflammable rubbish provideadditional free fuel supplies whichcan be saved and stored duringsummer and autumn for use inwinter. A large old fashioned, castiron range can supply the majorsource <strong>of</strong> domestic heat as well asbeing used for cooking meals. Youcan feed any methane from a wastefermentation unit or digester straightinto the grate through a copper orstainless steel burner pipe.Making a heat exchangerYou can make your own heat exchanger. One way is to have an open watercontainer, as shown, to provide a ready source <strong>of</strong> warm water. Alternatively,install a "doughnut" arrangement which will increase the surface area <strong>of</strong> theflue pipe and so transfer more heat to the air inside the house. You can evenbuild an oven. One word <strong>of</strong> caution to the <strong>self</strong>-supporter building his ownheat exchanger: any system which transports flue gases must be <strong>complete</strong>lyleakpro<strong>of</strong>l as stove fumes contain carbon monoxide and can kill in certaincircumstances. Your system should be made pom heavy gauge steel; thinsheets <strong>of</strong> steel will quickly corrode through.Heat storageMost <strong>of</strong> the domestic energy-saving schemes on this page can be fitted oradapted to any conventional house. If you are building a new house fromscratch, consider introducing large heat storage reservoirs. Being able to storeheat is especially valuable if you use solar collectors or windmills as energysources. <strong>The</strong> illustration above shows a combined solar collector and heatstore. This consists <strong>of</strong> water-filled oil barrels painted black behind a glasspanel. An insulated cover lies open on the ground: it reflects sunlight on tothe glass during the day and can be hinged up to lock the heat in at night.<strong>The</strong> whole structure forms the south wall <strong>of</strong> the house. You can use rocks tostore heat, <strong>by</strong> circulating hot air from a solar collector through them duringthe day to warm them, and then circulating air from the house through themat night, when the rocks will release stored heat back into the air and soprevent the temperature <strong>of</strong> the house from dropping too far.211
Natural EnergyPower from WaterParakrama Bahu, King <strong>of</strong> Ceylon, or Sri Lanka, in the seventhcentury, decreed that not one drop <strong>of</strong> water that fell on hisisland should reach the sea: all shouldbe used for agriculture.In wetter climes, where irrigation is not so necessary, the inhabitantswould do well to take the same attitude, but changethe objective a little: "let not one river or stream or rivuletreach the sea without yielding its energy potential".Water power is <strong>complete</strong>ly free, <strong>complete</strong>ly non-polluting,and always <strong>self</strong>-renewing. Unlike wind it is steady andreliable, although <strong>of</strong> course there may be seasonal variationsbut even these tend to be consistent. Like wind, it is generallyat its strongest in the colder months, and is therefore at itsgreatest strength when we most need it.<strong>The</strong> primitive water wheels that have stood the test <strong>of</strong>centuries are not to be despised, and for many uses are betterthan more sophisticated devices. For slow-flowing streamswith plenty 7 <strong>of</strong> water the "undershot wheel" is appropriate.With this you can take in the whole <strong>of</strong> quite a large stream,and thus exploit a river with a low head but large volume.Your wheel will be slow-turning, but if you use it for a directdrive to slow-turning machinery, a corn mill for example,this is an advantage. It is a common mistake <strong>of</strong> "alternativeenergy freaks" to think that all power should first be convertedto electricity and then converted back to poweragain. Energy loss is enormous in so doing.It may be worth your while to install a more sophisticatedwater engine than a water wheel, particularly if you want togenerate electricity with your water power, for this requireshigh speeds to which more complex water engines are wellsuited. For small heads - from as low as a yard (91 cm) to upto 20 feet (6.1 m) - the propeller turbine is very good. As youget over 12 feet (3.6 m) you may prefer a Banki turbine.Water wheel (overshot)<strong>The</strong> oldest method <strong>of</strong> using waterpower, the overshot water wheel(right) is up to 70% efficient. <strong>The</strong>water goes over the top, filling thebuckets round its rim. Water wheelslike this turn quite slowly but withconsiderable force, making thembest suited for driving mill-stones(as shown) or other heavy, slowspeedequipment. Depending onflow rate, power from this wheelmight be anything from five totwenty horsepower (4-16 kw).Water wheel (undershot)Undershot wheels are less efficientthan overshot, but are used whenthere is insufficient head <strong>of</strong> waterfor it to fall over the wheel. <strong>The</strong>ycan produce from two to five hp(li -3kw).Breast wheel (undershot)An undershot wheel with straightblades is up to 30% efficient; fittingcurved blades increases this to 60%.A breast wheel makes twice thepower from the same source.212
Flow rateWater power depends primarily on the flow rate and availablehead <strong>of</strong> water. <strong>The</strong> flowrate <strong>of</strong> a stream therefore needs tobe measured, as well as its fall, to predict the available power.A simple method is to find a length <strong>of</strong> the stream that isstraight and has as constant a cross-section as possible. <strong>The</strong>cross-section <strong>of</strong> flow is estimated <strong>by</strong> taking soundings atregular intervals across it (below left) and calculating theaverage depth: area equals average depth times width. Thisshould be repeated at several points to arrive at an averagecross-sectional area for the chosen length. A sealed bottle(top left) is then timed as it drifts along the middle <strong>of</strong> thechosen section. Flow rate for the stream will be around 75%<strong>of</strong> the speed <strong>of</strong> the bottle times the average cross-sectionalarea <strong>of</strong> that length <strong>of</strong> stream. An example <strong>of</strong> a water powercalculation using flow rate is given in the caption, left.Positioning and types <strong>of</strong> damIn order to build up a head <strong>of</strong> waterand control its flow, it is <strong>of</strong>ten necessaryto build a dam or a weir (above)across the main stream, usually at anarrow point or where there arerapids. A head race or leat, dugalong a contour above the stream,will create enough head for a waterwheel or turbine to function. A damcan be a pile <strong>of</strong> rocks in a stream,although wooden dams (belowright) or combined wood and earthfillones (right) are effective.Hydroelectric powerIf you are fortunate enough to havea stream available for use, one <strong>of</strong>its most valuable capabilities is theproduction <strong>of</strong> a free and continuoussupply <strong>of</strong> electricity. It is inadvisableto use a water wheel to run agenerator because this turns soslowly that an enormous step-upratio <strong>of</strong> gears or belts and pulleys isneeded to arrive at the requiredgenerator speed. Small turbinesturn much faster and need littlemore than a pair <strong>of</strong> pulleys and veebelts to connect them to a generator.<strong>The</strong>y are less expensive to buildbecause their smaller size means theyneed much less steel, and they arealso slightly more efficient thanwater wheels. <strong>The</strong>re are many differenttypes <strong>of</strong> turbine. <strong>The</strong> Peltonwheel turbine (top right) is for highhead applications where the fall is40 ft (12 m) or more, and is up to80% efficient. A special nozzledirects the water at high speedagainst a set <strong>of</strong> spoon-shapeddeflector buckets set around theperiphery <strong>of</strong> the turbine wheel.<strong>The</strong> Banki turbine (centreright) is for medium head, up to65% efficient and best suited to afall <strong>of</strong> 15-40 ft (4.5-12 m).Again a special nozzle directs waterinto the periphery <strong>of</strong> a spool-likewheel with curved blades. <strong>The</strong>propeller turbine (bottom right), upto 75% efficient, operates best onheads <strong>of</strong> under 20 ft (6 m), rightdown to 6 ft (1.8 m). It is the bestsubstitute for a water wheel on anold mill site. In principle it is merelya propeller in a pipe. To obtainreasonable efficiency, the watermust be given a spin opposite tothat <strong>of</strong> the propeller. This is bestdone <strong>by</strong> running it through a spiralvolute before entering the drafttubecontaining the propeller.Pelton wheelBanki turbinePropeller turbine213
Natural EnergyHeat from the Sun<strong>The</strong> most practical solar collector is a wood, for woodlandcan collect the sun's rays from vast areas, and, properlymanaged, can continually convert them into energy, while tocover a few square yards with a man-made solar collectorcosts a lot <strong>of</strong> effort and money. But if collecting and storingthe sun's heat can be done relatively easily and cheaply,as it usually can on the ro<strong>of</strong> <strong>of</strong> an existing house or wall, then,if nothing more, solar energy can be used to reinforce othersources <strong>of</strong> energy. <strong>The</strong> drawback is that in cold climates wewant heat in the winter and we get it in the summer, but ifthe winter gap is filled in with wind or water power (bothat their best in the winter) a consistent system canbe evolved.<strong>The</strong> practical choices open in temperate climates are:1 Heating water <strong>by</strong> letting it trickle over a black-paintedcorrugated ro<strong>of</strong> under a transparent covering which turns thero<strong>of</strong> into a heat collector. You will have to buy your transparentcovering and a pump to circulate the water. All thesame this will allow you to collect the sun over a large area.2 Heating water with black-painted pipes behind transparentmaterial. This has the advantage that there is no ohscurationSolar energySolar energy 1 is most abundant inmidsummer while our heatingrequirements 2 are greatest inmidwinter. Most solar collectorsprovide more heat than we need insummer B and less than we need inwinter A. <strong>The</strong> productive use <strong>of</strong>solar energy C reaches peaks inspring and autumn. Received energyper day per m might be 4 or 5 kwhrs in summer, and i to lkw hr inFlat-plate solar collectorsMost solar energy collectors use ablack surface 1 to absorb the sun'sradiation and produce heat. Youtransfer the heat into a hot watertank, or to heat space, <strong>by</strong> passingwater, or air in some cases, throughpipes or channels 2 behind theabsorbing surface. A glass or plasticcovering 3 prevents heat loss fromthe front <strong>of</strong> the collector, whileinsultrear tHeating air: the Trombe wallNamed after Pr<strong>of</strong>essor Trombe, thisis a clever method for making use <strong>of</strong>solar energy in winter. <strong>The</strong> Pr<strong>of</strong>essorperfected the wall high up in thePyrenees, where the sun shines quite<strong>of</strong>ten in winter, albeit weakly. Youuse a vertical double-glazed plateglass window 1 which faces south,and allow a black-painted wall 2behind it to catch and trap the sun'sheat. When you require heat inside•the house you open ventilators 3, 4and these allow warm air tocirculate between the glass and thewall. An over-hanging ro<strong>of</strong> 5prevents the high summer sun fromstriking the glass and also protectsthe building from getting overheated.An alternative to the Trombe wallis a glass-covered extension to yourhouse, in other words a conserva- ,ton-. This will warm the house if /.properly ventilated.A solar stillThis shallow concrete basin, paintedblack or tarred 1 contains a fewinches <strong>of</strong> polluted water. A heavygaugepolythene tent 2 encloses this,and condensation runs down theinside surface <strong>of</strong> the tent into apair <strong>of</strong>collecting gutters 3. <strong>The</strong> condensationis pure distilled water whichyou can syphon <strong>of</strong>f. Hold down theplastic sheeting <strong>by</strong> heavy woodenbattens 4 and close the cover endsrather like a ridge tent. You canreplenish the polluted water througha hose 5.Solar drierAn inclined, glazed, flat-plate solarair heater admits air through anadjustable flap 1. <strong>The</strong> air heats upas it crosses over a blackenedabsorber surface 2, because the heatis trapped <strong>by</strong> glass panels 3. <strong>The</strong>heated air rises through a bed <strong>of</strong>rocks 4 and then through a series <strong>of</strong>gratings which hold the produce tobe dried. A flap 5 under the overhangingro<strong>of</strong> allows the air supplyto be adjusted or closed <strong>of</strong>f. <strong>The</strong>rock bed heats up in the course <strong>of</strong>the day and continues releasing ameasure <strong>of</strong> warmth to the crop aftersunset, there<strong>by</strong> preventing condensationfrom occurring. <strong>The</strong>re isa door in the back <strong>of</strong> the unit toallow crops to be added or removed.214
Natural EnergyHeating water:the trickle ro<strong>of</strong>Provide a large surface area for asolar water heater <strong>by</strong> having watertrickle down a blackened,corrugated, aluminium ro<strong>of</strong> behindan area <strong>of</strong> glazing. Insulationbehind the aluminium preventsoverheating <strong>of</strong> the ro<strong>of</strong> space andkeeps most <strong>of</strong> the heat in the water.A small pump drives the waterround the system whenever a sensoron the ro<strong>of</strong> Cells a control-box thatdie ro<strong>of</strong> temperature is higher thanthat <strong>of</strong> the water in the copperimmersion heater. This system is notideal, but it is cheap enough tomake it worth converting an entiresouth-facing ro<strong>of</strong>.<strong>by</strong> misting-up and you don't need a circulatory pump becausehot water rises. But it is expensive to cover large areas.3 Solar stills: these are arrangements for using the heat <strong>of</strong>the sun directly for distilling water or other liquids.4 Solar driers: these can be used for drying fruit, grain,vegetables, malt and many other things.5 Solar hot air heaters: these provide extra heat for agreenhouse.6 Solar-heated walls: such as the Trombe Wall, these storeheat during the day and release it during the night.215
Natural EnergyPower from the Wind<strong>The</strong> common factory built steel pumping windmill, seenin thousands in all lands where water has to be pumpedup from deep boreholes, is one <strong>of</strong> the most effective devicesever conceived <strong>by</strong> Man. Many an old steel "wind pump" hasbeen turning away, for thirty or forty years, never failing inits job. Such machines will pump water comfortably froma thousand feet (304 m) and work in very little wind at all.<strong>The</strong> tail vane is arranged on a pivot so that they can turnthemselves sideways on to the wind in a storm.Wind power has followed the same trend as water powerin that low-powered but high-speed devices are now wantedfor driving dynamos to produce electricity. But the wind, <strong>of</strong>course is <strong>complete</strong>ly unpredictable, and so you must eitheraccept that you cannot use a machine in calm weather, or insevere gales, or you must be able to store electricity and that isvery expensive. However, if you can use the power when it isavailable, say for grinding corn, or store it, as heat for example,the total wind energy available over a period <strong>of</strong> time tendsto be fairly constant.How much power?<strong>The</strong> main problem in harnessingwind is that it carries very littlepower when it blows lightly, but<strong>of</strong>fers an embarrassing surfeit in agale. <strong>The</strong> power <strong>of</strong> wind is proportionalto its velocity cubed: inother words, if the wind speeddoubles its power potential riseseight-fold. This means that a fairlylarge windmill is needed if usefulamounts <strong>of</strong> power are to beextracted from a light breeze, andthat the windmill must be protectedfrom storm damage <strong>by</strong> having ahinged tail-vane which can swingthe wind-rotor out <strong>of</strong> the wind.Or it can have removable sails orblades which can be made to twistinto a "feathered" position wherethey act as air brakes to slow therotor. <strong>The</strong> diagram shows how many100 watt lightbulbs a 15 ft (4.5 m)diameter electricity-generatingwindmill is capable <strong>of</strong> powering.This is a variation on a Mediterraneansail windmill. Used forirrigation water pumping <strong>by</strong>market-gardeners on Crete it isreadily improvised.This typical all-metal windmill isused for pumping water. A swingingtail-vane turns it out <strong>of</strong> the wind ina storm. Many abandoned, pre-warones can still be renovated.In this German water-pumpingwindmill, the rotor runs in the lee <strong>of</strong>the tubular steel tower; weights atthe blade roots swing the blades intoa feathered position in strong winds.This electricity-generating windmillneeds only three aerodynamicallypr<strong>of</strong>iled blades. <strong>The</strong> machinetrickle-charges a bank <strong>of</strong> batteries tosupply low-powered appliances.216
Natural EnergyTo be <strong>self</strong>-sufficient in electricityWind power is hard to win and store, so you should alwaysuse wind-generated electricity sparingly. Never use it for heatingappliances. In order to exploit wind power you must havean average wind speed <strong>of</strong> at least 9 mph, with no lengthyperiods <strong>of</strong> low winds; even so you will need battery storage tocover up to 20 consecutive days <strong>of</strong> calm. Apart from anelectricity-generating windmill, you need a voltage regulatorand a cut-out to prevent the battery from overcharging. Totalbatten - storage capacity needs to be: 20 X average currentneeded in amps (w 7 atts-^ volts) X average usage time in hoursper day, measured in amp hours. Standard domestic electricappliances requiring 220 volts a.c. can be driven from a bank<strong>of</strong> 12 volt (d.c.) batteries <strong>by</strong> an electronic invertor. Alternativelylow voltage appliances may be used directly. Atypical 2 kw, commercially manufactured windmill will <strong>of</strong>tengenerate at 110 volts d.c. to charge a bank <strong>of</strong> low voltagebatteries, wired in series. You might get 5000 kw hrs annuallyfrom a 2 kw windmill. 1 kw is equal to one unit <strong>of</strong> electricity.This is the simple and cheapsailwing, developed at PrincetonUniversity USA. A fabric sleeve isstretched between the two edges<strong>of</strong> the "wings".Reading University, England,developed this vertical axis windmill.Wooden aer<strong>of</strong>oil blades arespring-loaded and fold outwards toprevent over-speeding.Generate your own electricity<strong>The</strong> typical electricity-generatingwindmill is available in kit form oras a do-it-your<strong>self</strong> design. <strong>The</strong>aluminium or fibreglass blades arepivoted from the hub: centrifugalforceworks on the balance weightsand overcomes a set <strong>of</strong> springsattached to the hub shaft, so theblades feather automatically if therotor overspeeds. A toothed rubberbelt drives a car alternator toproduce up to 750 watts. Power istransmitted down the inside <strong>of</strong> thetower, either through a conductingslip ring and brush, or <strong>by</strong> a cablewhich can be released when it istwisted, thus providing a breakableconnection. Similar arrangementsmight be improvised though theymight suffer in reliability.217
Natural EnergyFuel from Waste<strong>The</strong> attitude that has grown up in the Western world that allso-called "waste" from the body, human or otherwise, issomething to be got rid <strong>of</strong> at all costs and very quicklybecomes harder to sustain as our planet's fossil fuel comesinto shorter supply. If we can take the dung <strong>of</strong> animals or men,extract inflammable gas from it in quantities that make theeffort worthwhile, and still have a valuable manure left overto return to the land, we are doing very well.Methane is a gas which is produced <strong>by</strong> the anaerobic fermentation<strong>of</strong> organic matter: in other words allowing organicmatter to decay in the absence <strong>of</strong> oxygen. It is claimed thatafter the gas has been produced the resultant sludge is a bettermanure than it was before, for some <strong>of</strong> the nitrogen whichmight have been lost as ammonia is now in a fixed form whichwill be used <strong>by</strong> plants. As the methane gas it<strong>self</strong> is quite asgood a fuel as natural gas (in fact it is the same thing) and isnon-toxic and safe, methane production from farm andhuman wastes seems very worthwhile.Methane is made with a methane digester which is finefor animal wastes but there is a limit to the amount <strong>of</strong> bulkyvegetablematter that you can put into it. This precludesfilling it with either tons and tons <strong>of</strong> straw or with the largequantities <strong>of</strong> valuable manure that result from the traditionalpractice (well proven) <strong>of</strong> bedding animals with straw. <strong>The</strong>spent sludge from the digester is it<strong>self</strong> an excellent manure,but my own feeling is that, rather than dump it straight fromthe digester on to the land, it should flow on to straw or otherwaste vegetable matter. <strong>The</strong>re it will undergo further, thistime aerobic, fermentation, and at the same time activate thebacteria which will break down the tough cellulose content<strong>of</strong> the litter.Human beingPig9 ft 35400 BTUHow much gas?<strong>The</strong> diagram above shows theamount <strong>of</strong> gas produced <strong>by</strong> thewaste <strong>of</strong> different animah in a day.<strong>The</strong> gas is sufficient to boil thenumber <strong>of</strong> kettles shown.<strong>The</strong> methane digester<strong>The</strong> process shown below involvesthe digestion <strong>of</strong> organic wastes <strong>by</strong>bacterial action in a sealed containerfrom which all air is excluded.Animal manure mixed to a slurrywith water is added to-a holdingtank 1 daily. <strong>The</strong> input is fed intothe digester <strong>by</strong> gravity when a valve2 is opened. <strong>The</strong> stirrer 3 has anairtight joint where it enters thedigester and prevents scum buildingup. <strong>The</strong> tank is well insulated withstraw or similar material 4 as theprocess only works effectively attemperatures close to blood heat.Each fresh addition causes anequivalent amount <strong>of</strong> digester sludgeto overflow into the slurry collector6. <strong>The</strong> digestion process takes fromabout 14 to 35 days depending onthe temperature <strong>of</strong> the digester, sothe daily input should vary from1/14 to 1/35 <strong>of</strong> a digester volume toachieve the desired "retention time".<strong>The</strong> gas bubbles up through theslurry into space 5, and is syphonedalong a delivery line 7 to the gasholder 8. An important safetyprecaution is a brass or copper finemesh flame trap at the entry to thedelivery pipe to protect the gasholder if air gets into the line andcauses a burn-back. <strong>The</strong> gasproduced, called bio-gas, is amixture <strong>of</strong> about 60% methane (theinflammable fuel component) and40% carbon dioxide which is inertbut harmless. <strong>The</strong> digested sludgemakes a valuable fertilizer, beingrich in nitrogen and trace elements.
Crafts & SkillsBasketryYou can go for a walk in the country with no other equipmentthan a sharp knife and come back with a basket. One-yearshoots <strong>of</strong> willow, lilac, elm, lime, poplar, hazel, or young ash,can all be used for the tougher rods that radiate outwardsfrom the centre <strong>of</strong> the bottom <strong>of</strong> the basket, and vines,creepers or brambles like blackberry, snowberry, honeysuckle,dogwood and clematis can be used for the "weavers",as the more pliable, horizontal, members are called. But if youcan find, or grow, osiers, which are one-year-old canes <strong>of</strong> thosespecial straight-caned willows that are grown for basketry,you are <strong>of</strong>f to a flying start. Use osiers or other tough shootsfor hard basketry.Hard basketryTo make a basket you must first form the "slath", which is thebottom. Do this <strong>by</strong> making a cross from six or eight strongrods interlocked at right angles, and weaving round theirends with a long weaver (see illustration).<strong>The</strong>n you shove in your stakes, which are the verticalrods on which you weave the weavers right up to the top.When you reach the top you have got to finish the basket <strong>of</strong>f,in other words make a border. <strong>The</strong>re are two main patterns:the "trac" border (see illustration) and the "three-rod" border.Finally you have to make the handle. This is done with a"bow", a long osier which makes the core, and one or morevery long and supple weavers (see illustration).Making a hard basketYou need three different types <strong>of</strong>rod: eight short stout rods for the"slath", or base; a number <strong>of</strong> strongbut bendy rods for your side stakes;and some weavers, the long thinwhippy rods which hold the baskettogether. Side stakes are generallyabout eight inches (20 cm) longerthan the intended height <strong>of</strong> thebasket. Weavers can be any length,but they should be at least longenough to go round the basketonce. <strong>The</strong>y come in varyingthicknesses.S<strong>of</strong>t basketryBaskets can be made from reeds, rushes, sedges and grasses.Rushes and sedges are best, being s<strong>of</strong>t and pithy, and verytough and long lasting. <strong>The</strong>y should be cut in midsummer.<strong>The</strong> best way to cut them is to wade in shallow water pushinga punt, cut the plants as low as possible with a sickle and laythem carefully in the punt so they keep parallel and don'tbend. Dry rushes for about three weeks, in the shade if youcan because the sun bleaches them which spoils their appearance.<strong>The</strong>n bundle them and tie in "bolts", traditionally with astrap 45 inches (1.14 m) long.Before you use dried rushes wet them well and wrap themin ablanket for a few hours to s<strong>of</strong>ten. <strong>The</strong>n make longropes <strong>of</strong>plaited rushes, taking three rushes at a time and plaiting them.Avoid having them all come to an end at the same time so thatyou can feed another rush in as one comes to an end. Mats aremade <strong>by</strong> simply coiling plaits up and holding the coil in placewith waxed thread. To make a basket make a flat coil andwhen you get to the "chine", or bottom corner, continue thecoil up at whatever angle you like until you get to the border.A handle is best made <strong>by</strong> sewing a rush rope right roundunderneath the basket.<strong>The</strong> basketmakerYou can make baskets out <strong>of</strong> reeds, creepers, osiers, and tree shoots. You canmake "trugs", as opposite, out <strong>of</strong> wood. B> mastering a craft you gain twoimportant things: immense satisfaction and a commodity for trading.Shove in 31 side stakes, one eachside <strong>of</strong> every rod, with one gap.Start the sides with three rounds <strong>of</strong>"waling" (above). Take threeweavers, hold them behind threeadjacent stakes and weave roundtwo stakes at a time.Loop a weaver round one rod, and"pair" <strong>by</strong> weaving with both its ends.Pair until the base is the right size."Rand" up the side <strong>of</strong> the basket(above). Use long weavers andweave in front and behind eachstake. Begin and end weaversbehind a stake.Soak all your rods for an hourbefore using them. Cut eight rodsfor your slath, and cut slits in four<strong>of</strong> them. Poke the other fourthrough to form a cross. Take aweaver about four feet long and tietightly round the cross three timesand tuck the ends in.Cut the ends <strong>of</strong> the base rods.Finish <strong>of</strong>f with three rows <strong>of</strong> walingand then make a trac border(above) <strong>by</strong> bending the stakes over.For the handle take a good thickbase rod, sharpen both ends andpoke them well down into the topwaling on both sides <strong>of</strong> the basket.Take three thin weavers and loopthem under the waling on one side.Plait them round the rod, and whenyou reach the other side poke theend well into the waling.220
Crafts & Skills221
Crafts & SkillsPotteryClay is very <strong>of</strong>ten overlain with earth, and so you may bewalking on it, or even living on it, without knowing it is there.Prospect where a cutting has been made, or a well, or anythingthat exposes the subsoil. If it looks like clay, and when wettedbecomes plastic and sticky, it is clay.Testing clayOnce you have found it you have got to find out if it is anygood. It probably isn't. Wet some down to a plastic state andthen allow it to dry out. If it has a noticeable scum, usually awhitish stain, on its surface after it has dried, it containsundesirable alkali and probably isn't worth using. Drop asample <strong>of</strong> the clay into a beaker containing a 50 percentsolution <strong>of</strong> hydrochloric acid. If it fizzes forget it. Too muchlime. If the clay looks dark brown or black and is very sticky 7then there is too much humus. Clay very near the surfacemay be like this, but there is <strong>of</strong>ten better clay underneath.To test for plasticity, which is important, make some clayinto a stick the size <strong>of</strong> a pencil and see if you can bend it intoa ring an inch in diameter without it breaking. If you can it isgood clay.If there is too much sand in your clay it may be hard tomould or throw on the wheel. If this is so mix a fatter, lessgritty, clay with your sandy clay and try that. You can screensand out <strong>of</strong> clay, but it is a laborious job and probably notworth it.Mixing and screeningIf you want to mix it with other clay, or screen it, you mustmix it with water to a pretty sloppy liquid. Throw the clayinto a tank full <strong>of</strong> water (don't pour the water on the clay)and mix. You can do this <strong>by</strong> hand, or with a paddle, or in a"blunger", which is a special machine for the job, or in anordinary washing machine. <strong>The</strong> semi-liquid clay is then called"slip". <strong>The</strong> slip can be poured through a screen, to screen it.Use a 60 mesh to the inch screen for ordinary earthenwareand a 100 mesh for porcelain or china. If you want to mix twoor more clays make slip <strong>of</strong> them all and then mix them upin that condition.<strong>The</strong> next job is getting the water out <strong>of</strong> the clay again.An easy method is to let your slip sit in a barrel or tank for afew days until the clay all sinks to the bottom. <strong>The</strong>n yousiphon the water <strong>of</strong>f, much as a winemaker racks his wine.<strong>The</strong>re is a machine called a filterpress which will then extractthe rest <strong>of</strong> the water, but if you haven't got one you canplace the slip in bowls <strong>of</strong> unglazed earthenware and leavethese in a draughty place. <strong>The</strong> absorbent earthenware drawsthe water out <strong>of</strong> the clay. <strong>The</strong> water is then dried <strong>of</strong>f <strong>by</strong> theair, and after a few days the clay is fit to work.Preparing clayIf you are very lucky, you may well find a clay that you don'thave to combine with anything else, or screen, and all youhave to do is dig it up and let it weather, or age. All clay isbetter aged even if only for a fortnight, because bacteria dogood things to it. <strong>The</strong>n you must mix it with water and "pug"it, which means you must tread it well with your feet. Finallyyou must "wedge" it. This is the process <strong>of</strong> pushing the clayaway from you on a board, pulling it towards you, rolling it,cutting it up and recombining it: in fact giving it a thoroughkneading just as you knead bread.Shaping pots<strong>The</strong>re are many ways <strong>of</strong> shaping a pot. Almost certainlypottery was discovered because baskets used to be plasteredwith clay to make them hold water. One day a basket gotburnt and the clay became hard and durable. This was thefirst pot made with a mould. Simple ways <strong>of</strong> making pots <strong>by</strong>"pinching", "coiling" and with "slabs" are described overleaf.<strong>The</strong> potter's wheel<strong>The</strong> invention <strong>of</strong> the potter's w T heel was the great breakthrough,and there is really no substitute for it. You "throw"a lump <strong>of</strong> clay on the wheel, "centring" it plum in the middle<strong>of</strong> the wheel <strong>by</strong> pressure from both hands as the wheelrevolves. <strong>The</strong>n you shape it with pressure from your hands,fingers, tools and so on. Remove the pot from the wheel:usually you cut it <strong>of</strong>f with a piece <strong>of</strong> wire. Set it aside to dry.<strong>The</strong>n replace it on the wheel <strong>by</strong> sticking it with a little water,and "turn" it, that is spin it round and smooth <strong>of</strong>f the roughedges with a steel cutting tool. Turn it twice: once with thepot the right way up, and again with it upside down.Making a wheelIn primitive countries they still use wooden cart, or wagon,wheels as potter's wheels, and if you can get hold <strong>of</strong> one youcan do this too. You mount the wheel horizontally near theground, ideally on a short section <strong>of</strong> its original axle. Makea hole in the side <strong>of</strong> the wheel towards one edge or in aspoke if it has them. To use it you squat <strong>by</strong> the side <strong>of</strong> thewheel, put a stick in the hole and set the wheel turning.Because the wheel is very heavy -it goes on turning <strong>by</strong> its ownmomentum and your hands are then free to throw a potor two.A more sophisticated potter's wheel can be made <strong>by</strong>casting a reinforced concrete wheel, say 28 inches (71cm)in diameter and 3 Vi inches (9cm) high with a 1 inch (2.5 cm)diameter steel shaft about 30 inches (76cm) long throughit. <strong>The</strong> bottom <strong>of</strong> the shaft should protrude a couple <strong>of</strong>inches and steel reinforcing bars should be welded radiatingfrom the shaft so as to be embedded in the concrete. This isnot the wheel you throw on, but one you kick to make thethrowing wheel revolve. <strong>The</strong>n build a table high woodenframe which has a bearing let into it to house the top bearing<strong>of</strong> the shaft, and a thrust bearing at the bottom to take thebottom <strong>of</strong> the shaftv<strong>The</strong> frame should also include a seatfor you to sit on, and a table to place clay. Fix the concretewheel and shaft into the frame. And now you must fix on222
Crafts & Skillsyour throwing wheel. Weld (see p. 238) or braze a wheelhead,say a foot (30cm) in diameter and a l A to Vi inch (0.7 cmto 1.2cm) thick, to the top <strong>of</strong> a steel hub (a short piece <strong>of</strong>water pipe will do). Put this on top <strong>of</strong> the shaft and weld,or braze, it on. To use your wheel just sit on the seat andkick the concrete wheel round with your foot. Being heavyit has plenty <strong>of</strong> momentum.FiringFiring is necessary to harden the clay. With most glazedware there are two firings: the "biscuit firing" which is justthe clay and not the glaze, and the "glost firing," which isthe biscuit ware dipped in the liquid glaze and fired again.You can fire pots to flower-pot hardness in a large bonfire,although you cannot, <strong>of</strong> course, glaze them like this. Lay athick circle <strong>of</strong> seasoned firewood on the ground, lay yourware in the middle, build a big cone <strong>of</strong> wood over it, andlight. Pull the pots out <strong>of</strong> the ashes when they are cooled.Traditional kilns are "updraught" kilns (see illustration)and you can build one your<strong>self</strong> if you can lay bricks. "Downdraught"kilns are a more recent development and a littlemore difficult to build. <strong>The</strong> kiln is arranged so that the heatfrom the fire is sucked down through the pots before it isallowed to rise up the chimney. Much higher temperaturescan be achieved using this method.Temperature can be a matter <strong>of</strong> experience, or can bemeasured with "pyrometers" or "cones." Cones are littlepyramids <strong>of</strong> different kinds <strong>of</strong> clay mixture which areplaced in the kiln and which tell us the temperature <strong>by</strong>keeling over when they get to a certain heat. You can buythem very cheaply, but if you plan to use them rememberto build some sort <strong>of</strong> a peep-hole in your kiln so you cansee them.GlazingMost glaze is a mixture <strong>of</strong> silica, a "flux" which is generallyan oxide <strong>of</strong> some metal (like rust), and alumina which isclay. China clay is the most usual form <strong>of</strong> alumina in glazes.<strong>The</strong> silica melts and solidifies on cooling to form a coating<strong>of</strong> glass on the ware. <strong>The</strong> flux helps the fusion, lowers themelting point <strong>of</strong> the silica, and provides colour. <strong>The</strong> aluminagives the glaze viscosity so that it does not all run down theside <strong>of</strong> the pot when you put it in the kiln.Anybody can make their own glazes. You must grind thecomponents down fine, either with a pestle and mortar orin a ball mill. <strong>The</strong> latter is a slowly revolving cylinder whichyou fill with flint pebbles and whatever material you wantto grind. You can make a raw glaze from 31 parts washingsoda (the flux-sodium is a metal); 10.5 parts whiting; 12 partsflint (the silica); 55.5 parts feldspar. Grind this, mix it andpass it through a 100 mesh to the inch (2.5cm) lawn, whichis a piece <strong>of</strong> fine linen. <strong>The</strong>re are hundreds <strong>of</strong> glazes andthe best thing you can do is get a <strong>book</strong> on the subject andexperiment with a few.Before shaping your potLet newly-dug clay age for at least afortnight. <strong>The</strong>n pug it to get the airout. <strong>The</strong> easiest way is to mixit withwater and trample on it.homogeneous mass, free <strong>of</strong> airbubbles and foreign bodies like bits<strong>of</strong> stone and grit. You can wedge inthe same way as you would kneaddough for. bread. Roll the claytowards you with both hands, twistit sideways and push it down intoit<strong>self</strong>. Press out air bubbles andpick out bits <strong>of</strong> dirt. If you aremixing two clays wedge until yourclay is one uniform colour.A solid fuel updraught kilnYou can get kilns which use electricity, gas or oil, but a solid fuel kiln can beequally efficient, and you can build it your<strong>self</strong> out <strong>of</strong> ordinary bricks.Updraught kilns are the simplest. You have your fire box at the bottom. Ifyou bum wood you can do it on the ground, but coal and coke should beburned on steel firebars so that the ash can drop through. Build your potchamber directly above the fire, <strong>by</strong> supporting a system <strong>of</strong> shelves made <strong>of</strong>firebrick on steel firebars. Include a peephole so you can watch your potsprogress. And as long as you build the whole structure firmly the chimneycan be directly over the pot chamber.Use a wire to cut a workable lumpfrom your store <strong>of</strong> pug.Wedge the lump to make it a s<strong>of</strong>tAfter shaping your potMost glazes are applied after thefirst firing in the kiln, the biscuitfiring. <strong>The</strong> commonest method isto dip your pot in a soup <strong>of</strong>powdered glaze and water, but ittakes practice to avoid finger marks.You can pour glaze so that it flowsover the pot. You can spray it, orpaint it on with a brush.223
PotteryMaking pots <strong>by</strong> handBefore you begin to throw pots on the wheel you need athorough knowledge <strong>of</strong> clay it<strong>self</strong>: what happens to it whenit is pulled about, when it dries, when it is fired and so on.This vital knowledge is best gained <strong>by</strong> shaping some pots<strong>by</strong> hand before you ever try the wheel. Many potters preferto work <strong>by</strong> hand because they can create irregular shapes instead<strong>of</strong> being limited to those formed <strong>by</strong> the wheel.Coil potsYou can make coil pots with no other tools than your fingerssimply <strong>by</strong> rolling out long sausages <strong>of</strong> clay and coiling theminto whatever shapes you want. Obviously each turn <strong>of</strong>the coil has to be pressed hard against its neighbour, andthe sides <strong>of</strong> the pot have to be painstakingly smoothed.If you use a lot <strong>of</strong> care and patience your pot can have asfine a finish as anything thrown on a wheel. If you use a fewsimple tools (see illustrations) your job will be a lot easier.Take a lump <strong>of</strong> clay and roll itbetween your hands so that itforms a sausage about nine inches(23 cm) long. Lay it on the benchand roll backwards and forwardsapplying gentle pressure, until youhave a long coil about half an inch(1 cm) thickShaping a coil potA turntable is a great help. Instead<strong>of</strong> inching your coil round the pot,you can hold the coil still and turnthe pot round. Begin with a ball <strong>of</strong>clay and flatten it to form a basehalf an inch (1 cm) thick. Smooththe surface <strong>of</strong> the base with a knifeand cut it to a perfect circle <strong>by</strong>holdingthe knife still and revokingthe turntable. If you have not gota turntable make the base on aplate and cut round to form acircle. Use a modelling tool to givethe base "tooth" which meansroughen it so that the coil abovehas something to cling to.Make up some slurry, a mixture<strong>of</strong> clay and water. Brush someround the edge <strong>of</strong> the base witha toothbrush to make the coil stick.Lower the coil on and press downwith your fingers on the insideand outside.Where the coil begins to overlapit<strong>self</strong> brush on more slurry. Makethe joins firm <strong>by</strong> gently pushingthe clay downwards on the outsideand upwards on the inside. Whenyou need a new coil, make a "buttjoint" <strong>by</strong> slicing both ends diagonallyand pressing together withplenty <strong>of</strong> slum-.<strong>The</strong> finish is <strong>complete</strong>ly up toyou. If you like the corrugatedlook leave the outside as it is, butit is worth smoothing the insidea bit to make it easy to clean. Youcan smooth outside and inside tonear perfection with a flat piece<strong>of</strong> wood.224
Crafts & SkillsSlab pots"Slabbing", as the cognoscenti like to call it, is the best way tomake angular pots with flat surfaces, particularly boxes andtrays, You need a coarse grained clay if your pots are to be <strong>of</strong>any size, say more than six inches (15 cm) in any dimension.All you need is two battens and a rolling pin to make a slabfrom which you cut the parts <strong>of</strong> your pot. If you want to makeslab pots with sides which are not rectangular you can cut aset <strong>of</strong> patterns in paper, and use them to cut up your slab.Pinch potsPinch pots can be made entirely <strong>by</strong> hand, although a knifeand a turntable help create a neater finish. Similar to thepinch pot is what I call the "thumped pot". You get a thickplank, carve a concave shape in it, lay your clay in this andthump it with your fist. Thump it out thin, keep turning itround and shaping it, and you will make a pot.225
Crafts & SkillsSpinning Wool & CottonWOOLWool should be selected (or sheep should be selected) for thejob to be done. Different breeds <strong>of</strong> sheep give wool <strong>of</strong> varyinglengths <strong>of</strong> "staple" or fibre. Long staple wool is better thanshort for the hand spinner. Rough hairy wool is fine fortweeds and rugs: s<strong>of</strong>t silky wool for s<strong>of</strong>t fabrics like dressmaterial. <strong>The</strong>re are no hard and fast rules though.To turn raw wool straight from the sheep into yarn readyfor weaving you usually begin <strong>by</strong> "teasing" (see illustration)to straighten the wool out and get rid <strong>of</strong> dust, burrs and otherrubbish. <strong>The</strong>n you card (see illustration) to create "rollags",which are rolls <strong>of</strong> well-combed wool ready for spinning.Spinning (see illustrations) is done with a spindle, ahedgehogor a spinning wheel, and whichever it is the principle is thesame: to stretch and twist the straight fibres <strong>of</strong> wool fromyour rollags to make lengths <strong>of</strong> yarn ready for weaving orknitting. <strong>The</strong> subtle feature <strong>of</strong> a spinning wheel is that theendless twine which acts as a driving band goes over twopulleys <strong>of</strong> different sizes. This means that the bobbin and theflyer which the pulleys drive, revolve at different speeds. <strong>The</strong>flyer is therefore able to lay the yarn, as it is spun, on thebobbin at the right tension.RovingA <strong>self</strong>-supporting friend <strong>of</strong> mine wears the most flamboyantgarments, very warm and good looking and he makes thementirely from wool, with no other tools but five sticks and aneedle. He spins them on one stick and weaves them on theother four. Now it is possible to spin wool without carding itfirst. Instead you have to "rove" it, which can be done withthe hands alone. Take some teased wool in your left hand,release a little <strong>of</strong> it between your finger and thumb, and pull itout in a continuous rope with your right hand, but not pullingso hard that you break or disengage the rope. This is not aseasy as it sounds and it needs practice. When you have sopulled out all the wool, bend it double and do the wholeoperation again. Bend it double again (sometimes you mightlike to triple it) and go on doing this until you are satisfied thatit is fairly parallel and well teased-out. This is now a "roving"and you can spin it direct.Types <strong>of</strong> yarnFor weaving you generally use single-ply wool. <strong>The</strong> warp yarnshould be fairly tightly spun: the weft yarn less so. If youintend to knit with the yarn, double it. To do this put two full226
Crafts & Skillsbobbins on a "lazy kate", which is simply a skewer heldhorizontally at each end (two upright pegs will do just aswell), put the ends <strong>of</strong> the two yarns together, feed them intothe spindle on your spinning wheel just as if you were goingto spin, put them round the flyer (see illustration), tie them tothe spindle, and then turn the wheel backwards, or from rightto left. This will make two-ply wool. If you want three-ply dothe same thing with three bobbins.COTTONCotton is <strong>of</strong>ten "willowed" before being carded. In the westthis generally means being put in a string hammock andbeaten with whippy willow rods. <strong>The</strong> vibrations fluff out andclean the cotton very effectively. It is then carded just likewool, but it cards much more easily, the cotton staples beingmuch shorter.Spin it as if it were wool, but keep your hands muchcloser together, treadle more quickly, and don't hold thecotton back too much with the left thumb and finger or it willkink. Angora hair, if you can get it, is delightful stuff and canbe treated just like cotton. It makes amazingly s<strong>of</strong>t yarn, muchs<strong>of</strong>ter than most wool.Spinning with a hedgehogA hedgehog fits on to a treadle. lTiea string round the bobbin, loop overfirst two hooks, poke through and tieto your rollag. 2 Treadle, and pullunspun wool from your left handwith your right 3 When you have agood length <strong>of</strong> spun wool, stop treadling,move the string on to the nexthook, hold die outer bracket still andtreadle. <strong>The</strong> spun yarn will be drawnon to the bobbin.Teasing and carding1 To tease take raw wool and pullout small pieces. 2 Lay teased locksevenly over your left card. 3 Strokethe left card with the right until thefibres are well combed. 4 Transferfibres from left card to right. Comband transfer about five times. 5 Getall the wool on one card and roll it<strong>of</strong>f. Make a rollag, <strong>by</strong> rollinbetween the card backs or on a table.Spinning with a spindle1 Tiesomespunyarntoyourspindle,take a turn round the handle and tieto your rollag. 2 Spin the spindle. Pullunspun wool out between forefingerand thumb <strong>of</strong> your left hand. 3 Whenthe spindle reaches ground, haul it upwrapping the newly spun wool roundyour fingers. Transfer the spun woolback to the spindle. Spin anotherlength <strong>of</strong> wool. 4 Pull out the dowelsto release your wool.227
Crafts & SkillsDyeing & WeavingDYEINGStock dyeing is best for the <strong>self</strong>-supporter, that is dyeing thefibre in the skein before it is woven. It is easier thus to get aneven distribution <strong>of</strong> colour.Natural dyes will generally only dye natural materials: theywill not dye nylon and the other synthetics. But the rightnatural vegetable dyes, used with the correct "mordants",will dye any natural fabric with good and fast colours.(Mordants are chemicals which bite into the fabric and givethe dye something to fix on.) Although aniline dyes, whichare derived from coal tars and other strange chemical substancescan get close to natural colours they can never quitemake it. But if you want very brilliant colours, then you willprobably need artificial dyes.Some plant-derived dyes don't need a mordant, but mostdo. <strong>The</strong> mordants that you should be able to make for your<strong>self</strong>or come <strong>by</strong> very readily are vinegar, caustic soda andammonia. To get a greater range <strong>of</strong> colours you need substanceslike cream <strong>of</strong> tartar, alum, chrome (potassiumdichromate), tin (stannous chloride), and iron (ferroussulphate). Alum is the most useful one, and if that is the onlyone you have, you can still do a lot <strong>of</strong> dyeing.To mordant with alum heat 4 gallons (18 litres) <strong>of</strong> water,dissolve 4 oz (114 g) <strong>of</strong> alum and 1 oz (28 g) <strong>of</strong> cream <strong>of</strong> tartar ina little water and then add it to the 4 gallons (18 litres).Immerse 1 lb (0.5 kg) <strong>of</strong> clean, scoured (washed), dried woolin the form <strong>of</strong> a skein and simmer for an hour, stirringoccasionally. Lift the wool out and press gently.To prepare your vegetable dye cut up your vegetablematter into small pieces, let it stand in cold water overnightand boil it for an hour. <strong>The</strong>n add more water if necessary.You will need four gallons (18 litres) <strong>of</strong> dye for a pound (0.5kg) <strong>of</strong> wool. Drop wetted, mordanted wool into the dye all atonce. <strong>The</strong> dye should be warm. If it isn't, heat it. Leave thewool in for an hour, stirring occasionally very gently. <strong>The</strong>ntake it out and drain.A few materials that make strong colour are listed below,but the field is open to endless experiments.Yellow Bark <strong>of</strong> ash, elder, brickthorn, apple, pear andcherry; leaves and shoots <strong>of</strong> broom and gorse; privet leaves;onion skins (not very fast in sunlight though); marigoldflowers; golden-rod; Lombardy poplar leaves; lily-<strong>of</strong>-thevalleyleaves; bog myrtle leaves; dyers' chamomile; spindletree seeds; pine cones (reddish yellow); barberry roots andstems (no mordant required).Green Purging buckthorn berries; heather leaf tips; privetberries (a bluish green); bracken leaves; spindle tree seedsboiled in alum; elder leaves.Brown Walnut roots, leaves or husks <strong>of</strong> shells (no mordantrequired); slow or blackthorn bark (reddish-brown); boiledjuniper berries.Red Spindle tree seed vessels; blood root.Black Oak bark, which will dye purple if mixed with tin(stannous chloride). Oak galls make ink.Purple Bilberries are much used for tweeds in the Highlands<strong>of</strong> Scotland and are a fine dye (no mordant required);willow roots.Violet Wild marjoram.Orange Lungs <strong>of</strong> oak, Sticta pulmonacea (no mordantrequired).Magenta Lichen makes a magenta on the first dye andother colours as you enter successive dye-lots into the samedye. When the dye seems quite exhausted freshen it withvinegar and you will get a rosy tan.BLEACHINGFabrics can be bleached <strong>by</strong> soaking them in sour milk andlaying them in the sun. A mixture <strong>of</strong> chlorine and slaked limealso bleaches and is good for flax and cotton. Wool and silkcan-be bleached with fumes <strong>of</strong> sulphur. Simply hang theskeins over burning sulphur in an enclosed space.WEAVINGWeaving on a good hand loom is a magnificent accomplishment,and if you can do it you have made a big step towardstrue <strong>self</strong>-<strong>sufficiency</strong> Once you have the loom, and arepr<strong>of</strong>icient, you can achieve a considerable output <strong>of</strong> verygood cloth. Machine-woven cloth does not compare withhand-woven, nor have machines yet been devised that caneven imitate the hands <strong>of</strong> the weaver.Fasten four sticks in a square frame shape, tie lots <strong>of</strong>threads over them all parallel with each other (the "warp"),and haul another thread (the "weft") through the threads <strong>of</strong>the warp with a needle or sharpened stick, going over one andunder the next thread <strong>of</strong> the warp and so on. <strong>The</strong>n bring theneedle back with another-thread on it, going over the onesyou went under before. Keep on doing this and in no time youwill see your cloth appear.If you need to make cloth seriously you will soon findyour<strong>self</strong> inventing ingenious devices to make your taskeasier and your cloth better. Firstly you will devise a comb(see illustration) to poke between each pair <strong>of</strong> threads in thewarp and beat the threads <strong>of</strong> the weft together so that theweave is not too loose. You will have invented the ancestor<strong>of</strong> the "reed".<strong>The</strong>n you will find that it is tedious to go on threadingthe weft through with a needle and so you will invent anarrangement <strong>of</strong> two sets <strong>of</strong> strings, with loops in theirmiddles, hanging from sticks, and you will thread each thread<strong>of</strong> the warp through the loop in one <strong>of</strong> these strings, eachalternate thread going to a different set <strong>of</strong> strings from itsneighbours. You will have invented the "heddle". You will lifteach set <strong>of</strong> heddl es alternately, on a frame called the "harness"and it will leave a space called the "shed" between the twolots <strong>of</strong> threads. You will be able to throw your needle throughthe shed so that you can criss-cross, or weave, the threadswithout having to pick through each individual warp threadwith your needle.228
Crafts & Skills<strong>The</strong> square weaver<strong>The</strong> simplest loom is the 5-inch (13 cm) "square weaver". It makes 4-inch(10 cm) squares <strong>of</strong> cloth which can be sewn together as patchwork. Stringthe warp as shown below and weave the weft with a 5-inch (13 cm) needle.Design your own patterns on graph paper (right): on black squares theweft goes under, on white squares it goes over.Pattern withplain weaveSimple checksDiagonal weaveWarping frameBoat shuttleNext you will find it a nuisance having to attach a newweft thread to your needle each time. So you will carvenotches at either end <strong>of</strong> a stick and wind the thread round itin such a way that the stick can turn and release, or pay out,the yarn.You will have invented the "stick shuttle" (see illustration).As you get more inventive you may invent the "boatshuttle" (see illustration), into which you can drop a reel <strong>of</strong>thread, ready wound. You will soon find that, with all yournew gadgets, you quickly come to the end <strong>of</strong> your weavingframe and only have a small piece <strong>of</strong> cloth, so you will inventa roller at each end <strong>of</strong> your loom, one for rolling the threads <strong>of</strong>the warp on, the other for rolling the newly woven cloth on.This time you will have invented the "warp beam", or "warproller" (see illustration), and the "cloth beam" or "clothroller" (see illustration).You will find lifting the alternate harnesses up to form yourshed a nuisance, so you will connect the harnesses up to somefoot pedals with an elaborate arrangement <strong>of</strong> strings. Youwill have invented "treadles", with "marches" or "lamms"above them to transmit the motion to the harnesses.<strong>The</strong>n, if your life depends on weaving an awful lot <strong>of</strong> cloth,you will devise a sling device worked <strong>by</strong> a handle, which willfling the shuttle backwards and forwards through the warpwithout your having to touch it. By this time, you will haveinvented the "flying shuttle" and, believe it or not, you will be<strong>The</strong> four harness table loomA table loom takes up much lessspace than a floor loom and does allthe same things. It is a little slowerbecause the harnesses are operatedwith handles instead <strong>of</strong> pedals.Key1 Harness 4 Cloth beam2 Heddles 5 Shed3 Reed 6 Warp beamgetting dangerously near the Industrial Revolution.Now, when you come to thread your new patent loom upwith the warp threads you will find that it is so difficult thatyou nearly go mad, so you invent a revolving spool, a "warpingmill", to wind the threads <strong>of</strong> the warp around, or else arack, a warping frame (see illustration), with pegs that servethe same purpose.Finally you will realize that <strong>by</strong> having four harnessesinstead <strong>of</strong> two you can greatly vary the pattern formed <strong>by</strong> thewarp, for you can lift different combinations <strong>of</strong> warp threads.And <strong>by</strong> having two or more shuttles, with different colouredweft thread in them, you can alter the pattern in other ways.But to learn to weave you simply must get somebody whoknows how to do it to teach you: you cannot learn it out <strong>of</strong> a<strong>book</strong>, although a good <strong>book</strong> on weaving will help you.FINISHING CLOTH"Fulling" partially felts cloth and makes it denser andstronger. You do it <strong>by</strong> beating the cloth in water. Try puttingit in the bath and stamping on it hard. If you add "fuller'searth" you will fill up the pores <strong>of</strong> the cloth."Raising" is done <strong>by</strong> picking the surface <strong>of</strong> the cloth,'traditionally with "teazles", which are the heads <strong>of</strong> largethistles. You can <strong>of</strong>ten find them growing wild, or you cancultivate them your<strong>self</strong>. <strong>The</strong> effect <strong>of</strong> raising is to give thecloth a fluffy surface.229
Crafts & SkillsSpinning FlaxFlax is the most durable <strong>of</strong> all the fibres available to us.Man-made fibres haven't been invented long enough yet toknow whether they will outlast flax: my guess is they won't,for quite good-looking pieces <strong>of</strong> flax linen have been dug upin Egyptian pyramids and my corlene rope won't lasttwo years.<strong>The</strong> crop is harvested before the seed ripens which is a pitybecause it means losing the oil the seeds would ultimatelyproduce. It is pulled, not cut, then tied in sheaves and stacked.Preparing raw flaxFlax must first be "rippled" which means pulling the headsthrough a row <strong>of</strong> nails with their heads filed to points. Thisremoves the unripe seeds, which make a marvellous stockfood.<strong>The</strong>n flax is "retted" which really means rotted. Lay itin stagnant water for two or three weeks, until the fibroussheaf separates easily from the central woody portion. Youcan ret in running water but it takes much longer, or youcan spread your flax on grass for about six weeks and letthe dew do the job. After retting dry the flax carefully.<strong>The</strong>n you must "scutch" which is the process <strong>of</strong> breakingthe stems <strong>of</strong> the flax. Do this <strong>by</strong> beating the flax on a tablewith a broad wooden blade, or with a special "scutcher"."Hackling" is the next step, and consists <strong>of</strong> dragging theflax across a bed <strong>of</strong> nails to remove the "tow", which is allthe short fibres, and leave the "line" which is the long ones.<strong>The</strong> tow can be used for caulking deck seams on boats, orstuffing mattresses, or it can be carded and spun to make arather coarse and heavy yarn. <strong>The</strong> line can be spun to makelinen thread.To spin (you don't card line) you have to dress the line ona "distaff" which is simply a vertical stick, or small pole,which can be stuck into a'hole in a spinning wheel.Dressing a distaffDressing a flax distaff needs considerable skill. Put an apronon (if you don't happen to be wearing your long bombazineskirt), tie a string round your waist leaving the two ends afew inches long, and sit down. Take a handful <strong>of</strong> line, such asfalls naturally away from the larger bundle, and tie round oneend <strong>of</strong> it carefully with the two ends <strong>of</strong> the string round yourwaist and secure with a reef knot. Cut the two loose ends<strong>of</strong> the string. Lay the flax out full length on your lap withthe knotted end towards you. Hold the bundle with yourleft hand at the end furthest from you, pull a few fibres awayfrom the main bundle with your right hand, and lay them onyour right knee. Pull some more fibres away and lay themnext to the first few. Go on doing this until you have made athin, fine fan <strong>of</strong> flax on your lap. Remember that the endnearest to you is tied fast. Now grab the main bundle inyour right hand and reverse the process, laying a second fanfrom left to right on top <strong>of</strong> the first fan but be sure to pull fromthe same part <strong>of</strong> the main bundle. Go on doing this, alternatinghands and directions, until all the flax <strong>of</strong> the bundleDressing line on a distaffBefore it can be spun, line must bedressed on a distaff so that thefibres are separated out. You take ahandful <strong>of</strong> line and tie it at one endwith string which you have firstwound round your waist. Sit downand carefully spread out a series <strong>of</strong>fans <strong>of</strong> fibre on your lap, one on top<strong>of</strong> the other. Cut the knot, lay thedistaff on one edge and roll up thefans. Stand the distaff in its hole•..and tie with ribbon.has been laid out, in criss-crossing fan shapes, one on top<strong>of</strong> the other. As you work try to criss-cross the fibres, otherwisethey will not pull out properly when you come to spin.Now cut the string, take it away and slightly loosen thetop end <strong>of</strong> the bundle where it was tied. <strong>The</strong>n lay the distaffon one edge <strong>of</strong> the fan, with its top where the knotted stringwas. Wind the fan up on the distaff, winding very tightlyat the end nearest you but keeping the flax very loose atthe bottom <strong>of</strong> the distaff. <strong>The</strong>n put the distaff, with theflax fan round it, upright into its hole and tie the middle<strong>of</strong> a ribbon tightly round the top. <strong>The</strong>n criss-cross the twoends <strong>of</strong> the ribbon downwards round the cone <strong>of</strong> flax untilyou reach the bottom. Tie the two ends in a bow.Spinning flaxTake the yarn that you have already tied into the bobbin<strong>of</strong> the wheel and catch it in the flax at the bottom end <strong>of</strong>the distaff. Spin. Have a bowl <strong>of</strong> water <strong>by</strong> you and keepwetting your fingers so as to wet the flax. Use your left handto stop the spin from going up into the distaff, and yourright to clear knots and pull out thick threads. If you havedone your dressing operation right the line should steadilyfeed it<strong>self</strong> through the thumb and finger <strong>of</strong> your left handinto the spinning thread. Turn your distaff as required, and,when you have cleared the distaff as far as the bow in theribbon, untie the latter and tie it further up to expose morefibres. Keep doing this until you come to the very top <strong>of</strong> thedistaff and the last few fibres.230
Crafts & SkillsCuring & TanningAnimal skins become hard, like boards, when they have beenpulled <strong>of</strong>f the carcass and dried for some time, and then theyare good for practically nothing. Early on, mankind foundtwo ways to overcome this disadvantage: mechanicalmethods which produce rawhide, and chemical methodswhich produce leather.To make rawhide you must take hide straight <strong>of</strong>f the animaland begin working it before it gets hard. In this way you willbreak down the fibres which set to make it hard and it willremain permanently s<strong>of</strong>t. A great deal <strong>of</strong> working is needed.Eskimo ladies, we are told, do it <strong>by</strong> chewing the hide.Undoubtedly chewing, and working between the hands, forlong enough (probably pretty constantly for about a week)will do the trick.CuringI use a method which is part mechanical and part chemical tocure sheep-skins, fox skins, and especially rabbit skins, whichcome up beautifully. <strong>The</strong> end product is a cross betweenrawhide and leather.Wash your animal skin well in warm water and then rinseit in a weak borax solution. <strong>The</strong>n soak it in a solution <strong>of</strong>sulphuric acid made <strong>by</strong> mixing lib (0.5 kg) <strong>of</strong>saltwithlgallon(4.5 litres) <strong>of</strong> water and pouring in i ounce (14 g) <strong>of</strong> concentratedsulphuric acid. Don't throw the water onto the acidor you may lose your eyes and spoil your beauty.After three days and nights take the skin out and rinse it inwater and then in a weak borax solution. If you put it in thewashing machine and let it churn about for an hour or two somuch the better (after you have washed the acid out <strong>of</strong> it <strong>of</strong>course). Next hang it up and let it half dry.Take it down and rub oil or fat into the flesh side and workit. Scrape it and pull it about. Pulling it with both hands backwardsand forwards over the back <strong>of</strong> a chair is a good method.Leave it hanging over a chair and pull it about every timeyou go past. Rub more fat in from time to time. It will becomequite s<strong>of</strong>t and as good as tanned leather.TanningTanning with tannin is a purely chemical method, and the endproduct is leather. It takes half a ton <strong>of</strong> good oak bark to yielda hundredweight (50.8 kg) <strong>of</strong> tannin, and this will cure twohundredweight (101 kg) <strong>of</strong> fresh hides. Wattle, elder, birch,willow, spruce, larch and hemlock also contain tannin. <strong>The</strong>bark must be milled: that is pounded up small and soaked inwater. <strong>The</strong> hides must be steeped in the resulting solution for,from four months in the case <strong>of</strong> small hides, to a year in thecase <strong>of</strong> big ones. For really perfect results it is best to soakhides in a weak solution at first, putting them in increasingstrengths as the months go <strong>by</strong>.A fool-pro<strong>of</strong> method is to soak the hides in a weakishsolution for say a month, and then to lay them in a pit or tankwith a thick layer <strong>of</strong> bark between each skin. <strong>The</strong>n just coverthe pile with water. Leave like this for at least six months.A quick way <strong>of</strong> tanning a skin is the "bag method". Youmake a bag out <strong>of</strong> a skin (or take the skin <strong>of</strong>f whole). Hang thebag up, and fill it with tannin solution. After a week or two thehide should be tanned.To get the hair <strong>of</strong>f skins, lay them in a paste made <strong>of</strong> limeand water for three weeks, or in a lime-sulphide paste for a day.De-lime <strong>by</strong> washing in a weak vinegar solution.Sewing leatherSewing leather is as easy as sewing cloth: all you need are a fewlarge needles (sailmaker's needles are fine), an awl formaking holes in the leather and some strong waxed thread.Any thread dragged through a lump <strong>of</strong> beeswax is waxedthread. For stitches see illustrations.Stitching leatherYou need an awl to make holes, strong needles andtough waxed thread. <strong>The</strong> strongest stitch is theopposing stitch. Put a needle on each end <strong>of</strong> a longthread. Push one needle through the first hole andpull half the thread through. From then on pushboth needles through each hole, but from oppositedirections. <strong>The</strong> blanket stitch and the crossoverstitch are both good for light leather.Tapered lap seamCrossover stitchSeams in leatherUse the saddle seam or the standard lap seam if youwant strength above all else. <strong>The</strong> tapered lap seamlooks good, but is not so hard wearing. If your seam isto be exposed to wear, cut a groove for the stitches tosink into. When you have sewn the whole seam putbeeswax on and pound the stitches down into theleather to flatten them.231
Crafts & SkillsMaking Bricks & TilesIf you can help it, don't buy clay to make home-made bricks.Instead try the different clays on your land and in yourlocality. You are quite likely to find one that makes a goodbrick, and save your<strong>self</strong> a lot <strong>of</strong> money.When you have found it dig the clay and puddle it. Youcan do this <strong>by</strong> laying the clay in a pit, wetting it, and tramplingit for an hour or two with your feet. This method works verywell, but any way <strong>of</strong> well working the clay with water will do.<strong>The</strong>n, when the clay is <strong>of</strong> the right consistency, solid butmalleable, you can make bricks using the method illustrated.Drying and firing bricksIn countries with a rainless dry season the easiest way to drybricks is to lay them out in rows on level sand and justleave them. In rainier climes they must be under cover, andare usually piled up about six courses high, criss-cross toleave spaces for the air to circulate.Bricks must dry for anything from a week to a monthaccording to the climate, and then they must be fired. T<strong>of</strong>ire bricks you must build a clamp, which is basically arectangular pile, at least the size <strong>of</strong> a small room, made <strong>of</strong>bricks criss-crossed so as to leave cavities between them.<strong>The</strong>re are two ways <strong>of</strong> using the clamp. One is to leavefireplaces sufficiently large to contain fair-sized wood firesat roughly three foot (91cm) intervals on the two long sides<strong>of</strong> the clamp. <strong>The</strong>n you plaster the whole clamp with clayexcept for some small chimneys at the top <strong>of</strong> the leeward side,and light fires in the fireplaces on the windward side.If the wind changes block up the fireplaces on the newleeward side, open up the fireplaces on the new windwardside, and use them. <strong>The</strong> fireplaces can be rough arches <strong>of</strong>already burnt, or half-burnt, bricks, or false arches made <strong>by</strong>stepping bricks. After firing for a week let the fires go outand allow the clamp to cool. Open up, pull out the wellfiredbricks, and keep the half-fired ones to be fired again.<strong>The</strong> other method, which I think is easier and better, doesnot require fireplaces. Instead you fill the gaps between thebricks with charcoal (coal, anthracite or coke will do). <strong>The</strong>clamp can be smaller, seven feet (2.2 m) high <strong>by</strong> any widthor length you like. Plaster the whole clamp with mud exceptfor a hole at the bottom on the windward side and a holeat the top on the leeward side. Light a small wood fire inthe hole on the windward side and go away and forget it.<strong>The</strong> charcoal will quickly catch. After five or six days, when ithas cooled, open the clamp and take your bricks out. Youget more <strong>complete</strong>ly fired than with the other method.TilesTiles can be made <strong>of</strong> the same clay as bricks, but it must becarefully puddled and mixed. <strong>The</strong>y can be flat, or they can bepantiles, which have a convex and concave side, or theycan be, as most Mediterranean tiles are, half-cylinders. InSpain and Italy the latter are commonly tapered, because,it is said, in Roman times they were moulded on a man'sthigh. <strong>The</strong>se can be, and <strong>of</strong>ten are, made <strong>by</strong> throwing acylinder on a potter's wheel and splitting it in half beforedrying and firing. Any other tile must be made in a mould.Fire tiles in the same clamp as bricks and build it in sucha way that the bricks take the weight. Tiles are not strong.And don't forget they must have holes for nailing or pegging.Brickmaking: the essential toolsMost important is the mould which you should makeprecisely the right size to allow for the shrinkage <strong>of</strong>your particular clay. Make it from jointed wood and,if you want it to last, put a steel pin secured with abolt through each end. Make your bow <strong>by</strong> bending alength <strong>of</strong> hazel and stringing a wire across it. <strong>The</strong>cuckle is an excellent tool for moving large amounts<strong>of</strong> clay. Your sand tray should be deep enough toimmerse the mould in. You need a knife for cleaningthe mould and boards for drying bricks.232
Crafts & SkillsMaking bricks in a mouldA lot <strong>of</strong> time and practice has determinedthat bricks should measure 9inches (23 cm) <strong>by</strong> 4i inches (11 cm)<strong>by</strong> 2+ inches (5 cm). <strong>The</strong> length isdouble the width which is it<strong>self</strong>double the height. <strong>The</strong> whole isvery convenient for a man's hand.Depending on your clay and howmuch it shrinks, your mould mustbe marginally bigger in all its dimensions.So experiment and make amould to suit your clay.amount <strong>of</strong> clay and begin to form a"warp", a brick-sized lump.Throw die warp hard into themould so the clay spreads outtowards the corners.Cut <strong>of</strong>f excess clay <strong>by</strong> running yourbow across the top <strong>of</strong> the mould.Peel <strong>of</strong>f severed clay and return itto your pile.Work warp into the right shape <strong>by</strong>rolling on a board. Sand the boardand your hands to stop the claysticking to them.Clean the inside <strong>of</strong> your mould <strong>by</strong>scrapinground with a knife.Dip a length <strong>of</strong> wood in water anduse it to smooth over, or "strike",the top surface. <strong>The</strong>n sprinkle thetop with sand.Punch down into the clay to push itinto the corners and leave a hole inthe middle.Coat the inside <strong>of</strong> the mould withsand as you would a cake tin withflour, <strong>by</strong> dipping in sand and shaking.Gather the clay towards you (asshown above) roll the ends in anddrop it with a spinning action sothat it thuds on to the bench (asshown below). This is to knock outRam more clay into the hole andpress down as hard as you can.Pick up the mould and tap itscorners against the bench until yousee gaps on all sides <strong>of</strong> the clay.Take what you think is the right all the excess air.233
Crafts & SkillsWorking in StoneSome stone, particularly granite, is awkward for buildingbecause it does not split easily in straight lines. Other stone,most sedimentary stone in fact, has been laid down in layersunder water and therefore splits easily along horizontal lines,but they are not necessarily horizontal in the ground. <strong>The</strong>beds may have been tilted. Other stone still, which buildersand quarrymen call freestone, splits easily both horizontallyand vertically. This is what the builder is looking for and if hecan find it he is a very lucky man. Much <strong>of</strong> the oolitic limestonefrom Britain's Jurassic sea is like this, and it gave rise tothe superb school <strong>of</strong> vernacular building which stretchesfrom Dorset to Lincolnshire: the huge quarries <strong>of</strong> BarnackinNorthamptonshire having supplied much <strong>of</strong> the material forthe great gothic churches and cathedrals <strong>of</strong> Eastern England.<strong>The</strong> Jurassic limestone <strong>of</strong> the Isle <strong>of</strong> Portland is a freestonepar excellence as is Purbeck stone.Freestone can <strong>of</strong>ten be split out with wedges instead <strong>of</strong>explosives. Holes are drilled in a line along the rock, thewedges are driven in, in sequence further and further untilsuddenly the rock splits along the line. If you are splitting <strong>of</strong>fa big piece you can use "the plug and feathers". <strong>The</strong> feathersare two pieces <strong>of</strong> steel that you put down either side <strong>of</strong> a holedrilled in the rock. <strong>The</strong> plug is a wedge that you drive inbetween them. <strong>The</strong> advantage is that the feathers exert amore even pressure than the plug alone and so the rock splitsevenly when it comes away from the parent rock.Holes are driven in rock <strong>by</strong> a rock drill, which is a steel bitwith an edge like a chisel sharpened at a very obtuse angle.You either hit the bit in with a hammer, turning it betweeneach blow, or you drive it in with a percussion drill. You candrill the hardest rock in the world like this and in s<strong>of</strong>t rockgo quite quickly even with a hand hammer. Put water in thehole for lubrication, and get rid <strong>of</strong> the ground rock dust <strong>by</strong>splashing. Wrap a rag round the bit so you don't get splashedin the eye with rock paste.You can break out, subdivide, and dress to rectangle, anyrock, even the roughest and most intractable basalt orgranite: the harder the rock the harder the work. You canbuild with uneven, undressed boulders, and fill the inevitablespaces with - well, just earth, or earth and lime, or in thesedecadent days concrete made with cement so the rats can'tget in. But there will always be places where you need a solid,rectangular stone: doorsteps, lintels, hearth stones and othersimilar things.Slate is a metamorphic rock, which means it is a sedimentaryrock that has undergone great heat and pressure. <strong>The</strong>original layerings or laminations have been obliterated andothers have developed more or less at right angles to the first.It cleaves easily along these. Generally there are faults orweaknesses in large masses <strong>of</strong> slate more or less at rightangles to the laminations <strong>of</strong> the slate. <strong>The</strong>se make it possibleto break out large blocks without too much blasting. Slate isthe very best ro<strong>of</strong>ing material, and thicker slabs are ideal forshelves in larders.Handling the mason's toolsTo prepare stone you need nvotypes <strong>of</strong> chisel and hammer. <strong>The</strong>points and the edging-in chisel aregiven sharp, direct blows with asteel hammer. Claws and otherchisels must be given s<strong>of</strong>ter blowsso for these you use a woodenmallet.Edging-inTo help you control the edging-inchisel, place your thumb across it.Use small hard strokes keeping thechisel in position on the stone.Cleaving a large block <strong>of</strong> stoneMark round with a pencil. Drill andchisel deep V-shaped slots in thetop and sides. Crowbar the blockup and place a steel section belowFinishing a surfaceSkim rhythmically with the claw orchisel: lplace tool on surface; 2 hitfirmly with mallet; 3 draw backtool and mallet together and repeat.the future breaking point. Put steelwedges in the slots and hit insequence with a steel hammer,listening to the ring <strong>of</strong> the stone.It dulls as the stone cleaves.234
Crafts & Skills<strong>The</strong> mason's tools<strong>The</strong> heads <strong>of</strong> the claw and chisel arespecially flattened for use with thewooden mallet. <strong>The</strong> heads <strong>of</strong> thepoints and edging-in chisel roundover as they are hit repeatedly withthe steel hammer.Brush for dusting away chippingsnil"!' t. '•rj'KmSet squareWet and dry paperDressing stoneTo prepare a flatsmooth surface from anunprepared stone youmust follow five distinctprocesses.PointingUse points to knock <strong>of</strong>flarge lumps until onlysmall lumps remain.ClawingClaw in neat linesdiagonally across thestone, always workingaway from any edge.ChisellingChisel as thoughclawing.. Very littlestone need be removedto give a smooth surface.Usingcarborundum stoneTo smooth out chiselmarks, wet stone andrub surface with acoarse stone using acircular motion. Usewater to stop cliWet anddry paperingOn hard limestone,marble and granite, youcan get a polish <strong>by</strong>using wet and dry in thefollowing grades: 150,220, 320, 600 in thisorder. Use clean waterbetween stages to avoidscratching.
Working in StoneMasoning a block <strong>of</strong> stoneLevelling and edgingTo get a smooth surface on an unevenblock you must establish"draughts" or "datum lines''.Choose a rough plane for your proposedsurface <strong>by</strong> eye. <strong>The</strong>n masonyour first two "draughts", which aresimply strips chiselled down toyour chosen plane. Make themparallel to two edges <strong>of</strong> the block,so that they meet in a right angle inthe corner. Next join their ends t<strong>of</strong>orm a triangle and, if your block islarge, cut the triangle in half with afourth draught. <strong>The</strong>n with point,claw and chisel remove the"islands" thus formed. Use straightedge and square continually tocheck levels. Repeat the process onthe other half <strong>of</strong> the surface.To make a square edge use youredging-in chisel to inscribe a line onyour top surface. If there is a border<strong>of</strong> rough stone round your top surfaceinscribe the line inside it.Very carefully edge in along yourinscribed line using an edging-inchisel and a steel hammer. Take <strong>of</strong>f anarrow strip all the way along sothat you are left with a clean, sharpedge on your block.Join to comers and remove islands.<strong>The</strong>n with point, claw and chisel -and be sure, always, to use themin that order (see previous page,bottom right) - remove the centralisland. And remember: alwayswork away from the edge.Coping stoneYou "cleave" large stones (seeprevious page). You "cope", or split,smaller ones. You do this eitherwhen you want to take a small piece<strong>of</strong>f a stone to make it exactly theright size, or when you want to splita stone into two or more pieces.Simply <strong>by</strong> coping you can makerough fence posts, corner stones,anchors for fences and so on.stone, around the proposed breakingpoint.is horizontal. Get someone to holdthe stone otherwise lean it againstyour shoulder. Use a large bricklayer'scold chisel and place it in thenotch. Hit hard and repeatedlywith a steel hammer while movingthe chisel round the stone. Carryon until the ring <strong>of</strong> the stonebecomes deadened, or the stonefractures.Bricklayer's cold chiselFirst use your edging-in chisel toinscribe two parallel lines i inch(1 cm) apart on all four sides <strong>of</strong> theAgain using your edging-in chisel,inscribe a V-shaped channel abouti inch (2 cm) deep between thelines on all four sides. A stone willalways break at its weakest point, sobe sure your stone has no flawwhich will prove weaker than yourinscribed notch.Up-end the stone so that the notch236
Crafts & SkillsPitchingPitching is a method <strong>of</strong> removingstone from slabs <strong>of</strong> limestone orsandstone. You can use a specialblunt-ended chisel called a pitcher,though in fact any blunt chisel willdo the job.As with coping inscribe two lines2 inch (1 cm) either side <strong>of</strong> theproposed break on all four sides,and using your edging-in chisel cuta V-shaped notch approximately4 inch (2 cm) deep. Support thestone on the ground and lean itagainst your left shoulder. In thisway all the shock waves go throughthe stone and not into the wall, ortable or whatever you normallylean it against. It is vital that you getthe chisel at the right angle (illustrationright).<strong>The</strong> angle for pitching<strong>The</strong> pitcher or chisel should beheld against the stone at slightlyless than right angles, and given ahard blow. With limestone you willbe able to pare <strong>of</strong>f strips about 1inch (2 cm) thick; with sandstonethese will be IT inches (4 cm), ormore. Knock <strong>of</strong>f strips as necessaryso that your last strip takes youinto your notch. <strong>The</strong>n finish theedge <strong>of</strong>f with ordinary masonrytechniques.Cutting slate across the grainInscribe slate with two lines i inch(1 cm) apart. <strong>The</strong>n "stitch chisel",meaning drill a row <strong>of</strong> holes likeperforations, between the lines witha 4 inch (0.6 cm) tungsten masonrybit. Saw from hole to hole using amedium blade in a hacksawSmooth <strong>of</strong>f the edges with a dreadnoughtfile.Splitting a large slate slabTo split a large slab find the grainthat seems nearest to dividing theslab in half. Give a sharp tap with acold chisel against that grain halfway along each side <strong>of</strong> the slab.When you have walloped it on thefourth side the slab should spliteasily in half.Stitch chisellingMaking ro<strong>of</strong> slatesTake a thick piece <strong>of</strong> slate betweenyour knees, rest it on a steel pr<strong>of</strong>ileon the floor, whack it with a coldchisel and watch it split. Put asideone half and split the other. Carryon doing this until you have twoslates the right thickness. <strong>The</strong>n useup your pile <strong>of</strong> "halves".237
Crafts & SkillsWorking in MetalBLACKSMITHINGTo learn to be a proper blacksmith should take seven years,but you can learn to bend, shape and weld wrought iron in afew hours. To do it well takes practice though, and you willruin plenty <strong>of</strong> iron first. If you are planning to work with iron alot you need equipment: a forge, an anvil, a bench with atleast one good vice on it, and suitable hammers, and tongs.But I have done simple forge work <strong>by</strong> crawling about on myhands and knees in front <strong>of</strong> an Aga cooker, poking bits <strong>of</strong> ironinto the firebox, and hammering them on the head <strong>of</strong> a sledgehammer laid on the ground. A little knowledge may be adangerous thing but it helps sometimes.Blacksmiths work with ferrous metal and there are manykinds. Wrought iron is the blacksmith's classic material. It ismade from pig-iron (the stuff which runs out <strong>of</strong> the bottom <strong>of</strong>blast furnaces) <strong>by</strong> persistent heating and hammering. It hasenormous advantages for blacksmithing: you can shape it,split it, weld it, in fact treat it as if it w 7 ere clay or plasticine,provided you get it to the right temperature. When cold it ishard (but nothing like as hard as steel), tough and strong,ideal for much agricultural machinery 7 , chains, shackles, splitlinks,and the iron components <strong>of</strong> carts, boats, and buildings.It does not corrode easily.Malleable iron is only used for a few things, like the fingers<strong>of</strong> mowing machines, which have to be shaped when cold.Cast iron is what it says it is: cast in moulds. It is extremelyhard, but brittle. It will not stand hammering and it is no goodfor edge tools as the edge would just crumble <strong>of</strong>f, but it doesnot corrode easily.Steel comes in many forms and qualities. "Mild steel" ismuch used <strong>by</strong> blacksmiths nowadays because they cannot getwrought iron. It is nothing like so good because it is harder towork and it rusts easily.For forging wrought iron you need an ordinary blacksmith'sforge. This is a fire tray, or hearth, with a pipe, called atuyere, or tue iron, which blows air into the fire. <strong>The</strong> tuyerecommonly passes through a water bath before it reaches thefire so that it keeps cool enough not to burn away, but sometimesit simply passes through a massive piece <strong>of</strong> cast iron.Cast iron can stand great heat without melting or burning.<strong>The</strong> fire can be <strong>of</strong> coal, coke breeze or charcoal.If you use coal or coke, clinker will form, and hamper yourwork. Let the clinker solidify and remove it. Keep the fire assmall as possible <strong>by</strong> wetting the fuel around its centre, andplace the work to be heated in the heart <strong>of</strong> the fire. Draw wetcoal in sideways as needed: don't dump "green" coal on top<strong>of</strong> the fire. <strong>The</strong> blast can be provided <strong>by</strong> a bellows worked <strong>by</strong>hand, <strong>by</strong> an electric air pump, or <strong>by</strong> a vacuum cleaner turnedthe wrong way round so it blows instead <strong>of</strong> sucking but don'tuse more blast than you need.Different jobs require different degrees <strong>of</strong> heat.Blood red is for making fairly easy bends in mild steel.Bright red is for making sharper bends in mild steel, or forpunching holes and using the hot chisel in mild steel.Bright yellow is the heat for most forging jobs in wroughtiron, and for drawing down and upsetting (making thinnerand making thicker) both wrought iron and mild steel. It is alsoright for driving holes in or hot chiselling heavy work (iron orsteel more than an inch or 2 cm thick).S lippery heat is just below full welding heat and is used forforging wrought iron and for welding mild steel if it provesdifficult to weld it at a higher temperature. It takes speed andskill to weld steel at this heat.Full welding heat is for welding wrought iron and mostkinds <strong>of</strong> steel. When you reach it white sparks will be flung <strong>of</strong>fthe white hot metal making it look like a sparkler.Snowball heat is the temperature for welding very goodquality wrought iron, but it is too high for steel. If you gobeyond snowball heat you will burn your metal.TemperingTempering is the process <strong>of</strong> heating and then cooling metalto give it different degrees <strong>of</strong> hardness and brittleness. <strong>The</strong>general rule is that the higher you heat it and the quicker youcool it the harder it will be, but the more brittle.Whentempering a steel cutting tool you harden it first, <strong>by</strong> heatingit to somewherebetweenblack and blood red and then plungingit into water. When you have done this you temper it <strong>by</strong>heating it again, dipping the cutting edge into water so as tocool it, then letting the colours creep down from the rest <strong>of</strong> ituntil exactly the right colour reaches the edge and thenquenching it again.WeldingTo weld wrought iron or mild steel first get the metal to theright temperature. <strong>The</strong>n take the first piece.out <strong>of</strong> the fire,knock the dirt <strong>of</strong>f it and lay it face upwards on the anvil. Whipthe other bit out, knock the dirt <strong>of</strong>f it, lay it face downwardson the first bit and hit it in the middle <strong>of</strong> the weld with ahammer, hard. Keep on walloping it: on the flat if it is flatwork, around the beak <strong>of</strong> the anvil if it is, say, a chain link. Butall this has to be done very fast. If the weld hasn't taken put itin the fire again. If the centre has taken but not the outsides,fire again, or "take another heat" as blacksmiths say.To weld anything harder than wrought iron more modernforms <strong>of</strong> welding must be used. From the point <strong>of</strong> view <strong>of</strong> the<strong>self</strong>-supporter these are oxy-acetylene and electric arc.Neither <strong>of</strong> these are as formidable as they sound: every gypsyscrap-dealer uses oxy-acetylene and many a farmer has hisown small electric welding set and can use it too. But foreither gas or electric welding always wear goggles or a mask.It is possible to blind your<strong>self</strong> permanently if you gaze at anarc or a gas flame for more than a second or two, and it is veryeasy to do severe damage to your eyes.Oxy-acetyleneOxy-acetylene tackle consists <strong>of</strong> two pressure bottles, one <strong>of</strong>oxygen and the other <strong>of</strong> acetylene. <strong>The</strong> latter gas, in the238
Crafts & Skillspresence <strong>of</strong> oxygen, gives <strong>of</strong>f an intensely hot flame, and aflame, furthermore, that acts as a protection against oxidationfor the hot metal before it cools. <strong>The</strong> two gases arebrought together <strong>by</strong> pipes and then burnt at a nozzle. It is theinner flame that you must use - not the outer. <strong>The</strong> airn <strong>of</strong> thewelder is to melt rod metal and use it to fuse two metal facestogether, and also to fill in any spaces between them. Ideallythe edges <strong>of</strong> the steel plates should be bevelled where theymeet, and the space left filled with the rod metal.<strong>The</strong>re are two methods then <strong>of</strong> oxy-acetylene welding.One is "leftward", or "forward", welding. In this method therod, which is made <strong>of</strong> metal <strong>of</strong> more or less the same type asthe work to be welded, is held in the left hand and moved tothe left while the torch is held in the right hand and followsthe rod. <strong>The</strong> edges <strong>of</strong> the pieces <strong>of</strong> steel are pre-heated. Becareful not to keep the flame in one place too long, or themetal will be distorted. In "rightward", or "backward", weldingthe torch is moved to the right, and the rod follows it. Lessrod metal is used with this method, and it is considered betterthan leftward welding particularly for joining larger pieces<strong>of</strong> steel, anything over i inch (0.6 cm).Electric arcElectric arc welding is a simple matter <strong>of</strong> using a very highvoltage to create a spark at the top <strong>of</strong> a rod. Held between thetwo surfaces to be welded the spark melts them and also thetip <strong>of</strong> the rod. <strong>The</strong> material to be welded must be earthed. Youcan buy quite cheap and simple a.c. welding sets that work<strong>of</strong>fthe mains, and also portable sets that have a small motorto generate current for them.Sharpening tools<strong>The</strong> principle <strong>of</strong> sharpening is that, if it is just a freshening up<strong>of</strong> the edge you want, you use a "whetstone", but if the toolhas begun to lose shape then you put it on the "grindstone"first, grind it down to shape, and then hone it on the whetstoneafterwards. Whetstones come either as slipstones,which are shaped to be held in the hand, or as oilstoneswhich are mounted in a wooden box and used on a bench.Both should be oiled with thin oil when used. Grindstonesare coarser and are frequently circular and mounted with ahandle over a trough <strong>of</strong> water so that they can be kept wet.Most sharpening stones that you can buy nowadays areartincal with carborundum embedded in them. <strong>The</strong>y areundoubtedly better than anything except the best Arkansasstone, which is an almost pure quartz, grainless and hard.You must grind your cutting tools at the right angle. Thiswill be a compromise between the acute angle needed for easycutting and the obtuser angle needed for strength. Thus achisel to be whanged with a mallet must have a more obtuseedge than one to be used for delicate carving in the hand. Youcan buy a guide, or jig, to help set the angle.Using your anvilIf you want to work seriously withmetal you need an anvil. Most <strong>of</strong>your work will be done on theanvil's "face", the flat section at thetop. You should use the "table", theand just holding things. <strong>The</strong> longerthe handles, and the smaller thehead, the greater the leverage.chopping, because its surface iss<strong>of</strong>ter and will not suffer damage.<strong>The</strong> "beak", the long pointed bit, isfor wotking anything that needs acurved edge. To flatten metal, orremove marks made <strong>by</strong> a hammeror other tool, you should hold hotmetal on the face <strong>of</strong> your anvil withtongs, hold a flatter over it andwhack it with a sledgehammer untilyou achieve the desired effect.<strong>The</strong> hammer and pritehellTo make holes in any metal, andparticularly in horseshoes, youshould use a pritehell, which is asquare-handled punch. Again usethis on your anvil's face and hit itwith a heavy blacksmith's Warringtonpattern hammer (above), orwith a ball pane hammer. If youneed to make a large hole, do it overthe round hole in the "tail wedge"<strong>of</strong> your anvil to avoid damaging thetable underneath.Some <strong>of</strong>yourmost important toolswill be your pincers. You need themfor bending metal, pulling out nails<strong>The</strong> top and bottom swage<strong>The</strong> swages are for shaping circularrods from hot iron, or for bendingrods or pipes. <strong>The</strong> bottom swageslots into the square "hardie hole"in the anvil's tail wedge.Hot sett and cold sett<strong>The</strong> hot sett (left), with an edgesharpened to about 35 degrees,cuts hot metal. Place it on the metaland wallop with a sledgehammer.<strong>The</strong> cold sett (right), whose edge isabout 60 degrees, will cut light ironor mild steel cold.Leg vice and scroll wrench<strong>The</strong> best vice for a smithy is a legvice. It will stand up to heavyhammering because it is made <strong>of</strong>wrought iron, instead <strong>of</strong> the morenormal cast iron, and some <strong>of</strong> theload is transferred through the legto the floor. <strong>The</strong> front arm is heldon a hinge and is opened <strong>by</strong> aspring. <strong>The</strong> leg vice is excellent forbending metal, because the leg willstand up to heavy levering. A scrollwrench has rounded jaws for pullingstrip metal, especially wroughtiron, into curves. Quite intricatedesigns can be made with it.239
Crafts & SkillsBuilding & ThatchingRidge plateBUILDING<strong>The</strong> cheapest way to construct a solid building is to use mudand thatch, and don't be put <strong>of</strong>f <strong>by</strong> the way it sounds. Mudis rot-pro<strong>of</strong> and fire-pro<strong>of</strong>, and it keeps sound out and heatin pretty efficiently. Mud for building should be fairly free<strong>of</strong> organic matter, so dig it from well below the surface: fromtwo to three feet (61-91 cm) is best. Save your humus-ladentopsoil for growing things.Your building should be simple, with large areas <strong>of</strong>unbroken wall, few and small windows, all loads well spreadon timber plates, and no outward thrusting ro<strong>of</strong>s.An easy but effective method <strong>of</strong> building with mud is cobbuilding. Cob is simply clayey or chalky mud, mixed withstraw and laid in one foot (30cm) layers with a shovel andtrowel. Each layer is laid at a different angle from the onebelow it so that there is a certain amount <strong>of</strong> binding. <strong>The</strong> wallshould be at least 18 inches (46cm) thick, 24 inches (61cm)if your building is to be more than one storey. You cannotbuild very fast with this method, for each course has to dryout to some extent before the next one is laid on it. <strong>The</strong>resulting wall is only weatherpro<strong>of</strong> if you keep "its head andits feet" dry. In other words give your building a good overhangingro<strong>of</strong> and solid foundations using concrete ifpossible. And if you can, build a base wall <strong>of</strong> stone or brick,preferably with a damp pro<strong>of</strong> course (slate is imperviousto water and makes a good one), on top <strong>of</strong> your foundationsup to ground level. <strong>The</strong> outside too, should be protected<strong>by</strong> cement rendering if possible: otherwise with a lime andsand mortar rendering, or at least a thick whitewash. Brokenglass is sometimes embedded in the base <strong>of</strong> a cob wall todeter rats. Window sills must be protected <strong>by</strong> slate or otherstone or concrete.Rammed earth, or adobe, blocks are an improvement oncob because shrinkage takes place in the brick before the wallis built, you can make smoother surfaces and you can easilybuild cavity walls. <strong>The</strong> blocks are made <strong>by</strong> ramming a mudand straw mixture into wooden moulds. Dry them in theshade, so that they don't dry too quickly and crack <strong>The</strong> earthshould be, like brick earth, <strong>of</strong> just the right consistency for thejob: that is a benign mixture <strong>of</strong> clay and sand. <strong>The</strong> higher theclay content the more straw you should add, up to 20 percentstraw <strong>by</strong> volume.African hutTo make an African hut dig a circular trench, stand straightwall-high poles in it so that they touch one another and stampthem in leaving a space for the door. You can have one sectionshorter than the others if you want a window. <strong>The</strong>n on theground make a conical ro<strong>of</strong> <strong>of</strong> what is basically giant thatchedbasket-work. Get some friends to help you lift the ro<strong>of</strong> andlash it on to the circular wall. Plaster the pole wall with mud,preferably mixed with cow dung. If you rub the earth floorwith cow dung and sweep it every day it will become as hardand clean as concrete.Building with mud and thatchYou can build your<strong>self</strong> a warm andsolid house or barn mainly out <strong>of</strong>mud and straw. To make your buildinglast you should build foundations."Cyclopean concrete", whichis large stones embedded in concrete,is effective and fairly cheap.On top <strong>of</strong> this build a stone or brickwall to just above ground level andtop it with a damp course, ideally <strong>of</strong>slate. Walls can be built <strong>of</strong> "cob",which is mud mixed widi straw.Make your wall at least 18 inches(45 cm) thick, and lay in "courses"one foot (30 cm) deep. Allow twoor three weeks drying betweencourses. To keep rats out <strong>of</strong> yourhouse you can set broken glass inthe wall at ground level. Use slatesills and timber lintels for windows.Render die outside with cement orlime "rough cast", a lime and sandmixture. Apply two coats <strong>of</strong> pitchat the base to keep it dry. Top thewall with a timber wall plate and tothis attach your tie beams, whichrun right across from wall to wall.Each beam carries a king post,which supports the ridge and thestruts which in turn support dieprincipals. <strong>The</strong> purlins run dielength <strong>of</strong> the building from principalto principal and carry the rattersto which you nail the battens whichwill key your thatch. Secure thejoints with suitable strong boltsand straps.THATCHINGPhragmites communis, commonly called "Norfolk reed", isthe best thatching material there is. A good ro<strong>of</strong> <strong>of</strong> reed willlast seventy years. A ro<strong>of</strong> <strong>of</strong> "wheat reed" which is simplywheat straw that has not been broken in the threshing maywell survive twenty or thirty years. Wheat straw that has b eenthreshed and stored in a stack can be used for thatching ricks.To get it ready for thatching you "pull" it <strong>by</strong> hauling somedown to the foot <strong>of</strong> the stack and throwing several buckets <strong>of</strong>water on it. <strong>The</strong>n you pull the wet straw in handfuls from thebottom <strong>of</strong> the heap. Because the straw is wet the handfulscome out straight with the straws all parallel to each other.Lay the straws in neat piles about six inches (15 cm) indiameter. Tie these with twine or straw rope to make your"yealms". <strong>The</strong> secret <strong>of</strong> thatching is that each layer shouldcover the fastenings that tie down the layer below it, so thatno fastenings are visible or exposed to the weather. In practicethis means that each layer must cover just over three quarters<strong>of</strong> the layer below it.RicksRick thatching is fairly easy and uses comparatively littlematerial. You only need a coat <strong>of</strong> thatch two or three inches240
Crafts & SkillsThatching a ro<strong>of</strong>Always begin thatching at the eaves on the right hand side. Secure a shortrow <strong>of</strong> "yealms", straw bundles, to the ro<strong>of</strong> with "sways", lengths <strong>of</strong> bendyhazel held to the rafters with iron hooks. Gather the straw together at theupper end <strong>of</strong> each yealm <strong>by</strong> pushing in a "brortch". Keep laying rows <strong>of</strong>yealms, each overlapping the one below, until you reach the ridge. <strong>The</strong>nmove your ladder to the left and thatch another stretch <strong>of</strong> ro<strong>of</strong>. Carry onlike this until you have reached the ridge on both sides <strong>of</strong> the ro<strong>of</strong>.To thatch the ridge lay arow<strong>of</strong> yealms horizontally along it, and cover themwith more yealms folded over the ridge and secured on both sides withsways, brortches and hooks. You can use hazel sways to decorate the ro<strong>of</strong>.(5-8 cm) thick to shed the rain. Lay the straw or reed, earsupwards, in a row along the eaves <strong>of</strong> the rick. Hold this firstrow down with one or two lengths <strong>of</strong> string and hold thestring it<strong>self</strong> down with "brortches". <strong>The</strong>se are two foot (61 cm)lengths <strong>of</strong> hazel or willow (I prefer hazel), twisted in themiddle, bent into a hairpin shape and sharpened at bothends. Ram your brortches down over the string and bangthem into the rick with a mallet, so that they hold the stringdown tight. Space the brortches at the intervals that commonsense suggests (every thatcher has his own ideas). Now layyour next layer <strong>of</strong> straw so that it overlaps a little more thanthree quarters <strong>of</strong> the first layer and covers the strings. Pegthis down too with string and brortches. Go on, layer afterlayer, until you get to the top.You then have the problem <strong>of</strong> ridging. Make bundles <strong>of</strong>straw, about big enough to clasp in both hands, tie themtightly with string and lay them along the ridge <strong>of</strong> the rick.<strong>The</strong>n lay long straw over these bundles so that it overlapsthe top layer <strong>of</strong> thatch on both sides <strong>of</strong> the ridge. String andbrortch this down on both sides. Or, better still, use hazel orwillow rods instead <strong>of</strong> string here, and brortch them down.Make a pretty criss-cross pattern if you like. Of course with around rick you don't have a ridge, but a point, and this makesthe job much easier. It is a very simple matter to fashion aconical cap <strong>of</strong> straw and fasten it down with brortches.BuildingsYou can thatch a building with a comparatively thin layer <strong>of</strong>straw laid on, much as in rick thatching, pretty well parallelwith the slope <strong>of</strong> the ro<strong>of</strong>. This makes a watertight thatchprovided the pitch is steep enough but in a wet climate it isunlikely to last more than two years.Thick thatching is quite different (see illustration). <strong>The</strong>bundles <strong>of</strong> reed arelaid onmuch nearer the horizontal, so thatthe coat <strong>of</strong> thatch is nearly, but not quite, as thick as the reed islong. Such a ro<strong>of</strong> takes an enormous quantity <strong>of</strong> material, alot <strong>of</strong> time, the right equipment and a great deal <strong>of</strong> skill. Butif made <strong>of</strong> true reed, it will last a lifetime. It is <strong>complete</strong>lynoise-pro<strong>of</strong>, very warm in winter and cool in summer: in factit is, quite simply, the best insulation in the world.If you are building a mudhouse or a barn, you can userough, unsawn and unriven poles for the framework <strong>of</strong> thero<strong>of</strong>, and they don't have to be seasoned. Thatch is flexibleand if the timber moves it does not matter. <strong>The</strong> timber willseason naturally in the well-ventilated conditions <strong>of</strong> thethatched ro<strong>of</strong>, and generally last at least as long as the thatch.241
Crafts & SkillsWorking in WoodMaking a barrelWe take barrels for granted, and assume there will always beenough <strong>of</strong> them about for our purposes. Sadly there will notbe, because there are practically no coopers left in theWestern World and all the old sources <strong>of</strong> barrels are dryingup. And for the <strong>self</strong>-supporter there is just nothing to taketheir place. We need them for beer, wine, salt fish, pickledmeat, beans and other dried seeds: in fact for innumerablepurposes. In my experience you just cannot have enough.You cut an oak tree down, cut it into logs and rive (seep. 35) the logs into "billets" or rough planks (see illustration).Pile these up in stacks in the wood and cover them withleavesso that they dry slowly. You then cut the billets into "staves"with your axe and from these you make the barrel. After roughtrimming with the axe you shape the staves with a drawknifeand a "jigger" which hollows them out inside. <strong>The</strong> edges <strong>of</strong>the staves must be "shot" at exactly the right angle with aplane so that when they are pulled together they will fit perfectly.If you are making a "stout cask" (a heavy one) you mustboil the staves: for a "slight cask" they must be soaked.<strong>The</strong> two "heads", the ends <strong>of</strong> the barrel, are sawn out inthree or four pieces with a bow saw and the pieces aredowelled together. A groove is cut right round the inside <strong>of</strong>the staves for each head to fit into. Rushes called "flags" areput in these grooves to make the joints watertight. <strong>The</strong> hoopscan be iron, or wood. Yew wood is best for this. If you usewood you should put three rivetted hoops at each station,instead <strong>of</strong> a single iron one. You can make iron hoops <strong>by</strong>rivetting Moth inch (2 mm) mild steel in a circle, and taper them<strong>by</strong> hammering on one edge only with a hammer on an anvil.Putting the barrel together is called "raising it up". <strong>The</strong>staves are balanced together with their top ends touching andtheir bottoms splayed out. <strong>The</strong> top head is put in and the"raising-up hoop", one <strong>of</strong> the "chime" hoops (see illustration),banged on to hold them. <strong>The</strong> "ash runner" (a piece <strong>of</strong> round<strong>The</strong> parts <strong>of</strong> a barrelBarrels are made from billets split from a tree trunk (top left), preferably anoak. Staves (bottom left) are shaped from billets with an axe and draw-knifeand then hollowed with a jigger. <strong>The</strong> top and bottom, the heads 1, <strong>of</strong> thebarrel are made from sawn billets held together with dowels. <strong>The</strong> barrel issecured with three pairs <strong>of</strong> hoops, the chimes 2, the quarters 3, and thebooges 4- <strong>The</strong> wide point <strong>of</strong> the barrel is the pitch 5.ash, steamed and bent into a circle with its ends rivettedtogether), is put on over this and banged down. <strong>The</strong> wholebarrel is then put over a "cresset", which is an iron basket containinga fire. <strong>The</strong> fire s<strong>of</strong>tens the staves and makes it possibleto bend them. Bang down the ash runner so that it forces thestaves together. When you get it right down bang down asecond runner half an inch (1.2 mm) smaller in diameter thanthe first. Bang down the quarter and "booge" runners (seeillustration) for that end <strong>of</strong> the barrel. When the staves are asclose as you can get them in this way turn the barrel over, <strong>of</strong>fthe fire, work the other chime hoop over the bottom end, andbang that down. In this way the staves are brought together.Before they come right together put in the other head. <strong>The</strong>nbang on the other quarter and booge runners.When a new barrel is <strong>complete</strong> it must be pickled <strong>by</strong> beingfilled with concentrated brine and sodium carbonate. Thisneutralizes the tannic acid in the oak. Pickle it for three days,wash it out well and fill it with clear water for a day, wash it outagain and fill it. Use the same process if you have a "sour cask"(one in which beer or wine has turned to vinegar). If you get a"stinker" (an old barrel that stinks) you can cure it <strong>by</strong> picklingas above, or <strong>by</strong> burning an ounce or two <strong>of</strong> sulphur in it or, if itis really bad, <strong>by</strong> taking a head out and shaving i inch (3 mm)<strong>of</strong>f the inside. To take a head out bang hard on the chime hoop<strong>of</strong> the other end. <strong>The</strong>n knock the hoops <strong>of</strong>f the end where youwant to free the head.Obviously making a barrel is a fantastically complicatedjob and unless you are prepared to take weeks over it andmake several false starts you are well advised to watch, or gethelp from, a pr<strong>of</strong>essional cooper.Making a ladderUprights for ladders should be sawn out <strong>of</strong> a long, straight,clean-grained log ideally <strong>of</strong> ash, Scots pine, spruce or thuya.Rip the log in half with a rip-saw and rough saw the planks forthe uprights from each half <strong>of</strong> the log. <strong>The</strong> uprights for anyladder should be from the same piece <strong>of</strong> wood split in half.<strong>The</strong>y are, as it were, mirror-images <strong>of</strong> each other.<strong>The</strong> rungs should be oak or hickory <strong>The</strong>y are riven, orsplit out with wedges, then placed on the spoke-shave horseand spoke-shaved down. Pr<strong>of</strong>essional ladder-makers use a"stave block", which is like a large pencil sharpener, to shapethe ends <strong>of</strong> the rungs but you can do it with a spoke-shave oreven a draw-knife.Traditionally the uprights are marked <strong>by</strong> flipping a tautstring dipped in wax and lamp-black against them. This isquicker and better than trying to mark a pencil line on themwith a ruler. <strong>The</strong>n rough-trim them with an axe or an adze andthen plane. <strong>The</strong>y should be rounded on one side and flat onthe other. All ladders except thatchers' ladders are roundedonly on the outside. Thatchers like their ladders roundedon the inside so that there are no sharp corners to annoytheir knees.Drill the holes for the rungs nine inches (23 cm) apart,242
Crafts & Skillsand drill them right through the upright. Lay one uprightdown, clamp it in place and drive rungs into every hole. <strong>The</strong>yshould stick out the other side. Lay the upright with rungsattached on its side and fit the other upright to it. Bang thetwo uprights tight on to the rungs, and then put an iron rodthrough at each end to hold the ladder together. Saw theends <strong>of</strong> the rungs <strong>of</strong>f where they stick out.Making a latheA simple wooden foot-powered lathe can be made veryeasily, and although it works slowly it works as well as anyother lathe for wood-turning. <strong>The</strong> "chair-bodgers" <strong>of</strong> theEnglish woods worked them until very recent years.Plant two wooden uprights in the ground, or if you liveindoors attach them to the floor, about 3 feet (91 cm) apart.Six inch <strong>by</strong> four inch (15 cm x"10 cm) posts would be ideal.Nail a block <strong>of</strong> wood to each post, just at hand height andon a level with each other. Drill a hole in each block bigenough to take the ends <strong>of</strong> the "stock," which is the piece <strong>of</strong>wood to be turned. (You will have to whittle down the ends<strong>of</strong> this with a knife to make it small enough to fit the holes).Arrange a simple foot-pedal below. This can just be a piece<strong>of</strong> wood, held at one end <strong>by</strong> a pin which is supported ontwo short stakes.Arrange, a bendy horizontal pole <strong>of</strong> ash or other springywood above the contraption, so that one end sticks out andcan be bent up and down. You can use trees, stakes, or, if youare indoors, the rafters to support this pole. Tie a piece <strong>of</strong>rope, or rawhide, to the foot pedal, take one turn with itround the stock, tie the other end to the end <strong>of</strong> the whippypole. Nail another piece <strong>of</strong> wood across the posts next toyour stock to rest your chisel on, and you have a lathe.Depress the pedal and the stock turns one way, release itand the pole above your head straightens and turns it theother way. You only make your cut when it's turning theright way, <strong>of</strong> course.Wood turning is skilled work (see illustrations). If youcan, go and watch a skilled craftsman at work.Turning a bowl on a lathe<strong>The</strong>se pictures show a bowl beingturned on a simple lathe powered<strong>by</strong> electricity, but you can turn abowl in the same way on a treadlelathe, or, rather laboriously, on achair bodger's pole lathe (seeabove). If you use the latter youneeds be thicker than your screwsare long. Your work will be ruinedif you come down to a screw whenshaping the inside.Smooth <strong>of</strong>f the outside with yourscrapers. <strong>The</strong>n, keeping the bowlon the lathe, rub with sandpaper,which will give the wood a gloriouslysmooth finish.Take a block <strong>of</strong> wood, mark thecentre with a cross and draw a circlewith a compass slightly larger, say +inch (6 mm), than the intendeddiameter <strong>of</strong> your bowl.Round <strong>of</strong>t edges with a large gouge.must replace the stock with a rodfixed to a chuck to which the bowlcan be attached. For the heavywork<strong>of</strong> removing unwanted woodyou need three gouges <strong>of</strong> differingthicknesses (above right), and forthe more delicate shaping andsmoothing you need scrapers(above left). Never press hard withany tool, particularly a gouge. Ifthey stick you are in trouble. Keepyour tools sharp. Factory-builtlathes <strong>of</strong>ten have a revolvingsharpener built on. Otherwise usean oilstone.Cut roughly round your circle witha saw. <strong>The</strong>n establish the mid pointfor your chuck and screw it onevenly. Use short strong screws,because the base <strong>of</strong> your bowl mustShape the outside with a smallergouge. Use the handrest and keepthe gouge moving slowly along it.Move the handrest so that you canwork on the inside. <strong>The</strong> unbreakablerule for hollowing wood on alathe is: begin at the outside andwork towards the centre. Start witha gouge, then scrape with roundendedscrapers only, and finallysandpaper it smooth. Remove thechuck from the lathe, unscrew itand fill the holes with plastic wood.Polish the whole thing with beeswaxand glue felt on the bottom.243
Crafts & SkillsWells, Ponds & Fish FarmingSINKING A WELL<strong>The</strong> easiest way <strong>of</strong> finding water is to drill a hole with a drillingmachine, and if you can get hold <strong>of</strong> one it is well worth usingit. But they are expensive, even to hire, and all they really saveis time and energy. If you have got some <strong>of</strong> each to spare youcan dig your well your<strong>self</strong> <strong>by</strong> hand.In earth or s<strong>of</strong>t rockSinking a well in earth or s<strong>of</strong>t rock is very easy if laborious.You just dig in, keeping the diameter as small as you can, justleaving your<strong>self</strong> room to use a shovel. As you get deeper, yousend the spoil (dug earth) up to the surface in a bucket hauledup <strong>by</strong> a friend with a windlass, and you go up the same way. Itis almost always necessary 7 to line the well as you dig to stopthe earth from falling in. <strong>The</strong> easiest way to do this is withconcrete rings sent down from the top. As you dig down youdig under the lowest concrete ring which causes it to fall andall the other concrete rings on top fall with it. From time totime you put another concrete ring on top. Where timber ischeap you can use a timber lining on the same principle.In s<strong>of</strong>t sandSinking a well in s<strong>of</strong>t sand is very difficult, and can only bedone using the process <strong>of</strong> "spiling", which is hammeringsharpened planks down below you where you are working soas to form a lining which is already there when you dig allthe sand out.In rockSinking a well through rock is harder in that you have toblast it, but easier in that you probably don't have to line it.In days gone <strong>by</strong> the rock was shattered <strong>by</strong> building a fire on itand then quenching this with water. <strong>The</strong> rapid contractionshattered the surface <strong>of</strong> the rock. Nowadays we are morelikely to use explosives.Gunpowder will do, although you need a lot and it is a slowjob. Gelignite, or any <strong>of</strong> the modern detonating explosives,are much better. To use either you have to drill holes in therock. If you haven't got a compressor and pneumatic rockdrill you can do this <strong>by</strong> hand with a hand drill, which is ahardened steel bit, like a long cold chisel. Hold it in yourleft hand, wallop it with a four pound hammer, and turn it inthe hole after every wallop. If you don't turn it, it will jam. Toget the powdered rock out <strong>of</strong> the hole you must pour waterdown, which turns the powder into a paste which spurts outwith every blow. To stop it getting in your face wrap a clothround the bit at the collar <strong>of</strong> the hole.Drill four holes near the middle <strong>of</strong> your well floor to forma pyramid pointing down into the rock. <strong>The</strong>se are your "cutholes". Drill, say, eight more holes around these, this timevertically. <strong>The</strong>se are your "easers". <strong>The</strong>n drill holes all roundthe edge <strong>of</strong> your face. <strong>The</strong>se are your "slipers".Fill all the holes with "powder", which is the generic termminers and well-sinkers use for all explosives, light your fuses,and hope that your friend up top who winds you up with thewindlass is a real friend and doesn't decide to go away andhave a smoke instead.Gunpowder is set <strong>of</strong>f simply <strong>by</strong> lighting it, and if you can'tbuy a safety fuse, which does this job, you can make one your<strong>self</strong><strong>by</strong> sticking hollow goose feathers into each other, end toend, to form tubes and filling these tubes with gunpowder. Infact any kind <strong>of</strong> plastic or rubber tube filled with powder willdo just as well. Poke one end <strong>of</strong> the fuse into the gunpowderin the hole and light the other end. Presumably commonsense will have told you to test and time a fewfuses before youtrust your life to them. And remember with gunpowder anyspark will light it. A spark struck from a rock with a steel is allit needs, and, if it is in a confined space, it will explode.Gelignite, plastic H.E. (high explosive), and all the moderndetonants are quite different. If you light them they will onlyburn and make a stink. <strong>The</strong>y have to be detonated, and to dothis you need a cap full <strong>of</strong> fulminite <strong>of</strong> mercury, called adetonator. Take a measured length <strong>of</strong> safety fuse, cut one end<strong>of</strong>f straight and clean, put a detonator over this, and crimpthe detonator's metal case so it doesn't come <strong>of</strong>f (not withyour teeth, with pliers). <strong>The</strong>n cut the other end <strong>of</strong>f at anangle to expose the powder inside the safety fuse, lay a matchhead on this powder and strike the match with the box. Lightall the fuses thus and shout to your friend to start windingup the bucket. <strong>The</strong> cut holes must have the shortest fusesbecause they go <strong>of</strong>f first, then the easers and then the sliperswhich go <strong>of</strong>f last.Whichever way you sink a well, when you come to water goon sinking. Even if you have to spend half <strong>of</strong> each day windingup water in the bucket, go on sinking until the water beatsyou, because if you don't, when there is a drought and thewater table sinks, your well will go dry. When you have gotyour water the best thing you can do is install a steel pumpingwindmill (seep. 216)..Itwill pump water from a thousand feet(304 m) and go on doing it for years, free, and will need verylittle attention.MAKING A PONDIf you are going to keep ducks (see p. 128), or if you want to trythe highly rewarding process <strong>of</strong> fish farming you will need apond. You can just dig a hole, but if the bottom or sides areporous it will probably be necessary to puddle clay and tampit in so as to form an impervious sheet, or else bury a largesheet <strong>of</strong> thick plastic.Simply piling earth up in a bank to form a dam to impoundwater seldom works. <strong>The</strong> fill material may be too porous and"piping" will occur, meaning water will seep through anderode a hole. Or the material may contain too much clay andthere will be great drying, shrinkage and cracking. If the soil isjust right, and well compacted, and an adequate spillway totake <strong>of</strong>f the surplus caused <strong>by</strong> rainwater is constructed, asimple earth dam may work, but where there is doubt the damshould be made <strong>of</strong> porous soil with puddled and tamped clay244
Crafts & Skillsembedded in it. Nowadays plastic sheeting is sometimes usedinstead. If your pond is for fish farming then good topsoilshould be placed in the bottom for plants to grow on.FISHFARMINGFish are marvellously efficient producers <strong>of</strong> high proteinhuman food: far better in fact than other livestock. This isbecause they don't have to build a massive bone structureto support their weight (the water supports it), and they don'thave to use energy 7 to maintain their body heat (they are coldblooded). In the tropics, particularly in paddy-growing areas,they are a major crop. Modern commercial fish farming, inwhich only one species <strong>of</strong> fish is fed on expensive highprotein in water which is kept weed-free with herbicides, isecologically unsound and requires absurd inputs <strong>of</strong> expensivefeed or fertilizer. We should all start experimenting withwater ecosystems which achieve a proper balance <strong>of</strong> nature,and in which a variety <strong>of</strong>fish species can coexist with a crosssection<strong>of</strong> other marine life, both animal and vegetable.Strangely enough in the sixteenth century the matter wasfar better understood - even in England. At that time a writercalled <strong>John</strong> Taverner wrote that you should make largeshallow ponds, four feet deep and more, and keep them dryone year and full <strong>of</strong> water the next. When dry graze them withcattle, and when wet fill them with carp. <strong>The</strong> ponds growlushgrass because <strong>of</strong> the sediments left <strong>by</strong> the water, and the carpbenefit from the fertility left <strong>by</strong> the cattle. This is the trueorganic approach to husbandry. You should have at least twoponds so that there is akwa^s one. h\\l <strong>of</strong> hsh md owe dr^.Drain the wet pond dry in late autumn, and take the best fishout then to putin your stewpond near the house, where theyare ready for eating. Put a lot <strong>of</strong> young fish in your newlyfloodedbig pond.CarpCarnivorous fish, such as trout, are poor converters <strong>of</strong> foodinto flesh. Vegetarian fish are far better. This is why Tavernerand the monks <strong>of</strong> old in Europe had carp in their stewponds.Carp will give you a ton <strong>of</strong>fish per acre per year withoutany feeding if they are in a suitable pond. <strong>The</strong> way the monksfarmed them was to let them breed in large ponds, but then tocatch them and confine them to small stewponds near thehouse in the autumn. <strong>The</strong> stewponds were deep enough tokeep ice-free and the carp were therefore easy to net. As wellas being vegetarian, carp are healthy, quick growing, and theycan live in non-flowing water. <strong>The</strong>y need half their food fromnatural provenance, and can be encouraged <strong>by</strong> a certainamount <strong>of</strong> muck or rotting vegetation dumped in the water.This is transformed into the sort <strong>of</strong> food carp eat <strong>by</strong> bacterialaction, but they will also eat oatmeal, barley, spent malt andother similar food.<strong>The</strong> Hungarian strain <strong>of</strong> the Chinese Grass Carp has beentried in England, with success. In China these fish grow up to100 lbs (45 kg) in weight: in England 30 lbs (13.6 kg) is a goodfish, but they are fine converters <strong>of</strong> vegetable food. Unfortunatelythey need 122°F (51°C) to breed, and so are propagatedin heated tanks and released out <strong>of</strong> doors, wherethey flourish.Tilapia<strong>The</strong> best fish <strong>of</strong> all for fish-farming are the African Tilapia,but because they are tropical fish they need warm water.Nevertheless, putting your<strong>self</strong> out for them may well beworthwhile. Research has shown that the average familycould provide all its animal protein requirements in a 3,000gallon (13,640 litre) covered and heated pool full <strong>of</strong> Tilapia.<strong>The</strong> water should be about 80°F (27°C): less than 55°F(13°C) will kill them.Tilapia mossambica, which is one <strong>of</strong> the best <strong>of</strong> the manyspecies, can be bought from pet shops. <strong>The</strong> hen fish produceabout twenty five to thirty young, which live in their mothers'mouths for the first period <strong>of</strong> their lives, and the hens bring <strong>of</strong>fseveral broods a year. Much <strong>of</strong> their food can be supplied freewith a little labour <strong>by</strong> incubating pond water, slightly fertilizedwith organic manure, in tanks. After three weeks or amonth carefully pump this water into the tilapia pond withthe organisms that it contains. <strong>The</strong> incubation tanks shouldbe partially ro<strong>of</strong>ed with glass, but access for mosquitoes andother flying insects should be provided.In temperate climates Tilapia mossambica can be kept inheated pools, and they don't require constantly runningwater. A combination <strong>of</strong> solar heating and wind/electricheating has proved successful for growing them in America.<strong>The</strong>y will produce two tons <strong>of</strong> good meat per acre per year.When adult they will feed on algae or any vegetation youlike to put into the water (within reason) or they will eat oatmeal.When young they need protein, which can be suppliedm such forms as mosquito lawat, Tnaggots, VKOTOS, ot as (Ashmeat, or blood meal. <strong>The</strong>y are probably the most delicious <strong>of</strong>all fish to eat.TroutIn Berlin most <strong>of</strong> the city's sewage is discharged into hugelakes, where rainbow trout are reared to provide a colossaltonnage <strong>of</strong>fish per acre. Brown trout will not stand up to thistreatment. <strong>The</strong> sewage is not eaten <strong>by</strong> the trout, which arecarnivores, but <strong>by</strong> phytoplankton, which in turn are eaten <strong>by</strong>zooplankton, on which the fish feeds.If you want to farm rainbow trout you must give themsome kind <strong>of</strong> meat protein. You can buy proprietary troutfood but it is very expensive. If you have a source <strong>of</strong> verycheap sea fish you can use it for trout food. Salt any <strong>of</strong> the oilypelagic fish, pile them in stacks six foot high and put boardsand weights on them. This will expel the oil from them. Youcan then dry them in a kiln, powder them, and use them fortrout food.Several breeds <strong>of</strong>fish lend themselves to farming. A lot <strong>of</strong>success is had with American bluegills and catfish.245
Crafts & SkillsHousehold ItemsSOAP<strong>The</strong> first lion I ever shot had been eating a friend <strong>of</strong> mine'sdonkeys in Africa. It had a thick layer <strong>of</strong> fat on it, and myfriend's mother turned this into soap. She did it <strong>by</strong> the simplemethod <strong>of</strong> boiling the fat with caustic soda. It worked, butwas pretty rough stuff.<strong>The</strong> chemistry <strong>of</strong> soap making is to boil an alkaline withfat, which is an acid. <strong>The</strong> alkaline, or lye as soap-boilers call it,can be practically any alkali, and caustic soda will do. Butthere is a simple way <strong>of</strong> making your own lye. Knock someholes in the bottom <strong>of</strong> a barrel, lay some strawin the bottom,fill the barrel with wood-ash, and pour a bucketful <strong>of</strong> coldwater on top <strong>of</strong> the ash. Pour on a bucketful every three orfour hours on the first, third and fifth day. <strong>The</strong> water that dripsout <strong>of</strong> the bottom <strong>of</strong> the barrel will be lye.Now, to make soap take your fat and clarify it <strong>by</strong> melting itin a slow oven, straining it into cold water, and then skimmingit <strong>of</strong>f the water. If you haven't shot a lion practically any fatwill do: dripping, lard, chicken fat, goose fat and so on. Meltthe fat again, let it cool to hike-warm, and warm your lye toluke-warm at the same time. <strong>The</strong>n very slowly pour the lyeinto the fat (if you pour it too fast it will not mix) and stir itvery gently with a wooden spoon. When the mixture beginsto drip from your spoon like honey, stop pouring. <strong>The</strong>n if youwant to make your soap stronger pour in a solution <strong>of</strong> boraxand water (eight tablespoonfuls <strong>of</strong> borax to a pint (0.6 litres)<strong>of</strong> water) and a dash <strong>of</strong> ammonia. To half a gallon (2.2 litres)<strong>of</strong> soap mixture add a pint (0.6 litres) <strong>of</strong> the borax solutionand half a cup <strong>of</strong> ammonia. Put a board over the mixture,cover it with a carpet, leave until the next day and cut it.If you want a soap which will make you and your friendssmell good, take: 1 lb (0.5 kg) good fat or tallow; 1 cup oliveoil; 1 cup peanut oil; z cup water with 2 tablespoons lye in it;1 cup water with perfume in it.If the perfume is essential oil bought from the chemist, useabout three tablespoons <strong>of</strong> it, but you can make your ownperfume out <strong>of</strong> lavender, rosemary, lemon balm, or a score <strong>of</strong>other flowers or herbs, in which case you would probably addmore. Melt the fat, add the oils and the scent to it, and warmto 90°F (32°C) stirring all the while <strong>of</strong> course. Meanwhilemix the lye and the water and pour it into the fat and oilmixture and don't stop stirring. When the mixture thickenspour it into moulds <strong>of</strong> any fancy shape you like.Saddle soapTo make saddle soap take: 6 cups tallow; 1 cup lye; 1\ cupswater. Heat the tallow to 130°F (54°C). Dissolve the lye inthe water, cool it to 95°F (35°C) and pour it slowly into thetallow, stirring the while. Just before it is ready for mouldingpour in one cup <strong>of</strong> glycerine and stir.SUGARFrom sugar beetCut the tops <strong>of</strong>f your sugar beet and press the juice out <strong>of</strong>them any way you can: with a cider press, a car jack, or an oldfashioned mangle. Boil the juice until all die liquid has evaporatedand you will be left with unrefined sugar. Refining it is acomplicated process involving lime and carbon dioxide. Anywayit would be madness to refine this further, for unrefinedsugar is nourishing and meet for all the purposes <strong>of</strong> sugar,while refined sugar contains 99.9 per cent sucrose, absolutelyno vitamins, nor anything else that is <strong>of</strong> any use to body andsoul at all.From sugar caneSugar cane must be thoroughly crushed so as to producesyrup. Cane is tough stuff full <strong>of</strong> fibres, so you either need a lot<strong>of</strong> strength and a mortar and pestle, or a steel crushing mill.Put the syrup into a copper boiler, over a fire which you canfuel with the spent cane. Boiling turns the syrup into whatin India is called "gor", which is unrefined sugar. As I have saidabove it is a waste <strong>of</strong> time to refine sugar any further and it ismuch better for you like this.Maple sugarTo make this you must tap the sugar maple, in the chillymonth <strong>of</strong> March, <strong>by</strong> drilling the trunk and driving in a "spile",a short tube which you can buy or make your<strong>self</strong> out <strong>of</strong>bamboo, willow, sumac, elder or anything you can hollow.Hang a container under the spile (an old can will do, or abucket, or a plastic bag) and cover it to keep insects out.As soon as the sap runs carry it to the "arch": to leave it toolong is to spoil it. <strong>The</strong> "arch" is a boiler placed over a wood firethat needs to be kept blazing <strong>by</strong> a strong draught. <strong>The</strong> archmust be out <strong>of</strong> doors for a great deal <strong>of</strong> moisture is given <strong>of</strong>f.Don't let the sap get more than a couple <strong>of</strong> inches deep. Keepthe level <strong>by</strong> pouring in more sap. It is an advantage to havetwo boilers, and use one for the fresh sap and keep ladling thepartially boiled sap into the other from which you "syrup <strong>of</strong>f",meaning take the syrup.Skim the scum <strong>of</strong>f from time to time and watch constantlyto see that the sap doesn't boil over. If it starts climbing up thepan add some fresh sap, or drop some creamy milk on theclimbing froth, or draw a piece <strong>of</strong> fat across the bubbles. Testthe sap's temperature with a thermometer. When it is boilingat 219°F (104 C) it has turned into syrup. Strain it <strong>of</strong>f intojars, cover while hot andput away to cool. This is maple syrup.If you want sugar go on boiling until the temperature is242°F (U7°C), but if you pull a spoon out and the drip formsa thin spidery thread, that is boiling enough. Remove fromthe fire, leave to cool for a few minutes, then stir with awooden spoon. When the syrup begins to crystallize pour itinto moulds and you have sugar.SALTIf you live near the sea you can make salt <strong>by</strong> simply b oiling andevaporating sea-water. You can use driftwood for fuel andnowadays the oil spillage that coats most driftwood means it246
Crafts & Skillsgives even more heat. A mobile iron boiler, such as you boilpig-swill in is ideal. Never use a copper boiler. <strong>The</strong> copper andsalty sea-water will react against one another.PAINTVery good paints can be made from a mixture <strong>of</strong> sour milk,hydrated (slaked) lime, and any coloured earth pigment thatyou can find. <strong>The</strong> lime and the sour milk must have neutralizedeach other, and this can be tested with litmus paper: ifthe paper turns red add more lime, if it turns blue add moresour milk.<strong>The</strong> pigment that you add to this is any strongly colouredearth, sediment or clay. Dig it out and boil it in water severaltimes, each time in new water. Strain <strong>of</strong>f the water and dry- thesediment in a warm place. Pulverize it as finely as you can andstore. Mix this powder with the milk-lime mixture until youget the colour you want. Keen paint-makers keep an eye outas they travel about the countryside for any colourfullookingearth or clay, and grab it when they see it.PAPERIt is possible to make paper <strong>of</strong> any fibrous plant, or <strong>of</strong> wood, or<strong>of</strong> cotton or linen rags. Nettles, flax, hemp, rushes, coarsegrass, and tall fibrous plants like Tagetes minuta all make verygood paper.Ret the plants first <strong>by</strong> soaking them in stagnant water.<strong>The</strong>n chop them up as small as you can into, say half-inchlengths. Put the chopped material into a vat and cover with acaustic soda solution made up <strong>of</strong> two dessert spoonfuls <strong>of</strong>caustic soda per quart <strong>of</strong> water. Boil until the material is s<strong>of</strong>tand flab<strong>by</strong>. <strong>The</strong>n put it in a coarse sieve and drain. Hold thesieve under the tap, or plunge it up and down in a bath <strong>of</strong>water. This will clear the pulp away. If you want white papersoak the fibre you now have left in a bleach solution overnight.Otherwise the paper will be the colour <strong>of</strong> the materialyou are using. Drain the bleach <strong>of</strong>f through a fine-meshedsieve (you don't want to lose fibres).Next you must beat the material. You can do this with amallet, or with any kind <strong>of</strong> pounding engine your ingenuitycan devise. When you have beaten it thoroughly dry addsome water and continue beating the pulp. A large foodmixeror a large pestle and mortar will do very well for thisstage. During this process put some pulp in a glass <strong>of</strong> wateroccasionally and hold it up to the light. If there are still lumpsin it go on beating. If you want to make interesting papersdon't beat too long and your paper will have fragments <strong>of</strong>vegetation showing in it.You make the paper on moulds, which can be simplewooden frames covered with cloth. Cover the moulds with athin layer <strong>of</strong> pulp <strong>by</strong> dipping them into it and scooping. Asyou lift the mould out <strong>of</strong> the pulp give it a couple <strong>of</strong> shakes atright angles to each other. This helps the fibres to "felt", ormatt together. If you find the "waterleaf" which is what yoursheet is called, is too thin, turn the mould upside down, placeit in the vat, and shake the pulp <strong>of</strong>f back in the water. <strong>The</strong>nadd more fibre to your vat.Now, turn the mould upside down on a piece <strong>of</strong> wet feltand press the back <strong>of</strong> the cloth to make the watersheetadhere to the felt. Take the mould away, and lay another piece<strong>of</strong> wet felt on top <strong>of</strong> the watersheet. Repeat the operationswith another watersheet. Finally you need a press. Any kind<strong>of</strong> press will do. Make a "post" which is a pile <strong>of</strong> alternate feltsand watersheets and put the post in your press. Press for aday or so, then remove the paper from the felts and press justthe paper sheets. Handle the paper very carefully at thisjuncture. <strong>The</strong>n lay it out on racks to dry.RESIN, ROSIN and WOOD TARLong-leaf pine, maritimepine, Corsicanpine, Americanbalmor gilead, cedars, cypresses and larches can all be tapped fortheir resin.<strong>The</strong> best way <strong>of</strong> tapping is to clear a strip <strong>of</strong> bark, aboutfour inches (10 cm) wide and four feet (1.2 m) high, <strong>of</strong>f a largetree. This is called a "blaze". <strong>The</strong>n, with a very sharp axe, takea very thin shaving <strong>of</strong> true wood <strong>of</strong>f at the base <strong>of</strong> the blaze.Drive a small metal gutter into the tree at the base <strong>of</strong> this cutand lead the sap, or resin, into a tin. Every five days or s<strong>of</strong>reshen the cut <strong>by</strong> taking <strong>of</strong>f another shaving. When you canget no more out <strong>of</strong> the first cut make another just above it.Keep on doing this until you have incised the whole blaze,which may take several years. Don't tap between Novemberand February. If you grow conifers for tapping, clean the sidebranches <strong>of</strong>f the young trees so that the trunks are cleanfor tapping.If you distill resin - in other words, if you heat it and condensethe first vapour that comes <strong>of</strong>f it - you will get turpentine."Rosin" is the sticky stuff that remains behind and it is goodfor many things including violin strings, paints and varnishes.If you heat coniferous wood in a retort, or even just burn itin a hole in a bank, a black liquor will run out <strong>of</strong> the bottom.This is wood tar, and it is the best thing in the world forpainting boats and buildings.CHARCOALCharcoal is made, quite simply, <strong>by</strong> burning wood in thepresence <strong>of</strong> too little oxygen. In other words you set somewood alight, get it blazing well and right throughout its mass,and then cut <strong>of</strong>f the air. Ihave tried many ways <strong>of</strong> doing it and Ihave come to the conclusion that the simplest and best is todig a large trench, fill it up with wood and set light to it. <strong>The</strong>nwhen it is blazing fiercely throw sheets <strong>of</strong> old corrugated ironon to start smothering the fire and then very quickly, andyou will need perhaps half a dozen helpers, shovel earth ontop <strong>of</strong> the corrugated iron so as to bury it <strong>complete</strong>ly. Leavefor several days to cool, then open up and shovel thecharcoal into bags. You can use the charcoal for cooking fuel,for making bricks (as I described onp. 232), or anywhere elseyou need a slow-burning fire.247
Crafts & Skills<strong>The</strong> All - Purpose FurnaceFirewood is a renewable resource, and the best solar energycollectorin the world is a stretch <strong>of</strong> woodland. Woodlandcut for firewood should be coppiced (see p. 35). In otherwords the trees should be cut right down every ten to fifteenyears, depending on how fast they grow, and the stumpsleft to coppice, or shoot again. Cut over systematically inthis way two or three acres <strong>of</strong> woodland will yield a constantsupply <strong>of</strong> good firewood and other timber.To burn wood effectively and economically requiresseveral things. <strong>The</strong> wood must be burned on the floor <strong>of</strong>the furnace: not on a grid. <strong>The</strong> fire must be enclosed andthere must be a means <strong>of</strong> carefully regulating the draught.A huge open fire is a romantic thing, but all it does is cheerthe heart, freeze the back and heat the sky. Where wood is inlimitless supply it may be justified, but not otherwise.It is an advantage to burn wood in a dead end, admittingair from the front only. A tunnel with the back walled <strong>of</strong>fis ideal. Logs can be fed into the dead end tunnel and lit atthe end nearest the door, and the fire then slowly smouldersbackwards into the tunnel. <strong>The</strong> draught control should besuch that you can load the tunnel right up with dry logs,get a roaring fire going, and then actually put it out <strong>by</strong>cutting <strong>of</strong>f the air. If you can feed your furnace from outsideyour house you will avoid a lot <strong>of</strong> mess inside. And if youcan organize things so that your furnace can take long logs,you save an awful lot <strong>of</strong> work sawing.Now any decent economical furnace should be capable<strong>of</strong> doing at least four things: space heating, oven baking,hot-plate cooking, and water heating, and if it can smokemeat and fish as well so much the better. We have built afurnace that will do all these things on my farm, and as thefarm is called Fachongle I call it the Fachongle Furnace.But don't try to build one the same unless you know youcan get, for not too much money: firebricks, a cast iron platebig enough to cover the whole furnace, and a massivecast iron fire door.Building a furnaceWe built a firebrick tunnel, four feet (1.2 m) long insidethe house. It is bricked <strong>of</strong>f at the back, but the front fallsfour inches (10 cm) short <strong>of</strong> the exterior house wall. <strong>The</strong>house wall there is lined with firebricks. On either side <strong>of</strong>the tunnel we built a brick wall slightly higher than thetop <strong>of</strong> the tunnel. <strong>The</strong> bases <strong>of</strong> these need not be <strong>of</strong> firebrick,but the tops must be to withstand the heat. On top <strong>of</strong> thetwo outer walls we laid a steel plate. (This has since warpedslightly which is why I advise you to get a cast iron plate.)This goes from the back <strong>of</strong> the furnace right to the wall <strong>of</strong>the building. On top <strong>of</strong> the steel plate away from the wall<strong>of</strong> the building we built an oven, and at the very furthestend from the wall we built a chimney. We knocked a holein the outer wall and in that set a furnace door with firebricks.<strong>The</strong> furnace is fed through this door, and the heat andsmoke has to come back to the front end, curl up throughthe four inch (10 cm) gap, hit the iron plate, curve backand go under the oven and on up the chimney.Now we built a back boiler into the back wall <strong>of</strong> thetunnel, and the pipes from it come back between the tunnelwall and the outer wall, and then come out through twoholes in the latter. We partially filled the cavity betweentunnel and outer walls with sand to insulate and store heat.<strong>The</strong> boiler <strong>of</strong> this particular furnace has to supply:kitchen, dairy, brewery, laundry and bathrooms, and thisit does provided a good fire is kept up. To provide that muchhot water with an electric immersion heater would cost afortune. We are intending to preheat the water with a solarro<strong>of</strong> in due course so that in the summer, when we don'tneed so much heat indoors, we won't have to keep such alarge fire.A refinement, which is not <strong>complete</strong>ly necessary, is thatsome <strong>of</strong> the smoke and heat comes through a slit cut in theiron plate and so travels up the back <strong>of</strong> the oven, which ishollow, and over a steel plate which forms the top <strong>of</strong> theoven. <strong>The</strong> oven bakes magnificent bread providing there isa hot enough fire in the furnace.Making charcoal in a furnaceOne advantage <strong>of</strong> a Fachongle Furnace is that it will makecharcoal. If you get a big fire going in it and then close thedraught right down, the fire goes out and the wood turnsto charcoal. A final attraction is the smoke chamber whichwe have built over the oven. It is too hot in there for hamor bacon but marvellous for "cook smoking" fish or meat.<strong>The</strong> Fachongle Furnace is a good example, I think, <strong>of</strong> thenew attitude that we people who call ourselves <strong>self</strong>-sufficienthave to adopt. We must learn again to trust our ownintuition and judgment, and not always run to the "experts"or specialists. We must learn to improvise and make do withthe resources we can get for nothing if we use our eyes,hands and brains. A commercially-produced furnace on thescale <strong>of</strong> the Fachongle Furnace would cost a thousandpounds. Our furnace is not perfect, but we are improvingon it. You can only really succeed as a <strong>self</strong>-supporter if youare prepared to adapt, experiment and try your own ideas.As you go on you gain confidence in your own ability todo things for your<strong>self</strong>, and this is one <strong>of</strong> the most satisfyingaspects <strong>of</strong> the <strong>self</strong>-supporting way <strong>of</strong> life.Many <strong>of</strong> the things that we look upon as far too difficultto be done <strong>by</strong> anybody but a specialist are not difficult atall once we actually come to do them. I think <strong>of</strong> an old friend<strong>of</strong> mine who was living in the remote outback in SouthernAfrica, and who suddenly found him<strong>self</strong> unable to buypetrol because <strong>of</strong> the Depression. He invented, and builthim<strong>self</strong>, a "producer gas" plant to go on the back <strong>of</strong> hisold lorry, which he was then able to drive on charcoal.It worked. It was an apparently impossible task he sethim<strong>self</strong> to do and he did it. We should pr<strong>of</strong>it <strong>by</strong> his example.248
Crafts & SkillsKey1 Damper2 Oven door3 Hot plate4 Fire box door5 Draught control6 Smoking box7 OvenWater pipes9 Smoking box door10 Access door11 Flue passage12 Sand filling13 Firebrick14 Back boiler15 Fire boxA versatile furnace which you can build your<strong>self</strong>We designed and built the Fachongle Furnace with the idea <strong>of</strong> getting asmuch benefit as we could from burning wood. <strong>The</strong> furnace gives us: spaceheating for a large area, a lot <strong>of</strong> very hot water, a hot plate and oven forcooking, and a smoke chamber. We burn the wood in a tunnel made fromfirebricks. <strong>The</strong> back is closed <strong>of</strong>f and contains the back boiler for water.<strong>The</strong> front comes almost up to a hole in the house wall where we have built afire door so that the furnace is fed from outside. We built brick walls eitherside <strong>of</strong> the tunnel right up to the house wall, and rested a steel plate acrossthem. <strong>The</strong> front <strong>of</strong> the plate serves as a hot plate, and over the back we havebuilt an oven. <strong>The</strong>re is a slit in the steel plate so that heat circulates rightround the oven. At the very back is the chimney which widens out above theoven to form the smoke chamber. Heat from the fire comes forward along thetunnel, curls up under the hot plate and oven, and on up the chimney. It isquite likely that your requirements will be different and will necessitate amodified design.249
Useful AddressesGeneralAgricultural Development and Advisory Service(agricultural and science), Great WestminsterHouse, Horseferry Road, London SW1P 2AE.Probably the best place for the would-be <strong>self</strong>supporterto begin. As well as the London headquarters,regional <strong>of</strong>fices all over the UnitedKingdom provide advice and pamphlets on everyagricultural subject. If you are thinking <strong>of</strong> buying,clearing or draining land, <strong>of</strong> suitable equipment andbalanced livestock, start <strong>by</strong> getting advice and helpfrom this Government department. Pamphletsfrom: Ministry <strong>of</strong> Agriculture, Fisheries and Food(Publications), Tolcarne Drive, Pinner, MiddlesexF1A5 2DT. (Single copies free.)Ministry <strong>of</strong> Agriculture, Fisheries and Food, WhitehallPlace, London SW1A 2HH (for advice and informationon all general aspects <strong>of</strong> farming)<strong>The</strong> Self-Sufficiency and Small Holding Supplies,Priory Road, Wells, Somerset (for a large variety<strong>of</strong> useful items)Food from the FieldsWright Rain Ltd, Crow Arch Lane, Ringwood,Hampshire BH24 1PA (for irrigation equipment)Forestry Commission, 25 Savile Row, LondonW1X 2AY (for advice and pamphlets onwoodland)<strong>John</strong> Scott, Royal Nurseries, Merriot, Somerset (foryoung trees, as well as a variety <strong>of</strong> garden shrubs)J.H.B. Implements Ltd, Ickburgh, nr. Mundford,<strong>The</strong>tford, Norfolk (for ploughs and tractors)Russells Ltd, Agric. Engs., Engineering Works,Railway Bldgs, Kirk<strong>by</strong>moorside, Yorkshire (for the"Exel" precision seed drill)R. Hunt and Co Ltd, Atlas Works, Earls Colne,Colchester, Essex (for the "Atlas" hand mill)Semplex Home Brews Ltd, Old Hall Works, StuartRoad, Birkenhead (for beermaking equipment)Food from Animals<strong>The</strong> British Goat Society, c/o Secretary, Rougham,Bury St Edmunds, Suffolk (for buttet chums,milking, buckets, milk cartons etc)Clares Carlton Ltd, Town Hall Bldgs, Wells,Somerset (for all dairying equipment)Hansen's Laboratory Ltd, Rennet Manufacturers,476 Basingstoke Road, Reading (for starters andpure cultures for cheesemaking)*Fred Ritson, Goat Appliance Works, Longtown,Carlisle (for goats and information on goats)C. N. Flack & Co Ltd, Home Farm, Culford, BurySt Edmunds, Suffolk (for large white pigs)Pig Breeders Supply Co Ltd, Checkendon, Reading,Berkshire (for housing, equipment, etc to do withPigs)Stanley Brown and Son, Poultry Farm, Chearsley,nr. Aylesbury, Bucks (for poultry)May field Chicks Ltd, Bunkers Hill, Colne, Lancashire(for young poultry)<strong>John</strong> Inkstei- Ltd, <strong>The</strong> Chippings, Chigwell Row,Essex (for chicken litter)E. H. Thome Ltd, Beehive Works, Wrag<strong>by</strong>, Lincolnshire(for bee equipment)Food from the GardenHenry Doubleday Association, Bocking, Braintree.Essex (for general information on soil and organicgardening)Humus Products Ltd, Brunei House, St GeorgesRoad, Bristol 1 (for soil analysis and composts)J. Gtfebs Ltd, Starwell Road, Bedfont, Middlesex(for a large range <strong>of</strong> market garden tools)Jiffy Pot (UK) Ltd, Trulls Hatch, Rotherfield,Crowborough, Sussex (for peat pots)Stoke Lacy Herb Farm, Bromyard, Herefordshire(for seeds)<strong>The</strong> Old Rectory Herb Garden, Ightham, Kent (forseeds and young plants)<strong>The</strong> Amateur Winemaker, North Croye, <strong>The</strong>Avenue, Andover, Hampshire (for winemakingequipment and advice)Food from the WildASI, Importers and Wholesale Distributors,Alliance House, Snape Maltings, Saxmundham,Suffolk (for a wide range <strong>of</strong> guns, although topurchase any gun you must have a licence and gothrough a dealet)Bridport Gundry Ltd, Net, Line, Twine Mfrs, <strong>The</strong>Court, West St, Bridport, Dotset (for fishing nets)Natural EnergyUniversity <strong>of</strong> Cambridge, Department <strong>of</strong> Architecture,1 Scrope Terrace, Cambridge (for bulletins onall forms <strong>of</strong> alternative technology)Intermediate Technology Development, PamellHouse, 25 Wilton Road, London S Wl (for generalinformation on alternative technology)Tne National Centre for Intermediate Technology,Corwen, Machynlleth, Wales (for general informationon alternative technology)Gilbert Gilkes and Gordon Ltd, Turbine Mfrs,Kendal, Cumbria (for water power machinery)Kent Solartraps Ltd, 10 Albion Place, Maidstone,Kent (for information on solar heating and a widerange <strong>of</strong> panels)Conservation Tools and Technology, 143 Maple Road,Surbiton, Surrey (for a range <strong>of</strong> electriciry generatingwindmills)Wind Energy Supply Co, Bolney Avenue,Peacehaven, Sussex (for oil pumping and electricwindmills)WhyattBrotKers Ltd, Wayland Works, Whitechurch,Salop (for a variety <strong>of</strong> windmills)Crafts & SkillsW. Gads<strong>by</strong> and Son (Burrowbridge) Ltd, BurrowbridgeBasket Works, Burrowbridge, Bridgwater,Somerser (for willow as well as cane)Catterson-Smith Ltd, Furnace Mfrs, WoodrolfeRoad, Tollesbury, Maldon, Essex (for electric kilns)Cromartie Kilns Ltd, Dividy Road, Longton, Staffs(for electric kilns)Wengers Ltd, Gamer Street, Etruria, S.toke-on-Trent(for all pottery equipment and supplies)Harris Looms, Northgrove Road, Hawkhurst, Kent(for looms)Jacobs, Young and Westbury Ltd, J.Y.W. House,Bridge Road, Haywards Heath, Sussex (for rushesand loom cord)<strong>The</strong> Weaver's Journal, c/o Federation <strong>of</strong> BritishCrafts Societies, 80A Southampton Row, LondonWC1B 4BA (for information and suppliers)T. J. Willcocks, Wheatcr<strong>of</strong>t, Itchingfield, Horsham,Sussex (for wool carders and spinning machines)Frank Herring and Sons, 27 High West Street,Dorchester, Dorset (for spinning wheels)Eliza Leadbeater. Rookery Cottage, DalefordsLane, Whitegate, Near Norfhwich, Cheshire (formordants and dyeing equipment as well as dyes)Moordown Leather and Crafts, 923 WimborneRoad, Moordown, Bournemouth, HampshireBH9 2BJ (for leather and leather-working tools)<strong>John</strong> P. Milner Ltd, 67 Queen Street, Hitchin,Hertfordshire (for leather and tools)Tirana, Sculptors' Tools & Materials, 21 GoodgePlace, London Wl (for all stone masonry tools,as well as clay)Macready's Mewl Co Ltd, Usaspead Corner,131 Pentonville Road, London Nl (for steel)Buck and Ryan Ltd, 101 Tottenham Court Road,London Wl (for metal-working tools)General Woodworking Supplies, 76/80 StokeNewington High Street, London N16 (for widerange <strong>of</strong> British and imported woods)World <strong>of</strong> Wood, Industrial Estate, Mildenhall,Suffolk (for wood and all things to do with wood)Wood Components Ltd, Newbum Bridge Road,Ryton Industrial Estate, Blaydon-on-Tyne,Co. Durham NE21 4TB (suppliers <strong>of</strong> wood forturning)R. J. Woodley, <strong>The</strong> Falls, Exeter Road, NewtonPoppleford, Devon (for kick-wheels)250
Useful ReadingGeneralSelf-Sufficiency<strong>John</strong> and Sally <strong>Seymour</strong>/Faber<strong>The</strong> Fat <strong>of</strong> the Land<strong>John</strong> <strong>Seymour</strong>/FaberFood from the FieldsElements <strong>of</strong> AgricultureW. Fream/<strong>John</strong> MurrayOrganic FarmingHugh Chorley/FaberFertility without FertilisersLawrence D. Hills/Henry DoubledayAssociation, Bocking, Braintree, Essex<strong>The</strong> Horse in the FurrowGeorge Ewart Evans/FaberOld Farm ImplementsPhilip A. Wright/David & CharlesBreadmaking: its Principles and PracticeEdmund B. Bennian/OUPTritton's Guide to Better Wine and Beer Makingfor BeginnersS. M. Tritton/FaberGrow it!Richard Langer/Equinox Books<strong>The</strong> HerbalistJoseph E. Meyer/<strong>The</strong> Oak Tree PressHerb GardeningClare Loewenfeld/Faber<strong>The</strong> Complete Book <strong>of</strong> the GreenhouseIan G.Walls/Ward LockPutting Food B>'Stephen Greene Press, Battleboro,Vermont, USAAmateur Wine MakingS. M. Tritton/FaberFood from the WildFood for FreeRichard Mabey/CollinsPocket Guide to the Sea Shore<strong>John</strong> Barrett & C. M. Yonge/CollinsSeaweeds and their UseV. J. Chapman/MethuenEdible Wild PlantsOliver Perry Medsger/MacmillanHou. ! to Enjoy your WeedsAudrey Wynne Hatfield/MullerCrafts & SkillsCountry Crafts TodayJ. E. Manners/David & CharlesStudio Vista Guide to Craft SuppliesJudy Allen/Studio Vista<strong>The</strong> Craft BusinessRosemary Pettit/PitmanCountn' BazaarA. Pittaway and B. Sc<strong>of</strong>ield/CollinsBaskets and BasketryDorothy Wright/BatsiordA Potter's BookBernard Leach/FaberSpin your own Wool, Dye it and Weave itMollv Duncan/BellFood from Animals<strong>The</strong> Backyard Dairy BookLen Street and Andrew Singer/Whole EarthTools, Mill Cottage, Swaffham Road,CambridgeTrie Story <strong>of</strong> Cheese-making in BritainVal Cheke/Routledge & Kegan PaulGoat HusbandryDavid Mackenzie/FaberKeeping PigsC. Chappell/Hart-DavisButchering, Processing and Preservation <strong>of</strong> MeatFrank Ashbrook/Van Nostrand ReinholdNatural Poultry KeepingJim Worthington/Cros<strong>by</strong> Lockwood<strong>The</strong> World <strong>of</strong> BeesMurray Hoyt/Bodley HeadFood from the Garden<strong>The</strong> Complete Vegetable GrotcerW. E. Shewell-Cooper/FaberGrow your own Fruit and "VegetablesLawrence D. Hills/FaberPictorial GardeningCollingridge Books<strong>The</strong> Vegetable Garden DisplayedRoyal Horticultural Society<strong>The</strong> Fruit Garden DisplayedRoyal Horticultural Society<strong>The</strong> Living SoilLady Eve Balfour/FaberCompost: for Garden Plot or 1,000 acre FarmF. H. Billington & Ben Casey/FaberNatural EnergyEnergy Primer: Solar, Water, Wind and Bio-FuelsPortola Institute, 540 Santa Cruz Avenue,Menlo Park, Ca. 94025, USARadical Technology: Food, Shelter, Tools,Materials, Energy, Communication,Autonomy, Communityed. Godfrey Boyle and Peter Harper/Wildwood HouseKeeping Warm at Half the CostColes<strong>by</strong> and Townsend/Prism Press and CTTSeries, Stable Court, Chalmington, Dorchester,DorsetLow Cost Development <strong>of</strong> Small WaterPower SitesHans W. Hamm/Volunteers in TechnicalAssistance, 3706 Rhode Island Avenue, MtRainier, Maryland 20822, USADirect Use <strong>of</strong> the Sun's EnergyFarrington Daniels/Ballantine BooksSimplified Wind Power Systems forExperimentersJack Park/Helion, Box 4301, Sylamar,Ca. 91342 USA<strong>The</strong> Generation <strong>of</strong> Electricity <strong>by</strong> WindpowerE. W. Golding/E. & F. N. Spon Ltd (out <strong>of</strong>print, but the classic work on the subject)<strong>The</strong> Dutch WindmillFrederich Stokhuysen/Merlin PressPractical Building <strong>of</strong> Methane Power Plants forRural Energy IndependenceL. <strong>John</strong> Fry, D. A. Knox, Andover, Hants.Methane: Planning a DigesterPeter-<strong>John</strong> Meynell/Prism Press and CTTSeries, Stable Court, Chalmington,Dorchester, Dorset251
IndexFigures in italics indicateillustrations.AAcetobacter l96Acidacetic 196citric 192hydrochloric 222lactic 99sulphuric 87, 231Acidimeter 98,102,104,105Acrospire 69Adobe blocks 240Adze 242,33Alcohol 69-73,184,192-196Ale 70Alfalfa 80,124Alighting board 130,131Alum 228American balm 247Ammonol 28, 29Angelica Angelica archangelica 155,155Angling 202Animals, Food from 40-45,89-132wild 198-201Anise Pimpinella anisum 155,155Anvil 238, 239Apple 177-178,177crab 192,194,196, 208pickled 188storing 182,183Apricot 179,179Ark 125,125Artichokeglobe 146,160,146 •Jerusalem 87,146,160,200,83,146Ash 33, 34,34runner 242Asparagus 146,160,146Aubergine or egg plant 146,146Auger 28Awl 231Awn 124Axe 242, 247, 28felling- 33BBab 202,203Bacon 116-117Baconer 116-117,115Balala light 200Balfour method, the 126Baling hay 80-81Balm Melissa <strong>of</strong>ficinalis 155,155Bark 231Barley 26,68-69,57flour 62,68malting 68-69, 69sprouting 69RECIPESNorthumberland cakes 68-pastry 68-soup 68Barm 73Bam, building a 240Barrel 242,193, 242oil 211Basil Ocimum basilicum 156,156Basket 220,51,54, 220, 221Basketry 36, 220, 240hard 220s<strong>of</strong>t 220Batter31,36Battery 217Bay Laurusnobilis 156,156Beam (cloth or warp) 229, 229Bean 22, 26,160-170broad 141,147,160,147butter 149dried or haricot 149,160field or tic or horse or catde 88, 83French 88,149,160,149Lima 88,149runner 88,152-153,160,186,152salting 186snap 88soya 88,153,153Bee 130-132-escape 130,131-space 130-valve 130-veil 130Beef 92,106-107,107Beer 68-73, 71making 70, 72, 73Beermaking implements 70, 71Beetroot 146-147,160,146Beri-beri 75Betain 146Billets 242,242Birch, silver 34, 34Birds 46, 66, 74,88,124-129game 200,199Bit 44,45Blackberry or bramble fruit 174,174Black cherry 33Blackcurranr 174-175,174Black-flv 147Blackhead 124,128Black pudding 106,112Blacksmithing 238Blaze 247Bleaching 228Blight 86-87Bloater 206Block-tackle 106,112,114Blow 120Blueberry or bilberry 175,175, 208Blunger 222Boar 111-112Bobbin 226, 230,226, 217Bolting 82Borage Borago <strong>of</strong>ficinalis 156,156Bordeaux Mixture 87Botrytis 150Bottle-brush 193Bottling 184,186-187,193,187fruit 186tomatoes 187vegetables 186wine 193Boulders see RockBoulder-clav 29Bow 232Bowl 243Box anchor 38,38Box, cardboard 132,142Bramble fruir or blackberry 174,174Bran 42Brassica 82-85, 83break 22,160-170Brawn or pork-cheese 116-117Bread 59-64,61,63making 60-64,63RECIPESdoughnuts 64Greek pitta 64maize 62malt 64Norwegian flat 64oat 62rye 64soda 64s<strong>of</strong>t cakes 64sourdough 64wholemeal 62Brick 142, 232,233fire- 248,249Bridle 44,45Brine 116-117,186,242Britchin 45,45Broadcasting seed 46Broccoli 147,160,147hearting or winter cauliflower 147,147sprouting, green or calabrese 147,147sprouting, purple 147,147Brood chamber 130,132,131Broody coop 126,128,129,125Brortch'240-241,241- Brussels sprouts 147,160,147Buffer 42Bull 96,97Bullet 198Bullock 106Bund 32,32Bung 107,114Burgundy Mixture 87Burnet Poterium sanguisorba 156, 79,156Butcher 106-107Butter 98-101,108,101-chum 98-101,99,101-milk 100-worker 98-101,99,101cCabbagecow 85,83red 148spring 146-147,160,147summer and autumn 148,160winter 148,160,147Calabrese see BroccoliCalcium 15Calf92,97,106Cambium layers 180,181Capon 124Cappings 132,194Caraway Carum carvi 156,156Carcass 106-107,112-117,122-123Carding wool 226, 226, 227Cardoon 146Carp, Chinese Grass 245Carrot 84,148,160,182,82,148-marmalade 190Cartridge 198Caul 116,115Cauliflower 148,160,148winter, see BroccoliCaustic soda 228, 246, 247Cedar 247Celeriac 148,148Celery 148-149,161,148<strong>self</strong> blanching 149white 148-149Centipede 144Cereal 56-81,56-57break 15Chaff 54,55,53-cutter 42Chain 45belly- 45britchin- 45ridge- 45Chamomile Matricaria chamomilla156,156Chapatis 65Charcoal 232,247,248Chat 86Cheese 98,102-105implements 103mill 105press 98, 99,105vat 98, 99HARD 102-104,105Caerphilly 102Cheddar 102Stilton 103-104SEMI-SOFT 104Pont 1'Eveque 104SOFTcream 102poor man's 102Cheeses 77,192,196, 77Chemicals 144-145Cherry 178,178Chervil Anthriscus cerefolium156-157,156Chessit 98,102,105,99,103Chickens 91,124-127, 91,124,127drawing 12 7feeding 124killing 127plucking 12 7trussing 127Chicks 126Chicory 149,149Wido<strong>of</strong>l49Chiselbricklayer's cold 236edging-in 236-237, 234, 235pitcher 237placing the 237, 237stitch 237, 237Chitlings or chitterlings 116Chits 86,152Chives Allium schoenoprasum 157,157Chocolate-spot 88Churching oats 66Chutney 184,188-189,tomato 189Cider 196Citrus fruit 178,178Clam 205Clamp 232Clamping 182,183Claw 234, 235,236, 235Clay 14, 222-225,232,240,244,223,224, 225, 233Clearer-board 130,132Clearing land 28-29Cleaver 107Cleaving srone 234Cloche 142-143continuous 142glass 142-143glass barn 143glass tent 143hard plastic 143simple corrugated plastic 143s<strong>of</strong>t plastic tunnel 143Cloth 77,228-229Clover 78red 137, 79Club 33, 35Club-root 82,85,134,145,160,161Cobbett, William 91,100Cockerel 124,126Cocking hav 80-81Cockle 204 : 205,205Collar 44Colostrum or beestings 97Colt 42Comfrey 137Compost (see also Manure) 18,134,136-137heap 136<strong>John</strong> Innes 140-141Cone 223Conger-eel 204Conserves see JamCoping stone 236, 236Coppicing trees 34, 248Cordon 181Coriander Coriandum sativum 157,157Corking gun 193Com 52-55, 74,53Indian- 74-meal flour 62-meal mush 74-on-the-cob 74252
-salad 149,149-scoop 54sweet- 74,153-154,161,182,186,153Cotton 227-228Couching barley 69Coulter 48,48skim 48Cow 19, 22-23,26,90,92-97, 90, 95buying 92-93feeding 93-94housing 96milking 94,96,94, 95teeth 97BREEDSDanish Red 92Dexter 22Dutch Friesian or Holstein 92, 93,94,92Hereford 93Jersey 22,92,93,94,92Red Poll 92, 93Shorthorn 92DISEASESbrucellosis 93grass-staggers 94husk 97hypo-magnasemia 94mastitis 93Cow cabbage 85,83Crab 206, 205Crab apple 192,194,196, 208,208Crafts and skills 219-249Cranberry 175, 208,175Cream 98-100,108curdled 102Devonshire or clotted 98ice-100-separator 98, 99Creep feeding 110Creosote 33,36,38,39Cresset 242Crop rotation 10,15,18-19,22-23, 26,82,144,160-171Crops 10-26, 214garden 146-196field 56-59,66-68, 74-88storing 182-183Crowbar 28Crupper 45,45Cuckle232Cucumber 149,161,172-173,149Cultivation 46-59, 66-68, 74-88Curd-knife 99,103Curds-and-whey 100,102-105Curinganimal skins 231bacon and ham 116-117brine 116-117dry 116Cypress 247DDairy 98-105, 99equipment 98, 99Dairy producebutter99,100,101cheese 102-105,105cream 98ghee 100ice cream 100milk 98yoghourt 100Dam 213, 244, 213Damper 223, 249Dandelion 208Decoy 200Deer 200-201,199Detonator 244Dibber 138,141,139Digging 139,139Dill Anethum graveolens 157,157Dipping sheep 121Distaff 230, 230Distilling 72Ditch 30-31,32Donkey 41,41Double Tom or ridging plough 84Dough 60-65. 63Dowel 39,98,227,242,242Drain 30-31,30, 31bush 31cut-<strong>of</strong>f 30land 30-31,31mole 30-31,31plastic pipe 31semi-circular tile 31stone culvert 31underground 30-31, 31Draw-knife 33Driftwood 246Drone 132Drving produce 70,104,182Duck 91,128-129,200,91,199Aylesbury 129Indian Runner 129Muscovy 129wild 200,199Dulse Rhodymeniapalmata 206, 205Dunging passage 94,96Dwarf pyramid 181Dye, vegetable 228EEaser 244Ecosystem 245Eel 54,202,206Eel-worm 137,160Egg plant see AubergineEggs 124-128pickled 188Elderberry 208wine 194Elderflower "champagne" 194Electricitywater-generated 212-213wind-generated 216-217Elm 33,34Endive 149,149Energy 82,140, 209-218alternative 210-211saving 211solar 214-215Espalier 181Ewe 118-120Explosive 28-29,234,244Extractor 130,132,131FFabric 226-230Face 81Fachongle Furnace 172,248, 249Fan 181Farrowing rail HI, 111Feathers 202, 203Fell 107,122Fencersbattery 38main 38Fences 36-39,81,85,108electric 26, 38,81,85,108post-and-rail 36, 39,39wire 38-39Fennel Foeniculum vulgare 157,157Fermentation iar-and lock 193Ferret 199-200Fertilizer bags 81,109,125,125Fields, Food from the 27-88Fig 178,178Fire 116-117,232,248brick 248,249Firewood 33-34,117, 248Firingbricks 232clay 223Fish 202-207,245demersal 203, 207farming 245freshwater 202pelagic 202-203, 206, 245pickled 188sea 202-204shell- 204-206,205Flag iris 30Flail 53,54, 77,88,53,54Flats 140-141Flax 77,228, 230,247line 230tow 230Fleece 120,121Fleeter 105,105Flour 59-65barley 62commeal 62oatmeal 62rice 62rye 62sorghum 62soya 62wheat 62white 59,65wholemeal 59Flow rate 212-213Flyer 226,226Foal 44Fodder beet 84,82Fold-pritch 38,151Follower 98Food chain, the 10-11Forcing on 142-143Forge 238Fork 138,138pitch- 81Foundations 240,240Fox 123,125,126,128Framebrood 130,132,131cold 142,143glass 142hot 142,142warping or harness 228, 229wooden 142, 222, 247Freezingbeef 106bread 60yeast 60Froe 33, 35Fruit 174-196berry 208bottling 186-butter 190-191-cheese 190-191citrus 178,178oleaginous 77pickled 188-plot 134,163,165,167,169,171s<strong>of</strong>t 174-176storing 182,183-syrup 191tree 177-179Fulcrum 29Fumigator 142Fungi 208,208Funnel 193Furnace 211, 248,249Furrow 32,46,48,49,86,47,49,139GGaff 202Gambrel 106,112,113,122,112Game 198-201Garden, Food from the 133-196,135Garden line 138,141,139Garlic Allium sativum 157,157Gate 39,47Gelignite 28-29,244Ghee 100Gherkin 149,149Gilead 247Gilt HIGirth 45-strap 45Glaze 223,223Gloves 28hedging 3 7Gluten 62, 68Goat 23, 28,90,108-109, 90feeding 109fencing 108housing 109kidding "109milking 109tethering 108Goose 90,128,200, 90,199Embdenl29wild 200,199Gooseberry 175, 208,175Gor246Gouge 243, 243Grafting 180,181budding 182top-180whip 181Grain 52-59,69, 74-76,53,56,57Grape 175-176,192-193,175,176Grass 19, 22-23, 26,42,56, 78-81,90,110,118-119,126, 79cocksfoot 78, 79couch or spear 137,146Italian rye 79mat 78Meadow 126perennial rye- 78, 79rib-78ribwort plantain 78, 79Timothy 126, 79tussock 78wavy hair 78Yorkshire fog 7 8Grassland 22-23, 26,46, 78,125-126Grease-band 145,177,178Greenhouse 86,142,172,173,172,273cold 86,172crops 162,164,166,168,170,173heated 172lean-to 142,172,273Grig or eel-hive 202Grindstone 239Ground-eldetl37,146Gun 198Gunpowder 28-29,198,244black 28, 29HHackling flax 230Haemoglobin urea 42Hakes 48Halter 44Ham 116-117,114Hames 44, 45Hammer 29,42,234,236, 238,239,244,33sledge 238,33steel 234, 236,234, 235Hanginggame 201in nets 182,183Hardening <strong>of</strong>f 143,149Hare 200,199Harness 45Harrow 46,58,46,47,50disc 46,50spike 46,50spring-tined 58,50Harvestercombine 54,55,68forage 81Harvesting 52-55,53Haulm 87Hay 80-81-box 66-cocks 80Hazel 36, 37Heat 33,136,172, 214-215, 238,248-collector 33,172, 214-215-exchanger 211-loss 211, 214, 210-storage 222Heating 143air 214space 211, 248water 215Heddle 228,229Hedge 36-39,37building 37,37overgrown 3 7quickthom 36repairing 37, 37
IndexHedge-continuedstone-36, 37wall- 36Hedgehog 144Hedgehog (spinning) 226,227Heeling in 149,150,180,182,183Hen 124-127Herbs 155-159,188,189, 246Herring 202-203, 206,207pickled 206-207rollmop 207Hickory (shagbark) 33,117,242,34Hide 106-107,231Hilum 88Hipstrap 45Hive 130,132,131Hoedraw-138Dutch 138,138hand-50horse- 50, 47,51tractor- 50wheel-138,139Holding, theecologically sound 15,18five acre 26, 24, 25one acre 19,22-23, 26,20, 21• Holding-bed 161,168Homebrew 70-73, 71Honey 72, 76,130-132,194,131Honey-comb 130-132,192decappingl32,131Ho<strong>of</strong> 44pick 42scraping 42Hook 106,202,204,203bagging 37bill-3 7shearing- 241spar- 241Hoppers 124,125<strong>self</strong>-feed 125Hops 70,72,73, 70Horse 40-45,90,41, 43, 45, 91 _breaking 44feeding 42foaling 42,44harnessing 44, 45shoeing 44Horseradish Cochlearidarmoracia157-158,157Horseshoe 42removing 42,42Hotbed 142House, building a 240Household items 246-247charcoal 247paint 247paper 247resin 247rosin 247salt 246-247soap 246sugar 246wood tar 247Hulking orpaunching 123,200, 201Hulling 75Humane killer or captive bolt pistol106,112Humus 11,14, 222Hutdle 36,38-39, 111, 111wattle- 36,38-39, 39Husk42,75,77Hut 240Hydroelectric power 213Hydrometer 193Hyssop Hyssopus <strong>of</strong>ficinalis 158,158IIce cream 100Ink 77Insecticide 145Insemination, artificial 96-97Insulation 211, 214-215, 218, 240-241Intercropping 145Iron 238cast- 238, 248malleable 238pig- 238wrought- 238Irrigation 212flood 32,32sprinkle 32windmill 216JJam 184,190-191RECIPESblackberry and apple cheese 191blackberry and apple jelly 191damson or plum-190lemon and carrot marmalade 190lemon curd 190raspberry conserve 190three fruit marmalade 191Jelly 191Jigger 242Joints 106,116-117,107,114,115,122beef107lamb 111pork 114,115Jug 193Jumper 29Juniper berry 208Jute 59KKale 84-85,149-150,161,83,149Hungrv-gap 84, 85Kohl-rabi 84, 83Marrowstem 84, 85Rape- 84Thousand-headed 84Ketchup 184Kid 109Kiln 59,66,69, 223,245, 69, 223Kilnerjarl86Kipper 206Kive 70-73, 71, 73Knapsack or pressure sprayer 138Kneadingclay 222,223dough 60, 62, 65, 63Kohl-rabi 84,83LLadder 242-243Ladvbird 144Lamb 118-120,119Lambing 120,119Langstroth 130Larch 33,247,34Last 202,203Lathe 33,243, 243Laver weed Porph^ra umbilicalis206, 205Lazy Kate 227Leather 231Leek 150,161,150Leggat 241Lemon see Citrus fruitLettuce 150,161,150summer 150winter 150Ley 15,18,19,22,78Lights 107,116,201Lime 15,134, 222Limpet 204,205,205Lincoln, Abraham 36Line 203-204hand- 204long- 203-204Lion 246Liver 107,116,122Loam 14,140-141Lobster 206pot 206,203Loganberry 176,176Loom 228,229floor 228-229square weaver 229table 229Loose box 44, 42Lucerne 79Lug-worm 204. 203Lupin 137Lurcher 200Lye 246MMackerel 202-203, 206-207potting 207Maize 62, 74,161,56flout 62RECIPES-bread 62-meal mush 74-polenta gnocchi 74Mallet, wooden 234, 235Malt 69,70,72-73extract 70,72, 73Malting barley 68-69, 69Mangold 84, 82Manure 14-15,18,134,136-137,218(see also Compost)green 18,137,163-165,171Maple syrup 246Maraisl32Mare 42-43Margarine 77Marjoram 158,158pot Origanum oniies 158,158sweet Origanum majorana 158,158wild Origanum vulgare 158,158Marmalade see JamMarrow 150,161,150Marsh marigold 30Marsh orchid 30Marsh violet 30Mash 124fattening 124laying 124Mashing malt 72-73Maslin 62Mat 220Mattock 28,138Mead 194Measuring cylinder 193Meat 106-107,112-118,122-123,198-201Melon 150,150Metal 238-239Methanedigester 218, 218gas 210,211,218Milk 92-105,108-109,118,120.95, 99,105,109churn 99sour 247Milkinga cow 94,96, 94, 95a goat 109-shed 96,95Millhammer 59plate 59, 75, 77,59roller 59stone 59, 75, 77water 33wind- 32, 211, 216-217, 244,216,217Mint Mentha sp. 158,144,158Monkey-winch 28, 29Monocultute 10,11,18Mordant 228Mortice 39Mould for brick 232, 233Mould-board or breast 48, 48Mow 52,54-55, 68,55Mower 52, 81Muck see ManureMud 240cob 240Mulberry 208Mulch 50-51,134,137,47Mule 41,41Mushrooms see FungiMussel 204,205Must 192-193Mustatd85,137, 33blackBros5icajuncea 85white Brassica alba 85, 83Myxomatosis 198NNasturtium Tropaeolum major or minus158,144,158Natutal cycle 12-13Nectar 132Nesting box 126Netsdrift 202,203hanging in 182,183long-199,200nylon drift 203purse 200shore seine 203tangle 203trawl (beam or otter) 203Nettle 126,137,247,208Newspapet, using up 211Nitrogen 10,11,14-15, 78,136No-digging 46No-ploughing 46Nucleus 132Nut 208,208oOak 36,242Oat 62,66-67,57RECIPESbread 62cake 67-flake loaf 67muesli 67pancakes 67porridge 66, 67roasted or toasted flakes 67water biscuits 67Offal 107 'Oilolive 178-179peanut 76-ptess 77-seed rape 77sunflower 77Olive 77,178-179,178Onion 150-151,161,182,188.151,183pickled 188pickling 151salad 151,151sets 151shallots 151,151stringing 182,183tree 151Orange see Citrus fruitOrchard 177-179Osier 2200x41,106-107,41Oyster 205, 205PPaddv see RicePaint 77, 247Paper 247litmus 247Parlour pot 206, 203Parsley Carum petroselinum 158,158Parsnip 151,161,151Partridge 200Pasta 65Pasteurizing milk 104Paunch 106,122Pea 151-152,184,151-and-bean-break22, 26,160-170Peach 179,179Peanut 76-butter 76-oil 76Pearl79,182,179storing 182Peat 14,140-141pots 140,141Pectin 190Pepper 152,152Percussion cap 198254
IndexPerennial 134break 162,164,166,168,170Perfume 246Pest control 145Pestle and mortar 77,192, 246, 247Pests and diseases 144-145Pheasant 200,199Phosphorus 15Pickle 184,188, 206,207Pig 10, 23,26,28,90-91,110-115,91,111,112,113bucket 110-111farrowing 111feeding 110-111hanging 114,113housing HI, 111joints and jointing 114,115killing 112,112,113scraping 112,112sticking 112,112Pigeon 129,200Pigment 247Pike 202Pilchard 206Pincers 42, 239Pine 117, 247Pitchfork 81,54Pitching cheese 105Pitching stone 237,237Plank 35,35Pleaching stakes 36, 31Plough 46-48, 31, 48, 49Brabant 49, 49chisel 31disc 48fixed-furrow 48,48ridging or double Tom 84,86tumwrest 49, 49Pluck 116,122,113Plug and feathers 234Plum or damson 179,182,179jam 190Poaching grass 22, 23Point 236,235Polenta 74gnocchi 74Pond 244-245stew- 245Pony 42Dale 42Fell 42Poppy 77Post 36-38,81anchor 38concrete 81comer 37, 38kicking 38Pot 222-chamber 223coil- 224,224lobster- 206parlour- 206,203peat-140,141pinch-225,225slab-225, 225.thumped 225Potassium 15Potato 85-87,152,83,152blight 86-87break 22, 26,160-171clamping 182,183early 85-86main crop 86seed 85sweet 154,154Potter's wheel 222-224, 232Pottery 222-225Poultry- 23, 26,124-129chickens 124-127,124ducks 128-129,129geese 128,129pigeons 129turkeys 128,129Preserving produce 184-196, 206,185Pressure-cooker 186Pricking out 141Priest 204Pritchell 239Propagator 143Prune 179,182Pruning 174-179-knife 139Puddlingclay 232transplants 141Pugging clay 222,223Pullet 126Pulp 247Pumpkin 150Purlin 240QQuarter 93blind 93Quartering line 107Queen bee 130,132Queen excluder 130RRabbit 123,198-200,199, 201Racking 72-73.193,196beer 72-73cider 196wine 193Radish 152,161,152Rake 81,138,139,140buck-81Ram 118-120Rape 77, 85oil seed- 77Raspberry 176,176conserve 190Rat 124.128Rawhide 231Reaper-and-binder52Red currant 176,176Reddle 118Reed 240-241,229Norfolk or Prrragmites communis 240wheat 240Reins 44Rennet 102-105,103,105Resin 247Retting 230, 247flax 230plants 247Rhubarb 152,152Ribs 107,114flat 107spare 114wing 107Rice 62, 75,56flour 62Indian or wild 75RECIPES-griddle cakes 75risotto 75Rick 52-55,240,53,55Ridge 46,48,49,86,49Ridge chain 45Ridge pad 45Rifle 106,112,128,198Rippling flax 230Riving wood 38, 242, 35Rock 11,28-29, 211, 214, 234,244, 29drill 234, 244Rollag726,227Roller 46.47,51Cambridge or ring 51Rollmop herrings 207Ro<strong>of</strong>, thatching a 241Root crop 82-87break 15,22,26,160,163,165,167,169Rosemary Rosmarinus <strong>of</strong>ficinalis 159,159Rosin 247Rotation see Crop rotationRoughage 59,108Roving wool 226Row crop 82-88Rung 242-243Rush 78,220,247,30bul-30common 30jointed 30Rye 66-67,137,57flour 62RECIPESbread 64dropscones 67-and honey biscuits 67toast 67sSaddle 45Saffron 7 5Sage Salvia <strong>of</strong>ficinalis 159,159Salmon 202, 206Salt 100,107,116,186, 206-207,246-247,101Salting tub 106-107Saltpetre 107,116,117Samphire Salicornia europaea 206pickled 206Sand 14, 222, 244, 233sroring in 182,183-tray 232Sap 246-247Sauerkraut 85,187,187Sausage 116-117casings 116-117Savon-159,159summer 159.159 Satureja hortensiawinter 159,159 Satureja montanaSaw 237,237"bow 28pit- 35rip 242two-handed crosscut 33Scion 180,181Scotch hand 100,101Scout 132Scrapers 243Scroll wrench 239Scutching flax 230Scythe 52,52,54Sea-kale 206Sea lettuce Viva lactuca 206, 205Seams in leather 231Up 231saddle 231tapered lap 231Seashore 204-206Seasons 16-17,162-171Seaweed 94, 206,205dulse 206,205laver206, 205samphire 206sea lettuce 206, 205Secateurs 138,139Seed 46-47,49-50,140,46,47,140,141box 140,141drill 58,82-84,139,51,139" Separator 98,104,108,99Set square 225, 235Sett, cold and hot 2 3 9Shafts 42,44,45Shallots 151Share 48,48Sheaf 52,54, 66,68,88,52Shearing 120,121Shed 229Sheep 26,90,118-122,90,119,121feeding 118-119joints 122shearing 120teeth 119tupping 119BREEDSBorder Leicester 118Dorset Horn 118Southdown 118DISEASESfluke 122flystrikel20foot-rot 122mastitis 120Shellfish 204-206, 205Shepherd's purse 208Shooting 198-201Shot 198Shotgun 128,198Shrimp 205Shuttle 229, 229boat 229flying 229stick 229Sickle 52,54Sieve 193Silage 74,80-81,96,109,81Singling seedlings 84Skep 130,131Skimmer 98,105,105Skinning 106-107,122, 201an ox 106-107a rabbit 201a sheep 122Slash 28Slashers 28,37Slate 234, 237, 240,237Slath 220Sliper 244Sloe berry 208Slug 91,145Slurry 218,224-225Small beer 72Smoke-house 117Smoker 130,131Smoking 117, 206-207, 248cold-117cook-117,206, 248fish 206-207Snare 199, 202, 200Snood 202,204,203Soap 77,211, 246saddle 246Soil 11,14-15for field beans 88for the garden 134,136-137for the greenhouse 173for herbs 155-159for hops 70for seed boxes 140-141for s<strong>of</strong>t fruit 174-176for tree fruit 177-179for vegetables 88,146-154Solarcollector 33,172, 210, 214-215, 218,211,218drierl82,215,214energy 214-215flat-plate collectot 214heater 215,215still 215,214wall 215Sorghum 76,56flour 62porridge 76Sorrel Rumex acetosa 159,159Sow 110-112Spade 138,28,138Sparging malt 72-73Spice 117,184,188-189Spile 246Spiling 244Spinach 153,161,153Spindle 226-227, 226, 227Spinningflax 230wheel 227, 230, 226wool 226-227Spirit level 235Spring 30,31draining 31Squab see PigeonSquash 150Stable 42, 43Stack see RickStaging 172Stake 36-37Stallion 42,68Starterfor beer 72, 73for cheese 102,104-105for wine 192Staves 242,242Steel 59,69, 238plate 248Stetch 48,49Stitching leather 231
IndexStitching leather-continuedblanket stitch 231crossover stitch 231opposing stitch 231Stock 180,181Stone 36,234-237,239,37,234,235,236,237,mill 59Stook52,54-55,68, 88,52, 55Storingcorn 54,55,53fruit and vegetables 182,183grain 55hops 70Strainer 70, 72, 73, 73Sttawberry 176,176Stubble 125Stump 28-29, 29Sugar 246beet 246cane 246maple 246in beer 69, 72-73in cider 196in curing 116in honey 130in jam 190in maize 74in pickles and chutneys 188-189in pteserving 184in sorghum 76in wine-making 192-195Sun 214-215Sunflower 77,124,137Super 130,132,131Swages 239Swarm 130,132Swede 82,84-85,153,161,153Sweet chestnut 33, 208, 34, 208Sweet com 153-154,161,182,186,153bottling 186drying 182Sweet potato 154,154Sycamore 33TTagetes minuta 137, 247Tannin 192,196, 231Tanning hide 231Tapping for resin 247Tare 137Tarragon Artemisia dracunculus159,159Taverner, <strong>John</strong> 245Teasing wool 226,227Teat 93-94,96-97,94Teazles 229Teeth 119,97cow 97sheep 119Tempering metal 138Tether-gtazing 22, 26Thatch 66, 68,88, 240-241, 241Threshing 54,53,88-drum 54, 88Thrush 144Thyme Thymus vulgaris 159,159Tilapia 245mossambica 245Tile 232Toad 144Tomato 154,161,172-173,184,154,187,189bottling 187chutney 189indoor 154outdoor 154,154Tomb-stone 81, 81Tongue 107,117pickling 107Toolsfor brick-making 232for clearing land 28for forestry 33, 35for gardening 138-139,138,139' for metalworking 239, 239. for pottery 224-225tot stone masonry 234-237for thatching 241, 241for woodworking 242-243Tractor 40-41,40,41farm 40garden 40Treadle 227, 229,227Tree 33-35,177-181,34,35,180,181-care 180-181coppicing 34, 248felling 35,35planting 34,180shapes 181Treen 33Tripod 81, 80Trout 202, 245Trowel 138,141.139Trug221TuberJerusalem arrichoke 87,146potato 85,87,152Tugs 45Tull,Jethro58Turbine 211, 213Banki 213Pelton wheel 213propeller 213Turkey 128white 129Turning wood 243, 243Turnip 82, 84,153,161,82,153Turntable 224, 225Turpenrine 247Tuyere 238uUdder 93-94, 94Underbuck 73VVegetable 82-87,146-153,182-184,188-189, 82, 83,183bottling 186dye 228pickling and chutneying 188-189storing 182,183Vegetarian 18-19,102Ventilator 172-173, 210, 214Vice, leg 239Vinegar 117,184,188-189,196,228,196cider 188distilled or fortified 188malt 188spiced 188wine 188Vinegar flies 72-73,192wWall 36-37, 240cavity 240,210cob 240stone 3 7Trombe 214Walnut 33, 77, 208, 34, 208Warp 233Warp and weft 228-229, 229Washing soda 87Waste 218Water 30-3 2, 244-245power 210,212-213wheels (overshot and undershot) 212Watercress 154,154Watering can 138,139Wax 130,132Weaner23,112Weaver 220,220Weaving 228-229,229-comb 228, 229Wedge 33, 35Weed 51,137,144,208dandelion 208nettle 208shephetd's purse 208Welding metal 238-239electric arc 239oxv-acetvlene 238-239Well, sinking a 244Wethet 109,120Wheat 26,58-59,57flour 62Wheelbarrow 138, 28Whelk 205,205Whetstone 239Whimbel 241Whisky 72White currant 176,176Wild, Food from the 197-208Willowing cotton 227Wind 126, 216-217power 210,216-217speed 216Wind-bteak36,38Windlass 244Windmill 32, 211,216-217, 244, 216, 217electriciry-generating 216, 217Mediterranean sail 216metal 216sail wing 217vertical axis 217water-pumping 216Windrow 81Wine 184,192-195flower 184fruit 184grape 192-193toot 184country 194RECIPESelderberry 194elderflower "champagne" 194nettle 194parsnip 194rhubarb 194rose hip 195Wine-making equipment 193Winkle 205,205Winnowing 54-55,66-machine 55-trav 54Wire 37-38,29, 39, 70Withies 36, 38, 39Wood 242-243,248, 249-turning 243Woodland 28, 33-35, 214, 248Wood sedge 30Wood tar 247Wool 118,120 226-228,121Worker 132YYam 226-227, 229,230Yarrow 78Yealm 241Yeast 60, 62, 72-73,192-196, 63beer 72-73bread 60, 62, 63wine 192-196Yoghourt 100AcknowledgmentsI would like to thank the many peoplewho have helped me with informationand advice, particularly Sally<strong>Seymour</strong> without whom this <strong>book</strong>would never have been written. <strong>The</strong>students on my farm, Fachongle Isaf,also assisted in many ways, especiallyOliver Harding and David Lee whohelped with drawings and diagrams.<strong>John</strong> <strong>Seymour</strong>Dorling Kindetsley Limited wouldalso like to express their gratitude toSally <strong>Seymour</strong> and the many peopleassociated with Fachongle Isaf. Inaddition they would like to thank thefollowing for their special contributionsto the <strong>book</strong>:Susan CampbellPeter Fraenkel<strong>John</strong> WaltetsMr Woodsford <strong>of</strong> W. Fenn Ltd.Cleals <strong>of</strong> FishguardPeter Minter <strong>of</strong> Bulmer Brick &Tile Co.Mr Fred Patton <strong>of</strong> CumminsFarm, AldharhRachel ScottFred'k FordRamona Ann Gale<strong>John</strong> Norris WoodRichard KindersleyBarbara FraserMichael Thompson and the staff<strong>of</strong> Photoprint PlatesBarry Steggle, <strong>John</strong> Rule, MurrayWallis and the staff <strong>of</strong> DiagraphicArtistsDorling Kindersley Limited wouldespecially like to thank Eric Thomas,Jim Robins.Robert Micklewrighr andDavid Ash<strong>by</strong> for their major contributionsto the illustrations in this<strong>book</strong>.David Ash<strong>by</strong>Norman BarberHelen CowcherMichael CraigBrian CrakerRoy GrubbRichard JacobsIvan LapperRichard LewisRobert MicklewrightDave NashRichard OrrOsborne/MarksQEDChristine RobinsJim RobinsRodney ShackellKathleen SmithEric ThomasHarry TitcombeJustin ToddRoger TwinnAnn WinterborhamElsie Wrigley256
"Wise and witty words share 256 pages with arich harvest <strong>of</strong> beautiful drawings...knows his stuff and tells it in a masterly way,shaming text <strong>book</strong>s with his enthusiasm, humourand authority... comprehensive and seductive...Beauty and order pervade every page."Sunday Times Magazine'An invaluable manual <strong>of</strong> hope and skills...the text sparkles with intelligence andjoie de vivre.<strong>The</strong> explanatory diagrams and drawings are a delight."Glasgow Herald"<strong>The</strong> <strong>complete</strong> hand<strong>book</strong> to living <strong>of</strong>f the land...will make those brought up in a highlytechnical and idle age wonder what they havemissed all these years... even the mostham-fisted and ignorant should easilyunderstand the instructions."Daily Mail"<strong>The</strong> proper way to make a stook, lay a hedge,milk a goat, pickle an onion, thatch a rick,skin a rabbit, plant a potato, catch a bee swarm,grow an artichoke, tickle a trout, build acompost heap, prune a currant bush, slaughtera pig, throw a pot - you name it, the <strong>book</strong>will tell you how. It is no mere manual for survival,but a small encyclopaedia for all the knowledgeneeded <strong>by</strong> man who wants to do things for him<strong>self</strong>...excellent diagrams and illustrations."Sunday Telegraph"Whatever your needs from the land, you willfind the answers here. It will not be boughtonly <strong>by</strong> those living in the country and on theway to <strong>self</strong>-<strong>sufficiency</strong>, but also <strong>by</strong> the rest <strong>of</strong>us who would like to know how it is done,and perhaps give it a try."Ideal Home"Practical and very beautiful... <strong>John</strong> <strong>Seymour</strong>'slavishly illustrated <strong>book</strong> should finally convincethe faint-hearted and the sceptics alike thatthere's no magic in being your own provider.It's just commonsense and a way to greaterpersonal fulfilment."Here's Health"Over 250 large pages full <strong>of</strong> in-depth advice,illustrated with a wealth <strong>of</strong> clear andattractive drawings, take the reader intoevery conceivable way <strong>of</strong> saving money andat the same time being creative."Countryside