You also want an ePaper? Increase the reach of your titles
YUMPU automatically turns print PDFs into web optimized ePapers that Google loves.
Before attempting to connect or operate this product, please read these instructions completely.
Warning Notices• Do not expose the product to rain or moistureTo prevent fire or electric shock, do not expose the product to rain ormoisture• Do not dismantle this productTo prevent the risk of electric shock, do not dismantle the product. Thereare no user serviceable parts inside.• Clean the equipment carefully.A dry cloth is recommended for cleaning.!The exclamation mark in an equilateral triangle is intended toalert the user to the presence of important operating andmaintenance (servicing) instructions in the literatureaccompanying the productsThe lightning flash with the arrowhead symbol in an equilateraltriangle is intended to alert the user to the presence ofuninsulated ’’dangerous voltage’’ within the product housingthat may be of sufficient magnitude to constitute a risk ofelectric shock to persons.NOTEThis equipment generates and radiates radio frequency energy. It may causeharmful interference to radio communication if it is not installed and used inaccordance with the instruction manual. This equipment has been tested andfound to comply with the limits for a Class A computing device pursuant tosubsection J of section 15 of the FCC regulations, which are designed toprovide reasonable protection against harmful interference when operated ina commercial environment. This equipment has also been tested and found tocomply with the requirements of the CE Class A device safety standards.00-373130CSEA22
7.7 Reverse Play ..........................................................................................................................217.8 Playback.................................................................................................................................217.9 Fast Forward..........................................................................................................................217.10 Rewind....................................................................................................................................217.11 Stop.........................................................................................................................................217.12 Pause......................................................................................................................................217.13 Full Zoom ...............................................................................................................................217.14 Panorama ...............................................................................................................................217.15 PIP...........................................................................................................................................217.16 Search ....................................................................................................................................217.17 PTZ..........................................................................................................................................217.18 Lens Control in DVR Control Mode .....................................................................................227.19 Auto Focus.............................................................................................................................227.20 Auto Sequence ......................................................................................................................227.21 Run Sequence .......................................................................................................................22Appendix A: Specifications....................................................................................................23Appendix B: Function Tree ....................................................................................................24Appendix C: ID Address Mapping .........................................................................................26Appendix D: Firmware Upgrade ............................................................................................274
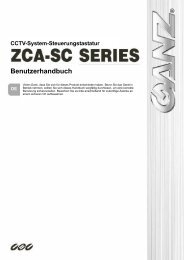
1. OverviewThis <strong>CCTV</strong> system control keyboard can easily be integrated with our full range of<strong>CCTV</strong> products, such as a digital video recorder, PTZ camera and other <strong>CCTV</strong>devices with an RS-485 interface for remote control and system configuration. Thebacklit LCD display and 3-axis control joystick provide user friendly operation.Multiple protocols enable the user to integrate our products into existing systemsfrom other brands and extend the system connectivity. Built-in firmware upgradecircuits allow the user to easily upgrade the firmware via the RS-232 port.Connect PTZ cameras to other devices, such as a control keyboard, DVR, monitorand alarm devices to create a complete surveillance system.The use of a repeater is recommended if the system network distance exceeds 1.2km (4000 feet). In this case, placing the repeater at the centre of the networkdistance could help to maintain signals. Refer to the repeater user manual fordetailed information.5
2. Product Features• <strong>CCTV</strong> device control• Joystick control for PTZ functions• Preset positions and pattern control• User-friendly interface in LCD display• Firmware upgrade available via RS-232 port• Rubber keypad makes it easier to input commands• Remote control via RS-485 interface• PTZ cameras, multiplexers, P/T/Z receivers and all-in-one cameras can becontrolled using this keyboard• Built-in clock for date and time recording• Built-in clock synchronisation function for RS-485 devices• Optional 3-dimensional joystick• Multiple built-in protocols: Ganz-S, Ganz-PT, Pelco-D, Pelco-P and receiverbox6
3. Function Keys and Connectors3.1 Front PanelDVR Control ButtonsCamera Control ButtonsNo. Key Definition No. Key Definition1 DVR/multiplexer mode selection 21 Full zoom: zoom in key2 Camera/dome mode selection 22 Panorama (DVR mode)3 System setup mode selection 23 PIP (DVR mode)4 AUX: Reserved 24 Search (DVR mode)5 LCD 25 Run SEQ & Up direction key6 Jog prev. 26 Set preset & Left direction key7 Jog next 27 Camera menu: enter OSD8 Display 28 Move to preset & Right direction key9 User 29 Set SEQ & Down direction key10 Spot 30 Auto pan11 Menu 31 Cruise12 Enter (DVR mode) 32 Number keys13 Fast forward & Up direction key 33 PTZ: PTZ mode under DVR control14 Reverse play & Left direction key 34 Enter15 Play & Right direction key 35 Key lock16 Stop 36 Auto focus17 Rewind & Down direction key 37 Iris control (N/A for Ganz-S protocol)18 Pause 38 Focus near/far19 ESC: Exit & back to previous menu 39 Zoom wide/tele20 Auto SEQ (DVR mode) 40 Joystick*Specifications are subject to change without notice7
3.2 Rear PanelConnectorDescription1 RS-232 D-SUBUser can upgrade the keyboard firmware using thisport.2 Termination switchThis switch is used to terminate the connected RS-485communication line. It should normally be left in theOFF position. The default is OFF.3 Mode switchThis mode is used for factory setting. This switchshould be set to MASTER.4 Line selection switchPlease select 2-lines mode (half-duplex) for the RS-485communication.5 RJ-11 jackThis jack is used for factory setting and should not beused.6 Terminal blocksUse this terminal block to connect 2-lines RS-485communication wires. Additional power input positionsare also available on this connector.7 Power jack Use this jack for the keyboard power supply.8
4.3 Standby Mode ActionsThe user can perform the following actions in standby mode.• Press the key to enter System Setup mode.• The user can enter Camera Control mode by pressing the key . This mode enables pan, tilt, zoomoperation, camera OSD setup and other PTZ camera controls to becarried out.• The user can enter DVR/Multiplexer Control mode by pressing the key .For detailed instructions on keyboard system settings, PTZ camera control and DVRcontrol, refer to the following sections.10
5. Keyboard System SettingsThe keyboard will enter System Setup mode when the user presses the keyand enters a correct password (default password is 0000). Detailed operation will bedescribed in the following sections. Use the ▲(RUNSEQ) and ▼(SETSEQ) keys toscroll through the setup options.1.0 System SettingEnter password [____]5.1 Keyboard ID AssignmentThis option allows the user to assign a new ID for this keyboard. Press the ◄ or ►key to change the ID number. The default ID for the control keyboard is 240.1.1 Set Keyboard ID(240-254):240NOTE: No two control keyboards connected to the same RS-485 bus shouldbe given the same ID.5.2 GANZ PTZ Camera ControlThere are two kinds of PTZ camera control mode. The user can press the right andleft direction keys in this setup menu to choose the control method – direct cameracontrol bypassing the connected DVR or through the DVR.1.2 Camera Controla. Bypass DVRNOTE: “Bypass DVR” means that control command signals will be sentdirectly to PTZ cameras. The user can simply enter the PTZ camera IDdirectly and operate the camera.1.2 Camera Controlb. Through DVRNOTE: “Through DVR” means that control command signals will be sent tothe DVR, and the DVR will transfer these commands to the PTZ camera toexecute the relevant operation. Generally, we do not recommend controllingcameras through a DVR in order to avoid any interference that can occur during theprocess.11
5.3 GANZ-S Protocol Baud Rate SettingThis option enables the user to change the baud rate for Ganz-S protocols. Theoptions are 4800, 9600, 19200 and 38400 bps; the factory default is 9600 bps.1.3 Ganz Baudrateb. Baud rate 9600bps5.4 System Date SettingThis option allows the user to set the control keyboard system date. Press the ◄and ► keys to select a column (year, month and date) to modify, and input the newsystem date directly using the number keys located on the control keyboard. Pressthe key when finished to exit this mode.1.4 Date SettingPress ENTER for Setup1.4.1 Date SettingYY:xx Mth:xx Day:xx5.5 System Time SettingThis option allows the user to set the control keyboard system time. Press the ◄and ► keys to select a column (hour, minute and second) to modify, and input thenew system time directly using the number keys. Press the key to exit thismode.1.5 Time SettingPress ENTER for Setup1.5.1 Time Settinghh:xx mm:xx ss:xx5.6 System Alarm ListThis option enables the user to list the 10 most recent alarm information messagesfrom the system bus, including the event trigger time and the triggered camera ID.Press to exit this mode.1.6 Alarm ListPress ENTER for Setup1.05/11/20 13:08:02Alarm camera ID: xxx12
5.7 Camera SettingThis option allows the user to assign an appropriate individual protocol to thekeyboard for each camera. Press to start protocol assignment. Press the ◄ or► keys to change the setting and the ▲ or ▼ keys to select a camera. Press when finished. The available protocols are Ganz-S, Ganz-PT, Pelco-D,Pelco-P and Chiper.1.7 Camera SettingPlease Press 11.7.1 Camera ID #001Pelco-P [GANZ-PT] ►Protocol Baud RateGanz-S 4800, 9600, 19200 and 38400 bps (in keyboard system setting)Ganz-PT 9600 bpsPelco-D 2400 bpsPelco-P 4800 bpsChiper For receiver box, baud rate 9600 bpsNOTE: Ganz-PT is for ZC-PT series PTZ camera. Ganz-S is for ZC-S seriesPTZ camera.5.8 Key Press BeepThis option enables the user to turn the key beep on and off. If the setting is ON, thekey beeps when pressed. Press the ◄ or ► key to change the setting.1.8 Key Press Beep[OFF] ON5.9 Alarm ResponseThe control keyboard can be programmed to execute the following actions if thecontrol keyboard receives alarm signals from a PTZ camera.• Buzzer beep• Link to the PTZ camera that broadcast this alarm message• Switch the video channel to full screen from multiplexerThis option is used to enable or disable the keyboard's alarm response function.The default is OFF. Press the ◄ or ► key to change the setting.1.9 Alarm Response[OFF] ON13
5.10 Password SettingThis option enables the user to change the password for the keyboard. The usermust correctly input a new 4-digit password twice to confirm the password change.1.10.1 Password[****]1.10.2 Password[****]Confirm[___]5.11 Key LockIf this key is pressed and held for three seconds, the keys on the controlkeyboard will be locked and the LED will be lit. To unlock the keys, press andhold the key again for three seconds.14
6. PTZ Camera ControlTo enter Camera Control mode, press the key , inputthe ID of the PTZ camera you want to operate, and press to confirm.Camera ControlEnter camera no:xxxThe control keyboard enters Camera Control mode when the user selects a cameraand all of the camera's functions can then be controlled.xxx Ganz PT Camera___The first row displayed in the LCD contains information about the selected cameratype. The second row in the LCD allows the user to input a preset point number(1~256) or other camera parameters. Detailed operating instructions are set out inthe following sections.The camera name displayed in the first row will be different depending on theprotocol used. It could be “Ganz-S Camera”, “Ganz PT Camera”, “PelcoD TypeCame” or “PelcoP Type Came”, which indicates that the PTZ Camera is usingGanz-S, Ganz-PT, Pelco-D or Pelco-P protocol relatively.6.1 Enter Camera OSD MenuPress the key to open the OSD menu for the PTZ camera if theselected camera is equipped with an OSD function. Once the OSD menu has beenopened, the user can move the OSD bar using the direction keys on the keyboard.For full details of the PTZ camera OSD setup, refer to the relevant cameradocumentation.NOTE: For Ganz-S protocol. The keyboard LCD displays “OSD ON” whilethe control keyboard is under OSD setup menu mode, and the message“TURN KEYBOARD OSD OFF” displaying on the monitor reminds the user to turnoff the OSD menu manually by pressing for three seconds.xxx Ganz-S CameraOSD ON6.2 JoystickPush joystick right/left/up/down to directly pan/tilt the PTZ camera.15
6.3 Preset FunctionIn Camera Control mode, the user can operate the preset function. Follow theinstructions below to set and execute preset points.xxx Ganz PT Camera___■ Set Preset PointPress a number key, e.g. , for a view area, and then press toenter this position as preset point 2.xxx Ganz PT CameraSet Preset 002 . . .___■ Go To Preset PointPress a number key, e.g. , and then press to move to thedefined preset position.xxx Ganz PT CameraGo Preset 002 . . .___6.4 Sequence FunctionIn Camera Control mode, the user can operate the sequence function. Up to eightsequence lines can be programmed into the ZC-PT2XX using the OSD menu, andthe first four sequence lines can be executed directly via the keyboard. Follow theinstructions below to manipulate this function.■ Setting Sequence LinePress to enter the OSD setup menu and set up the sequencelines as described in the camera operating instructions. The sequence setupmenu for the PTZ camera is as shown below.SEQUENCESEQUENCE LINE 1SEQUENCE POINT 01PRESET POSITION 001SPEED 1DWELL TIME 001RUN SEQUENCEENTEREXITYESFor more details refer to the GANZ ZC-PT2XX series camera manuals.16
■ Executing Sequence FunctionPress and to execute the first sequence line defined in theOSD; the first 4 sequence lines can be executed directly from the keyboard. Toset the other sequence lines, complete the setup and execute them in the OSDmenu.xxx Ganz PT CameraRunning Sequence 16.5 Auto-panIn Camera Control mode, the user can control the built-in auto-pan function on theZC-PT2XX. Follow the instructions below to manipulate this function.■ Setting Auto Pan FunctionUp to 4 auto-pan lines can be set up in the OSD menu. Press to enter the OSD setup menu and set up the auto-pan lines asdescribed in the camera operating instructions. The auto-pan setup menu forthe PTZ camera is as shown below.AUTOPANAUTOPAN LINE 1START POINTTO FINDEND POINTTO FINDDIRECTIONRIGHTSPEED 1RUN AUTOPANENTEREXITYESOnly the first auto-pan line can be set directly from the control keyboard; press and select to configure.3.0 Autopan Select1.Run 2.Setting■ Execute Auto-Pan functionThe first auto-pan line can be executed directly from the keyboard; the otherthree can be executed using the OSD menu. Press and then to execute the first auto-pan line defined in the OSD menu.3.0 Autopan Select1.Run 2.Settingxxx Ganz PT CameraRunning Auto Pan…17
For detailed instructions on setting auto-pan lines, refer to the PTZ camera usermanual.6.6 CruiseIn Camera Control mode, the user can control the built-in cruise function on theZC-PT2XX series. Follow the instructions below to manipulate this function.NOTE: If the camera uses Ganz-S protocol, the user is only allowed topan/tilt the camera when setting Cruise line.■ Setting Cruise FunctionPress to enter the OSD setup menu and set up the cruiseline as described in the camera operating instructions.■ Execute Cruise FunctionPress the key on the keyboard to execute the cruise function.xxx Ganz PT CameraRunning Cruise…6.7 Camera Lens ControlIn Camera Control mode, the user can control the camera lens functions. Thefunction of the lens control keys is described below.• Iris Function: Press to open the iris.: Press to close the iris.NOTE: This Iris adjustment is not available for ZC-S series camera.• Zoom Function: Press to zoom the lens in.: Press to zoom the lens out.18• Focus FunctionPress the focus keys to adjust the focus of the lens in manual focus mode.
: Press to move the lens focus closer.: Press to move the lens focus further away.6.8 Auto FocusPress the key to toggle the auto focus function and the LED willbe lit. When the user uses the lens control keys to manually operate the PTZcamera, the auto focus LED will be turned off automatically.19
7. DVR/Multiplexer ControlThe user can control the DVR/multiplexer remotely using the control keyboard.Press the key to enter DVR/multiplexer controlmode, enter the ID number of the DVR/multiplexer, and press the key toconfirm your input.Refer to the DVR/multiplexer user manual for advanced control instructions.DVR/MUX ModeSelect DVR(1-14):01DVR/MUX: 01CH: xx7.1 JogIf the connected DVR/MUX is in playback mode, press the right sideof the key (NEXT) to fast forward playback when paused. Press theleft side of the key (PREV) to rewind playback when paused. Thisfunction key has a similar function to the jog dial on the front panelof the DVR.7.2 DisplayIn DVR Control mode, the user can change the video image display format bypressing the key on the control keyboard. The image togglesbetween 1, 4, 9, 16 etc. split screens.7.3 UserEnter user-defined screen mode. Use the key to toggle between 4, 9,6, 7, 10, 13, 8 and PIP screens. Enter detail view while in recording schedule.7.4 SpotEnter SPOT mode to allow SPOT monitor control. The main monitor displaysthe SPOT status indicator when the keyboard is in SPOT mode.7.5 MenuPress this key to enter the DVR OSD setup menu. In OSD setup mode, use thiskey to complete the setup procedure and exit sub-menus.7.6 EnterIn the DVR OSD setup menu, use this key to enter a sub-menu and select asetup option.20
7.7 Reverse PlayIn DVR control mode, press this key to reverse playback. The key can also beused as the left direction key for panning PTZ cameras in PTZ control mode.7.8 PlaybackIn DVR control mode, press this key for playback. The key can also be used asthe right direction key for panning PTZ cameras in PTZ control mode.7.9 Fast ForwardIn DVR control mode, press this key to fast forward during playback. Pressagain to increase the speed. The user can also use this key as the up directionkey to tilt the PTZ camera in PTZ control mode.7.10 RewindIn DVR control mode, press this key to rewind during playback. Press again toincrease the speed. The user can also use this key as the down direction key totilt the PTZ camera in PTZ control mode.7.11 StopIn DVR control mode, use this key to stop playback or reset alarms and holddown to select multiple cells in the recording schedule.7.12 PauseIn DVR control mode, use this key to pause playback. Press the playback keyagain to resume playback.7.13 Full ZoomThis key enables a 2, 3 or 4 x zoom function. Use the direction keys to movethe zoom area.7.14 PanoramaPlay back a single channel on a multi-split screen. Use the key andchannel keys to adjust the viewing effects.7.15 PIPPicture-in-Picture mode allows you to view live and playback screenssimultaneously.7.16 SearchThe user can press this function key to select or search a video file to find aspecific date, time or event to play back.7.17 PTZIn the same way as when controlling cameras from the DVR front panel, tocontrol PTZ cameras in DVR mode the user must press this key to enter PTZmode.21
When the user presses the key, a PTZ flag will be displayed in the top rightcorner of the screen.In PTZ control mode, use the playback, replay, FF and RW keys to control thePTZ camera pan and tilt.7.18 Lens Control in DVR Control ModeThe user can control the functions of the lens using the lens control keys in PTZmode.• Zoom Function: Press to zoom the lens in.: Press to zoom the lens out.• Focus FunctionPress the focus keys to adjust the focus of the lens in manual focus mode.: Press to move the lens focus closer.: Press to move the lens focus further away.7.19 Auto FocusWhen the user switches to DVR control mode, the auto focus LED will be turnedoff immediately. Press this function key after manually adjusting the cameralens to bring the image back into focus.7.20 Auto SequenceIn DVR control mode, press this key to execute the defined sequence of monitordisplays.7.21 Run SequenceIn PTZ mode, the user can execute the first sequence line set on the PTZcamera. The function is similar to TOUR on the DVR front panel.22
Appendix A: SpecificationsGeneral FeaturesEnvironmentIndoorController interface RS-485Operating temperature 0° ~ 40 °CPower sourceDC 12VPower consumption 5WDimensions65mm (H) ×300mm (W) ×175mm (D)Weight1.5 kgControl FeaturesPTZ CameraDVR/MultiplexerProtocols supportedLens controlPan/tilt controlMode selectionMenu controlGanz-SGanz-PTPelco-D&PChiperZoom: Tele/WideFocus: Near/Far/AutoIRIS: Open/CloseManualPresetSequenceCruiseAuto-panYesYesYesYesYesYes (for receiver box)23
Appendix B: Function Tree■ PTZ Camera ControlFunction Operation DescriptionCamera selection + ~ Press number key to select a PTZ camera tocontrol it.Pan/tilt Joystick Right/left for pan, up/down for tiltLens control Zoom outZoom inFocus nearFocus farAuto focusSet preset ~ + Record preset pointCall preset ~ + Recall preset pointSequence ~ + Execute sequenceAuto-pan + Execute auto-panCruise Execute the cruise set in OSD menu.OSD open Press this key for 3 seconds to open OSDon camera.■ DVR/Multiplexer ControlFunction Operation DescriptionDVR/multiplexer ~ + DVR/multiplexer selectionselectionSplit screen display Toggles between 1,4,9,16,6,8,7Defined screen mode Enter user-defined screen display modeSPOT monitor control Allows control of SPOT monitorEnter MUX/DVR OSD Enter MUX/DVR OSD setup menu fordetailed configuration.Search files Search files by specific date, time and event.Playback key Playback recorded image filesReverse playback key Reverse playback of image filesFast forward Fast forward playback and speedadjustmentRewind Rewind playback and speed downadjustmentFF from pause Jog preview Fast forward playback from pauseRW from pause Jog next Rewind playback from pauseStop playback Stop playbackPause playback Pause playback, press play again to restartZoom in 2,3,4 x zoomMulti-split playback <strong>View</strong> playback image in multi-split screenPicture in picture <strong>View</strong> live and playback on same screenAuto Sequence Execute the defined sequence of monitorPTZ camera controldisplaysZoom: Wide/Tele Camera lens manual zoom adjustmentFocus: Near/FarAuto focusPreset: 1 ~ 32Camera lens manual focus adjustmentCamera lens auto focusSet and go to preset positionExecute the first sequence line set in thecamera OSD24
■ System Function TreeFunction Operation DescriptionLock the keypad Press key Lock/unlock keyboardSystem setting Press key <strong>CCTV</strong> system setting mode1. Set keyboard ID Keyboard ID setting2. Ganz dome control Bypass DVR, Through DVR3. Ganz-S protocol baud Use ◄ ► keys to select Configure the baud rate for Ganz-S protocolrate4800/9600/19200/384004. Date setting Date setting: Year, Month, Day5. Time setting Time setting: Hours, Minutes, Seconds6. System alarm list Record the last 10 alarm messages7. Camera type Use ◄ ► keys to selectprotocol for each camera8. Key press beep Use ◄ ► keys to turnON/OFF9. Alarm response Use ◄ ► keys to turnON/OFF10. Password Set new password25
Appendix C: ID Address Mapping■ System ID Setting RecommendationsItem ID address Device type Comments1 0 00H Host controller Keyboard or computer2 1~223 01H~ DFH PTZ cameras Total 223 PTZ cameras3 224~239 E0H~ EFH DVR/Multiplexer 224~239 ( Mpx1~Mpx16)4 240~254 F0H~ FEH Control keyboard <strong>CCTV</strong> control keyboard5 255 FFH Matrix■ DVR/Multiplexer Channel and Camera ID MappingMUX No MUX/DVR ID Camera ID Comments1 224 E0H 1~16 01H~10H Map to channel 1~16 of MPX2 225 E1H 17~32 11H~20H3 226 E2H 33~48 21H~30H4 227 E3H 49~64 31H~40H5 228 E4H 65~80 41H~50H6 229 E5H 81~96 51H~60H7 230 E6H 97~112 61H~70H8 231 E7H 113~128 71H~80H9 232 E8H 129~144 81H~90H10 233 E9H 145~160 91H~A0H11 234 EAH 161~176 A1H~B0H12 235 EBH 177~192 B1H~C0H13 236 ECH 193~208 C1H~D0H14 237 EDH 209~223 D0H~DFH Only 15 PTZ cameras can beconnected15 238 EEH None Can connect to normal camera16 239 EFH None Can connect to normal camera26
Appendix D: Firmware UpgradeFollow the instructions below to update the keyboard firmware.Set up the upgrade utility on the PC:(1) Open the keyboard upgrade package on the PC. Execute the file “Upgrade.exe” supplied; it isa self-extracting zip file.(2) Execute the file “setup.exe”, which will automatically install the “Keyboard Upgrade Utility”program on the PC.(3) Click ”OK” when the Utility starts running. A direct window will be shown on the screen.(4) Select the directory. The default setting is “D:\Program Files\Upgrade\”(5) After confirming the directory, click the “computer icon”.(6) Click “Continue” to install the upgrade program; “Keyboard Upgrade Utility Setup wascompleted successfully” will appear on the screen when finished.(7) Copy the file “xxxxxxx.tsk” supplied to the directory for the upgrading program.Connect the keyboard to the PC:(8) Connect the COM1 or COM2 port on the PC to the keyboard with a 9-PIN cable (one-to-one,not a cross-over NULL-MODEM cable).Start download process and prepare for upgrade on the keyboard:(9) Press and hold the key and then connect the power to the keyboard.(10) Press the key to update the program.(11) The LCD will then display “Are you sure you want to upgrade” 0=NO, 1=YES.(12) Press the number key to continue the process.(13) The message “Erasing old program!” appears on the control keyboard LCD.(14) “Verifying new program!” is displayed on the control keyboard.(15) “Ready to download!” is displayed on the control keyboard.Execute the upgrade utility for the keyboard firmware upgrade:(16) Go to “Start”, select “All programs”, and choose the “Keyboard Upgrade Utility” to execute theupgrade utility.27
(17) Select the COM port that connects the PC to the keyboard.(18) Go to “File” >> “Open”, and use the file directory to select and open the “xxxxxxx.TSK”upgrade file.(19) Then click “WRITE” to start the programming process.(20) After completing the download, turn off the keyboard.Check the MCU and firmware version:(21) Check the checksum shown on the utility program.(22) Press and hold the key and turn on the keyboard to check the MCUversion.(23) Press and hold the key and turn on the keyboard to check the firmware version.(24) Power up the keyboard again, and make the necessary system settings ( key).28