T485 Powertel 980 - Action On Hearing Loss
T485 Powertel 980 - Action On Hearing Loss
T485 Powertel 980 - Action On Hearing Loss

You also want an ePaper? Increase the reach of your titles
YUMPU automatically turns print PDFs into web optimized ePapers that Google loves.
PowerTel000PowerTel<strong>980</strong>User GuideUser Guide
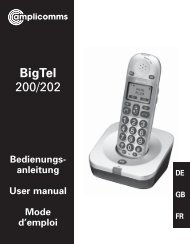
At a glanceCorded phone baseAt a glanceCordless handset and charger base234567840dBPowerTel <strong>980</strong>119 18 17 16Aa91514131211101 Menu/OK2 Play/Pause3 Stop4 Mute/Delete5 Equaliser6 40dB Boost(underhandset)7 Volume up8 Volume down9 Keypad10 Handsfree11 Headset12 Find handset(Page key) /Intercom /Registration13 Quick dialmemories/User profiles14 Phonebook15 Fast forward/Memo16 Up/Redial/Pause17 Incoming calllight/Newmessagesreceived18 Down/Callslist/Recall19 Rewind/OGM1234567891011Aa<strong>980</strong>121314151617181920211 Incoming call light2 Memory 1, 2, 33 Boost button withLED4 Profile setting5 Left softkey (opensthe menu instandby state)6 Internal key7 External call/Handsfree8 /Ringer on/off9 Pause(long press 0)10 Microphone11 Charging light12 Call transfer13 Headset socket(Headset notincluded)14 Up/Redial15 Volume (+ / -)16 Phonebook/Save/OK17 Recall18 End call19 Down/Calls list/Equalizer20 Keypad21 #/KeylockHelpline 0844 800 6503 (See page 114 for costs and hours of operation)Helpline 0844 800 6503 (See page 114 for costs and hours of operation)
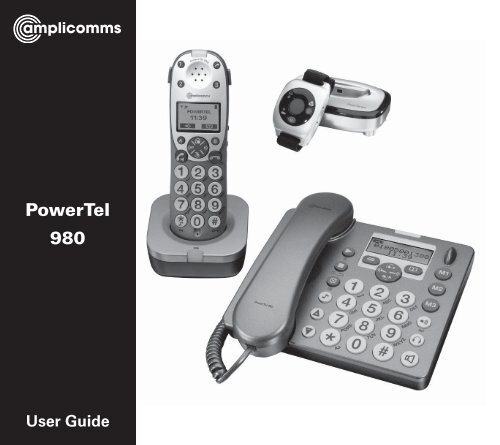
AT A GLANCEWrist shaker432 1 81 Emergency buttonNote: Can only beused with thePowerTel <strong>980</strong> telephone2 Battery charging red light3 Power on/off4 Wrist strap5 Registration mode/Out of range/Low battery2 colour green or red light56 76 Charging contacts7 Charging unit8 Incoming call green lightHelpline 0844 800 6503 (See page 114 for costs and hours of operation)
ContentsCONTENTSGetting started . . . . . . . . . . . . . . . . . . . . . . . . . . . . . . . . . . . . . . . . . . . . . . . . . . . .10Check box contents . . . . . . . . . . . . . . . . . . . . . . . . . . . . . . . . . . . . . . . . . . . . . . . .10Set up your phone system in four simple steps . . . . . . . . . . . . . . . . . . . . . . . . .11Connecting and charging your wrist shaker . . . . . . . . . . . . . . . . . . . . . . . . . . . .13Corded phone display icons explained . . . . . . . . . . . . . . . . . . . . . . . . . . . . . . . .17Handset display icons explained . . . . . . . . . . . . . . . . . . . . . . . . . . . . . . . . . . . . .18Phone menu guide . . . . . . . . . . . . . . . . . . . . . . . . . . . . . . . . . . . . . . . . . . . . . . . . .20How to use your phone menu display . . . . . . . . . . . . . . . . . . . . . . . . . . . . . . . . .20Basic guide . . . . . . . . . . . . . . . . . . . . . . . . . . . . . . . . . . . . . . . . . . . . . . . . . . . . . . .20Making and receiving calls . . . . . . . . . . . . . . . . . . . . . . . . . . . . . . . . . . . . . . . . . .24Make a call using your corded phone . . . . . . . . . . . . . . . . . . . . . . . . . . . . . . . . .24Make a call using your cordless handset . . . . . . . . . . . . . . . . . . . . . . . . . . . . . . .24End a call . . . . . . . . . . . . . . . . . . . . . . . . . . . . . . . . . . . . . . . . . . . . . . . . . . . . . . . .24Take a call . . . . . . . . . . . . . . . . . . . . . . . . . . . . . . . . . . . . . . . . . . . . . . . . . . . . . . . .25Redial a number using your corded phone . . . . . . . . . . . . . . . . . . . . . . . . . . . . .25Redial a number using your cordless handset . . . . . . . . . . . . . . . . . . . . . . . . . .26Call back a previous caller . . . . . . . . . . . . . . . . . . . . . . . . . . . . . . . . . . . . . . . . . . .26Dial a number in your phone book . . . . . . . . . . . . . . . . . . . . . . . . . . . . . . . . . . . .27Dial a number using the quick dial buttons . . . . . . . . . . . . . . . . . . . . . . . . . . . . .27Adjust the handset earpiece volume . . . . . . . . . . . . . . . . . . . . . . . . . . . . . . . . . .28Boost the handset earpiece volume . . . . . . . . . . . . . . . . . . . . . . . . . . . . . . . . . . .28Setting the tone / Equalizer . . . . . . . . . . . . . . . . . . . . . . . . . . . . . . . . . . . . . . . . . .28Helpline 0844 800 6503 (See page 114 for costs and hours of operation) 1
Contents CONTENTSHandsfree feature . . . . . . . . . . . . . . . . . . . . . . . . . . . . . . . . . . . . . . . . . . . . . . . . .29Use handsfree calling on the corded phone . . . . . . . . . . . . . . . . . . . . . . . . . . . .29Use handsfree calling on your cordless handset . . . . . . . . . . . . . . . . . . . . . . . .29See call length . . . . . . . . . . . . . . . . . . . . . . . . . . . . . . . . . . . . . . . . . . . . . . . . . . . .29Use a headset (not included) . . . . . . . . . . . . . . . . . . . . . . . . . . . . . . . . . . . . . . . .30Mute . . . . . . . . . . . . . . . . . . . . . . . . . . . . . . . . . . . . . . . . . . . . . . . . . . . . . . . . . . . .30Switch the handset ringer on and off . . . . . . . . . . . . . . . . . . . . . . . . . . . . . . . . . .30Lock and unlock the handset keypad . . . . . . . . . . . . . . . . . . . . . . . . . . . . . . . . . .30Make an internal call . . . . . . . . . . . . . . . . . . . . . . . . . . . . . . . . . . . . . . . . . . . . . . .31Transfer an external call internally . . . . . . . . . . . . . . . . . . . . . . . . . . . . . . . . . . . .32Make a conference call from the corded phone . . . . . . . . . . . . . . . . . . . . . . . . .33Make a conference call from the cordless handset . . . . . . . . . . . . . . . . . . . . . . .34Find handset . . . . . . . . . . . . . . . . . . . . . . . . . . . . . . . . . . . . . . . . . . . . . . . . . . . . . .34Power failure – What to do . . . . . . . . . . . . . . . . . . . . . . . . . . . . . . . . . . . . . . . . . .35Using your menu – corded phone . . . . . . . . . . . . . . . . . . . . . . . . . . . . . . . . . . . .38User Profiles . . . . . . . . . . . . . . . . . . . . . . . . . . . . . . . . . . . . . . . . . . . . . . . . . . . . . .38Change the profile name . . . . . . . . . . . . . . . . . . . . . . . . . . . . . . . . . . . . . . . . . . . .38Change a profile’s handset volume . . . . . . . . . . . . . . . . . . . . . . . . . . . . . . . . . . .39Change a profile’s boost setting . . . . . . . . . . . . . . . . . . . . . . . . . . . . . . . . . . . . . .39Change a profile’s tone (‘equalizer’) setting . . . . . . . . . . . . . . . . . . . . . . . . . . . . .40Copy a profile . . . . . . . . . . . . . . . . . . . . . . . . . . . . . . . . . . . . . . . . . . . . . . . . . . . . .41Choosing which profile to use . . . . . . . . . . . . . . . . . . . . . . . . . . . . . . . . . . . . . . .42Change ringer melody . . . . . . . . . . . . . . . . . . . . . . . . . . . . . . . . . . . . . . . . . . . . . .42Record a personal ringer melody . . . . . . . . . . . . . . . . . . . . . . . . . . . . . . . . . . . . .432Helpline 0844 800 6503 (See page 114 for costs and hours of operation)
ContentsCONTENTSChange ringer volume . . . . . . . . . . . . . . . . . . . . . . . . . . . . . . . . . . . . . . . . . . . . . .44Switching the boost function on permanently . . . . . . . . . . . . . . . . . . . . . . . . . .44Switch key tone on or off . . . . . . . . . . . . . . . . . . . . . . . . . . . . . . . . . . . . . . . . . . .45Change display contrast . . . . . . . . . . . . . . . . . . . . . . . . . . . . . . . . . . . . . . . . . . . .45Change display language . . . . . . . . . . . . . . . . . . . . . . . . . . . . . . . . . . . . . . . . . . .46Read number . . . . . . . . . . . . . . . . . . . . . . . . . . . . . . . . . . . . . . . . . . . . . . . . . . . . .46Change case . . . . . . . . . . . . . . . . . . . . . . . . . . . . . . . . . . . . . . . . . . . . . . . . . . . . . .47Change System PIN . . . . . . . . . . . . . . . . . . . . . . . . . . . . . . . . . . . . . . . . . . . . . . . .47Change date/time . . . . . . . . . . . . . . . . . . . . . . . . . . . . . . . . . . . . . . . . . . . . . . . . . .48Change clock hours to 12- or 24-hour format display . . . . . . . . . . . . . . . . . . . . .48Reset to default settings . . . . . . . . . . . . . . . . . . . . . . . . . . . . . . . . . . . . . . . . . . . .49Using your phone book – corded phone . . . . . . . . . . . . . . . . . . . . . . . . . . . . . . .50How to use the keypad when using your phone book . . . . . . . . . . . . . . . . . . . .50Enter a name and number in your phone book . . . . . . . . . . . . . . . . . . . . . . . . .51Edit a phone book entry . . . . . . . . . . . . . . . . . . . . . . . . . . . . . . . . . . . . . . . . . . . .51Delete a phone book entry or all entries . . . . . . . . . . . . . . . . . . . . . . . . . . . . . . .52Copy phone book entries to another phone . . . . . . . . . . . . . . . . . . . . . . . . . . . .52Using your quick dial memory – corded phone . . . . . . . . . . . . . . . . . . . . . . . . .54Store a quickdial name and number . . . . . . . . . . . . . . . . . . . . . . . . . . . . . . . . . .54Edit a quick dial entry . . . . . . . . . . . . . . . . . . . . . . . . . . . . . . . . . . . . . . . . . . . . . .54Delete a quick dial entry . . . . . . . . . . . . . . . . . . . . . . . . . . . . . . . . . . . . . . . . . . . .55Helpline 0844 800 6503 (See page 114 for costs and hours of operation) 3
ContentsCONTENTSChange language . . . . . . . . . . . . . . . . . . . . . . . . . . . . . . . . . . . . . . . . . . . . . . . . . .69Change date/time . . . . . . . . . . . . . . . . . . . . . . . . . . . . . . . . . . . . . . . . . . . . . . . . . .70Change clock hours to 12- or 24-hour format . . . . . . . . . . . . . . . . . . . . . . . . . . .70Set alarm . . . . . . . . . . . . . . . . . . . . . . . . . . . . . . . . . . . . . . . . . . . . . . . . . . . . . . . .71Change base (corded phone) ringer melody . . . . . . . . . . . . . . . . . . . . . . . . . . . .72Change base (corded phone) ringer volume . . . . . . . . . . . . . . . . . . . . . . . . . . .72Change system PIN code . . . . . . . . . . . . . . . . . . . . . . . . . . . . . . . . . . . . . . . . . . .73Appointment . . . . . . . . . . . . . . . . . . . . . . . . . . . . . . . . . . . . . . . . . . . . . . . . . . . . . .74Stop watch . . . . . . . . . . . . . . . . . . . . . . . . . . . . . . . . . . . . . . . . . . . . . . . . . . . . . . .75Reset to default settings . . . . . . . . . . . . . . . . . . . . . . . . . . . . . . . . . . . . . . . . . . . .75Using your phone book - cordless handset . . . . . . . . . . . . . . . . . . . . . . . . . . . . .76How to use the keypad when using your phone book . . . . . . . . . . . . . . . . . . . .76Enter a name and number in your phone book . . . . . . . . . . . . . . . . . . . . . . . . .77Edit a phone book entry . . . . . . . . . . . . . . . . . . . . . . . . . . . . . . . . . . . . . . . . . . . .77Delete a phone book entry or all entries . . . . . . . . . . . . . . . . . . . . . . . . . . . . . . .78Copy phone book entries to the Corded phone or another registered handset78Using your quick dial memory buttons - cordless handset . . . . . . . . . . . . . . . .80Store a quick dial name and number . . . . . . . . . . . . . . . . . . . . . . . . . . . . . . . . . .80Edit a quick dial entry . . . . . . . . . . . . . . . . . . . . . . . . . . . . . . . . . . . . . . . . . . . . . .80Delete a quick dial entry . . . . . . . . . . . . . . . . . . . . . . . . . . . . . . . . . . . . . . . . . . . .81Using your calls list - cordless handset . . . . . . . . . . . . . . . . . . . . . . . . . . . . . . . .82Store numbers from your calls list to the phone book . . . . . . . . . . . . . . . . . . . .83Helpline 0844 800 6503 (See page 114 for costs and hours of operation) 5
CONTENTSStore numbers from your calls list to a quick dial memory . . . . . . . . . . . . . . . .83Delete a single calls list entry . . . . . . . . . . . . . . . . . . . . . . . . . . . . . . . . . . . . . . . .84Delete all calls list entries . . . . . . . . . . . . . . . . . . . . . . . . . . . . . . . . . . . . . . . . . . .84Using your answering machine . . . . . . . . . . . . . . . . . . . . . . . . . . . . . . . . . . . . . .86Switch answering machine on or off . . . . . . . . . . . . . . . . . . . . . . . . . . . . . . . . . .86Taking a call from the answering machine . . . . . . . . . . . . . . . . . . . . . . . . . . . . .86Set the answering machine language . . . . . . . . . . . . . . . . . . . . . . . . . . . . . . . . .86Adjust the base loudspeaker volume . . . . . . . . . . . . . . . . . . . . . . . . . . . . . . . . . .87Set the answer mode . . . . . . . . . . . . . . . . . . . . . . . . . . . . . . . . . . . . . . . . . . . . . . .87Record your outgoing message . . . . . . . . . . . . . . . . . . . . . . . . . . . . . . . . . . . . . .88Check your outgoing message . . . . . . . . . . . . . . . . . . . . . . . . . . . . . . . . . . . . . . .88Set the answer delay . . . . . . . . . . . . . . . . . . . . . . . . . . . . . . . . . . . . . . . . . . . . . . .89Record a memo . . . . . . . . . . . . . . . . . . . . . . . . . . . . . . . . . . . . . . . . . . . . . . . . . . .90Listen to messages or memos using the base buttons . . . . . . . . . . . . . . . . . . .90Delete a single message or memo . . . . . . . . . . . . . . . . . . . . . . . . . . . . . . . . . . .91Delete all old messages and memos using the base . . . . . . . . . . . . . . . . . . . . .91Listen to messages or memos using your handset . . . . . . . . . . . . . . . . . . . . . .91Memory full . . . . . . . . . . . . . . . . . . . . . . . . . . . . . . . . . . . . . . . . . . . . . . . . . . . . . .91Remote access to your answering machine . . . . . . . . . . . . . . . . . . . . . . . . . . . .92Change PIN . . . . . . . . . . . . . . . . . . . . . . . . . . . . . . . . . . . . . . . . . . . . . . . . . . . . . . .92Call in to check messages . . . . . . . . . . . . . . . . . . . . . . . . . . . . . . . . . . . . . . . . . . .93Remote access instructions guide . . . . . . . . . . . . . . . . . . . . . . . . . . . . . . . . . . . .94Using your wrist shaker . . . . . . . . . . . . . . . . . . . . . . . . . . . . . . . . . . . . . . . . . . . .96Switch on . . . . . . . . . . . . . . . . . . . . . . . . . . . . . . . . . . . . . . . . . . . . . . . . . . . . . . . .966Helpline 0844 800 6503 (See page 114 for costs and hours of operation)
CONTENTSContentsSet the dial mode on the cordless handset . . . . . . . . . . . . . . . . . . . . . . . . . . . .112Help and support . . . . . . . . . . . . . . . . . . . . . . . . . . . . . . . . . . . . . . . . . . . . . . . . .114Troubleshooting guide . . . . . . . . . . . . . . . . . . . . . . . . . . . . . . . . . . . . . . . . . . . . .114Safety information . . . . . . . . . . . . . . . . . . . . . . . . . . . . . . . . . . . . . . . . . . . . . . . .120Intended use . . . . . . . . . . . . . . . . . . . . . . . . . . . . . . . . . . . . . . . . . . . . . . . . . . . . .120Phone location . . . . . . . . . . . . . . . . . . . . . . . . . . . . . . . . . . . . . . . . . . . . . . . . . . .120Power supply . . . . . . . . . . . . . . . . . . . . . . . . . . . . . . . . . . . . . . . . . . . . . . . . . . . .121Medical equipment . . . . . . . . . . . . . . . . . . . . . . . . . . . . . . . . . . . . . . . . . . . . . . .121Rechargeable batteries . . . . . . . . . . . . . . . . . . . . . . . . . . . . . . . . . . . . . . . . . . . .121<strong>Hearing</strong> aid compatibility . . . . . . . . . . . . . . . . . . . . . . . . . . . . . . . . . . . . . . . . . .122Disposal . . . . . . . . . . . . . . . . . . . . . . . . . . . . . . . . . . . . . . . . . . . . . . . . . . . . . . . .122Technical details . . . . . . . . . . . . . . . . . . . . . . . . . . . . . . . . . . . . . . . . . . . . . . . . . .123Default settings . . . . . . . . . . . . . . . . . . . . . . . . . . . . . . . . . . . . . . . . . . . . . . . . . .124Maintenance and guarantee . . . . . . . . . . . . . . . . . . . . . . . . . . . . . . . . . . . . . . . .125Maintenance . . . . . . . . . . . . . . . . . . . . . . . . . . . . . . . . . . . . . . . . . . . . . . . . . . . .125Guarantee . . . . . . . . . . . . . . . . . . . . . . . . . . . . . . . . . . . . . . . . . . . . . . . . . . . . . . .125Declaration of conformity . . . . . . . . . . . . . . . . . . . . . . . . . . . . . . . . . . . . . . . . . .1268Helpline 0844 800 6503 (See page 114 for costs and hours of operation)
Getting startedHelpline 0844 800 Helpline 6503 0844 (See 800 6503 page (See page 58 for 114 for costs and hours of operation) of operation) 9 9
GETTING STARTEDGetting startedImportant: please make sure you’ve read the safety information on page 120before you set up your phone system.Check box contentsIf you have purchased a PowerTel <strong>980</strong> pack you should have:• 1 corded phone (base)• 1 power adapter• 1 corded handset• 1 charger base with power adapter• 1 handset coil cord• 1 telephone cable• 1 cordless handset• 3 rechargeable AAA 1.2V 750mAh• 1 battery coverNiMH batteries• 1 belt clip• 1 charger unit for the wrist shaker• 1 wrist shaker with a wrist strap (with power adapter plug attached)attachedImportant: use only the power adapters, telephone line cord and batteriessupplied with your PowerTel <strong>980</strong> otherwise your phone may not work.10Helpline 0844 800 6503 (See page 114 for costs and hours of operation)
GETTING STARTEDSet up your phone system in four simple steps1 Connect your corded phone1 Plug the power adapter into the socket marked on the underside of yourcorded phone and the other end into the mains power wall socket and switchthe power on.2 Plug the telephone cable into the socket marked on the underside ofyour corded phone and plug the other end into the phone wall socket.3 Connect the handset to the telephone base using the coiled cord.Socket for VibratePad (PTV100)available asan accessoryMains powerwall socketJack for headset(headset not included)Helpline 0844 800 6503 (See page 114 for costs and hours of operation) 11
GETTING STARTEDImportant: use only the power adapters, telephone line cord and batteriessupplied with your PowerTel <strong>980</strong> otherwise your phone may not work. Youshould ensure access to the power adapter plug is not obstructed by furnitureor such.2 Connect your charger basePlug the other power adapter that’s already attached to your charger base intoyour mains power wall socket and switch the power on.3 Install your batteries1 Insert your rechargeable batteries into your handset. Make sure they’re theright way round so ‘+’ lines up with ‘+’.2 Replace your handset’s battery compartment cover.12Helpline 0844 800 6503 (See page 114 for costs and hours of operation)
GETTING STARTED4 Charge your handsetSo it can charge fully, place your handset on its base to charge for at least 16hours (make sure the power socket is switched on!).Important: only use the rechargeable 750mAh NiMH batteries supplied.Over time if you need to replace the batteries make sure they are of the sametype as those supplied. Never use Alkaline batteries.Attach the belt clipThere is a belt clip included in the box that you can attach to the back of yourhandset if required. Simply turn the handset over and slot the belt clip securelyinto the two recesses located on either side of the handset.Connecting and charging your wrist shaker1 Position your charger unitMake sure your charger unit:• is on a dry, flat and stable surface• isn’t a trip hazard with its power cable• is at least one metre from other electrical appliances2 Plug in the charger unitPlug your charger unit into your power supply. And switch on at the socket.Helpline 0844 800 6503 (See page 114 for costs and hours of operation) 13
GETTING STARTED3 Place the wrist shaker in the charger unitWhen you place your wrist shaker on its charger unit, make sure its two connectionpoints are facing down into the unit. You’ll know your wrist shakerischarging properly when you see a red light on it.So it can charge fully, your wrist shaker needs to charge for at least 10 hours beforeyou can use it (make sure the power socket is switched on!).Mains powerwall socketNote: when fully charged, your wrist shaker’s battery should last five days. Thelarger red light will flash slowly when the battery is low and you will need tocharge it for about another ten hours.14Helpline 0844 800 6503 (See page 114 for costs and hours of operation)
4 Switch your wrist shaker onPress and hold the button for about five seconds. You’ll see the green lightwith the warning triangle come on.GETTING STARTEDNote: if the light flashes green then red it means your wrist shakereitherisn’t registered or is out of range. Move closer to your PowerTeltelephone toensure you are within range. If the light still flashes, see page 104 for registrationinstructions.Power on/offbuttonbutton for about five se-To switch your wrist shaker off, press and hold theconds. The green light will go off.Helpline 0844 800 6503 (See page 114 for costs and hours of operation)15
GETTING STARTED5 Turn on “SOS Motor” featureYou need to turn on the SOS Motor feature on your telephone for your wristshaker to vibrate when you receive an incoming call.1 At the corded phone, press the left hand button under the display .2 Press on the large central round button to scroll to SOS Motor andpress the button again.3 Use the or buttons to scroll to <strong>On</strong> and press the buttonagain. Saved is displayed.Wrist strapThe wrist strap comes pre-attached to the wrist shaker but if you need to reattachor adjust it please follow these instructions:Thread the wrist strap through the slot on one side of the wrist shaker (front toback), around the back and then through the other slot (back to front), just likeyou would with a wrist watch.You can now wear your wrist shaker and tighten comfortably with the velcrofastening.Your telephones and wrist shaker are now ready for use!16Helpline 0844 800 6503 (See page 114 for costs and hours of operation)
GETTING STARTEDCorded phone display icons explainedThe following icons appear in your corded phone display to indicate:Phone book modeRinger offHandsfree modeCall in progressBoost receiver volume is on (Icon will flash)Mute microphoneYou have new callsInternal call in progressHelpline 0844 800 6503 (See page 114 for costs and hours of operation) 17
GETTING STARTEDHandset display icons explainedThe following icons appear in your cordless handset display to indicate:MenuConfirm / OKBackPhone book modeThere is more information to view on the leftThere is more information to view on the rightBattery statusRinger offAn alarm is activated18Helpline 0844 800 6503 (See page 114 for costs and hours of operation)
GETTING STARTEDKeylock is onHandsfree modeCall in progressBoost receiver volume is on (Icon will flash)Mute handset microphoneYou have new callsWhen steady, the handset is in range of the baseWhen flashing, the handset is out of range of the baseInternal call in progressAnswering machine is onAnswering machine is offHelpline 0844 800 6503 (See page 114 for costs and hours of operation) 19
GETTING STARTEDPhone menu guideUse this section to find your way around the menu display on your phones.How to use your phone menu displayWhen you’ve set up your phones and everything’s connected, use your menudisplay to do things with your phone – from changing the ringer sound to settingup user profiles and saving phone numbers.Basic guideOpen main menu: press (corded phone) or (handset).Browse sub menu: open your main menu and then press or .Select sub menu item: scroll using or until the item you’re looking foris shown and then press (corded phone) or (handset).Browse a function: open your sub menu and then press or .20Helpline 0844 800 6503 (See page 114 for costs and hours of operation)
GETTING STARTEDSelect a function: scroll using or until the function you’re looking for isshown and then press (corded phone) or (handset).Enter digits or letters: use your keypad.Confirm or save an entry or action: press (corded phone) or (handset)..Cancel and return to standby: press (corded phone) or (handset).Note: if you don’t do anything, your phone will automatically go on standbyafter 30 seconds.Private exchanges: if your phone is going to use a private exchange(for example, if you have to dial ‘9’ to get an outside line, please followthe steps on page 110).Helpline 0844 800 6503 (See page 114 for costs and hours of operation) 21
GETTING STARTED22Helpline 0844 800 6503 (See page 114 for costs and hours of operation)
Making andreceiving callsHelpline 0844 800 Helpline 6503 0844 (See 800 6503 page (See page 58 for 114 for costs and hours of operation) of operation) 23 23
MAKING AND RECEIVING CALLSMaking and receiving callsMake a call using your corded phoneAs you enter each number to be dialled it will be announced to you. For thisfeature to work you must have the Read number feature set to <strong>On</strong>, see page 46.1. Enter the number you wish to call using your corded phone’s keypad.2. If you make a mistake, press to delete the last digit.3. Dial the number by picking up the handset or pressing .4. End your call by putting the handset back in its cradle.Make a call using your cordless handset1. Enter the number you wish to call using your handset’s keypad.2. If you make a mistake, press to delete it.3. Dial the number by pressing .4. End your call by pressing .End a callSimply put the handset in its base cradle if you’re using your corded phone orpresson the cordless handset.24Helpline 0844 800 6503 (See page 114 for costs and hours of operation)
Take a callCorded phone: Simply lift the handset or press .MAKING AND RECEIVING CALLSCordless handset: Simply lift the handset off the charger base (if “Auto Talk“ isset to ON, see page 67) and speak into the phone or, if the handset is off thecharger base (or “Auto Talk“ is set to OFF, see page 67), press and thenspeak into the phone.Redial a number using your corded phoneYour corded phone stores the last five numbers you’ve dialled (max. 24 digitseach).1. Open the redial list by pressing .2. Scroll through the redial list using the or buttons until thenumber you wish to redial is highlighted. To dial the number simply lift thehandset or pressto dial in handsfree mode.Note: each phone number will be announced as you scroll through theredial list provided the Read Number feature is enabled. See page 46, “Readnumber” for details.Helpline 0844 800 6503 (See page 114 for costs and hours of operation) 25
MAKING AND RECEIVING CALLSRedial a number using your cordless handsetYour handset stores the last ten numbers you’ve dialled (max. 24 digits each).1. Open the redial list by pressing .2. Scroll through the redial list using or until the number you wish toredial is highlighted and then pressCall back a previous callerYour phone stores the last 30 incoming calls.to dial the number.1. Open the incoming calls list by pressing (corded phone) or (cordlesshandset).2. Scroll to find the number you want to call back using or then liftyour corded handset or presson the cordless handset.Note: each phone number will be announced (corded phone only) as you scrollthrough the incoming calls list provided the Read Number feature is enabled.See page 46, “Read number” for details.26Helpline 0844 800 6503 (See page 114 for costs and hours of operation)
MAKING AND RECEIVING CALLSDial a number in your phone bookTo store a phone number in your phone book, see page 51 (corded phone) orpage 77 (cordless handset).1. Open your phone book by pressing (corded phone) or (handset).2. Scroll to find your number using or then lift your corded handset orpresson the cordless handset.orenter the first letter of the desired entry using the keypad (e. g. “m” for “Miller”.If there are more than one entry beginning with “m“ scroll to find yournumber using or then lift your corded handset or press on thecordless handset.Dial a number using the quick dial buttonsTo store phone numbers under your quick dial memory buttons, see page 54(corded phone) or page 80 (cordless handset).1. Choose your quick dial number by pressing , or on the cordedphone or , or on the cordless handset.Helpline 0844 800 6503 (See page 114 for costs and hours of operation) 27
MAKING AND RECEIVING CALLS2. Lift your corded phone handset or press on the cordless handset to dialthe number.Note: the quick dial number you’ve selected will be announced (corded phoneonly) when you press the quick dial button provided the Read Number featureis enabled. See page 46, “Read number” for details.Adjust the handset earpiece volumeYou can increase or decrease the volume to suit you. To adjust the volumewhile you’re making a call, press the buttons and on the corded phoneor and on the right side of the handset.Boost the handset earpiece volumeTo boost the handset earpiece volume while you’re making a call, press thekey on the corded phone or the key on the top left side of the handset.An image of an ear will flash in the display to show that boost is on.Setting the tone / EqualizerTo set the tone (equalizer) during a call, presson the corded phone and setthe sound by pressing the keys or ..<strong>On</strong> the cordless handset press or during a call.28Helpline 0844 800 6503 (See page 114 for costs and hours of operation)
MAKING AND RECEIVING CALLSHandsfree featureUse the handsfree feature to talk to your caller without holding the handset orto let other people in the room listen to the conversation.Use handsfree calling on the corded phone1. To switch handsfree mode on and off, simply press .2. To adjust handsfree volume, press or (there are 5 levels).Use handsfree calling on your cordless handset1. Switch on handsfree mode by pressing the key twice.2. Exit handsfree mode by pressing .3. To adjust the handsfree volume, press the buttons and on the rightof the handset.Note: you can’t boost volume when using handsfree calling.See call lengthYou can see the call time on your display.Helpline 0844 800 6503 (See page 114 for costs and hours of operation) 29
MAKING AND RECEIVING CALLSUse a headset (not included)Simply plug your headset into the headset socket marked on the right sideof the corded phone as well as on the handset. This socket can also be usedwith an Induction Neck Loop NL100 (not supplied).MuteDuring a call you can mute the microphone so your caller cannot hear you.To switch off the microphone, simply press (corded phone) or (handset).To switch it on again, simply press (corded phone) or (handset) again.Switch the handset ringer on and offTo switch the ringer on and off, simply press and holdof seconds.Lock and unlock the handset keypadYou can still answer calls as usual when your keypad is locked.for a coupleTo lock the keypad, press and hold for 3 seconds. The icon willbe displayed. To unlock, press and hold again for 3 seconds.30Helpline 0844 800 6503 (See page 114 for costs and hours of operation)
MAKING AND RECEIVING CALLSMake an internal callYour corded phone base has an internal call number 0, and your cordlesshandset 1. You can make internal calls between the two devices. These calls arefree of charge.1. Press on the cordless handset or on the corded phone. The displaywill show Internal - (on the handset) or Handset? (on the corded phone).Enter the internal call number of the device you want to call, e.g. 1 (to callhandset) or 0 (to call the corded phone).2. To accept the call lift the handset on the corded phone or press on thecordless handset.3. End your call by replacing the handset on the base cradle or press on thecordless handset.Helpline 0844 800 6503 (See page 114 for costs and hours of operation) 31
MAKING AND RECEIVING CALLSTransfer an external call internally1. During your external call, press or on the cordless handset.2. Then enter the internal call number of the device you want to transfer the callto e.g. 0 (to transfer the call to corded phone). If you are using the cordedphone, pressfor approx. 3 seconds, until you hear a short beep.2. To accept the call on the receiving handset, press or lift the handset onthe corded phone.3. You can now speak to the person answering and tell them you are going totransfer a call. The call will be transferred when you presson the cordlesshandset or replace the handset on the corded phone.Note: if no one picks up the call you’re trying to transfer, you can take thecall back on your phone by pressing or .INT32Helpline 0844 800 6503 (See page 114 for costs and hours of operation)
Make a conference call from the corded phoneIt’s easy to hold a conference call between one external and two internal callers.1. During your external call, press and hold until a short beep is heard,then enter the internal call number of the handset you want to transfer thecall to e.g. 1 (to call cordless Handset 1).2. To accept the call on the receiveing handset, press .3. <strong>On</strong>ce the call has been received on the other handset that you’ve dialled, activateyour conference call by pressing and holding4. You can put the external call on hold by pressing .MAKING AND RECEIVING CALLSfor 2 seconds.5. The conference call will end when you put the handset back in its cradle.Helpline 0844 800 6503 (See page 114 for costs and hours of operation)33
MAKING AND RECEIVING CALLSMake a conference call from the cordless handset1. During your external call, press or . Then enter the internal callnumber of the handset you want to transfer the call to e.g. 0 (to call the cordedphone).2. To accept the call on the receiving device, lift the handset on the cordedphone.3. <strong>On</strong>ce the call has been received on the other handset that you’ve dialled, activateyour conference call by pressingbriefly.4. The conference call will end when you press .Find handsetYou can locate a missing handset or alert a handset user that they are wantedby causing the handset to beep from the corded phone.1. Press on the corded phone. The handset(s) will beep.2. Press any button on the handset to stop the handset(s) beeping.34Helpline 0844 800 6503 (See page 114 for costs and hours of operation)
MAKING AND RECEIVING CALLSPower failure – What to doIf your mains power fails, you can still use your corded phone to make andreceive calls – though the incoming call light won’t work, your caller’s detailswon’t be stored, and the display will only show when you lift the handset.You can still also:• View and dial numbers using your phonebook or the , and keys• Dial out a telephone number• Adjust the earpiece volume• Mute the microphoneHelpline 0844 800 6503 (See page 114 for costs and hours of operation)35
MAKING AND RECEIVING CALLS36Helpline 0844 800 6503 (See page 114 for costs and hours of operation)
Using your menu -corded phoneHelpline 0844 800 Helpline 6503 0844 (See 800 6503 page (See page 58 for 114 for costs and hours of operation) of operation) 37 37
USING YOUR MENU – CORDED PHONEUsing your menu – corded phoneFor information on your phone book, please go to page 50.For information on your answering machine, please go to page 86.User ProfilesYou can store 3 different user profiles, each with different settings for the “Volume“,“Boost“ and “Equalizer“ feature by naming it (Max 10 letters).Priority/Default SettingIf you are the main user of this telephone you should change the settings inthe menu so that they are just right for you. These settings will be memorisedautomatically whenever you wish to make or answer a call.The user profile feature can be used by others in the household whosepreferences for volume, boost and equalizer will also be memorised andapplied as indicated below.Change the profile name1. Open your menu by pressing , then scroll using or until youhighlight Profile and press .2. Scroll using or until you highlight the desired profile and press.38Helpline 0844 800 6503 (See page 114 for costs and hours of operation)
3. Scroll using or until you highlight Name and press .4. Delete the current name by pressing .5. Enter a new name (up to ten letters) and press .Change a profile’s handset volumeYou have a choice of five volume levels.1. Open your menu by pressing , then scroll using or until youhighlight Profile and press .2. Scroll using or until you highlight the desired profile and press.3. Scroll using or until you highlight Volume and press .4. You’ll see the current volume level (e.g. 3).5. Change the volume level using or and press .Change a profile’s boost setting1. Open your menu by pressing , then scroll using or until youhighlight Profile and press .2. Scroll using or until you highlight the desired profile and press.USING YOUR MENU – CORDED PHONEHelpline 0844 800 6503 (See page 114 for costs and hours of operation)39
USING YOUR MENU – CORDED PHONE3. Scroll using or until you highlight Boost and press .4. You’ll see the current boost setting (i.e. <strong>On</strong> or Off).5. Change the boost setting using or and press .Change a profile’s tone (‘equalizer’) setting1. Open your menu by pressing , then scroll using or until youhighlight Profile and press .2. Scroll using or until you highlight the desired profile and press.3. Scroll using or until you highlight Equalizer and press .4. You’ll see the current tone setting.5. Change the tone setting using or and press .Note: when you finish changing any profile settings, presscorded phone back to standby.to put the40Helpline 0844 800 6503 (See page 114 for costs and hours of operation)
Copy a profileYou can easily copy a profile to another registered and compatible PowerTelphone.1. Open your menu by pressing , then scroll using or untilyou highlight Profile and press .2. Scroll using or until you highlight the desired profile and press.3. Scroll using or until you highlight Copy and press .4. Scroll using or until you highlight the handset (e.g. 1, 2, 3, 4 or 5)you want to copy the profile to, and press .5. <strong>On</strong> the handset you’re copying the profile to: to confirm, press .Or to cancel, press .USING YOUR MENU – CORDED PHONEHelpline 0844 800 6503 (See page 114 for costs and hours of operation)41
USING YOUR MENU – CORDED PHONEChoosing which profile to useYou need to use the handset to choose a profile to use for a call – you can’tchoose a profile using handsfree.Before you answer an incoming call, press , or – depending onwhich profile you want to use. The display will confirm your choice.When you want to make a call and before you dial the number, press and hold, or – depending on which profile you want to use. The display willconfirm your choice.Note: once you’ve selected a profile to use when making a call, you haveabout 30 seconds to dial the call under that profile before the system willreturn to its default settings.Change ringer melodyYou have a choice of 10 ringer melodies (+ max. 5 personal ringer melodies) forexternal calls and 9 ringer melodies for internal calls.1. Open your menu by pressing , then scroll using or untilyou highlight Ringer Tone and press .2. Choose whether you want to use this melody for external or internal calls byscrolling or to highlight either EXT Melody or INT Melody, andpress .42Helpline 0844 800 6503 (See page 114 for costs and hours of operation)
USING YOUR MENU – CORDED PHONE3. You’ll see the current settings.4. Scroll using or until you highlight the ringer tone you want touse and press .Record a personal ringer melodyYou can record personal ringer melodies. They will appear in the list of melodiesfor external calls. You can record up to 5 personal ringer melodies.1. Open your menu by pressing , then scroll using or untilyou highlight Ringer Tone and press .2. Scroll using or until you highlight Rec. Ringer and press .3. Scroll using or until you highlight Record New and press .4. Record your personal ringer tone after the beep.5. Stop recording by pressing .6. Enter a name for the personal ringer tone and press .In the menu “Rec. Ringer“ you can rename your personal ringtones and deletethem one by one or all.Helpline 0844 800 6503 (See page 114 for costs and hours of operation)43
USING YOUR MENU – CORDED PHONEChange ringer volumeYou have a choice of five volume levels plus Off.1. Open your menu by pressing , then scroll using or untilyou highlight Ringer Tone and press .2. Scroll using or until you highlight Volume and press .3. You’ll see the current volume level (e.g. Ring Vol 5).4. Change the ringer volume using or and press .Switching the boost function on permanentlyWhen this feature is set to “<strong>On</strong>” the boost function is activated permanently.The display shows .During a call the boost button is illuminated andflashes in the display.By pressing the buttonyou can switch off the boost function for the currentcall. It will be switched on again for the next call.If the boost function is switched off, you can activate it by pressingbe switched off again for the next call.. It will1. Open your menu by pressing , then scroll using or untilyou highlight Settings and press .44Helpline 0844 800 6503 (See page 114 for costs and hours of operation)
2. Scroll using or until you highlight Boost <strong>On</strong> and press .3. You’ll see the current boost memory setting (e.g. Off).4. Change the boost memory setting using or and press .Switch key tone on or off1. Open your menu by pressing , then scroll using or until youhighlight Key Tone and press .2. You’ll see the current key tone setting (i.e. <strong>On</strong> or Off).3. Change the key tone on or off using or and press .Change display contrastYou have a choice of five screen contrast levels.1. Open your menu by pressing , then scroll using or until youhighlight Display and press .2. Scroll using or until you highlight Contrast and press .3. You’ll see the current contrast setting (e.g. 4).USING YOUR MENU – CORDED PHONE4. Change the contrast setting using or and press .Helpline 0844 800 6503 (See page 114 for costs and hours of operation)45
USING YOUR MENU – CORDED PHONEChange display languageYou have a choice of six languages to use on your corded phone: English, German,French, Spanish, Italian and Dutch.1. Open your menu by pressing , then scroll using or until youhighlight Display and press .2. Scroll using or until you highlight Language and press .3. You’ll see the current language setting (e.g. English).4. Change the language setting using or and press .Read numberWhen this feature is set to <strong>On</strong>: as you enter each number or press a quickdialbutton to make a call, or when you scroll through your phonebook entries, yourredial list or calls list the telephone numbers will be announced to you.1. Open your menu by pressing , then scroll using or until youhighlight Settings and press .2. Scroll using or until you highlight Read Number and press .3. You’ll see the current read number setting (e.g. <strong>On</strong>).4. Change the read number setting using or and press .46Helpline 0844 800 6503 (See page 114 for costs and hours of operation)
Change caseSelect a font set (ABC = without special characters / AÀÁÂÃÄÅ = with specialcharacters / ABΓ = Greek / AБBΓ = Cyrillic). This font set will be used for entriesin the phonebook.1. Open your menu by pressing , then scroll using or untilyou highlight Settings and press .2. Scroll using or until you highlight Change Case and press .3. The current setting is marked (e. g. ® ABC).4. Change the case setting using or and press .Change System PIN1. Open your menu by pressing , then scroll using or untilyou highlight Settings and press .2. Scroll using or until you highlight System PIN and press .3. Enter your old PIN and press .4. Enter your new PIN and press .5. Enter your new PIN once again and press .USING YOUR MENU – CORDED PHONEHelpline 0844 800 6503 (See page 114 for costs and hours of operation)47
USING YOUR MENU – CORDED PHONENOTE: If you are sure you want to change the PIN from the default, pleasekeep a note of it since it will not possible to carry out certain functions withoutit. It is also not possible to recover a lost PIN.Change date/time1. Open your menu by pressing , then scroll using or untilyou highlight Time and press .2. Scroll using or until you highlight Date & Time and press .3. Enter the day, month and year and press .4. Enter the hours and press .Change clock hours to 12- or 24-hour format display1. Open your menu by pressing , then scroll using or untilyou highlight Time and press .2. Scroll using or until you highlight Format and press .3. You’ll see the current time format setting (e.g. 24 hour).4. Change the time format using or and press .48Helpline 0844 800 6503 (See page 114 for costs and hours of operation)
USING YOUR MENU – CORDED PHONEFor information on dial mode, please go to page 110.For information on recall, please go to page 110.Reset to default settingsNote: your phone book, calls and redial lists and any answering machinemessages will be deleted if you reset your corded phone to its default settings.1. Open your menu by pressing , then scroll using or untilyou highlight Reset and press .2. Enter the System PIN and press . The corded phone will be reset.Helpline 0844 800 6503 (See page 114 for costs and hours of operation)49
USING YOUR PHONE BOOK – CORDED PHONEUsing your phone book – corded phoneYou can store, alphabetically, up to 200 names and their phone numbers in yourphone book. To quickly find a phone book entry, simply enter the first letter of thename you’ve stored.Note: each phone book entry allows for up to 16 letters for any name and upto 24 digits for any phone number.Important: please remember to also enter the area code for each phonenumber you enter in your phone book.How to use the keypad when using your phone bookYou’ll see that the keys on your keypad have letters as well as numbers. If youpress a chosen key a number of times it’ll show you all the numbers and lettersit represents.Here are some keys you may find useful when entering names and phonenumbers in your phone book:• press for a space• press or for certain special characters• press to delete a number or letter you’ve entered• press to toggle between lower case letters and upper case letters.50Helpline 0844 800 6503 (See page 114 for costs and hours of operation)
Enter a name and number in your phone book1. Press to open the phone book.2. If the phone book is empty, the display shows Empty.If there are entries, the first entry will be shown.Press , then scroll using or until you highlight Add New andpress .3. Enter the name you want to store and press .4. Enter the phone number you want to store and press .5. Scroll using or to choose a ringer melody for this name and numberand press .Edit a phone book entryUSING YOUR PHONE BOOK – CORDED PHONE1. Press to open the phone book.2. Scroll using or to find the entry you want to edit and press .3. Scroll using or until you highlight Edit and press .4. Press to delete characters and use the keypad to enter new ones, thenpress .Helpline 0844 800 6503 (See page 114 for costs and hours of operation)51
USING YOUR PHONE BOOK – CORDED PHONE5. Press to delete digits and use the keypad to enter new ones, then press.6. Scroll using or to choose a ringer melody for this entry and press.Delete a phone book entry or all entries1. Press to open the phone book.2. Scroll using or to find the entry you want to delete and press.3. Scroll using or until you highlight Delete or Delete All and press.4. Press to confirm or , to cancel.Copy phone book entries to another phoneNote: you can only copy the phone book to another phone if that phoneis registered on your phone system. See page 106.52Helpline 0844 800 6503 (See page 114 for costs and hours of operation)
USING YOUR PHONE BOOK – CORDED PHONEIt’s easy to copy:• a single entry (Copy entry)• entries not already on the handset you’re copying to (Copy append)• all entries (Copy all)Important: when you copy all entries to a handset, all existing entries willbe deleted. To prevent this from happening you can use the “Copy appendmode”.1. Press to open the phone book.2. Scroll using or to find the entry you want to copy and press.3. Scroll using or to either Copy entry, Copy append or Copy all andpress .4. Select the handset you want to copy to by pressing or and press.5. Pick up the handset you’re copying entries to and press .Helpline 0844 800 6503 (See page 114 for costs and hours of operation)53
USING YOUR QUICK DIAL MEMORY – CORDED PHONEUsing your quick dial memory – corded phoneYou can store a name (max. 16 characters) and telephone number (max. 24 digits)under each of the quick dial memory buttons: , and .Store a quickdial name and number1. Choose the quick dial button under which you want to store a name andnumber by pressing either , or .2. Press twice.3. Enter the name you want to store using the keypad and press .4. Enter the phone number you want to store and press .5. Scroll using or to choose a ringer melody for this entry and press.Edit a quick dial entry1. Choose the quickdial entry you want to edit by pressing either , or.2. Press .3. Scroll using or until you highlight Edit and press .54Helpline 0844 800 6503 (See page 114 for costs and hours of operation)
USING YOUR QUICK DIAL MEMORY – CORDED PHONE4. Press to delete characters and use the keypad to enter new ones, thenpress .5. Press to delete digits and use the keypad to enter new ones, then press.6. Scroll using or to choose a ringer melody for this entry and press.Delete a quick dial entry1. Choose the quickdial entry you want to delete by pressing either , or.2. Press .3. Scroll using or until you highlight Delete and press .4. You’ll see Delete? on your display. Press to confirm or to cancel.Helpline 0844 800 6503 (See page 114 for costs and hours of operation)55
USING YOUR CALLS LIST – CORDED PHONEUsing your calls list – corded phoneNote: you must subscribe to your network provider’s Caller Display/Caller IDservice for this feature to work. A quarterly fee may be payable.Incoming call telephone numbers should appear in your calls list. If you havethe caller’s number stored in your phonebook the name will be displayedinstead. A total of 30 incoming calls can be stored in the calls list (16 lettersper name and 23 digits per number). The number of new calls received will beshown in the display with the flashing icon. If the number doesn’t appear,this is because the caller’s identification (Call Line ID) has been withheld bythe caller.You can open and view your calls list by pressing . To scroll through yourcalls list simply press or .Here are some things you may see on your calls list display:• WITHHELD NUMBER – caller has withheld their number, or this informationisn’t available• INTERNATIONA – caller is calling from another country or using an internetservice• PAYPHONE – caller is calling from a public payphone• OPERATOR – caller is a telephone network operator56Helpline 0844 800 6503 (See page 114 for costs and hours of operation)
Store numbers from your calls list to the phonebook orQuick dial memory (M1, M2, M3)It’s easy to store incoming call numbers to your phone book or quick dial buttons.1. Press to open your calls list at the most recent entry.2. Scroll using or to find the entry you want to store and press.3. Scroll using or until you highlight Save to PB or M1, M2 or M3and press .4. Using your keypad, enter a name for this stored number and press .5. Edit the number for this name, if needed, and press .6. Scroll using or to choose a ringer melody for this entry and press.Delete a single calls list entry1. Press to open your calls list at the most recent entry.2. Scroll using or to find the entry you want to delete and press.USING YOUR CALLS LIST – CORDED PHONEHelpline 0844 800 6503 (See page 114 for costs and hours of operation)57
USING YOUR CALLS LIST – CORDED PHONE3. Scroll using or until you highlight Delete and press .4. You’ll see Delete? on your display. Press to confirm or to cancel.Delete all entries in the call list1. Press to open your calls list at the most recent entry.2. Scroll using or until you highlight Delete All and press .3. You’ll see Delete All? on your display. Press to confirm or to cancel.58Helpline 0844 800 6503 (See page 114 for costs and hours of operation)
Using your menu -cordless handsetHelpline 0844 800 Helpline 6503 0844 (See 800 6503 page (See page 58 for 114 for costs and hours of operation) of operation) 59 59
USING YOUR MENU - CORDLESS HANDSETUsing your menu - cordless handsetFor information on your phone book, please go to page 76.For information on your answering machine, please go to page 86.User ProfilesYou can store 2 different user profiles, each with different settings for the ‘Volume’,‘Boost’ and ‘Equaliser’ features. You can also personalise each Profile bynaming it (Max. 11 letters).Priority/Default SettingIf you are the main user of this telephone you should change the settings in themenu so that they are just right for you. These settings will be memorised automaticallywhenever you wish to make or answer a call.The user profile feature can be used by others in the household whose preferencesfor volume, boost and equaliser will also be memorised and applied asindicated below.Change a profile name1. Open your menu by pressing , then scroll using or until youhighlight Profile and press .2. Scroll using or until you highlight the desired profile and press .3. Scroll using or until you highlight Name and press .60Helpline 0844 800 6503 (See page 114 for costs and hours of operation)
4. Delete the current name by pressing .5. Enter a new name (up to 11 letters) and press .Change a profile’s handset volumeYou have a choice of five volume levels.USING YOUR MENU - CORDLESS HANDSET1. Open your menu by pressing , then scroll using or until youhighlight Profile and press .2. Scroll using or until you highlight the desired profile and press .3. Scroll using or until you highlight Volume and press .4. You’ll see the current volume level (e.g. 1).5. Change the volume level using or and press .Change a profile’s boost setting1. Open your menu by pressing , then scroll using or until youhighlight Profile and press .2. Scroll using or until you highlight the desired profile and press .3. Scroll using or until you highlight Boost and press .4. You’ll see the current boost setting (i.e. <strong>On</strong> or Off).5. Change the boost setting using or and press .Helpline 0844 800 6503 (See page 114 for costs and hours of operation) 61
USING YOUR MENU - CORDLESS HANDSETChange a profile’s tone (‘equalizer’) setting1. Open your menu by pressing , then scroll using or until youhighlight Profile and press .2. Scroll using or until you highlight the desired profile and press .3. Scroll using or until you highlight Equalizer and press .4. You’ll see the current tone setting.5. Change the tone setting using or and press .Note: pressto put the handset back to standby.Copy a profileYou can easily copy a profile to another registered and compatible PowerTelphone.1. Open your menu by pressing , then scroll using or until youhighlight Profile and press .2. Scroll using or until you highlight the desired profile and press .3. Scroll using or until you highlight Copy and press .62Helpline 0844 800 6503 (See page 114 for costs and hours of operation)
USING YOUR MENU - CORDLESS HANDSET4. Scroll using or until you highlight the phone (e.g. 0 = Cordedphone, 2, 3, 4 or 5) you want to copy the profile to, and press .5. <strong>On</strong> the phone you’re copying the profile to: to confirm, press (cordlesshandset) or(corded phone).To cancel, press (cordless handset) or (corded phone).Choosing which profile to useYou need to use a handset to choose a profile to use for a call – you can’tchoose a profile using handsfree.Before you answer an incoming call, press the key “Profile setting” on the lefthand side of the handset repeated if necessary, depending on which profile youwant to use. The display will confirm your choice.When you want to make a call and before you dial the number, press the key“Profile setting” on the left hand side of the handset repeated if necessary, dependingon which profile you want to use. The display will confirm your choice.Note: once you’ve selected a profile to use when making a call, you haveabout 30 seconds to dial the call under that profile before the system willreturn to its default settings.Helpline 0844 800 6503 (See page 114 for costs and hours of operation) 63
USING YOUR MENU - CORDLESS HANDSETChange the handset ringer melodyYou have a choice of ten ringer melodies.1. Open your menu by pressing , then scroll using or until youhighlight Handset and press .2. Ring tone is shown, press .3. Scroll using or until you highlight External or Internal and press.4. You’ll see the melody setting (e.g. 7 [External], 9 [Internal]).5. Change the melody using or and press .Change the handset ringer volumeYou have a choice of five volume levels plus Off.1. Open your menu by pressing , then scroll using or until youhighlight Handset and press .2. Scroll using to highlight Ringer volume and press .3. You’ll see the current volume level (e.g. 5).4. Change the ringer volume using or and press .64Helpline 0844 800 6503 (See page 114 for costs and hours of operation)
Change the tone (‘equalizer’) settingUSING YOUR MENU - CORDLESS HANDSET1. Open your menu by pressing , then scroll using or until youhighlight Handset and press .2. Scroll using or until you highlight Equalizer and press .3. You’ll see the setting.4. Change the tone setting using or and press .Note: to adjust tone while you’re making a call, press the button toaccess the equaliser setting. Then press the or button to adjust thesetting as shown on the bar-graph on the handset screen.Boost onWhen this feature is set to <strong>On</strong> the boost function is always activated. The Boost-LED on the top left side of the handset is on whilst on a call, and the boost iconwill be shown in the displayYou can use the key to switch it off for the recent call. For the next call it willbe on again.If the Boost on-function is set to Off, you will have to switch it on manually bypressing the key. For the next call, the boost function will be off again.Helpline 0844 800 6503 (See page 114 for costs and hours of operation) 65
USING YOUR MENU - CORDLESS HANDSET1. Open your menu by pressing , then scroll using or until youhighlight Handset and press .2. Scroll using or until you highlight Boost on and press .3. You’ll see the current boost memory setting (e.g. Off).4. Change the setting using or to <strong>On</strong> or Off and press .Change handset name1. Open your menu by pressing , then scroll using or until youhighlight Handset and press .2. Scroll using or until you highlight Handset name and press .3. Delete the current name by pressing .4. Enter a new name (up to 10 letters) and press .Switch keypad beep on or off1. Open your menu by pressing , then scroll using or until youhighlight Handset and press .2. Scroll using or until you highlight Keypad Beep and press .3. You’ll see the key pad setting (i.e. <strong>On</strong> or Off).4. Change the key pad beep on or off using or and press .66Helpline 0844 800 6503 (See page 114 for costs and hours of operation)
USING YOUR MENU - CORDLESS HANDSETChange contrastYou have a choice of five screen contrast levels so you can set the display tohow you find it most easy to read.1. Open your menu by pressing , then scroll using or until youhighlight Handset and press .2. Scroll using or until you highlight Contrast and press .3. You’ll see the current contrast setting (e.g. 3).4. Change the contrast setting using or and press .Switch auto talk on or offWhen auto talk’s switched on your handset will automatically answer the callwhen you pick up the handset from its charger base. This is the default setting.If you set it to off you will need to press the button to answer any calls.1. Open your menu by pressing , then scroll using or until youhighlight Handset and press .2. Scroll using or until you highlight Auto talk and press .3. You’ll see the current auto talk setting (e.g. <strong>On</strong>).4. Change the auto talk setting using or and press .Helpline 0844 800 6503 (See page 114 for costs and hours of operation) 67
USING YOUR MENU - CORDLESS HANDSETChange backlight timerYou have a choice of 10, 20, 30 or 40 seconds before the backlight timerswitches off.1. Open your menu by pressing , then scroll using or until youhighlight Handset and press .2. Scroll using or until you highlight Backlight time and press .3. You’ll see the current backlight timing (e.g. 10S).4. Change the backlight timer setting using or and press .Switch confirmation beep on or offThis is the beep you hear when you change a setting. You can switch thebeep on or off.1. Open your menu by pressing , then scroll using or until youhighlight Handset and press .2. Scroll using or until you highlight Confirm beep and press .3. You’ll see the current confirmation beep setting (e.g. <strong>On</strong>).4. Change the confirmation beep setting using or and press .68Helpline 0844 800 6503 (See page 114 for costs and hours of operation)
USING YOUR MENU - CORDLESS HANDSETSelect baseYou can use this feature if your handset is registered to more than one base.1. Open your menu by pressing , then scroll using or until youhighlight Handset and press .2. Scroll using or until you highlight Select base and press .3. You’ll see the current base setting (e.g. Auto or Manual). If Manual is selectedthen you can choose which of 4 possible bases you wish to log on to.4. Change the base setting using or and press .Change languageYou have a choice of 6 languages to use on your handset: English, German,French, Spanish, Netherlands and Italian.1. Open your menu by pressing , then scroll using or until youhighlight Handset and press .2. Scroll using or until you highlight Language and press .3. You’ll see the current language setting (e.g. English).4. Change the language setting using or and press .Helpline 0844 800 6503 (See page 114 for costs and hours of operation) 69
USING YOUR MENU - CORDLESS HANDSETChange date/time1. Open your menu by pressing , then scroll using or until youhighlight Time and press .2. Scroll using or until you highlight Date and Time and press .3. Enter the year, month, day, hours and minutes (your handset has a 24-hourclock) and press .Change clock hours to 12- or 24-hour format1. Open your menu by pressing , then scroll using or until youhighlight Time and press .2. Scroll using or until you highlight Set time format and press .3. You’ll see the current time format setting (e.g. 24 hour).4. Change the time format using or to highlight either 12 hour or 24hour and press .70Helpline 0844 800 6503 (See page 114 for costs and hours of operation)
Set alarmUSING YOUR MENU - CORDLESS HANDSET1. Open your menu by pressing , then scroll using or until youhighlight Time and press .2. Scroll using or until you highlight Set alarm (your alarm uses a24-hour clock) and press .3. Select <strong>On</strong>ce, Every Day, Mon to Fri or Off and press .4. Enter the time you want your alarm to go off and press .5. Choose your alarm melody and press .To confirm the alarm signal, press . Pressing activates the snoozefunction. With this function the alarm is repeated up to five times after every5 minutes before it is switched off completely.Helpline 0844 800 6503 (See page 114 for costs and hours of operation) 71
USING YOUR MENU - CORDLESS HANDSETChange base (corded phone) ringer melodyYou have a choice of 9 base ringer melodies.1. Open your menu by pressing , then scroll or until you highlightBase settings and press .2. Ring tone is highlighted, press .3. You’ll see the ringer melody setting (e.g. 8).4. Change the ringer melody using or and press .Change base (corded phone) ringer volumeYou have a choice of five volume levels plus Off.1. Open your menu by pressing , then scroll using or until youhighlight Base settings and press .2. Scroll until you highlight Ringer volume and press .3. You’ll see the current base ringer volume level (e.g. 5).4. Change the base ringer volume using or and press .72Helpline 0844 800 6503 (See page 114 for costs and hours of operation)
For information on dial mode, please go to page 110.For information on recall, please go to page 110.USING YOUR MENU - CORDLESS HANDSETChange system PIN code1. Open your menu by pressing , then scroll using or until youhighlight Base settings and press .2. Scroll using or until you highlight System PIN and press .3. Enter your old PIN code (default PIN is 0000) and press .4. Enter your new 4 digit PIN code and press .5. Enter your new PIN code again and press .NOTE: If you are sure you want to change the PIN from the default, pleasekeep a note of it since it will not possible to carry out certain functionswithout it. It is also not possible to recover a lost PIN.Helpline 0844 800 6503 (See page 114 for costs and hours of operation) 73
USING YOUR MENU - CORDLESS HANDSETAppointmentYou can enter up to five appointments your telephone should remind you at.1. Open your menu by pressing , then scroll or until you highlightTools and press .2. Scroll using or until you highlight Appointment and press .3. Scroll using or until you highlight 1, 2, 3, 4 or 5 and press .4. Scroll using or until you highlight Edit and press .5. Delete characters with , enter a name for the appointment using the keypadand press .6. Enter the date using the keypad and press .7. Enter the time using the keypad and press .8. Select a melody with or and press .If you want to edit or delete an appointment select it as described aboveand make your changes (Edit) or delete the entry (Delete).74Helpline 0844 800 6503 (See page 114 for costs and hours of operation)
Stop watchThe stop watch shows minutes and seconds.1. Open your menu by pressing , then scroll or until you highlightTools and press .2. Scroll using or until you highlight Stop watch and press .3. Press to start the stop watch.4. Press to stop the stop watch.USING YOUR MENU - CORDLESS HANDSETIf you stopped the stop watch you can press [Start] to restart it or [Reset] toreset it.Reset to default settingsImportant: if you reset to default settings all entries in your phone book,calls list and redial list are deleted.To reset to default settings1. Press for 10 seconds.2. Confirm the reset to default settings by pressing for Yes or for No.Helpline 0844 800 6503 (See page 114 for costs and hours of operation) 75
USING YOUR PHONE BOOK - CORDLESS HANDSETUsing your phone book - cordless handsetYou can store, alphabetically, up to 200 names and their phone numbers inyour phone book. To quickly find a phone book entry, simply enter the first letterof the name you’ve stored.Note: each phone book entry allows for up to 16 letters for any name and upto 24 digits for any phone number.Important: please remember to also enter the area code for each phonenumber you enter in your phone book.How to use the keypad when using your phone bookYou’ll see that the keys on your keypad have letters as well as numbers. If youpress a chosen key a number of times it’ll show you all the numbers and lettersit represents.Here are some keys you may find useful when entering phone numbers in yourphone book:• press for a space• enter special characters with or• press to delete a number or letter you’ve entered• press the key to change from upper case (e.g. ABC) to lower case (e.g.abc)76Helpline 0844 800 6503 (See page 114 for costs and hours of operation)
USING YOUR PHONE BOOK - CORDLESS HANDSETNote: to enter the same letter twice, simply enter the letter and thenwait until the cursor moves to after the letter you’ve entered, beforeentering it again.Enter a name and number in your phone book1. Open your phone book by pressing .2. Press . The display will show New entry, press again.3. Enter the name you want to store and press .4. Enter the phone number you want to store and press .5. Scroll using or to choose a ringer melody for this name and numberand press .Edit a phone book entry1. Open your phone book by pressing .2. Scroll using or to find the entry you want to edit and press .3. The display will show Edit entry, press again.4. Press to delete characters and use the keypad to enter new ones,then press .Helpline 0844 800 6503 (See page 114 for costs and hours of operation) 77
USING YOUR PHONE BOOK - CORDLESS HANDSET5. Press to delete digits and use the keypad to enter new ones, thenpress .6. Scroll using or to choose a ringer melody for this entry andpress .Delete a phone book entry or all entries1. Open your phone book by pressing .2. Scroll using or to find the entry you want to delete or highlight anyentry if you want to delete all entries and press .3. Press to display either Delete entry or Delete all and press .4. Press to confirm or to cancel.Copy phone book entries to the Corded phone or anotherregistered handsetNote: you can only copy the phone book to another handset if that handsetis registered on your phone system. See page 106.It’s easy to copy:• a single entry (Copy entry)• entries not already on the handset you’re copying to (Copy append)• all entries (Copy all)78Helpline 0844 800 6503 (See page 114 for costs and hours of operation)
USING YOUR PHONE BOOK - CORDLESS HANDSETImportant: when you copy all entries to a handset, all existing entries willbe deleted. To prevent this from happening you can use the “Copy appendmode”.1. Open your phone book by pressing .2. Scroll using or to find the entry or entries you want to copy andpress .3. Scroll to either Copy entry, Copy append or Copy all and press .4. Scroll or to highlight the handset number you want to copy to(e.g. 2 for Handset 2) and press to confirm.5. Pick up the handset you’re copying entries to and press .Helpline 0844 800 6503 (See page 114 for costs and hours of operation) 79
USING YOUR QUICK DIAL MEMORY - CORDLESS HANDSETUsing your quick dial memory buttons - cordlesshandsetYou can store a name (max. 16 characters) and a telephone number(max. 24 digits) under each of the quick dial memory buttons: , and .Store a quick dial name and number1. Choose the quick dial button under which you want to store a name andnumber by pressing either , or .2. Press . The display will show Edit entry, press again.3. Enter the name you want to store using the keypad and press .4. Enter the phone number you want to store and press .5. Scroll using or to choose a ringer melody for this entry and press.The display will show Entry saved.Edit a quick dial entry1. Choose the quick dial entry to edit by pressing either , or .2. Press . The display will show Edit entry, press again.80Helpline 0844 800 6503 (See page 114 for costs and hours of operation)
Using your quick dial USING memory YOUR QUICK DIAL MEMORY - CORDLESS HANDSET3. Press to delete characters and use the keypad to enter new ones,then press .4. Press to delete digits and use the keypad to enter new ones, thenpress .5. Scroll using or to choose a ringer melody for this entry and press.The display will show Entry saved.Delete a quick dial entry1. Choose the quick dial entry to delete by pressing either , or .2. Press . Scroll to Delete Entry and press .3. Display will show Delete Entry? Press to confirm or to cancel.Helpline 0844 800 6503 (See page 114 for costs and hours of operation) 81
USING YOUR CALLS LIST - CORDLESS HANDSETUsing your calls list - cordless handsetNote: you must subscribe to your network provider’s Caller Display/Caller IDservice for this feature to work. A quarterly fee may be payable.Incoming call telephone numbers should appear in your calls list. If you havethe caller’s number stored in your phonebook the name will be displayed instead.A total of 30 incoming calls can be stored in the calls list (16 letters pername and 23 digits per number). The number of new calls received will beshown in the display with the flashing icon. If the number doesn’t appear,this is because either the caller’s identification (Call Line ID) has been withheldby the caller, or it is unavailable due to network restrictions.You can open your calls list by pressing the button. To scroll through yourcalls list simply press or . To display more information includingthe date and time of the call, press .Here are some things you may see on your calls list display:• WITHHELD NUMBER – caller has withheld their number, or this informationisn’t available• INTERNATIONAL? – caller is calling from another country or using aninternet service• PAYPHONE – caller is calling from a public payphone• OPERATOR – caller is a telephone network operator82Helpline 0844 800 6503 (See page 114 for costs and hours of operation)
USING YOUR CALLS LIST - CORDLESS HANDSETStore numbers from your calls list to the phone bookIt’s easy to store incoming call numbers to your phone book.1. Press to open your calls list at the most recent entry.2. Scroll using or to find the entry you want to store and press .3. The display will show Save number, press .4. Using your keypad, enter a name for this stored number and press .5. Edit the number for this name, if needed, and press .6. Scroll using or to choose the ringer melody for this name and numberand press .Store numbers from your calls list to a quick dial memoryIt’s easy to store incoming call numbers to one of the three quick dial memorybuttons.1. Press to open your calls list at the most recent entry.2. Scroll using or to find the entry you want to store and press .3. Scroll using to Save to M1 / M2 / M3 and press .4. Proceed as described above “Store numbers from your calls list to the phonebook”.Helpline 0844 800 6503 (See page 114 for costs and hours of operation) 83
USING YOUR CALLS LIST - CORDLESS HANDSETDelete a single calls list entry1. Press to open your calls list at the most recent entry.2. Scroll using or to find the listed call you want to delete and press.3. Scroll until you highlight Delete.4. Press to confirm or to cancel.Delete all calls list entries1. Press to open your calls list at the most recent entry and press .2. Scroll until you highlight Delete all and press .3. The display will show Delete all? Press to confirm or to cancel.84Helpline 0844 800 6503 (See page 114 for costs and hours of operation)
Using youransweringmachineService-Hotline Deutschland: 0180 5 001 388Helpline 0844 800 6503 (See page 114 for costs and hours of operation)Kosten bei Drucklegung: 14 ct/Min. aus dem dt. Festnetz; maximal 42 ct/Min.85 85
USING YOUR ANSWERING MACHINEUsing your answering machineAfter you’ve set up your phone system, follow these easy steps to set up anduse your answering machine.Switch answering machine on or offTo switch your answering machine on and off, simply presson the cordedphone.The current answer mode will be announced. When new messages arereceived, the indicator light on the corded phone will flash. The display alsoshows the number of messages you have.Taking a call from the answering machineIf the answering machine has accepted a call yet and you hear the caller speakinghis message you can take the call to your phone and talk to the caller.Lift the handset on the corded phone and talk to the caller.<strong>On</strong> the cordless handset press and subsequently , to get the call.Set the answering machine languageYou have a choice of 6 answering machine voice prompt languages: English,German, French, Italian, Spanish and Dutch.86Helpline 0844 800 6503 (See page 114 for costs and hours of operation)
1. Press to open the menu, scroll using or until you highlightAns Machine and press .2. Scroll using or until you highlight Language and press .3. Choose the language using or and press .Adjust the base loudspeaker volumeYou can increase or decrease the corded phone’s loudspeaker volume using thebuttons.USING YOUR ANSWERING MACHINESet the answer modeHaving switched on the answering machine you can select “Answer & Record“or “Answer only“. If you set the answer mode to “Answer only“ your callers willnot be able to leave a message.1. Switch your answering machine on by pressing on the corded phone.2. To change the mode between Answer & Record and Answer <strong>On</strong>ly press andholdfor a couple of seconds.3. To switch off the answering machine, press briefly.Helpline 0844 800 6503 (See page 114 for costs and hours of operation)87
USING YOUR ANSWERING MACHINERecord your outgoing messageYou can change the default answering message to your own. Your outgoing messageneeds to be under two minutes.1. Press and hold on the corded phone for a couple of seconds and thenrecord your message after the beep.2. To stop recording, press . Your outgoing message will be played back toyou.Note: to return your outgoing message to the default message, simply pressand hold while the outgoing message is playing.Check your outgoing message1. Press briefly. Your current outgoing message is announced.88Helpline 0844 800 6503 (See page 114 for costs and hours of operation)
Set the answer delayYou either choose the number of rings you want before your answering machineanswers any incoming call (2-15 rings) or you can choose Time Saver.Time Saver saves you the cost of the call if you’re calling in from elsewhere topick up any messages: if your answering machine answers after 2 rings youhave new messages, if it answers after 5 rings you have no new messages.Therefore, you can hang up after 3 rings knowing you have no new messagesand you won’t be charged for the call.1. Press to open the menu, scroll using or until you highlightAns Machine and press .USING YOUR ANSWERING MACHINE2. Scroll using or until you highlight AnswerDelay and press .3. Change the setting using or and press .Helpline 0844 800 6503 (See page 114 for costs and hours of operation)89
USING YOUR ANSWERING MACHINERecord a memoYou can record memo messages for yourself or other members of the householdwhich can be played back like normal messages.1. Press and hold for a couple of seconds.2. After the beep record your memo.3. Press to finish recording.Listen to messages or memos using the base buttonsPlayback is in the order messages or memos were received. New messages areplayed before old ones. The time and date of each message or memo is announcedbefore playback.Here are some functions you may find useful:• to play or pause, press• to stop, press• to rewind, press• to fast forward, press90Helpline 0844 800 6503 (See page 114 for costs and hours of operation)
Delete a single message or memo1. Play the message or memo you want to delete by pressing .2. Press and hold for a couple of seconds during playback of the messageor memo to delete it.Delete all old messages and memos using the base1. Press and hold for a couple of seconds when no messages are beingplayed.2. To confirm, press .Listen to messages or memos using your handset1. Open the answering machine menu by pressing .2. Ans Machine is displayed, press .3. Scroll using or to display either Play New Msgs or Play All Msgsand press .4. Press to return to standby.USING YOUR ANSWERING MACHINEMemory fullYour answering machine will announce if it’s full and automatically stop takingany more messages and switch itself to Answer <strong>On</strong>ly. You’ll need to deleteHelpline 0844 800 6503 (See page 114 for costs and hours of operation)91
USING YOUR ANSWERING MACHINEsome of your messages or memos before any new messages can be recorded.Remote access to your answering machineYou can call your answering machine to hear your messages when you’re awayfrom home using most modern phones, including mobile phones.You need to use a PIN code to access your answering machine. The default codeis 000. We suggest you change this for security reasons.Change PIN1. Press to open the menu, scroll using or until you highlightAns Machine and press .2. Scroll using or until you highlight Remote PIN and press .3. Enter the old Remote PIN and press .4. Enter the new Remote PIN and press .5. Enter the new Remote PIN again and press .Note: If you change and then forget your remote access code, you can restorethe code to it's default by using the Reset procedure. Detailed on page 49.However all data will be lost.92Helpline 0844 800 6503 (See page 114 for costs and hours of operation)
Call in to check messagesNOTE: If you forget to switch on the answering machine it is possible to switchit on remotely. Call in and after 20 rings the "answer only" mode announcementis heard and it is then possible to use the procedures below to switch the machineon.1. Dial your own phone number from the remote phone and wait until theanswering machine picks up the call.2. Press two times, then enter your 3 digit PIN after the voice prompt.3. You can manage your messages using your keypad (see remote instructionsbelow)USING YOUR ANSWERING MACHINENote: if you make a mistake entering your PIN three times, your answeringmachine will hang up and you’ll need to call and try again.Helpline 0844 800 6503 (See page 114 for costs and hours of operation)93
USING YOUR ANSWERING MACHINERemote access instructions guideWhile listening to your messages from a remote location, enter these numbersto manage your messages.To . . .Rewind messages, press 1.Play or pause your messages, press 2.Fast Forward through your messages, press 3.Hear outgoing message (OGM), press 4.Record outgoing message (OGM), press 5. To end your message, press 6.Stop messages, press 6.Delete current message, press 7.Switch answering machine off, press 8.Switch answering machine on to take messages, press 9.Delete all old messages, press 0.Record a memo, press #. To end your message, press 6.94Helpline 0844 800 6503 (See page 114 for costs and hours of operation)
Using yourwrist shakerHelpline 0844 800 Helpline 6503 0844 (See 800 6503 page (See page 58 for 114 for costs and hours of operation) of operation) 95 95
USING YOUR WRIST SHAKERUsing your wrist shakerSwitch onPress and hold thebutton for about five seconds. You’ll see the green lightwith the warning triangle come on.Note: if the light flashes green then red it means your wrist shakereither isn’tregistered or is out of range. Move closer to your PowerTeltelephone to ensureyou are within range. If the light still flashes, see page 104 for registrationinstructions.Switch offPress and hold the button for about five seconds. The green light will go off.Power on/offbuttonRegistration/Out of range/Low battery light96Helpline 0844 800 6503 (See page 114 for costs and hours of operation)
USING YOUR WRIST SHAKERMake sure your wrist shaker is in rangeIf your wrist shaker is not in range, it won’t work. You can tell it’s out of rangewhen the large light flashes green and red. If this happens, you need to movecloser to your PowerTel phone for your wrist shaker to work.Battery lowIf the battery is low, the large light will turn red and will flash. You need to placethe wrist shaker in its charger base for 10 hours to charge the battery.Incoming callsWhen you receive an incoming call, the green light will flash and the wristshaker will vibrate.Note: The SOS Motor feature must be turned on for the wrist shaker tovibrate.See page 16 for instructions.You can answer the call by pressing the large emergency button in the middleof the wrist shaker. You will need to make sure you are within range of yourPowerTel phone to do so (see above ‘Make sure your wrist shaker is in range’).You cannot speak to your caller via the wrist shaker. <strong>On</strong>ce you’ve pressed theemergency button on the wrist shaker, your PowerTel phone will answer thecall in handsfree mode so that you can speak to your caller via the <strong>Powertel</strong>phone without picking up the handset.To end the call, just press and release the emergency button again.Helpline 0844 800 6503 (See page 114 for costs and hours of operation)97
USING YOUR WRIST SHAKEREmergency callYou can program 3 numbers to be dialled in an emergency under the M1, M2and M3 buttons on your telephone.Important: under no circumstances should the Emergency services number999 or 112 be stored as one of your personal emergency numbers.Storing emergency numbers in the telephone1. Press the red , or button on your telephone where you’d like tostore the emergency telephone number. A previously stored number or M1Empty (or M2, M3 as appropriate) is displayed.2. Press the left hand menu button under the display.Add New or Edit is displayed3. Press the button again.4. Using the keypad, enter the name for this telephone number(maximum of 16 characters).To enter a character for a name, press the key showing the required letter anumber of times eg: for the letter ‘B’ you would press the number 2 keytwice. If you need a space, just press the 1 key.98Helpline 0844 800 6503 (See page 114 for costs and hours of operation)
USING YOUR WRIST SHAKERTo enter the same letter twice, press the key to enter the letter, wait until thecursor moves forward one place, then press the key to enter the letter again.5. Press the button to save the name.6. Using the keypad, enter the telephone number, including the full diallingcode (maximum of 24 digits).If you make a mistake, press the red button on the left hand side for eachcharacter or digit that you wish to delete.7. Use the or buttons on the central round button to select a ringingmelody for the quickdial number.8. Press the button to confirm.Helpline 0844 800 6503 (See page 114 for costs and hours of operation)99
USING YOUR WRIST SHAKERSOS messageThe PowerTel <strong>980</strong> telephone has a pre-recorded SOS message which you canuse, or you can record your own personal emergency message.The pre-recorded emergency message is: “This is an emergency call. To acceptthis call press 0.”Record a personal SOS messageWhen you activate an emergency call each of the numbers stored under theM1, M2 and M3 buttons on your PowerTel 680 telephone are repeatedly dialledin turn until one of the numbers is answered. Your emergency message is thenplayed.It is very important that in your personal emergency message you include:• Your name and that the call is an emergency and you need help• That the person must press ‘0’ on their telephone keypad to accept the emergencycall.1. Press the button and then press the button to scroll toSOS Message.2. Press the button to select.3. Use the button to scroll to Record.100Helpline 0844 800 6503 (See page 114 for costs and hours of operation)
4. Press the button to start recording your message.SOS Record is displayed. Remember to speak slowly and clearly whilst facingthe telephone.5. Press the button again to stop the recording. SOS Play will be displayedand your message will automatically be played back to you.Listen to your personal SOS message1. Press the button and then press the button to scroll toSOS Message.2. Press the button to select.3. Playback is displayed. Press the button to select.4. SOS Play is displayed and your message is played back to you.Delete your personal SOS message1. When your message is played back to you (as in step 4 on the previouspage), press and hold the button.The pre-recorded emergency message will now be used.USING YOUR WRIST SHAKERNote: if you would like to change your personal message just follow thesteps from 1 to 5 above each time.Helpline 0844 800 6503 (See page 114 for costs and hours of operation)101
USING YOUR WRIST SHAKERActivating an emergency callWhen you activate an emergency call from your wrist shaker, the PowerTel <strong>980</strong>telephone will go to handsfree mode and will beep for 15 seconds.You will then hear as each of the emergency numbers you have stored underthe M1, M2 and M3 buttons (see page 98) are dialled automatically, one afterthe other, with intervals of approximately 60 seconds.The person answering the emergency call will hear the SOS message. Whenthey press the 0 button on their keypad, they will be able to talk to you via thehandsfree on your PowerTel <strong>980</strong> telephone for 3 minutes and the SOS procedurewill be terminated and no further calls will be made. If there is no answeror the 0 button was not pressed by the person answering the call, the nextnumber will be dialled after a further 60 secondsDuring the last 10 seconds of this 3 minute call you will hear a warning beepthat the call will be disconnected.If no numbers have been stored under the , or keys on yourPowerTel <strong>980</strong> then you will just hear a long continuous tone after the beep tonefor 15 seconds and no numbers will be dialled.If only 1 or 2 numbers have been stored under the , or keys, thenthe numbers that have been stored will be dialled.102Helpline 0844 800 6503 (See page 114 for costs and hours of operation)
USING YOUR WRIST SHAKERImportant: the wrist shaker must be in range of the telephone to be able tomake an emergency call.The battery in the wrist shaker must be charged. An emergency call is notpossible if the wrist shaker batteries are flat.If the emergency message is delivered to an answer phone or voicemailservicethen the dialing sequence will continue to the next number until suchtime that the recipient accepts the call by pressing ‘0’ on their telephone.To activate an emergency call1. Press and hold the large emergency button in the middle of the wristshaker for 5 seconds.To cancel an emergency call1. Press and hold the large emergency button in the middle of the wristshaker for 5 seconds.EmergencybuttonHelpline 0844 800 6503 (See page 114 for costs and hours of operation)103
USING YOUR WRIST SHAKERRegister your wrist shakerImportant: you will only need to register your wrist shaker if it has becomede-registered from the telephone or if you need to register a new wristshaker.At the wrist shaker:1. Turn on the wrist shaker by pressing and holding the button for aboutfiveseconds.2. Press and hold the button again for about 12 seconds, until the registrationlight flashes green quickly. The wrist shaker will be in registration forabout 1 minute.At the corded phone base:3. Press and hold the button for at least 10 seconds until Register is displayed.4. You’ll know your wrist shaker is registered and ready to use when the registrationlight unit is a steady green (i.e. it isn’t flashing).Note: the registration light will flash green and red if your wrist shaker eitherisn’t registered or is out of range.104Helpline 0844 800 6503 (See page 114 for costs and hours of operation)
Registering/deregisteringhandsetsHelpline 0844 800 Helpline 6503 0844 (See 800 6503 page (See page 58 for 114 for costs and hours of operation) of operation) 105 105
REGISTERING / DEREGISTERING HANDSETSRegistering / deregistering handsetsRegister a handsetYou only need to register a handset if it has become de-registered from thebase or if you’ve purchased a new handset separately. You can register up to 5handsets.Important: make sure any handset you’re registering is fully charged beforeyou try to register it.At the handset:1. Press and hold for approx 15 seconds until the display shows Press &Hold Base Page Key.At the corded phone:2. Press and hold for at least 10 seconds until the display shows Register.106Helpline 0844 800 6503 (See page 114 for costs and hours of operation)
Deregister a handsetYou may need to deregister a handset if you’ve too many registered on yourphone system, or if the handset develops a fault and needs to be replaced.To deregister a handset using the corded phone1. Open your menu by pressing .2. Scroll using or until you highlight Remove HS and press .3. Enter the PIN code and press .4. Enter the handset’s internal number (e.g. 2) and press .To deregister a handset using the cordless handsetImportant: You can only cancel subscription of another handset, not thehandset you are using to do the remove procedure.1. Open your menu by pressing , then scroll using or untilyou highlight Handset and press .2. Scroll using or until you highlight Registration, and press .Then scroll to highlight De-register and press .3. Enter the PIN code (default PIN 0000) and press .REGISTERING / DEREGISTERING HANDSETS4. Enter the handset’s internal number (e.g. 1) and press to confirm.Helpline 0844 800 6503 (See page 114 for costs and hours of operation)107
REGISTERING / DEREGISTERING HANDSETS108Helpline 0844 800 6503 (See page 114 for costs and hours of operation)
Use on a privatebranch exchangeHelpline 0844 800 Helpline 6503 0844 (See 800 6503 page (See page 58 for 114 for costs and hours of operation) of operation) 109 109
USE ON A PRIVATE BRANCH EXCHANGEUse on a private branch exchangeIf your phone’s on an exchange (e.g. you need to dial 9 to get an outside line),you can transfer calls and use call back by using the R button. You’ll need tocheck your private exchange manual to find out which timing to use for your exchange.You can choose two recall timings: 100ms (Short) and 300ms (Long).You have a choice of two dialling modes: tone and pulse. The default setting isTONE and this is the correct setting for use within Europe.To set the recall time on the corded phone1. Press to open the menu, scroll using or until you highlightSettings and press .2. Scroll using or until you highlight Recall and press .3. You’ll see the current recall timing setting (e.g. Short).4. Choose the recall timing setting you want (Short or Long) using orand press .To set the recall time on the cordless handset1. Open your menu by pressing , then scroll using or until youhighlight Base settings and press .2. Scroll using or until you highlight Recall and press .110Helpline 0844 800 6503 (See page 114 for costs and hours of operation)
3. You’ll see the current recall timing setting (e.g. Short).USE ON A PRIVATE BRANCH EXCHANGE4. Choose the recall timing setting you want (Short or Long) using orand press .Insert a dialling pauseIf you have to dial a number for an outside line and it takes a while to connect,you can insert a pause so you don’t have to wait to hear the dialling tone.To insert a dialling pause, simply enter the number you usually dial for an outsideline and then press for two seconds. A P on your display will showdialling pause is active.Note: you can also insert a dialling pause with a phone number in yourphone book.Using additional servicesYour phone should be able to support services such as call waiting and conferencecalls. You’ll need to check with your telephone network provider for furtherinformation on these services.Helpline 0844 800 6503 (See page 114 for costs and hours of operation) 111
USE ON A PRIVATE BRANCH EXCHANGESet the dial mode on the corded phone1. Press to open the menu, scroll using or until you highlightSettings and press .2. Scroll using or until you highlight Dial Mode and press .3. You’ll see the current dial mode setting (e.g. Tone).4. Choose the dial mode setting you want (Tone or Pulse) using orand press .Set the dial mode on the cordless handset1. Open your menu by pressing , then scroll using or until youhighlight Base settings and press .2. Scroll using or until you highlight Dial Mode and press .3. You’ll see the current dial mode setting (e.g. Tone).4. Choose the dial mode setting you want (Tone or Pulse) using or andpress .112Helpline 0844 800 6503 (See page 114 for costs and hours of operation)
Help and supportHelpline 0844 800 Helpline 6503 0844 (See 800 6503 page (See page 58 for 114 for costs and hours of operation) of operation) 113113
HELP AND SUPPORTHelp and supportIf you need some help and you’re in the UK, please first check and see if yourproblem can be solved using the troubleshooting guide below. If it can’t ,please call us on 0844 800 6503 (using a UK landline, at time of going to print:calls cost 6p for connection charge and then 5p a minute. Mobile costs mayvary). Lines are open Monday to Friday, 9am to 5pm, excluding public holidays.If you’ve a claim on your 2-year guarantee, please contact your supplier.Some issues may simply be resolved by disconnecting the power to the unit.In such instances the power to the base station (corded phone) should beswitched off and batteries in the handset should also be removed for about20 minutes. After which reconnect everything to determine if this has resolvedthe issue.Troubleshooting guideI can’t make phone calls1. Make sure the phone cable is connected properly. If it is, there may bea fault. Please make sure you’re using the phone cable that came withyour phone.2. Check power’s plugged in, switched on and working.3. Make sure you aren’t too far from the base/corded phone (in ideal conditions,it should work up to 300 metres outdoors and up to 50 metres indoors).4. Test the phone line and socket by using another phone.114Helpline 0844 800 6503 (See on this page for costs and hours of operation)
HELP AND SUPPORTI keep losing my connection1. Make sure you aren’t too far from the base/corded phone (in ideal conditions,it should work up to 300 metres outdoors and up to 50 metres indoors).2. The base/corded phone may not be in an ideal location – consider moving it.I keep getting a double beep from the handset at random intervals.1. Check the batteries are full charged.2. It may be caused by interference. Make sure that both Handset and base arenot adjacent to other electronic equipment.Try moving the base station to another location.My handset keeps switching off1. It may need recharging. So it can charge fully, place your handset on its chargerbase for at least 16 hours (make sure the power socket is switched on!).2. Replace the rechargeable batteries. Any replacement batteries should be thesame type as those provided.When I have called an automated service which requests me to press certaindigits, there is no response.The dial mode may be set to "PULSE" instead of "TONE". Change it to the correctmode as described on page 112.The phone system isn’t respondingYou may need to reset to default settings. Please see page 75.Helpline 0844 800 6503 (See page 114 for costs and hours of operation) 115
HELP AND SUPPORTCaller’s identification (Call Line ID) isn’t working1. Check you have this service on your phone line. Please call yournetwork provider.2. The caller may have withheld their phone number.My handset or base doesn’t ringCheck that the ringer is on. See pages 30, 64 and 72.I’ve got a buzzing noise on my radio, TV or computerWe suggest you use your cordless handset at least one metre away from electricalequipment and mobile phones.There is interference in the earpiece and/or internet connection is very slowwhen using the phoneYou must plug the phone into the wall socket via an ADSL filter if you havebroadband internet on your phone line.My answering machine won’t record messages or memos1. Check that your answering machine is connected and switched on.2. Answering memory may be full. See page 91.My remote access isn’t working1. Check you’re using the correct PIN. See page 92.2. Make sure you’re using a touchtone phone.116Helpline 0844 800 6503 (See page 114 for costs and hours of operation)
The white light on the corded phone is constantly flashingYou have new answering machine message(s).HELP AND SUPPORTPress thebutton to listen to them and the flashing will stop.1. I have been told by a caller that they had left a message but there are nomessages on my answering machine.2. I have been told by a caller that they heard a message that my "Mail box isfull"Check if you have a network based answering system such as "call minder" or"1571" on your line by dialling 1571. If you have such a service you should considerasking your network provider to remove it.Helpline 0844 800 6503 (See page 114 for costs and hours of operation) 117
HELP AND SUPPORT118Helpline 0844 800 6503 (See page 114 for costs and hours of operation)
General informationHelpline 0844 800 Helpline 6503 0844 (See 800 6503 page (See page 58 for 114 for costs and hours of operation) of operation) 119119
GENERAL INFORMATIONSafety informationPlease make sure you read this User Guide carefully.Intended useThis phone is suitable for use on either a public telephone network or an approvedPrivate exchange (PABX). Any other use is considered unintended use. Unauthorisedmodification or reconstruction isn’t permitted. Do not open thedevice and attempt any repair work yourself.Phone locationMake sure your phone:• is on a dry, flat and stable surface• isn’t a trip hazard with its power cable• is at least one metre from other electrical appliances• isn’t exposed to smoke, dust, vibration, chemicals, moisture, heat anddirect sunlight.Please take care that the power supply isn’t obstructed by furniture.120Helpline 0844 800 6503 (See page 114 for costs and hours of operation)
Power supplyGENERAL INFORMATIONImportant: use only the power adapters supplied with your PowerTel <strong>980</strong>.Power failure can affect your phone and equipment. This telephone cannot beused to make calls in the event of a power failure. Alternative arrangementsshould be made for access to emergency services.Energy efficient power adapterThe included mains adapters meet the eco-design requirementsof the European Union (Directive 2005/32/EG). Thus, its powerconsumption is considerably lower, both in operated as wellas in non-operated mode, compared with the mains adapterof previous design.Medical equipmentDo not use your phone:• near emergency or intensive care medical equipment• during an electrical stormIt is recommended that if you have a pacemaker fitted you check with a medicalexpert or your health adviser before using this product.Rechargeable batteriesDo not throw the batteries into a fire or water.Helpline 0844 800 6503 (See page 114 for costs and hours of operation) 121
GENERAL INFORMATION<strong>Hearing</strong> aid compatibilityYou phone works with most popular hearing aids. However, given the widerange of hearing aids available, we can’t guarantee that your phone willfunction fully with every hearing aid.Important: your phone can produce very high sound when Boost is switchedon. Please take care if the handset is used by others.DisposalIn order to dispose of your device, take it to a collection point providedby your local public waste authorities (e.g. recycling centre). Accordingto laws on the disposal of electronic and electrical devices,owners are obliged to dispose of old electronic and electrical devicesin a separate waste container.The adjacent symbol indicates that the device must not be disposedof in normal domestic waste!Batteries represent a hazard to both health and the environment!Never open, damage or swallow batteries, nor allow them to get intothe environment.They may contain toxic and ecologically hazardous heavy metals. Youare legally obliged to dispose of batteries at the point of sale or at appropriatecollection points provided by your local public waste authorities.Disposal is free of charge. The adjacent symbols indicate that122Helpline 0844 800 6503 (See page 114 for costs and hours of operation)
GENERAL INFORMATIONbatteries must not be disposed of in normal domestic waste and butat authorised collection points.Packaging materials must be disposed of according to local regulations.Technical detailsStandardDECT¹ GAP²Power supply (corded phone) Input: 100-240V 50/60HzOutput: 6VDC 800mAPower supply (charger base) Input: 100-240V 50/60HzOutput: 7VDC 420mARangeOutdoors approx. 300m, Indoors approx. 50mStandbyUp to 100hrsMaximum Talk TimeUp to 10hrsMaximum earpiece volume +40 dB (distortion < 1,5 %)Rechargeable batteriesAAA 1.2V 750mAh NiMHDialling modeTone (DTMF) / PulseRecall time (Flash)Short (100 ms) / Long (300 ms)Optimum ambient temperature 0˚C to 45˚COptimum relative humidity 20% to 80%¹ DECT: Digital Enhanced Cordless Telecommunication = standard forcordless phones.² GAP: Generic Access Profile = standard for the operation of handsets and basestations from different manufacturers.Helpline 0844 800 6503 (See page 114 for costs and hours of operation)123
GENERAL INFORMATIONDefault settingsTo reset to default settings, please see page 75.Cordless handset default settingsLanguageEnglishHandset namePOWERTELRinging melody (external/internal) 7 / 9Ringing volume 5Keypad beep<strong>On</strong>Auto talk<strong>On</strong>Contrast 3Backlight time10 sBoost onOffRecall timeShort (100 ms)Dialling modeTonePIN code 0000Corded phoneLanguageEnglishAnswer modeAnswer and recordPIN code for remote access 000Answer delay 3Time format24 hoursRinging melody (external/internal) 8 / 9Ringing volume 5Keypad beep<strong>On</strong>Contrast 4124Helpline 0844 800 6503 (See page 114 for costs and hours of operation)
GENERAL INFORMATIONBoostRecall timeDialling modeOffShort (100 ms)ToneMaintenance and guaranteeMaintenance• Please clean your equipment’s surfaces with a soft, fluff-free cloth.• Never use cleaning agents or solvents.GuaranteeAMPLICOMMS equipment is produced and tested according to the latest productionmethods. The implementation of carefully chosen materials and highlydeveloped technologies ensure trouble free functioning and a long service life.The terms of the guarantee do not apply where the cause of the equipmentmalfunction is the fault of the telephone network operator or any interposedprivate branch extension system. The terms of the guarantee do not apply tothe rechargeable batteries or power packs used in the products. The period ofguarantee is 24 months from the date of purchase.All deficiencies resulting from material of production faults which occur duringthe period of guarantee will be eliminated free of charge. Rights to claims underthe terms of guarantee are annulled following intervention by the purchaser orthird parties. Damage caused as a result of improper handling or operation, in-Helpline 0844 800 6503 (See page 114 for costs and hours of operation)125
GENERAL INFORMATIONcorrect positioning or storing, improper connection or installation, Acts of Godor other external influence are not covered by the terms of guarantee.In the case of complaints, we reserve the right to repair or replace defectparts or provide a replacement device. Replacement parts or devices becomeour property.Rights to compensation in the case of damage are excluded where there is noevidence or intent or gross negligence by the manufacturer.If your equipment shows signs of defect during the period of guarantee, pleasereturn to the sales outlet in which you purchased the AMPLICOMMS equipmenttogether with the purchase receipt. All rights to claims under the terms of guaranteein accordance with this agreement must be asserted exclusively with regardto your sales outlet.Two years after the purchase of our products, claims under the terms of guaranteecan no longer be asserted.Declaration of conformityThis device fulfils the requirements stipulated in the EU directive:1999/5 EU directive on radio equipment and telecommunicationsterminal equipment and the mutual recognition of their conformity.Conformity with the above mentioned directive is confirmed by the CE symbolon the device.To view the complete Declaration of Conformity, please refer to the freedownload available on our website www.amplicomms.com126Helpline 0844 800 6503 (See page 114 for costs and hours of operation)
IndexHelpline 0844 800 Helpline 6503 0844 (See 800 6503 page (See page 58 for 114 for costs and hours of operation) of operation) 127 127
INDEXAAlarm . . . . . . . . . . . . . . . . . . . . . . . . . . . . . . . 71Answer delay . . . . . . . . . . . . . . . . . . . . . . . . . 89Answer mode . . . . . . . . . . . . . . . . . . . . . . . . 87Appointment . . . . . . . . . . . . . . . . . . . . . . . . . 74Auto talk . . . . . . . . . . . . . . . . . . . . . . . . . . . . . 67BBacklight. . . . . . . . . . . . . . . . . . . . . . . . . . . . . 68Base loudspeaker volume . . . . . . . . . . . . . . 87Base ringer. . . . . . . . . . . . . . . . . . . . . . . . . . . 72Basic guide. . . . . . . . . . . . . . . . . . . . . . . . . . . 20Belt clip. . . . . . . . . . . . . . . . . . . . . . . . . . . . . . 13Boost . . . . . . . . . . . . . . . . . . . 28, 40, 44, 61, 65Box contents . . . . . . . . . . . . . . . . . . . . . . . . . 10CCall back . . . . . . . . . . . . . . . . . . . . . . . . . . . . . 26Call in to check messages . . . . . . . . . . . . . . . 93Call length . . . . . . . . . . . . . . . . . . . . . . . . . . . 29Calls list . . . . . . . . . . . . . . . . . . . . . . . . . . 56, 82Change Case . . . . . . . . . . . . . . . . . . . . . . . . . 47Change PIN . . . . . . . . . . . . . . . . . . . . . . . . . . 92Charge your handset. . . . . . . . . . . . . . . . . . . 13Clock hours format . . . . . . . . . . . . . . . . . . . . 70Conference call . . . . . . . . . . . . . . . . . . . . . . . 33Confirmation beep . . . . . . . . . . . . . . . . . . . . 68Connect your charger base. . . . . . . . . . . . . . 12Connect your corded phone . . . . . . . . . . . . . 11Contrast . . . . . . . . . . . . . . . . . . . . . . . . . . 45, 67DDate/time . . . . . . . . . . . . . . . . . . . . . . . . . 48, 70Declaration of conformity. . . . . . . . . . . . . . 126Default settings . . . . . . . . . . . . . . . . . . . 75, 124Delete a single message . . . . . . . . . . . . . . . . 91Delete all old messages . . . . . . . . . . . . . . . . 91Dial mode . . . . . . . . . . . . . . . . . . . . . . . . . . . 112Dialling pause . . . . . . . . . . . . . . . . . . . . . . . . 111Display icons . . . . . . . . . . . . . . . . . . . . . . . . . 17Disposal . . . . . . . . . . . . . . . . . . . . . . . . . . . . 122EEarpiece volume . . . . . . . . . . . . . . . . . . . . . . 28Emergency call . . . . . . . . . . . . . . . . . . . . . . . 98End a call . . . . . . . . . . . . . . . . . . . . . . . . . . . . 24Equalizer. . . . . . . . . . . . . . . . . . . . 28, 40, 62, 65FFind handset . . . . . . . . . . . . . . . . . . . . . . . . . 34128Helpline 0844 800 6503 (See page 114 for costs and hours of operation)
INDEXGGetting started . . . . . . . . . . . . . . . . . . . . . . . . 10Guarantee . . . . . . . . . . . . . . . . . . . . . . . . . . 125HHandset name . . . . . . . . . . . . . . . . . . . . . . . . 66Handset ringer . . . . . . . . . . . . . . . . . . . . . 30, 64Handsfree. . . . . . . . . . . . . . . . . . . . . . . . . . . . 29Headset . . . . . . . . . . . . . . . . . . . . . . . . . . . . . 30<strong>Hearing</strong> aid. . . . . . . . . . . . . . . . . . . . . . . . . . 122Help . . . . . . . . . . . . . . . . . . . . . . . . . . . . . . . . 114IInstall your batteries . . . . . . . . . . . . . . . . . . . 12Intended use . . . . . . . . . . . . . . . . . . . . . . . . 120Internal call . . . . . . . . . . . . . . . . . . . . . . . . . . 31KKey Tone . . . . . . . . . . . . . . . . . . . . . . . . . . . . . 45Keypad Beep . . . . . . . . . . . . . . . . . . . . . . . . . 66LLanguage . . . . . . . . . . . . . . . . . . . . . . 46, 69, 86Listen to messages . . . . . . . . . . . . . . . . . 90, 91Lock the keypad . . . . . . . . . . . . . . . . . . . . . . . 30MMaintenance . . . . . . . . . . . . . . . . . . . . . . . . 125Make a call . . . . . . . . . . . . . . . . . . . . . . . . . . . 24Medical equipment . . . . . . . . . . . . . . . . . . . 121Memo . . . . . . . . . . . . . . . . . . . . . . . . . . . . . . . 90Memory full . . . . . . . . . . . . . . . . . . . . . . . . . . 91Messages . . . . . . . . . . . . . . . . . . . . . . . . . . . . 90Mute . . . . . . . . . . . . . . . . . . . . . . . . . . . . . . . . 30OOutgoing message . . . . . . . . . . . . . . . . . . . . 88PPhone book. . . . . . . . . . . . . . . . . . 27, 50, 76, 83Phone location. . . . . . . . . . . . . . . . . . . . . . . 120PIN code . . . . . . . . . . . . . . . . . . . . . . . . . . . . . 73Power failure . . . . . . . . . . . . . . . . . . . . . . . . . 35Power supply . . . . . . . . . . . . . . . . . . . . . . . . 121Private branch exchange . . . . . . . . . . . . . . . 110Profile name. . . . . . . . . . . . . . . . . . . . . . . 38, 60QQuick dial . . . . . . . . . . . . . . . . . 27, 54, 57, 80, 83RRange of the wrist shaker . . . . . . . . . . . . . . . 97Helpline 0844 800 6503 (See page 114 for costs and hours of operation) 129
INDEXRead Number. . . . . . . . . . . . . . . . . . . . . . . . . 46Recall time . . . . . . . . . . . . . . . . . . . . . . . . . . 110Rechargeable batteries . . . . . . . . . . . . . . . . 121Record a memo . . . . . . . . . . . . . . . . . . . . . . . 90Record a personal ringer melody . . . . . . . . 43Record your outgoing message. . . . . . . . . . 88Redial . . . . . . . . . . . . . . . . . . . . . . . . . . . . . . . 25Remote access. . . . . . . . . . . . . . . . . . . . . . . . 92Remote access instructions guide . . . . . . . . 94Reset. . . . . . . . . . . . . . . . . . . . . . . . . . . . . 49, 75Ringer melody . . . . . . . . . . . . . . . . . . . . . . . . 42Ringer volume . . . . . . . . . . . . . . . . . . . . . . . . 44SSafety information. . . . . . . . . . . . . . . . . . . . 120Select base. . . . . . . . . . . . . . . . . . . . . . . . . . . 69Set the answering machine language . . . . . 86Setting the tone . . . . . . . . . . . . . . . . . . . . . . . 28SOS message . . . . . . . . . . . . . . . . . . . . . . . 100SOS Motor . . . . . . . . . . . . . . . . . . . . . . . . . . . 16Stop watch . . . . . . . . . . . . . . . . . . . . . . . . . . . 75Storing emergency numbers in thetelephone . . . . . . . . . . . . . . . . . . . . . . . . . . . . 98Support . . . . . . . . . . . . . . . . . . . . . . . . . . . . . 114Switch answering machine on or off . . . . . . 86Switch your wrist shaker on . . . . . . . . . . . . . 15System PIN . . . . . . . . . . . . . . . . . . . . . . . . 47, 73TTake a call. . . . . . . . . . . . . . . . . . . . . . . . . . . . 25Taking a call from the answering machine . 86Technical details . . . . . . . . . . . . . . . . . . . . . 123Time format . . . . . . . . . . . . . . . . . . . . . . . . . . 48Transfer an external call . . . . . . . . . . . . . . . . 32Troubleshooting . . . . . . . . . . . . . . . . . . . . . . 114UUser Profiles . . . . . . . . . . . . . . . . . . . . . . 38, 60VVolume . . . . . . . . . . . . . . . . . . . . . . . . . . . 39, 61WWrist shaker . . . . . . . . . . . . . . . . . . . . . . . 13, 96130Helpline 0844 800 6503 (See page 114 for costs and hours of operation)
Helpline 0844 800 6503 (See page 114 for costs and hours of operation) 131
Distributed by: Audioline GmbH, D-41460 NeussFebruary 12 – ISSUE 1.0