Z-3190BT Quick Reference Guide
Z-3190BT Quick Reference Guide
Z-3190BT Quick Reference Guide
- No tags were found...
Create successful ePaper yourself
Turn your PDF publications into a flip-book with our unique Google optimized e-Paper software.
Z-<strong>3190BT</strong><strong>Quick</strong> <strong>Reference</strong> <strong>Guide</strong>
Table of ContentsRevision History....................................................................................................2Important Notice ..................................................................................................2General Handling Precautions ..............................................................................2Guidance for Printing ...........................................................................................3Laser Safety ..........................................................................................................3For CE-Countries ...................................................................................................3Power Supply .......................................................................................................4Wireless Communication .....................................................................................4Product Overview .........................................................................................................8Scanner and Accessories ..............................................................................................9Battery Installation .....................................................................................................10Installing Cable Clip ....................................................................................................11Connecting the Cradle ................................................................................................13Charging the Battery ..................................................................................................14Power On the Scanner ................................................................................................15Radio Communication Host Type ...............................................................................15Cradle Host Mode ..............................................................................................15SPP Master/SPP Slave Mode ..............................................................................16HID Mode ...........................................................................................................16Paging the Scanner .....................................................................................................16Scanner USB Online to Host .......................................................................................16USB Online Mode ...............................................................................................16Visible Indicators ........................................................................................................17How to Scan ...............................................................................................................18Handheld scanning .............................................................................................18Presentation Scanning ........................................................................................18Default Parameters ....................................................................................................19Programming Card .....................................................................................................21Introduction .......................................................................................................21Programming Procedure ....................................................................................21System Settings ..........................................................................................................22Cradle Host Mode ......................................................................................................23Wireless Mode ...........................................................................................................24SPP Slave Mode ..................................................................................................24SPP Master Mode ...............................................................................................25HID mode ...........................................................................................................26USB Online Mode .......................................................................................................27Disable USB communication ...............................................................................27Enable USB communication ...............................................................................27Set USB as the primary connection ....................................................................27Data Transmit Method ...............................................................................................28Normal ...............................................................................................................28Out of Range ......................................................................................................28Batch Mode ........................................................................................................28Clearing Batch ............................................................................................................29Batch Transfer ............................................................................................................29Batch Mode Sounds Settings ......................................................................................30Appendix....................................................................................................................311
Revision HistoryChanges to the original manual are listed below:Version Date Description of Version1.0 September. 02, 2011 Initial release1.1 October. 26, 2011 Corrected names and password settingprocedure1.2 March. 26, 2012 Added wireless communication tips1.3 April. 25, 2012 Added cable clip installation1.4 June. 14, 2012 Removed the charging cradle section1.5 September. 03, 2013 Added cradle host enable instructionImportant NoticeNo warranty of any kind is made in regard to this material, including, but not limited to,implied warranties of merchantability or fitness for any particular purpose. We are notliable for any errors contained herein nor for incidental or consequential damages inconnection with furnishing, performance or use of this material. We shall be under noliability in respect of any defect arising from fair wear and tear, willful damage, negligence,abnormal working conditions, failure to follow the instructions and warnings, or misuse oralteration or repair of the products without written approval. No part of this documentmay be reproduced, transmitted, stored in a retrieval system, transcribed, or translatedinto any human or computer or other language in any form or by any means electronic,mechanical, magnetic, optical, chemical, biological, manual or otherwise, except for briefpassages which may be quoted for purposes of scholastic or literary review, withoutexpress written consent and authorization. We reserve the right to make changes inproduct design without reservation and without notification. The material in this guide isfor information only and is subject to change without notice. All trademarks mentionedherein, registered or otherwise, are the properties of their various, ill, assorted owners.General Handling PrecautionsDo not dispose the scanner in fire.Do not put the scanner directly in the sun or by any heat source.Do not use or store the scanner in a very humid place.Do not drop the scanner or allow it to collide violently with other objects.Do not take the scanner apart without authorization2
Guidance for PrintingThis manual is in A6 size. Please double check your printer setting before printing it out.When the barcodes are to be printed out for programming, the use of a high-resolutionlaser printer is strongly suggested for the best scan result.Laser SafetyThis equipment generates, uses, and can radiate radio frequency energy. If not installedand used in accordance with the instructions in this manual, it may cause interference toradio communications. The equipment has been tested and found to comply with thelimits for a Class A computing device pursuant to EN55022 and 47 CFR, Part 2 and Part 15of FCC Rules. These specifications are designed to provide reasonable protection againstinterference when operated in a commercial environment.Radiant Energy: The laser scanner uses one low-power visible laser diodes operating at650nm in an opto-mechanical scanner resulting in less than 3.9μW radiated power asobserved through a 7mm aperture and averaged over 10 seconds.Do not attempt to remove the protective housing of the scanner, as unscanned laser lightwith a peak output up to 0.8mW would be accessible inside.Laser Light Viewing: The scan window is the only aperture through which laser light maybe observed from this product. A failure of the scanner engine, while the laser diodecontinues to emit a laser beam, may cause emission levels to exceed those for safeoperation. The scanner has safeguards to prevent this occurrence. If, however, a stationarylaser beam is emitted, the failing scanner should be disconnected from its power sourceimmediately.Adjustments: Do not attempt any adjustments or alteration of this product. Do notremove the protective housing of the scanner. There are no user-serviceable parts inside.Optical: The use of optical instruments with this product will increase the eye hazard.Optical instruments include binoculars, magnifying glasses, and microscopes but do notinclude normal eye glasses worn by the user.CAUTION: Use of controls or adjustments or performance of procedures other than thosespecified herein may result in hazardous radiation exposure.For CE-CountriesThis scanner is in conformity with CE standards. Please note that an approved, CE-markedpower supply unit should be used in order to maintain CE conformance.3
Power Supply• Use only original factory battery and the charging equipments.• Using any other type of battery and charging equipment may damage the scannerand invalidate the warranty.• Do not short the battery terminals. The battery could overheat.• Do not attempt to split or peel the outer casing.• Remove the battery if the scanner is not going to be used for a long time. If thebattery is left unused for more than 3 months, you need to charge the batterybefore use.Wireless Communication• Wireless technology operates 100M / 75M with communication cradle.Maximum communication range may vary depending on obstacles(person, metal, wall, etc.) or electromagnetic environment.• The following conditions may affect the sensitivity of wirelesscommunication.• There is an obstacle such as a person, metal, or wall betweenthis unit and wireless device.• A device using 2.4 GHz frequency, such as a wireless LAN device,cordless telephone, or microwave oven, is in use near this unit.• Because wireless devices and wireless LAN (IEEE802.11b/g) use thesame frequency, microwave interference may occur and resulting incommunication speed deterioration, noise, or invalid connection if thisunit is used near a wireless LAN device. In such a case, perform thefollowing.• Use this unit at least 10 m (about 30 ft) away from the wirelessLAN device.• If this unit is used within 10 m (about 30 ft) of a wireless LANdevice, turn off the wireless LAN device.• Install this unit and wireless device as near to each other aspossible.• Microwaves emitting from a wireless device may affect the operation ofelectronic medical devices. Turn off this unit and other wireless devicesin the following locations, as it may cause an accident.• Where inflammable gas is present, in a hospital, train, airplane,or a petrol station4
• Near automatic doors or a fire alarm• This unit supports security capabilities that comply with the wirelessstandard to provide a secure connection when the wireless technologyis used, but security may not be enough depending on the setting. Becareful when communicating using wireless technology.• We do not take any responsibility for the leakage of information duringwireless communication.• Connection with all wireless devices cannot be guaranteed.• A device featuring wireless function is required to conform tothe wireless standard specified by wireless SIG, and beauthenticated.• Even if the connected device conforms to the above mentionedwireless standard, some devices may not be connected or workcorrectly, depending on the features or specifications of thedevice.• Depending on the device to be connected, it may require some time tostart communication.5
Tips to help improve your wireless network1. Position the access point (host/cradle) in a relatively empty space atcentral location.When possible, place the access point in a central location on the highground (1m or above). If your access point is against an outside wall,the signal will be weak on the other side of the room.X Bad host placementO Good host placementX Bad host placementO Good host placement2. Move the access point (host/cradle) off the floor and away from wallsand metal objects (such as metal file cabinets).Metal objects, walls, and floors will interfere with your wireless signals.The closer your access point is to these obstructions, the more severethe interference, and the weaker your connection will be.6
3. Reduce wireless interference.The most common wireless technology, 802.11g (wireless-G), operatesat a frequency of 2.4 gigahertz (GHz). Many cordless phones,microwave ovens, hospital equipments, refrigerator, LED, and otherwireless electronics also use this frequency. If you use these wirelessdevices in your office, your device might not be able to "hear" thesignals over the noise coming from them.If your network uses wireless-G, you can quiet the noise by avoidingwireless electronics that use the 2.4 GHz frequency. Instead, look forcordless phones and other devices that use the 5.8 GHz or 900megahertz (MHz) frequencies. Because 802.11n (wireless-N) operatesat both 2.4 GHz and the less frequently used 5.0 GHz frequency, youmay experience less interference on your network if you use thistechnology.Avoid possible wireless interference4. Update the firmware or driver of your wireless dongle.If you are using a wireless dongle or other similar devices to make theconnection, getting the latest firmware or driver updates may improvethe performance. Visit your manufacturer’s website for the updates.7
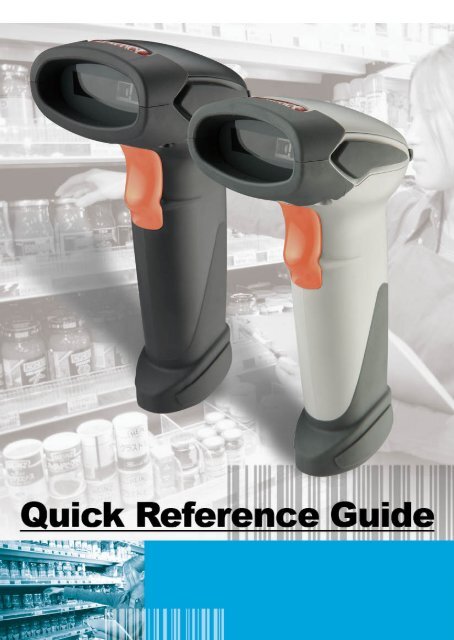
Product OverviewThis scanner is a gun type rugged wireless CCD/Laser barcode scanner with a state of theart scan engine. Featuring a superb scanning speed and able to withstand 1.5 meter drop,it is ideal for manufacturing and logistic sectors.ScannerExit WindowLED IndicatorBuzzerTriggerCable ConnectorStrap HoleMetal ChargingContactsCradleChargingContactsFunctionTrigger/LEDindicatorHost ConnectorDC PowerConnectorWireless AddressLabel8
Scanner and AccessoriesThe scanner package contains:Scanner/ Cradle (optional)Li-ion battery packCommunication cable for cradle (optional)Mini USB B to mini USB A cable5V USB Power adapterCD-ROM or handbook(Containing manual and programming guide)Cable clipIf any contents are damaged or missing, please contactyour dealer immediately.9
Battery InstallationInstalling BatteriesThe rechargeable batteries are packed individually for shipping safety.Please follow the steps below to install the batteries.Always use the rechargeable batteries provided by the manufacturer to avoidany non-compatible danger or void the warranty.1. Unscrew the cap from the battery compartment at the bottom of the scanner andinsert the battery.2. Make sure the red tag on the battery is tugged in and not blocking the cableconnector and close the cap.3. Tighten the screw on the cap to secure the battery.10
Installing Cable ClipCable clip is used to hold the mini USB cable in USB Online Mode. With thecable clip, you can easily transform your wireless scanner into a wired one.Please follow the instructions below to attach the cable clip to the scanner.1. Insert the cable clip to the strap hole asshown.2. Gently turn the cable clip counter-clockwiseand push the cable clip all the way throughthe strap hole.3. Attach the bottom part of the cable clip to thescanner handle.4. Attach the cable to the cable clip.11
Removing Cable Clip1. Detach the cable from the clip and detach thebottom part of the cable clip from the scannerhandle.2. Unhook the left part of the cable clip from thestrap hole then turn it clockwise. While inturning motion, push the cable clip all the waythrough.3. Remove the cable clip from the strap hole.12
Connecting the CradleThe cradle host features wireless technology and is designed to support radiocommunication to the scanner. It can be used for both battery charging and radiocommunication.1. Take the desirable interface cable and insert the RJ-45 connector on the bottom ofthe cradle. You will hear a clear and short “click” sound; then connect the otherend to the host.2. Connect the included USB cable of mini USB port in the bottom of the cradle andconnect other end to USB power adaptor.3. Connect the USB power adaptor into AC outlet. The LED indicator on the cradleshould flash blue until it made connection with the scanner.Communication cableMini USB B toUSB power• When using Keyboard wedge and USB interfacefor cradle communication, it is not necessary tohave an external power adapter if host hassufficient power. But these interfaces needexternal power adapter when charging batteries.• The mini USB port on the bottom of the cradleshould only be connected using the USB poweradaptor. Please do not connect the USB cable to aPC host for charging when using the cradle.13
Charging the BatteryThe scanner offers two different ways to charge the battery: USB Cable or Cradle.To charge the battery using the cradle:1. Connect the cradle.2. Place the scanner on the cradle. You will hear a short beep sound from thescanner indicating scanner is in contact with the cradle.3. The battery begins charging when the scanner LED indicator starts flashing green.LED turns steady green when charging is complete.Approx. charging time: 4.5 hoursTo charge the battery using the USB cable:There are two method to charge scanner via USB cable.• Host USB Power• Power adaptorConnect the mini USB connector directly to the scanner.1. Connect the other end of the USB connector to the host to begin charging. Youcan also connect the USB cable to an outlet using the power adapter to charge thebattery.2. The battery begins charging when the scanner LED indicator starts flashing green.LED turns steady green when charging is complete.Approx. charging time: 5~6 hours14
Power On the Scanner• The scanner will power on automatically whencharging.• Batteries shipped may not be full charged andshould be fully charged for maximum chargecapacity.• Recommended charging environment istemperature in 0°C~35°C (32°F~95°F).1. Ensure the battery is fully charged. Please refer to the previous section to chargethe battery.2. Press and hold the trigger for 1 second until a long beep sound is heard to turn onthe scanner.Radio Communication Host TypeThis scanner support three radio communication types:• Cradle Host mode• SPP master/slave mode• HID modeCradle Host ModeThe scanner communicates with the host through the cradle and the cradle communicatesdirectly to the host via host interface cable connection. Typically, scanner and cradle inthe same delivery box are paired in factory. As soon as both are powered on, they shouldfind and connect to each other immediately.However, under special circumstance that the scanner and the cradle are not paired withthe cradle, please see User’s Manual for detail operation information.15
SPP Master/SPP Slave ModeThe scanner communicates with the host through wireless connection.Please see User’s Manual for detail operation information.HID ModeThe scanner communicates with the smart phone through wireless HID connection.Please see User’s Manual for detail operation informationPaging the Scanner1. Ensure the cradle is properly connected to the host and LED indicator is showingsteady blue.2. Press the function trigger on the cradle. You should hear the scanner make 3 beepsounds and blue LED flash 3 times if it is in range.Scanner USB Online to HostThe scanner provides other ways for you to connect to the host. When the radiocommunication is not available, the scanner can be connected to transmit data via USBOnline mode. Please see USB Online Mode for detail operation information.USB Online ModeThe scanner connects directly to a USB host to recharge and transmit data.16
Visible IndicatorsGroup 2Group 1LED StatusIndicationGroup_ 2 Group_1Blue Flashing Waiting for radio connection (flash time 0.5s : 0.5s).Blue fast Flashing Radio connecting.Blue Slow Flashing Device connected (flash time 0.03s : 3s).1 Blue Flashing A barcode was decoded successfullyBlue FastData transmissionFlashingGreen Flashing Charging modeSteady Green Battery fully chargedSteady RedProgramming modeRed flashingslow (withLow battery warningcontinuousbeep sound)Red flash twice(with 2 beepVery low battery warningsound)Cradle LEDLED StatusRed steady and blue continuousflashingSteady red and blueRed and blue interchangeSteady blueBlue flashingIndicationCradle is radio disconnected and power fromDC adaptor is lost.Cradle is radio connected. But lost DC powerfrom the adaptor.USB Interface communication failed.Cradle is radio connected.Cradle is radio disconnected.17
How to ScanThere are two ways to scan with this device.• Handheld scanning• Presentation scanningHandheld scanning1. Power on the scanner.2. Press the trigger and aim at the barcode as illustrated.3. When decoding is successful, the scanner beeps and the LED indicates blue.Presentation Scanning1. Put the scanner into the cradle for presentation scanning.2. Move the barcode label approach the scanner scanning zone.3. When decoding is successful, the scanner beeps and the LED indicates blue.18
Default ParametersParameterDefaultRadio communicationWireless hostPairing modeData transmitRadio protocol timeoutPower off timeoutEncryptionCradle HostUnlockedNormal5 seconds20 minutesEnableCradle HostRS-232 communicationBaud rate 9600ParitynoneData bits 8Stop bit 1RTS/CTSoffTerminatorKeyboard Wedge CommunicationTerminatorPC/ATKeyboardUS keyboardTerminatorEnter(Alpha numeric)USB CommunicationTerminatorEnterCode modeScan codeKeyboardUS keyboardWand EmulationWand emulation speedNormalData outputBlack=highPair contact on cradleEnableScannerDecoder SelectionDefaultEAN/UPCEnableCODE 39EnableCode 32DisableCODABAREnableITF 2 OF 5Enable19
MSIChinese post codeCode 93Code 128EAN-128TelepenCode 11Standard 2 of 5Industrial 2 of 5GS1 DataBarBeeper SoundFrequencyDurationOperating ParameterScan modeStand modeHeader and trailerInter-message delayInter-character delayCode IdentifiersIdentifier code as ZEBEX standardIdentifier code as AIM standardCode 39 identifier codeITF 2 of 5 identifier codeChinese post code identifier codeUPC-A identifier codeUPC-E identifier codeEAN-13 identifier codeEAN-8 identifier codeCodabar identifier codeCode 128 identifier codeCode 93 identifier codeDisableDisableEnableEnableDisableDisableDisableDisableDisableDisableDefaultMediumMediumDefaultTrigger modeEnableNoneNoneNoneDefaultDisableDisableMIHAEFFFNKL20
Programming CardIntroductionThis programming card contains only frequently-used programming bar code labelsused to configure the scanners.For detailed programming instructions and safety notices please refer to the User’sManual or Programming <strong>Guide</strong>.Programming Procedure1. Power up the scanner.2. Scan the Start of Configuration barcode.3. Scan the barcode for the desired feature. Multiple features can be enabledor disabled before scanning the End of Configuration barcode.4. Scan the End of Configuration barcode and save the new configuration.5. To give up a configuration change, power off the scanner before scanningthe End of Configuration barcode or scan the Abort barcode.6. For some parameter setting, such as barcode length and identifier code, itis required to scan the Set barcode to save the configuration. See theseparameter descriptions for this procedure.Power up the scannerScan the “Start ofConfiguration” barcodeScan barcode of thedesired featureScan the “End ofConfiguration” barcodeScan the “Abort” barcodePower off the scannerFinish the configuration21Discard the configuration
Start Of ConfigurationSystem SettingsReturn scanner to factory defaultsReturn cradle host to factory defaultsReturn to USB default(Communication cradle link required)Return to wand emulation default(Communication cradle link required)Return to RS232 default(Communication cradle link required)IBM PC/AT/PS2 keyboard emulation(Communication cradle link required)Return as USB-virtual COM port defaultReturn to stand-alone keyboard defaultReturn as OPOS port defaultAbort (exit programming mode without anyupdates)End Of Configuration22
Start Of ConfigurationCradle Host Mode1. Connect the cradle and the computer. Please make sure the cradle LED is flashingblue indicating it’s not linked to any scanner. If the LED shows steady blue, thecradle is already paired to another scanner so you must unpair the scanner beforecontinuing.2. Power on the scanner and enable cradle host mode if necessary. To enable CradleHost mode, scan the following barcodes: Start Of Configuration, Cradle Host modeenable, then End Of Configuration.Cradle Host mode enable3. Use the scanner to scan the pairing barcode at the bottom of the cradle to beginpairing. 3 short beeps will be heard.4. The LED indicator on the scanner will flash blue rapidly indicating search mode inprocess. The LED on the cradle becomes steady blue when the pairing is successful.5. Scan the label of the corresponding host interface the cradle is using in SystemSettings to begin using the scanner.End Of Configuration23
Start Of ConfigurationSPP Master Mode1. Power on of the remote device and have its address ready in hand. Please alsomake it discoverable.2. Program the scanner with the “SPP Master enable” barcode.Scanner SPP Master enable3. Scan “Set wireless address” to set the address.Set wireless address (SPP Master only)4. Use the ASCII table in Programming <strong>Guide</strong> to input the 12 digit wireless address.For example: if the address is “011B1345600”, scan “0”, “0”, “1”, “1”, “B”, “1”, “3”,“4”, “5”, “6”, “0”, “0” from ASCII barcode labels.5. Scan “Confirm Setting” to store the address.Confirm Setting (for address and pin code settingrequired)6. Setup and input the pin code if necessary. Please see Setting Pin Code section formore details.7. Scan “Required Pair with slave (SPP Master)” to begin pairing.Required Pair with slave (SPP Master)End Of Configuration25
Start Of ConfigurationHID mode1. Power on the scanner and program it with “HID Mode”. To connect a smartmobile phone (for example, Android phone), the Smart phone mode mustalso be enabled.HID modeSmart phone mode2. Enable wireless function on your host and follow the instructions in yourhost to set it to discover other wireless devices in its surrounding.3. The scanner should be on the list of discoverable devices. The default nameof the scanner is “ZBBT”. You will be prompt to enter paring pin code. Select“ZBBT” and input the pin code that appears on your mobile device toconnect scanner to the phone.4. Scan the Enter barcode to confirm. A short beep should be heard uponconnection.EnterFull ASCII ---CRFunction key-----“Enetr(num.)”End Of Configuration26
Start Of ConfigurationUSB Online ModeThe scanner connects directly to a USB host to recharge and transmit data. You mayenable or disable the functions using the following settings.Disable USB communicationUSB online scan disableEnable USB communicationUSB online scan enableSet USB as the primary connectionUSB online scan, Ignore radio communicationEnd Of Configuration27
Start Of ConfigurationData Transmit MethodThe data transfer method includes three types: Normal (default), Out-of-Range Mode, andBatch Mode. Users may modify this setting according to their preferences.NormalWhen the scanner is within the connection range, the scanned data will be transferred tothe host computer immediately. If the scanner is out of its connecting range, the scannerdoes not send or store any data.Out of RangeData transmit normalScanned data are stored when scanner is out of its wireless communication range. Whenscanner is back into its communication range or re-connected, the stored data are sentwhen scanning next barcode label.Batch ModeOut of range buffer enableWhether within the connection range or not, in batch mode, the scanner stores allscanned data that will be transferred to the host computer after scanning “Send BatchData” label. Number of storable bar codes = 61,365 bytes of memory / (number ofcharacters in the bar code +2)Batch mode enableEnd Of Configuration28
Start Of ConfigurationClearing BatchUse the settings in this section to clear the stored data. “Confirm Setting” label must beread to save the settings in this section.Clear batch data after sendClear batch data by scanning “Delete batch data” labelConfirm Setting (for address and pin code setting required)Batch TransferDelete batch dataUse the settings in this section to setup batch transfer. Hold the trigger for over 1 secondto send the data.Send Batch Data By Scanning LabelSend Batch Data on line USB cable contactSend Batch data on cradleEnd Of Configuration29
Start Of ConfigurationBatch Mode Sounds SettingsUse the settings in this section to setup the sound.Out of range resend data with beeper soundOut of range resend data without beeper sound in Out ofrange mode.Send Batch Data without beepSend Batch Data with BeepEnd Of Configuration30
AppendixASCII Code 39 TableABCDEFGHIJKLMNOPQRSTUVWXY31Z
0 12 34 56 78 9EnterFull ASCII ---CRFunction key-----“Enetr(num.)”32
593-33190E-202


