GUIDE FOR TEACHERS & COACHES - Speedminton
GUIDE FOR TEACHERS & COACHES - Speedminton
GUIDE FOR TEACHERS & COACHES - Speedminton

Create successful ePaper yourself
Turn your PDF publications into a flip-book with our unique Google optimized e-Paper software.
<strong>GUIDE</strong> <strong>FOR</strong> <strong>TEACHERS</strong> & <strong>COACHES</strong><br />
1
2<br />
TABLE OF CONTENTS:<br />
SPEED BADMINTON <strong>FOR</strong> CLASSES 4<br />
EQUIPMENT 5<br />
Racquets 5<br />
Speeders ®<br />
Courts 5<br />
<strong>Speedminton</strong> ® School Sets 6<br />
MATCH RULES 7<br />
PLAYING SPEED BADMINTON 9<br />
Basics 9<br />
Techniques 10<br />
Tactics 15<br />
TEACHING SPEED BADMINTON 16<br />
Introduction of the Speeder ®<br />
TABLE OF CONTENTS<br />
Introduction of the racquet 16<br />
Warm up exercises 18<br />
Coordination exercises 19<br />
Conditioning exercises 20<br />
Training techniques 21<br />
More games using <strong>Speedminton</strong> ® 22<br />
Your first lesson (suggestions) 23<br />
TOURNAMENTS 24<br />
Fun tournaments 24<br />
Competitive tournaments 25<br />
BLACKMINTON ® 27<br />
5<br />
16
MAIN REASONS <strong>FOR</strong> ADDING SPEED BADMINTON TO YOUR CURRICULUM:<br />
» Fun and effective way to improve fitness, agility and coordination<br />
» High motivation for kids<br />
» Play on virtually any surface, indoors or outdoors<br />
» Easy to learn, simple rules<br />
» Different Speeders ®<br />
for different levels of play<br />
» Fast and simple set-up, no court or net needed<br />
» High quality equipment<br />
INTRODUCTION<br />
“ I love tennis and enjoy playing most racquet sports. I am really impressed<br />
with <strong>Speedminton</strong> ® . It is the easiest and most effective way to introduce<br />
children to racquet sports, it trains hand-eye coordination, footwork and<br />
improves physical conditioning, all while the children are having fun.”<br />
MARIA SHARAPOVA<br />
3-Time Grand Slam Champion<br />
3
4<br />
SPEEDMINTON ®<br />
<strong>FOR</strong> CLASSES<br />
Invented in Germany in 2001, Speed Badminton combines the best elements of three sports; tennis (the court size is the<br />
size as a tennis court split in half, one tennis court equalls two speed badminton courts), badminton (the use of birdies<br />
called Speeders ®) and racquetball (the racquet used is similar to a racquetball racquet). Speed Badminton is the perfect<br />
game for your curriculum and can be played by every student no matter their skill level.<br />
WHO<br />
Speed Badminton is the perfect game for your curriculum, because it can be played by every age and skill level. The<br />
durable racquets are short and lightweight, which makes them easy to handle for kids. The Speeders ® allow long hits<br />
without requiring a lot of power. The Speeders ® have different velocities; Match Speeders ® for aggressive play and Fun<br />
Speeders ® for recreational play.<br />
Speed Badminton is recommended for children ages 7 and up. Beginners are able to play short rallies after just a couple<br />
of minutes. Speed Badminton provides great recreational play for elementary and middle schools. For high schools,<br />
Speed Badminton can be played for recreation or competitively.<br />
WHERE<br />
No net is required for Speed Badminton, so you can play indoors or outdoors on virtually any surface. The Speeders ®<br />
were especially developed for outdoor fun, being both smaller and heavier than badminton birdies for better wind<br />
resistance. Their bold colors ensure easy visibility, indoors or out.<br />
The court can be marked easily on the ground with ribbons, cones or chalk, which allows play just about anywhere:<br />
grass fields, blacktop, gym floor, etc.<br />
HOW<br />
SPEEDMINTON ®<br />
Speed Badminton is a highly motivational game to improve both conditioning and coordination skills. When playing for<br />
recreation, the students can stand across from each other and hit the Speeder ® back and forth. Make sure that every<br />
child has enough space to react to the Speeder ®.<br />
For competitive play, each player stands in an 5.5 meters square with 8.8 (under 15) or 12.8 meters between the<br />
squares. Hitting the Speeder ® back and forth, each player tries to get it to land on the ground in their opponent’s<br />
square, while simultaneously defending their own.<br />
In this guide you will find many games that can be utilized using <strong>Speedminton</strong> ® equipment.<br />
SPEEDMINTON <strong>FOR</strong> P.E. CLASSES<br />
® <strong>FOR</strong> CLASSES
SPEEDMINTON ®<br />
RACQUETS<br />
EQUIPMENT<br />
<strong>Speedminton</strong> ® currently carries three different types of racquets; aluminum<br />
and graphite and kevlar. In the <strong>Speedminton</strong> ® School Sets we use the<br />
aluminum racquets, which have a unique shape and weigh about 150<br />
grams. The length of the racquet is about 60 centimeters and provides the<br />
best possible control and handling. The racquet is smaller than tennis and<br />
badminton racquets, making control easy for children. The “sweet spot” (optimal<br />
hitting point on the face) lays in an ideal distance from the hand, which results in the best<br />
possible vibration characteristics for arm protection.<br />
SPEEDERS ®<br />
The secret of <strong>Speedminton</strong> ® is the new birdies called Speeders, ® which were designed with outdoor fun in mind. Comparing<br />
traditional birders to Speeders, ® the Speeders ® are heavier and have less wind resistance, allowing for long distance play. The<br />
hollows (dimples) in the head of the Speeder ® also reduce air resistance. Each Speeder ® has a hole in the center of the head<br />
which stabilizes its flight path as the air in front of the head is funneled to the back through the canal. The rubber structure of<br />
the head surface guarantees optimal control and allows long hits using less power. High quality synthetic materials make the<br />
Speeder ® durable for every day use and competitive play. The material also transforms the invisible ultraviolet part of natural light,<br />
increasing the visibility of the Speeder. ®<br />
Besides the Match Speeder ® for competitive play, <strong>Speedminton</strong> ® offers a Fun Speeder ® for recreational play. The Fun<br />
Speeder ® weighs less and is perfect for beginners and smaller children. For breezy days, the Speeders ® come with a wind<br />
ring that can be rolled over the head of the Speeder, ® giving an additional 2 grams of weight for more stability.<br />
COURTS<br />
Match Speeder ® Fun Speeder ® Wind rings<br />
The variety of options for marking a Speed Badminton court is the key for playing the game on any surface, allowing every school<br />
to have Speed Badminton as part of its curriculum. The official Speed Badminton court consists of two 5,50 meters squares with<br />
12,80 meters between them, as defined for competitive play under international match rules. When teaching Speed Badminton at<br />
schools, court size can be adjusted to fit your needs.<br />
12,80 m<br />
SPEEDMINTON ® EQUIPMENT<br />
5,50 m 5,50 m<br />
5
6<br />
<strong>Speedminton</strong> ® Easy Court can be set up quickly to mark a court with the official international distance. The<br />
Geckomarkers can be used on grass or sandy soil, or you can tape the courts down on blacktop.<br />
<strong>Speedminton</strong> ® Geckomarkers let you mark the squares at official distance or can be re-sized to fit your needs.<br />
The cones ® are ideal for lessons at schools and training programs.<br />
A tennis court can easily become two Speed Badminton courts just by putting down the net. (If you prefer to<br />
keep the net up that is fine as well.) When playing on the tennis court, you will want to play from T-line to T-line<br />
or use rubber lines to simply lay down a court.<br />
COURT SET-UP OPTIONS<br />
SPEEDMINTON ®<br />
SCHOOL SETS<br />
SPEEDMINTON ® SPEEDMINTON EQUIPMENT<br />
® EQUIPMENT<br />
Use chalk on blacktop or draw a court in the sand Use the cones to mark a court on any kind of surface<br />
<strong>Speedminton</strong> ® offers special sets for schools and institutional use. The 30, 16, 8 Player sets make it convenient for<br />
teachers to grab the large bag and begin play immediately.<br />
<strong>Speedminton</strong> ® School Sets Include:<br />
» Racquets<br />
» Speeders ®<br />
» Geckomarkers<br />
» <strong>Speedminton</strong> ® Bag<br />
» Information for Teachers
MATCH RULES<br />
THE GAME<br />
Each set ends when a player reaches 16 points. If the score is tied at 15 or greater, the play continues until one player<br />
has a two-point advantage. It is up to the organizer to play 3 or 2 winning sets.<br />
THE SERVICE<br />
The players draw to decide who serves first. Service then alternates after every three serves. Every serve counts. If the<br />
score is tied 15-15, service alternates after each point. The server has to stand inside of the base court (serving zone)<br />
without crossing with any part of the foot the serve line or imaginary serve line respectively. The losing side always has<br />
the first service in the next game.<br />
THE COURT<br />
5,5*5,5m<br />
SCORING<br />
ATTACK LINE<br />
The court is used for single and double.<br />
Measured: Leading edge attack line<br />
to leading edge serve line 3m!<br />
Intermedium Zone<br />
12,8 m<br />
Players change sides after each game to<br />
ensure equal playing conditions (wind<br />
and lighting conditions). If a fifth game<br />
(tiebreaker) becomes necessary, players<br />
change sides every 9 played points<br />
Every volley counts unless it has to be repeated. Points are awarded in the following cases:<br />
» Service fault<br />
Security Zone<br />
ATTACK LINE<br />
View from<br />
in front<br />
» Speeder ® made contact with the ground<br />
» Speeder ® lands in playing field (or on one<br />
of the lines) and cannot be returned<br />
View behind<br />
BASE LINE<br />
5,5*5,5m<br />
5,5m<br />
SPEEDMINTON ® MATCH RULES<br />
NOTE: The intermediate zone corresponds<br />
to the distances of T-lines at a tennis<br />
court. The total court corresponds to the<br />
measure of a tennis court for double<br />
divided longitudinally.<br />
Structure of Squares<br />
Attack zone<br />
Back court /<br />
Serve zone<br />
3m<br />
2,5m<br />
LATERAL LINE<br />
ATTACK<br />
» Speeder ® lands “out” (Note: If a player returns an<br />
out Speeder, it is accepted and play continues)<br />
SERVE LINE /<br />
IMAGINARY BORDER LINE<br />
» Speeder ® is hit twice by the same player in sequence<br />
» Body contact with the Speeder<br />
7
8<br />
DOUBLES MATCH<br />
A player of the serve party has to serve inside of the base court/serve zone and belongs with his partner to the same<br />
party.<br />
Sequence and position on the court<br />
After having served the speeder can be shot in any position by each player of the return party‚ The winner party of the<br />
corresponding last set (or the returner party after the choice ) has to announce who will be the attacker or the back<br />
court player respectively before starting the next (or the first) set.<br />
Sequence of servers…<br />
The right to serve passes...<br />
…from the party (A) which has the right to serve…<br />
…onto the attacker of the returner (party B) who is then the back court player…<br />
…onto the partner of the party (A)…<br />
…onto the partner of the party (B)…<br />
…onto the first server, etc.<br />
A player is not allowed to serve out of the sequence.<br />
Both players of the party which lost the last set can serve first in the following set.<br />
Position faults at serve and return, i.e. during the rally mean…<br />
…the back court player puts a part, of his foot which is next to the base line in front of the partners foot at the moment<br />
of striking the speeder…<br />
...the attacker puts a part of his foot which is next to the base line behind the partners foot at the moment of striking<br />
the speeder…<br />
If a fault of position at the serve or return during the rally respectively is punished by the umpire, then the point is<br />
immediately lost, although the rally has not been finished yet.<br />
For the detailed rules see www.ISBTO.com<br />
SPEEDMINTON ® MATCH RULES
PLAYING SPEED BADMINTON ®<br />
HOLDING THE RACQUET<br />
The way you hold the racquet depends on your individual preference. We recommend using the middle grip for all kinds<br />
of strokes. In Speed Badminton, you never change your grip style. All types of strokes are played with the middle grip.<br />
By using the middle grip it is extremely easy to learn the different strokes and apply them during the play. See pictures<br />
below for correct and incorrect grip.<br />
Correct: Middle Grip Incorrect Incorrect<br />
THE BASIC POSITION<br />
Waiting for the Speeder ® in the basic position guarantees the optimal flexibility and agility for your<br />
upcoming move. (NOTE: Descriptions below are for right-handed players)<br />
» Spread your feet shoulder width apart<br />
» Bend your knees slightly<br />
» Hold the racquet in front of your body<br />
» Keep your body loose and ready<br />
» Be ready to step forward to meet the approaching Speeder ®<br />
» You should stay in the basic position as much as possible (applies to both the serving player and<br />
the returning player)<br />
Tip: Orient yourself on the front line and resume the basic position after every hit<br />
THE SPLIT STEP – Make a hop or small jump and<br />
land on the balls of your feet the moment the<br />
opponent hits the Speeder ® – this brings more<br />
agility to your following move.<br />
PLAYING SPEED BADMINTON<br />
Basic Position<br />
9
10<br />
Common Mistakes:<br />
» Stiff body position: You can’t react properly in this position<br />
» Your feet are too close together – you lose balance and can’t react as quickly<br />
» Knees are not bent – this makes it difficult to react quickly and powerfully<br />
» Many players stand exactly in the center of the field. If your forehand side is more effective than your backhand,<br />
you should stand slightly to the left<br />
TECHNIQUES<br />
SERVICE<br />
In Speed Badminton, the serve is one of the most important strokes. Beginners will not be able to get a rally going<br />
unless they know how to serve the Speeder ® adequately. During competitive play, a good serve will put your opponent<br />
under pressure right from the start.<br />
Starting Position<br />
» Stand sideways with your left foot in front and right foot in the back at a slight angle<br />
» Knees are slightly bent<br />
» Upper body is slightly rotated towards your opponent<br />
» Hitting arm is moved backwards<br />
» The left hand holds the Speeder ® head down on the basket between thumb and pointer finger<br />
Hitting Position<br />
» Drop the Speeder ®<br />
» Simultaneously swing your hitting arm to the Speeder ® while rotating your upper body towards your opponent<br />
» Hit the Speeder ® in front of your body to the right<br />
» Shift your weight to the left foot<br />
» Move your left arm backwards for more stability<br />
Finishing Position<br />
» Hitting arm swings out<br />
» Right foot is set forward to get into the basic position<br />
SERVICE POSITIONS<br />
Starting Position Hitting Position Finishing Position<br />
PLAYING SPEED BADMINTON
Common Mistakes<br />
» Throwing the Speeder ®: Many kids try to throw the Speeder ® up before hitting it; just dropping it from your hand<br />
makes it much easier. (Students can tap the Speeder ® with the racquets a few times before they hit it to get used to<br />
the feel.)<br />
» Lack of concentration: Because service from the waistline seems simple, many people do not take it seriously.<br />
<strong>FOR</strong>EHAND<br />
The forehand stroke is the most frequently used swing and most players will find the forehand technique much easier<br />
than the backhand. The forehand stroke can be played low, half high and high. A long swing towards the Speeder ®<br />
makes it easier to control. For precise control, you have to move your body in the direction you are aiming. Always try to<br />
hit the Speeder ® in front of your body.<br />
Starting Position:<br />
» Middle grip<br />
» Move upper body against the hitting direction (left shoulder goes forward)<br />
» Hitting arm goes backward<br />
» Body weight shifts to the right foot<br />
» Knees are slightly bent during the whole movement to guarantee optimal balance<br />
Hitting Position:<br />
» Racquet face points toward the direction you want to hit the Speeder ®<br />
» Body weight shifts to the left foot<br />
» Upper body rotates in the hitting direction<br />
» Hitting arm swings forward and hits the Speeder ® in front of the body<br />
» To add more speed you can whip your wrist<br />
Finishing Position:<br />
» Racquet swings out<br />
» Turn back to basic position as soon as possible<br />
<strong>FOR</strong>EHAND POSITIONS<br />
Starting Position Hitting Position Finishing Position<br />
PLAYING SPEED BADMINTON<br />
11
12<br />
Common Mistakes:<br />
» Not enough bending at the knees – makes you lose flexibility<br />
» Arm not extended – you hit the Speeder ® too close to your body<br />
BACKHAND<br />
For most Speed Badminton players, the backhand is the more challenging of the strokes. The player has to move his body<br />
first (pointing the right shoulder at the opponent). Thus, you need to change your position before making your stroke.<br />
Starting Position:<br />
» Middle grip<br />
» Move upper body against the hitting direction (right shoulder goes forward)<br />
» Hitting arm is slightly bent and goes backward<br />
» Body weight shifts to the left foot<br />
» Knees are slightly bent during the whole movement to guarantee the optimal balance<br />
Hitting Position:<br />
» Racquet face points toward the direction you want to hit the Speeder ®<br />
» Body weight shifts to the right foot<br />
» Upper body rotates in the hitting direction<br />
» Hitting arm swings forward and hits the Speeder ® in front of the body<br />
Finishing Position:<br />
» Racquet swings out<br />
» Turn back to basic position as soon as possible<br />
Common Mistakes:<br />
» Legs remain in basic position<br />
» Not enough body rotation<br />
» Arm not extended – you hit the Speeder ® too close to your body<br />
BACKHAND POSITIONS<br />
Starting Position Hitting Position Finishing Position<br />
PLAYING SPEED BADMINTON
OVERHEAD STROKES<br />
High and long shots from your opponent have to be played overhead. Playing in a high arc is the best way to get a rally<br />
going. Overhead strokes are very important to learn to play back and forth.<br />
Starting Position:<br />
» Middle grip<br />
» Hitting arm is lifted and bent and the racquet is behind your head<br />
» Body weight shifts to the right foot placed in the back<br />
» Knees are slightly bent during the whole movement to guarantee the optimal balance<br />
Hitting Position:<br />
» The elbow of the hitting arm moves towards the incoming Speeder ®<br />
» Upper body rotates towards the basic position<br />
» The hitting arm is stretched and rotates counter clockwise<br />
» Body weight shifts to the left leg<br />
» Left arm moves backwards to provide an optimal balance<br />
Finishing Position:<br />
» Racquet swings out down to the left<br />
» Right leg moves forward<br />
» Turn back to basic position as soon as possible<br />
Common Mistakes:<br />
» No body rotation – the stroke will be misdirected and weak<br />
» Failure to fixate on the approaching Speeder ® – you will not be able to calculate the flight path of the Speeder ® correctly<br />
» Failure to outstretch your hitting arm – Speeder ® will be hit with less swing and control<br />
OVERHEAD POSITIONS<br />
Starting Position Hitting Position Finishing Position<br />
PLAYING SPEED BADMINTON<br />
13
14<br />
SMASH vs. CLEAR<br />
Playing overhead, you can make different strokes with almost the same movement depending on what you want to<br />
achieve.<br />
A “clear” is a high stroke to the back of your opponent’s field. Under pressure, this stroke gives you more recovery time<br />
because the Speeder ® is in the air for a longer period. It drives your opponent to the back of their field and brings you in<br />
a good position to score with a short and fast stroke. You can also play an underhand clear from the frontline by lobbing<br />
the Speeder ® over to your opponent.<br />
A “smash” is a short and fast stroke. Playing overhead you try to hit the Speeder ® directly to the ground into your<br />
opponent’s square. The smash is the most powerful stroke in Speed Badminton and great for making a direct point;<br />
however, you have to play very precisely.<br />
Both strokes are played overhead and the movement is almost the same. When playing a clear you have to be careful<br />
with your power because you don’t want to hit too far. Playing a smash you hit as powerful as possible but it still has to<br />
be precise.<br />
Smash<br />
Clear<br />
PLAYING SPEED BADMINTON<br />
The main difference can be found in the point of the hit. A clear is played more to the back, over or even behind your<br />
body, a smash is played in front of your body.<br />
TIP: At first it may be easiest to learn the basics of Speed Badminton strokes by keeping your wrist straight, focusing<br />
on the movements of the arms, the legs and the upper body (more like a tennis stroke). As you get more advanced,<br />
using your wrist like a whip can improve your play with any kind of stroke.
TACTICS<br />
First you want your students to have nice rallies and improve their play by learning how to serve and keep the Speeder ®<br />
in the air, back and forth. Once you move to competitive play, you will have to know some basic tactics to be successful.<br />
TARGETS<br />
Where do you want to place the<br />
Speeder ® in the opponent’s square?<br />
Like other racquet sports, the edges<br />
of the court are the best spots, but<br />
you will need to control your distance.<br />
Without controlling your distance,<br />
you may find that your Speeders ® fly<br />
outside of your opponent’s square.<br />
Try directing the Speeder ® to the front edges of the court. A well placed and fast stroke to the front corners will be hard<br />
to return. The corners in the back of the field are also good targets, but you are less likely to score as your opponent has<br />
more time to go back for the Speeder. ® The tactic for using the back corners sets you up for your next smash.<br />
The third possibility is to aim directly at your opponent’s body. Though they do not have to go a long way to get it,<br />
these strokes are very difficult to return. (Use your discretion with this method. You may not want to encourage the<br />
students to aim at each other.)<br />
TIP: Smashing may be the fastest way to score, but it is not all about smashing the Speeder ® to the opponent’s front<br />
line. Players with the greatest variety of strokes are most successful. Alternate high strokes with fast and low<br />
strokes. Make your opponent run in every square keeping them anticipating where your next shot will go.<br />
POSITIONING AND FOOTWORK:<br />
Compared to other racquet sports, a Speed Badminton court seems small at first, but with the<br />
speed of the game, an 5,5 meter square is a big area to cover. Standing in the central position<br />
and always moving back to this position is essential to be prepared for your opponent’s strokes.<br />
The most effective stroke for a direct point is a fast hit to the edges in the front (yellow squares).<br />
Thus the central position of the player is not in the middle of the square, but shifted toward the<br />
front line. You can have more time to move backwards for the long and high strokes, but you<br />
need to be quick to return the short and low ones.<br />
PLAYING SPEED BADMINTON<br />
Central Position<br />
Always start from the central position to quickly cover the full area of the court,<br />
taking as few steps as possible, and then returning to the central position.<br />
To return short strokes to the front line, you can best cover the space by<br />
performing a lunge step forward. Make a quick, short return to your opponent or<br />
play a high stroke to get more time if you are under pressure. After the stroke, use<br />
your front foot to push back to the central position.<br />
Returning strokes to your back line will mostly be played overhead. Shift your<br />
weight to your front foot, pushing from your back foot. Use this element of the<br />
overhead stroke to move forward and back into the central position every time.<br />
15
16<br />
RECAP<br />
Now that you have the basics in techniques and tactics it’s time to transfer what you have read to the courts.<br />
The Speeder ® won’t always fly where you want and your feet may not be willing to move as quickly as you like.<br />
Understanding the basics is important in every sport and the following recap may help you remember the most<br />
important things when playing Speed Badminton.<br />
10 THINGS TO REMEMBER<br />
1. A good service starts the game<br />
2. Keep your eyes on the Speeder ®<br />
3. Always return to the central position<br />
4. Stay light on the balls of your feet<br />
5. Cover the field with few quick steps<br />
6. Play flexible and with many variants<br />
7. Control defense and offense<br />
8. Stretch and fight for each point<br />
9. Be self-confident and fair<br />
10. HAVE FUN!<br />
TEACHING SPEED BADMINTON<br />
INTRODUCTION OF THE SPEEDER ®<br />
If your class has not played a racquet sport with a birdie before, it is worth taking some time to introduce the Speeder. ®<br />
» Components of the birdie (head and basket)<br />
» How the birdie flies (head in front)<br />
» <strong>Speedminton</strong> ® Speeders ® are different from badminton birdies (Speeders ® basket and head are more durable and faster)<br />
Advise players not to squeeze the basket of the Speeder ® because this will cause the Speeder ® to lose its shape.<br />
Speeders ® should be held by the head while examining. Avoid putting Speeders ® in your pocket to keep from smashing<br />
the basket.<br />
Speeders ® are very durable and can last a long time. A fun rule is to count the Speeders ® out loud while handing them<br />
out to the students and do the same at the end of the lesson so you do not lose any of the Speeders. ®<br />
Before handing out the racquets, you can have the class do a few exercises to become acquainted with the Speeder. ®<br />
Hand out one Speeder ® to each child. Tell the class to do the following individually:<br />
» Make sure there is enough space between each student<br />
» Throw the Speeder ® straight up and try to catch it again with both hands<br />
» Throw the Speeder ® up and try to catch it with one hand<br />
» Throw the Speeder ® in a bow over your head and try to catch with each of your hands<br />
» Throw the Speeder ® in the air and turn 180º and catch the Speeder ®<br />
» Throw the Speeder ® straight up as high as you can and catch it coming down<br />
» Throw the Speeder ® straight up, sit down and catch it<br />
» Throw the Speeder ® straight up, lie down and catch it<br />
TEACHING SPEED BADMINTON
Throwing the Speeder ®<br />
– 2 students, 1 Speeder ®<br />
Tell the students to stand 8 to 12 feet apart and throw the Speeder ® to their partner<br />
Different types of throws:<br />
» From the bottom<br />
» Over the head<br />
» In a high bow<br />
» On a low line<br />
» Change hands<br />
» Change distances<br />
» Jump in the air and throw<br />
» Throw the Speeder ® standing backwards to your partner<br />
» Sit down and throw the Speeder ® back and forth<br />
Now give each student a second Speeder ® and have them use two Speeders ® to perform the same drills.<br />
Hitting the Speeder ®<br />
with the hands – individual<br />
By keeping an open, flat hand, the students can use them first to hit the Speeders. ®<br />
» Try to keep the Speeder ® in the air by hitting it repeatedly<br />
» See how high the Speeder ® can be hit in the air<br />
» Alternate hits between right and left hand<br />
» Do a single spin while hitting the Speeder ®<br />
» Walk around while hitting the Speeder ®<br />
Serving the Speeder ®<br />
with the hand – individual<br />
Teach the students how to serve with their hands first. Tell them to grab the Speeder ® in their left hand at the basket.<br />
With the right hand they tap the Speeder ® from the bottom while counting; one, two three. After the count of three tell<br />
them to drop the Speeder ® and let it fall slightly and hit it.<br />
Playing <strong>Speedminton</strong> ®<br />
with two hands – 2 students, 1 Speeder ®<br />
After teaching the children how to hit the Speeder ® and how to serve, you can start the first game of playing with their<br />
hands. Tell the students to stand 4 to 8 feet apart. You can use the cones to set up the court about 6 feet square. Let<br />
the students count their hits and find out who can do the longest rally.<br />
INTRODUCTION OF THE RACQUET<br />
Some students may have never played a racquet game before, so it is good to introduce the racquet to the students.<br />
» How the Speedracquet is different from a badminton or racquetball racquet<br />
» Why it is shorter – for fast reaction<br />
» Why the string is thicker than a badminton string – Speeders ® are heavier<br />
TEACHING SPEED BADMINTON<br />
Show the students the correct middle grip. Now give the students a racquet and have them balance the racquet on<br />
their pointer finger while walking around.<br />
17
18<br />
Have the students line up and try the following:<br />
» Put the Speeder ® on the racquet, throw the Speeder ® up using the racquet and try to make the Speeder ® land on the<br />
face of the racquet<br />
» Try to lift the Speeder ® from the ground just using the racquet<br />
» Try to keep the Speeder ® in the air by hitting the Speeder ® repeatedly<br />
» See how high they can hit the Speeder ® into the air<br />
» Use their left hand if they are right handed and right hand if they are left handed<br />
» Try to walk around while hitting the Speeder ®<br />
» Sit down and stand up again while hitting the Speeder ®<br />
» Count the number of times they can hit the Speeder ® up in the air without missing<br />
The last step is to teach the students how to serve the Speeder. ® Instruct them to hold the Speeder ® with their left hand<br />
at the head and hold the Speedracquet in their right hand. Count one, two, three and drop the Speeder, ® letting it fall<br />
slightly, and hit the Speeder ® underhand. Have the students line up, two lines 20 feet across from each other, and have<br />
them serve to each other.<br />
WARM-UP EXERCISES<br />
There are many exercises the students can do to warm up their entire bodies using just the Speedracquet.<br />
Hand out a racquet to each student and ask them to do the following:<br />
» Lay the racquet down and jump back and forth over the grip; use both legs at first and switch to one leg,<br />
alternating legs<br />
» Put the racquet in front of them and make a big lunge step over the racquet; alternate legs<br />
» Stand the racquet upright on the grip and jump over the racquet<br />
» Hold the racquet with both hands (one hand on top and one hand on the grip), step over the racquet and bring it<br />
around again (like jump rope)<br />
» Hold the racquet with both hands, bend over and try to touch their toes with the racquet<br />
» Hold the racquet over their heads and lean to the left, right, front and back<br />
OTHER GAMES USING SPEEDMINTON ®<br />
All against one<br />
The teacher stands in front of the group, each student has a racquet and stands arms length apart. The teacher calls<br />
out a certain stroke and the students have to demonstrate the stroke.<br />
» Smash – the students have to make an overhead swing with the racquet<br />
» Clear – the students have to jump and swing the racquet<br />
» Forehand – the students have to step right and swing in a forehand motion<br />
» Backhand – the students have to step left and swing in a backhand motion<br />
» Slip – Everyone sits down and stands up again quickly<br />
» Have the students run in place while they are doing the strokes<br />
Man in the mirror<br />
Each student has a court set up and a racquet. Using only the racquet, the student will serve<br />
without using a Speeder ® and the opponent must react to the serve and play the game.<br />
TEACHING SPEED BADMINTON
COORDINATION EXERCISES<br />
Partner exercises – students face each other, 1.5 meters apart<br />
» One student tosses the Speeder ® and the other has to make the Speeder ® land on the racquet; alternate<br />
» One student throws the Speeder ® and the other player has to hit the Speeder ® with the racquet back to his partner<br />
softly so it can be caught again; alternate<br />
» Play back and forth with two Speeders ® and see who can have the longest volley<br />
» Play back and forth jumping on their left legs only then their right legs<br />
» Sit down and play – who can have the longest volley<br />
Extra work<br />
Two students play back and forth, and at the same time they must do different tasks after each stroke:<br />
» Turn in a complete circle<br />
» Crouch down and jump back up<br />
» Hop using both legs<br />
» Skip in place<br />
Who’s next?<br />
All the students stand in a tight circle and have their racquet in front of them, placing the grip on the ground in an<br />
upright position. The teacher will give a clear signal (right or left) and all the students have to pass the racquet to either<br />
the right or the left.<br />
Last man standing<br />
Each student hits the Speeder ® straight up and tries to keep the Speeder ® in the air. If the Speeder ® falls to the ground,<br />
the student sits down with the Speeder. ® The last student who is able to keep the Speeder ® in the air wins.<br />
Obstacle course<br />
Create teams. Each student has a racquet and the Speeder ® is placed on the racquet. The student has to pass through<br />
an obstacle course while balancing the Speeder ® on the racquet. Once completed, the student runs back and tags the<br />
next player. Whichever team is the fastest wins.<br />
Jack in the box<br />
Create teams. Each student has to place a Speeder ® on the top of their head and run around a cone that is<br />
approximately 20 feet away. Once the student returns then he will pass the Speeder ® to the next student.<br />
Two at a time<br />
Create teams. Each student has to run around a cone approximately 20 feet away, holding the racquet in one hand<br />
while balancing the Speeder ® and dribbling a basketball. Once the student returns, he will pass the racquet/Speeder ®<br />
and basketball to the next student.<br />
Speeder Chase<br />
TEACHING SPEED BADMINTON<br />
Students make a circle and each student has a racquet. Using one Speeder ® passing to the left and one Speeder ® passing<br />
to the right each student has to pass the Speeder ® to the next student, the goal is to have the Speeders ® meet up.<br />
19
20<br />
Your turn<br />
Form a group up to six players. One student will be in control of the Speeder, ® hitting it in the air. While doing so, the<br />
student calls out the name of another student and he/she must hit the Speeder ® back in the air, calling out another<br />
student’s name.<br />
Sharp Shooter<br />
Create teams. Students line up 3 plastic cups approximately 20 feet away and have to serve overhead and knock the<br />
cups over. Keep one player of the team down by the cups to set-up for the next student. The student who sets up the<br />
cups must set his/her cups up and run to the rest of the team, grabbing the racquet and serving overhead to knock his/<br />
her cups over. Whoever finishes first is the winner.<br />
Go for three<br />
The students have to place a serve into a basket or hoop from a certain distance. Start at 10 feet and move out to as<br />
much as 30 feet. Play best out of 3.<br />
Take the risk<br />
Set up a playing area with hoops, and choose points for each of the hoops; closest gets 10 points, furthest gets 50<br />
points. Each student gets 5 hits. Whoever has the most points wins. You can make teams for this game as well.<br />
In the hoop<br />
Using a hoop for each player to stand in, place the hoops 20 feet apart; the player may not leave the hoop and must<br />
have a continuous volley with his/her partner. Whichever team volleys the longest wins. Have the rest of the students<br />
call out the number as each hit takes place.<br />
CONDITIONING EXERCISES<br />
Bring them home<br />
Create two teams and line them up behind two baskets. Spread Fun Speeders ® and Match Speeders ® all over the playing<br />
area. One team is responsible for the Fun Speeders ® and the other team is responsible for the Match Speeders. ® At the<br />
sign from the instructor, each student has to run and get two Speeders ® and put them into the appropriate basket. Once<br />
the Speeders ® are in the basket the next student can run out to get two more. The team that collects the Speeders ® in<br />
the basket first is the winner.<br />
Variation: All the students run at the same time after the sign from the instructor, and the students grab one Speeder ®<br />
at a time (Match or Fun), drop the Speeder ® into the basket and go to get another one. The team that collects<br />
the most Speeders ® wins.<br />
On and off<br />
TEACHING SPEED BADMINTON<br />
Create two teams and line up. Each student has a Speeder. ® Put a basket 30 feet in front of each line. At the sign from<br />
the instructor, the students run to the basket and drop the Speeder. ® When the student returns to the line, the next<br />
student goes. Once the line is complete, the first student runs to the basket to retrieve a Speeder ® and runs back to the<br />
line to let the next student go. Whichever team returns all the Speeders ® to the line wins.
Tag<br />
1. Choose a student as the tagger. The other students must run to racquets placed around the playing area to be ‘safe’<br />
but they can only stay for 5 seconds at a time. Once the tagger tags another student, that student becomes the tagger.<br />
2. Choose a student as the tagger. Give half of the remaining students Speeders, ® which is “safe” while the Speeder ® is<br />
in the student’s hand, but the student must pass the Speeder ® to another student within 5 seconds.<br />
3. Choose a student as the tagger. The tagger will have a Speeder ® in his/her hand and must throw the Speeder ® at the<br />
other students. Once the tagger hits a student with the Speeder, ® that student has to freeze and stand still with their<br />
legs shoulder length apart. Have a few other students with Speeders ® that can free the frozen player by throwing the<br />
Speeder ® between their legs.<br />
TRAINING TECHNIQUES<br />
To help the students focus on certain strokes, it is helpful to have them play in fixed sequences. Have each student play<br />
using one stroke, either forehand or backhand. Line the students up at a distance of 20 feet and have them volley.<br />
More complex sequences:<br />
» Player A always plays a short smash and Player B returns with a long underhand stroke<br />
» Two high and long strokes are followed by one short stroke (repeat as long as possible)<br />
» Two high and long strokes are followed by two short strokes (repeat as long as possible)<br />
» Three high and long strokes are followed by two short strokes (repeat as long as possible)<br />
» Player A can play free but has to hit the Speeder ® consistently to a certain spot in Player B’s court; Player B plays with<br />
the same stroke throughout the drill (example: Player A plays with a short stroke to the right, and Player B returns with<br />
a forehand out of a lunge step)<br />
Long rallies<br />
To establish longer rallies, you can ask the students to modify the rules:<br />
» The students must volley back and forth for at least 3 strokes before they can gain a point<br />
» Students are not allowed to smash the Speeder ®<br />
Mark targets<br />
In order to practice precise strokes to the vulnerable areas of your opponent’s court, mark those areas with extra cones.<br />
Have Player A return 10 strokes to Player B’s court. For example: Player A has to return 10 forehand strokes into a 3 foot<br />
square at the front of Player B’s court. You can even mark the areas during a match and give bonus points for strokes<br />
that go into the marked area.<br />
Improve footwork<br />
TEACHING SPEED BADMINTON ®<br />
Good footwork always starts in the central position. You can mark the central position on the ground and have the<br />
student return and step on the mark after each stroke in the game.<br />
To cover the front of the court with the lunge step is very important. Place three Speeders ® on the front line and let<br />
the students collect the Speeders ® with a lunge step (without racquet). Have them retrieve one Speeder ® at a time and<br />
return to the central position. You can also place Speeders ® in every corner of the square and have the students collect<br />
each Speeder ® in the same manner. This technique will improve the students’ speed and footwork.<br />
21
22<br />
Against the wall<br />
Speeders ® bounce off walls almost like tennis balls. If you have the possibility to let the students play against a wall, you<br />
can allow them to practice their strokes individually. Have the students work on the underhand serve against the wall<br />
and you will see improvement in their hand-eye coordination.<br />
Speed it<br />
Break students up in groups of three. One student holds a stopwatch and the other two are set up on the court. The<br />
students on the court volley back and forth as many times as they can within a minute. This works on speed and control.<br />
MORE GAMES USING SPEEDMINTON ®<br />
Fast fire<br />
Line two teams up 30 feet apart with a low wall between them. Using softballs, place the softballs on the wall, have each<br />
of the students (all at once) try to hit the softballs off of the wall using their racquets with Speeders. ® Give each student<br />
the same amount of Speeders. ® The team that hits the most balls into their opponent’s area wins.<br />
Round the world<br />
Set up a Speed Badminton court, and split the class into two teams. Have one team at the back of each court. The first<br />
student must serve the Speeder ® to the other court (both sides playing) and run to the end of the line on the other side’s<br />
court. If the student misses the square, they are out. Play continues until you have only one student left on each court.<br />
Then they play against each other until there are three outs.<br />
Jail<br />
Set up a Speed Badminton court, and have all the students line up on one side. The student must serve the Speeder ®<br />
and make it into the other square. If the student misses the square they must go to the other square and are “in jail.”<br />
In order to “get out of jail,” the student must catch a Speeder ® served from another student. If the Speeder ® is caught<br />
by the student in jail, the server goes to jail. When you are down to the last student, they must try to get three shots<br />
in the square that are not caught by the student in jail. If the student in jail catches one of the three Speeders ® it is a<br />
“jailbreak” and all of the students run free. (TIP: Adjust the court size to the number of participating students.)<br />
Caterpillar<br />
Divide the class into two groups and line them up standing with their legs shoulder width apart. The first student has<br />
to pass the Speeder ® through his/her legs backwards to the next student continuing until it gets to the last person in<br />
the line. Once the Speeder ® reaches the last student in line, they must crawl back to the front of the line through each<br />
student’s legs and start the process over. The winner is the team that finishes first.<br />
Speed Volleyball<br />
Students play on a volleyball court with the <strong>Speedminton</strong> ® equipment. 2 – 6 players are on a team and the rules are the<br />
same as volleyball but you are using <strong>Speedminton</strong> ® equipment.<br />
Speeder Golf<br />
TEACHING SPEED BADMINTON<br />
Build a golf course with a variety of stations. The students have to hit the Speeder ® into a basket (the hole) at each<br />
station. Be creative and add obstacles. Each student must keep his/her score (how many hits before making it into the<br />
basket). The student with the lowest score wins. You can break the students into groups of four if time allows.
YOUR FIRST LESSON WITH SPEEDMINTON ®<br />
Listed below is a suggested schedule for middle and high school students. Elementary-level students will require more<br />
time with introductory games before playing back and fourth.<br />
TIME ACTIVITY<br />
5 minutes<br />
5 minutes<br />
5 minutes<br />
15 minutes<br />
13 minutes<br />
2 minutes<br />
Total time of class 45 minutes<br />
Introduction of the equipment and how to play<br />
• What is special about the Speeder ®<br />
• What is special about the racquets<br />
• How to play (no net – two squares)<br />
Hand out a Speeder ® to every student and ask them to<br />
• Throw the Speeder ® into the air and catch it<br />
• Do the same with one hand<br />
• Do the same alternating hands<br />
• Throw the Speeder ® in an arc using left then right hand<br />
• Throw the Speeder ® in the air, turn in a complete circle and catch the Speeder ®<br />
• Throw the Speeder ® in the air and catch it behind their back<br />
Have the students get in groups and throw the Speeder ® to a partner back and forth using different<br />
methods to catch the Speeder ®<br />
• Overhead<br />
• Underhand<br />
• Both hands<br />
• Backwards<br />
• Jump and throw<br />
Hand out a racquet to each of the students<br />
Explain safety precautions (don’t come in contact with another student)<br />
Try the following racquet exercises (pages 20-21):<br />
• Who’s next?<br />
• Obstacle course<br />
• Last man standing<br />
• Speeder ® chase<br />
TEACHING SPEED BADMINTON ®<br />
Explain the underhand service to the students and line them up in rows (approximately 25 to 30 feet<br />
apart from each other) so they can practice with a partner using the Fun Speeder. ® Be sure to reiterate<br />
safety precautions. Then pass out the Match Speeder ® and have them feel the difference in the<br />
Speeders. ®<br />
Have the students gather the equipment and put it back into the <strong>Speedminton</strong> ® bags<br />
23
24<br />
TOURNAMENTS<br />
With the ease of setting up as many courts as you would like at the same time and keeping the matches short,<br />
Speed Badminton is the perfect game for tournaments. If you are going to have a tournament, here is a hit list so<br />
you are prepared:<br />
» What type of tournament (rules) do you want to play?<br />
» How many participants will there be?<br />
» How much time is allotted and how many sets will be played to win a game?<br />
» How many courts will you need to set-up?<br />
» Who will be the referees?<br />
» Who is in charge of the results (scoreboard)?<br />
» Who will play at what time and against whom?<br />
» Will you have snacks and drinks available?<br />
» What will the prizes be?<br />
FUN TOURNAMENTS<br />
PLAYING IN GROUPS<br />
Playing in groups is the easiest way to organize a large number of students or friends. In a group, everyone plays against<br />
each other at the same time to come to a final ranking. The students who are not playing will be the referees. Try to<br />
group students who are at the same play level, so you could have three different tournaments with three different levels<br />
(beginner, intermediate and match). After the ranking is set, play continues until you have the final tournament pairing.<br />
Have fun and have the students who are not playing cheer on the other tournaments.<br />
HANDICAP-DOUBLE<br />
In this tournament you play doubles and you create different handicaps to the teams. Handicaps might include binding<br />
the players together, only using one racquet and having teammates hand off the racquet after each play, or playing with<br />
your opposite hand. There are multiple handicaps that you can come up with for a fun tournament.<br />
FLAG TOURNAMENT<br />
For every victory the player gets a green flag on his/her racquet, and for every loss he/she gets a red flag. The person<br />
who has the most green flags wins.<br />
TIMED TOURNAMENT<br />
TOURNAMENTS<br />
If time is a factor then this tournament is for you. You decide how many minutes each game will last and at the end of<br />
that time the player with the most points wins the match. This way you can have three matches but maybe only allow 5<br />
minutes for each match. Everyone gets to play!
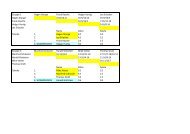
THE KING’S COURT<br />
This version is perfect for large classes that can play on a large field. The students play on courts next to each other. The<br />
game ends after a certain amount of time and the winner has to move to the next court on one side and the loser has<br />
to move to the court on the other side. This way the players will have playoffs with different opponents and the field of<br />
players will be in order from the strong to the weak. See example below<br />
KING’S COURT<br />
Winner<br />
remains on court<br />
→ →<br />
Loser moves<br />
right<br />
Loser moves<br />
right<br />
Winner moves<br />
left<br />
The Speed Badminton Athletic Badge<br />
Winner moves<br />
left<br />
Loser moves<br />
right<br />
Loser moves<br />
right<br />
Winner moves<br />
left<br />
Winner moves<br />
left<br />
Loser<br />
remains on court<br />
This is a perfect game for the end of the school year or the Speed Badminton period. The students have to master<br />
several stations. The students will get a card to collect points at the stations. To achieve the Speed Badminton Athletic<br />
Badge, they must collect enough points.<br />
Example of tasks:<br />
» Speeder ® sharp shooting (with cans or softballs)<br />
» Keep the Speeder ® in the air for at least 10 hits<br />
» Balance the Speeder ® on the racquet through a slalom course<br />
» Hit the Speeder ® 3, 6 and 9 meters using hoops to mark the distance<br />
COMPETITIVE TOURNAMENTS<br />
TEACHING SPEED BADMINTON<br />
The competitive tournament will show who the best player is, but at the same time is fun for everyone. It is very<br />
important that the students know and understand competitive match rules.<br />
25
26<br />
SINGLE ELIMINATION<br />
A single elimination tournament, also called a knockout or sudden death tournament, is a type of competition in<br />
which the loser of each match is immediately eliminated from the tournament. The number of participants in a single<br />
elimination tournament is fixed as a power of two. For example; the Wimbledon singles championships in tennis<br />
are tournaments of 128 players. This ensures all competitors will face opponents who have previously played the<br />
same number of matches. The full schedule of pairings across all rounds (the bracket) should be allocated before the<br />
tournament starts.<br />
The big disadvantage of single elimination is that once a player loses a match they are out for the whole tournament.<br />
This works for professional tournaments, but in a school you want to keep all the students active. If you decide to run<br />
a competitive tournament, it is suggested that you also include The Speed Badminton Athletic Badge as part of the<br />
year-end activities.<br />
TEAM A<br />
TEAM B<br />
TEAM C<br />
TEAM D<br />
TEAM E<br />
TEAM F<br />
TEAM G<br />
TEAM H<br />
DOUBLE ELIMINATION<br />
TEAM A<br />
TEAM D<br />
TEAM E<br />
TEAM H<br />
TEAM D<br />
TEAM E<br />
TEACHING SPEED BADMINTON<br />
WINNER<br />
A double elimination tournament is a competition in which a participant ceases to be eligible to win the tournament’s<br />
championship after losing two games or matches. A double elimination tournament is broken into two sets of brackets,<br />
the Winners Bracket and the Losers Bracket. After the first round, the winners proceed into the Winners Bracket and the<br />
losers proceed into the Losers Bracket. Every player has two matches before becoming eliminated.<br />
WINNER’S BRACKET<br />
TEAM A<br />
TEAM B<br />
TEAM C<br />
TEAM D<br />
Loser from round 1<br />
Loser from round 1<br />
LOSER’S BRACKET<br />
Loser from round 2<br />
WINNER<br />
Loser from round 3<br />
if first loss<br />
WINNER
PLAYING IN THE DARK - BLACKMINTON ®<br />
Playing Speed Badminton in the dark is great fun for everyone and gives your senses a whole new experience.<br />
BLACKMINTON ®<br />
With the Night Speeder ® and Speedlights you can discover the<br />
dark side of <strong>Speedminton</strong> ® with your students or with your friends.<br />
The Night Speeder ® is designed specifically for playing in the dark.<br />
You activate the Speedlight and insert it into the Night Speeder. ®<br />
The head of the Night Speeder ® will glow and you are ready for<br />
the game.<br />
You do not have to wait until it gets dark out, for instance if your<br />
school has a darkened gym. It is great fun for everyone to hit<br />
the glowing Speeder ® around and at the same time experience<br />
moving in a dark environment without really seeing your body,<br />
your racquet or your opponent.<br />
27
28<br />
Visit www.speedminton.com<br />
For additional information, visit www.speedminton.com<br />
CONTACT IN<strong>FOR</strong>MATION:<br />
<strong>Speedminton</strong> GmbH<br />
Paul-Lincke-Ufer 8c<br />
10999 Berlin<br />
Germany<br />
0049-30-69567740 Direct<br />
E-mail: gossen@speedminton.com<br />
Contact person: Daniel Gossen<br />
HAPPY SPEEDING!<br />
© <strong>Speedminton</strong> GmbH<br />
All rights reserved.<br />
General Manager: Niels Mester, Martin Stolz<br />
Amtsgericht Charlottenburg HRB 82157<br />
<strong>Speedminton</strong>® is a registered trademark owned by <strong>Speedminton</strong> GmbH, Germany.<br />
CONTACT