703549 Rev B - Control Unit User's Manual, GR2 ... - Game Ready
703549 Rev B - Control Unit User's Manual, GR2 ... - Game Ready
703549 Rev B - Control Unit User's Manual, GR2 ... - Game Ready

You also want an ePaper? Increase the reach of your titles
YUMPU automatically turns print PDFs into web optimized ePapers that Google loves.
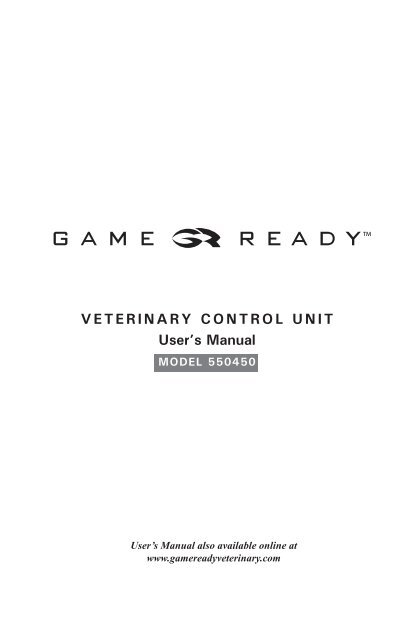
VETERINARY CONTROL UNITUser’s <strong>Manual</strong>MODEL 550450User’s <strong>Manual</strong> also available online atwww.gamereadyveterinary.com
T A B L E O F C O N T E N T SThe <strong>Game</strong> <strong>Ready</strong> Difference _________________________________ 3Indications for Use __________________________________________ 5General Warnings and Precautions ____________________________ 5General Warnings and Precautions ____________________________ 6Device Classification _______________________________ _________ 7Description of Device ________________________________________ 8Using Your <strong>Game</strong> <strong>Ready</strong> System ______________________________ 11Cleaning ___________________________________________________ 16Maintenance _______________________________________________ 17Storage ____________________________________________________ 17Specifications ______________________________________________ 17Accessories ________________________________________________ 17Troubleshooting ____________________________________________ 18Warranty __________________________________________________ 201
T H E G A M E R E A D Y D I F F E R E N C ET H E G A M E R E A D Y D I F F E R E N C E<strong>Game</strong> <strong>Ready</strong> was built upon the concept that the principles behind spacesuittechnology could be used to develop an injury treatment system. As a designer forthe National Aeronautics and Space Administration (NASA) and an inductee into the U.S.Space Foundation’s Hall of Fame, our founder helped pioneer the technology involvedin controlling pressure and temperature within a flexible garment. In 1998, we beganworking with athletes, athletic trainers, doctors, and veterinarians to expand breakthroughdiscoveries into the realm of sports medicine for both people and animals.REGISTER YOUR PRODUCTPlease complete your Warranty Registration for both the <strong>Game</strong> <strong>Ready</strong> <strong>Control</strong> <strong>Unit</strong>and the Wraps online at www.gamereadyveterinary.com. The Wrap registration card ispackaged with the Heat Exchanger of each Wrap. You must register within 30 days fromthe date of purchase in order to receive warranty service.Let us know what you think of our products. We’d love to hear from you.<strong>Game</strong> <strong>Ready</strong>CoolSystems Inc.1201 Marina Village Pkwy, Suite 200Alameda, CA 94501In the <strong>Unit</strong>ed States call toll-free:1.888.<strong>Game</strong><strong>Ready</strong>1.888.426.3732Outside of the U.S. call:001.510.868.2100www.gamereadyveterinary.com3
I N D I C A T I O N S F O R U S E• Follow the recommendations of your veterinarian.The <strong>Game</strong> <strong>Ready</strong> System combines cold and compression therapies. It is intended toprevent injuries, treat post-surgical and acute injuries to reduce edema, swelling, and painwhere cold and compression are indicated.G E N E R A L W A R N I N G S A N D P R E C A U T I O N SThank you for choosing the <strong>Game</strong> <strong>Ready</strong> System. To assure you have the best experiencepossible, please be sure to read the entire User’s <strong>Manual</strong> prior to use of the product.WARNINGS• Improper placement or prolonged use of <strong>Game</strong> <strong>Ready</strong> could result in tissuedamage such as frostbite.• During the course of <strong>Game</strong> <strong>Ready</strong> therapy, the treatment provider should monitorthe tissue surrounding the treated region or the extremities of the treated limb for anyabnormal appearance, increased swelling, or pain. If any of these signs present, or anychanges in skin appearance occur (such as increased redness, discoloration, or othernoticeable skin changes), you are advised to discontinue use and consult a veterinarian.• The <strong>Game</strong> <strong>Ready</strong> Wrap is not sterile; do not place directly against open wounds, sores,rashes, infections, or stitches. May be applied over dressing.• The <strong>Game</strong> <strong>Ready</strong> wraps are available in multiple configurations but are not intendedfor all possible uses. Use caution when selecting a particular wrap for useon anatomic regions other than that for which the wrap is indicated and closelysupervise the animal’s status.• To avoid the risk of electrical shock, do not remove any panels from the <strong>Control</strong> <strong>Unit</strong>.For all servicing and repair, please contact <strong>Game</strong> <strong>Ready</strong> Customer Service; from theU.S. call toll-free at 1.888.426.3732, from outside the U.S. call 001.510.868.2100.Opening the case will void the <strong>Game</strong> <strong>Ready</strong> warranty.• To avoid the risk of electrical shock, always turn off the System and disconnect thepower cord from its electrical outlet when not in use or before adding or emptyingice and water.• Do not use any adapter other than that provided by <strong>Game</strong> <strong>Ready</strong>. Use of other adaptersmay result in electrical shock and will void the <strong>Game</strong> <strong>Ready</strong> warranty.5
PRECAUTIONS• Caution: This product is for veterinary use only and is not indicated for human use.• Caution: Always attend the animal while the <strong>Game</strong> <strong>Ready</strong> Veterinary System is beingused, in the case that the animal needs to be quickly disconnected from the <strong>Control</strong> <strong>Unit</strong>.• Do not operate the System without any water in the ice box.• Never operate the System with damaged power cords or Connector Hoses, or othermechanical damage, or if the unit is otherwise not fully operational.• Do not pour hot water into the ice box. The System was not designed to operate, andhas not been tested, with hot water.• Do not pick up the <strong>Control</strong> <strong>Unit</strong> by the lid. Carry using the handle only.• Do not use other manufacturers’ wraps with the <strong>Game</strong> <strong>Ready</strong> System.• Do not operate the <strong>Control</strong> <strong>Unit</strong> without a Connector Hose attached.• Be careful not to trip over the System’s power cords and Connector Hose, or use theproduct where these are likely to trip an animal.• The <strong>Game</strong> <strong>Ready</strong> <strong>Control</strong> <strong>Unit</strong> is a veterinary medical device. Handle it with the samecare as you would a laptop computer. Do not drop it, kick it or otherwise abuseit unnecessarily. Such abuse will void all <strong>Game</strong> <strong>Ready</strong> warranties. Do not place the ACAdapter or battery pack inside the ice box for storage or transport.In addition to the precautions listed above, additional warnings and safety precautionsare posted throughout this manual. Read and carefully follow these instructions prior tooperating the System.6
D E V I C E C L A S S I F I C A T I O NProtection against electric shock (5.1):The <strong>Game</strong> <strong>Ready</strong> System is considered to be Class I (protective earth) when connected tothe Ault Model MW 128 power supply, and Class II (double insulated) when connected tothe GlobTek Model GTM-21097-5012 power supply.Protection against harmful ingress of water (5.3):This product provides ordinary protection against ingress of water.Degree of safety in the presence of flammable anesthetics or oxygen (5.5):Not suitable for use in an oxygen enriched environment or in the presence of flammableanesthetics.Electromagnetic interference:This equipment has been tested and found to comply with the limits for medical devicesin IEC 60601-1-2:2001. These limits are designed to provide reasonable protection againstharmful interference in a typical medical installation. This equipment generates, uses andcan radiate radio frequency energy and, if not installed and used in accordance with theinstructions, may cause harmful interference to other devices in the vicinity. However,there is no guarantee that interference will not occur in a particular installation. If thisequipment does cause harmful interference to other devices, which can be determined byturning the equipment off and on, the user is encouraged to try to correct the interferenceby one or more of the following measures:• Reorient or relocate the receiving device.• Increase the separation between the equipment.• Connect the equipment into an outlet on a circuit differentfrom that to which the other device(s) are connected.• Consult the manufacturer or field service technician for help.Powered by Direct CurrentType BF Applied PartsAttention: Consult accompanying documents before use.Manufacturer7
SleepTemp.Temp.55/1350/1045/740/5ºF/ºCD E S C R I P T I O N O F D E V I C EAC AdapterPressure O f Low Med High Avg. WrapRun Ice BathTime TimePower CordWelcomePacket<strong>Control</strong> <strong>Unit</strong>Heat ExchangerWrapSleeve<strong>Game</strong> <strong>Ready</strong> System: The following items are included in your <strong>Game</strong> <strong>Ready</strong> System: a<strong>Control</strong> <strong>Unit</strong>, an AC Adapter, a Power Cord, and a Welcome Packet. In addition to theseitems, a Hose, Heat Exchanger and Sleeve are required to operate the system. These itemsmay be purchased seperately.PressureVolumeBacklightPressureIndicatorAverage WrapTemperaturePowerProgramPlay/PausePressure Off Low Med HighSleepTimeRunTimeColdestWrap Temp.AverageWrap Temp.55/1350/1045/740/5ºF/ºCTemperatureKnobMODES OF OPERATIONSubtract AddTime Time(<strong>Manual</strong> Mode)C/F(Celsius/Fahrenheit)Coldest WrapTemperature<strong>Manual</strong> Mode: The System defaults to this mode, and allows the user to adjust time andpressure settings.Program Mode: This mode allows the user to choose one of six programs that providetreatment for a set time then sleep (no treatment) for a set time, continuously, at a specificpressure setting.8
Drain Mode: This mode allows a user to connect a Hose with a special Hose Adapterto the unit, enter Drain Mode and have the unit empty the water out of the ice box throughthe Hose. Drain Mode can be accessed by pressing the program key and toggling throughall six programs. To empty water in the System while in Drain Mode, press the programkey until you reach Drain Mode, attach the Hose Adapter to the Connector Hose, place theHose Adapter over a sink, and press the play button. Drain Mode will run the <strong>Control</strong> <strong>Unit</strong>’sfluid pump for up to six minutes (long enough to fully empty the ice box). Drain Mode isindicated by the following icons:BUTTONSPower: Use this button to turn the <strong>Control</strong> <strong>Unit</strong> on and off.Program: Use this button to select one of the available Programs or to returnto <strong>Manual</strong> Mode. See page 15 in this manual for more information on Programs.Play/Pause: Use this button to start or pause a treatment or to stop.Add Time: Use this button to add time in <strong>Manual</strong> Mode (does not work inProgram Mode). You can add up to 90 minutes. Treatment must be pausedin order to add or subtract time.Subtract Time: Use this button to reduce time in <strong>Manual</strong> Mode (does not work inProgram Mode). You can subtract up to 90 minutes. Treatment must be paused inorder to add or subtract time.Pressure Selection: Use this button to select one of four pressure settings:No Pressure, Low Pressure (5-15 mmHg), Medium Pressure (5-50 mmHg), andHigh Pressure (5-75 mmHg). Pressure selection is not available in Program Mode.Treatment must be paused to change pressure settings.Volume: Use this button to select the option of sound or no sound. Alarms will stillsound.C/F Button: Use this button to select either Celsius or Fahrenheit onthe temperature display.Backlight: Use this button to turn the backlight on or off.Adjusting Temperature: The <strong>Control</strong> <strong>Unit</strong> cools the Wrap by pumping water from the icebox into the Wrap; therefore, the temperature of the Wrap will never be colder than thewater in the ice box. If the knob is turned to three (3) snowflakes, the <strong>Control</strong> <strong>Unit</strong> willprovide the coldest possible therapy based on the temperature of the water in the ice box.Turning the knob towards one (1) snowflake will provide less cold therapy.Note: The unit should always be started on full cold (3 snowflakes), and run that way for atleast two minutes. The user can then adjust temperature as desired.AdjustingTemperature:Temperature KnobLess ColdMore ColdFull ColdTurn knob counter-clockwisefor less cold therapyTurn knob clockwisefor more cold therapy9
DISPLAYStatus bar:Off (Mute)OnIndicates selected modeIndicates unit is pausedIndicates unit is playingOther Icons:ErrorBatteryIndicates an error. See troubleshootingpages 18-19 for error codesIndicates sleep mode timeIndicates remaining battery capacityTemperature:Average Wrap Temperature:Indicates an estimate of the averagetemperature of the Wrap (averagesthe temperature of the water goinginto and out of the Wrap)When the Systemis running inProgram Mode:Sleep timecount-down barsColdest Wrap Temperature:Indicates an estimate of thetemperature of the water goinginto the Wrap from the ice boxDisplays the amount ofrun time remainingRun time count-down barsWhen the Systemis running in<strong>Manual</strong> Mode:Displays the amountof sleep time remainingDisplays the amountof run time remaining10
When selectinga program:Displays pressurePressure Off Low Med High Average WrapTemp.55/1350/1045/740/5ºF/ºCSleepTimeRunTimeColdest WrapTemp.Displays amount oftime unit will sleepDisplays amount oftime unit will runPressure: Off Low Med HighOff Low Med HighOff Low Med HighOff Low Med HighU S I N G Y O U R G A M E R E A D Y S Y S T E MTo operate your <strong>Game</strong> <strong>Ready</strong> System, you need:•A <strong>Control</strong> <strong>Unit</strong> filled with ice and water•A <strong>Game</strong> <strong>Ready</strong> supplied power supply•A Connector Hose (Sold seperately)•A Wrap (a Heat Exchanger and Sleeve) (Sold seperately)Notes:•The Wrap is comprised of an inner Heat Exchanger and an outer Sleeve. The combinationof Sleeve and Heat Exchanger is referred to throughout this manual as a “Wrap.”•The <strong>Game</strong> <strong>Ready</strong> <strong>Control</strong> <strong>Unit</strong> should be placed on a stable surface (such as the floor or atable) during use.•Please note that using the System in an environment with a high ambient temperaturemay affect its ability to provide adequate cooling, or may limit the ice life.•If you will be using the System with a <strong>Game</strong> <strong>Ready</strong> supplied battery pack please consultthe instructions for use that accompanied that battery pack for usage details.Warning:Position the <strong>Control</strong> <strong>Unit</strong> to minimize the risk of tripping over the <strong>Control</strong> <strong>Unit</strong>, ConnectorHose or power cord.11
U S I N G Y O U R G A M E R E A D Y S Y S T E MWarning:Your <strong>Game</strong> <strong>Ready</strong> <strong>Control</strong> <strong>Unit</strong> should be plugged into a grounded electrical outlet prior tooperation.Precautions:• Failure to properly follow the set-up instructions may result in inadequate therapy.• Unplug the <strong>Control</strong> <strong>Unit</strong> from the electrical outlet prior to filling the <strong>Control</strong> <strong>Unit</strong> with iceand water.STEP 1:Push the door release button to open the ice box door.STEP 2: Fill the ice box completely with ice, and at least ½ full with clean water.12STEP 3: Close the ice box door. Make sure you hear it click.Click12
U S I N G Y O U R G A M E R E A D Y S Y S T E MSTEP 4:STEP 5:Place the <strong>Control</strong> <strong>Unit</strong> in the location where you plan to use it.The <strong>Control</strong> <strong>Unit</strong> should only be used in the upright orientation as shown.The <strong>Control</strong> <strong>Unit</strong> will leak if placed on its side.Connect the AC Adapter to the <strong>Control</strong> <strong>Unit</strong> and the grounded electrical outlet.The power indicator light (orange color) on the <strong>Control</strong> <strong>Unit</strong> should illuminate.If it does not illuminate, check to make sure that the AC Adapter is firmlyconnected in all locations and that the outlet is receiving power. If necessary,try an alternate outlet or power supply. If the light is still not illuminated andthe <strong>Control</strong> <strong>Unit</strong> will not turn on, please contact <strong>Game</strong> <strong>Ready</strong> CustomerService; from the U.S. call toll-free at 1.888.426.3732, or from outside of theU.S. call 001.510.868.2100.Note: The <strong>Control</strong> <strong>Unit</strong> should be powered up prior to attaching a Wrap.AC Adapterto electrical outletSTEP 6:Connect the larger end of the Connector Hose to the <strong>Control</strong> <strong>Unit</strong>. Make sureyou hear it click. To disconnect, simply press the button and remove theconnector from its port.DisconnectButtonClickConnector Hoseto Wrap13
U S I N G Y O U R G A M E R E A D Y S Y S T E MSTEP 7:Apply the selected Wrap (consult the Use Guide for each Wrap for applicationinstructions).Warning: Do not place directly against open wounds, sores, rashes,infections, or stitches. May be applied over clothing or dressing.Caution: If applying the same Wrap to another animal, make sure theWrap is deflated before the next application.STEP 8:Connect the smaller end of the Connector Hose to the Wrap. Make sureyou hear it click. To disconnect, simply press the button and remove theconnector from its port.ClickDisconnect ButtonIf you have any problems with the set-up of your <strong>Game</strong> <strong>Ready</strong> System, please contact<strong>Game</strong> <strong>Ready</strong> Customer Service; from the U.S. call Toll-free at 1.888.426.3732, fromoutside of the U.S. call 001.510.868.2100.Warnings:• Follow the recommendations of your veterinarian.• Improper placement or prolonged use of <strong>Game</strong> <strong>Ready</strong> could result in tissuedamage such as frostbite.• For additional warnings and precautions, please refer to pages 5-6 of this manual.STEP 9:Press the power button. The screen should light up and the<strong>Control</strong> <strong>Unit</strong> should beep once. The power indicator lightshould turn from orange to green.STEP 10: Adjust the temperature by turning the temperature knob. Turningthe knob right, toward 3 snowflakes, will provide more cold therapy.Turning the knob left, toward 1 snowflake, will provide less coldtherapy.14
U S I N G Y O U R G A M E R E A D Y S Y S T E MSTEP 11:You can choose to operate in either <strong>Manual</strong> Mode or Program Mode.<strong>Manual</strong> Mode allows you to adjust time and pressure settings.Program Mode allows you to choose one of six programs that providetreatment for a set time then sleep (no treatment) for a set time,continuously, at a specific pressure setting. The unit will default to<strong>Manual</strong> Mode.<strong>Manual</strong> Mode:Set the time by pushing the +/- buttons.Set the pressure by pushing the pressure button. You can selectfrom 4 pressure settings: No pressure, Low Pressure (5-15 mmHg),Medium Pressure (5-50 mmHg), High Pressure (5-75 mmHg).Program Mode:Push the program button to enter Program Mode. In ProgramMode, the unit will operate continuously according to the selectedprogram. You will need to add ice peridically for optimal cooling.You can select from the following programs: (Push the ProgramButton to scroll through the available programs.)Program 1: 30 minutes on, 30 minutes sleep. No pressure.Program 2: 30 minutes on, 30 minutes sleep. Low pressure.Program 3: 30 minutes on, 30 minutes sleep. Medium pressure.Program 4: 30 minutes on, 60 minutes sleep. No pressure.Program 5: 30 minutes on, 60 minutes sleep. Low pressure.Program 6: 30 minutes on, 60 minutes sleep. Medium pressure.Program d: Drain Mode. Please refer to page 9 in this manualfor details.STEP 12:Press play/pause button.NOTE:To operate the <strong>Game</strong> <strong>Ready</strong> System, you do not need to remove it from the Bag. Simplyunzip the Bag’s main compartment and end panel. Fill the ice box with ice and water.Attach the Connector Hose and the AC Adapter to the end panel of the <strong>Control</strong> <strong>Unit</strong> andplug the AC Adapter into an electrical outlet.15
C L E A N I N GCONTROL UNITThe exterior of the <strong>Control</strong> <strong>Unit</strong> and the visible interior surfaces of the ice box can becleaned with a soft cloth and one of the following cleaning agents:• Mild detergent• 5% Bleach solution• 6% Hydrogen peroxide• 70% Isopropyl alcoholDO NOT USE• Phenolic-based disinfectants (such as Amphyl).• Quaternary Ammonium (such as Virex)• Any solvent-based cleaners on the <strong>Control</strong> <strong>Unit</strong>. Doing so will damage theplastics and will void your warranty.• Abrasive materials to clean the <strong>Control</strong> <strong>Unit</strong>. Doing so will damage theplastics and will void your warranty.Caution: The <strong>Control</strong> <strong>Unit</strong> is not a waterproof device. Do not apply a direct stream of anyliquid onto the <strong>Control</strong> <strong>Unit</strong>, submerge the <strong>Control</strong> <strong>Unit</strong>, or allow any liquid to pool on thesurface of the front panel of the <strong>Control</strong> <strong>Unit</strong>.Procedure:• Follow the manufacturer’s instructions and precautions for the cleaning agent you select.• Apply the selected cleaner to a soft cloth and wipe down all surfaces of the <strong>Control</strong> <strong>Unit</strong>.• Allow the <strong>Control</strong> <strong>Unit</strong> to dry thoroughly before storing it in the bag.• The <strong>Control</strong> <strong>Unit</strong> should be cleaned as needed.CONNECTOR HOSEThe Connector Hose can be cleaned using a soft cloth and one of the following:• Mild detergent• 70% Isopropyl alcoholWe do not recommend the use of Quaternary Ammonium (such as Virex).DO NOT USE:• Phenolic-based disinfectants (such as Amphyl).• Any solvent based cleaners on the Connector Hose. Doing so will damagethe plastics and will void your warranty.• Abrasive materials to clean the Connector Hose. Doing so will damage theplastics and will void your warranty.• Any petroleum based lubricants on the Connector Hose. Doing so willdamage the o-rings and will void your warranty. If lubrication is required, the use ofsilicone spray is recommended. The following silicone sprays have been successfullytested with our o-rings:• DuPont Teflon Silicone Spray (DuPont Part# DS0614101)• 3M Silicone Spray (3M Part# 62-4678-4930-3)• 500 PSI Silicone Pump Spray (<strong>Game</strong> <strong>Ready</strong> Part# 302056)WRAPSGently remove Heat Exchanger from the Sleeve. Hand wash the sleeve in cold water,using a mild detergent or antibacterial soap. Do not use fabric softener. Hang to dry.If needed, the external surface of the Heat Exchanger may be cleaned by wiping downwith commercial non-bleach cleaning wipes or hand washed using a very small amount ofmild detergent or antibacterial soap. DO NOT MACHINE WASH. Periodically run HydrogenPeroxide through your <strong>Game</strong> <strong>Ready</strong> System to keep the interior of your wrap clean.Refer to the Wrap Use Guide for more specific Wrap care instructions.16
C L E A N I N G C O N T I N U E DCARRY BAGThe Carry Bag should be cleaned using a soft cloth or brush and a mild detergent.Febreeze or the equivalent can be used on the Bag if desired. If the carry bag hasa biological material on the surface, Sterifab may be used to decontaminate thosesurfaces.Be sure to test any product on a small portion of the Bag to make sure that it will notdamage the Bag.M A I N T E N A N C EInspect and clean or replace the ice box filter as necessary. Remove the filter by rotatingit counter clockwise. No product maintenance should be performed by the user. If your<strong>Game</strong> <strong>Ready</strong> System requires maintenance, please contact <strong>Game</strong> <strong>Ready</strong> CustomerService; from the U.S. call toll-free at 1.888.426.3732, from outside of the U.S. call001.510.868.2100.S T O R A G EWhen you are done using the System for the day:• Unplug the AC Adapter and the Connector Hose from the <strong>Control</strong> <strong>Unit</strong>.• Push the door release button to open the door.• Carefully dump the ice and water into the sink.• Wipe off any excess water.• Store the <strong>Control</strong> <strong>Unit</strong> in the Carry Bag or in another safe location. Store the <strong>Control</strong> <strong>Unit</strong>with the lid fully open to allow the interior to dry and preserve the ice box seal.• Remember that your <strong>Game</strong> <strong>Ready</strong> <strong>Control</strong> <strong>Unit</strong> is a valuable piece of equipment andshould be treated like a laptop computer, with great care.Storage Temperature Conditions: 1 o - 50 o C (33 o - 122 o F)Relative Humidity: 10% - 95% non-condensingCaution: Do not keep in extreme hot or cold temperatures (above 122°F or below 33°F).Do not leave in a hot or freezing car. Do not leave the <strong>Control</strong> <strong>Unit</strong> in direct sunlight.The UV light may damage or discolor the <strong>Control</strong> <strong>Unit</strong>.S P E C I F I C A T I O N SSize: 16.25” length x 7.75” width x 9.25” height (413 x 197 x 235) mm, not includingcarrying caseWeight: 7.3 lb. empty, approximately 18 lb. full of ice and waterPressure level: cycles from 5mm Hg up to 75mm HgAC power: 100-240 V~, 50-60 Hz, 1.0ADC input: 12V/2.5 AA C C E S S O R I E SThe <strong>Game</strong> <strong>Ready</strong> <strong>Control</strong> <strong>Unit</strong> can be used with any of the following accessories:• Any <strong>Game</strong> <strong>Ready</strong> Wrap. Wraps made by any other manufacturer CANNOT be used withthis system.• A <strong>Game</strong> <strong>Ready</strong> supplied Power Supply (Ault Model MW128 or GlobTek ModelGTM-21097-5012) and Hospital Grade Power Cord• A <strong>Game</strong> <strong>Ready</strong> Connector Hose (Not included) • A <strong>Game</strong> <strong>Ready</strong> Carry Bag• A <strong>Game</strong> <strong>Ready</strong> supplied battery and charger17
T R O U B L E S H O O T I N GERRORWHAT DOES ITMEANAir Pressure Sensor:The <strong>Control</strong> <strong>Unit</strong>has detected aproblem calibratingthe pneumaticcompression circuiton start-up.Self-Test Error –Air Pump: The<strong>Control</strong> <strong>Unit</strong> hasdetected an electronicproblem in the aircircuit on start-up.Dry Pump: The<strong>Control</strong> <strong>Unit</strong> hasdetected a dry pump.In order to preventpossible damage tothe fluid pump, theunit will stop therapy.WHAT CAN I DO?• This is most likely to occur if you have restartedthe System with an inflated Wrap attached.• Detach the Wrap and try again.• Disconnect the Wrap from the <strong>Control</strong> <strong>Unit</strong>.• Turn the <strong>Control</strong> <strong>Unit</strong> off and on again withouta Wrap connected.• Make sure there is water in the ice box.• Verify that the ice box filter is not clogged.• Make sure there are no kinks in the Wrap orConnector Hose.• Turn the <strong>Control</strong> <strong>Unit</strong> off and on again.• Disconnect and reconnect the hose from the<strong>Control</strong> <strong>Unit</strong> and the Wrap.• Prime the Wrap using the following steps:- Select “No Pressure.”- Attach the largest Wrap available.- Lay the Wrap open (not on the body).- Run the System for 1 minute.• Prime the System using the following steps:- Disconnect the hose from the <strong>Control</strong> <strong>Unit</strong>.- Now, look at the Wrap connection locationon the <strong>Control</strong> <strong>Unit</strong>. On the top valve,push the white prong in so that it is evenwith the metal connector.- Make sure you are not fully covering theopening in the prong.- Push start, and water should squirt out ofthe valve.- Restart the System.Over Pressure:Indicates that the<strong>Control</strong> <strong>Unit</strong> hasexceeded the targetpressure.• Turn the <strong>Control</strong> <strong>Unit</strong> off and back on.• Apply the same Wrap more tightly.• Apply a different Wrap.18
T R O U B L E S H O O T I N GERROR WHAT DOES IT MEAN WHAT CAN I DO?Under Pressure: The <strong>Control</strong><strong>Unit</strong> can’t reach its targetmaximum compression. Thisoften indicates that thereis a leak in the pneumaticcompression circuit, either in theConnector Hose, Wrap or <strong>Control</strong><strong>Unit</strong>. Or it may occur becausethe hook and loop fastener onyour Wrap has worn out.• Make sure the Wrap is tightlyapplied.• Try using a different Wrap andHose to isolate the problem.Deflation Error: The <strong>Control</strong> <strong>Unit</strong>has detected that the Wrap hasnot properly deflated.Pump Performance Error : The<strong>Control</strong> <strong>Unit</strong> has determined thatthe fluid pump may be workingtoo hard. This could be caused byice or debris in the fluid circuit.In order to prevent possibledamage to the fluid pump, theunit will stop therapy.Low Flow: <strong>Control</strong> <strong>Unit</strong> hasdetected an interruption in thewater flow.Self-Test Error – Fluid Circuit:The <strong>Control</strong> <strong>Unit</strong> has detectedan electronic problem in the fluidcircuit on start-up.<strong>Control</strong> <strong>Unit</strong> will not turn on:• Turn the <strong>Control</strong> <strong>Unit</strong> off.• If there is air left in the Wrap,disconnect the Wrap from theConnector Hose and manuallydeflate the Wrap.• Reconnect the Hose to the Wrapand reapply the Wrap to the body.• Turn the <strong>Control</strong> <strong>Unit</strong> on and pressplay/pause.• Turn the <strong>Control</strong> <strong>Unit</strong> off and backon again.• Check to see if the filter is clogged.• If that does not solve the problemturn the <strong>Control</strong> <strong>Unit</strong> off for20 minutes (to let the pump cooldown) before turning it on again totry again.• Check all hose connections• Make sure there is water in theice box.• Verify that the ice box filter isnot clogged.• Make sure there are no kinks inthe Wrap or Connector Hose.• Turn the <strong>Control</strong> <strong>Unit</strong> off andon again.• Disconnect and reconnect the hosefrom the <strong>Control</strong> <strong>Unit</strong> and the Wrap.• Disconnect the Wrap from the<strong>Control</strong> <strong>Unit</strong>.• Turn the <strong>Control</strong> <strong>Unit</strong> off and onagain without a Wrap connected.• Check to make sure the AC Adapteris securely plugged into a workingelectrical outlet.• Press the power button again. If theorange LED on the control panelis illuminated, but the <strong>Control</strong> <strong>Unit</strong>will not turn on, call 1.888.426.3732from the U.S. and from outside theU.S. dial 001.510.868.2100. If noorange or green light is illuminated,check that the electrical outlet haspower.19
W A R R A N T YCoolSystems warrants that the <strong>Game</strong> <strong>Ready</strong> <strong>Control</strong> <strong>Unit</strong>, if properly used, will be freefrom defects in material and workmanship for a period of one (1) year after the date the<strong>Game</strong> <strong>Ready</strong> <strong>Control</strong> <strong>Unit</strong> was purchased. If the <strong>Game</strong> <strong>Ready</strong> <strong>Control</strong> <strong>Unit</strong>, which is thesubject of this Limited Warranty, fails during the warranty period for reasons covered bythis Limited Warranty, CoolSystems, at its options, will:• REPAIR the <strong>Game</strong> <strong>Ready</strong> <strong>Control</strong> <strong>Unit</strong> OR• REPLACE the <strong>Game</strong> <strong>Ready</strong> <strong>Control</strong> <strong>Unit</strong> with another <strong>Game</strong> <strong>Ready</strong> <strong>Control</strong> <strong>Unit</strong>.THIS LIMITED WARRANTY AND ANY IMPLIED WARRANTIES THAT MAY EXIST UNDERSTATE LAW APPLY ONLY TO THE ORIGINAL PURCHASER OF THE GAME READYCONTROL UNIT AND ARE NON-TRANSFERABLE.Extent of Limited WarrantyThis limited warranty does not cover damages due to external causes, including, withoutlimitation, accident, usage not in accordance with product instructions, misuse, neglect,alteration or repair.How to Obtain Warranty ServiceTo obtain warranty service please contact <strong>Game</strong> <strong>Ready</strong> Customer Service; from the U.S.call toll-free at 1.888.426.3732, from outside of the U.S. call 001.510.868.2100. You musthave returned the Warranty Registration card to CoolSystems within thirty (30) days fromthe date of purchase to qualify for warranty service. If you qualify for warranty servicefrom CoolSystems, you will be issued a Returned Material Authorization (RMA) number.When you return the <strong>Game</strong> <strong>Ready</strong> <strong>Control</strong> <strong>Unit</strong> to CoolSystems, you must write theRMA number on the outside of the package. CoolSystems will not accept returned <strong>Game</strong><strong>Ready</strong> <strong>Control</strong> <strong>Unit</strong>s without an RMA number on the package. If you return the <strong>Game</strong><strong>Ready</strong> <strong>Control</strong> <strong>Unit</strong> to CoolSystems, you must assume the risk of damage or loss duringshipping. You must use the original packaging or the equivalent. CoolSystems may requireyou to verify in writing that you are the original purchaser of the <strong>Game</strong> <strong>Ready</strong> <strong>Control</strong> <strong>Unit</strong>.CoolSystems may elect to replace or repair the <strong>Game</strong> <strong>Ready</strong> <strong>Control</strong> <strong>Unit</strong> with either anew or reconditioned product. The returned product shall become CoolSystems’ propertyupon receipt. The replacement <strong>Game</strong> <strong>Ready</strong> <strong>Control</strong> <strong>Unit</strong> is warranted under this writtenwarranty and is subject to the same limitations and exclusions for the remainder of theoriginal warranty period. THIS WARRANTY IS NOT TRANSFERABLE.WARRANTY LIMITATIONS AND EXCLUSIONSTHESE WARRANTIES REPLACE ALL OTHER WARRANTIES, EXPRESS ORIMPLIED INCLUDING, BUT NOT LIMITED TO, THE IMPLIED WARRANTIES OFMERCHANTABILITY AND FITNESS FOR A PARTICULAR PURPOSE. COOLSYSTEMSMAKES NO EXPRESS WARRANTIES BEYOND THOSE STATED HERE. COOLSYSTEMSDISCLAIMS ALL OTHER WARRANTIES, EXPRESS OR IMPLIED INCLUDING, WITHOUTLIMITATION, IMPLIED WARRANTIES OF MERCHANTABILITY AND FITNESS FOR APARTICULAR PURPOSE. SOME JURISDICTIONS DO NOT ALLOW THE EXCLUSION OFIMPLIED WARRANTIES SO THIS LIMITATION MAY NOT APPLY TO YOU. ALL EXPRESSAND IMPLIED WARRANTIES ARE LIMITED IN DURATION TO THE LIMITED WARRANTYPERIOD. NO WARRANTIES APPLY AFTER THAT PERIOD. SOME JURISDICTIONS DONOT ALLOW LIMITATIONS ON HOW LONG AN IMPLIED WARRANTY LASTS, SO THISLIMITATION MAY NOT APPLY TO YOU.20
W A R R A N T YLIMITATIONS OF LIABILITYCOOLSYSTEMS’ RESPONSIBILITY UNDER THIS, OR ANY OTHER WARRANTY, IMPLIEDOR EXPRESS, IS LIMITED TO REPAIR OR REPLACEMENT, AS SET FORTH ABOVE.THESE REMEDIES ARE THE SOLE AND EXCLUSIVE REMEDIES FOR ANY BREACHOF WARRANTY. COOLSYSTEMS IS NOT RESPONSIBLE FOR DIRECT, SPECIAL,INCIDENTAL, OR CONSEQUENTIAL DAMAGES RESULTING FROM ANY BREACH OFWARRANTY OR UNDER ANY OTHER LEGAL THEORY INCLUDING, BUT NOT LIMITEDTO, LOST PROFITS, DOWNTIME, GOODWILL, AND DAMAGE TO OR REPLACEMENTOF EQUIPMENT AND PROPERTY. SOME JURISDICTIONS DO NOT ALLOW THEEXCLUSION OR LIMITATION OF INCIDENTAL OR CONSEQUENTIAL DAMAGES, SO THEABOVE LIMITATIONS OR EXCLUSIONS MAY NOT APPLY TO YOU.THIS LIMITED WARRANTY GIVES YOU SPECIFIC RIGHTS, AND YOU MAY ALSO HAVEOTHER RIGHTS THAT VARY FROM JURISDICTION TO JURISDICTION.W A R R A N T Y R E G I S T R A T I O NPlease complete the Warranty Registration for both the <strong>Game</strong> <strong>Ready</strong> <strong>Control</strong> <strong>Unit</strong> and theWraps online at www.gamereadyveterinary.com. You must register within 30 days fromthe date of purchase in order to receive warranty service.You will need the following information to complete your Warranty Registration:The <strong>Control</strong> <strong>Unit</strong>’s model number (REF) and its serial number (SN). These numbers arelocated on the label on the bottom of the <strong>Control</strong> <strong>Unit</strong>. Simply go towww.gamereadyveterinary.com, click on the Product Registration link at the top of thepage, fill out and submit your information.Extended WarrantiesExtended Warranties are available for the <strong>Game</strong> <strong>Ready</strong> System. For details andinformation please contact <strong>Game</strong> <strong>Ready</strong> Customer Service; from the U.S. call toll-free at1.888.426.3732, from outside of the U.S. call 001.510.868.2100.<strong>Game</strong> <strong>Ready</strong> <strong>Control</strong> <strong>Unit</strong> User’s <strong>Manual</strong> PN <strong>703549</strong> <strong>Rev</strong> B21