Owner's Manual - Diamondback Bicycles
Owner's Manual - Diamondback Bicycles
Owner's Manual - Diamondback Bicycles

Create successful ePaper yourself
Turn your PDF publications into a flip-book with our unique Google optimized e-Paper software.
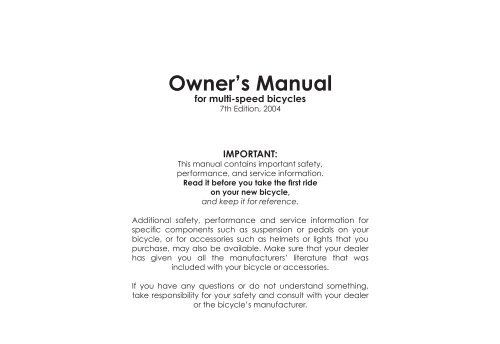
Owner’s <strong>Manual</strong>for multi-speed bicycles7th Edition, 2004IMPORTANT:This manual contains important safety,performance, and service information.Read it before you take the first rideon your new bicycle,and keep it for reference.Additional safety, performance and service information forspecific components such as suspension or pedals on yourbicycle, or for accessories such as helmets or lights that youpurchase, may also be available. Make sure that your dealerhas given you all the manufacturers’ literature that wasincluded with your bicycle or accessories.If you have any questions or do not understand something,take responsibility for your safety and consult with your dealeror the bicycle’s manufacturer.
1. FirstNOTE: All operators must read and understand all sectionsof this owner’s manual before their initial operation of thebicycle. If after reading this manual in its entirety you haveany questions, please contact your authorized dealerfor clarification or an explanation of specific topics thatyou are unsure about. Please note that not all bicycleshave all of the features described in this <strong>Manual</strong>. Ask yourdealer to point out the features of your bicycle.A. Bike Fit1. Is your bike the right size? To check, see Section 3.A.If your bicycle is too large or too small for you, you maylose control and fall. If your new bike is not the right size,ask your dealer to exchange it before you ride it.2. Is the saddle at the right height? To check, seeSection 3.B. If you adjust your saddle height, follow theMinimum Insertion instructions in Section 3.B.3. Are saddle and seatpost securely clamped?A correctly tightened saddle will allow no saddlemovement in any direction. See Section 3.B.4. Are the stem and handlebars at the right height foryou? If not, see Section 3.C.5. Can you comfortably operate the brakes? If not,you may be able to adjust their angle and reach. SeeSection 3.D and 3.E.6. Do you fully understand how to operate yournew bicycle? If not, before your first ride, have yourdealer explain any functions or features which you donot understand.B. Safety First1. Always wear an approved helmet when riding yourbike, and follow the helmet manufacturer’s instructionsfor fit, use and care.2. Do you have all the other required andrecommended safety equipment? See Section 2. It’syour responsibility to familiarize yourself with the lawsof the areas where you ride, and to comply with allapplicable laws.3. Do you know how to correctly operate your wheelquick releases? Check Section 4.A.1 to make sure.Riding with an improperly adjusted wheel quick releasecan cause the wheel to wobble or disengage from thebicycle, and cause serious injury or death.4. If your bike has toeclips and straps or clipless (“stepin”)pedals, make sure you know how they work (seeSection 4.E). These pedals require special techniquesand skills. Follow the pedal manufacturer’s instructionsfor use, adjustment and care.5. Do you have “toe overlap”? On smaller framedbicycles your toe or toeclip may be able to contactthe front wheel when a pedal is all the way forwardand the wheel is turned. Read Section 4.E. If you havetoeclip overlap.6. Does your bike have suspension? If so, check Section4.F. Suspension can change the way a bicycle performs.Follow the suspension manufacturer’s instructions for use,adjustment and care.C. Mechanical Safety CheckRoutinely check the condition of your bicycle before
a controlled environment, away from cars, other cyclists,obstacles or other hazards. Ride to become familiar withthe controls, features and performance of your new bike.Familiarize yourself with the braking action of the bike(see Section 4.C). Test the brakes at slow speed, puttingyour weight toward the rear and gently applying thebrakes, rear brake first. Sudden or excessive applicationof the front brake could pitch you over the handlebars.Applying brakes too hard can lock up a wheel, whichcould cause you to lose control and fall. Skidding is anexample of what can happen when a wheel locks up.If your bicycle has toeclips or clipless pedals, practicegetting in and out of the pedals. See paragraph B.4above and Section 4.E.4.If your bike has suspension, familiarize yourself with howthe suspension responds to brake application and riderweight shifts. See paragraph B.6 above and Section 4.F.Practice shifting the gears (see Section 4.D).Remember to never move the shifter while pedalingbackward, nor pedal backwards immediately afterhaving moved the shifter. This could jam the chain andcause serious damage to the bicycle.Check out the handling and response of the bike; andcheck the comfort.If you have any questions, or if you feel anythingabout the bike is not as it should be, consult your dealerbefore riding.Fig.12. SafetyA. The Basics! WARNING: Many states require specific safetydevices. It is your responsibility to familiarize yourselfwith the laws of the state where you ride and to complywith all applicable laws, including properly equippingyourself and your bike as the law requires.Observe all local bicycle laws and regulations.Observe regulations about licensing of bicycles, ridingon sidewalks, laws regulating bike path and trail use,helmet laws, child carrier laws, special bicycle trafficlaws, and so on. It’s your responsibility to know and obeythe laws.1. Always wear a cycling helmet which meets thelatest certification standards and is appropriate forthe type of riding you do. Always follow the helmetmanufacturer’s instructions for fit, use and care of yourhelmet. Most serious bicycle injuries involve head injurieswhich might have been avoided if the rider had wornan appropriate helmet.! WARNING: Failure to wear a helmet when riding mayresult in serious injury or death.2. Always do the Mechanical Safety Check (Section1.C) before you get on a bike.3. Be thoroughly familiar with the controls of your
icycle: brakes (Section 4.C.); pedals (Section 4.E.);shifting (Section 4.D.)4. Be careful to keep body parts and other objectsaway from the sharp teeth of chainrings, the movingchain, the turning pedals and cranks, and the spinningwheels of your bicycle.5. Always wear:• Shoes that will stay on your feet and will grip thepedals. Never ride barefoot or in sandals.• Bright, visible clothing that is not so loose that itcan be tangled in the bicycle or snagged by objects atthe side of the road or trail.• Protective eyewear, to protect against airbornedirt, dust and bugs — tinted when the sun is bright, clearwhen it’s not.6. Don’t jump with your bike. Jumping a bike,particularly a BMX or mountain bike, can be fun; but itcan put huge and unpredictable stress on the bicycleand its components. Riders who insist on jumping theirbikes risk serious damage, to their bicycles as well as tothemselves. Before you attempt to jump, do stunt ridingor race with your bike, read and understand Section 2.F.7. Ride at a speed appropriate for conditions.Increased speed means higher risk.B. Riding Safety1. You are sharing the road or the path with others— motorists, pedestrians and other cyclists. Respecttheir rights.2. Ride defensively. Always assume that others do notsee you.3. Look ahead, and be ready to avoid:• Vehicles slowing or turning, entering the road oryour lane ahead of you, or coming up behind you.• Parked car doors opening.• Pedestrians stepping out.• Children or pets playing near the road.• Pot holes, sewer grating, railroad tracks, expansionjoints, road or sidewalk construction, debris and otherobstructions that could cause you to swerve into traffic,catch your wheel or cause you to have an accident.• The many other hazards and distractions whichcan occur on a bicycle ride.4. Ride in designated bike lanes, on designated bikepaths or as close to the edge of the road as possible,in the direction of traffic flow or as directed by localgoverning laws.5. Stop at stop signs and traffic lights; slow down andlook both ways at street intersections. Remember that abicycle always loses in a collision with a motor vehicle, sobe prepared to yield even if you have the right of way.6. Use approved hand signals for turning and stopping.7. Never ride with headphones. They mask trafficsounds and emergency vehicle sirens, distract you fromconcentrating on what’s going on around you, andtheir wires can tangle in the moving parts of the bicycle,causing you to lose control.8. Never carry a passenger, unless it is a small childwearing an approved helmet and secured in a correctlymounted child carrier or a child-carrying trailer.9. Never carry anything which obstructs your visionor your complete control of the bicycle, or which couldbecome entangled in the moving parts of the bicycle.10. Never hitch a ride by holding on to another vehicle.11. Don’t do stunts, wheelies or jumps. If you intend
to do stunts, wheelies, jumps or go racing with your bikedespite our advice not to, read Section 2.F, Downhill,Stunt or Competition Biking, now. Think carefully aboutyour skills before deciding to take the large risks that gowith this kind of riding.12. Don’t weave through traffic or make any movesthat may surprise people with whom you are sharingthe road.13. Observe and yield the right of way.14. Never ride your bicycle while under the influenceof alcohol or drugs.15. If possible, avoid riding in bad weather, whenvisibility is obscured, at dawn, dusk or in the dark, or whenextremely tired. Each of these conditions increases therisk of accident.C. Off Road SafetyWe recommend that children not ride on rough terrainunless they are accompanied by an adult.1. The variable conditions and hazards of off-roadriding require close attention and specific skills. Startslowly on easier terrain and build up your skills. If your bikehas suspension, the increased speed you may developalso increases your risk of losing control and falling. Getto know how to handle your bike safely before tryingincreased speed or more difficult terrain.2. Wear safety gear appropriate to the kind of ridingyou plan to do.3. Don’t ride alone in remote areas. Even when ridingwith others, make sure that someone knows where you’regoing and when you expect to be back.4. Always take along some kind of identification, sothat people know who you are in case of an accident;and take along a couple of dollars in cash for a candybar, a cool drink or an emergency phone call.5. Yield right of way to pedestrians and animals. Ridein a way that does not frighten or endanger them, andgive them enough room so that their unexpected movesdon’t endanger you.6. Be prepared. If something goes wrong while you’reriding off-road, help may not be close.7. Before you attempt to jump, do stunt riding or racewith your bike, read and understand Section 2.F.Off Road respectObey the local laws regulating where and how youcan ride off-road, and respect private property. Youmay be sharing the trail with others — hikers, equestrians,other cyclists. Respect their rights. Stay on the designatedtrail. Don’t contribute to erosion by riding in mud or withunnecessary sliding. Don’t disturb the ecosystem bycutting your own trail or shortcut through vegetation orstreams. It is your responsibility to minimize your impact onthe environment. Leave things as you found them; andalways take out everything you brought in.D. Wet Weather Riding! WARNING: Wet weather impairs traction, brakingand visibility, both for the bicyclist and for other vehiclessharing the road. The risk of an accident is dramaticallyincreased in wet conditions.Under wet conditions, the stopping power of yourbrakes (as well as the brakes of other vehicles sharing
the road) is dramatically reduced and your tires don’tgrip nearly as well. This makes it harder to control speedand easier to lose control. To make sure that you canslow down and stop safely in wet conditions, ride moreslowly and apply your brakes earlier and more graduallythan you would under normal, dry conditions. See alsoSection 4.C.E. Night RidingRiding a bicycle at night is many times more dangerousthan riding during the day. A bicyclist is very difficult formotorists and pedestrians to see. Therefore, childrenshould never ride at dawn, at dusk or at night. Adultswho chose to accept the greatly increased risk of ridingat dawn, at dusk or at night need to take extra care bothriding and choosing specialized equipment which helpsreduce that risk. Consult your dealer about night ridingsafety equipment.straight, unbroken and securely mounted. Have yourdealer replace damaged reflectors and straighten ortighten any that are bent or loose.The mounting brackets of front and rear reflectors areoften designed as brake straddle cable safety catcheswhich prevent the straddle cable from catching on thetire tread if the cable jumps out of its yoke or breaks.! WARNING: Do not remove the front or rear reflectorsor reflector brackets from your bicycle. They are anintegral part of the bicycle’s safety system.Removing the reflectors may reduce your visibility toothers using the roadway. Being struck by other vehiclesmay result in serious injury or death.The reflector brackets may protect you from the brakestraddle cable catching on the tire in the event of brakecable failure. If a brake straddle cable catches on thetire, it can cause the wheel to stop suddenly, causing youto loose control and fall.! WARNING: Reflectors are not a substitute for requiredlights. Riding at dawn, at dusk, at night or at other timesof poor visibility without an adequate bicycle lightingsystem and without reflectors is dangerous and mayresult in serious injury or death.Bicycle reflectors are designed to pick up and reflectstreet lights and car lights in a way that may help you tobe seen and recognized as a moving bicyclist.! CAUTION: Check reflectors and their mountingbrackets regularly to make sure that they are clean,10If you choose to ride under conditions of poorvisibility, check and be sure you comply with all locallaws about night riding, and take the following stronglyrecommended additional precautions:• Purchase and install battery or generatorpowered head and tail lights which meet all regulatoryrequirements and provide adequate visibility.• Wear light colored, reflective clothing andaccessories, such as a reflective vest, reflective armand leg bands, reflective stripes on your helmet, flashinglights attached to your body and/or your bicycle ... anyreflective device or light source that moves will help youget the attention of approaching motorists, pedestrians
and other traffic.• Make sure your clothing or anything you may becarrying on the bicycle does not obstruct a reflectoror light.• Make sure that your bicycle is equipped withcorrectly positioned and securely mounted reflectors.While riding at dawn, at dusk or at night:• Ride slowly.• Avoid dark areas and areas of heavy or fastmovingtraffic.• Avoid road hazards.• If possible, ride on familiar routes.If riding in traffic:• Be predictable. Ride so that drivers can see you andpredict your movements.• Be alert. Ride defensively and expect the unexpected.• If you plan to ride in traffic often, ask your dealerabout traffic safety classes or a good book on bicycletraffic safety.F. Extreme, Stunt, Or Competition RidingWhether you call it Aggro, Hucking, Freeride, NorthShore, Downhill, Jumping, Stunt Riding, Racing orsomething else: by engaging in this sort of extreme,aggressive riding you voluntarily assume an increased riskof injury or death.Not all bicycles are designed for these types of riding,and those that are may not be suitable for all types ofaggressive riding. Check with your dealer or the bicycle’smanufacturer about the suitability of your bicycle beforeengaging in extreme riding.When riding fast down hill, you can reach speedsseen on motorcycles, and therefore face similar hazardsand risks. Have your bicycle and equipment carefullyinspected by a qualified mechanic and be sure it isin perfect condition. Consult with expert riders andrace officials on conditions and equipment advisableat the site where you plan to ride. Wear appropriatesafety gear, including an approved full face helmet,full finger gloves, and body armor. Ultimately, it is yourresponsibility to have proper equipment and to befamiliar with course conditions.! WARNING: Although many catalogs, advertisementsand articles about bicycling depict riders engaged inextreme riding, this activity is extremely dangerous,increases your risk of injury or death, and increases theseverity of any injury. Remember that the action depictedis being performed by professionals with many years oftraining and experience. Know your limits and alwayswear a helmet and other appropriate safety gear. Evenwith state-of-the-art protective safety gear, you couldbe seriously injured or killed when jumping, stunt riding,riding downhill at speed or in competition.! CAUTION: <strong>Bicycles</strong> and bicycle parts have limitationswith regard to strength and integrity, and this type ofriding can exceed those limitations.We recommend against this type of riding becauseof the increased risks; but if you choose to take the risk,at least:• Take lessons from a competent instructor first• Start with easy learning exercises and slowly developyour skills before trying more difficult or dangerous riding11
• Do stunts, jumping, racing or fast downhill riding onlyin areas designated for this type of riding• Wear a full face helmet, safety pads and othersafety gear• Understand and recognize that the stresses imposedon your bike by this kind of activity may break or damageparts of the bicycle and void the warranty• Take your bicycle to your dealer if anythingbreaks or bends. Do not ride your bicycle when anypart is damaged.If you ride downhill at speed, do stunt riding or ride incompetition, know the limits of your skill and experience.Ultimately, avoiding injury is your responsibility.G. Changing Components or AddingAccessoriesThere are many components and accessoriesavailable to enhance the comfort, performance andappearance of your bicycle. However, if you changecomponents or add accessories, you do so at your ownrisk. The bicycle’s manufacturer may not have tested thatcomponent or accessory for compatibility, reliability orsafety on your bicycle. Before installing any componentor accessory, including a different size tire, make surethat it is compatible with your bicycle by checking withyour dealer. Be sure to read, understand and follow theinstructions that accompany the products you purchasefor your bicycle.install, operate and maintain any component oraccessory can result in serious injury or death.! CAUTION: Changing the components on your bikemay void the warranty. Refer to your warranty, andcheck with your dealer before changing the componentson your bike.3. FitNOTE: Correct fit is an essential element of bicycling safety,performance and comfort. Making the adjustments toyour bicycle which result in correct fit for your body andriding conditions requires experience, skill and specialtools. Always have your dealer make the adjustmentson your bicycle; or, if you have the experience, skill andtools, have your dealer check your work before riding.! WARNING: If your bicycle does not fit properly, youmay lose control and fall. If your new bike doesn’t fit, askyour dealer to exchange it before you ride it.A. Standover HeightStandover height is the basic element of bike fit (seefig. 2). It is the distance from the ground to the top ofthe bicycle’s frame at that point where your crotch iswhen straddling the bike. To check for correct standoverheight, straddle the bike while wearing the kind of shoesin which you’ll be riding, and bounce vigorously on your! WARNING: Failure to confirm compatibility, properlyheels. If your crotch touches the frame, the bike is too12
ig for you. Don’t even ridethe bike around the block. Abike which you ride only onpaved surfaces and nevertake off-road should give youa minimum standover heightclearance of two inches(5cm). A bike that you’ll rideon unpaved surfaces shouldgive you a minimum of threeinches (7.5cm) of standoverheight clearance. And a bikethat you’ll use off road shouldgive you four inches (10cm) or more of clearance.Fig.2! WARNING: If you plan to use your bike for jumpingor stunt riding, read Section 2.F again.B. Saddle PositionCorrect saddle adjustment is an important factor ingetting the most performance and comfort from yourbicycle. If the saddle position is not comfortable for you,see your dealer.The saddle can be adjusted in three directions:1. Up and down adjustment. To check for correctsaddle height (fig. 3):• sit on the saddle;• place one heel on a pedal;• rotate the crank until the pedal with your heel onit is in the down position and the crank arm is parallel tothe seat tube.If your leg is not completely straight, your saddle heightneeds to be adjusted. If your hips must rock for the heel13to reach the pedal, the saddle istoo high. If your leg is bent at theknee with your heel on the pedal,the saddle is too low.Once the saddle is at thecorrect height, make sure that theseatpost does not project fromthe frame beyond its “MinimumInsertion” or “Maximum Extension”mark (fig. 4).If your bike has an interruptedseat tube, as is the case on somebikes with rear suspension, youmust also make sure that the seat postis far enough into the frame so thatyou can touch it through the bottomof the interrupted seat tube with thetip of your finger without inserting yourfinger beyond its first knuckle (see fig.5).! WARNING: If your seat post projectsfrom the frame beyond the MinimumInsertion or Maximum Extension mark(see fig. 4) or you cannot touch thebottom of the seat post through thebottom of the interrupted seat tube withthe tip of your finger without insertingyour finger beyond its first knuckle (seefig. 5), the seat post may break, which could cause you tolose control and fall.2. Front and back adjustment. The saddle can beadjusted forward or back to help you get the optimal
position on the bike. Ask your dealer to set the saddlefor your optimal riding position and to show you how tomake this adjustment.3. Saddle angle adjustment. Most people prefer ahorizontal saddle; but some riders like the saddle noseangled up or down just a little. Your dealer can adjustsaddle angle or teach you how to do it.riding with a saddle which is incorrectly adjusted orwhich does not support your pelvic area correctly cancause short-term or long-term injury to nerves and bloodvessels, or even impotence. If your saddle causes youpain, numbness or other discomfort, listen to your bodyand stop riding until you see your dealer about saddleadjustment or a different saddle.Note: If your bicycle is equipped with a suspension seatpost, periodically ask your dealer to check it.Small changes in saddle position can have asubstantial effect on performance and comfort. To findyour best saddle position, make only one adjustment ata time.! WARNING: After any saddle adjustment, be sure thatthe saddle adjusting mechanism is properly tightenedbefore riding. A loose saddle clamp or seat post bindercan cause damage to the seat post, or can cause youto lose control and fall. A correctly tightened saddleadjusting mechanism will allow no saddle movement inany direction. Periodically check to make sure that thesaddle adjusting mechanism is properly tightened.If, in spite of carefully adjusting the saddle height,tilt and fore-and-aft position, your saddle is stilluncomfortable, you may need a different saddle design.Saddles, like people, come in many different shapes,sizes and resilience. Your dealer can help you select asaddle which, when correctly adjusted for your bodyand riding style, will be comfortable.! WARNING: Some people have claimed that extended14C. Handlebar Height And AngleYour bike is equipped either with a “threadless” stem,which clamps on to the outside of the steerer tube,or with a “quill” stem, which clamps inside the steerertube by way of an expanding binder bolt. If you aren’tabsolutely sure which type of stem your bike has, askyour dealer.If your bike has a “threadless” stem, your dealermay be able to change handlebar height by movingheight adjustment spacers from below the stem toabove the stem, or vice versa. Otherwise, you’ll haveto get a stem of different length or rise. Consult yourdealer. Do not attempt to do this yourself, as it requiresspecial knowledge.If your bike has a “quill” stem, you can ask yourdealer to adjust the handlebar height a bit by adjustingstem height.A quill stem has an etched or stamped mark on itsshaft which designates the stem’s “Minimum Insertion”or “Maximum extension”. This mark must not be visibleabove the headset.! WARNING: On some bicycles, changing the stemor stem height can affect the tension of the front brakecable, locking the front brake or creating excess cable
slack which can make the front brake inoperable. If thefront brake pads move in towards the wheel rim or outaway from the wheel rim when the stem or stem height ischanged, the brakes must be correctly adjusted beforeyou ride the bicycle.! WARNING: The stem’s Minimum Insertion Mark mustnot be visible above the top of the headset. If the stem isextended beyond the Minimum Insertion Mark the stemmay break or damage the fork’s steerer tube, whichcould cause you to lose control and fall.Your dealer can also change the angle of thehandlebar or bar end extensions.! WARNING: An insufficiently tightened stem binderbolt, handlebar binder bolt or bar end extensionclamping bolt may compromise steering action,which could cause you to lose control and fall. Placethe front wheel of the bicycle between your legs andattempt to twist the handlebar/stem assembly. If youcan twist the stem in relation to the front wheel, turn thehandlebars in relation to the stem, or turn the bar endextensions in relation to the handlebar, the bolts areinsufficiently tightened.D. Control position adjustmentsThe angle of the brake and shift control levers andtheir position on the handlebars can be changed. Askyour dealer to make the adjustments for you.15E. Brake reachMany bikes have brake levers which can beadjusted for reach. If you have small hands orfind it difficult to squeeze the brake levers, yourdealer can either adjust the reach or fit shorterreach brake levers.WARNING: The shorter the brake leverreach, the more critical it is to have correctlyadjusted brakes, so that full braking powercan be applied within available brake levertravel. Brake lever travel insufficient to applyfull braking power can result in loss of control,which may result in serious injury or death.4. TechIt’s important to your safety, performanceand enjoyment to understand how things workon your bicycle. We urge you to ask yourdealer how to do the things described in thissection before you attempt them yourself, andthat you have your dealer check your workbefore you ride the bike. If you have even theslightest doubt as to whether you understandsomething in this section of the <strong>Manual</strong>, talk toyour dealer.
A. Wheelsneed to apply to secure the wheel.NOTE: If you have a mountain bike equipped withthrough axle front or rear wheels, make sure that yourdealer has given you the manufacturer’s instructions, andfollow those when installing or removing a through axlewheel. If you don’t know what a through axle is, ask yourdealer.1. Wheel Quick Release! WARNING: Riding with an improperly adjusted wheelquick release can allow the wheel to wobble or fall offthe bicycle, which can cause serious injury or death.Therefore, it is essential that you:1. Ask your dealer to help you make sure you knowhow to install and remove your wheels safely.2. Understand and apply the correct technique forclamping your wheel in place with a quick release.3. Each time, before you ride the bike, check that thewheel is securely clamped.The wheel quick release uses a cam action toclamp the bike’s wheel in place (see fig. 6). Because ofits adjustable nature, it is critical that you understand howit works, how to use it properly, and how much force you16! WARNING: The full force of the cam action is neededto clamp the wheel securely. Holding the nut with onehand and turning the lever like a wing nut with the otherhand until everything is as tight as you can get it will notclamp the wheel safely in the dropouts.a. Adjusting The Quick Release MechanismThe wheel hub is clamped in place by the force ofthe quick release cam pushing against one dropout andpulling the tension adjusting nut, by way of the skewer,against the other dropout. The amount of clamping forceis controlled by the tension adjusting nut. Turning thetension adjusting nut clockwise while keeping the camlever from rotating increases clamping force; turningit counterclockwise while keeping the cam lever fromrotating reduces clamping force. Less than half a turnof the tension adjusting nut can make the differencebetween safe clamping force and unsafe clampingforce.b. Front Wheel Secondary Retention DevicesMost bicycles have front forks which utilize a secondarywheel retention device to keep the wheel fromdisengaging if the quick release is incorrectly adjusted.Secondary retention devices are not a substitute forcorrect quick release adjustment.Secondary retention devices fall into two basiccategories:(1) The clip-on type is a part which the manufactureradds to the front wheel hub or front fork.(2) The integral type is molded, cast or machined into
the outer faces of the front fork dropouts.Ask your dealer to explain the particular secondaryretention device on your bike.! WARNING: Do not remove or disable the secondaryretention device. As its name implies, it serves as a backupfor a critical adjustment. If the quick release is notadjusted correctly, the secondary retention device canreduce the risk of the wheel disengaging from the fork.Removing or disabling the secondary retention devicemay also void the warranty.Secondary retention devices are not a substitute forcorrect quick release adjustment. Failure to properlyadjust the quick release mechanism can cause thewheel to wobble or disengage, which could causeyou to loose control and fall, resulting in serious injuryor death.the wheel; then go to the next step.(5) Raise the front wheel a fewinches off the ground and tap the topof the wheel with the palm of yourhand to knock the wheel out of thefront fork.b. Installing a Quick Release FrontWheel! CAUTION: If your bike is equippedwith disk brakes, be careful not todamage the disk, caliper or brakepads when re-inserting the disk into thecaliper. Never activate a disk brake’scontrol lever unless the disk is correctly inserted in thecaliper. See also Section 4.C.2. Removing and Installing Quick Release Wheelsa. Removing a Quick Release Front Wheel(1) If your bike has rim brakes, disengage the brake’squick-release mechanism to open the clearancebetween the tire and the brake pads (See Section 4.Cfig. 11 through 15).(2) Move the wheel’s quick-release lever from the lockedor CLOSED position to the OPEN position (figs. 7a & b).(3) If your front fork does not have a secondaryretention device go to step (5).(4) If your front fork has a clip-on type secondaryretention device, disengage it and go to step (5). If yourfront fork has an integral secondary retention device,loosen the tension adjusting nut enough to allow removing17(1) Move the quick-release lever so that it curves awayfrom the wheel (fig. 7b). This is the OPEN position.(2) With the steering fork facing forward, insert thewheel between the fork blades so that the axle seatsfirmly at the top of the slots which are at the tips of thefork blades — the fork dropouts. The quick-release levershould be on the left side of the bicycle (fig.7a & b). Ifyour bike has a clip-on type secondary retention device,engage it.(3) Holding the quick-release lever in the OPEN positionwith your right hand, tighten the tension adjusting nutwith your left hand until it is finger tight against the forkdropout (fig. 6).(4) While pushing the wheel firmly to the top of theslots in the fork dropouts, and at the same time centering
the wheel rim in the fork, move the quick-release leverupwards and swing it into the CLOSED position (fig.6 & 7a). The lever should now be parallel to the forkblade and curved toward the wheel. To apply enoughclamping force, you should have to wrap your fingersaround the fork blade for leverage, and the lever shouldleave a clear imprint in the palm of your hand.! WARNING: Securely clamping the wheel takesconsiderable force. If you can fully close the quickrelease without wrapping your fingers around the forkblade for leverage, and the lever does not leave a clearimprint in the palm of your hand, the tension is insufficient.Open the lever; turn the tension adjusting nut clockwise aquarter turn; then try again.(5) If the lever cannot be pushed all the way to aposition parallel to the fork blade, return the lever tothe OPEN position. Then turn the tension adjusting nutcounterclockwise one-quarter turn and try tightening thelever again.(6) Re-engage the brake quick-release mechanismto restore correct brake pad-to-rim clearance; spin thewheel to make sure that it is centered in the frame andclears the brake pads; then squeeze the brake lever andmake sure that the brakes are operating correctly.c. Removing a Quick Release Rear Wheel(1) Shift the rear derailleur to high gear (the smallest,outermost rear sprocket).(2) If your bike has rim brakes, disengage the brake’squick-release mechanism to open the clearancebetween the wheel rim and the brake pads (see Section184.C, figs. 11 through 15).(3) Pull the derailleur body back with your right hand.(4) Move the quick-release lever to the OPEN position(fig. 7b).(5) Lift the rear wheel off the ground a few inchesand, with the derailleur still pulled back, push thewheel forward and down until it comes out of therear dropouts.d. Installing a Quick Release Rear WheelNOTE: If your bike is equipped with disk brakes, be carefulnot to damage the disk, caliper or brake pads when reinsertingthe disk into the caliper. Never activate a diskbrake’s control lever unless the disk is correctly insertedin the caliper.(1) Make sure that the rear derailleur is still in itsoutermost, high gear, position(2) Pull the derailleur body back with your right hand.(3) Move the quick-release lever to the OPEN position(see fig. 6). The lever should be on the side of the wheelopposite the derailleur and freewheel sprockets.(4) Put the chain on top of the smallest freewheelsprocket. Then, insert the wheel into the frame dropoutsand pull it all the way in to the dropouts.(5) Tighten the quick-release adjusting nut until it isfinger tight against the frame dropout; then swing thelever toward the front of the bike until it is parallel to theframe’s chainstay or seatstay and is curved toward thewheel (fig. 7a & fig. 8). To apply enough clamping force,you should have to wrap your fingers around a frame
3. Before you ride the bike, first check that the seatpostis securely clamped.Adjusting The Seatpost Quick Release MechanismThe action of the quick release cam squeezes the seatcollar around the seat post to hold the seat post securelyin place. The amount of clamping force is controlled bythe tension adjusting nut. Turning the tension adjustingnut clockwise while keeping the cam lever from rotatingincreases clamping force; turning it counterclockwisewhile keeping the cam lever from rotating reducesclamping force. Less than half a turn of the tensionadjusting nut can make the difference between safeand unsafe clamping force.! WARNING: The full force of the cam action is neededto clamp the seatpost securely. Holding the nut with onehand and turning the lever like a wing nut with the otherhand until everything is as tight as you can get it will notclamp the seatpost safely.! WARNING: If you can fully close the quick releasewithout wrapping your fingers around the seat post or aframe tube for leverage, and the lever does not leavea clear imprint in the palm of your hand, the tension isinsufficient. Open the lever; turn the tension adjusting nutclockwise a quarter turn; then try again.C. Brakes! WARNING:1. Riding with improperly adjusted brakes or worn21brake pads is dangerous and can result in serious injuryor death.2. Applying brakes too hard or too suddenly can lockup a wheel, which could cause you to lose control andfall. Sudden or excessive application of the front brakemay pitch the rider over the handlebars, which mayresult in serious injury or death.3. Some bicycle brakes, such as disc brakes (fig. 11)and linear-pull brakes (fig.12), are extremely powerful.Take extra care in becoming familiar with these brakesand exercise particular care when using them.4. Disc brakes can get extremely hot with extendeduse. Be careful not to touch a disc brake until it has hadplenty of time to cool.5. See the brake manufacturer’s instructions forinstallation, operation and care of your brakes. If you donot have the manufacturer’s instructions, see your dealeror contact the brake manufacturer.1. Brake Controls And FeaturesIt’s very important to your safety that you learn andremember which brake lever controls which brake onyour bike.Make sure that your hands can reach and squeezethe brake levers comfortably. If your hands are toosmall to operate the levers comfortably, consult yourdealer before riding the bike. The lever reach maybe adjustable; or you may need a different brakelever design.Most brakes have some form of quick-releasemechanism to allow the brake pads to clear the tirewhen a wheel is removed or reinstalled. When the brakequick release is in the open position, the brakes are
inoperative. Ask your dealer to makesure that you understand the way thebrake quick release works on your bike(see figs. 11. 12, 13. 14 & 15) and checkeach time to make sure both brakeswork correctly before you get on thebike.2. How Brakes WorkThe braking action of a bicycle isa function of the friction between thebrake surfaces — usually the brakepads and the wheel rim. To makesure that you have maximum frictionavailable, keep your wheel rims andbrake pads clean and free of dirt,lubricants, waxes or polishes.Brakes are designed to controlyour speed, not just to stop the bike.Maximum braking force for eachwheel occurs at the point just beforethe wheel “locks up” (stops rotating)and starts to skid. Once the tire skids,you actually lose most of your stoppingforce and all directional control. Youneed to practice slowing and stoppingsmoothly without locking up a wheel.The technique is called progressivebrake modulation. Instead of jerkingthe brake lever to the position whereyou think you’ll generate appropriatebraking force, squeeze the lever,progressively increasing the brakingforce. If you feel the wheel begin to lock up, releasepressure just a little to keep the wheel rotating just short oflockup. It’s important to develop a feel for the amount ofbrake lever pressure required for each wheel at differentspeeds and on different surfaces. To better understandthis, experiment a little by walking your bike and applyingdifferent amounts of pressure to each brake lever, untilthe wheel locks.When you apply one or both brakes, the bikebegins to slow, but your body wants to continue atthe speed at which it was going. This causes a transferof weight to the front wheel (or, under heavy braking,around the front wheel hub, which could send youflying over the handlebars).A wheel with more weight on it will accept greaterbrake pressure before lockup; a wheel with less weightwill lock up with less brake pressure. So, as you applybrakes and your weight is transferred forward, you needto shift your body toward the rear of the bike, to transferweight back on to the rear wheel; and at the same time,you need to both decrease rear braking and increasefront braking force. This is even more important ondescents, because descents shift weight forward.Two keys to effective speed control and safestopping are controlling wheel lockup and weighttransfer. This weight transfer is even more pronouncedif your bike has a front suspension fork. Front suspension“dips” under braking, increasing the weight transfer (seealso Section 4.F). Practice braking and weight transfertechniques where there is no traffic or other hazardsand distractions.Everything changes when you ride on loose surfacesor in wet weather. Tire adhesion is reduced, so the wheels22
have less cornering and braking traction and can lockup with less brake force. Moisture or dirt on the brakepads reduces their ability to grip. The way to maintaincontrol on loose or wet surfaces is to go more slowly tobegin with.D. Shifting GearsYour multi-speed bicycle will have a derailleurdrivetrain (see 2. below), an internal gear hub drivetrain(see 3. below) or, in some special cases, a combinationof the two.1. How A Derailleur Drivetrain WorksIf your bicycle has a derailleur drivetrain, the gearchangingmechanism will have:• a rear cassette or freewheel sprocket cluster• a rear derailleur• usually a front derailleur• one or two shifters• one, two or three front sprockets called chainrings• a drive chaina. Shifting GearsThere are several different types and styles of shiftingcontrols: levers, twist grips, triggers, combination shift/brake controls, push-buttons, and so on. Ask your dealerto explain the type of shifting controls that are on yourbike, and to show you how they work.The vocabulary of shifting can be pretty confusing.A downshift is a shift to a “lower” or “slower” gear, onewhich is easier to pedal. An upshift is a shift to a “higher”23or “faster”, harder to pedal gear. What’s confusing is thatwhat’s happening at the front derailleur is the opposite ofwhat’s happening at the rear derailleur (for details, readthe instructions on Shifting the Rear Derailleur and Shiftingthe Front Derailleur below). For example, you can selecta gear which will make pedaling easier on a hill (make adownshift) in one of two ways: shift the chain down thegear “steps” to a smaller gear at the front, or up the gear“steps” to a larger gear at the rear. So, at the rear gearcluster, what is called a downshift looks like an upshift.The way to keep things straight is to remember thatshifting the chain in towards the centerline of the bike isfor accelerating and climbing and is called a downshift.Moving the chain out or away from the centerline of thebike is for speed and is called an upshift.Whether upshifting or downshifting, the bicyclederailleur system design requires that the drive chain bemoving forward and be under at least some tension. Aderailleur will shift only if you are pedaling forward.! CAUTION: Never move the shifter while pedalingbackward, nor pedal backwards immediately afterhaving moved the shifter. This could jam the chain andcause serious damage to the bicycle.b. Shifting The Rear DerailleurThe rear derailleur is controlled by the right shifter.The function of the rear derailleur is to move thedrive chain from one gear sprocket to another. Thesmaller sprockets on the gear cluster produce highergear ratios. Pedaling in the higher gears requires greaterpedaling effort, but takes you a greater distance witheach revolution of the pedal cranks. The larger sprockets
produce lower gear ratios. Using them requires lesspedaling effort, but takes you a shorter distance witheach pedal crank revolution. Moving the chain from asmaller sprocket of the gear cluster to a larger sprocketresults in a downshift. Moving the chain from a largersprocket to a smaller sprocket results in an upshift. In orderfor the derailleur to move the chain from one sprocket toanother, the rider must be pedaling forward.c. Shifting The Front Derailleur:The front derailleur, which is controlled by the left shifter,shifts the chain between the larger and smaller chainrings.Shifting the chain onto a smaller chainring makes pedalingeasier (a downshift). Shifting to a larger chainring makespedaling harder (an upshift).d. Which Gear Should I Be In?The combination of largest rear and smallest front gears(fig. 16) is for the steepest hills. Thesmallest rear and largest frontcombination (fig. 21) is for thegreatest speed. It is not necessaryto shift gears in sequence.Instead, find the “starting gear”which is right for your level ofability — a gear which is hardenough for quick accelerationbut easy enough to let you startfrom a stop without wobbling— and experiment with upshiftingand downshifting to get a feel forthe different gear combinations.At first, practice shifting wherethere are no obstacles, hazards or24other traffic, until you’ve built up your confidence. Learnto anticipate the need to shift, and shift to a lower gearbefore the hill gets too steep. If you have difficulties withshifting, the problem could be mechanical adjustment.See your dealer for help.! WARNING: Never shift a derailleur onto the largestor the smallest sprocket if the derailleur is not shiftingsmoothly. The derailleur may be out of adjustment and thechain could jam, causing you to lose control and fall.2. How An Internal Gear Hub Drivetrain WorksIf your bicycle has an internal gear hub drivetrain, thegear changing mechanism will consist of:• a 3, 5, 7 or possibly 12 speed internal gear hub• one, or sometimes two shifters• one or two control cables• one front sprocket called a chainring• a drive chaina. Shifting Internal Gear Hub GearsShifting with an internal gear hub drivetrain is simplya matter of moving the shifter to the indicated positionfor the desired gear. After you have moved the shifterto the gear position of your choice, ease the pressureon the pedals for an instant to allow the hub tocomplete the shift.b. Which Gear Should I Be In?The numerically lowest gear (1) is for the steepest hills.The numerically largest gear (3, 5, 7 or 12, depending on thenumber of speeds of your hub) is for the greatest speed.Shifting from an easier, “slower” gear (like 1) to a
harder, “faster” gear (like 2 or 3) is called an upshift.Shifting from a harder, “faster” gear to an easier, “slower”gear is called a downshift. It is not necessary to shiftgears in sequence. Instead, find the “starting gear” forthe conditions — a gear which is hard enough for quickacceleration but easy enough to let you start from a stopwithout wobbling — and experiment with upshifting anddownshifting to get a feel for the different gears. At first,practice shifting where there are no obstacles, hazards orother traffic, until you’ve built up your confidence. Learnto anticipate the need to shift, and shift to a lower gearbefore the hill gets too steep. If you have difficulties withshifting, the problem could be mechanical adjustment.See your dealer for help.E. Pedals1. Toe Overlap is when your toe can touch the frontwheel when you turn the handlebars to steer while apedal is in the forwardmost position. This is commonon small-framed bicycles, and is avoided by keepingthe inside pedal up and the outside pedal down whenmaking sharp turns. This technique will also prevent theinside pedal from striking the ground in a turn.! WARNING: Toe Overlap could cause you to losecontrol and fall. Ask your dealer to help you determine ifthe combination of frame size, crank arm length, pedaldesign and shoes you will use results in pedal overlap.If you have overlap, you must keep the inside pedal upand the outside pedal down when making sharp turns.2. Some bicycles come equipped with pedals that25have sharp and potentially dangerous surfaces. Thesesurfaces are designed to add safety by increasing gripbetween the rider’s shoe and the pedal. If your bicyclehas this type of high-performance pedal, you must takeextra care to avoid serious injury from the pedals’ sharpsurfaces. Based on your riding style or skill level, you mayprefer a less aggressive pedal design, or chose to ridewith shin pads. Your dealer can show you a number ofoptions and make suitable recommendations.3. Toeclips and straps are a means to keep feetcorrectly positioned and engaged with the pedals.The toeclip positions the ball of the foot over the pedalspindle, which gives maximum pedaling power. Thetoe strap, when tightened, keeps the foot engagedthroughout the rotation cycle of the pedal. While toeclipsand straps give some benefit with any kind of shoe, theywork most effectively with cycling shoes designed for usewith toeclips. Your dealer can explain how toeclips andstraps work. Shoes with deep treaded soles or welts whichmight allow the foot to be trapped should not be usedwith toeclips and straps.! WARNING: Getting into and out of pedals withtoeclips and straps requires skill which can only beacquired with practice. Until it becomes a reflex action,the technique requires concentration which can distractyour attention and cause you to lose control and fall.Practice the use of toeclips and straps where there are noobstacles, hazards or traffic. Keep the straps loose, anddon’t tighten them until your technique and confidencein getting in and out of the pedals warrants it. Never ridein traffic with your toe straps tight.
4. Clipless pedals (sometimes called “step-in pedals”)are another means to keep feet securely in the correctposition for maximum pedaling efficiency. They have aplate, called a “cleat,” on the sole of the shoe, whichclicks into a mating spring-loaded fixture on the pedal.They only engage or disengage with a very specificmotion which must be practiced until it becomesinstinctive. Clipless pedals require shoes and cleats whichare compatible with the make and model pedal beingused.Many clipless pedals are designed to allow the riderto adjust the amount of force needed to engage ordisengage the foot. Follow the pedal manufacturer’sinstructions, or ask your dealer to show you how to makethis adjustment. Use the easiest setting until engagingand disengaging becomes a reflex action, but alwaysmake sure that there is sufficient tension to preventunintended release of your foot from the pedal.If you do not have the manufacturer’s instructions, seeyour dealer or contact the manufacturer.F. Bicycle SuspensionMany bicycles are equipped with suspension systems.There are many different types of suspension systems— too many to deal with individually in this <strong>Manual</strong>. Ifyour bicycle has a suspension system of any kind, besure to read and follow the suspension manufacturer’ssetup and service instructions. If you do not have themanufacturer’s instructions, see your dealer or contactthe manufacturer.! WARNING: Failure to maintain, check and properlyadjust the suspension system may result in suspensionmalfunction, which may cause you to lose control andfall.! WARNING: Clipless pedals are intended for use withshoes specifically made to fit them and are designed tofirmly keep the foot engaged with the pedal. Using shoeswhich do not engage the pedals correctly is dangerous.Practice is required to learn to engage and disengagethe foot safely. Until engaging and disengaging thefoot becomes a reflex action, the technique requiresconcentration which can distract your attention andcause you to lose control and fall. Practice engagingand disengaging clipless pedals in a place where thereare no obstacles, hazards or traffic; and be sure to followthe pedal manufacturer’s setup and service instructions.26If your bike has suspension, the increased speedyou may develop also increases your risk of injury. Forexample, when braking, the front of a suspendedbike dips. You could lose control and fall if you do nothave experience with this system. Learn to handle yoursuspension system safely. See also Section 4.C.! WARNING: Changing suspension adjustment canchange the handling and braking characteristics of yourbicycle. Never change suspension adjustment unlessyou are thoroughly familiar with the suspension systemmanufacturer’s instructions and recommendations, andalways check for changes in the handling and braking
characteristics of the bicycle after a suspension adjustmentby taking a careful test ride in a hazard-free area.Suspension can increase control and comfort byallowing the wheels to better follow the terrain. Thisenhanced capability may allow you to ride faster; butyou must not confuse the enhanced capabilities of thebicycle with your own capabilities as a rider. Increasingyour skill will take time and practice. Proceed carefullyuntil you have learned to handle the full capabilities ofyour bike.! CAUTION: Not all bicycles can be safely retrofittedwith some types of suspension systems. Before retrofittinga bicycle with any suspension, check with the bicycle’smanufacturer to make sure that what you want to do iscompatible with the bicycle’s design.G. Tires and Tubes1. TiresBicycle tires are available in many designs andspecifications, ranging from general-purpose designsto tires designed to perform best under very specificweather or terrain conditions. If, once you’ve gainedexperience with your new bike, you feel that a differenttire might better suit your riding needs, your dealer canhelp you select the most appropriate design.The size, pressure rating, and on some highperformancetires the specific recommended use, aremarked on the sidewall of the tire (see fig. 17). The partof this information which is most important to you is TirePressure.! WARNING: Never inflate a tirebeyond the maximum pressuremarked on the tire’s sidewall.Exceeding the recommendedmaximum pressure may blow thetire off the rim, which could causedamage to the bike and injury tothe rider and bystanders.The best and safest way toinflate a bicycle tire to the correctpressure is with a bicycle pumpwhich has a built-in pressure gauge.! WARNING: There is a safety risk in using gas stationair hoses or other air compressors. They are not madefor bicycle tires. They move a large volume of air veryrapidly, and will raise the pressure in your tire very rapidly,which could cause the tube to explode.Tire pressure is given either as maximum pressureor as a pressure range. How a tire performs underdifferent terrain or weather conditions depends largelyon tire pressure. Inflating the tire to near its maximumrecommended pressure gives the lowest rollingresistance; but also produces the harshest ride. Highpressures work best on smooth, dry pavement.Very low pressures, at the bottom of the recommendedpressure range, give the best performance on smooth,slick terrain such as hard-packed clay, and on deep,loose surfaces such as deep, dry sand.27
Tire pressure that is too low for your weight and the ridingconditions can cause a puncture of the tube by allowing thetire to deform sufficiently to pinch the inner tube between therim and the riding surface.! CAUTION: Pencil type automotive tire gauges can beinaccurate and should not be relied upon for consistent,accurate pressure readings. Instead, use a high quality dialgauge.Ask your dealer to recommend the best tire pressure forthe kind of riding you will most often do, and have the dealerinflate your tires to that pressure. Then, check inflation asdescribed in Section 1.C so you’ll know how correctly inflatedtires should look and feel when you don’t have access to agauge. Some tires may need to be brought up to pressureevery week or two.Some special high-performance tires have unidirectionaltreads: their tread pattern is designed to work better inone direction than in the other. The sidewall marking of aunidirectional tire will have an arrow showing the correctrotation direction. If your bike has unidirectional tires, be surethat they are mounted to rotate in the correct direction.2. Tire ValvesThere are primarily two kinds of bicycle tube valves: TheSchraeder Valve and the Presta Valve. The bicycle pump youuse must have the fitting appropriate to the valve stems onyour bicycle.The Schraeder valve (fig. 18) is like the valve on a car tire.To inflate a Schraeder valve tube, remove the valve cap andclamp the pump fitting onto the end of the valve stem. Tolet air out of a Schraeder valve, depress the pin in the end28of the valve stem withthe end of a key or otherappropriate object.The Presta valve(fig. 18) has a narrowerdiameter and is onlyfound on bicycle tires.To inflate a Presta valvetube using a Prestaheaded bicycle pump, remove the valve cap; unscrew(counterclockwise) the valve stem lock nut; and push downon the valve stem to free it up. Then push the pump headon to the valve head, and inflate. To inflate a Presta valvewith a Schraeder pump fitting, you’ll need a Presta adapter(available at your bike shop) which screws on to the valvestem once you’ve freed up the valve. The adapter fits intothe Schraeder pump fitting. Close the valve after inflation.To let air out of a Presta valve, open up the valve stem locknut and depress the valve stem.! WARNING: Patching a tube is an emergency repair. If youdo not apply the patch correctly or apply several patches,the tube can fail, resulting in possible tube failure, whichcould cause you to loose control and fall. Replace a patchedtube as soon as possible.5. Service! WARNING: Technological advances have made bicyclesand bicycle components more complex, and the pace ofinnovation is increasing. It is impossible for this manual to
provide all the information required to properly repairand/or maintain your bicycle. In order to help minimizethe chances of an accident and possible injury, it iscritical that you have any repair or maintenance whichis not specifically described in this manual performedby your dealer. Equally important is that your individualmaintenance requirements will be determined byeverything from your riding style to geographic location.Consult your dealer for help in determining yourmaintenance requirements.! WARNING: Many bicycle service and repair tasksrequire special knowledge and tools. Do not begin anyadjustments or service on your bicycle until you havelearned from your dealer how to properly complete them.Improper adjustment or service may result in damage tothe bicycle or in an accident which can cause seriousinjury or death.If you want to learn to do major service and repairwork on your bike, you have three options:1. Ask your dealer for copies of the manufacturer’sinstallation and service instructions for the componentson your bike, or contact the component manufacturer.2. Ask your dealer to recommend a book onbicycle repair.3. Ask your dealer about the availability of bicyclerepair courses in your area.Regardless of which option you select, we recommendthat you ask your dealer to check the quality of yourwork the first time you work on something and before youride the bike, just to make sure that you did everything29correctly. Since that will require the time of a mechanic,there may be a modest charge for this service.A. Service IntervalsSome service and maintenance can and should beperformed by the owner, and require no special tools orknowledge beyond what is presented in this manual.The following are examples of the type of service youshould perform yourself. All other service, maintenanceand repair should be performed in a properly equippedfacility by a qualified bicycle mechanic using the correcttools and procedures specified by the manufacturer.1. Break-in Period: Your bike will last longer and workbetter if you break it in before riding it hard. Controlcables and wheel spokes may stretch or “seat” whena new bike is first used and may require readjustmentby your dealer. Your Mechanical Safety Check (Section1.C) will help you identify some things that needreadjustment. But even if everything seems fine toyou, it’s best to take your bike back to the dealer for acheckup. Dealers typically suggest you bring the bikein for a 30 day checkup. Another way to judge whenit’s time for the first checkup is to bring the bike in afterthree to five hours of hard off-road use, or about 10 to 15hours of on-road or more casual off-road use. But if youthink something is wrong with the bike, take it to yourdealer before riding it again.2. Before every ride: Mechanical Safety Check(Section 1.C)3. After every long or hard ride: if the bike has beenexposed to water or grit; or at least every 100 miles:
Clean the bike and lightly oil the chain. Wipe off excessoil. Lubrication is a function of climate. Talk to yourdealer about the best lubricants and the recommendedlubrication frequency for your area.4. After every long or hard ride or after every 10 to 20hours of riding:• Squeeze the front brake and rock the bike forwardand back. Everything feel solid? If you feel a clunk witheach forward or backward movement of the bike,you probably have a loose headset. Have your dealercheck it.• Lift the front wheel off the ground and swing it fromside to side. Feel smooth? If you feel any binding orroughness in the steering, you may have a tight headset.Have your dealer check it.• Grab one pedal and rock it toward and away fromthe centerline of the bike; then do the same with theother pedal. Anything feel loose? If so, have your dealercheck it.• Take a look at the brake pads. Starting to look wornor not hitting the wheel rim squarely? Time to have thedealer adjust or replace them.• Carefully check the control cables and cablehousings. Any rust? Kinks? Fraying? If so, have your dealerreplace them.• Squeeze each adjoining pair of spokes on either sideof each wheel between your thumb and index finger. Dothey all feel about the same? If any feel loose, have yourdealer check the wheel for tension and trueness.• Check to make sure that all parts and accessoriesare still secure, and tighten any which are not.• Check the frame, particularly in the area around alltube joints; the handlebars; the stem; and the seatpost30for any deep scratches, cracks or discoloration. These aresigns of stress-caused fatigue and indicate that a part isat the end of its useful life and needs to be replaced.! WARNING: Like any mechanical device, a bicycleand its components are subject to wear and stress.Different materials and mechanisms wear or fatigue fromstress at different rates and have different life cycles. Ifa component’s life cycle is exceeded, the componentcan suddenly and catastrophically fail, causing seriousinjury or death to the rider. Scratches, cracks, frayingand discoloration are signs of stress-caused fatigue andindicate that a part is at the end of its useful life and needsto be replaced. While the materials and workmanshipof your bicycle or of individual components may becovered by a warranty for a specified period of time bythe manufacturer, this is no guarantee that the productwill last the term of the warranty. Product life is oftenrelated to the kind of riding you do and to the treatmentto which you submit the bicycle. The bicycle’s warranty isnot meant to suggest that the bicycle cannot be brokenor will last forever. It only means that the bicycle iscovered subject to the terms of the warranty.5. As required: If either brake lever fails the MechanicalSafety Check (Section 1.C), don’t ride the bike. Haveyour dealer check the brakes.If the chain won’t shift smoothly and quietly fromgear to gear, the derailleur is out of adjustment. Seeyour dealer.6. Every 25 (hard off-road) to 50 (on-road) hours of riding:Take your bike to your dealer for a complete checkup.B. If Your Bicycle Sustains An Impact:
First, check yourself for injuries, and take care of themas best you can. Seek medical help if necessary.Next, check your bike for damage. If you see anydamage, don’t ride the bike until it has been repaired.After any crash, take your bike to your dealer for athorough check.! WARNING: A crash or other impact can putextraordinary stress on bicycle components, causingthem to fatigue prematurely. Components suffering fromstress fatigue can fail suddenly and catastrophically,causing loss of control, serious injury or death.31
DIAMONDBACK bicycles are distributed by Raleigh America, Inc.Raleigh America, Inc. Bicycle Limited WarrantyIt is the owner’s responsibility to thoroughly read and understand the owner’s manual and regularly examine the product to determine the need for professional, authorized service or replacement. Please consultan authorized Raleigh America, Inc. bicycle dealership with any questions on use and maintenance. Regardless of the length of the warranty, Raleigh America, Inc. does not infer that the bicycle will last foreveror cannot be broken. All Raleigh/<strong>Diamondback</strong> framesets and bicycles have a finite, limited useful product life cycle. The length of this useful life cycle will vary by environment, riding conditions, frame materialand construction, riding style, maintenance, and the amount as well as type of use the bicycle or frame is subjected to. A worn out bicycle does not indicate it is warrantable, rather that the bicycle has outlived(exceeded) its useful product cycle.Raleigh America, Inc. warrants this new Raleigh America, Inc. bicycle frame against defects in material and workmanship, subject to the following limitations, terms, and conditions:ItemSteel bicycle frames with wheel size less than 20˝Steel bicycle frames with 20˝, 24˝, 26˝, or 700c wheelsAlloy bicycle frames with 20˝, 24˝, 26˝, or 700c wheelsFull Carbon Fiber or Carbon fiber/alloy bicycle frames with 20˝, 24˝, 26˝, or 700c wheelsFull Suspension bicycle framesForks, Non-brandedForks, BrandedComponents, Non-brandedComponents, BrandedFinish and decalsSuspension parts including but not limited to bushings, pivot bearing, link plates,bolts, fasteners, chain stays, seat stays, and shock unitsLabor, frame replacementLabor, parts replacement32Warranty Term LengthLifetime, for as long as the original retail purchaser owns the bicycle*Lifetime, for as long as the original retail purchaser owns the bicycle*Lifetime, for as long as the original retail purchaser owns the bicycle*Lifetime, for as long as the original retail purchaser owns the bicycle*Five years from the date of original retail purchase to the original purchaser*Five years from the date of original retail purchaseCovered under the fork manufacturer’s warranty. Consult dealer for details.One year from the date of original retail purchaseCovered under the component manufacturer’s warranty. Consult dealer for details.One year from the date of original retail purchaseOne year from the date of original retail purchase under the condition that thebicycle is regularly maintained as well as operated under normal riding conditionsOne year from the date of original retail purchaseThirty days from the date of original retail purchase1. This warranty only applies to the original retail purchaser and is not transferable.2. Specific model exceptions to this warranty are noted with the bicycle documentation.3. Raleigh America, Inc.’s sole obligation during the acceptable duration of this warranty is, AT RALEIGH AMERICA, INC.’S OPTION, to repair or replace the product with a current item that is equivalent inconstruction, design, or value.4. Raleigh America, Inc.’s liability under this limited warranty shall never exceed the amount of the original purchase.To obtain service under this warranty, you must:1. Return your fully assembled Raleigh America, Inc. bicycle to an authorized Raleigh America, Inc. bicycle dealer within the United States of America.A bicycle that has had the components removed can not be evaluated or warranted.*2. Provide proof of purchase, including but not limited to the retail bill of sale, your credit or debit card receipt, or other satisfactory proof of the date of purchase.3. The proof of purchase must indicate the bicycle was sold fully assembled and adjusted by an authorized Raleigh America, Inc. dealer within the United States of America.Sales where the bicycle was delivered in a carton to the end user (e.g. mail order or Internet sales) void the warranty.This warranty does not apply to damage or failure due to:1. Accidents, alteration, abuse, neglect.2. Materials fatigue, normal wear and tear.3. Improper assembly, maintenance, or installation of parts or accessories not originally intended to be compatible with the bicycle as sold, including but not limited to power assist accessories, forks,brakes, or tires different from original specification.This warranty also excludes:1. Commercial use, racing or competition, stunting, jumping, trick riding, ramp riding, aggressive riding, riding with excessive loads, lack of technical skill, competence, or experience of the user.2. Bicycle frames, which have been repaired (e.g. welded or bonded), repainted, or had the original decals removed.3. Frames, forks, wheels, axles, handlebars, and stems, which are bent from just riding along, can be a sign of misuse or abuse and are not covered under this warranty.4. Personal transportation costs or product freight costs to or from an authorized Raleigh America, Inc. bicycle dealer.5. Any additional costs associated with the incompatibility of existing parts and the replacement frame or fork.Warranty replacement frames must be fully assembled by an authorized dealer to maintain the warranty coverage. The warranty for the replacement frame shall be the warranty offered for the equivalent bicycle’sframe of that model year. If not assembled by the dealer, replacement frames are considered aftermarket frames. After market frames are only warranted for one year from the date of purchase for the originalpurchaser. This one-year warranty excludes any issues that can be traced to assembly or component incompatibility.This warranty is expressly in lieu of all other warranties, and any implied warranties of merchantability or fitness for a particular purpose created hereby, are limited to the same duration as the express warrantyherein. Raleigh America, Inc. shall not be liable for any incidental or consequential damages. Some states do not allow the exclusion or limitations of implied warranties, incidental or consequential, so the abovelimitations and exclusions may not apply to you.Retailers and wholesale outlets for Raleigh America, Inc. products are not authorized to modify this warranty in any way.This warranty gives the original owner specific legal rights. Other additional rights may vary from state to state.Raleigh America, Inc.6004 S. 190th Street, Suite 101Kent, WA 98032 USA - Phone: 253-395-1100warranty revised: 03/25/05