
Create successful ePaper yourself
Turn your PDF publications into a flip-book with our unique Google optimized e-Paper software.
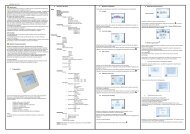
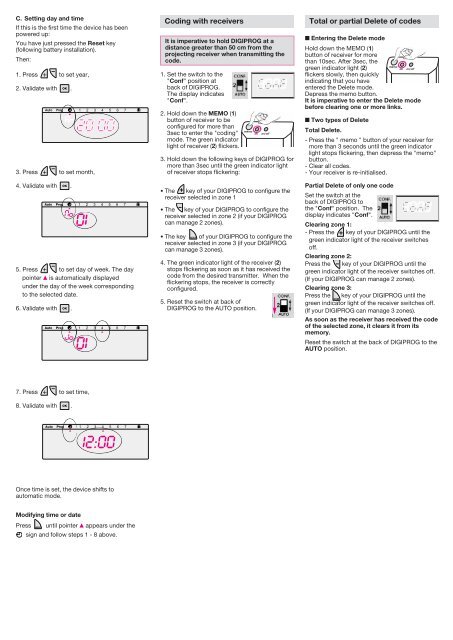
C. Setting day and time<br />
If this is the first time the device has been<br />
powered up:<br />
You have just pressed the Reset key<br />
(following battery installation).<br />
Then:<br />
-<br />
1. Press + to set year,<br />
2. Validate with OK .<br />
Auto Prog<br />
-<br />
3. Press + to set month,<br />
4. Validate with OK .<br />
Auto Prog<br />
-<br />
5. Press + to set day of week. The day<br />
pointer ▲ is automatically displayed<br />
under the day of the week corresponding<br />
to the selected date.<br />
6. Validate with OK .<br />
Auto Prog<br />
-<br />
7. Press + to set time,<br />
8. Validate with OK .<br />
Auto Prog<br />
Once time is set, the device shifts to<br />
automatic mode.<br />
Modifying time or date<br />
1 2 3 4 5 6 7<br />
1 2 3 4 5 6 7<br />
1 2 3 4 5 6 7<br />
1 2 3 4 5 6 7<br />
Press MODE until pointer ▲ appears under the<br />
sign and follow steps 1 - 8 above.<br />
Coding with receivers Total or partial Delete of codes<br />
It is imperative to hold DIGIPROG at a<br />
distance greater than 50 cm from the<br />
projecting receiver when transmitting the<br />
code.<br />
1. Set the switch to the<br />
"Conf" position at<br />
back of DIGIPROG.<br />
The display indicates<br />
"Conf".<br />
2. Hold down the MEMO (1)<br />
button of receiver to be<br />
configured for more than<br />
3sec to enter the "coding"<br />
mode. The green indicator<br />
light of receiver (2) flickers.<br />
3. Hold down the following keys of DIGIPROG for<br />
more than 3sec until the green indicator light<br />
of receiver stops flickering:<br />
• The + key of your DIGIPROG to configure the<br />
receiver selected in zone 1<br />
-<br />
mémo<br />
ok on/off<br />
• The key of your DIGIPROG to configure the<br />
receiver selected in zone 2 (if your DIGIPROG<br />
can manage 2 zones).<br />
• The key MODE of your DIGIPROG to configure the<br />
receiver selected in zone 3 (if your DIGIPROG<br />
can manage 3 zones).<br />
4. The green indicator light of the receiver (2)<br />
stops flickering as soon as it has received the<br />
code from the desired transmitter. When the<br />
flickering stops, the receiver is correctly<br />
configured.<br />
5. Reset the switch at back of<br />
DIGIPROG to the AUTO position.<br />
■ Entering the Delete mode<br />
Hold down the MEMO (1)<br />
button of receiver for more<br />
than 10sec. After 3sec, the<br />
mémo<br />
green indicator light (2)<br />
ok<br />
on/off<br />
flickers slowly, then quickly<br />
indicating that you have<br />
entered the Delete mode.<br />
Depress the memo button.<br />
It is imperative to enter the Delete mode<br />
before clearing one or more links.<br />
■ Two types of Delete<br />
Total Delete.<br />
- Press the " memo " button of your receiver for<br />
more than 3 seconds until the green indicator<br />
light stops flickering, then depress the "memo"<br />
button.<br />
- Clear all codes.<br />
- Your receiver is re-initialised.<br />
Partial Delete of only one code<br />
Set the switch at the<br />
back of DIGIPROG to<br />
the "Conf" position. The<br />
display indicates "Conf".<br />
Clearing zone 1:<br />
- Press the + key of your DIGIPROG until the<br />
green indicator light of the receiver switches<br />
off.<br />
Clearing zone 2:<br />
Press the - key of your DIGIPROG until the<br />
green indicator light of the receiver switches off.<br />
(If your DIGIPROG can manage 2 zones).<br />
Clearing zone 3:<br />
Press the key of your DIGIPROG until the<br />
MODE<br />
green indicator light of the receiver switches off.<br />
(If your DIGIPROG can manage 3 zones).<br />
As soon as the receiver has received the code<br />
of the selected zone, it clears it from its<br />
memory.<br />
Reset the switch at the back of DIGIPROG to the<br />
AUTO position.