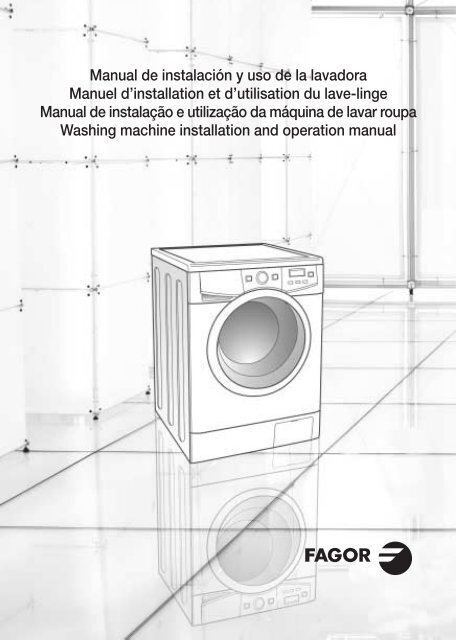
washing machine - Fagor
washing machine - Fagor
washing machine - Fagor
- No tags were found...

You also want an ePaper? Increase the reach of your titles
YUMPU automatically turns print PDFs into web optimized ePapers that Google loves.
<strong>washing</strong> <strong>machine</strong>specificationsPowercordWork topDetergentdispenserControlpanelDrain hoseStainlesssteeldrumHatchFilterLevellingfeetKickplateACCESSORIES LOCATEDINSIDE THE DRUMSpannerRear plugsDrain pipe benderWater inlet hose71
<strong>washing</strong> <strong>machine</strong>installation and assembly1UNPACKING ANDUNBLOCKING THEWASHING MACHINEaUNPACKINGa Remove the base, corner protectors andtop cover.UNBLOCKINGa There are 3 blocking screws on the backof the <strong>washing</strong> <strong>machine</strong>.b Use the spanner supplied to loosen andcompletely remove the 3 screws togetherwith the metal washer and the blackrubber and plastic tubes that make upthe blocking system.c Fit the 3 plastic plugs supplied in theholes you removed the screws from.cImportantDo not throw the blocking screws away.You may need to move the <strong>washing</strong><strong>machine</strong> at a later date.72
2 USING DETERGENT AND ADDITIVESusing the appliance and practical tipsaDETERGENTAND ADDITIVESYour <strong>washing</strong> <strong>machine</strong>’s detergentdispenser has three compartments.abIf you are going to use liquid detergentyou must close the wash compartmentflap. Take the blue tab protruding fromthe bottom of the compartment between2 fingers and pull outwards as far as itwill go. Release the flap and it will remainin the vertical position and prevent theliquid detergent from getting out. It mustbe open for powdered detergent. Put itin the horizontal position, pressing thetop tab with your finger and pushing itback as far as it will go.bWASHFABRIC SOFTENERPREWASHcPut the detergent, either liquid or powder,or additive into the detergent dispenserbefore starting the wash programme.ImportantThe liquid level must never be higherthan the MAX mark printed on thedispenser wall.Remember that the amount of detergent tobe used will always depend on:The amount of clothes to be washed.How heavily the clothes are soiled.The water hardness (information aboutwater hardness is available from the relevantlocal authorities).cImportantWe recommend the use of adecalcifying product if the waterhardness is high in your area.eco-noteRemember that concentrated detergentsexist which are more environment- andnature-friendly.The use of more detergent thannecessary will not improve your<strong>washing</strong> results, and apart from costing youmoney it will have a negative effect onthe preservation of the environment.We therefore recommend you followthe detergent manufacturer’sinstructions.77
3SELECTING THE WASHPROGRAMMEusing the appliance and practical tipsscreendoor openingbuttonON/OFFbuttonprogrammeselectorstart/pausebuttonspin andanti-creasebuttontimedelaybuttonadditionalfunctionbuttonscreenspinbuttontimedelaybuttonadditionalfunctionbuttonabTo select a wash programme, proceed asfollows:abcSwitch the <strong>washing</strong> <strong>machine</strong> on bypressing ON / OFF.Activate the programme selector bypressing it to release it (depending onthe model).Select the wash programme by turningthe programme selector (see programmetable).c78
using the appliance and practical tipsWhen you select the programme, the followinginformation will be displayed:11 Wash programme phases:PrewashWashRinseSpin-drying2. No. of revolutions3. Programme No. (for a few seconds)and then its duration.2 31Additional functionsEasy ironExtra rinseIntensive wash2 3There are 3 types of programmes:Normal programmesDelicate programmesSpecial programmesNormal Delicate Special1 Cold2 Quick 30’3 30ºC4 40ºC5 60ºC6 Stains/prew. 60ºCPROGRAMMES789Combined 40ºCCold30ºC10 Antibacteria 90ºC11 Quilt 30ºC12 Curtains 30ºC13 Hand wash14 Quick 15’15 Rinse16 Spin-dryingeco-noteWe recommend you choose a washprogramme without prewash wheneverpossible. This will save you money and helpprotect the environment.79
ProgrammeRecommendedtemperatureFabric typeExtrarinsePossible option buttonsIntensivewashEasy-ironSpin speedselectionNo spinAnti-creasecl1ColdColdCotton/Linendelicate coloursvery light soilYESNormal programmes2345 (*)Quick 30’30ºC40ºC60ºC30304060Cotton/Linenwhites/coloursvery light soilCotton/Linendelicate colourslight soilCotton/Linenfast colourslight soilCotton/Linenfast coloursmedium soilYES NO YESYESYESYES6Stains/prew. 60ºC60Cotton/Linenwhites/fast coloursheavy soilYESDelicate programmes789Combined 40ºCCold30ºC4030Cold4030Synthetic/mix cottondelicate coloursmedium soilSyntheticdelicate coloursvery light soilSyntheticdelicate colourslight soilYESYESYES10Antibacteria 90ºC90Cotton/Linenwhitesheavy soilYES11Quilt 30ºC30Quilt/mix cottonwhite/fast coloursmedium soilYESSpecial programmes121314Curtains 30ºCHand washQuick 15’30ColdColdCurtains/wool mixwhite/colourlight soilWool/wool mixwhite/colourvery light soilSynthetic/mix cottonwhite/fast colourslight soilYESYESYESNONONOYESYESYES15Rinse_Cotton/cotton mixSynthetic/DelicateWool/wool mixYESNOYES16Spin-drying_Cotton/cotton mixSynthetic/DelicateWool/wool mixNOYESNO(*) Programme for wash and energy consumption assessment inaccordance with standard EN60456, press intensive wash button.80
Max.load ofclothes (Kg)WashproductcompartmentProgrammedescriptionTURBO TIME PLUSTotalconsumptionKWh/litresApprox.duration(minutes)8Normal wash, rinses,automatic additive absorptionif desired and long final spin0,10/59504SHORT wash, rinses,automatic additive absorptionif desired and final long spin0,20/303380,30/59528Normal wash, rinses,automatic additiveabsorption if desiredand long final spin0,60/595781,36/59808Prewash, normal wash, rinses,automatic additive absorptionif desired and long final spin1,50/6410040,40/455540,10/45504Delicate wash, rinses,automatic additiveabsorption if desiredand gentle final spin0,20/455082,20/6411041,00/457022WOOL wash, rinses,automatic additiveabsorption if desiredand gentle final spin0,45/550,05/5540302SHORT wash, one rinse,automatic additive absorptionif desired and final long spin0,05/22158Rinses, automaticadditive absorption ifdesired and long final spin0,05/25238_Drain and final long spin0,05/010NOTE: the KWh and litre consumptions and programme durations may vary dependingon the type and amount of clothes, mains water pressure, etc.81
4 SPIN SPEED SELECTIONusing the appliance and practical tipsSPIN DRYINGThe wash options must always be selected afterchoosing the wash programme. Any programmechange during selection cancels the previouslyselected options.a Spin speed selection and anti-creasebutton.The programme selected is associatedwith certain spin revolutions, as shownon the display.abbIt can be modified by pressing the spindrying button and the number ofrevolutions will be reduced by 100revolutions at a time to 400.cdcNo spinPress the spin button again to get to theno spin option. A programme without afinal spin. It is used to prevent creasingwhen <strong>washing</strong> special fabrics.dAnti-crease optionThe wash programme stops on the lastrinse, with the clothes left in water.When the function is deactivated, the<strong>washing</strong> <strong>machine</strong> continues theprogramme, draining and spin-drying.It is used, for example, when you are notat home and want to delay the spindryinguntil you get home, to prevent theclothes creasing after spin-drying andbeing left in the drum to be removed.aOPENINGTHE HATCHaDepending on the model, you can open thehatch by pressing the hatch opening button.bIf you cannot open the hatch due to abreakdown or a power cut, proceed as follows:remove the dispenser by pulling the handleoutwards and pressing the blue lever with yourfinger. A button with a slot will appear on theright. Turn the button to the left with the aid ofa coin and the hatch will open.bIf your model of Washing <strong>machine</strong> does nothave remote opening you have to await about2 minutes from the end of the programmebefore being able to open the hatch.82
6STARTING UP ANDBLOCK FUNCTION SELECTIONusing the applianceSTARTING UPStart/pause buttona To start up the <strong>washing</strong> <strong>machine</strong> youhave to press the start / pause button.The display will constantly show theminutes left until the wash is over.aBLOCK FUNCTIONBlock function selectionThe various buttons can be blocked to preventthem from being pressed and affecting theselected wash programme and options. Thiscan be used to stop children playing with thebuttons, etc.The block function should be activated afterthe wash programme has been selectedtogether with all its options.Activating the block functiona The block function is activated bypressing the start/pause button andholding it down for at least 3 seconds.The display will show if it is activated.abDeactivating the block functionb The block function is cancelled whenthe wash programme comes to an end.If you want to deactivate the blockfunction before the end of theprogramme, you have to hold the startbutton down again for at least 3 seconds.After 3 seconds, the block functionindicator will disappear from the display,and it will go into pause status.The ON/OFF button does not cancelthe block function.84
7 WASH PROGRAMME PHASES AND POWER CUTSusing the appliancePROGRAMMEPHASESWhen the programme is running you can seewhich phase it is at on the display, as well ashow long there is to the end of the programme.The active phases will appear successively atthe top of the display as the programmeprogresses. The time remaining until the end ofthe programme will also appear on the display.It updates at regular intervals, but not minute byminute.Any option button can be selected provided thewash phase in which it takes effect has not beenpassed and when the programme accepts theoption.Pressing the delay button during the wash hasno effect on the <strong>washing</strong> <strong>machine</strong>.Pressing the start/pause button during the washactivates the PAUSE function.ImportantIf you change the wash programme duringthe wash using the selector, the PAUSEfunction is activated and the programme iscancelled.If you need to add or remove a garment,press the start/pause button and make surethat the water level is not above the dooroverflow level and that the temperatureinside is not high. Press the start/pausebutton again to restart the wash from thesame cycle phase it had stopped at.POWER CUTSPOWER CUTSIf there is a power cut, when the electricitycomes back on the <strong>washing</strong> <strong>machine</strong> willcontinue to run from where it left off (it hasseveral hours of memory). The same will happenif the ON/OFF button is pressed.warningsLevel the <strong>washing</strong> <strong>machine</strong> by adjusting thefeet to reduce the noise caused by spin-drying.Try and wash clothes of different sizes in thesame wash programme to favour the distributionof the clothes inside the drum during spin-drying.All the models have a safety system for spin-dryingthat prevents spin-drying from being carried out if thedistribution of the clothes inside the drum is tooconcentrated. This prevents the appliance fromvibrating too much.If you find that the clothes are not properly wrung out,try spin-drying them again after having distributed theclothes more evenly in the drum.85
<strong>washing</strong> <strong>machine</strong>maintenance and cleaningMAINTENANCEAfter each wash, leave the door openfor a while to allow the air to circulatefreely inside the <strong>machine</strong>.From time to time, depending on thehardness of your water, it isrecommendable to run a full wash cycleusing a decalcifying product.This will extend the life of your <strong>washing</strong><strong>machine</strong>.ImportantThe <strong>washing</strong> <strong>machine</strong> should bedisconnected from the mains electricitysupply before any cleaning ormaintenance is carried out.1 CLEANING THE DETERGENT DISPENSERClean the detergent dispenser wheneverthere is any <strong>washing</strong> product residue leftinside.aabPull outwards on the handle andpress the blue lever with your fingerto remove the detergent dispensercompletely.Use warm water and a brush toclean the compartments.Also clean the additivecompartment siphon. To removeit, pull the flap at the back out.Once it has been cleaned, put itback pressing down to make surethat it fits right in. Put the dispenserback into the <strong>washing</strong> <strong>machine</strong>.bImportantA dirty or incorrectly fitted siphonwill prevent the additives frombeing taken in and leave waterinside the compartment at the endof the wash.86
2CLEANING THE ACCESSIBLE FILTER ANDTHE OUTSIDEmaintenance and cleaningCLEANING THE FILTERClean the accessible filter if the drain pumpis blocked by any foreign objects.aa Open the kickplate cover with the aid ofa coin and by pulling gently on it.b Place a container under the drain pipeto collect any water that comes out ofit.Remove the drain pipe, place it on thecontainer and open the cover. Water willstart to come out.bc When all the water has come out of the<strong>machine</strong>, turn the filter several times untilit can be completely removed, by pullinggently on it.d Remove the objects or fluff caught in thefilter or the drain pump.Put the filter, the drain pipe and coverback in place again.cdImportantWe recommend that you clean the filterat least once a year.To avoid burns, do not carry out thisoperation when the wash water is at atemperature of over 30ºC.CLEANING LIMPIEZA THE EXTERIOR OUTSIDEThe outside of the <strong>washing</strong> <strong>machine</strong> shouldbe cleaned with warm soapy water or a gentlecleaning agent. Do not use abrasive cleaningproducts or solvents.It should then be thoroughly dried with a softcloth.Important87When there have been spillages ofdetergent or additives from thedispenser onto the <strong>washing</strong> <strong>machine</strong>cabinet, clean them up right away asthey are corrosive.
<strong>washing</strong> <strong>machine</strong>safety and troubleshootingIf you detect any problems withyour <strong>washing</strong> <strong>machine</strong>, you willprobably be able to rectify themyourself by consulting the followinginstructions.If this is not the case, unplug theappliance and contact theTECHNICAL ASSISTANCESERVICE.ImportantNever open up theappliance. There is no fuseor similar component insidethat can be replaced by theuser.IndicatorFO1FO2CO3FO4FO5 . .F10ProblemsNo water coming inDoes not drain or spin-dryDoes not spin-dryDoes not startCall the Technical Assistance ServicePROBLEMSWhy won’t the <strong>washing</strong><strong>machine</strong> start?This may be due to the following:The <strong>washing</strong> <strong>machine</strong> is not plugged into the mains orthere is no voltage in the mains supply.The Start/Pause button has not been pressed.When the <strong>washing</strong> <strong>machine</strong> door is not properly closed,F04 appears on the display.Check that the door has been closed properly.Why is the <strong>washing</strong> <strong>machine</strong>vibrating or making toomuch noise?This may be due to the following:The blocking and transport screws have not beenremoved.The <strong>washing</strong> <strong>machine</strong> has not been correctly levelled.During spin-drying the motor makes a “whistling” noisewhich is normal due to the mechanical action of themotor itself.88
safety and troubleshootingWhy doesn’t the <strong>washing</strong><strong>machine</strong> take in water?When there is no water coming in F01 will appear onthe display.Indicator F01, no water coming in, this may be due toa cut in the water supply, a tap turned off or a blockedwater inlet filter.The possible solutions are as follows: wait for the watersupply to be reconnected, turn on the tap, or removethe water inlet hose and clean the filter.Why doesn’t the <strong>washing</strong><strong>machine</strong> drain or spin dry?When F02 appears on the display.The reasons for the F02 indicator may be the following:<strong>washing</strong> <strong>machine</strong> drain pump blocked, building drainagepipes blocked, or incorrect pump electrical connection.Solution: if the pump is blocked, gain access to it asdescribed in section 2, maintaining and cleaning theappliance.Why doesn’t the <strong>machine</strong>spin-dry?When it does not spin-dry, C03 appears on the display.This may be due to an uneven distribution of clothesin the drum and may cause an excessive level ofvibrations.The solution is to select a spin-drying programme.Why can’t I see any water inthe drum during the wash?This is due to the fact that the <strong>washing</strong> <strong>machine</strong> is providedwith a system which is able to adapt to the load and typeof fabrics, adjusting the levels of water and energy used,in order to preserve the environment.So, although the water level you can see through the hatchmay look low, there is no cause for concern as <strong>washing</strong>and rinsing efficiency will still be optimum.89
safety and troubleshootingWhy is there still some waterin the dispenser?This may be because the dispenser needs cleaning. Thissimple operation is described in Maintaining and cleaningthe appliance.1. Cleaning the detergent dispenser.Why can’t I open the hatchimmediately after the washhas finished?Washing <strong>machine</strong>s today are provided with safety systemsfor users. One of them is that the <strong>washing</strong> <strong>machine</strong> cannotbe opened until it is certain that the drum is quite still. Thisis why the hatch cannot be opened for 2 minutes.Other indicationsThe <strong>washing</strong> <strong>machine</strong> can detect other indications.When this happens a number of other indicators appearon the display: F05, F06..., F10.This information may be due to very different reasons.Check if the problem is repeated and in this case callthe AUTHORISED SERVICE CENTRE.90
<strong>washing</strong> <strong>machine</strong>environmental warningseco-noteINFORMATION FOR THE CORRECT DISPOSAL OF WASTE ELECTRICAL ANDELECTRONIC APPLIANCESWhen your appliance is of no further use, it shouldnot be disposed of together with general domesticwaste.It can be taken, free of charge, to a specific wastecollection centre, run by your local authority, ordealers who provide this service.Disposing of waste domestic appliances separatelymeans avoiding possible negative consequencesfor the environment and health, derived fromincorrect disposal. This will enable the materialsin them to be treated and recycled, obtainingimportant savings in energy and resources.To highlight the obligation of collaborating withselective waste collection, the product is markedwith a symbol to warn against using traditionalcontainers for disposing of the appliance.For further information, contactyour local authority or the shopwhere you purchased the product.91
<strong>Fagor</strong> Electrodomésticos, S.Coop.Apartado 49Tel. 902 10 50 10Fax 902 33 32 09Bº San Andrés, 1820500 MONDRAGÓN (Guipúzcoa)www.fagor.come-mail: info@fagor.com04/07 LJ6A030N1