USER'S MANUAL & WARRANTY - Revolution Mobility
USER'S MANUAL & WARRANTY - Revolution Mobility
USER'S MANUAL & WARRANTY - Revolution Mobility
Create successful ePaper yourself
Turn your PDF publications into a flip-book with our unique Google optimized e-Paper software.
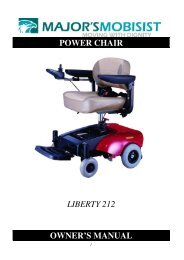
USER’S <strong>MANUAL</strong> & <strong>WARRANTY</strong>Liberty 2121
TABLE OF CONTENTS1. PREFACE AND INTRODUCTION……....…………………………………… 32. SAFETY NOTICE………..…………………….................……… ………….• Before driving• While driving• Labeling43.4.EMI……………………………………………..………………………………..PARTS INTRODUCTION……………………………………………..……….10115. OPERATION…………………………………………………………………....12• Control panel• How to operate your power chair• How to set to freewheel mode6. BATTERY CHARGING AND CARE……………………………………….....18• Charging the battery• Battery• Replacing Liberty batteries / charger7. INSPECTION AND MAINTENANCE……………………………………..….• Inspection• Regular checking record• Battery, fuse and tire• Storage218. TROUBLE SHOOTING AND SPECIFICATION…………….……………… 259. <strong>WARRANTY</strong>…………………………………………………………………..... 282
1. PREFACE AND INTRODUCTIONPlease carefully read this owner’s manual before using the power chair. Improper use of the power chaircould result in harm, injury or traffic accidents.This owner’s manual includes operating instructions for every aspect of the power chair, includingassembly instructions and how to deal with possible accidents.◆ The symbols used in this manual are explained below:Read carefully the notes marked with these symbols: Warning Attention SuggestionImproper usage could result in serious injury or deathImproper usage could lead to injury and/or damage to your power chair.Follow these instructions to keep your power chair in a good operating order.◆ This manual includes a copy of repair and maintenance record chart and warranty information.Please keep it in a safe place.◆ If someone else uses the power chair, please make sure that you provide them with the instructionmanual for his or her consideration.◆ We reserve the right to make design modifications. As designs change some illustrations and picturesin the manual may not correspond to the power chair that you have purchased.3
2. SAFETY NOTICE2.1 BEFORE DRIVINGThe user should become familiar with the usage and operation of this power chair before driving.Therefore, please always keep the following safety notices in mind.■ For your safety, please therefore follow these safety◆ Drive on the pavement, or pedestrian areas only.◆ Do not drive your power chair after consuming alcohol or when tired.◆ Please be careful when driving your power chair in low light. It has not been designed foruse at night.◆ The power chair has been designed to operate on pavement for speeds up to 3.5mph.■ Practice operating your power chairBefore using the power chair, familiarize yourself with the operation of your power chair.◆ Turn the speed dial to value 1 for your initial practice.◆ Be sure someone accompanies you for safety when operating you power chair for the first time.◆ Only use higher speed setting when you are confident that you can easily operate and control yourpower chair.■ The Liberty 212 power Chair is only to be used by one person at a timeDo not carry passengers on your power chair. (Including children)■ Do not use this power chair to carry or haul goodsThe maximum weight with occupant is 250 lbs.2.2 WHILE DRIVING■ Carry out daily inspections.Refer to the section “titled” “DAILY CHECKING”■ Do not move your body out of the power chair while moving◆ Such action may cause you to lose balance and risk injury from falling.◆ Pay attention that your clothes do not tangle in the wheels.4
2. SAFETY NOTICE■ Do not use your power chair under any of the conditions.◆ On roads with heavy traffic or roads that are operate, snow-covered, or icy.◆ Do not drive at night , Do not drive in rain or show.◆ Do not drive your power chair in an “S” pattern or make erratic turns.◆ Do not take the power chair onto escalators.■ About Mobile Phones and other electrical equipment◆ Do not use a mobile phone or other wireless communication device while driving.◆ Always switch off the power chair and remove the ignition key before using a mobile phone.◆ Do not charge the mobile phone or any other electrical device from the power chair battery.■ Automatic Power Shut DownIn order to avoid accidental battery run down, your power chair is equipped with an automatic powershut down . If the power chair is turned on, it will automatically turn off after remaining undisturbed fora period of thirty minutes. When this situation occurs, simply switch your power chair off and back onand it will be ready to use once again.■ Ramps, inclines and drops◆ Do not drive onto ramps that are steeper than the specified gradient. Refer to the section entitled“CLIMBING ANGLE” in “8. SPECIFICATION”◆ Always use a low speed setting when ascending or descending a gradient.◆ Do not drive on roads with large drops or potholes. Refer to the section entitled “MAX. GROUNDCLEARANCE” in “8. SPECIFICATION.”◆ Operate when driving on roads with inclines.◆ Do not make sudden turns when driving on gravel roads or ramps.◆ Always lean forward when climbing a steep gradient.■ Starting and Driving1. Make sure the seat is installed properly.2. Fold down the armrests so that you can rest your arms.3. Turn the power switch to “ON”.4. Check battery indicator to ensure proper power as necessary, Recharge the batteries.5. Set the speed dial to a safe and comfortable speed.6. Check the joystick lever to ensure it operates correctly.7. Make sure the electromagnetic brake works correctly.8. Engage the 3.5mph switch if you are driving on the pavement.5
2. SAFETY NOTICE Warning !◆ Do not set in the freewheel mode when driving on a gradient.◆ Always re-engage the anti-freewheel device before use. Fail to do so may result in injury.◆ Always fasten the seat belt when operating the power chair.◆ To protect your safety, the power will automatically cut off and electromagnetic brake system willactivate while driving down a steep gradient. This will limit the speed to a safe level. Turn the poweron again to re-start your power chair.◆ Maximum User Weight LimitRefer to section titled “MAX. LOAD WEIGHT in “8. SPECIFICATION”. Overloading pastthe weight limit may lead to damage of your power chair or cause it to malfunction and willendanger your own safety. The warranty does not cover this type of damage. Attention:1. Avoid putting all of your weight on the footrest. This may cause the power chair to tip. Possiblyresulting in injury.2. Do not turn the power switch to OFF while driving as this will lead to an emergency stop andpossible risk of accident and injury.3. Do not set to the higher speeds while driving indoors.4. Do not adjust the speed dial while driving; a sudden change in speed may cause danger to you andothers, and may damage your power chair.5. Do not place magnetic devices near the area of the controller as this could affect the safe operationof your power chair.6. Demons while driving in heavy traffic or in crowded areas.7. While backing up the power wheelchair, be aware of people or objects behind you.■ Stopping◆ Release the joystick control lever completely. The power chair will come to a stop.◆ Turn the power switch to (OFF). Remove the key.■ Driving on the pavement◆ Ensure the speed limit switch is set to the slowest setting when using the power chair. This will limitthe power wheelchair to a maximum speed of 3.5mph.◆ The speed switch can be set to the fastest setting for use on the road or on private ground.6
2. SAFETY NOTICEAttention:When climbing an incline, do not zigzag or drive at an angle up the face of the of the incline.Always drive your power chair straight up the incline.This greatly reduces the possibility of a tip or a fall.Always exercise extreme caution when negotiating an incline.Never travel up or down an incline that is or covered by snow or ice.■Inclines and uneven terrainWhen climbing an incline, try to keep your power chair moving. If you must stop, start up again slowlyand then accelerate cautiously. When driving down an incline, do so slowly and in the forward directiononly. If your power chair starts to move faster than you anticipated or desired it would, allow the chair tocome to a complete stop by releasing the joystick. Push the joystick slightly forward and continuetraveling slowly down the incline.■Maximum recommended inclineThe Liberty 212 Power chair has undergone extensive incline testing. Our results show that the maximumincline your Liberty can safely climb is six degrees at maximum weight capacity. Six degrees is the angleof most handicap access ramps. Any attempt to climb a steeper slope may put your Liberty into an unstableposition.7
2. SAFETY NOTICE• LabelingCarefully read all the labeling on the power chair before driving it. For your futurereminding, do not remove these labels.NEVER LIFT POWER CHAIR BY THEFRONT OR REAR SHROUD8
2. SAFETY NOTICEThis section provides the user with basic information that describes the problems with electromagneticinterference (EMI), known sources of EMI, protective measure to either lessen the possibility orexposure or to minimize the degree of exposure, and suggested action should unexpected or erraticmovement occur.Attention:It is very important that you read this information regarding the possible effects of electromagneticinterference on your Liberty power chair.■ELECTROMAGNETIC INTERFERENCE (EMI) FROM RADIO WAVE SOURCESPowered chair’s may be susceptible to electromagnetic interference (EMI), which is interferingelectromagnetic energy (EM) emitted from sources such as radio stations, TV stations, amateur radio(HAM) transmitters, two-way radios, and cellular phones. The interference (from radio wave sources)can cause the power chair to release its brakes, move by itself, or move in unintended directions. It canalso permanently damage the powered wheelchair’s control system. The intensity of the interfering EMenergy can be measured in volts per meter (V/m). Each power chair can resist EMI up to a certainintensity; this is called its “immunity level,” the higher the immunity level, the greater the protection. Atthis time, current technology is capable of achieving at least a 20 V/m immunity level, which wouldprovide useful protection from the more common sources of radiated EMI. This power chair model hasas shipped as with no further modification an immunity level of 20 V/m without any accessories.There are a number of sources of relatively intense electromagnetic fields in the everyday environment.Some of these sources are obvious and easy to avoid. Others are not apparent and exposure isunavoidable. However, we believe that by following the warning listed below, your risk to EMI will beminimized.The sources of radiated EMI can be broadly classified into three types:1. Hand-held portable transceivers ( transmitter-receivers with the antenna mounted directly on thetransmitting unit. Examples include: citizens band (CB) radios, “walkie talkie”, security, fire, andpolice transceivers, cellular telephones and other personal communication devices.Attention:Some cellular telephones and similar transmit signal while they are ON, even when not being used.2. Medium-range mobile transceivers, such as those used in police cars, fire trucks, ambulances andtaxis. These usually have the antenna mounted on the outside of the power wheelchair.3. Long-range transmitters and transceivers, such as commercial broadcast transmitters (radio and TVbroadcast antenna towers) and amateur (HAM) radios.9
3. EMIAttention:Other types of hand-held devices, such as cordless phones, laptop computers, AM/FM radios,TV sets, CD players, cassette and small appliances such as electric shavers and hair dryers arenot , likely to cause EMI problems to your powered power chair .■POWERED POWER CHAIR ELECTROMAGNETIC INTERFERENCE (EMI)Because EM energy rapidly becomes more intense as one moves closer to the transmitting antenna(source), the EM fields from hand-held radio wave sources (transceivers) are of special concern. It ispossible to unintentionally bring high levels of EM energy very closer to the powered s control systemof power chair while using these devices. This can affect powered power chair movement and braking.Therefore, the warnings listed below are recommended to prevent possible interference with thecontrol system of the powered power wheelchair.■WARNINGSElectromagnetic interference (EMI) from sources such as radio and TV stations, amateur radio(HAM) transmitters, two-way radios, and cellular phones can affect powered power chair andmotorized power chair. Following the warnings listed below should reduce the chance of unintendedbrake release or powered power chair movement which could result in serious injury.1. Do not operate hand-held transceivers-receivers, such as citizens band (CB) radios, or turn ONpersonal communication devices such as cellular phones, while the powered power chair is turnedON.2. Be aware of nearby transmitters such as radio or TV stations, and try to avoid coming close tothem.3. If unintended movement or brake release occurs, turn the powered power chair OFF as soon as it issafe;4. Be aware that adding accessories or components, or modifying the powered power chair, maymake it more susceptible to EMI (Note: There is no easy way to evaluate their effect on the overallimmunity of the powered power chair).5. Report all incidents of unintended movement or brake release to the powered power wheelchairmanufacturer, and note whether there is a source of EMI nearby.■ IMPORTANT INFORMATION1. 20 Volts per meter (V/m) is a generally achievable and useful immunity level against EMI ( thehigher the level, the greater the protection);2. This product has an immunity level of 20 V/m without any accessories and connected to it.10
4. PARTS INTRODUCTIONPARTS DESCRIPTION1. Controller 2. Armrest 3. Seatback 4. Seat5. Drive Wheel 6. Caster Wheel 7. Battery Pack 8. Footrest1234785611
5. OPERATIONJOYSTICK AND CONTROLLER2Your power wheelchair is operated by a joystick and controller.The Liberty is currently available with P&G VR 2 controller.1VS 2 Series CONTROL FUNCTIONS1. ON/OFF Button2. Battery Gauge3. Joystick4. Maximum Speed / Profile Indicator5. Speed / Profile Decrease Button6. Horn Button7. Speed / Profile Increase Button45367■ HOW TO OPERATE YOUR LIBERTY◆ ON/OFF ButtonThe ON/OFF button applies power to the control systemelectronics , which in turn supply power to the power chair’smotor. Do not use the ON/OFF button to stop the power chairunless there is an emergency.Attention:If you use the ON/OFF button to stop the power chair, it may shorten the life of the drive components.◆ Battery GaugeThe battery gauge shows you that the power chair is switched on. It also indicates the operating statusof the power chair .◆ JoystickThe primary function of the joystick is to control the speed and direction of the power chair. The furtheryou push the joystick from the center position the faster the power chair will move. When you releasethe joystick the brakes are automatically applied.◆ Maximum Speed / Profile IndicatorThis gauge shows the maximum speed setting of the power chair.There are five speed settings step 1 is the lowest speed and step 5 is the highest speed.12
5. OPERATIONAttention:We recommend that the first few times you operate your Liberty you turn the speed andrespond adjustment knob to the slowest setting until you become familiar with you newpower wheelchair.◆ Speed / Profile Decrease ButtonThis button decreases the maximum speed setting or, if the control system is programmed for driveprofile operation, selects a lower drive profile.◆ Horn ButtonPress either button to sound the horn.◆ Speed / Profile Increase ButtonThis button increases the maximum speed setting or, if the control system is programmed for driveprofile operation, selects a lower drive profile.◆ Locking / Unlocking the power chair‧ To lock the power chair.1. While the control system is switched on, depress and hold the on/off button.2. After 1 second the control system will beep. Now release the on/off button.3. Deflect the joystick forwards until the control system beeps.4. Deflect the joystick in reverse until the control system beeps.5. Release the joystick, there will be a long beep.6. The power chair is now locked.‧ To unlock the power chair.1. Use the on / off button to switch the control system on. The maximum speed / profile indicator willbe rippling up and down.2. Deflect the joystick forward until the control system beeps.3. Deflect the joystick in reverse until the control system beeps.4. Release the joystick, there will be a long beep.5. The power chair is now unlocked.Attention:This feature is disabled by default; if required, it must be enabled by programming.13
5. OPERATION Suggestion:1. You should recharge the batteries after each time the power chair is used to ensure maximumrange. The batteries should be charged at least once a week, even if the power chair is not used.2. After charging or replacing a new battery, drive the power chair for 2-3 minutes to make sure thebattery capacity is sufficient.3. In cold weather, the battery may respond more slowly and the battery range may be reduced.4. When driving on a gradient, the battery indicator light may move up and down. This is a normalphenomenon and should not cause concern.5. Even with proper care and use of the battery it is natural for the battery’s capacity to reduce withtime. Therefore, the battery’s range is about 50% of the range when the batteries were new, it istime for it to be replaced. Please contact your dealer about replacement batteries. If an old batterycon are used , it can lead to a rapid decline in performance.6. The battery range will be reduced when driving frequently, on a slope or on rough terrain, as thisrequires a greater consumption of power.7. The batteries have a six-month warranty covering manufacturing defect. This warranty doesnot cover faults due to incorrect battery recharging.■ BRAKINGElectro-magnetic brake: Release the speed control lever completely, the electromagnetic brake will beactivated automatically and the power chair will stop.Warning:When on a gradient NEVER switch the power chair to the freewheel mode. The electromagneticbrakes will not be applied and this may result in injury.▇ To adjust the armrest width◆ Loosen the knobs◆ Slide the armrests in or out to the desired width .◆ Tighten the knobs.Knob14
5. OPERATION▇ To remove the seat1. Turn the power OFF.2. Make sure the Liberty is not in freewheel mode.3. Pull the seat rotate lever while pulling up on the seat to remove.▇ To change the seat height1. Remove seat (See “To remove the Seat”)2. Remove the shroud.3. Disengage and remove the seat height adjustment pin from the seat post.4. Remove the height adjustment pin from each of the three posts.5. Raise or lower each post to the desired position.6. Reinstall the seat height adjustment pin through the seat post and armrest post. (Bend the end of thepin lock and position it over the end the pin.)7. Reinstall the shroud.8. Reinstall the seat.HOW TO ADJUST THE FOOTREST▇ To adjust the footrest angleYou can adjust the angle of the footrest with a hex wrench (M6).◆ Turn the setscrew clockwise to raise the front of the footrest.◆ Turn the setscrew clockwise to lower the front of the footrest.15
5. OPERATIONHOW TO SET TO FREE WHEEL MODEFor your convenience, the Liberty 212 is equipped with a freewheel level. This level allows you todisengage the drive motors and maneuver the chair manually.▇ To engage the drive and take power chair out of freewheel◆ Pull the freewheel lever to”DRIVE” position(left and right).◆ Activation of the joystick automatically releases the brake so the powered Liberty can bedriven.▇ To disengage the drive and place power chair in freewheel◆ Push the free wheel lever to “NEUTRAL” position (left and right). Warning:Do not use your Liberty Power Chair while the drive motors are disengaged unless you are in thepresence of an attendant! Do not disengage the drive motors when on an incline as the power chairmay roll down, causing injury! Suggestion:If a level is difficult to move in either direction, gently rock the power chair back and front; thelevel should then move to the desired position.CIRCUIT BREAKERSThe Liberty Power Chair has a circuit breaker protruding through the shroud cover at the lift of thepower chair.◆ In the unlikely event of a short circuit or heavy overload, all power to the power chair will be shutoff.◆ To reset, depress the circuit breaker button. A few minutes wait is required before the circuit breakerwell reset.◆ If the power chair continues to shut down after resetting have it serviced by a dealer.16
5. OPERATIONHOW TO ADJUST THE SEATAbove: Seat shown in the four possible “ENGAED” positionsBelow: Seat shown in the four possible “REMOVABLE” positions17
6. BATTERY CHARGING AND CAREBATTERIES◆ The Liberty Power Chair uses two long- lasting, 12 volt, deep-cycle batteries. These batteries aresealed and maintenance free. Since they are sealed, there is no need to check the electrolyte (fluid)level. Deep-cycle batteries are designed to handle a longer and deeper discharge. Though they aresimilar in appearance to automotive batteries, they are not interchangeable. Automotive batteriesare not designed to handle a long, deep discharge and are unsafe for use in powered power chairs.◆ These batteries are maintenance free and there is no need to refill with water.◆ Do not expose the battery to temperatures below 10°C or above 50°C when charging or storingthe power chair. Under the above temperature range can cause the battery either to freeze oroverheat, causing damage and shortening its life. Warning:Battery posts, terminals and related accessories contain lead and lead compounds. Wash hands afterhandling!▇ Use proper batteries◆ You power chair operates on two 12 volt batteries.◆ They should be 12 ampere hour rating . Only deep cycle sealed case construction batteries shouldbe used in the power chair.◆ When you buy a replacement, insist on a deep cycle sealed case. Do not use any other type.▇ To charge the batteries using the off-board charger◆ Position the power chair next to a standard wall outlet.◆ Be certain the controller power is turned off .◆ Plug the 3-pin extension cable into the charger.◆ Plug the charging cable into the wall outlet.◆ We also recommended that the batteries are not charged for more then 24 hours.◆ When your Liberty batteries are fully charged, unplug the charging cable from the wall outlet.◆ Disconnect the charging cable from the Liberty.Power packCharger18
6. BATTERY CHARGING AND CARE Warning:1. Keep away from flammable objects while charging as it may lead to fire or explosion of battery.2. Do not smoke while charging as the battery may release hydrogen gas. Always charge the battery in awell-ventilated space.3. Avoid electric shock! Never connect or disconnect the plug or cord with wet hands while charging.Do not connect or disconnect the plug or cord when they are wet. Attention - Follow these safety rules below to avoid accidents while charging.1. Use the manufacturer’s supplied charger only, and recharge the battery to its full capacityevery time. You may damage the battery and power chair if you use a charger which is notcorrectly specified.2. Charge in a well-ventilated space not directly exposed to sunlight. Do not charge in areasthat are humid or exposed to rain, mist or dew.3. Do not charge in temperatures -10°C or higher than +50°C as the charger may cause batterydamage. Suggestion – How to maximize your battery’s efficiency and service life1. Fully charge any new battery before its initial use.2. Be sure to charge the battery after each use. Battery power will be reduced if the battery is usedwithout being fully charged.3. If the power chair is not used for an extended period, batteries should be charged at least weekly.4. The ambient temperature affects charging time, it will be longer in the cold temperatures.5. After charging, do not leave the charger socket plugged in.■ Cleaning the batteryIf the batteries are contaminated by water, battery acid, dust or other substances, they will dischargequickly. The batteries supplied with the power chair are sealed and as such are maintenance free withno risk of battery leakage. Please follow the steps below to clean the battery.1. Turn the Liberty power switch to OFF.Power Pack2. Remove the seat.3. Open the battery pack then disconnect the cables from the four battery terminals.4. Use a clean cloth to wipe off the soiled area.5. Wipe with a clean cloth. If the terminal is covered with white powder, wipe it clean using warm water.19
6. BATTERY CHARGING AND CARE■ Batteries replacementFollow the procedure below step by step to replace the batteries:1. Remove the battery pack from the Liberty 212.2. Open the battery pack then disconnect the cables from the four battery terminals.3. Remove the batteries from the battery pack.4. Place new batteries inside the pack.5. Connect the red cable to the positive(+) battery terminal and black cable to the negative(-) on theother battery.6. Connect up the fused cable between the two batteries and close the battery pack. Warning :1. The wiring system and charger are well situated in the battery pack while being assembled inplant. Do not attempt to re-locate the wiring system by yourself. The improper layout of wiringsystem may result in the wires pinched by battery box, which might result in the electronic systemfailure.2. Be sure the battery wires are connected to their right battery terminal. Suggestions :1. Make sure the terminals are installed properly and replace the cover.2. Battery efficiency will vary with outside conditions- driving range will be reduced in coldweather If the power chair is not used for a long time, charge the battery at least once a week.3. Replace both batteries together.20
7. INSPECTION AND MAINTENANCEINSPECTIONInitial adjustments should be made to suit personal body structure and preference. Be sure to , followthese checks and maintenance procedures.NO. Item initially weekly monthly periodically1 General(Mechanical Troubleshooting)♦power chair rolls straight (no excessive drag or pull to oneside).2 Arms♦Secure but easy to release; adjustment levers engageproperly.♦Adjustable height arms operate and lock securely.♦Pivot point free of wear and looseness.3 Seat and back upholstery♦Inspect for rips or sagging. ○ ○4 Seat♦Seat secured to the power chair frame.♦Inspect seat release latches5 Drive wheel♦Mounting bolts are secure♦No excessive side movement or binding when lifted andspun when disengaged (free-wheeling)6 Caster assemblies♦Bolts are tight.♦Inspect caster assembly for proper tension by spinningcaster assembly; caster assembly should come to agradual stop.Attention: As with any power chair, the wheels and tiresshould be checked periodically for cracksand wear, and replaced if necessary.7 Caster assemblies/ wheel♦Ensure all fasteners are secure. ○ ○8 Wheels/tires♦Inspect for flat fasteners are secure.Attention: As with any power chair, the wheels and tiresshould be checked periodically for cracksand wear, and replaced if necessary.9 Cleaning♦Clean upholstery and armrests. ○ ○○○○○○○○○○○○○○○○○○○○○21
7. INSPECTION AND MAINTENANCEREGULAR CHECKING RECORDTo make sure your power chair is correctly serviced, take it to your dealer for regular maintenance checks.The initial inspection should be made after the first month’s use, thereafter every six months. Your dealermay charge a fee for this.YEAR 1 2 3 4 YEAR 1 2 3 4Service DatesService DatesControllerUpholsteryOn/off switchSeatJoystickBackBrakingArmrestsRecharge pointElectricsBatteriesConnectionsconditionLevelsUtility trayConnectionsTest runDischarge testForwardsWheels and TiresReverseWearStopPressureLeft turnBearingsRight turnWheel nutsSlope testMotorsOver obstaclesWiringList Items repairedNoiseConnectionsBrakeBrushesChassis/FootrestConditionFootrestBATTERY, FUSE AND TIRE■ BatteryRefer to the section titled “BATTERY CHARGING AND CARE” Suggestion :Ask for help from your Liberty dealer to inspect or replace the fuse as the steering shroud must beremoved for access■ TiresThe condition of the tires depends on how you drive and use your power chair.◆ Inspecting Tire Tread◆ Please check the tread depth regularly. Replace the tires when the tread depth is less than 0.5 mm.22
7. INSPECTION AND MAINTENANCE Attention:When tread depth is below 0.5mm it can easily lead to power chair slippage, making brakingdistances longer. Therefore replace the tyres as early as possible when they are found to haveinsufficient tread depth. Attention:Before doing any maintenance, turn the power switch to OFF and remove the charger cords. Suggestions :1 .Do not splash water onto the power chair as this could cause the electronic system to malfunction.2. Do not use caustic materials, solvents or aerosols as these may deform or damage the shrouds.3. Do not use wax.STORAGEMake sure the power chair is stored as follows:- With the charger unplugged- With the power switch OFF Suggestion :Always store the power chair in a location where it is out of direct sunlight, rain or dew. If storing foran extended period, charge the battery to full power and then disconnect the battery terminal. Fordetails inquire to your dealer.DISASSEMBLING THE LIBERTYThe Liberty can be disassembled in to four pieces, the seat (weight 8.2 kg), the front section (weight12 kg),the rear section (16.1 kg) and battery pack (weight 9.6kg), without any tools. Please follow thesteps.1. Switch off power of the power wheelchair.2. Discount the connector of controller from the rear shroud.3. Push the Seat Rotate Lever whilst pulling up on the seat to remove.4. Remove the battery pack.5. Pull up the power wheelchair using the seat post, whilst pulling the red handle behind the seat post..6. Lift the front section up until the lower pegs are longer in contact with the curved locking brackets onthe rear section.23
7. INSPECTION AND MAINTENANCEKnob lock WarningAlways unplug the rear section electrical connector before separating the two sections.ASSEMBLING THE LIBERTY SuggestionThe assembly process is essentially the disassembly process in reverse. First study the text andphotographs in the disassembly procedure before re-assembling the scooter. WarningAfter assembling the Liberty make absolutely certain the tiller adjustment knob is fully tightened.24
8. TROUBLE SHOOTING AND SPECIFICATION■ TROUBLE SHOOTINGSymptom Probable cause SolutionLimited driving distance ♦Batteries not fully charged. ♦Charge batteries overnight or ensure 10 hoursof charge between uses. Make sure setting oncharger is correct.♦Batteries weak won’t hold charge. ♦Replace batteriesBatteries not charging. ♦Charger not working♦Battery connections loose.♦No current at wall outlet.♦Bad connection on charger, chargercable, plug or internal wiring♦Replace charger.♦Check all connections. Secure connections.♦Switch to another wall outlet.♦Replace charger or internal repairs required.Contact dealer.problem.Batteries draw excessive ♦Battery failure.♦Replace batteriescurrent when charging.Charge indicator shows ♦Batteries weak won’t hold charge. ♦Replace batterylow charge♦Electrical malfunction.♦Contact dealerLevel immediately after ♦Charger not operating.♦Replace chargercharging.Battery indicator flashes ♦Have charger checked.the charge level islow-too soon after being ♦Weak batteries.♦Service or replace charger.Contact dealer♦Replace batteriesrecharged.Wheel chair will notdrive♦Motor release levers disengaged.♦Battery require charging.♦Charger plugged in.♦Circuit breaker tripped.♦Engage motor release levers.♦Charge batteries. Make sure setting on chargeris correct.♦Unplug charger from wall outlet.♦Reset breaker. If breaker trips again, it mayindicate need for internal repairs.♦Contact dealer.Motor “chatter” or runs ♦Electrical malfunction.♦Contact dealerirregularly.Joystick erratic or doesnot respond as resired.♦Electrical malfunction.♦Controller programmed improperly.♦Contact dealer♦Contact dealerOnly one (1) rear wheel ♦Electrical malfunction.♦Contact dealerturns.♦One (1) motor release lever is engaged. ♦Disengage motor release lever.Wheelchair does not ♦Poor battery terminal connection. ♦Clean terminals.respond to commands.Power indicator off even ♦Electrical malfunction.♦Contact dealerafter recharging.25
8. TROUBLE SHOOTING AND SPECIFICATIONSPECIFICTIONSMODELITEMDimension (L×W×H )Weight, with batteriesWithout batteriesBatteryLiberty 212850×560×835 mm43.6 / 95.9 Kg/lbs34.6/76.1 Kg/lbs12V 12Ah×2Motor 180W×2ChargerDC24V 1.5A Off-boardCaster wheels6“×2 SolidDrive wheels8“×2 SolidDriving systemDirect drive the rear wheelBrake systemElectromagnetic brakesTop speed5.6 km/hr /3.5mphClimbing angle 6°Cruising range12-16km/8-10milesTurning radius500 /19.7mm/inchesArmrestsAdjustable Width, AngleFootrestAdjustable Height, AngleMaxus weight115 kg / 250lbsControllerVR-2 60APlease note that the maximum range is based on an ambient temperature of 48 ℉ , a 165 lb driver, a brandnew and fully charged battery, and a constant driving speed of 3.5 mph with 70% battery powerdischarged.NOTE: Specifications are subject to change without notice.26
8. TROUBLE SHOOTING AND SPECIFICATION• Self-Help GuideIf a system trip occurs, you can find out what has happened by counting thenumber of blink on the battery gauge that are flashing.Overleaf is a list of self-help actions. Try to use this list before you contactyour service agent. Go to the number in the list that matches the numberOf flashing bars and follow the instructions.If the problem persists after you made the checks described above contactYour service agent.1 blink The battery needs charging or there is a badConnection to the battery. Check the connections tothe battery. If the connections are good, try chargingthe battery.2 blink The left hand motor has a bad connection. Checkthe connections to the left hand motor.3 blink The left hand motor has a short circuit to a batteryConnection. Contact your service agent.4 blink The right hand motor has a bad connection. Checkthe connections to the right hand module.5 blink The right hand motor has a short circuit to a batteryconnection. Contact your service agent.6 blink The wheelchair is being prevented from driving by anexternal signal. The exact cause will depend on theType of wheelchair you have, one possibility being that thebattery charger is connected.7 blink A joystick fault is indicated. Make sure that thejoystick is in the center position before switching onThe control system.8 blink A control system fault is indicated. Make sure that allconnections are secure.9 blink The parking brakes have a bad connection. Check theParking brake and motor connections. Make sure theControl system connections are secure10 blink An excessive voltage has been applied to the controlsystem. This is usually caused by a poor batteryconnection. Check the battery connections.27
9. <strong>WARRANTY</strong><strong>WARRANTY</strong>There is a comprehensive twelve-month warranty from the date on which your new powerchair is delivered. The warranty covers the power chair for repairs or replacement during thisperiod. For more detail, please see the Warranty Conditions below.Warranty Conditions:1. Any work or replacement part installation must be carried out by an authorized Liberty dealer / service agent.2. Should your power chair require attention under this warranty please contact the designated service agent listed below.3. Should any part of the power chair require repair or full or part replacement as a result of a manufacturing or material defect withintwelve months of delivery, repairs will be carried out free of charge.a) Frame:3Years limited warrantyb) Electronic parts:1Years limited warrantyNote: The warranty is not transferable4. Any repaired or replaced parts will be covered by this warranty for the balance of the warranty period on the power chair.5. Parts replaced after the original warranty has expired will by covered by a three month warranty.6. Wearable items will be covered during the normal warranty period unless such items require repair or replacement clearly as a directresult of a manufacturing or material defect.Such items include: upholstery, tires and batteries.7. The above warranty conditions apply to any new power chair purchased at the full retail price. If you are unsure whether your powerchair is covered, check with an authorized <strong>Revolution</strong> <strong>Mobility</strong> dealer.8. Under normal circumstances, no responsibility will be accepted where the power chair has failed as a direct result of:a) The power chair part not having been maintained in accordance with the manufacturer’s recommendations.b) Failure to use the manufacturer’s specified partsc) The power chair or part having been damaged due to neglect, accident or improper used) The power chair or part having been altered from the manufacturer’s specifications or repairs having been attempted before theservice agent is notifiedThe manufacturer reserves the right to alter without notices any weights, measurements or other technical data shown in this manual.All figures, measurements and capacities shown in this manual are approximate and do not constitute specifications.<strong>Revolution</strong> <strong>Mobility</strong> Authorized Service AgentNameAddressTelPostcode28
9 . <strong>WARRANTY</strong>VIN (POWERCHAIR INDIFICATION NUMBER)To ensure the correct after sales, service and warranty servicesupport, please write down the power chair identification numberfound on the rear right-hand side of the frame.Model Liberty 212VINMotor serial # Controller #Identification Number………………………………………………………………………………………………………………………………NameWarranty Application FormDate of BirthYear Month DayAddressModelVINDate of PurchasePower chair VIN:Motor Serial No: Controller #Year Month DayPurchaser Signature29
3072 Inland Empire Blvd.,Ontario, CA 91764, USATel: (866) 980-2259Fax: (909) 980-2269PART NO. C37-028-0020430


