You also want an ePaper? Increase the reach of your titles
YUMPU automatically turns print PDFs into web optimized ePapers that Google loves.
<strong>Fastrax</strong> Engine Settings 29/11/11 13:49 Page 2When the first tank is almost gone, bring the car in and shut off theengine. Allow the engine to cool for 8 to 10 minutes before starting theengine up again. Add more fuel. Start it back up and run the second tank offuel. Again allow the engine to cool before starting it up again.The key to breaking in your engine is patience. During the break inperiod , your engine may appear to malfunction with problems such asstalling, inconsistent performance, and fouling out glow plugs. Don’t giveup. These are just a few things you may go through during the break inperiod. Just keep it running, apply the throttle on and off as smoothly asyou can. Sudden bursts or quick releases of the throttle can stall yourengine. Soon after break in your patience will pay off with a well runningengine. The performance level of the engine will be limited by the “rich’fuel mixture which you will use all during the break-in process. Once theengine is fully broken-in the mixture can be “leaned out,” and speed andacceleration will increase. Because of the rich fuel mixture and the wearingof the new parts, deposits will form on the glow plug causing it to fail.Expect to replace the glow plug during the break in period, and definitelywhen the engine is fully broken in and the fuel mixture is leaned out.Setting Engine for NormalTuning High SpeedAs you approach the first 6-8 tanks running you can start toGRADUALLY adjust you engine for normal performance. PLEASE NOTE anyadjustments need to be very small at 1/8th turn increments. You can thenbegin adjusting the fuel mixture to maximize performance for your drivingneeds. To lean turn the main fuel control needle in a clockwise direction.This will allow the car to pull away faster and more cleanly, withouthesitation and increase the top speed. There should however still be anoticeable smoke trail.If the main needle is screwed in too far thus allowing the engine to runtoo lean, it will seem to run strong at first, but will bog, hesitate, or stallwhen running at high speed. The engine will also rapidly overheat whenthe setting is too lean. This is because fuel includes lubrication, and thatlubrication is inadequate when the setting is too lean. CHECK THE ENGINETEMPERATURE OFTEN AS YOU LEAN THE MIXTURE. DO NOT LET THE ENGINEOVERHEAT. You should always see smoke coming from the exhaust.At the optimum setting, the engine will clean out; have a strongsounding,high-pitched whine at full speed; and there will be a thin trail ofwhitish smoke coming from the exhaust. It is always better to set theengine a little rich rather than too lean.If the engine stalls on acceleration, begins to bog or slow down at fullthrottle, or if there is a reduction in exhaust smoke, then the engine isrunning too lean. Immediately turn the high speed mixture screwcounterclockwise 1/4 of a turn and operate the car at medium speeds for 1to 2 minutes to allow the engine to cool.Tuning Low SpeedThe low-speed mixture affects how the engine will perform in the lowto mid range rpms. Turning thelow-speed needle clockwise willlean the mixture. As with the highspeedmixture, leaning the lowspeedmixture increasesperformance. Again, if the mixturehere is set too lean, the enginemay be starved for lubrication inthe lowand mid-rpm ranges, thuscausing overheating andexcessive engine wear.Perform the following test todetermine if the low speedmixture is set correctly. With the engine warm and running, allow it to idlefor approximately 15 seconds. Now quickly apply throttle and note theperformance. If the engine bogs, accelerates erratically, and a large puff ofblue smokes emitted, then the low speed mixture is too rich. Turn the lowspeedscrew clockwise 1/8 of a turn. If the engine speeds up for a momentthen bogs, hesitates, or stalls,then the low speed mixture is toolean. Turn the screwcounterclockwise 1/8 of a turn.Adjust the mixture screws in 1/8of a turn increments, wait 15seconds, and retest after eachchange. Adjust for the bestacceleration without the carstalling.Care and MaintenanceWhen you are finished racingIDLEADJUSTMENTLOW SPEEDADJUSTMENTHIGH SPEEDADJUSTMENTfor the day, drain the fuel tank. Afterwards, energize theglow plug with your glow plug starter and try to restartthe engine in order to burn off any fuel that mayremain inside the engine. Repeat this procedureuntil the engine fails to fire. Try to eject residuewhile the engine is still warm. Finally, inject somecorrosion inhibiting oil, and rotate the engine todistribute the oil to all the working parts. Do not,however, inject the oil into the carburetor, for it may causethe O-rings inside to deteriorate. When cleaning the exterior of the engine,use WD-40. Do not use gasoline or any solvents that might damage thesilicone fuel tubing.Cleaning the air filter.When the air filter starts to get dirty, do the followingsteps:Step 1. Clean the foam with fuel. Do this by pouring a littlefuel in a small can and kneading the filter in the fuel.When it looks cleaner, then dispose of the fuel.Step 2. Dry the filter. Squeeze out the fuel with a papertowel until it’s dry.Step 3. Apply <strong>Fastrax</strong> Fast 63 Filter Oil to help keep the dirtout. Dab the treatment all around the filter, put thefilter in a plastic sandwich bag, and knead it untilthe filter is saturated, but not soaked.TroubleshootingGlow Plug ProblemsThe glow plug in your engine is an inexpensive consumable item whichmust be replaced periodically to maintain peak performance and startingease. Most often, any starting problems or erratic performance can betraced back to the glow plug. The glow plug should also be checked if theengine’s acceleration and top speed performance suddenly becomes flat.The only sure way to test for a faulty glow plug is simply install a new oneto see if the problem goes away. Remove the plug from the cylinder headwith a 8mm nut driver. Make sure there is no dirt or debris on top of thehead which could fall into the engine. Do not loose the copper gasketwhich seals the glow plug. Touch the glow plug to the contacts of the glowplug starter. All of the coils should glow white. Sometimes the first fewcoils will not glow while the rest are bright, most likely indicating a badplug. If the glow is dim orange, then the glow starter battery should bereplaced or recharged.At the high rpm that the engines operate only a top quality plug will cutthe mustard. Therefore we recommend the use of either <strong>Fastrax</strong> PlatinumNo4 FAST760-4.Fuel MixtureThe fuel mixture is the largest variable you have to control whileoperating your engine.Fuel brand, ambient temperature, and humidity all effect how yourmixture should be set. If the engine runs great one day but runs rich orlean the next day, it is probably the result of a change in the air quality andtemperature. This should be expected and adjusted for.Although there are many fuels on the market, very few are designed toperform and protect your engine at the likes of 35,000rpm that some of ourengines can attain. It is with this fact in mind, and our own in house testingthat we ONLY RECOMMEND the following fuels:Byron RACE Gen2, Byron RACE Gen2RTR and Model Technics Dynaglow.Keep between 10 and 20% nitromethenecontent for running and first use. The singlemost popular reason for engine failure orunreliability is poor or wrong fuel. Thesefuels have been tested with our engines andwe are confident of their performance.OTHER FUELS MAY WORK WITHOTHER ENGINES BUT THEFUELS LISTED WORK BESTWITH THESE ENGINES. FAILURETO KEEP TO THESE FUELS MAYRESULT IN DAMAGE ORREDUCED PERFORMANCE ANDVOID ANY WARRANTY CLAIMS.
<strong>Fastrax</strong> Engine Settings 29/11/11 13:49 Page 3Pull Starter HintsThe pull starter as fitted to most of the entry level engines is, iftreated correctly, the easiest and most cost effective method of starting anengine. As with every silver lining, there is a cloud. The pullstart system issimilar to that of a lawnmower to look at, but that is where the similarityends. The pullstarter is susceptible to breaking if the engine is flooded ornot lubricated enough. To ensure this does not happen, a few simple rulesshould be followed.1. Before attempting to start the engine from cold, remove theglowplug and then prime the engine with fuel. For cars with a primerbutton on the tank, press this until the fuel has travelled along the fuelpipe to the carburettor and then a further 10-20 presses. For cars withouta primer on the tank, pull the pullstarter rapidly with your finger over theexhaust pipe outlet until the fuel has travelled to the carb, and then afurther 10-20 times to lube the engine.2. Then turn the car upside down and pull the pullstarter rapidly untilall the excess fuel has emptied onto the floor through the glowplug hole.Refit the plug ensuring the copper gasket washer is also refitted. Wind itall the way in and then re-wind 1 to 1.5 turns. This allows gases to escapethus lowering the engines initial compression.3. Start engine. The engine will run “lumpily” or stop after a fewseconds so try and keep it running by blipping the throttle. Tighten theglowplug while the engine is running if possible. If the engine has stalledrestart with the plug tightened.The above procedure hould always be followed from cold or ifdifficulty with starting is being experienced.Troubleshooting Quick GlanceDescriptionProblemFlooding of the EngineThe most common cause of engine and pullstarter damage is from the‘flooding” of the engine or a hydro-locked. More accurately this is toomuch fuel inside the engines crankcase causing the piston to lock. Thepiston rises to the top of the combustion chamber and instead ofcompressing a gas i.e. fuel/air mixture it has to try and compress a liquid,fuel only, which isn’t possible. This puts massive strain on the piston,conrod and crankshaft as well as the starter. Invariably one componentwill fail, usually the conrod causing massive damage to the enginesinternals.To avoid flooding the engine, always start the engine from cold usingthe methods mentioned above and if at any time the engine becomesdifficult to turn over with the pullstarter, then remove the glowplug andempty all excess fuel out and start again. The pullstarter assembly canonly be damaged by a flooded engine, so if you break a pullstarter, this isa warning that your are flooding the engine.Cooling ProblemsEngine overheating is most often caused by running the engine toolean or because the cooling air for the cylinder head is blocked. If themixture is too lean, simply allow the engine to cool, richen the mixture andtry it again. Bodies must have holes cut in them to allow for cooling air tocirculate over the surface of the cylinder head. On most bodies, it is agood idea to cut part of the wind-shield out and part of the back windowto allow for additional cooling.SoloutionEngine will not startStarter will not pullEngine starts andthen stallsEngine sluggish /poor performanceEngine overheatsEngine hesitates orstumblesEngine stalls instantlywhen throttle is fullyopened from idleEngine stalls whiledriving around turnsOut of fuelImproper or contaminated fuelGlow starter not chargedGlow plug badEngine floodedEngine overheatingCarburetor incorrectly adjustedExhaust blockedAir cleaner blockedEngine is floodedRope is jammedEngine seizedIdle speed set too lowAir bubbles in fuel lineGlow plug is fouledEngine is overheatedInsufficient fuel tank pressureBlockage at exhaust header fittingHigh-speed fuel mixture is too richLeaking glow plugFuel bad or contaminatedCarburetor dirty or blockedEngine overheatingEngine over geared for applicationClutch slippingBound up drive trainHigh-speed fuel mixture is too leanCooling air is being blockedExcessive nitro in the fuelExcessive load on the engineLow-speed mixture too leanHigh-speed mixture too leanLow-speed mixture too richEngine overheatedAir bubbles in fuel lineGlow plug fouledGlow plug fouledLow-speed mixture too leanHigh-speed mixture too richFuel level is lowIdle speed set too lowFill fuel tankReplace fuelCharge glow starterReplace glow plug, see “Glow Plug Problems”See “ flooding” section.Allow engine to cool, richen fuel mixture, check airflowReadjust carburetorClean exhaust systemClean air filterClear excess fuel, see “flooding” Section.Repair starter.Examine engine for damage.Increase idle speed.Check for holes in the fuel line.Replace glow plug, see “Glow Plug Problem” section.Allow engine to cool, richen fuel Mixture, check airflowReplace pressure hose- clearCheck flow to and from the tank.Set high-speed mixture to a leaner settingCheck glow plug gasketReplace fuelClean CarburetorStop the engine- find the causeUse a lower gear ratioReplace clutch shoesFind the bound item and repairRichen high-speed mixtureGet air to the headUse fuel with lower nitroCheck for bound up drive trainRichen low-speed mixtureRichen high-speed mixture.Lean low-speed mixture.Stop the engine and find the cause.Check for holes in fuel line.Test or replace plugReplace glow plug.Richen low-speed mixture.Lean high-speed mixture.Add fuelIncrease idle speed.
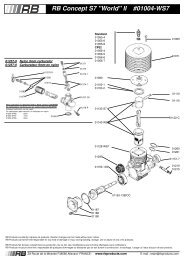
<strong>Fastrax</strong> Engine Settings 29/11/11 13:49 Page 4Factory Settings for <strong>Fastrax</strong> <strong>Enduro</strong>All new engines are assembled with what we will term ‘factorysettings’. These settings should allow almost all engines to be started upand allow for minimal adjustment for running in purposes.Bearing this in mind, we are offering you the opportunity of readjustingto the ‘factory settings’ based on engines currently held in stock.Main Needle Valve (MNV)Screw down until resistance is met, and no further movement is apparent.RE-OPEN 3 FULL TURNS.Supply Fuel nozzle (SFN)This nozzle should not extend beyond the body it is screwed into.SET FLUSH WITH CARBURETTOR BODY END FACE.Throttle Adjustment Screw (TAS)Gently shut off carburettor sliding body and slowly re-open by means ofadjusting screw.ADJUST SCREW UNTIL APPROX 1MM OF APERTURE APPEARS BETWEENTHE END OF THE THROTTLE BODY AND AIR INTAKE APERTURE.Sub Throttle Needle Valve (STNV)With adjustment screw setting in place, close off the throttle body againstthe screw. Very gently screw in the needle valve until it closes off thesupply fuel nozzle and is prevented from re-opening by the entry of theneedle valve into the centre hole of the fuel nozzle (work with great carewith this one - we are only looking for minimal frictional contact betweenboth parts).RE-OPEN VALV E 3.5 TURNS.Glossary of Carburettor FunctionsMain Needle Valve (High Speed)The main needle mixture screw controls how much fuel enters the engineduring mid- to high-speed operation. The screw is turned clockwise tolean (less fuel) and anti-clockwise to richen (more fuel)Sub Throttle Valve (Low Speed)This screw meters the fuel at low speeds. The low-speed mixture screw islocated in the end of the carburetor, inside the throttle arm.This screw controls how much fuel enters the engine at idle and lowthrottle. This adjustment will smooth the idle and improve the accelerationto mid speed. Make this adjustment with the throttle closed, after settingthe idle. The screw is turned clockwise to lean (less fuel) and anticlockwiseto richen (more fuel)Throttle Adjustment ScrewThe throttle adjustment screw regulates the throttle opening to control theidle speed. The screw is turned clockwise for a higher idle speed and anticlockwisefor a lower idle speed.TASMNVSFNSTNVPart No. DescriptionFAST3010FAST3011FAST3012FAST3013FAST3014FAST3015FAST3016FAST3017FAST3018FAST3019FAST3020FAST30<strong>21</strong>FAST3022FAST3023FAST3024FAST3025FAST3026FAST3027FAST3028FAST3029FAST3030FAST3031FAST3050FAST3051FAST3052FAST3053FAST3054FAST3055FAST3056FAST3057FAST3058FAST3059FAST3060Heatsink Head Screws M14 x 3.5 (4pcs)Heatsink Cyclinder HeadTurbo Head ButtonHead Gasket Brass 0.1mm (2pcsHead Gasket Alum 0.3mm (2pcs)Complete Piston/Liner/Rod SetPiston & LinerPiston Wrist Pin & ClipsConnecting RodComplete CrankcaseBall Bearing 13x24x6mmBall Bearing 7x19x6mmBrass Cone/Washer (2ps)Carburetor Bolt Pin/O-RingSilicone Manifold Seal (2pcs)SG CrankshaftRear Back Cover & O-RingRear Cover Screws M3x8mm (4pcs)Pull Start Turbo Fan One-Way & WasherPull Start Rear Cover & O-RingPull Start Hex AxlePull Start Complete SetComplete CarburetorThrottle Rod Nut Screws 3x3mmThrottle Rubber CoverSub Throttle Needle Valve O-Ring 2x1.5mm (2pcs)Carb Main Body O-Ring 11.5x1.25mm (2pcs)Carburetor ThrottleThrottle Adjustable Screws O-Ring 2x1.7mmMain Needle Hub Valve SetSupply Fuel Nozzle O-RingMain Needle O-RingO-Ring Complete Set<strong>Fastrax</strong> is a registered brand of <strong>CML</strong> <strong>Distribution</strong>. Saxon House, Saxon Business Park, Hanbury Road, Bromsgrove, Worcestershire. B60 4AD.England. Tel: +44 (0) 1527 575349 Fax: +44 (0) 1527 570536 E-mail: info@fastrax-rc.com Web site: www.fastrax-rc.com


