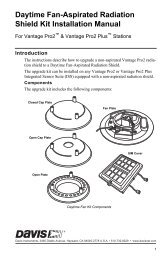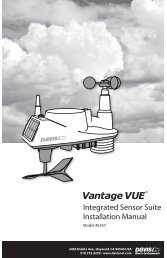
DriveRight 600E VSS Installation Guide - Davis Instruments Corp.
DriveRight 600E VSS Installation Guide - Davis Instruments Corp.
DriveRight 600E VSS Installation Guide - Davis Instruments Corp.
- No tags were found...

You also want an ePaper? Increase the reach of your titles
YUMPU automatically turns print PDFs into web optimized ePapers that Google loves.
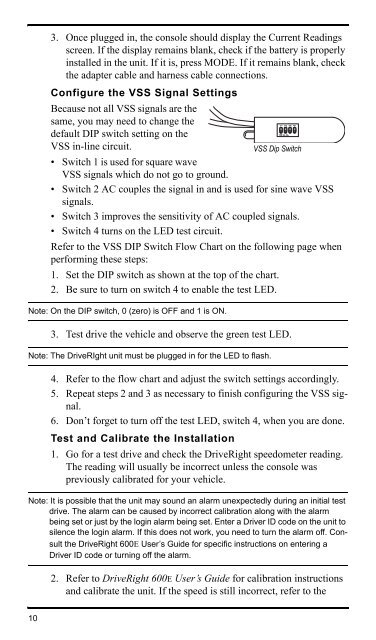
3. Once plugged in, the console should display the Current Readingsscreen. If the display remains blank, check if the battery is properlyinstalled in the unit. If it is, press MODE. If it remains blank, checkthe adapter cable and harness cable connections.Configure the <strong>VSS</strong> Signal SettingsBecause not all <strong>VSS</strong> signals are thesame, you may need to change thedefault DIP switch setting on the<strong>VSS</strong> in-line circuit.<strong>VSS</strong> Dip Switch• Switch 1 is used for square wave<strong>VSS</strong> signals which do not go to ground.• Switch 2 AC couples the signal in and is used for sine wave <strong>VSS</strong>signals.• Switch 3 improves the sensitivity of AC coupled signals.• Switch 4 turns on the LED test circuit.Refer to the <strong>VSS</strong> DIP Switch Flow Chart on the following page whenperforming these steps:1. Set the DIP switch as shown at the top of the chart.2. Be sure to turn on switch 4 to enable the test LED.Note: On the DIP switch, 0 (zero) is OFF and 1 is ON.3. Test drive the vehicle and observe the green test LED.Note: The DriveRIght unit must be plugged in for the LED to flash.4. Refer to the flow chart and adjust the switch settings accordingly.5. Repeat steps 2 and 3 as necessary to finish configuring the <strong>VSS</strong> signal.6. Don’t forget to turn off the test LED, switch 4, when you are done.Test and Calibrate the <strong>Installation</strong>1. Go for a test drive and check the <strong>DriveRight</strong> speedometer reading.The reading will usually be incorrect unless the console waspreviously calibrated for your vehicle.Note: It is possible that the unit may sound an alarm unexpectedly during an initial testdrive. The alarm can be caused by incorrect calibration along with the alarmbeing set or just by the login alarm being set. Enter a Driver ID code on the unit tosilence the login alarm. If this does not work, you need to turn the alarm off. Consultthe <strong>DriveRight</strong> <strong>600E</strong> User’s <strong>Guide</strong> for specific instructions on entering aDriver ID code or turning off the alarm.2. Refer to <strong>DriveRight</strong> <strong>600E</strong> User’s <strong>Guide</strong> for calibration instructionsand calibrate the unit. If the speed is still incorrect, refer to the10