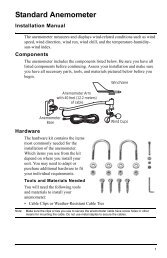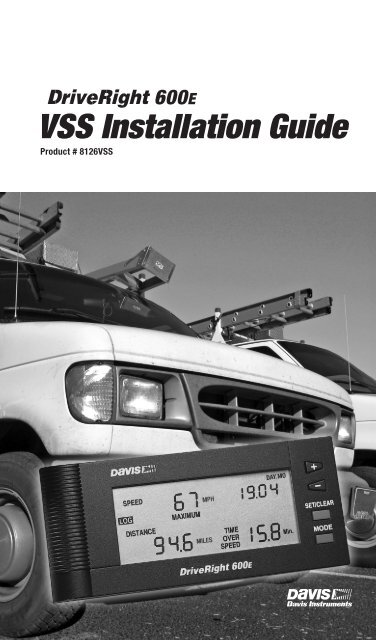
DriveRight 600E VSS Installation Guide - Davis Instruments Corp.
DriveRight 600E VSS Installation Guide - Davis Instruments Corp.
DriveRight 600E VSS Installation Guide - Davis Instruments Corp.
- No tags were found...

You also want an ePaper? Increase the reach of your titles
YUMPU automatically turns print PDFs into web optimized ePapers that Google loves.
elated equipment (headlights, tail lights, air bag, etc.) that you cantap into with an in-line splice. Possible candidate wires includethose from the cigarette lighter, dome light, glove compartmentlight, clock, tail gate light, or other convenience functions.2. Tap a red wire from the fuse holder to the unswitched +12 VDCsource you located. Use either an in-line splice (included) or use afuse tap connector (not included) appropriate for your vehicle.CAUTION: Do not install the fuse into the fuse holder until instructed to do so..In-Line SpliceUnswitched+12Vfrom VehicleTrim off flushstripped wire3. Locate or make a vehicle chassis ground connection for the harnesscable. You can make one by inserting a spade terminal under thehead of a screw threaded into the vehicle chassis. Be sure to test theconnection with a multimeter before connecting the ground wire.4. Crimp a spadeterminal, includedwith the unit toone end of theblack wire. Referto the illustration.5. Connect the spadeterminal to thevehicle chassis ground.VehicleGroundSpadeTerminalStrip 3/16 - 1/4"(5 - 6 mm)Red +12V Wire with FuseholderCrimp Tool,22-18 AWG Position(red dot)Black Ground Wire(22 AWG)6. Strip the red +12 VDC tap wire and the red harness cable wire to 3/16”- 1/4” (5-6 mm), then connect the wires using a butt splice.7. Strip both the black chassis ground tap wire and the black harnesscable wire to 3/16”- 1/4” (5-6 mm), then connect the wires using abutt splice.8. Install the fuse into the fuse holder in the red +12 VDC wire.9. Use a small tie wrap to secure and protect the connections under thedash.CAUTION: If the connections are on the driver’s side, make sure the wires can notbecome entangled in the vehicle pedals or driver’s feet.6
Procedure 2: Install the Adapter CableTwo digital inputs located on the adapter cable are available to monitorthe on/off state of lights, including brake lights, or of other 12 VDCelectrical accessories. Typically Digital Input 1 monitors the brakelights and Digital Input 2 monitors the headlights. In the <strong>DriveRight</strong>software Digital Input 1 is recorded in the GPS table and in the accidentlogs. Digital Input 2 is only recorded in the GPS table.You can record the digital input status during a trip by enabling GPS in<strong>DriveRight</strong> FMS, even if you aren’t using the optional GPS module.CAUTION: Connecting the digital inputs can be hazardous to both the installer andyour vehicle’s electrical system if not done by an experienced installer.This manual assumes you are aware of the inherent dangers of working inand around a vehicle and have a working understanding of electricity.1. If you are not using the digital inputs go to Step 6 of this procedure.2. Use an in-line splice to connectthe red +12 VDC wirefrom the adapter cable to thered +12 VDC wire in the harnesscable. Be sure the tap isprotected by the harness cablefuse. Refer to the “WiringDiagram” on page 4.3. Connect the black groundRed +12VDCHarness CableWireIn-Line SpliceRed +12VDCAdapter Cable WireTrim off flushstripped wirewire from the adapter cable to chassis ground.4. Use in-line butt splices to connect the blue wires with fuses to thegreen and yellow digital input cables.5. Use the included T-Tap disconnects to connect Digital Inputs 1 and2 to the desired circuits.6. Connect the adapter cable to the harness cable.It is easiest to make the connection by first holding the harnesscable connector by the housing. Then hold the adapter connector onthe cable itself next to the sliding connector housing and push the7
two connectors together. The two cables will lock together whenproperly connected.Sliding ConnectorHousingHold cables as shown to connect. The connector housing on thecable slides back when you make the connection, allowing the cables to lock together.Note: To disconnect the cables, hold both cables by the housing and pull apart. Slidingthe housing on the adapter cable connector will release the lock and allow thecables to be separated.Procedure 3: Install the <strong>DriveRight</strong> ConsoleThe <strong>DriveRight</strong> console can be mounted in a number of places,including the top of the dash, on the face of the dash, or on a sun visor.Some of the different mounting choices are illustrated below:Face of Dashboard Mounting OptionsORDouble-SidedFoam TapeMountingBracketMountingBracketFlat Head Self-Tapping ScrewTop of Dashboard Mounting OptionsPan Head Self-Tapping ScrewSplit-Lock WasherFlat WasherFlat Spacefor VelcroHex NutSplit-Lock WasherFlat WasherRight AngleAdapter BracketLoopsHooksMounting BracketFlat Head Machine ScrewBracket MountingVelcro Mounting8
Instructions for Using Velcro ®1. Apply the two adhesive-backed Velcro loop tapes to the flat spaceson the back of the console or to the back of the bracket.2. Attach the hook tapes to the loop tapes, then press adhesive backingof the hook tape onto your selected mounting surface. Do not separatethe Velcro for at least 24 hours after applying.Sun Visor MountingVisor ClipUse the visor clip tomount your console on avisor or door pocket.1. Install the clip on thetop or bottom of theconsole to orient theconsole as you wish.2. Push the clip in untilthe 3rd bumpengages.Finish the <strong>Installation</strong>Use the following steps to finish the installation.OR3 Bumps(to hold clip)Note: It is not necessary to enter a code in order to perform this test. Do not enter acode until you read the user’s manual.Install Battery1. Insert the battery into the<strong>DriveRight</strong> console as shown.Connect Console to AdapterCable1. Connect the adapter cable tothe console cable.It is easiest to make the connectionby first holding the adapter cable by the connector housing andholding the console cable by the cable itself next to the sliding connectorhousing.2. Push the two connectors together. The connector housing on theconsole cable slides back when you make the connection, allowingthe cables to lock together.Note: To disconnect the cables, hold both cables by the housing and pull apart. Slidingthe housing on the adapter cable connector will release the lock and allow thecables to be separated.9
3. Once plugged in, the console should display the Current Readingsscreen. If the display remains blank, check if the battery is properlyinstalled in the unit. If it is, press MODE. If it remains blank, checkthe adapter cable and harness cable connections.Configure the <strong>VSS</strong> Signal SettingsBecause not all <strong>VSS</strong> signals are thesame, you may need to change thedefault DIP switch setting on the<strong>VSS</strong> in-line circuit.<strong>VSS</strong> Dip Switch• Switch 1 is used for square wave<strong>VSS</strong> signals which do not go to ground.• Switch 2 AC couples the signal in and is used for sine wave <strong>VSS</strong>signals.• Switch 3 improves the sensitivity of AC coupled signals.• Switch 4 turns on the LED test circuit.Refer to the <strong>VSS</strong> DIP Switch Flow Chart on the following page whenperforming these steps:1. Set the DIP switch as shown at the top of the chart.2. Be sure to turn on switch 4 to enable the test LED.Note: On the DIP switch, 0 (zero) is OFF and 1 is ON.3. Test drive the vehicle and observe the green test LED.Note: The DriveRIght unit must be plugged in for the LED to flash.4. Refer to the flow chart and adjust the switch settings accordingly.5. Repeat steps 2 and 3 as necessary to finish configuring the <strong>VSS</strong> signal.6. Don’t forget to turn off the test LED, switch 4, when you are done.Test and Calibrate the <strong>Installation</strong>1. Go for a test drive and check the <strong>DriveRight</strong> speedometer reading.The reading will usually be incorrect unless the console waspreviously calibrated for your vehicle.Note: It is possible that the unit may sound an alarm unexpectedly during an initial testdrive. The alarm can be caused by incorrect calibration along with the alarmbeing set or just by the login alarm being set. Enter a Driver ID code on the unit tosilence the login alarm. If this does not work, you need to turn the alarm off. Consultthe <strong>DriveRight</strong> <strong>600E</strong> User’s <strong>Guide</strong> for specific instructions on entering aDriver ID code or turning off the alarm.2. Refer to <strong>DriveRight</strong> <strong>600E</strong> User’s <strong>Guide</strong> for calibration instructionsand calibrate the unit. If the speed is still incorrect, refer to the10
Troubleshooting section on page 12 in this manual as well as thetroubleshooting information in the <strong>DriveRight</strong> <strong>600E</strong> User’s <strong>Guide</strong>for help.<strong>VSS</strong> DIP Switch Flow ChartUse this flow chart to determine the optimum <strong>VSS</strong> dip switch setting.Set1 2 3 40 1 0 10 = OFF1 = ONYesDrive 2 mph.Green LED flashingor dimmed?NoSet1 2 3 41 1 0 1Drive 2 mph.Green LED flashingor dimmed?YesNoSet1 2 3 41 0 1 1Drive 2 mph.Green LED flashingor dimmed?YesNoTurn Test LED Off (SW4)and you are done.<strong>VSS</strong> notworking.SeeTroubleshooting.11
SpecificationsVisit our website for additional product information: www.davisnet.com.<strong>VSS</strong> CompatibilityThe <strong>DriveRight</strong> can work with many different <strong>VSS</strong> signals providedthe switch settings of the <strong>VSS</strong> in-line circuit are set correctly. However,if the signal does not meet the specifications below it may not work.Maximum <strong>VSS</strong> frequency: . . . . . . . . . . . . . . . . . .1 khz (144,000 PPM) at25 mphMin peak to peak amplitude: . . . . . . . . . . . . . . . .1 volt at 5 mphMax peak to peak amplitude: . . . . . . . . . . . . . . . .25 volts.<strong>VSS</strong> inline-circuit Input Impedance:. . . . . . . . . . .22k.Digital Input SpecificationsNumber of digital inputs: . . . . . . . . . . . . . . . . . . .2Input 1 wire color:. . . . . . . . . . . . . . . . . . . . . . . . .GreenInput 2 wire color:. . . . . . . . . . . . . . . . . . . . . . . . .YellowInput Impedance: . . . . . . . . . . . . . . . . . . . . . . . . .> 1 MegaohmHigh input range: . . . . . . . . . . . . . . . . . . . . . . . . .3 VDC min, system voltagemaxLow input range: . . . . . . . . . . . . . . . . . . . . . . . . .-0.5 min to 1.0 VDC maxInput 1 Sampling:. . . . . . . . . . . . . . . . . . . . . . . . .Start & stop of trip, GPSrecord, Accident LogInput 2 Sampling:. . . . . . . . . . . . . . . . . . . . . . . . .Start and stop of trip,GPS recordInput power requirements: . . . . . . . . . . . . . . . . . .+12 VDC nominalFuses (3):. . . . . . . . . . . . . . . . . . . . . . . . . . . . . . .3AG, 0.25A, Slo-Blo(1.25 x 0.25”, 6.4 x31.8mm)13
Technical SupportIf you are experiencing problems with your <strong>DriveRight</strong>, first check thecable connections and verify the calibration settings. If you are unableto solve the problem, please call <strong>Davis</strong> Technical Support. We’ll beglad to help. Most questions can be answered on the phone. You canalso email us for support, or visit our website. Sorry, we are unable toaccept collect calls.Note: Please do not return items for repair without prior authorization.(510) 732-7814 – Monday through Friday, 7:00 a.m. to 5:30 p.m.Pacific Time.(510) 670-0589 – Fax to Technical Support.support@davisnet.com – E-mail to Technical Support.info@davisnet.com – E-mail to <strong>Davis</strong> <strong>Instruments</strong>.www.davisnet.com – Product documentation is available on the<strong>DriveRight</strong> Support section of our website. Watch for FAQs and otherupdates.14