The Mathematics of the Longitude - Department of Mathematics
The Mathematics of the Longitude - Department of Mathematics
The Mathematics of the Longitude - Department of Mathematics

Create successful ePaper yourself
Turn your PDF publications into a flip-book with our unique Google optimized e-Paper software.
<strong>The</strong> <strong>Ma<strong>the</strong>matics</strong> <strong>of</strong> <strong>the</strong> <strong>Longitude</strong><br />
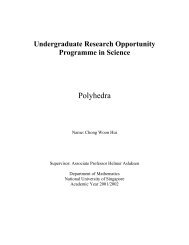
Wong Lee Nah<br />
An academic exercise presented in partial fulfilment for <strong>the</strong> degree <strong>of</strong> Bachelor <strong>of</strong><br />
Science with Honours in <strong>Ma<strong>the</strong>matics</strong>.<br />
Supervisor : Associate Pr<strong>of</strong>essor Helmer Aslaksen<br />
<strong>Department</strong> <strong>of</strong> <strong>Ma<strong>the</strong>matics</strong><br />
National University <strong>of</strong> Singapore<br />
2000/2001
Contents<br />
Acknowledgements...................................................................................................i<br />
Summary ................................................................................................................. ii<br />
Statement <strong>of</strong> Author's Contributions.......................................................................iv<br />
Chapter 1 Introduction ......................................................................................1<br />
Chapter 2 Terrestrial, Celestial and Horizon Coordinate Systems ...................3<br />
2.1 Terrestrial Coordinate System....................................................3<br />
2.2 <strong>The</strong> Celestial Sphere...................................................................5<br />
2.3 O<strong>the</strong>r Reference Markers on <strong>the</strong> Celestial Sphere .....................6<br />
2.4 <strong>The</strong> Celestial Coordinate System ...............................................7<br />
2.5 Geographical Position <strong>of</strong> a Celestial Body.................................8<br />
2.6 Horizon Coordinate System .....................................................10<br />
Chapter 3 Time Measurement.........................................................................12<br />
3.1 Greenwich Mean Time.............................................................12<br />
3.2 Greenwich Apparent Time .......................................................13<br />
3.3 Equation <strong>of</strong> Time......................................................................13<br />
3.4 Local Mean Time .....................................................................13<br />
3.5 Local Apparent Time................................................................14<br />
Chapter 4 Spherical Trigonometry..................................................................15<br />
4.1 <strong>The</strong> Spherical Triangle .............................................................15<br />
4.2 Spherical Trigonometry............................................................16<br />
Chapter 5 How to Measure <strong>the</strong> Altitude <strong>of</strong> a Celestial Body..........................18<br />
5.1 Introduction ..............................................................................18<br />
5.2 <strong>The</strong> Sextant...............................................................................20<br />
5.3 <strong>The</strong> Vernier Scale.....................................................................22<br />
5.4 Sextant Corrections ..................................................................23
Chapter 6 Lunar Eclipse Method ....................................................................29<br />
6.1 Introduction ..............................................................................29<br />
6.2 What is a Lunar Eclipse............................................................30<br />
6.3 Lunar Eclipses Method.............................................................31<br />
6.4 Weakness <strong>of</strong> <strong>the</strong> Lunar Eclipse Method...................................31<br />
Chapter 7 Eclipses <strong>of</strong> Jupiter's Satellites Method ...........................................33<br />
7.1 Introduction ..............................................................................33<br />
7.2 Eclipses <strong>of</strong> Jupiter's Satellites Method .....................................34<br />
7.3 Disadvantages <strong>of</strong> <strong>the</strong> eclipses <strong>of</strong> Jupiter's Satellites Method ...34<br />
Chapter 8 Lunar Distance Method..................................................................36<br />
8.1 Introduction ..............................................................................36<br />
8.2 Lunar Distance Method ............................................................37<br />
8.3 Clearing <strong>the</strong> Lunar Distance.....................................................39<br />
8.3.1 Borda's Method for Clearing <strong>the</strong> Lunar Distance...........39<br />
8.3.2 Application <strong>of</strong> <strong>the</strong> Borda's Method ................................42<br />
8.3.3 Merrifield's Approximation Method for Clearing <strong>the</strong><br />
Lunar Distance...............................................................43<br />
8.3.4 Application <strong>of</strong> <strong>the</strong> Merrifield's Approximation<br />
Method ...........................................................................46<br />
Chapter 9 Chronometer...................................................................................48<br />
Chapter 10 Meridian Transit Method................................................................50<br />
10.1 Meridian Transit Method........................................................50<br />
10.2 How to Determine TTransit .......................................................51<br />
10.3 Errors <strong>of</strong> Meridian Transit Method ........................................51<br />
Chapter 11 Sumner's Method............................................................................53<br />
11.1 Introduction ............................................................................53<br />
11.2 <strong>The</strong> Position Circle.................................................................54<br />
11.3 Sumner Lines <strong>of</strong> Position .......................................................55<br />
11.4 Sumner's Method....................................................................55
Chapter 12 <strong>The</strong> Intercept Method .....................................................................58<br />
12.1 Introduction ............................................................................58<br />
12.2 <strong>The</strong> Position Line ...................................................................58<br />
12.3 <strong>The</strong> Intercept Method .............................................................59<br />
Chapter 13 Prime Vertical Method ...................................................................64<br />
Bibliography ........................................................................................................66
Acknowledgements<br />
Firstly, I would like to take this opportunity to express my sincere appreciation<br />
and gratitude to my supervisor, Associate Pr<strong>of</strong>essor Helmer Aslaksen, for his<br />
constant concern, patient guidance and invaluable suggestions throughout <strong>the</strong><br />
preparation <strong>of</strong> this project. In particular, I am especially thankful to him for his<br />
continued patient in helping me to improve my <strong>the</strong>sis.<br />
Next, I would like to thank my family for <strong>the</strong>ir encouragements and support. Last<br />
but not least, I would like to thank Martin Yeo for being a good personal as well as<br />
spiritual companion to me.
Summary<br />
<strong>The</strong> main objective <strong>of</strong> this project is to write a clear ma<strong>the</strong>matical supplement to<br />
<strong>the</strong> book “<strong>Longitude</strong>” by Dava Sobel. This bestseller gives a wonderful summary<br />
<strong>of</strong> <strong>the</strong> history <strong>of</strong> <strong>the</strong> problem, but does not cover <strong>the</strong> ma<strong>the</strong>matical background. In<br />
this project, a summary <strong>of</strong> <strong>the</strong> <strong>the</strong>ory <strong>of</strong> navigation and <strong>the</strong> ma<strong>the</strong>matical<br />
background <strong>of</strong> <strong>the</strong> different methods for finding <strong>the</strong> longitude are being covered.<br />
Throughout history, it has been easy to determine latitude by measuring <strong>the</strong> angle<br />
between <strong>the</strong> Pole star or <strong>the</strong> sun at noon and <strong>the</strong> horizon by a simple angle<br />
measuring device or an advanced sextant. But how to determine longitude at sea<br />
had been a serious problem for a long time.<br />
Since <strong>the</strong>y could find latitude, but not longitude, navigators run mainly north and<br />
south until <strong>the</strong>y reached <strong>the</strong> latitude <strong>of</strong> <strong>the</strong>ir destinations, and <strong>the</strong>n turn east or west<br />
to make a landfall. Because <strong>the</strong> ships were not taking <strong>the</strong> most direct route to <strong>the</strong>ir<br />
destination, <strong>the</strong> journeys were long and dangerous. Thus, <strong>the</strong>re was a need to know<br />
longitude.<br />
In <strong>the</strong> ancient times, lunar eclipse was used as a clock for determining longitude.<br />
However, lunar eclipses are rare. Hence it is <strong>of</strong> no use to ships. Later, Jupiter's<br />
moon's eclipse was also used as a celestial clock for determining longitude. Unlike<br />
lunar eclipse, Jupiter's moon experienced a lot <strong>of</strong> eclipses. This idea actually<br />
worked but <strong>the</strong> difficulty in making <strong>the</strong>se observations on a rocking ship made it<br />
impractical.<br />
Lunar distance method was ano<strong>the</strong>r <strong>the</strong>oretically possible method by measuring<br />
<strong>the</strong> angle between <strong>the</strong> moon and o<strong>the</strong>r celestial bodies to determine precise time.<br />
However, <strong>the</strong> calculations were difficult and time consuming. <strong>The</strong> heyday <strong>of</strong><br />
Lunar distance method was probably from about 1780 to 1840.<br />
Finally in 1759, a British clockmaker named John Harrison developed a clock,<br />
called <strong>the</strong> chronometer, which was consistently accurate at sea. Because <strong>the</strong> earth
otates 15 degrees per hour, if you know <strong>the</strong> precise time at <strong>the</strong> Greenwich<br />
meridian <strong>of</strong> longitude, <strong>the</strong> difference between that time and <strong>the</strong> navigator's local<br />
time (<strong>the</strong> time at his location) will give him his longitude. At last <strong>the</strong> mariner had<br />
<strong>the</strong> ability to easily and consistently determine his exact position.<br />
With <strong>the</strong> invention <strong>of</strong> <strong>the</strong> chronometer, <strong>the</strong> Lunar distance method was being<br />
displaced completely. <strong>The</strong> introduction <strong>of</strong> <strong>the</strong> chronometer not only solved <strong>the</strong><br />
problem <strong>of</strong> measuring longitude but also made possible more flexible methods <strong>of</strong><br />
fixing position which did not involve finding latitude and longitude separately. In<br />
1837, Captain Charles Sumner devised a trigonometric method <strong>of</strong> obtaining from<br />
celestial observations <strong>the</strong> lines known as Sumner lines <strong>of</strong> position. In 1875,<br />
Frenchman Marcq St. Hilaire improved upon Sumner's trigonometric calculations.<br />
O<strong>the</strong>r methods such as <strong>the</strong> prime vertical method and <strong>the</strong> meridian transit method<br />
were also introduced for determining longitude.<br />
Hence, with <strong>the</strong> chronometer, longitude can be determined using <strong>the</strong> any <strong>of</strong> those<br />
methods mentioned above. Thus, navigators no longer have to fear being lost at<br />
sea.<br />
In this <strong>the</strong>sis, chapter 1 starts <strong>of</strong>f with a short introduction to <strong>the</strong> problems <strong>of</strong><br />
determining longitude. Next, chapter 2 to 4 introduce all <strong>the</strong> terminology and<br />
formulas used in this <strong>the</strong>sis. And chapter 5 gives a description on <strong>the</strong> evolution and<br />
<strong>the</strong> basic principal <strong>of</strong> a sextant. <strong>The</strong>n chapter 9 describes <strong>the</strong> invention <strong>of</strong> <strong>the</strong><br />
chronometer. Finally, chapter 6 to 8 and chapter 10 to 13 touch on all those<br />
methods mentioned above to determine longitude in greater details.
Statement <strong>of</strong> Author's Contributions<br />
In this project, I have tried with my best effort to write a clear ma<strong>the</strong>matical<br />
supplement to <strong>the</strong> book “<strong>Longitude</strong>” by Dava Sobel. <strong>The</strong> summary <strong>of</strong> <strong>the</strong> <strong>the</strong>ory <strong>of</strong><br />
navigation and <strong>the</strong> ma<strong>the</strong>matical background <strong>of</strong> <strong>the</strong> different methods for finding<br />
<strong>the</strong> longitude are being presented in such a way that you would find it easy to<br />
understand. Much work was done on <strong>the</strong> extraction and reorganization <strong>of</strong> basic<br />
ideas and terminology relevant to <strong>the</strong> context <strong>of</strong> this project (as shown from<br />
chapter 2 and 4). I have also furnished details and explanation <strong>of</strong> section 8.3.1 and<br />
8.3.3. I have understood <strong>the</strong> Meridian Transit Method, <strong>the</strong> Sumner's Method and<br />
<strong>the</strong> Prime Vertical Method and presented <strong>the</strong> procedures <strong>of</strong> each <strong>of</strong> <strong>the</strong> methods in<br />
a systematic way with some guidance from my supervisor (Section 10.1, 11.4 and<br />
chapter 13).
Chapter 1<br />
Introduction<br />
Throughout history, it has been easy to determine latitude by measuring <strong>the</strong> angle<br />
between <strong>the</strong> pole star and <strong>the</strong> horizon by a simple measuring device or an<br />
advanced sextant. Later with <strong>the</strong> available <strong>of</strong> tables for <strong>the</strong> sun declination, latitude<br />
can also be determined by measuring <strong>the</strong> angle between <strong>the</strong> sun and <strong>the</strong> horizon.<br />
At first sight it looks as though we ought to be able to find longitude in much <strong>the</strong><br />
same way; we can't, because <strong>the</strong> earth is spinning. <strong>The</strong> essential difference is, <strong>of</strong><br />
course, that latitude is measured with respect to <strong>the</strong> equator and poles <strong>of</strong> <strong>the</strong> earth<br />
which remain, stationary with respect to <strong>the</strong> stars or <strong>the</strong> sun. On <strong>the</strong> o<strong>the</strong>r hand,<br />
longitude is measured from some arbitrary north-south line, nowadays through<br />
Greenwich, and this line is not fixed with respect to <strong>the</strong> stars or sun but rotates<br />
with <strong>the</strong> earth. This means that to measure longitude by <strong>the</strong> stars or <strong>the</strong> sun we are<br />
concerned essentially with <strong>the</strong> rotation <strong>of</strong> <strong>the</strong> earth or, in o<strong>the</strong>r words, with <strong>the</strong><br />
measurement <strong>of</strong> time.<br />
As early as 1514, navigators knew well that <strong>the</strong> secret to determining longitude at<br />
sea lay in comparing <strong>the</strong> time aboard ship to <strong>the</strong> time at <strong>the</strong> home port at <strong>the</strong> very<br />
same moment. <strong>The</strong>y could <strong>the</strong>n convert <strong>the</strong> hour difference between <strong>the</strong> two places<br />
into a geographical one. Since <strong>the</strong> earth takes twenty-four hours to complete one<br />
full revolution <strong>of</strong> three hundred sixty degrees, in one hour it completes one<br />
twenty-fourth <strong>of</strong> that, or fifteen degrees. Each hour's time difference between <strong>the</strong><br />
ship and <strong>the</strong> starting point <strong>the</strong>refore marks a progress <strong>of</strong> fifteen degrees <strong>of</strong><br />
longitude to <strong>the</strong> east or west. Unfortunately, although navigators could figure out<br />
<strong>the</strong>ir local time at sea by watching <strong>the</strong> sun every day to see when it reached its<br />
highest point in <strong>the</strong> sky (at noon), <strong>the</strong>y could not keep track <strong>of</strong> time at ano<strong>the</strong>r
place. For that <strong>the</strong>y would have needed a clock or a watch set to <strong>the</strong> home port<br />
time. But pendulum clocks went haywire on <strong>the</strong> decks <strong>of</strong> rolling ships: <strong>the</strong>y<br />
slowed down, or sped up, or stopped running altoge<strong>the</strong>r.<br />
Early attempts to find longitude, such as <strong>the</strong> Lunar eclipses method, <strong>the</strong> Jupiter's<br />
moon eclipses method and <strong>the</strong> Lunar distances method were used at sea. But each<br />
<strong>of</strong> <strong>the</strong>se methods, which will be discussed in later chapters, has it own weakness<br />
and was not practical at sea.<br />
Astronomers tried to give mariners a way to tell time in two places at once by <strong>the</strong><br />
moon and stars. Indeed, <strong>the</strong> great observatories in Paris and London were founded<br />
(in 1666 and 1674, respectively) not to conduct pure research in astronomy, but to<br />
perfect <strong>the</strong> art <strong>of</strong> navigation.<br />
None <strong>the</strong> less, as <strong>the</strong> 18 th century dawned no better method had come along and<br />
<strong>the</strong> increasing toll <strong>of</strong> lost ships and lives was causing growing concern. In a<br />
notorious accident in 1707, Royal Navy ships, believing <strong>the</strong>mselves to be in<br />
deeper water fur<strong>the</strong>r east, were wrecked on <strong>the</strong> Scilly Isles with <strong>the</strong> loss <strong>of</strong> almost<br />
2000 lives.<br />
Finally in 1714, <strong>the</strong> British Government <strong>of</strong>fered, by Act <strong>of</strong> Parliament, 20 000<br />
pounds for a solution which could provide longitude to within half-a-degree (2<br />
minutes <strong>of</strong> time). <strong>The</strong> methods would be tested on a ship, sailing over <strong>the</strong> ocean,<br />
from Great Britain to any such Port in <strong>the</strong> West Indies as those Commissioners<br />
choose without losing <strong>the</strong>ir longitude beyond <strong>the</strong> limits before mentioned and<br />
should prove to be practicable and useful at sea.
Chapter 2<br />
Terrestrial, Celestial and Horizon<br />
Coordinate Systems<br />
2.1 Terrestrial Coordinate System<br />
<strong>The</strong> position <strong>of</strong> an observer on <strong>the</strong> earth's surface can be specified by <strong>the</strong><br />
terrestrial coordinates, latitude and longitude.<br />
Lines <strong>of</strong> latitude are imaginary lines which run in an east-west direction<br />
around <strong>the</strong> world (Figure 2.1). <strong>The</strong>y are also called parallels <strong>of</strong> latitude<br />
because <strong>the</strong>y run parallel to each o<strong>the</strong>r. Latitude is measured in degrees (°).<br />
Figure 2.1 Lines <strong>of</strong> latitude.
<strong>The</strong> most important line <strong>of</strong> latitude is <strong>the</strong> Equator (0°). <strong>The</strong> North Pole is<br />
90° North (90°N) and <strong>the</strong> South Pole is 90° South (90°S). All o<strong>the</strong>r lines <strong>of</strong><br />
latitude are given a number between 0° and 90°, ei<strong>the</strong>r North (N) or South<br />
(S) <strong>of</strong> <strong>the</strong> Equator. Some o<strong>the</strong>r important lines <strong>of</strong> latitude are <strong>the</strong> Tropic <strong>of</strong><br />
Cancer (23.5°N), Tropic <strong>of</strong> Capricorn (23.5°S), Arctic Circle (66.5°N) and<br />
Antarctic Circle (66.5°S).<br />
Lines <strong>of</strong> longitude are imaginary lines which run in a north-south direction,<br />
from <strong>the</strong> North Pole to <strong>the</strong> South Pole (Figure 2.2). <strong>The</strong>y are also measured<br />
in degrees (°).<br />
Figure 2.2 Lines <strong>of</strong> longitude.<br />
Any circle on <strong>the</strong> surface <strong>of</strong> a sphere whose plane passes through <strong>the</strong> center<br />
<strong>of</strong> <strong>the</strong> sphere is called a great circle. Thus, a great circle is a circle with <strong>the</strong><br />
greatest possible diameter on <strong>the</strong> surface <strong>of</strong> a sphere. Any circle on <strong>the</strong><br />
surface <strong>of</strong> a sphere whose plane does not pass through <strong>the</strong> center <strong>of</strong> <strong>the</strong><br />
sphere is called a small circle.<br />
A meridian is a great circle going through <strong>the</strong> geographic poles, <strong>the</strong> poles<br />
where <strong>the</strong> axis <strong>of</strong> rotation (polar axis) intersects <strong>the</strong> earth's surface. <strong>The</strong><br />
upper branch <strong>of</strong> a meridian is <strong>the</strong> half <strong>of</strong> <strong>the</strong> great circle from pole to pole<br />
passing through a given position; <strong>the</strong> lower branch is <strong>the</strong> opposite half.<br />
<strong>The</strong> equator is <strong>the</strong> only great circle whose plane is perpendicular to <strong>the</strong><br />
polar axis. Fur<strong>the</strong>r <strong>the</strong> equator is <strong>the</strong> only parallel <strong>of</strong> latitude being a great
circle. Any o<strong>the</strong>r parallel <strong>of</strong> latitude is a small circle whose plane is parallel<br />
to <strong>the</strong> plane <strong>of</strong> <strong>the</strong> equator.<br />
<strong>The</strong> Greenwich meridian, <strong>the</strong> meridian passing through <strong>the</strong> Royal<br />
Greenwich Observatory in London (closed in 1998), was adopted as <strong>the</strong><br />
prime meridian at <strong>the</strong> International Meridian Conference in October 1884.<br />
Its upper branch (0°) is <strong>the</strong> reference for measuring longitudes, its lower<br />
branch (180°) is known as <strong>the</strong> International Dateline. All <strong>the</strong> lines <strong>of</strong><br />
longitude are given a number between 0° and 180°, ei<strong>the</strong>r East (E) or West<br />
(W) <strong>of</strong> <strong>the</strong> Greenwich Meridian.<br />
2.2 <strong>The</strong> Celestial Sphere<br />
Figure 2.3<br />
<strong>The</strong> celestial sphere is an imaginary sphere whose center coincides with<br />
<strong>the</strong> center <strong>of</strong> <strong>the</strong> Earth. It represents <strong>the</strong> entire sky; all celestial bodies o<strong>the</strong>r<br />
than <strong>the</strong> earth are imagined as being located on its inside surface. If <strong>the</strong><br />
earth's axis is extended, <strong>the</strong> points where it intersects <strong>the</strong> celestial sphere<br />
are called <strong>the</strong> celestial poles; <strong>the</strong> north celestial pole is directly above <strong>the</strong><br />
earth's north pole, and <strong>the</strong> south celestial pole is directly below <strong>the</strong> earth's<br />
south pole. <strong>The</strong> great circle on <strong>the</strong> celestial sphere halfway between <strong>the</strong><br />
celestial poles is called <strong>the</strong> celestial equator; it can be thought <strong>of</strong> as <strong>the</strong><br />
earth's equator projected onto <strong>the</strong> celestial sphere (Figure 2.4).
Figure 2.4<br />
2.3 O<strong>the</strong>r Reference Markers on <strong>the</strong> Celestial Sphere<br />
<strong>The</strong> earth orbits <strong>the</strong> sun in a plane called <strong>the</strong> ecliptic (Figure 2.5). From<br />
our vantage point, however, it appears that <strong>the</strong> sun circle us once a year in<br />
that same plane. Hence, <strong>the</strong> ecliptic may be alternately defined as "<strong>the</strong><br />
apparent path <strong>of</strong> <strong>the</strong> sun on <strong>the</strong> celestial sphere".<br />
Figure 2.5 Earth orbits <strong>the</strong> sun in an ecliptic plane.<br />
<strong>The</strong> ecliptic is tilted 23.5 degrees with respect to <strong>the</strong> celestial equator<br />
because <strong>the</strong> earth's rotation axis is tilted by 23.5 degrees with respect to its<br />
orbital plane. Be sure to keep distinct in your mind <strong>the</strong> difference between<br />
<strong>the</strong> slow drift <strong>of</strong> <strong>the</strong> sun along <strong>the</strong> ecliptic during <strong>the</strong> year and <strong>the</strong> fast<br />
motion <strong>of</strong> <strong>the</strong> rising and setting sun during a day.
<strong>The</strong> ecliptic and celestial equator intersect at two points: <strong>the</strong> vernal<br />
(spring) equinox and autumnal (fall) equinox. <strong>The</strong> sun crosses <strong>the</strong><br />
celestial equator moving northward at <strong>the</strong> vernal equinox around March 21<br />
and crosses <strong>the</strong> celestial equator moving southward at <strong>the</strong> autumnal<br />
equinox around September 22. When <strong>the</strong> sun is on <strong>the</strong> celestial equator at<br />
<strong>the</strong> equinoxes, everybody on <strong>the</strong> earth experiences 12 hours <strong>of</strong> daylight and<br />
12 hours <strong>of</strong> night. <strong>The</strong> day <strong>of</strong> <strong>the</strong> vernal equinox marks <strong>the</strong> beginning <strong>of</strong><br />
<strong>the</strong> three-month season <strong>of</strong> spring on our calendar and <strong>the</strong> day <strong>of</strong> <strong>the</strong> autumn<br />
equinox marks <strong>the</strong> beginning <strong>of</strong> <strong>the</strong> season <strong>of</strong> autumn (fall) on our<br />
calendar.<br />
Figure 2.6<br />
2.4 <strong>The</strong> Celestial Coordinate System<br />
<strong>The</strong> celestial coordinate system is used for indicating <strong>the</strong> positions <strong>of</strong><br />
celestial bodies on <strong>the</strong> celestial sphere.<br />
To designate <strong>the</strong> position <strong>of</strong> a celestial body, consider an imaginary great<br />
circle passing through <strong>the</strong> celestial poles and through <strong>the</strong> body. This is <strong>the</strong><br />
body's hour circle, analogous to a meridian <strong>of</strong> longitude on earth. <strong>The</strong>n<br />
measure along <strong>the</strong> celestial equator <strong>the</strong> angle between <strong>the</strong> vernal equinox<br />
and <strong>the</strong> body's hour circle. This angle is called <strong>the</strong> body's right ascension
(RA) and is measured in hours, minutes, and seconds ra<strong>the</strong>r than in <strong>the</strong><br />
more familiar degrees, minutes and seconds. (<strong>The</strong>re are 360 degrees or 24<br />
hours in a full circle.) <strong>The</strong> right ascension is always measured eastward<br />
from <strong>the</strong> vernal equinox.<br />
Next measure along <strong>the</strong> body's hour circle and <strong>the</strong> angle between <strong>the</strong><br />
celestial equator and <strong>the</strong> position <strong>of</strong> <strong>the</strong> body. This angle is called <strong>the</strong><br />
declination (Dec) <strong>of</strong> <strong>the</strong> body and is measured in degrees, minutes and<br />
seconds north or south <strong>of</strong> <strong>the</strong> celestial equator, analogous to latitude on <strong>the</strong><br />
earth (Figure 2.7).<br />
Right ascension and declination toge<strong>the</strong>r determine <strong>the</strong> location <strong>of</strong> a body<br />
on <strong>the</strong> celestial sphere.<br />
Figure 2.7 shows <strong>the</strong> Dec and RA <strong>of</strong> a celestial body.<br />
2.5 Geographical Position <strong>of</strong> a Celestial Body<br />
Now consider a line connecting <strong>the</strong> center <strong>of</strong> a celestial body and <strong>the</strong> center<br />
<strong>of</strong> <strong>the</strong> earth. <strong>The</strong> point where this line crosses <strong>the</strong> surface <strong>of</strong> <strong>the</strong> earth is<br />
called <strong>the</strong> geographical position (GP) <strong>of</strong> <strong>the</strong> body (Figure 2.8). An
observer positioned in <strong>the</strong> GP <strong>of</strong> a body will see <strong>the</strong> body directly above<br />
his head.<br />
Figure 2.8 shows <strong>the</strong> GP <strong>of</strong> a celestial body.<br />
Because both <strong>the</strong> equator and <strong>the</strong> celestial equator are in <strong>the</strong> same plane,<br />
<strong>the</strong> latitude <strong>of</strong> <strong>the</strong> GP is equal to <strong>the</strong> declination <strong>of</strong> <strong>the</strong> body. <strong>The</strong> longitude<br />
<strong>of</strong> <strong>the</strong> GP is called Greenwich Hour Angle (GHA). <strong>The</strong> GHA <strong>of</strong> any<br />
body is <strong>the</strong> angle, measured at <strong>the</strong> pole <strong>of</strong> <strong>the</strong> celestial sphere, between <strong>the</strong><br />
Greenwich meridian and <strong>the</strong> hour circle <strong>of</strong> <strong>the</strong> body. <strong>The</strong> angle is measured<br />
along <strong>the</strong> celestial equator westward from <strong>the</strong> upper branch <strong>of</strong> <strong>the</strong><br />
Greenwich celestial meridian, from 0° through 360° (Figure 2.9). <strong>The</strong><br />
GHA differs from <strong>the</strong> longitude on <strong>the</strong> earth's surface in that longitude is<br />
measured east or west, from 0° through 180°, and remains constant. <strong>The</strong><br />
GHA <strong>of</strong> a body, however, increases through each day as <strong>the</strong> earth rotates.<br />
Figure 2.9 shows <strong>the</strong> Dec and GHA <strong>of</strong> a celestial body.
2.6 Horizon Coordinate System<br />
<strong>The</strong> apparent position <strong>of</strong> a body in <strong>the</strong> sky is defined by <strong>the</strong> horizon<br />
coordinate system (Figure 2.10). <strong>The</strong> altitude, H, is <strong>the</strong> vertical angle<br />
between <strong>the</strong> horizontal plane to <strong>the</strong> line <strong>of</strong> sight to <strong>the</strong> body. <strong>The</strong> point<br />
directly overhead <strong>the</strong> observer is called <strong>the</strong> zenith. <strong>The</strong> zenith distance, z,<br />
is <strong>the</strong> angular distance between <strong>the</strong> zenith and <strong>the</strong> body. H and z are<br />
complementary angles (H + z = 90°). <strong>The</strong> azimuth, AzN, is <strong>the</strong> horizontal<br />
direction <strong>of</strong> <strong>the</strong> body with respect to <strong>the</strong> geographic (true) north point on<br />
<strong>the</strong> horizon, measured clockwise through 360°.<br />
Figure 2.10<br />
Each <strong>of</strong> <strong>the</strong> following imaginary horizontal planes parallel to each o<strong>the</strong>r<br />
can be used as <strong>the</strong> reference plane for <strong>the</strong> horizon coordinate system<br />
(Figure 2.11).<br />
<strong>The</strong> true horizon is <strong>the</strong> horizontal plane tangent to <strong>the</strong> earth at <strong>the</strong><br />
observer's position.<br />
<strong>The</strong> celestial horizon is <strong>the</strong> horizontal plane passing through <strong>the</strong> center <strong>of</strong><br />
<strong>the</strong> earth.
Figure 2.11<br />
None <strong>of</strong> <strong>the</strong> above horizon coincides with <strong>the</strong> visible horizon used as <strong>the</strong><br />
natural reference at sea. Only <strong>the</strong> altitude with respect to <strong>the</strong> celestial<br />
horizon is relevant to navigational calculations. Since it can not be<br />
measured directly, it has to be derived from <strong>the</strong> altitude with respect to <strong>the</strong><br />
visible and true horizon (altitude corrections, see chapter 5).
Chapter 3<br />
Time Measurement<br />
3.1 Greenwich Mean Time<br />
<strong>The</strong> time standard for celestial navigation is Greenwich Mean Time,<br />
GMT. GMT is based upon <strong>the</strong> GHA <strong>of</strong> <strong>the</strong> mean sun (an imaginary sun<br />
which move at a constant speed):<br />
[ ]<br />
GMT[ h] GHAMean Sun °<br />
=<br />
+ 12.<br />
15<br />
(If GMT is greater than 24 h, subtract 24 hours.)<br />
In o<strong>the</strong>r words, GMT is <strong>the</strong> angle, expressed in hours, between <strong>the</strong> lower<br />
branch <strong>of</strong> <strong>the</strong> Greenwich meridian and <strong>the</strong> hour circle through <strong>the</strong> mean<br />
sun (Figure 3.1). <strong>The</strong> GHA <strong>of</strong> <strong>the</strong> mean sun increases by exactly 15<br />
degrees per hour, completing a 360 degrees cycle in 24 hours. Celestial<br />
coordinates tabulated in <strong>the</strong> Nautical Almanac refer to GMT.<br />
Figure 3.1 GHA <strong>of</strong> <strong>the</strong> mean sun.
3.2 Greenwich Apparent Time<br />
<strong>The</strong> time based upon <strong>the</strong> GHA <strong>of</strong> <strong>the</strong> apparent (observable) sun is called<br />
Greenwich Apparent Time, GAT. <strong>The</strong> hourly increase <strong>of</strong> <strong>the</strong> GHA <strong>of</strong> <strong>the</strong><br />
apparent sun is subject to periodic changes and is sometimes slightly<br />
greater, sometimes slightly smaller than 15 degrees during <strong>the</strong> course <strong>of</strong> a<br />
year. This behavior is caused by <strong>the</strong> eccentricity <strong>of</strong> <strong>the</strong> earth's orbit and its<br />
inclination to <strong>the</strong> plane <strong>of</strong> <strong>the</strong> equator.<br />
3.3 Equation <strong>of</strong> Time<br />
Most navigators are familiar with <strong>the</strong> fact that <strong>the</strong> sun transits <strong>the</strong> meridian<br />
on some days several minutes ahead <strong>of</strong> 12 noon local mean time and o<strong>the</strong>r<br />
days <strong>of</strong> <strong>the</strong> year it transits several minutes after 12 noon. That is, <strong>the</strong> mean<br />
sun and <strong>the</strong> apparent sun are out <strong>of</strong> step and <strong>the</strong> amount by which <strong>the</strong><br />
apparent is ahead <strong>of</strong> <strong>the</strong> mean sun, in minutes and seconds <strong>of</strong> mean time, is<br />
known as <strong>the</strong> equation <strong>of</strong> time, denoted by EoT:<br />
EoT=GAT-GMT.<br />
EoT varies periodically between approximately -16 minutes and +16<br />
minutes. Predicted values for EoT for each day <strong>of</strong> <strong>the</strong> year (at 0:00 and<br />
12:00 GMT) are given in <strong>the</strong> Nautical Almanac.<br />
3.4 Local Mean Time<br />
Local mean time, LMT, is equal to <strong>the</strong> LHA <strong>of</strong> <strong>the</strong> mean sun as measured<br />
from <strong>the</strong> lower branch <strong>of</strong> <strong>the</strong> observer's meridian to <strong>the</strong> hour circle <strong>of</strong> <strong>the</strong><br />
mean sun, that arc converted to time. Thus, if <strong>the</strong> observer were to locate at<br />
Greenwich <strong>the</strong>n LMT would be identical to GMT.
3.5 Local Apparent Time<br />
Local Apparent Time, LAT, follows <strong>the</strong> argument for LMT except that<br />
LHA is measured from <strong>the</strong> lower branch <strong>of</strong> <strong>the</strong> observer's meridian to <strong>the</strong><br />
apparent sun. <strong>The</strong> difference between local mean time and local apparent<br />
time is also known as <strong>the</strong> equation <strong>of</strong> time.
Chapter 4<br />
Spherical Trigonometry<br />
4.1 <strong>The</strong> Spherical Triangle<br />
A spherical triangle is formed by three planes passing through <strong>the</strong> surface<br />
<strong>of</strong> a sphere and through <strong>the</strong> sphere's center. In o<strong>the</strong>r words, a spherical<br />
triangle is part <strong>of</strong> <strong>the</strong> surface <strong>of</strong> a sphere, and <strong>the</strong> sides are not straight lines<br />
but arcs <strong>of</strong> great circles (Figure 4.1).<br />
Figure 4.1 A spherical triangle on <strong>the</strong> surface <strong>of</strong> a sphere.<br />
Any side <strong>of</strong> a spherical triangle can be regarded as an angle - <strong>the</strong> angular<br />
distance between <strong>the</strong> adjacent vertices, measured from <strong>the</strong> center <strong>of</strong> <strong>the</strong><br />
sphere. For example, in Figure 4.1, length <strong>of</strong> side a is equal to <strong>the</strong> angle it<br />
subtends at <strong>the</strong> center. And angle <strong>of</strong> A is equal to <strong>the</strong> angle between 2<br />
planes. <strong>The</strong> interrelations between angles and sides <strong>of</strong> a spherical triangle<br />
are described by <strong>the</strong> law <strong>of</strong> sines, <strong>the</strong> law <strong>of</strong> cosines for sides and <strong>the</strong> law<br />
<strong>of</strong> cosines for angles.
4.2 Spherical Trigonometry<br />
Law <strong>of</strong> sines:<br />
Law <strong>of</strong> cosines for sides:<br />
Law <strong>of</strong> cosines for angles:<br />
Figure 4.2 A spherical triangle.<br />
sin( A)<br />
sin( B)<br />
sin( C)<br />
= =<br />
sin( a)<br />
sin( b)<br />
sin( c)<br />
cos( a) = cos( b) cos( c) + sin( b) sin( c)<br />
cos( A)<br />
cos( b) = cos( a) cos( c) + sin( a) sin( c)<br />
cos( B)<br />
cos( c) = cos( a) cos( b) + sin( a) sin( b)<br />
cos( C)<br />
cos(A) = − cos( B) cos( C) + sin( B) sin( C)<br />
cos( a)<br />
cos( B) =− cos( A) cos( C) + sin( A) sin( C)<br />
cos( b)<br />
cos( C) =− cos( A) cos( B) + sin( A) sin( B)<br />
cos( c)<br />
<strong>The</strong> pro<strong>of</strong> <strong>of</strong> <strong>the</strong>se formulas can be found in navigational textbooks.
<strong>The</strong>se formulas allow us to calculate any quantity (angle or side) <strong>of</strong> a<br />
spherical triangle if three o<strong>the</strong>r quantities are known. In particular, <strong>the</strong> law<br />
<strong>of</strong> cosines for sides is <strong>of</strong> interest for navigational purposes.
Chapter 5<br />
How to Measure <strong>the</strong> Altitude <strong>of</strong> a<br />
Celestial Body<br />
5.1 Introduction<br />
<strong>The</strong><br />
astrolabe invented by <strong>the</strong> Greeks was <strong>the</strong> first instrument used to<br />
measure altitude <strong>of</strong> a celestial body. <strong>The</strong> astrolabe was mostly used in <strong>the</strong><br />
Medieval Ages and by <strong>the</strong> Islamic world. However, it was cumbersome<br />
because it had to be suspended and <strong>of</strong>ten produced large, unavoidable<br />
errors in rough wea<strong>the</strong>r.<br />
Figure 5.1 A man using <strong>the</strong><br />
astrolabe.<br />
<strong>The</strong><br />
development <strong>of</strong> <strong>the</strong> cross-staff supplanted <strong>the</strong> use <strong>of</strong> <strong>the</strong> astrolabe. <strong>The</strong><br />
cross-staff consisted <strong>of</strong> a long piece <strong>of</strong> wood with a crosspiece that could<br />
slide along <strong>the</strong> staff. <strong>The</strong> navigator would sight a celestial body along <strong>the</strong><br />
top <strong>of</strong> <strong>the</strong> crosspiece and move it so that <strong>the</strong> bottom tip met <strong>the</strong> horizon.<br />
Navigators <strong>of</strong>ten used <strong>the</strong> sun as a sight, and <strong>the</strong> cross-staff <strong>of</strong>ten caused<br />
eye damage for longtime navigators.
Figure 5.2 A man using <strong>the</strong> cross-staff.<br />
<strong>The</strong> back-staff was <strong>the</strong>n developed in 1590 so that navigator didn't have to<br />
look into <strong>the</strong> sun. <strong>The</strong> navigator faced away from <strong>the</strong> sun and used <strong>the</strong><br />
shadow cast by <strong>the</strong> device to measure <strong>the</strong> angle between <strong>the</strong> body and <strong>the</strong><br />
horizon. Later, smoked mirrors were added so that bodies which were too<br />
dim to give a shadow could be used while at <strong>the</strong> same time, dimming <strong>the</strong><br />
reflection <strong>of</strong> <strong>the</strong> sun so that it could still be used. This foreshadowed <strong>the</strong><br />
modern sextant.<br />
Figure 5.3 A man using <strong>the</strong> back-staff.<br />
<strong>The</strong> modern sextant was invented by Sir Isaac Newton in 1700. However,<br />
he never built one. It was an Englishman named John Hadley and an<br />
American named Thomas Godfrey who built two different versions <strong>of</strong> <strong>the</strong><br />
sextant, both equally useful. Later, Paul Vernier added a second graduated<br />
arc to make measurements more precise. Even later, <strong>the</strong> micrometer screw<br />
were invented, which fur<strong>the</strong>r added to <strong>the</strong> precision <strong>of</strong> <strong>the</strong> instrument and<br />
became what we now recognize as <strong>the</strong> modern sextant.
5.2 <strong>The</strong> Sextant<br />
Figure 5.4 A picture <strong>of</strong> a sextant.<br />
<strong>The</strong> sextant is an instrument used for measuring <strong>the</strong> altitude <strong>of</strong> a celestial<br />
body above <strong>the</strong> sea horizon. Figure 5.5 is a diagram embodying <strong>the</strong> more<br />
important features <strong>of</strong> <strong>the</strong> instrument. <strong>The</strong> sextant consists <strong>of</strong> a system <strong>of</strong><br />
two mirrors, a telescope and a graduated arc. <strong>The</strong> index mirror I is mounted<br />
on <strong>the</strong> index arm IP. <strong>The</strong> index mirror I and <strong>the</strong> index arm IP can rotate<br />
about an axis (perpendicular to <strong>the</strong> plane <strong>of</strong> paper) at I. To any given<br />
position <strong>of</strong> <strong>the</strong> index mirror and <strong>of</strong> <strong>the</strong> index arm IP, <strong>the</strong>re is a<br />
corresponding reading on <strong>the</strong> graduated arc. <strong>The</strong> horizon mirror H is fixed<br />
to <strong>the</strong> framework <strong>of</strong> <strong>the</strong> instrument and perpendicular to <strong>the</strong> plane <strong>of</strong> <strong>the</strong><br />
paper. T is a small telescope attached to <strong>the</strong> framework.<br />
Figure 5.5 Important features <strong>of</strong> a sextant.
To find <strong>the</strong> altitude <strong>of</strong> a celestial body above <strong>the</strong> sea horizon, <strong>the</strong> observer<br />
holds <strong>the</strong> instrument in a vertical plane and points <strong>the</strong> telescope so as to see<br />
<strong>the</strong> horizon. He <strong>the</strong>n moves <strong>the</strong> index mirror I by means <strong>of</strong> <strong>the</strong> arm IP until<br />
<strong>the</strong> image <strong>of</strong> <strong>the</strong> body is observed to be in his field <strong>of</strong> view. When <strong>the</strong><br />
image appears on <strong>the</strong> line <strong>of</strong> <strong>the</strong> horizon (Figure 5.6), he notes <strong>the</strong> reading<br />
on <strong>the</strong> graduated arc.<br />
Figure 5.6 <strong>The</strong> sun's image is on <strong>the</strong> line <strong>of</strong> <strong>the</strong> sea horizon.<br />
Let IS denote <strong>the</strong> direction <strong>of</strong> a celestial body. A ray in <strong>the</strong> direction SI is<br />
reflected by <strong>the</strong> index mirror I along IH; it is <strong>the</strong>n reflected by <strong>the</strong> horizon<br />
mirror H along HT, and <strong>the</strong> body is thus observed in <strong>the</strong> telescope in <strong>the</strong><br />
direction in which <strong>the</strong> sea horizon is seen.<br />
<strong>The</strong> altitude <strong>of</strong> <strong>the</strong> body is simply related to <strong>the</strong> inclination <strong>of</strong> <strong>the</strong> index<br />
mirror I to <strong>the</strong> horizon mirror H - in Figure 5.5 <strong>the</strong> inclination is <strong>the</strong> angle<br />
IDH, which we denote by x. Let AIB and HB be <strong>the</strong> normals to <strong>the</strong> mirrors<br />
I and H; <strong>the</strong>n <strong>the</strong> angle IBH is evidently x. <strong>The</strong> laws <strong>of</strong> reflection give<br />
SIA ∃ = AIH ∃ =θ<br />
and IHB ∃ = BHC ∃ =φ .<br />
If a is <strong>the</strong> body's altitude above <strong>the</strong> sea horizon, <strong>the</strong>n SCH ∃ = a.<br />
From <strong>the</strong><br />
triangle IHC, <strong>the</strong> exterior angle SIH ∃ = ICH ∃ + IHC ∃ , so that<br />
2θ= 2φ+<br />
a . (1)
Similarly, from <strong>the</strong> triangle IBH,<br />
Hence from (1) and (2),<br />
θ = φ + x . (2)<br />
a = 2 x , (3)<br />
or <strong>the</strong> body's altitude is twice <strong>the</strong> angle between <strong>the</strong> mirrors I and H (or<br />
between <strong>the</strong>ir normals). <strong>The</strong> altitude a is zero when x is zero, that is when<br />
<strong>the</strong> mirrors I and H are parallel. In Figure 5.5, IO is parallel to <strong>the</strong> fixed<br />
direction HD; O is <strong>the</strong> zero-point <strong>of</strong> <strong>the</strong> scale. <strong>The</strong> angle OIP can thus be<br />
found from <strong>the</strong> reading on <strong>the</strong> graduated arc and, by (3), <strong>the</strong> body's altitude<br />
is twice this angle.<br />
<strong>The</strong> arc <strong>of</strong> <strong>the</strong> sextant is generally about one-sixth <strong>of</strong> <strong>the</strong> circumference <strong>of</strong> a<br />
circle (hence <strong>the</strong> name "sextant"), but instead <strong>of</strong> having 60 divisions each<br />
representing one degree, <strong>the</strong> arc is divided into 120 divisions. In this way,<br />
<strong>the</strong> altitude is read directly from <strong>the</strong> scale without <strong>the</strong> necessity <strong>of</strong> applying<br />
<strong>the</strong> factor 2 <strong>of</strong> equation (3). With <strong>the</strong> aid <strong>of</strong> sub-divisions and a vernier,<br />
altitude can be read with a first-class instrument to one-tenth <strong>of</strong> a minute <strong>of</strong><br />
arc.<br />
5.3 <strong>The</strong> Vernier Scale<br />
In figure 5.7, 10 divisions <strong>of</strong> <strong>the</strong> so-called vernier scale V equal 9 divisions<br />
<strong>of</strong> <strong>the</strong> main scale S. It follows that <strong>the</strong> interval between divisions on V<br />
equals 0.9 times <strong>the</strong> interval between divisions on S. When <strong>the</strong> zero points<br />
<strong>of</strong> V and S are aligned, as shown in Figure 5.7 (A), <strong>the</strong> 1 mark on V will lie<br />
to <strong>the</strong> right <strong>of</strong> <strong>the</strong> 1 mark on S by 0.1 times <strong>the</strong> main-scale interval;<br />
similarly, <strong>the</strong> 2 mark on V will lie to <strong>the</strong> right <strong>of</strong> <strong>the</strong> 2 mark on S by 0.2<br />
times <strong>the</strong> main-scale interval, and so on. Suppose now <strong>the</strong> main scale S is<br />
moved to <strong>the</strong> right <strong>of</strong> <strong>the</strong> fixed vernier V by an arbitrary distance, say, 0.6<br />
times <strong>the</strong> main-scale interval as shown in Figure 5.7 (B). <strong>The</strong> zero <strong>of</strong> <strong>the</strong>
vernier will lie between <strong>the</strong> zero and 1 marks on <strong>the</strong> main scale and,<br />
fur<strong>the</strong>r, <strong>the</strong> 6 mark on V will be aligned with <strong>the</strong> 6 mark on S. In o<strong>the</strong>r<br />
words, <strong>the</strong> numerical value <strong>of</strong> <strong>the</strong> vernier mark which coincides with a<br />
mark on <strong>the</strong> main scale indicates <strong>the</strong> decimal part to be added to <strong>the</strong> mainscale<br />
reading <strong>of</strong> <strong>the</strong> sextant.<br />
Figure 5.7 Vernier scale: showing subdivisions <strong>of</strong> a main scale.<br />
5.4 Sextant Corrections<br />
<strong>The</strong> sextant altitude, Hs, is <strong>the</strong> altitude as indicated by <strong>the</strong> sextant before<br />
any corrections have been applied. Hs contains systematic errors and can<br />
only be used for navigational calculations after several corrections have<br />
been applied.<br />
(a) Index error<br />
Index error, IE, is a constant error due to a lack <strong>of</strong> parallel alignment<br />
between <strong>the</strong> index and horizon mirrors. A sextant, unless recently<br />
calibrated, usually has an index error that has to be subtracted from <strong>the</strong><br />
reading before <strong>the</strong>y can be processed fur<strong>the</strong>r.
To check for index error, hold <strong>the</strong> sextant in your right hand and look at <strong>the</strong><br />
sea horizon. By moving <strong>the</strong> index arm, line up <strong>the</strong> real and mirror horizons<br />
so that both appear as a single straight line. Now, look at <strong>the</strong> scale. If it<br />
reads zero, <strong>the</strong>re is no index error. If <strong>the</strong> scale reads anything but zero,<br />
<strong>the</strong>re is an index error. For example, if <strong>the</strong> scale reads +5’ when <strong>the</strong><br />
horizons are aligned, <strong>the</strong>n 5’ is subtracted from Hs; if <strong>the</strong> reading is below<br />
<strong>the</strong> zero mark, for example –5’, <strong>the</strong>n –5’ is subtracted from Hs.<br />
(b) Dip<br />
1 st correction: H1 = Hs - IE<br />
Due to <strong>the</strong> curvature <strong>of</strong> <strong>the</strong> earth's surface, <strong>the</strong> apparent or visible sea<br />
horizon usually appears several arcminutes below <strong>the</strong> true horizon,<br />
depending on <strong>the</strong> height <strong>of</strong> eye, HE (Figure 5.8). <strong>The</strong> difference between<br />
<strong>the</strong> apparent or visible sea horizon and <strong>the</strong> true horizon is known as dip.<br />
Dip depends on <strong>the</strong> height <strong>of</strong> <strong>the</strong> observer's eyes. <strong>The</strong> higher <strong>the</strong> observer<br />
is from <strong>the</strong> sea horizon, <strong>the</strong> greater is <strong>the</strong> dip.<br />
Since <strong>the</strong> sextant sights on <strong>the</strong> visible sea horizon and not on <strong>the</strong> true<br />
horizon, dip corrections must always be made on sextant observations. A<br />
table <strong>of</strong> dip corrections (height by dip correction) can be found in <strong>the</strong><br />
Nautical Almanac. Such corrections are negative. Hence <strong>the</strong>y are always<br />
subtracted.<br />
<strong>The</strong> altitude obtained after applying corrections for index error and dip is<br />
referred to as apparent altitude, Ha. <strong>The</strong> apparent altitude is measured<br />
with respect to <strong>the</strong> true horizon.<br />
2 rd correction: Ha = H1 - Dip
Figure 5.8 <strong>The</strong> visible sea horizon is dipped below <strong>the</strong> true horizon.<br />
(c) Refraction<br />
As light passes from a less to a more dense medium, i.e. from space to<br />
earth, it is deflected toward <strong>the</strong> earth. This phenomenon is called<br />
refraction. Since <strong>the</strong> eye cannot detect <strong>the</strong> curvature <strong>of</strong> <strong>the</strong> light ray, an<br />
observed body appears to be higher in <strong>the</strong> sky. <strong>The</strong> angle R is <strong>the</strong> angle <strong>of</strong><br />
refraction and represents <strong>the</strong> angular distance between <strong>the</strong> apparent and<br />
true position <strong>of</strong> <strong>the</strong> body (Figure 5.9). Refraction depends on <strong>the</strong> altitude <strong>of</strong><br />
<strong>the</strong> observed body. For example, if <strong>the</strong> observed body is at <strong>the</strong> zenith, <strong>the</strong>re<br />
is no refraction. And as <strong>the</strong> altitude <strong>of</strong> observed body decrease, refraction<br />
will increase.<br />
Figure 5.9 <strong>The</strong> apparent position <strong>of</strong> <strong>the</strong> celestial body is appeared<br />
to be higher than it's true position.<br />
<strong>The</strong> nautical navigator altitude correction tables for refraction can be found<br />
in <strong>the</strong> Nautical Almanac. <strong>The</strong>re is one table for stars and planets, ano<strong>the</strong>r<br />
for <strong>the</strong> sun (with different values for sighting <strong>the</strong> upper and lower limbs),<br />
and ano<strong>the</strong>r for <strong>the</strong> moon. Correction for refraction is always subtracted.<br />
3 rd correction: H3 = Ha - R
(d) Parallax<br />
Calculations <strong>of</strong> celestial navigation are measured with respect to <strong>the</strong><br />
celestial horizon. However, <strong>the</strong> altitude Ha is measured with respect to <strong>the</strong><br />
true horizon. Hence, correction has to be made. Such difference in angle<br />
between <strong>the</strong> altitude measured at <strong>the</strong> center <strong>of</strong> <strong>the</strong> earth (H4) and that<br />
measured at <strong>the</strong> surface <strong>of</strong> <strong>the</strong> earth (H3) is known as Parallax, PA (Figure<br />
5.10). Parallax is significant only when <strong>the</strong> object is near to <strong>the</strong> earth.<br />
Hence, in navigational practice, only <strong>the</strong> parallax <strong>of</strong> <strong>the</strong> moon need to be<br />
taken into account. Since PA is <strong>the</strong> difference between H3 and H4,<br />
<strong>the</strong>refore as a correction, PA must be added to H3 to get H4.<br />
4 th correction: H4 = H3 + PA<br />
From Figure 5.10, we can see that PA will change as <strong>the</strong> moon moves from<br />
<strong>the</strong> horizon to <strong>the</strong> zenith. Towards <strong>the</strong> zenith <strong>the</strong> value <strong>of</strong> PA diminishes<br />
toward zero. At <strong>the</strong> true horizon, <strong>the</strong> value <strong>of</strong> PA will be at <strong>the</strong> maximum.<br />
Parallax <strong>of</strong> <strong>the</strong> moon on <strong>the</strong> true horizon is known as horizontal parallax,<br />
HP. It is <strong>the</strong> value recorded in <strong>the</strong> Nautical Almanac and serves as <strong>the</strong><br />
basis for computing <strong>the</strong> parallax correction for <strong>the</strong> moon.<br />
Figure 5.10 Horizontal parallax and parallax <strong>of</strong> <strong>the</strong> moon.
(e) Semi-diameter<br />
Semi-diameter, SD, is <strong>the</strong> angular distance between center and limb <strong>of</strong> a<br />
body (Figure 5.11). When observing <strong>the</strong> sun or <strong>the</strong> moon, it is not possible<br />
to locate <strong>the</strong> center with sufficient accuracy. It is <strong>the</strong>refore common<br />
practice to measure <strong>the</strong> altitude <strong>of</strong> <strong>the</strong> lower or upper limb <strong>of</strong> <strong>the</strong> body.<br />
However, it is <strong>the</strong> center <strong>of</strong> <strong>the</strong> body that serves as reference for its<br />
positional coordinates. Consequently, if we sight on <strong>the</strong> lower limb <strong>of</strong> <strong>the</strong><br />
sun or <strong>the</strong> moon we must add <strong>the</strong> semi-diameter to our sextant reading.<br />
And if <strong>the</strong> upper limb is observed, <strong>the</strong> semi-diameter value is subtracted.<br />
Semi-diameter <strong>of</strong> sun and moon vary slightly from day to day depending<br />
on <strong>the</strong>ir distances from <strong>the</strong> earth. <strong>The</strong> correction tables for <strong>the</strong> sun, in <strong>the</strong><br />
Nautical Almanac, include semi-diameter and refraction. <strong>The</strong> differences<br />
in <strong>the</strong> corrections for upper and lower limbs are due to <strong>the</strong> differential<br />
effects <strong>of</strong> refraction on <strong>the</strong> two limbs. <strong>The</strong> corrections for <strong>the</strong> moon, in <strong>the</strong><br />
Nautical Almanac, include dip, refraction, semi-diameter, and parallax.<br />
Semi-diameter corrections for o<strong>the</strong>r bodies are insignificant and can be<br />
ignored.<br />
5 th correction: H5 = H4 ± SD<br />
<strong>The</strong> altitude obtained after applying <strong>the</strong> above corrections (in <strong>the</strong> above<br />
sequence), suitable to be used for navigational calculations, is called<br />
observed altitude, Ho. That is Ho=H5.
Figure 5.11 Semi-diameter <strong>of</strong> a celestial body.<br />
Now with <strong>the</strong> observed altitude, latitude is known. However, <strong>the</strong> longitude<br />
is not known yet. In <strong>the</strong> next few chapters, we shall see how to determine<br />
longitude.
Chapter 6<br />
Lunar Eclipse Method<br />
6.1 Introduction<br />
In <strong>the</strong> olden days, lunar eclipses have <strong>of</strong>ten been interpreted as bad omens.<br />
A well-known historical example dates back to Christopher Columbus. On<br />
his fourth voyage to America in 1504, Columbus faced problems. His ships<br />
were in poor condition due to shipworms and <strong>the</strong> vessels had to be beached<br />
in Jamaica. A lot <strong>of</strong> his supplies were stolen. Half <strong>of</strong> his crew had mutinied<br />
and worst still, <strong>the</strong> indigenous population refused to supply <strong>the</strong>m with<br />
food.<br />
In this dire situation, Columbus had a great idea. Western European<br />
astronomers had calculated that a lunar eclipse would occur during <strong>the</strong><br />
night <strong>of</strong> September 14-15, 1409. Columbus announced to <strong>the</strong> indigenous<br />
population that, due to <strong>the</strong> wrath <strong>of</strong> <strong>the</strong> Gods, <strong>the</strong> moon would disappear<br />
during <strong>the</strong> following night (Figure 6.1). <strong>The</strong> lunar eclipse appeared right on<br />
schedule and Columbus finally got his food supplies.<br />
Figure 6.1 Columbus announced to <strong>the</strong> indigenous population that <strong>the</strong> moon<br />
would disappear during <strong>the</strong> following night.
6.2 What is a Lunar Eclipse<br />
A lunar eclipse occurs when <strong>the</strong> moon is covered by <strong>the</strong> shadow <strong>of</strong> <strong>the</strong><br />
earth. That is, <strong>the</strong> earth comes between <strong>the</strong> sun and <strong>the</strong> moon, casting <strong>the</strong><br />
earth's shadow on <strong>the</strong> surface <strong>of</strong> <strong>the</strong> moon (Figure 6.2).<br />
Figure 6.2 A lunar eclipse occurs when <strong>the</strong> moon is covered<br />
by <strong>the</strong> shadow <strong>of</strong> <strong>the</strong> earth.<br />
A partial lunar eclipse happens when <strong>the</strong> moon only passed through <strong>the</strong><br />
outer part <strong>of</strong> <strong>the</strong> shadow (<strong>the</strong> penumbra). At this moment, <strong>the</strong> observer on<br />
<strong>the</strong> earth would see <strong>the</strong> moon only partially dimmed (Figure 6.3).<br />
On <strong>the</strong> o<strong>the</strong>r hand, a total lunar eclipse happens when <strong>the</strong> moon passes<br />
through <strong>the</strong> umbra. During this time, <strong>the</strong> observer on earth will see that <strong>the</strong><br />
entire moon is covered (Figure 6.4).<br />
Figure 6.3 A partial lunar eclipse. Figure 6.4 A total lunar eclipse.
6.3 Lunar Eclipse Method<br />
Being lost at sea was one <strong>of</strong> <strong>the</strong> greatest fears <strong>of</strong> <strong>the</strong> early navigator. While<br />
<strong>the</strong> latitude <strong>of</strong> <strong>the</strong> navigator position can be easily determined with a<br />
sextant, <strong>the</strong> longitude is harder to determine. As mentioned earlier,<br />
longitude is a matter <strong>of</strong> time. <strong>The</strong>re is no fixed point <strong>of</strong> reference in <strong>the</strong><br />
sky, but only <strong>the</strong> uniform rotation <strong>of</strong> <strong>the</strong> earth every day. Thus if one<br />
knows <strong>the</strong> difference in local time at two points, one knows <strong>the</strong><br />
longitudinal distance between <strong>the</strong>m. Measuring <strong>the</strong> time where one is<br />
located is relatively straightforward: by observing <strong>the</strong> sun or <strong>the</strong> stars in <strong>the</strong><br />
sky. Knowing <strong>the</strong> local time elsewhere at that same moment is ano<strong>the</strong>r<br />
matter.<br />
In <strong>the</strong> ancient times, <strong>the</strong> only practical method for determining longitude<br />
was <strong>the</strong> well-known lunar eclipse method. Lunar eclipse provides an easily<br />
observable event and everyone sees <strong>the</strong> eclipse happen at <strong>the</strong> same time.<br />
Thus, Lunar eclipse provides a method <strong>of</strong> time "synchronization". <strong>The</strong><br />
procedures <strong>of</strong> <strong>the</strong> lunar eclipse method are relatively simple. First, we<br />
determine <strong>the</strong> local time that <strong>the</strong> lunar eclipse starts or ends by direct<br />
observation. Next ei<strong>the</strong>r we obtain <strong>the</strong> local time <strong>of</strong> ano<strong>the</strong>r place from<br />
tables <strong>of</strong> Moon or we ask someone to station at a distant place to take <strong>the</strong><br />
time where <strong>the</strong> lunar eclipse starts or ends again. <strong>The</strong>n we compare <strong>the</strong><br />
local time for that event against <strong>the</strong> local time at that distant place. <strong>The</strong><br />
difference in <strong>the</strong> two times is <strong>the</strong> difference in longitude.<br />
6.4 Weakness <strong>of</strong> <strong>the</strong> Lunar Eclipse Method<br />
Although this method to find <strong>the</strong> navigators' longitude is simple and<br />
reliable, <strong>the</strong> use <strong>of</strong> eclipses was obviously <strong>of</strong> little use to <strong>the</strong>m. This is<br />
because lunar eclipses are relatively rare. <strong>The</strong>re are only about two lunar<br />
eclipses per year.
In ancient times, where accurate clocks were not available, sandglass was<br />
used as a timekeeper. As <strong>the</strong> sandglass does not provide accurate time, <strong>the</strong><br />
timing <strong>of</strong> <strong>the</strong> lunar eclipse is inaccurate. <strong>The</strong> result is in an error in <strong>the</strong><br />
longitude obtained. It was only in <strong>the</strong> 18 th century that an accurate<br />
chronometer was invented.<br />
Moreover, tables <strong>of</strong> <strong>the</strong> Moon used in <strong>the</strong> olden days were imperfect. And a<br />
prediction <strong>of</strong> a lunar eclipse from <strong>the</strong>m could easily be <strong>of</strong>f by a quarter <strong>of</strong><br />
an hour. Such an error, added to errors in determine <strong>the</strong> local time <strong>of</strong> <strong>the</strong><br />
eclipse, could result in an error in longitude <strong>of</strong> 8 degrees.<br />
If tables <strong>of</strong> <strong>the</strong> Moon are not available, <strong>the</strong>n one has to rely on someone at<br />
a distant place to take <strong>the</strong> time where lunar eclipse starts or ends again.<br />
And <strong>the</strong>n one has to wait until <strong>the</strong> information is passed to one. Thus, this<br />
method is impractical at sea.
Chapter 7<br />
Eclipses <strong>of</strong> Jupiter's Satellites Method<br />
7.1 Introduction<br />
Although<br />
<strong>the</strong> lunar eclipse method was simple and reliable and was used<br />
extensively on land, <strong>the</strong> use <strong>of</strong> eclipses was <strong>of</strong> little use to ships as eclipses<br />
are rare. <strong>The</strong> lack <strong>of</strong> an effective method for determining longitude had<br />
serious consequences for navigators and <strong>the</strong>ir vessels, <strong>of</strong>ten laden with<br />
precious goods. With increasing importance <strong>of</strong> navigation and a series <strong>of</strong><br />
maritime disasters due to uncertainty about longitude, <strong>the</strong>re was an urgent<br />
need to search for a satisfactory method <strong>of</strong> determining longitude at sea.<br />
In 1610, Galileo Galilei (1564-1642) discovered, with his telescope, that<br />
four satellites surrounded Jupiter. Every now and <strong>the</strong>n <strong>the</strong> satellites would<br />
pass in and out <strong>of</strong> <strong>the</strong> shadow <strong>of</strong> Jupiter and Galileo realised that <strong>the</strong>se<br />
eclipses could provide a celestial clock in <strong>the</strong> determination <strong>of</strong> longitude.<br />
His discovery was extremely important because it revealed <strong>the</strong> existence <strong>of</strong><br />
celestial bodies which rotated around a body o<strong>the</strong>r than <strong>the</strong> earth.<br />
Figure 7.1 Galileo Galilei (1564-1642).
7.2 Eclipses <strong>of</strong> Jupiter's Satellites Method<br />
Jupiter casts a shadow, which stretches behind it<br />
in space, and eclipses<br />
occur when a satellite passes into <strong>the</strong> planet's shadow. When a satellite<br />
moves into eclipse, its light dims until <strong>the</strong> satellite disappears from view. A<br />
few hours later it emerges from <strong>the</strong> o<strong>the</strong>r side <strong>of</strong> <strong>the</strong> shadow, and as it does<br />
so it brightens and become visible again.<br />
<strong>The</strong> procedures <strong>of</strong> <strong>the</strong> eclipses <strong>of</strong><br />
Jupiter's Satellites method for<br />
determining<br />
longitude are relatively simple. First, we use a telescope to<br />
watch one <strong>of</strong> <strong>the</strong> satellites <strong>of</strong> Jupiter as it revolves around Jupiter.<br />
Secondly, we note <strong>the</strong> local time at which this satellite appears or<br />
disappears behind Jupiter. Thirdly, we obtain <strong>the</strong> time from tables at which<br />
it appears to do so at Greenwich. <strong>The</strong>n <strong>the</strong> difference between <strong>the</strong>se two<br />
times gives us our longitude.<br />
7.3 Disadvantages <strong>of</strong> <strong>the</strong> Eclipses <strong>of</strong> Jupiter's Satellite Method<br />
Using <strong>the</strong> eclipses <strong>of</strong> Jupiter's satellite method to determine longitude<br />
requires <strong>the</strong> use <strong>of</strong> a telescope. Galilean<br />
telescopes, in use before about<br />
1650, were not optimum for observation <strong>of</strong> Jupiter's satellites. <strong>The</strong>ir fields<br />
<strong>of</strong> view were extremely small, so that it was difficult to find <strong>the</strong> planet and<br />
its satellites and almost as difficult to keep it in <strong>the</strong> field <strong>of</strong> view. In<br />
addition, <strong>the</strong> telescopes could not be used during overcast wea<strong>the</strong>r at night<br />
because <strong>the</strong> satellites are not visible.<br />
Besides telescope, this method also requires<br />
<strong>the</strong> use <strong>of</strong> tables <strong>of</strong> <strong>the</strong> times<br />
<strong>the</strong>se satellites eclipsed.<br />
However, accurate tables were not available. It<br />
was not until 1668, that <strong>the</strong> first reasonably accurate tables were published<br />
by Giovanni Domenico Cassini (1625 - 1712).
Figure 7.2 Giovanni Domenico Cassini (1625-1712).<br />
<strong>The</strong><br />
eclipses <strong>of</strong> Jupiter's satellites provided a wonderful method <strong>of</strong><br />
establishing longitude on land, but it was practically useless in sea. This is<br />
because making observation with a telescope at <strong>the</strong> deck <strong>of</strong> a rocking ship<br />
was impossible. Galileo made some trials <strong>of</strong> telescope attached to a helmet<br />
(which he called "celatone") on ships, but this approach only worked with<br />
ra<strong>the</strong>r low-powered telescopes. Hence, Galileo's effort to make telescopes<br />
adequate for observing Jupiter's satellites was not successful.
Chapter 8<br />
Lunar Distance Method<br />
8.1 Introduction<br />
Though<br />
<strong>the</strong> Jupiter's satellites eclipse method proved to be a better method<br />
than <strong>the</strong> lunar eclipse method, it was still not a successful method to be<br />
used at sea. This is because navigators were unable to observe <strong>the</strong> satellites<br />
with a telescope on <strong>the</strong> rocking deck <strong>of</strong> a ship. Hence, <strong>the</strong>re was a<br />
desperate need to discover a practical method <strong>of</strong> determining longitude at<br />
sea.<br />
In 1475, a well-known German astronomer Regiomontanus suggested <strong>the</strong><br />
lunar distance method to find longitude. Lunar distance method is <strong>the</strong><br />
measurement <strong>of</strong> <strong>the</strong> angular distance between <strong>the</strong> moon and a star or<br />
between <strong>the</strong> moon and <strong>the</strong> sun. While his <strong>the</strong>ory was sound, <strong>the</strong> 15 th<br />
century did not possess <strong>the</strong> instrument for measurement <strong>the</strong> lunar distance<br />
and <strong>the</strong> lunar tables to make it work. In was not until mid 15 th century<br />
when <strong>the</strong> cross-staff was proposed for making lunar distance measurements<br />
(Figure 8.1).<br />
Figure 8.1 Lunar distance from a star is being measured<br />
with a cross-staff.
Even with <strong>the</strong> availability <strong>of</strong> instruments and tables, <strong>the</strong> lunar distance<br />
method was still not successful. <strong>The</strong>re were two reasons for<br />
this. Firstly,<br />
<strong>the</strong>re was no instrument with which <strong>the</strong> angular distance between <strong>the</strong> moon<br />
and a star could be measured with sufficient accuracy from <strong>the</strong> deck <strong>of</strong> a<br />
moving ship. Secondly, astronomers could not predict <strong>the</strong> relative positions<br />
<strong>of</strong> <strong>the</strong> moon and <strong>the</strong> star with <strong>the</strong> necessary precision. It was only with <strong>the</strong><br />
development <strong>of</strong> <strong>the</strong> sextant and <strong>the</strong> available <strong>of</strong> better lunar tables, that <strong>the</strong><br />
lunar distance method for determining longitude proved successful.<br />
8.2 Lunar Distance Method<br />
A lunar distance measurement<br />
is most easily made with <strong>the</strong> sextant when<br />
<strong>the</strong><br />
angular distance between <strong>the</strong> Moon and <strong>the</strong> o<strong>the</strong>r body is not great. At<br />
nighttime, measurement is made between <strong>the</strong> Moon and one <strong>of</strong> <strong>the</strong> 57<br />
selected stars listed in <strong>the</strong> daily pages <strong>of</strong> <strong>the</strong> Nautical Almanac. In daytime,<br />
<strong>the</strong> Sun may be used as <strong>the</strong> second body.<br />
<strong>The</strong> procedures <strong>of</strong> <strong>the</strong> lunar distance method<br />
are described below.<br />
(1) Take three simultaneous sets <strong>of</strong> lunar observations. Each<br />
set <strong>of</strong><br />
lunar observations consists <strong>of</strong> a lunar distance, <strong>the</strong> altitude <strong>of</strong> <strong>the</strong><br />
Moon, <strong>the</strong> altitude <strong>of</strong> <strong>the</strong> sun or star and <strong>the</strong> local mean time (LMT)<br />
<strong>of</strong> <strong>the</strong> observations.<br />
All <strong>the</strong>se required angles<br />
should be measured simultaneously and<br />
repeatedly so that<br />
at least 3 sets <strong>of</strong> lunar observations are obtained.
Star's altitude<br />
Lunar distance<br />
Horizon<br />
Figure 8.2 A Lunar distance observation.<br />
(2) Calculate <strong>the</strong> mean <strong>of</strong> measured angles and LMT <strong>of</strong> <strong>the</strong><br />
observations made. That is to say, <strong>the</strong> sums <strong>of</strong> <strong>the</strong> lunar distances,<br />
<strong>the</strong> moon's altitudes, <strong>the</strong> sun or <strong>the</strong> star's altitude, and <strong>the</strong> LMT<br />
should be divided by <strong>the</strong> number <strong>of</strong> sets. By so doing, small errors<br />
<strong>of</strong> observation are eliminated or reduced.<br />
(3) Use LMT and EoT, obtained from <strong>the</strong> almanac, to find <strong>the</strong> Local<br />
Apparent Time (LAT).<br />
LAT = LMT + EoT<br />
Moon's altitude<br />
(4) Obtain <strong>the</strong> True Lunar Distance by clearing <strong>the</strong> mean <strong>of</strong> <strong>the</strong><br />
measured lunar distances in (1) <strong>of</strong> <strong>the</strong> effects <strong>of</strong> refraction and<br />
parallax (Section 8.3). It is at this moment that we need <strong>the</strong> altitude<br />
<strong>of</strong> <strong>the</strong> moon and <strong>the</strong> altitude <strong>of</strong> <strong>the</strong> stars or <strong>the</strong> sun in order to<br />
ascertain <strong>the</strong> exact values <strong>of</strong> <strong>the</strong> refraction and parallax for <strong>the</strong><br />
moon and sun or refraction for <strong>the</strong> stars.<br />
(5) Find Greenwich Apparent Time (GAT) from <strong>the</strong> True Lunar<br />
Distance in (4) by interpolation in <strong>the</strong> lunar-distance tables in <strong>the</strong><br />
almanac.<br />
(6) <strong>The</strong> LONGITUDE is <strong>the</strong> difference between Local Apparent Time<br />
in (3) and Greenwich Apparent Time in (5).
8.3 Clearing <strong>the</strong> Lunar Distance<br />
When finding longitude by <strong>the</strong> lunar method, <strong>the</strong> most tedious part <strong>of</strong> <strong>the</strong><br />
process is that which is known as clearing <strong>the</strong> distance. This involves<br />
reducing <strong>the</strong> apparent lunar distance to <strong>the</strong> true lunar distance or, in o<strong>the</strong>r<br />
words, clearing <strong>the</strong> apparent distance from <strong>the</strong> effects <strong>of</strong> parallax and<br />
refraction in order to ascertain <strong>the</strong> angle at <strong>the</strong> Earth's center between <strong>the</strong><br />
directions <strong>of</strong> <strong>the</strong> moon's center and <strong>the</strong> star, or sun's center. In <strong>the</strong><br />
following, two methods for clearing <strong>the</strong> lunar distance are discussed. One<br />
is Borda's Method and <strong>the</strong> o<strong>the</strong>r one is Merrifield's Method. Borda's<br />
Method allows us to get an exact true lunar distance. Merrifield's Method,<br />
on <strong>the</strong> o<strong>the</strong>r hand, allows us to get an approximated true lunar distance.<br />
8.3.1 Borda's Method for Clearing <strong>the</strong> Distance<br />
Chevalier Jean Borda, <strong>the</strong> French ma<strong>the</strong>matician and astronomer, was born<br />
at Dax in 1733. He entered <strong>the</strong> French Navy and made nautical<br />
astronomical investigation for which he became well known. In 1787<br />
Borda published his method <strong>of</strong> clearing lunar distances. At <strong>the</strong> time <strong>of</strong> its<br />
introduction to navigators, and for many decades afterwards, Borda's<br />
method was considered by competent authorities to be <strong>the</strong> best.<br />
Figure 8.3 A navigational triangle.
Let M be <strong>the</strong> true altitude <strong>of</strong> <strong>the</strong> Moon (arc MO),<br />
M be <strong>the</strong> apparent altitude <strong>of</strong> <strong>the</strong> Moon (arc Om),<br />
S be <strong>the</strong> true altitude <strong>of</strong> <strong>the</strong> Sun or star (arc SH),<br />
s be <strong>the</strong> observed altitude <strong>of</strong> <strong>the</strong> Sun or star (arc sH),<br />
D be <strong>the</strong> true lunar distance (arc SM ),<br />
d be <strong>the</strong> observed lunar distance (arc sm ).<br />
Due to <strong>the</strong> parallax <strong>of</strong> <strong>the</strong> Moon, <strong>the</strong> observed altitude <strong>of</strong> <strong>the</strong> Moon is<br />
smaller than <strong>the</strong> true altitude <strong>of</strong> <strong>the</strong> Moon as shown in Figure 8.3. And due<br />
to refraction, observed altitude <strong>of</strong> <strong>the</strong> Sun or star is bigger than <strong>the</strong> true<br />
altitude <strong>of</strong> <strong>the</strong> Sun or star.<br />
Using triangle ZSM and <strong>the</strong> law <strong>of</strong> cosines for sides, we have<br />
cos( SM) − cos( ZS) cos( ZM)<br />
cos( Z)<br />
=<br />
,<br />
sin( ZS) sin( ZM)<br />
cos( SM) − sin( HS) sin( OM)<br />
cos( Z)<br />
=<br />
. (1)<br />
cos( HS) cos( OM)<br />
Using triangle Zsm and <strong>the</strong> law <strong>of</strong> cosines for sides, we have<br />
cos( sm) − cos( Zs) cos( Zm)<br />
cos( Z)<br />
=<br />
,<br />
sin( Zs) sin( Zm)<br />
cos( sm) − sin( Hs) sin( Om)<br />
cos( Z)<br />
=<br />
. (2)<br />
cos( Hs) cos( Om)
Equating (1) and (2), we have<br />
cos( D) − sin( S) sin( M)<br />
cos( d) − sin( s) sin( m)<br />
=<br />
,<br />
cos( S) cos( M)<br />
cos( s) cos( m)<br />
cos( D) − sin( S) sin( M)<br />
cos( d) − sin( s) sin( m)<br />
1+ = 1+<br />
,<br />
cos( S) cos( M)<br />
cos( s) cos( m)<br />
cos( S) cos( M) + cos( D) − sin( S) sin( M)<br />
cos( s) cos( m) + cos( d) −sin(<br />
s) sin( m)<br />
=<br />
,<br />
cos( S) cos( M)<br />
cos( s) cos( m)<br />
cos( D) + cos( M + S)<br />
cos( d) + cos( m+<br />
s)<br />
=<br />
,<br />
cos( S) cos( M)<br />
cos( s) cos( m)<br />
( D ( )<br />
) 2<br />
M + S<br />
1− 2sin<br />
2<br />
+ cos<br />
2 2<br />
cos( S) cos( M)<br />
( D ( M S)<br />
) =<br />
+<br />
( ) ( )<br />
{ 2 } −1<br />
2cos<br />
m+ s+ d + −<br />
{ 2} cos<br />
m s d { 2}<br />
{ }<br />
2 2<br />
sin<br />
2<br />
cos<br />
2<br />
=<br />
cos( s) cos( m)<br />
( ) ( )<br />
cos( S) cos( M)<br />
cos<br />
m+ s+ d { 2} cos<br />
m+ s−d 2<br />
−<br />
cos( s) cos( m)<br />
Let<br />
( ) ( )<br />
cos( S) cos( M)<br />
cos<br />
m+ s+ d { } cos<br />
m+ s−d 2 2<br />
2<br />
cos ( θ ) =<br />
cos( s) cos( m)<br />
2 ( )<br />
<strong>The</strong>n, ( D 2 M S<br />
) =<br />
+<br />
2<br />
{ } − ( θ )<br />
sin<br />
2<br />
cos<br />
2<br />
cos<br />
1<br />
= { + ( + ) } − { + }<br />
2 1<br />
1<br />
cos M S 1 cos2θ<br />
2<br />
1<br />
= { cos( M + S) −cos(<br />
2θ<br />
) }<br />
2<br />
( )<br />
( )<br />
= sin<br />
M + S { + } sin −<br />
M + S<br />
2 θ θ<br />
2<br />
{ }<br />
{ }<br />
{ }<br />
. (3)<br />
,<br />
.
⎡ ( + )<br />
( )<br />
( )<br />
{ + θ} { θ −<br />
+<br />
2}<br />
⎤ 2<br />
∴ sin D = sin<br />
M S<br />
sin<br />
M S<br />
2<br />
.<br />
⎣⎢ 2<br />
⎦⎥<br />
Apply logarithm to equations (3) and (4), we have<br />
1<br />
( )<br />
⎧<br />
( )<br />
logcos θ = logsec( ) + logsec( ) + logcos<br />
+ + ⎫<br />
⎨ m s<br />
m s d<br />
⎬<br />
2 ⎩<br />
2 ⎭<br />
1 ⎧ ( )<br />
+ logcos<br />
m+ s−d ⎨ { } + logcos( ) + logcos ( )<br />
⎫<br />
⎬,<br />
2 ⎩<br />
2<br />
M S<br />
⎭<br />
1 ⎡ ( )<br />
( ) =<br />
+<br />
1<br />
{ }<br />
(4)<br />
( )<br />
{ + } + { −<br />
+ }<br />
logsin D logsin<br />
M S<br />
logsin<br />
M S ⎤<br />
2 2 ⎣⎢<br />
2 θ θ 2<br />
.<br />
⎦⎥<br />
8.3.2 Application <strong>of</strong> Borda's method<br />
Observed Altitudes True Altitudes Observed Distance<br />
m = 13°29'27" M = 14°18'32" d = 107°52'04"<br />
s = 31°11'34" S = 31°10'07"<br />
Using <strong>the</strong> above data and apply Borda's method to get <strong>the</strong> true lunar<br />
distance.<br />
d 107°52'04"<br />
m 13°29'27" log sec(m) 0.012151°<br />
s 31°11' 34" log sec(s) 0.067815°<br />
d+m+s 152°33'05"<br />
(d+m+s)/2 76°16'32.5" log cos(m+s+d)/2 -0.62479°<br />
(m+s-d)/2 -31°35'31.5" log cos(m+s-d)/2 -0.06966°<br />
M 14°18'32" log cos(M) -0.013686°<br />
S 31°10'07" log cos(S) -0.067705°
(M+S)/2 22°44'19.5"<br />
log cos θ = 1/2{ 0.012151 + 0.067815 - 0.62479 - 0.06966<br />
- 0.013686 - 0.067705 }<br />
= -0.3479375<br />
Hence θ = 63.33264127°<br />
= 63°19'57.51"<br />
θ+(M+S)/2 86°04'17.01" log sin{θ+(M+S)/2} -0.0010°<br />
θ-(M+S)/2 40°35'38.01" log sin{θ-(M+S)/2} -0.1866°<br />
log sin(D/2) = 1/2{ -0.0010 - 0.1866 }<br />
= -0.0938<br />
∴ D = 107.3653855°<br />
= 107°21'55.3"<br />
Hence, <strong>the</strong> true lunar distance is 107°21'55.3".<br />
8.3.3 Merrifield's Approximation Method for Clearing <strong>the</strong> Lunar<br />
Distance<br />
Dr John Merrifield was a well-known author <strong>of</strong> works on navigation. He<br />
invented <strong>the</strong> Merrifield method for clearing lunar distances. This method is<br />
direct in its application, requires no special tables, and is claimed to be a<br />
very close approximation well adapted for sea use.
Figure 8.4 A navigational triangle.<br />
Let Z be <strong>the</strong> zenith <strong>of</strong> an observer,<br />
d be <strong>the</strong> observed lunar distance (arc sm),<br />
D be <strong>the</strong> true lunar distance (arc SM),<br />
m be <strong>the</strong> apparent Moon position,<br />
s be <strong>the</strong> apparent second body position,<br />
y be <strong>the</strong> Moon's apparent zenith distance (arc Zm),<br />
z be <strong>the</strong> second body's apparent zenith distance (arc Zs),<br />
S' = (y+z+d)/2,<br />
S * = (m+s+d)/2,<br />
C = Moon's correction for altitude (arc Mm),<br />
c = second body's correction for altitude (arc sS),<br />
θ = Zms,<br />
φ = Zsm.<br />
This method is an approximation method because <strong>the</strong> true lunar distance D<br />
(arc MS) is approximated by arc qp.<br />
Thus D = arc MS<br />
= arc qp<br />
= sm − pm + sq<br />
= d − Ccos( θ) + ccos(<br />
φ)<br />
2 ⎡<br />
= − [ − ( ) ] + −<br />
⎛⎜<br />
⎞⎟ ⎤<br />
d C sin θ<br />
2 φ<br />
1 2<br />
2<br />
c 1 2sin<br />
⎣⎢ ⎝ 2 ⎠⎦⎥ ⎡<br />
= − − + −<br />
⎛ ⎤<br />
d C c C θ φ<br />
c<br />
⎣⎢ 2 ⎝ 2 ⎦⎥<br />
2 2<br />
( ) 2 sin ( ) sin ⎜ ⎞⎟ ⎠<br />
. () 1
2<br />
Now, sin ( θ )<br />
=<br />
=<br />
=<br />
=<br />
Similarly,<br />
2<br />
1 cos(<br />
θ)<br />
=<br />
2<br />
−<br />
1 1<br />
= − cos(<br />
θ)<br />
2 2<br />
( z) − ( d) ( y)<br />
sin( y) sin(<br />
d)<br />
1 1 ⎡cos<br />
cos cos<br />
= − ⎢<br />
2 2 ⎣⎢<br />
( d) ( y) − ( z) + ( d) ( y)<br />
sin( y) sin(<br />
d)<br />
1 ⎡sin<br />
sin cos cos cos<br />
⎢<br />
2 ⎣⎢<br />
( y−d) − ( z)<br />
sin( y) sin(<br />
d)<br />
1 ⎡cos<br />
cos<br />
⎢<br />
2 ⎣⎢<br />
⎤<br />
⎥<br />
⎦⎥<br />
( y−d) − ( 2S′<br />
−d − y)<br />
sin( y) sin(<br />
d)<br />
1 ⎡cos<br />
cos<br />
⎢<br />
2 ⎣⎢<br />
{ ( S′ −d) − ( S′ − y) } − ( S′ − d) + ( S′ − y)<br />
sin( y) sin(<br />
d)<br />
sin S′ − d sin S′ − y<br />
=<br />
sin y sin d<br />
⎤<br />
⎥<br />
⎦⎥<br />
1 ⎡cos<br />
cos<br />
⎢<br />
2<br />
⎣<br />
⎢<br />
( ) ( )<br />
( ) ( )<br />
⎤<br />
⎥<br />
⎦⎥<br />
( y+ z−d) ⎤ ⎡(<br />
z+ d − y)<br />
⎡<br />
⎤<br />
sin⎢ 2 ⎥ sin⎢<br />
2 ⎥<br />
⎣<br />
⎦ ⎣<br />
⎦<br />
=<br />
sin sin<br />
* * ( S ) ( S − s)<br />
cos sin<br />
=<br />
sin( d) cos(<br />
m)<br />
( d) ( y)<br />
( ) ( )<br />
sin<br />
⎡<br />
90 −<br />
m+ s+ d ⎤ ⎡ m+ d −s<br />
⎤<br />
⎣⎢<br />
2<br />
sin<br />
⎦⎥ ⎣⎢ 2⎦⎥<br />
=<br />
sin( d) cos(<br />
m)<br />
sin<br />
2<br />
.<br />
( − )<br />
* *<br />
⎛ cos( ) sin<br />
⎜φ ⎞ S S m<br />
⎟<br />
⎝ 2 ⎠<br />
=<br />
.<br />
sin( d) cos( s)<br />
⎤<br />
⎥<br />
⎦⎥<br />
{ }<br />
⎤<br />
⎥<br />
⎦<br />
⎥
Hence,<br />
( θ )<br />
2 2 φ<br />
Csin 2<br />
− csin<br />
⎛⎜<br />
⎞⎟ ⎝ 2⎠<br />
( ) ( − )<br />
Ccos S sin S s<br />
=<br />
sin( d) cos(<br />
m)<br />
( S )<br />
( − )<br />
( ) ( − )<br />
ccos S sin S m<br />
−<br />
sin( d) cos(<br />
s)<br />
* * * *<br />
( − )<br />
* * *<br />
cos ⎡Csin<br />
S s csin S m ⎤<br />
= ⎢<br />
−<br />
⎥<br />
sin(<br />
d ) ⎣ cos(<br />
m)<br />
cos(<br />
s)<br />
⎦<br />
[ ]<br />
* * *<br />
( S ) ec( d) C ( S s) ( m) c ( S −m)<br />
( s)<br />
= cos cos sin − sec − sin sec<br />
*<br />
( M N) ec( d) ( S )<br />
= −<br />
cos cos ,<br />
*<br />
where M = C ( m) ( S −s)<br />
sec sin ,<br />
*<br />
and N = c ( s) ( S −m)<br />
sec sin .<br />
<strong>The</strong>n from formula (1), we have<br />
( ) 2( ) cos ( ) cos(<br />
)<br />
D= d − C− c + M − N ec d S<br />
8.3.4 Application <strong>of</strong> Merrifield's Approximation Method<br />
Observed Altitudes True Altitudes Observed Distance<br />
m = 13°29'27" M = 14°18'32" d = 107°52'04"<br />
s = 31°11'34" S = 31°10'07"<br />
Using <strong>the</strong> above data and Merrifield's approximation method to obtain <strong>the</strong><br />
approximated true lunar distance.<br />
* .
C = M − m=<br />
49′ 05′′<br />
c= s− S = 01′ 27′′<br />
m 13° 29′ 27′′ sec ( m)<br />
1028375707 . °<br />
s 31° 11′ 34′′ sec ( s)<br />
1169003337 . °<br />
d 107° 52′ 04′′ cos ec( d)<br />
1050677202 . °<br />
m+ s+ d 152° 33′ 05′′<br />
( )<br />
( )<br />
( m)<br />
* *<br />
S 76° 16′ 32. 5′′ cos S 0. 237250267°<br />
*<br />
S − s 45° 04′ 585 . ′′<br />
*<br />
sin S − s 0. 708129343°<br />
*<br />
S − m 62° 47′ 055 . ′′<br />
*<br />
sin S − 0889295566 . °<br />
C− c 47′ 38′′<br />
* ( ) ( )<br />
M = Csec m sin S −s<br />
= 35′ 44. 62′′<br />
* ( ) ( )<br />
N = csec s sin S −m<br />
= 01′ 30. 44′′<br />
M − N = 34′ 1418 . ′′<br />
*<br />
( ) 2(<br />
) cos ( ) cos(<br />
)<br />
∴ D= d − C− c + M − N ec d S<br />
= 107° 21′ 301 . ′′<br />
Hence, <strong>the</strong> approximated true lunar distance is 107°21'30.1" .<br />
By comparing with <strong>the</strong> exact lunar distance obtained in section 8.3.2, we<br />
see that <strong>the</strong> approximated true distance obtained above is very close to our<br />
exact value <strong>of</strong> 107°21'55.3".
Chapter 9<br />
Chronometer<br />
It had always been realized that in principle <strong>the</strong> use <strong>of</strong> a transportable clock was<br />
<strong>the</strong> simplest <strong>of</strong> all methods <strong>of</strong> finding longitude but in practice <strong>the</strong> mechanical<br />
problems <strong>of</strong> developing a suitable clock was complicated. <strong>The</strong> first practical<br />
timepiece which was sufficiently accurate to find longitude when carried in a ship<br />
was made in Yorkshire by John Harrison. When <strong>the</strong> <strong>of</strong>fer <strong>of</strong> <strong>the</strong> great prize for<br />
longitude was made in 1714, Harrison was 17 years old and he apparently devoted<br />
his life to winning it.<br />
Figure 9.1 John Harrison (1693-1776)<br />
<strong>The</strong> technical problem which Harrison solved was to develop a clockwork<br />
mechanism which would run at a uniform rate in a moving ship under conditions<br />
<strong>of</strong> varying temperature. He eventually cracked this problem with his fourth<br />
timepiece (H4) which he completed in 1759 at <strong>the</strong> age <strong>of</strong> 66. Harrison made it<br />
look like an ordinary pocket watch although it was laid on a cushion in a box<br />
whose level could be adjusted by hand.
Figure 9.2 H4, Harrison's fourth marine chronometer.<br />
<strong>The</strong> introduction <strong>of</strong> <strong>the</strong> marine chronometer not only solved <strong>the</strong> problem <strong>of</strong><br />
measuring longitude but also made possible more flexible methods <strong>of</strong> fixing<br />
position which did not involve finding latitude and longitude separately. <strong>The</strong> best<br />
example is Sumner's method, which will be discussed in a later chapter. <strong>The</strong>re are<br />
later refinements <strong>of</strong> this way <strong>of</strong> fixing position but <strong>the</strong>y are mostly based on<br />
Sumner's method.
Chapter 10<br />
Meridian Transit Method<br />
10.1 Meridian Transit Method<br />
We know that <strong>the</strong> earth rotates with an angular velocity <strong>of</strong> 15 degrees per hour with<br />
respect to <strong>the</strong> mean sun. Using this fact, <strong>the</strong> time <strong>of</strong> local meridian transit <strong>of</strong> <strong>the</strong> (true)<br />
sun, TTransit, can be used to calculate <strong>the</strong> observer's longitude. Note that TTransit is measured<br />
as GMT. <strong>The</strong> procedures <strong>of</strong> <strong>the</strong> Meridian Transit method are described below.<br />
(1) Determine <strong>the</strong> TTransit [h]. (Refer section 10.2)<br />
(2) From <strong>the</strong> Nautical Almanac, for TTransit, find EoTTransit by interpolation.<br />
(3) Use GMT and EoTTransit to find GAT.<br />
GAT[h] = GMT[h]- EoT[h]<br />
(4) Use GAT and LAT to determine longitude. Note that our LAT is 1200h.<br />
10.2 How to Determine TTransit<br />
Lon[°]=15(LAT-GAT)<br />
Local Apparent Noon (LAN) is <strong>the</strong> local time when <strong>the</strong> (true) sun is at our meridian.<br />
That is <strong>the</strong> LAT is 1200 noon. A sextant reading is taken at a time before <strong>the</strong> LAN (T1).<br />
Assuming that <strong>the</strong> sun moves along a symmetric arc in <strong>the</strong> sky and keeping our sextant<br />
reading, <strong>the</strong> time (T2) past LAN at which <strong>the</strong> sun has an altitude equal to our sextant<br />
reading is taken. <strong>The</strong>n <strong>the</strong> mean <strong>of</strong> T1 and T2 is our TTransit.
T + T<br />
ieT .. =<br />
Transit<br />
1 2<br />
2<br />
Figure 10.1 Sun moves along a symmetric arc in <strong>the</strong> sky.<br />
10.3 Errors <strong>of</strong> Meridian Transit Method<br />
Unfortunately, <strong>the</strong> arc <strong>of</strong> <strong>the</strong> true sun is usually not quite symmetrical with respect to<br />
TTransit due to <strong>the</strong> changing declination <strong>of</strong> <strong>the</strong> sun. As a result, TTransit is not exactly <strong>the</strong><br />
mean <strong>of</strong> T1 and T2.<br />
<strong>The</strong> resulting systematic error in longitude is negligible around <strong>the</strong> times <strong>of</strong> <strong>the</strong> solstices<br />
when Dec is almost constant, and is greatest at <strong>the</strong> times <strong>of</strong> <strong>the</strong> equinoxes when <strong>the</strong> rate <strong>of</strong><br />
change <strong>of</strong> Dec is greatest (Figure 10.2).<br />
Figure 10.2 Motion <strong>of</strong> <strong>the</strong> Sun.
Chapter 11<br />
Sumner's Method<br />
11.1 Introduction<br />
Sumner lines were discovered by chance by a sea captain, Charles Sumner<br />
in 1837. On a voyage back home, he was worried because he had been<br />
sailing for several days in bad wea<strong>the</strong>r, and had not been able to see <strong>the</strong><br />
sun or any stars, <strong>the</strong> coast was getting near, and he did not know where he<br />
was. Suddenly <strong>the</strong>re was a break in <strong>the</strong> clouds, so he grabbed his sextant<br />
and snatched a quick sun sight, before <strong>the</strong> clouds covered <strong>the</strong> sky again. He<br />
also timed his observation with a chronometer.<br />
Now he was wondering what to do with this information so he played a<br />
"what if" game. He knew <strong>the</strong> altitude formula and he said, "what if my<br />
latitude is…" and calculated <strong>the</strong> corresponding longitude and he plotted it<br />
on a chart. After doing that half a dozen times he suddenly realized that all<br />
<strong>the</strong> points he was marking on <strong>the</strong> chart seemed to fall on a straight line.<br />
Without thinking about it any more, he saw that <strong>the</strong> line needed pushing<br />
north by 30 odd miles to lead straight into his destination, so he turned<br />
north for 30 miles, <strong>the</strong>n turned to port until he was sailing parallel to that<br />
Sumner line. His crew were a bit perplexed at that, wondering if <strong>the</strong><br />
captain had gone mad, but when suddenly <strong>the</strong>y arrived right at <strong>the</strong> entrance<br />
<strong>of</strong> <strong>the</strong> harbor, <strong>the</strong>y thought he was a genius. And so did <strong>the</strong> rest <strong>of</strong> <strong>the</strong><br />
sailing community.<br />
Although this single observation did not tell him <strong>the</strong> position <strong>of</strong> his ship,<br />
Captain Sumner realized that it did tell him that <strong>the</strong> ship must lie
somewhere on a line, actually a position circle, which he could draw on<br />
his chart - a remarkable discovery to be made by <strong>the</strong> captain <strong>of</strong> a ship<br />
during a storm.<br />
11.2 <strong>The</strong> Position Circle<br />
Let S be <strong>the</strong> heavenly body,<br />
U be <strong>the</strong> GP <strong>of</strong> <strong>the</strong> heavenly body,<br />
C be <strong>the</strong> center <strong>of</strong> <strong>the</strong> earth,<br />
PGQ be <strong>the</strong> Greenwich meridian,<br />
P and Q be <strong>the</strong> north and south pole respectively.<br />
Figure 11.1 A position circle.<br />
Now, consider <strong>the</strong> observation <strong>of</strong> altitude from which <strong>the</strong> true zenith<br />
distance z is derived. If <strong>the</strong> observer were actually at <strong>the</strong> point K on <strong>the</strong><br />
earth’s surface, <strong>the</strong>n angle KCU or <strong>the</strong> great circle arc UK is <strong>the</strong> true zenith<br />
distance z. Since <strong>the</strong> GMT at which <strong>the</strong> observation <strong>of</strong> altitude was made is<br />
noted, <strong>the</strong> GP <strong>of</strong> <strong>the</strong> body U can <strong>the</strong>n be found from <strong>the</strong> Nautical Almanac.<br />
Thus U is a definite point on <strong>the</strong> earth’s surface. <strong>The</strong> true zenith distance z<br />
is also known, and <strong>the</strong>refore <strong>the</strong> observer must be situated somewhere on a<br />
small circle KJR <strong>of</strong> which U is <strong>the</strong> pole, every point <strong>of</strong> this small circle
eing an angular distance z from U. This small circle is called <strong>the</strong> position<br />
circle.<br />
It is noted that a single observation <strong>of</strong> a heavenly body leads only to a<br />
certain small circle, on which <strong>the</strong> observer is situated. If we suppose that a<br />
similar observation <strong>of</strong> ano<strong>the</strong>r heavenly body is made at <strong>the</strong> same GMT, a<br />
second position circle will be derived on which <strong>the</strong> observer must be<br />
situated. <strong>The</strong>refore his actual position must be at one or o<strong>the</strong>r <strong>of</strong> <strong>the</strong> two<br />
points <strong>of</strong> intersection <strong>of</strong> <strong>the</strong> two position circles. As <strong>the</strong> approximated<br />
position <strong>of</strong> <strong>the</strong> ship is always known, <strong>the</strong>re is no difficulty in deciding<br />
which <strong>of</strong> <strong>the</strong> two points is <strong>the</strong> correct position.<br />
11.3 Sumner Lines <strong>of</strong> Position<br />
Sumner's method makes use <strong>of</strong> two points on <strong>the</strong> position circle to draw a<br />
straight line, called <strong>the</strong> sumner line <strong>of</strong> position (Sumner LoP). Thus,<br />
Sumner's line <strong>of</strong> position is a secant. As a sumner line tells us that we can<br />
be any where on this line, it does not tells us our position. So in order to<br />
obtain our position, we need to ano<strong>the</strong>r sumner's line. <strong>The</strong>n <strong>the</strong> intersection<br />
<strong>of</strong> <strong>the</strong> two sumner lines is our position.<br />
11.4 Sumner's Method<br />
Although Sumner's method is quite old, it is an interesting sight reduction<br />
alternative. <strong>The</strong> procedures <strong>of</strong> <strong>the</strong> Sumner's method are described below.<br />
(1) Choose a convenient position on your map, preferable <strong>the</strong> point<br />
where two grid lines intersect. This position is called assumed<br />
position, AP.
(2) Find <strong>the</strong> altitude H <strong>of</strong> a selected celestial body by sextant and note<br />
<strong>the</strong> GMT.<br />
(3) From <strong>the</strong> Nautical Almanac, for <strong>the</strong> date and GMT, find <strong>the</strong> GHA<br />
and Dec <strong>of</strong> <strong>the</strong> body.<br />
(4) Use H, LatAP and Dec to compute LHA.<br />
⎡sin( H ) − sin( Lat AP ) sin( Dec)<br />
⎤<br />
LHA = arccos⎢<br />
⎥<br />
⎣ cos( Lat AP ) cos( Dec)<br />
⎦<br />
(5) From our assumed latitude, LatAP, two longitudes are obtained<br />
based on <strong>the</strong> following formulas:<br />
Lon1 = LHA - GHA<br />
If Lon1
(9) A second Sumner LoP is obtained by entering <strong>the</strong> data <strong>of</strong> a second<br />
body.<br />
(10) <strong>The</strong> point <strong>of</strong> intersection <strong>of</strong> both LoPs is your position (fix).<br />
Figure 11.2
Chapter 12<br />
<strong>The</strong> Intercept Method<br />
12.1 Introduction<br />
<strong>The</strong> practice <strong>of</strong> position fixing by celestial bodies has been used by<br />
navigators in ocean passage until accurate and low cost electronic<br />
navigation aids, like transit satellite and GPS, are available. Sun sights<br />
during <strong>the</strong> daylight hours and star sights during twilight are obtained to<br />
determine <strong>the</strong> ship’s position. <strong>The</strong> Marcq Saint-Hilaire or intercept<br />
method is <strong>the</strong> most popular way to reduce a sight for a position line. <strong>The</strong><br />
intercept method uses <strong>the</strong> difference between <strong>the</strong> observed true altitude and<br />
<strong>the</strong> calculated altitude <strong>of</strong> <strong>the</strong> ship's assumed position to give an intercept<br />
for plotting <strong>the</strong> position line on chart.<br />
12.2 <strong>The</strong> Position Line<br />
As we have seen, <strong>the</strong> altitude observation <strong>of</strong> a heavenly body yields <strong>the</strong><br />
information that at <strong>the</strong> time <strong>of</strong> observation <strong>the</strong> ship is situated on a certain<br />
small circle KJR (Figure 11.1). We shall suppose that in Figure 11.1, D<br />
represents <strong>the</strong> approximated position <strong>of</strong> <strong>the</strong> ship at this moment. It is clear<br />
that <strong>the</strong> only part <strong>of</strong> <strong>the</strong> position circle with which <strong>the</strong> navigators need<br />
concern is that part in <strong>the</strong> immediate neighborhood <strong>of</strong> D. <strong>The</strong>ir objects <strong>the</strong>n<br />
are to represent on <strong>the</strong> chart this part AJB <strong>of</strong> <strong>the</strong> position circle (shown<br />
with a heavy line in Figure 11.1).
Now <strong>the</strong> latitude and longitude <strong>of</strong> U and <strong>of</strong> D are known, hence <strong>the</strong> length<br />
<strong>of</strong> <strong>the</strong> great circle arc UD can be calculated. But this arc is simply <strong>the</strong><br />
zenith distance <strong>of</strong> <strong>the</strong> hypo<strong>the</strong>tical observer situated at D. We shall call this<br />
zenith distance UD <strong>the</strong> calculated zenith distance. Now <strong>the</strong> length <strong>of</strong> <strong>the</strong><br />
arc UJ is known from <strong>the</strong> observation, it is <strong>the</strong> true zenith distance z;<br />
hence, by subtraction we obtain <strong>the</strong> length <strong>of</strong> <strong>the</strong> arc DJ. This arc DJ is<br />
known as <strong>the</strong> intercept. <strong>The</strong> arc DJ is perpendicular to <strong>the</strong> position circle<br />
at J, for U is <strong>the</strong> pole <strong>of</strong> KJR.<br />
Also, <strong>the</strong> spherical angle UDP is easily seen to be <strong>the</strong> azimuth <strong>of</strong> <strong>the</strong><br />
heavenly body, at <strong>the</strong> GMT concerned, for an observation at D can be<br />
calculated. In Figure 11.1, <strong>the</strong> azimuth <strong>of</strong> J is <strong>the</strong> same as <strong>the</strong> azimuth <strong>of</strong> U,<br />
which we now suppose to be known. Thus, under <strong>the</strong> circumstances<br />
depicted in figure 11.1, where <strong>the</strong> calculated zenith distance UD is greater<br />
than <strong>the</strong> true zenith distance UJ, <strong>the</strong> navigator can draw from <strong>the</strong><br />
approximated position on his chart a straight line in <strong>the</strong> direction given by<br />
<strong>the</strong> azimuth <strong>of</strong> <strong>the</strong> heavenly body. He <strong>the</strong>n marks <strong>of</strong>f along this line a<br />
distance equal to <strong>the</strong> intercept, and through <strong>the</strong> point so obtained he draws<br />
a straight line, called <strong>the</strong> position line, perpendicular to <strong>the</strong> line <strong>of</strong><br />
azimuth. <strong>The</strong> position line represents on his chart <strong>the</strong> portion AJB <strong>of</strong> <strong>the</strong><br />
position circle KJR (Figure 11.1). This line is know as a tangent to <strong>the</strong><br />
position circle at J. It is clear that if D is within <strong>the</strong> position circle, that is,<br />
if <strong>the</strong> calculated zenith distance is less than <strong>the</strong> true zenith distance, <strong>the</strong><br />
intercept will be marked <strong>of</strong>f in <strong>the</strong> direction opposite to that given by <strong>the</strong><br />
azimuth.<br />
12.3 <strong>The</strong> Intercept Method<br />
<strong>The</strong> intercept method <strong>of</strong> obtaining a position line was discovered by a<br />
French navigator Marcq St. Hilaire in 1875. Now with an idea <strong>of</strong> what <strong>the</strong><br />
position line is, we can now described <strong>the</strong> procedures <strong>of</strong> applying <strong>the</strong>
intercept method to obtain ship current position, called “fix”. <strong>The</strong><br />
procedures <strong>of</strong> obtaining a fix are described below.<br />
(1) Choose a convenient position on your map, preferably <strong>the</strong> point<br />
where two grid lines intersect. This position is called assumed<br />
position, AP.<br />
(2) Find <strong>the</strong> altitude H <strong>of</strong> a selected celestial body by sextant and note<br />
<strong>the</strong> GMT.<br />
(3) From <strong>the</strong> Nautical Almanac, for <strong>the</strong> date and GMT, find <strong>the</strong> GHA<br />
and Dec <strong>of</strong> <strong>the</strong> body.<br />
(4) Use <strong>the</strong> GHA and LonAP to compute LHA.<br />
+ : For eastern longitude<br />
- : For western longitude<br />
LonAP : <strong>Longitude</strong> <strong>of</strong> AP.<br />
LHA = GHA ± LonAP<br />
If LHA is not in <strong>the</strong> range between 0° and 360°, add or subtract<br />
360°.<br />
Figure 12.2
(5) Calculate <strong>the</strong> altitude <strong>of</strong> <strong>the</strong> observed body as it would appear from<br />
AP. This is called calculated or computed altitude, Hc.<br />
[ ( AP ) ( ) ( AP ) ( ) ( ) ]<br />
Hc = arcsin sin Lat sin Dec + cos Lat cos Dec cos LHA ,<br />
where LatAP is <strong>the</strong> geographic latitude <strong>of</strong> AP.<br />
(6) Calculate <strong>the</strong> azimuth <strong>of</strong> <strong>the</strong> body, AzN, <strong>the</strong> direction <strong>of</strong> GP with<br />
reference to <strong>the</strong> geographic north point on <strong>the</strong> horizon, measured<br />
clockwise from 0° through 360° at AP<br />
( Dec) − ( Hc) ( Lat AP )<br />
cos( Hc) cos(<br />
Lat )<br />
⎡sin<br />
sin sin<br />
Az = arccos⎢ ⎣⎢<br />
<strong>The</strong> azimuth angle, Az, <strong>the</strong> angle formed by <strong>the</strong> meridian going<br />
through AP and <strong>the</strong> great circle going through AP and GP, is not<br />
necessarily identical with AzN since <strong>the</strong> arccos function yields<br />
results between 0° and +180°. To obtain AzN, apply <strong>the</strong> following<br />
rules:<br />
⎧Az<br />
if sin LHA < 0<br />
Az N = ⎨<br />
⎩360°−<br />
Az if sin LHA > 0 .<br />
(7) Calculate <strong>the</strong> intercept, Ic, <strong>the</strong> difference between observed (Ho)<br />
and computed (Hc) altitude. For <strong>the</strong> following procedures, <strong>the</strong><br />
intercept is expressed in distance units:<br />
400316 .<br />
Ic[ nm] = 60 ( Ho − Hc)<br />
or Ic[ km] = ( Ho − Hc)<br />
,<br />
360<br />
<strong>The</strong> mean perimeter <strong>of</strong> <strong>the</strong> earth is 40031.6 km.<br />
AP<br />
⎤<br />
⎥.<br />
⎦⎥
(8) Take <strong>the</strong> map and draw a suitable segment <strong>of</strong> <strong>the</strong> azimuth line<br />
through AP. Measure <strong>the</strong> intercept, Ic, along <strong>the</strong> azimuth line<br />
(towards GP if Ic>0, away from GP if Ic
If a high precision is required, <strong>the</strong> intercept method can be applied<br />
iteratively, that is repeating <strong>the</strong> calculation with <strong>the</strong> obtained position (fix)<br />
instead <strong>of</strong> AP (same altitudes and GP <strong>of</strong> <strong>the</strong> 2 observed bodies), until <strong>the</strong><br />
obtained position remains virtually constant.
Chapter 13<br />
Prime Vertical Method<br />
Before <strong>the</strong> introduction <strong>of</strong> <strong>the</strong> Sumner's method, prime vertical method is a<br />
common method used by navigator to find <strong>the</strong>ir longitude. At sea, navigator will<br />
determine <strong>the</strong> latitude at noon. After sometimes, dead reckoning is used to<br />
determine <strong>the</strong> new local latitude. <strong>The</strong>n this obtained latitude is <strong>the</strong> assumed<br />
latitude used in <strong>the</strong> prime vertical method to determine <strong>the</strong> longitude. Dead<br />
reckoning is <strong>the</strong> navigational term for calculating one's new position from <strong>the</strong><br />
previous position, course and distance (calculated from <strong>the</strong> vessel's average speed<br />
and time elapsed).<br />
Prime vertical method makes use <strong>of</strong> <strong>the</strong> altitude when a celestial body is on <strong>the</strong><br />
prime vertical to determine longitude. <strong>The</strong> celestial body is said to be on <strong>the</strong> prime<br />
vertical when its azimuth is 90° or 270°. <strong>The</strong> procedures <strong>of</strong> <strong>the</strong> method are<br />
described below.<br />
(1) Obtain an assumed latitude, LatAP and <strong>the</strong> declination <strong>of</strong> <strong>the</strong> body, dec.<br />
(2) Use LatAP and Dec to calculate <strong>the</strong> observed altitude, Ho, <strong>of</strong> <strong>the</strong> body.<br />
Ho = sin<br />
−1<br />
⎡ sin(<br />
Dec)<br />
⎤<br />
⎢ ⎥<br />
⎣⎢<br />
sin(<br />
Lat AP ) ⎦⎥<br />
(3) Obtain sextant altitude, Hs, by adding navigational errors to Ho.<br />
(4) Note <strong>the</strong> GMT when <strong>the</strong> sextant reading gives Hs.
(5) From <strong>the</strong> Nautical Almanac, for <strong>the</strong> GMT, obtain <strong>the</strong> GHA <strong>of</strong> <strong>the</strong> body.<br />
(6) Use Ho and Dec to calculate <strong>the</strong> meridian angle, t, east or west <strong>of</strong> <strong>the</strong><br />
body.<br />
t = sin<br />
(7) Use GHA and t to determine longitude.<br />
−1<br />
Lon = GHA ±<br />
t<br />
⎡ cos(<br />
Ho)<br />
⎤<br />
⎢<br />
⎣cos(<br />
Dec)<br />
⎥<br />
⎦
Bibliography<br />
[1] Charles H. Cotter, A History <strong>of</strong> Nautical Astronomy, American Elservier<br />
Publishing Company, Inc., New York, NY, USA, 1968.<br />
[2] Hanbury Brown FRS, Man and <strong>the</strong> Stars, Oxford University Press, 1992.<br />
[3] J.E.D. Williams, From Sails to Satellites <strong>The</strong> Origins and Development <strong>of</strong><br />
Navigational Science, Oxford University Press, 1992.<br />
[4] Merle B. Turner, Celestial for <strong>the</strong> Cruising Navigator, Cornell Maritime<br />
Press, 1995.<br />
[5] James B. Kaler, <strong>The</strong> Ever-Changing Sky: A Guide to <strong>the</strong> Celestial Sphere,<br />
Cambridge University Press, 1996.<br />
[6] William J.H Andrewes, <strong>The</strong> Quest For <strong>Longitude</strong>: <strong>The</strong> Proceedings <strong>of</strong> <strong>the</strong><br />
<strong>Longitude</strong> Symposium, Harvard University, Cambridge, Massachusetts,<br />
1993.<br />
[7] W.M. Smart; Text-Book on Spherical Astronomy; Cambridge University<br />
Press; 1960.<br />
[8] Dava Sobel, <strong>The</strong> True Story <strong>of</strong> a Lone Genius Who Solved <strong>the</strong> Greatest<br />
Scientific Problem <strong>of</strong> His Time, Walker and Company, 1995.<br />
[9] Henry H. Shufeldt and Kenneth E. Newcomer, <strong>The</strong> Calculator Afloat: A<br />
Mariner's Guide to <strong>the</strong> Electronic Calculator, Naval Institute Press, 1980.<br />
[10] John S. Letcher, Jr, Self-Contained Celestial Navigation with H.O. 208,<br />
International Marine Publishing, 1977.
[11] H.R. Mills, Positional Astronomy And Astro-Navigation Made Easy A<br />
new approach using <strong>the</strong> pocket calculator, Stanley Thornes Publishers Ltd,<br />
1978.<br />
[12] http://home.t-online.de/home/h.umland/page2.htm<br />
[13] http://members.tripod.com/~worldsite/astronomy/astroinst.html