IC-F3000/F4000 Series Instruction Manual - Icom France
IC-F3000/F4000 Series Instruction Manual - Icom France
IC-F3000/F4000 Series Instruction Manual - Icom France

Create successful ePaper yourself
Turn your PDF publications into a flip-book with our unique Google optimized e-Paper software.
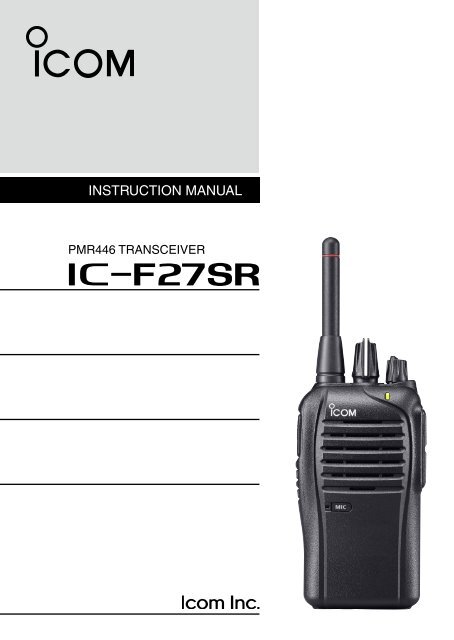
INSTRUCTION MANUALPMR446 TRANSCEIVERiF27SR
FOREWORDREAD ALL INSTRUCTIONS carefully and completely beforeusing the transceiver.SAVE THIS INSTRUCTION MANUAL— This instructionmanual contains important operating instructions for the <strong>IC</strong>-F27SRPMR446 TRANSCEIVER.This instruction manual includes some functions which are usableonly when they are preprogrammed by your dealer. Ask yourdealer for details.EXPL<strong>IC</strong>IT DEFINITIONSWORDRDANGER!RWARNING!CAUTIONNOTEDEFINITIONPersonal death, serious injury or an explosionmay occur.Personal injury, fire hazard or electric shockmay occur.Equipment damage may occur.If disregarded, inconvenience only. No risk ofpersonal injury, fire or electric shock.i<strong>Icom</strong>, <strong>Icom</strong> Inc. and the <strong>Icom</strong> logo are registered trademarks of <strong>Icom</strong> Incorporated(Japan) in Japan, the United States, the United Kingdom, Germany, <strong>France</strong>,Spain, Russia and/or other countries.
iiCOUNTRY CODE LIST• ISO 3166-1Country Codes Country Codes1234567891011121314151617AustriaBelgiumBulgariaCroatiaCzech RepublicCyprusDenmarkEstoniaFinland<strong>France</strong>GermanyGreeceHungaryIcelandIrelandItalyLatviaATBEBGHRCZCYDKEEFIFRDEGRHUISIEITLV18192021222324252627282930313233LiechtensteinLithuaniaLuxembourgMaltaNetherlandsNorwayPolandPortugalRomaniaSlovakiaSloveniaSpainSwedenSwitzerlandTurkeyUnited KingdomLILTLUMTNLNOPLPTROSKSIESSECHTRGB
PRECAUTIONSR DANGER! NEVER short the terminals of the battery pack.R DANGER! Use and charge only specified <strong>Icom</strong> battery packswith <strong>Icom</strong> radios or <strong>Icom</strong> chargers. Only <strong>Icom</strong> battery packs aretested and approved for use with <strong>Icom</strong> radios or charged with <strong>Icom</strong>chargers. Using third-party or counterfeit battery packs or chargersmay cause smoke, fire, or cause the battery to burst.R WARNING! NEVER hold the transceiver so that the antennais very close to, or touching exposed parts of the body, especiallythe face or eyes, while transmitting. The transceiver will performbest if the microphone is 5 to 10 cm away from the lips and thetransceiver is vertical.R WARNING! NEVER operate the transceiver with a headsetor other audio accessories at high volume levels. Hearing expertsadvise against continuous high volume operation. If you experiencea ringing in your ears, reduce the volume level or discontinue use.R WARNING! NEVER operate the transceiver while driving avehicle. Safe driving requires your full attention—anything less mayresult in an accident.CAUTION: NEVER connect the transceiver to a power sourceother than the specified battery pack/case. Such a connection willruin the transceiver.CAUTION: MAKE SURE the battery pack is securely attachedto the transceiver, and that the battery pack is dry before attachment.Exposing the inside of the transceiver to water will result inserious damage to the transceiver.DO NOT push the PTT when not actually desiring to transmit.iii
DO NOT use or place the transceiver in direct sunlight or in areaswith temperatures below –25°C or above +55°C.The basic operations, transmission and reception of the transceiver,are guaranteed within the specified operating temperature range.DO NOT modify the transceiver. The transceiver warranty doesnot cover any problems caused by unauthorized modification.DO NOT use harsh solvents such as benzine or alcohol whencleaning, as they will damage the transceiver surfaces.BE CAREFUL! The transceiver will become hot when operatingit continuously for long periods of time.KEEP the transceiver away from heavy rain, and never immerseit in water. The transceiver meets IP54* requirements for dust-protectionand splash resistance. However, once the transceiver hasbeen dropped, dust-protection and splash resistance cannot beguaranteed because of possible damage to the transceiver’s caseor the waterproof seal.* Only when the battery pack/case and jack cover are attached.MAKE SURE to turn the transceiver power OFF before connectingthe supplied/optional equipment.iv
TABLE OF CONTENTSFOREWORD...................................................................................iEXPL<strong>IC</strong>IT DEFINITIONS................................................................iCOUNTRY CODE LIST..................................................................iiPRECAUTIONS............................................................................ iiiTABLE OF CONTENTS.................................................................v1 ACCESSORIES....................................................................1–4‘‘Supplied accessories.............................................................1‘‘Accessory attachments.........................................................2ï ïBelt clip...............................................................................2ï ïBattery pack/case..............................................................3ï ïJack cover..........................................................................42 PANEL DESCRIPTION.........................................................5–9‘‘Front, top and side panels.....................................................5‘‘Programmable key functions.................................................7‘‘LED indicator.........................................................................93 OPERATION.....................................................................10–18‘‘Turning ON the power..........................................................10ï ïBattery type selection.......................................................10‘‘Channel selection................................................................11‘‘Receiving and transmitting..................................................12ïïPreprogrammed frequency and CTCSS tone list (Default)..13ï ïTransmitting notes............................................................14‘‘Setting the microphone gain................................................15‘‘Setting the squelch level......................................................16‘‘Priority A channel selection.................................................17‘‘Auto scan function...............................................................17‘‘Power save function.............................................................18v
4 BATTERY CHARGING.....................................................19–29‘‘Caution (for the BP-264 Ni-MH battery)...............................19‘‘Caution (for the BP-265 Li-ion battery)................................21ï ïBattery caution.................................................................21ï ïCharging caution..............................................................23‘‘Battery chargers..................................................................24ï ïUsing the BC-191 to rapid charge the BP-264.................24ï ïUsing the BC-192 to regular charge the BP-264..............25ï ïUsing the BC-193 to rapid charge the BP-265.................26ïïUsing the BC-197 to rapid charge the BP-264 or BP-265..275 BATTERY CASE.....................................................................30‘‘Optional BP-263 battery case............................................306 OPTIONS..........................................................................31–36ï ïBATTERY PACK/CASE....................................................31ï ïCHARGERS.....................................................................31ï ïDC POWER CABLES......................................................32ï ïBELT CLIPS.....................................................................32ï ïOTHER OPTIONS...........................................................33‘‘VOX function........................................................................34ï ïOptional unit connection...................................................34ï ïTurning the VOX function ON or OFF...............................35ï ïSetting the VOX gain........................................................367 SPECIF<strong>IC</strong>ATIONS............................................................37–38ï ïGeneral............................................................................37ï ïTransmitter.......................................................................37ï ïReceiver...........................................................................38ï ïDimensions......................................................................388 INDEX...............................................................................39–401234567891011121314151617181920vi
1 ACCESSORIES■■Supplied accessoriesThe following accessories are supplied with the transceiver.Battery pack*Battery charger*AC adapter*Belt clipJack cover(with screws)* Not supplied, or the shape is different, depending on the version.1
■■Accessory attachmentsACCESSORIESDDBelt clipTo attach the belt clip:➥➥ Slide the belt clip in the direction of the arrow until it locks inplace, and makes a ‘click’ sound.Belt clipBattery packTo detach the belt clip:qqRemove the battery pack from the transceiver, if it is attached.(p. 3)wwLift the tab up ( q), and slide the belt clip in the direction of thearrow (w).qTabw112345678910111213141516171819202
1 ACCESSORIES■■ Supplied accessories (continued)DDBattery pack/caseTo attach the battery pack/case:qqFit the battery pack/case in the direction of the arrow, thenclose.wwHook the latch until it makes a ‘click’ sound.qBattery pack/casewLatchTo remove the battery pack/case:Unhook the latch (q), and lift up the battery pack/case in the directionof the arrow (w).wq3Be careful! The latch is tightly locked, so use caution when releasingit. DO NOT use your finger nail. Use the edge of a coin orscrewdriver tip to carefully release it.
ACCESSORIESNEVER remove or attach the battery pack/case when the transceiveris wet or soiled. This may result in water or dust gettinginto the transceiver, battery pack/case, and may result in thembeing damaged.NOTE: Keep the battery terminals clean. It’s a good idea to regularlyclean them.DDJack coverAttach the jack cover when optional equipment is not used.To attach the jack cover:qqAttach the jack cover to the[SP M<strong>IC</strong>] jack.wwTighten the screws.qww1To detach the jack cover:q Remove the screws with aPhillips screwdriver.w Detach the jack cover to connectoptional equipment.qqw12345678910111213141516171819204
2 PANEL DESCRIPTION■■Front, top and side panelsAntennau PTT SWITCHy UPPER KEYt LOWER KEYq ROTARYSELECTORw VOLUMECONTROLe LED IND<strong>IC</strong>ATORSpeakerr SPEAKER-M<strong>IC</strong>ROPHONEJACKMicrophoneq ROTARY SELECTORRotate to select the preprogrammed memory channels.w VOLUME CONTROL [VOL]Rotate to turn the power ON/OFF, and adjust the audio level.5
2 PANEL DESCRIPTION■■Programmablekey functionsVarious functions can be assigned to the [Upper] and [Lower] programmablefunction keys.If [Upper] or [Lower] is preprogrammed, push to activate whicheverfunction is set.Consult your <strong>Icom</strong> dealer for details concerning which functions areprogrammed into the key.SCAN A➥➥ Push to start or cancel the scanning operation.➥➥ When the Power ON scan function is turned ON, push to pausethe scanning. The paused scan resumes after the specified timeperiod has passed.SCAN BPush to start or cancel scanning.If the scan pauses for any reason, except being cancelled by thiskey, it will resume after a specified time period has passed.PRIORITY A CHANNEL, PRIORITY B CHANNELPush to select the Priority A or Priority B channel.PRIORITY A CHANNEL (REWRITE),PRIORITY B CHANNEL (REWRITE)➥➥ Push to select the Priority A or Priority B channel.➥➥ Hold down [PRIO A (Rewrite)] or [PRIO B (Rewrite)] for 1 secondto assign the operating channel to Priority A or Priority Bchannel, respectively.7MEMORY CHANNEL 1, MEMORY CHANNEL 2,MEMORY CHANNEL 3, MEMORY CHANNEL 4Push to select memory channel 1, 2, 3 or 4, if programmed. Consultyour dealer for details.
2 PANEL DESCRIPTION■■LED indicatorThe LED indicator indicates the status of variousparameters of the transceiver, as follows;(Ref.; R=Red, G=Green, O=Orange)• TX: Lights Red while transmitting a signal.R*• RX: Lights Green while receiving a signal.G• Fast/Slow scan: Blinks when the Fast/Slow scan is activated.anGG• Low Battery 1: You should charge the battery. (blinks slowly)BATT1• Low Battery 2: You must charge the battery. (blinks fast)GGATT2G G G G• TX low Battery 1: Low Battery was detected during transmit.BATT1R* R*• TX low Battery 2: Very Low Battery was detected during transmit.BATT2 R* R* R* R*• Channel Error: A non-programmed channel is selected.R O R O R O R O R O R O R O R O* Lights (or blinks) orange when the optional battery case is attached.9
OPERATION■■Turning ON the powerPrior to using the transceiver for the firsttime, the battery pack must be fully chargedfor optimum life and operation. (p. 19)➥➥ Rotate [VOL] to turn ON the power.3[VOL]DDBattery type selectionThe battery type must be selected according to the battery pack orcase when it is changed, but only the first time it is used.Check the battery type before you begin the selection procedure.One to three beep(s) sound in sequence, so you must repeat thesteps until the number of beeps matches your battery type.For example, if your battery type is a Ni-MH battery pack, you mustrepeat the procedure until 3 beeps are heard.q qSet [ROTARY SELECTOR] to anychannel other than Channel 16. [ROTARY SELECTOR]wwRotate [VOL] to turn OFF the[VOL]transceiver power.eeWhile holding down [PTT], rotate[VOL] to turn ON the power.• You should hold [PTT] until the beepsounds. (It takes approximately 5seconds; while holding down [PTT], [PTT]the count down beeps sound.)• 1 beep sounds when the Li-ion batteryis selected.• 2 beeps sound when the battery case is selected.• 3 beeps sound when the Ni-MH battery is selected.rrAfter the beep sounds, release [PTT].ttRepeat steps w to r until you select the correct battery type.NOTE: This operation may not be available, depending on thepreprogramming. Ask your dealer for details.123456789101112131415161718192010
3 OPERATION■■Channel selectionSeveral types of channel selecting methods are available. Theymay differ, according to your system set up.To select a desired operating channel, do one of the following:• Rotate [ROTARY SELECTOR].• Push one of memory channel keys, [MR-CH 1] to [MR-CH 4].AUTOMAT<strong>IC</strong> SCAN TYPE:Selecting a channel is not necessary for this type. When turning thepower ON, the transceiver automatically starts scanning. Scanningstops when a signal is received, and then the channel is set.NOTE: If the Move to Priority A channel at Power ON function(p. 17) is turned ON, the transceiver does not start scanning atpower ON, and the Priority A channel is automatically selected.11
■■Receiving and transmittingOPERATIONReceiving:qqRotate [VOL] to turn ON the power.wwRotate [ROTARY SELECTOR], or push one of the memorychannel keys, [MR-CH 1] to [MR-CH 4], to select a channel.eeWhen receiving a call, adjust the audio output to a comfortablelistening level.• When the received signal contains the same CTCSS tone or DTCScode, the LED indicator lights green.• If no audio is heard, hold down [MONI] while adjusting the audiooutput level. Release to receive.rrThe transceiver is now set to receive on the selected channel.NOTE: The transceiver may be equipped with CTCSS tone orDTCS code capability. The CTCSS tone squelch or DTCSsquelch opens only when the received signal includes a matchingtone or code. You can silently wait to receive calls from onlystations using the same tone or code. The default settings foreach channel are listed on the next page.Transmitting:Wait for the channel to become clear to avoid interfering.qqWhile holding down [PTT], speak into the microphone at a normalvoice level.wwRelease [PTT] to receive.IMPORTANT: To maximize the readability of your signal;1. Pause briefly after pushing [PTT].2. Hold the microphone 5 to 10 cm from your mouth, then speakinto the microphone at a normal voice level.3123456789101112131415161718192012
3 OPERATION■■ Receiving and transmitting (continued)DDPreprogrammed frequency and CTCSS tone list(Default)CH Frequency (MHz)* 1 Tone (Hz)* 21 446.006250 No setting2 446.018750 No setting3 446.031250 No setting4 446.043750 107.25 446.056250 110.96 446.068750 114.87 446.081250 118.88 446.093750 123.09 446.006250 127.310 446.018750 131.811 446.031250 136.512 446.043750 141.313 446.056250 146.214 446.068750 151.415 446.081250 156.716 446.093750 159.8* 1 The operating channel frequencies cannot be changed.* 2 The DTCS codes or different CTCSS tone frequencies may be preprogrammedinstead of the CTCSS tones as listed above. Ask yourdealer for details.13
OPERATIONDDTransmitting notes• Transmit inhibit functionThe transceiver has several inhibit functions which restrict transmissionunder the following conditions:- The channel is muted.- The channel is busy.- A signal with an un-matched CTCSS (or DTCS) tone is received.- The selected channel is a ‘receive only’ channel.• Time-out timerThe transceiver has a time-out timer function which prevents continuous,extend transmissions.After continuously transmitting longer than the preprogrammedtime period, the Time-out timer function activates, and stops furthertransmitting.• Penalty timerOnce the time-out timer function activates, transmitting is furtherinhibited for a time period determined by the penalty timer.3123456789101112131415161718192014
3 OPERATION■■Setting the microphone gainAdjusts the microphone gain.qqRotate [VOL] to turn OFF the [ROTARY SELECTOR]transceiver power.wwSet [ROTARY SELECTOR] to[VOL]any channel other than Channel16.eeWhile pushing and holding[Lower], rotate [VOL] to turn ONthe power and enter the microphonegain adjustment mode.rrPush [Upper] to increase, or [Upper]push [Lower] to decrease the[Lower]microphone gain.• The adjustable range is 1 (minimum)to 4 (maximum).• A beep sounds after pushing[Upper] or [Lower].If the level is set on 1 or 4, a lowtone error beep sounds.Therefore, you can determine the current level setting by the typeof beep that sounds.ttRotate [VOL] to turn OFF the power, then turn ON again to exitthe microphone gain adjustment mode.NOTE: This operation may not be available, depending on thepreprogramming. Ask your dealer for details.15✓✓ INFORMATION:When using the VOX function, we recommend setting the microphonegain to 3. However, you can adjust it to suit your operatingenvironment (including your headset performance).
■■Setting the squelch levelOPERATIONThe squelch circuit mutes the received audio signal, depending onthe signal strength and the squelch setting.qqRotate [VOL] to turn OFF the [ROTARY SELECTOR]transceiver power.wwSet [ROTARY SELECTOR] to[VOL]any channel other than Channel16.eeWhile pushing and holding [PTT]and [Lower], rotate [VOL] to turnON the power and enter the [PTT]squelch level adjustment mode.rrPush [Upper] to increase the [Upper]squelch level (tight squelch), or [Lower]push [Lower] to decrease thesquelch level (loose squelch).• The adjustable range is 0 (loosesquelch) to 9 (tight squelch).• A beep sounds after pushing [Upper] or [Lower].If the level is set on 0 or 9, an error beep sounds after pushing.Therefore, you can determine the current level setting by the typeof beep that sounds.ttRotate [VOL] to turn OFF the power, then turn ON again to exitthe squelch level adjustment mode.NOTE: This operation may not be available, depending on thepreprogramming. Ask your dealer for details.3123456789101112131415161718192016
3 OPERATION■■Priority A channel selectionDepending on the preprogramming, the Priority A channel is selectedeach time the transceiver power is turned ON.■■Auto scan functionThe Auto scan function sequentially scans from the selected channel.Scanning automatically searches for signals and makes it easierfor you to find stations to contact or to just listen to.qqSet [ROTARY SELECTOR] to any channel that the Auto scanfunction is ON.wwScan starts automatically.• The LED indicator slowly blinks green.• When receiving a signal, scan pauses until the signal disappears.17
■■Power save functionOPERATIONThe power save function reduces the current drain to conserve batterypower.• Depending on the preprogramming, the power save function is automaticallyturned ON when no operation is performed or no signalis received for the preprogrammed time period. Ask your dealer fordetails.3123456789101112131415161718192018
4 BATTERY CHARGING■■Caution (for the BP-264 ni-mh battery)R DANGER! NEVER short terminals (or charging terminals) of thebattery pack. Also, current may flow into nearby metal objects suchas a necklace, so be careful when placing battery packs (or thetransceiver) in handbags, etc.Simply carrying with or placing near metal objects such as a necklace,etc. may cause shorting. This may damage not only the batterypack, but also the transceiver.R DANGER! NEVER incinerate used battery packs. Internal batterygas may cause an explosion.R DANGER! NEVER immerse the battery pack in water. If the batterypack becomes wet, be sure to wipe it dry BEFORE attachingit to the transceiver.CAUTION: Always use the battery within the specified temperaturerange for the transceiver (–25˚C to +55˚C) and the battery itself(–5˚C to +65˚C). Using the battery out of its specified temperaturerange will reduce the battery’s performance and battery life.CAUTION: Shorter battery life could occur if the battery is left completelydischarged, or in an excessive temperature environment(above +55˚C) for an extended period of time. If the battery mustbe left unused for a long time, it must be detached from the radioafter charging. Keep it safely in a cool dry place at the followingtemperature range:–20˚C to +45˚C (up to a month)–20˚C to +35˚C (up to six months)–20˚C to +25˚C (up to a year*)* We recommend charging the battery pack every 6 months.Clean the battery terminals to avoid rust or misscontact.Keep the battery terminals clean. It’s a good idea to regularly cleanthem.19
4 BATTERY CHARGING■■ Battery chargers (continued)DDUsing the BC-197 to rapid charge the BP-264 orBP-265The BC-197 rapidly charges up to six battery packs.Charging time for the BP-264: Approximately 2 hoursCharging time for the BP-265: Approximately 2.5 hoursThe following additional item is required:• An AC adapter (not supplied with some versions) or the OPC-656 dcpower cableBattery packTransceiverTurn OFF the powerThe charger adapters are installedin each slot. The shapeof charger adapter dependson the version of the BC-197.AC adapter(An AC adapter isnot supplied withsome versions.)Status indicator(each indicator independently functions)OPC-656 (DC power cable)(Connect to a DC power supply;12 to 16 V/at least 7 A)Red line : + Black line : _27
BATTERY CHARGINGThere are two types of BC-197 chargers for the <strong>IC</strong>-F27SR; one isfor Ni-MH batteries, and the other is for Li-ion batteries.Before you purchase a BC-197, check the type of battery you areusing, and then be sure to choose the suitable charger type.BC-197 Charger TypeWith AD-120* charger adaptersWith AD-121* charger adaptersChargeable BatteryBP-264 Ni-MH batteryBP-265 Li-ion battery* The charger adapter type, AD-120 or AD-121, is printed on the insidebottom of the charger adapter. The type of battery it holds is printed onthe top right corner of the adapter.4123456789101112131415161718192028
4 BATTERY CHARGING■■ Battery chargers (continued)IMPORTANT:Ensure the tabs on the battery pack are correctly aligned withthe guide rails inside the charger.TabsBC-191, BC-192, BC-193Guide rail29
BATTERY CASE■■Optional BP-263 battery caseWhen using the optional battery case, install 6 × AA (LR6) sizealkaline batteries, as illustrated below.qqRemove the battery case if it is attached. (p. 3)w wInstall 6 × AA (LR6) size alkaline batteries, as shown below.• Install only alkaline batteries.• Be sure to observe the correct polarity.eeReattach the battery case. (p. 3)5Be careful! The negativeterminals of the battery caseprotrude from the body, sopay attention not to injureyour fingers when insertingthe batteries.CAUTION:• When installing batteries, make sure they are all the samebrand, type and capacity. Also, do not mix new and old batteriestogether.• Keep the battery terminals clean. It’s a good idea to regularlyclean them.• Never incinerate used battery cells since internal battery gasmay cause them to rupture.• Never expose a detached battery case to water. If the batterycase gets wet, be sure to wipe it dry before using it.• Never use batteries whose insulated cover is damaged.NOTE: When the optional battery case is attached, the batterytype must be selected as “Battery case operation” when turningthe transceiver ON. See page 10 for details.123456789101112131415161718192030
6 OPTIONSDDBATTERY PACK/CASEBatterypack/caseBP-263Voltage Capacity Battery life* 1Battery case forAA (LR6) × 6 alkaline—* 2BP-264 7.2 V 1400 mAh (typ.) 24.8 hrs.BP-2657.4 V1900 mAh (min.)2000 mAh (typ.)35.3 hrs.* 1 When the power save function is turned ON, and the operating timeis calculated under the following conditions;TX : RX : standby = 5 : 5 : 90* 2 The average operating time depends on the alkaline cells used.DDCHARGERS• BC-191 desktop charger + BC-123SE ac adapterFor rapid charging of the Ni-MH battery pack. An AC adapter maybe supplied with the charger, depending on the version.Charging time period for the BP-264: Approximately 2 hours.• BC-192 desktop charger + BC-147SE ac adapterFor regular charging of the Ni-MH battery pack. An AC adaptermay be supplied with the charger, depending on the version.Charging time period for the BP-264: Approximately 16 hours.(at 16 V)• BC-193 desktop charger + BC-123SE ac adapterFor rapid charging of the Li-ion battery pack. An AC adapter maybe supplied with the charger, depending on the version.Charging time period for the BP-265: Approximately 2.5 hours.31
OPTIONS6• BC-197 multi-charger + BC-157SE ac adapterFor rapid simultaneously charging of up to six battery packs. AnAC adapter may be supplied with the charger, depending onthe version. There are two types of BC-197 chargers for the <strong>IC</strong>-F27SR.BC-197 Charger Type Chargeable Battery Charging timeWith AD-120* BP-264 Ni-MH battery Approx. 2 hrs.With AD-121* BP-265 Li-ion battery Approx. 2.5 hrs.*Either AD-120 or AD-121 charger adapters are installed in the BC-197,depending on the chargeable battery pack.DDDC POWER CABLES• CP-23L cigarette lighter cableAllows charging of the battery pack through a 12 V cigarette lightersocket. (For BC-191/BC-193)• OPC-515L/OPC-656 dc power cableFor charging of the battery packs using a 12 V DC power sourceinstead of the AC adapter.OPC-515L : BC-191/BC-192/BC-193OPC-656 : BC-197DDBELT CLIPS• MB-124 belt clipExclusive alligator-type belt clip.123456789101112131415161718192032
6 OPTIONSDDOTHER OPTIONS• HM-158L/HM-159L speaker-microphoneCombination speaker-microphone that provides convenient operationwhile hanging the transceiver on your belt.• HS-94/HS-95/HS-97 headset + OPC-2004 plug adapter cableHS-94 : Ear hook typeHS-95 : Neck-arm typeHS-97 : Throat microphoneOPC-2004 : Allows you to connect the HS-94, HS-95 or HS-97to the transceiver. After connection, the VOX functioncan be used.Approved <strong>Icom</strong> optional equipment is designed for optimal performancewhen used with an <strong>Icom</strong> transceiver.<strong>Icom</strong> is not responsible for the destruction or damage to an <strong>Icom</strong> transceiverin the event the <strong>Icom</strong> transceiver is used with equipment that isnot manufactured or approved by <strong>Icom</strong>.Some options may not be available in some countries. Please ask yourdealer for details.33
■■VOX functionOPTIONSThe transceiver has a VOX (voice operated transmission) function,which allows you hands-free operation.In addition, an HS-94, HS-95 or HS-97 headset and an OPC-2004plug adapter cable are required.• The VOX function starts transmission when you speak into the microphone,then automatically returns to receive when you stop speakingwithout needing to push or release the PTT switch.DDOptional unit connectionqqRotate [VOL] to turn OFF the transceiver power.wwRemove the jack cover. (p. 4)eeConnect an optional HS-94, HS-95 or HS-97 headset and OPC-2004, as illustrated below.[VOL]qOPC-2004weHS-946123456789101112131415161718192034
6 OPTIONS■■ VOX function (continued)DDTurning the VOX function ON or OFFThe VOX function can be turned ON or OFF when turning the transceiverpower ON.qqRotate [VOL] to turn OFF thetransceiver power.wwSet [ROTARY SELECTOR] toany channel other than Channel16.eeWhile holding down [Upper],turn ON the transceiver powerto switch the VOX function ONor OFF.• 1 beep sounds when the VOXfunction is turned OFF.• 2 beeps sound when the VOXfunction is turned ON.[ROTARY SELECTOR][VOL][PTT][Upper]NOTE: This operation may not be available, depending on thepreprogramming. Ask your dealer for details.35
OPTIONSDDSetting the VOX gainThe VOX sensitivity level can be adjusted from 1 (minimum) to 10(maximum). Higher values make the VOX function more sensitiveto your voice.✓✓ IMPORTANT!Set the microphone gain before setting the VOX gain. (p. 15)qqConnect the optional HS-94, [ROTARY SELECTOR]HS-95 or HS-97 headset and[VOL]the OPC-2004. (p. 34)wwRotate [VOL] to turn OFF thetransceiver power.eeSet [ROTARY SELECTOR] toChannel 16.rrWhile holding down [PTT] and [PTT][Upper], rotate [VOL] to turn ONthe power and enter the VOX [Upper]gain adjustment mode.[Lower]ttPush [Upper] to increase, orpush [Lower] to decrease theVOX gain while speaking into theoptional headset.• The adjustable range is 1 (minimum) to 10 (maximum).• A beep sounds after pushing [Upper] or [Lower].If the level is set on 1 or 10, an error beep sounds after pushing.Therefore, you can determine the current level setting by the typeof beep that sounds.y Rotate [VOL] to turn OFF the power, then turn ON again to exitthe VOX gain adjustment mode.NOTE: This operation may not be available, depending on thepreprogramming. Ask your dealer for details.6123456789101112131415161718192036
7 SPECIF<strong>IC</strong>ATIONSDDGeneral• Frequency coverage : 446.00625–446.09375 MHz• Mode: 8K50F3E (FM)• Current drain (at 7.2 V) : TX 400 mA approx.RX Max. audio 330 mA approx.• Power supply requirement : 7.2 V DC nominal* (negative ground)*Only specified <strong>Icom</strong>’s battery pack• Frequency stability : ±2.5 ppm (–25°C to +55°C)• Antenna impedance : 50 ˘ nominal• Weight: Approximately 330 g (with BP-264): Approximately 270 g (with BP-265)DDDimensions111.5 74.5186.0135.532.0*58.0Unit: mm*with a BP-26436.5 mm with a BP-26537
DDTransmitter• Output power• Modulation system• Max. frequency deviation• Spurious emissions• Adjacent channel power• External mic. connectorSPECIF<strong>IC</strong>ATIONS: 0.5 W ERP: Variable reactance frequencymodulation: ±2.5 kHz: 0.25 µW (1 GHz or below)1.00 µW (above 1 GHz): 60 dB: 3 conductor 2.5 (d) mm/2.2 k˘DDReceiver• Receive system: Double conversionsuperheterodyne• Sensitivity (20 dB SINAD) : –4 dBµV(EMF) (typical)• Squelch sensitivity: 26.5 dBµV/m (Threshold)• Intermodulation rejection ratio : 86.29 dBµV/m• Spurious response rejection ratio : 91.29 dBµV/m• Adjacent channel selectivity : 81.29 dBµV/m• Audio output power: 0.8 W (typical) at 5% distortionwith a 12 ˘ load0.4 W (typical) at 5% distortionwith an 8 ˘ load• External speaker connector : 2 conductor 3.5 (d) mm/8 ˘All stated specifications are subject to change without noticeor obligation.7123456789101112131415161718192038
8 INDEXAAuto scan function............. 11, 17BBatteryCase............................... 3, 30Caution (Li-ion).................. 21Caution (Ni-MH)................. 19Chargers............................ 24Charging............................ 19Life..................................... 31Pack..................................... 3Type selection.................... 10Belt clip...................................... 2CChannel selection.................... 11Country code list........................iiCTCSS tone............................ 12DDefinitions...................................iDTCS code.............................. 12FFront panel................................ 5JJack cover............................. 4, 6KKey functions............................. 7Lock key............................... 8Memory channel select keys. 7Monitor key........................... 8Priority channel rewrite keys. 7Priority channel select keys. 7Scan keys............................. 7Siren key.............................. 8Surveillance key................... 8LLED indicator......................... 6, 9Lower key [Lower]..................... 6MMicrophone gain setting.......... 15OOptions.................................... 31PPenalty timer........................... 14Power ON................................ 10Power save function................ 18Preprogrammed frequency andCTCSS tone list (Default)........ 13Priority A channel selection..... 17PTT Switch [PTT]...................... 639
RRapid chargeUsing the BC-191 to chargethe BP-264......................... 24Using the BC-193 to chargethe BP-265......................... 26Using the BC-197 to chargethe BP-264 or BP-265........ 27Receiving................................ 12Regular chargeUsing the BC-192 to chargethe BP-264......................... 25Rotary selector.......................... 5SSquelch level setting............... 16Side panel................................. 5Speaker-microphone jack[SP M<strong>IC</strong>].................................... 6Specifications.......................... 37Supplied accessories................ 1TTime-out timer......................... 14Top panel................................... 5Transmitting............................. 12Inhibit function.................... 14Notes.................................. 14INDEX8UUpper key [Upper]..................... 6VVolume control [VOL]................ 5VOX function........................... 34Turning ON or OFF............ 35Unit connection.................. 34VOX gain setting................ 36123456789101112131415161718192040
#91 EUR-22, #92 EUR-23< Intended Country of Use >BE CY CZ DKFR DE GR HULV LT LU MTPT SK SI ESIS LI NO CHTR HRATFIITPLGBROEEIENLSEBG#93 UK-02, #94 UK-03< Intended Country of Use >BE CY CZ DKFR DE GR HULV LT LU MTPT SK SI ESIS LI NO CHTR HRATFIITPLGBROEEIENLSEBGA-6954D-1EUPrinted in Japan© 2011 <strong>Icom</strong> Inc.Printed on recycled paper with soy ink.1-1-32 Kamiminami, Hirano-ku, Osaka 547-0003, Japan
ABOUT CEDECLARATIONOF CONFORMITYWe <strong>Icom</strong> Inc. Japan1-1-32, Kamiminami, Hirano-kuOsaka 547-0003, JapanDeclare on our sole responsibility that this equipment complies with theessential requirements of the Radio and Telecommunications TerminalEquipment Directive, 1999/5/EC, and that any applicable Essential TestSuite measurements have been performed.Kind of equipment: PMR446 TRANSCEIVERType-designation:iC- f27srVersion (where applicable):This compliance is based on conformity with the following harmonisedstandards, specifications or documents:i) EN 60950-1:2006/A1:2010ii) EN 300 296-2 V1.3.1 (2010-07)iii) EN 301 489-1 V1.8.1 (2008-04)iv) EN 301 489-5 V1.3.1 (2002-08)v)vi)Bad Soden 4th Jul. 2011Place and date of issue<strong>Icom</strong> (Europe) GmbHCommunication EquipmentAuf der Krautweide 24,65812 Bad Soden am Taunus,GermanyAuthorized representative nameY. FurukawaGeneral ManagerSignatureJUN.2011The <strong>IC</strong>-F27SR complies with the essential requirementsof the European Radio and TelecommunicationTerminal Directive 1999/5/EC.A-6954D-2EU