The Rehab Guide, Volume 2: Exterior Walls - ToolBase Services
The Rehab Guide, Volume 2: Exterior Walls - ToolBase Services
The Rehab Guide, Volume 2: Exterior Walls - ToolBase Services

Create successful ePaper yourself
Turn your PDF publications into a flip-book with our unique Google optimized e-Paper software.
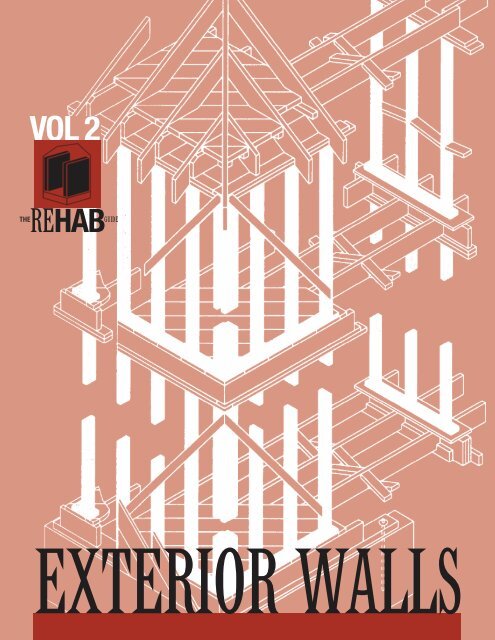
EXTERIOR WALLSVOLUME 2 OF THE REHAB GUIDETABLE OF CONTENTSFOREWORD 31. INTRODUCTION 42. DESIGN & ENGINEERING 63. MASONRY/BRICK VENEER 214. SHEATHING 285. VAPOR RETARDERS & AIR INFILTRATION BARRIERS 326. INSULATION 397. VINYL SIDING 458. METAL SIDING 499. WOOD SHINGLES & SHAKES 5210. SOLID WOOD SIDING 5511. HARDBOARD SIDING 6012. ENGINEERED WOOD SIDING 6313. PLYWOOD PANEL SIDING 6514. FIBER-CEMENT SIDING 6815. EIFS & STUCCO 7216. EXTERIOR TRIM 7717. SEALANTS & CAULKS 8018. PAINT & OTHER FINISHES 84APPENDIX: PROFESSIONAL ASSOCIATIONS & RESEARCH CENTERS 89Prepared for:U.S. Department of Housingand Urban DevelopmentOffice of Policy Developmentand ResearchPrepared by:Steven Winter Associates, Inc.Building Systems ConsultantsNorwalk, CTContract DUIOOCOOOOO5956August 1999
FOREWORDPresident Clinton recognizes that research and technological innovation are crucial if America is to meetits affordable housing needs. In 1998, the President introduced a major new initiative: <strong>The</strong> Partnership forAdvancing Technology in Housing (PATH). This initiative brings together leaders from the home building,product manufacturing, insurance, and financial industries, as well as representatives from federal agencies,to spur housing design and construction innovations.Thanks to the development of new machinery and materials and the creation of new technologiesand techniques, the construction industry has made great progress. But a breakthrough material, a laborsavingtool, or a cost-cutting technique is only valuable if it is widely adopted, which means the constructionindustry must first become aware of these new developments.<strong>The</strong> Department of Housing and Urban Development can help. We have commissioned a set ofguidebooks that will present state-of-the-art techniques, materials, and technologies for housing rehabilitation.This volume, <strong>Exterior</strong> <strong>Walls</strong>, is the second of nine guidebooks—known collectively as <strong>The</strong> <strong>Rehab</strong><strong>Guide</strong>—that will appear over the next few years.We are presenting these guidebooks because, like research and technological innovation, housingrehabilitation is an essential component of America’s commitment to provide affordable housing. I ampleased to present this important publication in the hope that it will become a valuable resource that leadsto affordable, high quality rehabilitation, and thus to better housing for all Americans.Andrew Cuomo, SecretaryU.S. Department of Housing and Urban Development3
1THE REHAB GUIDE:EXTERIOR WALLSINTRODUCTIONThis publication, <strong>The</strong> <strong>Rehab</strong> <strong>Guide</strong>: <strong>Exterior</strong> <strong>Walls</strong> is one in a series of guidebooks produced by theU.S. Department of Housing and Urban Development (HUD) to keep the design and construction industryabreast of innovations and state-of-the-art materials and practices in home rehabilitation. As is toooften the case, innovative techniques, materials, technologies, and products are slow to make their wayinto accepted practice. <strong>The</strong> <strong>Rehab</strong> <strong>Guide</strong> series is intended to accelerate this process by informingbuilders, architects, engineers, and other housing rehabilitation professionals about such innovations andstate-of-the-art practices.<strong>The</strong> <strong>Rehab</strong> <strong>Guide</strong> was also prompted by the lack of a comprehensive publication to make thedesign and construction industry aware of innovative and cost-saving developments in housing rehabilitation.Professional trade magazines, conferences, and trade shows offer some distribution of this information,but they are rarely focused on housing rehabilitation, as this series is, nor are they comprehensive.It is evident that such innovations will not advance unless the industry is made aware of them and they aretested.FOCUS OF THE REHAB GUIDE<strong>The</strong> focus of this series is on housing rehabilitation, which is different than home improvement.<strong>Rehab</strong>ilitate means “to restore to good condition,” not necessarily to improve to a state that is significantlydifferent than the original. This is a fine line, but it distinguishes this series from “home improvement”books written for the amateur. <strong>The</strong> <strong>Rehab</strong> <strong>Guide</strong> focuses on building technology, materials, components,and techniques rather than “projects” such as adding a new room, converting a garage into a den, orfinishing an attic. Nor is <strong>The</strong> <strong>Rehab</strong> <strong>Guide</strong> intended to be a “diagnostic” tool; a number of such books arealready available to the industry.<strong>The</strong> content for this guidebook, <strong>Exterior</strong> <strong>Walls</strong>, has been gathered from professionals in thehousing rehabilitation field; manufacturers and suppliers of innovative technologies, materials, components,tools, and equipment; trade shows, conferences, reports, and publications considering such issues;trade organizations; and building research centers.A NOTE ON SOURCES4Particularly useful sources of technical information on exterior wall design and construction are publicationsby APA--<strong>The</strong> Engineered Wood Association, the Cedar Shake and Shingle Bureau, the Brick IndustriesAssociation, the Western Wood Products Association, the California Redwood Association and other industryassociations. Other valuable and detailed sources of information from the general construction industryinclude technical trade magazines such as Construction Specifier and RSI Roofing Siding Insulationmagazine. Publications relating more directly to residential construction include the Journal of LightConstruction, Old House Journal, This Old House, Fine Homebuilding, Energy Design Update,
dations (Fig. 3). Specific reinforcement requirements will depend on individual site and building coderequirements and should be reviewed with a structural engineer.ADVANTAGES: Simplest, most positive connection.DISADVANTAGES: May not be possible where there is insufficient headroom to drill.2. ATTACH A SILL, JOIST, OR STUD TO THE FOUNDATION WITH SIDE BRACKETSOR STRAPS.Where it is not possible to install anchor bolts because of insufficient headroom, a variety of fasteners hasbeen specially developed to affix frames to foundations. Anchors are available from manufacturers suchas Simpson Strong-Tie Co., Inc., among others. Typical products include straps and plates designed forattachment of plates and joists to the face of foundations and mud sills (Fig. 4).ADVANTAGES: Can connect walls to foundations in areas with limited headroom.DISADVANTAGES: Not as strong or direct a connection as anchor bolts.FIGURE 2EPOXIED ANCHOR BOLT, EXPANSION ANCHOR BOLTFIGURE 3TYPICAL HOLD-DOWNS8
FIGURE 4TYPICAL ANCHORS3. REINFORCE CRIPPLE WALLS WITH PLYWOOD OR OSB.<strong>The</strong> lateral forces of an earthquake are concentrated on the interface of the foundation and the woodframe. Cripple walls are inherently weak connections and have to be reinforced to prevent buckling andcollapse. This is easily accomplished with plywood or oriented strand board (OSB) structural sheathingused as a rigid diaphragm connecting the top and bottom plates with the studs (Fig 5). <strong>The</strong> selection ofthe proper fastener type and spacing is critical. For crawlspaces that are not accessible, most municipalitieshave standards for the application of plywood or alternative structural sheathing to the outside of thecrawlspace. Consultation with a licensed engineer is recommended.ADVANTAGES: An inexpensive and effective remedy.DISADVANTAGES: Requires accessible crawlspace, otherwise existing siding and sheathing have to beremoved and new sheathing applied to the building exterior.FIGURE 5PLYWOOD REINFORCEMENT9
4. PROVIDE SECURE LOAD PATH FROM ROOF TO FOUNDATION.Engineers recommend that a continuous “load path” or “hold down path” be created with metal connectorsor sheathing so the walls, floors, and roof act together as a structural unit. This is accomplished byproviding, in addition to the wall/foundation connection, a secure load path between the walls and floors(in platform construction) and between the walls and the roof. Typical floor-to-floor connectors includebolted hold-downs with threaded rods or straps designed specifically for that use. <strong>The</strong> choice woulddepend on job-site conditions and loading requirements (Fig. 6). Another material used to tie buildingcomponents together is plywood or OSB sheathing which provides a hold-down path and resists shear orracking forces. <strong>The</strong> lower portion of the plywood sheathing should connect the lower to the upper floorand be nailed into the bottom plate, the wall studs, the top plate and the second floor rim joist, the upperportion should connect the rim joists, bottom plate and studs, to the top wall plate (Fig. 7). In areas ofhigh seismic probability, engineers may specify a top grade of plywood, Structural #1, in lieu of regularrated sheathing. Consultation with a licensed engineer is recommended. Wall/roof connections in seismicareas are reviewed in <strong>Rehab</strong> <strong>Guide</strong>, <strong>Volume</strong> 3: Roofs.ADVANTAGES: Provides structural continuity to the entire house.DISADVANTAGES: Costly, requires removal of siding and possibly sheathing.FIGURE 6FLOOR-TO-FLOOR CONNECTIONSFIGURE 7SHEATHING RESISTS SHEAR AND RACKING
FURTHER READINGA <strong>Guide</strong> to Strengthening and Repairing Your Home Before the Next Earthquake. Developed by theGovernor’s Office of Emergency <strong>Services</strong>, State of California, and the Federal Emergency ManagementAgency, revised May 1995. Association of Bay Area Governments (ABAG) Publications, P.O. Box 2050,Oakland, CA 94604–2050.An Ounce of Prevention: Strengthening Your Wood Frame House for Earthquake Safety: A Do-It-Yourself Program. Video and book. Governor’s Office of Emergency <strong>Services</strong>, State of California, 1993.Association of Bay Area Governments (ABAG) Publications, P.O. Box 2050, Oakland, CA 94604–2050.“Bracing <strong>Walls</strong> Against Racking,” Harris Hyman, P.E., Journal of Light Construction, April 1987.Buildings at Risk: Wind Design Basics for Practicing Architects, Michael J. Crosbie, Washington, DC:American Institute of Architects, 1998.How the City of San Leandro Can Help Strengthen Your Home for the Next Big Earthquake in the BayArea (publication includes prescriptive details). <strong>The</strong> City of San Leandro Development <strong>Services</strong>, BuildingRegulation Division, 835 East 14th Street, San Leandro, CA 94577; 510–577–3405.Prescriptive Seismic Strengthening Plan for Wood Frame Residential Structures, Simpson Strong-Tie Co., 1996.<strong>Rehab</strong> <strong>Guide</strong>, <strong>Volume</strong> 3: Roofs, Washington, DC: US Department of Housing and Urban Development, 1999.<strong>The</strong> San Francisco Bay Area—On Shaky Ground. Association of Bay Area Governments, 1995 (multimediaCD-ROM, 1996). Association of Bay Area Governments (ABAG) Publications, P.O. Box 2050,Oakland, CA 94604–2050.Structural Strengthening for Seismic Conditions, (Video 1997), Simpson Strong-Tie ® Co.“Tying Down the House,” John Scoggins, Journal of Light Construction, September 1997.PRODUCT INFORMATIONEarthquake Resistant Construction Connectors, Simpson Strong-Tie ® Co., 4637 Chabot Drive, Suite 200,Pleasanton, CA 94588; 800–999–5099; www.strongtie.com.United Steel Products Co. (USP), 703 Rogers Drive, Montgomery, MN 56069; 800–328–5934.2.3WOOD FRAME WIND RESISTANCEESSENTIAL KNOWLEDGE<strong>Exterior</strong> walls, in combination with interior shear walls that brace them, resist perpendicular and lateralloads and uplift forces generated by high winds (which can tear off roofs and porches). <strong>The</strong> increasingamount of damage caused by hurricanes to the Gulf and Atlantic coastal states and the mounting costs torepair and replace existing structures demonstrate the need to better design, build, and retrofit houses forwind resistance.While code requirements regarding wind resistance are extensive for new home construction, thereare relatively few requirements for rehab of existing houses (unless the work is extensive enough to warrantbringing the entire building up to code). Exceptions to this occur in some municipalities, such as Dade County,Florida, which have specific requirements for rehabing existing buildings. <strong>Rehab</strong> guidelines regarding wind11
esistance being considered by local, state, and model code agencies include the following recommendations.A key aspect of these considerations is whether to provide prescriptive “fixes” for simple building configurationsor whether to require that a professional engineer or architect prescribe the specific details. <strong>The</strong> latteris recommended for complicated building geometries.TECHNIQUES, MATERIALS , TOOLS1. REINFORCE CONNECTIONS OF WOOD-FRAME WALLS TO FOUNDATIONS.Depending on the type of foundation and access possible, there are a number of anchor bolts, straps, orthreaded-rod connections that can be used to reinforce the connection of the frame to the foundations.Many of these connectors are similar to those used in seismic areas. In Northern areas, crawl spaces mightprovide accessibility, while foundations in Southern regions are slab on grade or, along the coast, pilingsor piers. Typical rehab options for reinforcement are shown in Figs. 3 and 4.ADVANTAGES: Relatively simple, cost-effective remedies.DISADVANTAGES: May involve removing exterior or interior finishes.2. REINFORCE WOOD-FRAME WALLS FOR SHEAR RESISTANCE.Winds cause lateral forces on buildings that can, in severe cases, displace and collapse the building walls.Resistance to these forces is provided by exterior and interior shear walls that brace the building’s structureand transfer loads to the floors and foundations. <strong>The</strong> most effective shear walls are made of plywoodor oriented strand board. Alternative systems include other structurally approved sheathings, let-in woodbracing, metal strapping, “T” bracing, or special stud connectors. For buildings that have qualifying structuralsheathings, a cost-effective retrofit is to increase the number of fasteners or connectors from thesheathing to the studs or to add resistance with foamed-in-place adhesives such as Foam Seal ® products.This can be accomplished with the removal and replacement of the siding.ADVANTAGES: A simple way of providing shear resistance.DISADVANTAGES: Will require removal of siding and may require removal of sheathing if it is not structurallyadequate.3. REINFORCE CONNECTIONS OF WOOD-FRAME WALLS TO FIRST FLOOR.Connections are simple to make in new construction but difficult in rehab work unless the siding isremoved to expose the wall sheathing. Metal straps similar to those used in seismic areas provide structuralcontinuity from one building component to another (Figs. 5 and 6).ADVANTAGES: Provides a continuous load path.DISADVANTAGES: Requires removal of siding and sheathing, if it is structurally inadequate.FIGURE 8WALL/ROOF CONNECTORS12
4. REINFORCE CONNECTIONS OF WOOD-FRAME WALLS TO ROOF TRUSSESAND RAFTERS.<strong>The</strong> connection of the exterior walls to the roof structure is the key element in transferring wind loads tothe building frame and in preventing uplift forces from tearing off the roof. While new houses in high windareas are required to have metal connectors, older houses most likely do not have them. <strong>The</strong> simplest connectionis made from the outside after the soffit is removed (Fig. 8). This juncture can be reinforced fromthe inside, but the top portions of the wall as well as portions of the ceiling at the wall have to be removedfor access. See <strong>Rehab</strong> <strong>Guide</strong>, <strong>Volume</strong> 3: Roofs, for further discussion.ADVANTAGES: An effective means of providing uplift resistance.DISADVANTAGES: Will require removal of soffit material.5. REINFORCE CONNECTIONS OF WOOD-FRAME WALLS TO ROOF OVERHANGS.<strong>The</strong> most vulnerable portion of a building for wind uplift is the connection of roof overhangs and walls.<strong>The</strong> typical connection of the wall to the “ladder” overhang (Fig. 9) is inadequate if the overhand exceedsone foot in depth, and uplift forces can lead to separation of the ladder from the wall. <strong>The</strong> preferred detailon new or repaired construction is to use “lookouts” tied to the top of the exterior wall and anchoredback to the adjoining truss or rafter (Fig. 10).ADVANTAGES: Effective means of providing uplift resistance.DISADVANTAGES: Will require removal of soffit and modification to gable end.FIGURE 9SHALLOW LADDER OVERHANDFIGURE 10 DEEP OVERHANGS SUPPORTED BY “LOOKOUTS” 13
FURTHER READINGBuildings at Risk – Wind Design Basics for Practicing Architects, Michael J. Crosbie, Washington, DC:American Institute of Architects, 1998.<strong>Rehab</strong> <strong>Guide</strong>, <strong>Volume</strong> 3: Roofs, Washington, DC: US Department of Housing and Urban Development, 1998.PRODUCT INFORMATIONHigh-Wind-Resistant Construction Connectors, Simpson Strong-Tie Co., Inc., 4637 Cabot Drive, Suite200, Pleasanton, CA 94588; 800–999–5099; www.strongtie.com.High-Wind Retrofit of Wood Trusses or Rafters to Masonry or Concrete <strong>Walls</strong>, Simpson Strong-Tie Co.,Inc., 4637 Cabot Drive, Suite 200, Pleasanton, CA 94588; 800–999–5099; www.strongtie.com.2.4REINFORCING EXISTINGMASONRY WALL CONSTRUCTIONESSENTIAL KNOWLEDGEIt is often difficult to reinforce existing masonry walls for seismic or high wind resistance. Reinforcementstrategies should be developed for individual buildings on a case-by-case basis by a licensed professional.Masonry buildings generally perform well in high wind as long as they are reinforced in accordance withcodes, and as long as the connections to the roof structure are adequate to prevent uplift failure.Unreinforced masonry buildings perform poorly in seismic areas. <strong>The</strong> connection to roof structures andsecondary structures such as porches are similar in concept to those used for wood-frame constructionbut adapted to masonry. Typical masonry-to-roof connectors are illustrated in Fig. 11.ADVANTAGES: An effective means of providing uplift resistance.DISADVANTAGES: Will require removal of soffit material.FIGURE 11MASONRY-TO-ROOF CONNECTORSPRODUCT INFORMATION14High-Wind Retrofit of Wood Trusses or Rafters to Masonry or Concrete <strong>Walls</strong>, Simpson Strong-Tie Co.,Inc., 4637 Cabot Drive, Suite 200, Pleasanton, CA 94588; 800–999–5099; www.strongtie.com.
2.5MOISTURE DETERIORATIONESSENTIAL KNOWLEDGEWater absorbed by structural wood-framing can raise its moisture content, reduce its compressive and tensilestrength, ultimately cause rot and decay, and also attract termites. <strong>The</strong> most critical points of the building envelopesusceptible to leakage are: tears or gaps in the roofing material; at flashings and penetrations of the roofplane; roof/wall connections; wall penetrations such as windows and doors; rainwater penetration through sidingmaterials; and wall/foundation connections. Roofing water-related problems are discussed in the <strong>Rehab</strong><strong>Guide</strong>, <strong>Volume</strong> 3: Roofs, wall penetration leaks at wall openings are covered in <strong>Volume</strong> 4: Windows andDoors, and water penetrations through wall materials are covered in other chapters of this volume.Wall/foundation junctures are particularly critical because run-off from roofs and walls collectson the ground at that location. If the sill and floor assembly are not sufficiently elevated, rot will occur.Older timber-framed and balloon-framed structures with sill plates that rest on a few courses of stone (or,occasionally, directly on grade) are at greatest risk. Platform-framed houses that have foundation wallswith the sill a minimum of 6 inches to 8 inches above grade (to comply with code minimums) are less susceptibleto rot and decay from moisture. However, unless the grade below the siding is sufficiently slopedaway and kept clear of debris and plantings, moisture can wick up through the siding and cause decay. Rotand decay cannot progress in the absence of moisture.Sills can be inspected from inside the building in the crawl space or from outside by removing aportion of the siding and sheathing. <strong>The</strong> condition of the wood can be checked with a sharp object suchas a screwdriver or pocket knife. Sound wood will split into fibrous splinters, while decayed wood will separateinto small chunks of a dark brown, black, or gray color. Decay can also be revealed by rapping thesurface of the wood member; a dull, hollow sound frequently indicates decay below the surface.Decayed sills can be replaced with full-sized members, partially replaced with built-up lumber,or stabilized with structural epoxy conservation techniques.TECHNIQUES, MATERIALS, TOOLS1. REPAIR SILL WITH BUILT-UP LUMBER.If the sill is a heavy timber section (4 by 6 to 8 by 8) and the wall studs are 3 or 4 inches wide, the houseis most likely of post-and-beam construction. <strong>The</strong> roof and floor loads are transferred by means of beams(girts) to the columns and the studs between columns carry very little weight. Accordingly, it is possible totemporarily support the building at its bearing columns and replace sections of the sill below. If the buildingis balloon-framed or platform-framed, with individual studs carrying the load, the wall has to be supportedalong its length. Once the load is taken by the shoring, deteriorated sections of the sill can beremoved with a reciprocating saw and a mallet and chisel. Pressure-treated sections of lumber can bescabbed (spliced) into the affected area (using APA-<strong>The</strong> Engineered Wood Association (APA) approvedgap-filling adhesives) and fastened with galvanized drywall screws, spikes, or other rust-resistant fasteners.ADVANTAGES: Relatively simple fix for sills requiring isolated repairs.DISADVANTAGES: Requires accurate assessment of sill condition; sections of rotting sill may be overlooked.2. REPLACE LARGE SECTIONS OR THE ENTIRE SILL.If significant decay runs the length of the sill, it should be replaced in its entirety. <strong>The</strong> exterior wall can besupported by jacking timbers placed next to the plate, running perpendicular to the joists (Fig. 12).Sections of the sill can be cut with a chain saw or reciprocating saw between joists that frame into the sill.A new sill is placed on top of the foundation. If the floor joists do not rest directly on top of the sill theycan be hung from the new sill with joist hangers or, if the ends of the joists are not decayed, they can bemortised into the new sill. Replacing a sill is much easier with stud-framed houses, as individual joists rest15
FIGURE 12JACKING FLOOR JOISTSon top of the sill. Because each stud of a load-bearing wall carries a relatively small portion of the load,the process of supporting the floor joists while removing the rotted sill or rim joist is relatively simple.Once the new sill is anchored to the foundation, the grade next to the wall should be sloped to providedrainage away from the wall.ADVANTAGES: Replacing a major portion or the entire sill is a way to comprehensively address the problemsof decay, and may be more cost-effective than a series of small, interim repairs.DISADVANTAGES: Costly; might require extensive exterior sheathing and siding repairs.3. REPAIR PORTIONS OF THE FOUNDATION OR SUPPORTING COLUMNSUSING EPOXY TECHNIQUES.Small portions of the foundation or columns that support structure above can be reconstituted and consolidatedusing liquid epoxy or epoxy putty (Fig. 13). This is particularly appropriate if the building is ofhistoric significance.ADVANTAGES: Can repair existing structure without removal.DISADVANTAGES: Time consuming. Not practical with large areas of work.FIGURE 1316EPOXY REPLACEMENT
FURTHER READINGRenovating Old Houses, George Nash, Newtown, CT: Taunton Press, 1996.Renovation: A Complete <strong>Guide</strong> (Second Edition), Michael W. Lichfield, New York: Prentice Hall, 1991.<strong>The</strong> Old House Journal <strong>Guide</strong> to Restoration, edited by Patricia Poore, New York: Dutton, 1992.<strong>Rehab</strong>ilitation of Wood-Frame Homes, USDA, Forest Service, Handbook No. 704, February 1998.“Saving House Sills,” “Structural Repair Under Old Floors,” Old House Journal, March/April 1992.“<strong>The</strong> Structure of Wood-Frame Houses,” Old House Journal, March/April 1992.PRODUCT INFORMATIONIN-SITU STRUCTURAL REPAIRSPreservation Resource Group, P.O. Box 1768, Rockville, MD 20849–1768; 301–309–2222.Abatron, Inc. Wood Restoration Systems, 5501–95th Avenue, Department HP, Kenosha, WI 53144;800–445–1754; www.abatron.com.2.6MITIGATING INSECT DAMAGEESSENTIAL KNOWLEDGEDestructive insects include termites, carpenter ants, and wood-boring beetles (Fig.14). Termites accessabove-ground wood through cracks in foundation walls or slabs or build tubes from the ground up to thewood above to provide the necessary moist environment. Having infested the wood, they can live thereindefinitely with no ground contact if the moisture level is adequate. Sources of moisture include roofleaks, condensation, or plumbing problems. Termites in crawlspaces may build free-hanging tubes fromwood members to the ground. Evidence of termite infestation includes: the presence of mud tubes; damagedwood; active swarms of winged termites or large numbers of discarded wings or evidence of conduciveconditions (e.g., moisture; wood-to-ground contact; inadequate ventilation; settlement cracks; andother likely entry points). Detection tools include: visual inspection; probing of the wood surface with ascrewdriver or pocket knife; sounding (tapping) of the affected area with a hard object such as the handleof the screwdriver; the use of a moisture meter to detect likely environments; infestations; listeningdevices; electronic gas (methane) detectors; and fiber optic devices to inspect areas otherwise inaccessibleto visual inspections. Many species of termites prefer wood that has been previously invaded by fungi. Toguard against drying, termites consume wood only until the outer shell remains, leaving the wood lookingintact. Wood that has been tunneled by termites will sound hollow when tapped with a solid object.Termites will attack all types of wood including redwood, cypress, and junipers if the wood has aged andthe chemicals that provide termite-resistance (alcohols, oils, gums and resins) have leached out. Termiteshave been known to penetrate and damage many non-cellulosic materials such as drywall, plaster, stucco,and plastics. Items damaged include some softer metals (e.g., lead, copper, aluminum). Insulation boardused as a substrate for <strong>Exterior</strong> Insulation and Finish Systems (EIFS) has often been riddled by termites leadingto the prohibition of foam plastic within 8" of the ground in states with very heavy infestation of termites.Ants are the most reported pests in many parts of the country and range from the arctic to thetropics. Carpenter ants, the major group that damages buildings, tunnel through wood but do not consumeit for food. Main colonies of carpenter ants, given their name because they typically dwell in and17
FIGURE 14TERMITE POWDERPOST BEETLE CARPENTER ANTexcavate wood, are located in trees surrounding the infested structures. Inside buildings, satellitecolonies will nest in a variety of voids including walls, hollow doors, behind appliances, in floor cavitiesand attic rafter spaces, under kitchen cabinets, bathroom fixtures, etc. Carpenter ant infestations can belocated by their very presence or by piles of “frass,” pieces of dead ants and other insects mixed in withbits of wood.<strong>The</strong>re is a variety of wood-boring beetles. Among the best known and most destructive are thepowderpost, roundhead, and flathead beetles. Some beetles attack both hardwood and softwoods, usuallylimiting their feeding to the sapwood portion. <strong>The</strong>ir presence is usually indicated by frass and a numberof exit holes in wood, although the number of holes does not necessarily indicate the activity or severityof infestation. <strong>The</strong> potential for damage is greatest when the infestations are new and the number of exitholes is low. Beetles are typically introduced into structures in building materials that have been infestedat lumber yard stock piles, although they may also enter homes in finished wood products such as flooring,paneling, furniture, and firewood. Dead tree limbs may serve as a habitat from which flying adults mayenter the house.TECHNIQUES, MATERIALS, TOOLSMITIGATE AND CONTROL INSECTS.Mitigation methods to reduce the likelihood of termite infestations include: removal of all cellulous materialon or beneath the soil adjacent to structures or in crawlspaces; eliminating details that allow materialsto continue from the exterior wall into the soil; providing adequate clearance between grade and structuralmembers to allow access and inspection of termite tunnels; eliminating dirt-filled porches, steps, andsimilar raised attachments; providing termite shields; and using pressure-preservative-treated lumber.Treatment strategies include the use of: liquid termiticides; termiticidal foams that fill cracks and gaps inmaterials and can be injected into soils; borate insecticides; and termite baits. <strong>The</strong> variety of treatmentproducts is widespread and new products are being developed. <strong>The</strong> effectiveness of individual products,especially new ones, may vary depending on local soil and building-related conditions. Local pest controlexperts should be contacted for site-specific recommendations. Certain treatments may be prohibited bylocal authorities.Mitigation methods for subterranean termites are of little benefit against drywood termites sinceinfestations originate from “swarmers” entering through vents, cracks, or other openings. Drywood termiteslive within the affected wood. <strong>The</strong>ir presence is indicated by piles of fecal pellets or discarded wingsadjacent to holes or joints in the affected wood. Methods to control drywood termites include the use of:pressure-preservative-treated wood; sprayed insecticides; silica aerogel dust (a desiccant); borate dust;fumigation; heat treatment; and “drill-and-treat” with termiticides. Some new, and as yet unproven, strate-18
gies include the use of microwave equipment and electrocution. Local pest control experts should be contactedfor site-specific recommendations. Ant mitigation methods include: reducing moisture conditions;sealing cracks in the building’s exterior; trimming trees away from the house roofs; keeping log piles awayfrom houses; and eliminating wood-to-soil contact. Treatment strategies include a variety of sprayed insecticides,baits, and soil treatment. Treatment of affected houses for wood-boring beetles includes: removinginfested wood; use of sprayed insecticides; fumigation; moisture reduction; and use of borate sprays.ADVANTAGES: Soil treatment and elimination of cellulose in backfill can be effective deterrents.DISADVANTAGES: New chemical treatments need replenishing sooner and are less effective than thoseapproved in the past. Treatments can be costly.FURTHER READINGHandbook of Pest Control, Eighth Edition, Arnold Mallis, Mallis Handbook & Technical Training Company, 1997.<strong>The</strong> Approved Reference Procedures for Subterranean Termite Control, National Pest ControlAssociations (NPCA), 1991.2.7FIRE DAMAGE TO WOOD FRAMINGESSENTIAL KNOWLEDGEDamage from fire can range from the total loss of a building and its contents to minor inconvenience fromsmoke odors. <strong>The</strong> process of determining the restoration requirements of a fire-damaged building variesconsiderably with the building location and extent of damage. Insurance adjusters often make settlementoffers based on their own evaluation of restoration needs, although they may employ consultants on morecomplex projects. Recommendations may also originate from local fire marshals, building departmentofficials, contractors, consulting engineers, industrial hygienists, public adjusters, and architects hired bythe building owner. Unless the damage is limited, the restoration process can be complicated, involvingstructural, electrical, HVAC, and plumbing systems, as well as building finishes. In addition, significanthealth and comfort issues arise from the residual smoke, combustion gases, moisture from fire departmenthoses, and the existence of products containing asbestos. For these reasons the selection of arestoration contractor who is experienced and knowledgeable in current techniques is critical. At leastone national association, the Association of Specialists in Cleaning and Restoration (ASCR) manages trainingand certification programs and publishes a restoration guideline.TECHNIQUES, MATERIALS, TOOLSFIRE-DAMAGE RESTORATION.<strong>The</strong> first step in a restoration project is to assess the damage to the wall structure. In 2 by 4 construction,significantly charred members are generally removed in their entirety. Heavy timber construction canremain (according to the American Society of Civil Engineers), once the char is removed and if theremaining section is still structurally adequate (after a reduction-in-size-factor of 1 /4 inch on all sides).Char is removed by scraping and abrasive blasting. It should generally be removed because it holds odors,although encapsulating coatings inhibit their transmittal. New construction, replacing the damaged construction,should meet codes for new construction. Smoke-damaged materials should be cleaned anddeodorized as necessary. <strong>The</strong> use of ozone generators, sometimes used to remove odors and contaminants,is controversial and considered by a number of specialists to be ineffective and potentially dangerous(see Further Reading).19
ADVANTAGES: Restoration can be relatively effective in removing odors when fire damage is slight.DISADVANTAGES: Restoration after serious fires is expensive and complicated. Finding competent restorationprofessions is sometimes difficult.FURTHER READINGEvaluation, Maintenance, and Upgrading of Wood Structures, American Society of Civil Engineers.“Research Sheds New, Unfavorable Light on Ozone Generators,” IEQ Strategies, P.O. Box 129, CenterStrafford, NH 03815–0129; 603–664–6942; www.cutter.com/energy/.NIDR - <strong>Guide</strong>lines for Fire and Smoke Damage Repair, National Institute for Disaster Restoration (adivision of the Association of Specialists in Cleaning and Restoration); 1997; 410–729–9900;www.ascr.org.Odor Removal Manual, <strong>Volume</strong> I, Clifford B. Zlotnik, Unsmoke Systems, Inc.Restoration Technology, <strong>Volume</strong> I, Clifford B. Zlotnik, Unsmoke Systems, Inc.PRODUCT INFORMATIONUnsmoke Systems, Inc., 1135 Braddock Avenue, Braddock, PA 15104; 800–332–6037.20
3MASONR Y/BRICK VENEERBrick and stone masonry are among the oldest, long-lasting, and most versatile materials. Throughout theU.S. many brick homes, centuries old, continue to perform well. In many regions brick is the predominantbuilding material because of its low maintenance, non-combustibility, availability, moisture resistance,and aesthetic appeal.Any corrective work should be preceded by a careful visual assessment of the wall’s conditionsto determine overall patterns of deterioration and distress so that underlying problems can be appraisedand corrected. Some common problems include foundation displacement (see <strong>Rehab</strong> <strong>Guide</strong>, <strong>Volume</strong> 1:Foundations); water penetration into the wall assembly; inappropriate material choices; poor constructionpractices; stresses caused by expansion and contraction due to temperature changes; shrinkage of thewood structural walls; and routine aging of the masonry facing and joints.This chapter focuses on repair and rehabilitation of brick masonry, primarily clay and concretebrick veneer wall construction, as this is the most common construction type, although many of the recommendationsapply also to stone, concrete block, and solid brick construction. Topics include cleaning,protective coatings, repointing, and repair.3.1CLEAN EXISTING MASONRY WALLSESSENTIAL KNOWLEDGE<strong>The</strong> decision to clean a masonry veneer facade requires careful consideration because the cleaningprocess may remove weathered material as well as accumulated dirt. It might be justified if the dirt andpollutants (such as that from acidic rain, efflorescence, bird droppings, deteriorated paint, etc.) are havinga harmful effect on the wall, however, “lightening up” the facade for cosmetic reasons may not be prudent.<strong>The</strong> benefits of cleaning should be weighed against the possibility of adverse affects on the masonrysurfaces and mortar joints, as well as on flashing, windows, and other elements.<strong>The</strong> least invasive cleaning is usually recommended; improper or over-cleaning can causeirreparable damage. Cleaning strategies for historic buildings should be reviewed with a restoration professional.All cleaning procedures and materials should be tested prior to the start of the project. For largejobs, the test area should be a minimum of 20 square feet. Before chemical cleaners are used, the wallshould be saturated with water to avoid staining by heavy concentrations of cleaning agents. A waitingperiod of at least one week after finishing the test area is recommended in order to judge the results ofthe cleaning procedure, especially if chemical agents are used. For recommendations on cleaning specificstains see Further Reading.TECHNIQUES, MATERIALS, TOOLS1. CLEAN WITH BRUSH BY HAND.This technique employs a variety of cleaning agents including water, detergents, proprietary cleaners, and21
acid. Efflorescence can often be removed by dry brushing, with pressurized water, or with proprietarycleaners. Dirt can be removed with water or with a detergent solution such as trisodium phosphate andlaundry detergents dissolved in water. Many stains can be removed with conventional “kitchen cleaners.”Other stains, resulting from leaching of salts or coloring agents within the brick, require acid cleaners,which should be used very carefully in diluted form. Some acids, such as hydrochloric (muriatic acid)can seriously degrade mortar. Acid can also discolor lighter masonry surfaces and damage metal, glass,marble, terra cotta, limestone, and cast stone surfaces, and can also leave a white film that is difficult toremove. <strong>Walls</strong> treated with acid must be thoroughly flushed with water after cleaning.ADVANTAGES: Easiest and most conservative approach. Employs the widest variety of cleaning options.Allows for most cost-effective approach. Can confirm the appropriateness of cleaning strategies prior tolarge-scale application.DISADVANTAGES: Appropriate only for relatively small areas. Time consuming; requires direct access towall surfaces.2. CLEAN WITH PRESSURIZED WATER.Useful in covering large areas, pressurized cleaning may be accomplished with low- or moderate-pressurewater, steam, or water in combination with detergents or other cleaning solutions. <strong>Walls</strong> should be saturatedwith water prior to cleaning and completely flushed after cleaning. Care should be taken with acidiccompounds as discussed above.ADVANTAGES: Cost-effective for large areas; can reach heights of 100 feet.DISADVANTAGES: Requires specialized equipment. Nozzle pressures in excess of 700 psi may damagebrick, especially sand-finished material, and erode mortar joints. May not remove certain stains as effectivelyas brush cleaning by hand. Disposal of water run-off may be a problem. Excess water can bring solublesalts from within the masonry to the surface. Cannot be used during periods of freezing weather.Steam cleaning with or without chemicals may be useful in removing paint and embedded grime, butrequires careful analysis, testing, and experienced professionals. Can be costly.3. CLEAN BY ABRASIVE-BLASTING.Abrasive-blasting, usually with sand, is often considered a means of last resort, and in many cases is prohibitedbecause it can erode ornamental details and destroy or scar brick and stone faces. Less abrasiveand softer aggregates than sand, such as glass and plastic beads, and organic matter such as finely groundnut shells, wheat starch, peach and apricot pits, and cherrystones, are sometimes used on small sectionsof decorative brick, stone or metal elements.ADVANTAGES: Will clean when other techniques will not.DISADVANTAGES: Potentially destructive; use only after careful analysis and testing. May be prohibited.FURTHER READING“<strong>The</strong> Cleaning and Waterproof Coating of Masonry Buildings,” Preservation Briefs, No. 1, Robert C. Mark,National Park Service, Washington, D.C., 1975.“Cleaning Brick Masonry,” Brick Industries Association Technical Note #20, Rev. 11, November 1990.“Gentle Blasting—New Methods of Abrasive Cleaning,” Valerie Sivinski, Old House Journal, July/Aug. 1996.“Moisture Resistance of Brick Masonry,” BIA Technical Note #7F, January 1987.22
3.2APPLY COLORLESS PROTECTIVECOATINGSESSENTIAL KNOWLEDGEColorless coatings are sometimes considered for masonry walls in order to enhance water resistance orto repel graffiti. <strong>The</strong> chemicals used fall within two classifications: films and penetrates. <strong>The</strong>se two havesignificantly different physical properties and performance. Whereas these coatings may have some limitedusefulness, in many cases they provide little or no advantages, require frequent replacement, and canhave adverse effects. Brick manufacturers should be contacted for recommendations on the use of colorlesscoatings.TECHNIQUES, MATERIALS, TOOLS1. APPLY FILM COATING TO MASONRY WALL.Products include acrylics, stearates, mineral gum waxes, urethane, and silicone resins. <strong>The</strong> large molecularsize of these materials prevents them from penetrating into the masonry.ADVANTAGES: Can reduce the absorption of some bricks and can bridge hairline cracks. Can keep surfacesclean and help prevent graffiti from penetration into the masonry surface.DISADVANTAGES: Can inhibit evaporation of water within the masonry through the exterior face, which cancause the coating to cloud or spall under some freeze/thaw conditions. Generally not recommended insuch environments. Sheen or gloss may darken material. Vulnerable to cracking due to thermal fluctuations.Urethane often breaks down under Ultraviolet light. Silicones do not chemically bond with substrate,and as a result have a short life.2. APPLY PENETRATING COATING TO MASONRY WALL.<strong>The</strong>se coatings typically penetrate into the masonry to depths up to 3 /8 inch, due to their small molecularstructure. Materials include silane and siloxanes that chemically bond with silica- or aluminum-contentmaterials to make them water repellent. <strong>The</strong>se coatings are not generally necessary on new walls or brickveneer walls with drainage cavities.ADVANTAGES: Coatings can last up to 10 years, decrease absorption, and increase water repellence. Unlikefilm coatings, penetrating coatings allow wall to breathe. Siloxanes have been shown to be effective onsome multi-wythe brick barrier walls where water penetration is a problem.DISADVANTAGES: May have limited lifetime; cannot be applied over film coatings. May react with otherbuilding materials. Can kill vegetation and emit harmful vapors. Will not seal cracks in mortar joints.FURTHER READING“Colorless Coatings for Brick Masonry,” BIA Technical Note #6A April 1995.23
3.3REPOINT EXISTING WALLSESSENTIAL KNOWLEDGEWhile the service life of many types of brick can exceed 100 years, the longevity of mortar joints, dependingon the exposure, is closer to 25 years, according to the Brick Industries Association (BIA). At somepoint the mortar joint will fail, allowing water to enter the wall cavity. Conditions that require repointingmay include: mortar erosion more than 1 /4 inch, crumbling mortar, and hairline cracks in the mortar andbetween the mortar and brick.TECHNIQUES, MATERIALS, TOOLSREPOINT EXISTING WALL.Visual observation in combination with a light scraping with a metal tool can detect most deficiencies.Other conditions requiring repairs beyond repointing are discussed in section 3.4. Where repointing workis undertaken on houses of special architectural or historical significance, advice should be sought froma preservation specialist. Portland cement mortar was not used before the beginning of the 20th century.To avoid serious brick damage the compressive strength of the repointing mortar should be similar to orweaker than that of the original mortar. If it is not, dead loads and stresses from the expansion and contractionof the brick can transfer loads through the new mortar into the brick and can spall and crack thebrick face. Mortars used in more recent construction include types N and O (Table 1).TABLE 1MORTAR TYPES AND INGREDIENTS BY VOLUMEType Cement Hydrated Lime SandN 11 6O 12 9K 14 15ADVANTAGES: Repointing walls can stabilize deterioration, strengthen walls, and provide weathertightness.DISADVANTAGES: Costly, may require scaffolding. Requires skilled and thorough mechanics.FURTHER READING“Mortars for Brick Masonry,” BIA Technical Note #8, revised Aug. 1995.“Repointing (Tuckpointing) Brick Masonry,” BIA Engineering and Research Document #622.3.4REPAIR EXISTING MASONRY WALLSESSENTIAL KNOWLEDGE<strong>The</strong>re are certain conditions where repointing alone is not effective and replacement of a portion of a wallmay be required. Some of these include:24■ Wall cracking associated with thermal movement: Such cracks are cyclical and will open and close withthermal swings. <strong>The</strong>se cracks may gradually expand as dislodged mortar accumulates in the crack after
each cycle. <strong>The</strong> cracks should be cleaned and protected with flexible sealants. Remortaring cyclical crackswill prevent them from closing and may lead to further cracking. In some instances, the masonry may needto be cut and expansion joints installed.■ Wall cracking associated with moisture penetration and caused by freeze/thaw cycles and corrosion:Examples include cracking around sills, cornices, eaves, parapets, joints between dissimilar materials,and other elements subject to water penetration and freezing; cracking around clogged or non-functioningweep holes at lintels and at the base of brick veneer cavity walls. A number of companies, includingMortar Net and Heckman Building Products, Inc., make plastic mesh products for cavity wall constructionthat suspend mortar droppings above the weep holes, thereby reducing the chance of blockingthem with mortar debris (Fig. 1). Mortar Net also makes a vertical insert between bricks that acts as acontinuous weep (Fig. 2).FIGURE 1 NO. 365 TRASH MORTAR DIVERTER CAVITY DRAINAGE SYSTEMFIGURE 2WEEP VENT■ Wall cracking associated with failure of structural elements. Above-ground examples include crackingor displacement of brick over openings resulting from deflection or failure of lintels or the deteriorationof mortar joints in masonry arches; cracking from outward displacement of sloped roofs due to lack orfailure of collar ties; bulging and cracking of walls caused by deteriorated or inadequate wall ties; crackingdue to inadequately supported point loads; cracking due to ground tremors, nearby construction, orheavy traffic. Light gauge (22 or 24 ga.) corrugated wall ties typically used in residential construction arenot recommended, according to the BIA, for three reasons: the tie shape allows water to flow more freelyto the interior of the wall; they are susceptible to corrosion; they have poor strength to transfer loadsbetween the brick wythes and the building structure. Adjustable ties, similar to those recommended foruse with metal studs, (Fig. 3) are preferred. Serious structural problems require a professional engineer’sassistance in determining appropriate corrective measures.25
FIGURE 3 CONVENTIONAL CORRUGATED TIE PREFERED WIRE TIES■ Deteriorated masonry: A number of factors, in addition to structural distress, can contribute to the deteriorationof a masonry wall, including weathering effects of rain, UV, temperature changes, as well as theeffects of chemicals in the air or ground, inappropriate cleaning or coatings, and erosion from faulty leadersand down spouts.TECHNIQUES, MATERIALS, TOOLSREPAIR MASONRY WALL.If individual bricks or masonry units, or sections of the masonry wall, require replacement, they may beremoved relatively easily by cutting out the units to be replaced and replacing with new material. <strong>The</strong> archaction of masonry walls can often prevent adjacent sections from collapsing if the area to be removed issmall. Alternatively, in the event that the masonry ties are missing or deteriorated, a number of companiesmake stabilization systems that connect exterior brick wythes with backup walls (Fig. 4). <strong>The</strong>se are eithermechanically-attached pins or ties that are drilled directly through the veneer into its substrate, or ties thatare anchored to the substrate with epoxy cements (see Product Information). Consultation with a professionalengineer is advised if the affected area of wall is significantly large, or if the brick failure is due tounderlying structural problem.ADVANTAGES: <strong>The</strong> repair or replacement of brick on low structures is relatively simple and cost-effective.DISADVANTAGES: Replaced brick and mortar will not match color of existing wall. <strong>The</strong> replacement ofbrick on high walls will require scaffolding and is costly.PLANFIGURE 4STABILIZATION TIESSECTION26
FURTHER READING“Anchored Brick Veneer Wood Frame Construction,” BIA Technical Note #28, revised Aug. 1991.“Brick Masonry Cavity <strong>Walls</strong>—Detailing,” BIA Technical Note #21B, Jan. 1987.“Brick Veneer Basics,” Rob Swanson, Journal of Light Construction, June 1994.“Brick Veneer Existing Construction,” BIA Technical Note #28A, Sept. 1988.“Getting Started with Brick Veneer,” Steve Thomas, Journal of Light Construction, Nov. 1997.“<strong>Guide</strong>line on the <strong>Rehab</strong>ilitation of <strong>Walls</strong>, Windows, and Roofs,” U.S. Department of Housing and UrbanDevelopment, 1986.“<strong>Guide</strong>lines for Residential Building Systems Inspection,” U.S. Department of Housing and UrbanDevelopment, 1986.Preservation Briefs 1: <strong>The</strong> Cleaning and Waterproof Coating of Masonry Buildings, Robert C. Mark,U.S. National Park Service, Nov. 1975.Preservation Briefs 2: Repoint Mortar Joints in Historic Buildings, Robert C. Mark, Patterson Tiller, andJames S. Askins, U.S. National Park Service, Sept. 1980.PRODUCT INFORMATIONDRAINAGE MESHMortar Net USA Ltd., 3641 Ridge Road, Highland, IN 46322; 800–664–6638; www.mortarnet.com.BRICK TIES, ACCESSORIES, AND STABILIZATION SYSTEMSDur-o-Wal ® , Inc., 3115 North Wilke Road, Suite A, Arlington Heights, IL 60004; 800–323–0090;www.dur-o-wal.comHeckman Building Products, Inc., 4015 West Carroll Avenue, Chicago, IL 60674; 800–621–4140.Helifix ® , 30 Millwick Drive, Weston, Ontario, Canada M9L 1Y3; 800–561–3026.Hohman and Bainard, Inc. 30 Rasons Court, P.O. Box 5270, Hauppauge, NY 11788–0270;800–645–0616; www.H-B.com.27
4SHEA THINGESSENTIAL KNOWLEDGE<strong>Exterior</strong> wall sheathing serves a number of functions. It provides rigidity and shear resistance to the mainframing elements; it is part of the barrier system that keeps out the destructive effects of moisture; it providesvarying degrees of insulation; and it can serve as the nail base for exterior siding.Until the mid-1960s, when plywood was introduced, the dominant sheathing material was 1-by-3 -inch and 1-by-4-inch wood boards, typically nailed diagonally to the stud frame. Today the most commonwall sheathing materials are oriented strand board and plywood, which together account for approximately55 percent of the sheathing market, with slightly more plywood sold than OSB (other siding productsare described below). It is important to recognize that APA - <strong>The</strong> Engineered Wood Association (APA)does not differentiate between plywood and oriented strand board (OSB) under its APA Rated Sheathingprogram. OSB prices have dropped by half over the past several years, and in some areas of the countryit is about half the price of comparable plywood. OSB is expected to be the most common sheathing materialby 2002.If the finished siding has been well maintained, the wall sheathing should not have deteriorated.Exceptions to this would be deterioration from moisture trapped behind the finished siding. Moisture entryis due to improperly flashed or caulked joints between the siding and openings such as doors and windows;inadequate or poorly fabricated flashing at the wall/roof juncture; water driven by high winds between sidingmaterial during rain storms; moisture penetration through mortar joints in brick veneer walls; and thelack of, or improperly lapped, moisture retarder such as building paper or housewrap behind the siding.Much of the research into sheathing failure suggests that, particularly in the case of <strong>Exterior</strong> Insulation andFinish Systems (EIFS), it should be assumed that moisture will penetrate the finished siding and that provisionsshould be made to allow the system to be self-draining between the finish material and the sheathingby means of furring strips, drainage channels, plastic matting, or other devices.TECHNIQUES, MATERIALS, TOOLS1. REPAIR EXISTING WALL SHEATHING.<strong>The</strong> specific sheathing repair will depend on the location and extent of damage and the type of sheathingencountered. <strong>The</strong>re is very little possibility of consolidating existing sheathing material. Replacement isnecessary if the material is unsound and can no longer function as intended. Replacement of sheathingwill require removal and replacement of siding as well.ADVANTAGES: Localized repairs of sheathing are cost-effective if the damage is limited.DISADVANTAGES: Localized repairs will only mask the problems if they are widespread and result in apatchwork of new siding. If the problems are widespread the affected sheathing should be replaced in itsentirety and new siding installed.2. REPLACE EXISTING SHEATHING WITH ORIENTED STRAND BOARD.Introduced in the early 1980s, OSB (made with rectangular-shaped wood strands cross-oriented in layersfor better structural performance) has replaced particleboard, “flakeboard,” “chipboard,” and “waferboard”as the most popular alternative to plywood sheathing. OSB utilizes a variety of fast-growing woodspecies, including aspen, southern yellow pine, poplar, birch, and mixed hardwoods, with waterproofphenolic resin or polyisocyanate binders. Available in varying thicknesses, it typically comes in 4-by-8-footsheets, but can also be custom ordered in lengths up to 24 feet and in widths up to 12 feet.ADVANTAGES: Excellent shear resistance, dimensional stability, and bond durability under normal conditions.28
Increasingly popular and readily available nationally. Economical (significantly less expensive than plywood).Recognized by all three model code agencies. Can serve as a nail base for a variety of siding material.DISADVANTAGES: Edges can swell if subject to continuous wetting. Has a relatively low R-factor of 1.25/inch.3. REPLACE EXISTING SHEATHING WITH PLYWOOD.Structural plywood is generally identified in terms of the veneer grades (A-B, B-C, C-D) used on the faceand back of the panels or sheets, or by a term suggesting the panel’s intended use (APA Rated Sheathing).Veneer grades define appearance in terms of natural unrepaired growth characteristics and allowablenumber and size of repairs that may be made during manufacture. According to the APA-Engineered WoodAssociation, the minimum face veneer grade permitted in exterior plywood is C. D-grade veneer is usedin panels intended for interior use or in applications protected from the weather. CDX (exterior adhesive)panels should not be used in applications where the plywood is permanently exposed to weather or moisture.According to APA, the “CDX” plywood is not a recognized grade designation. A better designation is(DOC) PS1-95 (a prescriptive standard that references plywood only). (DOC) PS2-92 is a performancestandard that allows the supplier to submit either plywood or OSB. Plywood sheathing also comes in astructural - 1 grade, a higher performing grade than normal sheathing, which is used for shear walls inseismic areas.ADVANTAGES: Long considered the highest-performing sheathing. Has excellent structural and weatheringcharacteristics. Can be used as a nail base for virtually any type of siding, including both cements and syntheticstuccos, and brick veneer applications.DISADVANTAGES: Considerably more expensive than similar structural sheathing such as OSB, thus losingmarket share. Has relatively low R-factor of 1.25/inch.4. REPLACE EXISTING SHEATHING WITH FIBERBOARD SHEATHING.Fiberboard sheathing has a 40-year track record in the construction industry, and is in wide use throughoutthe country. Known under a variety of names, such as “blackboard,” “grayboard,” and “buffaloboard,” the material is made from recycled newspaper, wood fiber, and other cellulose products, heldtogether with a binder. It is available in regular density, which requires additional corner bracing, and highdensity with sufficient racking strength to be used without additional bracing (unless required by localcode officials).ADVANTAGES: Historically less expensive than most other sheathing material. Has higher R-value (approx.2.4/inch) than OSB, gypsum sheathing, and paper board sheathing. Is vapor-permeable. Can be used as asubstrate for a variety of finish materials including stucco and wood.DISADVANTAGES: Has a lower R-value than insulated sheathings. Cannot be used as a nail base for aluminumand vinyl clapboard siding (siding must be nailed to studs or furring strips). Becoming less costcompetitivewith OSB in some areas.5. REPLACE EXISTING SHEATHING WITH GYPSUM SHEATHING.In use for many years as a substrate for stucco, brick veneer, and a variety of other siding materials wherefire-rated assemblies are required by code officials. <strong>The</strong>re is a variety of different types of gypsum sheathingavailable as both nonfire-rated and fire-rated.5.1. PAPER-FACED GYPSUM SHEATHING.In use for over 30 years, combines a wax-treated water resistant gypsum core with a water repellant paperfacing.ADVANTAGES: Economical, widely available in 4-by-8-foot and 2 by 8 feet sheets of varying thickness.Relatively inexpensive sheathing for brick veneer, stucco, and EIFS. Provides fire ratings for a variety ofassemblies.DISADVANTAGES: Standard paper-faced gypsum cannot be left exposed for more than four weeks beforeapplications of finish material. <strong>The</strong>re have been problems with delamination of the paper face when usedunder exterior insulation finish systems (EIFS). Requires careful handling, as edges are subject to breakage.29
5.2. GLASS MAT-FACED GYPSUM SHEATHING.A product recently developed by Georgia Pacific, Dens-Glass Gold combines inorganic glass matsembedded with a water resistant and silicone-treated gypsum core and an alkali-resistant surface treatment.<strong>The</strong> product is more water resistant and generally performs better than paper-faced gypsum sheathing,particularly as a substrate to EIFS and brick veneer. Available in 1 /2- and 5 /8-inch thicknesses andlengths of 8 to 10 feet, and greater on special order.ADVANTAGES: Resistant to wicking, moisture penetration, and delamination. Can be installed and exposed upto six months before application of finish siding. Superior performance compared to paper-faced gypsum.Can be used as a substrate for a wide variety of siding applications, but not as a nail-base. Does not requireadditional bracing for normal applications. As light-weight and easy to handle as paper-faced sheathing.DISADVANTAGES: Costs up to 50 percent more than paper-faced gypsum sheathing. R-value for 1 /2-inchthickness is 0.56; 5/8-inch thickness is 0.67, which is considerably less than for insulative sheathing.Cannot be used as a nail base for siding.5.3. GYPSUM SHEATHING MADE WITH A NON-PAPER-FACED BLEND OF CEL-LULOSE FIBER AND GYPSUM.Developed recently as a high-performing alternative to paper-faced boards by Louisiana Pacific,FiberBond fiber-reinforced wall sheathings are made from recycled newsprint, perlite, and gypsum,with a special water-resistant face treatment.ADVANTAGES: Stronger and more moisture resistant than paper-faced boards. Structural wall bracing;superior resistence to screw withdrawal. Can be used as a substrate for EIFS, brick veneer, and a varietyof other claddings. Higher impact strength than other gypsum sheathings; harder edges and ends.Available in up to 12-foot lengths. Uses recycled materials.DISADVANTAGES: Somewhat heavier than other 4 x 8 sheets of gypsum sheathing (paper-faced: 56 pounds,Dens-Glass: 64 pounds, FiberBond: 72 pounds). Priced comparable to Dens-Glass; significantly moreexpensive than paper-faced. Unfinished exposure limited to 60 days. Cannot be used as a nail base for sidings.6. REPLACE EXISTING SHEATHING WITH PAPERBOARD SHEATHING.In use for over 60 years, paperboard sheathing is a code- approved, low-cost alternative to the other structuralsheathings, and has found a considerable following among large home builders for new construction.Available from Simplex Products Division (<strong>The</strong>rmo-Ply) and other manufacturers, in thicknessesfrom 0.078 to 0.137 inch, it can be obtained in sheets up to 80 inches wide and 16 feet long, with bothreflective foil surfaces and non-reflective. Vapor-permeable sheathing is under development. It is oftenavailable to builders with their own private label.ADVANTAGES: Does not require additional shear bracing. Recognized as structural sheathing by nationalmodel codes. Less expensive than other sheathing alternatives. Excellent air infiltration resistance due tooverlapping joints.DISADVANTAGES: Thinness of the material makes it difficult to use in small-scale rehab projects as infillfor thicker sheathing products. Not as strong as OSB or plywood. Sheathing material has R-value of 0.2, butis claimed to be greater with reflective surface and air space, but less than other insulating sheathing. Mayrequire adjustments to wood window trim detailing due to thinness of material. Cannot be used as a nailbasefor siding products.307. REPLACE EXISTING SHEATHING WITH FIBER-CEMENT SHEATHING.A number of fiber-cement sheathing products are available as structural sheathing underlayments. <strong>The</strong>seproducts range from 30-year-old cement and wood fiber products such as Wonderboard, to high-techfiber-cement products such as Hardiboard and Eternit, which perform well in high-moisture locations.As such, they are frequently used as underlayments for thin brick, tile, and EIFS.ADVANTAGES: Good performance in high-moisture locations. Resistant to face delamination.Noncombustible, strong, and rigid.DISADVANTAGES: More costly than gypsum board and other types of sheathing. Not typically used forsiding systems other than for EIFS.
8. REPLACE EXISTING SHEATHING WITH FOAM INSULATING SHEATHING.With increased energy conservation mandated by state and model energy codes, and an increased awarenessby the public of possible cost savings and environmental benefits, the use of insulating sheathingsincluding polyisocyanurate (ISO), extruded polystyrene (XPS), and molded expanded polystyrene (EPS)has grown steadily. This is especially true with steel construction, which has potentially large heat lossesthrough thermal bridging. Foam insulating sheathings generally are not structural and require structuralsheathing underlayment, such as OSB, or other approved form of shear bracing; they require a 15-minutefire-rated barrier (usually gypsum) when used on the interior of habitable residential spaces. Foam insulatingsheathings are discussed in Chapter 6, Insulation. See Product Information for a list of suppliers.ADVANTAGES: Foam insulating sheathing provides the most energy-saving method of providing insulationon the outside of walls with R-values up to 7.7/inch for ISO insulation material. Provides a thermal break.Can also be used in cavity wall construction and as a substrate to stucco and EIFS systems.DISADVANTAGES: Most foam sheathings are not structural sheathings. Applications of many siding productsover foam sheathings require special nailing provisions (see individual siding manufacturers’specifications). Thicknesses of 1 inch and over present attachment problems to existing or new framingif not adequately addressed.FURTHER READINGHouse Building Basics, APA-Engineered Wood Association, APA Form X461, 1997.Oriented Strand Board, APA-Engineered Wood Association, APA Form W410, April 1996.OSB Performance by Design, Structural Board Association, 1997–98.Residential & Commercial Design/Construction <strong>Guide</strong>, APA- Engineered Wood Association, APA FormE30, April 1996.PRODUCT INFORMATIONPLYWOOD AND OSBAPA–<strong>The</strong> Engineered Wood Association, P.O. Box 11700, Tacoma, WA 98411–0700; 253–565–6600;www.apawood.org.OSBStructural Board Association, 45 Sheppard Avenue East, Suite 412, Willowdale, Ontario, Canada M2N 5W9;416–730–9090; www.sba-osb.com.RIGID FOAM INSULATIONCelotex Building Products, P.O. Box 31602, Tampa, FL 33631–3602; 813–873–4230.Dow Chemical Company, Styrofoam Brand Products, 2020 Willard H. Dow Center, Midland, MI 48674;800–258–2436.Owens Corning, One Owens Corning Parkway, Toledo, OH 43659; 800–354–PINK or 800–GET–PINK.Tenneco Building Products, 2907 Log Cabin Drive, Smyrna, GA 30080; 800–241–4402.RADIANT BARRIER/PAPER BOARD PRODUCTSEnergy-Brace reflective sheathing; Fiber-Lam, Inc., P.O. Box 2002, Doswell, VA 23047; 804–876–3135.<strong>The</strong>rmo-ply reflective sheathing; Simplex Products Division, P.O. Box 10, Adrian, MI 49221;517–263–8881.31
5VAPOR RET ARDERS& AIR INFILTRATIONBARRIERS5.1VAPOR RETARDERESSENTIAL KNOWLEDGE32Vapor retarders first appeared in building construction in the 1920s. Early theories held that moisturevapor will migrate from a region of high concentration towards a region of low concentration along a linearpath. <strong>The</strong> amount of moisture transfer is dependent on the differences in concentration and the vaporpermeability of the membrane separating the two regions. This is the theory of vapor diffusion, whichviewed the flow of moisture vapor directly analogous to the conductive flow of thermal energy. In this theory,air movement, and the moisture propelled by it, were not considered to be major factors. In the early1950s, Canadian research found that air movement was the primary mechanism of moisture vapor migration.Without active air infiltration control, vapor retarder barriers become ineffective.Current theory on vapor retarders indicates that both air infiltration and direct diffusion playsignificant roles in the transfer of moisture vapor and, therefore, both must be accounted for. Effectivevapor retarders must have a water vapor permeability not exceeding 1.0 grains per hour per square footper inch of mercury vapor pressure difference (referred to as 1.0 perms), and must be installed in sucha manner as to prevent air leaks at joints and laps.Although the issue of what makes a vapor retarder effective is generally settled, controversy stillremains as to where to install it, if at all. From this standpoint, the authority on the subject is the 1997ASHRAE Handbook of Fundamentals, which has more to say on the topic than any of the model codes. Inwhat is defined as heating climates (4,000 heating degree days, base 65ºF, or more), vapor retarders belongon the interior side of the insulation. In warm, humid, cooling climates (Florida and Gulf Coast) where moisturevapor transfer conditions are effectively reversed, vapor retarders are best placed close to the exterior.In mixed climates (not fitting either of the above definitions), the vapor retarder should beplaced to protect against the more serious condensation condition, summer or winter. If in a mixed climatethe winter indoor relative humidity is kept below 35 percent, a vapor retarder at the interior side ofthe insulation is usually not required, and an exterior vapor retarder strategy is most effective. Where winterinterior humidity is not controlled or if a humidifier is used, an interior vapor retarder is most useful.Vapor retarders should never be placed on both sides of a wall. Where a vapor retarder isemployed, the opposite wall surface must provide a permeable surface to allow drying to occur. Thus, inhot, humid, cooling climates, where a vapor retarder is employed at the exterior, the interior wall surfacesshould be permeable. No vapor retarder paints, kraft-faced insulation, or vinyl wall coverings should beused. Conversely, in northern heating climates, with interior vapor retarders, the exterior wall coveringsshould be vapor permeable.<strong>The</strong> primary purpose for installing a vapor retarder in residential rehabilitation is to minimize
moisture vapor migration into a wall or roof assemly where it has the potential to deposit condensate whenthe dew point is reached. <strong>The</strong> resulting water in liquid form may cause decay in structural wood framing,wood-based sheathing materials, and interior gypsum board or plaster wall coverings. <strong>The</strong> prolongedpresence of moisture will also encourage and facilitate mold and mildew growth, raising potential serioushealth concerns for the homes’ occupants.TECHNIQUES, MATERIALS, TOOLSVapor retarders can be classified into two major groups: flexible or coatings. Metal foils, laminated foils,treated paper, and plastic films are flexible sheet goods, while paint, semi-fluid mastic, and hot melt arecoatings. In typical residential construction and rehabilitation, the commonly used materials are exteriororinterior-applied plastic films, interior-applied foil-faced products, interior treated paper-faced products,and interior paint coatings.1. APPLY A VAPOR RETARDER PAINT COATING.A relatively new product on the market suitable for interior applications is vapor retarder paint. Produced byseveral manufacturers, including Sherwin-Williams and Glidden, vapor retarder paints are available as interiorlatex primers, typically with a perm rating of approximately 0.7. <strong>The</strong>se primers are formulated to behave muchlike standard latex interior primers, in terms of consistency, coverage, and application. <strong>The</strong>y are tintable andsuitable for use over new gypsum board or previously painted surfaces. As with standard interior primers, normalprep work is needed, and stained areas will require a stain-hiding primer prior to application. <strong>The</strong> costper gallon of the vapor barrier primers is generally competitive with standard interior primers.ADVANTAGES: Vapor retarder primers are the simplest application in situations where existing wallboard orplaster surfaces are not to be significantly disturbed. Where interior primers are used, the vapor retarderfunction comes at virtually no additional cost. Can effectively upgrade the vapor transmission performanceof an exterior frame wall with no more effort and cost than a new primer and finish coat paint application.DISADVANTAGES: Appropriate for interior wall surface applications only. With the vapor retarder at the insidesurface of the wall assembly, damage to the paint can compromise retarding ability. If required prepriming prepwork is inadequate, the primer coat vapor retarder effectiveness will be diminished. To be fully effective, all penetrationsand material intersections at the interior surface of the wall must be caulked or otherwise sealed.2. INSTALL TREATED PAPER OR FOIL VAPOR RETARDERS.For residential rehabilitation purposes, treated paper and foil vapor barriers usually take the form of kraftand foil-faced batt installation. In a situation where interior wall finish has been removed and new exteriorwall insulation is to be installed, kraft or foil-faced batts are cost-effective and do provide an adequate to marginalvapor barrier. <strong>The</strong> amount of unsealed edge is significant and does provide a path for moisture vapormigration. To improve effectiveness, the kraft or foil flanges can be installed over the face of the studs andlapped instead of stapled to the inner stud faces (Fig. 1). Convenient and cost-effective, kraft and foil battinsulation facings do have limitations and their use as a primary vapor barrier should be limited to applicationswhere vapor barrier performance is not critical, such as in mixed, non-humid climates. In heating climateswith 4,000 degree days or more, a more continuous vapor barrier surface should be considered.ADVANTAGES: <strong>The</strong> most cost-effective interior vapor retarder strategy where exterior wall framing isexposed and new insulation is to be installed. Saves labor costs as fiberglass batt insulation and vaporretarder are installed in one step.DISADVANTAGES: Installation requires that walls are stripped to rough framing and that fiberglass batt insulationbe installed. <strong>The</strong> number of joints and edges inherent in this system make for a functionally marginal vaporretarder, but sufficient for mixed climates or where indoor humidity is controlled in heating climates.Performance can be improved by installing faced batts with flanges attached to narrow face of studs and lapped.33
FIGURE 1LAPPED FLANGE3. INSTALL A CLEAR POLYETHYLENE VAPOR RETARDER.Most plastic barrier films are either clear polyethylene, black polyethylene, cross-laminated polyethylene, orreinforced polyethylene. <strong>The</strong> most basic of these materials, clear polyethylene, is also the most economical.Available in 4-, 6-, and 10-mil thicknesses, it is best suited for interior wall applications over framing and insulation.As clear poly’s content is up to 80 percent “reprocessed” material, it is also an environmentally sustainablechoice. <strong>The</strong> high recycled content comes at a cost: its quality can be uneven and it generally has poortear and puncture resistance. Clear poly should never be used for exterior applications or applications withmore than limited exposure to sunlight. Clear poly is available in widths of 4 to 32 feet in 100-foot long rolls.As with all polyethylene vapor retarders, for horizontal application over wood framing, staples are most oftenused. For maximum effectiveness, joints should be kept to a minimum and seams should be lapped and taped.ADVANTAGES: Relatively inexpensive and easy to install. In more severe heating climates, the use of interiorpolyethylene films is most effective and is practical where interior finish surfaces are removed. Beingtransparent, attachments to framing members are simplified, as is the installation of wallboard materialover the polyethylene, because the studs are visible.DISADVANTAGES: Limited tear and puncture resistance. Clear poly must be installed with care to avoid damage.All penetrations such as electrical junction boxes must be taped and sealed to ensure effectiveness. Clear polycan be used only in instances where wall finishes and surfaces have been removed, fully exposing wall framing.4. INSTALL A BLACK POLYETHYLENE VAPOR RETARDER.Black polyethylene is nearly identical to clear poly, except for the addition of carbon black to the compositionas a Ultraviolet inhibitor. This permits the use of the polyethylene where some limited exposure tosunlight is required, such as at exterior wall surfaces. Black polyethylene strength characteristics are similarto clear poly, with low tear and puncture resistance.ADVANTAGES: For exterior wall surface applications in hot, humid, cooling climates, black UV protectedpoly films can provide superior vapor retarder performance.DISADVANTAGES: Limited tear and puncture resistance. Unreinforced black poly must be installed with care toavoid damage. Its opaque nature makes installation more difficult by obscuring underlying framing, sheathing,and other components. Joints and seams must be lapped and taped for full effectiveness. Installation is limitedto conditions where siding has been fully removed and attachment directly to exterior sheathing can be made.345. INSTALL A CROSS-LAMINATED POLYETHYLENE OR FIBER-REINFORCEDPOLYETHYLENE VAPOR BARRIER.Compared with standard polyethylene, high-density cross-laminated poly and fiber-reinforced poly areboth specialty products manufactured for applications where higher strength is required. For retrofitting
over rough, irregular surfaces, such as solid board sheathing, both products would be less susceptable totearing or puncture by lifted nail heads, splinters, or exposed sharp corner edges. Either product wouldalso be appropriate where rough handling and adverse site conditions are expected.ADVANTAGES: Stronger than standard poly, reinforced and laminated material can withstand more adversesite conditions and rough handling. <strong>The</strong> reinforced and laminated products are typically rated for limited UVexposure for exterior use and situations where the installation of siding and coverings is delayed. Black reinforcedand laminated poly can be used as the required weather barrier under exterior siding and cladding.DISADVANTAGES: Higher initial cost compared to standard black poly. Application is limited to conditionswhere siding and exterior wall coverings have been removed. Seams must be lapped and sealed for fulleffectiveness.FURTHER READINGASHRAE Handbook of Fundamentals, Chapters 22–24. Atlanta: American Society of Heating,Refrigeration and Air Conditioning Engineers, 1997.PRODUCT INFORMATIONSto-Cote Products, Inc., 218 South Road, Genoa City, WI 53128; 800–435–2621 (Tu-Tuf products).Raven Industries, P.O. Box 5107, Sioux Falls, SD 57117–5107; 800–635–3456 (Rufco Moisture/VaporBarriers).Owens Corning, Fiberglass Tower, Toledo, OH 43659; 800–GET–PINK (kraft and foil-faced batt insulation).Reef Industries, Inc., P.O. Box 750250, Houston, TX 77275–0250; 800–23–6074 (Griffolyn ReinforcedVapor Barriers).5.2AIR INFILTRATION BARRIERSESSENTIAL KNOWLEDGEAir infiltration barriers, or “housewraps,” as they are known in the industry, have grown in popularitysince their appearance in the 1970s in the wake of the energy crisis. DuPont, one of the first companiesto introduce such a product, came out with Tyvek in the late 1970s. Today there is a variety of similarproducts that reduce air infiltration and improve energy performance.<strong>The</strong> primary attribute of housewraps is their ability to operate as air infiltration barriers while notforming an impervious vapor barrier. When placed over the exterior surface of the wall sheathing, the materialallows moisture vapor to escape from the frame wall cavity while reducing convective air movement inthe insulation, thereby helping to maintain the composite R-value of the wall. <strong>The</strong> greater the exterior airmovement, the greater the benefit.<strong>The</strong> ten biggest selling housewrap products fall into one of two basic categories: perforated and nonperforated.Perforated products are either woven polyethylene, woven polypropylene, spun bonded polypropylene,or laminated polypropylene film. <strong>The</strong>se materials are more impervious to moisture vapor migration thannonperforated wraps, thus are provided with “micro-perforations” to allow vapor migration and diminishtheir vapor retarding properties. With the exception of the polyethylene films, all the perforated housewrapsare further coated with either polyethylene or polypropylene for added air infiltration resistance. In contrast,nonperforated housewraps are either spun bonded polyethylene or fiber-mesh-reinforced polyolefin. <strong>The</strong>structure of these materials allows water vapor to pass through, while inhibiting air infiltration.35
In addition to their primary functions as air infiltration barriers and water vapor transmitters,some (but not all) of the major housewrap brands are code approved as substitutes for required moistureprotection barriers. To gain national code approval as a substitute for No. 15 felt, the product manufacturermust apply to each of the three major model building codes, or CABO, and supply specific testingdata on water penetration resistance. With code recognition, the product can be used under all sidingapplications, including stucco and masonry veneer. Currently, at least four products are listed by all threemodel codes as acceptable moisture protection barriers: Amowrap, Pinkwrap, R-Wrap, and Tyvek. Tyvekalso produces a product, StuccoWrap, that is specifically intended for use with traditional and syntheticstucco, and is code listed for that application. Other housewraps are acceptable to some codes as weatherresistant barriers. Before using a particular product as a weather barrier, its approval should be verifiedwith the governing code.In addition to air leakage resistance, permeance, and moisture resistance, two other materialcharacteristics are worth considering: UV sunlight resistance, and strength. All major housewrap brandshave a manufacturer’s rated UV exposure time ranging from 120 days to more than 1 year. Some productsare manufactured with antioxidants and UV stabilizers, while others are naturally more resistant by theircomposition. In the field, however, covering the housewrap as quickly as practicable is recommended, assome UV degradation will occur even over a short period, and other unrelated damage to the membranecan be avoided.Strength of the housewrap can be critical, as wind conditions or adverse job site handling cantear or puncture the material during and after installation. Even small holes can negatively affect overallperformance. <strong>The</strong> inherent strengths of housewrap can be judged on three levels: tensile strength, tearstrength, and burst strength. Respectively, these are the material’s ability to withstand damage from pullingand stretching; withstand tearing at nail and staple locations; and to withstand separation of materialfibers, fabrics, or films. Unfortunately, testing procedures and standards vary between manufacturers, soproduct comparison is difficult. Generally, the spun bonded products have good tensile and burst strengthbut tear easily; woven and fiber-reinforced have good tear and burst strength, but are susceptible to diagonaltensile loading; laminated film products tend to be weakest of all and can lose strength significantly,making a tight installation more difficult.Although the wide variety of housewrap products with varying performance characteristics mayappear confusing, they offer a wide selection for any particular job. In northern heating climates, whereinterior vapor barriers are the norm, a highly moisture vapor permeable housewrap may be required. Inhot, humid, cooling climates, where an interior vapor barrier is not required, a housewrap with a low airleakage rate may be preferred. In low-wind environments, a low-strength material may be selected. A particularlycost-conscious choice would be laminated film.TECHNIQUES, MATERIALS, TOOLSINSTALL HOUSEWRAP OVER NEW OR EXISTING SHEATHING.For rehab applications, housewraps will generally be placed over existing solid board sheathing, plywood,or OSB, or over new plywood or OSB where the existing sheathing needs replacement. Housewraps come inrolls of varying widths, with 9 feet being the standard. Other widths are available, depending on the manufacturer,including 1 foot 6 inches, 3 feet, and 4 feet 6 inches. Roll lengths vary from 60 to 200 feet. Somecustom sizes and lengths are available. Material thickness varies somewhat, but is irrelevant in terms of application.Beginning at an outside corner, hold the roll of housewrap vertically and unroll the material acrossthe face of the sheathing for a short distance. Make sure the roll remains plumb and that the bottom edge ofthe housewrap extends over the foundation by two inches. <strong>The</strong> application should start at an outside cornerextending around the starting point corner by six inches (Fig. 2).Manufacturers specify acceptable fasteners, typically large head nails, nails with plastic washers, orlarge crown staples. Fastener edge and field spacing patterns are also specified. Housewrap sheets areinstalled shingle-style, from the bottom up. Horizontal laps should be a minimum of 2 inches; vertical lapsof 6 inches are acceptable (Fig. 3). To be fully effective in their primary role as air infiltration barriers, all36
FIGURE 2HEAD LAPFIGURE 3SILL LAPseams and edges must be taped or caulked. While some manufacturers market products for this purpose,others provide information outlining the performance requirements for approved products.ADVANTAGES: Relatively low cost, lightweight, easily installed energy conservation and moisture controlproduct. Especially effective in mixed and northern heating climates where unchecked air infiltration cansignificantly degrade house energy performance and occupant comfort. Beneficial in limiting airbornemoisture vapor transmission into the wall cavity by limiting air movement, while allowing moisture in thecavity to be expelled. Some products can be used as a code-approved substitute for building felt.DISADVANTAGES: Slightly more in initial cost than building felt. Availability of some products may be limited.Inferior performance as a weather barrier compared with building felt. Nail penetrations in housewrap arenot self-sealing, as they tend to be in felts. Housewraps are not selective vapor permeable membranes: moisturevapor will pass through in both directions. As water-absorptive siding materials such as wood and brickveneer dry, moisture in vapor form can be forced through housewrap into sheathing and insulation. Lessvapor-permeable building felt can better withstand reverse vapor migration. Some recent studies appear toindicate that surfactants, a class of substances found in wood, stucco, soap and detergents, can decrease thenatural surface tension of water and allow it to pass through housewraps wetting the underlying materials.According to anectdotal field observations, this process is most likely to occur in regions with heavy rainfalland when unprimed wood siding is placed in direct contact with the housewrap.FURTHER READING“Can Moisture Beat Housewrap?”, Ted Cushman, Ed., Journal of Light Construction, June 1997, p. 9.“Sizing Up Housewraps,” Bruce Greenlaw, Fine Homebuilding, October/November 1994, No. 91, p. 42.37
“Housewrap Manufacturers Prescribe New Details for Windows and Doors,” Energy Design Update,August 1998.“Housewraps or Building Paper? No Perfect Answer,” Energy Design Update, July 1998.“Housewrap vs. Felt,” Paul Fishett, Journal of Light Construction, November 1998.PRODUCT INFORMATION<strong>The</strong> Celotex Corp., P.O. Box 31602, Tampa, FL 33631; 800–CELOFAX (Tuff Wrap).DuPont, P.O. Box 80705, Wilmington, DE 19880–0705; 800–44–TYVEK (Tyvek Homewrap).Owens Corning, Fiberglass Tower, Toledo, OH 43659; 800–GET–PINK (Pinkwrap).Raven Industries, P.O. Box 5107, Sioux Falls, SD 57117–5107; 800–635–3456 (Rufco Wrap).Simplex Products Division, P.O. Box 10, Adrian, MI 49221-0010; 517–263–8881 (R-Wrap, BarricadeBuilding Paper).38
6INSULA TIONESSENTIAL KNOWLEDGEInsulation is one element in a tightly knit construction system intended to improve indoor comfort andreduce energy consumption. In rehab work, installing insulation or improving existing insulation levelswill be critical in providing comfort. Insulation should never be applied without considering its effect onother aspects of construction. Some factors to consider when evaluating wall insulation are density andcompressibility, air leakage, moisture control, fire safety, and wall construction in existing homes.Each type of insulation has a density at which its R-value per inch is greatest, but reaching thisdensity is not always cost-effective. For 3 1 /2-inch thick fiberglass batts, an R-13 batt contains 40 percentFIGURE 1TYPICAL FIBERGLASS BATT DENSITIES AND VALUESmore material, and an R-15 batt 180 percent more material, than an R-11 batt (Fig. 1).To achieve a desired overall R-value for dry blown-in insulation, and to prevent settlement, theinstalled density must be above a recommended minimum. For convenience in comparing estimates ormonitoring the installation, have the bidder or installer calculate the number of bags required to achievethe required density.Unless insulation completely fills all the wall cavities, air leakage can bypass the insulation andcreate a risk of condensation. Reducing air leakage is an inseparable part of insulating: you should not doone without doing the other. Typical locations for air leakage through walls are at the sill, the wall plates,vertical corners, around openings, and at electrical devices.Before filling stud cavities of older homes with blown-in or foamed-in-place retrofit insulation,explore the construction. Stud cavities are often interrupted by blocking half-way up the wall, or in girtframeconstruction, by full-depth diagonal corner braces. <strong>The</strong> outside walls may be “back-plastered,”where a hidden layer of plaster creates two parallel cavities within each stud space, neither deep enoughto receive loose-fill insulation. After insulating, an infrared camera scan of the wall will show cavities thathave not been fully insulated.Avoid deliberately ventilating walls, since any convective airflow within an outside wall risks condensationwithin the wall and compromises its R-value. Ventilation passages behind the exterior finish arecalled for when extreme interior humidity is expected and no vapor retarder can be applied, or wherewood siding is applied directly over exterior foam insulation.39
TECHNIQUES, MATERIALS, TOOLSOf the innumerable possible combinations of insulating materials and wall configuration, the following listcovers those in common use and uncommon systems that are recommended.1. INSTALL BATT INSULATION.Fiberglass insulation is available in batt form, typically sized 93 inches long to fit within the stud-space of an8-foot wall, or in continuous rolls. Both forms are here referred to as “batt insulation.” It is available in manythicknesses, densities and in widths to fit framing at 16-inch and 24-inch centers. Unfaced batts can easily becut to fit into odd-sized spaces, and are preferred where a continuous membrane vapor retarder is installed.Residential batts are available faced with kraft-paper and aluminum foil, and commercial batts with a flameresistantfoil facing are available. All have extended tabs on the facings to secure them in place. When properlyapplied, the facings create a partial vapor retarder. Only unfaced or fire-retardant-faced batts can be leftexposed in attics or occupied spaces. If not accurately cut around wiring and other obstacles, faced batts createlarge air cavities that compromise their effectiveness. Tabs can be “inset stapled“ to the sides of the studs,or “face stapled” to the inner face (Fig. 2). Face stapling is preferred because it creates a better vaporretarder and avoids the air cavity left between the facing and the wall finish when inset stapling. Unless thiscavity is carefully sealed at the top and bottom, it can compromise the wall’s air-tightness and R-value. Staplesinto stud faces must be fully set to avoid interfering with drywall installation. In a three-sided wall cavity, friction-fitunfaced batts, covered with a separate vapor retarder, will typically result in a more effective installationthan will stapled faced batts. In an open wall, the facings are usually necessary for attachment.ADVANTAGES: An economical, flexible, and well-known product. Provides a dependable thickness of uniformdensity and does not settle, if properly installed. Faced batts can insulate an open stud wall.DISADVANTAGES: Effectiveness requires careful installation to avoid gaps and consequent convectivelosses. Glass fibers can be irritating if touched or inhaled.FIGURE 2 FACE STAPLED INSET STAPLED2. INSTALL ENCAPSULATED FIBERGLASS INSULATION.Fiberglass insulation is available in rolls or batts, encapsulated with kraft paper or plastic to reduce mechanicalirritation to installers. <strong>The</strong>se can be used in any installation where batts are appropriate. One face isextended to form attachment tabs. <strong>The</strong> faces on sound control batts do not have a vapor retarder; and someexterior wall batts have a polyethylene vapor retarder on the flange side. Some encapsulated batts have a ClassA fire-rating and can be left exposed if allowed by local codes. Owens Corning markets Miraflex, made fromloose, virtually itch-free glass fibers with no binder, contained in a plastic sleeve. Cutting encapsulated battsaround obstructions is possible, but exposes the fiberglass. Cutting Miraflex releases the fibers; the product40
is therefore intended primarily as attic floor insulation.ADVANTAGES: deal for rehab contractors. Can be left exposed (check local codes). Flange-attached withor without a vapor retarder on some products.DISADVANTAGES: More costly than regular batt insulation. Cutting encapsulated batts exposes the fiberglass,and cutting Miraflex releases the fibers.3. INSTALL BLOWN-IN LOOSE-FILL INSULATION INTO CLOSED STUD SPACES.Loose-fill insulation (fiberglass, cellulose, or mineral wool) can be blown into closed stud spaces throughopenings formed by drilling holes through the interior or exterior finish, or by removing strips of interior orexterior finish, at the top and bottom of each rafter space. Careful installation is required because material canbridge over electric lines and other obstructions, causing voids and later settlement. Beware of blocking; blowinto cavities above and below it. At least a moderate amount of pressure is required to produce sufficient densityto inhibit settlement. Fiberglass blown into a 2 by 4 stud cavity at a density of about 1.5 pcf produces R-13without excess pressure on finishes. In a “dense-pack” installation of cellulose, dry material is applied at highvelocity through a narrow tube inserted through a single hole at the top and extended to the bottom of the cavity.<strong>The</strong> tube is gradually withdrawn, compacting the material to a density of 3 to 3 1 /2 pcf. “Stabilized” celluloseincludes an adhesive, and “Fiberized” cellulose is made in strands instead of chunks; both processesare claimed to inhibit or prevent settlement. Insulation packed into and filling wall cavities suppresses airmovement within the cavity, does not create a vapor retarder, but may substantially improve fire safety.ADVANTAGES: If the cavities are completely filled under sufficient pressure, provides superior insulating performancewithout settlement, greatly reducing air circulation within the walls, and may improve fire safety.DISADVANTAGES: Some types of installation may leave voids and/or settle after installation. Blown-in materialsdo not form a vapor retarder, and form only a partial air barrier.4. INSTALL BLOWN-IN OR SPRAYED-ON INSULATION INTO OPEN STUD SPACES.An inexpensive material can be applied as a membrane over open studs to form “see-through” cavities,within which any blown-in insulation can be applied under moderate pressure. In Ark-Seal’s Blown-in-Blanket ® (BIBS) system, fiberglass mixed with some water and adhesive is blown through slits cut in atightly stretched nylon netting. In Par-Pac’s Dry-Pac Wall System, dry cellulose is blown at 3 pcf densityinto a cavity closed by a reinforced polyethylene vapor retarder (Fig. 3). <strong>The</strong> material is installed from theFIGURE 3BIBS SYSTEMbottom up to minimize voids and settlement. All such installations will cause the membrane to bulge out;make sure this bellying does not interfere with drywall installation. Various types of polyurethane- andpolyisocyanurate-based insulations, such as Icynene, can also be spray-applied into stud cavities. A thinlayer of such material can form an air-barrier skin, over which cheaper material can be placed. Excess41
material must be scraped off, and windows and electrical devices protected or cleaned. Water is mixedwith cellulose in a “wet-spray” application. <strong>The</strong> water combines with the starch in the cellulose to form anatural adhesive, which holds the material in place. Excess material must be scraped off, but can bereused. <strong>The</strong> material must dry out before a finish is applied; excessive water can prevent drying and generaterot or mildew. High-density insulation filling cavities may improve fire safety.ADVANTAGES: Fills the cavities without settling. Visual inspection is possible to insure filled cavities. Greatlyreduces air circulation within walls. May improve fire safety.DISADVANTAGES: Bellying of the interior membrane may interfere with drywall installation. Sprayed-onfoam products are more expensive than batt or loose-fill installations, and are messy processes, requiringcleanup and protection. Excess water in wet-spray applications may lead to rot and mildew.5. INSTALL RIGID WALL INSULATION.A 3 /4-inch to 1-inch layer of rigid insulation, typically polyisocyanurate (ISO), molded expanded polystyrene(EPS), or extruded polystyrene (EPS), is a widely used adjunct to cavity insulation. Where cavity insulationcannot be installed, rigid foam may be the only way to insulate a wall. It is preferably applied on the outsideof the framing, keeping the framing warm enough in cold weather to prevent condensation within the walls,and inhibiting thermal short-circuits through the studs. It is also useful on the outside as a base for cementstucco or extorior insulation and finish systems (EIFS), although the latter should be part of an engineeredsystem that provides interior drainage. A layer of foam is essential in conjunction with conventional steelframing to prevent surface condensation. In Gulf-coast climates, a layer of foam behind the interior finish ispreferred over an exterior layer or a layer on both sides of the studs, especially with steel framing. Since foamcannot be relied upon to resist racking, it must be applied over structural sheathing or in parallel with asystem of wall shear bracing. Structural sheathing separated from the framing by an outside layer of foammay not meet code racking requirements (consult with a structural engineer). Celotex makes a structuralpolyisocyanurate foam sheathing that, when glued and nailed to the framing, acts as racking bracing. Woodsiding should not be applied directly to foam insulation.ADVANTAGES: Isolates framing to minimize or eliminate internal condensation and reduce cold bridgingthrough framing. Can add more than its rated R-value to a wall assembly.DISADVANTAGES: More costly per R than fiberglass insulation. If substituted for exterior sheathing,requires other measures to create racking resistance in the structure. Should not be used with EIFS exceptas part of an engineered system with interior drainage. EPS cannot support one-coat cement stucco overmore than 16" stud spacing.6. INSTALL A RADIANT BARRIER.While radiant barriers and coatings are commonplace in high-temperature industrial applications (typically500º F or more), they are marginally effective at ordinary temperatures. To be cost-effective in building applications,they must have a very low incremental cost (from 2 to 10 cents/sf, depending on the application). Clean,shiny aluminum foil facing a 3 /4 inch or deeper air space can create a radiant barrier. Foil-faced insulation heldback and inset-stapled creates only a marginally effective radiant barrier because the insulation bulges into theair space, and because the cavity can create heat loss through convection: it is always more effective to fill thecavity with insulation. If an air space is present for other reasons (for example, the cavity between sheathing andbrick veneer), facing the air space with foil-faced sheathing will add thermal resistance if the material remainsclean. A new form of radiant barrier is Radiance paint, which contains aluminum dust.ADVANTAGES: An easy way to add insulating value at brick cavity walls.DISADVANTAGES: Marginally cost-effective; unlikely to be effective if exposed to dirt or condensation. Not costeffectivein cold climates, except possibly Radiance paint. Seldom or never cost-effective if the air space isdeliberately “stolen” from conventional insulation. Foil may create a vapor barrier where one is not desired.7. INSTALL A STRUCTURAL INSULATED PANEL WALL.Rigid foam insulation adhered to structural skins can create a structural insulated panel (SIP). SIPsprovide a combination of structure and insulation. Depending upon the design, the panels may be42
self-supporting or may be a non-load-bearing exterior skin applied over a post and beam frame. Very tightjoints are crucial, since a small amount of air leakage through a joint is guaranteed to create destructivecondensation at the most critical structural point. Panels are typically fabricated to order and delivered tothe site for quick erection. Acoustical tightness is readily noticeable.ADVANTAGES: A high-R wall that can be load bearing and resists racking. Provides excellent acoustical resistance.Allows a high level of prefabrication and fast on-site erection.DISADVANTAGES: Not yet in common use, and therefore more expensive than ordinary framing. Requirescareful air-sealing at all joints.FURTHER READINGASHRAE, 1997 Handbook of Fundamentals, Inch-Pound Edition, Chapter 22: <strong>The</strong>rmal and Moisture Controlin Insulated Assemblies—Fundamentals; Chapter 23: <strong>The</strong>rmal and Moisture Control in InsulatedAssemblies—Applications; Chapter 24: <strong>The</strong>rmal and Water Vapor Transmission Data, American Society ofHeating, Refrigerating and Air-Conditioning Engineers, Inc., Atlanta, GA; 404–636–8400; www.ashrae.org.“Fiberglass vs. Cellulose: Making the Choice,” Ted Cushman, Journal of Light Construction, Sept. 1995,pp 27–31.Energy Source® Catalog; Iris Communications, Inc.; 800–346–0104.Energy Star Fact Sheets; Builder <strong>Guide</strong>s; U.S. Environmental Protection Agency (EPA), AtmosphericPollution Prevention Division; 888–STAR–YES.Home Energy’s Consumer <strong>Guide</strong> to Insulation; www.homeenergy.org/eehem/96/9609insulation.html.Residential Energy Efficiency Database (REED); http://139.142.36.88/reed/index.htm.Sawnee Energy Library; /www.energydepot.com/sawnee/library/library.cfm.U.S. Department of Energy (DOE) Energy Efficiency and Renewable Energy Clearing House (EREC);800–363–3732; e-mail: doe.erec@nclinc.com; http://erecbbs.nclinc.com.“Insulation Fact Sheet,” August 1997, Document DOE/CE–0180.“Loose-Fill Insulations,” May, 1995, Document DOE/GO–10095–060.“Insulation Materials: Environmental Comparisons,” Alex Wilson, Environmental Building News, <strong>Volume</strong>4, Number 1, January/February 1995.“Insulation Comes of Age,” Alex Wilson, Fine Homebuilding, February/March 1996, No. 100.PRODUCT INFORMATIONBATT, SPRAY-ON, AND LOOSE-FILL INSULATIONCellulose Insulation Manufacturers Association, 136 South Keowee Street, Dayton, OH 45402;937–222–2462; www.cellulose.org.American Rockwool, Inc., P.O. Box 880, Spring Hope, NC 27882; 919–478–5111.Ark-Seal International, 2190 South Kalamath, Denver, CO 80223; 800–525–8992.Building Products Division, <strong>The</strong> Celotex Corporation, P.O. Box 31602, Tampa, FL 33631; 813–873–4000.CertainTeed Corporation, 750 East Swedesford Road, Valley Forge, PA 19482; 800–523–7844.GreenStone Industries Inc., 6500 Rock Spring Drive, Suite 400, Bethesda, MD 20817; 888–592–7684.Icynene Inc., 376 Watline Avenue, Mississauga, ON L4Z 1X2, Canada; 800–946–7325.43
International Cellulose Corp., 12315 Robin Boulevard, Houston, TX 77245–0006; 800–444–1252.Johns Manville Corporation (formerly Schuller International Inc.), 717 17th Street, Denver, CO 80202; orP.O. Box 5108, Denver, CO 80217-5108; 800–654–3103.Knauf Fiber Glass, 240 Elizabeth Street, Shelbyville, IN 46176; 800–200–0802.Owens Corning, One Owens Corning Parkway, Toledo, OH 43659; 800–354–PINK or 800–GET–PINK.Par-Pac, 4545 East 52nd Avenue, Commerce City, CO 80022; 800–850– 8505.Rock Wool Manufacturing Co., 203 North Seventh Street, Leeds, AL 35094; 205–699–6121.Sloss Industries Corporation, 3500 35th Avenue North, Birmingham, AL 35207; 205–808–7803.U.S. Fiber, Inc., 905 East Martin Luther King Dr., Suite 400, Tarpon Springs, FL 34689; 800–666–4824.Western Fiberglass Group, 6955 Union Park Center, Suite 580, Midvale, UT 84047; 801–562–9558.STRUCTURAL INSULATED PANELSStructural Insulated Panel Association, 1331 H Street NW, Suite 1000, Washington D.C. 20005;202–347–7800; e-mail: sipadc@aol.com.RIGID FOAM INSULATIONExpanded Polystyrene Molders Association (EPSMA), 1926 Waukegan Road, Suite 1, Glenview, IL 60025–1770;800–607–3772.Polyisocyanurate Insulation Manufacturer’s Association (PIMA), 1001 Pennsylvania Avenue, N.W., 5thFloor, Washington, DC 20004; 202–624–2709; www.pima.org.Celotex Building Products, P.O. Box 31602, Tampa, FL 33631–3602; 813–873–4230.Dow Chemical Company, Styrofoam Brand Products, 2020 Willard H. Dow Center, Midland, MI 48674;800–258–2436.Johns Manville Corporation (formerly Schuller International Inc.), 717 17th Street, Denver, CO 80202; orP.O. Box 5108, Denver, CO 80217–5108; 800–654–3103.Owens Corning, One Owens Corning Parkway, Toledo, OH 43659; 800–354–PINK or 800–GET–PINK.Tenneco Building Products, 2907 Log Cabin Dr., Smyrna, GA 30080; 800–241–4402.RADIANT BARRIER PRODUCTSEnergy-Brace reflective sheathing, Fiber-Lam, Inc., P.O. Box 2002, Doswell, VA 23047; 804–876–3135.Radiance Low-e interior paint, ChemRex, 889 Valley Park Drive, Shakopee, MN 55379; 800–433–9517.<strong>The</strong>rmo-ply reflective sheathing, Simplex Products Division, P.O. Box 10, Adrian, MI 49221;517–263–8881.44
7VINYL SIDINGESSENTIAL KNOWLEDGETABLE 1Introduced in the 1960s, vinyl siding has become the leading wall cladding material for siding (60 to 70percent of the national residing market, and 40 to 50 percent of the national new siding market).Regionally, its most prevalent use is east of the Mississippi. Originally considered a relatively low-performingproduct that had fading and cold-weather cracking problems, vinyl siding has evolved into a highperforming product with good weatherability and a level of detailing and finish that, in the most sophisticatedand innovative examples, comes fairly close in appearance to the wood siding products that it emulates.It is essential, however, that vinyl siding be allowed to expand and contract freely. It is estimated thatover 90 percent of the problems with vinyl siding are caused by a lack of sufficient clearance between thenail head and the nailing slot or between the siding and trim.Vinyl siding is made of polyvinyl chloride (PVC) resins with inorganic color pigments, Ultraviolet(UV) stabilizers, and various plasticizers. It has a typical exposure of 8 or 10 inches plus a fastening tab(hem), and is commonly available in 12 foot lengths, although longer lengths are available from somemanufacturers. Physical characteristics are established by American Society for Testing Materials (ASTM)D3679, which sets minimum thickness at 0.035-inch. Thickness is not the only indicator of performance.<strong>The</strong> specific PVC formulation, siding profile, and attachment details are also important characteristics. <strong>The</strong>industry is reviewing ways to set multiple performance requirements, but at this time siding thickness isthe primary means of differentiating products.<strong>The</strong>re are three general classifications for vinyl siding based on thickness, with subclassificationsfor low and high-end products:Super Economy Economy Standard Premium Super Premium0.035" to 0.040" to 0.042" to 0.044" to 0.048" +< 0.040" < 0.042" < 0.044" < 0.048"Prices vary accordingly, with some super premium products costing up to twice the cost of supereconomy. Most of the material sold is in the economy range. Industry consensus holds that material below0.040 inch may be too thin to conceal uneven substrates. <strong>The</strong> super premium products, at 40 percentthicker, will not necessarily last 40 percent longer than standard products, although they will be straighter,less wavy, more resistant to impact damage, and may be architecturally more distinctive. Most vinyl sidingis sold as a “commodity” product, in standard economy styles and finishes. However, some fairly recentevolutions/innovations in vinyl siding have been introduced largely in higher-end products. Many of thesereflect small niche markets today, but the market is becoming more selective and quality conscious:■ Product formulations: Most manufacturers have continued to refine existing formulas to develop betterweathering and non-fading characteristics. Non-fading warranties have been introduced that extend thewarranty period. New premium resins are being developed that will allow darker colored panels to performas well as lighter ones.■ Finishes: A number of manufacturers have developed low gloss finishes that replicate sanded, sealed,and painted cedar. Some closely resemble the texture of cedar clapboard and the color of stained siding.Simulated plain and scalloped cedar shingles and decorative cedar panels, such as Certainteed’s CedarImpressions, made from polypropylene, are also available. Extended warranties are available againstpeeling, blistering, rotting, flaking, chipping, cracking, corroding, and excessive fading.45
■ Profiles and reinforcements: High-end products, such as Wolverine’s Super Premium Portfolio HP,provide thicknesses up to 0.055 inch, deeper reveals, reinforced nailing hems, and stronger lockingprofiles. Wolverine offers a fiberglass reinforcement bar in its Benchmark series that overlaps adjacentpanels and provides increased rigidity. Wolverine has recently developed a flexible nail hem on itsMillennium series that eliminates the conventional slotted hem, making fastening faster and simpler,reducing expansion and contraction problems, and allowing the use of stapling as well as nailing.Certainteed, Heartland, and Alside also have developed reinforced interlocks (Fig. 1).■ Insulated siding products: Progressive Foam Products manufactures an insulated contoured underlayment,<strong>The</strong>rmoWall ® , that is designed to go over existing siding products, provide a rigid base for new vinylsiding and add an R-value of up to 4.2 to the existing wall. <strong>The</strong> underlayment panels (Fig. 2), 20 incheshigh, 48 inches long, and minimum 1 /2 inch thick, are profile-specific and have been developed for overWOLVERINE ® MILLENNIUM SIDINGALSIDE CENTERLOCKBENCHMARK LAPLOCKCERTAINTEED CERTILOCKWOLVERINE ® GRIPLOCKSTANDARD VINYL SIDINGS46 FIGURE 1VINYL SIDING LOCKING PROFILES
FIGURE 2, 3 THERMOWALL ® ZIP TOOL750 existing vinyl siding products from different manufacturers. Progressive has helped develop a fourcourseprofile for VIPCO (a division of Crane Plastics) that is laminated to a vinyl siding panel approximately12 feet long by 16 inches high, sold under the name of TechWall.■ Trim and accessory panels: A number of manufacturers produce wide window, door, and corner trimwith reveals that eliminate the standard J channel and make the joining of material appear closer to thatof wood siding. Note that siding cannot be butted directly against wood trim without use of a J channel.Vinyl siding requires trim on outside and inside corners.TECHNIQUES, MATERIALS, TOOLS1. REMOVE STAINS FROM EXISTING VINYL SIDING.Some vinyl siding, which might appear to need replacement, can be rehabilitated by careful cleaning. Vinylsiding will fade over time, but maintenance and cleaning will prolong the service life and appearance ofthe material. Vinyl siding is easily cleaned with a variety of approved cleaners that are formulated forspecific staining problems. <strong>The</strong> Vinyl Siding Institute has prepared a comprehensive list of those cleanersthat will remove most stains (see Further Reading).ADVANTAGES: A low-cost approach to vinyl siding rehab.DISADVANTAGES: Cleaning might not eliminate all staining and will not eliminate fading.2. REPAIR EXISTING VINYL SIDING.Sections of vinyl siding that are buckled, dented, cracked, stained, or otherwise damaged can be easilyreplaced by means of a “Zip” tool that slips behind the bottom of the siding panel above the damagedpanel, allowing access to the damaged panel for replacement (Fig. 3). Instructions are provided by theVinyl Siding Institute and individual manufacturers (see Further Reading).ADVANTAGES: Allows portions of vinyl siding to be replaced without complete residing.DISADVANTAGES: New vinyl replacement siding will not match weathered vinyl siding. Small discoloredsections can be painted with an all-acrylic paint, although the Vinyl Siding Institute does not specificallyendorse painting.3. REPLACE/COVER EXISTING SIDING WITH NEW VINYL SIDING.Existing siding can be prepared in three ways:1. Strip off existing siding that has deteriorated to the point where it cannot be used as a substrate.This will assure the straightest and flattest application and will allow inspection of the sheathing and47
insulation, which can be replaced if necessary. Install new vinyl siding as per manufacturer’s installationrequirements. Note that vinyl siding requires a smooth, even, rigid substrate such as plywood, wood composition,rigid foam insulation, or fiber sheathing. It cannot be installed directly to structural framing orit will sag and deflect between framing members. (Failure to establish a smooth solid substrate mayconstitute a misapplication under the terms of the warranty.)2. Apply rigid or semi-rigid (e.g. FoamCore by International Paper) sheathing to existingsiding to provide a smooth substrate. Nail securely through old siding and into framing members. Flashas necessary around projections and openings.3 Apply vertical furring strips to old siding to strengthen and straighten uneven surfaces. <strong>The</strong>napply rigid sheathing as described in example 1 above. Vinyl siding cannot be applied directly over furring.Residing over existing material will require jamb and trim extensions.Vinyl siding should be applied with corrosion resistant nails (aluminum or galvanized) with aminimum 3 /4 inch penetration into wood or wood composition substrate. When foam sheathing is useddirectly over studs, nails must penetrate studs by at least 3 /4 inch. Nails should be driven so that the headsare 1 /16 to 1 /8 inch away from the slotted nailing tab to allow for shingle movement. Pneumatic staplers ornailers can be used but can bind siding more easily (especially staples) than hand nailing, unless used byan experienced installer. Individual manufacturers’ installation guidelines should be followed carefully.ADVANTAGES: Better quality vinyl siding replicates wood siding appearance. New formulations, textures,colors, and details are now available that allow more choice and improve the appearance of most architecturalstyles. A relatively low maintenance product.DISADVANTAGES: Vinyl siding, especially the thinner products, might appear wavy and will reflect theirregularity of some substrates. Expands and contracts more than other siding materials. Thinner gagesare susceptible to “oil canning” and may become brittle over time. Overdriven or improperly placedfasteners can resist siding movement and cause buckling. Colors, especially dark ones, will fade overextended periods. Vinyl siding is not weatherproof and requires a weather barrier.FURTHER READING“Application Instructions,” Vinyl Siding Institute, the Society of Plastics Industry Inc., 1994.“Cleaning of Vinyl Siding,” Vinyl Siding Institute, the Society of Plastics Industry Inc., 1994.“Fire Properties,” Vinyl Siding Institute, the Society of Plastics Industry Inc., 1994.“Installation <strong>Guide</strong> for Vinyl Siding and Accessories,” Wolverine/Certainteed, 1998; 888–838–8100;www.vinylsiding.com.“Vinyl Siding,” George Schamback, <strong>The</strong> Journal of Light Construction, June 1997, pp. 27–31.PRODUCT INFORMATIONVinyl Siding Institute, 1801 K Street, Suite 600K, Washington, DC 20006; 888–FORVSI–1; www.vinylsiding.org.(A complete list of member companies, their web sites and products, can be obtained from theVinyl Siding Institute.)Progressive Foam Products, Beach City, Ohio; 800–860–3636; www.progressivefoam.com.TechWall–VIPCO, 1441 Universal Drive, Columbus, OH 43216; 800–366–8472; www.crane-plastics.com.Foam-Core–International Paper, P.O. Box 1839, Statesville, NC 08687–1839; 800–438–1701;www.ipaper.com.48
8METAL SIDINGESSENTIAL KNOWLEDGEAluminum and steel siding gained great popularity in the 1950s and 1960s as the most durable and costeffectivematerials for replacing or covering up old, deteriorating siding. It frequently contained thin foaminserts which, manufacturers claimed, greatly enhanced the insulating qualities of the material. While thenew siding may have been effective in reducing air infiltration, the thinness of the insulation and the greatthermal conductivity of metal made this siding a poor performer in terms of energy.<strong>The</strong> use of aluminum and steel siding has drastically declined in recent years with the emergenceand popularity of vinyl and fiber cement siding products, to the point where metal siding now accountsfor only about 1 percent of the new siding market. Primary markets include the Midwest (particularly forsteel siding) where cladding must resist hailstorms and temperature extremes. In metropolitan areaswhere local codes require noncombustible building materials, metal siding is an obvious choice. <strong>The</strong>plethora of existing metal siding makes it a prime candidate for repair or replacement in rehab work.TECHNIQUES, MATERIALS, TOOLS1. MAINTAIN METAL SIDING.Under normal conditions, metal siding will require only occasional washdown with a garden hose and asoft bristle brush. If the siding is moderately dirty, use a solution of 1 /3 cup of a mild clothwashing detergentto a gallon of water. For heavier dirt and stains the non-abrasive detergent can be mixed with 2 /3 cuptrisodium phosphate (Soilax, or Spic-N-Span for example) to a gallon of water. Use mineral spirits toremove caulking compounds, tar and similar substances. Clean from bottom to the top. Rinse thoroughly.Avoid abrasive cleaners and strong solvents.ADVANTAGES: Maintenance is simple and effective.DISADVANTAGES: Will not remove fading and severe caulking.FIGURE 1REPLACEMENT OF SIDING49
FIGURE 2ON-SITE ROLL FORMING2. REPAIR METAL SIDING.<strong>The</strong> replacement of metal panels is relatively simple: 1. Cut the damaged panel along its center with a utilityknife or metal shears. Remove and discard the bottom section; 2. Cut and remove the top lock or a newpanel; 3. Apply a heavy bead of Gutterseal (Alcoa or other brand) the full length of the defective panel; 4.Install the new panel over the Gutterseal. Apply pressure with the palm of the hand. Do not nail the panel.(Fig. 1)ADVANTAGES: Repair is relatively simple procedure.DISADVANTAGES: Color of replacement will not match original.3. REPLACE EXISTING SIDING WITH STEEL SIDING.Considered by some in the industry to be one of the highest performing siding products on the marketbecause of its resistance to cracking, bending, high winds, and high temperatures, steel continues to havea strong niche market. Steel can be placed directly over existing siding materials, over insulated sheathingon top of existing material, or attached to furring strips placed on masonry or uneven walls. It typicallycomes in 12-foot lengths and panel widths of double 4 or 5-inch exposures, with a PVC or acrylicfinish. A number of companies, such as ABC Seamless, provide seamless steel siding through franchisedinstallers. It is roll-formed on site to eliminate vertical joints (Fig. 2).ADVANTAGES: One of the strongest and most damage-resistant siding products available; lays flat andstraight against most substrates; color finishes warranted against fading and peeling; noncombustible; canbe touched up with paint.DISADVANTAGES: Approximately double the cost of standard vinyl siding; 30 percent more expensive thanaluminum siding. Fewer profiles, styles, colors, trim, and accessories than vinyl siding.4. REPLACE EXISTING SIDING WITH ALUMINUM SIDING.Aluminum continues to have some niche market appeal, although its use is diminishing. Aluminum sidingis typically available in 12-foot lengths and panel widths of double 4 or 5-inch exposures, with a PVC oracrylic finish. <strong>The</strong> most popular color is white, but a limited color palette is available. Like steel siding,aluminum can be applied directly over wood-sided walls that are sound and straight, over insulated siding,and over furring strips.ADVANTAGES: Lays straight over most substrates; less likely to show waviness than vinyl siding; lightweight,noncombustible, durable, and easy to clean.DISADVANTAGES: More costly than vinyl; dents relatively easily; comes in limited styles and colors.50