EASY-WAY-COIL SYSTEM® | - Adenta
EASY-WAY-COIL SYSTEM® | - Adenta
EASY-WAY-COIL SYSTEM® | - Adenta

You also want an ePaper? Increase the reach of your titles
YUMPU automatically turns print PDFs into web optimized ePapers that Google loves.
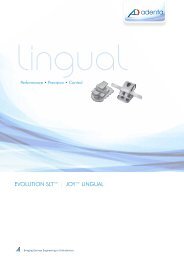
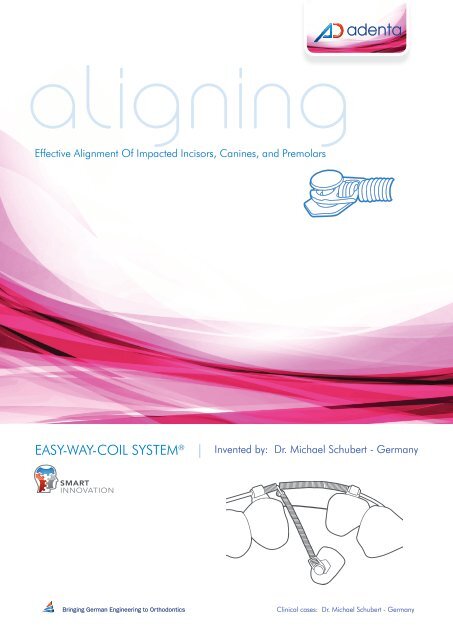
aligningEffective Alignment Of Impacted Incisors, Canines, and Premolars<strong>EASY</strong>-<strong>WAY</strong>-<strong>COIL</strong> SYSTEM ® |ADENTA | SMART INNOVATION | V05aInvented by: Dr. Michael Schubert - GermanySMARTINNOVATIONSMARTSMARTINNOVATIONINNOVATIONSMARTINNOVATIONSMARTINNOVATIONSMARTINNOVATIONSMARTINNOVATIONSMARTSMARTINNOVATIONINNOVATIONSMARTINNOVATIONSMART Bringing German Engineering to OrthodonticsINNOVATIONSMARTINNOVATIONClinical cases: Dr. Michael Schubert - Germany
1<strong>EASY</strong>-<strong>WAY</strong>-<strong>COIL</strong> ® SYSTEM for lingual and buccal treatmentClinically reliable, efficient, easy to use and economical system for the alignment ofimpacted and ectopic teeth.Many different traction appliance options are available for the task of aligning theectopic or impacted tooth. The forces in some of these appliances use elastics. Thequality of the material of elastics, elastic chains or an elastic rubber thread makesfrequent replacement necessary for the purpose of re-activation. Lever designs arehighly elastic and supply effective force for a relatively long period of time, but theyare easily damaged, rather uncomfortable for patients, and make oral hygiene moredifficult.The <strong>EASY</strong>-<strong>WAY</strong>-<strong>COIL</strong> SYSTEM ® consists of a stainless steel tensionspring which is pivot-mounted to a lingual button with a bondingbase. The appliance is activated by systematically shortening thespring. It is reliable and demonstrates an intermitting application offorce throughout the treatment procedure, including stable maximumanchorage.• Pivot-mounted button• Bonding base• Space maintainingStainless steel spring• Choosen if forcedirection is 90° to thebonding surfaceBuccal treatment steps using the Frasaco model“Choosing the right forceminimizes root damages andreduces treatment time.”Lingual treatmentplease call for more detailsInventor Dr. Michael SchubertBringing German Engineering to Orthodontics
<strong>EASY</strong>-<strong>WAY</strong>-<strong>COIL</strong> ® SYSTEMInstructions for ORTHODONTISTSThe system of the tension spring consists of a stainless steel tension spring which is pivot-mounted to a lingual button with abonding base. An activation of 2 mm triggers an average force of 32cN. A piece of tension spring is added, which you canpull over the bracing arch wire to maintain the gap for the tooth you want to pull into the right position.3Before using the tension spring, it’s important to ensure that there is enough space for the tooth you want to position. In the.018’’ method for the bracket slot, a stainless steel arch wire of .016 x .022’’ suffices for anchorage, corresponding to a.020 x .020’’ arch wire of the same quality in the .022’’ method.In the area of the prepared gap, an exact-fitting piece of the auxillary wire spring is pulled over the arch wire as a passiveplaceholder. The first activation takes place seven days after the operation in six steps.Step 1Depending on the force direction for the alignment of the ectopic/retainedtooth the anchorage point has to be chosen. Carefully place a ligature cutteron the auxiliary wire spring and close is slightly in order to create a smallgap within the spring coil, in which the ligature wire will be fixed. Thus, theligature wire cannot shift.Step 2The end of the EWC ® extension spring needs to point into the direction of theanchorage point on the auxiliary wire spring. Then, cut the EWC ® spring untilthe distance between the anchorage point and the tip of the EWC ® springis approx. 2 mm. This distance of 2 mm allows a force of approx. 0.32cN.Step 3Place a ligature cutter approx. 3-4 mm (3-4 loops) of the end of the EWC ®spring and close is slightly without cutting the wire in order to isolate 3-4mm of the spring, then turn this part 45° in order to create a loop. Insert aligature wire into the loop.Step 4Ligate the ligature wire onto the anchorage point on the auxiliary/wirespring. All four weeks the EWC ® spring should be cut by 2 mm in order tore-activate the spring. Therefore, please follow step 1- 4 every 4 weeks.Repeat it until the tooth has broken through.Step 5After the ectopic tooth has clearly broken through and the button of theEWC ® spring is clearly visible, the clip of the EWC ® should be carefullypulled of with a How or a Weingart plier. In case the lingual button unintentionallyde-bonds, a new lingual button should be bonded at exactly thesame palatinal position.Step 6With a u-shaped chain the tooth will be moved buccally and de-rotated.Now a bracket or a button can be bonded buccally in order to continueextrusion.Bringing German Engineering to Orthodontics
4<strong>EASY</strong>-<strong>WAY</strong>-<strong>COIL</strong> ® SYSTEMInstructions for ORAL SURGEONSAfter creating a mucoperiosteum lobe, the crown of the retained or dislocated tooth has to be uncovered up to thesupposed enamel-cement borderline.After etching, the attachment with the spring gets fixed to the tooth by light-curing composite material (with palatinaldislocation at the palatinal surface, with buccal dislocation at the buccal surface). If the tooth is locatedpalatinally, it’s important to bond the spring system palatinally, to get a long enough activation way of the spring.If there is too much bonding, the surplus has to be removed, to ensure that the spring can turn around the button.BuccalWith a tooth dislocated buccally, the spring system has to be fixed at thebuccal surface and orientated to the required tension direction to caudal.PalatinalWith a tooth dislocated palatinally, the spring system has to be fixed atthe palatinal surface and orientated to the required tension direction todisto-buccal.Removal of excess bonding materialAfter the EWC ® button is bonded check carefully for excessive bondingmaterial between the button and latch of the EWC ® . Excessive bondingmaterial will obstruct the rotational movement needed later in treatment.Test bond strengthAfter bonding and before sealing the wound, the bond strength should betested. Pull spring with approx 100 - 150cN of force, the spring shouldopen a little once pull force is applied, this will be adequate to test thebonding strength.Sealing the woundBefore sealing the wound, the spring system should be orientated to thedirection where the first activation will occur. The mucoperiosteum lobeis placed over the tension system and fixed with a suture. The end of thetension spring is fixed temporarily and tensionless to the arch wire by usingsuture material.FixationTensionless fixation of the tension spring using suture material.<strong>Adenta</strong> GmbH | Phone: +49 (0)8105 7343 – 60 | Fax: +49 (0)8105 7343 – 622 | Mail: info@adenta.com | Internet: www.adenta.com<strong>Adenta</strong> SPAIN | Phone: +(34) 933 844 705 | Fax: +(34) 933 844 153 | Mail: info@adentaspain.com | Internet: www.adentaspain.com<strong>Adenta</strong> USA | Phone: 215-942-2070 | Toll Free: 1-888-942-2070 | Fax: 215-942-2072 | Mail: info@adentausa.com | Internet: www.adentausa.com
5Palatinal impacted teeth upper left and right cuspids, retention of lower left and right cuspids.Beginning of treatment Male 17.6 yearsSurgical Exposure5.9 1.5 months months after surgical exposure 5.9 months after surgical exposuresurgical exposure8.5 months after surgical exposure - upper2.6 months after surgical exposure - lower10.8 months after surgical exposure313.9 months after surgical exposure -change of force direction to buccal15.3 months after surgical exposure15.9 months aftersurgical exposure19.8 months after surgical exposure 22.8 months after surgical exposureBringing German Engineering to Orthodontics
Clinical CasesBoth sides palatinal impacted upper left and right cuspidsMale 14 yearsTreatment time: 20 months77 days aftersurgical exposure9.4 months aftersurgical exposure10.5 months aftersurgical exposure5.9 monthsMarch 2009surgical exposureApril 2010 October 2010 11.3 months aftersurgical exposure12.2 months aftersurgical exposure12.2 months aftersurgical exposure13.4 months aftersurgical exposure14.5 months after surgical exposure16.7 months after surgical exposure 19.4 months after surgical exposureTime between surgical exposure and appliance removal 20 months<strong>Adenta</strong> GmbH | Phone: +49 (0)8105 7343 – 60 | Fax: +49 (0)8105 7343 – 622 | Mail: info@adenta.com | Internet: www.adenta.com<strong>Adenta</strong> SPAIN | Phone: +(34) 933 844 705 | Fax: +(34) 933 844 153 | Mail: info@adentaspain.com | Internet: www.adentaspain.com<strong>Adenta</strong> USA | Phone: 215-942-2070 | Toll Free: 1-888-942-2070 | Fax: 215-942-2072 | Mail: info@adentausa.com | Internet: www.adentausa.com213.04