


Create successful ePaper yourself
Turn your PDF publications into a flip-book with our unique Google optimized e-Paper software.
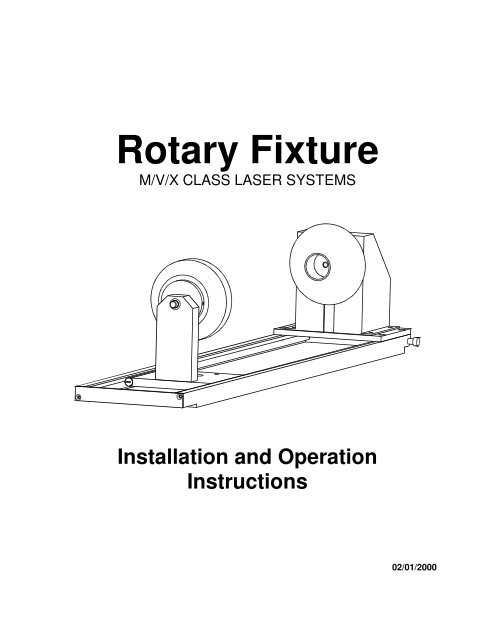
<strong>Rotary</strong> <strong>Fixture</strong>M/V/X CLASS LASER SYSTEMSInstallation and OperationInstructions02/01/2000
IntroductionThe <strong>Rotary</strong> <strong>Fixture</strong> controls in the Printer Driver are used along with the optional <strong>Rotary</strong> <strong>Fixture</strong>to engrave onto round or cylindrical objects. Before attempting to use this option, you MUSTcompletely understand how the laser system operates. Please make sure that you have readand understood the Operation Manual before continuing.Two attachments are included with the fixture, a cone shaped disk attached to the motorizedend of the fixture and an inverted cone disk attached to the adjustable end of the fixture. Theseattachments are designed to hold wine glasses, mugs, cups, etc. To make it easier tounderstand, we will illustrate a step by step procedure to engrave an image on a glass.NOTE: These instructions apply to many different models even if your system has asmaller or larger field size.First Time Installation1. Turn the laser system ON.2. If your laser system has the Auto Focus Option and it is turned ON, you MUST now turn itOFF at this time. This option was NOT designed or intended to be used with the <strong>Rotary</strong><strong>Fixture</strong> installed.3. Remove any materials that may be underneath the table and lower the table ALL THE WAYdown to the bottom or at least far enough down so that the Focus Carriage will clear the topof the <strong>Rotary</strong> <strong>Fixture</strong> when it is installed on the table. Now, turn the laser system OFF.4. Place the bracket on the table. Insert the thumbscrews and washers into the screw holesbut do not tighten down completely. Leave the thumbscrews loose enough so that thebracket can slide around.2
5. Place the <strong>Rotary</strong> <strong>Fixture</strong> on a flat surface. Using an Allen wrench, attach the two(2) sockethead shoulder screws to the side of the base plate.Attach Shoulder Screws6. Place the <strong>Rotary</strong> <strong>Fixture</strong> on top of the bracket so that its pivot bolts set into the forks in thebracket. Gently push the fixture flat up against the top ruler. NOW, tighten down thethumbscrews.7. With the power to the system still OFF, connect the 9-pin <strong>Rotary</strong> <strong>Fixture</strong> control cable to thereceptacle on the laser engraving system.3
1 2 3 4 5 6 7 8 9 10 11 12 13 14 15 16 17 18 19 20 21 22 23 24123456789101112RECEPTACLELOCATIONREADYInstalled <strong>Rotary</strong> <strong>Fixture</strong>8. Before loading the glass into the fixture, measure the diameter of the glass in the areawhere the engraving is to be located by using a caliper or similar measuring device. Eitherremember this number or write it down.Diameter9. Place the open end of the glass on the right side of the <strong>Rotary</strong> <strong>Fixture</strong>. Lift the lever on theadjustable end of the fixture and slide it up against the other end of the glass so the glassrests firmly centered inside of the inverted cone. Push the adjustable end of the fixture tothe right, firmly against the bottom of the glass. Do not to apply too much pressure,especially with glass. You only need enough pressure to prevent the object from slipping onthe cone while it rotates. Lower the lever on the adjustable end of the fixture to lock it inplace.4
10. You must now focus on the glass. Turn ON the laser system and waitfor the display to show “READY”. Press the “Z” button on the controlpanel and notice that the motion system will align to the centerline ofthe <strong>Rotary</strong> <strong>Fixture</strong> automatically. You will also notice that the left andright arrow buttons will cause the Focus Carriage to move left and rightrespectively. This control is the same as when engraving a flat objecton the table. However, the up arrow now causes the fixture to rotatethe glass towards the front of the machine and the down arrow causes it to rotate towardsthe rear of the machine. What the <strong>Rotary</strong> <strong>Fixture</strong> actually does is remove the normal upand down Y-axis movement and replace it with a rotational movement. So instead of thesystem engraving down the flat page of a graphic, it takes that flat graphic and wraps itaround the cylindrical object. Now, using the Focus Tool method, focus on the glass. Afterfocusing is complete, press the “Z” button again and the arm will move back into its homeposition.11. If engraving a tapered object, the <strong>Rotary</strong> <strong>Fixture</strong> can be rotated to maintain proper focus.To do this, lift up the left end of the fixture and place some sort of spacer underneath thefixture to prop it up. Slide the spacer left and right until the surface of the object is parallelto the Focus Carriage. Be careful not to raise the <strong>Rotary</strong> <strong>Fixture</strong> too high, otherwise parts ofit might interfere with the Focus Carriage. NOTE: If you operate the fixture in this manner,you might need to taper your graphic in your software so that it matches the taper angle ofyour object. Otherwise, your graphic might appear to be tapered when it is engraved.Make sure thereis clearanceFocus CarriageRotateTapered ObjectSpacer(not supplied)Objects surface needs to be parallelwith Focus Carriage movement5
Determining Graphic PlacementWe now need to determine where we want the engraving to appear on the glass. You can usethe top ruler as a visual aid in referencing the engraving area of the glass or you can use theRed Diode Laser and the X-Y coordinate system to precisely place the graphic in your graphicsprogram. To be more precise, we will use the Red Diode Laser Pointer.To activate the Red Diode Laser Pointer, press the X-Y button while either in the “READY”,“MAIN”, or “FILE DISPLAY” menu. The following submenu will appear:Using the Motion Control buttons, position the Focus Carriage above the glass and observe theRed Diode <strong>Lasers</strong> position. Stop movement where you would like the top of the graphic (theright dotted line in the engraving area) to begin. Look at the coordinate display and read the“POS” “X” position. Retain this number in memory or write it down. Ignore the “Y” position.Now, position the red dot at the lowest point (the left dotted line in the engraving area) on theglass where you would like the engraving to end. Remember this “POS” “X” coordinate or writeit down.1 2 3 4 5 6 7 8 9 10 11 12 13 14 15 16 17 18 19 20 21 22 23 24123456789EngravingArea101112T O P V I E WIn this example our upper limit is about 20500X and the lower limit is 19000X. This translates to20.5 inches and 19.0 inches respectively because the coordinates are in 1/1000 inch units.We have now set up the glass to be engraved. Close all doors of the laser system, go to yourcomputer, and open your graphics software.6
Printer Driver SettingsWith your graphics software open, proceed immediately to “Printer Setup” and open the printerdriver. In the printer driver, click on the “Engraving Field” tab, is set to page orientation to”Landscape” and the size set to the maximum field size of the laser system. In this example,we will set it to 24 x 12 inches. Then, click on the “<strong>Rotary</strong> Installed” selection box and type inthe diameter of the glass that was measured.Notice that while typing in the diameter, the sizeof the height dimension changes automatically.Remember or write down this new page size. Inthis example, the diameter of the glass is 3.075inches. After typing in this number, observe thatthe new page height is now 9.66 inches. Clickon “OK” and go back to the graphics software’spage setup and change it to EXACTLY matchthe new page size that the Printer Driverestablished when the diameter of the object wastyped in.This new vertical page size is now the actual circumference of the object that is going to beengraved. From the top of the page (on screen) to the bottom represents one completerevolution of the <strong>Rotary</strong> <strong>Fixture</strong>. For example, if engraving a glass that has a diameter of 3.075inches (78.1 mm), the driver calculates that the circumference of the glass (and vertical pagesize) is 9.66 inches (245.4 mm).7
né léto. Po výbuchu sopky Tambora v roce 1883 1 se v NovéAnglii nevyvedla sklizeň, jelikož přišly přízemní mrazíky; místníobyvatelé tento rok přirovnávali k „roku bez léta“ (1816). Mnohéz těchto dřívějších erupcí byly o dost silnější než výbuchsopky Mount Pinatubo na Filipínách v roce 1992, a ten vykouzlilopravdu překrásné západy slunce a ochladil na jeden rokglobální klima o 0,3 °C.Druhým faktorem, který zřejmě mohl ovlivnit klima na několikstoletí či desítek let, je měnící se zářivý výkon Slunce. (Pozor,nezaměňovat se změnami oslunění zapříčiněnými výchylkamizemské orbity!) Družicová měření prováděná od roku 1981 prokázalamalé změny zářivého výkonu naší hvězdy, které časověkolidovaly se změnami počtu slunečních skvrn. Skvrny jako chlad -nější oblasti slunečního povrchu sice snižují množství vyzářenéenergie, avšak výsledný efekt je právě opačný: jsou-li skvrnyhojné, vydává Slunce více záření, protože zesílená aktivita zbyléhopovrchu lokální deficit více než vyrovnává.Počet slunečních skvrn i intenzita slunečního záření pravidel ně kolísá z maxima na minimum a zase zpátky v cyklu trvajícím 11 let. Tento 11letý cyklus slunečních skvrn lze dobřepo zorovat hvězdářským dalekohledem a pečlivé záznamy o němsa hají až do 18. století. Jenže téměř žádný klimatický záznam zezemského povrchu nenese přesvědčivé stopy teplotních změnv 11letém cyklu, neboť změny zářivého výkonu jsou jen malé.To však neznamená, že změny zářivého výkonu Slunce nemajívliv na delší časové úseky. Pozorování prováděná ve středověkuhvězdářskými dalekohledy napovídají, že „shluky“ 11letýchcyklů slunečních skvrn mohou vykazovat dosti odlišnou am -plitudu, a dokonce se mohou i zcela vytratit, jako se to stalo na -příklad v letech 1645–1715. Někteří (ale ne všichni) klimatolo gové věří, že tato kratší období s menší četností výskytuslu nečních skvrn (a tedy snížením zářivého výkonu Slunce) částečněpřispěly k ochlazení klimatu v „malé době ledové“.1V roce 1883 vybuchla sopka Krakatoa. Pozn. red.CO 2 NA HOUPAČCE / 183