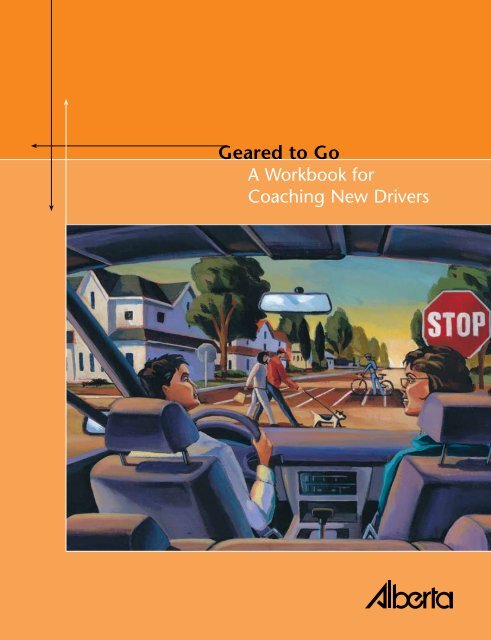
Geared to Go A Workbook for Coaching New Drivers
Geared to Go A Workbook for Coaching New Drivers
Geared to Go A Workbook for Coaching New Drivers

Create successful ePaper yourself
Turn your PDF publications into a flip-book with our unique Google optimized e-Paper software.
<strong>Geared</strong> <strong>to</strong> <strong>Go</strong>A <strong>Workbook</strong> <strong>for</strong><strong>Coaching</strong> <strong>New</strong> <strong>Drivers</strong>
Table of ContentsIntroduction........................................... 1Message <strong>to</strong> Parents................................ 2L.E.A.R.N. ...............................................4Getting Ready <strong>to</strong> <strong>Go</strong>.............................. 5Being a coach.................................. 5Communication tips........................ 6<strong>Coaching</strong> Instructions............................ 8Control the situation........................ 8Demonstrate the skills...................... 8Draw diagrams................................ 9Use running commentary................ 9Model a good attitude..................... 9Driver progressreports and practice log......................... 10Exercise 3 – BackingBacking in a straight line........................ 28Backing with slightright or left movements......................... 29Backing sharply <strong>to</strong> the left or right......... 29Driver’s Progress Report......................... 30Exercise 4 – Right and Left TurnsRight turns............................................. 32Left turns................................................ 34Driver’s Progress Report......................... 35Exercise 1 – Pre-Driving Habits,Instruments and ControlsPre-driving habits................................... 12Instrument panel.................................... 15Controls................................................. 16Pre-trip checks....................................... 16Driver’s Progress Report......................... 18Exercise 2 – Starting and S<strong>to</strong>ppingStarting.................................................. 21S<strong>to</strong>pping................................................ 24Driver’s Progress Report......................... 25Exercise 5 – ParkingParallel parking....................................... 38Hill parking............................................ 40Leaving hill parking................................ 41Angle parking......................................... 42Driver’s Progress Report......................... 45Exercise 6 – Residential DrivingTraffic control signs and signals.............. 48General residential driving tips............... 50Lane changing....................................... 51Intersections........................................... 52Driver’s Progress Report......................... 55
Table of ContentsExercise 7 – Driving in Moderate<strong>to</strong> Heavy TrafficTraffic control signs and signals.............. 58Driver’s Progress Report......................... 63Exercise 8 – Highway DrivingEntering a highway................................ 66Exiting a highway.................................. 67Highway driving safety........................... 70Exercise 11 – Handling CommonEmergency SituationsBrake failure........................................... 86Tire failure.............................................. 87Recovering if thevehicle goes off the road........................ 87Skids...................................................... 88Power skids............................................ 89Skids while turning corners.................... 90Driver’s Progress Report......................... 91School bus safety................................... 70Driver’s Progress Report......................... 71Exercise 9 – Driving After DarkDangers of driving after dark.................. 74Driving after dark in urban areas............ 74Driving after dark in rural areas.............. 75Driving after dark on highways.............. 75Driver’s Progress Report......................... 77Exercise 10 – Driving in Poor ConditionsDriving in rain........................................ 80Driving on snow or ice........................... 81Exercise 12 – Standard TransmissionVehiclesStarting the vehicle................................ 94Driver’s Progress Report......................... 98OverviewDriver’s Practice Log............................... 100Complete Progress Assessment.............. 104Complete ProgressAssessment – Sample............................. 111Notes..................................................... 113Diagrams and Drawings......................... 115Feedback and Comments....................... 117Driving in fog or smoke......................... 82Driver’s Progress Report......................... 83
IntroductionIn 2003, Alberta introduced a Graduated Driver Licensing (GDL) program <strong>for</strong> new drivers. The intent ofGDL is <strong>to</strong> improve road safety by extending the learning stage, regardless of age. <strong>New</strong> drivers will gainvaluable experience in driving and handling a vehicle under low-risk conditions. Then, when they areready, they will move on <strong>to</strong> more demanding and complex situations.As part of GDL, Alberta Transportation has created <strong>Geared</strong> To <strong>Go</strong>: A <strong>Workbook</strong> <strong>for</strong> <strong>Coaching</strong> <strong>New</strong> <strong>Drivers</strong>.This is NOT intended <strong>to</strong> take the place of professional driver training. It does not cover every detail ofthe driving process. Alberta Transportation strongly encourages new drivers <strong>to</strong> take a professionalDriver Education and Training Course. Practical, behind-the-wheel instruction is provided by qualifieddriver instruc<strong>to</strong>rs. These instruc<strong>to</strong>rs are licensed by Alberta Transportation under the Driver Trainingand Driver Examination Regulation.Professional driver education and training provides new drivers with the knowledge and skills necessary<strong>to</strong> become capable, proactive and responsible drivers throughout their driving careers.The GDL program includes a one-year manda<strong>to</strong>ry learning period be<strong>for</strong>e taking a standard Alberta roadtest. During this time, new drivers are encouraged <strong>to</strong> practise, under the supervision of an experienced,non-probationary, licensed driver. The practice should be during various types of driving conditions. Theseinclude driving after dark, ice and snow, very wet, and other challenging situations. Alberta Transportationrecommends at least 60 hours of adult supervised, hands-on training and coaching.NOTE: Additional helpful in<strong>for</strong>mation pertaining <strong>to</strong> areas where new drivers tend <strong>to</strong> make errors during thelearning phase and how <strong>to</strong> minimize or avoid these errors is available at www.saferoads.com under “<strong>Drivers</strong>”,listed in the main heading “Driver Safety.”Important NoticeThe in<strong>for</strong>mation in <strong>Geared</strong> <strong>to</strong> <strong>Go</strong>: A <strong>Workbook</strong> <strong>for</strong> <strong>Coaching</strong> <strong>New</strong> <strong>Drivers</strong> is provided <strong>for</strong>illustration and instruction only. It does not create a business or professional services relationshipwith Alberta Transportation. Laws and regulations vary and change from time <strong>to</strong> time. Relyingon the in<strong>for</strong>mation contained in <strong>Geared</strong> <strong>to</strong> <strong>Go</strong>: A <strong>Workbook</strong> <strong>for</strong> <strong>Coaching</strong> <strong>New</strong> <strong>Drivers</strong> is solelyat the learner's and coach's own risk.1
Message <strong>to</strong> Parents<strong>Geared</strong> To <strong>Go</strong>: A <strong>Workbook</strong> <strong>for</strong> <strong>Coaching</strong> <strong>New</strong> <strong>Drivers</strong> is <strong>to</strong> be used <strong>to</strong> coach your new driver <strong>to</strong> handlethe demands of the complex driving environment that exists <strong>to</strong>day. <strong>New</strong> drivers are most likely <strong>to</strong> beinvolved in a collision resulting in injury, or death, in the first few months of unsupervised driving. Drivingexperience and newly acquired skills are at their lowest stage of development during this time. For thisreason, Alberta Transportation strongly supports several months of supervised practice prior <strong>to</strong> and afterthe Class 5 licence has been earned, in addition <strong>to</strong> driver training. This will greatly assist your new driver<strong>to</strong> gain valuable experience and maturity, and will allow <strong>for</strong> the newness of being a driver <strong>to</strong> diminish.We encourage you <strong>to</strong> build a practice and experience plan <strong>for</strong> you and your new driver, and <strong>to</strong> carefullyreview the in<strong>for</strong>mation and messages contained in the Capital Health Region’s L.E.A.R.N. campaign thatis outlined on the next page. Alberta Transportation strongly urges you, the parents or guardians, <strong>to</strong>en<strong>for</strong>ce the restrictions outlined in the Graduated Licensing and L.E.A.R.N. programs. These restrictionsare identified as key areas necessary <strong>for</strong> promoting a safer passage in<strong>to</strong> driving as a mature, responsible,and well-in<strong>for</strong>med road user.For additional in<strong>for</strong>mation on Graduated Driver Licensing, visit www.saferoads.com and <strong>for</strong> in<strong>for</strong>mationrelated <strong>to</strong> Capital Health Region’s L.E.A.R.N. campaign, visit www.capitalhealth.ca/learn.2
An Essential Message<strong>for</strong> Parents of<strong>New</strong> <strong>Drivers</strong>What can parents do?The crash rate <strong>for</strong> teen drivers is low when driving is supervised by an adult.Make sure your teen gets a lot of supervised driving practice in a variety of dayand night driving situations. The best supervisor is an adult with good drivingskills who is old enough <strong>to</strong> be the teen driver’s parent.My teen has been <strong>to</strong> driving school,isn’t that enough?Driving schools offer a great opportunity <strong>for</strong> your teen <strong>to</strong> learn the basics ofdriving but he or she needs a lot more practice <strong>to</strong> master the complex skillsof safe driving.Did you know?Vehicle crashes are the number onekiller of young people in Alberta.Age, inexperience, distraction andpeer pressure are significant fac<strong>to</strong>rsin vehicle-related injuries and deathduring the teen years.Half of all Alberta teens who weretested following a serious vehiclecrash had high levels of blood alcohol.One in every five new drivers will beinvolved in a collision during theirfirst two years of driving.Crash rates <strong>for</strong> young driversare highest when there are otherteen passengers in the vehicle andat night.
How can we reduce the risk of collisions and injury?Graduated Driver Licensing (GDL) is a great start <strong>to</strong> reduce the risks <strong>for</strong> new drivers but thereis even more that you can do. Help your teen LEARN <strong>to</strong> drive with these additional rules:LEARNLimit t h en u m b e r o fpa s s e n g e r sEv e ry o n ew e a r s as e at b e lt –e v e ry t i m eAf t e r d a r k,it’s t i m et o pa r kRu r a l r o a d sm e a n m o r er i s kNo a l c o h o lo r d r u g s –e v e rPassengers are a huge risk fac<strong>to</strong>r <strong>for</strong> new young drivers.Fatal crashes involving 16-year-old drivers are more likely <strong>to</strong> occurwhen there are other teens in the vehicle – and the risk increaseswith every additional teen passenger. Consider a no-passenger rule<strong>for</strong> at least the first year of unsupervised driving. <strong>New</strong> drivers needtime <strong>to</strong> practise without the distraction of other teen passengers.Seatbelts provide the best protection in a crash,reducing the chance of injury or death by more than50%. Yet, over half of Alberta’s teen drivers and passengers whowere seriously injured in crashes over a five-year period were notwearing seatbelts. Your teen should only drive when everyone inthe vehicle is buckled up.Most deadly crashes involving teens happen between9:00 p.m. and 6:00 a.m. Consider restricting your teen’s drivingduring these hours, especially on Friday and Saturday nights. You canrenegotiate this once your teen shows responsibility and gets moredriving experience.In Alberta, over 75% of serious injury crashes involvingteens happen in rural areas. There are many reasons <strong>for</strong> this,including <strong>to</strong>o many passengers in the vehicle, limited use of seatbelts,road conditions and alcohol use. If your teen must drive on ruralroads, consider setting some <strong>to</strong>ugh rules on where, when and withwhom they can drive.The effects of alcohol on driving per<strong>for</strong>mancecan begin with the first drink. The risk of a crashincreases significantly at the .05 blood alcohol level or just overhalf of the legal limit of .08. Alberta’s GDL puts <strong>to</strong>ugh restrictionson alcohol use during the learner and probationary periods (zeroalcohol level). Consider making your own no alcohol or drug policyafter your teen gets a full privilege license.As a parent, you are involved in your teenager’s driving in many ways – fromteaching and supervision <strong>to</strong> paying <strong>for</strong> insurance and controlling access <strong>to</strong> the familycar. You have the right <strong>to</strong> set rules <strong>for</strong> your family and you will not be alone. Mostparents do set limits – whether their teens admit it or not!When you help your teen LEARN <strong>to</strong> drive,you make the road a safer place <strong>for</strong> everyone.For more in<strong>for</strong>mation, visit www.saferoads.comThis Essential Message <strong>for</strong> Parents is brought <strong>to</strong> you by Injury Prevention partners in Alberta whoare working <strong>to</strong> reduce the number of teenagers killed and injured every year in our province.
Getting Ready <strong>to</strong> <strong>Go</strong>Being a coachBeing a coach requires committing <strong>to</strong> many hours on the road, demonstrating driving skills and coachingthe learner through a variety of skills. Be<strong>for</strong>e you decide <strong>to</strong> be a coach, ask yourself the following.Do I have the time?The new driver needs a lot of practice <strong>to</strong> become a safe and capable driver. The recommended practicetime is a minimum of 60 hours.Am I a safe, skilled driver?Safe drivers don’t do things like speed, run amber lights or tailgate. Make sure you’re the right person <strong>to</strong>help a learner become a safe driver.Do I have a good relationship with the new driver?Tensions can get high on the road. Be sure your relationship can handle the stress of many hours ofdriving practice.Do I communicate well?A coach needs <strong>to</strong> be able <strong>to</strong> listen, speak clearly and give instructions and explanations that are easy <strong>to</strong>understand.Do I have the patience <strong>for</strong> this job?Accompanying a learner can be challenging at times. Ask yourself if you have the calm nature needed <strong>for</strong>the task.Choosing a coachThe new driver also needs <strong>to</strong> think carefully about whom <strong>to</strong> choose <strong>for</strong> a coach. The samequestions can apply. Does this person have:• time <strong>to</strong> commit <strong>to</strong> the practice I need?• safe and confident driving skills and a current Alberta non-probationary Class 5 driver’slicence? Can my coach be relied on <strong>to</strong> set a good example by not driving while impaired byalcohol or drugs, or taking other risks on the road? Is this person familiar with traffic rulesand regulations? Does this person always drive defensively?• a good relationship with me so I can learn without having tensions arise between us?• communication skills that get in<strong>for</strong>mation and ideas across clearly?• patience and a calm manner required <strong>to</strong> guide me effectively?5
Communication tipsCommunicating clearly with a new driver is important. These tips may help.Keep focusedLearning <strong>to</strong> drive requires focus and concentration. Save conversation not related <strong>to</strong> driving <strong>for</strong> later.Keep calmWhen you are talking <strong>to</strong> the learner, be clear and calm. This may not always be easy. It helps <strong>to</strong> choosesafe, low-traffic driving routes and <strong>to</strong> give well-timed instructions. Remember, a new driver will need moretime <strong>to</strong> think and react than an experienced driver.Be positiveA new driver needs reassurance about making progress. Avoid criticism and use positive comments. Try <strong>to</strong>end each practice session on a positive note. Helpful sentences like "That turn was good. Next time youcould try . . . ." or "What did you like about the way you . . .?" help focus the learner’s mind on possibleimprovements.Give clear feedbackThe best-trained driver is one who understands what <strong>to</strong> do and why. You can encourage this type ofunderstanding by providing detailed feedback right away. For example, "I like the way you looked in alldirections be<strong>for</strong>e you made that turn. It would have been really easy <strong>to</strong> cut off that bike coming up besideyou," creates a logical reason in the learner’s mind <strong>for</strong> a required behaviour.Coach’s TipWhen you give feedback, always have the learner pull over <strong>to</strong> the side of the road. At the end ofeach session, discuss the driving skills that have improved and areas that require work. It’s a goodidea <strong>to</strong> draw diagrams <strong>to</strong> explain important points. Keep a written note of areas needing morepractice as a reminder <strong>for</strong> the start of the next session.Be careful with the word ‘right’Be careful not <strong>to</strong> say ‘right’ when you really mean ‘okay’ or ‘yes.’ This can avoid confusion and sudden,unplanned right turns.Use hand gestures <strong>for</strong> pointing out directionsMany people find right and left directions confusing, especially when they also have <strong>to</strong> deal with traffic.6
It’s often helpful <strong>to</strong> rein<strong>for</strong>ce your instruction with a hand gesture, pointing the way the driver should go.Know when <strong>to</strong> talkWhen new drivers are practicing a skill, they need <strong>to</strong> concentrate. Be careful not <strong>to</strong> give <strong>to</strong>o manyinstructions at one time.Ask questionsWith a little help, new drivers can often figure out what they did wrong. The answers they come up withwill be remembered better than the advice you give. Here are some key questions <strong>to</strong> ask.• Where do you think you could improve this activity?• Where were your eyes looking?• What was your speed?• Did you see that car (or bicycle or pedestrian)?Throughout the practice sessions in this book are Stay Safe boxes that highlight safe driving tips. Gettingacross the concept of responsible driving isn’t easy, but it will make the difference of a lifetime. Try <strong>to</strong>make driving attitudes a frequent conversation <strong>to</strong>pic. You may want <strong>to</strong> encourage your local school orcommunity service group <strong>to</strong> put on a program on the <strong>to</strong>pic of driver attitudes and safe driving. This couldinclude videos, speakers and discussions.Communication tips<strong>Go</strong> over the following tips with the learner so you will know what works well and what <strong>to</strong> adjust.Have the learner think about the following.• Is my coach speaking clearly and loudly enough <strong>for</strong> me <strong>to</strong> hear?• Do I understand what my coach is saying?• Would I learn better if my coach used another method, such as drawing me a diagram orencouraging me <strong>to</strong> repeat the things that I find difficult?Encourage the learner <strong>to</strong> let you know about any confusion at the end of an explanation. If thereis something that is still not clear, go over the situation again. Make sure what you are saying isunders<strong>to</strong>od by having your explanation repeated back <strong>to</strong> you.7
<strong>Coaching</strong> InstructionsControl the situation• The first rule when helping someone <strong>to</strong> develop driving skills is <strong>to</strong> practise in a safe setting. <strong>New</strong>drivers may be overconfident, insisting that they are ready <strong>to</strong> take on peak hour traffic after a coupleof lessons. Others may lack confidence, wanting <strong>to</strong> avoid even the simplest driving activities. Theoverconfident driver needs firm guidance <strong>to</strong> prevent risky situations. For the less confident driver, bepatient and encouraging. Use diagrams and demonstrate the activities <strong>to</strong> increase both understandingand confidence.• In the early sessions, controlling a situation often means getting the vehicle in position <strong>for</strong> the student<strong>to</strong> drive. For example, be<strong>for</strong>e the learner has learned <strong>to</strong> back up, it may be necessary <strong>for</strong> you <strong>to</strong> backthe car out of the driveway and position it <strong>to</strong> drive straight ahead.• Early practice sessions should take place during daylight hours in an area of low traffic such as a quietstreet or empty parking lot. Move in<strong>to</strong> moderate traffic only when the learner can per<strong>for</strong>m the basicskills smoothly and with control. Moderate traffic would be ordinary street traffic at non-peak hours.• Practise <strong>for</strong> a minimum of one hour but not more than two hours at a time. After that, the learnermay s<strong>to</strong>p learning effectively. Shorter practice sessions are best at first. If the learner becomes tired orfrustrated during practice, take a break.• Don’t move on <strong>to</strong> the next skill until the learner is per<strong>for</strong>ming well and is confident about thepresent task.• Always plan driving routes in advance, making sure they aren’t <strong>to</strong>o difficult. The best way <strong>to</strong> makedriving practice safe is <strong>to</strong> be sure the driving situation does not place unrealistic demands onthe learner.• Once the learner is skilled and confident in moderate traffic, it is time <strong>to</strong> move in<strong>to</strong> higher risk settingssuch as driving in the dark, on the highway, or in poor weather.Demonstrate the skillsAn effective method <strong>for</strong> teaching a driving skill is <strong>to</strong> demonstrate it correctly first.• Explain each step as you go.• Describe what you are doing and why you are doing it.• Let the learner copy what you have done.• Help teach safe habits by emphasizing the see-think-do habit:See Help the driver watch <strong>for</strong> possible hazards."What do you see ahead?"Think Help the driver <strong>to</strong> think about what might happen and possible solutions."See that bicycle? What could happen here? What should you do?"Do Help the driver <strong>to</strong> decide what <strong>to</strong> do.8
"Yes, it’s a good idea <strong>to</strong> give him a bit more space."Draw diagramsDrawing diagrams is an effective way <strong>to</strong> teach new skills.• Use diagrams <strong>to</strong> show what should happen be<strong>for</strong>e the learner tries a complicated skill, such as entering anintersection <strong>to</strong> make a left turn.• Ask the learner <strong>to</strong> pull over <strong>to</strong> the side of the road and draw the diagram <strong>to</strong>gether. Then ask the learner <strong>to</strong>repeat back what <strong>to</strong> do.• When a skill doesn’t go well, pull over and use diagrams again <strong>to</strong> point out what was done, and whatshould be done.• Repeat the in<strong>for</strong>mation once or twice and demonstrate if necessary.<strong>Geared</strong> <strong>to</strong> <strong>Go</strong> includes some blank pages at the end of the book <strong>for</strong> drawing diagrams. Keep a notepad in thecar <strong>for</strong> additional diagrams.Use running commentaryOne technique used by many professional driver educa<strong>to</strong>rs is ongoing description or running commentary. Thisis a way of ‘talking through’ driving procedures.• Describe what you see ahead and how you plan <strong>to</strong> respond when demonstrating a driving technique.• Encourage the learner <strong>to</strong> take over the running commentary.• Ask <strong>for</strong> explanations with questions such as "What are you seeing?" and "What are you going <strong>to</strong> do now?"Not all new drivers find this easy <strong>to</strong> do, so don’t be discouraged if it takes a while. Some drivers who havedifficulty with basic skills will find it easier <strong>to</strong> talk later on, after feeling more com<strong>for</strong>table with the vehiclecontrols.<strong>Go</strong>od commentary should rein<strong>for</strong>ce what the driver sees, what should be done and why. "If I’m going <strong>to</strong> turnleft, I need <strong>to</strong> change lanes. I’ll check the mirrors <strong>to</strong> see if anyone is in that lane. Now I’ll shoulder check . . . putthe turn signal on . . . shoulder check again. Okay, I’ll change lanes. Now I can see the red light coming up, soI’ll start <strong>to</strong> slow down and s<strong>to</strong>p."Model a good attitudeBecause you will be an influence and a model, the learner may adopt your attitude <strong>to</strong>ward driving. Make sureyou pass on an attitude that supports good judgment and responsibility. For example, never coach or supervisea new driver while you are impaired by alcohol or drugs, or encourage the learner <strong>to</strong> take unnecessary risks.If the driver is taking lessons from a driving school, make sure you find out from the instruc<strong>to</strong>r what your newdriver has learned and what needs <strong>to</strong> be practised. Feel free <strong>to</strong> change the order of the practice sessions in thisbook <strong>to</strong> follow the order used by the driving school.9
Driver progress reports and practice logThe Driver Progress Report at the end of each exercise provides the opportunity <strong>for</strong> coaches <strong>to</strong> evaluate andrecord new drivers’ progress as they gain driving experience and learn new skills. Pho<strong>to</strong>copy the progressreport as often as you need <strong>to</strong> and use it <strong>for</strong> every practice session. When the learner receives a good orfair marking on the Progress Report three times in a row, concentrated practice <strong>for</strong> the exercise is no longerneeded. At this time you can complete the sign-off box. However, have the learner maintain the skills bypractising them every two <strong>to</strong> four weeks throughout the one-year GDL Class 7 licence stage.A Complete Progress Assessment is included at the back of the workbook. This should be used once all theindividual exercises are completed and signed off. It is an overall evaluation of the new driver’s progress.The assessment can be pho<strong>to</strong>copied and used as often as needed.A Driver Practice Log is also included at the back of the workbook. Use the practice log <strong>to</strong> keep track ofhours <strong>for</strong> each practice session and <strong>to</strong> help track the goal of 60 practice hours on the road. The more newdrivers practice, the more their skills and safety will improve.10
Exercise 1Pre-Driving Habits, Instrumentsand ControlsRecommended practice time: 3 hours minimum21
1Learning <strong>to</strong> drive is exciting. It may even be a little nerve-racking <strong>for</strong> some new drivers. Be<strong>for</strong>e starting ou<strong>to</strong>n the road, it’s critical <strong>to</strong> take the time <strong>to</strong> teach and rein<strong>for</strong>ce good habits inside and outside the vehicle.Coach’s TipBe<strong>for</strong>e the first practice session, check the expiry date and condition codes on the new driver’slicence. For each exercise, make sure you and the new driver have your driver’s licences with you,as well as the vehicle insurance and registration.Review and discuss the in<strong>for</strong>mation in the following sections. Review each section at home or in thelegally parked vehicle and then practise the required skills.Pre-driving habitsCertain activities should become habits by having them practised every time a driver gets in<strong>to</strong> a vehicle.Entering and exiting a vehicleExplain how <strong>to</strong> enter a vehicle parked on a street. The driver should always approach the driver’s doorfrom the front of the vehicle. This way the driver can keep an eye on approaching traffic <strong>to</strong> determinewhen it is safe <strong>to</strong> open the vehicle door. When exiting a vehicle parked on a street the driver should alwaysdo the following.• Check the inside and outside rear view mirrors <strong>for</strong> traffic.• Make a shoulder check left be<strong>for</strong>e opening the door.• Open the door at a safe time.• Exit walking <strong>to</strong> the rear of the vehicle facing traffic.Procedures be<strong>for</strong>e startingDemonstrate the following basic procedures be<strong>for</strong>e putting a vehicle in motion. These can be done be<strong>for</strong>eor after explaining the vehicle’s instruments and controls.With the learner in the driver’s seat and the vehicle parked, teach about door safety. Explain how <strong>to</strong> adjustand properly position the seat, head restraint, seat belt and mirrors. Be thorough in your explanations. Thefollowing instructions will help the driver follow correct procedures.DoorsMany people don’t think about locking the vehicle doors when they are inside, but this should become ahabit. Lock the doors <strong>to</strong>:• prevent unplanned openings.• keep unwanted persons out of the vehicle.• reduce the chance <strong>for</strong> doors <strong>to</strong> open in a collision.12
SeatAdjust the angle of the seat back <strong>to</strong> an upright position and move the seat <strong>to</strong> a position that suits thedriver. The learner should be able <strong>to</strong> do the following.• Push the small of the back in<strong>to</strong> the seat.• Have a slight bend in the legs, approximately a 45 degree angle <strong>to</strong> the floor.• Pivot the right foot <strong>to</strong> the brake when the ball of the foot is placed on the gas pedal and the heel ison the floor. Try not <strong>to</strong> lift the foot; just ensure the seat position allows pivoting between the gas andbrake pedals.• Keep the arms slightly bent. The left hand should be at the 9 or 10 o’clock position and the righthand at the 2 or 3 o’clock position of the steering wheel.• Position the seat within reach of all the controls.1Stay Safe – Air BagsIf your vehicle has a driver side air bag, position the seat so that the controls can be reached andthe driver is at least 25 centimetres from the steering wheel. (The distance between the elbow andthe wrist is about 25 centimetres.) This allows room <strong>for</strong> the air bag <strong>to</strong> inflate and protects againstfurther injury. Consult your owner’s manual <strong>for</strong> safety precautions.Head restraintA head restraint is not a place <strong>to</strong> rest the head — it is an important safety feature.• Prevent neck injuries by making sure the centre of the restraint is level with the <strong>to</strong>p of the ears.The head restraint must be at the back of the head and not at the base or curve of the neck.13
Seat belts1It is the law. Everyone in a vehicle must wear a seat belt.• Ensure that the seat belt is not loose, damaged, or twisted.• Place the lap belt across the hips as low as possible.• Wear the shoulder belt over the shoulder and snug across the chest.It should permit free movement and the ability <strong>to</strong> reach <strong>for</strong>ward <strong>to</strong>use all of the vehicle’s controls. It should never be worn under the arm,behind the back or with the seat dropped back.Stay Safe – Seat BeltsThe impact your body receives in a 48 km/hr crash is about the same as falling from a third floorwindow <strong>to</strong> the hard ground below. By wearing your seat belt, you reduce the chance of beinginjured or killed by 55 percent.-Transport Canada-MirrorsMirrors are the driver’s extra eyes.• Show how <strong>to</strong> use manual and power mirror controls.• Explain and demonstrate blind spot zones.• Adjust the mirrors correctly.- Adjust the side view mirrors so that each side of the vehicle is just visible in the mirror of that side.- Set the rear view mirror so it frames the rear window.- Explain the rear view mirror’s daytime and nighttime adjustments.BAUsing the inside rear view mirror– Vehicle A can see Vehicle BBCAUsing the left outside mirror– Vehicle C is visibleBCDAUsing both outside mirrors and rearview mirror – Vehicle A can see VehiclesB, C and DBAVehicle A can not see Vehicles E andF, either in the mirrors or throughperipheral side vision. These vehiclesare said <strong>to</strong> be in Vehicle A’s blind spot.14AB
Instrument panelDo not take <strong>for</strong> granted that the learner knows how <strong>to</strong> read and interpret the vehicle instruments.• Take time <strong>to</strong> explain the more complex instruments and gauges, especially if the learner does notseem <strong>to</strong> understand or is asking questions.• Park the vehicle in a safe and legal place and have the learner sit in the driver’s seat.• <strong>Go</strong> over the instrument panel and explain:- the meaning of each gauge, warning light or instrument.- how <strong>to</strong> interpret them.- what <strong>to</strong> do if a warning light comes on or if a gauge shows an abnormal reading or does notwork correctly.11 2 3 4 5 6 770 80 90 100 11060120200 5 263 7 850130104030126 31401500Km/h 160RPM X 10060708030405013 12 11 10 9 81. Alterna<strong>to</strong>r(gauge or light)2. Parking Brake Light3. Oil Pressure(gauge or light)4. High Beam5. Seat Belt6. Turn Signals7. Temperature8. Fuel Gauge9. Tachometer10. Hazard Switch11. Odometer12. Trip Odometer13. SpeedometerCoach’s TipTo be sure all the in<strong>for</strong>mation is covered on the various controls and warning lights, refer <strong>to</strong> thevehicle owner’s manual.15
1ControlsAn experienced driver understands vehicle controls. However, the new driver will have little or noknowledge of what a control is or how it should be used effectively and safely. For example, it is notenough <strong>to</strong> point out the various gear positions. Each gear position, function, and correct selection needs<strong>to</strong> be explained.Using the controls• Have the learner operate each of the controls while the vehicle is parked and the engine is notrunning. (In some cases the engine will need <strong>to</strong> be running <strong>to</strong> explain the operation and the properprecautions of each control.)• Demonstrate the proper use of the controls.Checking under the hood• Show the learner how <strong>to</strong> open the hood.• Demonstrate checking the engine oil and other fluid levels. Always refer <strong>to</strong> the vehicleowner’s manual.• Stress safety concerns. Explain the caution needed when checking fluid levels when the engine hasbeen running. (For example, the radia<strong>to</strong>r cap should not be opened when the engine is warm. Thesystem is pressurized and there is a danger of being badly scalded or burned.)Pre-trip checksFor the first few practice sessions, have the learner per<strong>for</strong>m a detailed pre-trip vehicle inspection. Thisprocedure should be repeated <strong>for</strong> each practice session until the new driver has demonstrated the checksand inspections without difficulty. From this point, the detailed inspection does not need <strong>to</strong> be done everytime. The learner can switch <strong>to</strong> the daily pre-trip check be<strong>for</strong>e driving.Detailed pre-trip checkHave the learner go through this detailed pre-trip list <strong>for</strong> the first few sessions and check <strong>for</strong> the following.(These check lists can be pho<strong>to</strong>copied and used <strong>for</strong> each practice session.)Under the hoodFluid levels (oil, radia<strong>to</strong>r, power steering, transmission, brake, and windshield washer).Leaks on the engine or on the ground.Belts <strong>for</strong> wear, damage and tension.Hoses <strong>for</strong> leaks, damage and tightness.Battery terminals and clamps <strong>for</strong> corrosion and tightness.16
Outside the vehicleHeadlights, tail lights, brake lights, signal lights and warning lights <strong>for</strong> properworking order.Windows and windshield <strong>for</strong> cleanliness and damage.Wiper blades <strong>for</strong> wear, damage and condition.Mirrors <strong>for</strong> cleanliness.Tires <strong>for</strong> inflation, sufficient tread, damage and bulges.Under the vehicle <strong>for</strong> fluid leaks.Check ahead, behind and <strong>to</strong> both sides <strong>for</strong> children and pedestrians be<strong>for</strong>e enteringthe vehicle. Check also <strong>for</strong> obstacles that could interfere with vehicle movement.1Inside the vehicleVehicle registration and insurance.Horn, wipers and washers, heater and defroster fans <strong>for</strong> operation.Gauges, instruments and warning lights.Adequate brakes (check <strong>for</strong> excess pedal movement).Adequate steering (check <strong>for</strong> excess movement of the steering wheel).Packages or objects that could be a safety hazard in the event of an emergency s<strong>to</strong>p.Daily pre-trip checkAfter the first few sessions, have the learner go through this pre-trip check regularly.Ahead, behind and <strong>to</strong> both sides <strong>for</strong> children, pedestrians or obstacles while walkingaround the vehicle.Windows, mirrors and lights <strong>for</strong> cleanliness.Tires <strong>for</strong> inflation, cuts, bulges and sufficient tread.Oil or fluid patches under the vehicle.Seat, seat belt, head restraint and mirrors <strong>for</strong> proper adjustment.Loose packages or objects that could be a safety hazard in the event of anemergency s<strong>to</strong>p.Vehicle registration and insurance must be with the vehicle.17
1Driver’s Progress Report – Exercise 1Pre-Driving Habits, Instruments and ControlsPer<strong>for</strong>mance Assessment (Circle One)1-<strong>Go</strong>od 2-Fair 3-Needs PracticePre-Driving HabitsEnter and exit the vehicle 1 2 3Be<strong>for</strong>e starting:• Lock doors 1 2 3• Adjust seat 1 2 3• Adjust head restraint 1 2 3• Seat belt use 1 2 3• Mirror use 1 2 3Instrument Panel and Controls• Using the controls 1 2 3• Checking under the hood 1 2 3Pre-Trip Checks• Under the hood 1 2 3• Outside the vehicle 1 2 3• Inside the vehicle 1 2 3Comments:_____________________________________________________________________________________________________________________________________________________________________________________________________________________________________________________________________________________________Coach: _______________________________________________<strong>New</strong> Driver: _______________________________________________Date: _______________________________________________18
Exercise 2Starting and S<strong>to</strong>ppingRecommended practice time: 3 hours minimum2
2NoteThis exercise provides in<strong>for</strong>mation and driving procedures <strong>for</strong> au<strong>to</strong>matic transmissions only.For standard transmission vehicles, please refer <strong>to</strong> Exercise 12.The best place <strong>for</strong> the new driver <strong>to</strong> practise this exercise is in a large empty parking lot. If thereare painted lines in the lot, they can be used <strong>to</strong> represent roads, curbs, other vehicles and parkingspaces. As the learner gains experience and becomes more skilled, practise can begin on quiet roads.The following instructions will help the new driver begin driving safely.Coach’s TipThe first sessions should be planned so that the new driver will not drive through medium or heavytraffic <strong>to</strong> get <strong>to</strong> the practice area. If necessary, you drive the vehicle <strong>to</strong> the practice area and havethe new driver take over once there.Review and discuss the in<strong>for</strong>mation in the following sections. Review each section at home or in thelegally parked vehicle and then practise the required skills.Be<strong>for</strong>e teaching starting and s<strong>to</strong>pping, help the new driver learn basic techniques.• Teach the proper methods <strong>for</strong>:- gear selection.- moving the vehicle away from a curb.- driving in a straight line.- returning <strong>to</strong> the curb.- parking the vehicle.• Have the learner practise and learn <strong>to</strong>:- select and use the gears properly.- operate the gear-shift once the engine is running.- hold and turn the steering wheel correctly.- slow and s<strong>to</strong>p the vehicle by taking the foot off the gas pedal and use the brake correctly.- move the vehicle <strong>for</strong>ward smoothly and s<strong>to</strong>p smoothly.- make simple turns and partial turns.- use correct turning and steering recovery methods.- per<strong>for</strong>m smooth increases and decreases of speed.- watch other traffic and be aware of the surroundings.Stay Safe - Signal LightsIf the signal lights do not function any time during driving, use hand signals until they are repaired.20
Starting• Remind the learner of procedures <strong>to</strong> follow be<strong>for</strong>e starting the vehicle. This includes identifying whichgauges and warning lights should be checked be<strong>for</strong>e and after starting the engine.• Explain the correct use of the starter.• Have the learner demonstrate the following sequence <strong>for</strong> starting the engine.- Ensure the park brake is applied and the right foot is firmly on the brake. (The park brake may be ahand brake or a foot brake.)- Ensure the vehicle is in the proper gear <strong>for</strong> starting the engine (Park or Neutral <strong>for</strong> au<strong>to</strong>matictransmissions, Neutral <strong>for</strong> standard transmission vehicles with the clutch depressed).- Turn the key in the ignition <strong>to</strong> start the engine. Release the key as soon as the engine starts.- Release the park brake and maintain firm pressure on the brake.2Moving <strong>for</strong>ward from a parked position (no vehicle in front)• Follow procedures <strong>for</strong> selecting appropriate gear.• Scan in all directions (360 degrees). Look <strong>for</strong> the immediate hazards.• Check the rear and side view mirrors.• Do a shoulder check.• Hold the steering wheel with the right hand on the lower right quadrant (4 <strong>to</strong> 5 o’clock).• Activate the turn signal.• Do a shoulder check again. When safe <strong>to</strong> proceed, accelerate slowly and smoothly, steering away fromthe curb or edge of the road.• Straighten the steering wheel while moving in<strong>to</strong> the first available traffic lane.• Accelerate smoothly and check that the signal light is off.Moving <strong>for</strong>ward from a parked position (vehicle in front)• Follow procedures <strong>for</strong> selecting appropriate gear.• Scan in all directions. Look <strong>for</strong> the immediate hazards.• Ease off the brake, moving ahead very slowly. Steer sharply all the way <strong>to</strong> the left using the hand-overhandsteering method. S<strong>to</strong>p. The vehicle should not have moved more than about one metre.• Check the rear and side view mirrors.• Do a shoulder check.• Place the right hand at the 12 o’clock position on the steering wheel and signal left.• Do a shoulder check again. When safe <strong>to</strong> proceed, move <strong>for</strong>ward slowly by accelerating slightly.Be careful that the right front corner of the vehicle will clear the vehicle in front. Use hand-over-handsteering <strong>to</strong> recover while moving smoothly in<strong>to</strong> the first available traffic lane.• Accelerate smoothly and check that the signal light is off.21
2Driving down the roadIt is important the new driver learns effective search and scanning techniques. Provide focal points suchas a parked car at the end of the street or the next set of lights. This will rein<strong>for</strong>ce proper visual skills. Notlooking far enough down the road is one of the key reasons <strong>for</strong> poor driving. Looking ahead and scanningshould be stressed during every practice session. This can be rein<strong>for</strong>ced by correcting the driver’s visualhabits when necessary.• Teach the learner:- where <strong>to</strong> look (well ahead, side and rear view mirrors, along the intended path).- when <strong>to</strong> look (while driving straight or turning, when anticipating slowing or s<strong>to</strong>pping).- what <strong>to</strong> look <strong>for</strong> (next available lane, obstructions and hazards, other vehicles and pedestrians).- what is important <strong>to</strong> the driving task and what is not (potential hazards, objects that will directlyaffect my intended path).• Teach the learner that vision must be high (above the nose) and wide. Vision should be along theintended path and not just over the hood. Looking over the hood will affect the driver’s ability <strong>to</strong>:- steer (<strong>to</strong> hold correct road position).- maintain the correct speed (not looking far enough down the road can result in uneven speed).- turn (<strong>to</strong> aim at the correct place).- s<strong>to</strong>p (<strong>to</strong> judge time and distance).- function safely on the road.Stay SafeAlways keep the vehicle in the centre of the lane, whether driving in a straight line or turning.The following instructions will help the new driver proceed safely down the road.• Maintain a ‘big picture’ when driving by using good visual habits. These habits include:- establishing enough visual lead time.- watching <strong>for</strong> traffic developments or hazards ahead.- checking rear view mirrors often <strong>for</strong> traffic patterns behind.- watching <strong>for</strong> traffic slowing down, turning or s<strong>to</strong>pping.- conducting ground searches <strong>for</strong> hazards or obstacles that could interfere with the path of travel.- watching <strong>for</strong> traffic control devices and signs.• Look well down the intended path of travel <strong>to</strong> stay in the centre of the lane. A driver should look 12<strong>to</strong> 15 seconds (about 1 <strong>to</strong> 1 1/2 blocks) ahead of the vehicle in urban areas and about 25 secondsahead in rural areas.• Make slight steering wheel corrections or movements <strong>to</strong> drive in a straight line.• Begin <strong>to</strong> reduce speed at appropriate distances from intersections or when coming <strong>to</strong> a s<strong>to</strong>p.• Base the speed according <strong>to</strong> road, weather and traffic conditions.• Check left, centre and right <strong>for</strong> other traffic be<strong>for</strong>e proceeding through an intersection or whenleaving a s<strong>to</strong>pped position at an intersection.22
Coach’s TipIn some instances it may be helpful <strong>for</strong> you <strong>to</strong> use different wording <strong>to</strong> describe a required action,especially when making reference <strong>to</strong> time or speed. For example, rather than saying “Your visuallead time should be 12 <strong>to</strong> 15 seconds,” a new driver may better understand “You should look atleast one block ahead.”2Returning <strong>to</strong> a parked position• Reduce speed.• Check the rear and side view mirrors.• Do a shoulder check.• Signal intent <strong>to</strong> move in<strong>to</strong> the curb lane or edge of the road.• Move safely in<strong>to</strong> the curb lane or <strong>to</strong> the edge of the road, using the proper steering technique <strong>to</strong>position the vehicle <strong>for</strong> the park. (The legal distance is 50 centimetres from the curb. Part of thecoach’s responsibility is <strong>to</strong> teach legal parking distances and describe a simple method <strong>for</strong> the driver <strong>to</strong>judge the distance when doing a curb park.)• Use short glances well along the intended path, with glances <strong>to</strong> the curb or edge of the road, as aneffective method <strong>for</strong> positioning next <strong>to</strong> the curb.• Use small steering wheel movements only. (Over-steering is the result of staring at the curb over thehood of the vehicle.)• Continue <strong>to</strong> move ahead, but while still some distance from the actual park, begin <strong>to</strong> bring the vehicle<strong>to</strong> a smooth, safe s<strong>to</strong>p.• Keep the right foot firmly on the brake after the s<strong>to</strong>p, select park gear and apply the park brake.• Turn off the engine.Coach’s TipWhen parking, the park brake may be applied be<strong>for</strong>e or after the au<strong>to</strong>matic transmission is placedin the park position, as long as the right foot remains firmly on the brake <strong>to</strong> secure the vehicle.This procedure is acceptable in all exercises.23
2S<strong>to</strong>ppingAs in all other activities, visual skills are crucial here. As the vehicle slows down, new drivers might droptheir vision <strong>to</strong>ward the front of the vehicle. This is the beginning of poor judgment of speed and distance.The following instructions will help the learner brake correctly.• Keep vision well ahead of the vehicle. (Watch the learner’s head and chin. If the chin goes up, theeyes go down. Keeping the chin down will ensure the vision stays along the intended path.)• Anticipate the possible need <strong>to</strong> slow down or s<strong>to</strong>p. Part of this includes checking the rear view mirror.Do not wait until vehicles in front begin braking. Scan well ahead and assess the driving situation.Leave at least a two <strong>to</strong> three second following distance. Plan ahead and don’t just react <strong>to</strong> a situation.• Cover the brake <strong>to</strong> s<strong>to</strong>p or slow down. Apply some pressure on the brake as soon as it is covered.Gradually reduce <strong>to</strong> half speed. This will help in a couple of areas. If the time and space needed <strong>to</strong>s<strong>to</strong>p or <strong>to</strong> avoid an object is misjudged, it is better <strong>to</strong> brake more in the beginning rather than nearthe required s<strong>to</strong>pping point. Also, if the vehicle behind is following <strong>to</strong>o closely, braking sooner willslow that vehicle down well in advance of the required s<strong>to</strong>pping point. This reduces the possibility ofbeing hit from the rear.Coach’s Tip<strong>Drivers</strong> who look directly over the hood of the vehicle tend <strong>to</strong> brake hard and late because theirvision is not far enough ahead <strong>to</strong> assess time and space properly. Remember – if the chin is up, theeyes are down.24
Driver’s Progress Report – Exercise 2Starting and S<strong>to</strong>ppingPer<strong>for</strong>mance Assessment (Circle one)1-<strong>Go</strong>od 2-Fair 3-Needs Practice2Moving Forward from a Parked PositionVision:• Scans in all directions 1 2 3• Shoulder checks 1 2 3• Mirror checks 1 2 3Speed:• Use of brake 1 2 3• Use of gas pedal 1 2 3General Requirements:• Hand position (no vehicle in front) 1 2 3• Hand position (vehicle in front) 1 2 3• Lane change sequence 1 2 3• Use of hand signals 1 2 3Steering:• Direction 1 2 3• Method (hand-over-hand/other) 1 2 3Driving Down the RoadVision:• Scanning 1 2 3• 12 <strong>to</strong> 15 second visual lead (urban) 1 2 3• 25 seconds visual lead (rural) 1 2 3Speed:• Use of brake 1 2 3• Use of gas pedal 1 2 3• Adjusts speed <strong>for</strong> conditions 1 2 3General Requirements:• Lane change sequence 1 2 3• Shoulder checking 1 2 3Steering:• Hand position (9 and 3/10 and 2) 1 2 3• Method (hand-over-hand) 1 2 325
2Returning <strong>to</strong> a Parked PositionVision:• Scanning 1 2 3• Looks along intended path 1 2 3Speed:• Use of brakes 1 2 3• Use of gas pedal 1 2 3General Requirements:• Shoulder checking 1 2 3• Lane change sequence 1 2 3Steering:• Hand position 1 2 3• Method (hand-over-hand/other) 1 2 3S<strong>to</strong>ppingVision:• Well ahead of vehicle 1 2 3• Checks rear view mirror 1 2 3Speed:• Use of brakes 1 2 3General Requirements:• Anticipates braking situation in advance 1 2 3• Slows vehicle early enough <strong>to</strong> s<strong>to</strong>p easily 1 2 3Steering:• Hand position 1 2 3• Method (hand-over-hand/other) 1 2 3Comments:_____________________________________________________________________________________________________________________________________________________________________________________________________________________________________________________________________________________________Coach: _______________________________________________<strong>New</strong> Driver: _______________________________________________Date: _______________________________________________26
Exercise 3BackingRecommended practice time: 2 hours minimum3
3This exercise should be taught in a large empty parking lot. If there are painted lines, they can represen<strong>to</strong>ther vehicles or obstacles that a learner can back <strong>to</strong>ward, around or between.Backing is a hazardous movement and should be done only when necessary. The obligation is entirely onthe driver of the backing vehicle <strong>to</strong> do so when absolutely safe. Backing should not be taught or practisedon a street. This is illegal in many cases and it is dangerous. As much as possible, backing should belimited <strong>to</strong> parking only, such as parallel, hill and angle parking. The following instructions will help thenew driver learn <strong>to</strong> back safely.Stay Safe – BackingCaution must always be used while per<strong>for</strong>ming backing exercises. The backward movement shouldonly be done at the equivalent of a slow walking speed.Review and discuss the in<strong>for</strong>mation in the following sections. Review each section at home or in thelegally parked vehicle and then practise the required skills.Backing in a straight lineCoach’s TipA two-handed steering method while backing is the normal way <strong>to</strong> control the vehicle. However,when backing in a straight line, the preferred method is one hand. Demonstrate as you describe theactivity <strong>for</strong> the new driver.• Scan in all directions around the vehicle. Look <strong>for</strong> the hazards.• Keep the right foot firmly on the brake, select reverse gear and release the park brake.• Place the left hand at the 12 o’clock position on the steering wheel.• Shift the body on<strong>to</strong> the right hip <strong>for</strong> easy viewing through the rear window.• Place the right hand in a com<strong>for</strong>table position on the console or back of the passenger seat <strong>for</strong>support while looking through the rear window.• Ease up on the brake pedal when it is safe <strong>for</strong> the vehicle <strong>to</strong> move.• Maintain constant contact with the brake in case an immediate s<strong>to</strong>p is necessary.• Do not move the left hand from the 12 o’clock position on steering wheel. This will help keep thevehicle in a straight line.• Keep eyes up and well along the intended path.• Maintain a safe and controlled speed, about the same as a slow walk.Coach’s TipBacking in a straight line usually involves making slight steering adjustments. If reverse steering isnot straight or if there are more than slight adjustments, check the new driver’s eyes <strong>to</strong> see thatthey are looking where the vehicle should go.28
Backing with slight right or left movementsAfter the learner can per<strong>for</strong>m straight line backing safely and at a controlled speed, the coach shouldbegin teaching backing with slight turning moves <strong>to</strong> the left and right.• Place the left hand at the 12 o’clock position on the steering wheel.• Limit steering adjustments <strong>to</strong> no more than one-quarter turn of the steering wheel from the 12o’clock position.• Turn the steering wheel in the desired direction of travel.• Keep scanning all around the vehicle while backing. The main emphasis is on the rear path of traveluntil the vehicle is at a full s<strong>to</strong>p.• Maintain firm pressure on the brake after the s<strong>to</strong>p, select park gear and apply the park brake. Onlythen should the pressure be released from the brake.3Coach’s TipWhen backing <strong>to</strong> the right, turn the steering wheel <strong>to</strong> the right. When backing <strong>to</strong> the left, turn thesteering wheel <strong>to</strong> the left.Backing sharply <strong>to</strong> the left or right• Scan all around the vehicle <strong>for</strong> hazards.• Look over the left shoulder <strong>to</strong> the rear when backing left.• Look over the right shoulder <strong>to</strong> the rear when backing right.• Keep scanning all around the vehicle while backing. The main emphasis is on the rear path of traveluntil the vehicle is at a full s<strong>to</strong>p.• Use the hand-over-hand method of steering when turning sharply <strong>to</strong> the left or right.• Maintain contact with the brake at all times in case an immediate s<strong>to</strong>p is necessary.• Maintain a safe and controlled speed, about the same as a slow walk.• Use hand-over-hand steering <strong>to</strong> recover from the turn.• Do not over-recover (turn <strong>to</strong>o far the opposite direction) as this can cause the vehicle <strong>to</strong> go in theopposite direction.Hands in position <strong>to</strong>start the right turn.Left hand appliesturning power.Right hand takes newposition and appliesturning power.Turn completed,return hands <strong>to</strong>driving position.29
3Driver’s Progress Report – Exercise 3BackingPer<strong>for</strong>mance Assessment (Circle One)1-<strong>Go</strong>od 2-Fair 3-Needs PracticeStraight LineVision:• Scans in all directions 1 2 3• Shifts body 1 2 3Speed:• Use of brake 1 2 3• Walking speed 1 2 3General Requirements:• Left hand position 1 2 3• Right hand position 1 2 3Steering• Hand position 1 2 3Left or RightVision:• Scans in all directions 1 2 3• Shifts body 1 2 3Speed:• Use of brake 1 2 3• Walking speed 1 2 3General Requirements:• Hand position 1 2 3• Shoulder checks 1 2 3Steering:• Direction 1 2 3• Method (1/4 turn or hand-over-hand) 1 2 3Comments:_____________________________________________________________________________________________________________________________________________________________________________________________________________________________________________________________________________________________Coach: _______________________________________________<strong>New</strong> Driver: _______________________________________________Date: _______________________________________________30
Exercise 4Right and Left TurnsRecommended practice time: 4 hours minimum4
4When the learner has gained the necessary skills from Exercises 1, 2 and 3, begin <strong>to</strong> practise the correctmethods of making right and left turns on streets. A quiet residential area is an appropriate location <strong>for</strong>this exercise.Remind the learner of the visual skills needed <strong>for</strong> safe driving (see Exercise 2, Driving down the road).Proper steering depends on vision and movement. This means the learner needs a clear explanation ofwhere <strong>to</strong> look while keeping the vehicle moving.Stay Safe – Other VehiclesBecause the new driver is practising on public roads, always be alert <strong>for</strong> other vehicles driving withinthe practice area.Review and discuss the in<strong>for</strong>mation in the following sections. Review each section at home or in thelegally parked vehicle and then practise the required skills.Coach’s Tips• Turns in one direction, starting with right turns, should be learned fully be<strong>for</strong>e starting turns inthe other direction.• The amount of steering during any turn will depend on the sharpness of the turn. A hand-overhandsteering method should be used.Right turnsCoach’s Tips• Remind the new driver <strong>to</strong> keep both hands on the wheel and eyes on the road.• Never allow one-handed turns. Correct this immediately, be<strong>for</strong>e it becomes a habit.• For more experienced drivers, recovery of the steering wheel occurs by letting it slip through thehands while keeping contact with the wheel. However, the hand-over-hand recovery method ispreferable. Do not allow the new driver <strong>to</strong> let the steering wheel spin back <strong>to</strong> its natural position.• If the curb lane has no parked vehicles <strong>for</strong> the recommended one half block, enter the curb laneand change lanes safely.The following instructions will help the new driver learn <strong>to</strong> make safe right turns.• Reduce speed well ahead of the turn or intersection (recommended distance is about 50 metres orone-half block).• Make a lane change, if required, and move in<strong>to</strong> the curb lane well ahead (at least 15 metres) of theintersection. If there are parked vehicles in the curb lane then use the lane immediately next <strong>to</strong> theparked vehicles.• Signal an appropriate distance from the turn. The signal should be made about 30 metres or one-thirdof a block from the intersection in urban areas. In rural areas, signal about 100 metres from the turn.32
• Scan the intersection <strong>for</strong> traffic lights or signs.• Check carefully left, centre and right <strong>for</strong> hazards, obstacles, pedestrians and other traffic.• Do a shoulder check <strong>to</strong> the right <strong>for</strong> passing cyclists or pedestrians approaching from the blind side.• Yield <strong>to</strong> pedestrians in the crosswalk.• Look in<strong>to</strong> the lane where the turn will occur <strong>for</strong> obstructions, hazards or parked vehicles. If the lane isclear within one-half block (enough room <strong>to</strong> turn, accelerate, and make a lane change), enter the curblane first and then, if necessary, make a safe lane change <strong>to</strong> the left. If there are obstructions, hazardsor parked vehicles within one-half block, enter the first available driving lane next <strong>to</strong> the parkedvehicles or obstruction.• Follow the curve of the curb, without staring at it, <strong>to</strong> maintain the correct position during the turn.• Maintain a safe and controlled speed.• Accelerate smoothly and move with the traffic flow.• Make sure the signal light is off.• Resume scan and look 12 <strong>to</strong> 15 seconds (one and one-half city blocks) ahead in urban areas and 25seconds ahead in rural areas.4Unless prohibited by a sign, you can make aright turn on a red light after you come <strong>to</strong> afull s<strong>to</strong>p. Be sure you yield the right-of-way<strong>to</strong> pedestrians and traffic on the cross street.Be<strong>for</strong>e you begin <strong>to</strong> turn, check over your rightshoulder <strong>for</strong> cyclists who may have moved upon the right side of your vehicle. Turn in<strong>to</strong> thefirst available traffic lane on the right.If a vehicle is parked immediately around thecorner, turn in<strong>to</strong> the first available lane <strong>to</strong> theleft of the parked vehicle.If a parked vehicle or obstruction is far enoughaway, complete the turn as shown. Make aproper lane change <strong>to</strong> the left when safe. Itis generally recommended <strong>for</strong> this type of turnthat the curb lane be clear of parked vehicles<strong>for</strong> at least 1/2 a block.33
4Left turnsA left turn requires extra attention. The following instructions will help the new driver make a safeleft turn.Coach’s TipStart with what is most familiar. Have the new driver practise left turns from a two-way stree<strong>to</strong>n<strong>to</strong> a two-way street be<strong>for</strong>e progressing <strong>to</strong> other left turn situations.• Reduce speed well ahead of the turn or intersection (recommended distance is about 50 metres orone-half block).• Make a lane change, if required, in<strong>to</strong> the lane going in your direction that is closest <strong>to</strong> the centre. Ifthere is a left turning lane, use this. Change lanes well ahead (at least 15 metres) of the intersection.• Signal the intention <strong>to</strong> turn about 30 metres or one-third of a block from the intersection in urbanareas. In rural areas signal about 100 metres from the turn.• Obey the traffic lights or signs in the intersection.• Check carefully left, centre and right <strong>for</strong> hazards, obstacles, pedestrians, other traffic and the first lane<strong>to</strong> be used after turning.• Check intended path of travel <strong>to</strong> establish the centre line or centre of roadway (this could be markedor unmarked).• Enter the intersection <strong>to</strong> a point about one vehicle length back from the first available lane. Keep thefront wheels facing straight ahead.Two-way in<strong>to</strong> a two-way:turn from the lane nearest the centre linein<strong>to</strong> the lane nearest the centre line.• Yield <strong>to</strong> approaching traffic and pedestrians in the crosswalk.• Look in the intended path of travel and keep scanning <strong>for</strong> pedestrians, cyclists and other mo<strong>to</strong>rists.• Do a shoulder check left <strong>to</strong> be sure no vehicles or cyclists are about <strong>to</strong> pass on the left side. Thisapplies <strong>to</strong> both urban and rural areas.• Steer hand-over-hand in<strong>to</strong> the intended path of travel, maintaining a safe and controlled speed.• Accelerate smoothly and move with the traffic flow.• Make sure the signal light is off.• Resume scan and look 12 <strong>to</strong> 15 seconds (one and one-half city blocks) down the road in urban areasand 25 seconds ahead in rural areas.34
Driver’s Progress Report – Exercise 4Right and Left TurnsPer<strong>for</strong>mance Assessment (Circle One)1-<strong>Go</strong>od 2-Fair 3-Needs Practice4Right TurnsVision:• Scans well ahead and behind 1 2 3• Checks left, centre, right 1 2 3• Shoulder checks right be<strong>for</strong>e turning 1 2 3• Identifies lane <strong>to</strong> use after turn 1 2 3• Re-establishes visual lead time 1 2 3Speed:• Slows on approach 1 2 3• Accelerates gently after turn 1 2 3General Requirements:• Selects proper lane be<strong>for</strong>e/after turn 1 2 3• Turns on/off signal light 1 2 3Steering:• Hand position 1 2 3• Method (hand-over-hand) 1 2 3Left TurnsVision:• Scans well ahead and behind 1 2 3• Checks left, centre, right 1 2 3• Shoulder checks left be<strong>for</strong>e turning 1 2 3• Identifies lane <strong>to</strong> use after turn 1 2 3• Re-establishes visual lead time 1 2 3Speed:• Slows on approach 1 2 3• Accelerates gently while turning 1 2 3General Requirements:• Selects proper lane be<strong>for</strong>e/after turn 1 2 3• Position in intersection 1 2 3• Wheels straight while waiting in intersection 1 2 3• Turns on/off signal light 1 2 335
4Steering:• Hand position 1 2 3• Method (hand-over-hand) 1 2 3Comments:_____________________________________________________________________________________________________________________________________________________________________________________________________________________________________________________________________________________________Coach: _______________________________________________<strong>New</strong> Driver: _______________________________________________Date: _______________________________________________36
Exercise 5ParkingRecommended practice time: 4 hours minimum5
5This exercise consists of three different types of parking: parallel parking, hill parking and angle parking.Vehicles must be safely parked according <strong>to</strong> the law.By this time, the learner should be skilled in basic vehicle control and backing skills. The next stage is <strong>to</strong>practice parking in an empty lot or quiet street. The following instructions will help the new driver learn<strong>to</strong> park correctly.Stay Safe – Parking• Always use the turn signals <strong>to</strong> show your intentions. Watch <strong>for</strong> pedestrians close by and <strong>for</strong> carsmoving in<strong>to</strong> or out of parking spaces.• Be especially cautious around children whose behaviour is unpredictable.• Pay strict attention <strong>to</strong> traffic signs posted in the parking lot and painted s<strong>to</strong>p lines on thepavement.Review and discuss the in<strong>for</strong>mation in the following sections. Review each section at home or in thelegally parked vehicle and then practise the required skills.Parallel parkingCoach’s Tips• The first few parallel parks should be done on level ground. For the first attempts, do not parkbetween two vehicles. Practice where there is no vehicle behind the parking spot chosen.• When parallel parks are done on a hill, the front wheels must be turned as described inHill Parking.• Check parked vehicles <strong>for</strong> movement or doors opening when approaching the chosen parallelparking space.• Make a safe lane change, if necessary.• Tap the brakes two or three times <strong>to</strong> warn vehicles coming from behind about the planned s<strong>to</strong>p.• Assess the size and position of the parked vehicle.• Move slowly alongside this vehicle leaving an appropriate distance (minimum one metre) between thevehicles. Keep the vehicle parallel with the curb.• S<strong>to</strong>p when the rear bumper of your vehicle is in a direct line with the rear bumper of theparked vehicle.• Select reverse gear and scan in all directions. Check <strong>for</strong> hazards.• When safe, back very slowly while keeping foot contact with the brake pedal. Look over the rightshoulder <strong>to</strong> the rear. Roll straight back half a metre, then steer sharply <strong>to</strong> the right.• S<strong>to</strong>p when the vehicle is at an angle of about 45 degrees <strong>to</strong> the curb.• Scan again in all directions <strong>for</strong> hazards.38
• Look <strong>to</strong> the rear. When safe, continue backing very slowly, straightening the front wheels by turning<strong>to</strong> the left. Do not over-steer. The wheels must be pointed straight ahead.• Back straight until the right front bumper of the vehicle will safely clear the left rear bumper of theparked vehicle.• S<strong>to</strong>p and scan in all directions <strong>for</strong> hazards.• When safe, continue backing very slowly and turn the steering wheel <strong>to</strong> the left.• Continue looking <strong>to</strong> the rear with quick glances <strong>to</strong> the front <strong>to</strong> check that the vehicle is clearing thevehicle or objects ahead.• Straighten the front wheels and s<strong>to</strong>p, as the vehicle comes <strong>to</strong> a parallel position with the curb.• Pay careful attention not <strong>to</strong> hit the vehicle behind.• Select <strong>for</strong>ward gear and move slowly ahead, centering the vehicle in the parking space and within thelegal distance of the curb (50 centimetres).• Place the vehicle in park gear and set the park brake.5BABBBABAACCCCC1. When you are approaching your intended parallelparking space, check early <strong>to</strong> the rear <strong>for</strong> traffic thatis following you. Apply your brakes well in advanceand start <strong>to</strong> slow down. Your brake lights will aler<strong>to</strong>ther drivers of your intent <strong>to</strong> s<strong>to</strong>p and park parallelby the curb. S<strong>to</strong>p when the rear bumper of yourvehicle is in line with the rear bumper of Vehicle Band parallel <strong>to</strong> the curb. Leave about one metre ofspace between the vehicles.126 m108 mABBBABABBBBBBAAAAAAAAAACCCCCCCCCC2. Back very slowly, steering sharply <strong>to</strong> the right untilthe vehicle is approximately at a 45-degree angle <strong>to</strong>the curb. Your steering wheel should now be in linewith the rear bumper of Vehicle B.3. Straighten your front wheels. Continue backinguntil the right end of your front bumper is in linewith the back end of Vehicle B. Be careful not <strong>to</strong>make contact with this vehicle.126 m108 m126 m108 m126 mBBBBBBAAAAAACCCCCC4. Turn the wheel rapidly <strong>to</strong> the left as far as it willgo and back until you are parallel with the curb. Becareful not <strong>to</strong> make contact with the bumper of thevehicle behind.108 mBAC126 m108 mBAC5. Move <strong>for</strong>ward very slowly while straightening thewheels. S<strong>to</strong>p when your vehicle is centred betweenVehicles B and C. Set the park brake. The law requiresthat the wheels of the parked vehicle not be morethan 50 centimetres from the curb.39
5Coach’s Tips• You may find that when the parallel park is completed, the vehicle position is not correct(rear tire <strong>to</strong>uching curb, vehicle at slight angle, <strong>to</strong>o far from curb). Discuss the reason(s) whythis occurred and show how <strong>to</strong> correct.• Have the new driver repeat parallel parking until you are satisfied it can be per<strong>for</strong>med smoothly,skillfully and in a controlled manner.Hill parkingUphill with a curb• Make necessary lane changes.• Bring the vehicle <strong>to</strong> a complete s<strong>to</strong>p in a position parallel with the curb. To complete the park in asatisfac<strong>to</strong>ry position, the vehicle must start quite close <strong>to</strong> the curb. If necessary, ease <strong>for</strong>ward <strong>to</strong>adjust position.• Check left. When safe, move <strong>for</strong>ward slowly a short distance while steering sharply <strong>to</strong> the left one fullturn of the steering wheel.• Select reverse gear. Check <strong>to</strong> the rear <strong>for</strong> hazards, and if safe, allow the vehicle <strong>to</strong> move backwardsslowly until the right front tire lightly <strong>to</strong>uches the curb.• Select neutral gear, ease off the brake and allow the vehicle <strong>to</strong> settle against the curb.• Re-apply the brake, select park gear and set the park brake.If you park facing uphill on a street with acurb, turn the front wheels <strong>to</strong>ward the leftand allow your vehicle <strong>to</strong> roll back until theright front tire is <strong>to</strong>uching the curb.Uphill without a curb• Make necessary lane changes.• Bring the vehicle <strong>to</strong> a full s<strong>to</strong>p in a position parallel and near the edge of the road. If necessary, ease<strong>for</strong>ward <strong>to</strong> adjust the position.• Check the area <strong>to</strong> the right front of the vehicle. If safe, steer sharply right while moving slowly <strong>for</strong>warda very short distance. Take care not <strong>to</strong> run off the edge of the road. S<strong>to</strong>p the vehicle.• Keep firm pressure on the brake pedal, select park gear and set park brake.If you park facing uphill on a street withouta curb, turn your front wheels <strong>to</strong> the right.40
Downhill with or without a curb• Make necessary lane changes.• Bring the vehicle <strong>to</strong> a s<strong>to</strong>p in a position parallel with the curb or, if there is no curb, the right edge ofthe road. To complete the park properly, start quite close <strong>to</strong> the curb or edge of the road. If necessary,ease <strong>for</strong>ward <strong>to</strong> adjust position.• Check left and when safe, move slowly <strong>for</strong>ward a short distance steering one-half turn <strong>to</strong> the left. Asthe vehicle is moving slowly, steer sharply <strong>to</strong> a full right turn. Still moving slowly, allow the right fronttire <strong>to</strong> <strong>to</strong>uch the curb. If there is no curb, s<strong>to</strong>p the vehicle be<strong>for</strong>e running off the edge of the road.• If there is a curb, select neutral, ease off the brake and allow the vehicle <strong>to</strong> settle against the curb.• Keep firm pressure on the brake pedal, select park gear and apply park brake.5If you park facing downhill, alwaysturn your front wheels <strong>to</strong> the right.Leaving hill parkingLeaving an uphill park (with a curb)• Apply firm pressure on the brake pedal and select <strong>for</strong>ward gear.• Look carefully in all directions, including <strong>to</strong> the rear over the left shoulder.• Keep firm pressure on the brake pedal and signal left.• Release the park brake, look over the left shoulder again and if safe, leave the curb.• Accelerate smoothly and enter the proper lane of traffic.• Check that the signal light is off.Leaving an uphill park (without a curb)• Apply firm pressure on the brake pedal and select reverse or neutral gear.• Look carefully in all directions, including <strong>to</strong> the rear over the left shoulder. If safe, release thepark brake.• Move the vehicle slowly backwards a short distance. At the same time, steer sharply <strong>to</strong> the left untilthe front wheels are facing straight ahead. S<strong>to</strong>p the vehicle.• Keep firm pressure on the brake pedal and select <strong>for</strong>ward gear.• Check over left shoulder and if safe, signal left.• Accelerate smoothly and enter the proper lane of traffic.• Check that the signal light is off.41
5Leaving a downhill park (curb or no curb)• Apply firm pressure on the brake pedal and select reverse gear.• Look carefully in all directions, including <strong>to</strong> the rear over the left shoulder. If safe, release thepark brake.• Back very slowly <strong>for</strong> a very short distance while looking <strong>to</strong> the rear and steering sharply <strong>to</strong> the left <strong>to</strong>straighten out the front wheels. S<strong>to</strong>p.• Keep firm pressure on the brake, select <strong>for</strong>ward gear and check over the left shoulder.• Signal left if safe.• Accelerate smoothly and enter the proper lane of traffic.• Check that the signal light is off.Coach’s TipPerpendicular parking (90 degrees) is often required in shopping mall parking lots. For this typeof park, the minimum space between you and the parked vehicles, as you approach your parkingspace, should be about two metres.Angle parkingAngle parking - right sideRight side angle parking will only apply <strong>to</strong> parking lots and designated spaces on the right side of a street.Spaces may angle from 30 <strong>to</strong> 60 degrees <strong>to</strong> the traffic lane.• Watch <strong>for</strong> vehicles backing out of nearby angle parking spaces.• Make necessary lane changes safely and signal right when approaching the space.• Keep a distance of about one and one-half metres away from the rear of the parked vehicle(s) onthe right.• Approach the space slowly and check the blind spot over the right shoulder.• Begin steering hand-over-hand <strong>to</strong> the right when the length of the left side of the parked vehicle <strong>to</strong>the right is visible.• Move at a safe and controlled speed. Check the left front <strong>to</strong> be sure there is enough space from thevehicle parked on the left.• Pay attention <strong>to</strong> the right side <strong>to</strong> clear the parked vehicle on the right.• Continue moving slowly in<strong>to</strong> the parking space, straightening the front wheels so that the vehicle iscentred and midway between the painted lines. If there are no painted lines, position the vehicle anequal distance from the other vehicles.• Remember <strong>to</strong> use proper visual technique. Keep the chin down and look <strong>for</strong> a focal point well aheadin the centre of the parking space.42
• S<strong>to</strong>p within 50 centimetres of the curb.• Keep firm pressure on the brake pedal, select park gear and apply the park brake.5Leaving angle park - right side• Apply firm pressure on the brake pedal and select reverse gear.• Look carefully in all directions. If safe, release the park brake.• Look <strong>to</strong> the rear over the right shoulder. Begin backing straight, very slowly, until it is possible <strong>to</strong> seepast the parked vehicle on the right and down the lane of planned travel.• When safe, continue backing slowly until the left front bumper clears the parked vehicle <strong>to</strong> the leftand then steer sharply right.• Continue backing while looking <strong>to</strong> the rear until the vehicle is in the first lane of traffic.• Straighten the wheels and s<strong>to</strong>p.• Check <strong>to</strong> the rear <strong>for</strong> approaching traffic and ahead <strong>for</strong> other vehicles that may be backing out of theirparking spaces.• Keep firm pressure on the brake pedal, select <strong>for</strong>ward gear and proceed smoothly in<strong>to</strong> the traffic flow.Angle parking – left sideAngle parking <strong>to</strong> the left will only apply <strong>to</strong> parking lots and one way streets with designated angle parkingspaces. Spaces may angle from 30 <strong>to</strong> 60 degrees <strong>to</strong> the traffic lane.Stay Safe – Sensible ParkingOn two-way streets, never cross over <strong>to</strong> angle park on the left side of the street.• Watch <strong>for</strong> vehicles about <strong>to</strong> back out of nearby angle parking spaces.• Keep a distance of about one and one-half metres away from the rear of parked vehicles on the left.• Approach the space slowly and check the blind spot over the left shoulder.• Begin hand-over-hand steering <strong>to</strong> the left when the length of the right side of the vehicle parked onthe left is visible.• Check front <strong>to</strong> ensure there is enough space <strong>to</strong> clear the parked vehicle <strong>to</strong> the right.• Pay attention <strong>to</strong> the left side <strong>to</strong> clear the parked vehicle on the left.43
5• Continue moving slowly in<strong>to</strong> the parking space, straightening the front wheels until the vehicle iscentred in the angle parking space and midway between the painted lines. If there are no paintedlines, position the vehicle at the proper angle, leaving enough space <strong>to</strong> open the doors safely.• S<strong>to</strong>p within 50 centimetres from the curb.• Keep firm pressure on the brake pedal, select park gear and apply the park brake.Leaving angle park - left side• Apply firm pressure on the brake pedal and select reverse gear.• Look carefully in all directions. If safe, release the park brake.• Look <strong>to</strong> the rear over the left shoulder. Begin backing straight, very slowly, until it is possible <strong>to</strong> seepast the parked vehicle on the left and down the lane of planned travel.• When safe, continue backing slowly until the right front bumper clears the parked vehicle <strong>to</strong> the rightand then steer sharply left.• Continue backing while looking <strong>to</strong> the rear until the vehicle is in the first lane of traffic.• Straighten the wheels and s<strong>to</strong>p.• Check <strong>to</strong> the rear <strong>for</strong> approaching traffic and ahead <strong>for</strong> other vehicles that may be backing out of theirparking spaces.• Keep firm pressure on the brake pedal, select <strong>for</strong>ward gear and proceed smoothly in<strong>to</strong> the traffic flow.44
Driver’s Progress Report – Exercise 5ParkingPer<strong>for</strong>mance Assessment (Circle One)1-<strong>Go</strong>od 2-Fair 3-Needs Practice5Parallel ParkingVision:• Scans in all directions be<strong>for</strong>e backing 1 2 3• Glances <strong>to</strong> front while looking back 1 2 3Speed:• Slows on approach 1 2 3• Backing done at crawl speed 1 2 3Steering:• Hand position 1 2 3• Method (hand-over-hand while turning) 1 2 3• Method (left hand at 12 o’clock while 1 2 3backing straight)General Requirements:• Approaches about one metre from parked vehicle 1 2 3• Lines up rear bumpers 1 2 3• Turns sharply right while backing 1 2 3• Backs straight at 45 degree angle 1 2 3• Turns sharply left <strong>to</strong> be parallel with curb 1 2 3• Parks within legal distance from curb 1 2 3Hill ParkingVision:• Scans in all directions be<strong>for</strong>e moving 1 2 3• Glances <strong>to</strong> front while looking back 1 2 3Speed:• Slows on approach 1 2 3• Positioning done at crawl speed 1 2 3Steering:• Hand position 1 2 3• Method (hand-over-hand while turning) 1 2 3General Requirements:• Approaches close <strong>to</strong> curb/edge of road 1 2 345
5Per<strong>for</strong>mance Assessment• Taps curb gently (where applicable) 1 2 3• Puts vehicle in neutral <strong>to</strong> settle against curb 1 2 3• Wheels turned proper direction when finished 1 2 3• Moves in proper direction <strong>to</strong> leave parking spot 1 2 3• Signals be<strong>for</strong>e leaving park 1 2 3Angle ParkingVision:• Scans in all directions on approach/be<strong>for</strong>e backing 1 2 3• Checks left or right be<strong>for</strong>e turning 1 2 3• Looks in<strong>to</strong> centre of the stall when parking 1 2 3Speed:• Slows on approach 1 2 3• Turns in<strong>to</strong> stall at crawl speed 1 2 3Steering:• Hand position 1 2 3• Method (hand-over-hand while turning) 1 2 3• Method (left hand at 12 o’clock while 1 2 3backing out of stall)General Requirements:• Approaches at least 1.5 metres from 1 2 3parked vehicles• Checks blind zone area 1 2 3• Centres vehicle in stall within 50 cm. from curb 1 2 3• Backs in<strong>to</strong> proper lane when leaving park 1 2 3Comments:_____________________________________________________________________________________________________________________________________________________________________________________________________________________________________________________________________________________________Coach: _______________________________________________<strong>New</strong> Driver: _______________________________________________Date: _______________________________________________46
Exercise 6Residential DrivingRecommended practice time: 6 hours minimum6
6Exercises 1 through 5 develop the new driver’s skills and abilities in a controlled environment where thereis little or no traffic. Exercise 6 requires the learner <strong>to</strong> begin sharing the road with other mo<strong>to</strong>rists.Sometime during practice sessions, show the learner how <strong>to</strong> fill the gas tank. Explain about using theproper fuel <strong>for</strong> the type of vehicle being driven. Next time you need gas, have the learner fill the tank andassist only if needed.Review and discuss the in<strong>for</strong>mation in the following sections. Review each section at home or in thelegally parked vehicle and then practise the required skills.Traffic control signs and signalsThe new driver must know what the various signs and signals mean and how <strong>to</strong> respond <strong>to</strong> them.Examples of the types of signs that a driver must understand include:• traffic lights • playground zone signs• s<strong>to</strong>p signs • pedestrian crosswalk signs• yield signs • no parking signs• speed limit signs • construction signs• school zone signs • warning signsThe instruction should focus on:• the legal requirements of each traffic light or sign.• how <strong>to</strong> approach each of them.• how <strong>to</strong> drive according <strong>to</strong> the requirements of each one.Be<strong>for</strong>e the driving <strong>for</strong> the practice session begins, you should be satisfied that the learner fully understandsand is familiar with all control signs and signals, and knows how <strong>to</strong> manage driving each one.Pavement markingsThe learner must know the differences between yellow and white pavement markings. Also, the learnermust understand the meaning of different pavement markings, and how they should be handled.These include:• single solid line.• double solid lines.• single broken line.• solid line in driver’s lane.• broken line in driver’s lane.Practise driving through every type of pavement marking in a variety of settings. This way the learnergains the experience and confidence <strong>to</strong> handle these driving tasks.48
ColourYellowYellow lines separate traffic travelling in oppositedirections. A yellow line should always be onyour left.6WhiteWhite lines separate traffic travelling in the samedirection. White lines may also designate theshoulder portion of the roadway.Broken LinesBroken yellowBroken yellow lines indicate that there isadequate sight distance available <strong>to</strong> permitpassing. You must be sure that the lane in<strong>to</strong>which you are moving is clear and that the passcan be completed safely.Broken whiteBroken white lines indicate that lane changing ispermitted.Solid LinesSolid yellowIn rural areas, solid yellow lines whether single ordouble indicate that passing is not permitted.Solid and broken yellowA solid and broken yellow line indicates thatpassing is permitted in one direction. Passing isnot permitted if the solid yellow line is on yourside of the roadway.Solid whiteSolid white lines indicate that lane changing isnot permitted.49
6General residential driving tipsResidential driving involves travel in areas where there are many reasons <strong>to</strong> be cautious. The followinginstructions will help the new driver become skilled at residential driving.Stay Safe – See-Think-DoRemind the new driver about the importance of visual skills. Have the learner do a runningdescription of what is seen. Remember the See-Think-Do habit.See Help the driver watch <strong>for</strong> possible hazards."What do you see ahead?"Think Help the driver <strong>to</strong> think about what might happen and possible solutions."See that bicycle? What could happen here? What should you do?"Do Help the driver <strong>to</strong> decide what <strong>to</strong> do."Yes, it’s a good idea <strong>to</strong> give him a bit more space."• Use the two-second rule when following other vehicles. Allow more time and distance during difficulttraffic or road conditions and in poor visibility.• Be alert <strong>for</strong> small children who may dart in front of the vehicle.• Glance under parked vehicles often <strong>to</strong> check <strong>for</strong> little feet, bicycles and tricycle wheels, <strong>to</strong>ys, and balls.These will provide advance warning that children may run out.• Watch sidewalks, driveways, yards, playgrounds and other pedestrian traffic areas <strong>for</strong> children playingnearby who might run out on the road.• Glance in the rear and side view mirrors often <strong>to</strong> be aware of traffic and traffic patterns developingbehind the vehicle. A driver should check these mirrors at least every 10 <strong>to</strong> 15 seconds, or about everyone and one-half city blocks. Check the mirrors whenever slowing or s<strong>to</strong>pping is anticipated. Thisgives enough time <strong>to</strong> deal with situations behind the vehicle.• Move steadily along the street, keeping a safe cushion of space all around the vehicle.• Look about 12 <strong>to</strong> 15 seconds ahead of the vehicle (one and one-half city blocks) in urban areas <strong>to</strong>allow time <strong>to</strong> make decisions and control the vehicle. In rural areas look about 25 seconds ahead.Coach’s Tips• Practice sessions should include handling each type of traffic light and sign available. Themore this is repeated, the more skill will be developed. Talk the new driver through eachsituation, and demonstrate if necessary. As driving confidence increases, the new driver canbegin <strong>to</strong> make more decisions. Offer corrections only when necessary.• Have the new driver practise left turns from a two-way street on<strong>to</strong> a two-way street. Thenpractise turning left from a one-way street on<strong>to</strong> a one-way street. Do this from the most leftlane and enter the most left lane.50
Lane changingReview and discuss the procedures <strong>for</strong> changing lanes with the new driver. Emphasize the need <strong>to</strong> do ashoulder check of blind spots on every lane change. Demonstrate if necessary. Remind the learner that ashoulder check is just that – over the shoulder. The learner should not be turning all the way around <strong>to</strong>look through the rear window.6Using both outside mirrors and rear viewmirror – Vehicle A can see Vehicles B, C and DVehicle A cannot see Vehicles E and F, either inthe mirrors or through peripheral side vision.These vehicles are said <strong>to</strong> be in Vehicle A’sblind spot.The proper sequence of events during a safe lane change is:Mirrorcheck rear and side view mirrors.Shoulder check the blind spot in the direction of the lane change.Signalif clear in the direction of the lane change.Shoulder check the blind spot in the direction of the lane change.Movesafely in<strong>to</strong> the lane.Coach’s TipEnsure the new driver uses glances, rather than staring, when doing shoulder checks. Remind thedriver <strong>to</strong> maintain speed <strong>for</strong> the entire lane change.Practice! Practice! Practice! The learner must do shoulder checks on each and every lane change madewhile driving.Stay Safe – Shoulder ChecksIf you have <strong>to</strong> make several lane changes, do a shoulder check <strong>for</strong> each new lane.51
6IntersectionsCoach’s Tip<strong>New</strong> drivers will often drive quickly when approaching intersections. They may go through themwithout checking left, centre, right and left again <strong>to</strong> ensure it is safe <strong>to</strong> proceed. Rein<strong>for</strong>ce theimportance of slowing down and scanning the intersection.Controlled intersectionsA controlled intersection is one that has a traffic light or traffic sign <strong>to</strong> control the traffic going through it,regardless of the direction of travel.When approaching a controlled intersection do the following.• Take the foot off the gas pedal <strong>to</strong> slow the vehicle.• Poise the foot over the brake pedal <strong>to</strong> reduce braking reaction time.• Check carefully <strong>for</strong> pedestrians, cyclists and other traffic.If safe <strong>to</strong> proceed, do the following.• Return the foot <strong>to</strong> the gas pedal.• Proceed through the intersection if there is not a traffic control signal or sign that would require thevehicle <strong>to</strong> s<strong>to</strong>p or yield.• S<strong>to</strong>p, if facing a signal or sign that requires a s<strong>to</strong>p.Have the new driver practise driving through several controlled intersections <strong>to</strong> develop the skills inhandling these situations.Stay Safe – IntersectionsWhen s<strong>to</strong>pped at a red traffic light, after it turns green, always look left, centre, right and leftbe<strong>for</strong>e proceeding. This defensive driving technique will prevent a collision if another driver isrunning the red light.52
The point-of-no-return (anticipating the light)Coach’s TipThe point-of-no-return requires good judgment and experience. Many things must be assessedbe<strong>for</strong>e making the decision about proceeding through the intersection. These include the speedof the vehicle, road conditions, traffic volume <strong>to</strong> the front, rear and side, visibility and even thecondition of the vehicle, especially the tires.6It is not uncommon <strong>for</strong> drivers <strong>to</strong> proceed through an intersection when a traffic light has turned <strong>to</strong>amber (yellow). In some cases this happens because the driver has not anticipated how much timeremains be<strong>for</strong>e the light will change.• Identify whether the light has become stale (the ‘Don’t Walk’ light is activated), or if it is fresh (legallyokay <strong>to</strong> cross the street). This is a very important part of deciding how <strong>to</strong> handle the traffic light. Notethis from as far away as one block (8 <strong>to</strong> 10 seconds).• If the traffic light is fresh, continue within the speed limit, but be aware that the light mayturn stale.• If the traffic light is stale, check the rear view mirror, and cover the brake. The stale light is the firstwarning that it will soon be changing <strong>to</strong> amber. By now the vehicle is likely half a block (or two <strong>to</strong>three light standards) from the intersection.- Removing the foot from the gas pedal slows the vehicle down.- Reaction time is less because the brake is already covered.- The focus is now on planning a possible s<strong>to</strong>p, as opposed <strong>to</strong> running the light or slamming onthe brakes.• Explain that, when approaching the traffic light, amber should be treated as ‘prepare <strong>to</strong> s<strong>to</strong>p’ socovering the brake is a good idea. If the vehicle is already in the intersection (waiting <strong>to</strong> turn left),amber means ‘clear the intersection.’• Plan <strong>to</strong> s<strong>to</strong>p. <strong>New</strong> drivers are anxious about approaching traffic lights that may change. Some driversgo faster and try <strong>to</strong> get through the light instead of slowing and preparing <strong>to</strong> s<strong>to</strong>p.• Scan the area <strong>to</strong> determine the point-of-no-return. There is no exact point but there is an area orrange a short distance be<strong>for</strong>e the intersection where the driver must decide if it is possible <strong>to</strong>s<strong>to</strong>p safely be<strong>for</strong>e the crosswalk or intersection. After this point the driver has made a decision<strong>to</strong> continue.• If continuing through the intersection, pivot between the brake and the gas pedal.Stay Safe – ScanningScanning should be done all the time when driving. When approaching a traffic light, scan wellbe<strong>for</strong>e the intersection. If you do decide <strong>to</strong> proceed through the light, it is wise <strong>to</strong> know what ishappening on the next roadway and behind you.53
A6Uncontrolled intersectionsAn uncontrolled intersection has no traffic light or traffic sign <strong>to</strong> control traffic going through it. Thelaw governing uncontrolled intersections states: When two vehicles B approach or enter an intersection fromAdifferent roadways at approximately the same time, the driver of the vehicle on the left shall yield the right ofway <strong>to</strong> the vehicle on the right.BBABBAAABA yields B <strong>to</strong> B A yields <strong>to</strong> B A yields <strong>to</strong> BConditions vary at different types of uncontrolled intersections and the learner needs practice at as manytypes as possible. Most collisions occur at intersections so the more experience the learner has at handlingAAthem the better.• Slow down at every uncontrolled intersection.B• Come <strong>to</strong> a s<strong>to</strong>p or near s<strong>to</strong>p at blind intersections (where visibility is limited or nothing can be seen <strong>to</strong>the right and left).• Prepare <strong>to</strong> s<strong>to</strong>p safely and quickly if a vehicle appears unexpectedly. The right-of-way is given,not taken.ABStay Safe‘T’ intersections that are not controlled are handled in the same way as regular four-wayintersections. The rules are the same – the vehicle on the right has the right-of-way over the vehicleon the left.54
Driver’s Progress Report – Exercise 6Residential DrivingPer<strong>for</strong>mance Assessment (Circle One)1-<strong>Go</strong>od 2-Fair 3-Needs Practice6Residential – Low Traffic Volume AreasVision:• Scans 1 <strong>to</strong> 1.5 blocks ahead 1 2 3• Checks rear view mirror every 1 <strong>to</strong> 1 2 31.5 blocks (10 <strong>to</strong> 15 seconds)• Scans <strong>for</strong> hazards (children, vehicles, pets) 1 2 3• Scans <strong>for</strong> traffic signs and signals 1 2 3• Identifies intersections (controlled/uncontrolled) 1 2 3Speed:• Drives <strong>for</strong> the conditions 1 2 3• Adjusts speed <strong>for</strong> school and playground zones 1 2 3• Adjusts speed <strong>for</strong> crosswalks 1 2 3• Adjusts speed <strong>for</strong> intersections 1 2 3Steering:• Hand position (9 and 3 o’clock) 1 2 3• Method (hand-over-hand while turning) 1 2 3General Requirements:• Chooses proper lane <strong>for</strong> turning 1 2 3• Per<strong>for</strong>ms proper lane change sequence 1 2 3• Uses signal lights appropriately 1 2 3• Applies right-of-way at all intersections 1 2 3• S<strong>to</strong>ps at proper s<strong>to</strong>pping points 1 2 3• Understands lane markings 1 2 3• Anticipates traffic lights properly 1 2 3• Identifies fresh and stale traffic lights 1 2 3Comments:_____________________________________________________________________________________________________________________________________________________________________________________________________________________________________________________________________________________________Coach: _______________________________________________<strong>New</strong> Driver: _______________________________________________Date: _______________________________________________55
656
Exercise 7Driving in Moderate<strong>to</strong> Heavy TrafficRecommended practice time: 12 hours minimum7
7When practising Exercise 7, the learner needs a greater knowledge of traffic signals, lane markings,speed limits and other traffic control devices. This knowledge will help ensure the driver doesn’t block orinterfere with other road users. The rules of the road must be known and applied while driving.Stay Safe – Heavy TrafficAlertness and concentration are always very important. As well, in moderate <strong>to</strong> heavy traffic, thenew driver will need <strong>to</strong> be alert <strong>for</strong> an even greater number of hazards. Excellent observationtechniques and good driving skills are required while involved with other traffic.Coach’s TipLimit practice time <strong>to</strong> short periods. These can be increased gradually as the new driver gainsconfidence. Practice time should be a minimum of one hour and never more than two hours.This will provide the new driver with the opportunity <strong>to</strong> gain experience and confidence graduallywithout the risk of becoming frustrated and overwhelmed at <strong>to</strong>o much, <strong>to</strong>o soon.Review and discuss the in<strong>for</strong>mation in the following sections. Review each section at home or in thelegally parked vehicle and then practise the required skills.Traffic control signs and signalsPractice should include a review of the signs and signals normally found when driving in areas ofmoderate <strong>to</strong> heavy traffic. Examples include:• right turns on green arrow lights• right turns on red lights• advanced green light phase <strong>for</strong> left turns• delayed green light phase• amber lights• flashing amber lights• one way streets• left turns on red lights on one way streets• parking signs• no parking signs• two lanes of traffic turning left or right atan intersection• pedestrian crosswalk signs• loading zone signsCoach’s TipIt will be helpful <strong>to</strong> draw diagrams while legally parked <strong>to</strong> explain the skills the new driver will bepractising.Exposure <strong>to</strong> a variety of traffic signs and signals will assist the learner <strong>to</strong> handle each situation effectively inthe future. The following instructions will help the new driver make safe decisions about driving in heaviertraffic.58
Lanes and lane markings• Explain how <strong>to</strong> use merge and exit lanes <strong>to</strong> and from busy streets and thoroughfares.• Review the meaning of single and double solid lines within city boundaries.• Emphasize the importance of using the correct lane when approaching, during or exiting left andright turns. Lanes that can cause extra problems are:7turns from oneways <strong>to</strong> one ways.turns from twoways <strong>to</strong> one ways.turns from oneways <strong>to</strong> two ways.dual turns atintersections.• traffic circles (see page 61).• Have the learner practise driving as often as possible in all types of situations involving lanes andlane markings.Stay Safe – BicyclesBicycles are considered vehicles, and are entitled <strong>to</strong> an equal share of the road. Cyclists must obeythe same rules of the road as drivers of mo<strong>to</strong>r vehicles.59
Marked and unmarked crosswalks7• Discuss pedestrian right-of-way laws and the requirement <strong>for</strong> drivers <strong>to</strong> s<strong>to</strong>p when a pedestrian is ina crosswalk.• Explain where the learner must s<strong>to</strong>p the vehicle at a crosswalk. This is the same whether proceedingstraight through, turning left or turning right at an intersection controlled by a traffic light or sign.S<strong>to</strong>p at the s<strong>to</strong>pline be<strong>for</strong>e amarked crosswalk.If there is no s<strong>to</strong>pline or markedcrosswalk at theintersection, youmust s<strong>to</strong>p withinthree metres ofthe intersectingroadway. S<strong>to</strong>p soas not <strong>to</strong> interferewith pedestrianswho are crossingthe roadway or areabout <strong>to</strong> cross.Where there isno s<strong>to</strong>p line, s<strong>to</strong>pbe<strong>for</strong>e the markedcrosswalk.Where a s<strong>to</strong>p linehas been marked,bring your vehicle<strong>to</strong> a complete s<strong>to</strong>pbe<strong>for</strong>e crossingthe line. Be<strong>for</strong>emoving <strong>for</strong>ward,give pedestrians ortraffic the right-ofway.Unless otherwise marked, you must:• S<strong>to</strong>p be<strong>for</strong>e entering a main street froma road, alley, driveway or parking lot.• S<strong>to</strong>p be<strong>for</strong>e any sidewalk crossing. Yield<strong>to</strong> pedestrians.• Discuss the correct place <strong>to</strong> s<strong>to</strong>p the vehicle at marked s<strong>to</strong>p lines.• Have the learner practise these procedures.Stay Safe – CrosswalksNever pass or attempt <strong>to</strong> pass another vehicle s<strong>to</strong>pped at a crosswalk.60
Traffic circlesSome cities in Alberta have traffic circles. In a traffic circle, the vehicle on the right must yield <strong>to</strong> thevehicle on the left. The driver on the left must signal the intention <strong>to</strong> exit right. Caution must be usedwhen leaving the circle as this driver must cut across the outside lane. In other words, the driver on theleft must cross through the right lane <strong>to</strong> exit the circle.7In this diagram:• Vehicles B and C must yield <strong>to</strong> Vehicle A.• Vehicle E must yield <strong>to</strong> Vehicle D, whileVehicles F and D proceed <strong>to</strong>gether.• Vehicle H must yield <strong>to</strong> Vehicle G.Traffic in the lanes shown in red must yield <strong>to</strong> traffic in the lanes shown in yellow. Traffic entering thecircle must yield <strong>to</strong> traffic already in the circle. When leaving the traffic circle, use the right turn signal.This tells other drivers what is intended.Remember these safety tips <strong>for</strong> traffic circles.• Approach the traffic circle using the right lane when the plan is <strong>to</strong> leave at the first available exit point.• Use the left lane if the plan is <strong>to</strong> leave the circle at the second exit or beyond.• Watch <strong>for</strong> pedestrian crosswalks when entering or leaving a traffic circle.Intersection safety• Never pass another vehicle that is s<strong>to</strong>pped <strong>for</strong> a pedestrian crossing a street. This applies <strong>to</strong> all lanes oftraffic regardless of which one the vehicle is in. It is the law.• Allow more than 2-4 seconds when following larger vehicles such as trucks or buses; because thesevehicles are wider and taller, they will block the view and interfere with the ability <strong>to</strong> see what ishappening ahead.• When approaching intersections, a learner needs <strong>to</strong> look ahead and answer the following questions.- Are there any traffic lights or signs?- Where are the intersecting roads?- What lane should I be in <strong>to</strong> go straight ahead? Turn left? Turn right?- Are there special turning lanes or bays?- Are there any vehicles approaching at the same time as I am?- If there are no traffic lights or signs, who is <strong>to</strong> go first and who must yield?- Are there any pedestrians that I must yield <strong>to</strong>?61
Speed control7• Review and discuss speed limits indicated by white signs (required limit) and yellow signs (suggestedlimit). Explain the importance of driving at safe speeds <strong>for</strong> various types of road, weather and visibilityconditions.• Emphasize that driving within the speed limit reduces the chances of getting in<strong>to</strong> dangeroussituations. Keeping within the speed limit is not just <strong>to</strong> avoid being s<strong>to</strong>pped by law en<strong>for</strong>cemen<strong>to</strong>fficers.• Advise when <strong>to</strong> begin slowing down or speeding up <strong>for</strong> posted speed limits and how <strong>to</strong> maintainspeed control.• Have the learner practise speed control in various situations. Ensure a safe, consistent speed ismaintained and good decisions are made while:- accelerating- braking- allowing the vehicle <strong>to</strong> coastCoach’s TipAn excellent place <strong>to</strong> practice speed control is on hills. <strong>New</strong> drivers tend <strong>to</strong> lose speed going up hillor race going downhill.Stay Safe – Behind Other VehiclesNever drive in another vehicle’s blind spot <strong>for</strong> any length of time. The other driver may not be able<strong>to</strong> see you. When following larger vehicles, a good rule of thumb is ‘If you can’t see the driver inthe driver’s side and rear view mirrors, that driver can’t see you.’Possible trouble spots in moderate and heavy trafficThere are several hazards in moderate and heavy traffic. Stress <strong>to</strong> the learner the need <strong>to</strong> be alert <strong>for</strong>situations that present an increased risk. These include:• traffic blocking intersections.• slow moving or heavy traffic that could mean more braking.• crowding from trucks, buses and other oversized vehicles.• pedestrians coming out from between parked cars or in the middle of a block.• drivers or passengers opening doors of parked vehicles.• drivers trying <strong>to</strong> make their way through crowded traffic.• drivers running red lights.• uneven pavement and sudden changes in street conditions.• one-way streets.• shared centre lanes used <strong>for</strong> left turns by traffic going in both directions.• oncoming left turning vehicles that block the view of through traffic when the vehicle is about <strong>to</strong>turn left.62
Driver’s Progress Report – Exercise 7Driving in Moderate <strong>to</strong> Heavy TrafficPer<strong>for</strong>mance Assessment (Circle One)1-<strong>Go</strong>od 2-Fair 3-Needs Practice7Moderate <strong>to</strong> Heavy Traffic Volume AreasVision:• Scans 1 <strong>to</strong> 1.5 blocks (12 <strong>to</strong> 15 seconds) ahead 1 2 3• Checks rear view mirror every 1 <strong>to</strong> 1.5 blocks 1 2 3(10 <strong>to</strong> 15 seconds)• Scans <strong>for</strong> hazards (construction, pedestrians, 1 2 3situations requiring caution)• Scans <strong>for</strong> traffic signs, signals, and controls 1 2 3• Identifies intersections (controlled/uncontrolled) 1 2 3Speed:• Drives <strong>for</strong> the conditions 1 2 3• Drives recognizing posted/unposted speed limits 1 2 3• Adjusts speed <strong>for</strong> conditions ahead 1 2 3• Accelerates and brakes properly 1 2 3Steering:• Hand position – driving straight or s<strong>to</strong>pping 1 2 3(9 and 3 o’clock)• Method (hand-over-hand while turning) 1 2 3General Requirements:• Chooses proper lane <strong>for</strong> turning on<strong>to</strong> 1 2 3one ways and dual turns• Recognizes various lanes and their use 1 2 3• Per<strong>for</strong>ms proper lane change sequence 1 2 3• Maintains speed while changing lanes 1 2 3• Uses signal lights appropriately 1 2 3• Applies right-of-way at all intersections 1 2 3• Applies right-of-way at traffic circles 1 2 3• Anticipates s<strong>to</strong>pping/slowing well in advance 1 2 3• Adjusts <strong>to</strong> conditions (braking, steering) 1 2 3• S<strong>to</strong>ps at proper s<strong>to</strong>pping points <strong>for</strong> marked and 1 2 3unmarked crosswalksComments:_____________________________________________________________________________________________________________________________________________________________________________________________________________________________________________________________________________________________Coach: _______________________________________________<strong>New</strong> Driver: _______________________________________________Date: _______________________________________________63
764
Exercise 8Highway DrivingRecommended practice time: 10 hours minimum8
8The first practice sessions with a new driver should be during non-rush hour traffic or a time whenhighway (refers <strong>to</strong> urban and rural high speed roadways) traffic is light. This allows the new driver <strong>to</strong>become familiar with acceleration and deceleration lanes, and entrance and exit ramps without having<strong>to</strong> deal with the added pressure of heavy traffic. Lighter traffic will be less daunting. The followinginstructions can help the new driver learn safe driving on highways.Review and discuss the in<strong>for</strong>mation in the following sections. Review each section at home or in thelegally parked vehicle and then practise the required skills.Coach’s TipPlan a route that allows <strong>for</strong> getting on and off the highway several times.Entering a highwayInstructions <strong>for</strong> entering a highway must emphasize the proper use of the entrance ramp and accelerationlane in order <strong>to</strong> merge safely in<strong>to</strong> traffic.• Check the traffic flow on the highway while still on the entrance ramp and approaching theacceleration lane.• Use the side view mirror and do a shoulder check <strong>to</strong> find a gap (the entry point) in traffic.• Turn on the signal light as the vehicle enters the acceleration lane and adjust speed <strong>to</strong> match that ofthe traffic on the highway.• Do a shoulder check again when the vehicle is about halfway along the acceleration lane <strong>to</strong> locate thepre-selected gap. Maintain speed and merge with the traffic in<strong>to</strong> the first lane of the highway.• Check that the signal light is off.Stay Safe – Solid and Broken LinesIt is against the law <strong>to</strong> cross over a single solid line that divides the acceleration lane from the trafficlanes on the highway. Merge only where there are broken lines.66
Coach’s Tips• When following another vehicle in the acceleration lane, remind the new driver <strong>to</strong> keep asafe following distance. Be aware of other drivers who are merging at the same time. Whileone driver is checking <strong>for</strong> a safe gap <strong>to</strong> merge in<strong>to</strong>, the driver ahead may slow down or s<strong>to</strong>pabruptly. Maintain enough space <strong>to</strong> make an unexpected s<strong>to</strong>p.• When entering a highway from an entrance ramp, do not pull directly on<strong>to</strong> the highway. Usemost or all of the acceleration lane <strong>to</strong> adjust speed and merge safely in<strong>to</strong> a gap in the traffic.8Exiting a highwayInstructions <strong>to</strong> the learner should emphasize the proper method <strong>for</strong> exiting a highway safely.• Move in<strong>to</strong> the proper lane <strong>for</strong> exiting well in advance of the intended exit. Do not wait <strong>for</strong> thelast minute.• Signal an intention <strong>to</strong> leave the highway well be<strong>for</strong>e reaching the deceleration lane.• Do not reduce speed until the vehicle has fully entered the deceleration lane.• After entering the deceleration lane, keep the signal light on until the exiting is complete.• Slow down <strong>to</strong> the posted speed limit of the exit ramp.Stay Safe – Highways• If you miss your exit, do not s<strong>to</strong>p or back on<strong>to</strong> the highway. Instead, continue on <strong>to</strong> the nextexit or interchange and plan <strong>to</strong> return <strong>to</strong> your intended route.• Do not cross the single solid line that separates the deceleration lane of the exit with the travellanes of the highway.• Cross in<strong>to</strong> the next lane only in the areas designated by broken lines, which permit this transfer.67
Weave zones8On some highway interchanges, the entrance and exit points are very close <strong>to</strong>gether. This can increasethe risk of collisions. One group of vehicles is slowing down <strong>to</strong> exit the highway. At the same time andwithin the same space, another group of vehicles is speeding up <strong>to</strong> enter the highway. The area whereboth groups of vehicles cross is referred <strong>to</strong> as a weave zone. <strong>Drivers</strong> must give their full attention and useextreme caution in these zones.Instruct the learner who is in a weave zone <strong>to</strong> do the following.• Control the vehicle’s speed.• Signal well in advance so other drivers know what move is intended.• Do a shoulder check when timing the sideways move in<strong>to</strong> an acceleration or deceleration lane.• Use extreme caution when moving within weave zones.Lane changing and passing on highwaysWhen wanting <strong>to</strong> pass another vehicle, the learner should per<strong>for</strong>m the following sequence.• Plan <strong>to</strong> pass only in an area where passing is permitted.• Maintain a safe following distance from the vehicle in front.• Check traffic ahead and behind <strong>to</strong> ensure it is safe <strong>to</strong> pass.• Do a shoulder check of the blind spot in the next lane <strong>to</strong> ensure there will be no traffic interferingwith the pass, such as another vehicle about <strong>to</strong> pass.• Signal the intention <strong>to</strong> move over, and double check that the road ahead is clear <strong>for</strong> the pass.• Move in<strong>to</strong> the passing lane <strong>to</strong> pass the vehicle. Remember, it is not permitted <strong>to</strong> exceed the speedlimit even while passing.• Once the passed vehicle is clearly visible in the inside rear view mirror, do a shoulder check of theblind spot in the lane about <strong>to</strong> be entered <strong>to</strong> be sure the vehicle just passed will not be cut off.• Signal the intention <strong>to</strong> return <strong>to</strong> the original lane of travel.• Move in<strong>to</strong> the lane while maintaining speed.• Check that the signal light is off.68
1. Maintain a safe following distance.2. Check <strong>for</strong> traffic ahead.3. Mirror check <strong>for</strong> traffic behind.4. Shoulder check left <strong>for</strong> passingvehicles.5. Signal left and double check <strong>for</strong>traffic ahead.6. Move in<strong>to</strong> the passing lane.7. Make a smooth pass. Do notexceed the speed limit.8. When the passed vehicle appearsin the inside of the rear viewmirror, shoulder check right<strong>for</strong> clearance.9. Signal right.10. Move in<strong>to</strong> original lane of travelmaintaining passing speed.11. Resume travel. Check <strong>for</strong> signallight cancellation.8It is illegal <strong>to</strong> pass another vehicle when:• approaching vehicles in the opposing lane of traffic are <strong>to</strong>o close.• a solid yellow line is in the centre of a highway or when a solid line is on the driver’s side of thecentre line.• a sign indicates a no passing zone.• in a school or playground zone while restricted speed limits are in effect.• driving uphill on any two-lane highway.• driving within a curve on any two-lane highway.• approaching within 30 metres of a railroad crossing on a two-lane highway.• a school bus is s<strong>to</strong>pped and displaying alternating red flashing lights. This means s<strong>to</strong>p whetherapproaching an oncoming bus or following one. The only time a vehicle is permitted <strong>to</strong> proceedis when the vehicle and the school bus are on the opposite side of a divided highway.Stay Safe – PedestriansAlways be alert <strong>for</strong> pedestrians on or near a highway. Give them enough space when approachingand passing. Be especially careful after dark when pedestrians are difficult <strong>to</strong> see.69
8Highway driving safetyStay Safe – Other VehiclesMove over <strong>to</strong> the right side of your lane and slow down when being passed by larger vehicles.As the new driver gains confidence and becomes more familiar with highway driving and practice sessionsbecome longer, use the following in<strong>for</strong>mation and hints <strong>for</strong> safer driving.• Maintain the speed of the flow of traffic as much as possible, without exceeding the postedspeed limit.• Avoid getting caught between groups of vehicles driving close <strong>to</strong>gether.• Do not tailgate other vehicles (follow <strong>to</strong>o closely). Maintain, at a minimum, a two-second followingdistance during normal conditions.• Stay out of the left lane unless passing. Left lanes are designed <strong>for</strong> faster traffic and <strong>for</strong> passing. InAlberta, signs are posted on highways reminding slower traffic <strong>to</strong> stay right. On a three-lane highwaywhere there are several entrances and exits, stay in the centre lane because it presents the fewestconflicts. However, a new driver who may be driving slower than the speed limit should stay in theright lane.• Maintain good visual lead-time, looking about 25 <strong>to</strong> 30 seconds ahead of the vehicle. This helps thedriver <strong>to</strong> take action sooner and make better driving decisions when spotting hazards ahead.• Keep searching <strong>for</strong> clues in traffic of possible conflicts. Do not stare at any one object <strong>for</strong> any length oftime. Seeing a conflict sooner will give more time <strong>to</strong> react <strong>to</strong> it safely.• Avoid driving in another driver’s blindspot. Speed up or slow down in<strong>to</strong> a position where the vehiclecan be seen. This is also important with trac<strong>to</strong>r-trailers and trucks whose drivers can see behind onlythrough their side view mirrors.• Use the rear view mirror often <strong>to</strong> keep track of activity behind the vehicle. It is recommended rearview mirror checks be done every 15 <strong>to</strong> 20 seconds when driving on a highway.• Be alert <strong>for</strong> the brake lights of vehicles in front. This could be an early sign of trouble. If spotted earlyenough, the warning will provide plenty of lead-time <strong>for</strong> a controlled s<strong>to</strong>p.Stay Safe – Blind SpotsAlways be aware of large vehicle’s blind spots. If you cannot see the driver in the driver’s side viewmirror, the driver cannot see you.School bus safety<strong>Drivers</strong> must slow down and prepare <strong>to</strong> s<strong>to</strong>p when a school bus is preparing <strong>to</strong> s<strong>to</strong>p. At this time thealternating amber flashing lights are on.• Drive with added care and caution when approaching a school bus. Children may run out or appearalmost anywhere near the bus or from across the road.• S<strong>to</strong>p about 20 metres from the bus whether behind it or coming <strong>to</strong>ward it, when the school bus iss<strong>to</strong>pped and the red alternating lights are flashing. The only time s<strong>to</strong>pping is not required is whenapproaching the s<strong>to</strong>pped school bus from the front on a highway physically divided by a median.• Remain s<strong>to</strong>pped until the red lights s<strong>to</strong>p flashing. If the bus is s<strong>to</strong>pped <strong>to</strong> allow children off, remains<strong>to</strong>pped until the children have reached a safe place away from traffic.70
Driver’s Progress Report - Exercise 8Highway DrivingPer<strong>for</strong>mance Assessment (Circle One)1-<strong>Go</strong>od 2-Fair 3-Needs PracticeHighway and Weave Zone - Entry and ExitVision:• Scans 25 <strong>to</strong> 30 seconds ahead 1 2 3• Checks rear view mirror every 15 <strong>to</strong> 20 seconds 1 2 3• Scans <strong>for</strong> merging traffic 1 2 3• Scans <strong>for</strong> entry and exit gaps 1 2 3• Identifies merge and weave zones 1 2 38Speed:• Drives <strong>for</strong> the conditions 1 2 3• Drives recognizing posted/unposted speed limits 1 2 3• Adjusts speed <strong>for</strong> entry or exit properly 1 2 3• Accelerates and brakes properly <strong>for</strong> merge 1 2 3and weave zonesSteering:• Hand position – driving straight, 1 2 3s<strong>to</strong>pping and lane changes• Method 1 2 3General Requirements:• Chooses proper lane <strong>for</strong> merge and weave zones 1 2 3• Recognizes various lanes and their use 1 2 3• Per<strong>for</strong>ms proper lane change sequence 1 2 3• Adjusts speed while changing lanes in weave zones 1 2 3• Uses signal lights appropriately 1 2 3• Applies right-of-way when entering or exiting 1 2 3• Anticipates well in advance 1 2 3• Adjusts <strong>to</strong> conditions (braking, steering) 1 2 3• S<strong>to</strong>ps at proper points <strong>for</strong> school bus loading 1 2 3and unloading71
8Lane Changing and PassingGeneral Requirements:• Passes in permitted areas only 1 2 3• Does not exceed speed limit when passing 1 2 3• Waits <strong>to</strong> see passed vehicle in rear view mirror 1 2 3be<strong>for</strong>e changing back in<strong>to</strong> lane• Per<strong>for</strong>ms proper lane change 1 2 3Comments:_____________________________________________________________________________________________________________________________________________________________________________________________________________________________________________________________________________________________Coach: _______________________________________________<strong>New</strong> Driver: _______________________________________________Date: _______________________________________________72
Exercise 9Driving After DarkRecommended practice time: 10 hours minimum9
9This exercise should be done once the new driver has become reasonably skilled in all previous exercises.During the first few after dark practice sessions, have the learner return <strong>to</strong> the same streets that werepractised on during the day. All the skills practised during the day are handled the same way after dark.However, decreased visibility after dark makes driving more difficult and increases the risk of a collision.The following instructions will help the learner drive more safely after dark.Review and discuss the in<strong>for</strong>mation in the following sections. Review each section at home or in thelegally parked vehicle and then practise the required skills.Stay Safe – Lights on <strong>for</strong> SafetyDriving with headlights on makes you more visible during the day and helps you <strong>to</strong> see hazardsat night.Dangers of driving after dark• Vision is severely limited after dark, making objects and traffic patterns more difficult <strong>to</strong> see and plan<strong>for</strong> ahead of time.• A driver’s reactions depend on vision. When vision is limited after dark, it is more difficult <strong>to</strong> make safegap judgments, notice pedestrians and cyclists, and see curbs, medians, pavement markings androadway edges clearly.• Glare from oncoming headlights makes seeing things more difficult, and temporarily blinds somedrivers. It takes several seconds <strong>for</strong> the normal eye <strong>to</strong> re-adjust from this temporary blindness.• Most people become more tired as the night progresses. This interferes with concentration andjudgment, and slows reaction time.Driving after dark in urban areas• Never drive with only the vehicle’s park lights on. Park lights are <strong>for</strong> when the vehicle is parked.• Drive a little more slowly after dark and increase the following distance <strong>to</strong> take in<strong>to</strong> account thereduced visibility.• Use extra caution when judging distances after dark. Landmarks and reference points used during theday are more difficult <strong>to</strong> see after dark.• Help reduce the effect of headlight glare and associated temporary blindness by focusing <strong>to</strong> the rightside or edge of the roadway while an oncoming vehicle passes.• Reduce the amount of glare from headlights behind by flipping the inside rear view mirror <strong>to</strong> thenight driving setting.Coach’s Tips• Teach the new driver <strong>to</strong> watch <strong>for</strong> objects that reflect the light of the headlights. This givesadvanced warning of danger or the need <strong>to</strong> s<strong>to</strong>p or slow down. Examples include roadsigns, reflective striping or lane markings, a piece of metal or glass on the road and the eyesof an animal.• In urban areas, traffic signals and signs are harder <strong>to</strong> see at night against a background ofneon lights, street lights, other signs and lit s<strong>to</strong>re windows.74
Driving after dark in rural areasA quiet country road, preferably the same one used <strong>for</strong> daytime practice, should be used <strong>for</strong> the newdriver <strong>to</strong> gain experience while driving in darkness.Driving after dark in rural areas requires the use of high and low beam lights. Have the learner becomeaccus<strong>to</strong>med <strong>to</strong> using them. Explain about the proper distances <strong>for</strong> dimming high beam lights wheneverapproaching an oncoming vehicle (300 metres) or following another vehicle (150 metres).9• Use high beams when it is safe <strong>to</strong> do so without affecting the vision of other drivers.• Do not overdrive the headlights. In other words, do not drive so fast that it would be impossible <strong>to</strong>s<strong>to</strong>p the vehicle in time <strong>to</strong> avoid what the headlights illuminate.• Slow down on gravel roads. Loose gravel can cause loss of control of the vehicle. It is difficult <strong>to</strong> judgethe dangers of loose gravel under night driving conditions.• Be alert <strong>for</strong> pedestrians or animals on or near the road.Since many rural roads are gravel and do not have a centre line, help the new driver learn <strong>to</strong> judge thecentre of the road under high and low beam light conditions. The same applies <strong>to</strong> judging the right edgeof the roadway by noticing the difference in contrast between the gravel road and the grass in the ditch.Stay Safe – Headlights and Warning SignsRemember that headlights do not follow curves, hills and dips in the road. To compensate, reducespeed and pay special attention <strong>to</strong> road warning signs such as curve, winding road, bump, narrowbridge, roadway narrows and slippery when wet.Driving after dark on highways• Pay attention when entering and exiting highways after dark. It is similar <strong>to</strong> daytime procedures asmost of these areas or interchanges are lit up after dark. However, watch <strong>for</strong> ‘Wrong Way’ and ‘DoNot Enter’ signs near entry and exit ramps that might not be as obvious in the dark.• Ensure that, on roadways, the yellow line is always <strong>to</strong> the left of the vehicle.• Maintain a safe following distance. Increase the following distance after dark <strong>to</strong> allow <strong>for</strong> reduced orlimited visibility.• Do not drive faster than the posted speed limit.75
9• Be courteous in the use of high and low beam headlights. Dim the high beams well be<strong>for</strong>e comingclose <strong>to</strong> another vehicle, in order not <strong>to</strong> affect the vision of drivers ahead, as well as those oncoming.• Reduce the effects of glare from oncoming headlights by driving in the right lane of a highway withseveral lanes. Don’t look at oncoming lights. Focus instead on the right edge of the roadway aheadwhile passing oncoming vehicles.Coach’s TipYellow lines separate traffic travelling in opposite directions. The yellow line should always be <strong>to</strong>the left of the vehicle. If it is on the right, you are driving on the wrong side of the road.76
Driver’s Progress Report – Exercise 9Driving after DarkPer<strong>for</strong>mance Assessment (Circle One)1-<strong>Go</strong>od 2-Fair 3-Needs Practice9Driving after DarkVision:• Scans 12 <strong>to</strong> 15 seconds ahead 1 2 3• Checks rear view mirror every 5 <strong>to</strong> 8 seconds 1 2 3• Looks <strong>to</strong> highway shoulder when oncoming 1 2 3vehicle headlights are <strong>to</strong>o bright• Scans <strong>for</strong> hazards (construction, pedestrians, 1 2 3situations requiring caution)• Scans <strong>for</strong> traffic signs, signals, and controls 1 2 3• Identifies intersections (controlled/uncontrolled) 1 2 3• Uses low and high beam headlights properly 1 2 3Speed:• Drives <strong>for</strong> the conditions 1 2 3• Drives recognizing posted/unposted speed limits 1 2 3• Adjusts speed <strong>for</strong> conditions ahead 1 2 3• Accelerates and brakes properly 1 2 3Steering:• Hand position – driving straight or s<strong>to</strong>pping 1 2 3(9 and 3 o’clock)• Method (hand-over-hand while turning) 1 2 3General Requirements:• Chooses proper lane <strong>for</strong> turning 1 2 3• Recognizes various lanes and their use 1 2 3• Per<strong>for</strong>ms proper lane change sequence 1 2 3• Maintains speed while changing lanes 1 2 3• Uses signal lights appropriately 1 2 3• Applies right-of-way at all intersections 1 2 3• Anticipates s<strong>to</strong>pping/slowing well in advance 1 2 3• Adjusts <strong>to</strong> conditions (braking, steering) 1 2 3• S<strong>to</strong>ps at proper s<strong>to</strong>pping points 1 2 3• Does not overdrive headlights 1 2 3• Increases following distance 1 2 3• Dims headlights appropriately 1 2 3Comments:_____________________________________________________________________________________________________________________________________________________________________________________________________________________________________________________________________________________________Coach: _______________________________________________<strong>New</strong> Driver: _______________________________________________Date: _______________________________________________77
978
Exercise 10Driving in Poor ConditionsRecommended practice time: 6 hours minimum10
10Once the new driver has become skilled in Exercises 1 through 9, begin driving in poor weather and roadconditions. Although Exercise 10 involves driving in various seasons, keep in mind that a new driver musthave an Alberta Class 7 Learners licence <strong>for</strong> one year. This will allow enough time and opportunity <strong>for</strong>practice during different seasons and under poor weather and road conditions.Practice sessions may need <strong>to</strong> be at the spur of the moment, <strong>for</strong> example during a rains<strong>to</strong>rm, wind or fog.At the very minimum, thoroughly review and discuss safe and proper driving techniques <strong>for</strong> unfavourableconditions with the new driver. Practise when the learner is ready and the poor conditions are present.NOTE: Use good judgment when practicing in poor conditions. If conditions are extreme then it is unsafe <strong>for</strong>even experienced drivers <strong>to</strong> travel.Review and discuss the in<strong>for</strong>mation in the following sections. Review each section at home or in thelegally parked vehicle and then practise the required skills.During poor weather and road conditions, extra road hazards are created by:• slippery roads.• build up of snow or water on road surfaces.• poor visibility.• other drivers who do not take in<strong>to</strong> account the poor driving conditions.• use of cruise control.The following instructions will help the new driver adjust <strong>to</strong> driving in changing weather and roadconditions.Stay SafeIncreasing your following distance is the most important thing you can do when driving in poorweather conditions. More time is needed <strong>to</strong> s<strong>to</strong>p during rain, snow or on icy roads. Keeping a safedistance between your vehicle and the vehicles around you allows more time <strong>to</strong> plan.Driving in rain• Turn on the wipers after the windshield is wet. This allows them <strong>to</strong> work better. Select a low, high orintermittent speed, depending on the amount of rain and how severe it is.• Be sure the low beam headlights are on during rains<strong>to</strong>rms. This will make it easier <strong>for</strong> the vehicle <strong>to</strong> beseen by other drivers.• Choose a slower speed that is appropriate <strong>for</strong> how severe the s<strong>to</strong>rm is and the visibility.• Avoid sudden s<strong>to</strong>ps. During slippery conditions, apply enough pressure, without locking the brakes, <strong>to</strong>slow or s<strong>to</strong>p the vehicle. By not locking the brakes, the driver is better able <strong>to</strong> steer if s<strong>to</strong>pping isn’tpossible.80
• If the vehicle is equipped with an anti-lock braking system (ABS), maintain steady pressure on thebrake pedal.• Slow down <strong>to</strong> reduce the chance of hydroplaning (gliding over mixed water and oil). Duringhydroplaning the vehicle can lose traction and go out of control.10Stay SafeSlow down in the first few minutes of a rains<strong>to</strong>rm. This is when roadways are the most slippery.Water, that is deeper than the tire tread, mixes with oil that has built up on the road surfacemaking it very slippery. This may result in hydroplaning.• Use caution not <strong>to</strong> splash pedestrians walking near the roadway.• Stay back from large vehicles such as trucks or buses during heavy rains<strong>to</strong>rms. They can throw out aspray of water that can completely block vision even if the wipers are on maximum speed.• Look well down the road and check the layout of the road be<strong>for</strong>e passing. Use caution when passing alarge vehicle, remembering that the spray of water may completely block the vision.• Watch <strong>for</strong> highway signs showing ‘Slippery When Wet’ and use extra caution.• Do not drive if the road appears flooded. The vehicle may be stranded if it stalls inside the floodedarea. If floodwaters are deep, the vehicle could be carried away in<strong>to</strong> a more dangerous situation.Driving on snow or iceCoach’s TipAccelerate and decelerate very gently on snow or ice <strong>to</strong> prevent the tires from spinning.Accelerating or decelerating <strong>to</strong>o quickly may cause the vehicle <strong>to</strong> skid.• Make sure all windows are cleared of snow and ice be<strong>for</strong>e driving. As well, clear the entire vehicle, asits movement can cause snow <strong>to</strong> blow or slide on<strong>to</strong> windows and block the driver’s view.81
10• Accelerate gently without spinning the wheels, keeping the front wheels pointed straight ahead.• Decrease speed in areas of poor traction caused by snow or ice. In extreme conditions, use a lowergear in both au<strong>to</strong>matic and standard transmission vehicles.• Begin slowing down well ahead of a turn or an intersection, <strong>to</strong> maintain full control. This way the vehiclewill not slide in<strong>to</strong> or through the intersection.• Apply the brakes gently and release just be<strong>for</strong>e lock up. Repeat this, with short pauses in between <strong>to</strong>avoid skidding. If the vehicle is equipped with ABS, steady pressure is all that is needed on the brake pedal.• Watch <strong>for</strong> danger spots such as shaded areas, and bridge or overpass decks that may be slippery due<strong>to</strong> frost, while the rest of the road is clear.• Be extremely careful of patches of black ice (where the pavement is seen through a layer of ice). Theseare sometimes difficult <strong>to</strong> spot but can be very dangerous.• Do not put <strong>to</strong>o much pressure on the gas pedal when going up a slippery hill. The wheels could spin,causing a skid or loss of control.• Stay well behind the vehicles ahead. This will allow time <strong>for</strong> slowing down or a safe s<strong>to</strong>p if anothervehicle loses control.• Shift down <strong>to</strong> a lower gear be<strong>for</strong>e going downhill on slippery surfaces <strong>to</strong> avoid skidding. Shift slowlyand smoothly with both au<strong>to</strong>matic and standard transmissions.Stay SafeBe careful when s<strong>to</strong>pping. Allow more time and distance <strong>to</strong> s<strong>to</strong>p. S<strong>to</strong>pping distances increase about10 times in snow and ice.Driving in fog or smoke• Decrease speed according <strong>to</strong> the density of the fog or smoke. The vehicle speed should match thedriver’s ability <strong>to</strong> see ahead, even if it means slowing <strong>to</strong> a crawl.Stay SafeDo not use high beam headlights in fog or smoke. They reflect off the fog causing glare and reducedvisibility. Always use low beam headlights or fog lights (if equipped).82
Driver’s Progress Report – Exercise 10Driving in Poor ConditionsPer<strong>for</strong>mance Assessment (Circle One)1-<strong>Go</strong>od 2-Fair 3-Needs Practice10Driving in Poor ConditionsVision:• Scans 12 <strong>to</strong> 15 seconds ahead 1 2 3• Checks rear view mirror every 10 <strong>to</strong> 15 seconds 1 2 3• Scans <strong>for</strong> hazards (construction, pedestrians, 1 2 3situations requiring caution)• Scans <strong>for</strong> traffic signs, signals, and controls 1 2 3• Scans <strong>for</strong> road hazards (water, ice, snow) 1 2 3Speed:• Drives <strong>for</strong> the conditions 1 2 3• Drives recognizing posted/unposted speed limits 1 2 3• Adjusts speed <strong>for</strong> conditions ahead 1 2 3• Accelerates and brakes properly 1 2 3Steering:• Hand position – driving straight, s<strong>to</strong>pping, 1 2 3or lane changing (9 and 3 o’clock)• Method (hand-over-hand while turning) 1 2 3General Requirements:• Chooses proper lane <strong>for</strong> turning 1 2 3• Recognizes various lanes and their use 1 2 3• Per<strong>for</strong>ms proper lane change sequence 1 2 3• Maintains speed while changing lanes 1 2 3• Uses signal lights appropriately 1 2 3• Applies right-of-way at all intersections 1 2 3• Anticipates s<strong>to</strong>pping/slowing well in advance 1 2 3• Adjusts <strong>to</strong> conditions (braking, steering) 1 2 3• S<strong>to</strong>ps at proper s<strong>to</strong>pping points 1 2 3• Increases following distance 1 2 3Driving in Rain• Uses windshield wipers 1 2 3• Aware of hydroplaning 1 2 3• Scans <strong>for</strong> large puddles, hazards 1 2 3Driving on Snow or Ice• Brushes, scrapes, and clears all windows 1 2 3• Uses lower gears <strong>for</strong> increased traction 1 2 3• Accelerates gradually 1 2 3• Uses brakes appropriately 1 2 383
10Driving in Fog or Smoke• Uses low beam headlights 1 2 3• Pulls off roadway <strong>to</strong> s<strong>to</strong>p driving 1 2 3Comments:_____________________________________________________________________________________________________________________________________________________________________________________________________________________________________________________________________________________________Coach: _______________________________________________<strong>New</strong> Driver: _______________________________________________Date: _______________________________________________84
Exercise 11Handling Common EmergencySituationsRecommended practice time: 4 hours minimum11
11Exercise 11 deals with some common driving emergencies that can happen at any time. The learnerneeds <strong>to</strong> know how <strong>to</strong> react and handle these problems properly. However, it is not recommended thatthese situations be created <strong>for</strong> teaching or demonstration during the coach and the new driver’s practicesessions, because of the danger or damage that could result. Each situation should be discussed until thelearner knows what <strong>to</strong> do and how <strong>to</strong> handle it safely. The following sets of instructions will help the newdriver understand how <strong>to</strong> manage the vehicle in these situations.Review and discuss the in<strong>for</strong>mation in the following sections. Review each section at home or in thelegally parked vehicle and then practise the required skills.Brake failureMost modern vehicles have dual braking systems that protect against <strong>to</strong>tal brake failure. A warninglight on the vehicle’s dashboard should light up <strong>to</strong> warn of any problem be<strong>for</strong>e a brake failure occurs.To determine if the vehicle has this warning system, refer <strong>to</strong> the opera<strong>to</strong>r’s manual or ask at the localdealership.Discuss with the learner how a brake failure situation should be handled.• Find a safe place <strong>to</strong> park the vehicle immediately if the brake warning light comes on.• Do not drive the vehicle until the brakes have been checked or repaired by a qualified mechanic.When <strong>to</strong>tal brake failure occurs, the brake pedal is pressed and nothing happens or it falls <strong>to</strong> the floor.If this happens do the following.• Shift down <strong>to</strong> a lower gear immediately (even with an au<strong>to</strong>matic transmission) so the vehicle begins<strong>to</strong> slow.• Apply the park brake.• Bring the vehicle <strong>to</strong> a safe s<strong>to</strong>p.• Do not drive the vehicle until the brakes are repaired.There is another type of brake failure that can occur and is unique <strong>to</strong> power braking systems. It occurswhen the vehicle’s engine stalls and no power is being produced <strong>to</strong> assist in braking. With this type ofbrake failure, the brake pedal is pushed down with normal <strong>for</strong>ce, but the vehicle does not slow down. Ifthis happens, do the following.• Do not panic. Push harder on the pedal – the brakes will still work.• Apply hard, continuous pressure <strong>to</strong> the brake pedal and the vehicle will begin <strong>to</strong> slow down. If thevehicle is equipped with ABS, hard steady pressure is all that is needed.• If the wheels lock because of the hard brake pressure, release the pedal <strong>for</strong> a second and brake againusing a little less pressure on the pedal.86
Tire failureThis is another example of an emergency that can occur at any time while driving. It is important <strong>to</strong>review thoroughly what <strong>to</strong> do if tire failure occurs.11If the front tire has blown out, there will be a strong and definite pull of the vehicle <strong>to</strong> the side of theblown tire. A rear tire failure will usually cause the vehicle <strong>to</strong> weave. If a flat tire happens while driving, thefollowing is recommended.• Grip the steering wheel firmly with both hands and hold the vehicle on a straight course.• Do not <strong>to</strong>uch the brakes.• Ease off the gas pedal, allowing the vehicle <strong>to</strong> slow.• Apply the brake with a gentle but steady pressure after the vehicle starts <strong>to</strong> slow.• Look <strong>for</strong> a safe place <strong>to</strong> s<strong>to</strong>p and park, entirely off the road if possible.• Turn on the vehicle’s four-way hazard warning lights.Coach’s TipThe discussion of flat tires and blowouts provides an ideal time <strong>for</strong> the learner <strong>to</strong> change a tire onthe vehicle. This should be done more than once so that the new driver will be able <strong>to</strong> do it whenthey are alone.Changing a tire• Point out the location of the spare tire and the necessary <strong>to</strong>ols.• Demonstrate how <strong>to</strong> change a tire and have the learner practise changing it.• Show how <strong>to</strong> add air <strong>to</strong> the tires. Check the inside of the driver’s door or the owner’s manual <strong>for</strong> therequired tire pressure.Recovering if the vehicle goes off the roadIf the wheels of the vehicle move off the edge of the pavement, a driver should do the following.• Grip the steering wheel firmly with both hands.• Resist the urge <strong>to</strong> turn the steering wheel <strong>to</strong> bring the vehicle back on the pavement.• Ease off the gas pedal and let the engine slow the vehicle down.• Look well ahead along the intended path of travel. Dropping the line of sight can cause over steering.• Avoid braking firmly, but use gradual pressure on the brake pedal <strong>to</strong> maintain control of the vehicle.• Do a shoulder check <strong>for</strong> traffic that may be attempting <strong>to</strong> pass, be<strong>for</strong>e returning <strong>to</strong> the pavement.87
11• Return <strong>to</strong> the pavement gradually once the vehicle has slowed down considerably.• Be careful not <strong>to</strong> over steer the vehicle. This increases the possibility of losing control or ending up inthe oncoming lane of traffic.• Straighten the tires and resume speed once the vehicle is safely on the pavement.SkidsMost skids occur as a result of driver error, such as:• turning <strong>to</strong>o sharply.• turning at unsafe speeds.• braking <strong>to</strong>o hard.• accelerating <strong>to</strong>o quickly.• poor anticipation – not looking and planning ahead.Skid recoveryIn a skid always steer in the direction you want the front of the vehicle <strong>to</strong> go.Stay Safe - Wheel Lock UpThe most efficient braking occurs just be<strong>for</strong>e the wheels lock up. Do not push so hard on the brakesthat wheel lock up occurs. If the wheels should lock, release pressure on the brake pedal and reapplywith lighter pressure.88
Braking skidA braking skid occurs when the vehicle’s brakes are applied so hard that one or more of the wheels lock.This causes a loss of steering control. If this happens the driver should do the following.• Release pressure on the brake pedal immediately so that the locked wheel(s) begin turning allowingsteering control <strong>to</strong> return.• Look well ahead and turn the steering wheel in the direction of the skid.• If necessary, brake once the vehicle has straightened but use less pressure on the brake pedal.11Power skidsRear wheel driveIn rear wheel drive vehicles, a power skid is most likely <strong>to</strong> occur when a driver presses <strong>to</strong>o hard on the gaspedal and the rear wheels start <strong>to</strong> spin. If not corrected immediately, the vehicle will skid. If this happensdo the following.• Ease up immediately on the gas pedal until the wheels s<strong>to</strong>p spinning.• Look in the direction the vehicle should go and steer in the direction of the skid. The vehicle shouldstraighten.• Be careful not <strong>to</strong> over-steer. The vehicle may skid in the opposite direction.• Make steering corrections, as necessary, <strong>to</strong> bring the vehicle under control.• Resume speed.Front wheel driveIn front wheel drive vehicles, a power skid can result when there is <strong>to</strong>o much pressure on the gas pedal.This causes the front wheels <strong>to</strong> spin. If not corrected immediately, the vehicle will skid and steering controlwill be lost. If this happens do the following.• Ease up on the gas pedal immediately <strong>to</strong> s<strong>to</strong>p the front wheels from spinning and regain steeringcontrol.• Look in the direction the vehicle should go and steer in the direction of the skid. The vehicle shouldstraighten.• Be careful not <strong>to</strong> over-steer. The vehicle may skid in the opposite direction.• Make steering corrections, as necessary, once control of the vehicle is regained.• Resume speed.89
11Skids while turning cornersRear wheel driveIn rear wheel drive vehicles, a cornering skid can occur when the driver does not slow the vehicle enoughwhile approaching a turn or bend. The vehicle’s back end will slide in the opposite direction of thesteering. If this happens do the following.• Ease up on the gas pedal.• Keep vision well ahead and along the intended path of travel.• Steer in the direction the vehicle should go. A number of steering corrections may be required <strong>to</strong>straighten the vehicle.• Be careful not <strong>to</strong> over-steer. The vehicle may skid in the opposite direction.• Resume speed once the vehicle has straightened.Front wheel driveIn front wheel drive vehicles, the vehicle will tend <strong>to</strong> travel through the corner or <strong>to</strong> run off <strong>to</strong> the outsideof the corner or turn. To reduce the chances of this happening, do the following.• Ease up on the gas pedal.• Keep vision well ahead and along the intended path of travel.• Steer in the direction the vehicle should go. A number of steering corrections may be required <strong>to</strong>straighten the vehicle.• Be careful not <strong>to</strong> over-steer. The vehicle may skid in the opposite direction.• Accelerate gently so the front wheels can pull the vehicle out of the skid.• Resume speed once the vehicle has straightened.90
Driver’s Progress Report – Exercise 11Handling Common Emergency SituationsPer<strong>for</strong>mance Assessment (Circle One)These emergency situations will not be created during the 1-<strong>Go</strong>od 2-Fair 3-Needs Practicepractice sessions. However, the learner must know thefollowing in<strong>for</strong>mation on handling these situations.11Common EmergenciesVision:• Scan 12 <strong>to</strong> 15 seconds ahead 1 2 3• Check rear view mirror every 10 <strong>to</strong> 15 seconds 1 2 3• Scan <strong>for</strong> hazards (snow, ice, large puddles, 1 2 3smoke, fog)• Scan <strong>for</strong> traffic signs, signals, and controls 1 2 3• Maintains vision well along intended path 1 2 3Speed:• Drive <strong>for</strong> the conditions 1 2 3• Drive recognizing posted/unposted speed limits 1 2 3• Adjust speed <strong>for</strong> conditions ahead 1 2 3• Accelerate and brake properly 1 2 3Steering:• Hand position – driving straight or s<strong>to</strong>pped 1 2 3(9 and 3 o’clock)• Method (9 and 3 o’clock <strong>for</strong> managing emergencies) 1 2 3Brake Failure• Shift <strong>to</strong> lower gear 1 2 3• Allow vehicle <strong>to</strong> slow down 1 2 3• Use park brake 1 2 3• Keep firm grip on steering wheel at 9 and 3 o’clock 1 2 3Engine Stall Brake Failure• Shift <strong>to</strong> lower gear 1 2 3• Allow vehicle <strong>to</strong> slow down be<strong>for</strong>e braking 1 2 3• Apply steady pressure <strong>to</strong> brake 1 2 3• Place vehicle in neutral 1 2 3• Keep firm grip on steering wheel at 9 and 3 o’clock 1 2 3Tire Failure• Keep firm grip on steering wheel at 9 and 3 o’clock 1 2 3• Stay off brake and gas pedal 1 2 3• Allow vehicle <strong>to</strong> slow down gradually 1 2 3be<strong>for</strong>e applying brakes91
11Off-Road Recovery• Keep firm grip on steering wheel at 9 and 3 o’clock 1 2 3• Stay off brake and gas pedals 1 2 3• Allow the vehicle <strong>to</strong> slow gradually 1 2 3• Keep vision well along intended path 1 2 3• Shoulder check be<strong>for</strong>e returning gradually <strong>to</strong> roadway 1 2 3• Return <strong>to</strong> roadway with small steering movements 1 2 3Skid Recovery• Stay off brake and gas pedal 1 2 3• Keep vision well along intended path 1 2 3• Turn steering wheel in direction of skid 1 2 3• Gain control of vehicle be<strong>for</strong>e using brakes or 1 2 3gas pedalComments:_____________________________________________________________________________________________________________________________________________________________________________________________________________________________________________________________________________________________Coach: _______________________________________________<strong>New</strong> Driver: _______________________________________________Date: _______________________________________________92
Exercise 12Standard Transmission VehiclesRecommended practice time: 6 hours minimum12
12If the new driver is learning <strong>to</strong> drive using a standard transmission vehicle, teach this exercise be<strong>for</strong>eExercise 1, or between Exercise 1 and Exercise 2. This will prepare the learner <strong>for</strong> the activities in Exercises2 through 11. This exercise can also be taught after the learner has successfully progressed through all theexercises with an au<strong>to</strong>matic transmission vehicle.Review and discuss the in<strong>for</strong>mation in the following sections. Review each section at home or in thelegally parked vehicle and then practise the required skills.Stay SafeWhen practicing this exercise, be sure it is done in a large empty parking lot or a remote area awayfrom any traffic. The new driver should be able <strong>to</strong> start smoothly and shift gears properly be<strong>for</strong>eheading in<strong>to</strong> traffic.In this exercise, the new driver will learn the procedure <strong>for</strong> starting a standard transmission vehicle,putting it in<strong>to</strong> motion, shifting gears up and down, and moving away from an uphill grade.Coach’s TipBe<strong>for</strong>e letting the learner drive a standard transmission vehicle, explain and demonstrate how theclutch and gears of the standard transmission work with each other.Starting the vehicle• Apply the park brake.• Depress the clutch fully.• Select neutral gear.• Turn the key in the ignition <strong>to</strong> start the engine, keeping the clutch fully depressed.Selecting the gear• Start with the park brake on.• Apply the brake pedal firmly.• Depress the clutch firmly.• Select a gear (<strong>for</strong>ward or reverse).• Release the park brake, keeping pressure on the brake pedal.94
12ACBGClutch,Brake andGas PedalDEase UpOn Clutchand FootCovering GasB1Shift ToFirstERaise Clutch... <strong>to</strong> Friction Point... then PauseCReleaseParkingBrakeFDepress Gasand ReleaseClutchSmoothlyMoving the vehicleNOTE: Use only the clutch’s friction point, without applying any gas, <strong>for</strong> the first hour or so when teaching thelearner <strong>to</strong> move the vehicle in 1st gear. The idle speed is enough <strong>to</strong> move the vehicle. Not using the gas allowsthe new driver <strong>to</strong> get a better feel <strong>for</strong> the friction point and its’ ability <strong>to</strong> move the vehicle on its own.• Check the rear and side view mirrors <strong>for</strong> traffic.• Do a shoulder check.• Signal the intention <strong>to</strong> move.• Do a shoulder check again.• Release the clutch slowly until the friction point is reached (where vehicle is just wanting <strong>to</strong> move).• Remove the right foot from the brake pedal and press the gas pedal gently.• Increase pressure on the gas pedal and continue releasing the clutch slowly until the vehicle is infull motion.• Accelerate slowly.• Do not ‘ride the clutch’ (keeping the foot on the clutch pedal) because it causes excess wear.95
12Shifting gears – upwardNOTE: 3S Rule <strong>for</strong> Clutch Use. Only depress the clutch when:1. Starting the vehicle and starting <strong>to</strong> move in 1st gear2. Shifting from one gear <strong>to</strong> another3. S<strong>to</strong>pping the vehicle1 st gear 2 nd gear• Accelerate <strong>to</strong> reach the shifting range <strong>for</strong> thenext higher gear.• Ease off the gas pedal just be<strong>for</strong>e depressingthe clutch.• Release the gas pedal completely and depressthe clutch fully.• Shift in<strong>to</strong> the next higher gear.• Release the clutch slowly.• Increase pressure on the gas pedal.• Accelerate slowly.3rd gear4th gear5 th gear ReverseShifting gears - downward and s<strong>to</strong>pping in traffic or parking• Reduce speed by easing off the gas pedal and using the brake.• Depress the clutch fully.• Shift in<strong>to</strong> the next lower gear.• Release the clutch smoothly.• Maintain the reduced speed.• Depress the clutch fully just be<strong>for</strong>e the vehicle s<strong>to</strong>ps, <strong>to</strong> prevent stalling.• Keep the clutch depressed and apply pressure <strong>to</strong> the brake pedal until the vehicle comes <strong>to</strong> acomplete s<strong>to</strong>p.• Continue <strong>to</strong> keep the clutch fully depressed and keep the right foot firmly on the brake pedal.• If s<strong>to</strong>pping in traffic, select first or low gear <strong>for</strong> starting from the s<strong>to</strong>p position. When starting, followthe same procedure as outlined in Moving the vehicle and Shifting gears – upward.• If parking, place the right foot on the brake pedal and select neutral gear. Turn off the ignition, applythe park brake and release the clutch.96
1Shifting <strong>to</strong> a lower gear4To s<strong>to</strong>p the vehicle112BrakeRaise ClutchWhile Braking ORDepress Clutch andRelease Gas2523Clutch4 34 3Raise Clutch WhileAcceleratingBrakeShiftCoach’s TipsIt is not necessary <strong>to</strong> shift down through the gears when making a normal s<strong>to</strong>p. If an immediates<strong>to</strong>p is needed where space ahead is limited do the following.• Quickly apply the brake pedal.• Push in the clutch just be<strong>for</strong>e the vehicle s<strong>to</strong>ps or the engine stalls.• Apply as much pressure on the brake pedal as necessary <strong>to</strong> bring the vehicle <strong>to</strong> a s<strong>to</strong>p.Starting on an uphill grade• Keep the right foot firmly on the brake pedal and the left foot fully depressing the clutch. Set the parkbrake firmly.• Keep the clutch fully depressed and the right foot firmly on the brake, and select first or low gear.• Remove right foot from the brake pedal, then apply slight pressure <strong>to</strong> the gas pedal <strong>to</strong> bring theengine <strong>to</strong> higher revolutions (RPMs). This will prevent the vehicle from stalling when it begins <strong>to</strong>move <strong>for</strong>ward.• Release the clutch slowly <strong>to</strong> the friction point and hold it there.• Release the park brake.• Apply slightly more pressure <strong>to</strong> the gas pedal while slowly releasing the clutch fully.• Advance the vehicle slowly <strong>for</strong>ward.97
12Driver’s Progress Report – Exercise 12Standard Transmission VehiclesPer<strong>for</strong>mance Assessment (Circle One)1-<strong>Go</strong>od 2-Fair 3-Needs PracticeStandard (Manual) TransmissionsUse of Clutch:• Does not ride the clutch 1 2 3• Depresses clutch only <strong>for</strong> Starting, 1 2 3Shifting & S<strong>to</strong>pping• Releases clutch slowly 1 2 3Shifting:• Uses open palm 1 2 3• Puts transmission in 1st gear at each s<strong>to</strong>p 1 2 3• Does not grind gears 1 2 3• Removes foot from gas pedal <strong>to</strong> shift 1 2 3• Keeps eyes along intended path when shifting 1 2 3• Does not rest hand on gear shift while driving 1 2 3• Does not over-rev the engine when shifting 1 2 3• Shifts at proper speed <strong>for</strong> each gear 1 2 3Hill Starts:• Does not release park brake until friction 1 2 3point reached• Does not over-rev the engine 1 2 3General Requirements:• Uses no gas <strong>to</strong> start in 1st gear <strong>for</strong> first 1 2 3hour of practice• Keeps vision well along intended path 1 2 3• Uses correct hand position when not shifting 1 2 3Comments:_____________________________________________________________________________________________________________________________________________________________________________________________________________________________________________________________________________________________Coach: _______________________________________________<strong>New</strong> Driver: _______________________________________________Date: _______________________________________________98
Overview
Driver’s Practice LogTasksExercise 1 – Pre-driving Habits, Instruments & ControlsNumber ofPractice Hours• Pre-Driving Habits______- Entering and exiting a vehicle ______- Procedures be<strong>for</strong>e starting ______- Instrument panel ______• Controls- Using the controls ______- Checking under the hood ______• Pre-trip Checks- Detailed pre-trip check ______- Daily pre-trip check ______Exercise 2 – Starting and S<strong>to</strong>pping• Starting- Moving <strong>for</strong>ward ______- Driving down the road ______- Returning <strong>to</strong> a parked position ______• S<strong>to</strong>pping______Exercise 3 – Backing• Backing- Backing in a straight line ______- Backing with slight left or right movements ______- Backing sharply <strong>to</strong> the left or right ______Exercise 4 – Right and Left Turns• Right turns• Left turns____________100
Exercise 5 – Parking• Parallel parking______• Hill parking- Uphill with a curb ______- Uphill without a curb ______- Downhill with or without a curb ______• Leaving hill parking- Leaving uphill parking with a curb ______- Leaving uphill parking without a curb ______- Leaving downhill park (curb or no curb) ______• Perpendicular park______• Angle park- Right side ______- Left side ______• Leaving angle park- Right side ______- Left side ______Exercise 6 – Residential Driving• Traffic control signs and signals- Pavement markings ______• General residential driving tips• Lane changing____________• Intersections- Controlled ______- Point of no return ______- Uncontrolled ______101
Exercise 7 – Driving in Moderate <strong>to</strong> Heavy Traffic• Traffic control signals and signs- Lanes and lane markings ______- Marked and unmarked crosswalks ______- Traffic circles ______- Intersection safety ______- Speed control ______- Potential trouble spots ______Exercise 8 – Highway Driving• Entering a highway______• Exiting a highway- Weave zones ______- Lane changing and passing on highways ______• Highway driving safety• School bus safety____________Exercise 9 – Driving after Dark• Dangers of driving after dark• Driving after dark in urban areas• Driving after dark in rural areas• Driving after dark on highways________________________Exercise 10 – Driving in Poor Conditions• Driving in rain• Driving on snow or ice• Driving in fog or smoke__________________102
Exercise 11 – Handling Common Emergency Situations• Brake failure______• Tire failure- Changing a tire ______• Recovering if vehicle goes off the road______• Skids- Skid recovery ______- Braking skids ______- Power skids ______- Skids while turning corners ______Exercise 12 – Standard Transmission Vehicles• Starting the vehicle- Selecting the gear ______- Moving the vehicle ______- Shifting gears – upward ______- Shifting gears – downward ands<strong>to</strong>pping in traffic or parking______- Starting on an uphill grade ______103
Complete Progress AssessmentInstructionsThe Complete Progress Assessment should be used once all the individual exercises are completed andsigned off. It is an overall evaluation of the new driver’s progress.The assessment can be pho<strong>to</strong>copied and used as often as needed. Score each activity and <strong>to</strong>tal eachsection as it is completed. The goal is <strong>for</strong> the learner <strong>to</strong> earn a mark of good or fair <strong>for</strong> every skill.Limit the assessment time <strong>to</strong> one <strong>to</strong> two hours <strong>to</strong> ensure the learner does not become <strong>to</strong>o tired. Areasnot covered in the first assessment can be covered the next time out. It is not necessary <strong>to</strong> complete theassessment in one session.Assessing Per<strong>for</strong>manceA <strong>Go</strong>od assessment score is achieved when the skills are completed safely, smoothly, and withoutdisrupting other vehicles or pedestrians.A Fair assessment score is made when the skills are not per<strong>for</strong>med as well as they could have been, butare done safely with little or no disruption <strong>to</strong> traffic or pedestrians.A Needs Practice assessment score is made when the learner’s per<strong>for</strong>mance is poor and unsafe, and couldor does interfere with other vehicles or pedestrians.A space <strong>for</strong> comments is provided below each section.Date: __________________________104
Basic Habits, Instruments and Controls <strong>Go</strong>od Fair NeedsPractice1. Pre-Trip Check2. Entering the Vehicle3. Knowledge and Use of Instruments4. Knowledge and Use of Controls5. Pre-Driving Habits6. Starting the Engine7. Exiting the VehicleComments:_____________________________________________________________________________________________________________________________________________________________________________________________________________________________________________________________________________________________Starting <strong>Go</strong>od Fair NeedsPractice1. Visual Skills2. Signal Use3. Use of Pedals and SteeringComments:_____________________________________________________________________________________________________________________________________________________________________________________________________________________________________________________________________________________________S<strong>to</strong>pping <strong>Go</strong>od Fair NeedsPractice1. Visual Skills2. Signal Use3. Use of Pedals and Steering4. Position - Curb, Other VehiclesComments:_____________________________________________________________________________________________________________________________________________________________________________________________________________________________________________________________________________________________105
Parallel Parking <strong>Go</strong>od Fair NeedsPractice1. Visual Skills2. Signal Use3. Position - Curb, Other Vehicles4. Speed Control5. Use of Pedals and SteeringComments:_____________________________________________________________________________________________________________________________________________________________________________________________________________________________________________________________________________________________Hill Parking <strong>Go</strong>od Fair NeedsPractice1. Visual Skills2. Signal Use3. Position - Curb, Other Vehicles4. Speed Control5. Use of Pedals and SteeringComments:_____________________________________________________________________________________________________________________________________________________________________________________________________________________________________________________________________________________________Perpendicular and Angle Parking <strong>Go</strong>od Fair NeedsPractice1. Visual Skills2. Signal Use3. Position - Curb, Other Vehicles4. Speed Control5. Use of Pedals and SteeringComments:_____________________________________________________________________________________________________________________________________________________________________________________________________________________________________________________________________________________________106
Turns Left Right<strong>Go</strong>od Fair Needs <strong>Go</strong>od Fair Needs1. Speed Control2. Signal Use3. Proper Lane Use4. Judging Right of Way5. Use of Pedals and SteeringPracticePracticeComments Left Turn:_____________________________________________________________________________________________________________________________________________________________________________________________________________________________________________________________________________________________Comments Right Turn:_____________________________________________________________________________________________________________________________________________________________________________________________________________________________________________________________________________________________Intersections/Railroads Uncontrolled Intersection Controlled Intersection<strong>Go</strong>od Fair Needs <strong>Go</strong>od Fair NeedsPracticePractice1. Visual Skills2. Speed Control3. Position - Intersection, RR Tracks4. Judging Right of Way5. Complying with Traffic Controls6. Use of Pedals and SteeringComments Uncontrolled Intersection:_____________________________________________________________________________________________________________________________________________________________________________________________________________________________________________________________________________________________Comments Controlled Intersection:_____________________________________________________________________________________________________________________________________________________________________________________________________________________________________________________________________________________________107
Driving in Traffic <strong>Go</strong>od Fair NeedsPractice1. Visual Skills2. Speed Control3. Signal Use4. Awareness of Other Vehicles5. Judging Right of Way6. Position – Lane, Other Vehicles7. Complying with Traffic Controls8. Proactive, Defensive Driving9. Use of Pedals and SteeringComments:_____________________________________________________________________________________________________________________________________________________________________________________________________________________________________________________________________________________________High Speed Traffic and Highway Driving <strong>Go</strong>od Fair NeedsPractice1. Visual Skills2. Speed Control3. Signal Use4. Awareness of Other Vehicles5. Judging Right of Way6. Position – Lane, Other Vehicles7. Complying with Traffic Controls8. Proactive, Defensive Driving9. Use of Pedals and Steering10. Entering and Exiting11. Proper Lane and Weave Zone Use12. School Bus SafetyComments:_____________________________________________________________________________________________________________________________________________________________________________________________________________________________________________________________________________________________108
Driving After Dark <strong>Go</strong>od Fair NeedsPractice1. Visual Skills2. Speed Control3. Use of Headlights4. Driving <strong>for</strong> the ConditionsComments:_____________________________________________________________________________________________________________________________________________________________________________________________________________________________________________________________________________________________Driving in Poor Conditions <strong>Go</strong>od Fair Needs1. Visual Skills2. Speed Control3. Steering – Hand Position4. Driving <strong>for</strong> Conditions (Rain, Snow,Ice, Fog, Smoke)PracticeComments:_____________________________________________________________________________________________________________________________________________________________________________________________________________________________________________________________________________________________Handling Common Emergency Situations <strong>Go</strong>od Fair NeedsAwareness of handling of:• Brake Failure• Tire Failure• Off-Road Recovery• SkidsPracticeComments:_____________________________________________________________________________________________________________________________________________________________________________________________________________________________________________________________________________________________109
Standard Transmission Vehicles <strong>Go</strong>od Fair NeedsPractice1. Gear Selection2. Starting3. Shifting4. Hill StartsComments:_____________________________________________________________________________________________________________________________________________________________________________________________________________________________________________________________________________________________Learner’sSignature: _____________________________________Coach’sSignature: _____________________________________Date:_____________________________________110
Complete Progress Assessment - SampleInstructionsThe Complete Progress Assessment should be used once all the individual exercises are completed andsigned off.The following is an example of what the completed Assessment may look like.111
SAMPLEPre-driving Habits, Instruments and Controls <strong>Go</strong>od Fair Needs1. Pre-Trip Check2. Entering the Vehicle3. Knowledge and Use of Instruments4. Knowledge and Use of Controls5. Pre-Driving Habits6. Starting the Engine7. Exiting the Vehicle√√√√√Practice√√Comments:_______________________________________________________________________________________________2. Enters vehicle from rear which is incorrect_______________________________________________________________________________________________5. Does up seat belt be<strong>for</strong>e completing seat adjustment_______________________________________________________________________________________________6. No park brake while starting engineStarting <strong>Go</strong>od Fair Needs1. Visual Skills2. Signal Use3. Use of Pedals and Steering√√Practice√Comments:_______________________________________________________________________________________________1. No mirror check_______________________________________________________________________________________________2. Did not signal when leaving curb_______________________________________________________________________________________________3. Hard on gas pedal and brake, poor controlS<strong>to</strong>pping <strong>Go</strong>od Fair Needs1. Visual Skills2. Signal Use3. Use of Pedals and Steering4. Position – Curb, Other Vehicles√√√Practice√Comments:_______________________________________________________________________________________________3. Hit curb hard_______________________________________________________________________________________________4. Did not leave enough space_______________________________________________________________________________________________Learner’s Signature:_______________________________________________Coach’s Name Signature: _______________________________________________Date:_______________________________________________112
Notes________________________________________________________________________________________________________________________________________________________________________________________________________________________________________________________________________________________________________________________________________________________________________________________________________________________________________________________________________________________________________________________________________________________________________________________________________________________________________________________________________________________________________________________________________________________________________________________________________________________________________________________________________________________________________________________________________________________________________________________________________________________________________________________________________________________________________________________________________________________________________________________________________________________________________________________________________________________________________________________________________________________________________________________________________________________________________________________________________________________________________________________________________________________________________________113
Notes________________________________________________________________________________________________________________________________________________________________________________________________________________________________________________________________________________________________________________________________________________________________________________________________________________________________________________________________________________________________________________________________________________________________________________________________________________________________________________________________________________________________________________________________________________________________________________________________________________________________________________________________________________________________________________________________________________________________________________________________________________________________________________________________________________________________________________________________________________________________________________________________________________________________________________________________________________________________________________________________________________________________________________________________________________________________________________________________________________________________________________________________________________________________________________114
Diagrams and Drawings115
116Diagrams and Drawings
Feedback and CommentsAlberta Transportation created <strong>Geared</strong> <strong>to</strong> <strong>Go</strong>: A <strong>Workbook</strong> <strong>for</strong> <strong>Coaching</strong> <strong>New</strong> <strong>Drivers</strong> as a supplement <strong>for</strong>driver education. We are interested in your comments on how this <strong>Workbook</strong> worked <strong>for</strong> you as a coach.Please take a few minutes <strong>to</strong> provide feedback on this <strong>Workbook</strong> by answering the following questions.The <strong>for</strong>m can also be completed online at www.saferoads.com.1. Did you find this <strong>Workbook</strong> helpful when coaching your new driver?Yes No SomewhatComments:2. Were the exercises easy <strong>to</strong> understand?Yes No SomewhatComments:3. Were the diagrams easy <strong>to</strong> follow?Yes No SomewhatComments:4. Did you find the Coach’s Tips and Stay Safe hints useful?Yes No SomewhatComments:5. Would you recommend this <strong>Workbook</strong> <strong>to</strong> your family or friends who may act as a coach <strong>for</strong> anew driver?Yes No SomewhatComments:6. Other comments: (What did you like? What could have been done better?)Thank you <strong>for</strong> taking the time <strong>to</strong> complete this questionnaire. Please <strong>for</strong>ward your comments <strong>to</strong>:Alberta Transportation, Transportation Safety Services Division, 4999 – 98 Avenue, Edmon<strong>to</strong>n, AB T6B 2X3.You can also fax <strong>to</strong>: (780) 427-0833 or submit online at www.saferoads.com.117
118
www.saferoads.comApril 2008