Whiteboard - Trade Essentials - The Laminex Group
Whiteboard - Trade Essentials - The Laminex Group
Whiteboard - Trade Essentials - The Laminex Group
- No tags were found...

Create successful ePaper yourself
Turn your PDF publications into a flip-book with our unique Google optimized e-Paper software.
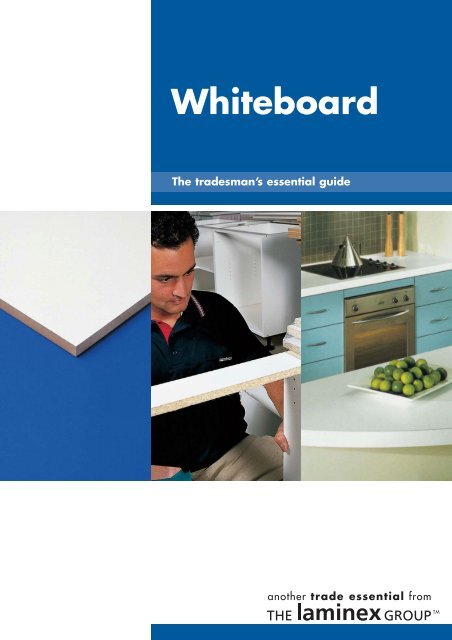
<strong>Whiteboard</strong> HMR<strong>Whiteboard</strong> HMR is a highly moisture resistant particleboardlaminated on both sides with a hard-wearing whitemelamine surface.<strong>The</strong> high moisture resistant properties of <strong>Whiteboard</strong> HMRare due to the bonding of the wood particles with a speciallyformulated moisture resistant resin system. <strong>Whiteboard</strong> HMRcan be easily identified by the green dye incorporated in thecore of the board.Applications<strong>Whiteboard</strong> HMR is designed for interior use for thefollowing applications:Kitchen cupboards, bathroom vanities, laundry cupboards,shelving, built in cupboards, wardrobes and furniture, walllinings and all detailed joinery where a moisture resistantdecorative board is required.Surface finishesDécor Texture and Velvet finishesDecorative surface propertiesWhen tested in approved manner complies with the relevantsections of AS/NZS 1859.3: 1996 for surface propertiesas follows:Resistance to wearTypical results 600 cycles.Resistance to steamNo noticeable effects after one hour exposure.<strong>Whiteboard</strong> HMR shelving<strong>Whiteboard</strong> HMR is also available as shelving. It is pre-cutand edged on one long side and is available in varioussheet widths to suit most shelving applications.It allows quick, convenient cutting of shelves for cupboardsand built in furniture.Moisture resistance<strong>Whiteboard</strong> HMR complies with the Wet Cyclic Testfor moisture resistance properties as specified in AS/NZS1859.1: 2001(Int). Refer to the Physical Properties tablefor details.Physical Properties(# Typical physical properties when tested to AS/NZS 1859.1: 2001.Int)PropertyBoard Thickness16mm-Unit 9mm 12mm 18mm 25mm 33mmBoard Density Kg/m 3 700 670 640 620 640Internal Bond KPa 700 670 580 550 550Modulus of Rupture MPa 19 19 19 18 18Modulus of Elasticity MPa 2700 2800 2600 2700 2800*Screw Holding - Face N N/A N/A 700 700 800*Screw Holding - Edge N N/A N/A 1000 900 900Surface Soundness MPa 1.0 1.2 1.4 1.2 1.5Moisture Content % 5-8 5-8 5-8 5-8 5-8Thickness Swell 24hrs % 10 9 8 7 6Moisture Resistance Test V313 V313 V313 V313 V313* Values reflect new testing methods for screw holding properties inAS/NZS 4266.13: 2001 (Int).# In most instances the performance characteristics of the particleboard exceeds theminimum requirement of AS/NZS 1859.1: 2001 (Int). However for minimum propertyvalues refer to AS/NZS 1859.1: 2001 (Int).Fire Hazard Indicies(Typical achieved when tested toAS/NZS 1530.3: 1989)Indicies Result RangeIgnitability 14 0 - 20Spread of Flame 8 0 - 10Heat Evolved 7 0 - 10Smoke Developed 3 0 - 10General Board WeightUnit (Kg/m 2 )9mm 6.312mm 8.016mm 10.218mm 11.525mm 15.533mm 21.14
Thin White Edgings<strong>The</strong>re are two types of <strong>Trade</strong> <strong>Essentials</strong> ® continuous ThinWhite Edgings:1. Melamine Edging is constructed from paper and acombination of melamine thermosetting resins to givea thin durable surface that ensures high wear and stainresistance. White Melamine Edging is supplied incontinuous rolls pre-glued with a hot melt or ungluedfor bonding with hot melts.2. PVC Edging is a tough, flexible polymer edgingproduced in continuous lengths. Because of the natureof the material, PVC Edging will resist chipping andsplintering. White PVC Edging is supplied in continuousrolls unglued for bonding with hot melts.Applications<strong>Trade</strong> <strong>Essentials</strong> ® Thin White Edgings are recommended forthe edge treatment of <strong>Whiteboard</strong>, and decorated whiteMDF board products. Thin White Edgings are used foredging shelving, cabinets and built in cupboard panels.For decorative, high wear applications such as doors, endpanels, bench tops and display panels, thicker melamine orrigid ABS edgings are recommended.A broad range of decorative edgings are available from the<strong>Laminex</strong> ® , Formica ® and Formex ® brands.Finishes<strong>Trade</strong> <strong>Essentials</strong> ® Thin White Edgings are available in twofinishes, Stipple and Velvet.Sizes<strong>Trade</strong> <strong>Essentials</strong> ® Thin White Edgings are available in twowidths; 19mm wide Edging is suitable for 16mm thick panelsonly, whilst 21mm wide Edging is suitable for both 16mmand 18 mm thick panels.BondingGeneral site works1. Avoid cold air draughts in the area where the edgebanding operation is performed.2. Store edging in a dry place, maintaining temperatureat or above 18°C.3. Use adequate pressure on pressure roller.4. Always use heating fence where fitted.5. Periodically check the accuracy of temperature gauges;these can be out by is much as 50°C.6. Do not use Thin White Melamine Edging if the materialhas been allowed to become damp or wet, or if itstemperature is less than 18°C. Do not use PVC Edging ifit has been allowed to become damp or extremely cold.Applying pre-glued Melamine EdgingTo achieve adequate bonding, a glue film temperature at thepoint of contact of 140°C must be achieved. Commercialedgebanders with a feed speed of 6- 8m/min. and a hot airtemperature of 375°C, will successfully bond <strong>Trade</strong> <strong>Essentials</strong> ®pre-glued Thin White Melamine Edging. For an 'iron-on'operation temperatures greater than 250°C are recommendedto achieve a glue film temperature of 140°C. This is achievednormally after 10-15 seconds (under pressure) and an'iron-on' speed of 60-70 seconds per metre length.Applying un-glued Melamine and PVC EdgingTo achieve an adequate performance, the following factorsmust be taken into consideration:1. Glue:6It is recommended that a high melting point hot melt adhesive(Bond-Rite/Jowat 4490 or similar) be used witha loading of 3.5-4.0 gr/lineal metre (21mm width).
2. Substrate:In order to minimise the ‘chilling-effect’ when the hot meltis pressed against a cold substrate, the substrate edge shouldbe pre-heated by means of a heating fence or electrical blower.3. Temperature:<strong>The</strong> following information is listed as a general guide.<strong>The</strong> data sheet for the particular hot melt used should beused as the primary reference.A glue tank temperature of 195-210°C and applicator rolltemperature of 205-215°C are essential for successful bonding.Bond failure is likely to occur if glue temperature at theapplicator roll is below 195°C.Maintain constant glue level in glue tank by adding glueoften. Do not let tank level run down and then add largequantity of glue, as this will dramatically reduce gluetemperature in tank even though gauge may still indicaterequired temperature.4. Machine speed:Speeds of a minimum of 20m/min. are recommended.Lower speeds are acceptable provided the ‘open time’(time it takes for the glue to get from the applicator rollerto the pressure roller) is less than one second.Cleaning• Removal of hot melt adhesive residues from the surfaceof Melamine and PVC Edging can be accomplished byrubbing with a soft cloth containing:<strong>Trade</strong> <strong>Essentials</strong> ® ABS Edge Strip Cleaner• Care must be exercised withrubbing as severe rubbingcan result in gloss change tothe surface.• Solvents are hazardous.Please read the Material SafetyData Sheet for the solventbefore it is used.<strong>Whiteboard</strong>7
Storage and handlingStorage and handling of <strong>Whiteboard</strong> panel products<strong>The</strong> following recommendations should be applied to maintain<strong>Whiteboard</strong> panels in good order and condition. <strong>The</strong> storagearea should be protected from the sun, rain and wind. Opensided sheds would not be regarded as dry stores.Pre-conditioning<strong>The</strong> <strong>Laminex</strong> <strong>Group</strong> usually dispatches <strong>Whiteboard</strong> with amoisture content of between 5% to 8%. This can alter, however,during the time the boards are in transit or storage beforeuse. Apart from this, the relative humidity of the environmentwhere the boards are to be fixed may call for quite a differentmoisture content, and some adjustment may be needed.All packs should be evenly supported at each end at intervalsof not more than 750mm where the packs are multiplestacked, and no further than 150mm from the edge of boards.All supports should be vertically aligned.Keep work area clean. Avoid contact with abrasive surfacesor grit.Pre- conditioning panels is recommended to ensure that theyattain an equilibrium moisture content (EMC) before fixing,so as to reduce the likelihood of bowing after they havebeen fixed. Any subsequent movement will thus be a dryingshrinkage which, given adequate support and fixings, keepsthe boards flat and taut.Some boards may achieve anEMC simply by being storedfor some time in the locationwhere they are to be usedwithout any positiveconditioning.Incorrect storage methodConditioning in airConditioning in air is adequate for most locations. It involvesexposing the boards in the room where they are to be fixedfor long enough to allow them to reach a moisture contentwhich is in balance with their surroundings and adjust theirdimensions accordingly.Correct storage methodTo encourage free air circulation over all board surfaces, theboards should be arranged loosely as shown above, eithervertically or horizontally. <strong>The</strong>y should then be allowed tostand like this for a minimum of 48 hours.FabricationMachining<strong>Whiteboard</strong> panels can be cut, drilled and machined usingstandard wood working equipment fitted with tungstencarbide tipped cutting edges.8
It is recommended that the material be cut on a bench typeor beam saw, using a 300mm tungsten tipped blade with 72to 96 teeth. For pre-laminated board such as <strong>Whiteboard</strong> atriple chip saw blade should protrude 20-30mm above thesurface of the board.Note: All decorated panels should be cut only on saws thathave a scribing blade on the underside. Work piece mustbe firmly fixed. Observe all professional machining safetypractices.Adhesives and bondingWhen gluing dowels or biscuits tothe core of <strong>Whiteboard</strong> panels, ahigh solids PVA with good gapfilling properties is suitable. <strong>Trade</strong><strong>Essentials</strong> ® General Purpose PVAis recommended for this application.Hole diameter<strong>The</strong> fit of the dowel in the hole is critical to withdrawalstrength. Holes drilled in the edges should be just a firmpush- in fit to prevent the edge of the board from splittingas the dowels expand due to moisture uptake from theadhesive. Dowels inserted into the face of a panel shouldbe a firm knock-in fit.Dowel and Dowel Hole DiametersBoard Dowel Dowel HoleThickness (mm) Diameter (mm) Diameter (mm)12 to 15 6 6.216 to 24 6 to 8 6.2 to 8.225 or more 10 10.2GluingWhen using dowel joints only the dowels are glued in place.<strong>The</strong> practice of using glue between the edge and the facemay actually weaken the joint.However, when gluing timber andother wood panels to the <strong>Whiteboard</strong>surface, <strong>Trade</strong> <strong>Essentials</strong> ® MelamineAdhesive is recommended.It provides a superior bond to thenon-porous surface of the melaminecoated board and dries to a clearglue line.Dowel jointsDowel joints are one of the most common adhesive basedfurniture assembly joints. Dowelling is a simple, inexpensive,strong and reliable way of making a butt or mitre joint.Machining dowel holesDowel holes should be cleanly machined with all looseparticles blown from the holes. If a blunt drill is used the drillwill overheat and polish the inside of the hole and reduce theability of the adhesive to bond.Interference fit(not recommended)DepthInserting the dowel to the proper depth is important. <strong>The</strong>yshould be inserted at least 25mm into the edge of the<strong>Whiteboard</strong> panel and as deep as practical into the facesurface, but no more than two thirds of the thickness.In general, the longer the dowel the stronger the joint.Dowel selectionClearance 0.1mm all round(preferred)Dowels with multiple longitudinal or spiral groove patternsare recommended to ensure uniform adhesive spread withinthe joint. <strong>The</strong> dowels should be cleanly machined and freefrom any loose or torn fibres. <strong>The</strong> moisture content of dowelsat the time of assembly should be in the range 10% +/-2%.Dowel diameterDowels used should be no thicker than 50% of the thicknessof the panel used.Smooth dowel(not recommended)Grooved dowels(preferred)<strong>Whiteboard</strong>9
Mechanical fixingSelecting screw typeQuality parallel threaded screws are recommendedfor <strong>Whiteboard</strong>.Pilot holesCorrect pilot holes are essential to avoid splitting. <strong>The</strong> pilotholes should be approximately 80% of the screw corediameter. Do not over tighten screws, as further turning afterthe screw is tight will reduce holding power.Selecting screw length<strong>The</strong> length of the screw directly affects the holding power ofthe screws, for example, a 25mm screw has twice the holdingpower as a 13mm screw. This is most important when screwinginto the edge of <strong>Whiteboard</strong> panels.Selecting screw diameterTo avoid splitting the panel when screwing into the edge, thescrew diameter should not exceed 20% of the panel thickness.For example, the maximum screw diameter for 16mm boardis 6 gauge. Please see tables below.Screw locationScrews should be carefully positioned to prevent splinteringand breakout - no closer than 25mm to a corner and nocloser than 12mm to the edge. When a long line of screwshas to be used, it is a good idea to stager the screws to preventsplitting the substrate being screwed to. When screwing intothe edge, never place a screw closer than 75mm from theend of the panel.Countersunk - Recessed HeadParallel ShankCountersunk - Slotted HeadTraditional Wood Screw12mm minimum from edgeScrews position on panel face25mm minimumfrom corner✔✘75mm minimumfrom corner(recommended screw type)(not recommended)Screws position on panel edgesScrew Pilot Hole SelectionRecommended Pilot Hole ThicknessScrew Gauge Diameter4 2.0mm 9mm5 2.4mm 12mm6 2.6mm 16mm7 2.7mm 18mm8 3.0mm 25mm9 3.3mm 33mmMaximum Screw Gauge SelectionThickness<strong>The</strong> Maximum Recommended Screw Gaugeto Thickness of <strong>Whiteboard</strong>4 5 6 7 89mm – – N/R N/R N/R12mm Yes Yes N/R N/R N/R16mm Yes Yes Yes N/R N/R18mm Yes Yes Yes Yes Yes25mm Yes Yes Yes Yes Yes33mm Yes Yes Yes Yes YesN/R = Not Recommended10
<strong>Whiteboard</strong> shelf loadings<strong>The</strong> following chart details the shelf loadings for <strong>Whiteboard</strong>. Applications for shelving may range from a simple shelf ina kitchen to a huge collection of books in a library.With shelf simply supported at both ends (no fixing) with an evenly distributed load. <strong>The</strong> shelf will not deflect more than 4mm.Thickness Size Shelf loading Size Shelf loading16mm 600mm x 200mm 23kg 1000mm x 200mm 5kg18mm 33kg 7kg25mm 90kg 19kg33mm 190kg 41kg16mm 600mm x 300mm 35kg 1000mm x 300mm 7kg18mm 50kg 10kg25mm 135kg 29kg33mm 205kg 61kg16mm 600mm x 400mm 47kg 1000mm x 400mm 10kg18mm 67kg 14kg25mm 181kg 39kg33mm 380kg 82kg16mm 600mm x 500mm 59kg 1000mm x 600mm 15kg18mm 84kg 21kg25mm 226kg 58kg33mm 475kg -16mm 600mm x 600mm 71kg 1200mm x 200mm 2kg18mm 101kg 4kg25mm 271kg 11kg33mm 570kg 23kg16mm 900mm x 200mm 7kg 1200mm x 300mm 4kg18mm 10kg 6kg25mm 26kg 16kg33mm 56kg 35kg16mm 900mm x 300mm 10kg 1200mm x 400mm 5kg18mm 15kg 8kg25mm 40kg 22kg33mm 84kg 47kg16mm 900mm x 400mm 14kg 1200mm x 600mm 8kg18mm 20kg 12kg25mm 53kg 33kg33mm 112kg 71kg16mm 900mm x 600mm 21kg18mm30kg25mm80kg33mm168kgNote: <strong>The</strong>se loads should be used as a guide only. We recommend that all designers carry out their own full load analysis based on their specific application.Safety and handling<strong>Whiteboard</strong> is a reconstituted wood product containing wood, resin and wax. Machine tools should be fitted with dustextractors and the wearing of a dust mask and eye protection is recommended. Material Safety Data Sheets for<strong>Whiteboard</strong> are available on request from any branch of <strong>The</strong> <strong>Laminex</strong> <strong>Group</strong>.<strong>Whiteboard</strong>11
<strong>Trade</strong> <strong>Essentials</strong> ®Product Range• Adhesives • Craftform ® • Craftwood ®• Craftwood ® Mouldings • Particleboard• Particleboard Flooring • <strong>Whiteboard</strong><strong>Whiteboard</strong> is marketed, distributed and manufacturedin Australasia by <strong>The</strong> <strong>Laminex</strong> <strong>Group</strong><strong>The</strong> information contained in this technical publication is intended to give a general indication of the characteristics of thematerial. While all possible care has been taken to ensure that the information is correct, the manufacturer cannot acceptany liability, nor is any liability on the part of the manufacturer to be implied as a result of the data given. All measurementsshown are in millimetres and nominal unless otherwise stated. <strong>The</strong> information contained in this publication supersedes allprevious information and is subject to alteration without notice.For more information including sheetsizes and product availability, visitwww.thelaminexgroup.com.auFor sales enquiries call any one of <strong>The</strong> <strong>Laminex</strong> <strong>Group</strong> Customer Service Centres:<strong>Laminex</strong> ® 132 136, Formex ® VIC/NSW - 1300 731 100 , QLD (07) 3277 7649,WA (08) 9356 0800, NT (08) 8947 2312, SA (08) 8245 6300, Formica ® 136 346.® and are trade marks of<strong>Laminex</strong> <strong>Group</strong> LimitedABN 98 004 093 092© <strong>Laminex</strong> <strong>Group</strong> Limited10/02 advanz