Innovative Präzision Made in Germany - OT medical GmbH
Innovative Präzision Made in Germany - OT medical GmbH
Innovative Präzision Made in Germany - OT medical GmbH

You also want an ePaper? Increase the reach of your titles
YUMPU automatically turns print PDFs into web optimized ePapers that Google loves.
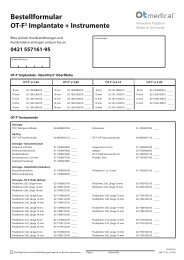
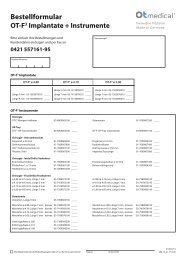
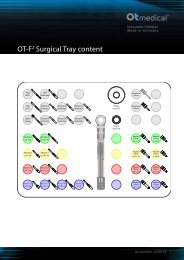
<strong>Innovative</strong> Präzision<strong>Made</strong> <strong>in</strong> <strong>Germany</strong>PreparationAny implantation should <strong>in</strong> pr<strong>in</strong>ciple bepreceded by a thorough cl<strong>in</strong>ical exam<strong>in</strong>ation.The vertical and horizontal bone quantity canbe determ<strong>in</strong>ed with the aid of an osteometerwhich is placed through the g<strong>in</strong>giva. For anexact diagnosis, the use of a panoramic radiographand a template prepared <strong>in</strong> the laboratoryis mandatory. The X-ray <strong>in</strong>dicator helps todeterm<strong>in</strong>e the optimal length and the diameterof the implant for the implant site prior tosurgery. The X-ray <strong>in</strong>dicator which correspondswith the magnification factor of the X-ray unitused, is placed on the radiograph.An additional aid for diagnosis is the threedimensional CT or DVT scan method <strong>in</strong> order todecide for the exact implantation plann<strong>in</strong>g andsurgery.In many cases, model or computer supportedsurgery templates based on a virtual surgeryplann<strong>in</strong>g at the computer, can be recommended.This guarantees a high safety both forthe doctor and the patient. An <strong>in</strong>tra-operativedecision for the suitable implant size as describedabove, is usually not necessary with thismethod.A sufficient number of implants <strong>in</strong> differentlengths and diameters should be availabledur<strong>in</strong>g surgery as <strong>in</strong> many cases the def<strong>in</strong>itivedecision as to which implant would have theoptimal dimensions for the revealed boneanatomy can be made only after exposure ofthe jaw bone.Surgical TrayThe surgical tray is compact and well-accessibleand conta<strong>in</strong>s all drills and accessories for<strong>in</strong>sertion of the <strong>OT</strong>-F 1 implants of 3.30 mm upto 4.90 mm diameter. Please note the SurgicalTray Guide.Immediately after <strong>in</strong>sertion, the implantsshould be protected with the cover screw conta<strong>in</strong>ed<strong>in</strong> the implant package.After heal<strong>in</strong>g and exposure, the implantsshould be provided with heal<strong>in</strong>g abutments <strong>in</strong>straight or flared shape.For impression tak<strong>in</strong>g, the doctor can choosebetween impression cop<strong>in</strong>gs for the closed orthe open impression.The ideal plann<strong>in</strong>g prior to surgery shouldencompass the awareness about the availableprosthetic abutments and their <strong>in</strong>dicationswhich the implant system offers.Preparation_<strong>OT</strong>-F 1 | 3
<strong>Innovative</strong> Präzision<strong>Made</strong> <strong>in</strong> <strong>Germany</strong>PreparationStep-by-Step Instructions for the Bone PreparationAll drills are cooled externally (an <strong>in</strong>ternal cool<strong>in</strong>g would be difficult to clean). The drills are <strong>in</strong>serted <strong>in</strong>to the jaw bonewith careful up and down movements. Any bone particles should carefully be preserved and used later for a possiblynecessary augmentation.Important: The drills must not be used more than 15 times as otherwise optimum cutt<strong>in</strong>g action cannot be guaranteed.Step 1: Exposure<strong>OT</strong>-F 1 implants are <strong>in</strong>serted after exposure of the jaw bone. Thedoctor decides if <strong>in</strong>dividual <strong>in</strong>cisions are required <strong>in</strong> the presentsituation.Step 2: Preparation of the jaw boneIf the exposed alveolar crest shows protrusions which are unfavorablefor implant <strong>in</strong>sertion, such as small or even sharp edgedridges, these can be removed by us<strong>in</strong>g a bone treph<strong>in</strong>e <strong>in</strong> orderto prepare a plane level for <strong>in</strong>sertion of the implant.Step 3: Perforation of the Cortical BoneThe pilot drill 1 (diameter 1.6 mm) perforates the cortical boneplate <strong>in</strong> an exact horizontal distance position<strong>in</strong>g and <strong>in</strong> verticalcorrespondence with the axis.The pilot drill is a very sharp three-edged drill which can performthe first drill<strong>in</strong>g considerably easier than the conventional rosebur (recommended speed: 1,200 rpm).Step 4: Pilot Drill<strong>in</strong>gThe first preparation is now cont<strong>in</strong>ued to the complete depthwith pilot drill No. 2 (diameter 2.0 mm). This drill has a lasergraduation accord<strong>in</strong>g to the implant lengths 8/10/12/14 and16 mm (recommended speed 1,100 rpm).1 2 3 46 | <strong>OT</strong>-F 1 _Preparation
<strong>Innovative</strong> Präzision<strong>Made</strong> <strong>in</strong> <strong>Germany</strong>InsertionStep by step <strong>in</strong>structions for the implant <strong>in</strong>sertionPlease take care that the implant when removed from the sterile acrylic vial, does not come <strong>in</strong>tocontact with for <strong>in</strong>stance saliva, neighbor<strong>in</strong>g teeth, <strong>in</strong>struments or is contam<strong>in</strong>ated by sal<strong>in</strong>e solution.The implant is mounted on a carrier which is connected with the round cover cap.Step 1: Primary fixationRemove the implant by pull<strong>in</strong>g off the covercap from the acrylic vial and place directly <strong>in</strong>tothe bone preparation which has ideally filledwith blood. Stabilize the implant <strong>in</strong> bone firstmanually by us<strong>in</strong>g two to maximum four turnsand then pull off the carrier from the hex of theimplant.Step 2: Complete <strong>in</strong>sertionThe further <strong>in</strong>sertion procedure is made with the<strong>in</strong>sertion key. Please note when select<strong>in</strong>g thecorrespond<strong>in</strong>g key that the <strong>OT</strong>-F 1 implants withthe smaller diameters of 3.30/3.80 (green/yellow)have a smaller <strong>in</strong>ternal hex connection (2.20),while the larger diameters 4.10/4.90 (red/blue)have a larger hex connection (2.50) accord<strong>in</strong>gly.The <strong>in</strong>sertion key for the diameters 3.30/3.80 mmis marked by two grooves at the shaft.A complete 360° turn – see mark<strong>in</strong>g on the f<strong>in</strong>gerkey – will <strong>in</strong>sert the implant by approx. 1.1 mmfurther <strong>in</strong>to depth. Due to the self tapp<strong>in</strong>g expansionthreads of the <strong>OT</strong>-F 1 implant the friction will<strong>in</strong>crease the deeper the implant proceeds <strong>in</strong>tothe bone preparation.If the resistance feels too strong, turn the implantback slightly counter-clockwise (120°-180°)and then proceed clockwise aga<strong>in</strong>. Repeat thisprocedure until the implant has reached thef<strong>in</strong>al depth and is ideally level with the alveolarcrest.Please consider for the f<strong>in</strong>al position of theimplant the most favorable prosthetic position ofthe <strong>in</strong>ternal hex <strong>in</strong> order to facilitate an optimalprosthetic restoration at this po<strong>in</strong>t.8 | <strong>OT</strong>-F 1 _Insertion
<strong>Innovative</strong> Präzision<strong>Made</strong> <strong>in</strong> <strong>Germany</strong>Heal<strong>in</strong>g time of the implantsHeal<strong>in</strong>g timeThe length of the heal<strong>in</strong>g time depends on several factors:• bone quality D1-D4 (mandible/maxilla)• implant surface (TPS or NANOPLAST®)• time of <strong>in</strong>sertion (immediate/delayed/late)• age and state of health of the patient• required augmentation proceduresetc.Pr<strong>in</strong>cipal rule for heal<strong>in</strong>g time of <strong>OT</strong>-F 1 implants:• 3 months <strong>in</strong> the mandible• 5-6 months <strong>in</strong> the maxillaAt trans-g<strong>in</strong>gival heal<strong>in</strong>g, the implants should be allowed toosseo<strong>in</strong>tegrate without load<strong>in</strong>g. Please take care that the heal<strong>in</strong>gabutments should be selected – aside from the planned laterprosthetic restoration – with a height which will protrude fromthe g<strong>in</strong>giva, but on the other hand do not transfer any load<strong>in</strong>gforces on the implant.Special attention should be focused on the fact that there shouldbe absolutely no contact to the antagonists.A prolonged heal<strong>in</strong>g time due to the smaller implant surface ofimplants with a diameter of 3.30 mm should be accounted for.For control of the heal<strong>in</strong>g process a perio-test check is recommended.10 | <strong>OT</strong>-F 1 _Heal<strong>in</strong>g Time
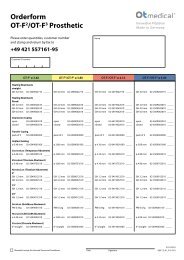
<strong>Innovative</strong> Präzision<strong>Made</strong> <strong>in</strong> <strong>Germany</strong>Exposure and ImpressionExposure of the implantsWhen the heal<strong>in</strong>g time has elapsed, the mucous membrane isreentered <strong>in</strong> order to expose the implants. 1The doctor decides which type of <strong>in</strong>cision he will use, whichheal<strong>in</strong>g abutment should be <strong>in</strong>serted and which suture techniquewould be favorable <strong>in</strong> each case.Exposure by laser technology is also <strong>in</strong>dicated and is also up tothe surgeon’s decision. The use of a manual center<strong>in</strong>g punch forexposure can also be <strong>in</strong>dicated <strong>in</strong> certa<strong>in</strong> cases. The implantsshould be covered with the heal<strong>in</strong>g abutments. 2At this po<strong>in</strong>t we recommend:• the check-up by a perio-test <strong>in</strong> order to control theosseo<strong>in</strong>tegration• the panoramic radiograph for documentation.ImpressionAfter complete heal<strong>in</strong>g of the g<strong>in</strong>giva, the impression can betaken.The implant system offers a selection between closed(reposition technique) 3 and open impression method(pick-up technique). 4Remove the heal<strong>in</strong>g abutments and place the impression cop<strong>in</strong>gsonto the implants and fix with the correspond<strong>in</strong>g fixationscrews. The hex connection provides an exact transfer of theimplant position to the master model to be prepared.We recommend to use an <strong>in</strong>dividually prepared impression trayfor the impression tak<strong>in</strong>g.If an immediate temporary primary restoration with theabutments CREATIVELINE is planned with temporary crowns, werecommend to prepare these <strong>in</strong> anatomically smaller shape andto anchor these <strong>in</strong> stable connection to the neighbor<strong>in</strong>g teeth.1 234Exposure and Impression_<strong>OT</strong>-F 1 | 11
<strong>Innovative</strong> Präzision<strong>Made</strong> <strong>in</strong> <strong>Germany</strong>09-713200000 • 11-2010/2<strong>OT</strong> <strong>medical</strong> <strong>GmbH</strong>Konsul-Smidt-Straße 8b, 28217 Bremen, <strong>Germany</strong>Tel. +49 421 557161-0, Fax +49 421 557161-95<strong>in</strong>fo@ot-<strong>medical</strong>.de, www.ot-<strong>medical</strong>.de