AVALANCHE MAGAZINE - New Zealand Mountain Safety Council
AVALANCHE MAGAZINE - New Zealand Mountain Safety Council
AVALANCHE MAGAZINE - New Zealand Mountain Safety Council

Create successful ePaper yourself
Turn your PDF publications into a flip-book with our unique Google optimized e-Paper software.
Peter BilousTHE <strong>AVALANCHE</strong> TRAININGPROGRESSION FOR SKIPATROLLERS, GUIDES ANDROAD WORKERSStage 1 is offered from a myriad of providers on semester basedcourses from Otago Polytechnic, Tai Poutini Polytechnic, CPIT,Whiterea Polytechnic and OPC. Additionally Otago Polytechnic alsooffers 3-4 short (6 and ½ day) courses annually for those with agreater amount of mountain experience; such as guides and moreexperienced back-country skiers.Stage 2 is only available from Otago Polytechnic and, since 2008,requires completion of a mentored logbook (Applied Snow Studies),3 Theory courses, a 5-day Field Training (FT) course and a final 8-dayIntegrated Practical Assessment (IPA). The logbook and all 3 theorycourses must be completed before attending the FT and IPA. Thiswas developed to meet the needs of our NZ avalanche industry, andincluded input from the NZMGA, SAANZ(representing ski area management and Ski Patrol), Milford Roadand others. The redevelopment not only brought us up to pace witheducational trends internationally, but leads the field in terms offlexible study options and reflective workplace application. What youmay not be aware of is what you should be doing post Stage 1 toyou need to use templatesprovided by the polytech todrive the feedback processprepare for your Stage 2. This is where the mentored logbookcomes in. The purpose of the mentored logbook is to provideevidence of you receiving structured feedback on practicing theStage 1 field skills and progressively exposing you to the levelexpected on Stage 2 from a current stage 2 practitioner/mentor.The field skills we are referring to are stability evaluations, snowprofiles, terrain evaluation and rescue practice. Most people canexpect to spend 100 days practicing these skills before being readyto stage 2. However, completion is based on demonstratingconsistent competency (defined as minimal corrective feedbackfrom your mentor on your last 3 sessions) in each of the 4 field skillareas. This system therefore recognises that different studentsmay progress at different rates. The quality of your mentoredfeedback may also affect your pace of learning.You can and shouldbe including your summer (climbing guiding) and overseas patrollingexperience as part of the logged mentored process whenever youare employing the above mentioned skill set-i.e. travelling inavalanche terrain.Importantly, you need to use the templates provided by thePolytech to drive the feedback process. This is to ensure thatnothing is missed in the discussions over time and provides therequired evidence of learning. Do remember that the process shouldinvolve discussions before you leave, sometimes in the field andat day’s (or trip’s) end. If you have documented evidence of thisprocess happening prior – and you can convert it into the templateform, that would be valid towards your completion goal. Notehowever, that competency is based on current skills which must bedemonstrated to more than one mentor prior to being accepted forthe FT (and IPA). Contact Barbara Emmitt (Avalanche ProgrammeAdministrator) at 0800 765 9276 for the latest copy of thetemplates. These are available without cost to get you started. Toget credit for the course, you must have the submitted templatesapproved by someone designated by the Polytech to do so. Onceenrolled in the Applied Snow Studies (mentored logbook) course,you have one year in which to complete it. Bottom line - get startedon it as soon as you finish Stage 1 Avalanche <strong>Safety</strong>, then enrol inthe Applied Snow Studies (mentored logbook) course when you canrealistically complete it in one year. At some point, you should signup and get started on your Theory Courses, which are best done inthe traditionally low-workload spring and fall periods. This involvesenrolling with the Polytech and getting access to the materialsand a tutor (Theory Support Advisor – TSA). Students have 9 monthin which to complete each of the 3 theory courses from the timethey enrol.My advice is to be proactive about your professional training goalsso you keep focused, motivated and on a realistically, achievabletrack. Plan your course of study from when you want to completeyour Stage 2 or Diploma in Avalanche Studies, and then workbackwards on when you need to jump the hoops with each aspectof the requirements.If you have any other questions, please refer to the OPwebsite www.avalanche.ac.nz first, then get a copy of theApplied Snow Studies Mentored Logbook, (which tells you how touse it), and read it. Contact Barbara or myself if you still have anyoutstanding issues.Peter Bilous is NZMGA Ski Guide and the AvalancheProgramme Manager for Otago Polytechnic. He prefers that yourefer to the ‘Applied Snow Studies’ as just that or the ‘MentoredLogbook’ rather than its obvious acronym...Weekly AvalancheWorkshopFollowing the success of last year, the Wanaka Branch of the<strong>Mountain</strong> <strong>Safety</strong> <strong>Council</strong> will once again be running WeeklyAvalanche Workshops to help promote avalanche safety.Kindly supported and hosted on Thursday nights between 730-830pm at Mainly Tramping’s Store on Dunmore St, each weekfeatures:A wrap up of current Weather, Snowpack, and Avalancheconditions from the www.avalanche.net.nzA short presentation/led discussion on the themed topic forthe evening and a question and answer session.Every week the facilitator starts a discussion about the trips/tours people have been out on during the past week, questioning,and drawing out of them any observations (Avalanche, Snowpack,Weather) they had made. After helping to put their lay speakobservations into more technical language, the discussion turnsto the INFOEX advisories which generally reflect and back up thegroup’s own observations.The regular and relaxed format is helping to build acommunity of Backcountry users where people:Participated in a less intimidating setting compared to thebig one-off Seminar many regions currently runARVA 3Axes- Analog &Digital, 3 Antennas,Marking Function forMultiple Burials,Distance & Direction inReal TimewANAKACould be referred onto CoursesShared their experience or teamed up with others that havemore experienceShared rides/split costs – more sustainablePromoted the exchange/reporting of informationDVD and other media were also used, after which adiscussion (question and answer) reinforced the pointscovered in the DVD.Thanks to Steve and his team at Mainly Tramping for hosting theworkshops. It is hoped this format can be used elsewhere in NZ.If you are interested in knowing more, or need help to setup similarworkshops, please contact Gordon Smith.Gordon Smithinfo@avalanche.net.nzvisit www.smenz.co.nzARVA LINK- W-Link (868mHz) and457kHz, Analog & Digital, 3 Antennas,Marking Function for Multiple Burial,360 degree Directional Guide in RealTime- Available winter 201165 CRYSTAL BALL CRYSTAL BALL 6
VALLEY FLOORThe Valley floor’s a miserable placeWhile your mates are having funI’m standing alone in the cold and shadeThey’re skiing in the sunThese things I do to help them outI really do not mindJust once in a while let the tables turnAnd let them stay behindStill easy come, easy goI’ve had my share of funJust now and then I’d like to beThe last one on a runRussell CarrPhotography: MARY HOBBS87 CRYSTAL BALL CRYSTAL BALL 8
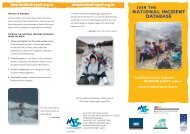
STAGE ONEPreseason AvalancheSAR TrainingAvalanche <strong>Safety</strong>course redevelopmentplanned 2011The Avalanche Education Working Group -AEWG– which is all thecurrent providers of the Stage 1 course has planned an upgrade totake effect for the 2011 winter season. Changes that have beenear-marked include pre-course study and assessment to helpstudents better prepare for the theory concepts, and to have moretime to learn practical skills on the course. Updated teaching/student resources are also to be an outcome of this exercise.If you have an area of expertise to offer to this process or would justlike to be involved, please contact Andrew Hobman, AEWG chairmanAndrew.Hobman@mountainsafety.org.nz1) It enables the collation of skiing and boarding incidents on anational basis so that we can begin to analyse trends. Importantlybecause we are able to know how many people purchased ski passesand the number of incidents we are able to gauge the incident rateper 1000 skier/boarders. This information can be utilised to informdecision makers about safety campaigns and potential changes topractice.2) The National Incident database is a valuable tool for each of theregistered ski areas who are able to easily use the filter boxes toproduce their own reports. The filter boxes include location,severity, time of day, body part and weather conditions. It isimportant that ski areas understand the potential of this databaseas a tool for recording, analysing and sharing incident data.While the NID is a fantastic collaborative tool which illustrates thewillingness of the ski industry to understand and learn fromincidents, there are still some ski areas, which while registered donot contribute incident data. In my discussion with some of thesefields it seems that the transient nature of the staff plays asignificant role in this lack of engagement. I would like to encourageall ski areas to meet best practice expectations and also tocontribute to the national understanding of incidents bycontributing to the NID.Fig 1: The slowing down phase once the victim is being uncovered and airway secured. Diggers continue to work widening the hole to aid in the extraction whileothers work on the victim.As is often the challenge when setting up training scenarios, realismis difficult to replicate. All too often we train hard on finding buriedavalanche targets in good time, but do not put as much effort intomocking up the care needed for someone who has been buried pastthe time that gives them decent of odds of survival.The National IncidentDatabaseWhile it is very difficult to present rescuers with a patientsuffering from triple H syndrome (hypothermia, hypoxia, andhypercarbia), we are at least now, incorporating other elements ofthe “rescue” part of search and rescue into our scenarios. For moreon conveyer belt shoveling techniques and First aid for avalanchevictims look in the links below.www.mountainsafety.org.nz/researchFig 2: Preseason training exercises. Treble Cone Patrollers work a conveyer beltshoveling technique once the victim has been located with a probe.The National Incident Database (NID) continues to be a valuabletool for those involved in the ski industry. There were 5455 incidentsrecorded by ski areas during the 2009 season and the informationcaptured about these events gives us all a greater understandingof ski and boarding incidents. The 2009 report is available fromhttp://www.incidentreport.org.nz/reports.php the NationalIncident database has two important functions.http://www.incidentreport.org.nz/For further information contact:Annie Dignane: annie.dignan@mountainsafety.org.nz. 04 9159284.109 CRYSTALCRYSTALBALL CRYSTAL BALL 10BALL
Using “Google Earth”and “Dropbox”to record, and share Snowpackand Avalanche Observations.Many of us are familiar with using Google Earth to spatially recorddata within our operations. In combination with“Dropbox” (another freely downloadable software), trialsare being carried out to test the viability of using theseapplications to record and then share observations of Class 1 and 2information – Avalanche, and Snowpack/snowprofile observations.These trials are being carried out as part of the overall redevelopmentof the NZMSC INFOEX system.This is a cross platform solution (MAC and PC)How it’s doneIt is possible to easily draw/overlay into Google Earth your fieldobservations no matter if you are a Ski Area, Heliski/guiding, orRoading/Access Operation:Where avalanches have occurredWhere snowpits/profiles have been dugWhere explosive charges have been placed… other Operation specific infrastructure such as: landingzones, ski lifts, medical facilities, snowmaking plant,tunnels and roads, zoning, rescue equipment, topographicmaps, radio comms range, weather telemetry…etcAs you draw these layers into the program, you can also enterinformation that can be recalled as you move your mouse over eachobservation in the picture. This embedded information may be text,for example:Snow pit information“CTM13 RP down 32cm on FC above RC”Avalanche information“Sz 2 Sa 25m wide 40cm deep ran fast, no involvement”Or you can embed a link to a picture or graphic file(jpeg), like theexample in Fig1.How the observations are shared!“Dropbox” creates a folder on your local computer, anda sync’d backup version of it on a secure webserver. Dropbox letsyou share folders with others by inviting them to view the folder youspecify from within your own Dropbox. Once you add other membersto the folder, it will appear in your colleagues own Dropbox just as itdoes in yours. Any changes made to the shared folder’s contents willappear instantaneously to everyone who is a member of the folder.1: Screen shot of Google Earth with pop up bubble appearing after clicking on a (green) snowprofile icon. The “Snowpro” image at right,appears after clicking on the blue link in the pop up bubble.Questions about dropbox may be answered here:https://www.dropbox.com/helpWhen your daily observations have been entered into Google Earth,you then choose the “save place as” in the google earth menu. Bysaving the small kmz file into the relevant shared folder in yourdrop box, makes it accessible to colleagues who share this INFOEXfolder.There will be 2 different shared folders during this test. Members ofthe Professional Operation (current INFOEX subscribers) will haveaccess to one, and an entirely separate Shared folder will used byPublic contributors. Members of the public group cannot view theProfessional Obs – in this way it is exactly the same as the currentINFOEX.Any Operation or Individual wishing to take part in this trial willneed to contact me in order to be invited into the relevant“Shared Folder”.Extensive detailed instructions including Video tutorials have beencreated, and can be sent to those wishing to take part in this trial.Gordon Smithinfo@avalanche.net.nz12 11 CRYSTAL BALL CRYSTAL BALL 12
Jordy HendrikxThe NIWANational Snow and IceMonitoring Network.Snow and ice are two resources that are likely to be subject tosignificant change over the next 20-100 years, depending on thepace of global climate change. Such changes will have substantialimpacts on the long term planning and daily operations ofhydro-electricity, agriculture and tourism/skiing industries. Thesechanges, will also affect all aspects of the alpine and downstreamenvironments, with influences on the hydrological cycle, erosion andland stability, biodiversity and people’s ability to recreate in theseareas (to name just a few). In 2006, the National Institute of Waterand Atmospheric Research (NIWA) started on the development ofthe National Snow and Ice Monitoring Network to better observeand quantify these changes. The primary aims of the new networkare two-fold: First to gain a better understanding of snow and icein terms of a resource and a hazard (e.g. Avalanches); Secondly, toassess the impact of climate change on snow and ice. This meansthat we have both a real-time and a long-term need for the datafrom these sites.SnoTel Network in the USA has over 700 sites across the westernUSA with some sites having data back to 1930. While in Switzerlandthere are over 100 alpine climate stations in the Swiss Alps alone,providing a station density of approximately 1 per 270 km2 . Bycontrast, if we consider the area above 500m in the South Islandto be the “Southern Alps” (i.e. 76,440 km2), then we wouldrequire more than 280 stations to achieve the same coverage asSwitzerland! While I am not advocating this as an aim of the NIWASnow and Ice Monitoring Network, as there are many manydifferences between <strong>New</strong> <strong>Zealand</strong> and Switzerland, it is aninteresting analysis to provide a context with regards to spatialcoverage. In the first phase of the Network we have planned for upto 14 new sites throughout <strong>New</strong> <strong>Zealand</strong>. Data from this newSite Elevation National Park StatusChateau at 1100 Tongariro Upgraded existing siteRuapehuMahanga 2010 Nelson Lakes <strong>New</strong> site installedRolleston Glacier 1650-1800 Westland <strong>New</strong> site installedArthur’s Pass 740 Arthurs Pass Upgraded existing siteIvory Glacier 1380 Westland <strong>New</strong> site installedRakaia 1700-1850 - <strong>New</strong> site installedMt Potts 2140 - <strong>New</strong> site installedMueller 1780 Aoraki / Mt Cook <strong>New</strong> site installedMt Cook 760 Aoraki / Mt Cook Upgraded existing siteAlbert Burn* 1280 Mt Aspiring <strong>New</strong> site installedMurchison Mts 1120 Fiordland <strong>New</strong> site installedRuapehu 2000-2480 Tongariro Planning & negotiation withland owner / manager underwayBrewster Glacier 1680 Mt Aspiring Awaiting new MANPMPRichardson Mts 1800 - Planning & negotiation withland owner / manager underwayClinton Valley 2000 Fiordland Planning & negotiation withland owner / manager underwayLewis Pass Region 1500-2000 - Early planning underwayKaikoura Mts 1500-2500 - Early planning underway* Albert Burn is in association with Otago Regional <strong>Council</strong>.Albert Burn is in association with Otago Regional <strong>Council</strong>.We are especially interested in the snow depth andsnow density as these two pieces of information arerequired to estimate the snow water equivalenceFigure 2A schematic of a “full” site, as installed at the Murchison <strong>Mountain</strong>s and atMahanga.Back in 2006, unlike other countries around the world, we didnot have a national monitoring network for these valuable andvulnerable resources. We lagged behind many countries in the worldand this was poignantly illustrated by the fact that countries likeKazakhstan had a national snow monitoring network, while <strong>New</strong><strong>Zealand</strong> did not. This was also in stark contrast to the <strong>New</strong> <strong>Zealand</strong>glacier snowlines record, which dates back to 1977. While the glaciersnowlines are a snow observation, they are only an annual snapshotof the end of summer snow lines and presents the aggregate ofseasonal snowfall and the subsequent summer melt. Additionally,simple analysis of NIWA’s current observation network showed aclear disparity between “what we have got” and “what we measure”with over 50% of the land area of the South Island being above500 m in elevation, but less than 10% of our network at or abovethese elevations. This disparity is even more accentuated at higherelevations, with only a few sparse and mainly non-continuous (i.e.seasonal) records available above 1000 m. By comparison, theFigure 1Map of the installed and proposed NIWA snow and ice network sites. Additionalsites (not shown on the map) which are in the early phases of planning andwill hopefully be situated in; Northern Fiordland; Richardson <strong>Mountain</strong>s (nearQueenstown); Lewis Pass Region, and the Kaikoura <strong>Mountain</strong>s. *Albert Burn isin association with Otago Regional <strong>Council</strong>.network, combined with advanced model capabilities, will improvescientific understanding of seasonal snow, avalanches, snow meltand climate change impacts in <strong>New</strong> <strong>Zealand</strong> and help us assess themass-balance of glaciers in the Southern Alps.Table 1 shows details of the installed and proposed (in grey) NIWAsites, including site name, elevation, National Park within andoperational status.So, what do these sites look like and how dothey work?A schematic of a “full” site is shown in Figure 2 and photosare in Figure 3. The stations measure snow depth with an ultrasonicsensor (SR50), along with other regular climate parameters such astemperature, wind speed and direction, humidity and rain. The snowdepth sensor works by transmitting ultrasonic pulses towards theground, measuring the time it takes for the echoes to return fromthe closest surface, and using the measurement to determine thedistance to it. As snow falls, this distance decreases, so the sensormeasures the total height of the snow as it accumulates. The sensorhas a range of 10 metres, but is limited by our mast height, and hasan accuracy of 0.4%, or about 0.01m. We have also installed snowpillows at key locations to record the total weight of the snow in mm.At most sites, the data is transmitted hourly using satellitecommunications and can be accessed via a user friendly interfaceon the internet. We are especially interested in the snow depth andsnow density as these two pieces of information are required toestimate the snow water equivalence (SWE), i.e. the amount ofwater locked up in the snowpack. This is really important for springrunoff and recharge as in some catchments this component of thewater balance can be very substantial. Snow is also very sensitive tochanges in temperature (and precipitation), so this new snow datawill provide us with another index or measure of climate change.This data is also important for real time applications like avalancheforecasting. Using a snow depth sensor and snowpillow we canobserve the density of a layer of snow (Figure 4) – as many will know,as a generalisation, light snow, overlaid by denser snow is generally1413CRYSTALCRYSTALBALLBALL CRYSTAL BALL 14
ad news. Snowpack temperatures also allow us to track liquid waterwithin the snowpack, helping us determine if the snowpack hasbecome isothermal, or to what depth the water has penetrated.Figure 4 shows a graph of the snow depth and SWE from a stormin early May at the Murchison <strong>Mountain</strong>s site. Here we can see thatthere was approximately 0.16 m of snow and this represented about16mm of water. This indicated that the density of this snowfall wasaround 100 kg/m3, or that the snow had approximately 10% watercontent (which is light for <strong>New</strong> <strong>Zealand</strong> snow, but not atypical for acold early season storm). As the season progressed, we observed thesnowpack “ripen” and the water content slowly rises to about 30%and at the end of winter / early spring, when it started melting,it will sit around 45-55%. Real time non quality assured data foreach site is provided to the land owners or managers via access toan internet web page. In many cases this is the Department ofConservation and they are using it for a range of managementpurposes, including snow and avalanche management and hut /track closures. At most sites, this is the first time that real-timedata has been available from these remote locations to assistin management decisions. The data is also provided to the<strong>Mountain</strong> <strong>Safety</strong> <strong>Council</strong> for use in the creation of the dailybackcountry avalanche advisory (BAA) as posted on www.avalanche.net.nz page. This new stream of data enables the regional avalancheforecaster to have an improved understanding about snow depthsand densities, temperatures, wind speed and direction from aremote location, where manual observations are not possible. Thepublic also have free access to most of this data within a few hours /days, following quality assurance procedures undertaken by NIWA,via our web page www.cliflo.co.nzIn summary, since 2006 we have made good progress towards thegoal of developing a National Snow and Ice Network for <strong>New</strong> <strong>Zealand</strong>.We have eleven operational sites, including eight new sites,providing real-time data to a number of key groups and agencies. Wehave also built and aim to install several more sites in the 2010/2011summer. The real-time data from these sites are already providingvaluable observations as input for the creation of MSC daily publicavalanche forecasts and will increasingly do so as we complete thenational network. If you find one of our sites as part of your trips intothe <strong>Mountain</strong>s please don’t be tempted to tinker with it, please justgive it the respect that a piece of expensive and sensitive scientificequipment deserves. We have sited them to minimise their visualimpact – so other than a few exceptions (where they are sited nextto a hut), you will need to search really hard to find them!Please get in touch if you have any questions.Dr Jordy HendrikxNIWA Snow & Ice ScientistE: j.hendrikx@niwa.co.nzFigure 3 (A) A summer photo of the Murchison <strong>Mountain</strong>s site in FiordlandNational ParkFigure 4 (B) A winter photo of the Mahanga site in Nelson Lakes National Park.Figure 4 Early snow storm in May 2009 showing the snow depth from down looking ultrasonic (blue) compared with Snow Water Equivalent (red).1615CRYSTALCRYSTALBALLBALL CRYSTAL BALL 16
DON BOGIEATES Avalanche TerrainExposure ScaleATES is the avalanche terrain exposures scale. It is independent ofstability. The terrain class remains the same no matter what thesnow stability is. ATES was developed in Canada by Parks Canadaand the Canadian Avalanche Association. It is designed to give usersinformation on the level of exposure to avalanche hazard when theygo into uncontrolled avalanche terrain. ATES has been adopted in<strong>New</strong> <strong>Zealand</strong> by the <strong>Mountain</strong> <strong>Safety</strong> <strong>Council</strong> and the Departmentof Conservation for providing backcountry users with informationon likely exposure to avalanches. MSC also uses it for decidingwhere instruction courses can be run and DOC also uses it for staffrisk management purposes by setting defined levels of staff skillfor each terrain class.ATES can be applied to fixed features such as a track or markedroute, or to an unmarked route, or to parts of catchments or ranges,or to entire catchments or ranges. It is important to be clear aboutwhat it is applied to because the scale at which it is applied couldaffect the category outcome. When an ATES assessment is done ofa catchment or mountain range it is likely that the area has in it amixture of simple, challenging and complex. The finer the scaleused the more definite things will be. When assessing a large areayou should think about what sort of user goes there and thedegree of use. If a lot of use is in a specific place then this shouldbe looked at separately. As an example a mountain range maygenerally be challenging but contain areas of complex. It still meetsthe definition of challenging because people have options foravoiding avalanche paths. If people are using a particular valley inthe range where there is no option for avoiding avalanche terrainthen that place is complex.ATES assessments of the <strong>New</strong> <strong>Zealand</strong> backcountry will occur overa period of time. For the 2010 winter DOC has classified Aoraki MtCook National Park and surrounding terrain and Tongariro NationalPark. More assessments of other places should occur for the 2011winter and be available through the MSC and DOC websites.Initially many of these assessments will be done as larger scaleassessments of catchments and ranges in order to give visitors ageneral indication of the likely ATES class contained in that area. Ifother groups and organisations have a need for more detailedanalysis to work out where they wish to operate they will need totake these larger areas and split them into smaller blocks. Thisinformation can then be incorporated into information that DOC andthe MSC supply to visitors. As guidebooks are written or revised itwould be good if they could include the ATES classifications of theroutes and trips in them.Assessing the terrainATES assessments should be done by a small group of people whoare familiar with the terrain. At least one person in that group needsto have the stage 2 avalanche qualification. When the assessment ATES zone map for Aoraki Mount Cook National Parkis done a technical model form (see later in this article) needs tobe filled in for each area being assessed. Displaying the results.An ATES assessment can be displayed either through marking the terrain class should be used in the text and reference made to theclassifications onto a map or by the use of a list. When putting ATES system and where to get more information on it. The use ofATES assessments onto maps this should be done in a GIS system the terrain class on warning signs should also be encouraged.with the simple terrain in green, challenging in blue and complex inblack. If the ATES assessment is being done as a text list then the When preparing pamphlets the appropriate terrain class should becolours should be used if possible either through the lists of each used in the text and reference made to the ATES system and whereterrain class being in the appropriate colour or through the use of a to get more information on it. The use of the terrain class on warningcoloured header bar. When preparing pamphlets the appropriate signs should also be encouraged.SIMPLE challenging COMPLEXAoraki Mount Cook VillageTasman Valley FloorMurchison Valley FloorUpper Tasman GlacierLiebig RangeMueller GlacierBall Hut RdGrand PlateauUpper Hooker ValleyTrack to Mueller HutExample of part of Aoraki Mount Cook National Park1817 CRYSTAL CRYSTAL BALL BALL CRYSTAL BALL 18
Public Information modelThe following table is the public information model. This information will need to go into any web sites giving information on ATES and intoATES pamphlets and visitor centre information along with the accompanying advice on the amount of experience needed. An importantpart of ATES is providing advice to the public on how much experience is needed. Note that the experience level goes up for places with noavalanche advisories.SIMPLE1Exposure to low angle or primarily forested terrain. Some forest openingsmay involve the runout zones of infrequent avalanches. Many options toreduce or eliminate exposure. No glacier travel.How does ATES apply inAoraki/Mount Cook National Park?Be avalanche aware!challengingcomplex23Exposure to well defined avalanche paths, starting zones or terrain traps;options exist to reduce or eliminate exposure with careful routefinding.Glacier travel is straightforward but crevasse hazards may exist.Exposure to multiple overlapping avalanche paths or large expanses ofsteep, open terrain; multiple avalanche starting zones and terrain trapsbelow; minimal options to reduce exposure. Complicated glacier travelwith extensive crevasse bands or icefalls.The majority of the park and surrounding terrain is seriousavalanche country.There is very little simple terrain and a moderate amountof challenging terrain. The majority of the park is complexavalanche terrain, which demands respect from all whouse it. See insertAll park visitors should consider carefully the class ofavalanche terrain they are going into, and check theavalanche-danger advisory prior to undertaking any trip.Avalanche seasonAt higher altitudes avalanches can occur at any time of theyear as snow falls year-round in the park. Climbers can beat particular risk during the summer at higher elevations.During winter and spring, avalanches can occur on someIf you are going into places avalanches could occur, makesure you:• have checked the ATES class for where you want togo and the BAA for the avalanche rating• have the skills for the ATES class you are going into• take an avalanche transceiver, a snow shovel and aprobe. Know how to use these tools!Risk statementATES and the BAA should be used together for evaluating hazardsand managing personal risk in the backcountry.How much experience do I need for these trips?Simple (Class 1) terrain requires common sense, proper equipment,first aid skills, and the discipline to respect avalanche warnings.Simple terrain is usually low avalanche risk, ideal for people gainingbackcountry experience.These trips may not be entirely free from avalanche hazards,and on days when the Backcountry Avalanche Advisory is ratedConsiderable or higher, you may want to re-think any backcountrytravel that has exposure to avalanches – stay within the boundariesof a ski area. If there is no advisory you or someone in your groupshould have done an avalanche awareness course.Challenging (Class 2) terrain requires skills to recognize and avoidavalanche prone terrain – big slopes exist on these trips. You mustalso know how to understand avalanche advisories, performavalanche self rescue, basic first aid, and be confident in your routefinding skills. In places with an avalanche advisory exists you shouldtake an avalanche course prior to travelling in this type of terrain.If there is no advisory you or someone in your group should havedone the 4 day backcountry avalanche course. If you are unsure ofyour own, or your group’s ability to navigate through avalancheterrain - consider hiring a professional guide, normally an NZMGAqualified guide. Complex (Class 3) terrain demands a strong groupwith years of critical decision-making experience in avalanche terrain.There can be no safe options on these trips, forcing exposure to bigslopes. A recommended minimum is that you or someone in yourgroup should have taken a 4 day backcountry avalanche course andhas several years of backcountry experience. Be prepared! Check theavalanche advisory regularly, and ensure everyone in your group is upfor the task and aware of the risk. If there is no advisory then itis recommended that everyone in the group has done the 4 daybackcountry course. This is serious country - not a place to considerunless you’re confident in the skills of your group. If you areuncertain, hiring a professional NZMGA qualified guide isrecommendedTechnical ModelThe technical model is used to define each class and utilises themodel being used by Parks Canada as at May 2010.(version 1.04) The following link http://www.pc.gc.ca/pn-np/ab/banff/visit/visit7a1_e.asp takes you to the Parks Canada avalancheweb page. The technical model should be made available on websitesbut should not be used in pamphlets or visitor centre displays.Changes from the Canadian ModelATES as applied in <strong>New</strong> <strong>Zealand</strong> is as close to the Canadian systemas possible. The technical model and public information model arethe same. The only differences are in the “how much experience do Ineed?” section where the relevant <strong>New</strong> <strong>Zealand</strong> course names havebeen used and some additional material on skill levels for wherethere is no advisory has been added.The Canadian model has several references to trees in it. While thereare very few start zones in <strong>New</strong> <strong>Zealand</strong> in trees there are a lot ofavalanche paths that run down to valley floor through mature forestso trees are still relevant to the <strong>New</strong> <strong>Zealand</strong> situation.Don Bogiee: dbogie@doc.govt.nzThere are inherent risks in backcountry travel, and most of theroutes described here will at times be unsafe due to potential snowavalanches. The Department of Conservation has done its best toprovide accurate information describing the terrain characteristicstypical of each general region, based on its current knowledge.However, it is up to you to use this information to make your ownrisk-management decisions and learn the necessary skills for safebackcountry travel, to access additional trip-planning materials,and to exercise caution while travelling in backcountry areas. Thisinformation is no substitute for experience and good judgement.beavalanchealertAvalanche terrain ratingspark tracks, and on the Ball Hut road. To reduce risk, thefollowing applies at three sites:Hooker Valley Track• During periods of high risk to people at the outlet endof the lake, this track is closed. You should not gobeyond the outlet end of the lake unless you have theright avalanche experience.Ball Hut Road• Large avalanches regularly cross the road each winterand into the spring. You should not stop in any of themarked avalanche paths. Check with the visitor centrefor the latest avalanche information prior to walking orfour-wheel driving here.Mueller Hut Route• The route to Mueller Hut travels through complexavalanche terrain. There is no way to avoid beingexposed to avalanche danger on this route whenthere is enough snow in the start zones to produceavalanches. Check at the visitor centre to see ifavalanches are likely to be an issue.• If you lack experience at travelling in avalanche terrain,our recommendation is that you should only go up ordown from the hut when the avalanche danger is low.• If staying overnight in the hut, you need to beprepared to stay longer if the danger level rises whileyou are there.BAA –BackcountryAvalancheAdvisoryThe BackcountryAvalanche Advisoryis provided by the<strong>Mountain</strong> <strong>Safety</strong><strong>Council</strong>, and isavailable atwww.avalanche.net.nzPublished byDepartment of ConservationCanterbury ConservancyPrivate Bag 4715Christchurch, <strong>New</strong> <strong>Zealand</strong>2010www.doc.govt.nzCover photo: Avalanche on Ball Hut Road, Aoraki/Mount Cook National Parkaoraki/mount cook national parkAn example of how DOC will be using/publicizing ATES20 19 CRYSTAL BALL CRYSTAL BALL 20