TEAM PT3208S - Team Electronic
TEAM PT3208S - Team Electronic
TEAM PT3208S - Team Electronic

You also want an ePaper? Increase the reach of your titles
YUMPU automatically turns print PDFs into web optimized ePapers that Google loves.
14<br />
ENGLISH<br />
6) Sockets for External Speaker-Microphone<br />
Behind the screw-fixed cover on top of the unit’s right side you can find two jack<br />
sockets for stereo plugs Ø 2,5/3,5 mm [SPK/MIC] ( 7 ). They serve for the connection<br />
of a speaker-microphone with PTT function or for a separate microphone or a<br />
separate speaker. As already indicated on the cover, the upper socket is for the speaker<br />
and the lower socket is for the microphone. The internal speaker and/or the internal<br />
microphone will be switched off, if the socket for the corresponding external<br />
accessory is in use.<br />
7) Charging of the Accumulator<br />
The accumulator is not charged in the factory. Therefore it must be charged before<br />
it is used the first time.<br />
Insert the DC connector of the power cord coming from the adapter into the socket<br />
on the rear of the charging mould. Then connect the adapter with a wall outlet<br />
( 230 V, 50 Hz ).<br />
Now insert the transceiver with mounted accumulator or only the accumulator itself<br />
into the charging mould. The front panel must show into the direction of the<br />
push button, or the charging contacts to the rear.<br />
The red LED ( CHARGING ) on the charging mould lights up now, which indicates<br />
that the charging process has started. After approximately six hours the red LED turns off and<br />
the green LED ( COMPLETION ) lights up. That means that now the accumulator is charged and<br />
the charging current is reduced. The charging process can be continued for 1 or 2 hours after<br />
the green LED has turned on, to take advantage of the entire capacity of the accumulator. But<br />
do not exceed the charging duration beyond this time, otherwise you will cause an overcharging<br />
which will reduce the accumulator capacity or shorten the accumulator life. A too frequent recharging<br />
of a partially discharged accumulator will also result in a reduction of its capacity. For this end<br />
the charging mould is equipped with a discharge function. To activate a previous discharging of<br />
a partially discharged accumulator insert the transceiver with mounted accumulator or only the<br />
accumulator itself into the charging mould. After the red LED has begun to light up, depress briefly<br />
the button on the charging mould. This will cause the red LED to turn off and the yellow LED<br />
( DISCHARGING ) to turn on. That means that the accumulator is discharged now. At the end of<br />
the discharge process the yellow LED turns off automatically and the red LED<br />
( CHARGING ) lights up again. This indicated that the charging process has started automatically.<br />
At the end of the charge process the red LED turns off and the green LED lights up again,<br />
which indicates that the accumulator is charged now.<br />
Never try to recharge alkaline cells or other accumulators than the supplied one with the charging<br />
mould.<br />
8) Accumulator Alert Indication<br />
The unit is equipped with a accumulator level monitoring circuit which alerts you, when the stored<br />
energy is nearly completely used up. If the accumulator voltage drops below a certain value<br />
in receiving mode, you will hear a warning tone in the speaker. If the accumulator voltage drops<br />
below this value while transmitting, the control lamp ( 2 ) starts to flash red. After releasing the<br />
PTT key and pressing it once again now, the unit will not transmit any more. Now it is time to<br />
recharge the accumulator.<br />
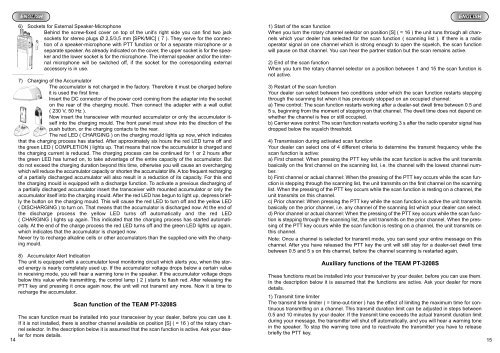
Scan function of the <strong>TEAM</strong> PT-3208S<br />
The scan function must be installed into your transceiver by your dealer, before you can use it.<br />
If it is not installed, there is another channel available on position [S] ( = 16 ) of the rotary channel<br />
selector. In the description below it is assumed that the scan function is active. Ask your dealer<br />
for more details.<br />
1) Start of the scan function<br />
When you turn the rotary channel selector on position [S] ( = 16 ) the unit runs through all channels<br />
which your dealer has selected for the scan function ( scanning list ). If there is a radio<br />
operator signal on one channel which is strong enough to open the squelch, the scan function<br />
will pause on that channel. You can hear the partner station but the scan remains active.<br />
2) End of the scan function<br />
When you turn the rotary channel selector on a position between 1 and 15 the scan function is<br />
not active.<br />
3) Restart of the scan function<br />
Your dealer can select between two conditions under which the scan function restarts stepping<br />
through the scanning list when it has previously stopped on an occupied channel:<br />
a) Time control: The scan function restarts working after a dealer-set dwell time between 0.5 and<br />
5 s, beginning from the moment of stopping on that channel. The dwell time does not depend on<br />
whether the channel is free or still occupied.<br />
b) Carrier wave control: The scan function restarts working 3 s after the radio operator signal has<br />
dropped below the squelch threshold.<br />
4) Transmission during activated scan function<br />
Your dealer can select one of 4 different criteria to determine the transmit frequency while the<br />
scan function is active:<br />
a) First channel: When pressing the PTT key while the scan function is active the unit transmits<br />
basically on the first channel on the scanning list, i.e. the channel with the lowest channel number.<br />
b) First channel or actual channel: When the pressing of the PTT key occurs while the scan function<br />
is stepping through the scanning list, the unit transmits on the first channel on the scanning<br />
list. When the pressing of the PTT key occurs while the scan function is resting on a channel, the<br />
unit transmits on this channel.<br />
c) Prior channel: When pressing the PTT key while the scan function is active the unit transmits<br />
basically on the prior channel, i.e. any channel of the scanning list which your dealer can select.<br />
d) Prior channel or actual channel: When the pressing of the PTT key occurs while the scan function<br />
is stepping through the scanning list, the unit transmits on the prior channel. When the pressing<br />
of the PTT key occurs while the scan function is resting on a channel, the unit transmits on<br />
this channel.<br />
Note: Once a channel is selected for transmit mode, you can send your entire message on this<br />
channel. After you have released the PTT key the unit will still stay for a dealer-set dwell time<br />
between 0.5 and 5 s on this channel, before the channel scanning is restarted again.<br />
Auxiliary functions of the <strong>TEAM</strong> PT-3208S<br />
ENGLISH<br />
These functions must be installed into your transceiver by your dealer, before you can use them.<br />
In the description below it is assumed that the functions are active. Ask your dealer for more<br />
details.<br />
1) Transmit time limiter<br />
The transmit time limiter ( = time-out-timer ) has the effect of limiting the maximum time for continuous<br />
transmitting on a channel. This transmit duration limit can be adjusted in steps between<br />
0.5 and 10 minutes by your dealer. If the transmit time exceeds the actual transmit duration limit<br />
during your message, the transmitter will shut off automatically, and you will hear a warning tone<br />
in the speaker. To stop the warning tone and to reactivate the transmitter you have to release<br />
briefly the PTT key.<br />
15