TEAM PT3208S - Team Electronic
TEAM PT3208S - Team Electronic
TEAM PT3208S - Team Electronic

You also want an ePaper? Increase the reach of your titles
YUMPU automatically turns print PDFs into web optimized ePapers that Google loves.
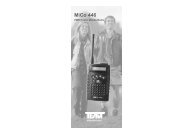
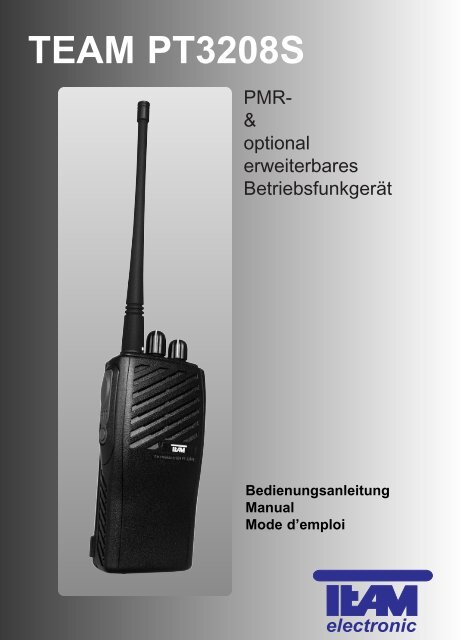
<strong>TEAM</strong> <strong>PT3208S</strong><br />
PMR-<br />
&<br />
optional<br />
erweiterbares<br />
Betriebsfunkgerät<br />
Bedienungsanleitung<br />
Manual<br />
Mode d’emploi<br />
electronic
<strong>TEAM</strong> PT-3208S<br />
Manual<br />
Table of Contents<br />
page<br />
Displays and Controls 2<br />
Setting Up the <strong>TEAM</strong> PT-3208S 12<br />
Mounting of the Accumulator 12<br />
Mounting and Removing of the Belt Clip 12<br />
Operation of the <strong>TEAM</strong> PT-3208S 13<br />
1) Turning the Unit On/Off 13<br />
2) Volume Level Adjustment 13<br />
3) Channel Selection 13<br />
4) Transmission 13<br />
5) Reception 13<br />
6) Sockets for External Speaker-Microphone 14<br />
7) Charging of the Accumulator 14<br />
8) Low Power Indicator 14<br />
Scan Function of the <strong>TEAM</strong> PT-3208S 14<br />
1) Start of Scan Function 15<br />
2) End of Scan Function 15<br />
3) Restart of the Scan Function 15<br />
4) Transmission during activated Scan Function 15<br />
Auxiliary Functions of the <strong>TEAM</strong> PT-3208S 15<br />
1) Transmit Time Limiter 15<br />
2) Busy Channel Lockout Function 16<br />
3) Energy Saving Function 16<br />
4) Additional Muting Function 16<br />
General 17<br />
1) Safety 17<br />
2) Service 17<br />
3) Conformity 17<br />
4) Programmed Channels 17<br />
5) Programmed Functions 17 - 18<br />
6) Technical Data 18<br />
7) CTCSS-Tones and DQT-Codes 27<br />
ENGLISH<br />
11
12<br />
ENGLISH<br />
Setting up the <strong>TEAM</strong> PT-3208S<br />
Unpack carefully your UHF radio PT-3208S. Please check whether the supplied material matches<br />
with the positions listed below. In case of loss or damage of a part contact your carrier at<br />
once.<br />
manual<br />
battery pack belt clip desktop<br />
charger<br />
wrist loop adapter<br />
Declaration of<br />
Conformity<br />
This transceiver is a heavy duty PMR radio, which can be optionally modified by your dealer also<br />
into a professional transceiver together with the PMR channels. In this unit only the channels<br />
1 – 8 are already factory-preset to the PMR channels, i.e. the number of the rotary channel selector<br />
position corresponds with the actual PMR channel. The positions 9 – 16 are free according to<br />
the factory setting. The TX output power on the PMR channels is reduced to 500 mW in the<br />
radiated field according to the European regulation. See in the chapter “technical data“ for the<br />
table of the PMR channel numbers together with the corresponding frequencies. When the unit<br />
remains in pure PMR operation, it is free of charge and registration in most European countries.<br />
If you want to use the unit as a professional transceiver, you have to contact your local telecommunication<br />
authorities. You may be required to pay costs of registrations and annual fees for<br />
every unit and for every frequency. If your application is passed, you can go to your dealer and<br />
let him set your PT-3208S to the permitted frequency(ies) and adjustments.<br />
Mounting of the Accumulator<br />
At first turn the rear panel towards you. Place the accumulator ( 9 ) in that way<br />
on the unit’s rear panel that the 4 slip planes of the unit grip into the corresponding<br />
guiding slots of the accumulator, and that the accumulator’s charging<br />
contacts show into the direction of the unit’s base. Then push the accumulator<br />
under simultaneous slight pressure on its back into the direction of the unit’s top<br />
side, until the latch on the unit’s base clicks into place. Now the unit is ready for<br />
radio operation.<br />
Detaching of the Accumulator<br />
Turn again the unit’s rear panel towards you. To release the accumulator from<br />
the unit you have to pull the latch on the unit’s base with your finger towards the<br />
unit’s front panel, while pushing simultaneously the accumulator towards the<br />
unit’s base. After the accumulator is slid out of the unit’s slip planes you can take it off.<br />
Removing and mounting of the belt clip<br />
Turn the rear panel towards you.<br />
Mounting of the Belt Clip<br />
Pull the springy support of the belt clip a bit out of its rest position by using your<br />
index finger and your middle finger. When the support is parallel to belt clip’s main<br />
part insert it from above into the corresponding guide on the back of the accumulator.<br />
Push the belt clip into the direction of the unit’s base until the belt clip’s latch<br />
clicks into place.<br />
Detaching<br />
The latch of the belt clip is located on the accumulator’s back near the top side.<br />
Pull the latch with your fingernail away from the accumulator’s back and push<br />
simultaneously the belt clip towards the unit’s top side. After the belt clip is slid out<br />
of its guide you can take it off.<br />
Operation of the <strong>TEAM</strong> PT-3208S<br />
ENGLISH<br />
1) Turning the unit On/Off<br />
To turn on the unit rotate the volume control with ON/OFF switch [VOLUME/OFF] ( 4 )<br />
from its rest position clockwise until you hear a clicking sound. A short beep tone will<br />
be heard from the loudspeaker ( 8 ), which indicates that the unit is in reception mode.<br />
To switch off the unit rotate the volume control with ON/OFF switch [VOLUME/OFF] ( 4 )<br />
counterclockwise to the final stop [OFF] until you hear a clicking sound. This indicates that the<br />
unit is switched off now.<br />
2) Volume level adjustment<br />
If a radio operator sends a message on the actual channel, you can hear it in the<br />
incorporated loudspeaker ( 8 ). If the actual channel is free, the loudspeaker will be<br />
silent. In this case you can produce a strong noise in the loudspeaker by pressing the<br />
monitor key ( 6 ). Adjust the volume control [VOLUME/OFF] ( 4 ) to a comfortable<br />
listening level. Turning the control clockwise will increase the volume level and turning it counterclockwise<br />
will reduce the volume level.<br />
3) Channel selection<br />
The <strong>TEAM</strong> PT-3208S has maximal 16 channels available. To select another channel<br />
turn the rotary channel selector [1-15, S] ( 3 ). According to the programming of the<br />
channels, which has been made by your dealer, the unit will call up those transmit and<br />
reception frequencies which correspond to the actual position 1 – 15 ( 16 ) of the<br />
rotary channel selector.<br />
Note: If the rotary channel selector is set to a not programmed position, you will hear a continuous<br />
warning tone in the loudspeaker.<br />
4) Transmission<br />
Do not transmit if the antenna ( 1 ) is not mounted. Check activity on the actual channel. Do not<br />
send if someone talks on the actual channel. Only if the loudspeaker is silent and the control<br />
lamp ( 2 ) is dark, the channel is free. Press also the monitor key ( 6 ). There must be a noise if<br />
the channel is not occupied.<br />
To transmit depress and hold the PTT key ( 5 ). During transmission the control lamp ( 2 ) lights<br />
up red and the rotary channel selector is disabled. Hold the unit upright. The sensitivity of the<br />
built-in microphone is set for speaking at a distance of 2 inches. Speaking too loud will cause<br />
distortions and makes the signal difficult to understand. On completion of the transmission release<br />
the PTT key and the set will return to receive mode.<br />
Note: Radio operation is only possible with the counter operator at coinciding channels.<br />
5) Receiving<br />
After being switched on, the unit is always in receiving mode, as long as it is not transmitting.<br />
When it does not find any signal on the actual channel, it would produce a disturbing noise in the<br />
loudspeaker ( 8 ). For this end the unit is equipped with a built-in noise suppression circuit<br />
( squelch ) that mutes the receiver if there is no station on the actual channel. If there is any<br />
incoming signal, the squelch will turn the loudspeaker on and cause the control lamp ( 2 ) simultaneously<br />
to light up green. This indicates that the channel is occupied. Your dealer can adjust<br />
the squelch threshold. The squelch function can be disabled to hear also weak stations which<br />
are not strong enough for the squelch to turn the loudspeaker on ( monitor function ).<br />
Depress the monitor key ( 6 ). Now the noise suppression is shut off and the control lamp lights<br />
simultaneously up green. If there is no station on the actual channel you hear a noise in the speaker.<br />
To reactivate the squelch release the monitor key ( 6 ) again. Thus the squelch works again.<br />
The monitor key function can also be changed by your dealer. For further information see point<br />
4 of the chapter “Auxiliary functions of the PT-3208S”.<br />
13
14<br />
ENGLISH<br />
6) Sockets for External Speaker-Microphone<br />
Behind the screw-fixed cover on top of the unit’s right side you can find two jack<br />
sockets for stereo plugs Ø 2,5/3,5 mm [SPK/MIC] ( 7 ). They serve for the connection<br />
of a speaker-microphone with PTT function or for a separate microphone or a<br />
separate speaker. As already indicated on the cover, the upper socket is for the speaker<br />
and the lower socket is for the microphone. The internal speaker and/or the internal<br />
microphone will be switched off, if the socket for the corresponding external<br />
accessory is in use.<br />
7) Charging of the Accumulator<br />
The accumulator is not charged in the factory. Therefore it must be charged before<br />
it is used the first time.<br />
Insert the DC connector of the power cord coming from the adapter into the socket<br />
on the rear of the charging mould. Then connect the adapter with a wall outlet<br />
( 230 V, 50 Hz ).<br />
Now insert the transceiver with mounted accumulator or only the accumulator itself<br />
into the charging mould. The front panel must show into the direction of the<br />
push button, or the charging contacts to the rear.<br />
The red LED ( CHARGING ) on the charging mould lights up now, which indicates<br />
that the charging process has started. After approximately six hours the red LED turns off and<br />
the green LED ( COMPLETION ) lights up. That means that now the accumulator is charged and<br />
the charging current is reduced. The charging process can be continued for 1 or 2 hours after<br />
the green LED has turned on, to take advantage of the entire capacity of the accumulator. But<br />
do not exceed the charging duration beyond this time, otherwise you will cause an overcharging<br />
which will reduce the accumulator capacity or shorten the accumulator life. A too frequent recharging<br />
of a partially discharged accumulator will also result in a reduction of its capacity. For this end<br />
the charging mould is equipped with a discharge function. To activate a previous discharging of<br />
a partially discharged accumulator insert the transceiver with mounted accumulator or only the<br />
accumulator itself into the charging mould. After the red LED has begun to light up, depress briefly<br />
the button on the charging mould. This will cause the red LED to turn off and the yellow LED<br />
( DISCHARGING ) to turn on. That means that the accumulator is discharged now. At the end of<br />
the discharge process the yellow LED turns off automatically and the red LED<br />
( CHARGING ) lights up again. This indicated that the charging process has started automatically.<br />
At the end of the charge process the red LED turns off and the green LED lights up again,<br />
which indicates that the accumulator is charged now.<br />
Never try to recharge alkaline cells or other accumulators than the supplied one with the charging<br />
mould.<br />
8) Accumulator Alert Indication<br />
The unit is equipped with a accumulator level monitoring circuit which alerts you, when the stored<br />
energy is nearly completely used up. If the accumulator voltage drops below a certain value<br />
in receiving mode, you will hear a warning tone in the speaker. If the accumulator voltage drops<br />
below this value while transmitting, the control lamp ( 2 ) starts to flash red. After releasing the<br />
PTT key and pressing it once again now, the unit will not transmit any more. Now it is time to<br />
recharge the accumulator.<br />
Scan function of the <strong>TEAM</strong> PT-3208S<br />
The scan function must be installed into your transceiver by your dealer, before you can use it.<br />
If it is not installed, there is another channel available on position [S] ( = 16 ) of the rotary channel<br />
selector. In the description below it is assumed that the scan function is active. Ask your dealer<br />
for more details.<br />
1) Start of the scan function<br />
When you turn the rotary channel selector on position [S] ( = 16 ) the unit runs through all channels<br />
which your dealer has selected for the scan function ( scanning list ). If there is a radio<br />
operator signal on one channel which is strong enough to open the squelch, the scan function<br />
will pause on that channel. You can hear the partner station but the scan remains active.<br />
2) End of the scan function<br />
When you turn the rotary channel selector on a position between 1 and 15 the scan function is<br />
not active.<br />
3) Restart of the scan function<br />
Your dealer can select between two conditions under which the scan function restarts stepping<br />
through the scanning list when it has previously stopped on an occupied channel:<br />
a) Time control: The scan function restarts working after a dealer-set dwell time between 0.5 and<br />
5 s, beginning from the moment of stopping on that channel. The dwell time does not depend on<br />
whether the channel is free or still occupied.<br />
b) Carrier wave control: The scan function restarts working 3 s after the radio operator signal has<br />
dropped below the squelch threshold.<br />
4) Transmission during activated scan function<br />
Your dealer can select one of 4 different criteria to determine the transmit frequency while the<br />
scan function is active:<br />
a) First channel: When pressing the PTT key while the scan function is active the unit transmits<br />
basically on the first channel on the scanning list, i.e. the channel with the lowest channel number.<br />
b) First channel or actual channel: When the pressing of the PTT key occurs while the scan function<br />
is stepping through the scanning list, the unit transmits on the first channel on the scanning<br />
list. When the pressing of the PTT key occurs while the scan function is resting on a channel, the<br />
unit transmits on this channel.<br />
c) Prior channel: When pressing the PTT key while the scan function is active the unit transmits<br />
basically on the prior channel, i.e. any channel of the scanning list which your dealer can select.<br />
d) Prior channel or actual channel: When the pressing of the PTT key occurs while the scan function<br />
is stepping through the scanning list, the unit transmits on the prior channel. When the pressing<br />
of the PTT key occurs while the scan function is resting on a channel, the unit transmits on<br />
this channel.<br />
Note: Once a channel is selected for transmit mode, you can send your entire message on this<br />
channel. After you have released the PTT key the unit will still stay for a dealer-set dwell time<br />
between 0.5 and 5 s on this channel, before the channel scanning is restarted again.<br />
Auxiliary functions of the <strong>TEAM</strong> PT-3208S<br />
ENGLISH<br />
These functions must be installed into your transceiver by your dealer, before you can use them.<br />
In the description below it is assumed that the functions are active. Ask your dealer for more<br />
details.<br />
1) Transmit time limiter<br />
The transmit time limiter ( = time-out-timer ) has the effect of limiting the maximum time for continuous<br />
transmitting on a channel. This transmit duration limit can be adjusted in steps between<br />
0.5 and 10 minutes by your dealer. If the transmit time exceeds the actual transmit duration limit<br />
during your message, the transmitter will shut off automatically, and you will hear a warning tone<br />
in the speaker. To stop the warning tone and to reactivate the transmitter you have to release<br />
briefly the PTT key.<br />
15
16<br />
ENGLISH<br />
2) Busy channel lockout function<br />
The lockout function for busy channels has the effect to prevent the unit from interfering with<br />
other stations. If there is a station on the actual channel at the moment when you press the PTT<br />
key, the transmitter will not be switched on. In this situation you will only hear a warning tone in<br />
the speaker. When you release the PTT key the warning tone will be stopped and the set will<br />
revert to receiving mode. You can only send if there is no station on the actual channel at the<br />
moment when you press the PTT key.<br />
3) Energy saving function<br />
The unit is equipped with an energy saving function. This function is factory set in your unit. This<br />
function works only in receive mode. It reduces the current consumption when no signal is<br />
detect-ed on the actual channel and no the rotary channel selector is not turned for a longer period.<br />
If you do not use the unit for a longer period of time, you should switch it off.<br />
4) Additional muting function<br />
The unit is also equipped with a possibility to suppress messages of unwanted operators on the<br />
actual channel while the message of the partner station remains audible. To identify the wanted<br />
radio messages there are two methods available: CTCSS and DQT.<br />
CTCSS method ( = Continuous Tone Coded Squelch System )<br />
The wanted radio message must contain a certain inaudible tone, which the CTCSS detecting<br />
circuit of the receiving unit recognises and which can take the additional muting device out of service.<br />
In transmit mode the unit adds to its voice signal also a certain inaudible tone which will be<br />
recognised by the CTCSS detecting circuit of the counter station’s receiver to open its additional<br />
muting device.<br />
DQT method ( Digital Quiet Talk )<br />
The digital pulse detecting circuit of the receiving unit checks if the received signal contains any<br />
digital pulses. If it has identified a certain sequence of digital pulses as the opening code of the<br />
wanted message, the muting device lets the radio message pass from that moment on. In case<br />
of sending DQT coded messages the unit transmits immediately, after the PTT key has been<br />
pressed down, a certain sequence of digital pulses, too. These pulses will be recognised by the<br />
digital pulse detecting circuit of the counter station’s receiver, which gives an order to the muting<br />
device to let the radio message pass to the speaker from that moment on. The duration of the<br />
sequence of digital pulses is very short, so you can start to speak without waiting after you have<br />
pressed the PTT key.<br />
Please take into account that other radio operators, who are not equipped with a CTCSS or DQT<br />
coding/encoding device, or who don’t use it, can hear all your conversation if they are working<br />
on the same channel like you and your counter operator.<br />
Your dealer can install for each channel separately the CTCSS or DQT operation. It is also possible<br />
to set at the same channel different operation types for receive and transmit mode. But if<br />
you do not want the CTCSS or DQT operation at all, you can take it as well out of service.<br />
If the CTCSS or DQT operation is installed in receiving mode on the actual channel, and if<br />
there is a radio operator on this channel who uses either no CTCSS or DQT operation or a not<br />
according one, you will see only the control lamp ( 2 ) lighting up green, but the speaker will be<br />
silent. This shows you that the channel is occupied and that you should not transmit on this channel<br />
for not disturbing the other station.<br />
The CTCSS method allows your dealer to select one of 38 different inaudible tones to encrypt<br />
your messages between you and the wanted radio operator. If you use the DQT method your<br />
dealer will have 166 different digital codes to encrypt your messages between you and the wanted<br />
radio operator.<br />
The monitor key stops besides the noise suppression also a possible CTCSS or DQT operation<br />
in the receiver. The monitor key function can be changed in that way by your dealer that only the<br />
CTCSS or DQT operation in receiving mode is shut off, but not the noise squelch.<br />
General<br />
1)Safety<br />
The unit radiates RF energy in transmitting mode. To reduce the exposure to the lowest possible<br />
value and to benefit the most of the set’s features, keep the following in mind:<br />
In transmission mode, keep the unit in a vertical position at a distance of 2 inches away from your<br />
face. Keep the antenna at a distance of at least 3 inch away from your head and your body.<br />
2) Service<br />
The condition of the accumulator must be tested from time to time. If the accumulator is weak a<br />
short time after complete charge, it should be removed from the set. It can leak and damage the<br />
device. Replace it by a new one.<br />
Worn out accumulators do not belong into the waste bin, but must be returned to a suitable<br />
collecting depot or to a special dealer, for the sake of the environment.<br />
There are no user-adjustable or user-serviceable parts inside the radio. The casing must not be<br />
opened. Independent repairs or adjustments must not be carried out, since each modification or<br />
unauthorised intervention will immediately cancel all and any guarantee or repair claims, they are<br />
also likely to result in non-conformity to ETS/EN regulations which will render the set to become<br />
illegal.<br />
In the event a defect becoming apparent, contact a properly equipped and authorised <strong>TEAM</strong><br />
dealer or <strong>TEAM</strong> directly.<br />
3) Conformity<br />
The transceiver <strong>TEAM</strong> PT-3208S complies with the rules of the European Directive R&TTE and<br />
meets the European Telecommunication Standards EN 300 296, EN 300 086, EN 301 489-1/-5<br />
and EN 60065.<br />
4) Programmed Channels<br />
ENGLISH<br />
Channel Transmit Frequency Encryption TX Reception Frequency Decryption RX Bandwidth<br />
(MHz) (MHz) Narrow / Wide<br />
1 446,00625 MHz 446,00625 MHz narrow<br />
2 446,01875 MHz 446,01875 MHz narrow<br />
3 446,03125 MHz 446,03125 MHz narrow<br />
4 446,04375 MHz 446,04375 MHz narrow<br />
5 446,05625 MHz 446,05625 MHz narrow<br />
6 446,06875 MHz 446,06875 MHz narrow<br />
7 446,08125 MHz 446,08125 MHz narrow<br />
8 446,09375 MHz 446,09375 MHz narrow<br />
9<br />
10<br />
11<br />
12<br />
13<br />
14<br />
15<br />
16<br />
5) Programmed functions<br />
Insert below the functions that your dealer has programmed into your transceiver.<br />
Condition to Restart the Channel Scan Function Channel Scanning<br />
Time Control Carrier Wave Control activated deactivated<br />
Duration [ s ]<br />
17
18<br />
ENGLISH<br />
Transmit Channel during Active Channel Scan Function<br />
First Channel First Channel or Prior Channel Prior Channel or<br />
actual Channel actual Channel<br />
Function of the Monitor Key<br />
Out of Function Stopping briefly Stopping Stopping briefly<br />
CTCSS & DQT CTCSS & DQT Noise Squelch<br />
in toggle mode CTCSS & DQT<br />
Transmit Time-Out-Timer<br />
Duration [min]<br />
6) Technical Data<br />
PMR Frequency Range<br />
Channel Frequency [ MHz ] Channel Frequency [ MHz ] Channel Frequency [ MHz ]<br />
1 446.00625 2 446.01875 3 446.03125<br />
4 446.04375 5 446.05625 6 446.06875<br />
7 446.08125 8 446.09375<br />
Channel spacing: 12.5 kHz<br />
Radiated TX output power: 500 mW<br />
Modulation type: 8K50F3E<br />
Deviation: max. 2.5 kHz ( narrow )<br />
RX sensitivity: + 14 dBµV/m ( narrow )<br />
Audio output power: 0.56 W at 8 Ω at 10 % THD<br />
Supply voltage: 5.5 – 7.5 V<br />
Current consumption:<br />
Professional radio communication:<br />
TX: 490 mA<br />
Frequency range: 450 MHz – 470 MHz<br />
Frequency step size: 6.25 kHz; 5 kHz<br />
Channel separation: narrow: 12.5 kHz / wide: 25 kHz<br />
TX output power: max. 5 W<br />
Modulation type: FM<br />
Deviation: narrow: 2.5 kHz / wide: 5 kHz<br />
RX sensitivity: narrow: + 14 dBµV/m / wide: + 8 dBµV/m<br />
Audio output power: 0.56 W at 8 Ω at 10 % THD<br />
Supply voltage: 5.5 – 7.5 V<br />
Current consumption: TX ( Low ): 490 mA; TX ( High ): 1.5 A<br />
RX without power down mode: 60 mA<br />
RX with power down mode: 30 mA<br />
Dimsions ( cabinet ): W/H/D: 59 x 117 x 42 mm<br />
Weight with Batteries and antenna: 322 g<br />
This product is meant for distribution and sale in the following European countries:<br />
Austria, Germany, Switzerland.
CTCSS-Töne • CTCSS tones • Fréquences des tons CTCSS :<br />
Code Frequ. (Hz) Code Frequ. (Hz) Code Frequ. (Hz) Code Frequ. (Hz) Code Frequ. (Hz)<br />
1 67,0 10 94,8 18 123,0 26 162,2 34 218,1<br />
2 71,9 11 97,4 19 127,3 27 167,9 35 225,7<br />
3 74,4 12 100,0 20 131,8 28 173,8 36 233,6<br />
4 77,0 13 103,5 21 136,5 29 179,9 37 241,8<br />
5 79,7 14 107,2 22 141,3 30 186,2 38 250,3<br />
6 82,5 15 110,9 23 146,2 31 192,8<br />
7 85,4 16 114,8 24 151,4 32 203,5<br />
8 88,5 17 118,8 25 156,7 33 210,7<br />
DQT-Codes<br />
Code Code Code Code Code Code<br />
D023N D114N D174N D315N D445N D631N<br />
D025N D115N D205N D331N D464N D632N<br />
D026N D116N D223N D343N D465N D654N<br />
D031N D125N D226N D346N D466N D662N<br />
D032N D131N D243N D351N D503N D664N<br />
D043N D132N D244N D364N D506N D703N<br />
D047N D134N D245N D365N D516N D712N<br />
D051N D143N D251N D371N D532N D723N<br />
D054N D152N D261N D411N D546N D731N<br />
D065N D155N D263N D412N D565N D732N<br />
D071N D156N D265N D413N D606N D734N<br />
D072N D162N D271N D623N D612N D743N<br />
D073N D165N D306N D431N D624N D754N<br />
D074N D172N D311N D432N D627N<br />
DQT-Codes<br />
Code Code Code Code Code Code<br />
D023I D114I D174I D315I D445I D631I<br />
D025I D115I D205I D331I D464I D632I<br />
D026I D116I D223I D343I D465I D654I<br />
D031I D125I D226I D346I D466I D662I<br />
D032I D131I D243I D351I D503I D664I<br />
D043I D132I D244I D364I D506I D703I<br />
D047I D134I D245I D365I D516I D712I<br />
D051I D143I D251I D371I D532I D723I<br />
D054I D152I D261I D411I D546I D731I<br />
D065I D155I D263I D412I D565I D732I<br />
D071I D156I D265I D413I D606I D734I<br />
D072I D162I D271I D623I D612I D743I<br />
D073I D165I D306I D431I D624I D754I<br />
D074I D172I D311I D432I D627I<br />
27
<strong>TEAM</strong> <strong>PT3208S</strong><br />
for sale and use in :<br />
Austria, Germany and Switzerland<br />
<strong>Team</strong> <strong>Electronic</strong> GmbH<br />
Bolongarostrasse 88<br />
65929 Frankfurt am Main<br />
Tel. 069 - 30 09 50 - 0<br />
Fax 069 - 31 43 82<br />
eMail team-electronic@t-online.de<br />
Web Seite www.team-electronic.de<br />
electronic