SQUIRE 'PLUS 2' - IDD Process & Packaging, Inc.
SQUIRE 'PLUS 2' - IDD Process & Packaging, Inc.
SQUIRE 'PLUS 2' - IDD Process & Packaging, Inc.

Create successful ePaper yourself
Turn your PDF publications into a flip-book with our unique Google optimized e-Paper software.
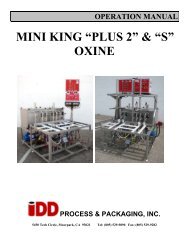
OPERATION MANUAL<strong>SQUIRE</strong> <strong>'PLUS</strong> <strong>2'</strong>2 HEAD <strong>SQUIRE</strong> <strong>'PLUS</strong> <strong>2'</strong>PROCESS & PACKAGING, INC.5450 Tech Circle, Moorpark, CA 93021 Tel: (805) 529-9890 Fax: (805) 529-9282
Table of contentsTITLETable of contentsPrefaceDisclaimerConfidentiality and CopyrightsSECTIONOperational Safety Notes EMERGENCY STOPETrainingSpecificationsStart-up and Shut-down ProcedureC.I.P. ProceduresPlant LayoutElectrical SectionMechanical SectionPneumatics SectionPlanned Prevenative Maintenance ScheduleQuality ControlDimensionsSparesServicesCycle TimesFlow DiagramControl PhilosophyProgram ListingAppendix SectionABCDFGHIJKLMPQRSTVWXYZPROCESS & PACKAGING, INC. ©1998
OPERATIONAL SAFETY NOTESEWEAR SAFETY GOGGLESWear Safety Goggles approved for use by your Safety and Operational Procedures Committeeswhen operating or observing this system.WEAR CHEMICAL RESISTANT GLOVES & APRONWear Chemical Resistant Gloves and Apron approved for use by your Safety and OperationalProcedures Committee.WEAR BACK SUPPORT EQUIPMENTWear Back Support Equipment approved for use by your Safety and Operational ProceduresCommittees and use proper lifting technique approved for use by your Safety and OperationalProcedures Committees.A full keg weighs up to 165 lbs and must be lifted using proper equipment.VENTILATIONArea should have adequate ventilation approved for use by your Safety and Operational ProceduresCommittees.Respirators should be used during cleaning and operations where fumes are present.EMERGENCY STOPMANUAL PROCESS STOPSTo STOP the process sequence at any time for each of the process heads, use the Manual Stop<strong>Process</strong> Buttons, that are located on the Control Panel.PROCESS & PACKAGING, INC. ©1998
.On-site training is available from our technical staff at the customers request.TRAININGFSPECIFICATIONSGOutput subject to keg valve style, keg size and wash sequence used.Note: Insert your specific optimum and acceptable values into this chart for your internal reference.This chart is the be used as a bench mark in the future of your production. Change in operatingpersonnel, valves, wash sequences and mechanical integrity can be tracked with this bench-marking.Date: Keg Size: Valve Style: Kegs/Hour:Special Notes:Date: Keg Size: Valve Style: Kegs/Hour:Special Notes:Date: Keg Size: Valve Style: Kegs/Hour:Special Notes:Date: Keg Size: Valve Style: Kegs/Hour:Special Notes:Date: Keg Size: Valve Style: Kegs/Hour:Special Notes:PROCESS & PACKAGING, INC. ©1998
START UP AND SHUT DOWN PROCEDURES HSEE CONTROL PHILOSOPHYSECTION FOR DETAILSPROCESS & PACKAGING, INC. ©1999
FLUSH OUT AND CLEAN UP PROCEDURE I 11. Flush out the detergent supply with clean water to remove any scum, scale or residualsthat may have formed in the tank.2. Flush out of residual product from the Filling Head and adjacent pipework can beachieved as described in the C.I.P. sequence that follows. It is recommended that all productresiduals are flushed from the system with cold water prior to introducing the C.I.P. cleaningsolution under item 6 of the C.I.P. procedures.3. Clean up of the <strong>SQUIRE</strong> can be best achieved with warm soapy water and brush. Rinsingwith LOW pressure water hose can be carried out. Care MUST be taken not to wet the areasaround electrical equipment such as the pump motors, control panels and electrical terminalboxes.C.I.P. SEQUENCE I 21. Connect the filler connection head to the cleaning cap by turning in a clockwisemovement. Depress and lock down the coupling head lever by pulling up and pushing down.2. Turn off CO2 isolating valve, if installed.3. Connect your C.I.P. return line to the F.O.B. Drain Pipe for C.I.P. solution recovery.4. Open Product and Filler Drain/F.O.B. valves.5. C.I.P. solution will flow through the Product valve across the connection head out throughthe Racker Drain/F.O.B. valve for as long as desired.6. Allow C.I.P. to continue for at least 20 minutes with 2 to 3 % caustic at 160 degrees F.7. Flush out caustic to drain with cold water until caustic residual is clear.8. Prime system with 50 ppm OXINE in water for 15 minutes prior to commencing kegfilling for sanitization purposes.9. To end the sequence, simply close Product and Filler Drain/F.O.B. valves.10. Ready for washing and filling Kegs.PROCESS & PACKAGING, INC. ©2001
PLANT LAYOUT JSEE SECTION L FOR ADDITIONALINFORMATIONPROCESS & PACKAGING, INC. ©1999
ELECTRICAL SECTIONKPLEASE NOTE:Customer to supply local disconnect and ground fault devicePROCESS & PACKAGING, INC. ©1999
MECHANICAL SECTION LSEE SUPPLEMENTALTECHNICAL DATA MANUALFOR ADDITIONAL INFORMATIONIF PROVIDEDPROCESS & PACKAGING, INC. ©2003
PROCESS VALVEN/O Part # : VA0166N/C Part # : VA0165Repair Kit Part # : VA0167
Part #: VA1701Pinch Valve OperationOperation PressuresOperating pressures for controlled material vary depending on sleeve elastomer andvalve size, and can range from a moderate vacuum (up to 26" Hg) to a maximum of 90psi when controlling with air. Required control pressure is normally 20 to 40 psi greaterthan the material pressure. Use of excessive actuation pressure (air or liquid) than thatwhich results in complete valve closure will impact sleeve life. Use of actuation pressureabove 90 psi is not recommended.Recommended ConfigurationRegulate control air to pinch valve at 25 to 35 PSIGsubject to product CO2 levels and temperatureAirpinch valves are normally open and require constant pressure for complete closure.Therefore, a loss of control pressure will allow the valve to open. In the event of sleevefailure, controlled material can enter the actuation system.
Detergent Dosing Unit
FLOAT VALVE WITH PROPORTIONERPART #: TF0400INSTALLATION INSTRUCTIONS1. UPARTS U:A. Valve Assembly 1B. Proportioner with Backflow Preventer 1C. ¼” ID X 8’ Long Vinyl Supply Tubing & Foot Valve Assembly 1D. Float and Chain 1E. Mounting Bracket 1F. Ceramic Weight 1G. ½” ID X 3’ Long Vinyl Discharge Tubing 1H. Model 903 Foot Valve (Model 440-24 Only) 1I. Metering Tip Kit (61-9k for 440-23T) (100-15K for 440-23BT) 1J. Large Lt. Blue & Tan Metering Tips (For 440-24) 1K. Bracket Mounting Screws 22. UINSTALLATION U:A. UValve Bracket and Proportioner Assembly U:Attach mounting bracket to valve assembly with two (2) screws provided. Screw siphon breaker and proportioner to valve outlet,then mount bracket to tank as shown in figure #1. Either attach a garden hose to the valve assembly or mount the valve assemblydirectly to a 1/4 NPT pipe line by removing the inlet garden hose adapter. Apply pipe dope, hand tighten, and then turn with awrench until tight. DO NOT OVER TIGHTEN. The plastic discharge tubing is supplied and must be used. The pipe or hoseoutlet should be below the bottom of the float.WARNING: Do not use Teflon® tape to seal internal plastic threads as the extra thickness of the tape may cause theplastic to crack. Use a non-welding liquid sealant instead.B. UFloatU:Run chain through the clip on the pull wire until the top of the float is about 1 or 2 inches above the desired maximum water level(with pull wire in "up" position). Snap the bead into the clip to hold the chain in place. Excess chain may be cut off if so desired(see Figure #1).C. UChemical SupplyU:Place the chemical container in a convenient location not more than 6 feet below the valve, (greater lifts will reduce injectioncapacities). Insert the end with the foot valve of the 8 foot vinyl tubing into the chemical container. Slip the ceramic weight overthe chemical intake tubing and then cut the tubing to any convenient length that will allow it to extend from the bottom of thechemical container to the proportioner inlet barb (See Figure #1).3. UOPERATION U:Turn on the main water valve. At least 15 PSI pressure must be available to operate the proportioner. As the tank fills, chemicalconcentrate will be drawn up thought the plastic tubing and mixed with the incoming water. When the fluid level in the tank reaches 1to 2 inches below the top of the float the valve will close. When the tank levels drops about 4 inches the valve will open again.4. UCHEMICAL INJECTION ADJUSTMENTS U:WARNING: USE CARE WHEN HANDLING HAZARDOUS CHEMICALS.Metering tips are used to control chemical feed rates. Tables 1, 2, & 3 show the dilution ratios for various chemical viscosities. Forvery viscous products the induction rate can be increased by substituting 1/2" ID inlet tubing. (Leave a short piece of 3/8" ID tubing onproportioner and foot valve barbs as bushings.)1 cps (centipoise) is equal to the viscosity of water75 cps is approximately equal to the viscosity of 10 weight motor oil200 cps is approximately equal to the viscosity of most dishwashing detergentsI-461 Pg. 1 of 3Rev. E29345 8/03
FLOAT VALVE WITH PROPORTIONERPART #: TF0400INSTALLATION INSTRUCTIONS5. USERVICINGU:CAUTION: TURN OFF WATER SUPPLY BEFORE SERVICING.A. UProportioner fails to draw chemicalU:1. Proportioner outlet tubing cut too short for priming or not attached. Pinch outlet tube to create back pressure, which willcause unit to prime. The foot valve will keep the inlet tube primed thereafter.2. Insufficient water supply pressure. 15 psi is the minimum allowableB. UProportioner stops drawing chemicalU:1. Inspect foot valve for dried chemical or dirt. Soak in hot water to clean.2. Proportioner metering tip clogged with dried chemical. Remove tip and try injecting in hot water. If there is no suction,remove proportioner and soak in hot water to clear interior passages.3. If there is a buildup of calcium carbonate (lime) inside the proportioner then soaking it in a delimeing solution or vinegar willrestore it to working order.C. UProportioner continues to draw chemical after water valve closes U:Chemical supply is higher than bottom of discharge tube creating a natural siphon. Lower the supply container or hang up outlettube after use.D. UValve malfunctionU:1. Check that the wire moves freely up & down and that a “click” can be heard when the wire is pulled and released, indicating thatthe magnet is activating the plunger properly. To inspect internal parts, remove magnet housing and carefully pull off theenclosing tube so as not to drop the plunger, kick-off spring and spacer. Check for dirt or damage impeding plunger and kickoffspring movement. Inspect the diaphragm, making sure the two small pin holes (bleed holes) in the diaphragm convolutionare clear to allow the valve to close.2. Valve will not operate if pressure exceeds 150 psi.CAUTION: When servicing unit, be sure that replacement parts have been installed according to drawing* Note: All induction rates are based on a water pressure of 40 psi.Table 1440-23BTInjection Rates For Viscosities ShownMetering Tip Color1 cps 75 cps 200 cpsOz/Gal Ratio Oz/Gal Ratio Oz/Gal RatioTan 0.33 387-1 0.26 500-1 0.12 1090-1Orange 0.42 307-1 0.32 430-1 0.17 735-1Turquoise 0.51 251-1 0.34 382-1 0.19 676-1Pink 0.78 165-1 0.56 230-1 0.3 422-1Clear 0.87 147-1 0.67 192-1 0.33 391-1Brown 0.99 129-1 0.74 174-1 0.37 345-1Red 1.37 93-1 0.91 141-1 0.44 289-1White 1.52 84-1 1.04 123-1 0.48 264-1Green 1.72 74-1 1.22 105-1 0.52 244-1Blue 2.13 60-1 1.27 101-1 0.54 239-1Yellow 3.05 42-1 1.71 75-1 0.56 229-1Black 4.50 28-1 1.96 65-1 0.57 224-1Purple 7.75 17-1 2.4 53-1 0.59 217-1Gray 9.86 13-1 2.54 50-1 0.63 204-1No Tip 19.63 7-1 3.16 40-1 0.67 190-1I-461 Pg. 2 of 3Rev. E29345 8/03
FLOAT VALVE WITH PROPORTIONERPART #: TF0400INSTALLATION INSTRUCTIONSTable 2440-23TInjection Rates For Viscosities ShownMetering Tip Color1 cps 75 cps 200 cpsOz/Gal Ratio Oz/Gal Ratio Oz/Gal Ratio2BClear 0.30 430-1 0.22 592-1 0.13 864-1Purple 0.48 265-1 0.32 406-1 0.24 524-1Yellow 1.28 100-1 0.82 157-1 0.6 212-1Green 1.67 77-1 1.29 99-1 1 128-1Pink 2.36 54-1 1.65 77-1 1.25 103-1Turquoise 3.76 34-1 2.55 50-1 1.85 69-1Black 4.47 29-1 3.03 42-1 2.12 60-1Gray 5.53 23-1 3.67 35-1 2.58 50-1Red 7.00 18-1 4.79 27-1 2.79 46-1Blue 8.78 15-1 5.39 24-1 3.06 42-1Brown 10.95 12-1 6.49 20-1 3.35 38-1White 14.19 9-1 7.08 18-1 3.46 37-1Orange 17.58 7-1 7.91 16-1 3.71 35-1Light Blue* 21.75 6-1 8.66 15-1 3.9 33-1Tan* 27.98 5-1 9.15 14-1 4.11 31-1No Tip 33.15 4-1 10.54 12-1 4.52 28-1Table 3440-24Injection Rates For Viscosities ShownMetering Tip Color1 cps 75 cps 200 cpsOz/Gal Ratio Oz/Gal Ratio Oz/Gal Ratio3BClear 0.66 195-1 .027 470-1 .14 903-1Purple 1.01 127-1 .041 315-1 .33 393-1Yellow 1.53 83-1 1.03 124-1 .86 148-1Green 2.52 51-1 1.64 78-1 1.44 89-1Pink 3.53 36-1 2.04 63-1 2.09 61-1Turquoise 5.73 22-1 3.24 40-1 2.92 44-1Black 6.72 19-1 3.88 33-1 3.34 38-1Gray 8.95 14-1 4.98 26-1 4.04 32-1Red 12.34 10-1 6.22 21-1 4.67 27-1Blue 14.00 9-1 7.28 18-1 4.99 26-1Brown 18.68 7-1 9.02 14-1 5.35 24-1White 24.45 5-1 10.35 12-1 5.53 23-1Orange 30.97 4-1 11.86 11-1 5.88 22-1Light Blue* 38.26 3-1 13.31 10-1 6.22 21-1Tan* 53.96 2.5-1 15.21 8-1 6.49 20-1No Tip 66.07 2-1 18.61 7-1 7.07 18-1* These tips are not included in the standard tip pack.I-461 Pg. 3 of 3Rev. E29345 8/03
<strong>Process</strong> & <strong>Packaging</strong>, <strong>Inc</strong>.ADJUSTABLE SINGLE STAGE INJECTORSMODEL TF0402S<strong>IDD</strong> <strong>Process</strong> & <strong>Packaging</strong>, <strong>Inc</strong>.5450 Tech Circle, Moorpark, CA 93021Tel: 805-529-9890, Fax: 805-529-9282, Toll Free: 800-621-4144Email: idd2jeff@aol.com, Web Site: www.iddeas.com
PUMPSBEER BOOST PUMP PART #: PU0100WASH PUMPS PART #: PU0222
PROCESS & PACKAGING, INC. ©2003PNEUMATICS M
I/O LISTNPROCESS & PACKAGING, INC. ©1999
PROCESS & PACKAGING, INC. ©1999OXINE O
Manual Oxine Dilution & UseUseful figures to have available if you are diluting Oxine manually without a titration kit. Thesefigures are applicable with Oxine that has been activated within 48 hours of dilution with a foodgrade acid at 2.5 to 3 pH .For keg sanitizing and use with the Super King, Mini King or Squire series machines:It is recommended that you start by using approximately 100 ppm of activated Oxine for kegsanitizing until you can determine through your own QC procedures whether you need toincrease or decrease the amount based upon microbial results obtained. Experience indicatesthat normal usage will be in the range of 20 to 100 ppm.1. Take a one gallon container with a screw lid and drill a hole in the cap to suit the dosing unitsiphon tube.2. Take 0.6 liter (20 ounces) of Oxine, add food grade acid to lower the pH to approximately 2.5to 3.0 pH to activate the Oxine and stir. This will give you approximately 20,000 ppm ofactivated Oxine. CAUTION – Do so in a well ventilated area and do NOT breathe the fumesgiven off during activation. See the MSDS in this section for more details.3. When activated (after 5 to 10 minutes) add 3 liters (101 ounces) of water to the activatedOxine (5:1 ratio). This will give you approximately 4,000 ppm of activated Oxine. Stir andreplace cap with siphon tube into Oxine.4. Using the chart supplied with the Oxine doser venturi kit select the colored venturi that willthen give you a 40:1 reduction ratio. This will give you approximately 100 ppm of activatedOxine being supplied as your rinse and sanitizing water to the keg for pre and post rinse.5. This can be verified with the Oxine test kit or Oxystix attainable from <strong>IDD</strong> <strong>Process</strong> &<strong>Packaging</strong>, <strong>Inc</strong>.
Other ratios of Oxine for general sanitizing purposesOne unit of manually activated Oxine at 20,000ppm and you:Add 1 unit of water, the concentration reduces to 10000ppm – Ratio of water to Oxine 1:1.Add a further 2 units of water, the concentration reduces to 5000ppm – Ratio of water to Oxine 3:1.Add a further 4 units of water, the concentration reduces to 2500ppm – Ratio of water to Oxine7:1.Add a further 8 units of water, of the concentration reduces to 1250ppm – Ratio of water to Oxine 15:1.Add a further 16 units of water, the concentration reduces to 625ppm – Ratio of water to Oxine 31:1.Add a further 32 units of water, the concentration reduces to 312.5ppm – Ratio of water to Oxine 63:1.Add a further 64 units of water, the concentration reduces to 156.5ppm – Ratio of water to Oxine 127:1.Add a further 128 units of water, the concentration reduces to 78ppm – Ratio of water to Oxine 255:1.Add a further 256 units of water, the concentration reduces to 39ppm – Ratio of water to Oxine 511:1.Add a further 512 units of water, the concentration reduces to 19.5ppm – Ratio of water to Oxine 1023:1.Add a further 1024 units of water, the concentration reduces to 9.5ppm – Ratio of water to Oxine 2047:1.Add a further 2048 units of water, the concentration reduces to 5ppm – Ratio of water to Oxine 4095:1.Add a further 4096 units of water, the concentration reduces to 2.5ppm – Ratio of water to Oxine 8191:1.Add a further 8192 units of water, the concentration reduces to 1.25ppm – Ratio of water to Oxine 16382:1.
OXINE & PUROGENE SANITIZERThe following information is offered as suggested uses of Oxine and Purogene and isnot intended to be definitive or accurate for all applications. <strong>IDD</strong> <strong>Process</strong> & <strong>Packaging</strong>,<strong>Inc</strong>. do not accept any liability for the use or application of Oxine or Purogene.OXINE AND PUROGENE...THE SANITIZERS FOR ALL REASONS. For years it hasbeen known that chlorine dioxide gas is a powerful anti-microbial agent. However, thisgas is toxic and unstable in an aqueous solution. Modern technology has overcomethese problems with Oxine and Purogene. Today, stabilized chlorine dioxide (ClO2) isavailable in a concentrated stable form with very low toxicity. As a powerful oxidant,stabilized ClO2 is virtually unaffected by organic load and hard water. These technicaladvances have resulted in the FDA, EPA and USDA approving stabilized ClO2 as anacceptable sterilant for numerous applications within the brewery, dairy and foodprocessing plants. Properties which make stabilized ClO2 most attractive to thebrewer, maltster and other beverage plant operators are:LOW ODOR - Unlike typical sanitizers such a hypochlorites, quaternary ammonium, oreven peroxy-acetic acid, stabilized ClO2 has an almost undetectable odor whilesurpassing the bacteriocidal efficacy of these other compounds. Hypochlorites canform chlorophenols (a medicinal flavor compound) when combined with organicmaterial in beer: Quaternary ammonia compounds have well known negative effects onflavor; the end product of the reduction of peroxy-acetic acid is acetic acid, with itstypically "vinegar-like" character. Even small amounts remaining in a tank and havingthe opportunity of coming in contact with beer, can have a deleterious effect on beerflavor.LOW CORROSIVITY - Stabilized ClO2 is not harmful to vessels or piping systemswhen used at the recommended dosages. Typically, brewers like the effectiveness ofhypochlorites but a major drawback is hypochlorites role in causing stress corrosionfatigue in stainless steel, particularly at weld joints. Stabilized ClO2 while actually being4 to 7 times more effective as a sanitizer than hypochlorite, does not enhance orcontribute to “stress corrosion fatigue” in the metal. Stabilized ClO2 is only slightlymore corrosive than tap water at and much of this is due to the acid used in theactivation of the product. When it is used as a final rinse in vessels, or piping systems,it is perfectly safe to leave a 10 ppm solution un-rinsed in a tank, pipe network or pieceof process equipment, (i.e. bottle fillers, keg racking machines, sheet or pressure leaffilters, etc.).EASE OF HANDLING - While idophors, peroxy-acetic acid and hypochlorites arepopular sanitizers for tanks, fillers and other equipment, they have some handlingdrawbacks. Iodophors are really only effective at low pH, thus they are typically carriedas a concentrate in a solution of phosphoric or nitric acid. This makes them hazardousto handle. Iodophors also have a tendency to stain equipment (and people). Pereoxy-PROCESS & PACKAGING, INC. ©2003
OXINE & PUROGENE SANITIZERacetic acid is actually quite volatile at moderately elevated temperatures (120_F/50_C)and can cause spontaneous explosions. It is also corrosive in its concentrated form.Hypochlorites as chlorine gas have a short-term exposure limit slightly higher than thatof stabilized ClO2 (1.0 ppm versus 0.3 ppm respectively). However, since stabilizedClO2 is 4 to 7 times more effective than hypochlorites at normal use levels, it is lesshazardous.NO ENVIRONMENTAL IMPACT - Stabilized ClO2 does not form the highlycarcinogenic trihalomethanes as do hypochlorites in the presence of organic materials.Oxine is environmentally and user friendly and has been accepted by the EPA hashaving no environmental impact upon disposal. It is not corrosive nor is it volatile in itsconcentrated (2%) form.EFFICACY - Stabilized ClO2 does not act by chlorination but by oxidation and hasproven effective against all common brewery, winery and beverage plant microorganisms.It is an effective bacteriostat at use rates as low as 5 to 20 ppm againstsuch common pests as Lactobacillus and Pediococcus sp. and at 50 ppm against WildYeasts and Mold strains.As with all gaseous products such as stabilized ClO2, Oxine can be monitored byusing a standard gas monitoring system such as those supplied by LAB SAFETYSUPPLIES COMPANY. Toll free telephone number 800-356-0722. It is necessary totake extra care with good ventilation during the "activation" process of Oxine. If it isconsidered necessary to monitor gas levels at this time for your safety records, werecommend that the chlorine "low range" (0.05 to 16ppm) tube be used to monitor gaslevels. These tubes readily detect and measure all types of inorganic chlorine.MALTHOUSE:Stabilized ClO2 is an effective wash down sanitizer for walls and floors, germinationareas and steep tanks. At 100 to 500 ppm it will kill and bleach out mold and mildewcommon to these high-humidity areas. Stabilized ClO2 is successfully used in barleysteep waters to inhibit microbial growth of all types. Typically at 10 to 50 ppmdepending on the microbial load, one can assure a safe re-cyling of the steep waterinto subsequent batches. Stabilized ClO<strong>2'</strong>s strong oxidizing capability actually reducesB.O.D. loads for disposal.BREWHOUSE:Safe for all vessels and piping systems, whether copper or stainless steel, stabilizedClO2 can ensure a microbially free environment in coppers/kettles, mash filters orlauter tuns, swirl tanks, settlers and wort cooling systems when used at 50 to 100 ppm.The related piping systems for wort transfer to fermentation areas can be sanitized at100 ppm. A 50 ppm solution is also safe to leave in the pipelines during periods of nonuse,to keep them sanitized.PROCESS & PACKAGING, INC. ©2003
OXINE & PUROGENE SANITIZERFERMENTATION/STORAGE AREAS:A 50 ppm solution is adequate to sanitize tank walls and related piping systems.Since low levels of contact with finished product do not effect final beer flavor, one cansafely use stabilized ClO2 in a final rinse and be able to obtain some residualbacteriostatic value. It is recommended that boots, gloves, yeast-handling tools and thelike be sanitized at 100 ppm. Stabilized ClO2 at 100 ppm is ideal for foot baths at ornear tank entry areas.FILTRATION:Stabilized ClO2 is particularly useful for stabilizing and sanitizing filter systems. It canbe used to shock sanitize activated carbon and sand/gravel filters in the watertreatment facility. Typically, a 50 to 100 ppm solution is run slowly through these typefilters. Stabilized ClO2 will not be absorbed significantly by the active carbon. Once thebed is sanitized it is then possible to dose Oxine into the water stream prior to the filterbed at a concentration of 1 to 5 ppm in order to prevent future contamination.Plate-and-frame filters can be sanitized with a 10 to 50 ppm solution without thetypical water flush/rinse required by acid-sanitizers and the like. A standing solution ofup to 10 ppm can be left in a filter during periods of non-use with no harm to the filterframe or the sheets.It is recommended that this procedure be carried out after any normal beer filter use toinhibit the growth of yeasts and bacteria, since residual beer on the sheets makes foran ideal growth media. A solution of the same strength sprayed over the outer exposededges of the filter sheets will prevent mold growth when standing.PACKAGING:Stabilized ClO2 provides a safe sanitization and soaking solution for keg washerrackers, bottle and can fillers. Sanitize at 50 ppm and soak or stand filler bowls in coldwater at 10 ppm.Aseptic keg, bottle and can rinsing immediately prior to filling with beer is enhancedwhen 20 to 50 ppm of stabilized ClO2 is used as a final cold rinse.The use of stabilized ClO2 as an aseptic "fog" spray around aseptic bottle and canfillers is highly effective as a sanitizer and microbial preventative at 10 to 20 ppm.The non-corrosive nature of stabilized ClO2 makes it an ideal growth inhibitor in tunnelpasteurizers. Stabilized ClO2 is most effective in the moderate temperature zones(warm-up and cool-down fresh water zones) of the pasteurizer. A 20 to 30 ppm solutionis normally adequate and quite safe to the equipment.PROCESS & PACKAGING, INC. ©2003
OXINE & PUROGENE SANITIZERTANK-TRUCK WASHING:As in the typical use for tank washing and sanitizing, stabilized ClO2 can be used forthe sanitization and cleanup of bulk tankers and their related piping and hoses. Washdown tank internals, pumps and hoses at 100 ppm, externals at 250 to 500 ppm. Thiswill prevent transfer of micro-organisms to or from the connecting systems.MOLD AND MILDEW CLEANUP AND CONTROL:Clean off walls and floors as well as air handling units and machinery using a 200 to500 ppm solution of stabilized ClO2. This effectively kills mold and mildew spores whilestill retaining some bleaching ability to remove tough black stains. This is goodprocedure prior to painting, or prior to the application of a mold and slime growthinhibitor such as Alltech's Mold-Zap.PROCESS WATER TREATMENT:The FDA has approved stabilized ClO2 for process water sanitization at between 100to 200 ppm available ClO2. Potable water treatment is approved for humanconsumption at 4 ppm available ClO2.ACTIVE CARBON BED (ACB):Infected ACB's can be back flushed and soaked in a 100 ppm solution of ClO2 for 15to 60 minutes, after which time a forward flush-out of 15 to 30 minutes with the processwater can take place. It is then advisable to inject 1 to 3 ppm of activated ClO2 into theprocess water stream thereafter prior to the ACB to prevent future infections.GLASS WASHING/RINSING:Even at the final stage of the brewer's trade, where bars and pubs have a need for aneffective and safe drinking-glass sanitizer, stabilized ClO2 can fill the need. Sincestabilized ClO2 can be safely consumed at 4 ppm, it makes an ideal glass rinse. Unliketypical quaternary ammonium rinses, it will not have any deleterious effect on beerflavor, nor on beer foam quality. Use at 20 to 50 ppm in final rinse water.WASHING OF YEAST SLURRY WITH STABILIZED ClO2 (OXINE):Stabilized ClO2 (Oxine) will effectively kill unwanted bacteria in yeast at 20 to 40 ppm,while leaving the culture yeast unharmed. Because of stabilized ClO<strong>2'</strong>s unique action,it does not have the drawbacks of phosphoric acid. It does not form chlorophenols(which contribute to a much feared medicinal character in beers) in the presence oforganic materials.METHOD:Normally, an initial washing at 20 to 40 ppm (20 ppm for homogenous yeast, 40 ppmfor "clumpy" or highly flocculant strains) is effective against most Lactobacilli andPediococci species. This "wash" is done by adding stabilized ClO2 directly to yeastslurry on a volume/ppm basis. It does not need to be activated as the pH of the yeastslurry is low enough to convert to ClO2.PROCESS & PACKAGING, INC. ©2003
OXINE & PUROGENE SANITIZERStabilized ClO2 is supplied at a concentration of 20,000 ppm or 2% Chlorine Dioxidewhen activated. Therefore, on a volume basis, one could essentially make up with onegallon of stabilized ClO2 concentrate, one thousand gallons of solution at 20 ppm. Bythis method, we can also assume with one gallon of concentrate to make up onethousand gallons of yeast slurry at 20 ppm. It is impractical to measure theconcentration of ClO2 in the presence of yeast, so the dilution must be made based onthe strength of the concentrate (20,000 ppm).Yeast slurry should be thin enough to allow for homogeneous mixing, usually 20 to40% solids. The killing action of stabilized ClO2 is very fast compared to the traditionalphosphoric acid wash. Only 15 to 30 minutes need be allowed for effective bactericidaleffect of stabilized ClO2, with no resultant stress on yeast cells.DOSING RATE:NORMAL WASH: For regular washing of homogenous recycled brewers yeast, a 20to 40 ppm wash for a minimum 30 minutes to 5 hours prior to pitching. Mix 1 to 2 ml ofstabilized ClO2 concentrate with each liter of yeast slurry. Agitate thoroughly during theprocess.ACTIVATION OF CONCENTRATE:Since the ClO2 is in a stabilized form in concentrate, it must be "activated" beforeusing. To activate Oxine add acid to lower the pH in a well ventilated area to below 5pH. Activation can be verified by a corresponding color change of the concentrate fromclear to yellow/green. Any number of acids will activate the stabilized ClO2, however,food grade Citric or Phosphoric acid is recommended for this application.Normally it requires up to 200 grams of Citric Acid to activate one gallon of stabilizedClO2 concentrate (up to 50 grams per liter of stabilized ClO2 concentrate).Following are the details for replacement chemicals for your Oxine Test Kits.10% Potassium Iodide - 100 g diluted to 1,000 ml with distilled water.0.2N Hydrochloric Acid - Add 16.6 ml Concentrated HCL (39%) to 800 ml water. Bringto 1,000 ml with water.0.00564N PAO (Phenylarsine Oxide).Oxine is available from <strong>IDD</strong> in 1, 5, 30, 55 gallon and tote containers. Test kits andreplacement materials can also be purchased from <strong>IDD</strong>.PROCESS & PACKAGING, INC. ©2003
OXINE & PUROGENE SANITIZERSTORAGE:Concentrated ClO2 can be stored in a dry area away from acids for up to 3 yearsunder standard conditions.Activated ClO2 has a half-life of approximately 48 hours under standard conditions.Activated ClO2 can be added to cold water at 4,000 ppm. Under such conditions ahalf-life of up to 2 weeks is possible under standard conditions.AUTOMATIC ACTIVATION SYSTEMS:A series of low cost, hands free, automated activation systems are available to providea continuous volume of activated ClO2 into a storage reservoir as needed. Thesesystems eliminate the need for manual mixing, measuring and dispensing.PROCESS & PACKAGING, INC. ©2003
INTERNATIONAL,INC.MATERIAL SAFETY DATA SHEETISECTION 1: CHEMICAL PRODUCT AND COMPANY IDENTIFICATIONPRODUCT NAMEOxine®CHEMICAL FAMILYMixture of Oxychlorine CompoundsMANUFACTURERBio-Cide International, <strong>Inc</strong>., 2845 Broce Drive, Norman, OK 73072 U.S.A. (800.323.1398)EPA REGISTRATION9804-1EFFECTIVE DATE:June 2004SUPERSEDES:April 2002NUMBER:SECTION 2: COMPOSITIONIINFORMATIONON INGREDIENTSChemical NameSodium ChloriteC.A.S. No.7758-19-2% by Wt.3.35%SECTION 3: HAZARDS IDENTIFICATIONEMERGENCY OVERVIEWClear liquid with very faint chlorinous odorMay cause skin reaction. May cause eye irritation.POTENTIAL HEALTH EFFECTSINHALATION:Prolonged inhalation of fog or mist may be irritating to nose and throat.SKIN: Based on rabbit studies, product is listed as "practically not an irritant".Prolonged exposure may produce localized irritation, contact dermatitis, milderythema and edema.EYE:Based on rabbit studies, product has been given an EPA Category III rating as amild irritant. Exposure can produce slight irritation of conjunctiva, cornea andeyelid.INGESTION: Ingestion may produce gastric discomfort, nausea, vomiting and diarrhea. Intakeof large quantities may produce methemoglobinemia.SYSTEMS OF OVER EXPOSURESkin and eye irritation.Exposures to chlorine dioxide from activation can produce coughing.MEDICAL CONDITIONS AGGRAVATED BY EXPOSURESkin disorders, such as dermal allergies and dermatitis. Exposure to chlorine dioxide producedby activation can aggravate pulmonary disorders, such as emphysema.- 1 -
ENVIRONMENTALSECTION 6: ACCIDENTAL RELEASE MEASURESNOTIFICATIONAll spills and leaks involving more than 10 gallons should be reported to the nearest regional EPAoffice or designated state emergency response office with 24 hours. Spills from ocean vessels orwhich may contaminate U.S. costal waterways should be reported to the nearest Coast Guardoffice within 24 hours.SPILL OR LEAK PROCEDURESmall spills, involving less than 10 gallons, may be flushed to a designated and permitted sewersystem with the amount of water that is about 10 times the amount of the spill.Large spills, involving more than 10 gallons, should be contained and neutralized using anyoneof the three neutralizers: i) sodium sulfite, ii) sodium bisulfite, or iii) sodium thiosulfate. Theneutralization reaction can be extremely exothermic, and therefore, care should be taken to addthe neutralizer in small increments. Sodium sulfite is the most preferred (least exothermic)neutralizer that can be used in the ratio of 1 Ib per gallon of spilled material. Sodium thiosulfatecan be used in the ratio of 2 Ibs of anhydrous salt or 3 Ibs of pentahydrate salt per estimatedgallon of the spilled material. The neutralized solution can then be flushed to a designated andpermitted sewer system with double the amount of water. The product that is not neutralized maybe disposed of as chemical waste in the manner indicated below. The vicinity of the spill shouldbe thoroughly flushed with water after clean-up. At no time should the spilled material be allowedto dry to a crystalline salt. Do not discharge this product to storm drains or to any surface orgroundwater source unless specifically allowed under a valid NPDES permit.If the neutralizer is not available, volumes larger than 10 gallons should be carefully transferredinto a container and taken to an authorized chemical disposal site (Class I or landfill) inaccordance with all federal, state, and local regulations. Consult with selected facility regardingthe need for prior neutralization of waste.SECTION 7: HANDLING AND STORAGEHANDLINGUse product only as directed by the label. Avoid contact with skin and eyes; avoid breathing anyvapors or fumes resulting from product activation. Wash thoroughly after handling. Thoroughly rinseall protective gear and handling equipment, such as transfer pumps and lines, with water prior toreuse or storage. Keep away from children, animals, and unauthorized personnel.PRODUCT STORAGEStore in a cool, dry, well-ventilated location away from acids, chlorine and chlorine compounds,hypochlorites (bleach), organic solvents, sulfur and sulfite compounds, phosphorus,combustiblelflammable materials, and direct sunlight. Keep containers tightly closed when not inuse and open carefully to prevent spillage. Storage on wooden floors and pallets is notrecommended. Do not contaminate water, food or feed by storage or disposal.SECTION 8: EXPOSURE CONTROLS/PERSONALPROTECTIONENGINEERING CONTROLSVENTILATIONOpen air or good room ventilation is normally adequate for safe use of this product.breathing any vapors or fumes resulting from acid activation.Avoid-3 -
PERSONAL PROTECTIVE EQUIPMENT (PPE)Eye/Face ProtectionGood manufacturing practice recommends use of chemical safety goggles for all applicationsinvolving chemical handling.Skin ProtectionGood manufacturing practice recommends that, at a rmrumurn, rubber, neoprene, or otherchemically impervious gloves be worn for all applications involving chemical handling.Respiratory ProtectionGeneralIn accordance with OSHA regulations (29 CFR 1910.134 and 29 CFR 1910.1000), fogging orspraying applications may require worker respiratory protection, such as: (1) NIOSH/MSHAapproved air-purifying respirators, or (2) NIOSH/MSHA approved canister/cartridge facialrespirators rated for chlorine/acid vapors or specified for chlorine dioxide.Product should be stored and applied in close proximity to a safety shower, chemical eyewashstation or other fresh water source.SECTION 9: PHYSICAL AND CHEMICAL PROPERTIESOdor, Color, GradeGeneral Physical FormVolatile Organic CompoundsFlash PointEvaporation RateSolubility in WaterBoiling PointVapor DensityVapor PressureSpecific GravitypHMelting point:Clear liquid with very faint chlorinous odorLiquid
SECTION 11: TOXICOLOGICAL INFORMATIONANIMAL TOXICOLOGYInhalation LC50:Dermal LD50:Oral LD50:CARCINOGENICITY>5.61 mg/I>2,020 mg/kg (rabbit)4,360 mg/kg (rat)Active ingredients are not listed by ROTECS, OSHA, IARC, NTP or EPA.implicating product as a carcinogen or tumor promoter.MUTAGENICITYNo evidence to dateThough product active ingredient is a chemical oxidant, no evidence to date for mutagenicity fromwhole animal or in vitro studies.REPRODUCTIVE/DEVELOPMENTALNo known effects to date.TOXICITYSECTION 12: ECOLOGICAL INFORMATIONECOTOXICOLOGICALINFORMATIONThis product is toxic to fish and aquatic organisms. Do not discharge effluent containing thisproduct into lakes, streams, ponds, estuaries, oceans or other waters unless in accordance withthe requirements of a National Pollutant Discharge Elimination System (NPDES) permit and thepermitting authority has been notified in writing prior to discharge. Do not discharge effluentcontaining this product to sewer systems without previously notifying the sewage treatment plantauthority. For guidance, contact your State Water Board or Regional office of the EPA.CONTAINER DISPOSALSECTION 13: DISPOSAL CONSIDERATIONSTriple rinse. Then offer for recycling or reconditioning; or puncture and dispose of in a sanitarylandfill; or by incineration; or, if allowed by state and local authorities, by burning. If burned, stayout of smoke.PESTICIDE DISPOSALWastes resulting from the use of this product may be disposed of on site or at an approved wastedisposal facility.DISPOSAL PROCEDURESmall quantities, less than 10 gallons, may be flushed to an authorized and permitted sewer withcopious amounts of water. Larger volumes should be taken to an authorized chemical disposalsite (Class I or landfill) in accordance with all federal, state and local regulations. Consult withselected facility regarding the need for prior neutralization of waste.SECTION 14: TRANSPORT INFORMATIONNot DOT Regulated- 5 -
US FEDERAL REGULATIONSSECTION 15: REGULATORYINFORMATIONTSCAAll product ingredients are in inventorySARA TITLE 312/313Neither the product nor its constituent ingredients are listed under SARA reporting requirements.Chlorine dioxide produced from activation is listed under SARA 313.RCRAFIFRANot considered a hazardous waste either categorically or by chemical listing.Oxine" is an EPA registered sanitizer (EPA No. 9804-1)FEDERAL OSHA REGULATIONSNeither product nor constituent ingredients is classified as an acute or chronic health hazard byOSHA. Chlorine dioxide produced by activation is regulated with an air exposure limit of 0.1 ppmTL V and 0.3 ppm STEL.STATE LAWSCALIFORNIA: Not regulated under the provisions of Proposition 65 (Safe Drinking Water andToxic Enforcement Act of 1986)NEW JERSEY: Sodium Chlorite is listed under New Jersey's Chemical Inventory NotificationRequirement (NJAC 7:1Z). Estimated release notification, however, is not required.NOTE: Regulatory requirements are subject to change and may vary from one location toanother. It is the user's responsibility to ensure compliance with all applicable federal, state andlocal regulations pertaining to the purchase, transport, storage, use and disposal of this product.CHEMICAL INVENTORIESThis material contains one or more substances listed on the TSCA Inventory.this material is regulated by the EPA.Commercial use ofThis MSDS has been prepared to meet the U.S. OSHA Hazard Communication Standard, 29 CFR 1910.1200SECTION 16: OTHER INFORMATONNFPA Hazard ClassificationHealth: 1 Flammability: 0 Reactivity: 1 Special Hazards: NoneNational Fire Protection Association (NFPA) hazard ratings are designed for use by emergency responsepersonnel to address the hazards that are presented by short-term, acute exposure to a material underconditions of fire, spill, or similar emergencies. Hazard rating primarily based on the inherent physicaland toxic properties of the material but also include the toxic properties of combustion or decompositionproducts that are known to be generated in significant quantities.NOTICE: Manufacturer believes the information contained herein is accurate; however we make noguarantees with respect to such accuracy and assume no liability in connection with the use of theinformation contained herein by any party. Any party using this product should review all such laws, rulesor regulations prior to use.Product may bleach clothing and fabric materials, such as draperies and carpets.NO WARRANTY IS MADE, EXPRESS OR IMPLIED FOR A PARTICULAR PURPOSEOR OTHERWISE-6-
PLANNED PREVENTATIVE MAINTENANCE PPROCESS & PACKAGING, INC. ©1999
PLANNED PREVENTATIVE MAINTENANCE FOR<strong>SQUIRE</strong>, MINI KING, SUPER KING & EMPERORSERIES KEGGING & FLASH PASTEURIZATIONSYSTEMSDAILY:1. Clean machine after use, with low pressure hose and warm soapy water.DO NOT HOSE DOWN THE ELECTRICAL PANELS2. Check and monitor service pressures and temperatures prior to and during operation in line withoperations manual recommendations.3. Change caustic and/or acid detergents hourly and monitor pH levels as necessary.4. Check the connection head spear adapters for damage. Change if necessary. Any damage may betransferred to the keg valve seal.WEEKLY:1. Check connection head seals and “O” rings for wear and damage. Replace if necessary.2. Check for leaks on all service lines and unions. Replace seals and/or tighten as necessary.3. Check for loose nuts and bolts. Tighten as necessary.4. Check for loose wire terminations. Tighten as necessary.MONTHLY:1. Check dosing units for accuracy and operation in line with operations manual recommendations.Adjust if necessary.2. Check fiber optic, I.R. and/or fiber optic probes for cleanliness and operation. Clean and/or replace ifnecessary.3. Clean out all airline filters and drain out condensate.4. Check all push button switches and indicator lamps for damage. Replace is necessary.5. Clean out all steam strainers.6. Check all spare parts inventory levels in line with operations manual. Order if necessary.THREE MONTHLY:1. Check pressure gauges for accuracy. Adjust and/or replace if necessary.2. Check the transfer system alignment and keg placement over the connection heads. Adjust and/orreplace worn parts and lubricate if necessary.3. Check all hoses for leaks and/or wear. Replace if necessary.4. Check tri-clover seals for wear and/or damage. Replace if necessary.5. Check pressure switch calibrations and adjust according to the manual if necessary.6. Check all reject functions are operational on all process heads.7. Check all electrical power connections and motor overload settings. Reset if necessary.YEARLY:1. Inspect all wearing strips. Replace if necessary.2. Check process valve, seats, “O” rings and seals for wear. Replace if necessary.3. Inspect pump seals for wear or damage. Replace if necessary.4. Inspect all air cylinder seals for wear and/or damage. Replace if necessary.5. Check nylon air lines for leaks and flexibility. Replace if necessary.6. Check all solenoid valves for proper operation. Replace if necessary.7. Replace seals on all process valves.PROCESS & PACKAGING, INC. ©1996
QUALITY CONTROL QPROCESS & PACKAGING, INC. ©1999
QC CHECKS QKEG & KEG PLANT QUALITY CONTROL CHECKSA. DETERGENT TANK TITRATIONThe detergent set, detergent tank(s), Q.C. checks should be made before starting and at least twiceduring each 8 hour operating shift. Adjust frequency to meet the Q.C. department “comfort level”.The acid titration level (phosphoric) should be in the range 0.25% to maximum of 0.4% v/v. Thealkali titration level (caustic) in the range of 1.5 to 2.5% v/v.B. KEG WATER CARRY-OVER AND TITRATION CHECKS1. After the keg has completed the wash head(s) sequence(s), the keg must be allowed tocontinue through the sterilizing sequence and then rejected (stopped) immediately prior tocommencing the racking head(s) sequence(s). When the keg is retrieved at the discharge endof the machine, the keg can be cooled down by placing a cold water hose over the outersurfaces (if steam is used). A Q.C. sample or funnel coupler is then used to tap the keg. Thekeg must be inverted to remove the contents via the CO2 port of the coupler by allowing thekeg to drain or forcing the contents out with air or CO2. The condensate or rinse residuals ina 50 liter or ½ barrel keg normally measures between 40 to 80 ml. A limit of 100 ml. shouldbe set as a maximum allowable limit. If the operation must be checked together with that ofthe steam quality and relevant steam main condensate traps.2. The condensate obtained from the keg can be titrated to ensure that there is no acid and/oralkali carry-over from the wash head(s).NOTE 1: For this check, the pH. of the steam condensate should be a known factorif steam is used for purging.NOTE 2: This check should be carried out once a day for each machine lane andthen reduced to the Q.C. department “comfort level”.3. Another keg is used to do a similar check after it has been allowed to complete thesequences through the racker head(s) up to the point of immediately prior to starting the beerfilling sequence. Reject the keg prior to starting the beer filling sequence and remove fromthe conveyor after discharging from the machine. When checking for the quantity ofcondensate present in the keg, it should be less than 15ml.NOTE: This check should be carried out once a day for each machine lane and thenreduced to the suit the Q.C. departments “comfort level”.C. MICROBIOLOGICAL CHECKS TO THE KEGIntroduce a liter of sterile liquid, (preferably beer), into a keg having completed thesequence as described in item 3, via a sterilized keg valve and “funnel” coupler. Thisallows the keg to be checked for microbial integrity by removing 250 ml. of thePROCESS & PACKAGING, INC. ©1999
KEG PLANT QUALITY CONTROL CHECKS (CONT.)Page 2sterile liquid into a sterile flask. Split the sample into two, 100 ml. samples viaMillipore type membranes, plate and incubate the membranes on agar suitable foraerobic and anaerobic organisms.Methods of doing this vary slightly. The main objective, however, is to ensure thatconsistency in sampling is maintained, i.e. having introduced the sterile liquid intothe keg, each keg should be rotated a set number of times to ensure all surfaceshave been covered equally before it is extracted. A known quantity should alwaysgo into the keg and a known quantity should always be extracted, filtered and plated.NOTE: This procedure should be carried out at least once every two weeks.D. AFTER A C.I.P. SEQUENCEAfter the C.I.P. sequence, the process mains, bright beer tank and racker connectionhead(s), can be swabbed and checked for visual cleanliness to ensure that thecleaning operation frequencies are effective and adequate.NOTE: This should be carried out at least once a week.E. BEER STABILITY SAMPLINGSamples are taken from the B.B.T. and keg at a frequency laid down by the breweryQ.C. department. A suitable stability test is to set aside a keg of beer from the kegline after filling and “forcing” the contents by leaving the keg in an environment of70°F (21°C). Taste, odor and clarity tests can then be taken after 72 hours and atregular duration’s thereafter as desired to suit the Q.C. departments standards.A keg filled with beer should be removed from the keg line and allowed to stand for5 to 10 minutes. The Pressure Test coupler is connected to the keg after beingsterilized along with the keg neck. Pressure in the keg should be approximately 75%of the counter pressure used during the latter part of the filling sequence.F. SUMMARYIt is possible to determine the following about the keg machine function andcleaning procedures from the aforementioned.1. The wash water and detergent is being cleared from the keg by the final CO2 orsteam purge sequence on the final wash head.2. The final rinse on the final wash head is removing the detergent residual from thekeg.KEG PLANT QUALITY CONTROL CHECKS (CONT.)PROCESS & PACKAGING, INC. ©1999
Page 33. The CO2 purge is removing the condensate trace from the keg on the racker head prior tofilling with beer.4. The microbial integrity, via steam sterilizing or Oxine (Cl02) sanitizing of the keg isbeing achieved.5. The separate plant C.I.P. sequence is effective in removing all traces of beer protein andother residual from the keg plant connection head(s) and piping system(s).6. The cleanliness and microbial integrity is being maintained by the separate plant C.I.P.regime.7. The residual pressure in the keg after filling will indicate that the keg CO2 in solution isgoing to be maintained. If the pressure in the keg is above that of the filling counterpressure, then it is highly probable that the keg was overfilled and creating a hydraulicpressure. When filling against a “backup” probe, this hydraulic pressure condition will benormal.NOTE: Sample, Funnel and Pressure Test couplers can be purchased from <strong>IDD</strong> tosuit your keg valve type.If you have any questions, please contact Jeff Gunn at <strong>IDD</strong> <strong>Process</strong> & <strong>Packaging</strong>, <strong>Inc</strong>.Toll free: 800-621-4144, Tel: 805-529-9890, Email: idd2jeff@aol.comPROCESS & PACKAGING, INC. ©1999
Keg Line Quality AssuranceSampling Coupler (SA35336) - Used forremoving samples from the keg under aseptic conditionsFunnel Coupler (SA35338) - Used for insertingsamples into the keg under Aseptic conditionsPressure Test Coupler (SA35337) –Used for pressure testing the keg after fillingSee the keg QC Procedures for application
DIMENSIONSRPROCESS & PACKAGING, INC. ©2003
<strong>SQUIRE</strong> “PLUS 2” & “SQE” – SINGLE VALVE KEGWASHING, SANITIZING & FILLING SYSTEMSDIMENSIONS:DIMENSION SQP2 SQELength 60 inches 60 inchesDepth 54 inches 30 inchesHeight 68 inches 50 inchesEstimated shipping weight (crated) 750 pounds 450 poundsOUTPUT:5 gallon and 20 liter kegs Up to 30 per hour¼ barrel and 30 liter kegsUp to 28 per hour½ barrel and 50 liter kegsUp to 25 per hourNOTE: Output subject to keg and keg valve style and wash sequence used.
RECOMMENDED SPARES PARTS SPROCESS & PACKAGING, INC. ©1999
<strong>Process</strong> & <strong>Packaging</strong>, <strong>Inc</strong>.Recommended Spares List for <strong>SQUIRE</strong>SQty <strong>IDD</strong> Part# Description Category General/Specific1 EL0400 2 POSITION SWITCH ELEC SWITCH1 EL0402 PUSH BUTTON RED 22MM ELEC SWITCH1 EL0403 PUSH BUTTON BLACK 22MM ELEC SWITCH1 EL0411 PUSH BUTTON GREEN 22MM ELEC SWITCH1 EL0437 BLOCK, N/C CONTACT ELEC SWITCH2 EL0438 BLOCK, N/O CONTACT ELEC SWITCH2 EL0521 6MM BLUE TERMINAL ELEC TERMINALS2 EL0623 24VDC FUSE HOLDER,GMA ELEC FUSE/HLDR1 EL0624 115-220vFUSE HLDR,GMA ELEC FUSE/HLDR5 EL0626 GMA 1 AMP FUSE ELEC FUSE/HLDR5 EL0627 GMA 5 AMP FUSE ELEC FUSE/HLDR5 EL0628 GMA 3.15 AMP FUSE ELEC FUSE/HLDR1 EL0801 LAMP 220V WHITE ELEC LAMP LIGHT1 EL0808 LAMP 24VDC RED ELEC LAMP LIGHT1 EL1200 PROBE IR POLY. PNP ELEC SENSOR5 MD 3137 AMER. SANKEY REBUILD COUP LERS2 MD 35417 WASH COUPLER A.SANKEY STANDARDS2 PF1600 1/2" & 3/4" TC CLAMP FTNG TC CLAMP10 PN0603 MALE ELBOW 1/8 X 5/32 PNEU FITIINGS1 PN0800 3/2 SOL'D 24VDC BURK PNEU VALVE1 PN1158 BLANKING PLATE PNEU MANIFOLD2 PN1159 VALVE 3 WAY 24V PNEU MANIFOLD1 PN1160 DIN PLUG W/LED PNEU MANIFOLD10 PN1203 1/8" FILTER/BREATHER PNEU SILNCR/FLW5 PN1601 1/8 MPT X 5/32 (4MM) PNEU FTNG ELBOW1 PU0100 PUMP-BOOST 110/220V PUMP PRODUCT1 PU0222 WASH 110/220-1-60 PUMP LIQUOR2 PU0300 WASH/BEER PUMP H.TEMP LIQ KIT, PUMP REPAIR5 SL0200 3/4 EPDM TC SEAL SEAL TC1 SL0201 1"EPDM TC SEAL SEAL TC2 SL0601 CPLER NUT TEFLON SEAL SEAL WASHER<strong>IDD</strong> <strong>Process</strong> & <strong>Packaging</strong>, <strong>Inc</strong>.5450 Tech Circle, Moorpark, CA 93021Tel: 805-529-9890, Fax: 805-529-9282, Toll Free: 800-621-4144Email: idd2jeff@aol.com, Web Site: www.iddeas.com
<strong>Process</strong> & <strong>Packaging</strong>, <strong>Inc</strong>.1 SL0602 3/8 NPT TEFLON SEAL WASHER120 SS0201 BREW HOSE 1/2 PER INCH SPEC HOSE120 SS0202 TYGON HOSE 1/2 PER INCH SPEC HOSE2 SS0401 5/8 TO 1 SPEC JUB CLIP1 TF0309 220-1-3KW 2"NPT INCLY TANK HEATER1 TF0400 COMPLETE UNIT H/TEMP TANK DOSERS1 TF0402S INJECTOR <strong>SQUIRE</strong> ST/ST TANK DOSERS2 VA0123 V/V SEAT FOR VA0165 VALV PROCESS2 VA0167 REPAIR KIT FOR VA0165/66 VALV PROCESS1 VA1701 5/8 POLY/EPDM 3/4 NPT VALV PINCH1 VA1704 5/8" BLADDER EPDM VALV PINCH<strong>IDD</strong> <strong>Process</strong> & <strong>Packaging</strong>, <strong>Inc</strong>.5450 Tech Circle, Moorpark, CA 93021Tel: 805-529-9890, Fax: 805-529-9282, Toll Free: 800-621-4144Email: idd2jeff@aol.com, Web Site: www.iddeas.com
PROCESS & PACKAGING, INC. ©2003SERVICES T
SERVICE SUPPLIES TCO2 and Low Pressure (Purge) AirIt is recommended that 1" regulators are fitted within 10 feet of the machine and a 3/4" or 1” I/Dline is run between the regulator and machineA minimum 3/4" supply line set at 100 psig should be run to the 1” regulators stated above.Controls Air3/8” minimum supply line at 100 psig and regulated to 80 PSIG at the machine.NOTE: You MUST use an air dryer on your air supplies to the machine to prevent prelubricatedpneumatic equipment from seizing up due to condensation moisture in the air supply. In allinstances a water separator is NOT sufficient to ensure dry oil free air.Steam SupplyPlease ensure steam supplies (where appropriate) are run to ASME and local codes in the followingmanner to ensure a safe, clean supply free of dirt and condensate.PROCESS & PACKAGING, INC. ©1996
An Air Dryer will remove moisture from compressed air to a certain degree of dryness and this is referredto as pressure dew point. Different types of dryers can achieve different dew points and, for the most part,the drier the air needs to be, the more expensive it is to dry• Refrigerated Dryers condense the moisture out of the air and drain it away as liquid. They are limited toabout 35° F because the water would freeze if it got any colder.• Desiccant Dryers adsorb the moisture in the compressed air and remove it while still suspended as vapor.They are typically applied at about -40° F, but can get to -100 and below.• Membrane Dryers use permeability to separate the moisture from the air and can also achieve low dewpoints.The selection is made on personal preference, the dryness required, and cost, which should includeoperating and electrical or utility costs.Reproduced in part from the web site of:Gulf Atlantic Equipment, Co., Jacksonville, Florida. 904-636-8555 Fax: 904-636-8554 © 2006
CYCLE TIMESVPROCESS & PACKAGING, INC. ©2003
08/31/08 Rev2<strong>SQUIRE</strong> “PLUS 2” & “EXTRA” SEQUENCE TIMESOXINE MACHINE WITH ALLEN BRADLEY PLCWASH HEADREGULARSEQUENCELONGSEQUENCEWash Water Pre-soak 3 sec. 3 sec.Air Purge Pre-soak Event EventWash 1 Water (pulse on long seq) 7.5 sec. 15 sec.Low Flow Wash 1 (pulse on long seq) 7.5 sec. 15 sec.Air Purge Event EventWash 2 Detergent (Pulsed Wash) 15 sec. 30 sec.Low Flow Wash 2 15 sec. 30 sec.Air Purge Event EventWash 3 Water (Pulsed Wash) 7.5 sec. 7.5 sec.Low Flow Wash 3 10 sec. 10 sec.Wash 3 fill 3 sec. 3 sec.Sterilize Hold 12 sec. 12 sec.CO2 purge Event EventCO2 pressurize 2.5 sec. 2.5 sec.FILL HEADProduct Event EventGas Scavenge 4 sec. 4 sec.De-pressurize time 2 sec. 2 sec.
PROCESS & PACKAGING, INC. ©2003FLOW DIAGRAM W
FLOW DIAGRAM WDETERGENT RECOVERYSQP2 ONLYDETERGENT TANK WITHSQP2 ONLY.SQE FITTED WITH IN LINEINJECTORDETERGENT PUMPOPTIONAL WITH SQEPROCESS & PACKAGING, INC. ©2000
CONTROL PHILOSOPHY XPROCESS & PACKAGING, INC. ©2003
<strong>SQUIRE</strong> “PLUS 2” & “EXTRA”CONTROL PHILOSOPHY12/13/04 Rev2WASH SEQUENCENOTE: The cycle lengths are selected by the operator from the selector switchon the side of the control panel, long or short cycle• Attach the wash coupler to the keg.• Depress the blue handle down into the lock position• Place keg inverted on the wash platform• Press start button.• Wash sequence lamp on.• Wash water pre-soak time.• Wash water off.• Air purge on.• Purge until keg is clear, checked by liquid sensor.• Wash 1 on, enable probe guard• Low Flow on when Wash 1 high flow times out.• Low flow off. (Repeat high and low flow for Long cycle)• Air purge on.• Purge until keg is clear, checked by liquid sensor.• Reject keg if insufficient liquid was detected during purge of keg, if ok then,• Wash drain off.• Wash 2 detergent and detergent recovery on for SQP2 only and wash 2 detergent andwash drain on for SQE.• Low Flow on when Wash 2 high flow times out.• Low Flow off (Repeat high and low flow for Long cycle)• Wash 2 detergent and low flow off.• Air purge on.• Purge until keg is clear, checked by liquid sensor.• Reject keg if insufficient liquid is detected during purge, if ok then,• Detergent return off for SQP2 only.• Wash 3 water and wash drain on.• Low Flow on when Wash 3 high flow times out.• Low Flow off. (Repeat high and low flow for Long cycle)• Wash drain off• Water fill keg time.• Wash 3 off• Sterilize hold time.• CO2 purge & wash drain on• Purge until keg is clear, checked by liquid sensor.• Wash drain off
<strong>SQUIRE</strong> “ PLUS 2” CONTROL PHILOSOPHY CONT.)Page 2WASH SEQUENCE (CONT.)• CO2 pressurize keg• CO2 and wash drain off.• Wash sequence lamp off.END OF CYCLEWASH REJECTED KEG SEQUENCE• Flash sequence lamp to indicate rejected keg.• Operator presses stop button to release keg and reset cycle.FILLING SEQUENCE• Place keg upright on the floor and connect the filling coupler to the keg.• Depress the handle until in the locked down position.• Press start button.• Product pump on• Product valve on• Racker drain off (normally on) & F.O.B. on after delay, 5 seconds.• When product sensor detects product.• Product valve & product pump off, Racker drain on, F.O.B off.END OF CYCLESCAVENGE SEQUENCE• Place filling coupler handle to the upright position. Do not remove the coupler.• Press the Scavenge start button• Filler Gas on.• Racker drain off (normally on)• Gas scavenge time on.• Gas off.• Depressurize head.• Racker drain onEND OF CYCLE
<strong>SQUIRE</strong> “PLUS 2” CONTROL PHILOSOPHY CONT.)Page 3CIP SEQUENCE• Place the filling coupler in the CIP cup on the machine and twist to lock in place.• Turn CIP/Rack switch to CIP.• Product valve & product pump on.• Racker drain off (normally on)• When CIP is complete. (determined by customer)• Return CIP/Racking switch to “Rack”• Product valve & product pump off• Racker drain on.END OF CYCLE.JRG/Squire “Plus 2” control philosophy - Oxine
PROGRAM LISTING YProgram Loaded into PLC& Fully TestedProgram Listing Copy is on FilePROCESS & PACKAGING, INC. ©1999
PROCESS & PACKAGING, INC. ©2003APPENDIX Z