
You also want an ePaper? Increase the reach of your titles
YUMPU automatically turns print PDFs into web optimized ePapers that Google loves.
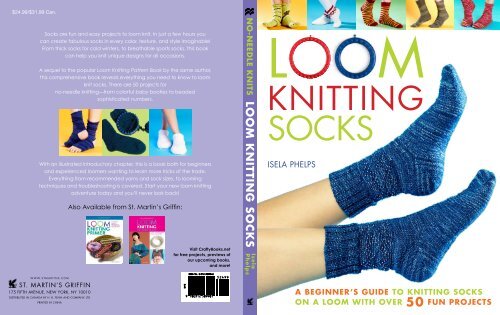
$24.99/$31.99 Can.<br />
Socks are fun and easy projects to loom knit. In just a few hours you<br />
can create fabulous socks in every color, texture, and style imaginable!<br />
From thick socks for cold winters, to breathable sports socks, this book<br />
WWW.STMARTINS.COM<br />
ST. MARTIN’S GRIFFIN<br />
175 FIFTH AVENUE, NEW YORK, NY 10010<br />
DISTRIBUTED IN CANADA BY H. B. FENN AND COMPANY, LTD<br />
PRINTED IN CHINA<br />
can help you knit unique designs for all occasions.<br />
A sequel to the popular Loom Knitting Pattern Book by the same author,<br />
this comprehensive book reveals everything you need to know to loom<br />
knit socks. There are 50 projects for<br />
no-needle knitting—from colorful baby booties to beaded<br />
sophisticated numbers.<br />
With an illustrated introductory chapter, this is a book both for beginners<br />
and experienced loomers wanting to learn more tricks of the trade.<br />
Everything from recommended yarns and sock sizes, to looming<br />
techniques and troubleshooting is covered. Start your new loom knitting<br />
adventure today and you’ll never look back!<br />
Also Available from St. Martin’s Griffin:<br />
Visit CraftyBooks.net<br />
for free projects, previews of<br />
our upcoming books,<br />
and more!<br />
NO-NEEDLE KNITS<br />
<strong>LOOM</strong> <strong>KNITTING</strong> <strong>SOCKS</strong> Isela<br />
Phelps<br />
L M<br />
<strong>KNITTING</strong><br />
<strong>SOCKS</strong><br />
ISeLa PheLPS<br />
A BEGINNER’S GUIDE TO <strong>KNITTING</strong> <strong>SOCKS</strong><br />
ON A <strong>LOOM</strong> WITH OVER 50 FUN PROJECTS
This edition published by St. Martin’s Press 2009.<br />
All rights reserved. No part of this book may be used<br />
or reproduced in any manner whatsoever without<br />
written permission except in the case of brief<br />
quotations embodied in critical articles or reviews.<br />
For information, address<br />
St. Martin’s Press, 175 Fifth Avenue, New York<br />
NY 10010<br />
www.stmartins.com<br />
A Quintet Book. Copyright © 2009 Quintet<br />
Publishing Limited<br />
QTT.LKS<br />
No part of this publication may be reproduced,<br />
stored in a retrieval system, or transmitted in any<br />
form or by any means, electronic, mechanical,<br />
photocopying, recording or otherwise, without the<br />
prior written permission of the copyright holder.<br />
This book was designed and produced by<br />
Quintet Publishing Limited, 6 Blundell Street<br />
London N7 9BH, UK<br />
Art Director: Michael Charles<br />
Designer: Tania Field<br />
Photography: Jonny Thompson<br />
Illustrator: Anthony Duke, Bernard Chau<br />
Project Editor: Martha Burley<br />
Managing Editor: Donna Gregory<br />
Publisher: James Tavendale<br />
Printed in China by 1010 Printing International<br />
Limited<br />
Library of Congress Cataloging-in-Publication Data<br />
available upon request<br />
ISBN-13: 978-0-312-38055-7<br />
ISBN-10: 0-312-38055-0<br />
First U.S. Edition: June 2009<br />
10 9 8 7 6 5 4 3 2 1<br />
Contents<br />
6 Introduction<br />
8 Materials and tools<br />
10 Using the loom<br />
18 Color and design<br />
24 Sock 101<br />
30 Designing your own socks<br />
32 Fixing mistakes<br />
34 Part I<br />
sImPle socks<br />
36 Single rib socks<br />
38 Ribbed socks<br />
40 Classic men's socks<br />
42 Sha sha socks<br />
44 Part II<br />
TexTuRed socks<br />
46 Guppy socks<br />
48 Borderline socks<br />
50 Brocade socks<br />
52 Seeded rib socks<br />
54 Garter stitch<br />
56 Baskets<br />
58 Spiraling tubes<br />
60 Moss stitch<br />
61 Seascape melody<br />
62 Slouch socks<br />
64 Part III<br />
coloRwoRk socks<br />
66 Snow<br />
68 Golden heels and toes<br />
70 Horizontal striped socks<br />
72 Bloom for Bethany<br />
74 Tennis socks<br />
76 Ropes<br />
78 Part IV<br />
fancy: cables & beads<br />
80 Abuelita's socks<br />
82 Braid cable socks<br />
84 Twists and bricks<br />
85 Cascading socks<br />
86 Clustered cable<br />
88 Snaking socks<br />
90 Trellis<br />
92 Hourglass socks<br />
94 Starry night<br />
96 Beaded peaks<br />
98 Waves<br />
100 Part V<br />
lace socks<br />
102 Ladder lace<br />
104 Garden<br />
106 Marbled socks<br />
108 Little wisps of wheat<br />
110 Lazaro shells<br />
112 Part VI<br />
fooTsIes & oTHeR<br />
114 Cherlooms pedi socks<br />
116 Pedi socks<br />
118 Early dawn yoga socks<br />
120 Pink hottie sandal sock<br />
122 House socks<br />
126 Part VII<br />
kId's socks<br />
128 Corazonitos (little hearts)<br />
130 Dress socks—for child<br />
132 Cuff down baby socks<br />
134 Beaded flowers child socks<br />
136 Butterfly kisses<br />
138 Woven child's sock<br />
140 Common abbreviations<br />
141 Resources & contributors<br />
142 Index<br />
144 Acknowledgements
INTRoDUCTIoN<br />
Casting on (continued)<br />
long tail cast on<br />
This is known as the long tail cast on because you use the tail of the yarn<br />
and the working yarn to create the cast on. This is the same term used in<br />
needle knitting. It creates a flexible cast on.<br />
1 Make a slip knot, leaving a tail<br />
that is about four times as long as the<br />
width of your project. Place the slip<br />
knot on a peg. The slip knot will<br />
become your first stitch.<br />
3 Flip your hand toward the left<br />
until your palm faces up. The hand is<br />
now in a slingshot position.<br />
12 LooM <strong>KNITTING</strong> SoCKS<br />
2 Position your left hand palm<br />
down: wrap the working yarn (the one<br />
coming from the skein) around your<br />
index finger and the tail over your<br />
thumb. Hold both yarn ends with the<br />
remaining three fingers.<br />
4 Guide the crochet hook by the<br />
palm side of the thumb under the<br />
yarn strand, then guide it over to the<br />
yarn strand on the index finger, hook<br />
the yarn strand on the index finger,<br />
and guide it down through the loop<br />
on your thumb.<br />
5 Place the loop on the adjacent<br />
empty peg. Remove your thumb from<br />
its loop and gently tug on the yarn tail<br />
to tighten the new stitch that you<br />
created. Repeat steps 3–5 until you<br />
have the number of stitches called for<br />
in the pattern.<br />
no crochet hook? Basic stitches<br />
There is a method of using long<br />
tail cast on without a crochet<br />
hook but it is slightly more<br />
complicated.<br />
1 With the slip knot on your first<br />
peg, grab the tail yarn and ewrap<br />
the peg to the left. The peg<br />
now has two loops, knit over so<br />
only one loop remains.<br />
2 Grab yarn coming from the<br />
skein and e-wrap the next<br />
empty peg.<br />
3 Grab the tail yarn and place it<br />
above the e-wrap done in step 2.<br />
Lift the bottom loop over and off<br />
the peg (the peg should remain<br />
wrapped with the tail).<br />
4 Repeat steps 2 and 3 with the<br />
remaining pegs.<br />
Tips<br />
● You may find it more<br />
comfortable to place the loom on<br />
your lap or table to work on the<br />
cast on.<br />
● When making your slip knot,<br />
it is better to overestimate and<br />
make the tail too long rather<br />
than too short.<br />
The two basic stitches are the knit, or plain, and purl stitches. With these two stitches<br />
under your belt you will be able to create numerous stitch patterns for your loom<br />
knits.<br />
knit stitch (k)<br />
The knit stitch is the cornerstone of any loom-knitted item. Known also as the plain<br />
stitch, the knit stitch resembles the knit stitch created on knitting needles. It looks like<br />
a small V. Variations on the knit stitch are known as the flat stitch and the u-stitch.<br />
Preparation: The knitting loom must have at least one stitch on each peg (a<br />
cast-on row).<br />
1 Lay the working yarn in<br />
front and above the stitch<br />
on the peg.<br />
flat stitch (fs)<br />
1 Take working yarn to the front<br />
of the peg and place it above the<br />
loop on the peg. Do not place any<br />
tension on it, simply rest it above.<br />
2 Insert the knitting tool<br />
through the stitch on the<br />
peg from bottom up. You<br />
are going to hook the<br />
working yarn where<br />
indicated by the red ring.<br />
3 Hook the working yarn<br />
with the knitting tool,<br />
making a loop. Grab the<br />
loop with your fingers.<br />
This variation looks exactly like the knit stitch, except it is a shorter and tighter stitch.<br />
INTRoDUCTIoN<br />
KniT sTiTch basics<br />
knit stitch: Tall<br />
height and wider stitch<br />
u-stitch: Medium<br />
height and medium<br />
width<br />
flat stitch: Short<br />
height and narrower<br />
width<br />
4 Take the original loop<br />
off the peg and replace<br />
with the new. Gently<br />
tighten the working yarn.<br />
Repeat steps 1–4 to<br />
complete a knit row.<br />
2 Insert tool through the loop. 3 Lift the loop off the peg.<br />
LooM <strong>KNITTING</strong> SoCKS<br />
13
SIMPLE <strong>SOCKS</strong><br />
Knitting loom<br />
Materials<br />
64 peg extra fine gauge knitting<br />
loom. to recreate the pattern,<br />
you will need a knitting loom<br />
with a peg count multiple of 2.<br />
Yarn<br />
400–440 yd (365–402 m)<br />
of sock weight yarn.<br />
(Sample uses Scout’s<br />
Swag in Stocker Pond.)<br />
Tools<br />
Knitting tool<br />
tapestry needle<br />
2 double pointed needles in size<br />
2 (US)<br />
Gauge<br />
18 sts and 24 rows to<br />
2 in. (5 cm) in St st (knit all rows)<br />
Size<br />
Shown in 9 in. (23 cm) foot<br />
circumference. Pattern can be<br />
adapted to any other smaller or<br />
larger loom with a peg multiple<br />
of 2.<br />
36 <strong>LOOM</strong> KnIttIng <strong>SOCKS</strong><br />
Single rib socks<br />
Single rib socks are classic! The pattern is easily adaptable as it<br />
has a multiple of 2. Make a pair for everyone in the family.<br />
LEVEL 1<br />
Stitch pattern:<br />
Single Rib stitch<br />
Rnd 1: *K1, p1; rep from * to the<br />
end of rnd.<br />
Rep this rnd throughout.<br />
Directions<br />
Cast on 64sts, join to work in<br />
the round.<br />
Cuff & Leg<br />
Work in single rib st until leg<br />
measures 6 in. (15 cm) from cast-on<br />
edge (or desired length).<br />
Heel<br />
Done in rows as in a flat panel using<br />
short-rows on 32 pegs. Follow<br />
short-row shaping instructions on<br />
page 25 until 12 sts remain<br />
unwrapped. End ready for a<br />
clockwise row.Continue with the<br />
reverse short-row shaping<br />
instructions on page 26.<br />
Foot<br />
Done in the round, sole is done in st<br />
st, instep continues in single rib st.<br />
Next rnd: k31, p1 *k1, p1; rep<br />
from * to the end of rnd.<br />
Repeat last rnd until foot measures<br />
6 1 ⁄2 in. (16.5 cm) from back of heel<br />
(or desired length).<br />
Toe<br />
Follow short-row shaping as<br />
previously done for the heel.<br />
Remove sts from loom as follows:<br />
Place on dpn 1: Sts from pegs 1–32.<br />
Place on dpn 2: Sts from pegs 33–64.<br />
Sts are now prepared to graft close.<br />
Follow grafting instructions to close<br />
the toe (see page 17 for illustrated<br />
instructions).<br />
Finishing<br />
Weave all yarn tail ends.<br />
Block lightly.<br />
SIMPLE <strong>SOCKS</strong><br />
<strong>LOOM</strong> KnIttIng <strong>SOCKS</strong><br />
37
fancy socks: caBLEs & BEaDs<br />
Knitting loom<br />
Materials<br />
64 peg extra fine gauge knitting<br />
loom.<br />
Yarn<br />
350–400 yd (320–365 m)<br />
of sock weight yarn.<br />
(sample uses Patons<br />
kroy Heathers 75% wool<br />
25% nylon 152 yd [139 m)<br />
per 50 g.)<br />
Tools<br />
knitting tool<br />
tapestry needle<br />
2 double pointed needles size 2<br />
(Us)<br />
cable needle<br />
Gauge<br />
18 sts and 24 rows to<br />
2 in. (5 cm) in st st (knit all rows)<br />
Size<br />
shown in 8 1 ⁄2 in (21.5 cm) foot<br />
circumference.<br />
Abbreviations<br />
c4f: a cable that takes place over<br />
4 pegs (left cross cable).<br />
86 Loom knitting socks<br />
clustered cable<br />
When you have a craving for cables, the cluster of cables will<br />
not disappoint. Grab your favorite yarn and get going!<br />
LEVEL 3<br />
Stitch pattern:<br />
Clustered cable<br />
follow instructions on pages 20–21<br />
for cables over 4 stitches.<br />
8 7 6 5 4 3 2 1<br />
10<br />
9<br />
8<br />
7<br />
6<br />
5<br />
4<br />
3<br />
2<br />
1<br />
multiple of 8 + 4<br />
Rnds 1–2: P4, k4.<br />
Rnd 3: P4, c4f.<br />
Rnds 4–5: P4, k4.<br />
Rnds 6–7: k4, p4.<br />
Rnd 8: c4f, p4.<br />
Rnds 9–10: k4, p4.<br />
Key<br />
Purl<br />
Knit<br />
Directions<br />
cast on 64 sts, join to work in<br />
the round.<br />
Cuff<br />
Rnd 1: *k2, p2; rep from * to the<br />
end of round<br />
Repeat rnd 1 until cuff measures<br />
1 ⁄2 in. (1.5 cm) from cast-on edge.<br />
Leg<br />
start and work clustered cable<br />
pattern until leg measures<br />
6 in. (15 cm) from cast-on edge.<br />
c4b<br />
Heel<br />
Done in rows as in a flat panel using<br />
short-rows on 32 pegs. follow<br />
short-row shaping instructions on<br />
page 25 until 12 sts remain<br />
unwrapped. End ready for a<br />
clockwise row. continue with the<br />
reverse short-row shaping<br />
instructions on page 26.<br />
Foot<br />
Worked in the round. foot is<br />
worked completely in st st (knit<br />
every round) until foot measures<br />
6 1 ⁄2 in. (16.5 cm) from back of heel<br />
(or desired length).<br />
Toe<br />
follow short-row shaping as<br />
previously done for the heel.<br />
Remove sts from loom as follows:<br />
Place on dpn 1: sts from pegs 1–32.<br />
Place on dpn 2: sts from pegs<br />
33–64.<br />
sts are now prepared to graft<br />
closed. follow grafting instructions<br />
to close the toe (see page 17 for<br />
illustrated instructions).<br />
Finishing<br />
Weave all yarn tail ends.<br />
Block lightly.<br />
Fancy socks: caBLEs & BEaDs<br />
Loom knitting socks<br />
87
TexTured socks<br />
58 Loom kniTTing socks<br />
spiraling tubes<br />
The spiraling tubes are the most basic project you will find in<br />
this book. It is your basic tube sock with a twist!<br />
Materials<br />
Knitting loom<br />
64 peg extra fine gauge loom.<br />
LeVeL 2<br />
Pattern note<br />
4 3 2 1<br />
Key<br />
read chart from 8 bottom up. every<br />
7<br />
round is read from Purl right to left.<br />
6<br />
Knit<br />
5<br />
4<br />
Stitch pattern: 3<br />
Yar<br />
350–400 yd (320–365 m)<br />
Work from chart 2 or use following<br />
1<br />
instructions.<br />
Left leg<br />
of sock weight yarn.<br />
(sample uses shiBuiknits<br />
fingering weight, 100%<br />
superwash merino, 1.75 oz [50 g]<br />
191 yd [175 m].)<br />
2 x skeins in 51305.<br />
4 3 2<br />
Right leg<br />
1<br />
8<br />
7<br />
6<br />
5<br />
4<br />
3<br />
2<br />
1<br />
4 3 2 1<br />
Left leg<br />
8<br />
7<br />
6<br />
5<br />
4<br />
3<br />
2<br />
1<br />
Key<br />
Purl<br />
Knit<br />
Tools<br />
4 3 2 1<br />
knitting tool.<br />
Tapestry needle.<br />
2 double pointed needles size 2<br />
(us).<br />
cable needle.<br />
Gauge<br />
18 sts and 24 rows to<br />
2 in. (5 cm) in st st (knit all rows)<br />
Size<br />
shown in 8 in. (20.5 cm) foot<br />
circumference.<br />
Right leg<br />
Rnd 1: (rs) k2, p2.<br />
Rnd 2: k2, p2.<br />
8<br />
7<br />
6<br />
5<br />
4<br />
3<br />
2<br />
1<br />
Rnds 3 and 4: P1, k2, p1.<br />
Rnds 5 and 6: P2, k2.<br />
Right leg<br />
Rnds 7 and 8: k1, p2, k1.<br />
Left leg<br />
Rnd 1: (rs) P2, k2.<br />
Rnd 2: P2, k2.<br />
Rnds 3 and 4: P1, k2, p1.<br />
Rnds 5 and 6: k2, p2.<br />
Rnds 7 and 8: k1, p2, k1.<br />
Both legs<br />
rnds 1–8 form pattern and are<br />
repeated throughout.<br />
Directions<br />
cast on 64sts, join to work in<br />
the round.<br />
Right leg<br />
Rnds 1–8: Work in spiraling rib<br />
pattern for right leg.<br />
repeat pattern until entire tube<br />
measures 12 in. (30.5 cm) in length.<br />
Toe<br />
move every loop from the odd pegs<br />
over to the neighboring peg (1 to 2,<br />
3 to 4, etc.) every other peg is<br />
empty and every other peg has 2<br />
loops on it. Treat both loops as<br />
though they were one.<br />
Next rnd: knit.<br />
Bind off<br />
cut yarn leaving a 2 yd (2 m) tail.<br />
Thread tapestry needle with yarn<br />
coming from sock, bind off with<br />
gather bind off method (see<br />
page 16 for illustrated instructions).<br />
Left leg<br />
repeat instructions for right leg<br />
except follow left leg rib pattern.<br />
Finishing<br />
Weave in all ends (see page 27).