CONTROL PANEL OPERATING MANUAL - Daikin
CONTROL PANEL OPERATING MANUAL - Daikin
CONTROL PANEL OPERATING MANUAL - Daikin

Create successful ePaper yourself
Turn your PDF publications into a flip-book with our unique Google optimized e-Paper software.
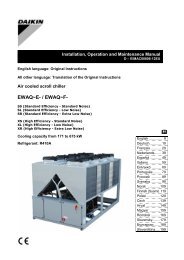
Field Wiring Diagram Notes1. Compressor terminal boxes are factory-mounted and wired. All line-side wiring must be in accordance with the NEC and bemade with copper wire and copper lugs only. Power wiring between the terminal box and compressor terminals is factoryinstalled.2. Minimum wire size for 115 VAC is 12 ga. for a maximum length of 50 feet. If greater than 50 feet refer to <strong>Daikin</strong> forrecommended wire size minimum. Wire size for 24 VAC is 18 ga. All wiring to be installed as NEC Class 1 wiring system.All 24 VAC wiring must be run in separate conduit from 115 VAC wiring. Wiring must be wired in accordance with NECand connection to be made with copper wire and copper lugs only.3. Voltage unbalance not to exceed 2% with a resultant current unbalance of 6 to 10 times the voltage unbalance per NEMA MG-1, 1998 Standard. Supply voltage must be +/- 10% of compressor nameplate voltage.4. A customer furnished 24 or 120 vac power for alarm relay coil may be connected between UTB1 terminals 84 power and 81neutral of the control panel. For normally open contacts wire between 82 & 81. For normally closed wire between 83 & 81.The alarm is operator programmable. Maximum rating of the alarm relay coil is 25VA.5. Remote on/off control of unit can be accomplished by installing a set of dry contacts between terminals 70 and 54.6. If field supplied pressure differential switches are used, they must be installed across the vessel and not the pump. They mustbe suitable for 24 vac and low current application.7. Customer supplied 115 VAC 20 amp power for optional evaporator and condenser water pump control power and tower fansis supplied to unit control terminals (UTB1) 85 power / 86 neutral, PE equipment ground.8. Optional customer supplied 115 VAC, 25-VA maximum coil rated, chilled water pump relay (ep1 & 2) may be wired asshown. This option will cycle the chilled water pump in response to chiller demand.9. The condenser water pump must cycle with the unit. A customer supplied 115 VAC 25 VA maximum coil rated, condenserwater pump relay (CP1 & 2) is to be wired as shown. Units with free-cooling must have condenser water above 60°F beforestarting.10. Optional customer supplied 115 VAC 25 VA maximum coil rated cooling tower fan relays (C1 - C2 standard, C3-C4 optional)may be wired as shown. This option will cycle the cooling tower fans in order to maintain unit head pressure.11. Auxiliary 24 VAC rated contacts in both the chilled water and condenser water pump starters must be wired as shown.12. 4-20mA external signal for chilled water reset are wired to terminals 71 and 51 on the unit controller; load limit is wired toterminals 71 and 58 on the unit controller.13. Optional Control Inputs. The following 4-20 ma optional inputs are connected as shown:• Demand Limit; Terminals 58 and 71 common• Chilled Water Reset; Terminals 51 and 71 common• Evaporator Water Flow; Terminals 59 and 71 common• Condenser Water Flow; Terminals 60 and 71 common14. Optional Control Power Source. 115 volt control power can be supplied from a separate circuit and fused at 20 amps inductiveload. Connection is to terminals 85 and 86 common.15. 4-20 mA external signal for chilled water reset are wired to terminals 71 and 51 on the unit controller; load limit is wired toterminals 71 and 58 on the unit controller.Operator Interface Touch ScreenNavigationThe home-view screen shown on page 34 is usually left on (there is a screen-saver built in that is reactivatedby touching the screen anywhere). This VIEW screen contains the STOP and AUTO buttons used to start andstop the unit when in Local control. Other groups of screens can be accessed from the Home screen bypressing one of three buttons on the bottom of the screen: HISTORY, VIEW, SET.• HISTORY will go to the last history screens viewed and can toggle between the two history screens.• Trend History• Alarm History• VIEW will go to the home View screen. Pressing again will go to the detail View screen used to look indetail at settings and the operation of the chiller. Pressing VIEW from any other screen will return to thelast displayed View screen. A new button called MENU will appear when in the View mode. See page37 for details.• SET will go to the last Set screen used.D - EOMWC00905-10EN - 31/88