VA-LCP Anterior Clavicle Plate. The anatomically precontoured ...
VA-LCP Anterior Clavicle Plate. The anatomically precontoured ...
VA-LCP Anterior Clavicle Plate. The anatomically precontoured ...

You also want an ePaper? Increase the reach of your titles
YUMPU automatically turns print PDFs into web optimized ePapers that Google loves.
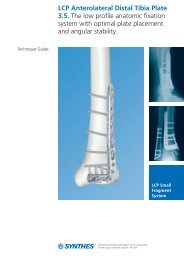
Technique Guide<strong>VA</strong>-<strong>LCP</strong> <strong>Anterior</strong> <strong>Clavicle</strong> <strong>Plate</strong>. <strong>The</strong><strong>anatomically</strong> <strong>precontoured</strong> fixationsystem with angular stability for clavicleshaft and lateral clavicle.
Table of ContentsIntroduction<strong>VA</strong>-<strong>LCP</strong> <strong>Anterior</strong> <strong>Clavicle</strong> <strong>Plate</strong> 2AO Principles 4Indications 5Surgical TechniquePreparation 6<strong>Plate</strong> Insertion 8Screw Insertion 13Implant Removal 20Product Information<strong>Plate</strong>s 21Screws 22Instruments 23Sets 26Image intensifier controlWarningThis description alone does not provide sufficient background for direct use ofthe product. Instruction by a surgeon experienced in handling this product ishighly recommended.Reprocessing, Care and Maintenance ofSynthes InstrumentsFor general guidelines, function control and dismantling of multi-part instruments,please refer to: www.synthes.com/reprocessing<strong>VA</strong>-<strong>LCP</strong> <strong>Anterior</strong> <strong>Clavicle</strong> <strong>Plate</strong> Technique Guide Synthes 1
<strong>VA</strong>-<strong>LCP</strong> <strong>Anterior</strong> <strong>Clavicle</strong> <strong>Plate</strong>. <strong>The</strong><strong>anatomically</strong> <strong>precontoured</strong> fixationsystem with angular stability for clavicleshaft and lateral clavicle.<strong>VA</strong>-<strong>LCP</strong> <strong>Anterior</strong> <strong>Clavicle</strong> <strong>Plate</strong> 2.7/3.5, lateral (7, 9, 10,11 and 12 holes)30°Shaft holes. For 3.5 mm locking,3.5 mm cortex and 4.0 mmcancellous bone screwsLateral variable angle holes. For2.7 mm variable angle locking,2.7 mm locking, or 2.4 mm cortexscrewsUndercuts. Reduceimpairment of bloodsupplyVariable angle locking screws. Ensure optimalscrew purchase and increased pull out strength inthe thin lateral fragment2 Synthes <strong>VA</strong>-<strong>LCP</strong> <strong>Anterior</strong> <strong>Clavicle</strong> <strong>Plate</strong> Technique Guide
Synthes <strong>Clavicle</strong>Solutions<strong>LCP</strong> <strong>Anterior</strong> <strong>Clavicle</strong> <strong>Plate</strong> 3.5, medial (6, 7 and 8 holes)<strong>LCP</strong> Superior <strong>Clavicle</strong> <strong>Plate</strong>– Fractures of the clavicle shaft– Fractures of the lateral clavicle<strong>LCP</strong> Superior <strong>Anterior</strong> <strong>Clavicle</strong> <strong>Plate</strong>– Fractures of the clavicle shaft– Fractures of the lateral clavicleA rounded profile and screwheads that are seated flushin the plate. Prevent conflictsbetween the plate and surroundingsoft tissue<strong>LCP</strong> <strong>Clavicle</strong> Hook <strong>Plate</strong>– Acromioclavicular joint dislocation– Fractures of the lateral clavicleRecon plate segments. Allowadditional contouring of platesto fit patient anatomyTapered plate tip. Facilitates percutaneousinsertion and prevents soft tissueirritationElastic Nail System– Fractures of the clavicle shaft<strong>VA</strong>-<strong>LCP</strong> <strong>Anterior</strong> <strong>Clavicle</strong> <strong>Plate</strong> Technique Guide Synthes 3
AO PrinciplesIn 1958, the AO formulated four basic principles, which havebecome the guidelines for internal fixation 1, 2 . Those principles,as applied to the <strong>VA</strong>-<strong>LCP</strong> <strong>Anterior</strong> <strong>Clavicle</strong> <strong>Plate</strong>s Systemare:Anatomic reductionPrecontoured plate assists in anatomic reduction.Stable fixationLocking screws create a fixed-angle construct providingangular stability.Preservation of blood supplyTapered end for subcutaneous plate insertion preserves tissueviability. A limited-contact plate design reduces plate-to-bonecontact and helps to preserve the periosteal blood supply.Early, active mobilizationEarly mobilization per standard AO technique creates anenvironment for bone healing, expediting a return to optimalfunction.1Müller ME, Allgöwer M, Schneider R, Willenegger H (1995) Manual of InternalFixation. 3rd, expanded and completely revised ed. 1991. Berlin, Heidelberg,New York: Springer2Rüedi TP, Buckley RE, Moran CG (2007) AO Principles of Fracture Management.2nd ed. Stuttgart, New York: Thieme4 Synthes <strong>VA</strong>-<strong>LCP</strong> <strong>Anterior</strong> <strong>Clavicle</strong> <strong>Plate</strong> Technique Guide
Indications– Fractures of the clavicle shaft– Fractures of the lateral clavicle– Malunions of the clavicle– Non-unions of the clavicle<strong>VA</strong>-<strong>LCP</strong> <strong>Anterior</strong> <strong>Clavicle</strong> <strong>Plate</strong> Technique Guide Synthes 5
medial lateralmediallateral034.000.680 AA 30100404 © 10/2010 Synthes, Inc. or its affiliates All rights reserved Synthes is trademark of Synthes, Inc. or its affiliatesPreparation1Preoperative planning<strong>VA</strong>-<strong>LCP</strong> <strong>Anterior</strong> <strong>Clavicle</strong> <strong>Plate</strong>lateralMedial <strong>Plate</strong>Flip for left viewmediallateralLateral <strong>Plate</strong>medial6 holes7 holesComplete the preoperative radiographic assessment andprepare the preoperative plan. Use the x-ray templates for<strong>VA</strong>-<strong>LCP</strong> <strong>Anterior</strong> <strong>Clavicle</strong> <strong>Plate</strong> (Art. No. 034.000.680)to determine the length of the plate and the position ofthe screws.77 mm7 holes91 mm8 holes102 mmTitanium Stainless Steel Holes Length (mm)04.112.040 02.112.040 6 7904.112.041 02.112.041 7 9104.112.042 02.112.042 8 1021.10 Magnification10 20 30 40 0 50 60 70 80 90 100 mmCaution: Due to variable magnification factors in x-rays,this template should be used for general pre-operative planning only.For use only with the Original AO System ofInstruments and Implants9 holes10 holes11 holes12 holes77 mm89 mm101 mm113 mm124 mmTitanium Stainless Steel Holes Length (mm)04.112.045 02.112.045 7 7704.112.046 02.112.046 9 8904.112.047 02.112.047 10 10104.112.048 02.112.048 11 11304.112.049 02.112.049 12 124Ö034.000.680öAA0ä6 Synthes <strong>VA</strong>-<strong>LCP</strong> <strong>Anterior</strong> <strong>Clavicle</strong> <strong>Plate</strong> Technique Guide
2Position patientPosition the patient in a supine position on a radiolucentoperating table. Provide enough room to swing the imageintensifier 45° in both directions to view the clavicle intwo planes intra-operatively.Notes– Longer tubes for anesthesia may be required.– Prepare the associated arm so that it can be intra-operativelymobilized. <strong>The</strong> mobilization of the arm can beused as reduction aid.<strong>VA</strong>-<strong>LCP</strong> <strong>Anterior</strong> <strong>Clavicle</strong> <strong>Plate</strong> Technique Guide Synthes 7
<strong>Plate</strong> Insertion1ApproachMake a gentle curvilinear incision parallel to the skin cleavagelines.Subcutaneous dissection permits identification of the supraclavicularsensory nerve branches. <strong>The</strong> major fibers of thesenerves should be identified and protected with small vesselloops throughout the surgery.Carefully divide the platysma to expose the clavicle periosteumat the deltotrapezial fascia. Minimally dissect the periosteumto expose the fracture.Warning: Bone fragments must not be detached from theperiosteum in order to enable proper bone healing. It is criticalnot to strip any comminuted fragments.8 Synthes <strong>VA</strong>-<strong>LCP</strong> <strong>Anterior</strong> <strong>Clavicle</strong> <strong>Plate</strong> Technique Guide
2Fracture reduction and temporary fixationNormal length, axis angulation and rotation should be restored.After exposing the fracture, the two main fragments are distractedand the length of the clavicle is restored. If the boneends are angled or oblique, reduce with a pointed or serratedreduction forceps.Any large comminuted fragments should also be reducedand held temporarily with small pointed bone clamps orKirschner wires. Assess and plan for any temporary fixationso as to not interfere with the placement of the definitivefixation implants.Kirschner wires can be placed through the distal end of theplate to assist with temporary maintenance of the reductionand for plate placement.Additional options for maintaining the reduction include independentlag screws and lag screws inserted through theplate.Option: <strong>The</strong> <strong>VA</strong>-<strong>LCP</strong> <strong>Anterior</strong> <strong>Clavicle</strong> <strong>Plate</strong> can be used forbiological, bridging osteosynthesis. Only the main fragmentsare reduced and the actual fracture zone is not engaged withany screw.<strong>VA</strong>-<strong>LCP</strong> <strong>Anterior</strong> <strong>Clavicle</strong> <strong>Plate</strong> Technique Guide Synthes 9
<strong>Plate</strong> Insertion3Determine plate length and adapt plateOptional instruments329.291 Bending Pliers for Clavicular <strong>Plate</strong>s,length 227 mm329.040/ Bending Iron for <strong>Plate</strong>s 2.4 to 3.5,329.050 length 145 mm329.300 Bending Press, length 400 mmSelect a plate length appropriate for the fracture.Due to varying patient anatomy, the plate may not be perfectlyanatomical and slight plate bending may be necessary.Using bending irons, bending pliers, and/or the bendingpress, contour the plate as needed. For an optimum fit, theplate can be bent at each notch in the plane of the shaft.To bend the plate, insert it into the jaws of the bending pliersfor clavicle plates at the appropriate notch.To adjust the S-curve, insert the plate at the back of the jawsof the bending pliers.10 Synthes <strong>VA</strong>-<strong>LCP</strong> <strong>Anterior</strong> <strong>Clavicle</strong> <strong>Plate</strong> Technique Guide
To adjust the superior inferior bend, place the plate betweenthe two notches in the front of the jaws of the bending pliers.For more leverage and control when bending, loosen the adjustmentscrew on the bending pliers so that the handles arecloser together. If more adjustment is needed, make a seriesof small bends, threading the adjustment screw roughly halfa turn at a time.<strong>VA</strong>-<strong>LCP</strong> <strong>Anterior</strong> <strong>Clavicle</strong> <strong>Plate</strong> Technique Guide Synthes 11
<strong>Plate</strong> Insertion4Insert platePosition the plate on the reduced bone, and attach it temporarilywith the plate holding forceps or a 3.5 mm cortexscrew.After plate insertion, check alignment on the bone using animage intensifier.12 Synthes <strong>VA</strong>-<strong>LCP</strong> <strong>Anterior</strong> <strong>Clavicle</strong> <strong>Plate</strong> Technique Guide
Screw InsertionDetermine the combination of screws to be used for fixation.If a combination of locking and cortex screws is used,cortex screws should be inserted first to pull the bone tothe plate.1Verify screw placementSince the direction of the 3.5 mm locking screw depends onthe contour of the plate, final screw position may be verifiedwith Kirschner wires before insertion. This becomes importantwhen the plate has been manually contoured, appliednear the acromioclavicular joint, or for unusual anatomy.Verify Kirschner wire placement under image intensificationto determine if final screw placement will be acceptable.<strong>VA</strong>-<strong>LCP</strong> <strong>Anterior</strong> <strong>Clavicle</strong> <strong>Plate</strong> Technique Guide Synthes 13
Screw Insertion2Screw fixation2aFixation with 3.5 mm cortex screwsInstruments310.250 Drill Bit 2.5 mm, length 110/85 mm,2-flute,for Quick Coupling323.360 Universal Drill Guide 3.5319.010 Depth Gauge for Screws 2.7 to 4.0 mm,measuring range up to 60 mm314.070 Screwdriver, hexagonal, small, 2.5 mm,with GrooveUse the 2.5 mm drill bit with the 3.5 universal drill guide topre-drill the bone through both cortices.Warning: Avoid contact with the subclavian artery andbrachial plexus when drilling through the clavicle.To set screws in a neutral position, press the drill guide downin the non-threaded hole. To obtain compression, place thedrill guide at the end of the non-threaded hole away fromthe fracture, being sure not to apply downward pressure onthe spring loaded tip.For neutral positionFor compression14 Synthes <strong>VA</strong>-<strong>LCP</strong> <strong>Anterior</strong> <strong>Clavicle</strong> <strong>Plate</strong> Technique Guide
Determine the required length of the cortex screw using thedepth gauge.Insert the appropriate 3.5 mm cortex screw using the hexagonalscrewdriver.<strong>VA</strong>-<strong>LCP</strong> <strong>Anterior</strong> <strong>Clavicle</strong> <strong>Plate</strong> Technique Guide Synthes 15
Screw Insertion2bFixation with 3.5 mm locking screwsInstruments323.027 <strong>LCP</strong> Drill Sleeve 3.5, for Drill Bits 2.8 mm310.284 <strong>LCP</strong> Drill Bit 2.8 mm with Stop, length165 mm, 2-flute, for Quick Coupling319.010 Depth Gauge for Screws 2.7 to 4.0 mm,measuring range up to 60 mm314.030 Screwdriver Shaft, hexagonal,small, 2.5 mmor314.116 Screwdriver Shaft Stardrive 3.5, T15,self-holding, for AO/ASIF Quick Coupling511.773 Torque Limiter, 1.5 Nm, for AO/ASIFQuick Coupling311.431 Handle with Quick CouplingNote: If a locking screw is used as the first screw, be surethat the fracture is reduced and the plate is held securely tothe bone. This prevents plate rotation as the screw is lockedto the plate.Insert the drill sleeve into a 3.5 mm locking hole until fullyseated. Drill through both cortices with the drill bit.Warning: Avoid contact with the subclavian artery andbrachial plexus when drilling through the clavicle.Remove the drill guide. Use the depth gauge to determinethe screw length.16 Synthes <strong>VA</strong>-<strong>LCP</strong> <strong>Anterior</strong> <strong>Clavicle</strong> <strong>Plate</strong> Technique Guide
Insert the locking screw with the appropriate screwdrivershaft (hexagonal or Stardrive recess) mounted on the 1.5 Nmtorque limiter. Insert the screw manually or by power untila click is heard. If a power tool is used, reduce speed whentightening the head of the locking screw into the plate.Repeat the above steps for all required shaft holes.<strong>VA</strong>-<strong>LCP</strong> <strong>Anterior</strong> <strong>Clavicle</strong> <strong>Plate</strong> Technique Guide Synthes 17
Screw Insertion2cFixation with 2.7 mm variable angle locking screws(only for lateral plates)Instruments03.211.002 <strong>VA</strong>-<strong>LCP</strong> Drill Sleeve 2.7,for Drill Bits 2.0 mm323.062 Drill Bit 2.0 mm, with double marking,length 140/115 mm, 3-flute,for Quick Coupling03.111.005 Depth Gauge for Screws 2.0 to 2.7 mm,measuring range up to 40 mm313.304 Screwdriver Shaft Stardrive, T8,cylindrical, with groove, shaft 3.5 mm,for AO/ASIF Quick Coupling03.110.002 Torque Limiter, 1.2 Nm, with AO/ASIFQuick Coupling03.110.005 Handle for Torque Limiters 0.4/0.8/1.2 NmWarning: Avoid contact with the subclavian artery andbrachial plexus when drilling through the clavicle.Insert the 2.7 <strong>VA</strong>-<strong>LCP</strong> drill sleeve into the variable anglescrew hole, ensuring that the drill sleeve tip keys into thecloverleaf portion of the hole.Use the cone-shaped end of the drill sleeve to drill variableangle holes at the desired angle. <strong>The</strong> cone allows the drill bita total variation in angulation of 30°.Use the 2.0 mm drill bit to drill at the desired angle and tothe desired depth.Verify the drill bit angle under image intensification to ensurethe desired angle has been achieved.18 Synthes <strong>VA</strong>-<strong>LCP</strong> <strong>Anterior</strong> <strong>Clavicle</strong> <strong>Plate</strong> Technique Guide
Remove the drill sleeve and use the depth gauge to measurethe screw length.Note: If the depth gauge 319.010 is used for 2.7 mm screws,subtract 4 mm from the indicated length to obtain the correctscrew length.Use the T8 Stardrive screwdriver shaft attached to the1.2 Nm torque limiter to insert the 2.7 mm variable anglelocking screw. For manual insertion, use the handle fortorque limiters.Repeat for all lateral holes to be used.Option: <strong>The</strong> drill sleeve can also be inserted coaxially intothe variable angle hole. <strong>The</strong> fixed-angle end of the drillsleeve ensures that the drill bit follows the nominal trajectoryof the locking hole. Determine the required length of thescrew by using the scale on the drill sleeve. If a single markingis visible on the drill bit, the scale from 0 – 30 mm applies;if a double marking is visible, the scale from 30 – 60 mm applies.<strong>VA</strong>-<strong>LCP</strong> <strong>Anterior</strong> <strong>Clavicle</strong> <strong>Plate</strong> Technique Guide Synthes 19
Implant RemovalInstruments314.030 Screwdriver Shaft, hexagonal,small, 2.5 mmor314.116 Screwdriver Shaft Stardrive 3.5, T15,self-holding, for AO/ASIF Quick Coupling313.304 Screwdriver Shaft Stardrive, T8, cylindrical,with Groove, shaft 3.5 mm,for AO/ASIF Quick Coupling311.431 Handle with Quick Coupling309.521 Extraction Screw for Screws 3.5 mm309.510 Extraction Screw for Screws 1.5 mmand 2.0 mmTo remove the implants, unlock all locking screws beforeremoving them completely. <strong>The</strong> plate may otherwise rotatewhile the last screw is being removed, which may damagethe soft tissue. If the locking screws cannot be removed withthe screw driver (e.g. the recess of the screw is damagedor the locking screw is stuck in the plate), use an extractionscrew with left-handed thread. Loosen the screw by turningthe handle counter-clockwise.Important: Verify that the correct instrumentation isavailable to ensure trouble free implant removal. <strong>The</strong> correctscrewdrivers (hexagonal or Stardrive) and the extractionscrews are of special importance.20 Synthes <strong>VA</strong>-<strong>LCP</strong> <strong>Anterior</strong> <strong>Clavicle</strong> <strong>Plate</strong> Technique Guide
<strong>Plate</strong>s<strong>LCP</strong> <strong>Anterior</strong> <strong>Clavicle</strong> <strong>Plate</strong> 3.5, medialArt. No. Holes Length (mm)0X.112.040 6 790X.112.041 7 910X.112.042 8 102<strong>VA</strong>-<strong>LCP</strong> <strong>Anterior</strong> <strong>Clavicle</strong> <strong>Plate</strong> 2.7/3.5, lateralArt. No. Holes Length (mm)0X.112.045 7 770X.112.046 9 890X.112.047 10 1010X.112.048 11 1130X.112.049 12 124X = 2: stainless steelX = 4: titaniumAll plates and screws are also available sterile packed.For sterile implants, add suffix “S” to article number.<strong>VA</strong>-<strong>LCP</strong> <strong>Anterior</strong> <strong>Clavicle</strong> <strong>Plate</strong> Technique Guide Synthes 21
ScrewsLateral0X.211.016 –0X.211.032<strong>VA</strong> Locking Screw Stardrive 2.7 mm(head 2.4), self-tapping,length 16 – 32 mmShaftX12.102 – Locking Screw Stardrive 3.5 mm,X12.111 self-tapping, length 12–30 mmorX13.012– Locking Screw 3.5 mm,X13.030 self-tapping, length 12–30 mmX04.812– Cortex Screw 3.5 mm,X04.830 self-tapping, length 12–30 mmor0X.200.012– Cortex Screw Stardrive 3.5 mm,0X.200.030 self-tapping, length 12 – 30 mmX = 2: stainless steelX = 4: titaniumAll plates and screws are also available sterile packed.For sterile implants, add suffix “S” to article number.22 Synthes <strong>VA</strong>-<strong>LCP</strong> <strong>Anterior</strong> <strong>Clavicle</strong> <strong>Plate</strong> Technique Guide
Instruments309.521 Extraction Screw for Screws 3.5 mm309.510 Extraction Screw, conical, for Screws 1.5and 2.0 mm310.250 Drill Bit 2.5 mm, length 110/85 mm,2-flute, for Quick Coupling310.284 <strong>LCP</strong> Drill Bit 2.8 mm with Stop, length165 mm, 2-flute, for Quick Coupling311.431 Handle with Quick Coupling313.304 Screwdriver Shaft Stardrive, T8, cylindrical,with Groove, shaft 3.5 mm, for AO/ASIFQuick Coupling<strong>VA</strong>-<strong>LCP</strong> <strong>Anterior</strong> <strong>Clavicle</strong> <strong>Plate</strong> Technique Guide Synthes 23
Instruments314.030 Screwdriver Shaft, hexagonal, small, 2.5 mm314.116 Screwdriver Shaft Stardrive 3.5, T15,self-holding, for AO/ASIF Quick Coupling319.010 Depth Gauge for Screws 2.7 to 4.0 mm,measuring range up to 60 mm323.027 <strong>LCP</strong> Drill Sleeve 3.5, for Drill Bits 2.8 mm323.062 Drill Bit 2.0 mm, with double marking,length 140/115 mm, 3-flute, for QuickCoupling323.360 Universal Drill Guide 3.524 Synthes <strong>VA</strong>-<strong>LCP</strong> <strong>Anterior</strong> <strong>Clavicle</strong> <strong>Plate</strong> Technique Guide
329.291 Bending Pliers for Clavicular <strong>Plate</strong>s,length 227 mm511.773 Torque Limiter, 1.5 Nm, for AO/ASIFQuick Coupling03.110.002 Torque Limiter, 1.2 Nm, with AO/ASIFQuick Coupling03.110.005 Handle for Torque Limiters 0.4/0.8/1.2 Nm03.111.005 Depth Gauge for Screws 2.4 to 2.7 mm,measuring range up to 40 mm03.211.002 <strong>VA</strong>-<strong>LCP</strong> Drill Sleeve 2.7,for Drill Bits 2.0 mm<strong>VA</strong>-<strong>LCP</strong> <strong>Anterior</strong> <strong>Clavicle</strong> <strong>Plate</strong> Technique Guide Synthes 25
Sets01.112.041 Tray for <strong>VA</strong>-<strong>LCP</strong> <strong>Anterior</strong> <strong>Clavicle</strong> <strong>Plate</strong>s(Stainless Steel), with Contents,for Vario Caseor01.112.040 Tray for <strong>VA</strong>-<strong>LCP</strong> <strong>Anterior</strong> <strong>Clavicle</strong> <strong>Plate</strong>s(Pure Titanium), with Contents,for Vario Case01.122.013 Small Fragment Basic Instruments,in Modular Tray, Vario Case System01.122.015 Screw Insertion Instruments 3.5/4.0, inModular Tray, Vario Case System01.104.007 Screw Insertion Instruments 2.7/2.4, inModular Tray, Vario Case SystemOptional sets01.122.019 Small Fragment Bending Instruments,in Modular Tray, Vario Case System01.122.014 Small Fragment Reduction Instruments,in Modular Tray, Vario Case System26 Synthes <strong>VA</strong>-<strong>LCP</strong> <strong>Anterior</strong> <strong>Clavicle</strong> <strong>Plate</strong> Technique Guide
<strong>VA</strong>-<strong>LCP</strong> <strong>Anterior</strong> <strong>Clavicle</strong> <strong>Plate</strong> Technique Guide Synthes 27
02/2011 30100414 © Synthes, Inc. or its affiliates Subject to modification Synthes, Stardrive and Vario Case are trademarks of Synthes, Inc. or its affiliatesAll technique guides are available as PDF files atwww.synthes.com/litÖ036.001.220öAADä0123036.001.220 version AA