Telkom Easidial 225
Telkom Easidial 225
Telkom Easidial 225
- No tags were found...

You also want an ePaper? Increase the reach of your titles
YUMPU automatically turns print PDFs into web optimized ePapers that Google loves.
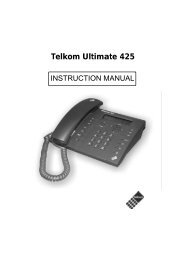
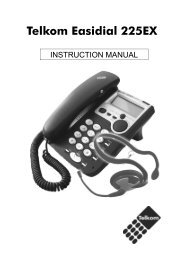
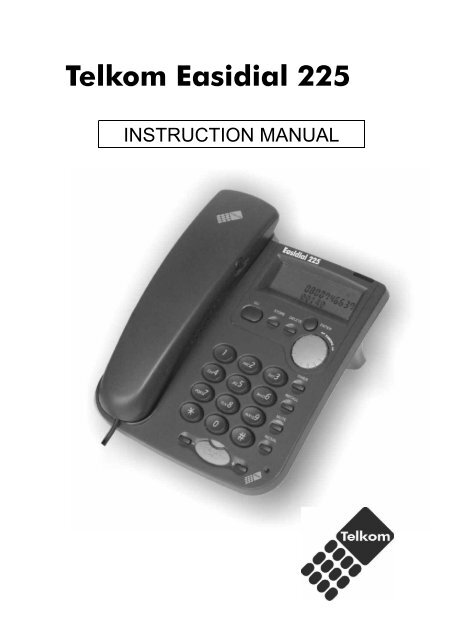
<strong>Telkom</strong> <strong>Easidial</strong> <strong>225</strong>INSTRUCTION MANUAL
1. Important safety instructionsRead the instruction manual carefully before connecting and operating yourtelephone. The telephone has no user serviceable components and serviceshould therefore be referred to authorized service centers only.2. MaintenanceOnly use a damp cloth to clean the cabinet. A mild soap will help to removegrease or oil. Never use polish, solvents, abrasives or strong detergentssince these can damage the telephone.Your phone should be situated away from heat sources such as radiators,heaters, stoves or any other appliance that produces heat.3. Installation PrecautionsNever install telephone wiring during a lightning storm.Never touch un-insulated telephone wires or terminals unless the telephoneline has been disconnected at the network interface.4. CautionTo reduce the risk of fire or injury read and follow these instructions: Use only the batteries specified in this manual. Do not dispose of the batteries in a fire. When inserting the batteries into this product, the proper polarity or directionmust be observed. Reverse insertion of the batteries can cause leakage ordamage to the telephone. Remove the batteries from this product if the product will not be used for along period of time (several months or more). Discard the “dead” batteries as soon as possible since “dead” batteries aremore likely to leak inside a product. Disconnect the telephone line before inserting or removing batteries.1
Bottom of <strong>Telkom</strong> <strong>Easidial</strong> <strong>225</strong> Base 5. Installing batteriesYour phone requires four A AA batteries (supplie d) for power. Although batteriesare supplied with the <strong>Telkom</strong> <strong>Easidial</strong> <strong>225</strong> the shelf life of the batteries can notbe guaranteed. Rechargeable batteries can also be used.1 . Open the battery door by pulling back the latch.2. Insert four AAA batteries into the compartment as indicated by thepolarity symbols.3. Snap the battery compartment door back into place.When appears on the display or the display dims, replace the batteries orrecharge the batteries where rechargeable batteries are used. During replacementof the batteries, disconnect all telephone line cords from the wall modular jacks.NOTE: The content of the CLI memory should be reviewed before the batteriesare replaced, as the CLI memory could be lost during battery replacement. 6. Selecting a locationSelect a location for your telephone that is: Within reach of a telephone jack. Not in the way of normal activities in the area.2
7. Mounting the phoneYou can mount your telephone against a wall, or place it on a shelf, desk or table. 7.1 On a DesktopIf you intend to use your telephone on a desk, the desk support supplied must befitted. To do this, turn the phone over. Now insert the two upper hooks into theopenings provided and push the desk support firmly home.The wall mounting hanging device should not be used when the phone is in thedesktop position.If you ever need to remove the support, press on the middle clip on the upperedge and then pull the desk support off. 7.2 Wall MountTo mount the phone against a wall, you need two screws (not supplied) with headsthat fit into the keyhole slot on the bottom of the base.1. Drill two holes 67mm apart (vertically). Insert wall plugs into each hole. Thenthread a screw into each hole, letting the heads extend about 5mm from thewall. Place the base on the 2 screws and push it slightly downwards.2. There is a small hanging device in the receiver rest to prevent the receiverfrom falling when it is placed on the rest with the telephone mounted on thewall. Using a small screwdriver, turn this hanging device until a small hookappears at the upper end.If you are using the telephone fitted to the wall, you can hang the receiver on thetelephone without hanging up. You will find a small hook for this purpose at theupper end of the receiver rest. 8. Connecting the handset and line cordPlug one end of the telephone line cord into the socket marked LINE on the bottomof the unit.Plug the other end of the telephone line cord into the wall outlet.Plug one end of the coil cord, the longest uncoiled end into the socket markedHANDSET on the bottom of the unit.Plug the other end of the coil cord, the short uncoiled end, into the handset socket. 9. Adjusting the LCD ContrastWith the receiver on the hook, the display contrast can be adjusted using (+)and (-) buttons. 10. Ringer VolumeThe ringer can be adjusted from a loud (HI) to a soft (LO) sound level. When youdon’t want to be disturbed, slide the RINGER switch to the OFF position. You canstill make outgoing calls without being disturbed by incoming calls. The ringervolume control switch is on the bottom of the base.3
To answer the call, lift the handset or pressTo end the call, replace the handset or pressbutton to answer the call.button again.NOTE: The NEW CALL indicator continues to flash until you have reviewed allcalls.NOTICE: A subscription is required to use the IdentiCall services. Please call10219 to subscribe to this service. 13. Speaker volume controlUnder speaker phone mode (not off hook mode), press (+) or (-) button toadjust the speaker phone volume.NOTE: The speaker phone facility does not function when the batteries areremoved. 14. TimerThis unit is designed with a clock-timer to count the off-hook time in seconds, up toone hour. The timer appears on the display and starts to count up when you dialany number or answer incoming calls.NOTE: If you lift the handset and don't dial any number, the timer will appear andstart to count. When the off-hook time extends beyond an hour the timer counts upto 59:59, returns to 00:00, and continues counting. Pressing RECALL will clear thecall timer. 15. Adjusting the handset receiver volumeTo adjust the receiver volume set the RECEIVER switch to NORM position to havea normal sound level, and set the switch to HIGH position to have a louder soundlevel. The receiver volume switch is on the side of the handset. 16. Using MuteTo talk to someone on your end of the phone without the other party hearingyour conversation, press the MUTE button. Press MUTE button again toresume your conversation. 17. Using RecallYour <strong>Telkom</strong> <strong>Easidial</strong> <strong>225</strong> supports the WaitingCall service. If you subscribeto this service you can use this feature to put a call on hold and answeranother call on the same line by pressing the RECALL button. Press theRECALL button and then press 2 to answer the second call.NOTES:1. If you do not have WaitingCall, pressing RECALL might disconnect thecurrent call.2. Pressing RECALL will clear the call timer.NOTICE: A subscription is required to use the WaitingCall services. Pleasecall 10219 to subscribe to this service.5
18. Using RedialLift the handset or press the button, then press the REDIAL button whenyou hear a dial tone, to dial the last dialed number. The number scrolls acrossthe display, and the number is dialed. 19. Using PauseIn some telephone systems, you must dial an access code (9, for example) andwait for a second dial tone before dialing an outside number. When you manuallydial a number, or when you store a number in memory, you can have yourtelephone pause anywhere during the dialing sequence. Simply press REDIAL atthe desired location. 20. Phone BookYou can store 200 telephone numbers with associated names in the phone book.When the memory capacity of 200 numbers has been used, the display will showthe message MEMORY FULL the next time an attempt is made to store a number. Inthis case, other telephone numbers must be deleted first. 20.1 To store telephone numbers & names in the Phone Book1. Press the STORE button. The display will show SAVE?2. Press the STORE button again.3. Enter the required telephone number with a maximum of 22 digits using thenumber pad.4. Press the STORE button.5. Enter the required name with a maximum of 16 letters. The next section willtell you how to enter names.6. Press the STORE button. The display will show SAVED!.How to enter namesThe number buttons are also inscribed with letters for entering the name. Byrepeatedly pressing the appropriate button, upper case letters as well as numbersand special characters can be entered.Overview:Button 1 Space, +, &, -, /, 1Button 2 A, B, C, 2Button 3 D, E, F, 3Button 4 G, H, I, 4Button 5 J, K, L, 5Button 6 M, N, O, 6Button 7 P, Q, R, S, 7Button 8 T, U, V, 8Button 9 W, X, Y, Z, 9Button 0 , . : ; ? 0Button ’ @ ( )Button # $, _, %, !, #6
22. Caller ID OperationThe calling line identification display shows the origin of incoming calls. If the datais available, the display shows the caller’s telephone number after the first ring.The calling numbers are stored in a list so that you can return missed calls easily. Atotal of 99 calling numbers can be stored in the list. Once the list is full, the oldestnumber is automatically deleted each time a new call is received.NOTICE: A subscription is required to use the IdentiCall services. Please call10219 to subscribe to this service.22.1 Receiving a callIf an incorrect, invalid or incomplete Caller ID signal is received, the display shows“-ERROR-”.If only the caller’s phone number is received, the display shows the caller’s phonenumber with the time and date it was received. The NEW icon turns on and NEWCALL LED blinks.Notes:1. CALL#01 means this data is stored in Caller ID memory location #01.2. The calling time and date are immediately recorded from the real-time clock.If the callers name is stored with the telephone number, the display shows thecaller’s name and phone number, with the time and date it was received. The“NEW” icon turns on and NEW CALL LED blinks.Note:If the caller’s name has more than 16 characters, only 16 characters will bedisplayed.If the name and number are not available due to the caller’s restriction, the displayshows “-PRIVATE-” with the time and date received. The NEW icon turns on andNEW CALL LED blinks.If the name and number are not available, the display will show “-unavailable-”With the call’s time and date. The NEW icon turns on and NEW CALL LED blinks.If the caller suppresses his/her CLI, the display will show “-PRIVATE-” with the call’stime and date. The NEW icon turns on and NEW CALL LED blinks.Notes:1. If the Caller ID information received duplicates of another call in memory,the time/date will be updated and the “REPEAT” icon will be lit.2. If no key is pressed within 60 seconds, the total call counter, new callcounter, current time and date will be displayed.8
22.2 View the Caller ID MemoryPress the CLI button on the keypad, then turn the EASIDIAL selector to the rightto review more recent calls. The CALL# will increase.After you view the most recent data in memory, the display will show “END OFLIST”.Turn the EASIDIAL selector to the left to review older calls. The CALL# willdecrease. After you view the oldest data in memory, the display will show “END OFLIST”.If the data memory is being reviewed for the first time, the NEW icon will be lit.The NEW CALL LED will go off if you review the data.If no key is pressed within 20 seconds, the total call counter, new call counter,current time and date will be displayed. 22.3 Erase the Caller ID Memory1. Select the required Caller ID memory location by pressing the CLIbutton on the keypad, then rotating the EASIDIAL selector.2. To delete a number from the list of callers, press the DELETE buttononce. The display will show “DELETE?”. Press the DELETE button for 2seconds. The data for that call will be erased, and the CALL# andCaller ID information will be updated. If the most recent call in memorywas erased, the display will show “END OF LIST”.To delete the entire list of callers, press and hold the DELETE buttonuntil the display shows “DELETE ALL?”. Press DELETE for 5 secondsuntil “NO CALLS” appear on the display. Both the total call and newcall counters will become zero, and the current time and date will bedisplayed. 22.4 Copying a number from the Caller ID to the Phone BookYou can copy Caller ID information to the phone book while you are reviewing theCaller ID information.1. Select the required Caller ID memory location by pressing the CLI button onthe keypad, then rotating the EASIDIAL selector.2. Press the STORE button, the display will show “COPY TO DATA BANK”.3. Press the STORE button again, display will show “SAVED!”. 22.5 Call back from Caller ID MemoryOption 11. With the handset on the base, select the required Caller ID memory locationby pressing the CLI button, then rotating the EASIDIAL selector.2. Press the DIAL/CALLBACK button. The display will show “PICK UP HANDSET”.3. Lift the receiver or press button. The display will show “DIALLING” and theconnection will be made.9