Slide Making Techniques
Slide Making Techniques
Slide Making Techniques
- No tags were found...

Create successful ePaper yourself
Turn your PDF publications into a flip-book with our unique Google optimized e-Paper software.
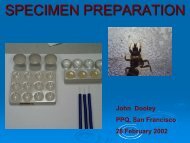
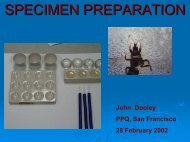
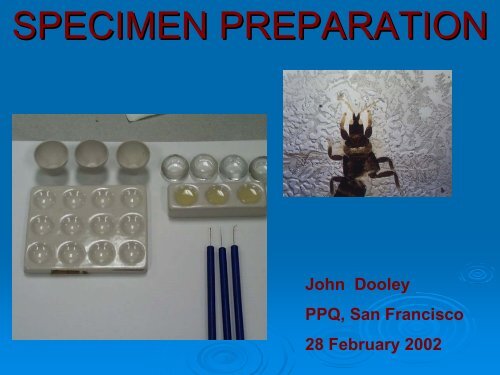
SPECIMEN PREPARATIONJohn DooleyPPQ, San Francisco28 February 2002
INTRODUCTION•Organisms• Tools•Chemicals• Safety & Health• References, Sources, & Links• Preparation of specimens• Specimen storages• Preparation & Mounting <strong>Techniques</strong>
ORGANISMSAcarinaTarsonemidae Tetranychidae OthersHomopteraCoccoideaAleyrodidae Aphididae CoccoideaDiaspididae Pseudococcidae OthersThripsThripidae Phlaeothrips nymphs
TOOLS1. Wilkey micro tool set (from Bioquip)2. slide warmer3. hot Plate4. spot plates or small specimen dishes or stender dishes (2 mmdiameter)5. crucibles6. microscope slides & 18 mm cover slips7. Funnel8. Beaker
Tools for <strong>Slide</strong> Mounting(Reference: Phil Johnson, SFO)• Tools/Equipment:– Wilkey’s Microtools (I also find you can make your own to suit yourtechniques/preferences out of insect pins and small wood dowels).– Small watch glasses– Coor’s color plates (for dessication in alcohol/clove oil and for staining)– Coor’s porcelain crucibles (for KOH)– Old 2 dram vials with caps (vinyl seal removed) for boiling mealybugs orplacing specimens in cold KOH.– Alcohol lamp (for boiling specimens)– Hot plate (for heating specimens in KOH solution)– Test tube holder (for holding vials over alcohol flame)– Essig’s, double stain, clove oil, alcohol.– Stereo zoom microscope (and older one you don’t mind using fordissections).– Fume hood (a MUST).– Convection oven (for curing slides) or a slide warmer.
Microtools
Chemicals Required1. AGA solution (Alcohol-Glycerin-Acetic Acid)2. balsam and other Mounting media3. Bleaching agent: Ammonia and Hydrogen Peroxide solution4. Carbo-Histoclear (Histoclear with dissolved phenol)5. Carbo-xylol (Xylene + 10% phenol)6. chloral hydrate ***requires DEA permit7. chloro-phenol◦ 50 grams chloral hydrate◦ 50 grams phenol◦ 5 ml water8. clove oil9. double stain10. essig’s aphid fluid11. ETOH=ethanol (70 & 90%)12. Histoclear (to thin Balsam) Manufactured by National Diagnostics, Atlanta GA 800-526-3867 (in a pinch citrus oil (orange or lemon) from a grocery store could beused)13. hoyers medium (needs DEA permit for Chloral hydrate)14. Maceration agent: Potassium or Sodium Hydroxide (10%)15. Phenol16. ROH=alcohol17. Terpineol18. Xylene
AGA SOLUTIONETOH8 parts by volumeWater5 parts by volumeGlycerin1 parts by volumeGlacial acetic acid1 parts by volume
Mounting Media Balsam-permanentThin with Histoclear Euparal-permanentpermanentThin with Euparal Essence Hoyers-temporaryNeeds DEA permit for Chlorohydrate Piccolyte Permount PVA-temporary
– chloral hydrate **– waterHoyers medium20 parts by volume**Needs DEA permit for Chloral hydrate5 parts by volume– gum Arabic granules3 parts by volume– glycerin2 parts by volumereference:http://www.extento.hawaii.edu/kbase/resource/slide_resource.htm
Maceration AgentsMaceration agents• KOH• NaOH14 pellets/50 mlBleaching agents• ammonia1 part by volume• hydrogen peroxide 6 parts byVolume
Essig’s s Aphid Fluid– lactic acid20 parts by volume– glacial acetic acid 4 parts by volume– phenol2 parts by volume– water1 part by volume
Nesbitt’s s Fluid(for old mite specimens stored in ROH) Chloral hydrate**40 grams Distilled Water25 cc Concentrated hypochloric acid2.5 cc** Note this requires a DEA permit(controlled substance)
SAFETY & HEALTH• Safety Precautions– Whenever heating specimens in vial or tube, always direct mouth oftube away from person and do not plug tube. Use appropriate tubeholders.– Antidote for Chloro-phenol is plenty of ETOH as per Susan Halbert ofDPI, Florida• MSDS Sheets• Many no longer use phenol, xylene, and other poisons because of healthissues. Always consult the MSDS sheets before using chemicals.• If using Chloral Hydrate, have a valid DEA permit on file.• If using phenol or other dangerous chemicals, use a portable or fixed hoodappropriate for the chemical.
Sources & Links• Van Water Rogers: http://www.vwrsp.com/ & Bioquip (URL): http://www.bioquip.com• COLLECTING AND PREPARING INSECTS AND MITES: TECHNIQUES ANDTOOLS BY M. SCHAUFF (SEL NATIONAL MUSEUM NATURAL HISTORY):– Collecting and Preserving Insects and Mites: <strong>Techniques</strong> and Tools• Dr. Susan Halbert (DPI, Florida)• Ray Gill (CDFA), retired• Dr. Greg Evans (PPQ, Beltsville)• Dr. Jon Martin (NHM, London)• Eric McDonald (PPQ, Houston)• Dr. Dug Miller (ARS, SEL)• Dr. Ron Ochoa (ARS, SEL)• Dr. Gary Miller (ARS, SEL)• Dr. Laurence Mound, CSIRO• Dr. Manya Stoetzel
VARIOUS SPECIMENPREPARATION TECHNIQUESBy Arthropod groupingsAcarina: R. Ochoa &E.McDonaldHomoptera: SEL-PPQPPQ-BMNHThysanoptera: S. BrodaEriophyiidsAleyrodids-dark: dark: DooleyPhlaeothripsOthersAleyrodids-light: light: DooleyOthersAphididae: G.Miller & S.HalbertCoccoidea: Diaspids-J.DooleyOthers- G.Evans & D.Miller
PREPARATION OF ACARINAPlease refer to theAcarina Powerpoint PresentationCreated by R. Ochoa, E. McDonald, & F. Salantri.
PREPARATION OF ACARINAMites other than Eriophyids.• Source: Systematic Entomology Lab1. Submit specimen dried or in alcohol2. May clear heavily sclerotized mites or large ticks inlacto phenol or heat in KOH solution.3. Place a drop of Hoyers medium in center of slide.4. Use needle (wetted tip) to remove mite from tissue orspatula to remove from alcohol.5. Place single specimen in medium. Orient mite in thefollowing way:• most dorsoventrally;• Acaridae & Tetranychidae laterally.6. Place cover slip on slide and heat on hotplate. Removeimmediately when bubbling starts.7. Place in Oven at 45-50 degrees for 24 hours8. To prevent the slide from drying out, ring the slidewith more hoyers medium after removing from oven.
MOUNTING TECHNIQUES: MITES(Reference-”Manual of Acaralogy” by Kranz (1971)• Best Quick/Dirty technique is Hoyers.– If received in ROH, try to puncture lateral side with very small micro pin or cutter.– If time is no issue, place specimens in lacto-phenol and leave at room temperature 24-48hours. Note that immersion more than 48 hours weakens the leg conjunctiva and shields oflight colored mites.– If time is a factor, heat shortly in lacto-phenol.– Wash specimens 3 to 4 times in a porcelain spot plate until solution is clear.– Place a drop of hoyers on the center of the slide.– Transfer specimen with micro spatula to the drop of hoyers– Use a microprobe to tease the mite to the bottom of the drop (never leave on surface whenapplying the coverslip-it will roll to the edge).– Apply the cover slip.– heat (no more than 45 o C) from 4 to 7 days.– Hold the heat treated slides for one week to observe if the media bubbles or contracts. If soadd more hoyers if the medium contracts.– Ring the slide with nonsoluable, such as zut or euparal. Apply a second coat when the slideis dried.
Mounting Procedures for Eriophyidae• The drawing to the right wasdistributed by Dr. Ochoa. Thefollowing structure areas(numbered) are essential for IDdetermination:1. prodorsal shield2. dorsal View3. lateral view4. genital shield (importance with females5. leg setae6. Feather claw (detail very important)
Mounting Procedures for Tetranychids• The drawing to the right wasdistributed by Dr. Ochoa. Thefollowing structure areas(numbered) are essential for IDdetermination:1. dorsal View2. region must show striae- very important forID3. males must be mounted with a lateralview.4. leg #1 must show setae5. empodium area must be visible (detail veryimportant)6. Ventral anal aperture area must be visible
ALEYRODID PREPARATION(Pupae only) Tech Paper no. 38,June 1999 (CSIRO)1. Macerate body contents in tube or vial by warming pupa (~80 degrees C) in a 10% KOH for5-10 minutes until contents become translucent.2. Decant excess macerant.3. “De-wax” the cuticle by gently warming specimens in any of the following media:carboxylol, carbo Histoclear, or Chloral-phenol.4. Decant de-waxing fluid5. Handling dark or pale puparia:a) Rinse dark puparia in strong alcohol and partially bleach cuticle cold in fresh mix of ammonia & hydrogenperoxide solution. Monitor the bleaching since it may be rapid. No need to stain. DO NOT USE HOUSEHOLDBLEACH.b) Stain pale puparia by adding acid fuchsin to solution of either glacial acetic acid, 100% isopropyl, or 95% ETOH.c) If the staining fails, excess wax still remains (repeat #3).6. Decant bleach/stain and rinse in Glacial Acetic acid or 95% ETOH.7. Complete final dehydration by soaking in glacial acetic acid, 100% isopropyl, or absoluteETOH.8. Clear specimens by addinga) A few drops of clove oil or histoclear while using Balsam; or,b) Euparal essence while using Euparal.9. Place specimen(s) in the mountant on a clean slide and orient both dorsally and ventrally ifmounting several specimens per slide. Let the mountant partially dry; add fresh mountantto cover slip and lay cover slip on slide.10. Adequately dry slides (balsam ay take up to two months). Recommend using only thickcard labels, not paper labels.
Dark Colored Aleyrodids-CorrectlyBleached• Note that the specimen needs to be light brown in colorshowing the legs, margin etc for Identification.
ALEYRODID PREPARATION(Adults & Pupae) per Ray Gill, CDFA.• Do not make incision as in other groups.• Remove specimens dried with a pin or small spatula from 70% alcohol to a crucible or other containercontaining a10% KOH solution. Clear for several hours or overnight (preferred). NEVER HEATSPECIMENS IN KOH!!!!!!!• Transfer to alcohol to wash and neutralize KOH. May add a few drops of Essigs Aphid Fluid.If you need to make a quick slide (quick & dirty mount), transfer specimen to Hoyers on a slidefrom the ROH and heat from 1 to several hours on a slide warmer and then following“Mounting specimen….” section below. Be sure to ring slide with more hours.• Transfer to Essigs fluid (with stain for adults & light colored pupae) and heat at 50 o C.– For adults with legs down/dorsum up.– Not necessary to submerge entire specimen.• Transfer to Cellusolve and tease with fine point needle (0 or 00 insect pin).– Return to Essigs if necessary & reheat• Place very thin, runny balsam on a slide (diluted with Xylene) to prevent the antennae & legs fromcollapsing.• Mount specimens on a slide with a propped cover slip.– Props should be vinyl or short lengths of monofilament fishing leader (0.25 mm in diameter).– For adults orient the specimens either dorsum up or lateral.– For pupa orient the specimens both dorsal & ventral sides up.– Thicker balsam should be added before applying the cover slip• Heat the slide on a slide warmer for several hours• Label the slide appropriately
Aphid Preparation as per SusanHalbert-DPI, FloridaPrepare and heat a water bath near but not boiling.Make slide labels use pencil or indelible ink.6 drops each terpineol & acetic acid in watch glass.Poke a role in lateral abdominal area.• Heat specimen in 95% ethanol one minute or until boiling, whatever is first. Decant liquid from tube (not theaphid).• Add 10% KOH (1/4th full) until aphid is translucent-do not boil to prevent forming bubbles. Do not leaveovernight.• Add 70% ETOH (3/4 th full) and cap tube, invert to mix. Decant liquid.• Cover aphid with chloro-phenol and heat 15-30 minutes until aphid is clear. Do not boil. May leaveovernight but cold-not on heat.• Pour into watch glass and gently pump abdomen to remove bubbles. If abdomen collapses, pumps thoraxto reinflate it for better mount.• Position aphid ventral side up with legs etc extended in a watch glass and add a 50-50 mixture of aceticacid and terpineol. Soak for 10 minutes. If legs collapse, leave in acid longer. Do not leave overnight.• Reposition in pure terpineol right side up. Leave 10 minutes (overnight is OK).• Place aphid on slide with balsam: orient right side up with legs, cornicles, antenna, and mouth parts (&wings) visible. Add cover slip and place on warmer for two weeks.
Aphid Preparation as per Manya Stoetzl(SEL, USNM)1. Place specimens in cold 10% solution of KOH (potassium hydroxide) for 24 to 48 hours to soften body contents. [Specimens should not be left in KOH any longer than isnecessary to soften body contents because KOH destroys or lightens the natural body color that is frequently used in identifications.]2. OR, Heat the KOH for 10-20 minutes (or until body contents have softened) on a hot plate set at 110 F. Make sure to cover specimen dish to prevent evaporation.3. Using a sharp probe or needle, make a small incision on the side of the abdomen. If several specimens are being prepared, vary the location of the incision so thatamong the specimens there are some complete left and right abdominal margins.4. With a small spatula or other tool, gently press down on abdomen and tease out body contents. If the body contents do not all come out after pumping, place specimensback onto hot plate for another 5 minutes or place into a solution of half dishwashing detergent-half distilled water for 3 minutes.5. Pump specimens in distilled water and leave for 5 minutes.6. If specimens are colorless, they can be stained with double stain. Leave in stain 5 minutes. If lighter stain is desired, mix stain with distilled water or 70% EtOH.7. Pump in 70% EtOH and leave for 5-10 minutes.8. Pump in 95% EtOH. If specimens are stained too dark, add water, a drop at a time, to remove some of the stain. Leave in 95% EtOH for a minimum of 5-10minutes.Note: The presence of water in legs or antennae can cause them to collapse so make sure specimen is in EtOH long enough.9. Transfer to clove oil for a minimum of 5 minutes. Gently pump specimens to remove excess EtOH. Specimens can be left overnight in clove oil if there is not time formounting on a slide.10. Place drop of thin Canada balsam in the center of a slide. [Thin balsam with histoclear instead of xylene.] Gently transfer specimens to slide. If specimens are smallenough to allow for mounting 3-4 or more on a slide, mount at least one ventral side up. When mounting specimens, representatives of all stages (aptera, alate, alatoidnymph, smaller nymphs) should be included on each slide as space and material allows. Place specimens on slide head pointed down with younger stages to the left andolder alate adults to the right. Do not mount aphid nymphs on slides without at least one adult.11. Carefully place cover slip over balsam. Place slide on hot plate to spread balsam evenly.12. Cure slides in a 110 F oven (40 C) for one month so the balsam is no longer soft. If no oven is available, slides can be left undisturbed for 2 months at room temperature.13. Place a slide label to the left of the cover slip which contains the following information if available: (/ represents the end of a line)Genus/ species Author/ Host/ date(7-IV-2000)/STATE or COUNTRY, City, County/Collector/ specimen ID numberTo remount a balsam mount place slide in histoclear to dissolve old balsam then follow mounting procedure.
Mounting APHIDS(Reference: Phil Johnson, SFO)• Make a small incision in side of the abdomen.• Place in cold KOH 24-48 hours.• Gently manipulate while in KOH to remove body contents.• Remove to water for several minute and continue to manipulate ifnecessary clear body contents.• Place overnight or longer in Essig’s for additional clearing. Ifmostly cleared, specimens can also go directly from KOH Essig’s. The “bubbling” that occurs as a result of the KOH mixingwith the glacial acetic acid in the Essig’s may “blow” out anymaterial still in the body.• Remove to 70% EtOH 100% EtOH clove oil.• Mount in Balsam (NO Euparal). Consistency should be slightlyviscous, but not watery. “Bake” at 40-50◦C for 1-2 weeks.
Coccoidea Preparation as per DougMiller (SEL, USNM)1. Place specimens in cold 10% solution of KOH (potassium hydroxide) for 24 to 48 hours to soften body contents. [Specimens should not be left in KOH any longerthan is necessary to soften body contents because KOH destroys or lightens the natural body color that is frequently used in identifications.]2. OR, Heat the KOH for 10-20 minutes (or until body contents have softened) on a hot plate set at 110 F. Make sure to cover specimen dish to prevent evaporation.3. Using a sharp probe or needle, make a small incision on the side of the abdomen. If several specimens are being prepared, vary the location of the incision so thatamong the specimens there are some complete left and right abdominal margins.4. With a small spatula or other tool, gently press down on abdomen and tease out body contents. If the body contents do not all come out after pumping, placespecimens back onto hot plate for another 5 minutes or place into a solution of half dishwashing detergent-half distilled water for 3 minutes.5. Pump specimens in distilled water and leave for 5 minutes.6. If specimens are colorless, they can be stained with double stain. Leave in stain 5 minutes. If lighter stain is desired, mix stain with distilled water or 70% EtOH.7. Pump in 70% EtOH and leave for 5-10 minutes.8. Pump in 95% EtOH. If specimens are stained too dark, add water, a drop at a time, to remove some of the stain. Leave in 95% EtOH for a minimum of 5-10minutes.Note: The presence of water in legs or antennae can cause them to collapse so make sure specimen is in EtOH long enough.9. Transfer to clove oil for a minimum of 5 minutes. Gently pump specimens to remove excess EtOH. Specimens can be left overnight in clove oil if there is not timefor mounting on a slide.10. Place drop of thin Canada balsam in the center of a slide. [Thin balsam with histoclear instead of xylene.] Gently transfer specimens to slide. If specimens aresmall enough to allow for mounting 3-4 or more on a slide, mount at least one ventral side up. When mounting specimens, representatives of all stages (adults,nymphs, and pupa males and females) should be included on each slide as space and material allows. Place specimens on slide head pointed down with youngerstages to the left and older adults to the right.11. Carefully place cover slip over balsam. Place slide on hot plate to spread balsam evenly.12. Cure slides in a 110 F oven (40 C) for one month so the balsam is no longer soft. If no oven is available, slides can be left undisturbed for 2 months at roomtemperature.13. Place a slide label to the left of the cover slip which contains the following information if available: (/ represents the end of a line)Genus/ species Author/ Host/ date(7-IV-2000)/STATE or COUNTRY, City, County/Collector/ specimen ID numberTo remount a balsam mount place slide in histoclear to dissolve old balsam then follow mounting procedure.
Mounting Aleyrodids & Coccoidea(Reference: Phil Johnson, SFO)• Pseudococcidae:– Make a small cut in the side, between 2nd and 3rd leg.– Place in KOH and gently boil until body contents have cleared.– Remove to water and gently manipulate specimen to clear body contents.– Use 100% alcohol to remove any stubborn wax.– Place over night in dye.– Remove from dye to 70% EtOH 100% EtOH clove oil.– Mount in Euparal or Balsam; “Bake” at 40-50◦C for 1-2 weeks.• Other Coccoidea and Aleyrodidae:– Place in KOH over low heat.– Make an incision in the body wall if needed.– Remove to water and gently manipulate specimen to clear body contents.– Use 100% alcohol to remove any stubborn wax – be gentle as the alcohol will make thespecimens fragile.– Place over night or longer in dye.– Remove from dye to 70% EtOH 100% EtOH clove oil.
Mounting Mealy bugs and Scales• While in isopropyl alcohol puncture it behind its last leg .• Place into a 10% potassium hydroxide solution (14 pellets in 50 ml water).• Gently pump and tease out the contents of the insect using a spatula. The scaleexuvia should be removed at this time.• Leave the insect in the solution at room temperature for 24 hours.• Transfer the insect into water to rinse off the potassium hydroxide.• Transfer into essig’s aphid fluid• Transfer the insect into 70% isopropyl alcohol to dehydrate.• Transfer the insect into 70% isopropyl alcohol with a drop of stain and leave for 30minutes.• Transfer the insect to cellusolve for 5 minutes (skip if mounting in Hoyer’s).• Mount the insect ventral side up using Canada balsam or Hoyer’s.• Allow the slides to dry for 10 to 14 days on a slide warmer.• Periodically check for air pockets. Remove them by adding Canada balsam orHoyer’s to the edge of the cover slip.• Slight heat may be necessary to displace the air pockets.• Ring the edge of the cover slip with Glyptal electric paint (skip if mounting in Canadabalsam). Two coats are needed to• keep out moisture.• Scrape away excess Canada balsam or Hoyer’s that seeped out of the cover slip.
Mounting Diaspids-Preparation• The above left image shows the diaspids in clove oil. Need to betranslucent to transparent. The above right two image show thelive scale insects (exuvia top and female below the exuvia).
Mounting Diaspids-slides• The pygidium for Diaspids must be“picture perfect for species ID (likeimage on the right). If with an internalparasite or blanketed with fungidiscard.If the stain does not hold onthe permanent mount, OK to submitusephase contrast.• Note the internal eggs-try to removebut still sufficient to submit.
<strong>Techniques</strong> for preparingMicroslides for Thrips[As used at Canberra for thrips by Dr. Laurence Mound-CSIRO]• COLLECTING– Thrips are best collected into a fluid known as AGA, a mixture of 10parts of 60% ethyl alcohol with 1 part of glycerine and 1 part of aceticacid. This mixture helps to distend the body of most thrips and keepsthe body parts supple. However, 80 - 95% alcohol followed by storagein a freezer may still yield good microscope slides, and the unmountedspecimens are useful for DNA studies. In 2006 this is the collectingfluid that I am using generally, BUT I DO NOT YET KNOW HOWLONG SPECIMENS CAN BE PRESERVED THIS WAY – CERTAINLYTHEY MUST BE KEPT IN A FREEZER.
<strong>Techniques</strong> for preparingMicroslides Con’t• SLIDE PREPARATION FOR ROUTINE IDENTIFICATIONS– The following method, using a water-soluble mountant, is rapid andthus relatively inexpensive. <strong>Slide</strong>s prepared in such media are not‘permanent’, but can remain useable for several, or even many, years.This method is recommended for all routine identification work, and isparticularly appropriate for larvae and for small pale adults. Note theimportance of placing newly prepared slides onto a hot-plate or in anoven for several hours, because specimens often collapse initially butthen recover slowly when heated.• 1. Remove the specimens from the collecting fluid into clean 70% alcohol.• 2. If the specimens are reasonably flexible attempt to open the wings and straightenthe antennae using micro-pins (see below).• 3. Place a drop of Hoyers Mountant onto a cover slip (13mm circle, No. 0 or 1).Place a thrips into this drop, ventral side uppermost, and gently lower a slide ontothe drop. Invert the slide as soon as the mountant has spread sufficiently.• 4. Place immediately into an oven, or onto a hot-plate, at about 40-50°C. Leave for 6hours before attempting to study.• 5. Leave in the oven for about 3 weeks to dry the mountant, then ring with nailvarnish, and label appropriately (see below).• COMMENTS - The cover slip used should be small — large cover slips crushspecimens and need more mountant. The traditional method of mounting aspecimen onto a slide and then placing the cover slip onto this with forceps is moredifficult and often introduces bubbles of air
<strong>Techniques</strong> for preparingMicroslides Con’t• SLIDE PREPARATION FOR TAXONOMIC RESEARCH– The objective is to prepare specimens onto slides with their shape andcolour retained in a condition as close as possible to the natural, livingstate but with the body cleared so that surface detail is visible. Thisideal is difficult to achieve, and a compromise must be adopted.– Most specimens should be macerated gently to reveal fine details ofbody sculpture and minute setae. A few specimens should beprepared for study without maceration in order to preserve theirnatural colouration.– TOOLS: Specimens can be manipulated with fine micro-pins,mounted in sealing wax on match sticks. Use a pair of such pins, onestraight the other with the apex bent. A simple lifting tool to movespecimens from one dish to another can be made from a small loop offine wire. Alternatively, alcohols can be changed in dishes using anhypodermic needle or fine glass pipette. The most appropriate dishesto use are ‘excavated blocks’ — glass blocks 15mm high and 40mmsquare with a median excavation of about 5ml volume, and with aglass lid to prevent evaporation.
<strong>Techniques</strong> for preparingMicroslides Con’t– MACERATION• The objective of maceration is to remove the body contents. This is done bysoaking the specimens in a weak NaOH solution for an appropriate period— NaOH solution seems to cause less damage to the body surface thanKOH solution. The length of the period of treatment must be determined byexperiment.• Students are recommended to experiment with very weak NaOH solution(2%) for longer periods, such as overnight (for black specimens evenlonger), because a long, slow process is more easily controlled thanattempting to get results quickly. Maceration should always be carried outat room temperature; heating causes damage to setae and the bodysurface. Note that this contrasts with the techniques used forpreparation of aphid and coccid specimens.– 1. Place up to 20 thrips into clean water in an excavated block, but fewer specimens if theyare very large; it is best if the specimens float with their wings on the surface. Leave for 1 to3 hours.– 2. Add to the water an equal volume of 5% NaOH solution. Pale specimens may requireonly one hour, but I usually leave specimens overnight in this weak solution. Blackspecimens may be left for 2 or more days. This period can be determined only byexperience, but should always be as short as possible to minimise damage.– 3. Transfer the specimens from NaOH solution to water for a few hours, using a needle orwire loop. Gently massage each specimen to expel most of the body contents, and spreadthe legs and antennae.– 4. Store the specimens in 60% alcohol for 12 to 24 hours
<strong>Techniques</strong> for preparingMicroslides Con’t– DEHYDRATION• Alcohols and clove oil will absorb water from the atmosphere if notprotected, particularly under warm humid conditions. The objectiveof the dehydration schedule is to remove water, then to render thespecimens translucent with clove oil. Clearing can be improved bymassaging each specimen gently with the back of the bent needle.– 1. Replace the 60% alcohol with 70% alcohol and leave for about 1hour; unmacerated specimens must be punctured to speed the entry ofalcohols, and the legs, antennae and wings should be spread.– 2. Replace with 80% alcohol and leave for 20 minutes.– 3. Replace with 95% alcohol and leave for 10 minutes.– 4. Replace with absolute alcohol and leave for 5 minutes.– 5. Replace with fresh absolute alcohol and leave for another 5 minutes.– 6. Transfer to clove oil and leave for about half an hour beforemounting.
<strong>Techniques</strong> for preparingMicroslides Con’t– MOUNTING: To facilitate this process it is best first to prepare asmall mounting block. This is done by fixing to the centre of amicroscope slide a 2mm deep layer of 1 inch square white card.Mark the centre of this with crossed lines, and then cover itsecurely with plastic tape to provide a clean, shiny surface.• 1. Place a clean 13 mm diameter cover slip onto the mounting block; put adrop of Canada Balsam onto the centre of the cover slip and into this placeone thrips specimen ventral side uppermost.• 2. Spread the legs and wings, and straighten the antennae by pressing on thebasal segments with a fine needle.• 3. Invert a clean microscope slide and lower it firmly but gently onto thespecimen in balsam on the cover slip. As soon as the surfaces touch, reinvertthe slide with the coverslip adhering; this technique usually avoids theinadvertent introduction of bubbles which ruin so many students' slides.[Sometimes it helps to place a small drop of balsam (or xylene if the dropplaced on the cover slip was found to be too large) in the centre of the slidebefore touching the balsam of the cover slip.]• 4. Place the slide onto a hot-plate at once, at about 45°C, to drive off thexylene as quickly as possible. Then dry the slides until they are hard in anoven at about 45°C for several weeks. The quantity of balsam must besufficient - after it has dried - to support the coverslip without distorting thespecimen.
<strong>Techniques</strong> for preparingMicroslides Con’t– LABELLING: An insect specimen is of limited valueif it is not labelled with its original data.• 1. With the head of the thrips directed toward you, the righthand label should indicate the host plant, followed by thecountry (in capital letters) and then the locality and date, withcollector's name (and code number).• 2. The left hand label should indicate the sex, morph andgenus and species names with author, with sufficient roomleft for any special notes to be added about that particularspecimen e.g. measurements, number of wing setae etc.
Mounting Thysanoptera(Reference: CAB #2, BMNH by Dr. Mound et al)• Let specimen stand in 5% NaOH (during this stage you may puncture the insect behind the hind coxae. Spread thelegs and antennae. Only spread the wings when you are about to remove the specimen from NAOH. )– ½ hour for light colored thrips– Up to 4 hours for dark colored thrip[you may need to soak the dark thrips in H 2 O 2 /NH 4 soution-but monitor the bleaching to prevent overbleaching.]• Replace the NaOH with water. Slowly add 50% ROH.• Replace effluent with 60% ROH and store for a minimum of 24 hours.• Next dehydrate specimen to remove all water:– Replace 60% with 70% ROH and let stand for one hour.– Replace 70% with 80% ROH and let stand for 20 minutes– Replace 80% with 95% ROH and let stand for 10 minutes– Replace 95% with absolute ROH and let stand for 5 minutes– Refresh 95% ROH and let stand for 5 minutes– Transfer specimen to clove oil and let stand for one hour• Apply drop of balsam on slide.• Transfer one thrip-ventral side up to the balsam.• Spread legs, antenna and wings• Add cover slip• Haet at 37 o C until hard.• Note: this publication also covers using a “mounting block” first before before placing on a slide. Please refer to thepublication.
• Thrips (routines):Mounting Thysanoptera(Reference: Phil Johnson, SFO)– Make a small incision (a “poke with a fine needle) in side of the abdomen.– Place in cold KOH for 24-48 hours.– Gently manipulate while in KOH to remove body contents.– Remove to water for several minutes and continue to manipulate if necessary clear body contents.– Place overnight or longer in Essig’s (adults).– Place overnight or longer in 50% Essig’s/50% double stain (immatures).– Remove from Essig’s or dye to 70% EtOH 100% EtOH Clove Oil.– Mount in a thin, almost watery consistency of Balsam directly from 100% EtOH or Clove Oil. Body parts caneasily collapse in thicker Balsam. DO NOT USE EUPARAL. “Bake” at 40-50◦C for 1-2 weeks.• Thrips (urgents):• OR– Place directly in Hoyer’s and apply gentle heat to clear.– Make a small incision (a “poke with a fine needle) in side of the abdomen.– Place in KOH over low heat.– Gently manipulate while in KOH to remove body contents. Specimens need not be totally cleared – Hoyer’swill assist in an additional clearing.– Remove to water or 70% EtOH for several minutes for remove excess KOH.– Place directly in Hoyer’s and apply gentle heat.
MACERATION/BLEACHING OF DARKCOLORED THRIPS• Most Phlaeothripid adults need to be bleached-if they do notlighten after maceration. The center image, courtesy of Dr.Mound at CSIRO, shows a satisfactory mount
Thysanoptera: light colored& larvae• Adult brown adult light larvae• Remember: NEVER STAIN ADULT THRIPS. Larvae may be stained or not
LABELING TECHNIQUESPlease follow the following diagram for properlabeling of all slidesFamilyCountryGenus/species/author specimen HostSexDate collectedName (determined by)name of collectorName (if confirmed by)acct/ID/PIN numberMounting mediumTetranychidae [family]Tetranychus urticae Koch[genus species author]Male [sex]J.Dooley [determined by]Conf: R. Ochoa (confirmed by)Hoyers [mounting medium]JapanMalus sylvestris (fruit)Date: II-01-2001Coll: John Dooley[collected by]SFO 101250 CA[PIN/acct number]
MOUNTING DEFICIENCIES<strong>Slide</strong> DebrisCHEMICAL AGENTSBleaching agents• Ammonia• Hydrogen Peroxide• Clorox1. Water contamination2. PVA etc mediumcrackingBIOLOGICAL AGENTS1. Disease agents• Aschersonia• Sooty Mold• Various fungi2. Arthropod agents• Hymenoptera3. Wax Residue• Stain interference
Soiled <strong>Slide</strong>sMinor amount of debris-keep itto a minimum to avoid interferingwith the view.
BLEACHING PROBLEMSMixing NH4 (AMMONIA)/ H2O2 (PEROXIDE)Cloroxvs.(DANGER!!!!!) -DO NOT MIX CLOROXWITH AMMONIA!)• Upper right image shows Aleurocanthus that isover-bleached.• Lower right shows Aleurocanthus when householdbleach (Clorox) is used-no control over the bleach.• Below shows Aleurocerus not bleached enough.
Medium cracking/Wax residue• The image to the right showsthe PVA mounting mediacracking and shrinking fromimproper preparation. Also thespcimen was underbleached.• The image to the right did pickup minimal stain but the waxwas not completely removedblurring the structures andinterfering with the stainingprocess.
Biological Agents• Note the fungi attacking the diaspid(Discard any pests attacked by fungi-makepoor mounts):– Aschersonia– Sooty MoldAschersonia– Other fungi• Hymenoptera internal parasites– Chalcicoidea larva internal parasite foundinside the diaspid Pseuaulacaspisbrimblecombei on Protea from Australia.– Most internal parasites interfere withmounting techniques-discard them.