26a red wing lathe operating manual - Handler Manufacturing
26a red wing lathe operating manual - Handler Manufacturing
26a red wing lathe operating manual - Handler Manufacturing
- No tags were found...
You also want an ePaper? Increase the reach of your titles
YUMPU automatically turns print PDFs into web optimized ePapers that Google loves.
26A RED WING LATHEOPERATING MANUALIMPORTANT INSTRUCTIONSWARNING!FOR YOUR SAFETY PLEASE READ INSTRUCTIONSBEFORE OPERATING TOOL & WEAR EYE PROTECTIONFD.06/2009
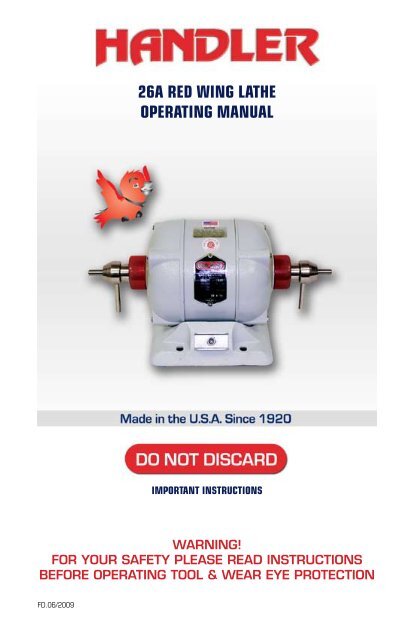
THANK YOU FOR PURCHASING A HANDLER PRODUCTThank you for purchasing a HANDLER’s Red Wing Lathe.Open the carton and inspect all contents. Your 26A was inspected several timesduring the manufacturing process, plus as a completed unit after it was built andtested.Should damage have occur<strong>red</strong>, please contact the freight forwarder, immediately.Failure to contact the freight forwarder, immediately, will result in the loss of yourrights to place a claim for possible external or internal damage.After you have contacted the freight forwarder, please contact your distributoradvising that you have received a unit which sustained damage, detailing thepossible damage and requesting they contact <strong>Handler</strong>. Possible damage MUSTBE CLAIMED by the receiver of the product, not the sender.RED WING MOTORYour Red Wing has been inspected prior to being shipped. Open the package andinspect its contents. Should damage have occur<strong>red</strong> in transit, contact the freightforwarder immediately. Do not contact <strong>Handler</strong> as the receiver of a product mustfile a claim for damage within 14 days. Failure to file a claim in a timely mannercould result in the loss of your rights of recovery. Should you require assistance,please contact <strong>Handler</strong> <strong>Manufacturing</strong> at: 1-908-233-7796 or 1-800-274-2635CAUTION!BEFORE Connecting and Operating!Unpack Accessories from UnitFor Your Protection EXAMINE THE GOODS.26A Red Wing Lathe Instruction
WARNING!SAFETY INSTRUCTIONS!WARNING FOR YOUR SAFETY:READ INSTRUCTIONS BEFOREOPERATING TOOL.WEAR EYE PROTECTION!ALL ELECTRICAL ITEMS WITH A CORD SET:Repair or Replace Damagedor worn cord Immediately.Do not expose to rain or use indamp locations.ADVERTISSEMENT:Ne Pas Exposer a la pluieet ne pas utiliser dans lesemplacements humides.26A Red Wing Lathe Instruction
CHUCK REMOVAL INSTRUCTIONSCHUCKREMOVERPUSH ON AND TAP IN PLACETURN MOTOR OFFPULL HANDLE UPWARD TO REMOVE CHUCKFIGURE 1Remove the <strong>lathe</strong> from the carton and place it in a suitable location on a sturdy horizontal surface.The unit must be bolted to the table top. Bolting the unit securely to a solid table top will preventpossible <strong>lathe</strong> movement during operation and possible operator injury.Plug the <strong>lathe</strong>’s cord set into a grounded 115 Volt/60 Hz electrical socket only. Do not utilize a3-2 prong adapter. Failure to plug the <strong>lathe</strong> into a properly grounded receptacle may result inoperator injury. Your <strong>lathe</strong> is now ready for operation with the aid of chucks placed on the shaft (seeinstructions).The No. 26, 26A, 26L, and 28H <strong>lathe</strong>s are constructed to function on two speeds. Low speed is1725 RPM and high speed is 3450 RPM. The <strong>lathe</strong> shaft is provided with special dental tape<strong>red</strong>shafts which will accept chucks which fit onto a tape<strong>red</strong> shaft only. The models 27, 29, & 29A arebuilt to function at 3450 RPM. NOTE: if you have specified that your <strong>lathe</strong> should contain 1/2” straightshafts, only chucks which contain a 1/2” arbor hole will adapt to these shafts.The polishing motor with a tape<strong>red</strong> shaft is provided with a left and right chuck remover (see figureNo. 1). By pulling upward toward the front of the <strong>lathe</strong>, the chuck remover will unscrew outward to“push” the chuck from the tape<strong>red</strong> shaft. Various types of chucks and chuck accessories are utilized toperform different types of grinding and polishing operations with your <strong>lathe</strong>. These are attached to your<strong>lathe</strong>’s shaft via a friction fit.To place a chuck onto the shaft of your <strong>lathe</strong>, please follow these instructions:1. Make certain both the <strong>lathe</strong>’s shaft and the arbor hole of the chuck to be placed onto the shaft areclean of any dust and debris. Be certain the chuck remover on each side is in place.2. With the <strong>lathe</strong> turned “OFF”, place the chuck onto the right or left shaft of your <strong>lathe</strong>. DO NOTplace a chuck labeled “R” or “L” on the opposite shaft. (See Instructions on follo<strong>wing</strong> page.)3. Push the chuck onto the shaft as far as it will go. Since the chucks fit onto tape<strong>red</strong> shafts viafriction fit, make certain the chuck is placed securely on the <strong>lathe</strong> shaft. It may be necessary totap the end of the chuck onto the <strong>lathe</strong> shaft with the aid of a soft rubber, plastic or leathermallet. Do not use a metal hammer or mallet as this will damage the chuck.4. After the chuck has been placed securely on the <strong>lathe</strong> shaft, place the buff, brush, abrasivewheel, bur or mandrel onto the chuck. Secure this in place as per the manufacturers suggestions.5. Turn the <strong>lathe</strong> on and make certain the accessory which has been placed on the <strong>lathe</strong> chuck issecurely in position. If either the chuck or accessory have not been secu<strong>red</strong> to the <strong>lathe</strong> shaft,secure it now.NOTE: Many Red Wing polishing motors are shipped with 1/2” straight shafts. Chucks used on RedWing Polishing motors equipped with a 1/2” straight shaft utilize a set screw to hold the chuck inposition. Make certain to tighten this securely.26A Red Wing Lathe Instruction
CARE AND MAINTENANCEPROTECTION - IMPORTANT1. Never attempt to use a polishing motor without proper instruction.2. Never use a polishing motor unless the motor has been fitted with polishingsplash hoods or a similar protective device containing a protective shield.3. Always use a dust collector when performing polishing or grinding operations.4. Read and follow all instructions contained in this <strong>manual</strong> regarding “tool safety.”<strong>Handler</strong> manufactures a full line of Chucks, Splash Hoods, Dust Collectors, andProtective Shields. Contact us at the number below to request a <strong>Handler</strong> Catalogue.CHUCK REMOVALAfter finishing and completing a polishing or grinding operation, you may wish to removethe chuck accessory and change to another type of chuck or accessory. This is completedas follow:1. Turn the <strong>lathe</strong> off and allow the shaft to come to a complete stop.2. Using the chuck remover located on the left or right side of the <strong>lathe</strong>, pull upward onthe remover’s handle. This will push the remover outward, and push the chuck fromthe <strong>lathe</strong> shaft, (See Figure 1. Page 4).A few chucks may require the chuck remover to be rotated 360 Degrees before thechuck accessory is removed. Chucks fitted to polishing motors containing a 1/2”shaft are removed by loosening the set screw which holds it in position.3. To place another chuck onto the <strong>lathe</strong> shaft, follow the procedure listed on this page.CARE AND MAINTENANCEYour Red Wing polishing motor has been fitted with ball bearings. No further lubrication isnecessary during the life of your motor. Occasionally remove the motor’s cord set from itselectrical source and wipe the unit clean with a clean, soft cloth. DO NOT use abrasive orliquid cleaners. Read, fully, the safety instructions contained on page 6.ACCESSORIES<strong>Handler</strong> manufactures a full line of Chucks, Protective Hoods, Shields, and Dust Collectorsfor use with your Red Wing motor. <strong>Handler</strong> chucks are precision manufactu<strong>red</strong> to fit ontoyour Red Wing motor. A few of these are described below.The No. 7 L or R chuck is made to accommodate buffingwheels and brushes for polishing acrylic dentures, plastics,and metals. The threads contained on the tape<strong>red</strong> portionof the chuck’s frontal surface secure the buff or brush inposition.<strong>Handler</strong>’s 8T Jacobs type chucks are made to accommodatefrom 3/32” to 1/4” burs and mandrels. It is manufactu<strong>red</strong>for gross finishing26A Red Wing Lathe Instruction
Chucks and Chuck Changers<strong>Handler</strong>’s No. 18 Atlas Jacobs type chuckis precision ground to provide excellentconcentricity and durability. This chuck willaccommodate burs and mandrels from 0” to1/4” in diameter. Available for right side ONLY.Our No. 9 Arbor band chucks are built toaccept 3/4” x 3/4” abrasive bands. These areused for gross finishing of plastics or metals -Right or Left.<strong>Handler</strong>’s No. 1-6 stone chucks are built toaccept abrasive stones and <strong>lathe</strong> wheels with5/16”, 3/8” and 1/4”, arbor mountings for theright and left side.1 - 3/8” R 4 - 5/16” L2 - 3/8”L 5 - 1/4” R3 - 5/16” R 6 - 1/4” LNote: Specify a No. 20 L or R chuck for apolishing motor with a straight 1/2” shaft.No. 18 Atlas JacobsNo. 9 Arbor band chucksNo. 1-6 stone chucks<strong>Handler</strong> has designed and built a full line ofautomatic chucks which will adapt to your RedWing or other polishing motors. <strong>Handler</strong>’sautomatic chucks are durable and built tosave processing time and money.16 Chuk/ChangerThe <strong>Handler</strong> Chuk/Changer was designed toprovide full automatic, precision changing of1/4” and 3/32” diameter burs, mandrels andchuck accessories with the slight movementof a handle while the motor is turning.The Chuk/Changer provides the technicianwith exacting concentricity and quick, easychanging of various chucks which greatlyspeeds grinding, polishing and finishingprocedures. The No. 16 Chuk/Changer isadaptable to most types of dental motors,including older models e.g. R&M, Ritter,Baldor, Emesco and Red Wing.NOTE: Specify make, model and catalogue numberof <strong>lathe</strong> when ordering 16L Chuk/Changer is for useon left side of motor.The No. 16 is shipped completewith chuck accessories as follows:(1) P-16-15 Arbor Band Chuck(1) P-16-16 Spiral Tape<strong>red</strong> Chuck(2) P-16-19 Stone Chucks(2) P-16-20 Mandrels - for smallabrasive wheels.(1) P-16-8 Collet Wrench(1) P-16-10 Clutch(1) P-16-ADW Adapter26A Red Wing Lathe Instruction
RED WING LATHE PARTS LIST(1) PARTS LIST:Locate part number on diagram. Specify, on order, identifying part number. Supply all dataon nameplate of your Red Wing Lathe - especially the serial number appearing on the lastline. (L = Left; R = Right)PARTS:No.1 Chuck Remover (Throw Off) -Specify L or RNo.1a Chuck Remover Male Part -Specify L or RNo.1b Chuck Remover Female Part -Specify L or RNo.1c Handle for Throw-offNo.2 Chuck Remover -set screw for male partNo.3 End Bell - one speed -Specify L or RNo.4 Spacing WashersNo.5 Spring WashersNo.5a Bearing spacer - one speed -Specify L or RNo.6 Thru-Bold with nutsNo.7 Bearings - two per set -for right and left side - 1- and 2-speed <strong>lathe</strong>s.No.8 Rotor -specify whether 1 or 2 speed <strong>lathe</strong>No.9 Centrifugal Switch -specify whether 1 or 2 speed <strong>lathe</strong>No.10 Field Ring - specify whether 1 or2 speed <strong>lathe</strong>No.11 Stator - specify whether 1 or 2speed <strong>lathe</strong>No.12 Hood Switch - specify whether 1 or2 speed <strong>lathe</strong>No.13 Insulating Washer - for hoodswitch - one speed <strong>lathe</strong>No.14 Supply Cord - including 2 prongadaptorNo.14a 2 prong adaptor onlyNo.15 Switch - two speed (toggle)No.15a Switch - one speedNo.16 Switch WasherNo.17 Base, Low - 4 1/2” shaft heightNo.17a Base, high - 6” shaft heightNo.18 Base Bolts and Washers -low base (4-2 speed, 2-1 speed)No.19 Base PlateNo.20 Rubber Base Grommets (set, 4)No.21 Screws for above (set, 4)No.22 Lubri-Plate - 1 3/4 oz tube26A Red Wing Lathe Instruction
OSHA RECOMMENDED SHIELDS<strong>Handler</strong> has designed and built a full line of automatic chucks which will adapt to your RedWing or other polishing motors. <strong>Handler</strong>’s automatic chucks are durable and built to saveprocessing time and money.PROTECTIVE SHIELDS AND HOODSPolishing and Grinding must be completed with the addition of a protective hood with shieldor a protective shield, <strong>Handler</strong> manufactures a full line of protective hoods and shields toprotect the technician from possible flying dusts and debris. Below are three examples ofthe various types available.The 86D hood shield provides adjustable protection for the technician. Constructed ofEver-brite aluminum, it contains an adjustable 6”x9” clear acrylic shield to help protect thepolisher. Hoods are available in 6”x8” and 10” widths. Resin Hoods available in 6” width ONLY.The protector was designed to provide protection from possible flying debris. Constructedof 3/8” clear acrylic, the protector offers excellent protection for <strong>lathe</strong> and hand piecegrinding.Protect yourself from UNIDENTIFIED FLYING OBJECTS. The New #26SHLD shield from<strong>Handler</strong> mounts directly to your <strong>lathe</strong>. Made of 8” x 6” x 1/8” clear Polycarbonate, fullyadjustable, replaceable shield, helps comply with OSHA requirements. Comes with allmounting hardware, Contact your dealer or <strong>Handler</strong>.<strong>Handler</strong> manufactures a full line of protective hoods, shields, and dust collectors.To obtain a <strong>Handler</strong> catalogue illustrating our hoods, shields, and dust collectors, visit ourwebsite at: WWW.HANDLERMFG.COM or call 1-800-27HANDL (1-800-274-2635)79 86D 26SHLD26A Red Wing Lathe Instruction
GROUNDING AND TOOL SAFETY1. GROUNDING INSTRUCTIONSThis tool should be grounded while in use to protect the operator from electric shock.The tool is equipped with an approved three-conductor cord and three-prong groundingtype plug to fit the proper grounding type receptacle. The green (or green and yellow)conductor in the cord is the grounding wire. Never connect the green (or green and yellow)wire to a live terminal. If your unit is for use on less than 150 volts, it has a plug that lookslike that shown in sketch (A) in Figure 1. If it is for use on 150 to 250 volts, it has a plugthat looks like that shown in sketch (B). Use of an extension cords or a 2 prong adapter isnot recommended.2. TOOL SAFETY INSTRUCTIONS1. Keep Work Area Clean: Clutte<strong>red</strong>areas and benches invite accidents.2. Avoid Dangerous EquipmentDon’t expose power tools to rain.Don’t use power tools in damp or wetlocations. Keep work area well lit.3. Keep Children AwayAll visitors should be kept safe distancefrom work area and appliance.4. Store Idle ToolsWhen not in use, tools should be sto<strong>red</strong>in dry, high, and locked location out ofthe reach of children.5. Don’t Force ToolIt will do the job better and be safe atthe rate for which it was designed.6. Use Right ToolDon’t force small tool or attachment todo the job of a heavy-duty tool.7. Wear Proper ApparelDo not wear loose clothing or jewelry whichmay get caught in moving parts. Tie backlong hair or use a proper hair net.8. Use Safety GlassesUse safety glasses with all rotating tools.Also use a face or dust mask if cuttingoperation is dusty.9. Don’t Abuse CordNever carry tool by cord or yank it todisconnect from receptacle. Keep cordfrom heat, oil, and sharp edges.10. Secure WorkUse clamps or a vise to hold work. It’ssafer than using your hand and it freesboth hands to operate tool.11. Don’t OverreachKeep proper footing and balance at alltimes.12. Maintain Tools with CareKeep tools sharp and clean for best andsafest performance. Follow instructions forlubricating and changing accessories.13. Disconnect Tools and TURN OFF.When not in use; before servicing; whenchanging accessories such as blades, bits,cutters, etc.14. Avoid Accidental Starting this and any otherappliance. Be sure switch is OFF whenplugging in.26A Red Wing Lathe Instruction
IMPORTANT NOTICEWHAT SHOULD YOU DO TO RETURN GOODS1. Our terms of sale are F.O.B. our plant. <strong>Handler</strong> makes every effort to insure theproper delivery of goods, but we cannot guarantee the carrier’s performance. Eachproduct is tested and inspected for proper performance prior to leaving our facility.The responsibility for damage in transit is the carrier’s, whether it is visible damageor concealed damage.2. Inspect this shipment IMMEDIATELY. Insist that visible damage or possible damagebe written on the Delivery Receipt by the receiver.3. Inspect the contents of your shipment within 24 hours of receipt. Using your copyof our packing list, check for piece count and accuracy immediately to insure properbilling.4. If damage is discove<strong>red</strong>, save all crates, cartons and packaging material until aninspection has been made by an agent of the carrier.5. In case of damage, notify the delivering carrier IMMEDIATELY requesting that aninspection be made. Retain a copy of the inspection request for claim purposes.Failure to notify the freight carrier immediately will result in the loss of your rightsto claim damage.6. We have taken every precaution to insure safe arrival of your products. We cannotbe responsible for negligence by another party.7. The receiver of the goods must make claims for incorrectly shipped goods to theshipper within 15 days of receipt of delivery.RETURNING GOODS1. DO NOT return merchandise without our authorization. You must call first for a returnauthorization number.2. We will not accept returned merchandise from the carrier unless our authorizationNUMBER has been issued, and is clearly marked on the outside of the carton.3. We will not accept goods (i.e. dust collectors) that are not cleaned and free of dustand debris. The merchandise will be shipped back. This is in compliance with OSHAregulations.HANDLER MFG.612 NORTH AVENUE EAST, WESTFIELD, NEW JERSEY 0709026A Red Wing Lathe Instruction 10
NOTES26A Red Wing Lathe Instruction 11
WARRANTYThis HANDLER product is warranted to be free from defects in material and workmanship,when used under the conditions recommended by the manufacturer, and/or the purpose forwhich the product was intended, for a period of 12 months from the date of shipment fromfactory to job site of original owner. Products purchased from distributor warehouse stockare warranted for a period of 18 months from date of shipment from the manufacturer’swarehouse.In all cases, the full name and address of the distributor must be supplied, along with thename of the customer, product name and number, and serial number. A copy of the originalinvoice, sho<strong>wing</strong> date of purchase must accompany the warranty repair request.This warranty will apply to equipment installed, operated and maintained in accordancewith HANDLER procedures and recommendations.During the life of this warranty, HANDLER will repair or replace (At HANDLER’s option)free of charge. F.O.B. its plant, any defective part or assembly, if such defect occur<strong>red</strong> innormal service and was not due to apparent misuse, abuse, or accident.Any warranty service performed in the field must be authorized by HANDLER MFG.Unauthorized service voids the warranty and any resulting charge will not be paid byHANDLER MFG.HANDLER MFG. makes no other warranties or guarantees, expressed or implied.The merchantability of the components is expressly excluded. The manufacturer assumesno liability for indirect or consequential damages.Detach or copy and mail back to the address below.-------------------------------------------------------------------------------------------------------------------------Customer Name:Address:City: State: Zip:Model No.:Distributor:Distributor’s AddressSerial No.:Return to HANDLERHANDLER MFG.612 NORTH AVENUE EAST, PO BOX 520WESTFIELD, NEW JERSEY 07090-0520


