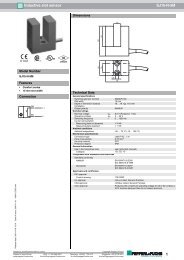
BA307E, BA327E, BA308E & BA328E intrinsically safe ... - Ex-Baltic
BA307E, BA327E, BA308E & BA328E intrinsically safe ... - Ex-Baltic
BA307E, BA327E, BA308E & BA328E intrinsically safe ... - Ex-Baltic
- No tags were found...

Create successful ePaper yourself
Turn your PDF publications into a flip-book with our unique Google optimized e-Paper software.
239.3.10 Alarm silence time: SiLThis function is primarily intended for use in smallinstallations where the alarm output directlyoperates an alarm annunciator such as a sounderor beacon. When the alarm silence time, which isadjustable between 0 and 3600 seconds in 1second increments, is set to any figure other thanzero, the P push-button becomes an alarm acceptbutton. After an alarm has occurred, operating theP button will cause the alarm output to revert to thenon-alarm condition for the programmed alarmsilence time. If the alarm condition still exists atthe end of the silence time, the alarm output will bereactivated. During the silence time the indicatoralarm annunciator will flash until the silence timeexpires or the alarm is cleared.If the ‘FLSH’ function, which flashes the indicatordisplay when an alarm occurs has been enabled,it will only function when the alarm output isactivated, not during the silence time. See section9.3.11To adjust the alarm silence time select 'SiL' fromthe alarm configuration menu and press P whichwill reveal the existing silence time. The flashingdigit of the silence time can be adjusted using the▲ and ▼ push-buttons, and the P button to movecontrol to the other digits. When the requiredsilence time has been entered press E to return tothe alarm menu.9.3.11 Flash display when alarm occurs ‘FLSH’In addition to the two alarm annunciators on thetop left hand corner of the indicator display whichshow the status of both alarms, this functionprovides an even more conspicuous indication thatan alarm condition has occurred.When enabled, the function alternates the indicatordisplay between the numerical value and the alarmreference, ‘ALr1’ or ‘ALr2’, when the alarm outputis activated. If both alarm outputs are activated,the alarm references are displayed in sequence.To enable or disable the function select 'FLSH'from the alarm menu and press P which will revealthe current setting ‘on’ or ‘oFF’. The function canchanged by pressing the ▲ or ▼ button followedby the E button to return to the alarm menu.9.3.12 Access setpoint in display mode: ACSPThis function enables a separate menu providingaccess to the alarm setpoints from the displaymode by simultaneously operating the P and ▲push-buttons. An operator can therefore adjust thealarm setpoints without having access to theindicator configuration menu. Protection againstaccidental adjustment of the setpoints when theindicator is in the display mode is provided by aseparate security code.This direct setpoint access menu is enabled andthe separate security code entered from the'ACSP' function in the alarm configuration menu asshown in Fig 12. To change the menu parametersselect 'ACSP' from the configuration menu andpress P which will display the enable prompt'EnbL'. Press P again to reveal if the direct accessmenu is 'on' or 'oFF'. The ▲ or ▼ button willtoggle the display between the two conditions.If 'oFF' is selected, the operator will not haveaccess to the setpoints from the display mode.Return to the 'ACSP' prompt in the main menu bypressing E twice.If 'on' is selected, the operator will have directaccess to the alarm setpoints from the displaymode via a separate optional security code. Todefine this four digit security code press P to returnto the 'Enbl' prompt followed by the ▲ or ▼ buttonto select the access code prompt 'ACCd'.Pressing P will reveal the current security code.Each digit of the code may be changed byoperating the ▲ and ▼ push-buttons, and the Pbutton to move control to the next digit. When therequired code has been entered, press E twice toreturn to the 'ACSP' prompt in the configurationmenu.Default code 0000 will disable the security codeallowing direct access to the setpoints in thedisplay mode by pressing the P and ▲ buttonssimultaneously. Unless otherwise requested newinstruments with alarms are supplied with thisfunction disabled and the security code set to0000.9.3.13 Adjusting alarm setpoints from thedisplay modeAccess to the alarm setpoints from the indicatordisplay mode is obtained by operating the P and ▲push-buttons simultaneously as shown in Fig 14.If the setpoints are not protected by a securitycode the alarm setpoint prompt 'SP1' will bedisplayed. If the setpoints are protected by asecurity code, 'Code' will be displayed first.Pressing P again will enable the alarm securitycode to be entered digit by digit using the ▲ and▼ buttons to change the flashing digit, and the Ppush-button to move control to the next digit. If thecorrect code is entered pressing E will cause alarmsetpoint prompt 'SP1' to be displayed. Pressingthe ▲ or ▼ button will toggle the display betweenthe two alarm setpoint prompts 'SP1' and 'SP2'.If an incorrect security code is entered, or a buttonis not pressed within twenty seconds, the indicatorwill automatically return to the display mode.