Durkan Print - Mohawk Group
Durkan Print - Mohawk Group
Durkan Print - Mohawk Group

You also want an ePaper? Increase the reach of your titles
YUMPU automatically turns print PDFs into web optimized ePapers that Google loves.
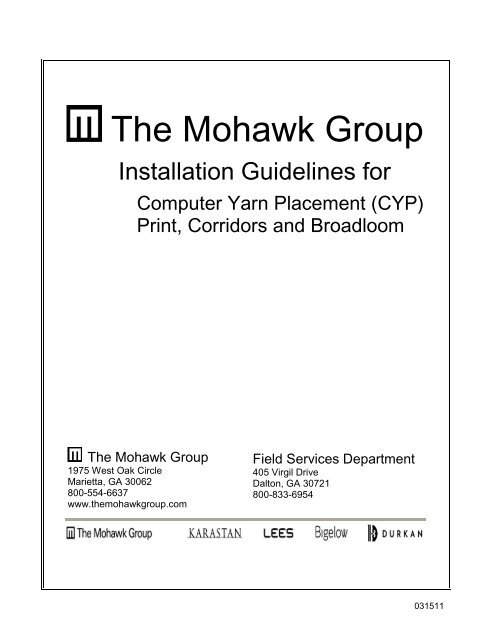
The <strong>Mohawk</strong> <strong>Group</strong><br />
Installation Guidelines for<br />
Computer Yarn Placement (CYP)<br />
<strong>Print</strong>, Corridors and Broadloom<br />
The <strong>Mohawk</strong> <strong>Group</strong><br />
1975 West Oak Circle<br />
Marietta, GA 30062<br />
800-554-6637<br />
www.themohawkgroup.com<br />
Field Services Department<br />
405 Virgil Drive<br />
Dalton, GA 30721<br />
800-833-6954<br />
031511
CYP/PRINTS<br />
Carpet Installation Check off List<br />
1. Newly poured concrete floors generally will take 90 to 120 days to cure. Moisture should not exceed<br />
five pounds/1000sf per 24 hours as determined by a calcium chloride test per ASTM F1869, or 80%<br />
relative humidity per ASTM F2170. If the results are more than 5 lbs or higher than 80%, do not<br />
proceed with the installation. Contact Field Services at 800-833-6954. Gypcrete or substrates with<br />
excessive dust must be cleaned, and then primed with The <strong>Mohawk</strong> <strong>Group</strong>’s (TMG’s) PrimeCoat or an<br />
approved primer, such as a latex milk additive.<br />
2. The alkalinity or pH in a concrete slab should be between 5 and 9 for a glue-down installation. When<br />
pH is between 9-12 and moisture is below 5 lbs or 80% then PrimeCoat can be used to block pH.<br />
Should the pH be outside this range, stop and do not proceed with the installation. Contact Field<br />
Services at 800-833-6954.<br />
3. The floor and room temperature must be acclimated by maintaining the temperature at 65° F and 95°<br />
F, and the humidity between 10% and 65%, for at least 48 hours before, during, and 72 hours after<br />
installation. In addition, the adhesive and seam sealer should be stored under these conditions for at<br />
least 24 hours before installation. The installation site must be acclimated with HVAC in operation.<br />
4. Old adhesive must be properly removed prior to any installation of TMG’s branded carpet. When cutback<br />
adhesive is present or existing adhesive has indications of plasticization or PVC backed<br />
products are being installed then SureSeal must be applied after the old adhesive has been properly<br />
removed. See note #1.<br />
5. Mechanically remove all wax, dirt, grease and paint. DO NOT use solvents to clean the floor. DO NOT<br />
use oil based sweeping compound. Fill cracks more than 1/16-inch wide with a Portland or cement<br />
based patching compound. The floor must be flat to within 1/8” in 10 feet. Use leveling compound<br />
when required. Patched areas may need to be primed (Consult patch manufacture for requirements)<br />
with PrimeCoat or an approved primer. DO NOT install over resin or silicate based curing compound.<br />
6. Carpet should only be bent when absolutely necessary for transporting purposes only and must be<br />
unrolled immediately. Carpet should be rolled out and allowed to relax for at least 24 hours prior to<br />
installation.<br />
7. Never cut carpet over carpet, as this can result in over penetration of the blade and cutting loops on<br />
the lower carpet. Never install broadloom carpet over carpet.<br />
8. Carpet should be protected from heavy traffic and construction dust with a non-staining building<br />
material paper. Never use plastic sheeting as it will trap moisture and prevent proper curing of the<br />
adhesive. Plastic may also leave residues that can result in rapid soiling after removal.<br />
9. Furniture placement and heavy traffic should be avoided for at least 24 hours after a direct glue-down<br />
or double glue installation. Furniture and heavy equipment concentrated pressure, and movement<br />
over unprotected carpet can cause adhesive breakdown. This can result in buckling and/or wrinkling.<br />
It is strongly recommended that plywood or masonite boards be placed over the carpet during the<br />
move-in phase to spread the concentrated weight of furniture and heavy equipment.<br />
Please Note<br />
1. Asbestos-containing floor tiles, any adhesive possibly containing asbestos, or other asbestos-<br />
containing floor coverings require special preparation, handling, and removal procedures. Consult the<br />
appropriate local or state authorities or the Resilient Floor Covering Institute before disturbing any<br />
suspected asbestos-containing material.<br />
2. UPS Bloc, HPS Bloc, Unibond, Unibond Flex Bloc and Weldlok cannot be installed using the<br />
tackless/stretch-in method. Attached cushions can only be installed by the direct glue method.<br />
3. Installation of The <strong>Mohawk</strong> <strong>Group</strong>’s branded Carpet and Carpet Tile on a floor outside the scope of<br />
the guidelines in this document will void all applicable warranties.<br />
4. The <strong>Mohawk</strong> <strong>Group</strong> is not responsible for any product failure due to improper floor preparation and/or<br />
installation procedures. The required adhesives are TMG’s family of adhesives.<br />
The <strong>Mohawk</strong> <strong>Group</strong> Field Services 800-833-6954 031511<br />
2
CYP/PRINTS<br />
General Information<br />
ROLL IDENTIFICATION FOR SURE-FIT AND SPECTRA-FIT<br />
Each roll of carpet you receive will be identified on the roll and plastic as follows:<br />
• Order number • Roll number • Size of the roll • Pattern number • Contents of the roll<br />
A set of installation instructions will be enclosed in the roll, which is wrapped in RED PLASTIC,<br />
with INSTALLATION INSTRUCTIONS ENCLOSED printed on the outside of the roll. The installation<br />
instructions included the seaming diagram and the roll layout. The seaming diagram will indicate the<br />
placement of each rug and the location of the seams. In some cases, it may be necessary for mill<br />
seams and additional field seams. All known seams will be indicated on the seaming diagram.<br />
ROLL SEQUENCE FOR BROADLOOM<br />
• <strong>Print</strong><br />
Sequence numbers are placed on each roll. These numbers are in the order in which they are<br />
printed. TMG recommends following these sequence numbers, however, if the rolls need to be<br />
arranged differently in order to ensure a better pattern match, this is an option.<br />
• CYP<br />
A sequence report will be enclosed in the roll which is wrapped in RED PLASTIC with<br />
INSTALLATION INSTRUCTIONS ENCLOSED printed on the outside of the roll. Rolls will be<br />
sequenced according to pattern repeat lengths, from longest to shortest.<br />
Proper Seam Characteristics<br />
With any seaming method, a properly constructed seam:<br />
� has cleanly trimmed edges properly secured with seam sealer<br />
� has tightly abutted edges without gaps or overlaps<br />
� maintains reasonable pattern match where applicable<br />
� will not be totally invisible<br />
Seam Preparation<br />
If the installation requires more than one width, select the best location for the first seam and strike a<br />
chalk line on the floor square with the walls for seam placement. No seam in invisible. Therefore, when<br />
possible, place seams in areas of least traffic, away from the direct lighting, and perpendicular to side<br />
lighting, such as windows.<br />
Adhesives<br />
NuBroadlok Adhesives are the only adhesives approved for TMG Carpets. If NuBroadlok Adhesives are<br />
not used, our warranties are voided.<br />
For Direct Glue Down Installations<br />
BACKING ADHESIVE TROWEL SIZE<br />
All <strong>Durkan</strong> Backings NuBroadlok<br />
Adhesive<br />
For Double Glue Down Installations<br />
LOCATION<br />
Between Floor &<br />
Cushion<br />
Between Cushion &<br />
Carpet<br />
ADHESIVE<br />
EnPress<br />
NuBroadlok<br />
Adhesive<br />
1/8” x 1/8” x 1/8” U-Notch<br />
1/8” x 1/8” x 1/16” V-Notch<br />
TROWEL SIZE<br />
1/16” x 1/16” x 1/16”<br />
Square-Notch<br />
SEAM SEALER<br />
NuBroadlok Seam<br />
Sealer<br />
SEAM SEALER<br />
1/8” x 1/8” x 1/16” U-Notch NuBroadlok Seam<br />
Sealer<br />
The <strong>Mohawk</strong> <strong>Group</strong> Field Services 800-833-6954 031511<br />
3
CYP/PRINTS<br />
Spectra-Fit Corridors Direct Glue-down<br />
All Backings<br />
After the designated carpet has been located, dry lay the entire<br />
corridor, centering the carpet in corridor with equal bleed out on<br />
each side. In some cases, it will be necessary to change the<br />
amount of bleed out on each end of the corridors, and/or between<br />
the rugs due to shrinkage and stretching of the carpet.<br />
Use a dry line or laser to ensure the carpet is running straight down<br />
the corridor. At this point, the squareness of the carpet should be<br />
checked. When the carpet is positioned properly, windows may be<br />
cut in both sides to make sure the carpet does not shift during the<br />
installation process. (See figure to right).<br />
Fold back half of the carpet, back across the width of the corridor.<br />
Apply NuBroadlok Adhesive using a 1/8” x 1/8” x 1/8” U-notched<br />
trowel or 1/8” x 1/8” x 1/16” V-notched trowel. Open time will vary<br />
depending upon the environmental conditions.<br />
Lay the folded half back into the adhesive being careful not to shift<br />
the carpet out of position. With the use of a dry line, make sure the<br />
patterns are straight. If bowing or skewing occurs, power or<br />
mechanical stretchers may be needed. Repeat the other half as the first. Make sure all seams are properly<br />
sealed with a seam sealer. Any voids may result in the loss of face yam or delamination. Roll carpet using<br />
a roller weighing 75-100 pounds.<br />
ActionBac Only Double Glue-down<br />
A cushion such as a flat rubber or urethane foam padding should not exceed 3/8 inch in thickness and<br />
must have a minimum density of 16 pounds, such as UniPlus II Cushion.<br />
Felted underlays (Synthetic Fiber Cushion) such as <strong>Durkan</strong>’s EcoComfort Step, or hair and jute underlays<br />
should be at least 28 oz. in weight and should not exceed 3/8” in thickness.<br />
Adhesive can either be NuBroadlok Multi-Purpose Adhesive or EnPress Pressure Sensitive Adhesive<br />
between the floor and cushion using a 1/16 square notched trowel. NuBroadlok Multi-Purpose Adhesive<br />
must be used between the cushion and the carpet. The cushion should be installed in the longest<br />
continuous lengths possible with consideration given to the traffic pattern and seam placement of the<br />
carpet. The cushion seams should be at a right angle to carpet seams or offset at least six inches to either<br />
side.<br />
When applying the adhesive between cushion and carpet a 1/8” x 1/8” x 1/16” U-notched trowel should be<br />
used. In a double-glue installation, strict attention must be given to the open time. Adhesives should be<br />
tacky, but wet enough so that any bowing or skewing can be dealt with using mechanical stretchers.<br />
Use the same methods utilized for direct glue down when cutting and stretching the carpet. Make sure all<br />
seams are properly sealed with NuBroadlok Seam Sealer.<br />
When constructing hot melt seams, use only tape specifically designed for double-glue installations.<br />
Do not use a roller exceeding 50 pounds on this type of installation. Heavy traffic should be avoided for at<br />
least 24 hours to allow proper adhesive cure.<br />
ActionBac Only Stretch-in Installation<br />
Commercial or architectural tackless strips must be used.<br />
The proper type of padding plays a key role in achieving satisfactory results and prolonging the life of the<br />
carpet. A proper cushion is firm and uniform in thickness. For all Ultra Performance System and Tufted<br />
Action Bac carpets, flat rubber or urethane foam padding should not exceed 3/8 inch in thickness and<br />
must have a minimum density of 16 pounds. A 1/4-inch pad is more desirable if it meets the density<br />
requirement, such as UniPlus II Cushion.<br />
Felted underlays (Synthetic Fiber Cushion) such <strong>Durkan</strong>’s EcoComfort Step, or hair and jute underlays<br />
should be at least 28 oz. in weight and should not exceed 3/8” in thickness.<br />
The <strong>Mohawk</strong> <strong>Group</strong> Field Services 800-833-6954 031511<br />
4
CYP/PRINTS<br />
Please Note: Underlays that are too soft or have an uneven or nonuniform density (including pads that<br />
contain deep bubbles or ripples or have a high profile, such as waffle pads) are not recommended for<br />
commercial carpet, as they are frequently the cause of re-stretch calls and seam splitting.<br />
Before starting the stretching process, dry lay the entire corridor. Center the carpet in the corridor with<br />
equal bleedout on each side. In some cases, as in the glue-down installation, it will be necessary to<br />
change the amount of bleedout on each end of the corridors, and/or between the rugs due to the shrink-<br />
age and the stretching of the carpet.<br />
Use a dry line or laser to ensure the carpet is<br />
running straight down the corridors. Start in the<br />
center of the corridor and power stretch both<br />
ways. Stay nails may also be needed on long<br />
corridors to hold the stretch until the entire<br />
corridor is stretched.<br />
SEAMS MUST BE SEALED. Apply seam sealer to<br />
both edges of the seam. Allow the seam sealer<br />
to dry before seaming. Neglecting to seal seams<br />
can cause delamination or loss of face yarns. The<br />
carpet is to be joined with a fabric seaming tape<br />
pre-coated with a thermoplastic adhesive, such as<br />
Orcon’s Super 3, Orcon XU-90, AAT Urabond U-<br />
900, or a comparable premium tape. A double<br />
headed power stretcher and deadman may be<br />
needed to get a proper match while the seam is<br />
being constructed. Stay nails may also be needed<br />
to align the pattern. After the seam has cooled, the<br />
carpet is ready to be stretched. THE USE OFA<br />
POWER STRETCHER IS MANDATORY. The<br />
carpet should be stretched both length and width<br />
angling slightly towards the corners. (See figure to<br />
the right).<br />
Body & Cap Corridors<br />
In corridor pattern widths of 7-1/2 feet or less, it will be necessary to<br />
split along the center of the width of the roll. This can best be<br />
accomplished by straight edging along the middle of the bleedout in<br />
both body and caps. (See diagram to right).<br />
The caps must be straight edged across the width at the proper<br />
match point. There are two separate caps printed. One for the top<br />
and the other for the bottom. This assures the pile will be going in<br />
the same direction. (See diagrams below).<br />
Now, lay the end cap over the edge of the body until a match is<br />
obtained. Then lay the straight edge over the match line and cut the<br />
body on both ends.<br />
Next, measure the body to get the proper length so that the other<br />
cap can be placed. Repeat above procedure to achieve a proper<br />
match on both ends.<br />
The caps must be seam sealed, and then seamed with a hot melt<br />
iron on a stretch-in installation. On a direct glue-down installation,<br />
all of the seams must be properly sealed.<br />
The <strong>Mohawk</strong> <strong>Group</strong> Field Services 800-833-6954 031511<br />
5
CYP/PRINTS<br />
Please Note: A double-headed or a power stretcher and deadman may have to be used to stretch<br />
either the cap or body for a proper match.<br />
After the carpet is cut, center the carpet in the corridor<br />
with equal bleedout on both sides. A dry line or laser<br />
may be used to ensure the carpet is running straight in<br />
the corridor. When<br />
carpet is positioned properly; windows may be cut in<br />
both sides to make sure the carpet does not shift<br />
during the installation process. (See diagram to right).<br />
When cutting and positioning is finished, carpet may be<br />
stretched in or glued down, Make sure all seams are<br />
sealed with the required seam sealer.<br />
Broadloom Guidelines<br />
Locate an exact point in the pattern approximately 3/4” to 1”<br />
from the selvedge edge. Cut along complementary patterns<br />
using a cushion back cutter and straight edge from the face.<br />
Trim with the blade closest to the seam edge; hold the cutter<br />
slightly away from the seam edge at no more than a 5° angle,<br />
so as to cut slightly more backing material than face yarn.<br />
(See picture right).<br />
These procedures should be followed on both sides of the<br />
seam. The pattern that is trimmed and removed from one side<br />
must be left on the other.<br />
An alternate method would be to slit the carpet from the face<br />
along complementary pattern points and cut between slits from<br />
the back.<br />
These methods apply on both side to side and end to end<br />
seams.<br />
TMG’s printed carpet is tufted, the secondary backing is<br />
applied, and then the carpet is printed. <strong>Print</strong>ed carpet does not<br />
follow tufting rows; therefore, running a row will not result in a<br />
pattern match.<br />
Pattern Elongation<br />
Roll Sequence Numbers can be rearranged by measuring the pattern repeat to establish the correct roll<br />
sequence. The longest pattern must be installed first, then the next longest, etc. This allows the shorter<br />
pattern to be stretched to the longer pattern, and keeps the closest pattern repeats together. After the roll<br />
sequence is established, glue half the long pattern and half the shorter pattern lengthwise. Stretch the<br />
The <strong>Mohawk</strong> <strong>Group</strong> Field Services 800-833-6954 031511<br />
6
CYP/PRINTS<br />
shorter pattern to match the longer pattern by starting in the center of the seam and stretching toward the<br />
ends. Stay nails will be needed to secure the pattern match as the adhesive sets.<br />
All Backings - ActionBac, Duraton, Attached Cushion or Direct Glue-down Installation<br />
After the carpet has been placed in its designated areas and<br />
the seams trimmed, dry lay all breadths. The starting point<br />
will be the longest pattern repeat section gradually working<br />
down to the shortest pattern repeat section.<br />
Align the patterns in the center of each breadth. Check the<br />
bow and skew. If the pattern run-off is more than one half<br />
inch in twelve feet, pre-stretch the carpet using deadman<br />
and power stretchers. (See picture right).<br />
This procedure is done before any adhesive is applied.<br />
Stretch in ten to twelve feet increments at a time. If the<br />
pattern needs stretching one half inch in twelve feet,<br />
stretch carpet one inch in twelve feet. After the stretchers<br />
are removed, some of the stretch will slip back, but not the<br />
entire stretch. At this time, the installer will be able to<br />
determine the amount of stretch the carpet will require to<br />
achieve the match, after the adhesive has been applied.<br />
After the pattern has been dry laid, make sure that each<br />
section of carpet lines up to the chalk lines on the floor.<br />
Position the carpet so that the patterns are matched in the<br />
middle of each breadth. Stay nails or pails of adhesives may<br />
be used to prevent shifting of the carpet.<br />
Guidelines for Borders & Corners<br />
Borders and corner patterns require splitting the roll<br />
exactly at the cut lines using a straight edge and<br />
cushion back cutter. The patterns may have shifted<br />
from side to side slightly during the printing<br />
process; therefore, the tufted roll will not follow the<br />
patterns. Some corners print individually and some<br />
corners in groups of two, and groups of four.<br />
The corners are printed inside the border roll usually in<br />
the middle the roll. (See figure A).<br />
Types of Corners<br />
Matching Corners: Corners<br />
that match to the borders<br />
allowing a continuous flow of<br />
design around the borders.<br />
(See figure B).<br />
Enclosed Corners: Corners that<br />
are completely surrounded by<br />
solid stripes that separate the<br />
corners from the running border.<br />
(See figure C).<br />
The <strong>Mohawk</strong> <strong>Group</strong> Field Services 800-833-6954 031511<br />
7
CYP/PRINTS<br />
Seaming and Length Calculation for Different Types of Corners<br />
Mitered Corners: Borders are overlapped and then cut at 45° angle (See figure D).<br />
CORNERS WITH NO BLEEDOUT ONE CORNER WITH BLEEDOUT<br />
Figure D<br />
CORNER WITH OVERMATCH MITERED CORNER<br />
After the borders are split and the corners cut, the<br />
match is determined by moving a corner down a border<br />
section match point. After the match is found, cut<br />
borders to the proper length. Remember some of the<br />
corners are cut without the bleedout. In this case, the<br />
bleedout must be cut longer in or to miter bleedout<br />
from border around corner. (See figure E).<br />
Due to the shape and size of room and the pattern<br />
repeat border; bleedout may not be consistent on all<br />
walls. For example: two walls may have an 8”<br />
bleedout and the other two walls may have a 10”<br />
bleedout.<br />
With the borders and corners cut, measure from the<br />
inside of the borders in each direction to determine<br />
the field dimensions. Strike a chalk line on the floor<br />
for border to field seam placement.<br />
Install the field using the guidelines for broadloom. The field should be installed with the patterns<br />
centered up to the chalk line.<br />
Position the borders and corners against the field. Fold back half of the border, and spread the<br />
adhesive on the floor. Before moving the border into place on the floor; apply seam sealer to the field<br />
and then lay the border into the adhesive.<br />
Position the corner into place after applying seam sealer to one side of each of the seams. The ministretcher<br />
(crab) and the knee kicker should be used to move the border and corner into an exact<br />
pattern match. A tractor can be used to ensure a smooth and secure seam. Stay nails may have to be<br />
used to secure pattern match until the adhesive takes hold.<br />
TMG patterned carpets are produced to the most exacting tolerances in the carpet industry. Patterned<br />
carpet is a synthetic textile product subject to variance in pattern repeats during the manufacturing<br />
process, however a match should be achieved during the installation process.<br />
The <strong>Mohawk</strong> <strong>Group</strong> Field Services 800-833-6954 031511<br />
8
CYP/PRINTS<br />
Manufacturing Tolerances<br />
A straight edge or chalk line is drawn across the full 12’<br />
width of the roll connecting the same pattern points in the<br />
design. At all pattern points across the width, the design should<br />
be approximately I% of this line. Carpet is a textile product;<br />
therefore multiple checks along the length of the roll should be<br />
performed and the average considered.<br />
A straight edge or chalk line is drawn across the full 12’ width of<br />
the roll perpendicular to the lengthwise edge of the pattern. At<br />
the opposite end of the starting point, the design should be<br />
approximately 1% of this line. This procedure can be checked using<br />
a sheet-rock square, 6’ straightedge and chalk line. Carpet is a<br />
textile product; therefore multiple checks along the length of the roll<br />
should be performed and the average considered.<br />
To check pattern elongation, count and measure the same<br />
number of patterns on each cut.<br />
Very Important Steps to Remember<br />
1. Dry-lay carpet before applying adhesive.<br />
2. When needed pre-stretch.<br />
3. Always stretch the short side to align with the long side. This is a synthetic tufted carpet, which<br />
will not shrink, as it will stretch. Power stretchers and deadman are required.<br />
4. Never glue the short side first.<br />
5. Always use proper adhesives.<br />
6. Always use the proper notched trowels.<br />
7. Seam sealer is a must on all seams.<br />
8. Dry line must be used to check straightness of patterns.<br />
Bow 1% in width of the carpet.<br />
Skew 1% in width of the carpet.<br />
Pattern Elongation 1%<br />
Please Note: The use of TMG’s branded adhesives are required to ensure optimum results and are the only<br />
approved adhesives that TMG will warrant. Failure to use TMG’s branded adhesives can result in warranties<br />
being null and void.<br />
This information, offered as a customer service, is based on TMG's engineering tests and field experience. It<br />
is intended for installers with professional experience, to be used at their discretion and risk. TMG does not<br />
guarantee results and assumes no liability in connection with these installation instructions.<br />
The <strong>Mohawk</strong> <strong>Group</strong> Field Services 800-833-6954 031511<br />
9