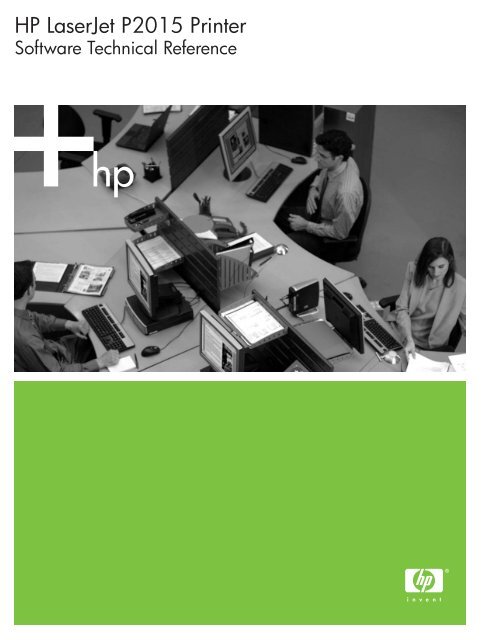
HP LaserJet P2015 Printer Software Technical Reference - ENWW
HP LaserJet P2015 Printer Software Technical Reference - ENWW
HP LaserJet P2015 Printer Software Technical Reference - ENWW
- No tags were found...

You also want an ePaper? Increase the reach of your titles
YUMPU automatically turns print PDFs into web optimized ePapers that Google loves.
<strong>HP</strong> <strong>LaserJet</strong> <strong>P2015</strong> <strong>Printer</strong><strong>Software</strong> <strong>Technical</strong> <strong>Reference</strong>
<strong>HP</strong> <strong>LaserJet</strong> <strong>P2015</strong> printer<strong>Software</strong> <strong>Technical</strong> <strong>Reference</strong>
Table of contents1 Purpose and scopeIntroduction ........................................................................................................................................... 1Device features .................................................................................................................................... 2Printing-system software ...................................................................................................................... 4System requirements ........................................................................................................... 5Windows .............................................................................................................. 5Linux .................................................................................................................... 5UNIX® ................................................................................................................. 5Operating-system support .................................................................................................. 6Standalone drivers .............................................................................................. 6Print driver support in other operating systems ................................................... 6Availability ........................................................................................................................... 7Printing-system software on the Web ................................................................. 8In-box printing-system software CDs .................................................................. 8Windows partition ............................................................................... 9CD versions ........................................................................................ 9<strong>HP</strong> <strong>LaserJet</strong> documentation ............................................................................................................... 142 <strong>Software</strong> descriptionIntroduction ......................................................................................................................................... 17MS Windows printing-system software .............................................................................................. 18Printing system and installer .............................................................................................. 18<strong>HP</strong> <strong>LaserJet</strong> <strong>P2015</strong> printing-system software CD for MS Windowssystems ............................................................................................................. 18<strong>HP</strong> <strong>LaserJet</strong> print drivers ................................................................................................... 19<strong>HP</strong> Extended Capabilities ................................................................................................................... 21<strong>HP</strong> ToolboxFX .................................................................................................................................... 22Overview of the <strong>HP</strong> ToolboxFX ......................................................................................... 22Starting the <strong>HP</strong> ToolboxFX ............................................................................... 22Structure ............................................................................................................ 22Opening screen ................................................................................................. 23System requirements ......................................................................................................... 23Key features ....................................................................................................................... 23Receive Alert messages for device events ....................................................... 23<strong>HP</strong> Device pop-up alert messages ................................................... 24System-tray icon alert ....................................................................... 24Desktop alert .................................................................................... 24E-mail alert ....................................................................................... 25The <strong>HP</strong> ToolboxFX folders ................................................................................................ 25<strong>ENWW</strong>iii
Status folder ...................................................................................................... 25Device Status ................................................................................... 26Supplies Status ................................................................................. 27Device Configuration ........................................................................ 27Network Configuration ...................................................................... 28Print Info Pages ................................................................................ 29Event Log ......................................................................................... 31Alerts folder ....................................................................................................... 31Set up Status Alerts .......................................................................... 32Set up E-mail Alerts .......................................................................... 34Help folder ......................................................................................................... 35Troubleshooting ................................................................................ 36How do I...? ...................................................................................... 37Animated Demonstrations ................................................................ 38User Guide ....................................................................................... 39Device Settings folder ....................................................................................... 39Device Information ............................................................................ 40Paper Handling ................................................................................. 41Printing ............................................................................................. 41PCL5e ............................................................................................... 42PostScript ......................................................................................... 43Print Quality ...................................................................................... 44Paper Types ..................................................................................... 44System Setup ................................................................................... 49Service .............................................................................................. 50Network Settings folder ..................................................................................... 51IP Configuration ................................................................................ 52Advanced .......................................................................................... 53SNMP ............................................................................................... 54Network Configuration ...................................................................... 56Password .......................................................................................... 56Other screens .................................................................................................................... 57About <strong>HP</strong> ToolboxFX dialog box ....................................................................... 58<strong>HP</strong> Instant Support ............................................................................................ 58Product Support ................................................................................................ 58Product Registration .......................................................................................... 59Supplies Ordering ............................................................................................. 59Summary of <strong>HP</strong> ToolboxFX known issues ........................................................................ 59.NET Framework dependencies ........................................................................ 60Device communication ...................................................................................... 61Obtaining debugging information from <strong>HP</strong> ToolboxFX ...................................... 62USB drivers are unsigned ................................................................................ 63Enable or disable <strong>HP</strong> ToolboxFX ...................................................................... 63<strong>HP</strong> Embedded Web Server ................................................................................................................ 65Status tab ........................................................................................................................... 65Device Status .................................................................................................... 66Supplies Status page ........................................................................................ 66Device Configuration page ................................................................................ 67Network Configuration page .............................................................................. 68Print Info Pages ................................................................................................. 68iv<strong>ENWW</strong>
Current watermarks ......................................................................................... 170Watermark Message ....................................................................................... 171Message Angle ............................................................................................... 171Font Attributes ................................................................................................. 171Default watermark settings .............................................................................. 172Finishing tab features ....................................................................................................................... 173Print Task Quick Sets ...................................................................................................... 174Document options ............................................................................................................ 174Correct Order for Straight Paper Path ............................................................. 174Print on Both Sides ......................................................................................... 174Automatically print on both sides ................................................... 175Manually print on both sides ........................................................... 175Flip Pages Up .................................................................................................. 177Booklet layout .................................................................................................. 178Book and Booklet Printing .............................................................. 178Print a booklet ................................................................................. 179Pages per Sheet ............................................................................................. 179Print Page Borders .......................................................................................... 179Page Order ...................................................................................................... 180Document preview image ................................................................................................ 180Orientation ....................................................................................................................... 180Services tab features ........................................................................................................................ 182Internet Services .............................................................................................................. 183Device services ................................................................................................................ 183Device Settings tab features ............................................................................................................ 184Form to Tray Assignment ................................................................................................ 185Font Substitution Table .................................................................................................... 186External Fonts .................................................................................................................. 187Installing external fonts ................................................................................... 187Removing external fonts ................................................................................. 188PS 3 Emulation Unidriver Device Settings ....................................................................... 188Available PostScript Memory .......................................................................... 189Output Protocol ............................................................................................... 189Send Ctrl-D Before Each Job .......................................................................... 189Send Ctrl-D After Each Job ............................................................................ 189Convert Gray Text to PostScript Gray ............................................................. 190Convert Gray Graphics to PostScript Gray ..................................................... 190Add Euro Currency Symbol to PostScript Fonts ............................................. 190Job Timeout .................................................................................................... 190Wait Timeout ................................................................................................... 190Minimum Font Size to Download as Outline ................................................... 190Maximum Font Size to Download as Outline ................................................. 190Installable Options ........................................................................................................... 191Tray 3 .............................................................................................................. 191Duplex Unit (for 2-Sided Printing) .................................................................. 191Allow Manual Duplexing .................................................................................. 191<strong>Printer</strong> Memory ................................................................................................ 191Mopier Mode ................................................................................................... 191Mopier mode and collation .............................................................................. 192Postscript Passthrough (PS 3 Emulation Unidriver only) ................................ 192<strong>ENWW</strong>vii
JPEG Passthrough (PS 3 Emulation Unidriver only) ...................................... 193About tab features ............................................................................................................................ 1945 MacintoshIntroduction ....................................................................................................................................... 197Macintosh printing-system software ................................................................................................. 198Hardware requirements ................................................................................................... 198Operating-system support ............................................................................................... 198Availability ........................................................................................................................ 198Printing-system software on the Web ............................................................. 199Printing-system software ................................................................ 199<strong>Software</strong> component availability ..................................................... 199In-box printing-system software CDs .............................................................. 199Macintosh partition ......................................................................... 199CD versions .................................................................................... 200Macintosh install and uninstall instructions ...................................................................................... 202Macintosh component descriptions ................................................................................. 202<strong>HP</strong> <strong>LaserJet</strong> PPDs .......................................................................................... 202PDEs ............................................................................................................... 202<strong>HP</strong> Embedded Web Server ............................................................................. 203Install notes (Readme file) .............................................................................. 203Online help ...................................................................................................... 203Install the Macintosh printing system ............................................................................... 203General installation for Macintosh operating systems ..................................... 203Detailed Mac OS X installation ........................................................................ 204Main Install dialog sequence .......................................................... 204<strong>Printer</strong> setup .................................................................................................... 209Set up a printer with Mac OS X V10.4 or higher) ........................... 209Set up a printer with Mac OS X V10.3 ............................................ 214Set up a printer with Mac OS X V10.2.8 ......................................... 216Troubleshooting the printer setup ................................................... 218Uninstall the Macintosh printing system .......................................................................... 219<strong>HP</strong> Embedded Web Server (EWS) .................................................................................................. 219Access to the <strong>HP</strong> EWS .................................................................................................... 220Status tab ......................................................................................................................... 221Device Status .................................................................................................. 221Supplies Status page ...................................................................................... 222Device Configuration page .............................................................................. 222Network Configuration page ............................................................................ 223Print Info Pages ............................................................................................... 224Event Log page ............................................................................................... 225Settings tab ...................................................................................................................... 225Device Information page ................................................................................. 226Paper Handling page ...................................................................................... 227Printing page ................................................................................................... 227PCL5e page .................................................................................................... 228PostScript page ............................................................................................... 228Print Quality page ............................................................................................ 229Paper Types page ........................................................................................... 229System Setup page ......................................................................................... 230viii<strong>ENWW</strong>
Service page ................................................................................................... 230Networking tab ................................................................................................................. 230IP Configuration page ..................................................................................... 231Advanced page ............................................................................................... 232Bonjour page ................................................................................................... 232SNMP page ..................................................................................................... 233Network Configuration page ............................................................................ 234Password page ............................................................................................... 2346 Engineering DetailsIntroduction ....................................................................................................................................... 237Troubleshooting ................................................................................................................................ 238Basic troubleshooting checklist ........................................................................................ 238Troubleshooting tools ...................................................................................................... 238File to E-mail utility .......................................................................................... 239AccessDeniedUtility.exe .................................................................................. 239FixErr1714 utility ............................................................................................. 240Known Issues for the <strong>HP</strong> <strong>LaserJet</strong> <strong>P2015</strong> printer ............................................................ 240Uninstall ............................................................................................................................................ 241Uninstall methods ............................................................................................................ 241Uninstall component list ................................................................................................... 241Uninstall instructions for Microsoft Windows 2000 and Microsoft Windows XP .............. 242Uninstall instructions for Microsoft Windows 98 SE and Microsoft Windows Me ............ 244Media attributes ................................................................................................................................ 245Media types and sizes .................................................................................................... 245Custom paper sizes ........................................................................................................ 247Hewlett-Packard <strong>HP</strong> <strong>LaserJet</strong> <strong>P2015</strong> Series Printing System Readme ........................................... 249Introduction ...................................................................................................................... 249Purpose of this document ............................................................................... 249Product connection information ....................................................................... 249Product <strong>Software</strong> ............................................................................................................. 249Supported operating systems ......................................................................... 249<strong>Printer</strong> drivers .................................................................................................. 249Microsoft Windows printer drivers .................................................. 250Macintosh printer driver .................................................................. 250<strong>Printer</strong> driver downloads ................................................................. 250<strong>HP</strong> ToolboxFX software for Microsoft Windows .............................................. 250Uninstaller software for Microsoft Windows .................................................... 250Known issues and workarounds ...................................................................................... 250Installation Instructions .................................................................................................... 251Installation options for Microsoft Windows ...................................................... 251Installing software on Microsoft Windows ....................................................... 252Installing software on Macintosh OS X V10.2.8, V10.3.9, and V10.4.3 .......... 252Uninstaller ....................................................................................................... 253Customer assistance ....................................................................................................... 253Legal statements ............................................................................................................. 253TRADEMARK NOTICES ................................................................................. 253WARRANTY AND COPYRIGHT .................................................................... 254Index ................................................................................................................................................................. 255<strong>ENWW</strong>ix
x<strong>ENWW</strong>
List of tablesTable 1-1 <strong>Software</strong> technical reference overview .............................................................................................. 1Table 1-2 Features of the <strong>HP</strong> <strong>LaserJet</strong> <strong>P2015</strong> printer ....................................................................................... 3Table 1-3 <strong>Software</strong> components for Windows .................................................................................................... 4Table 1-4 <strong>Software</strong> component availability for the <strong>HP</strong> <strong>LaserJet</strong> <strong>P2015</strong> printer ................................................. 7Table 1-5 CD part numbers for the <strong>HP</strong> <strong>LaserJet</strong> <strong>P2015</strong> printing-system software .......................................... 10Table 1-6 <strong>Software</strong> component localization by language, A-H ........................................................................ 11Table 1-7 <strong>Software</strong> component localization by language I-Z ........................................................................... 12Table 1-8 User documentation availability and localization ............................................................................. 14Table 2-1 Event alerts for <strong>HP</strong> ToolboxFX ......................................................................................................... 32Table 2-2 Standard print modes ...................................................................................................................... 45Table 2-3 Advanced Network Settings options and settings ............................................................................ 54Table 4-1 Print Task Quick Set default values for the <strong>HP</strong> <strong>LaserJet</strong> <strong>P2015</strong> printer ........................................ 151Table 4-2 PCL 6 custom media sizes ............................................................................................................ 156Table 4-3 Font Attribute settings for new and preset watermarks .................................................................. 172Table 4-4 Page orientation ............................................................................................................................. 178Table 4-5 Driver mopier mode and collation settings .................................................................................... 192Table 5-1 Adding a printer in Macintosh operating systems .......................................................................... 204Table 6-1 Troubleshooting checklist ............................................................................................................... 238Table 6-2 Supported media attributes ............................................................................................................ 245Table 6-3 Tray 1 and Tray 2 specifications .................................................................................................... 247Table 6-4 Optional Tray 3 specifications ........................................................................................................ 247Table 6-5 Specifications for automatic 2-sided printing ................................................................................. 248<strong>ENWW</strong>xi
xii<strong>ENWW</strong>
List of figuresFigure 2-1 Installation software CD browser ................................................................................................... 19Figure 2-2 <strong>HP</strong> Device Alert – Load Paper pop-up message ............................................................................ 24Figure 2-3 <strong>HP</strong> Device Alert – CLOSE DOOR System Tray and Desktop pop-up message ............................ 24Figure 2-4 Device Status screen ...................................................................................................................... 26Figure 2-5 Supplies Status screen ................................................................................................................... 27Figure 2-6 Device Configuration screen ........................................................................................................... 28Figure 2-7 Network Configuration screen ......................................................................................................... 29Figure 2-8 Print Information Pages screen ....................................................................................................... 30Figure 2-9 Event Log screen ............................................................................................................................ 31Figure 2-10 Set up Status Alerts screen .......................................................................................................... 32Figure 2-11 Set up E-mail Alerts screen – 1 of 2 ............................................................................................. 34Figure 2-12 Set up E-mail Alerts screen – 2 of 2 ............................................................................................. 35Figure 2-13 Troubleshooting sub-folder ........................................................................................................... 36Figure 2-14 How do I...? sub-folder .................................................................................................................. 37Figure 2-15 Animated Demonstrations screen ................................................................................................. 38Figure 2-16 <strong>HP</strong> <strong>LaserJet</strong> <strong>P2015</strong> Series User Guide ........................................................................................ 39Figure 2-17 Device Information screen ............................................................................................................ 40Figure 2-18 Paper Handling screen ................................................................................................................. 41Figure 2-19 Printing screen .............................................................................................................................. 42Figure 2-20 PCL5e screen ............................................................................................................................... 42Figure 2-21 PostScript screen .......................................................................................................................... 43Figure 2-22 Print Quality screen ....................................................................................................................... 44Figure 2-23 Paper Types screen ...................................................................................................................... 45Figure 2-24 Print Modes screen ....................................................................................................................... 46Figure 2-25 System Setup screen .................................................................................................................... 49Figure 2-26 Service screen .............................................................................................................................. 50Figure 2-27 IP Configuration screen ................................................................................................................ 52Figure 2-28 Advanced Network Settings screen .............................................................................................. 53Figure 2-29 SNMP screen ................................................................................................................................ 54Figure 2-30 Network Configuration screen ....................................................................................................... 56Figure 2-31 Password screen .......................................................................................................................... 57Figure 2-32 <strong>HP</strong> ToolboxFX dialog box ............................................................................................................. 58Figure 2-33 Product Registration screen .......................................................................................................... 59Figure 2-34 <strong>HP</strong> ToolboxFX – sample error dialog ............................................................................................ 60Figure 2-35 <strong>HP</strong> ToolboxFX – sample error dialog ............................................................................................ 62Figure 2-36 <strong>HP</strong> EWS – Device Status page ..................................................................................................... 66Figure 2-37 <strong>HP</strong> EWS – Supplies Status page .................................................................................................. 66Figure 2-38 <strong>HP</strong> EWS – Device Configuration page ......................................................................................... 67Figure 2-39 <strong>HP</strong> EWS – Network Configuration page ....................................................................................... 68<strong>ENWW</strong>xiii
Figure 2-40 <strong>HP</strong> EWS – Print Info Pages page ................................................................................................. 69Figure 2-41 <strong>HP</strong> EWS – Event Log page .......................................................................................................... 69Figure 2-42 <strong>HP</strong> EWS – Device Information page ............................................................................................. 70Figure 2-43 <strong>HP</strong> EWS – Paper Handling page .................................................................................................. 70Figure 2-44 <strong>HP</strong> EWS – Printing page ............................................................................................................... 71Figure 2-45 <strong>HP</strong> EWS – PCL5e page ................................................................................................................ 71Figure 2-46 <strong>HP</strong> EWS – PostScript page .......................................................................................................... 72Figure 2-47 <strong>HP</strong> EWS – Print Quality page ....................................................................................................... 72Figure 2-48 <strong>HP</strong> EWS – Paper Types page ...................................................................................................... 73Figure 2-49 <strong>HP</strong> EWS – System Setup page .................................................................................................... 74Figure 2-50 <strong>HP</strong> EWS – Service page ............................................................................................................... 74Figure 2-51 <strong>HP</strong> EWS – IP Configuration page ................................................................................................. 75Figure 2-52 <strong>HP</strong> EWS – Advanced page ........................................................................................................... 76Figure 2-53 <strong>HP</strong> EWS – Bonjour page .............................................................................................................. 76Figure 2-54 <strong>HP</strong> EWS – SNMP page ................................................................................................................ 77Figure 2-55 <strong>HP</strong> EWS – Network Configuration page ....................................................................................... 78Figure 2-56 <strong>HP</strong> EWS – Password page ........................................................................................................... 79Figure 3-1 Configure the driver ........................................................................................................................ 85Figure 3-2 Add New Hardware Wizard USB Composite Device dialog box .................................................... 86Figure 3-3 Add New Hardware Wizard USB Composite Device - Search for driver dialog box ....................... 87Figure 3-4 Add New Hardware Wizard USB Composite Device - Specify a location dialog box ..................... 87Figure 3-5 Add New Hardware Wizard USB Composite Device - What do you want to install? dialogbox ...................................................................................................................................................................... 88Figure 3-6 Add New Hardware Wizard USB Composite Device - Ready to Install dialog box ........................ 88Figure 3-7 Add New Hardware Wizard USB Composite Device - Finish dialog box ........................................ 89Figure 3-8 Add New Hardware Wizard Search for driver dialog box ............................................................... 90Figure 3-9 Add New Hardware Wizard USB Printing Support dialog box ........................................................ 91Figure 3-10 Add New Hardware Wizard <strong>HP</strong> EWS dialog box .......................................................................... 91Figure 3-11 Add New Hardware Wizard – Finish dialog box ........................................................................... 92Figure 3-12 Animated installation guide – Welcome screen ............................................................................ 97Figure 3-13 Install <strong>Printer</strong> <strong>Software</strong> screen ...................................................................................................... 98Figure 3-14 <strong>HP</strong> <strong>LaserJet</strong> <strong>P2015</strong> CD Browser screen ....................................................................................... 99Figure 3-15 USB install – Welcome to the Install Wizard dialog box ............................................................. 100Figure 3-16 USB install – Sample screen showing current progress ............................................................. 101Figure 3-17 USB install – Do Not Block <strong>HP</strong> Install Wizard Processes dialog box ......................................... 102Figure 3-18 USB install – Check for recommended installation updates (optional) dialog box ...................... 102Figure 3-19 USB install – Installation Options dialog box .............................................................................. 103Figure 3-20 USB Install – sample System Requirements Results dialog box ................................................ 104Figure 3-21 USB install – License Agreement dialog box .............................................................................. 105Figure 3-22 USB install – <strong>HP</strong> Extended Capabilities dialog box .................................................................... 106Figure 3-23 USB install – Destination Folder dialog box ................................................................................ 107Figure 3-24 USB install – Ready to Install dialog box .................................................................................... 108Figure 3-25 Installing screen .......................................................................................................................... 109Figure 3-26 USB install – Connection Type dialog box .................................................................................. 109Figure 3-27 USB install – Connect Your Device Now dialog box ................................................................... 110Figure 3-28 USB install – Device has been detected dialog box ................................................................... 111Figure 3-29 USB install – Restart your computer dialog box ......................................................................... 112Figure 3-30 USB install – Congratulations! <strong>Software</strong> installation complete dialog box .................................. 113Figure 3-31 USB install – Test Page dialog box ............................................................................................ 114Figure 3-32 Sign up now screen .................................................................................................................... 115xiv<strong>ENWW</strong>
Figure 3-33 <strong>HP</strong> Registration screen ............................................................................................................... 116Figure 3-34 Network install — Welcome dialog box ....................................................................................... 117Figure 3-35 Network install – Sample screen showing current progress ....................................................... 118Figure 3-36 Network install – Check for recommended installation updates (optional) dialog box ................ 119Figure 3-37 Network install – Installation Options dialog box ........................................................................ 120Figure 3-38 Network Install – sample System Requirements Results dialog box .......................................... 121Figure 3-39 Network install – Licence Agreement dialog box ........................................................................ 122Figure 3-40 Network install – <strong>HP</strong> Extended Capabilities dialog box .............................................................. 123Figure 3-41 Network install – Destination Folder dialog box .......................................................................... 124Figure 3-42 Network install – Ready to Install dialog box .............................................................................. 125Figure 3-43 Network install – Connection Type dialog box ............................................................................ 126Figure 3-44 Network install – Identify <strong>Printer</strong> dialog boxIdentify <strong>Printer</strong> ......................................................... 127Figure 3-45 Network install – Searching dialog box ....................................................................................... 128Figure 3-46 Network install – Specify <strong>Printer</strong> dialog box ................................................................................ 129Figure 3-47 Network install – <strong>Printer</strong> Found dialog box ................................................................................. 130Figure 3-48 Network install – Confirm Network Settings dialog box .............................................................. 131Figure 3-49 Network install – Confirm Changing Setting dialog box .............................................................. 132Figure 3-50 Network install – Change TCP/IP Settings dialog box ................................................................ 133Figure 3-51 Network install – Restart your computer dialog box ................................................................... 134Figure 3-52 Network install – Congratulations! <strong>Software</strong> installation complete dialog box ............................ 135Figure 3-53 Network install – Test Page dialog box ....................................................................................... 135Figure 3-54 Sign up now screen .................................................................................................................... 136Figure 3-55 <strong>HP</strong> Registration screen ............................................................................................................... 137Figure 4-1 A typical constraint message ........................................................................................................ 143Figure 4-2 The default appearance of the Advanced tab ............................................................................... 145Figure 4-3 Paper/Quality tab .......................................................................................................................... 149Figure 4-4 Paper Options group box .............................................................................................................. 154Figure 4-5 Custom Paper Size dialog box ..................................................................................................... 155Figure 4-6 Front Cover options ...................................................................................................................... 159Figure 4-7 First Page options ......................................................................................................................... 160Figure 4-8 Other Pages options ..................................................................................................................... 161Figure 4-9 Last Page options ......................................................................................................................... 162Figure 4-10 Back Cover options ..................................................................................................................... 163Figure 4-11 Effects tab ................................................................................................................................... 166Figure 4-12 Preview images – Legal on Letter; Scale to Fit off (left) and on (right) ...................................... 168Figure 4-13 Watermark Details dialog box ..................................................................................................... 170Figure 4-14 Finishing tab ................................................................................................................................ 173Figure 4-15 Print on Both Sides Instructions dialog box ................................................................................ 177Figure 4-16 Page-order preview images ........................................................................................................ 180Figure 4-17 Services tab ................................................................................................................................ 182Figure 4-18 <strong>HP</strong> PCL 6 Unidriver Device Settings tab .................................................................................... 184Figure 4-19 PS 3 Emulation Unidriver Device Settings tab ............................................................................ 185Figure 4-20 Font Substitution Table ............................................................................................................... 186Figure 4-21 <strong>HP</strong> Font Installer dialog box ....................................................................................................... 187Figure 4-22 About tab ..................................................................................................................................... 194Figure 5-1 hp <strong>LaserJet</strong> <strong>P2015</strong> CD-ROM icon ................................................................................................ 204Figure 5-2 hp <strong>LaserJet</strong> <strong>Software</strong> screen ........................................................................................................ 205Figure 5-3 <strong>HP</strong> <strong>LaserJet</strong> v.5.7 icon .................................................................................................................. 205Figure 5-4 Authenticate dialog ....................................................................................................................... 205Figure 5-5 <strong>HP</strong> <strong>LaserJet</strong> for Macintosh installer startup-screen ...................................................................... 206<strong>ENWW</strong>xv
Figure 5-6 License dialog ............................................................................................................................... 206Figure 5-7 Easy Install dialog ......................................................................................................................... 207Figure 5-8 <strong>HP</strong> <strong>LaserJet</strong> Installer dialog (custom install) ................................................................................. 207Figure 5-9 Installing dialog ............................................................................................................................. 208Figure 5-10 <strong>LaserJet</strong> ReadMe icon ................................................................................................................ 208Figure 5-11 Installation success message ..................................................................................................... 209Figure 5-12 <strong>Printer</strong> list screen ........................................................................................................................ 210Figure 5-13 Print & Fax screen ...................................................................................................................... 210Figure 5-14 Default Browser tab .................................................................................................................... 211Figure 5-15 Installable Options screen .......................................................................................................... 213Figure 5-16 <strong>Printer</strong> List screen ....................................................................................................................... 213Figure 5-17 <strong>Printer</strong> List screen ....................................................................................................................... 214Figure 5-18 Print & Fax screen ...................................................................................................................... 214Figure 5-19 Add printer screen ....................................................................................................................... 215Figure 5-20 Print Center screen ..................................................................................................................... 216Figure 5-21 Add printer screen ....................................................................................................................... 217Figure 5-22 Device Status screen .................................................................................................................. 220Figure 5-23 <strong>HP</strong> EWS – Device Status page ................................................................................................... 221Figure 5-24 <strong>HP</strong> EWS – Supplies Status page ................................................................................................ 222Figure 5-25 <strong>HP</strong> EWS – Device Configuration page ....................................................................................... 223Figure 5-26 <strong>HP</strong> EWS – Network Configuration page ..................................................................................... 224Figure 5-27 <strong>HP</strong> EWS – Print Info Pages page ............................................................................................... 225Figure 5-28 <strong>HP</strong> EWS – Event Log page ........................................................................................................ 225Figure 5-29 <strong>HP</strong> EWS – Device Information page ........................................................................................... 226Figure 5-30 <strong>HP</strong> EWS – Paper Handling page ................................................................................................ 227Figure 5-31 <strong>HP</strong> EWS – Printing page ............................................................................................................. 227Figure 5-32 <strong>HP</strong> EWS – PCL5e page .............................................................................................................. 228Figure 5-33 <strong>HP</strong> EWS – PostScript page ........................................................................................................ 228Figure 5-34 <strong>HP</strong> EWS – Print Quality page ..................................................................................................... 229Figure 5-35 <strong>HP</strong> EWS – Paper Types page .................................................................................................... 229Figure 5-36 <strong>HP</strong> EWS – System Setup page .................................................................................................. 230Figure 5-37 <strong>HP</strong> EWS – Service page ............................................................................................................. 230Figure 5-38 <strong>HP</strong> EWS – IP Configuration page ............................................................................................... 231Figure 5-39 <strong>HP</strong> EWS – Advanced page ......................................................................................................... 232Figure 5-40 <strong>HP</strong> EWS – Bonjour page ............................................................................................................ 232Figure 5-41 <strong>HP</strong> EWS – SNMP page .............................................................................................................. 233Figure 5-42 <strong>HP</strong> EWS – Network Configuration page ..................................................................................... 234Figure 5-43 <strong>HP</strong> EWS – Password page ......................................................................................................... 235Figure 6-1 Important Information dialog box .................................................................................................. 242Figure 6-2 Cleanup Progress dialog box ........................................................................................................ 243Figure 6-3 Restart dialog box ......................................................................................................................... 244xvi<strong>ENWW</strong>
1 Purpose and scopePurpose and scopeIntroductionThis <strong>Software</strong> <strong>Technical</strong> <strong>Reference</strong> (STR) provides information about and troubleshooting tips for theprinting-system software for the <strong>HP</strong> <strong>LaserJet</strong> <strong>P2015</strong> printers.This document is prepared in an electronic format to serve as a quick-reference tool for Customer CareCenter (CCC) agents, support engineers, system administrators, Management Information Systems(MIS) personnel, and end users, as appropriate.NOTE: This STR describes software that is shipped on the software CD that comes with the<strong>HP</strong> <strong>LaserJet</strong> <strong>P2015</strong> printer. This STR does not describe drivers that will become available on the Web.The following information is included in this technical reference:●●●Overview of software and platformsProcedures for installing and uninstalling software componentsDescriptions of problems that can arise while using the <strong>HP</strong> <strong>LaserJet</strong> <strong>P2015</strong> printer, and knownsolutions to those problemsNOTE: An addendum to this STR describes system modification information, including file lists andchanges to registry keys.The following table describes the structure of this STR.Table 1-1 <strong>Software</strong> technical reference overviewChapterChapter 1, Purpose and scopeContentThis chapter contains basic information about the <strong>HP</strong> <strong>LaserJet</strong> <strong>P2015</strong> printer andits software:●●Overview of the <strong>HP</strong> <strong>LaserJet</strong> <strong>P2015</strong> printerPrinting-system software overview, including the following topics:◦ System requirements◦ Operating-system support◦ Availability●<strong>HP</strong> <strong>LaserJet</strong> software documentationChapter 2, <strong>Software</strong> descriptionThis chapter provides an overview of the printing-system software installer andprint drivers.<strong>ENWW</strong> Introduction 1
Table 1-1 <strong>Software</strong> technical reference overview (continued)ChapterContentThis chapter also contains general information about other software features,including the following topics:●●●●Driver configuration for Microsoft® (MS) Windows®<strong>HP</strong> Embedded Web Server<strong>HP</strong> ToolboxFX<strong>HP</strong> Web JetadminChapter 3, Install MS Windows printingsystemcomponentsChapter 4, <strong>HP</strong> PCL 6, PCL 5, and PSemulation unidrivers for MS WindowsChapter 5, MacintoshChapter 6, Engineering detailsThis chapter provides instructions for installing the <strong>HP</strong> <strong>LaserJet</strong> <strong>P2015</strong> printer inMS Windows operating systems by using various installation methods.This chapter provides detailed descriptions of the <strong>HP</strong> PCL 6, PCL 5, and <strong>HP</strong>postscript level 3 emulation print unidrivers for Windows 2000, Windows XP, andWindows Server 2003.This chapter provides instructions for installing and uninstalling the<strong>HP</strong> <strong>LaserJet</strong> <strong>P2015</strong> printer in Macintosh operating systems and for usingMacintosh features.This chapter contains information about the following special topics:●●●●●Troubleshooting informationFile to E-mail utilityMedia attributesRemote firmware update<strong>HP</strong> <strong>LaserJet</strong> <strong>P2015</strong> printing system Readme fileFor information about the location of information within chapters, see the table of contents. An index isalso provided.Additional detailed information about the <strong>HP</strong> <strong>LaserJet</strong> <strong>P2015</strong> printing-system software is published inan addendum to this STR. The following information is available only in the addendum:●●●Lists of installed filesSystem-modification information, such as changes to the registry and registry keysDescriptions of known software issues and solutionsTopics:●●●Device featuresPrinting-system software<strong>HP</strong> <strong>LaserJet</strong> documentationDevice featuresThe following table contains descriptions of the <strong>HP</strong> <strong>LaserJet</strong> <strong>P2015</strong> printer features that are discussedin this STR. Device configurations might vary among countries/regions.2 Chapter 1 Purpose and scope <strong>ENWW</strong>
Table 1-2 Features of the <strong>HP</strong> <strong>LaserJet</strong> <strong>P2015</strong> printerFeature<strong>HP</strong> product number<strong>HP</strong> <strong>LaserJet</strong> <strong>P2015</strong> printerQ7821AMemory ● 32 megabytes (MB) of synchronous random access memory(SDRAM)●To allow for memory expansion, the printer has one DIMM slot thataccepts 256 MB RAM (the printer can support up to 288 MB ofmemory)Purpose and scopeSpeed ● Prints 26 pages per minute (ppm) on A4/letter sized mediaConnectivity ● A high-speed universal serial bus (USB) port●10/100Base-T network Jetdirect port (<strong>HP</strong> <strong>LaserJet</strong> <strong>P2015</strong>n,<strong>HP</strong> <strong>LaserJet</strong> <strong>P2015</strong>dn. and <strong>HP</strong> <strong>LaserJet</strong> <strong>P2015</strong>x printers only)Paper handling ● Single sheet priority feed slot (tray 1)● 250-sheet universal tray (tray 2)●Optional 250-sheet universal tray (optional tray 3, <strong>HP</strong> <strong>LaserJet</strong> <strong>P2015</strong>xprinter only)Print ● ProRes 1200 provides fine-line detail at 1200 x 1200 dpi●●●●●True 600x600 dpi text and graphicsAdjustable settings to optimize print qualityThe <strong>HP</strong> UltraPrecise print cartridge has a finer toner formulation thatprovides sharper text and graphics<strong>Printer</strong> command language (PCL) 5e and 6 drivers<strong>HP</strong> postscript level 3 emulationEnergy savingsThe <strong>HP</strong> <strong>LaserJet</strong> <strong>P2015</strong> printer automatically conserves electricity bysubstantially reducing power consumption when it is not in use. As anENERGY STAR® partner, Hewlett-Packard Company has determined thatthis product meets ENERGY STAR® guidelines for energy efficiency.ENERGY STAR® is a U.S. registered service mark of the United StatesEnvironmental Protection Agency.<strong>ENWW</strong> Device features 3
Printing-system softwareThe <strong>HP</strong> <strong>LaserJet</strong> <strong>P2015</strong> printer includes the following software components and programs for MicrosoftWindows operating systems.Table 1-3 <strong>Software</strong> components for WindowsComponents<strong>HP</strong> installerUninstaller<strong>HP</strong> ToolboxFXDescriptionInstalls the <strong>HP</strong> <strong>LaserJet</strong> <strong>P2015</strong> printing-system software based on the hardware it detects from thehost computer.Removes files and folders that were installed when the <strong>HP</strong> <strong>LaserJet</strong> <strong>P2015</strong> printing-systemsoftware was originally installed on the computer.Provides a software interface to manage the <strong>HP</strong> <strong>LaserJet</strong> <strong>P2015</strong> printer. Use the <strong>HP</strong> ToolboxFXto perform the following tasks:●●●●Monitor the status of the product.Change the print settings for the product.Find troubleshooting information and instructions for performing basic tasks.Receive Status Alerts when certain events occur or conditions exist on the product.Driver softwareThis software includes the following drivers:● The <strong>HP</strong> PCL 6 Unidriver. The <strong>HP</strong> PCL 6 Unidriver is installed by default in Windows 2000,Windows XP, and Windows Server 2003.●●The postscript (PS) print driver and PostScript® printer description (PPD) file for printing with<strong>HP</strong> postscript level 3 emulation. This driver is not installed by default. To install thePS 3 Emulation Unidriver or PS 3 Emulation Driver, use the Add <strong>Printer</strong> wizard.The <strong>HP</strong> PCL 5e Unidriver. This driver is not installed by default. To install the <strong>HP</strong> PCL 5eUnidriver, use the Add <strong>Printer</strong> wizard.Online HelpProvides help for using the software for the <strong>HP</strong> <strong>LaserJet</strong> <strong>P2015</strong> product.The user documentation for these products is included on the installation CD as both .CHM (onlinehelp) files and Adobe® Acrobat® .PDF files. The software CD uses a version of Adobe AcrobatReader that remains on the CD and does not need to be installed on the computer. However, youneed a web browser installed on the computer in order to view the contents from any .CHM file.Additional software●●<strong>HP</strong> <strong>Software</strong> Update. The <strong>HP</strong> <strong>Software</strong> Update utility checks the <strong>HP</strong> Web site for the latestsoftware updates for the <strong>HP</strong> <strong>LaserJet</strong> <strong>P2015</strong> printer.<strong>HP</strong> Product Assistant.The <strong>HP</strong> Product Assistant utility detects problems that occur with your<strong>HP</strong> product and can offer solutions. You can also view and search events that have beenreported by your <strong>HP</strong> products in order to check for available solutions.Topics included in this section:●●●System requirementsOperating-system supportAvailability4 Chapter 1 Purpose and scope <strong>ENWW</strong>
System requirementsThe following operating systems support the <strong>HP</strong> <strong>LaserJet</strong> <strong>P2015</strong> printing-system software:● Windows● Linux● UNIX®Purpose and scopeWindowsNOTE: For information about the <strong>HP</strong> <strong>LaserJet</strong> <strong>P2015</strong> printing-system software for Macintoshoperating systems, see Macintosh on page 197.The <strong>HP</strong> <strong>LaserJet</strong> <strong>P2015</strong> printing-system software has the following minimum system requirements.●●Windows 98 SE, Windows Millennium Edition, Windows 2000, Windows Server 2003, orWindows XP operating systemProcessor and RAM requirements:◦ For Windows 98 SE and Windows Me: a Pentium® II processor or greater, with 64 MB of RAM(for a driver-only installation)◦ For Windows 2000, Windows Server 2003, and Windows XP (32-bit Home and Professionaleditions): a Pentium II processor or greater (Pentium III or greater recommended), with 192MB of RAM (for a full installation)●●●250 MB of available hard disk spaceA 2x or faster CD-ROM drive (required for installation)A direct connection to a computer for full product functionality requires a USB port.NOTE: If the USB port has another device attached to it, such as an external storage device, thedevice must be disconnected or an additional USB port must be added. You can add an additionalUSB port by using a hub, or by installing an additional USB card.LinuxYou can also print to the <strong>HP</strong> <strong>LaserJet</strong> product from any operating system that complies with the PCLcommand language, such as OS/2, UNIX, or Linux systems.Linux users should check for the availability of drivers at the following Web site:www.hp.com/go/linuxprintingNOTE:The Linux drivers are supported through the Linux community.UNIX®UNIX systems require a Model Script to set up the UNIX environment for printing. The <strong>HP</strong> <strong>LaserJet</strong> IIImodel script, or any generic <strong>HP</strong> <strong>LaserJet</strong> printer Model Script, should work. These files are written andprovided by the individual UNIX vendor. Users of <strong>HP</strong>-UX can check for availability of the Model Scriptand the support model at the following Web site:www.hp.com/go/unixmodelscripts<strong>ENWW</strong> Printing-system software 5
Click the Support & Drivers link.Operating-system supportNOTE: For information about the <strong>HP</strong> <strong>LaserJet</strong> <strong>P2015</strong> printing-system software for Macintoshoperating systems, see Macintosh on page 197.NOTE: The <strong>HP</strong> <strong>LaserJet</strong> <strong>P2015</strong> printer does not support the Windows NT® 4.0 or Windows 95operating systems.Throughout this document, Windows XP is used to denote Windows XP Home Edition, Windows XPProfessional, and Windows Server 2003 unless noted otherwise.For more information about the <strong>HP</strong> <strong>LaserJet</strong> <strong>P2015</strong> printer, go to the following Web site:www.hp.com/support/lj<strong>P2015</strong>Topics:●●Standalone driversPrint driver support in other operating systemsStandalone driversThe following Windows operating systems fully support the <strong>HP</strong> <strong>LaserJet</strong> <strong>P2015</strong> printer through thesoftware installer, and drivers for these operating systems are available on the printing-system softwareCD that comes with the product.●●Microsoft Windows 2000 (requires Administrator privileges)Microsoft Windows XP (32-bit; requires Administrator privileges)Print driver support in other operating systemsThe following operating systems support plug-and-play or add-printer-wizard installations.●●●●●Windows 98 Second Edition (Windows 98 SE)Windows Millennium Edition (Windows Me)Windows XP Intel 64-bit (driver available only on the Web; requires Administration privileges)Windows Server 2003 (uses the Win2000_XP driver on the <strong>HP</strong> <strong>LaserJet</strong> <strong>P2015</strong> software CD andis also available on the Web)Itanium Architecture (IA) 64-bit (driver available only on the Web)Use a plug-and-play installation or the Add <strong>Printer</strong> Wizard to install the print driver for these operatingsystems. The print driver for these operating systems is available at the following <strong>HP</strong> support Web site:www.hp.com/support/lj<strong>P2015</strong>NOTE:NOTE:The <strong>HP</strong> <strong>LaserJet</strong> <strong>P2015</strong> printer does not support Windows 98 First Edition.For information and printer drivers for Linux, go to the following Web site:www.hp.com/go/linux6 Chapter 1 Purpose and scope <strong>ENWW</strong>
NOTE:AvailabilityFor information and printer drivers for UNIX, go to the following Web site:www.hp.com/go/unixmodelscriptsThe following table lists the availability of the <strong>HP</strong> <strong>LaserJet</strong> <strong>P2015</strong> printing-system software componentsby operating system.Table 1-4 <strong>Software</strong> component availability for the <strong>HP</strong> <strong>LaserJet</strong> <strong>P2015</strong> printerPurpose and scopeComponent Windows 98SE andWindows MeDrivers<strong>HP</strong> Traditional PCL 5e Driver X 1<strong>HP</strong> Traditional PCL 6 Driver X 1PS 3 Emulation Driver X 1<strong>HP</strong> traditional PPD X 1Windows 2000andWindows XP –32-bitWindows UNIX LinuxWindows– 64-bit 4bit and IA 2003 4XP – X64- Server<strong>HP</strong> PCL 5e Unidriver X X 1 X 1<strong>HP</strong> PCL 6 Unidriver X X 1 X 1PS 3 Emulation Unidriver X 1 X 1 X 1UNIX Model Script X 2Linux print drivers and model script X 3InstallersCommon Windows Installer XCD Browser X.INF File (Add <strong>Printer</strong>) X X X 4 , 1 X 4 , 1Remote management and statusApplet for <strong>HP</strong> WebJet Admin 5 X X<strong>HP</strong> ToolboxFX XOnline Documentation<strong>HP</strong> <strong>LaserJet</strong> <strong>P2015</strong> Series User Guide X XHewlett-Packard <strong>LaserJet</strong> <strong>P2015</strong> X XPrinting-System Install Notes 6Screen fonts X<strong>ENWW</strong> Printing-system software 7
Table 1-4 <strong>Software</strong> component availability for the <strong>HP</strong> <strong>LaserJet</strong> <strong>P2015</strong> printer (continued)Component Windows 98SE andWindows MeWindows 2000andWindows XP –32-bitWindows UNIX LinuxWindows– 64-bit 4bit and IA 2003 4XP – X64- ServerHelp systems X X X X1This driver is installed through the Add <strong>Printer</strong> Wizard only.2This component is available at the following Web site: www.hp.com/go/unixmodelscripts3This component is available at the following Web site: www.hp.com/go/linuxprinting4This component is available only at the following Web site: www.hp.com/support/lj<strong>P2015</strong>5This component is available at the following Web site: www.hp.com/go/webjetadmin6This document is also available at the following Web site: www.hp.com/support/lj<strong>P2015</strong>Topics:●●Printing-system software on the WebIn-box printing-system software CDsPrinting-system software on the WebAll software that is contained on the installation CD is also available on the Web.Web deployment is the preferred method for obtaining the latest software. The <strong>HP</strong> Web site offers anoption for automatic e-mail notification about new software releases.The <strong>HP</strong> <strong>LaserJet</strong> <strong>P2015</strong> printing-system software is available for download at the following Web site:www.hp.com/go/lj<strong>P2015</strong>_softwareNOTE: Only 32-bit print drivers are available on the printing-system software CD. If the computer isrunning a 64-bit operating system, install a 64-bit print driver. The 64-bit print drivers for Windows XPand Windows Server 2003 are available at the following Web site:www.hp.com/go/lj<strong>P2015</strong>_softwareTo order the <strong>HP</strong> <strong>LaserJet</strong> <strong>P2015</strong> printing–system software if the CD is damaged or missing, contact <strong>HP</strong>Support at the following Web site. To request the software CD by phone, see the following Web site forthe correct contact number for your country/region:www.hp.com/go/lj<strong>P2015</strong>_softwareNOTE: If you need a replacement CD or newer version of the software than what was shipped withthe product, go to the following Web site:www.hp.com/support/lj<strong>P2015</strong>Click CD-ROM Order Page to order, or click Download drivers and software to get the softwareupdate.In-box printing-system software CDsThe software CD for the <strong>HP</strong> <strong>LaserJet</strong> <strong>P2015</strong> printer contains a variety of files for installing the printingsystemsoftware on the computer.8 Chapter 1 Purpose and scope <strong>ENWW</strong>
The <strong>HP</strong> <strong>LaserJet</strong> <strong>P2015</strong> printing-system software CD is divided into two partitions, one for each of thefollowing operating systems:●●MS WindowsMacintoshEach partition includes documentation files and files that are required to install and uninstall the printingsystemcomponents.Topics:Purpose and scope●●Windows partitionCD versionsWindows partitionThe root directory in the MS Windows partition of the software CD contains the AUTORUN.EXE file, theSETUP.EXE file, and the following directories and support files:●●●●AppsLanguage directories (containing documentation)DriversFonts●●SetupUtilNOTE:File layouts differ by language for each regional version of the software CD.CD versionsTo view the files, insert the <strong>HP</strong> <strong>LaserJet</strong> <strong>P2015</strong> printing-system software CD, right-click Start, clickExplore, and then select the CD-ROM drive.The following table presents the part numbers and language groups on the software CDs for the<strong>HP</strong> <strong>LaserJet</strong> <strong>P2015</strong> printers.<strong>ENWW</strong> Printing-system software 9
Table 1-5 CD part numbers for the <strong>HP</strong> <strong>LaserJet</strong> <strong>P2015</strong> printing-system softwarePart number Description Languages includedon CDNeed part numberWindows software CD for the <strong>HP</strong> <strong>LaserJet</strong> <strong>P2015</strong>printer●●EnglishCatalan●Italian●Spanish●Dutch●French●German●Greek●PortugueseNeed part numberWindows software CD for the <strong>HP</strong> <strong>LaserJet</strong> <strong>P2015</strong>printer●●EnglishDanish●Swedish●Finnish●Norwegian●Hebrew●Estonian●Lithuanian●LatvianNeed part numberWindows software CD for the <strong>HP</strong> <strong>LaserJet</strong> <strong>P2015</strong>printer●●EnglishFrench●Bulgarian●Croatian●Czech●Hungarian●Kazakh●Polish●Romanian●Russian●Serbian●Slovak●Slovenian●Turkish10 Chapter 1 Purpose and scope <strong>ENWW</strong>
Table 1-5 CD part numbers for the <strong>HP</strong> <strong>LaserJet</strong> <strong>P2015</strong> printing-system software (continued)Part number Description Languages includedon CDNeed part numberWindows software CD for the <strong>HP</strong> <strong>LaserJet</strong> <strong>P2015</strong>printer●●●●UkranianArabicEnglishBahasaIndonesianPurpose and scope●●●●KoreanSimplifiedChineseTraditionalChineseThaiThe following table provides localization information about the software components for the<strong>HP</strong> <strong>LaserJet</strong> <strong>P2015</strong> printer.NOTE:A language key follows each table.Table 1-6 <strong>Software</strong> component localization by language, A-HComponent 1 Operating system AR CA CS DA DE EL EN ES FI FR HE HU<strong>HP</strong> ToolboxFX 2000, XP X X X X x X X X X X X<strong>HP</strong> TraditionalPCL 6 Driver andPS 3 Emulation Driver<strong>HP</strong> PCL 6 Unidriverand PS 3 EmulationUnidriverCommon WindowsInstallerOnline manuals (.PDFand .CHM)98 SE, Me X X X X X X X X X X2000, XP X X X X X X X X X X X X2000, XP X X X X X X X X2000, XP X X X X X x X X X X X X1Components that are not available in a specific language are supported in English.Language key for Table 1-6 <strong>Software</strong> component localization by language, A-H on page 11:●●●●●AR = ArabicCA = CatalanCS = CzechDA = DanishDE = German<strong>ENWW</strong> Printing-system software 11
●●●●●●●EL = GreekEN = EnglishES = SpanishFI = FinnishFR = FrenchHE = HebrewHU = HungarianTable 1-7 <strong>Software</strong> component localization by language I-ZComponent 1 Operating system ID IT KO NL NO PL PT RU SV TH TR ZHCNZHTW<strong>HP</strong> ToolboxFX 2000, XP x X X X X X X X X X X X X<strong>HP</strong> TraditionalPCL 6 Driver andPS 3 Emulation Driver<strong>HP</strong> PCL 6 Unidriverand PS 3 EmulationUnidriverCommon WindowsInstallerOnline manuals (.PDFand .CHM)98 SE, Me X X X X X X X X X X X X2000, XP X X X X X X X X X X X X2000, XP X X X X X X X X X X X2000, XP X X X X X X X X X X X X X1Components that are not available in a specific language are supported in English.Language key for Table 1-7 <strong>Software</strong> component localization by language I-Z on page 12:●●●●●●●●●●●ID = IndonesianIT = ItalianKO = KoreanNL = DutchNO = NorwegianPL = PolishPT = PortugueseRU = RussianSV = SwedishTH = ThaiTR = Turkish12 Chapter 1 Purpose and scope <strong>ENWW</strong>
●●ZHCN = Simplified ChineseZHTW = Traditional ChinesePurpose and scope<strong>ENWW</strong> Printing-system software 13
<strong>HP</strong> <strong>LaserJet</strong> documentationThe documentation in the following table is available for the <strong>HP</strong> <strong>LaserJet</strong> <strong>P2015</strong> printer.Table 1-8 User documentation availability and localizationDocument name Languages Part number Location<strong>HP</strong> <strong>LaserJet</strong> <strong>P2015</strong> SeriesUser GuideEnglishArabicCB366-90911?The <strong>HP</strong> <strong>LaserJet</strong> <strong>P2015</strong>Series User Guide is availablein electronic format on theCatalanCB366-90917<strong>HP</strong> <strong>LaserJet</strong> <strong>P2015</strong> printingsystemsoftware CD.Chinese (Simplified) ?Chinese (Traditional) ?Czech ?Danish ?DutchCB366-90918Finnish ?FrenchGermanCB366-90912CB366-90913Hebrew ?Hungarian ?Indonesian (Bahasa) ?ItalianCB366-90914Korean ?Norwegian ?Portuguese (Brazilian)CB366-90921Polish ?Russian ?SpanishCB366-90915Swedish ?Thai ?Turkish ?Getting Started Guide ● Catalan● Dutch● English? The Getting Started Guide isavailable in hard copy andcomes in the box with the<strong>HP</strong> <strong>LaserJet</strong> <strong>P2015</strong> printer.●●●FrenchGermanHebrew14 Chapter 1 Purpose and scope <strong>ENWW</strong>
Table 1-8 User documentation availability and localization (continued)Document name Languages Part number Location● Italian● Portuguese (Brazilian)● Spanish● Danish?● EnglishPurpose and scope●●●●●●●●●●●●●●●●●●●●●●●EstonianFinnishHebrewLatvianLithuanianNorwegianSwedishArabicBulgarianEnglishGreekKazakhLatvianLithuanianRussianTurkishUkrainianEnglishIndonesianKoreanSimplified ChineseThaiTraditional Chinese??<strong>ENWW</strong> <strong>HP</strong> <strong>LaserJet</strong> documentation 15
Table 1-8 User documentation availability and localization (continued)Document name Languages Part number Location●●●●●●●●●CroatianCzechEnglishHungarianPolishRomanianSerbianSlovakSlovenian?16 Chapter 1 Purpose and scope <strong>ENWW</strong>
2 <strong>Software</strong> descriptionIntroductionThe <strong>HP</strong> <strong>LaserJet</strong> <strong>P2015</strong> printer comes with software and installers for MS Windows and AppleComputer, Inc., Macintosh systems. Linux and UNIX systems also support the <strong>HP</strong> <strong>LaserJet</strong> <strong>P2015</strong>, andsoftware is available on the Web. For information about specific system installers, drivers, andcomponents, see the section that corresponds to that system.Topics:●MS Windows printing-system software<strong>Software</strong> description●●●●<strong>HP</strong> Extended Capabilities<strong>HP</strong> ToolboxFX<strong>HP</strong> Embedded Web Server<strong>HP</strong> Web Jetadmin<strong>ENWW</strong> Introduction 17
MS Windows printing-system softwareTopics:●●Printing system and installer<strong>HP</strong> <strong>LaserJet</strong> print driversPrinting system and installerTopics:●<strong>HP</strong> <strong>LaserJet</strong> <strong>P2015</strong> printing-system software CD for MS Windows systems<strong>HP</strong> <strong>LaserJet</strong> <strong>P2015</strong> printing-system software CD for MS Windows systemsIn the MS Windows environment (Windows 2000 and Windows XP), insert the <strong>HP</strong> <strong>LaserJet</strong> <strong>P2015</strong>printing-system software CD in the CD-ROM drive to open an interactive CD browser. Use the CDbrowser to install the print drivers and related components, and to gain access to online userdocumentation, a customization utility, and Adobe Acrobat Reader software.The following figure shows the main screen of the <strong>HP</strong> <strong>LaserJet</strong> <strong>P2015</strong> printing-system software CD.If the screen does not appear when you insert the software CD into the CD-ROM drive, follow thesesteps to open the CD browser:1. Click Start.2. Click Run.18 Chapter 2 <strong>Software</strong> description <strong>ENWW</strong>
3. Click Browse…. and navigate to the root directory of the software CD.4. Double-click the SETUP.EXE file to start the installer.Figure 2-1 Installation software CD browser<strong>Software</strong> descriptionNOTE: The options on devices might differ from the illustration.Install <strong>Printer</strong> <strong>Software</strong>. The installation wizard guides users through the <strong>HP</strong> <strong>LaserJet</strong> <strong>P2015</strong> printingsystemsoftware installation. Select a Basic Installation, a Full Installation, or a Custom Installation. Ifyou select Basic Installation, only the necessary software is installed. If you select Custom Installation,select the components that you want to install.View User Guide. Use this option to view the <strong>HP</strong> <strong>LaserJet</strong> <strong>P2015</strong> Series User Guide.NOTE: If Adobe Acrobat Reader 4.0 or later is not installed, clicking the user guide link opens it in aversion of Adobe Acrobat Reader that runs from the <strong>HP</strong> <strong>LaserJet</strong> <strong>P2015</strong> printing-system software CD.The CD browser version of Acrobat Reader is in English only, but can be used to open localized versionsof .PDF documents. The Adobe Acrobat Reader software is not installed on the computer and can onlyrun while the printing-system software CD is in the CD-ROM drive. Adobe Acrobat Reader is alsoavailable at the following Web site: www.adobe.com<strong>HP</strong> <strong>LaserJet</strong> print driversAll of the MS Windows drivers are supported in Microsoft 32-bit operating systems. Separate versionsof the <strong>HP</strong> PCL 6, PCL 5e, and <strong>HP</strong> postscript level 3 emulation unidrivers are available for Windows XPand Windows Server 2003 64-bit operating systems. These 64-bit drivers are not included on theprinting-system software CD, but they can be downloaded from the following <strong>HP</strong> Web site: www.hp.com/go/lj<strong>P2015</strong>_software<strong>ENWW</strong> MS Windows printing-system software 19
The following drivers are available on the <strong>HP</strong> <strong>LaserJet</strong> <strong>P2015</strong> printing-system software CD:●●The <strong>HP</strong> PCL 6 Unidriver for Windows 2000 and Windows XP<strong>HP</strong> PCL 5e Unidriver for Windows 2000 and Windows XP● The <strong>HP</strong> Postscript Level 3 Emulation Unidriver (the PS 3 Emulation Unidriver) for Windows 2000and Windows XP●●The <strong>HP</strong> Traditional PCL 6 Driver for Windows 98 and Windows MeThe <strong>HP</strong> Traditional PCL 5e Driver for Windows 98 and Windows Me● The <strong>HP</strong> Traditional Postscript Level 3 Emulation driver (the PS 3 Emulation Driver) for Windows 98and Windows Me20 Chapter 2 <strong>Software</strong> description <strong>ENWW</strong>
<strong>HP</strong> Extended CapabilitiesWhen installing the <strong>HP</strong> <strong>LaserJet</strong> <strong>P2015</strong> printing-system software, you have the option of participatingin <strong>HP</strong>'s voluntary program for communication between your system and <strong>HP</strong>. This feature, availablethrough software that is included on the printing-system software CD, helps <strong>HP</strong> monitor toner usage.If you select the option to participate, you receive an invitation about two weeks later. It contains fulldisclosure of the information to be communicated. Participation is entirely voluntary, and the impact onprocessing and connecting speed is negligible. Personal information is never sent to <strong>HP</strong> withoutpermission. Network addresses are used only to enable the connection and for security purposes.If you decline the invitation, the dialog box does not appear again later, and no data is gathered.<strong>Software</strong> description<strong>ENWW</strong> <strong>HP</strong> Extended Capabilities 21
<strong>HP</strong> ToolboxFXThis section provides information about the following topics:●●●●●●Overview of the <strong>HP</strong> ToolboxFXSystem requirementsKey featuresThe <strong>HP</strong> ToolboxFX foldersOther screensSummary of <strong>HP</strong> ToolboxFX known issuesOverview of the <strong>HP</strong> ToolboxFXNOTE:The <strong>HP</strong> ToolboxFX is available for Windows 2000 and Windows XP operating systems only.<strong>HP</strong> ToolboxFX allows end users to easily communicate with and manage their <strong>HP</strong> <strong>LaserJet</strong> <strong>P2015</strong>printer. The <strong>HP</strong> ToolboxFX provides the following capabilities:●●●●●Provides a view of the current status of the productProvides a view of the current status of the product consumablesProvides Device Alert functionality, notifying the end user when particular events or conditionsoccur at the device.Provides access to troubleshooting informationProvides access to some of the product settings, as an alternative to using the product controlpanelStarting the <strong>HP</strong> ToolboxFXStart the <strong>HP</strong> ToolboxFX by using any of the following methods.●●●Double-click the <strong>HP</strong> ToolboxFX icon in the Windows system tray.Click Start, click Programs, click <strong>HP</strong>, click <strong>HP</strong> <strong>LaserJet</strong> <strong>P2015</strong> series, and then click<strong>HP</strong> ToolboxFX.Click Utilities or click Settings, and then click Status in the <strong>HP</strong> Solution Center.StructureThe <strong>HP</strong> ToolboxFX consists of a single framework divided into several sections.●●●Heading banner. Each page that appears in the <strong>HP</strong> ToolboxFX has a heading banner at the topthat includes the <strong>HP</strong> logo.Devices pane. The Devices Pane is always visible on the left-hand side of the <strong>HP</strong> ToolboxFXwindow. The Devices pane lists the <strong>HP</strong> products that are available to the host computer systemand folders for the types of information available about each product.Main content area. Click any of the devices or folders listed in the Devices pane to see informationabout the product in the main content area.22 Chapter 2 <strong>Software</strong> description <strong>ENWW</strong>
●●Toolbar. A toolbar appears at the top of the Main content area. The toolbar contains controls forprinting, refreshing the page, ordering supplies, and getting help.Other Links pane. The Other Links pane is always visible in the lower-left corner of the<strong>HP</strong> ToolboxFX window. The Other Links pane contains links to the <strong>HP</strong> Instant Support, ProductSupport, and Product Registration pages on the <strong>HP</strong> Web site.Opening screenThe opening screen that appears in the <strong>HP</strong> ToolboxFX section depends on the installed configurationof the <strong>HP</strong> ToolboxFX. If the <strong>HP</strong> ToolboxFX is installed for a single <strong>HP</strong> <strong>LaserJet</strong> product, the DeviceStatus page for that <strong>HP</strong> <strong>LaserJet</strong> product appears when you open the toolbox. If the <strong>HP</strong> ToolboxFX isinstalled for multiple products, a product summary page appears that contains a brief summary of eachproduct available to the <strong>HP</strong> ToolboxFX. Double-click any of the products listed to go to the Device Statuspage for that product.System requirements<strong>HP</strong> ToolboxFX is currently supported on the following operating systems:● Windows 2000●Windows XP Professional<strong>Software</strong> description●Windows XP HomeKey features<strong>HP</strong> ToolboxFX also requires the Microsoft .NET Framework 1.1 on the client machine, which happensautomatically during installation of the <strong>HP</strong> <strong>LaserJet</strong> <strong>P2015</strong> printing-system software.This section provides information about the device alert features.Receive Alert messages for device eventsThrough <strong>HP</strong> ToolboxFX, the appropriate person can be alerted when certain events occur at the<strong>HP</strong> <strong>LaserJet</strong> <strong>P2015</strong> printers. Receive pop-up dialogs (Status Alerts) or automatically generated e-mailmessages (E-mail Alerts) for certain events. Alerts can also appear as a taskbar icon or as a desktopmessage. To see a list of the events that generate alerts in <strong>HP</strong> ToolboxFX, see the Set up StatusAlerts on page 32 section.For status alerts, a group of errors or a group of print-cartridge warnings can be selected, but not specificitems within those groups. To configure alerts, use the Set up Status Alerts screen in the Alerts folderin the <strong>HP</strong> ToolboxFX.The following alert messages are available:●●●●<strong>HP</strong> Device pop-up alert messagesSystem-tray icon alertDesktop alertE-mail alert<strong>ENWW</strong> <strong>HP</strong> ToolboxFX 23
<strong>HP</strong> Device pop-up alert messagesPop-up alert messages notify you immediately when an error or print-cartridge warning occurs in thedevice. An error, such as a jam, halts device operation and requires correction before the devicecontinues operation. The alert condition can be corrected at any time. Alerts are sent only to the specificcomputer that prints to the device. This feature is provided through <strong>HP</strong> ToolboxFX and is turned on bydefault.Figure 2-2 <strong>HP</strong> Device Alert – Load Paper pop-up messageSystem-tray icon alertThe system-tray icon feature shows information about all of the current alert conditions for the device.An <strong>HP</strong> Device Alert icon appears in the Windows system tray when an alert condition occurs. Thisfeature is turned on by default.Figure 2-3 <strong>HP</strong> Device Alert – CLOSE DOOR System Tray and Desktop pop-up messageDesktop alertDesktop alert messages notify you immediately when an error or print-cartridge warning occurs in thedevice. Desktop alerts only appear for a few seconds, and then automatically disappear. This featureis turned off by default.24 Chapter 2 <strong>Software</strong> description <strong>ENWW</strong>
E-mail alertE-mail alert messages notify up to two users when a specific alert condition occurs in the device. Thealert condition can be a specific error alert or print-cartridge warning. This feature can be used to alertadministrators or service providers that the device requires attention. For instance, when the toner lowalert occurs, the person in charge of ordering print cartridges can be notified by e-mail.This feature is turned off by default. To use this feature, specify the appropriate e-mail address, selectthe notification events, configure the SNMP e-mail server, and enable the feature in <strong>HP</strong> ToolboxFX.The <strong>HP</strong> ToolboxFX folders● Status folder● Alerts folder● Help folder● Device Settings folder● Network Settings folderStatus folder<strong>Software</strong> descriptionThe Status folder contains the following sub-folders:●●●●●●Device StatusSupplies StatusDevice ConfigurationNetwork ConfigurationPrint Info PagesEvent Log<strong>ENWW</strong> <strong>HP</strong> ToolboxFX 25
Device StatusThe Device Status screen shows device status messages from the product.Figure 2-4 Device Status screenNOTE: The <strong>HP</strong> <strong>LaserJet</strong> <strong>P2015</strong> printers include a Supplies Status section and a Supplies Informationsection on the Device Status screen, which provide information about the estimated toner level, theapproximate pages remaining based on the estimated toner level, and the <strong>HP</strong> part number for easyreference when ordering new consumables.26 Chapter 2 <strong>Software</strong> description <strong>ENWW</strong>
Supplies StatusThe Supplies Status screen provides detailed information about the cyan, magenta, yellow, and blackprint cartridges. This information is not available if a non-<strong>HP</strong> cartridge is installed in the product.Figure 2-5 Supplies Status screen<strong>Software</strong> description<strong>ENWW</strong> <strong>HP</strong> ToolboxFX 27
Device ConfigurationThe Device Configuration screen shows the values for all of the settings available for the product andother configuration items, such as installed DIMMs, personalities, and page counts. The contents of thisscreen should be consistent with the configuration page that the product generates.Figure 2-6 Device Configuration screen28 Chapter 2 <strong>Software</strong> description <strong>ENWW</strong>
Network ConfigurationThe Network Configuration screen shows the values for all of the network settings that are availablefor the product. The contents of this screen should be consistent with the configuration page that theproduct generates.Figure 2-7 Network Configuration screen<strong>Software</strong> description<strong>ENWW</strong> <strong>HP</strong> ToolboxFX 29
Print Info PagesUse the Print Info Pages screen to print out the internal special pages that the product generates.Click Print next to the name of the page that you want to print.Figure 2-8 Print Information Pages screenThe contents of these reports are generated by the product firmware, not by the <strong>HP</strong> ToolboxFX.30 Chapter 2 <strong>Software</strong> description <strong>ENWW</strong>
Event LogUse the Event Log screen to monitor events for the <strong>HP</strong> <strong>LaserJet</strong> <strong>P2015</strong> printer. Up to ten events canappear on this screen. If this screen is empty, no events have occurred on the printer.Figure 2-9 Event Log screen<strong>Software</strong> descriptionAlerts folderThe Alerts folder contains the following sub-folders:●●Set up Status AlertsSet up E-mail Alerts<strong>ENWW</strong> <strong>HP</strong> ToolboxFX 31
Set up Status AlertsUse the Set up Status Alerts screen to set up status alerts on the for the <strong>HP</strong> <strong>LaserJet</strong> <strong>P2015</strong> printer.Select the Turn on alerts option and then click Apply to turn on alerts.Figure 2-10 Set up Status Alerts screenSelect the options under Show an alertto receive alerts like those in the following table.Table 2-1 Event alerts for <strong>HP</strong> ToolboxFXPop-up alerts, system-tray icon alerts,and desktop alertsSupplies warningsEventOrder CartridgeSupplies errors ● Black Incorrect●●●●●Black MissingNon-<strong>HP</strong> Black CartridgeUnauthorized Black CartridgeReplace BlackBlack E-label Error<strong>Printer</strong> errors ● Load Paper [TYPE] [SIZE]●High Fuser Error●Tray 1 Paper Out●Fuser Driver Error32 Chapter 2 <strong>Software</strong> description <strong>ENWW</strong>
Set up E-mail AlertsUse the Set up E-mail Alerts screen to set up e-mail alerts for the <strong>HP</strong> <strong>LaserJet</strong> <strong>P2015</strong> printer.Figure 2-11 Set up E-mail Alerts screen – 1 of 234 Chapter 2 <strong>Software</strong> description <strong>ENWW</strong>
Figure 2-12 Set up E-mail Alerts screen – 2 of 2<strong>Software</strong> descriptionE-mail messages can be sent when certain events occur at the product. Select the specific events forwhich you want notification.To use this feature, use a valid e-mail address, select the events for which you want notification,configure the SNMP e-mail server that will be used to send the e-mail message, and then click Applyto save the settings.Up to two e-mail addresses can be configured to receive separate e-mail messages for separate events.To ensure that the correct e-mail addresses have been used and that the SNMP server information isvalid, click the Test E-mail Settings button.NOTE:Click Apply to make the changes take effect.Help folderThe Help folder contains the following sub-folders:●●TroubleshootingHow do I...?<strong>ENWW</strong> <strong>HP</strong> ToolboxFX 35
●●Animated DemonstrationsUser GuideTroubleshootingAll of the content in the Help folder is static HTML content, except for the animated demonstrations.This content contains hyperlinks, and Next and Previous buttons that can be used to navigate throughthe various sections of the Help content.Figure 2-13 Troubleshooting sub-folderClick Troubleshooting on the Troubleshooting screen to gain access to the Troubleshooting chapterof the <strong>HP</strong> <strong>LaserJet</strong> <strong>P2015</strong> Series User Guide.36 Chapter 2 <strong>Software</strong> description <strong>ENWW</strong>
How do I...?Figure 2-14 How do I...? sub-folder<strong>Software</strong> descriptionClick How do I... ? on the How do I... ? screen to gain access to the How do I... ? chapter of the<strong>HP</strong> <strong>LaserJet</strong> <strong>P2015</strong> Series User Guide.Each of the How do I...? screens (Print, Network, Add Memory, and Other), contains a set of links. Eachlink corresponds to a particular task. Click these links to open a new window that provides content aboutthe task.<strong>ENWW</strong> <strong>HP</strong> ToolboxFX 37
Animated DemonstrationsFigure 2-15 Animated Demonstrations screenClick the links on the Animated Demonstrations screen to view the following animated demonstrations:●●●●Paper jam removalPaper jam removal from duplex assemblyReplacing a print cartridgePrinting on both sides of the paper38 Chapter 2 <strong>Software</strong> description <strong>ENWW</strong>
User GuideFigure 2-16 <strong>HP</strong> <strong>LaserJet</strong> <strong>P2015</strong> Series User Guide<strong>Software</strong> descriptionUse the User Guide screen to gain access to the <strong>HP</strong> <strong>LaserJet</strong> <strong>P2015</strong> Series User Guide.Device Settings folderThe Device Settings folder contains the following sub-folders:●●●●●●●●●Device InformationPaper HandlingPrintingPCL5ePostScriptPrint QualityPaper TypesSystem SetupService<strong>ENWW</strong> <strong>HP</strong> ToolboxFX 39
Device InformationUse the Device Information screen to add or change information about the <strong>HP</strong> <strong>LaserJet</strong> <strong>P2015</strong> printer.Figure 2-17 Device Information screenNOTE:Click Apply to make the changes take effect.40 Chapter 2 <strong>Software</strong> description <strong>ENWW</strong>
Paper HandlingUse the Paper Handling screen to change the paper-handling defaults for the <strong>HP</strong> <strong>LaserJet</strong> <strong>P2015</strong>printer.Figure 2-18 Paper Handling screen<strong>Software</strong> description<strong>ENWW</strong> <strong>HP</strong> ToolboxFX 41
PrintingUse the Printing screen to change the printing defaults for the <strong>HP</strong> <strong>LaserJet</strong> <strong>P2015</strong> printer.Figure 2-19 Printing screenPCL5eUse the PCL5e screen to change the PCL defaults for the <strong>HP</strong> <strong>LaserJet</strong> <strong>P2015</strong> printer.Figure 2-20 PCL5e screen42 Chapter 2 <strong>Software</strong> description <strong>ENWW</strong>
NOTE:Click Apply to make the changes take effect.PostScriptUse the PostScript screen to change the PostScript defaults for the <strong>HP</strong> <strong>LaserJet</strong> <strong>P2015</strong> printer.Figure 2-21 PostScript screen<strong>Software</strong> descriptionNOTE:Click Apply to make the changes take effect.<strong>ENWW</strong> <strong>HP</strong> ToolboxFX 43
Print QualityUse the Print Quality screen to change the print-quality defaults for the <strong>HP</strong> <strong>LaserJet</strong> <strong>P2015</strong> printer.Figure 2-22 Print Quality screen44 Chapter 2 <strong>Software</strong> description <strong>ENWW</strong>
Paper TypesUse the Paper Types screen to configure the standard print modes that correspond to the various papertypes.Figure 2-23 Paper Types screen<strong>Software</strong> descriptionA print mode is a special setting that controls the print speed and the fuser temperature of the printer.The product speed and fuser temperature are adjusted to match the selected print mode, which canresult in better print quality when printing on certain media types.NOTE:Not all of the paper types listed in the driver can be adjusted on the Paper Types screen.The following table shows the paper types that the <strong>HP</strong> <strong>LaserJet</strong> <strong>P2015</strong> printer supports and the defaultfuser mode for each type.Table 2-2 Standard print modesStandard print modes Extended print modes Sensor correlation prefix Default paper typesNormal Mode None PlainFull Plain, Color,Preprinted,<strong>ENWW</strong> <strong>HP</strong> ToolboxFX 45
Table 2-2 Standard print modes (continued)Standard print modes Extended print modes Sensor correlation prefix Default paper typesPrepunched, Recycled,LetterheadHeavy Mode None PlainHalf Heavy, BondCardstock Mode None PlainHalf CardstockLight Mode None PlainFull LightGlossy Mode None Glossy Heavy GlossyTransparency Mode None Glossy TransparencyLabel Mode None PlainHalf LabelsPrint Modes screenThe Print Modes screen is available to control the extended print modes for the <strong>HP</strong> <strong>LaserJet</strong> <strong>P2015</strong>printer. To gain access to this screen, Press Ctrl + Alt + Shift on the computer keyboard, and then clickthe printer name in the Devices pane of the <strong>HP</strong> ToolboxFX. The following screen appears:Figure 2-24 Print Modes screen46 Chapter 2 <strong>Software</strong> description <strong>ENWW</strong>
Clicking Restore Modes and then clicking Apply causes the <strong>HP</strong> <strong>LaserJet</strong> <strong>P2015</strong> printer to set all of theprint modes to the original factory defaults.NOTE:Click Apply to make the changes take effect.The Print Modes screen contains the following sections:Media Type sectionThe Media Type section of the Print Modes screen contains options to modify the engine print modeseparately for each media type in the driver. Only one selection can be made for each control. Thefollowing controls are available:●Fuser. The fuser temperature control in the engine is a complex algorithm that is based on theprint mode and print duty cycle. An “increase” or “decrease” in fuser temperature means that thefuser control algorithm increases or decreases the current temperature target by some amountwhich depends on media type and other factors.The following settings are available for the Fuser control:◦ Paper curl . This setting decreases fuser temperature. The instant-on fuser applies heatmostly on the image side. This causes asymmetric drying of the paper. When the paperreabsorbs moisture after printing, the difference between the front and back surfaces causescurl (heavy toner coverage also causes curl). Decreasing the heating of the paper and tonertends to reduce curl (watch out for “cold” offset). Paper curl is increased on lighter papers andin higher humidity.<strong>Software</strong> description◦ Heavy coverage. This setting increases fuser temperature. The first option is to pick a heaviermedia type in the driver. The defect in this case is “cold” toner offset in the fuser. The tonerdoes not melt sufficiently to adhere to the paper, so large patches stick to the fuser sleeveand offset 55 mm (2.17 inches) down the page.◦ Toner offset. This setting decreases fuser temperature. The first option is to pick a lightermedia type in the driver. The defect is “hot” toner offset in the fuser. The toner next to the fusersleeve gets too hot and partially separates from the toner that sticks to the paper. Offset alsooccurs at 55 mm (2.17 inches) down the page, but it looks more like faint ghosting.◦ Less/More fusing (-2, -1, +1, +2). These settings provide two levels of decreased fusertemperature and two levels of increased fuser temperature if the other adjustments areinsufficient. Increment this control to find the best setting.●Transfer. The transfer bias voltage control in the engine is a complex algorithm that is based onthe print mode, toner cartridge and humidity. An “increase” or “decrease” in transfer bias meansthat the transfer control algorithm increases or decreases the transfer bias by some amount, whichdepends on media type and other factors. The following settings are available for the Transfercontrol.The following settings are available for the Transfer control.◦ Dry paper. This setting increases transfer bias. Some papers (notably Chinese papers)become highly resistive in dry environments. To improve transfer, increase the transfer biasvoltage. The range of paper resistivity in low humidity is so wide that a single, standard engineprint mode cannot cover all the cases.◦ Humid paper. This setting decreases transfer bias. All papers absorb water at higher humidityand become electrically less resistive, resulting in transfer defects. The engine has a humiditysensor and also checks the conductivity of the ETB in order to estimate the humidity of themedia, but this can be inadequate in more extreme cases.<strong>ENWW</strong> <strong>HP</strong> ToolboxFX 47
◦ Rough paper. This setting increases transfer current. The texture in the surface of roughpapers, such as cotton bond papers, carries a large portion of the surface area away fromcontact with the OPC drum. In this case, more transfer current is required.◦ Less/More transfer (-2, -1, +1, +2). These settings provide two levels of decreased transferbias voltage and two levels of increased transfer bias voltage if the other adjustments areinsufficient. Increment this control to find the best setting. In extreme case (very dry or verywet), low transfer current defects and high transfer current defects can overlap; that is, adefect-free setting might be impossible. These adjustments can help find the best operatingpoint.●Duplex Transfer. Paper that has passed through the fuser before being printed on the secondside is much drier and has higher resistivity than when the first side is printed. Therefore, the engineuses different transfer bias settings for the second side. It is common for the second side to showa transfer defect while the first side does not. These adjustments allow second-side defects to beimproved without affecting transfer performance on the first side (or vice versa).The following settings are available for the Duplex Transfer control.◦ Dry paper. This setting increases transfer bias. Some papers (notably Chinese papers)become highly resistive in dry environments. To improve transfer, increase the transfer biasvoltage. The range of paper resistivity in low humidity is so wide that a single, standard engineprint mode cannot cover all the cases.◦ Humid paper. This setting decreases transfer bias. All papers absorb water at higherhumidities and become electrically less resistive, resulting in transfer defects. The engine hasa humidity sensor and also checks the conductivity of the ETB in order to estimate the humidityof the media, but this can be inadequate in more extreme cases.◦ Rough paper. This setting increases transfer current. The texture on the surface of roughpapers, such as cotton bond papers, carries a large portion of the surface area away fromcontact with the OPC drum. In this case, more transfer current is required.◦ Less/More transfer (-2, -1, +1, +2) . These settings provide two levels of decreased transferbias voltage and two levels of increased transfer bias voltage if the other adjustments areinsufficient. Increment this control to find the best setting. In extreme case (very dry or verywet), low transfer current defects and high transfer current defects can overlap; that is, adefect-free setting might be impossible. These adjustments can help find the best operatingpoint.●Toner. This adjustment is applied by the formatter.The following settings are available for the Toner control.◦ Less toner (-1, -2, -3) . These settings decrease the maximum primary toner amount from100% to 95%, 90%, and 85%, respectively. This is useful for fixing toner scatter on highresisitivitypapers in low humidity environments.●Discharge. The following settings are available for the Discharge control.◦ On/Off. The <strong>HP</strong> <strong>LaserJet</strong> <strong>P2015</strong> printer has an electrostatic discharge brush where the paperseparates from the ETB (before the fuser). This prevents toner scatter after a sudden paperdischarge. Because the brush can sometimes make scatter worse, this setting is provided toturn the discharge brush off.48 Chapter 2 <strong>Software</strong> description <strong>ENWW</strong>
Optimize sectionThe Optimize settings are applied to all media printed depending on the engine’s internal tables. Thefollowing controls are available:●●●●●Background Toner. The On setting selects optimized EP process parameters for reducingbackground on glossy paper.Extra Cleaning. High acid content or “talc” papers tend to leave a conductive residue on the OPCdrums. The On setting turns on increased OPC/ETB cleaning rotations before and after pages areprinted to help rub off this residue.Trailing Edge Over-development (full-speed). The On setting selects optimized EP processparameters for decreasing trailing edge over-development in full speed (Light and Plain mediatypes). Trailing edge over-development is a jump-gap developer defect which causes excess tonerat trailing edges of halftoned or solid areas.Trailing Edge Over-development (half-speed). The On setting selects optimized EP processparameters for decreasing trailing edge over-development in half speed (heavy and glossy mediatypes). Trailing edge over-development is a jump-gap developer defect which causes excess tonerat trailing edges of halftoned or solid areas.Mottle Prevention. The On setting selects optimized EP process parameters for decreasingdeveloper mottle. This problem has largely been eliminated by cartridge and toner design changes.<strong>Software</strong> descriptionSystem SetupUse the System Setup screen to change the system defaults for the <strong>HP</strong> <strong>LaserJet</strong> <strong>P2015</strong> printer.Figure 2-25 System Setup screen<strong>ENWW</strong> <strong>HP</strong> ToolboxFX 49
The following Jam recovery settings are available:●●●Auto (default)OnOffThe following Auto continue settings are available:●●OnOff (default)Set the Connection time-out (I/O) setting to any value from 5 to 7200 seconds.The following Fast first page out settings are available:●●On (default)OffSet the Cartridge low threshold setting to any value from 1% to 20%. The Cartridge low thresholdoption sets the percentage threshold that triggers a toner-low alert in the <strong>HP</strong> ToolboxFX.NOTE:Click Apply to make the changes take effect.ServiceUse the Service screen to start the cleaning mode procedure on the <strong>HP</strong> <strong>LaserJet</strong> <strong>P2015</strong> printer.Figure 2-26 Service screen50 Chapter 2 <strong>Software</strong> description <strong>ENWW</strong>
During the printing process, paper, toner, and dust particles accumulate inside the printer. Over time,this buildup can cause print-quality problems such as toner specks or smearing. Click Start to run thecleaning mode procedure on the <strong>HP</strong> <strong>LaserJet</strong> <strong>P2015</strong> printer.Network Settings folderThe <strong>HP</strong> <strong>LaserJet</strong> <strong>P2015</strong>n, <strong>HP</strong> <strong>LaserJet</strong> <strong>P2015</strong>dn, and <strong>HP</strong> <strong>LaserJet</strong> <strong>P2015</strong>x printers contain onboardnetworking support. They do not require the use of an external Jetdirect box for network connectivity.Use the Network Settings options to configure the network settings for the <strong>HP</strong> <strong>LaserJet</strong> <strong>P2015</strong> printer.For network installations, the <strong>HP</strong> ToolboxFX communicates with the <strong>HP</strong> <strong>LaserJet</strong> <strong>P2015</strong> printer by usingthe network settings that appear on the following Network Settings sub-folder screens:●●●●●IP ConfigurationAdvancedSNMPNetwork ConfigurationPasswordCAUTION: Changing network settings can cause communication problems between <strong>HP</strong> ToolboxFXand the product.<strong>Software</strong> description<strong>ENWW</strong> <strong>HP</strong> ToolboxFX 51
IP ConfigurationThe IP Configuration screen shows the settings for basic Transmission Control Protocol/InternetProtocol (TCP/IP) network configuration. After changing these settings, click Apply to save the changes.The printer is restarted after the settings are changed.Figure 2-27 IP Configuration screenThe IP Configuration screen shows the host name and domain of the <strong>HP</strong> <strong>LaserJet</strong> <strong>P2015</strong> printer. Bydefault, the <strong>HP</strong> <strong>LaserJet</strong> <strong>P2015</strong> printer uses automatic IP configuration and DNS server. Use this screento configure the TCP/IP address and DNS server manually.The following IP Address Configuration options are available:●●Automatic IP. This option is selected by default. It causes the printer to obtain a TCP/IP addressfrom a Dynamic Host Configuration Protocol (DHCP) server, BOOTP server, or AUTOIP.Manual IP. Select Manual IP to manually specify an Internet Protocol (IP) address (also known asa static IP address). If you select this option, specify an IP address in the IP address, Subnetmask, and Default gateway fields.52 Chapter 2 <strong>Software</strong> description <strong>ENWW</strong>
The following DNS Address Configuration options are available:●●Automatic DNS Server. This option is selected by default. It causes the printer to automaticallyobtain network addresses for DNS servers from the network. If you select this option, a DHCPserver provides this information.Manual DNS Server. Select this option to manually specify network addresses for DNS serversused by the computer. If you select this option, type the IP address for the DNS server in PreferredDNS server field. If you are not sure which IP address to use, contact your network administrator.AdvancedNOTE:In the Alternate DNS server field, specify the IP address for the alternate or secondary DNS serverfor this computer. This server is used if the DNS server specified in Preferred DNS server isunavailable.Click Apply to make the changes take effect.Use the Advanced screen to set advanced networking features for the <strong>HP</strong> <strong>LaserJet</strong> <strong>P2015</strong> printer.Figure 2-28 Advanced Network Settings screen<strong>Software</strong> descriptionThe following table shows the options and settings that are available for the Advanced screen.<strong>ENWW</strong> <strong>HP</strong> ToolboxFX 53
Table 2-3 Advanced Network Settings options and settingsOptionSettingsEnabled Features ● LPD Printing (enabled by default)●<strong>HP</strong> SLP Discovery (enabled by default)Link Speed and Duplex ● Auto negotiation (default setting)●Manual negotiation◦ Link speed: 10 megabits per second (Mbps) or 100Mbps◦ Duplex: Full or HalfAutomatic Crossover ● Enable (default)●DisableNOTE:Click Apply to make the changes take effect.SNMPUse the SNMP screen to set SNMP networking features for the <strong>HP</strong> <strong>LaserJet</strong> <strong>P2015</strong> printer.Figure 2-29 SNMP screen54 Chapter 2 <strong>Software</strong> description <strong>ENWW</strong>
The following options are available on the SNMP screen:●Enable SNMP v1 read-write access. Select this option to enable SNMP V1 agents on the printer.Custom community names can be configured to control management access to the<strong>HP</strong> <strong>LaserJet</strong> <strong>P2015</strong> printer.●●◦ Set Community name: Type the SNMP Set Community Name (password) to allow SNMPinformation to be configured (or written) on the printer.◦ Confirm Set Community name: Retype the SNMP Set Community Name (password) toallow SNMP information to be configured (or written) on the printer.◦ Get Community name: Type the SNMP Get Community Name (password) to allow SNMPinformation to be read from the printer.◦ Confirm Get Community name: Retype the SNMP Get Community Name (password) toallow SNMP information to be read from the printer.◦ Disable SNMP v1 default Get Community name of “public”. Select this option to disablethe default Get community name "public". If you select this option, type the appropriate valuesinto the Get Community name and Confirm Get Community name fields.Enable SNMP v1 read-only access (uses “public” for the Get Community value). Select thisoption to enable the SNMP V1 agents on the <strong>HP</strong> <strong>LaserJet</strong> <strong>P2015</strong> printer, but limit access to readonly.Write-access is disabled. The default Get Community name "public" is automaticallyenabled.Disable SNMP v1. Select this option to disable the SNMP V1 agents on the <strong>HP</strong> <strong>LaserJet</strong> <strong>P2015</strong>printer, which is recommended for secure environments. If SNMP V1 is disabled, some portmonitors or discovery utilities might not operate properly.<strong>Software</strong> descriptionNOTE:Click Apply to make the changes take effect.<strong>ENWW</strong> <strong>HP</strong> ToolboxFX 55
Network ConfigurationThe Network Configuration screen provides an overview of the network settings that are enabled forthe <strong>HP</strong> <strong>LaserJet</strong> <strong>P2015</strong> printer.Figure 2-30 Network Configuration screenThe settings appear under the following headings:●●●●●Network Hardware ConfigurationEnabled FeaturesTCP/IPSNMPNetwork StatisticsPasswordUse the Password screen to set a password for the <strong>HP</strong> <strong>LaserJet</strong> <strong>P2015</strong> printer.56 Chapter 2 <strong>Software</strong> description <strong>ENWW</strong>
Figure 2-31 Password screen<strong>Software</strong> descriptionNetwork administrators can set user passwords to protect network settings. After a password is set, onlyusers who know the password have access to the Network Settings folder. If a password has beenset, users are prompted to type the password. If the typed-in password matches the password storedin the printer, users can navigate through the Network Settings screens and make changes to thesettings. Users who do not type the correct password within three attempts are not allowed access tothe Network Settings screens.If the password is lost or forgotten, the factory settings for the <strong>HP</strong> <strong>LaserJet</strong> <strong>P2015</strong> printer must berestored and a new password assigned.NOTE:Click Apply to make the changes take effect.Other screensThe following table lists screens that are also available through the <strong>HP</strong> ToolboxFX.ScreenAbout <strong>HP</strong> ToolboxFX screen<strong>HP</strong> Instant SupportProduct Support screenProduct Registration screenSupplies Ordering screenAccessClick the <strong>HP</strong> logo that appears in the upper-left corner of the<strong>HP</strong> ToolboxFX screens.Click the <strong>HP</strong> Instant Support link in the Other Links box thatappears on all <strong>HP</strong> ToolboxFX and <strong>HP</strong> EWS screens.Click the Product Support link in the Other Links box thatappears on all <strong>HP</strong> ToolboxFX and <strong>HP</strong> EWS screens.Click the Product Registration link in the Other Links boxthat appears on all <strong>HP</strong> ToolboxFX and <strong>HP</strong> EWS screens.Click the Supplies Ordering link in upper-right corner of the<strong>HP</strong> ToolboxFX screens.<strong>ENWW</strong> <strong>HP</strong> ToolboxFX 57
About <strong>HP</strong> ToolboxFX dialog boxClick the <strong>HP</strong> logo in the <strong>HP</strong> ToolboxFX heading banner on any <strong>HP</strong> ToolboxFX screen to gain access tothe About <strong>HP</strong> ToolboxFX dialog box. This dialog box shows the software version number and acopyright notice. This dialog box also shows the version number for each <strong>HP</strong> ToolboxFX product thatis installed.Figure 2-32 <strong>HP</strong> ToolboxFX dialog box<strong>HP</strong> Instant SupportClick <strong>HP</strong> Instant Support to access self-help based on information sent from the product to the <strong>HP</strong>Web site. The help includes recommendations for troubleshooting, firmware upgrades, and referencedocumentation that is customized to respond to the most recent events that have occurred on theproduct.Product SupportThe Product Support link connects you to a Web page that contains links to online support for the<strong>HP</strong> <strong>LaserJet</strong> <strong>P2015</strong> printer.58 Chapter 2 <strong>Software</strong> description <strong>ENWW</strong>
Product RegistrationThe Product Registration link connects you to a Web page where you can register the<strong>HP</strong> <strong>LaserJet</strong> <strong>P2015</strong> printer.Figure 2-33 Product Registration screen<strong>Software</strong> descriptionSupplies OrderingThe Supplies Ordering link connects to a Web page that helps you order supplies online from a resellerof your choice. The <strong>HP</strong> <strong>LaserJet</strong> <strong>P2015</strong> printer supplies are pre-selected. Change quantities or selectadditional items. The items are dropped into the shopping cart, ready for checkout, ensuring that thecorrect supplies are ordered through the selected reseller.Summary of <strong>HP</strong> ToolboxFX known issuesThis section summarizes issues that are known to affect the version of <strong>HP</strong> ToolboxFX released with the<strong>HP</strong> <strong>LaserJet</strong> <strong>P2015</strong> printer. The following topics are included:●●●.NET Framework dependenciesDevice communicationObtaining debugging information from <strong>HP</strong> ToolboxFX<strong>ENWW</strong> <strong>HP</strong> ToolboxFX 59
●●USB drivers are unsignedEnable or disable <strong>HP</strong> ToolboxFX.NET Framework dependenciesBecause the <strong>HP</strong> ToolboxFX is implemented using .NET technologies, the Microsoft .NET Frameworkmust be installed on the users' system. When the <strong>HP</strong> ToolboxFX software installer runs, it silently installsMicrosoft .NET Framework 1.1 (no service pack). However, some known issues with .NET Framework1.1 (no service pack) might impact users.NOTE: If the .NET Framework 1.1 is already installed on the users' system at the time of the<strong>HP</strong> ToolboxFX software installation, the framework is not installed.The optimal system configuration for <strong>HP</strong> ToolboxFX includes all of the following items:●●●Microsoft .NET Framework 1.1 (no service pack) as installed by the <strong>HP</strong> ToolboxFX softwareinstaller or by some other meansMicrosoft .NET Framework 1.1 Service Pack 1, available through Microsoft Windows UpdateMicrosoft Windows Update, to download and install all critical updatesNOTE: Continue to run Windows Update until a message appears that says no further criticalupdates are needed.If the optimal system configuration is not set up on the users' system, before or after the <strong>HP</strong> ToolboxFXsoftware is installed, the user might experience errors in <strong>HP</strong> ToolboxFX as a result of defects in variousportions of the Microsoft code. Specifically, <strong>HP</strong> ToolboxFX might intermittently report that it cannotconnect to the device, with the following error message:Figure 2-34 <strong>HP</strong> ToolboxFX – sample error dialogThese communication errors might be resolved by rebooting the computer, but the only way to addressthis problem permanently is to have the optimal system configuration.Another problem has been observed when Microsoft .NET Framework 2.0 is already installed on yoursystem. The <strong>HP</strong> ToolboxFX software installs the .NET Framework 1.1, because <strong>HP</strong> ToolboxFX cannotuse the .NET 2.0 Framework. After the installation, a Microsoft Windows update will not recognize thatthe .NET 1.1 framework requires .NET 1.1 Service Pack 1. Therefore, not all of the necessary security60 Chapter 2 <strong>Software</strong> description <strong>ENWW</strong>
updates are installed. Again, in these cases, the user might experience the intermittant Cannot connectto the device. error. The best recourse in this situation is to uninstall the Microsoft .NET Framework2.0, run Windows update to install the .NET 1.1 Service Pack 1 and all of the subsequent critical securityupdates, and then run the Windows update and reinstall the .NET Framework 2.0, which is available asan optional update.Alternatively, if uninstalling the .NET 2.0 Framework is unacceptable, search the Internet for and theninstall the following Microsoft files:●NDP1.1sp1-KB867460-X86.exe●NDP1.1sp1-KB886903-X86.exeThese files do not appear as necessary options to the .NET 1.1 Framework if the .NET 2.0 Frameworkis installed. The related Knowledge base article numbers are KB867460 and KB886903, which discussService Pack 1 for the .NET Framework and the current security patch.Device communicationThe majority of problems observed with <strong>HP</strong> ToolboxFX involve broken communication with the device.In these cases, always check to make sure that the cables are plugged in and that the device is turnedon. Also, see the preceding section about .NET Framework dependencies. If communication problemsare observed, particularly over a USB connection, the .NET Framework and Windows configurationshould be checked and updated as necessary.<strong>Software</strong> descriptionCommunication with the device can also be impacted if the IP address or hostname is changed on anetwork connected device. The <strong>HP</strong> ToolboxFX uses the properties that the print driver stores in orderto determine the device address. If communication errors are observed, print a test page to the devicefrom the computer. If you cannot print a test page, the address or port for the print driver might not beconfigured correctly. Turn the computer of and then on again after reconfiguring the print driver in orderfor <strong>HP</strong> ToolboxFX to resume communication with the device.<strong>ENWW</strong> <strong>HP</strong> ToolboxFX 61
Obtaining debugging information from <strong>HP</strong> ToolboxFXAlthough it is very unlikely, <strong>HP</strong> ToolboxFX can encounter fatal errors that cause it to crash. If this occurs,the following dialog box appears:Figure 2-35 <strong>HP</strong> ToolboxFX – sample error dialogYou likely did nothing to cause this error, and nothing can be done to recover from the internal issuesthat caused the error. The only recourse is to turn the computer off and then on again, or to restart<strong>HP</strong> ToolboxFX from the Program Group.The error log contains information that might be helpful for CPE and R&D engineers to assist indiagnosing the problem. All fatal errors, and some other events, are logged to an error log file. Whenreporting problems to CPE or R&D, please include this error log. Often, no other debugging informationis needed for fatal errors.The error log file is located at:C:\Documents and Settings\All Users\Application Data\Hewlett-Packard\ToolboxFX\ToolboxFXErrorlog.txt62 Chapter 2 <strong>Software</strong> description <strong>ENWW</strong>
Follow these instructions to obtain detailed debugging information from <strong>HP</strong> ToolboxFX:1. Shut down <strong>HP</strong> ToolboxFX by executing <strong>HP</strong>TLBXFX.exe shutdown. See Enable or disable<strong>HP</strong> ToolboxFX on page 63.2. Use Notepad or Wordpad to edit the C:\Program Files\<strong>HP</strong>\ToolBoxFX\defaults\manifest.xml file asfollows:Change these values:
5. Add the disabling option by typing -disable at the end of the path so that the Open field appearsas:"C:\Program Files\<strong>HP</strong>\ToolboxFX\bin\hptlbxfx.exe -disable"6. Click OK.CAUTION:Disabling the <strong>HP</strong> ToolboxFX terminates all <strong>HP</strong> ToolboxFX functionality.If multiple devices use the <strong>HP</strong> ToolboxFX, disabling it causes all the devices to lose <strong>HP</strong> ToolboxFXfunctionality, including status and e-mail alerts.64 Chapter 2 <strong>Software</strong> description <strong>ENWW</strong>
<strong>HP</strong> Embedded Web ServerThe <strong>HP</strong> Embedded Web Server (<strong>HP</strong> EWS) is a Web-based application that allows users to controlsettings on the <strong>HP</strong> <strong>LaserJet</strong> <strong>P2015</strong> printer through the Web browser. To open the <strong>HP</strong> EWS, open a Webbrowser and type the printer IP address in the address bar. The printer IP address appears on theNetwork Configuration screen in <strong>HP</strong> ToolboxFX.NOTE: If the <strong>HP</strong> <strong>LaserJet</strong> <strong>P2015</strong> printer is connected to the computer through the USB port, you donot have access to the <strong>HP</strong> EWS interface. However, most of the information that appears in <strong>HP</strong> EWScan be viewed by using the <strong>HP</strong> ToolboxFX interface. For more information, see <strong>HP</strong> ToolboxFXon page 22.The following tabs are available in the <strong>HP</strong> EWS:●●●Status tabStatus tabSettings tabNetworking tabUse the Status tab to access and print detailed information regarding device and supply status, deviceconfiguration, network configuration, and usage.<strong>Software</strong> descriptionThe Status tab contains the following pages:●●●●●●Device StatusSupplies Status pageDevice Configuration pageNetwork Configuration pagePrint Info PagesEvent Log page<strong>ENWW</strong> <strong>HP</strong> Embedded Web Server 65
Device StatusThe Device Status page shows device status messages from the device. The Device Status page alsocontains some pertinent printer information and device settings.Figure 2-36 <strong>HP</strong> EWS – Device Status pageSupplies Status pageThe Supplies Status page shows the status of all of the printer supplies, including the print cartridges.Figure 2-37 <strong>HP</strong> EWS – Supplies Status page66 Chapter 2 <strong>Software</strong> description <strong>ENWW</strong>
Device Configuration pageThe Device Configuration page shows the values of all of the settings that are available in the printer.The contents of this page are consistent with the configuration page that the firmware generates.Figure 2-38 <strong>HP</strong> EWS – Device Configuration page<strong>Software</strong> description<strong>ENWW</strong> <strong>HP</strong> Embedded Web Server 67
Network Configuration pageThe Network Configuration page contains information about the network and its enabled features.Figure 2-39 <strong>HP</strong> EWS – Network Configuration pagePrint Info PagesUse the Print Info Pages page to print the internal special pages that the device generates. Thefollowing information pages are available:●●●●PCL Font ListPCL6 Font ListPS Font ListSupplies Page68 Chapter 2 <strong>Software</strong> description <strong>ENWW</strong>
Figure 2-40 <strong>HP</strong> EWS – Print Info Pages pageEvent Log pageUse the Event Log page to track the events that occur on the <strong>HP</strong> <strong>LaserJet</strong> <strong>P2015</strong> printer.Figure 2-41 <strong>HP</strong> EWS – Event Log page<strong>Software</strong> descriptionSettings tabUse the Settings tab to view and change settings for the following features:●●●●●●●●●Device Information pagePaper Handling pagePrinting pagePCL5e pagePostScript pagePrint Quality pagePaper Types pageSystem Setup pageService page<strong>ENWW</strong> <strong>HP</strong> Embedded Web Server 69
Device Information pageThe Device Information page contains identifying information about the <strong>HP</strong> <strong>LaserJet</strong> <strong>P2015</strong> printer.Figure 2-42 <strong>HP</strong> EWS – Device Information pagePaper Handling pageUse this page to configure the paper-handling settings for the <strong>HP</strong> <strong>LaserJet</strong> <strong>P2015</strong> printer.Figure 2-43 <strong>HP</strong> EWS – Paper Handling page70 Chapter 2 <strong>Software</strong> description <strong>ENWW</strong>
Printing pageUse this page to change the printing defaults for the <strong>HP</strong> <strong>LaserJet</strong> <strong>P2015</strong> printer.Figure 2-44 <strong>HP</strong> EWS – Printing page<strong>Software</strong> descriptionPCL5e pageUse the PCL5e page to change font information and form length.Figure 2-45 <strong>HP</strong> EWS – PCL5e page<strong>ENWW</strong> <strong>HP</strong> Embedded Web Server 71
PostScript pageUse the PostScript page to change the Print PS Errors option.Figure 2-46 <strong>HP</strong> EWS – PostScript pagePrint Quality pageUse the Print Quality page to change the print quality defaults for the <strong>HP</strong> <strong>LaserJet</strong> <strong>P2015</strong> printer.Figure 2-47 <strong>HP</strong> EWS – Print Quality page72 Chapter 2 <strong>Software</strong> description <strong>ENWW</strong>
Paper Types pageUse the Paper Types page to set the default paper type settings for the <strong>HP</strong> <strong>LaserJet</strong> <strong>P2015</strong> printer.Figure 2-48 <strong>HP</strong> EWS – Paper Types page<strong>Software</strong> description<strong>ENWW</strong> <strong>HP</strong> Embedded Web Server 73
System Setup pageUse the System Setup page to change settings on the <strong>HP</strong> <strong>LaserJet</strong> <strong>P2015</strong> printer such as JamRecovery and Auto Continue.Figure 2-49 <strong>HP</strong> EWS – System Setup pageService pageUse the Service page to initiate the cleaning mode on the <strong>HP</strong> <strong>LaserJet</strong> <strong>P2015</strong> printer.Figure 2-50 <strong>HP</strong> EWS – Service pageNetworking tabUse the Networking tab to view and change settings for the network connection and communicationwith the printer. The following pages are available:●IP Configuration page74 Chapter 2 <strong>Software</strong> description <strong>ENWW</strong>
●●●●●Advanced pageBonjour pageSNMP pageNetwork Configuration pagePassword pageIP Configuration pageUse the IP Configuration page to configure the IP address and host and domain names for the<strong>HP</strong> <strong>LaserJet</strong> <strong>P2015</strong> printer.Figure 2-51 <strong>HP</strong> EWS – IP Configuration page<strong>Software</strong> description<strong>ENWW</strong> <strong>HP</strong> Embedded Web Server 75
Advanced pageUse the Advanced page to configure the enabled settings and other settings, such as link speed, forthe <strong>HP</strong> <strong>LaserJet</strong> <strong>P2015</strong> printer.Figure 2-52 <strong>HP</strong> EWS – Advanced pageBonjour pageUse the Bonjour page to enable or disable the Bonjour settings for the <strong>HP</strong> <strong>LaserJet</strong> <strong>P2015</strong> printer.Figure 2-53 <strong>HP</strong> EWS – Bonjour page76 Chapter 2 <strong>Software</strong> description <strong>ENWW</strong>
SNMP pageUse this page to configure the SNMP settings for the <strong>HP</strong> <strong>LaserJet</strong> <strong>P2015</strong> printer.Figure 2-54 <strong>HP</strong> EWS – SNMP page<strong>Software</strong> description<strong>ENWW</strong> <strong>HP</strong> Embedded Web Server 77
Network Configuration pageThe Network Configuration page contains information about the network and its enabled features.Figure 2-55 <strong>HP</strong> EWS – Network Configuration page78 Chapter 2 <strong>Software</strong> description <strong>ENWW</strong>
Password pageUse this page to set or change the Administrator password.Figure 2-56 <strong>HP</strong> EWS – Password page<strong>Software</strong> description<strong>ENWW</strong> <strong>HP</strong> Embedded Web Server 79
<strong>HP</strong> Web JetadminUse the <strong>HP</strong> Web Jetadmin and a browser to manage <strong>HP</strong> Jetdirect-connected devices within an intranet.<strong>HP</strong> Web Jetadmin is a browser-based management tool that should be installed only on a singlenetwork-administration server.To download a current version of <strong>HP</strong> Web Jetadmin, and for the latest list of host systems that support<strong>HP</strong> Web Jetadmin, go to the following Web site:www.hp.com/go/webjetadmin80 Chapter 2 <strong>Software</strong> description <strong>ENWW</strong>
3 Install MS Windows printing-systemcomponentsIntroductionThe <strong>HP</strong> <strong>LaserJet</strong> <strong>P2015</strong> printer comes with software and installers for MS Windows and AppleComputer, Inc., Macintosh systems. Linux and UNIX systems support the <strong>HP</strong> <strong>LaserJet</strong> <strong>P2015</strong>, andsoftware is available on the Web. This document provides procedures for installing and removing the<strong>HP</strong> <strong>LaserJet</strong> <strong>P2015</strong> printing-system software for MS Windows operating systems.NOTE: If the computer is running a 64-bit MS Windows operating system, install the corresponding64-bit print driver. For instructions, see Installing the print drivers by using Microsoft Windows Plug-and-Play or the add-printer wizard on page 84.Topics:●●●Installation overviewInstallation optionsInstallation dialog box options for Microsoft Windows 2000 and Microsoft Windows XPMS Windows install<strong>ENWW</strong> Introduction 81
Installation overviewThe software for the <strong>HP</strong> <strong>LaserJet</strong> <strong>P2015</strong> printer comes on one CD. The CD includes print drivers andall of the necessary software for the <strong>HP</strong> <strong>LaserJet</strong> <strong>P2015</strong> printer.The <strong>HP</strong> <strong>LaserJet</strong> <strong>P2015</strong> includes a new installer that improves the software installation process andsupports a software-first installation, which is the recommended installation method. A Minimuminstallation option is available, which consists of only the print drivers.On computers running Microsoft Windows 2000 or Microsoft Windows XP the Setup program installsthe <strong>HP</strong> <strong>LaserJet</strong> <strong>P2015</strong> printing-system software from the CD onto the hard disk and updates MicrosoftWindows files.The Setup program is not supported for Microsoft Windows 98 SE, Microsoft Windows Me, or MicrosoftWindows Server 2003. A plug-and-play or add-printer-wizard installation must be used for theseoperating systems. For more information, see Installing the print drivers by using Microsoft WindowsPlug-and-Play or the add-printer wizard on page 84.For all of the supported platforms, each installation option presents a series of query dialog boxes thatmove through the installation process. Different dialog boxes are presented for a directly-connected ornetworked <strong>HP</strong> <strong>LaserJet</strong> <strong>P2015</strong> printer.NOTE: The <strong>HP</strong> <strong>LaserJet</strong> <strong>P2015</strong> printing-system software uses Microsoft USB printing support(USB00X) rather than DOT4 printing support.82 Chapter 3 Install MS Windows printing-system components <strong>ENWW</strong>
Installation optionsThe <strong>HP</strong> <strong>LaserJet</strong> <strong>P2015</strong> printing-system software can be used with the <strong>HP</strong> <strong>LaserJet</strong> <strong>P2015</strong> printer inthe following configurations:●Direct Connection. Install the <strong>HP</strong> <strong>LaserJet</strong> <strong>P2015</strong> printing-system software on a computer that isdirectly connected to the product through a USB port and running Microsoft Windows 2000 orMicrosoft Windows XP.In this configuration, the printer is not shared. A single user has complete physical control over theprinter. In this configuration, access is available to all of the printer features.●Shared direct connection using Microsoft peer-to-peer networking. Install the<strong>HP</strong> <strong>LaserJet</strong> <strong>P2015</strong> printing-system software on a computer that is directly connected to the productthrough a USB port and running Microsoft Windows 2000, Microsoft Windows XP, or MicrosoftWindows Server 2003 . Then share the <strong>HP</strong> <strong>LaserJet</strong> <strong>P2015</strong> printer with other users on the networkby using Microsoft Windows sharing.●When you use Microsoft Windows to share a local printer over the network, the operating systemhandles all of the networking issues. The product prints in this configuration, but only the localcomputer can use the <strong>HP</strong> ToolboxFX. Also, because Microsoft peer-to-peer networking isunidirectional, network users do not receive printer-status messages when they print to the product.NOTE: <strong>HP</strong> does not support vending drivers across operating systems that have different printdriverarchitectures, such as <strong>HP</strong> Traditional drivers and <strong>HP</strong> Unidrivers. To use a mix of operatingsystems, download and install an alternative print driver for the specific operating system.Network connection using onboard networking. Install the <strong>HP</strong> <strong>LaserJet</strong> <strong>P2015</strong> printing-systemsoftware on a computer that is running Microsoft Windows 2000 or Microsoft Windows XP and thathas access to a local area network (LAN) to which the <strong>HP</strong> <strong>LaserJet</strong> <strong>P2015</strong> printer is also connected .The <strong>HP</strong> <strong>LaserJet</strong> <strong>P2015</strong>n, the <strong>HP</strong> <strong>LaserJet</strong> <strong>P2015</strong>dn, and the <strong>HP</strong> <strong>LaserJet</strong> <strong>P2015</strong>x printers haveonboard networking that connects to a LAN through a 10/100Base-T (RJ-45) port.The following elements are required for a networked <strong>HP</strong> <strong>LaserJet</strong> <strong>P2015</strong> printer:◦ An installed network that uses the TCP/IP network protocol◦ A cable for your type of network connection (not included)MS Windows installMicrosoft Windows installation for direct connectionsUse the following instructions to install the product software on a computer that is running MicrosoftWindows 2000 or Microsoft Windows XP.NOTE: Set up and turn on the <strong>HP</strong> <strong>LaserJet</strong> <strong>P2015</strong> printer before installing the printing-systemsoftware. Do not connect the <strong>HP</strong> <strong>LaserJet</strong> <strong>P2015</strong> printer to the computer until the software promptappears.NOTE: You must have Administrator privileges to install the printing-system software on MicrosoftWindows 2000 or Microsoft Windows XP.1. Quit all open programs.2. Insert the <strong>HP</strong> <strong>LaserJet</strong> <strong>P2015</strong> printing-system software CD into the CD-ROM drive.NOTE: If the CD does not start automatically, click Start, click Run, and then browse to anddouble-click the SETUP.EXE file in the root directory of the CD.<strong>ENWW</strong> Installation options 83
3. Follow the onscreen prompts to install the software.4. When the installation is nearly complete, the Finish dialog box appears and you can print a testpage. Click the Print a test page check box, and then click Finish to finish the installation andprint a test page.5. If prompted to restart the computer, click Yes.Installing the print drivers by using Microsoft Windows Plug-and-Play or theadd-printer wizardThe <strong>HP</strong> <strong>LaserJet</strong> <strong>P2015</strong> printing-system software installer does not support Microsoft Windows 98 SE,Microsoft Windows Me, or Microsoft Windows Server 2003. To install the print drivers on computersrunning any of these operating systems, use a plug-and-play installation for direct USB printerconnections, or an add-printer-wizard installation for network-connected printers.During a plug-and-play or add-printer-wizard installation, the following drivers are installed:●●●Print driverUSB driver (for plug-and-play installations only)EWS null driver (for the embedded Web server)If your computer is running Windows 98 SE or Windows Me and you have an <strong>HP</strong> <strong>LaserJet</strong> <strong>P2015</strong>n,<strong>HP</strong> <strong>LaserJet</strong> <strong>P2015</strong>dn, or <strong>HP</strong> <strong>LaserJet</strong> <strong>P2015</strong>x printer, configure the driver to include the advancedfeatures of these printer models after the <strong>HP</strong> <strong>LaserJet</strong> <strong>P2015</strong> printing-system software is installed.Follow these steps to configure the driver:1. Click Start, click Settings, and then click <strong>Printer</strong>s.2. Right-click the printer icon for the <strong>HP</strong> <strong>LaserJet</strong> <strong>P2015</strong> printer, and then click Properties.84 Chapter 3 Install MS Windows printing-system components <strong>ENWW</strong>
3. On the Configure tab, click the drop-down menu, select the printer model, and then click OK.Figure 3-1 Configure the driverMS Windows installPlug-and-play installation for direct USB connection in Microsoft Windows 98 SEUp to five events might occur when you use Microsoft Windows Plug-and-Play to install the<strong>HP</strong> <strong>LaserJet</strong> <strong>P2015</strong> print driver software on a computer running Microsoft Windows 98 SE.NOTE: The SETUP.EXE program on the <strong>HP</strong> <strong>LaserJet</strong> <strong>P2015</strong> printing-system CD is not supported inWindows 98 SE, Windows Me, or Windows Server 2003. For these operating systems, use MicrosoftPlug-and-Play for direct USB connections or the add-printer-wizard installation for network connectionsto install the print drivers. If you run SETUP.EXE in these operating systems, an error messageappears: The operating system on this computer is not supported.Follow these steps to install the <strong>HP</strong> <strong>LaserJet</strong> <strong>P2015</strong> printing-system software on a computer runningMicrosoft Windows 98 SE.1. Verify that the <strong>HP</strong> <strong>LaserJet</strong> <strong>P2015</strong> printer is turned on.2. Quit all open programs.<strong>ENWW</strong> Installation options 85
3. Insert the <strong>HP</strong> <strong>LaserJet</strong> <strong>P2015</strong> printing-system CD into the CD-ROM drive on the computer.NOTE:4.If a dialog box that contains an Install button appears, click Exit and continue with step4. Connect a USB cable between the printer and the computer.5. When the Add New Hardware Wizard USB Composite Device dialog box appears, click Next.Figure 3-2 Add New Hardware Wizard USB Composite Device dialog box86 Chapter 3 Install MS Windows printing-system components <strong>ENWW</strong>
6. Click the Search for the best driver for your device. (Recommended) option button, and thenclick Next.Figure 3-3 Add New Hardware Wizard USB Composite Device - Search for driver dialog box7. Select the CD-ROM check box and clear all other check boxes. Click Next to continue.Figure 3-4 Add New Hardware Wizard USB Composite Device - Specify a location dialog boxMS Windows install<strong>ENWW</strong> Installation options 87
8. Click Next to accept the updated driver (USBHUB).Figure 3-5 Add New Hardware Wizard USB Composite Device - What do you want toinstall? dialog box9. Click Next to install the driver for the <strong>HP</strong> <strong>LaserJet</strong> <strong>P2015</strong> printer.Figure 3-6 Add New Hardware Wizard USB Composite Device - Ready to Install dialog box88 Chapter 3 Install MS Windows printing-system components <strong>ENWW</strong>
10. Click Finish to complete the installation of the <strong>HP</strong> <strong>LaserJet</strong> <strong>P2015</strong> printer.Figure 3-7 Add New Hardware Wizard USB Composite Device - Finish dialog box11. The remaining plug-and-play events for the <strong>HP</strong> Embedded Web Server, USB Printing Support, and<strong>HP</strong> <strong>LaserJet</strong> <strong>P2015</strong> PCL 6 driver are automatic.12. Click Start, click Settings, and then click <strong>Printer</strong>s to confirm that the <strong>HP</strong> <strong>LaserJet</strong> <strong>P2015</strong> PCL 6driver is installed.MS Windows install<strong>ENWW</strong> Installation options 89
Plug-and-play installation for a direct USB connection in Microsoft Windows MeUp to five events might occur when you use Microsoft Windows Plug-and-Play to install the<strong>HP</strong> <strong>LaserJet</strong> <strong>P2015</strong> print driver software on a computer running Microsoft Windows Me.NOTE: The SETUP.EXE program on the <strong>HP</strong> <strong>LaserJet</strong> <strong>P2015</strong> printing-system CD is not supported inWindows 98 SE, Windows Me, or Windows Server 2003. For these operating systems, use MicrosoftPlug-and-Play for direct USB connections or the add-printer-wizard installation for network connectionsto install the print drivers. If you run SETUP.EXE in these operating systems, an error messageappears: The operating system on this computer is not supported.Follow these steps to install the <strong>HP</strong> <strong>LaserJet</strong> <strong>P2015</strong> printing-system software on a computer runningMicrosoft Windows Me.1. Verify that the <strong>HP</strong> <strong>LaserJet</strong> <strong>P2015</strong> printer is turned on.2. Quit all open programs.3. Insert the <strong>HP</strong> <strong>LaserJet</strong> <strong>P2015</strong> printing-system CD into the CD-ROM drive on the computer.NOTE:4.If a dialog box that contains an Install button appears, click Exit and continue with step4. Connect a USB cable between the printer and the computer.5. When the New Hardware Wizard dialog box appears, click Automatic search for a better driver.(Recommended), and then click Next.Figure 3-8 Add New Hardware Wizard Search for driver dialog box90 Chapter 3 Install MS Windows printing-system components <strong>ENWW</strong>
6. Click Finish in the USB Printing Support dialog box.Figure 3-9 Add New Hardware Wizard USB Printing Support dialog box7. In the <strong>HP</strong> EWS dialog box, click the Automatic search for a better driver (Recommended) optionbutton and then click Next to continue the installation.Figure 3-10 Add New Hardware Wizard <strong>HP</strong> EWS dialog boxMS Windows install<strong>ENWW</strong> Installation options 91
8. Click Finish to continue copying files to the computer. The remaining plug-and-play events for the<strong>HP</strong> <strong>LaserJet</strong> <strong>P2015</strong> PCL 6 driver are automatic.Figure 3-11 Add New Hardware Wizard – Finish dialog box9. Click Start, click Settings, and then click <strong>Printer</strong>s to confirm that the <strong>HP</strong> <strong>LaserJet</strong> <strong>P2015</strong> driver isinstalled.Add-<strong>Printer</strong> Wizard installation for network connections in Windows Server 2003The SETUP.EXE program on the <strong>HP</strong> <strong>LaserJet</strong> <strong>P2015</strong> printing-system CD is not supported in WindowsServer 2003. Use the Microsoft Add-<strong>Printer</strong> Wizard for network connections or using a plug-and-playinstallation for direct USB connections to install the printer driver.Follow these steps to install the <strong>HP</strong> <strong>LaserJet</strong> <strong>P2015</strong> printing-system software on a computer runningWindows Server 2003.1. Quit all open programs.2. Insert the <strong>HP</strong> <strong>LaserJet</strong> <strong>P2015</strong> printing-system CD into the CD-ROM drive on the computer.NOTE:step 3.If the CD starts automatically, click Exit to exit the installation program and continue with3. Open <strong>Printer</strong>s and Faxes and double-click Add <strong>Printer</strong>.4. Click Next on the Welcome screen.5. Follow the onscreen instructions.6. When prompted for a location of the driver, browse to the following location on the<strong>HP</strong> <strong>LaserJet</strong> <strong>P2015</strong> software CD::\drivers\Win2000_XP92 Chapter 3 Install MS Windows printing-system components <strong>ENWW</strong>
NOTE:Windows Server 2003 uses the same print driver as Windows 2000 and Windows XP.7. If prompted to restart the computer, click Yes.MS Windows install<strong>ENWW</strong> Installation options 93
Microsoft Windows installation for networked computersEach networked computer that has the <strong>HP</strong> <strong>LaserJet</strong> <strong>P2015</strong> printing-system software installed hasaccess to all of the printer features over a network connection. This access is through on-boardnetworking that comes standard on the <strong>HP</strong> <strong>LaserJet</strong> <strong>P2015</strong>n, <strong>HP</strong> <strong>LaserJet</strong> <strong>P2015</strong>dn, and<strong>HP</strong> <strong>LaserJet</strong> <strong>P2015</strong>x printers.To install the <strong>HP</strong> <strong>LaserJet</strong> <strong>P2015</strong> printing-system software on networked computers running MicrosoftWindows 2000 or Microsoft Windows XP, follow these steps.NOTE:You must have Administrator privileges to install the software.1. Quit all open programs.2. Insert the <strong>HP</strong> <strong>LaserJet</strong> <strong>P2015</strong> printing-system software CD into the CD-ROM drive.NOTE: If the CD does not start automatically, click Start, click Run, and then browse to anddouble-click the SETUP.EXE file in the root directory of the CD.3. Follow the onscreen prompts to install the software.4. When the Installer software prompts you to select how the printer will be connected, select Throughthe network, and then click Next. Follow the onscreen instructions.5. When the installation is completed, a setup dialog box appears that asks whether or not you wantto print a test page. Click Yes.6. If prompted to restart the computer, click Yes.Setting up Microsoft Windows Sharing (peer-to-peer networking)This section contains instructions for using Microsoft Windows Sharing to make the product availableto network users when the product is directly connected to a computer.NOTE: This document outlines the procedures for sharing a printer through Microsoft WindowsSharing (peer-to-peer networking). If these procedures are not successful, contact Microsoft at thefollowing Web site: www.microsoft.com Because it is a function of Microsoft operating systems and notof the <strong>HP</strong> printer drivers, <strong>HP</strong> does not support peer-to-peer networking.In Windows-sharing, the person who uses the computer that is directly connected to the product canallow other users on the network to print to the <strong>HP</strong> <strong>LaserJet</strong> <strong>P2015</strong> printer.When the <strong>HP</strong> <strong>LaserJet</strong> <strong>P2015</strong> printer is shared, install the printer drivers on all of the computers thatneed to print to the <strong>HP</strong> <strong>LaserJet</strong> <strong>P2015</strong> printer.Setting up the Microsoft Windows 98 SE, Microsoft Windows Me, or Microsoft Windows2000 host computerAt the computer that is directly connected to the <strong>HP</strong> <strong>LaserJet</strong> <strong>P2015</strong> printer, perform the following steps.1. Click Start, click Settings, and then click <strong>Printer</strong>s.2. In the printer list, right-click the icon for the <strong>HP</strong> <strong>LaserJet</strong> <strong>P2015</strong> printer, and then click Sharing.94 Chapter 3 Install MS Windows printing-system components <strong>ENWW</strong>
If Sharing does not appear on the menu, follow these stepsenable printer sharing for MicrosoftWindows 98 SE or Microsoft Windows Me. :a. Click Start, click Settings, and then click Control Panel.b. Double-click the Network icon.c. On the General tab, click File and Print Sharing.d. Click the I want to be able to allow others to print to my printers check box, and thenclick OK.e. Click OK again, and then close the Control Panel. If you are prompted to restart the computer,click Yes.f. Return to step 1.3. On the Sharing tab, click the Share As option button, and then type a name for the product inthe Share Name field. Click OK.NOTE:The Share Name must be a maximum of 8 characters.Setting up the Microsoft Windows XP or Microsoft Windows Server 2003 host computerAt the computer that is directly connected to the <strong>HP</strong> <strong>LaserJet</strong> <strong>P2015</strong> printer, perform the following steps.1. Click Start and then click <strong>Printer</strong>s and Faxes.2. In the printer list, right-click the icon for the <strong>HP</strong> <strong>LaserJet</strong> <strong>P2015</strong> printer, and then click Sharing.3. On the Sharing tab, click the Share this printer option button and type a name for the product inthe Share Name field. Click OK.4. Click the Ports tab. Click to clear the Enable bidirectional support check box, and then clickOK.MS Windows installSetting up the client computersAfter the host computer is set up to share the <strong>HP</strong> <strong>LaserJet</strong> <strong>P2015</strong> printer, the client computers can beconfigured. Perform the following steps at all the other network computers that will use the<strong>HP</strong> <strong>LaserJet</strong> <strong>P2015</strong> printer.Setting up Microsoft Windows 98 SE, Microsoft Windows Me, or Microsoft Windows 2000 clientcomputers1. Click Start, click Settings, and then click <strong>Printer</strong>s.2. Double-click the Add <strong>Printer</strong> icon to open the Add <strong>Printer</strong> wizard.3. Click Next to start the wizard.4. Click the Network <strong>Printer</strong> option button, and then click Next.<strong>ENWW</strong> Installation options 95
5. Type the path and share name of the <strong>HP</strong> <strong>LaserJet</strong> <strong>P2015</strong> printer to connect to, or click Browseand navigate to the printer.6. Click Next.7. Click Yes or No when asked if you want to use this printer as the default printer for MicrosoftWindows-based programs, and then click Next.8. Click Finish to complete the installation and close the Add <strong>Printer</strong> wizard.NOTE:You might need the product software CD to complete the print–driver installations.Setting up Microsoft Windows XP or Microsoft Windows Server 2003 client computers1. Click Start and then click <strong>Printer</strong>s and Faxes.2. In the column to the left, under <strong>Printer</strong> Tasks, click Add a printer to open the Add <strong>Printer</strong> wizard.3. Click Next to start the wizard.4. Click the A network printer or a printer attached to another computer option button, and thenclick Next.5. Type the path and share name of the <strong>HP</strong> <strong>LaserJet</strong> <strong>P2015</strong> printer to connect to- OR -Click Browse and navigate to find the <strong>HP</strong> <strong>LaserJet</strong> <strong>P2015</strong> printer to connect to.6. Click Next.7. Click Yes or No when asked if you want to use this printer as the default printer for MicrosoftWindows-based programs, and then click Next.8. Click Finish to complete the installation and close the Add <strong>Printer</strong> wizard.96 Chapter 3 Install MS Windows printing-system components <strong>ENWW</strong>
Installation dialog box options for Microsoft Windows 2000and Microsoft Windows XPThe following section shows the dialog box options that appear during the <strong>HP</strong> <strong>LaserJet</strong> <strong>P2015</strong> printingsystemsoftware installation on Microsoft Windows 2000 and Microsoft Windows XP operating systems.NOTE: The <strong>HP</strong> <strong>LaserJet</strong> <strong>P2015</strong> printing-system software installer does not support Microsoft Windows98 SE, Microsoft Windows Me, or Windows Server 2003. To install the <strong>HP</strong> <strong>LaserJet</strong> <strong>P2015</strong> printingsystemsoftware on a computer running Microsoft Windows 98 SE, Microsoft Windows Me, or WindowsServer 2003, complete a Plug-and-Play installation. For more information, see Installing the print driversby using Microsoft Windows Plug-and-Play or the add-printer wizard on page 84.NOTE: <strong>HP</strong> recommends installing the software before connecting the <strong>HP</strong> <strong>LaserJet</strong> <strong>P2015</strong> printer tothe computer (software-first installation). These instructions are for a software-first installation.Use these instructions the first time you install the <strong>HP</strong> <strong>LaserJet</strong> <strong>P2015</strong> printing-system software .Topics:●●Animated installation guidePrinting-system software installationAnimated installation guideWhen you insert the printing-system software CD into the CD-ROM drive, the animated installation guidestarts automatically. The Begin Setup screen appears.Figure 3-12 Animated installation guide – Welcome screenMS Windows install<strong>ENWW</strong> Installation dialog box options for Microsoft Windows 2000 and Microsoft Windows XP 97
Click Begin Setup to initiate a series of screens that show how to prepare the <strong>HP</strong> <strong>LaserJet</strong> <strong>P2015</strong> forsoftware installation. Click the arrows in the lower-right corner of the screen to view animated illustrationsof each step.When setup is complete, the Install <strong>Printer</strong> <strong>Software</strong> screen appears.Figure 3-13 Install <strong>Printer</strong> <strong>Software</strong> screenClick Install <strong>Printer</strong> <strong>Software</strong> to install the print drivers and other software features.98 Chapter 3 Install MS Windows printing-system components <strong>ENWW</strong>
Printing-system software installationThe following sections describe the dialog-box options that appear during the <strong>HP</strong> <strong>LaserJet</strong> <strong>P2015</strong>software installation on Windows operating systems.Figure 3-14 <strong>HP</strong> <strong>LaserJet</strong> <strong>P2015</strong> CD Browser screenThe first dialog box contains the following links:Install <strong>Printer</strong> <strong>Software</strong>. This link takes you to the initial command for installing the software. Click thislink to close the CD Browser and the initial installation wizard and open the Welcome to the InstallWizard screen. For information about installing the printing-system software over a USB connection,see USB installation dialog-box options for Windows on page 99. For information about installing theprinting-system software over a network connection, see Network installation dialog box options forWindows on page 116MS Windows installView User Guide. Click this option to go to the <strong>HP</strong> <strong>LaserJet</strong> <strong>P2015</strong> Series User Guide.USB installation dialog-box options for WindowsNOTE: For USB installations, <strong>HP</strong> recommends installing the software before connecting the<strong>HP</strong> <strong>LaserJet</strong> <strong>P2015</strong> to the computer (software-first installation). These instructions are for a softwarefirstinstallation.Use these instructions the first time you install the <strong>HP</strong> <strong>LaserJet</strong> <strong>P2015</strong> software.This section shows the dialog boxes that appear when installing the <strong>HP</strong> <strong>LaserJet</strong> <strong>P2015</strong> over a directconnection (USB).<strong>ENWW</strong> Installation dialog box options for Microsoft Windows 2000 and Microsoft Windows XP 99
In any dialog box where it is available, click the Back button, to return to the previous dialog box, or clickthe Cancel button to cancel the installation.NOTE: The sequence of dialog boxes might differ from what is shown here, depending on the productand the selected options.Figure 3-15 USB install – Welcome to the Install Wizard dialog boxClick Next to continue. Between dialog boxes, a current-progress screen appears. This screen showsthe progress of the installation and provides information about the number of subtasks that have beencompleted in each step. The current-progress screen appears throughout the installation, but issometimes covered by a new dialog box that contains the next option in the installation sequence.100 Chapter 3 Install MS Windows printing-system components <strong>ENWW</strong>
Figure 3-16 USB install – Sample screen showing current progressThe Do Not Block Install Wizard Processes dialog box provides information about possible conflictswith firewall or anti-spyware software that might be running on your system. Read and follow theinstructions, and then click Next.MS Windows install<strong>ENWW</strong> Installation dialog box options for Microsoft Windows 2000 and Microsoft Windows XP 101
Figure 3-17 USB install – Do Not Block <strong>HP</strong> Install Wizard Processes dialog boxNOTE: The Check for recommended installation updates dialog box appears only if the installerdetects that a network connection is available.Figure 3-18 USB install – Check for recommended installation updates (optional) dialog box102 Chapter 3 Install MS Windows printing-system components <strong>ENWW</strong>
If you have Web access, click Yes to check for <strong>HP</strong> <strong>LaserJet</strong> <strong>P2015</strong> installation updates. This step isoptional.Click any of the links to open a screen that provides further information:●●●Show the information that will be sent to <strong>HP</strong>More information about installation updates<strong>HP</strong>'s Privacy PolicyClick No to continue the installation without checking for installation updates.Figure 3-19 USB install – Installation Options dialog boxMS Windows installSelect the Full (Recommended) option to install the complete printing-system software.Select Minimum to install only limited software.Click Details for information about the Full (Recommended) and Minimum installations and to find outif your system meets the recommended installation requirements. A sample System RequirementsResults dialog box is shown in the following illustration.<strong>ENWW</strong> Installation dialog box options for Microsoft Windows 2000 and Microsoft Windows XP 103
Figure 3-20 USB Install – sample System Requirements Results dialog boxNOTE: When appropriate, the Continue button is available and installation can proceed despite thewarning, such as in the System Requirements Results screen in the foregoing illustration. If a blockingcondition prevents the installation from continuing, the Continue button is not available.Click Retry to check again for minimum system requirements.Click Continue to proceed with the installation.Between dialog boxes, a Preparing to Install screen appears. This screen shows the progress of theinstallation and provides information about the number of subtasks that have been completed in eachstep. This screen disappears, and the License Agreement dialog box appears.104 Chapter 3 Install MS Windows printing-system components <strong>ENWW</strong>
Figure 3-21 USB install – License Agreement dialog boxWhen you select the I accept the terms in the license agreement option, the Next button becomesavailable. Click Next. The <strong>HP</strong> Extended Capabilities dialog box appears.MS Windows install<strong>ENWW</strong> Installation dialog box options for Microsoft Windows 2000 and Microsoft Windows XP 105
Figure 3-22 USB install – <strong>HP</strong> Extended Capabilities dialog boxIf you select the Install <strong>HP</strong> Extended capabilities option, a dialog box appears two weeks afterinstalling the <strong>HP</strong> <strong>LaserJet</strong> <strong>P2015</strong>, giving details about participation in the <strong>HP</strong> Product Survey Program.If you select the Do not install <strong>HP</strong> Extended capabilities option, you are not invited to participate inthe <strong>HP</strong> Product Survey Program.Click More Information to find out more about <strong>HP</strong> Extended Capabilities and the <strong>HP</strong> Product SurveyPlan.Click Next to continue the installation. The Destination Folder dialog box appears.106 Chapter 3 Install MS Windows printing-system components <strong>ENWW</strong>
Figure 3-23 USB install – Destination Folder dialog boxThe Destination Folder dialog box shows where the printing-system software files are installed. Thedefault option creates an <strong>HP</strong> program group, which you access by clicking Start and then selectingPrograms or All Programs.Click Next to open the Ready to Install dialog box.MS Windows install<strong>ENWW</strong> Installation dialog box options for Microsoft Windows 2000 and Microsoft Windows XP 107
Figure 3-24 USB install – Ready to Install dialog boxTo continue the installation, click Next.Between dialog boxes, an Installing screen appears. This screen shows the progress of the installationand provides information about the number of subtasks that have been completed in each step. Thisprocess might take a few minutes.108 Chapter 3 Install MS Windows printing-system components <strong>ENWW</strong>
Figure 3-25 Installing screenNext, the Connection Type dialog box appears.Figure 3-26 USB install – Connection Type dialog boxMS Windows install<strong>ENWW</strong> Installation dialog box options for Microsoft Windows 2000 and Microsoft Windows XP 109
Select the Directly to this computer using a USB cable. option, and then click Next to continue theinstallation. The Connect Your Device Now dialog box appears.Figure 3-27 USB install – Connect Your Device Now dialog boxWhen the Connect Your Device Now screen appears, make sure that the <strong>HP</strong> <strong>LaserJet</strong> <strong>P2015</strong> is turnedon. Then attach the USB cable between the computer and the <strong>HP</strong> <strong>LaserJet</strong> <strong>P2015</strong>.110 Chapter 3 Install MS Windows printing-system components <strong>ENWW</strong>
Figure 3-28 USB install – Device has been detected dialog boxThe Device has been detected dialog box appears. Click Next to continue the installation. It might takeas long as 35 minutes for the installation to finish.MS Windows install<strong>ENWW</strong> Installation dialog box options for Microsoft Windows 2000 and Microsoft Windows XP 111
Figure 3-29 USB install – Restart your computer dialog boxThe You must restart your computer to finish the installation of your device. dialog box appears.Click Restart to continue the installation.112 Chapter 3 Install MS Windows printing-system components <strong>ENWW</strong>
Figure 3-30 USB install – Congratulations! <strong>Software</strong> installation complete dialog boxWhen you start the computer again, the Congratulations! <strong>Software</strong> installation complete. dialog boxappears. Click Finish to continue.MS Windows install<strong>ENWW</strong> Installation dialog box options for Microsoft Windows 2000 and Microsoft Windows XP 113
Figure 3-31 USB install – Test Page dialog boxThe Test Page dialog box indicates that a test page is being sent to the <strong>HP</strong> <strong>LaserJet</strong> <strong>P2015</strong>. If the testpage prints successfully, click OK. If the test page fails to print, click Troubleshoot. This option opensa series of troubleshooting dialog boxes.The Sign up now screen appears.114 Chapter 3 Install MS Windows printing-system components <strong>ENWW</strong>
Figure 3-32 Sign up now screenIf you have Web access, you can sign up to receive information from <strong>HP</strong>. On the Sign up now screen,click Next to open the <strong>HP</strong> Registration Web page. Follow the onscreen instructions to register.MS Windows install<strong>ENWW</strong> Installation dialog box options for Microsoft Windows 2000 and Microsoft Windows XP 115
Figure 3-33 <strong>HP</strong> Registration screenNetwork installation dialog box options for WindowsThis section shows the dialog boxes that appear when you install the <strong>HP</strong> <strong>LaserJet</strong> <strong>P2015</strong> over a networkconnection.In any dialog box where it is available, click the Back button to return to the previous dialog box, or clickthe Cancel button to cancel the installation.116 Chapter 3 Install MS Windows printing-system components <strong>ENWW</strong>
NOTE: The sequence of dialog boxes might differ from what is shown here, depending on the product,the network configuration, and the selected options.Figure 3-34 Network install — Welcome dialog boxClick Next to continue. Between dialog boxes, a current-progress screen appears. This screen showsthe progress of the installation and provides information about the number of subtasks that have beencompleted in each step. The current-progress screen appears throughout the installation, but issometimes covered by a new dialog box that contains the next option in the installation sequence.MS Windows install<strong>ENWW</strong> Installation dialog box options for Microsoft Windows 2000 and Microsoft Windows XP 117
Figure 3-35 Network install – Sample screen showing current progressNOTE: The Check for recommended installation updates dialog box appears only if the installerdetects that a network connection is available.118 Chapter 3 Install MS Windows printing-system components <strong>ENWW</strong>
Figure 3-36 Network install – Check for recommended installation updates (optional) dialog boxIf you have Web access, click Yes to check for <strong>HP</strong> <strong>LaserJet</strong> <strong>P2015</strong> installation updates. This step isoptional.Click any of the links to open a screen that provides further information:●●Show the information that will be sent to <strong>HP</strong>More information about installation updatesMS Windows install●<strong>HP</strong>'s Privacy PolicyClick No to continue the installation without checking for installation updates.<strong>ENWW</strong> Installation dialog box options for Microsoft Windows 2000 and Microsoft Windows XP 119
Figure 3-37 Network install – Installation Options dialog boxSelect the Full (Recommended) option to install the complete printing-system software.Select Minimum to install only limited software.Click Details for information about the Full (Recommended) and Minimum installations and to find outif your system meets the recommended installation requirements. A sample System RequirementsResults dialog box is shown in the following illustration.120 Chapter 3 Install MS Windows printing-system components <strong>ENWW</strong>
Figure 3-38 Network Install – sample System Requirements Results dialog boxNOTE: When appropriate, the Continue button is available and installation can proceed despite thewarning, such as in the System Requirements Results screen in the illustration. If a blocking conditionprevents the installation from continuing, the Continue button is not available.Click Retry to check again for minimum system requirements.Click Continue to proceed with installation.MS Windows installBetween dialog boxes, a Preparing to Install screen appears. This screen shows the progress of theinstallation and provides information about the number of subtasks that have been completed in eachstep. This screen disappears, and the License Agreement dialog box appears.<strong>ENWW</strong> Installation dialog box options for Microsoft Windows 2000 and Microsoft Windows XP 121
Figure 3-39 Network install – Licence Agreement dialog boxWhen you select the I accept the terms in the license agreement option, the Next button becomesavailable. Click Next. The <strong>HP</strong> Extended Capabilities dialog box appears.122 Chapter 3 Install MS Windows printing-system components <strong>ENWW</strong>
Figure 3-40 Network install – <strong>HP</strong> Extended Capabilities dialog boxIf you select the Install <strong>HP</strong> Extended capabilities option, a dialog box appears two weeks afterinstalling the <strong>HP</strong> <strong>LaserJet</strong> <strong>P2015</strong> product, giving details about participation in the <strong>HP</strong> Product SurveyProgram.If you select the Do not install <strong>HP</strong> Extended capabilities option, you are not invited to participate inthe <strong>HP</strong> Product Survey Program.MS Windows installClick More Information to find out more about <strong>HP</strong> Extended Capabilities and the <strong>HP</strong> Product SurveyPlan.Click Next to continue the installation. The Destination Folder dialog box appears.<strong>ENWW</strong> Installation dialog box options for Microsoft Windows 2000 and Microsoft Windows XP 123
Figure 3-41 Network install – Destination Folder dialog boxThe Destination Folder dialog box shows where the printing-system software files are installed. Thedefault option creates an <strong>HP</strong> program group, which you access by clicking Start and then selectingPrograms or All Programs.NOTE: The destination-folder path might differ from what is shown in the illustration. If <strong>HP</strong> softwarehas been installed previously, the Change... option will not appear.To change the location of the files to be installed, click the Change button, navigate to the appropriatelocation, and then click OK.Click Next to open the Ready to Install dialog box.124 Chapter 3 Install MS Windows printing-system components <strong>ENWW</strong>
Figure 3-42 Network install – Ready to Install dialog boxTo continue the installation, click Next.Between dialog boxes, an Installing screen appears. This screen shows the progress of the installationand provides information about the number of subtasks that have been completed in each step.MS Windows install<strong>ENWW</strong> Installation dialog box options for Microsoft Windows 2000 and Microsoft Windows XP 125
Figure 3-43 Network install – Connection Type dialog boxSelect the Through the network option and then click Next to continue the installation. The Identify<strong>Printer</strong> dialog box appears.126 Chapter 3 Install MS Windows printing-system components <strong>ENWW</strong>
Figure 3-44 Network install – Identify <strong>Printer</strong> dialog boxIdentify <strong>Printer</strong>If you select Search from a list of detected printers (Recommended), the Searching dialog boxappears as the software searches the network for the <strong>HP</strong> <strong>LaserJet</strong> <strong>P2015</strong>.MS Windows install<strong>ENWW</strong> Installation dialog box options for Microsoft Windows 2000 and Microsoft Windows XP 127
Figure 3-45 Network install – Searching dialog boxIf you select the Specify a printer by address option on the Identify <strong>Printer</strong> dialog box, the Specify<strong>Printer</strong> dialog box appears.128 Chapter 3 Install MS Windows printing-system components <strong>ENWW</strong>
Figure 3-46 Network install – Specify <strong>Printer</strong> dialog boxSpecify the <strong>HP</strong> <strong>LaserJet</strong> <strong>P2015</strong> by hardware address (MAC), TCP/IP address, or IP Hostname. Aftertyping one of these options in the appropriate field, click Next to continue.The <strong>Printer</strong> Found dialog box appears either after the software completes its search for the<strong>HP</strong> <strong>LaserJet</strong> <strong>P2015</strong>, or after you specify the product.MS Windows install<strong>ENWW</strong> Installation dialog box options for Microsoft Windows 2000 and Microsoft Windows XP 129
Figure 3-47 Network install – <strong>Printer</strong> Found dialog boxThe Yes, install this printer option is selected by default. To install a different printer, select the No, Iwant to install a different printer option. To continue installing the <strong>HP</strong> <strong>LaserJet</strong> <strong>P2015</strong>, click Next.The Confirm Network Settings dialog box appears.130 Chapter 3 Install MS Windows printing-system components <strong>ENWW</strong>
Figure 3-48 Network install – Confirm Network Settings dialog boxTo accept the settings (recommended), click Next to continue the installation. The Congratulations!<strong>Software</strong> installation complete dialog box appears.To change the settings, click Change TCP/IP Settings. The Confirm Changing Settings dialog boxappears.MS Windows install<strong>ENWW</strong> Installation dialog box options for Microsoft Windows 2000 and Microsoft Windows XP 131
Figure 3-49 Network install – Confirm Changing Setting dialog boxBecause the printer is already configured for the existing network, first confirm that you want to changethe settings. Click Next to continue. The Set Network Protocol dialog box appears.132 Chapter 3 Install MS Windows printing-system components <strong>ENWW</strong>
Figure 3-50 Network install – Change TCP/IP Settings dialog boxTo change the settings, make your changes in the dialog box that appears, and then click Next tocontinue. The Confirm Settings dialog box appears (see Figure 3-48 Network install – Confirm NetworkSettings dialog box on page 131).Click Next to continue. It might take as long as 35 minutes for this step to finish the installation process.MS Windows install<strong>ENWW</strong> Installation dialog box options for Microsoft Windows 2000 and Microsoft Windows XP 133
Figure 3-51 Network install – Restart your computer dialog boxThe You must restart your computer to finish the installation of your device. dialog box appears.Click Restart to continue the installation.134 Chapter 3 Install MS Windows printing-system components <strong>ENWW</strong>
Figure 3-52 Network install – Congratulations! <strong>Software</strong> installation complete dialog boxClick Finish to continue the installation. The Test Page dialog box appears.Figure 3-53 Network install – Test Page dialog boxMS Windows install<strong>ENWW</strong> Installation dialog box options for Microsoft Windows 2000 and Microsoft Windows XP 135
Click OK if the test page prints successfully. If the test page fails to print, click Troubleshoot. This optionopens a series of troubleshooting dialog boxes.The Sign up now screen appears.Figure 3-54 Sign up now screenIf you have Web access, you can sign up to receive information from <strong>HP</strong>. On the Sign up now screen,click Next to open the <strong>HP</strong> Registration Web page. Follow the onscreen instructions to register.136 Chapter 3 Install MS Windows printing-system components <strong>ENWW</strong>
Figure 3-55 <strong>HP</strong> Registration screenMS Windows install<strong>ENWW</strong> Installation dialog box options for Microsoft Windows 2000 and Microsoft Windows XP 137
138 Chapter 3 Install MS Windows printing-system components <strong>ENWW</strong>
4 <strong>HP</strong> PCL 6, PCL 5, and PS emulationunidrivers for MS WindowsIntroductionThis document describes the features of the <strong>HP</strong> <strong>LaserJet</strong> <strong>P2015</strong> unidrivers: the <strong>HP</strong> PCL 6 Unidriver,the <strong>HP</strong> PCL 5e Unidriver, and the <strong>HP</strong> Postscript Level 3 Emulation Unidriver (PS 3 Emulation Unidriver)for Windows 2000, Windows XP (32-bit and 64-bit), and Windows Server 2003 (32-bit and 64-bit).You can control print jobs from several places:●●●Device control panel<strong>Software</strong>-program print-dialog boxDriver user interfaceGenerally, for features that are duplicated in more than one location (for instance, the media input trayfrom any of them), settings that are established in the software program take precedence over printdriversettings. Print-driver settings, in turn, override device control-panel settings.When installing the print-system software in Windows 2000, Windows XP, and Windows Server 2003,the <strong>HP</strong> PCL 6 Unidriver is installed by default. The <strong>HP</strong> PCL 5e Unidriver and the PS 3 Emulation Unidrivercan be installed by performing a Custom Installation.The following sections describe the options that are available on each tab of the <strong>HP</strong> PCL 6 Unidriver,the <strong>HP</strong> PCL 5e Unidriver, and the PS 3 Emulation Unidriver.This document also describes differences between the <strong>HP</strong> PCL 6 Unidriver, the <strong>HP</strong> PCL 5e Unidriver,and the PS 3 Emulation Unidriver. Unless otherwise noted, features described here apply to all three.Topics:●●Access to print drivers in Windows 2000 and Windows XPHelp system<strong>HP</strong> unidrivers forWindows●●●●●<strong>HP</strong> postscript level 3 emulation supportAdvanced tab featuresPaper/Quality tab featuresEffects tab featuresFinishing tab features<strong>ENWW</strong> Introduction 139
●●●Services tab featuresDevice Settings tab featuresAbout tab features140 Chapter 4 <strong>HP</strong> PCL 6, PCL 5, and PS emulation unidrivers for MS Windows <strong>ENWW</strong>
Access to print drivers in Windows 2000 and Windows XPDepending on the operating system on which the print drivers are installed, access to the print driversand different print-driver interfaces is available in several ways:●●<strong>Software</strong>-program print-dialog boxPrint-driver user interface<strong>Software</strong>-program print-dialog boxTo gain access to the print-driver settings from within most software programs, follow these steps:1. Click File.2. Click Print.3. Click Properties.The appearance and names of the driver tabs can vary, depending on the operating system. Thesedriver settings apply only while that software program is open.Print-driver user interfaceControl the drivers directly from the <strong>Printer</strong>s folder for access to two sets of driver tabs: the PrintingPreferences tabs and the Properties tabs. The settings on the Printing Preferences driver tabs controlthe driver default settings for each user's profile. Configure installable options on the Properties drivertabs.Printing Preferences driver tabsThe Printing Preferences driver tabs change the default settings that are used across all softwareprograms. To gain access to these tabs, follow these steps:1. Click Start.2. Select Settings.3. Click <strong>Printer</strong>s (Windows 2000) or <strong>Printer</strong>s and Faxes (Windows XP Professional andWindows Server 2003) or <strong>Printer</strong>s and Other Hardware Devices (Windows XP Home).4. Right-click the device name.5. Click Printing Preferences.The following Printing Preferences print-driver tabs are available:●Advanced<strong>HP</strong> unidrivers forWindows●●●●Paper/QualityEffectsFinishingServicesAll of these tabs are device-specific.<strong>ENWW</strong> Access to print drivers in Windows 2000 and Windows XP 141
Properties driver tabsThis set of tabs controls the driver behavior and driver connections. To gain access to the Propertiestabs, follow these steps:1. Click Start.2. Select Settings.3. Click <strong>Printer</strong>s (Windows 2000) or <strong>Printer</strong>s and Faxes (Windows XP Professional andWindows Server 2003) or <strong>Printer</strong>s and Other Hardware Devices (Windows XP Home).4. Right-click the device name.5. Click Properties.The following Properties print-driver tabs are available:●●●●●●●GeneralSharingPortsAdvancedSecurityDevice SettingsAboutOnly device-specific <strong>HP</strong> driver tabs are described in this document; the other driver tabs are part of theoperating system. The following Properties driver tabs are described in this document:●●Device SettingsAbout142 Chapter 4 <strong>HP</strong> PCL 6, PCL 5, and PS emulation unidrivers for MS Windows <strong>ENWW</strong>
Help systemThe <strong>HP</strong> <strong>LaserJet</strong> <strong>P2015</strong> PCL 6 and PS emulation unidrivers include a full-featured Help system toprovide assistance with printing and configuration options. The following Help options are available.●●●“What's this?” HelpContext-sensitive HelpConstraint messages“What's this?” Help"What's this?" Help is supported in Windows 2000 and Windows XP. Access "What's this?" Helpmessages in any of the following ways:●●●Right-click a control and click What's this?, and a pop-up Help window appears.Click the ? button in the upper-right corner of the frame, next to the X, to change the cursor to anarrow with a question mark. Use this special cursor to select a control, and the pop-up Help windowfor that feature appears.Press the F1 key, and the Help window for the currently selected control appears.Context-sensitive HelpClick the Help button on a driver tab or in a dialog box, and context-sensitive Help appears.Constraint messagesConstraint messages are unsolicited messages that appear in response to specific actions. Thesemessages appear in response to selections that are illogical or impossible given the capabilities of theprinter or the current settings of other controls. For example, if you click Print on Both Sides and thenchange the paper type to Transparency, a message appears asking you to resolve this conflict.Figure 4-1 A typical constraint message<strong>HP</strong> unidrivers forWindows<strong>ENWW</strong> Help system 143
Whenever a constraint message appears with Resolve all conflicts for me automatically or I willresolve the conflict myself buttons, the action of the buttons is as follows:●●To reject the change that was just made, returning the control to its previous value, click Resolveall conflicts for me automatically and then click OK.To accept the change that was just made and return to the driver settings to resolve the conflict,click I will resolve the conflict myself and then click OK.<strong>HP</strong> postscript level 3 emulation supportThe <strong>HP</strong> postscript level 3 emulation maintains full compatibility with Adobe PS level 3 when PS level 3soft fonts are purchased from Adobe.Users of Adobe-licensed software might also have the right to use the Adobe PS level 3 print driversfrom Adobe with the <strong>HP</strong> <strong>LaserJet</strong> printer postscript level 3 emulation PPD, available on the <strong>HP</strong> <strong>LaserJet</strong>printer software CD or from the <strong>HP</strong> Web site. Users must comply with all Adobe licensing agreementswhen using the Adobe PS level 3 print driver, as stated on the Adobe Web site at www.adobe.com/support/downloads/license.html.Advanced tab featuresTo gain access to the Advanced tab, follow these steps:1. Click Start.2. Select Settings.3. Click <strong>Printer</strong>s (Windows 2000) or <strong>Printer</strong>s and Faxes (Windows XP Professional and WindowsServer 2003) or <strong>Printer</strong>s and Other Hardware Devices (Windows XP Home).4. Right-click the device name.5. Click Printing Preferences.6. Click the Advanced tab.Use the Advanced tab to change the layout of printed pages and to configure special controls that arenot commonly used. Also use this tab to control features such as media size and copies in the driver144 Chapter 4 <strong>HP</strong> PCL 6, PCL 5, and PS emulation unidrivers for MS Windows <strong>ENWW</strong>
(although most current software programs support these features in the print dialog box or through thepage settings in the software program). The following figure shows the Advanced tab.Figure 4-2 The default appearance of the Advanced tabThe Advanced tab contains the following controls:● Paper/Output● Document Options<strong>HP</strong> unidrivers forWindowsPaper/OutputCopy CountThe Paper/Output settings contain the Copy Count control:Copy Count specifies the number of copies to print. This driver setting is useful for software programsthat do not provide a copy count. If a copy count is available in the software program, set the copy countin the software program.<strong>ENWW</strong> Advanced tab features 145
The requested number of copies appears in the Copy Count option. Select the number by typing in thebox or by using the up and down arrows to the right of the text box. Valid entries are numbers from 1 to9999. The copies value will not advance from the maximum number (9999) to 1 when the up arrow isused, or change from 1 to the maximum number (9999) when the down arrow is used.When you click another group box or leave the Advanced tab, invalid entries into the edit box (such asnon-numerical input, numbers less than 1, or numbers greater than the maximum allowed) are changedto the last valid value that appeared in the box. The default number of copies is 1.Because the number of copies can be set in some software programs, conflicts between the softwareprogram and the driver can arise. In most cases, the software program and the driver communicate sothat the number of copies set in one location (such as the software program) appears in the other (suchas the driver). For some software programs, this communication does not take place, and the copiesvalues are treated independently. For example, setting 10 copies in the program and then setting 10copies in the driver will result in 100 copies (10 x 10) being printed. Set the number of copies in thesoftware program, wherever possible.Document OptionsThe Document Options setting contains the following controls:●●●●Advanced Printing FeaturesPrint Optimizations<strong>Printer</strong> FeaturesLayout OptionsAdvanced Printing FeaturesWhen the Advanced Printing Features setting is Enabled, metafile spooling is turned on andFinishing tab options such as Page Order, Booklet Layout, and Pages per Sheet are available,depending on the device. For normal printing, leave the Advanced Printing Features setting at thedefault (Enabled). If compatibility problems occur, disable the feature. However, some advancedprinting features might still be available in the print driver, even if they have been disabled. Selecting anadvanced printing feature in the print driver that has been disabled on the Advanced tab automaticallymakes the feature available.Print OptimizationsNOTE: Print Optimization settings are available only in the <strong>HP</strong> PCL 6 Unidriver and <strong>HP</strong> PCL 5eUnidriver. They are not available in the PS 3 Emulation Unidriver.The default setting for Print Optimizations is Enabled. When this feature is enabled and the documentcontains overlapping text and graphics, the text that is placed on top of a graphic might not print correctly.If the printed output is not correct, disable this feature. When this feature is disabled, print optimizationfeatures,such as substituting device fonts for TrueType fonts and scanning for horizontal and verticalrules, are turned off.PostScript OptionsNOTE: Postscript Options are available only in the PS 3 Emulation Unidriver. They are not availablein the <strong>HP</strong> PCL 6 Unidriver and <strong>HP</strong> PCL 5e Unidriver.146 Chapter 4 <strong>HP</strong> PCL 6, PCL 5, and PS emulation unidrivers for MS Windows <strong>ENWW</strong>
Select one of the following settings in the PostScript Output Options drop-down menu:●●●●Optimize for Speed. This is the default setting.Optimize for Portability. Use this setting to create a file that conforms to the Adobe DocumentStructuring Conventions (ADSC). Each page of the document is a self-contained object. Forexample, use this option to create a postscript file and print it on a different printer.Encapsulated PostScript (EPS). Use this setting to include the file as an image in anotherdocument that is to be printed from another program.Archive format. Use this option to create a postscript file that you can use later.Select one of the following settings in the TrueType Font Download drop-down menu:●●●●Automatic. This is the default setting. The PS 3 Emulation Driver determines which format is best.Outline. Select this option if you want to download the TrueType font as a scalable outline font.Bitmap. Select this option to download the TrueType font as a bitmap font.Native TrueType If the printer is a TrueType rasterizer printer; select this option to download theTrueType font as an outline font.Select one of the following settings in the PostScript Language Level drop-down menu:● 3● 2● 1The default setting is 3. It is usually better to select the highest number available, because it providesmore features. In some instances, lower numbers might be necessary. For example, if you are printinga file to disk and that file is to be printed by someone who has a level-1 printer, select 1.Select one of the following settings in the Send PostScript Error Handler drop-down menu:●●Yes. This is the default setting. When an error occurs in the print job, an error page is sent to theprinter.No. Select this setting if you do not want an error page to be printed when an error occurs.Select one of the following settings in the Negative Output drop-down menu:●●Yes. Select this option to print a negative of the image by reversing the values for black and white.No. Print the image without reversing the values for black and white. This is the default setting.<strong>HP</strong> unidrivers forWindows<strong>ENWW</strong> Advanced tab features 147
<strong>Printer</strong> FeaturesThe <strong>Printer</strong> Features setting contains the following controls:●Print All Text as BlackThe Print All Text as Black feature is Disabled by default. When Enabled is selected, the driverprints all text as black regardless of the original document text color. Color text is printed as black,except for white text, which remains white. (White text is a reliable method of printing reversetypeface against a dark background.) This setting does not affect graphic images on the page, nordoes it affect any text that is part of a graphic.●REt<strong>HP</strong> Resolution Enhancement technology (REt) is a suite of proprietary image-enhancementtechnologies. Working with the image-writing systems in the print cartridge, FastRes 1200 and <strong>HP</strong>REt ensure professional-quality printing.●Alternative Letterhead ModeLayout OptionsUse this feature to load letterhead or preprinted paper into the tray the same way for all jobs,whether printing on one side or both sides of the sheet. When this option is selected, load the paperthe same as for printing on both sides. See the user documentation that came with the device forinstructions about loading letterhead for printing on both sides.When this option is selected, the device speed slows to the speed required for printing on bothsides.The Layout Options setting contains the Page Order setting.Page Order specifies the order in which the pages of the document are printed. Front to Back printsthe document so that page 1 prints first. Back to Front prints the document so that page 1 prints last.NOTE: The page-ordering operation works on whole sheets of media rather than on individual logicalpages. Accordingly, if Pages per Sheet (on the Finishing tab) is greater than one, the ordering of logicalpages on a physical sheet of media does not change.148 Chapter 4 <strong>HP</strong> PCL 6, PCL 5, and PS emulation unidrivers for MS Windows <strong>ENWW</strong>
Paper/Quality tab featuresTo gain access to the Paper/Quality tab, follow these steps:1. Click Start.2. Select Settings.3. Click <strong>Printer</strong>s (Windows 2000) or <strong>Printer</strong>s and Faxes (Windows XP Professional andWindows Server 2003) or <strong>Printer</strong>s and Other Hardware Devices (Windows XP Home).4. Right-click the device name.5. Click Printing Preferences.6. Click the Paper/Quality tab.Use the Paper/Quality tab to specify the size, type, and source of the media. Also use this tab to specifydifferent media selections for the front cover, first page, other pages, last page, and back cover of thedocument. The following figure shows the Paper/Quality tab.Figure 4-3 Paper/Quality tab<strong>HP</strong> unidrivers forWindows<strong>ENWW</strong> Paper/Quality tab features 149
The Paper/Quality tab contains the following control sets:●●●●●Print Task Quick SetsPaper OptionsUse Different Paper/CoversDocument preview imagePrint QualityPrint Task Quick SetsThe first group box in the upper portion of the Paper/Quality tab is Print Task Quick Sets. Becausethey are all the same control, any change to the Print Task Quick Sets group box that is made onthe Paper/Quality tab affects all the Printing Preferences driver tabs that have the Print Task QuickSets setting:●●●●Paper/QualityEffectsFinishingJob StorageUse the Print Task Quick Sets setting to store the current combination of driver settings that appearon all of the other print driver tabs (except the Advanced tab, where the setting is not available). PrintTask Quick Sets are either preset by network-administrator settings or user-defined printingspecifications (such as media size, pages per sheet, and so on). The Print Task Quick Sets controldoes not appear on the driver Properties tabs.NOTE: Administrators can predefine Print Task Quick Sets for their users. These administrator PrintTask Quick Sets are defined on the server and are available to users, but usually cannot be modifiedby users. Users can also define Print Task Quick Sets for their own use.The following selections are available in the Print Task Quick Sets drop-down menu:●●Default Print SettingsUser Guide Print SettingsDefault Print SettingsWhen you select Default Print Settings, nearly all of the settings are restored to the combination thatexisted after the driver was installed (the original settings). However, if the attribute combinations thatare associated with watermark definitions, custom media sizes, or the other quick sets have beenchanged or deleted, the original settings for those items are not restored.Type a new Quick Set name here appears in the Print Task Quick Sets menu automatically if noother driver settings have been changed since the driver was installed, or if all of the driver settingsmatch the original settings. Otherwise, the setting in the Print Task Quick Sets menu is the same labelthat appeared when a user on the computer last closed the printing Properties dialog box by clickingOK.The following table shows the default settings for Print Task Quick Sets.150 Chapter 4 <strong>HP</strong> PCL 6, PCL 5, and PS emulation unidrivers for MS Windows <strong>ENWW</strong>
Table 4-1 Print Task Quick Set default values for the <strong>HP</strong> <strong>LaserJet</strong> <strong>P2015</strong> printerDriver feature Feature setting location Default values forU.S. English PrintTask Quick SetsPreconfigurablePrint on Both SidesFinishing tab, Document Options groupboxAvailable, not selectedYesFlip Pages UpFinishing tab, Document Options groupboxUnavailable, notselectedYesBooklet LayoutFinishing tab, Document Options groupboxUnavailable, OffYesPages per SheetFinishing tab, Document Options groupbox1 page per sheet YesPrint Page BordersFinishing tab, Document Options groupboxUnavailableYesPage OrderFinishing tab, Document Options groupboxUnavailableYesOrientation Finishing tab, Orientation group box Portrait YesRotate by 180degreesFinishing tab, Orientation group box Available, not selected YesResizing Options Effects tab, Resizing Options group box Actual Size YesPrint document on Effects tab, Resizing Options group box Available, not selected YesSize to print on Effects tab, Resizing Options group box Actual Size YesScale to Fit Effects tab, Resizing Options group box Unavailable, selected Yes% of Normal Size Effects tab, Resizing Options group box Available, not selected YesWatermarks Effects tab (none) YesWatermarks FirstPage OnlyEffects tab, Watermark Details dialog boxUnavailable, notselectedYesCurrent watermarksWatermarkMessageMessage Angle(watermark)Watermarkmessage angle(angle)Effects tab, Watermark Details dialog box(Click Edit for Watermark Details.)Effects tab, Watermark Details dialog box(Click Edit for Watermark Details.)Effects tab, Watermark Details dialog box(Click Edit for Watermark Details.)Effects tab, Watermark Details dialog box(Click Edit for Watermark Details.)(none)Yes(none) Yes 1Diagonal Yes 1Unavailable unlessthe Angle option isselected, 52 degreesYes<strong>HP</strong> unidrivers forWindowsName (watermarkfont)Effects tab, Watermark Details dialogbox, Font Attributes group boxArial Yes 1Color (watermarkfont)Effects tab, Watermark Details dialogbox, Font Attributes group boxGray Yes 1Shading (watermarkfont)Effects tab, Watermark Details dialogbox, Font Attributes group boxVery Light Yes 1Size (watermarkfont)Effects tab, Watermark Details dialogbox, Font Attributes group box80 No<strong>ENWW</strong> Paper/Quality tab features 151
Table 4-1 Print Task Quick Set default values for the <strong>HP</strong> <strong>LaserJet</strong> <strong>P2015</strong> printer (continued)Driver feature Feature setting location Default values forU.S. English PrintTask Quick SetsPreconfigurableStyle (watermarkfont)Effects tab, Watermark Details dialogbox, Font Attributes group boxRegular Yes 1Size is:Paper/Quality tab, Paper Options groupboxLetterYesUse Different PaperPaper/Quality tab, Paper Options groupboxAvailable, not selectedNoSource is:Paper/Quality tab, Paper Options groupboxAutomatically SelectYesType is:Paper/Quality tab, Paper Options groupboxUnspecifiedYesEconomode Paper/Quality tab, Print Quality dialog box Available, unselected YesUnlabeled groupboxJob Storage tabStatus message: forexample, Your jobwill be printed butnot stored on theprinterNoJob Storage ModeJob Storage tab, Job Storage Mode groupboxOff is selectedNoProof and HoldJob Storage tab, Job Storage Mode groupboxAvailable, not selectedNoPrivate JobJob Storage tab, Job Storage Mode groupboxAvailable, not selectedNoQuick CopyJob Storage tab, Job Storage Mode groupboxAvailable, not selectedNoStored JobJob Storage tab, Job Storage Mode groupboxAvailable, not selectedNoRequire PIN to PrintJob Storage tab, Job Storage Mode groupboxUnavailable, notselectedNoMS Windows UserNameJob Storage tab, User Name group boxUnavailable, selected(Windows UserName appears infield)NoPIN to Print Job Storage tab, Require PIN group box Unavailable, notselectedNoDisplay Job ID whenprintingJob Storage tab, Job Notification Optionsgroup boxUnavailable, selectedNoJob Name Job Storage tab, Job Name group box Unavailable,AutomaticallyselectedNo1Not supported in Windows 98 and Windows Me.User Guide Print SettingsThe User Guide Print Settings option provides a Print Task Quick Set for optimal printing of the<strong>HP</strong> <strong>LaserJet</strong> <strong>P2015</strong> Series User Guide.152 Chapter 4 <strong>HP</strong> PCL 6, PCL 5, and PS emulation unidrivers for MS Windows <strong>ENWW</strong>
When you select User Guide Print Settings, all of the settings are restored to the default settings,except for the following settings:●●●●●On the Paper/Quality tab, Type Is: is set to Unspecified.On the Finishing tab, the Print on Both Sides check box is selected.On the Finishing tab, Flip Pages Up check box is selected.On the Finishing tab, Pages per Sheet is set to 2 pages per sheet.On the Finishing tab, Page Order is set to Right then Down.Default Print SettingsBy default, the Print Task Quick Sets menu is set to Default Print Settings. To change any of thedefault settings on any of the Printing Preferences driver tabs and save the configuration as a PrintTask Quick Set, highlight the words Default Print Settings, type the name for the new Print Task QuickSet, and then click Save. Print Task Quick Sets are saved in the system registry. To delete a Print TaskQuick Set, select it from the drop-down menu and click Delete.NOTE: Administrators can predefine Print Task Quick Sets for their users. These administrator PrintTask Quick Sets are defined on the server and are available to users, but usually cannot be modifiedby users. Users can also define Print Task Quick Sets for their own use.A maximum of 25 Print Task Quick Sets can be stored on a particular system. If you attempt to savemore, a message box appears that states: There are too many Print Task Quick Sets defined. Pleasedelete some before adding new ones.<strong>HP</strong> unidrivers forWindows<strong>ENWW</strong> Paper/Quality tab features 153
Paper OptionsThe settings specified in the Paper Options group box on the Paper/Quality tab apply to all of thepages of the document. The following figure shows the Paper Options group box and the selectionsthat are available by default.Figure 4-4 Paper Options group boxSize isThe appearance of the Paper Options group box changes when the Use Different Paper/Coverscheck box is selected. The settings in the Paper Options group box are described in the following order:● Size is on page 154● Custom Paper Size on page 155● Source is on page 157● Type is on page 157● Use Different Paper/Covers on page 158The Size is: setting is a drop-down menu that lists all of the supported media sizes.When the mouse cursor moves over the dimensions label, the cursor changes from an arrow to a glovedhand. Click the dimensions label to toggle between English and metric units.Because media-size settings in most software programs override driver settings, it is generally best touse the driver to set media size only when printing from software programs that do not include a media-154 Chapter 4 <strong>HP</strong> PCL 6, PCL 5, and PS emulation unidrivers for MS Windows <strong>ENWW</strong>
size setting, such as Notepad, or when producing a book or a booklet that does not require differentmedia sizes.NOTE: Certain software programs can override the size command and specify different media sizeswithin a single document.When you change the print-driver setting to a media size that is not currently loaded in the device, acontrol-panel message appears that prompts you to load the media size or select another tray.For information about media sizes, see the Media attributes on page 245 section of this STR.When the Use Different Paper/Covers check box is selected and different options are configured,the Size is:, Source is:, and Type is: menus change, offering a variety of options.Custom Paper SizeThe Custom Paper Size dialog box appears when you click Custom… on the Paper/Quality tab. Thefollowing figure shows the initial appearance of the Custom Paper Size dialog box.The Custom Paper Size dialog box for the <strong>HP</strong> <strong>LaserJet</strong> <strong>P2015</strong> printer, shown in the following figure,does not reflect the maximum media size that the <strong>HP</strong> <strong>LaserJet</strong> <strong>P2015</strong> printer supports. The maximumwidth is 312 mm (12.28 inches); the maximum height is 470 mm (8.5 inches).Figure 4-5 Custom Paper Size dialog box<strong>HP</strong> unidrivers forWindowsNameUse the Name text box to type a new name for a custom media size.<strong>ENWW</strong> Paper/Quality tab features 155
The name that appears in the Name text box depends on the following conditions:●●●If a saved custom media size has been selected from the drop-down menu on the Paper/Quality tab, then the Name text box shows the name of the selected custom media size.If a standard media size has been selected on the Paper/Quality tab, then the Name text boxshows the default name of "Custom."If a new name has been typed into the Name text box for the purpose of saving a new size orrenaming an existing size, then that new name will remain in the text box until the new size is savedor the dialog box is closed.Paper sizeUnitsIf you type a new name into the Name text box, but then do not click Save, you can change the widthand height values without losing the name. However, if you close the dialog box without clicking Save,any unsaved name or size values are lost without warning.Change the width and height values by typing numeric strings into the edit boxes in the Paper Sizegroup box.Any entry that is greater than the maximum limits of the width and height control is rounded down to themaximum valid entry, while any entry that is smaller than the minimum limits of the width and heightcontrol is rounded up to the minimum valid entry.If units are in millimeters, the custom media-size range minimum is the limit rounded up to the nearestwhole millimeter. The custom media-size range maximum is the limit rounded down to the nearest wholemillimeter. Any non-numerical entry reverts to the last valid entry. Width and height entries are validatedwhen the focus has changed.The resolution of each control is 1 millimeter or 1/10 of an inch, depending on the current measurementunits.To change measurement units, click one of the options in the Units group box (either Inches orMillimeters).Custom width and height control limitsThe minimum media size for the <strong>HP</strong> <strong>LaserJet</strong> <strong>P2015</strong> printer is 76.2 x 127 mm (3 x 5 inches) and themaximum is 215.9 x 355.6 mm (8.5 x 14 inches). The following table summarizes media size limits foreach media-handling device.Table 4-2 PCL 6 custom media sizesTray Dimensions Minimum MaximumTray 1 (100-sheetmultipurpose)Width 76 mm (3.0 inches) 312 mm (12.28 inches)Height 127 mm (5.0 inches) 470 mm (18.5 inches)Tray 2 (250-sheet) Width 148.0 mm (5.83 inches) 297 mm (11.7 inches)Height 210 mm (8.26 inches) 432 mm (17 inches)Tray 3 (250-sheet, optional) Width 148.0 mm (5.83 inches) 297 mm (11.7 inches)Height 210 mm (8.26 inches) 432 mm (17 inches)156 Chapter 4 <strong>HP</strong> PCL 6, PCL 5, and PS emulation unidrivers for MS Windows <strong>ENWW</strong>
Table 4-2 PCL 6 custom media sizes (continued)Tray Dimensions Minimum MaximumDuplexing unit Width 148.0 mm (5.83 inches) 297 mm (11.7 inches)Height 210.0 mm (8.26 inches) 432 mm (17 inches)Source isThe Source is: setting specifies the source tray to use for printing a document. The list of source traysdepends on the device accessories that are installed. Any optional source trays that are installed throughthe Device Settings tab also appear here.The Source is: drop-down menu can contain the following options, depending on what has beeninstalled on the device:●●Automatically select<strong>Printer</strong> Auto Select● Manual Feed in Tray 1●●●Tray 1 (100-sheet multipurpose tray)Tray 2 (250-sheet tray)Tray 3 (optional 250-sheet tray)The default setting is Automatically Select. When this setting is selected, the <strong>HP</strong> <strong>LaserJet</strong> <strong>P2015</strong> usesthe source tray that supports the selected media size. If you select a source tray other thanAutomatically select, make sure that the correct media size is loaded in the source tray. For informationabout media sources, see the Media attributes on page 245 section of this STR.Type isThe Type is: drop-down menu shows all of the media types that the <strong>HP</strong> <strong>LaserJet</strong> <strong>P2015</strong> supports. Whenyou use the default setting, Unspecified, the printer uses the default media type, which is usuallyPlain.No mechanism exists for manually adding custom media types through the driver. Custom types canbe added only by using the bidirectional communication mechanism, so they must already exist in thedevice when the bidirectional query occurs. If bidirectional communication is enabled, then theinformation an updated list of media types is returned. If bidirectional communication is not enabled,then the driver looks for custom media types that have been saved from a previous bidirectionalcommunication query, and uses those. Otherwise, no custom media types are available through thedriver.The following standard types appear in the list:<strong>HP</strong> unidrivers forWindows●●●●●UnspecifiedPlain<strong>HP</strong> Multipurpose Paper<strong>HP</strong> Office Paper<strong>HP</strong> All-in-one Printing Paper<strong>ENWW</strong> Paper/Quality tab features 157
●●●●●●●●●●●●●●●<strong>HP</strong> <strong>LaserJet</strong> Paper<strong>HP</strong> Premium Choice <strong>LaserJet</strong> PaperPreprintedLetterheadTransparencyPrepunchedLabelsBondRecycledColorLight 60-75 g/m2 (16–20 lb)Heavy 90-105 g/m2 (24-28 lb)Cardstock 105-176 g/m2 (28–65 lb)EnvelopeRoughThe default setting is Unspecified, and the program selects the media type. Before selecting a differentsetting, make sure that the correct media type is loaded in the tray that is specified in the Source is:setting.If the print-driver setting is changed to a media type that is not currently loaded in the device, a controlpanelmessage appears that prompts you to load the media type or select another tray.Use Different Paper/CoversPrint books that include different media types by using the Use Different Paper/Covers options.When the Use Different Paper/Covers check box is selected, the following settings can appear in thegroup box, along with the associated options:●●●●●Front CoverFirst PageOther PagesLast PageBack CoverNOTE: When you change the Source Is and Type is settings for any of the covers or pages, thesettings remain configured until you close the software program from which you are printing. Forexample, if you select First Page and change the media source or type, and then select Back Coverto change the media source or type, the check mark remains beside Front Cover and the selectedsource and type settings remain in effect. The settings are cleared only when you close the softwareprogram.158 Chapter 4 <strong>HP</strong> PCL 6, PCL 5, and PS emulation unidrivers for MS Windows <strong>ENWW</strong>
Front CoverUse the Front Cover options to include a blank or preprinted front cover on a document, or to includea front cover from a source tray that is different from the one used for the remainder of the document.The following figure shows the Front Cover setting and options.Figure 4-6 Front Cover optionsThe following are the Front Cover options:●Size is: drop-down menu●●●Add a Blank or Preprinted Cover check boxSource is: drop-down menuType is: drop-down menuThe Size is: setting specifies the media size to use for the entire print job. Changes made to the Sizeis: setting here override any previous Size is: settings in other Use Different Paper/Covers options.When you select Front Cover, also select the Add a Blank or Preprinted Cover check box to enablethe setting. The Source is: and Type is: drop-down menus become available and a check mark appearsnext to the Front Cover option.<strong>HP</strong> unidrivers forWindowsThe Source is: setting specifies the source tray to use for adding a front cover to the document. Thelist of source trays depends on the device accessories that are installed. Any optional trays that areinstalled through the Device Settings tab also appear here.The Type is: drop-down menu shows all of the media types that the device supports.<strong>ENWW</strong> Paper/Quality tab features 159
First PageNOTE: Use the same size of media for the entire print job. All Use Different Paper/Covers optionsuse the last Size is: setting selected in any one of the Use Different Paper/Covers options.When you change the type and source of the media and covers, the settings remain configured untilyou close the software program.Use the First Page options to select an alternative media type or source for the first page of a document.The following figure shows the appearance of the Paper Options group box when Use Different Paper/Covers is selected.Figure 4-7 First Page optionsThe following are the First Page options:●●●Size is: drop-down menuSource is: drop-down menuType is: drop-down menuThe Size is: setting specifies the media size to use for the entire print job. Changes made to the Sizeis: setting here override any previous Size is: settings in other Use Different Paper/Covers options.The Source is: setting specifies the source tray to use for printing a document. The list of source traysdepends on the device accessories that are installed. Any optional trays that are installed through theDevice Settings tab also appear here.The Type is: drop-down menu shows all of the media types that the device supports.160 Chapter 4 <strong>HP</strong> PCL 6, PCL 5, and PS emulation unidrivers for MS Windows <strong>ENWW</strong>
Other PagesNOTE: Use the same size of media for the entire print job. All Use Different Paper/Covers optionsuse the last Size is: setting selected in any one of the Use Different Paper/Covers options.When you change the type and source of the media and covers, the settings remain configured untilyou close the software program.Use the Other Pages options to select an alternative media type or source for the other pages of thedocument. The following figure shows the appearance of the Paper Options group box when UseDifferent Paper/Covers is selected.Figure 4-8 Other Pages optionsThe following are the Other Pages options:● Size is: drop-down menu● Source is: drop-down menu● Type is: drop-down menu<strong>HP</strong> unidrivers forWindowsThe Size is: setting specifies the media size to use for the entire print job. Changes made to the Sizeis: setting here override any previous Size is: settings made in other Use Different Paper/Coversoptions.The Source is: setting specifies the source tray to use for printing a document. The list of source traysdepends on the device accessories that are installed. Any optional trays that are installed through theDevice Settings tab also appear here.The Type is: drop-down menu shows all of the media types that the device supports.<strong>ENWW</strong> Paper/Quality tab features 161
Last PageNOTE: Use the same size of media for the entire print job. All Use Different Paper/Covers optionsuse the last Size is: setting selected in any one of the Use Different Paper/Covers options.When you change the type and source of the media and covers, the settings remain configured untilyou close the software program.Use the Last Page options to select an alternative media size, type, or source for the last page of adocument. The following figure shows the appearance of the Paper Options group box when UseDifferent Paper/Covers is selected.Figure 4-9 Last Page optionsThe following are the Last Page options:●●●Size is: drop-down menuSource is: drop-down menuType is: drop-down menuThe Size is: setting specifies the media size to use for the entire print job. Changes made to the Sizeis: setting here override any previous Size is: settings in other Use Different Paper/Covers options.The Type is: drop-down menu shows all of the media types that the device supports.NOTE: Use the same size of media for the entire print job. All Use Different Paper/Covers optionsuse the last Size is: setting selected in any one of the Use Different Paper/Covers options.When you change the type and source of the media and covers, the settings remain configured untilyou close the software program.162 Chapter 4 <strong>HP</strong> PCL 6, PCL 5, and PS emulation unidrivers for MS Windows <strong>ENWW</strong>
Back CoverUse the Back Cover options to include a blank or preprinted back cover on a document, or to includea back cover from a source tray that is different from the one used for the remainder of the document.The following figure shows the Back Cover setting and options.Figure 4-10 Back Cover optionsThe following are the Back Cover options:●●●●Size is: drop-down menuAdd a Blank or Preprinted Cover check boxSource is: drop-down menuType is: drop-down menuThe Size is: setting specifies the media size to use for the entire print job. Changes made to the Sizeis: setting here override any previous Size is: settings in other Use Different Paper/Covers options.<strong>HP</strong> unidrivers forWindowsWhen you select Back Cover, also select the Add a Blank or Preprinted Cover check box to enablethe setting. The Source is: and Type is: drop-down menus become available and a check mark appearsnext to the Back Cover option.NOTE: The Back Cover options are not available when the Booklet Printing Layout setting isenabled on the Finishing tab. The back cover setting is unavailable, because this page would be printedin the middle of a booklet.<strong>ENWW</strong> Paper/Quality tab features 163
The Source is: setting specifies the source tray to use for adding a back cover to the document. Thelist of source trays depends on the device accessories that are installed. Any optional trays that areinstalled through the Device Settings tab also appear here.The Type is: drop-down menu shows all of the media types that the device supports.NOTE: Use the same size of media for the entire print job. All Use Different Paper/Covers optionsuse the last Size is: setting selected in any one of the Use Different Paper/Covers options.When you change the type and source of the media and covers, the settings remain configured untilyou close the software program.Document preview imageThe document preview image is a line-drawn image of a page that represents graphics and text. Thedocument preview image is always oriented so that the contents of the page are right-side-up. Thedocument preview image appears in the upper-right corner of the following Printing Preferences drivertabs:●●●Paper/QualityEffectsFinishingPrint QualitySwitching between tabs does not change the location or appearance of the document preview image.When the mouse cursor moves over the document preview image, the cursor changes from an arrowto a gloved hand. Toggle between portrait and landscape page orientation by clicking the image.The Print Quality group box contains the following controls:●●Print Quality drop-down menuEconoModePrint Quality drop-down menuThe Print Quality drop-down menu contains the following controls in the <strong>HP</strong> PCL 6 Unidriver:●●ProRes 1200 (132 lpi)ProRes 1200 (180 lpi)● FastRes 1200●600 dpiNOTE: When a ProRes1200 setting is selected, documents are printed using a resolution of 1200 x1200 dpi. This is the best print quality, but printing speed is slower than for documents printed on theFastRes 1200, which uses a resolution of 1200 x 600 dpi.The Print Quality drop-down menu contains the following controls in the <strong>HP</strong> PCL 5e Unidriver:●●600 dpi300 dpi164 Chapter 4 <strong>HP</strong> PCL 6, PCL 5, and PS emulation unidrivers for MS Windows <strong>ENWW</strong>
The Print Quality drop-down menu contains the following controls in the PS 3 Emulation Unidriver:●1200 dpi● FastRes 1200●●600 dpi300 dpiEconoModeNOTE: When a “ProRes” setting is selected, documents are printed using a resolution of 1200 x 1200dpi. This is the best print quality, but printing speed is slower than for documents printed on a “FastRes”setting. The “FastRes” setting emulates 1200-dpi printing, but places fewer dots on the page and usesless toner, and printing speed is faster than for documents printed on a “ProRes” setting.Select the EconoMode check box to reduce the amount of toner on each printed page.Selecting this option extends the life of the toner supply and reduces cost per page. However, it alsoreduces print quality. The printed image is lighter, but it is adequate for printing drafts or proofs.<strong>HP</strong> does not recommend the full-time use of EconoMode. If EconoMode is used full-time when theaverage toner coverage is significantly less than 5%, it is possible that the toner supply will outlast themechanical parts in the print cartridge. If print quality begins to degrade under these circumstances,install a new print cartridge, even if toner remains in the cartridge.NOTE: The EconoMode setting might work only if a genuine <strong>HP</strong> print cartridge is installed. <strong>HP</strong> printcartridges can measure the life of the mechanical parts as well as the quantity of toner. If theEconoMode setting is used frequently, the mechanical parts can wear out before the supply of toner isdepleted, increasing the risk of toner leaking. Use genuine <strong>HP</strong> parts to avoid this problem.The EconoMode option can be activated from the printer control panel, from the Print Quality tab inthe software application properties, or from the Print Quality dialog on the Paper-Quality tab in thedriver. If the EconoMode option is selected from the control panel, and if the printer has a genuine <strong>HP</strong>cartridge, the ON setting overrides any setting made in the application or driver, as shown in the followingtable.Driver EconoMode settingfor print job<strong>HP</strong> CartridgeDevice control panelreportsSelected Yes On YesSelected No Off NoNot selected Yes On YesNot selected No Off NoEconoMode setting takeseffect<strong>HP</strong> unidrivers forWindowsSelected Yes Off YesSelected No Off NoNot selected Yes Off NoNot selected No Off No<strong>ENWW</strong> Paper/Quality tab features 165
Effects tab featuresTo gain access to the Effects tab, follow these steps:1. Click Start.2. Select Settings.3. Click <strong>Printer</strong>s (Windows 2000) or <strong>Printer</strong>s and Faxes (Windows XP Professional andWindows Server 2003) or <strong>Printer</strong>s and Other Hardware Devices (Windows XP Home).4. Right-click the device name.5. Click Printing Preferences.6. Click the Effects tab.Use the Effects tab to create unique media effects such as scaling and watermarks. The following figureshows the Effects tab.Figure 4-11 Effects tab166 Chapter 4 <strong>HP</strong> PCL 6, PCL 5, and PS emulation unidrivers for MS Windows <strong>ENWW</strong>
The Effects tab contains the following controls:●●●●Print Task Quick SetsResizing OptionsDocument preview imageWatermarksPrint Task Quick SetsUse the Print Task Quick Sets control to store the current combination of driver settings that appearon all other Printing Preferences driver tabs. Print task quick sets are either preset or user-definedprinting specifications, such as media size and pages per sheet.Resizing OptionsThe Resizing Options group box consists of the following controls:●●●●Actual Size (default)Print Document On settingScale to Fit option% of Normal Size settingActual SizeActual Size is the default setting. It prints the document without changing the document size.Print Document OnClick the Print Document On option to format the document for one media size and then print thedocument on a different media size, with or without scaling the image to fit the new media size.The Print Document On control is disabled by either of the following conditions:● The % of Normal Size value is not 100.● The Pages per Sheet value (on the Finishing tab) is not 1.When Print Document On is selected, the drop-down menu shows the media sizes on which you canprint. The list contains all of the standard media sizes that the selected media source supports and anycustom sizes that you have created. When Print Document On is selected, Scale to Fit is automaticallyselected. Clear this check box if you do not want the document reduced or enlarged to fit on the selectedmedia.<strong>HP</strong> unidrivers forWindowsScale to FitThe Scale to Fit option box specifies whether each formatted document page image is scaled to fit thetarget media size. By default, Scale to Fit is selected when Print Document On is selected. If the settingis turned off, then the document page images will not be scaled, and are instead centered at full sizeon the target media. If the document size is larger than the target media size, then the document imageis clipped. If it is smaller, then it is centered within the target media. The following figure shows previewimages for a document formatted for Legal-size media with the Print Document On check box selected,and the target size specified as Letter.<strong>ENWW</strong> Effects tab features 167
Figure 4-12 Preview images – Legal on Letter; Scale to Fit off (left) and on (right)When the size for which the document is formatted (that is, the logical size) differs from the target size,the preview image uses a dashed gray line to show the boundaries of the logical page in relation to thetarget page size.% of Normal SizeThe % of Normal Size option provides a slider bar to use for scaling the percentage setting. The defaultsetting in the entry box is 100% of normal size. Normal size is defined as the media size that is selectedwithin the driver or what the driver receives from the software program (if the software program doesnot negotiate the media size with the driver). The driver scales the page by the appropriate factor andsends it to the printer.The limits of the range are from 25% to 400%, and any values outside the range are adjusted to thoselimits as soon as the focus is removed from the control (that is, when the Tab key is pressed or anothercontrol is selected).Any change to the scale also changes the page preview, which increases or decreases from the upperleftcorner of the preview.The slider bar controls the scale directly. The value in the edit box changes as the slider-bar indicatoris dragged, and the document preview image is updated to the new image scale. Each click on thearrows increases or decreases the scale by 1%. Each click on the slider bar affects the scale by 10%.You cannot achieve an exact value by dragging the slider-bar indicator. Instead, either use the sliderbarindicator to approximate the value that you want and then use the arrows to refine the value, or typethe value into the entry box.The following settings disable % of Normal Size:●Print Document On (on the Effects tab) is selected● Pages per Sheet (on the Finishing tab) is not 1Document preview imageThe document preview image is a line-drawn image of a page that represents graphics and text. Thedocument preview image is always oriented so that the contents of the page are right-side-up. The168 Chapter 4 <strong>HP</strong> PCL 6, PCL 5, and PS emulation unidrivers for MS Windows <strong>ENWW</strong>
document preview image appears in the upper-right corner of the following Printing Preferences drivertabs:●●●Paper/QualityEffectsFinishingWatermarksSwitching between tabs does not change the location or appearance of the document preview image.When you move the mouse cursor over the document preview image, the cursor changes from an arrowto a gloved hand. You can toggle between portrait and landscape page orientation by clicking the image.Use the Watermarks feature to select a watermark, create your own custom watermarks (text only), oredit an existing watermark. The following watermarks are preset in the driver:●●●●(none)ConfidentialDraftSAMPLEThe drop-down menu shows alphabetically sorted watermarks that are currently available on the system,plus the string "(none)", which indicates that no watermark is selected. This is the default setting. Anywatermark that is selected from this list appears in the preview image.When the First Page Only check box is selected, the watermark is printed only on the first page of thedocument. The First Page Only check box is disabled when the current watermark selection is "(none)".Watermarks are applied to logical pages. For example, when Pages per Sheet is set to "4" and FirstPage Only is turned off, four watermarks appear on the physical page (one on each logical page).<strong>HP</strong> unidrivers forWindows<strong>ENWW</strong> Effects tab features 169
Click Edit, and the Watermark Details dialog box appears.Figure 4-13 Watermark Details dialog boxThe dialog box shows a preview image and provides options for creating a new watermark andcontrolling the message angle and font attributes.Click OK to accept all of the changes that are made in the Watermark Details dialog box. However,clicking Cancel does not cancel all of the changes. If you make changes to a watermark and then selecta different watermark or click New, all of the changes are saved, and only the current, unsaved changescan be canceled.Current watermarksThe Current Watermarks group box contains a list of available watermarks, both predefinedwatermarks that are available in the driver and any new watermarks that you have created.To create a new watermark, click New. The new watermark appears in the Current Watermarks listand in the Watermark Message edit box as "Untitled" until you name it. The name that you type inthe Watermark Message field appears in the Current Watermarks group box in the WatermarkDetails dialog box and in the Watermarks group box on the Effects tab.To name the new watermark, type the selected watermark text in the Watermark Message edit box.To delete a watermark, select the watermark in the Current Watermarks list and click Delete. A warningappears asking whether you are sure you want to delete the selected item. Click Cancel if you want tokeep the watermark. Click OK to delete the selected watermark.170 Chapter 4 <strong>HP</strong> PCL 6, PCL 5, and PS emulation unidrivers for MS Windows <strong>ENWW</strong>
NOTE: You can have no more that 30 watermarks in the Current Watermarks list at one time. Whenyou reach the limit of 30 watermarks, the New button is disabled.To edit an existing watermark, select the watermark in the Current Watermarks list. If you changethe Watermark Message for that watermark, you are, in effect, creating a new watermark.Watermark MessageMessage AngleThe Watermark Message is also the name that identifies the watermark in the Current Watermarkslist, except when more than one watermark has the same message. For example, you might wantseveral different watermarks with the message DRAFT, each with a different typeface or font size. Whenthis occurs, the string is appended with a space, a pound sign, and a number (for example, Draft #2).When a number is added, the number two is used first, but if the resulting name is also in the list, thenthe number increases until the name is unique (Draft #3, Draft #4, and so on).Use the controls in the Message Angle group box to print the watermark in different orientations on thepage. All settings center the watermark string within the page; the selection of a particular setting affectsonly the angle of the string placement. The following settings are available:●●●Diagonal. This is the default setting. Select this setting to place the text along a line that spans thelower-left to upper-right corners of the page.Horizontal. Select this setting to place the text along a line that spans the mid-left and mid-rightedges of the page.Custom. Select this setting to place the text at the specified angle across the page. Use the numericspin box to select the angle.Font AttributesUse the controls in the Font Attributes group box to change the font and the shading, size, and styleof the font.The Font Attributes group box contains the following controls:●●●NameThe Name drop-down menu lists fonts that are currently installed on the system. The default islanguage-dependent.ColorThe Color drop-down menu contains only one option: Gray.ShadingThe default Shading setting for new and preset watermarks is Very Light. The following range ofshades is available from the Shading drop-down menu:◦ Lightest◦ Very Light (default)◦ Light◦ Medium Light<strong>HP</strong> unidrivers forWindows<strong>ENWW</strong> Effects tab features 171
◦ Medium◦ Medium Dark◦ Dark◦ Very Dark◦ DarkestThese values represent the intensity of the gray that is used. Select Light to produce a lightlysaturated gray watermark. Select Lightest to produce the lightest shade of watermark. SelectDarkest to produce a black watermark.●SizeFont sizes from 1 to 999 points are available from the Size menu. The default point size is languagedependent.●StyleThe following settings are available:◦ Regular◦ Bold◦ Italic◦ Bold ItalicThe default Style setting for new and preset watermarks is Regular.Default watermark settingsThe following table shows Font Attribute settings for new and preset watermarks.Table 4-3 Font Attribute settings for new and preset watermarksSetting New watermark Preset watermarkName Arial Varies by languageColor Gray GrayShading Very Light Very LightSize 80 Varies by languageStyle Regular RegularClick OK to accept all of the changes that have been made in the Watermark Details dialog box.Clicking Cancel does not cancel all of the changes. If you make changes to a watermark and then selecta different watermark or click New, all of the changes are saved, and only the current, unsaved changescan be canceled.172 Chapter 4 <strong>HP</strong> PCL 6, PCL 5, and PS emulation unidrivers for MS Windows <strong>ENWW</strong>
Finishing tab featuresTo gain access to the Finishing tab, follow these steps:1. Click Start.2. Select Settings.3. Click <strong>Printer</strong>s (Windows XP) or <strong>Printer</strong>s and Faxes (Windows XP Professional andWindows Server 2003) or <strong>Printer</strong>s and Other Hardware Devices (Windows XP Home).4. Right-click the device name.5. Click Printing Preferences.6. Click the Finishing tab.Use the Finishing tab to print booklets and control the media output. The following figure shows theFinishing tab.Figure 4-14 Finishing tab<strong>HP</strong> unidrivers forWindows<strong>ENWW</strong> Finishing tab features 173
The Finishing tab contains the following controls:●●●●Print Task Quick SetsDocument optionsDocument preview imageOrientationPrint Task Quick SetsUse the Print Task Quick Sets control to store the current combination of driver settings that appearon all other Printing Preferences driver tabs. Print task quick sets are either preset or user-definedprinting specifications, such as media size and pages per sheet.Document optionsThe Document Options group box contains the following controls:●●●●●●●Correct Order for Straight Paper PathPrint on Both SidesFlip Pages UpBooklet layoutPages per SheetPrint Page BordersPage OrderCorrect Order for Straight Paper PathThe <strong>HP</strong> <strong>LaserJet</strong> <strong>P2015</strong> has a door in the back that can be opened to make the paper go straight outthe back of the printer. Use this bin or slot to minimize curl and avoid jams with heavier paper, such ascardstock. You may also need to feed the paper from the multipurpose tray for best results. The paperis delivered printed side up. Use this feature to order the pages correctly for this bin or slot. If you clickthis check box and also click Print on Both Sides, the printer prints the first side of each page, pausesfor you to reload the paper, and then prints the second side of each page. Other documents cannot beprinted while the printer is paused. Follow the onscreen instructions.Print on Both SidesThe default setting for the Print on Both Sides option is off (not selected). Print on Both Sides isavailable when the following conditions exist:●Type is: on the Paper tab is set to any media type except for the following types:◦ Labels◦ Transparency◦ Envelope174 Chapter 4 <strong>HP</strong> PCL 6, PCL 5, and PS emulation unidrivers for MS Windows <strong>ENWW</strong>
◦ Cardstock◦ Tough Paper●Size is: is set to any media size except for the following sizes:◦ Statement◦ Envelope #10◦ Envelope DL◦ Envelope C5◦ Envelope B5◦ Envelope MonarchNOTE: As a rule, extra memory need not be installed on the <strong>HP</strong> <strong>LaserJet</strong> <strong>P2015</strong> printer in order toprint on both sides. However, very complex double-sided print jobs might require additional memory.Topics:●●Automatically print on both sidesManually print on both sidesAutomatically print on both sidesThe duplexing unit in the device prints on two sides of a sheet of paper when the Print on BothSides option is specified in the print job. The <strong>HP</strong> <strong>LaserJet</strong> <strong>P2015</strong> printer comes with a duplexing unitinstalled in the following models:●●<strong>HP</strong> <strong>LaserJet</strong> <strong>P2015</strong>dn<strong>HP</strong> <strong>LaserJet</strong> <strong>P2015</strong>xTo achieve the best print quality when printing on the second side of the page, the printer needs to makeadjustments to its print modes. When you select a media type, you are, in effect, instructing the printerto use a group of settings (such as fuser temperature and print speed) to print the media with the bestpossible quality. This group of settings is known as print mode. A different print mode is used with eachmedia type. Print-mode adjustments for the second side of a duplexed page are automatic.Manually print on both sidesSelect the Print on Both Sides (Manually) check box to print on the second side of the media for the<strong>HP</strong> <strong>LaserJet</strong> <strong>P2015</strong> and <strong>HP</strong> <strong>LaserJet</strong> <strong>P2015</strong>n printer models, which do not have a duplexing unitinstalled. Also select Print on Both Sides (Manually) on the other <strong>HP</strong> <strong>LaserJet</strong> <strong>P2015</strong> printer models formedia types that are not available when using the automatic duplexing unit, such as cardstock and thickmedia.<strong>HP</strong> unidrivers forWindowsManually printing on the second side of a page is available when you are using the <strong>HP</strong> PCL 6, PCL 5,or PS emulation unidriver. If a duplexing unit is installed and manual duplexing is enabled in the driver,the printer automatically prints on both sides of media types that are supported for automatic duplexing(Letter, A4, Legal, and 8.5 x 13 only), and forces manual printing on both sides for media types that arenot supported.<strong>ENWW</strong> Finishing tab features 175
Select the media type that corresponds to the media that you are using for the print job. The followingmedia types have a different print modes when you manually print on the second side:●●●●●●●●PlainPreprintedLetterheadPrepunchedBondRecycledColorRoughNOTE: To make the Print on Both Sides (Manually) check box available in the document options,select the Allow Manual Duplexing option on the Device Settings tab in the Properties print-drivertabs.If you want to print on both sides manually while using media that is supported for automatic duplexing,select and apply the Not Installed setting on the Duplex Unit (for 2-Sided Printing) option on theDevice Settings tab.Cardstock media can be manually printed on the second side, but no change occurs to the print mode.Transparencies and labels should not be manually printed on the second side.176 Chapter 4 <strong>HP</strong> PCL 6, PCL 5, and PS emulation unidrivers for MS Windows <strong>ENWW</strong>
To print a multiple-page document, follow these steps:1. Select the Print on Both Sides (Manually) check box.2. Click OK. The even-number pages of the document print.3. When the control panel shows the MANUALLY FEED message, insert the stack of media (on whichthe even-number pages have been printed) as indicated in the following figure.Figure 4-15 Print on Both Sides Instructions dialog boxFlip Pages UpWhen you have completed the steps that appear in the dialog box, the second half of the print job printson the back side of the stack of media. The driver does not require the program to specifically supportodd- and even-page printing, because the driver coordinates this function.Use the Flip Pages Up check box is used to specify the duplex-binding option. By default, the FlipPages Up check box is available only when Print on Both Sides is selected.<strong>HP</strong> unidrivers forWindowsThe following table demonstrates the results of selecting this check box, depending on the mediaorientation selected on the Finishing tab.<strong>ENWW</strong> Finishing tab features 177
Table 4-4 Page orientationOrientation (Finishing tab) Flip Pages Up selected Flip Pages Up not selectedPortrait Short-edge binding Long-edge bindingLandscape Long-edge binding Short-edge bindingBooklet layoutWhen Print on Both Sides is selected, the document preview image changes to show a spiral bindingalong either the left edge or the top edge of the page. In addition, a folded-over corner appears in thelower-right portion of the preview image, indicating that printing occurs on the back side. An arrow onthe folded-over corner points in the direction that the pages would be flipped if they were bound together.Short-side binding is for print jobs with pages that read by flipping over like the pages of a calendar.Long-side binding is for print jobs with pages that read by turning like the pages of a book.The Booklet Layout drop-down menu, visible when Print on Both Sides is selected, offers choicesthat are based on the current media size. The default setting for the Booklet Printing drop-down menuis Off. The other settings have the following format, where [paper size] depends on the media size thatis set on the Paper/Quality tab:●●Left Edge BindingRight Edge BindingWhen you select Left Edge Binding or Right Edge Binding, the document preview image changes toshow the location of the binding. If the Pages per Sheet setting is on the default setting of 1, itautomatically changes to 2 pages per sheet. If you change the Pages per Sheet setting manually to4, 6, 9, or 16 pages per sheet, the booklet setting is disabled.Topics:●●Book and Booklet PrintingPrint a bookletBook and Booklet PrintingThe <strong>HP</strong> <strong>LaserJet</strong> <strong>P2015</strong> supports book and booklet printing.A book is a print job that consists of at least two pages. It can have a different media type for the frontcover, first page, other pages, last page, or back cover. Use the settings on the Paper tab (availablewhen you select the Use Different Paper/Covers check box) to select the following printing options forthe book:●●●●●Front CoverFirst PageOther PagesLast PageBack Cover178 Chapter 4 <strong>HP</strong> PCL 6, PCL 5, and PS emulation unidrivers for MS Windows <strong>ENWW</strong>
Print a bookletA booklet is a print job that places two pages on each side of a sheet that can then be folded into abooklet that is half the size of the media. Use the Booklet Layout drop-down menu on the Finishingtab to control booklet settings.Complete the following steps to print a booklet in most software programs.1. Click File.2. Click Print.3. Click Properties.4. Click the Finishing tab.5. Select the Print on Both Sides check box.6. In the Booklet Layout drop-down menu, select the type of booklet printing that you want (forexample, Right Edge Binding).7. Click OK in the print driver.8. Click OK in the print dialog box to print.Pages per SheetUse the Pages per Sheet option to select the number of pages that you want to print on a single sheetof media.If you choose to print more than one page per sheet, the pages appear smaller and are arranged onthe sheet in the order that they would otherwise be printed. The Pages per Sheet drop-down menuprovides six settings:●●1 page per sheet (this is the default)2 pages per sheet● 4 pages per sheet● 6 pages per sheet● 9 pages per sheet● 16 pages per sheetNOTE: When you select an option other than 1 page per sheet, booklet printing is unavailable.<strong>HP</strong> unidrivers forWindowsPrint Page BordersRelated controls indented beneath the Pages per Sheet edit box are Print Page Borders and PageOrder, which become active when Pages per Sheet is greater than 1.Print Page Borders sets a line around each page image on a printed sheet to help visually define theborders of each logical page.<strong>ENWW</strong> Finishing tab features 179
Page OrderThe Page Order drop-down menu contains four selections:●●●●Right, then DownDown, then RightLeft, then DownDown, then LeftThe preview document image changes to reflect alterations in these settings, as shown by the examplesin the following figure.Figure 4-16 Page-order preview images●●●●●2 pages per sheet4 pages per sheet6 pages per sheet9 pages per sheet16 pages per sheetDocument preview imageThe document preview image is a line-drawn image of a page that represents graphics and text. Thedocument preview image is always oriented so that the contents of the page are right-side-up. Thedocument preview image appears in the upper-right corner of the following Printing Preferences drivertabs:●●●Paper/QualityEffectsFinishingOrientationSwitching between tabs does not change the location or appearance of the document preview image.When you move the mouse cursor over the document preview image, the cursor changes from an arrowto a gloved hand. You can toggle between portrait and landscape page orientation by clicking the image.Orientation refers to the layout of the image on the page, and does not affect the way that media feedsinto the printer. You can specify the orientation of the print job. The three available orientations areportrait, landscape, and rotated. The default orientation is Portrait.180 Chapter 4 <strong>HP</strong> PCL 6, PCL 5, and PS emulation unidrivers for MS Windows <strong>ENWW</strong>
NOTE: Nearly all software programs establish the orientation for the printed page, so the pageorientation in the driver is useful only for the few software programs that do not set an orientation.The Orientation group box contains three options:●●●Portrait. The top edge of the document is the shorter edge of the media.Landscape. The top edge of the document is the longer edge of the media.Rotate by 180 degrees. This creates a landscape or portrait orientation in which the image isrotated 180°. This setting is useful for printing prepunched media.You can toggle orientation between portrait and landscape by clicking the document preview image. Ifyou select the Rotate by 180 degrees check box, no change occurs in the document preview image.<strong>HP</strong> unidrivers forWindows<strong>ENWW</strong> Finishing tab features 181
Services tab featuresTo gain access to the Services tab, follow these steps:1. Click Start.2. Select Settings.3. Click <strong>Printer</strong>s (Windows 2000) or <strong>Printer</strong>s and Faxes (Windows XP Professional andWindows Server 2003) or <strong>Printer</strong>s and Other Hardware Devices (Windows XP Home).4. Right-click the device name.5. Click Printing Preferences.6. Click the Services tab.The Services tab is shown in the following figure.Figure 4-17 Services tabThe Services tab contains the following features:182 Chapter 4 <strong>HP</strong> PCL 6, PCL 5, and PS emulation unidrivers for MS Windows <strong>ENWW</strong>
●●Internet ServicesDevice servicesInternet ServicesThe Internet Services group box contains the Select a destination drop-down menu with the followingselections:●●●●●Online diagnostic tools. Open the <strong>HP</strong> Instant Support Web site, where you can find interactivetools and contacts for troubleshooting.Support and troubleshooting. Open the product page for the <strong>HP</strong> Business Center.Product manuals. Open a Web page from which you can view or download <strong>HP</strong> <strong>LaserJet</strong> <strong>P2015</strong>printer manuals.Check for driver updates. Automatically check the print drivers to see whether the correct andmost up-to-date print drivers are installed.Order supplies. Open the <strong>HP</strong> SureSupply Web page and shop online for <strong>HP</strong> <strong>LaserJet</strong> <strong>P2015</strong>printer supplies.If you have Internet access, select any of these items and click Go! to open the corresponding <strong>HP</strong> Webpage.Device servicesClick the Device and Supplies status icon to open the Device Status screen of the <strong>HP</strong> EWS.<strong>HP</strong> unidrivers forWindows<strong>ENWW</strong> Services tab features 183
Device Settings tab featuresThe Device Settings tab is in the Properties window for the print driver. To gain access to the DeviceSettings tab, follow these steps:1. Click Start.2. Select Settings.3. Click <strong>Printer</strong>s (Windows 2000) or <strong>Printer</strong>s and Faxes (Windows XP Professional andWindows Server 2003) or <strong>Printer</strong>s and Other Hardware Devices (Windows XP Home).4. Right-click the device name.5. Click Properties.6. Click the Device Settings tab.The Device Settings tab contains controls for media-handling devices and controls for managing the<strong>HP</strong> <strong>LaserJet</strong> <strong>P2015</strong> printer.Available options depend on the driver and the particular feature. The following figure shows the DeviceSettings tab for the <strong>HP</strong> PCL 6 Unidriver.Figure 4-18 <strong>HP</strong> PCL 6 Unidriver Device Settings tabThe following figure shows the Device Settings tab for the PS 3 Emulation Unidriver.184 Chapter 4 <strong>HP</strong> PCL 6, PCL 5, and PS emulation unidrivers for MS Windows <strong>ENWW</strong>
Figure 4-19 PS 3 Emulation Unidriver Device Settings tabThe Device Settings tab contains the following controls:●●Form to Tray AssignmentFont Substitution Table● External Fonts● PS 3 Emulation Unidriver Device Settings● Installable OptionsForm to Tray AssignmentA network administrator can use Form to Tray Assignment to specify the media size in each input tray.<strong>HP</strong> unidrivers forWindowsThe <strong>HP</strong> <strong>LaserJet</strong> <strong>P2015</strong> printer supports more than one source of media. You can assign a form (whichdefines the media size and margins) to each media source. When a form is matched to a source, youcan select the form when you print. The device prints from the tray to which that form is assigned.Network administrators can use the Form to Tray Assignment setting to specify, in the driver, themedia size that is loaded into each available input tray. The use of forms constrains the choices thatare available in the media-size list on the Paper/Quality tab in the Printing Preferences driver tabs.This constraint prevents (or reduces the likelihood of) tying up the printer with media-mount messagesthat occur when users request sizes or types that are not available.<strong>ENWW</strong> Device Settings tab features 185
The trays listed in the Form to Tray Assignment setting include standard trays and optional accessorytrays. Generally, items that are installed separately have a separate Installable Options setting.The input trays listed here are also listed as media sources on the Paper/Quality tab.Configuring the trays1. Select the appropriate tray in the Form to Tray Assignment list.2. Use the drop-down menu to select the media size (or form) that is loaded in that tray.3. Repeat steps 1 and 2 for the remaining trays.4. Click OK to enable the settings, or, if necessary, click Cancel to reconfigure all the trays, andremove the size and type constraints that have been imposed on the Paper/Quality tab.Font Substitution TableNOTE: The Font Substitution Table is available only in the PS 3 Emulation Unidriver. It is not availablein the <strong>HP</strong> PCL 6 and PCL 5 unidrivers.Use the Font Substitution Table settings to install and remove external fonts for the device. Externalfonts can be soft fonts or DIMM fonts.Click the Font Substitution Table option to open a list of fonts, as show in the following figure. Use thesettings to change the TrueType-to-printer font mappings.Figure 4-20 Font Substitution Table186 Chapter 4 <strong>HP</strong> PCL 6, PCL 5, and PS emulation unidrivers for MS Windows <strong>ENWW</strong>
External FontsNOTE: The External Fonts option is available only in the <strong>HP</strong> PCL 6 and PCL unidrivers. It is notavailable in the PS 3 Emulation Unidriver.Use the External Fonts option to install and remove external fonts for the device. External fonts canbe soft fonts or DIMM fonts.Click the External Fonts option to make the Properties button available. Click Properties to openthe <strong>HP</strong> Font Installer dialog box, which is shown in the following figure.Figure 4-21 <strong>HP</strong> Font Installer dialog boxTopics:● Installing external fonts● Removing external fontsInstalling external fontsFollow these steps to install external fonts.1. Click Start.2. Select Settings.<strong>HP</strong> unidrivers forWindows3. Click <strong>Printer</strong>s (Windows 2000) or <strong>Printer</strong>s and Faxes (Windows XP Professional andWindows Server 2003) or <strong>Printer</strong>s and Other Hardware Devices (Windows XP Home).4. Right-click the name of the device.5. Click Properties.6. Click the Device Settings tab.<strong>ENWW</strong> Device Settings tab features 187
7. Click the External Fonts option. The Properties button appears.8. Click Properties. The <strong>HP</strong> Font Installer dialog box appears.9. Type the name and path of the font metric file in the <strong>Printer</strong> Font File Location text box, orclick Browse to locate the file on the computer. The font file names appear in the Font(s) to beAdded window.10. Select the fonts that you want to add, and then click Add. The fonts are installed and the file namesappear in the Installed Font(s) window.11. Click OK to close the <strong>HP</strong> Font Installer dialog box.Removing external fonts1. Click Start.2. Select Settings.3. Click <strong>Printer</strong>s (Windows 2000) or <strong>Printer</strong>s and Faxes (Windows XP Professional andWindows Server 2003) or <strong>Printer</strong>s and Other Hardware Devices (Windows XP Home).4. Right-click the name of the device.5. Click Properties.6. Click the Device Settings tab.7. Click the External Fonts option. The Properties button appears.8. Click Properties. The <strong>HP</strong> Font Installer dialog box appears. The external fonts that are installedappear in the Installed Fonts window.9. Select the fonts that you want to remove, and then click Remove. The fonts are removed.10. Click OK to close the <strong>HP</strong> Font Installer dialog box.PS 3 Emulation Unidriver Device SettingsThe following controls are available and appear only in the PS 3 Emulation Unidriver Device Settingstab:●●●●●●●●●Available PostScript MemoryOutput ProtocolSend Ctrl-D Before Each JobSend Ctrl-D After Each JobConvert Gray Text to PostScript GrayConvert Gray Graphics to PostScript GrayAdd Euro Currency Symbol to PostScript FontsJob TimeoutWait Timeout188 Chapter 4 <strong>HP</strong> PCL 6, PCL 5, and PS emulation unidrivers for MS Windows <strong>ENWW</strong>
●●Minimum Font Size to Download as OutlineMaximum Font Size to Download as OutlineAvailable PostScript MemoryThis control specifies the amount of available postscript memory and provides a spin box for changingthis value. The available postscript memory is a subset of the device total physical memory. It is usuallybest to set the postscript memory to match the total RAM that is shown on the configuration page. Toprint a configuration page, open <strong>HP</strong> ToolboxFX, select Print Info Pages, and then click Print next tothe Configuration page option.Output ProtocolThis control specifies the protocol that the device uses for print jobs. The following options areavailable:●●●ASCII (default)TBCPBinaryWhen you click ASCII, data is sent in ASCII format (7-bit), which might take longer to print but can besent through any I/O channel, such as a serial, parallel, or network port.When you click TBCP (Tagged Binary Communications Protocol), all data except special controlcharacters is sent in binary (8-bit) format. The binary formats can be sent over parallel or serialcommunications ports and are faster than sending data in ASCII format.When you click Binary, all data except special control characters is sent in binary (8-bit) format. Thebinary formats can be sent over parallel or serial communications ports and are faster than sending datain ASCII format.Send Ctrl-D Before Each JobThis control specifies whether the device will be reset at the beginning of every postscript document.The default setting is No. Pressing Ctrl-D resets the device to its default setting to ensure that previousprint jobs do not affect the current print job. Using Ctrl-D might cause a print job to fail if the device isconnected through a network. If the document fails to print when sent to a device connected throughparallel or serial ports, change No to Yes.Send Ctrl-D After Each JobThis control specifies whether the device will be reset at the end of every postscript document. Thedefault setting is Yes. Pressing Ctrl-D resets the device to its default setting to ensure that future printjobs are not affected by the current print job. Using Ctrl-D might cause a print job to fail if the device isconnected through a network. If the document fails to print when sent to a network printer, changeYes to No.<strong>HP</strong> unidrivers forWindows<strong>ENWW</strong> Device Settings tab features 189
Convert Gray Text to PostScript GrayThis control specifies whether to convert the true gray value (RGB) in text to the gray provided by thePS 3 Emulation Driver. The following settings are available:●●YesNo. This is the default setting.Convert Gray Graphics to PostScript GrayThis control specifies whether to convert the true gray value (RGB) in graphics to the gray provided bythe PS 3 Emulation Driver. The following settings are available:●●YesNo. This is the default setting.Add Euro Currency Symbol to PostScript FontsThis control specifies whether to add the Euro symbol to the printer fonts. The following settings areavailable:●●Yes. This is the default setting.NoJob TimeoutWait TimeoutThis control specifies how long the document can take to get from the computer to the device beforethe device stops trying to print the document. If you specify 0 seconds, the device continues trying toprint indefinitely. The default setting is 0 seconds. You can use the spin box to change this value to amaximum of 32,767 seconds.This control specifies how long the device waits to get more postscript information from the computer.After the specified time passes, the device stops trying to print the document and prints an errormessage. If you are trying to print a very complicated document, you might want to increase this value.If you specify 0 seconds, the device waits indefinitely. The default setting is 300 seconds. You can usethe spin box to change this value to a maximum of 32,767 seconds.Minimum Font Size to Download as OutlineThis control specifies the minimum font size (in pixels) for which the driver downloads TrueType fontsas outline (Type 1) fonts. A font smaller than the minimum setting is downloaded as a bitmap (Type 3)font. Use this option to fine-tune the Automatic setting for the TrueType Font Download option onthe Advanced tab in Document Defaults. The default setting is 100 pixel(s). You can use the spin boxto change this value to a maximum of 32,767 pixels.Maximum Font Size to Download as OutlineThis control specifies the maximum font size (in pixels) for which the driver will download TrueType fontsas bitmap (Type 3) fonts. A font larger than the maximum setting will be downloaded as an outline (Type1) font. Use this option to fine-tune the Automatic setting or override the Send TrueType as Bitmapsetting for the TrueType Font Download option on the Advanced tab in Document Defaults. The190 Chapter 4 <strong>HP</strong> PCL 6, PCL 5, and PS emulation unidrivers for MS Windows <strong>ENWW</strong>
default setting is 600 pixel(s). You can use the spin box to change this value to a maximum of 32,767pixels.Installable OptionsTopics:● Tray 3●●●●●●●Duplex Unit (for 2-Sided Printing)Allow Manual Duplexing<strong>Printer</strong> MemoryMopier ModeMopier mode and collationPostscript Passthrough (PS 3 Emulation Unidriver only)JPEG Passthrough (PS 3 Emulation Unidriver only)Tray 3This control specifies whether you have tray 3, an optional 250-sheet tray, installed on the device. Thedefault setting is Not Installed.Duplex Unit (for 2-Sided Printing)The <strong>HP</strong> <strong>LaserJet</strong> <strong>P2015</strong>dn and the <strong>HP</strong> <strong>LaserJet</strong> <strong>P2015</strong>x printer models come with a duplex unit installed.This setting is enabled (Installed) by default.Allow Manual DuplexingSelect Allow Manual Duplexing to print on both sides of any size and most types of media (excepttransparencies, envelopes, and labels). To use this feature, reinsert the media stack into the input trayto print the second side. The device pauses while you make this adjustment.<strong>Printer</strong> MemoryThis setting is enabled by default.This option matches the setting to the amount of memory that is installed in the device. The drivergenerates ranges of memory that can be selected, up to the maximum that the device can accept. Thedriver can use this information to manage how the print driver uses the device memory.<strong>HP</strong> unidrivers forWindowsMopier ModeThe multiple-original print (mopy) function is an <strong>HP</strong>-designed feature that produces multiple, collatedcopies from a single print job. Multiple-original printing (mopying) increases performance and reducesnetwork traffic by transmitting the job to the device once, and then storing it in memory. The remainderof the copies are printed at the fastest speed. All documents that are printed in mopier mode can becreated, controlled, managed, and finished from the computer, which eliminates the extra step of usinga photocopier.<strong>ENWW</strong> Device Settings tab features 191
The <strong>HP</strong> <strong>LaserJet</strong> <strong>P2015</strong> supports the transmit-once mopying feature when the Mopier Mode: settingon the Device Settings tab is Enabled.When you use the <strong>HP</strong> PCL 6 Unidriver, <strong>HP</strong> PCL 5e Unidriver, or PS 3 Emulation Unidriver, mopying isperformed in one of two ways: either through the software or through the device hardware. When themopier is enabled, mopying takes place through the device hardware by default. One copy of a multiplepageprint job is transmitted once through the network to the device, together with a printer job language(PJL) command directing the device to make the specified number of copies.When you disable the mopier, you are not necessarily disabling mopying, which the driver can stillperform through the software rather than the device hardware (the mopying path that is disabled whenyou change the Mopy Mode setting to Disabled). However, a multiple-copy print job that is sent whenthe mopier is disabled loses the advantage of transmitting the print job once, because the job is sentthrough the network for each copy.Mopier mode and collationMopying and collating print jobs are independent but closely related functions. Mopying, the ability tosend original print jobs to the device, is performed by the print driver. Collating can be controlled byeither the print driver or the document software program. The mopying mode is selected by default inthe driver, and can be disabled by changing the Mopier Mode setting on the Device Settings tab toDisabled.Control collation through the print driver by selecting or clearing the Collated check box on theAdvanced tab. You can clear the check box, which is available only when the Copy Count option isset to more than 1 copy, to allow the software program to control collation.To receive uncollated multiple copies of a print job, clear the Collated check box and make sure thatthe software program collation feature is not selected.The following table shows the relation between mopier mode settings and collation settings in thesoftware program and the driver. The first three columns show the settings; the last column, "Expectedresult", shows how a 3-page print job would appear.Table 4-5 Driver mopier mode and collation settingsMopier mode Application collation Driver collation Expected resultDisabled Not selected Not selected 3 copies uncollatedDisabled Not selected Selected 3 copies uncollatedDisabled Selected Not selected 3 copies collatedDisabled Selected Selected 3 copies collatedEnabled Not selected Not selected 3 copies uncollatedEnabled Not selected Selected 3 copies uncollatedEnabled Selected Not selected 3 copies collatedEnabled Selected Selected 3 copies collatedPostscript Passthrough (PS 3 Emulation Unidriver only)Postscript Passthrough is enabled by default, and must be enabled for most print jobs. Postscriptpassthrough provides additional capabilities for some software programs when printing to a postscriptdriver. Options such as Watermarks, n-up and Booklet Printing might not print correctly from some192 Chapter 4 <strong>HP</strong> PCL 6, PCL 5, and PS emulation unidrivers for MS Windows <strong>ENWW</strong>
software programs with Postscript Passthrough enabled, because such programs send postscriptinformation to the printer that cannot be controlled by the driver. Other programs might print using theseoptions without problems. Select Disabled and print the document again if you encounter problems.NOTE: In some cases, disabling Postscript Passthrough can cause unexpected results within asoftware program.JPEG Passthrough (PS 3 Emulation Unidriver only)The JPEG Passthrough setting contains the following options:●●●Disable. When this option is selected, images sent as JPEG are printed as bitmaps, resulting infaster printing.Enable. When this option is selected, images sent as JPEG are printed as JPEG (JPEGpassthrough).Auto. When this option is selected, the printer connection type is automatically detected. Fornetwork (TCP/IP) connections, JPEG passthrough is disabled. For parallel (LTP), DOT4, and USBconnections, JPEG passthrough is enabled.<strong>HP</strong> unidrivers forWindows<strong>ENWW</strong> Device Settings tab features 193
About tab featuresThe About tab is in the Properties for the print driver. To gain access to the print driver Properties,click Start on the MS Window task bar, select Settings, and then click <strong>Printer</strong>s (Windows 2000) or<strong>Printer</strong>s and Faxes (Windows XP Professional and Windows Server 2003) or <strong>Printer</strong>s and OtherHardware Devices (Windows XP Home).1. Click Start.2. Select Settings.3. Click <strong>Printer</strong>s (Windows 2000) or <strong>Printer</strong>s and Faxes (Windows XP Professional andWindows Server 2003) or <strong>Printer</strong>s and Other Hardware Devices (Windows XP Home).4. Right-click the device name.5. Click Properties.6. Click the About tab.The About tab provides detailed information about the driver. It contains an overall build number (inparentheses after the model name) together with specific information about each of the components.The information varies according to the <strong>HP</strong> <strong>LaserJet</strong> <strong>P2015</strong> model number, driver, date, and versions.The About tab is shown in the following figure.Figure 4-22 About tab194 Chapter 4 <strong>HP</strong> PCL 6, PCL 5, and PS emulation unidrivers for MS Windows <strong>ENWW</strong>
The About lists driver installation file names and their version numbers. The About tab also indicateswhether the driver was autoconfigured, whether administrator preferences were set, the date the driverwas last configured, and whether the configuration is default or user-defined.<strong>HP</strong> unidrivers forWindows<strong>ENWW</strong> About tab features 195
196 Chapter 4 <strong>HP</strong> PCL 6, PCL 5, and PS emulation unidrivers for MS Windows <strong>ENWW</strong>
5 MacintoshIntroductionThe <strong>HP</strong> <strong>LaserJet</strong> <strong>P2015</strong> comes with printing software and installers for Apple Computer, Inc., Macintoshoperating systems.Topics:●●●Macintosh printing-system softwareMacintosh install and uninstall instructions<strong>HP</strong> Embedded Web Server (EWS)Macintosh<strong>ENWW</strong> Introduction 197
Macintosh printing-system softwareThe <strong>HP</strong> <strong>LaserJet</strong> <strong>P2015</strong> printing system for Macintosh is composed of an <strong>HP</strong>-created postscript printerdefinition file (PPD) and a printer dialog extension (PDE) file that work together with the Macintosh OSprint system. These files are used by the Macintosh OS print system to determine default print settingsand also allows the user to select between the various print options and settings and are installed bythe provided <strong>HP</strong> <strong>LaserJet</strong> Installer. Additionally, an <strong>HP</strong>-supplied Macintosh printer device configurationutility is provided, which allows the user to access the printer’s embedded web server (EWS) to allowfor additional configuration and printer status monitoring. The following are provided on the installationCD:●●The <strong>HP</strong> <strong>LaserJet</strong> Installer for MacintoshInstall notes (Readme file)The following major components are installed by the <strong>HP</strong> <strong>LaserJet</strong> Installer for Mac:●●●●●<strong>HP</strong> <strong>LaserJet</strong> <strong>P2015</strong> PPD<strong>HP</strong> <strong>LaserJet</strong> <strong>P2015</strong> PDE<strong>HP</strong> USB EWS Gateway<strong>HP</strong> Device Configuration Utility<strong>HP</strong> Uninstaller for the <strong>HP</strong> Device Configuration Utility and <strong>HP</strong> USB EWS GatewayTopics:●●●Hardware requirementsOperating-system supportAvailabilityHardware requirements●●●●PowerPC G3, G4, G5 or Intel Core processor256 MB RAM32 MB of available hard-disk spaceCD-ROM drive or internet connectionOperating-system support●●Mac OS X v10.2.8, v10.3, v10.4 and later are supported.Mac OS 9 and Mac OS X classic are not supported.AvailabilityThis document provides information about the availability of the <strong>HP</strong> <strong>LaserJet</strong> <strong>P2015</strong> printing-systemsoftware and related software and firmware. Printing-system software on a CD is available from<strong>HP</strong> fulfillment centers.Topics:198 Chapter 5 Macintosh <strong>ENWW</strong>
●●Printing-system software on the WebIn-box printing-system software CDsPrinting-system software on the WebAll software that is contained on the installation CD is also available on the Web.Web deployment is the preferred method for obtaining the latest software. The Web site offers an optionfor automatic e-mail notification about new software releases.NOTE: This document describes drivers that are shipped with the printing-system software CD. Thisdocument does not describe any drivers that might be released for use by support personnel.Topics:●●Printing-system software<strong>Software</strong> component availabilityPrinting-system softwareThe <strong>HP</strong> <strong>LaserJet</strong> <strong>P2015</strong> printing-system software is available for download at the following Web site:www.hp.com/go/lj<strong>P2015</strong>_software<strong>Software</strong> component availabilityThe following <strong>HP</strong> <strong>LaserJet</strong> software components are installed:●●●●●<strong>HP</strong> <strong>LaserJet</strong> <strong>P2015</strong> PPD<strong>HP</strong> <strong>LaserJet</strong> <strong>P2015</strong> PDE<strong>HP</strong> USB EWS Gateway<strong>HP</strong> Device Configuration Utility<strong>HP</strong> Uninstaller for the <strong>HP</strong> Device Configuration Utility and <strong>HP</strong> USB EWS GatewayIn-box printing-system software CDsThe software CD for the <strong>HP</strong> <strong>LaserJet</strong> <strong>P2015</strong> printer contains the files for installing the printing-systemsoftware on the computer.Topics:●●Macintosh partitionCD versionsMacintosh partitionThe <strong>HP</strong> <strong>LaserJet</strong> <strong>P2015</strong> printing-system software CD is divided into two partitions, one for each of thefollowing operating systems:●●MS WindowsMacintoshMacintosh<strong>ENWW</strong> Macintosh printing-system software 199
CD versionsThe <strong>HP</strong> Macintosh printing-system software files all reside in the Macintosh partition. The <strong>HP</strong> <strong>LaserJet</strong>Installer for Macintosh is at the root of the Macintosh CD Partition. The user manuals (in PDF format)are grouped by language and are under the Documents directory on the Macintosh CD Partition.The software CD for the <strong>HP</strong> <strong>LaserJet</strong> <strong>P2015</strong> contains the files for installing the printing-system softwareon the computer.The <strong>HP</strong> <strong>LaserJet</strong> <strong>P2015</strong> printing-system software CD is available in five versions, each of which containsprinting-system documentation in various languages, as follows:●CD AM – Americas and Western Europe (part number CB366-60105):◦ CA = Catalan (Català)◦ DE = German (Deutsch)◦ EL = Greek◦ EN = English◦ ES = Spanish (Español)◦ FR = French (Français)◦ IT = Italian (Italiano)◦ NL = Dutch (Nederland)◦ PT = Brazilian Portuguese (Português)●CD NE – Northern Europe (part number CB366–60106):◦ DA = Danish (Dansk)◦ EN = English◦ ET = Estonian◦ FI = Finnish (Suomi)◦ HE = Hebrew◦ LV = Latvian◦ LT = Lithuanian◦ NO = Norwegian (Norsk)◦ SV = Swedish (Svenska)●CD EE – Eastern Europe (part number CB366–60107):◦ AR = Arabic◦ BG = Bulgarian◦ HR = Croatian◦ CS = Czech (Cesky)200 Chapter 5 Macintosh <strong>ENWW</strong>
◦ EN = English◦ FR = French (Français)◦ HU = Hungarian (Magyar)◦ KK = Kazakh◦ PL = Polish (Polski)◦ RO = Romanian◦ RU = Russian◦ SK = Slovak◦ SL = Slovenian◦ SR = Serbian◦ TR = Turkish◦ UK = Ukranian●CD AS – Asia (part number CB366–60108):◦ EN = English◦ ID = Indonesian (Bahasa)◦ KO = Korean◦ TH = Thai◦ ZHCN = Simplified Chinese◦ ZHTW = Traditional ChineseMacintosh<strong>ENWW</strong> Macintosh printing-system software 201
Macintosh install and uninstall instructionsThe <strong>HP</strong> <strong>LaserJet</strong> <strong>P2015</strong> printer comes with software and installers for MS Windows and AppleComputer, Inc., Macintosh systems. This document provides procedures for installing and removing the<strong>HP</strong> <strong>LaserJet</strong> <strong>P2015</strong> printing-system software for Macintosh operating systems.Topics:●●●Macintosh component descriptionsInstall the Macintosh printing systemUninstall the Macintosh printing systemMacintosh component descriptionsThe device includes the following software for Macintosh computers:●●●●●<strong>HP</strong> <strong>LaserJet</strong> <strong>P2015</strong> PPD<strong>HP</strong> <strong>LaserJet</strong> <strong>P2015</strong> PDE<strong>HP</strong> USB EWS Gateway<strong>HP</strong> Device Configuration Utility<strong>HP</strong> Uninstaller for the <strong>HP</strong> Device Configuration Utility and <strong>HP</strong> USB EWS GatewayTopics:●●●●●<strong>HP</strong> <strong>LaserJet</strong> PPDsPDEs<strong>HP</strong> Embedded Web ServerInstall notes (Readme file)Online help<strong>HP</strong> <strong>LaserJet</strong> PPDsPDEsIn Mac OS X V10.2.8 or later, the PPDs are installed in Library/<strong>Printer</strong>s/PPDs/Contents/Resources:.lproj, where is the appropriate localized folder.The PPDs, in combination with the driver, provide access to the device configuration settings andinstallable options. These settings are usually configured during the installation process by using AppleMac OS X tools such as Print Center, <strong>Printer</strong> Setup Utility, and Print & Fax. For more information,see Table 5-1 Adding a printer in Macintosh operating systems on page 204.<strong>Printer</strong> Dialog Extensions (PDEs) are code plug-ins (for Mac OS X V10.2.8 or later only) that provideaccess to device features, such as number of copies, duplexing, and quality settings.202 Chapter 5 Macintosh <strong>ENWW</strong>
<strong>HP</strong> Embedded Web ServerMac OS X supports the <strong>HP</strong> Embedded Web Server (<strong>HP</strong> EWS). Use the <strong>HP</strong> EWS to perform the followingtasks:●●●●View the device status and change device settings.View and change network settings for the device.Print information pages for the device.View the device event log.The <strong>HP</strong> EWS is accessed by using a web browser such as Safari. The <strong>HP</strong> USB EWS Gateway softwareallows the web browser access to the device if the device is connected using a USB cable. The <strong>HP</strong> EWScan also by opened by choosing the Utility button in the Macintosh Print Center or <strong>Printer</strong> Setup Utility,or through the <strong>HP</strong> Device Configuration utility.Install notes (Readme file)Online helpThis text file contains information about basic device installation and OS support.The help system is in English only, and can be viewed through a browser or in the Macintosh OS HelpCenter.Install the Macintosh printing systemOn a Macintosh computer, the installation procedures are basically the same for a network administrator,a network client, and a single user. Install the software on any computer that has access rights to theprinter. The computer user must also have administrative rights on the computer in order to install thesoftware.Topics:●●●General installation for Macintosh operating systemsDetailed Mac OS X installation<strong>Printer</strong> setupGeneral installation for Macintosh operating systems1. If you are connecting the printer to a network, connect the network cable to the printer network port(on <strong>HP</strong> <strong>LaserJet</strong> <strong>P2015</strong>n, <strong>HP</strong> <strong>LaserJet</strong> <strong>P2015</strong>dn, or <strong>HP</strong> <strong>LaserJet</strong> <strong>P2015</strong>x printers only). If you areconnecting the printer to a computer using the USB cable, install the software before connectingthe USB cable.2. Insert the Macintosh printing-system software CD into the CD-ROM drive.NOTE: If the CD screen does not open automatically, double-click the hp <strong>LaserJet</strong> <strong>P2015</strong> CD-ROM icon on the desktop to open the CD-ROM window.3. Double-click the <strong>HP</strong> <strong>LaserJet</strong> v6.1.0.213.app icon.NOTE: The Continue button appears only after you type the "admin" password in theAuthenticate dialog.Macintosh<strong>ENWW</strong> Macintosh install and uninstall instructions 203
4. The main Installer dialog appears. Click Install and then follow the onscreen instructions tocomplete the software installation.NOTE: When you are installing the printing-system software, be patient. The installer mustperform an initial search of the computer for up to 1 minute. During this time the installer mightappear to be stalled.5. When software installation is complete, click Quit.6. Continue with the steps for setting up a printer.The software program that you use to finish setting up the printer varies by operating system. Thefollowing table shows the print setup tools that are available.Table 5-1 Adding a printer in Macintosh operating systemsOperating System Print Center <strong>Printer</strong> Setup Utility Print & FaxMac OS X V10.2.8 xMac OS X V10.3 x xMac OS X V10.4 x xDetailed Mac OS X installationTopics:●Main Install dialog sequenceMain Install dialog sequenceThis section provides information about the Macintosh installation dialog-box sequence for the EasyInstall (the typical installation option).NOTE: If you are installing the printer using a network connection, you can connect the printer to thenetwork before installing the software, but if you are installing the printer using a USB connection, installthe software before connecting the USB cable.Insert the <strong>HP</strong> <strong>LaserJet</strong> <strong>P2015</strong> printing-system software CD in the CD-ROM drive.If the CD screen does not open automatically when the CD is put into the CD-ROM drive, double-clickthe hp <strong>LaserJet</strong> <strong>P2015</strong> CD-ROM icon on the desktop to open the installer folder.Figure 5-1 hp <strong>LaserJet</strong> <strong>P2015</strong> CD-ROM iconThe hp <strong>LaserJet</strong> <strong>Software</strong> dialog opens.204 Chapter 5 Macintosh <strong>ENWW</strong>
Figure 5-2 hp <strong>LaserJet</strong> <strong>Software</strong> screenIn the hp <strong>LaserJet</strong> <strong>Software</strong> pane, double-click the Mac OS X folder to open it.In the Mac OS X folder, double-click the <strong>HP</strong> <strong>LaserJet</strong> v6.1.0.213.app icon. This begins the installprocess.Figure 5-3 <strong>HP</strong> <strong>LaserJet</strong> v.5.7 iconThe Authenticate dialog appears.Figure 5-4 Authenticate dialogType the correct “admin” name and password and click OK to continue. The installer startup screenappears.Click Cancel to exit the installation.Macintosh<strong>ENWW</strong> Macintosh install and uninstall instructions 205
Figure 5-5 <strong>HP</strong> <strong>LaserJet</strong> for Macintosh installer startup-screenClick Continue. The License dialog appears.Figure 5-6 License dialogClick Print… to open the Page Setup dialog for the default printer and print a copy of the licenseagreement.Click Save… to open the system Save dialog and save the license agreement to disk.Read the software-license agreement and then click Continue to continue the installation. A dialogappears, asking you to accept the license agreement. Click Agree to accept the agreement. The EasyInstall dialog appears. Click Decline to end the installation process and close the installer.206 Chapter 5 Macintosh <strong>ENWW</strong>
Figure 5-7 Easy Install dialogThe default option in the drop-down menu at the top of the screen is Easy Install. You can alsoselect Custom Install in the same menu.The Configuration installation option installs the <strong>HP</strong> EWS Configuration Utility, which is used to accessthe <strong>HP</strong> EWS program. For more information, see <strong>HP</strong> Embedded Web Server (EWS) on page 219.Click Install to start the installation.Figure 5-8 <strong>HP</strong> <strong>LaserJet</strong> Installer dialog (custom install)The Custom Install screen displays all of the options that are available on the printing-system softwareCD. Use the check boxes on the list to install the components that you want to install.Click the ? icon to the right of each item in the list to open a screen that describes the component.Macintosh<strong>ENWW</strong> Macintosh install and uninstall instructions 207
Click Install to start the installation on the selected disk. The printing system files are installed in themain Library folder on the Macintosh hard drive. If installed, the <strong>HP</strong> Device Configuration Utility isinstalled under the Application directory in a directory labeled <strong>HP</strong> EWS Device Configuration. Anuninstaller utility for the Device Configuration utility is also installed in this directory.Figure 5-9 Installing dialogThe Installing dialog shows installation progress. No action is required unless you want to stop theinstallation.Click Stop to interrupt the install file copy process.When installation is complete, the LASERJET README.RTF file opens and the <strong>LaserJet</strong>ReadMe.rtf icon appears on the desktop. Follow these instructions to set up a printer queue for the<strong>HP</strong> <strong>LaserJet</strong> <strong>P2015</strong> printer.Figure 5-10 <strong>LaserJet</strong> ReadMe iconA pop-up message stating that the installation was successful also appears.208 Chapter 5 Macintosh <strong>ENWW</strong>
Figure 5-11 Installation success messageClick Quit to exit the installer.Click Continue to return to the <strong>HP</strong> <strong>LaserJet</strong> Installer.<strong>Printer</strong> setupAfter installing the printing-system software in Macintosh operating systems, the printer must be set up.Topics:●Set up a printer with Mac OS X V10.4 or higher)● Set up a printer with Mac OS X V10.3●●Set up a printer with Mac OS X V10.2.8Troubleshooting the printer setupSet up a printer with Mac OS X V10.4 or higher)Carry out these steps after the software installation is complete.1. If you are installing the printer using a USB connection, connect the USB cable between the<strong>HP</strong> <strong>LaserJet</strong> <strong>P2015</strong> printer and the computer. Turn on the printer. If you are installing using anetwork connection, verify that the network cable is connected to the printer and the printer is on.Macintosh<strong>ENWW</strong> Macintosh install and uninstall instructions 209
2. In the Applications folder, open the Utilities folder, and then run the <strong>Printer</strong> Setup Utility. The<strong>Printer</strong> List appears. It looks similar to the one shown in the following figure.Figure 5-12 <strong>Printer</strong> list screenYou can also configure the printer using the Print & Fax pane of System Preferences (from theApple menu, choose System Preferences..., then choose Print & Fax).Figure 5-13 Print & Fax screen3. If you are installing the printer using a USB connection, verify that the printer appears on the printerlist. The Kind column in the printer list should display <strong>HP</strong> <strong>LaserJet</strong> <strong>P2015</strong> Series. If this is thecase, the setup is complete.If the printer does not appear, or if the correct information does not appear in the Kind column,see Troubleshooting the printer setup on page 218.If you are installing the printer using a network connection, continue with the following steps.4. Click Add (or the + button in the Print & Fax utility) to open the <strong>Printer</strong> Browser screen.210 Chapter 5 Macintosh <strong>ENWW</strong>
5. You can use either Bonjour or IP Printing for the network connection.If you are using Bonjour, carry out the following steps:a. Click the Default Browser tab.Figure 5-14 Default Browser tabb. Select the <strong>HP</strong> <strong>LaserJet</strong> <strong>P2015</strong> printer from the list. The software verifies that the printer isconnected to the network and the Print Using field is automatically populated with the correctPPD for the printer.NOTE: If the <strong>HP</strong> <strong>LaserJet</strong> <strong>P2015</strong> does not appear in the list, verify that the printer is on andconnected to the network, then try turning the printer off and then on again. If the<strong>HP</strong> <strong>LaserJet</strong> <strong>P2015</strong> Series PPD does not appear in the Print Using pull-down list, turn thecomputer off and then on again, then restart the setup process. For more troubleshootinginformation, see Troubleshooting the printer setup on page 218.Macintosh<strong>ENWW</strong> Macintosh install and uninstall instructions 211
If you want to use the IP Printing method, carry out the following steps:a. Click the IP <strong>Printer</strong> tab.b. Select <strong>HP</strong> Jet Direct – Socket from the Protocol pull-down menu. This is the recommendedsetting for <strong>HP</strong> printers.c. Print out the printer configuration pages. On the printer, press and hold in the green buttonfor eight seconds, or until you see the LEDs above the button start to blink. The printer printsout the configuration pages.d. On the first configuration page, under Product Settings, find the IP Address. Type thisaddress into the Address field on the add printer screen.e. The Name, Location, and Print Using information will automatically be filled in. If the<strong>HP</strong> <strong>LaserJet</strong> <strong>P2015</strong> Series PPD does not appear in the Print Using field, turn the computeroff and then on again and restart the setup process.212 Chapter 5 Macintosh <strong>ENWW</strong>
6. Click Add. The Installable Options screen appears.Figure 5-15 Installable Options screen7. In the Collation in <strong>Printer</strong> drop-down menu, select one of the following options, depending on thedevice configuration:●●Yes – Total RAM > 96 MB or Hard DiskNo – Total RAM < 96 MB and No Hard Disk8. If the device has the optional 250-sheet tray 3, select Tray 3.9. If the device has a duplex unit (a standard feature on the <strong>HP</strong> <strong>LaserJet</strong> <strong>P2015</strong>dn and the<strong>HP</strong> <strong>LaserJet</strong> <strong>P2015</strong>x models), select the Duplex Unit check box.10. After selecting the installable options, click Continue. The device name appears in the <strong>Printer</strong>List and the setup is complete.Figure 5-16 <strong>Printer</strong> List screenMacintosh<strong>ENWW</strong> Macintosh install and uninstall instructions 213
Set up a printer with Mac OS X V10.31. If you are installing the printer using a USB connection, connect the USB cable between the<strong>HP</strong> <strong>LaserJet</strong> <strong>P2015</strong> printer and the computer. Turn on the printer. If you are installing using anetwork connection, verify that the network cable is connected to the printer and the printer is on.2. In the Applications folder, open the Utilities folder, and then run the <strong>Printer</strong> Setup Utility.Figure 5-17 <strong>Printer</strong> List screenYou can also configure the printer using the Print & Fax pane of System Preferences (from theApple menu, choose System Preferences..., then choose Print & Fax).Figure 5-18 Print & Fax screen3. If you are installing the printer using a USB connection, verify that the printer appears on the printerlist. (In the Print & Fax screen, click the Set Up <strong>Printer</strong>s... button to see the printer list.) TheKind column in the printer list should display <strong>HP</strong> <strong>LaserJet</strong> <strong>P2015</strong> Series. If this is the case, thesetup is complete.If the printer does not appear, or if the correct information does not appear in the Kind column,see Troubleshooting the printer setup on page 218.214 Chapter 5 Macintosh <strong>ENWW</strong>
If you are installing the printer using a network connection, continue with the following steps.4. Click Add (or the Set Up <strong>Printer</strong>s... button in the Print & Fax screen, and then Add) to open theadd printer screen.Figure 5-19 Add printer screen5. Select the network connection protocol in the top pull-down menu. The two supported protocolsare Rendezvous and IP Printing.If you are using Rendezvous, carry out the following step:Select the <strong>HP</strong> <strong>LaserJet</strong> <strong>P2015</strong> in the Name list. The <strong>Printer</strong> Model and Model Name areselected automatically.NOTE: If the <strong>HP</strong> <strong>LaserJet</strong> <strong>P2015</strong> does not appear in the list, verify that the printer is poweredon and connected to the network. If it still does not appear, try turning the printer off and thenon again. Finally, turn the computer off and then on again, then restart the setup process. Formore troubleshooting information, see Troubleshooting the printer setup on page 218.NOTE: If the automatic selection fails, or if you want to manually select a .PPD file, clickthe <strong>Printer</strong> Model pull-down menu, select <strong>HP</strong>, and then select the .PPD file that you want toadd. If the <strong>HP</strong> <strong>LaserJet</strong> <strong>P2015</strong> Series PPD does not appear in the Model Name list, turn thecomputer off and then on again and restart the setup process.If you are using IP Printing, carry out the following steps:a. Select Socket/<strong>HP</strong> Jet Direct from the <strong>Printer</strong> Type pull-down menu. This is therecommended setting for <strong>HP</strong> printers.b. Print out the printer configuration pages. On the printer, press and hold in the green buttonfor eight seconds, or until you see the LEDs above the button start to blink. The printer printsout the configuration pages.Macintosh<strong>ENWW</strong> Macintosh install and uninstall instructions 215
c. On the first configuration page, under Product Settings, find the IP Address. Type thisaddress into the <strong>Printer</strong> Address field on the add printer screen.d. Select the <strong>Printer</strong> Model and select <strong>HP</strong> <strong>LaserJet</strong> <strong>P2015</strong> in the Model Name list. If the<strong>HP</strong> <strong>LaserJet</strong> <strong>P2015</strong> Series PPD does not appear in the Model Name list, turn the computeroff and then on again and restart the setup process.6. Click Add. The <strong>HP</strong> <strong>LaserJet</strong> <strong>P2015</strong> printer appears in the <strong>Printer</strong> List.7. To configure installable options such as a duplexing unit or optional paper tray, click Show Info?on the printer list and select Installable Options in the pull-down menu.8. In the Collation in <strong>Printer</strong> drop-down menu, select one of the following options, depending on thedevice configuration:●●Yes – Total RAM > 96 MB or Hard DiskNo – Total RAM < 96 MB and No Hard Disk9. If the device has the optional 250-sheet tray 3, select Tray 3.10. If the device has a duplex unit (a standard feature on the <strong>HP</strong> <strong>LaserJet</strong> <strong>P2015</strong>dn and the<strong>HP</strong> <strong>LaserJet</strong> <strong>P2015</strong>x models), select the Duplex Unit check box.11. Click Apply Changes, and then close the <strong>Printer</strong> List dialog.Set up a printer with Mac OS X V10.2.81. If you are installing the printer using a USB connection, connect the USB cable between the<strong>HP</strong> <strong>LaserJet</strong> <strong>P2015</strong> printer and the computer. Turn on the printer. If you are installing using anetwork connection, verify that the network cable is connected to the printer and the printer is on.2. In the Applications folder, open the Utilities folder, and then run the Print Center.Figure 5-20 Print Center screen3. If you are installing the printer using a USB connection, verify that the printer appears on the printerlist. The Kind column in the printer list should display <strong>HP</strong> <strong>LaserJet</strong> <strong>P2015</strong> Series. If this is thecase, the setup is complete.NOTE: If the Kind column does not appear in the printer list, go to the View menu, andchoose Columns and then Kind.216 Chapter 5 Macintosh <strong>ENWW</strong>
If the printer does not appear, or if the correct information does not appear in the Kind column,see Troubleshooting the printer setup on page 218.If you are installing the printer using a network connection, continue with the following steps.4. Click Add to open the add printer screen.Figure 5-21 Add printer screen5. Select the network connection protocol in the top pull-down menu. The two supported protocolsare Rendezvous and IP Printing.If you are using Rendezvous, carry out the following step:Select the <strong>HP</strong> <strong>LaserJet</strong> <strong>P2015</strong> in the Name list. The <strong>Printer</strong> Model and Model Name areselected automatically.NOTE: If the <strong>HP</strong> <strong>LaserJet</strong> <strong>P2015</strong> does not appear in the list, verify that the printer is poweredon and connected to the network. If it still does not appear, try turning the printer off and thenon again. Finally, turn the computer off and then on again, then restart the setup process. Formore troubleshooting information, see Troubleshooting the printer setup on page 218.NOTE: If the automatic selection fails, or if you want to manually select a PPD file, clickthe <strong>Printer</strong> Model pull-down menu, select <strong>HP</strong>, and then select the PPD file that you want toadd. If the <strong>HP</strong> <strong>LaserJet</strong> <strong>P2015</strong> Series PPD does not appear in the Model Name list, turn thecomputer off and then on again and restart the setup process.Macintosh<strong>ENWW</strong> Macintosh install and uninstall instructions 217
If you are using IP Printing, carry out the following steps:a. Print out the printer configuration pages. On the printer, press and hold in the green buttonfor eight seconds, or until you see the LEDs above the button start to blink. The printer printsout the configuration pages.b. On the first configuration page, under Product Settings, find the IP Address. Type thisaddress into the <strong>Printer</strong>'s Address field.c. Select the <strong>Printer</strong> Model and select <strong>HP</strong> <strong>LaserJet</strong> <strong>P2015</strong> in the Model Name list.6. Click Add. The <strong>HP</strong> <strong>LaserJet</strong> <strong>P2015</strong> printer appears in the <strong>Printer</strong> List.7. Select the <strong>HP</strong> <strong>LaserJet</strong> <strong>P2015</strong> printer, go to the <strong>Printer</strong>s menu, and choose Show Info.8. Select Installable Options from the top pull-down menu.9. In the Collation in <strong>Printer</strong> drop-down menu, select one of the following options, depending on thedevice configuration:●●Yes – Total RAM > 96 MB or Hard DiskNo – Total RAM < 96 MB and No Hard Disk10. If the device has the optional 250-sheet tray 3, select Tray 3.11. If the device has a duplex unit (a standard feature on the <strong>HP</strong> <strong>LaserJet</strong> <strong>P2015</strong>dn and the<strong>HP</strong> <strong>LaserJet</strong> <strong>P2015</strong>x models), select the Duplex Unit check box.12. Click Apply Changes, and then close the <strong>Printer</strong> List dialog.Troubleshooting the printer setupIf the printer does not appear in the printer list after an installation:218 Chapter 5 Macintosh <strong>ENWW</strong>
Carry out each one of these solutions in the order given, and restart the setup process after each oneto see if the issue has been resolved.●●●●●●Verify that the USB or network cable is connected between the printer and the computer and thatthe printer is powered on.Try disconnecting and reconnecting the cable. If the computer has more than one USB port, try adifferent USB port.Turn the printer off and then back on again.Turn the computer off and then back on again.If you are using a USB hub on the computer, disconnect the other USB devices from the hub.Try forcing the printer into USB Full Speed mode by using the printer control panel.If the wrong PPD appears in the Kind column in the printer list after an installation:1. Unplug USB cable.2. Delete the print queue with the incorrect type (for example, Generic PostScript <strong>Printer</strong>).3. Reinstall the printer software.4. Turn the computer off and then on again.5. Reconnect the USB cable from the computer to the printer.If these steps do not resolve the problem, delete the incorrect print queue, click Add, select the printerfrom the list, and then browse manually for the <strong>HP</strong> <strong>LaserJet</strong> <strong>P2015</strong> Series PPD.Uninstall the Macintosh printing systemFollow these instructions to uninstall the Macintosh Printing System.1. Browse to the folder containing the PPDs. In Mac OS X V10.2.8 or later, the PPDs are installedin Library/<strong>Printer</strong>s/PPDs/Contents/Resources:.lproj, where is the appropriatelanguage.2. Select the <strong>HP</strong> <strong>LaserJet</strong> <strong>P2015</strong>.gz file and drag it to Trash.3. Empty the Trash.4. To uninstall the <strong>HP</strong> Device Configuration application and supporting files, go to Applications/<strong>HP</strong>EWS Device Configuration and run the <strong>HP</strong> Uninstaller application.<strong>HP</strong> Embedded Web Server (EWS)<strong>HP</strong> EWS is embedded in the printer firmware. It is a series of web pages that provide access to additionalprinter status and configuration tools in Mac OS X.Topics:●●●Access to the <strong>HP</strong> EWSStatus tabSettings tabMacintosh<strong>ENWW</strong> <strong>HP</strong> Embedded Web Server (EWS) 219
●Networking tabAccess to the <strong>HP</strong> EWSUse any one of the following methods to gain access to the <strong>HP</strong> EWS:●Using the Mac OS Print Center, <strong>Printer</strong> Setup Utility, or Print & Fax screen:1. In the Applications folder, open the Utilities folder, and then run the <strong>Printer</strong> Setup Utility orthe Print Center utility. You can also access the <strong>HP</strong> EWS using the Print & Fax pane of SystemPreferences (from the Apple menu, choose System Preferences..., then choose Print & Fax).2. Select the <strong>HP</strong> <strong>LaserJet</strong> <strong>P2015</strong> printer, and then click Utility (Mac OS X V10.3 or later). The webbrowser opens and the Device Status screen appears. In the Print & Fax screen, select the<strong>HP</strong> <strong>LaserJet</strong> <strong>P2015</strong> printer, click the Print Queue... button, then click Utility.●Using a web browser:NOTE:This method can only be used if the printer is using a network connection.1. On the printer, press and hold in the green button for eight seconds, or until you see the LEDsabove the button start to blink. The printer prints out the configuration pages.2. On the first configuration page, under Product Settings, find the IP Address. Type this addressinto a web browser such as Safari. The Device Status screen appears.●Using the <strong>HP</strong> Device Configuration application:1. In the Applications folder, open the <strong>HP</strong> EWS Device Configuration folder. Run the <strong>HP</strong> DeviceConfiguration application.2. Select the <strong>HP</strong> <strong>LaserJet</strong> <strong>P2015</strong> from the list of devices. The web browser opens and the DeviceStatus screen appears.Figure 5-22 Device Status screenThe following sections describe the screens and features that are available in the <strong>HP</strong> EWS.220 Chapter 5 Macintosh <strong>ENWW</strong>
Status tabThe Status tab allows you to access and print out detailed information regarding device and supplystatus, device configuration, network configuration, and usage.The Status tab contains the following pages:●●●●●●Device StatusSupplies Status pageDevice Configuration pageNetwork Configuration pagePrint Info PagesEvent Log pageDevice StatusThe Device Status page shows device status messages from the device. The Device Status page alsodisplays some pertinent printer information and device settings.Figure 5-23 <strong>HP</strong> EWS – Device Status pageMacintosh<strong>ENWW</strong> <strong>HP</strong> Embedded Web Server (EWS) 221
Supplies Status pageThe Supplies Status page displays the status of all of the supplies used by the printer, including theblack, cyan, magenta, and yellow print cartridges.Figure 5-24 <strong>HP</strong> EWS – Supplies Status page222 Chapter 5 Macintosh <strong>ENWW</strong>
Device Configuration pageThe Device Configuration page displays the values of all of the settings available to be set in the printer.The contents of this page are consistent with the Configuration page generated by the firmware.Figure 5-25 <strong>HP</strong> EWS – Device Configuration pageMacintosh<strong>ENWW</strong> <strong>HP</strong> Embedded Web Server (EWS) 223
Network Configuration pageThe Network Configuration page contains all the information about the network and its enabledfeatures.Figure 5-26 <strong>HP</strong> EWS – Network Configuration pagePrint Info PagesThe Print Info Pages page provides users the ability to easily print out the internal special pages thatare generated by the device. The following information pages are available.●●PCL Font ListPCL6 Font List224 Chapter 5 Macintosh <strong>ENWW</strong>
●●PS Font ListSupplies PageFigure 5-27 <strong>HP</strong> EWS – Print Info Pages pageEvent Log pageUse the Event Log page to track the events that occur on the <strong>HP</strong> <strong>LaserJet</strong> <strong>P2015</strong> printer.Figure 5-28 <strong>HP</strong> EWS – Event Log pageSettings tabThe Settings tab allows you to view and change settings for the following features:●●●●●●●Device Information pagePaper Handling pagePrinting pagePCL5e pagePostScript pagePrint Quality pagePaper Types pageMacintosh<strong>ENWW</strong> <strong>HP</strong> Embedded Web Server (EWS) 225
●●System Setup pageService pageDevice Information pageThe Device Information page contains identifying information about the <strong>HP</strong> <strong>LaserJet</strong> <strong>P2015</strong> printer.Figure 5-29 <strong>HP</strong> EWS – Device Information page226 Chapter 5 Macintosh <strong>ENWW</strong>
Paper Handling pageUse this page to configure the paper-handling settings for the <strong>HP</strong> <strong>LaserJet</strong> <strong>P2015</strong> printer.Figure 5-30 <strong>HP</strong> EWS – Paper Handling pagePrinting pageUse this page to change the printing defaults for the <strong>HP</strong> <strong>LaserJet</strong> <strong>P2015</strong> printer.Figure 5-31 <strong>HP</strong> EWS – Printing pageMacintosh<strong>ENWW</strong> <strong>HP</strong> Embedded Web Server (EWS) 227
PCL5e pageUse the PCL5e page to change font information and form length. This page does not apply to Macintoshprint drivers.Figure 5-32 <strong>HP</strong> EWS – PCL5e pagePostScript pageThe PostScript page allows you to change the Print PS Errors option.Figure 5-33 <strong>HP</strong> EWS – PostScript page228 Chapter 5 Macintosh <strong>ENWW</strong>
Print Quality pageUse the Print Quality page to change the print quality defaults for the <strong>HP</strong> <strong>LaserJet</strong> <strong>P2015</strong> printer.Figure 5-34 <strong>HP</strong> EWS – Print Quality pagePaper Types pageUse the Paper Types page to set the default paper type settings for the <strong>HP</strong> <strong>LaserJet</strong> <strong>P2015</strong> printer.Figure 5-35 <strong>HP</strong> EWS – Paper Types pageMacintosh<strong>ENWW</strong> <strong>HP</strong> Embedded Web Server (EWS) 229
System Setup pageUse the System Setup page to change settings on the <strong>HP</strong> <strong>LaserJet</strong> <strong>P2015</strong> printer such as JamRecovery and Auto Continue.Figure 5-36 <strong>HP</strong> EWS – System Setup pageService pageUse the Service page to initiate the cleaning mode on the <strong>HP</strong> <strong>LaserJet</strong> <strong>P2015</strong> printer.Figure 5-37 <strong>HP</strong> EWS – Service pageNetworking tabThe Networking tab allows you to view and change settings for the device’s network connection andcommunication. The following pages are available:●IP Configuration page230 Chapter 5 Macintosh <strong>ENWW</strong>
●●●●●Advanced pageBonjour pageSNMP pageNetwork Configuration pagePassword pageIP Configuration pageUse the IP Configuration page to configure the IP address and host and domain names for the<strong>HP</strong> <strong>LaserJet</strong> <strong>P2015</strong> printer.Figure 5-38 <strong>HP</strong> EWS – IP Configuration pageMacintosh<strong>ENWW</strong> <strong>HP</strong> Embedded Web Server (EWS) 231
Advanced pageUse the Advanced page to configure the enabled settings and other settings, such as link speed, forthe <strong>HP</strong> <strong>LaserJet</strong> <strong>P2015</strong> printer.Figure 5-39 <strong>HP</strong> EWS – Advanced pageBonjour pageUse the Bonjour page to enable or disable the Bonjour settings for the <strong>HP</strong> <strong>LaserJet</strong> <strong>P2015</strong> printer. Youcan also use this page to change the Bonjour printer name.Figure 5-40 <strong>HP</strong> EWS – Bonjour page232 Chapter 5 Macintosh <strong>ENWW</strong>
SNMP pageUse this page to configure the SNMP settings for the <strong>HP</strong> <strong>LaserJet</strong> <strong>P2015</strong> printer.Figure 5-41 <strong>HP</strong> EWS – SNMP pageMacintosh<strong>ENWW</strong> <strong>HP</strong> Embedded Web Server (EWS) 233
Network Configuration pageThe Network Configuration page contains all the information about the network and its enabledfeatures.Figure 5-42 <strong>HP</strong> EWS – Network Configuration page234 Chapter 5 Macintosh <strong>ENWW</strong>
Password pageUse this page to set or change the Administrator password.Figure 5-43 <strong>HP</strong> EWS – Password pageMacintosh<strong>ENWW</strong> <strong>HP</strong> Embedded Web Server (EWS) 235
236 Chapter 5 Macintosh <strong>ENWW</strong>
6 Engineering DetailsEngineering DetailsIntroductionTopics:●●●●TroubleshootingUninstallMedia attributesHewlett-Packard <strong>HP</strong> <strong>LaserJet</strong> <strong>P2015</strong> Series Printing System Readme<strong>ENWW</strong> Introduction 237
TroubleshootingThis section contains the following topics:●●●Basic troubleshooting checklistTroubleshooting toolsKnown Issues for the <strong>HP</strong> <strong>LaserJet</strong> <strong>P2015</strong> printerBasic troubleshooting checklistUse the following steps when trying to solve a problem with the device.Table 6-1 Troubleshooting checklistStep number Verification step Possible problems Solutions1 Is the power on?When the device is connectedto a grounded power source,amber lights on the top of theprinter will show that it iswarming up. When the deviceis ready to print, only thegreen light will be on.2 Does the device print fromthe computer?Use a word-processingapplication to send a print jobto the device.No power due to failed powersource, cable, switch, or fuse.<strong>Software</strong> is not installedcorrectly or an error occurredduring software installation.The cable is not connectedcorrectly.An incorrect driver is selected.Other devices are connectedto the USB port.There is a port driver problemin Microsoft Windows.1. Verify that the device isplugged in.2. Verify that the powercable is functional andthat the power switch ison.3. Check the power sourceby plugging the devicedirectly into the wall orinto a different outlet.4. Test the outlet orconnect another deviceto the outlet to verify thatthe outlet is functioning.Uninstall and then reinstall thedevice software. Verify thatyou are using the correctinstallation procedure and thecorrect port setting.Reconnect the cable.Select the proper driver.Disconnect the other devicesand try again to print.Uninstall and then reinstall thedevice software. Verify thatyou are using the correctinstallation procedure and thecorrect port setting.If the error persists, contact <strong>HP</strong> Customer Contact Center.Troubleshooting toolsThe <strong>HP</strong> <strong>LaserJet</strong> <strong>P2015</strong> printing-system CD contains the following troubleshooting tools in the Utilitiesfolder on the root directory. This section contains the following topics:238 Chapter 6 Engineering Details <strong>ENWW</strong>
●●●File to E-mail utilityAccessDeniedUtility.exeFixErr1714 utilityFile to E-mail utilityThe File to E-mail utility collects the data specified in an .INI file and then attaches the data files to ane-mail that can be sent to <strong>HP</strong> Customer Support to assist troubleshooting. The utility runs on thecomputer, but does not interact with the <strong>HP</strong> <strong>LaserJet</strong> all-in-one.Engineering DetailsThe tool is included on the installer CD, but is not copied to the computer during the software installation.<strong>HP</strong> Customer Support can also send the utility to you by e-mail or by posting it to an <strong>HP</strong> Web page.The tool is compatible with Windows 98 SE, Windows Me, Windows 2000, and Windows XP.The File to E-mail utility runs with any MAPI-compliant e-mail applications. It does not run with Webbasede-mail services such as Yahoo, Hotmail, or AOL.Depending on the speed of the computer, it might take a few minutes for the utility to gather the log filesand attach them to an e-mail message.The File to E-mail utility consists of two files that are located in the util folder on the <strong>HP</strong> <strong>LaserJet</strong> <strong>P2015</strong>software CD:●●util\CCC\FiletoEmail\FileToEmail.exeutil\CCC\FiletoEmail\FileToEmail.iniTo use the File to E-mail utility, copy these files to the desktop, navigate to them in Explorer, and doubleclickFileToEmail.exe to open the utility. The utility generates files, opens an e-mail message, andattaches the files so that you can send them to your IT administrator, as shown in the following figureshows some of the attachments.If the File to E-mail utility is not successful for any reason (for instance, if you cancel the new messageor you are using Web-based e-mail software), all the files are copied to a folder on the desktop that isnamed HpCCC, possibly with strings of 0's attached to the end. You can zip these files and e-mail themseparately.NOTE:This version of the File to Email utility does not copy the collect .BAT logs.AccessDeniedUtility.exeThis utility is used by CCC agents when customers call in with registry “access denied” problems.●●●●●Fixes the registry access-denied issuesNot very useful because the Shield plug-in already does this.CCC requested this utility to ship anywayNo command line options exist, just double-click.No logging takes place<strong>ENWW</strong> Troubleshooting 239
FixErr1714 utilityThis utility is used by CCC agents when customers call in with MSI error 1714, which is an occasionalproblem that occurs when a different user than the installing user attempts to uninstall the product.●●●●This utility might fix the 1714 problem; some evidence exists that this utility might not work in allcases.No command line options exist, just double-click.No logging takes place.No user interface exists.Known Issues for the <strong>HP</strong> <strong>LaserJet</strong> <strong>P2015</strong> printerThe following issues are known issues for the <strong>HP</strong> <strong>LaserJet</strong> <strong>P2015</strong> printer.240 Chapter 6 Engineering Details <strong>ENWW</strong>
UninstallThis section provides information about the following topics:● Uninstall methods● Uninstall component list● Uninstall instructions for Microsoft Windows 2000 and Microsoft Windows XPEngineering Details●Uninstall instructions for Microsoft Windows 98 SE and Microsoft Windows MeUninstall methodsThe following three methods exist for uninstalling the <strong>HP</strong> <strong>LaserJet</strong> <strong>P2015</strong> printing-system software fromthe computer:●●●Program group. Click Uninstall from the <strong>HP</strong> <strong>LaserJet</strong> <strong>P2015</strong> program group fromPrograms menuon the computer. This is the preferred uninstall method.Add/Remove programs. Click Add/Remove Programs from the Windows Control Panel, andthen click the <strong>HP</strong> <strong>LaserJet</strong> <strong>P2015</strong> software components that you want to remove.<strong>HP</strong> <strong>LaserJet</strong> <strong>P2015</strong> printing-system CD. Reinsert the <strong>HP</strong> <strong>LaserJet</strong> <strong>P2015</strong> printing-system CDinto the CD-ROM drive on the computer and then click Uninstall.Uninstall component listThe <strong>HP</strong> <strong>LaserJet</strong> <strong>P2015</strong> uninstaller removes the following components from the computer:●●●Drivers<strong>HP</strong> ToolboxFXUser guidesThe <strong>HP</strong> <strong>LaserJet</strong> <strong>P2015</strong> uninstaller does not remove the following components from the computer:●●<strong>HP</strong> Extended Capabilities<strong>HP</strong> <strong>Software</strong> UpdateYou must remove these components using Microsoft Windows Add/Remove Programs feature. Awarning screen appears if any other <strong>HP</strong> products are still using the components you want to remove.For a full list of the files installed and uninstalled on the computer using the <strong>HP</strong> <strong>LaserJet</strong> <strong>P2015</strong>uninstaller, see the <strong>HP</strong> <strong>LaserJet</strong> <strong>P2015</strong> <strong>Software</strong> <strong>Technical</strong> <strong>Reference</strong> Addendum.<strong>ENWW</strong> Uninstall 241
Uninstall instructions for Microsoft Windows 2000 and Microsoft WindowsXPNOTE: To uninstall the software from Microsoft Windows 2000 and Microsoft Windows XP, log on withAdministrator privileges.1. Quit all open programs.2. Click Start, click Programs (or All Programs in Microsoft Windows XP), select <strong>HP</strong>, select<strong>HP</strong> <strong>LaserJet</strong> <strong>P2015</strong> series, and then click Uninstall.3. The Important Information dialog box appears. Click Next to continue.Figure 6-1 Important Information dialog box242 Chapter 6 Engineering Details <strong>ENWW</strong>
4. The Cleanup Progress dialog box appears. A progress bar reflects the status of the uninstallprocess.Figure 6-2 Cleanup Progress dialog boxEngineering Details<strong>ENWW</strong> Uninstall 243
5. When the uninstall process is completed, the Restart dialog box appears. Select the Click hereto restart later check box if you want to restart the computer at a later time, and then clickFinish. Or, click Finish to restart the computer and finish the uninstall process.Figure 6-3 Restart dialog boxUninstall instructions for Microsoft Windows 98 SE and Microsoft WindowsMeFollow these steps to uninstall the <strong>HP</strong> <strong>LaserJet</strong> <strong>P2015</strong> printing-system software for Microsoft Windows98 SE and Microsoft Windows Me.1. Click Start, click Settings, and then click <strong>Printer</strong>s.2. Right-click the icon for the <strong>HP</strong> <strong>LaserJet</strong> <strong>P2015</strong> printer and then click Delete. The product icon andthe associated files are removed from the computer.244 Chapter 6 Engineering Details <strong>ENWW</strong>
Media attributesThis section includes the following information about media attributes:●●Media types and sizesCustom paper sizesMedia types and sizesThe tables in this section provide information about media features, media attributes, and paperhandlingconstraints for the <strong>HP</strong> <strong>LaserJet</strong> <strong>P2015</strong> printer.Engineering DetailsNOTE: The following table lists the features and attributes of various media listed under the Size Isdrop-down menu on the Paper/Quality tab. The list order can vary, depending on the operating system.The list will contain all the sizes shown here, and might contain sizes from other drivers.Table 6-2 Supported media attributesPaper sizes Width HeightLetterLegalA4ExecutiveB5 (ISO)Envelope #10Envelope MonarchEnvelope C5 (ISO)Envelope DL (ISO)Envelope B5 (ISO)Custom216 mm(8.5 inches)216 mm(8.5 inches)210 mm(8.27 inches)185 mm(7.25 inches)176 mm(6.93 inches)105 mm(4.13 inches)99 mm(3.88 inches)162 mm(6.38 inches)110 mm(4.33 inches)176 mm(6.93 inches)Minimum:76 mm279 mm(11.0 inches)355 mm(14.0 inches)297 mm(11.69 inches)266 mm(10.5 inches)250 mm(9.84 inches)241 mm(9.5 inches)190 mm(7.5 inches)229 mm(9.02 inches)220 mm(8.66 inches)250 mm(9.84 inches)Minimum:127 mm<strong>ENWW</strong> Media attributes 245
Table 6-2 Supported media attributes (continued)Paper sizes Width HeightB5 (JIS)Postcard (JIS)Double Postcard (JIS)A5(3.0 inches)Maximum:216 mm(8.5 inches)182 mm(7.16 inches)100 mm(3.94 inches)148 mm(5.83 inches)148 mm(5.83 inches)(5.00 inches)Maximum:356 mm(14.0 inches)257 mm(10.12 inches)148 mm(5.83 inches)200 mm(7.87 inches)210 mm(8.27 inches)8.5 x 13 (Foolscap) 216 mm(8.5 inches)330 mm(13 inches)16K 7.75 x 10.7516K 184x260mm16K 195x270mm197 mm(7.75 inches)184 mm7.2 inches195 mm7.67 inches273 mm(10.75 inches)260 mm10.2 inches270 mm10.6 inches246 Chapter 6 Engineering Details <strong>ENWW</strong>
Custom paper sizesThe following table identifies the media types the <strong>HP</strong> <strong>LaserJet</strong> <strong>P2015</strong> supports in trays 1, 2, and 3.Table 6-3 Tray 1 and Tray 2 specificationsTray 1 and Tray 2 Dimensions 1 Weight Capacity 2PaperMinimum: 76 x 127 mm(3 x 5 inches)Maximum: 216 x 356 mm60 to 163 g/m 2 (16 to 43 lb)Up to 176 g/m 2 (47 lb) forpostcardsSingle sheet of 75 g/m 2 (20 lb)paper for Tray 1Up to 250 sheets for Tray 2Engineering Details<strong>HP</strong> <strong>LaserJet</strong> glossy paper and<strong>HP</strong> <strong>LaserJet</strong> photo paper(8.5 x 14 inches)Same as the preceding listedminimum and maximumsizes.75 to 220 g/m 2 (20 to 58 lb) Single sheet of <strong>HP</strong> <strong>LaserJet</strong>glossy paper or <strong>HP</strong> <strong>LaserJet</strong>photo paper for Tray 1Up to 25 mm (0.99 inch) stackheight for Tray 2<strong>HP</strong> Premium Cover Paper 3 200 g/m 2 (53 lb) cover Single sheet of <strong>HP</strong> Coverpaper for Tray 1Up to 25 mm (0.99 inch) stackheight for Tray 2Transparencies and opaquefilmLabels 4Thickness: 0.10 to 0.13 mm(3.9 to 5.1 mils)Thickness: up to 0.23 mm (upto 9 mils)Single sheet of transparencyor opaque film for Tray 1Up to 50 sheets for Tray 2Single sheet of labels for Tray1Up to 25 mm (0.99 inch) stackheight for Tray 2Envelopes Up to 90 g/m 2 (up to 24 lb) Single envelope for Tray 1Up to ten envelopes for Tray 21The printer supports a wide range of standard and custom sizes of print media. Check the printer driver for supported sizes.2Capacity can vary depending on media weight and thickness, and environmental conditions.3Smoothness: 100 to 250 (Sheffield).4Hewlett-Packard does not guarantee results when printing with other types of heavy paper.Table 6-4 Optional Tray 3 specificationsOptional Tray 3 (250-sheettray)Dimensions 1 Weight Capacity 2Plain paperMinimum: 76 x 127 mm(3 x 5 inches)Maximum: 216 x 356 mm(8.5 x 14 inches)60 to 163 g/m 2 (16 to 43 lb) Up to 200 sheets1The printer supports a wide range of standard and custom sizes of print media. Check the printer driver for supported sizes.2Capacity can vary depending on the media weight and thickness, and environmental conditions.<strong>ENWW</strong> Media attributes 247
Table 6-5 Specifications for automatic 2-sided printingTray 1, Tray 2, and optionalTray 3Dimensions 1 Weight Capacity 2Paper Letter, A4, legal, 8.5 x 13inches60 to 105 g/m 2 (16 to 28 lb) Single sheet for Tray 1Up to 250 sheets for Tray 2and optional Tray 3<strong>HP</strong> <strong>LaserJet</strong> glossy paper Letter, A4 75 to 120 g/m 2 (20 to 32 lb) Single sheet for Tray 1Up to 250 sheets for Tray 2and optional Tray 31The printer supports a wide range of standard and custom sizes of print media. Check the printer driver for supported sizes.2Capacity can vary depending on the media weight and thickness, and environmental conditions.248 Chapter 6 Engineering Details <strong>ENWW</strong>
Hewlett-Packard <strong>HP</strong> <strong>LaserJet</strong> <strong>P2015</strong> Series PrintingSystem Readme●●●●IntroductionProduct <strong>Software</strong>Known issues and workaroundsInstallation InstructionsEngineering Details●●Customer assistanceLegal statementsIntroductionPurpose of this documentThis document contains installation instructions for the <strong>HP</strong> <strong>LaserJet</strong> <strong>P2015</strong> printing system software.Product connection informationAll <strong>HP</strong> <strong>LaserJet</strong> <strong>P2015</strong> Series printers have a Hi-Speed USB 2.0 port.The <strong>HP</strong> <strong>LaserJet</strong> <strong>P2015</strong>n, <strong>HP</strong> <strong>LaserJet</strong> <strong>P2015</strong>dn, and <strong>HP</strong> <strong>LaserJet</strong> <strong>P2015</strong>x models can also connectto a network by using the <strong>HP</strong> internal networking port.Product <strong>Software</strong>The <strong>HP</strong> <strong>LaserJet</strong> <strong>P2015</strong> Series printer comes with an installation CD-ROM that contains printer driversfor Windows and Macintosh, <strong>HP</strong> ToolboxFX software for Windows, and uninstaller software forWindows.Supported operating systemsThe printer software runs on the following operating systems:●●Windows 98 (printer driver only)Windows Me (printer driver only)● Windows 2000●●●●Windows Server 2003 (printer driver only)Windows XP (32-bit)Windows XP (64-bit) (printer driver only)Macintosh OS X V10.2.8, V10.3.9, and V10.4.3<strong>Printer</strong> driversA printer driver is software that allows other software programs to access printer configuration features.Typically, you should install a printer driver for each printer that you use.<strong>ENWW</strong> Hewlett-Packard <strong>HP</strong> <strong>LaserJet</strong> <strong>P2015</strong> Series Printing System Readme 249
Microsoft Windows printer driversThe software CD-ROM that came with the printer includes three Windows printer drivers: PCL 5e, PCL6, and <strong>HP</strong> postscript level 3 emulation. Choose a printer driver based on the way you use the printer.●●●Use the PCL 6 printer driver to take full advantage of all printer features. Unless complete backwardcompatibility with previous PCL drivers or older printers is necessary, the PCL 6 driver isrecommended.Use the PCL 5e printer driver if you need print results to look consistent with those from older<strong>HP</strong> <strong>LaserJet</strong> printers. Certain features are not available in this printer driver.Use the <strong>HP</strong> postscript level 3 emulation printer driver for <strong>HP</strong> postscript level 3 emulation. Certainprinter features are not available in this printer driver.Macintosh printer driverThe software CD-ROM that came with the printer includes an <strong>HP</strong> <strong>LaserJet</strong> <strong>P2015</strong> Series printer driverfor Macintosh OS X V10.2.8, V10.3.9 and V10.4.3.<strong>Printer</strong> driver downloadsThe latest printer drivers and printing software for the <strong>HP</strong> <strong>LaserJet</strong> printer are available on the Webat http://www.hp.com/support/ljp2015.<strong>HP</strong> ToolboxFX software for Microsoft WindowsThe software CD-ROM that came with the printer includes <strong>HP</strong> ToolboxFX software for Windows.<strong>HP</strong> ToolboxFX is used to complete the following tasks:●●●●Check the printer status.Configure the printer settings.View troubleshooting information.View online documentation.Uninstaller software for Microsoft WindowsThe uninstaller utility allows you to remove the Windows <strong>HP</strong> printing system components. SeeUninstaller on page 253 for more instructions.Known issues and workarounds●●●The <strong>HP</strong> ToolboxFX application that is installed with a full installation of the <strong>HP</strong> <strong>LaserJet</strong> <strong>P2015</strong>Series software might not function in Windows 2000 if Service Pack 4 (SP4) and critical updatesare not currently installed. If you encounter problems with the <strong>HP</strong> ToolboxFX application, verify thatWindows 2000 Service Pack 4 is installed, and install all available critical updates for Windows2000 from Windows Update.Firewall software can interfere with the <strong>HP</strong> software installer. If you do not disable the firewall duringinstallation, you may experience longer install times and failures to detect the device during anetwork install.Certain high-speed USB 2.0 cards ship with unsigned host controller drivers. If you have purchaseda USB 2.0 add-in card and have an unsigned driver, you may experience driver installation250 Chapter 6 Engineering Details <strong>ENWW</strong>
●●problems or communication problems between the device and <strong>HP</strong> software. It is recommendedthat you always use a Microsoft WHQL Certified host controller driver with the USB hardware.Plug-and-Play print driver packages are available on the web at the following URL:http://www.hp.com/support/ljp2015.Functionality on systems that meet only minimum system requirements will be limited. Use of manyimages or videos requires a system that meets the recommended system requirements foracceptable performance and reliability.Engineering DetailsIf the device is not recognized:●●●●●Verify that the cable is USB 2.0 high-speed compliant.Ensure that the cable is connected correctly. Remove the USB cable, look at the end of the cable,and then match it to the pattern on the USB port. Make sure that it is not upside down. Insert oneend of the USB cable completely into the USB port on the <strong>HP</strong> device and the other end into theback of the computer.Check that the peripheral is turned on. Peripherals will not be recognized if the power is off.Ensure that the USB cable is no more than 15 feet or 5 meters in length.Check that the USB port is enabled. Some computers ship with disabled USB ports.For a complete list of known issues and workarounds, click the following link (a connection to the internetis required): http://h20000.www2.hp.com/bizsupport/TechSupport/Document.jspInstallation InstructionsOn Microsoft Windows, the CD-ROM installation software detects the operating system version.Installation options for Microsoft WindowsTwo methods are available for installing printer drivers and software components for the printer.Full (Recommended). Installs everything that the device needs to work plus <strong>HP</strong> ToolboxFX:●●●●●<strong>HP</strong> <strong>LaserJet</strong> <strong>P2015</strong> Series PCL 6 driver.<strong>HP</strong> ToolboxFX. Allows you to change printer settings and contains documentation and self-helptools.Screen Fonts. <strong>Printer</strong>-matching TrueType fonts help ensure WYSIWYG printing.<strong>HP</strong> <strong>LaserJet</strong> <strong>P2015</strong> Series printer documentation. A list of documentation, which includesinformation about product operation, troubleshooting, warranty and specifications, supplies, andsupport.<strong>HP</strong> <strong>Software</strong> Update. Use this software to check for software updates for your <strong>HP</strong> products.Minimum. Installs only the software required to print. The following is a list of available components:●●●<strong>HP</strong> <strong>LaserJet</strong> <strong>P2015</strong> Series PCL 6 driver.Screen Fonts. <strong>Printer</strong>-matching TrueType fonts help ensure WYSIWYG printing.<strong>HP</strong> <strong>Software</strong> Update. Use this software to check for software updates for your <strong>HP</strong> products.<strong>ENWW</strong> Hewlett-Packard <strong>HP</strong> <strong>LaserJet</strong> <strong>P2015</strong> Series Printing System Readme 251
NOTE: To install additional printer drivers (PCL 5e or <strong>HP</strong> postscript level 3 emulation), utilize theWindows Add <strong>Printer</strong> utility.Installing software on Microsoft WindowsUSB ConnectionNOTE: Administrator privileges are required to install the printing system onto a Windows 2000 orWindows XP operating system.1. Insert the software installation CD into the computer CD-ROM drive.2. If the installation program does not start automatically, browse the CD contents and run theSETUP.EXE file.3. Follow the on-screen instructions.Network ConnectionIf a computer on the network already has the <strong>HP</strong> <strong>LaserJet</strong> <strong>P2015</strong> software installed, no additionalsoftware installation is necessary when adding a new <strong>HP</strong> <strong>LaserJet</strong> <strong>P2015</strong> printer to the network.Otherwise, install the printer software on one of the networked computers as directed below.1. Insert the software installation CD into the computer CD-ROM drive.2. If the installation program does not start automatically, browse the CD contents and run theSETUP.EXE file.3. Follow the on-screen instructions.Installing software on Macintosh OS X V10.2.8, V10.3.9, and V10.4.3USB connection1. Insert the CD-ROM.2. Run the installation utility.3. After the software installation is complete, attach the USB cable to the printer and the computerand then restart the computer.4. After the computer has restarted, open the Print Center or <strong>Printer</strong> Setup Utility to see if the printername appears in the <strong>Printer</strong> List.5. If the printer name displays in the <strong>Printer</strong> List, the setup is complete. If the printer name does notdisplay in the <strong>Printer</strong> List, go to the next step.6. Click the Add button, and then select USB from the drop-down list.7. Select <strong>HP</strong> <strong>LaserJet</strong> <strong>P2015</strong> Series and then click Add. The printer name displays in the <strong>Printer</strong>List. Setup is complete.Network connection1. Connect the local area network (LAN) cable to the printer.2. Print the Network configuration report from the printer control panel. Find the "mDNS printer name"located under the TCP/IP heading. The mDNS name will be needed in step 7.252 Chapter 6 Engineering Details <strong>ENWW</strong>
3. Insert the CD-ROM.4. Run the installation utility.5. After the installation utility has completed, open the Print Center or <strong>Printer</strong> Setup Utility.6. Click Add, and then select Bonjour/Rendezvous from the drop-down list.7. Select the <strong>HP</strong> <strong>LaserJet</strong> <strong>P2015</strong> Series printer name that matches the mDNS printer name foundon the Network configuration report printed in step 2.Engineering DetailsUninstaller8. Click Add. The printer name displays in the <strong>Printer</strong> List. Setup is complete.Use the Uninstall icon in the <strong>HP</strong> <strong>LaserJet</strong> <strong>P2015</strong> Series printer program group to select and remove the<strong>HP</strong> printing system components from a Windows machine.1. From the Start menu, in the <strong>HP</strong> <strong>LaserJet</strong> <strong>P2015</strong> Series program group, click the Uninstall icon.2. The printing system guides you through removing all of the printing system components.3. If you have performed a Full install and you do not have any other <strong>HP</strong> devices installed, followsteps 4 and 5. Following these steps may disable certain functionality of other <strong>HP</strong> devices that areinstalled because they share the software.4. Open the Microsoft Windows Control Panel. Double-click Add/Remove Programs.5. You will see entries for <strong>HP</strong> Extended Capabilities and <strong>HP</strong> <strong>Software</strong> Update. For each item,click Change/Remove and follow the prompts.NOTE: For printer-driver-only (Add <strong>Printer</strong>) installations, delete the printer icon from the <strong>Printer</strong>s folder(Windows 98 Second Edition, Windows Me, Windows 2003 Server, and Windows XP 64-bit).Customer assistanceBrowse to one of the following URLs for online technical support:●●United States: http://www.hp.com/support/ljp2015Worldwide: http://www.hp.comSee the printer user guide for additional methods of obtaining software and support information, suchas printer driver distribution centers, fax services, and other online support.Legal statementsTRADEMARK NOTICESAdobe, Acrobat, and PostScript are either registered trademarks or trademarks of Adobe SystemsIncorporated in the United States and/or other countries/regions.Microsoft ®, MS-DOS ®, Windows ®, and Windows NT ® are U.S. registered trademarks of MicrosoftCorp.<strong>ENWW</strong> Hewlett-Packard <strong>HP</strong> <strong>LaserJet</strong> <strong>P2015</strong> Series Printing System Readme 253
WARRANTY AND COPYRIGHT© 2006 Copyright Hewlett-Packard Development Company, L.P.Reproduction, adaptation, or translation without prior written permission is prohibited, except as allowedunder the copyright laws.The information contained in this document is subject to change without notice.The only warranties for <strong>HP</strong> products and services are set forth in the express warranty statementsaccompanying such products and services. Nothing herein should be construed as constituting anadditional warranty. <strong>HP</strong> shall not be liable for technical or editorial errors or omissions contained herein.254 Chapter 6 Engineering Details <strong>ENWW</strong>
IndexSymbols/Numerics% of Normal Size settingunidrivers 168AAbout tab<strong>HP</strong>ToolboxFX 58About tab, unidrivers 194AccessDeniedUtility.exe 239Add <strong>Printer</strong> Wizardinstallation 84Windows Server 2003 92ADFmedia supported 3Adobe Acrobat Readerinstalling 19viewing documentation 14Advanced network settings 53Advanced page, <strong>HP</strong> EWS 76,232Advanced Printing Features setting,unidrivers 146Advanced tab, unidrivers 144alertse-mail 25, 34pop-up 24Receive Alert messages fordevice events 23Setup Status Alerts screen, <strong>HP</strong>ToolboxFX 32system-tray icons 24Alerts folder, <strong>HP</strong> ToolboxFX 31Animated Demonstrations screen,<strong>HP</strong> ToolboxFX 38Animated installation guide 97application settingsunidrivers 139ASCII output protocol, PSEmulation Unidriver 189Auto continue settings 50automatic two-sided printingunidrivers 174autorun CD-ROM, Windows 19availability, Windows softwarecomponents 7BBack Cover settingsunidrivers 158, 163Back to Front printing,unidrivers 148Basic Installationchoosing 19binary output protocol, PSEmulation Unidriver 189binding settingsunidrivers 177binscustom paper sizes 156black, printing all text asunidrivers 148Bonjour page, <strong>HP</strong> EWS 76, 232booklet printing settingsunidrivers 178both sides, printing onpaper specifications 248unidrivers 174browsers supported, <strong>HP</strong>ToolboxFX 23CCartridge low thresholdsettings 50CD Browser screen 99CD-ROMdirectory structure,Macintosh 199directory structure,Windows 9documentation 14, 19installer, Windows printingsystemsoftware 18installing Macintosh printingsystemsoftware 203languages, Macintosh 200languages, Windows 9CDs, ordering 8Change TCP/IP Settings screen(Windows networkinstallation) 133Check for recommendedinstallation updates screen (USBWindows installation) 102cleaning mode 50collation settingsunidrivers 145, 192components, softwareavailability 7Windows 4Confirm Changing Setting screen(Windows networkinstallation) 132Confirm Network Settings screen(Windows networkinstallation) 131Congratulations <strong>Software</strong>installation complete screen (USBWindows installation) 113Congratulations <strong>Software</strong>installation complete screen(Windows networkinstallation) 135Connect Your Device Now screen(USB Windows installation) 110Connection time-out (I/O)settings 50Connection Type screen (USBWindows installation) 109<strong>ENWW</strong> Index 255
Connection Type screen (Windowsnetwork installation) 126constraint messagesconstraint, unidrivers 143control panel settingsunidrivers 139Copy Count settingsunidrivers 145, 192covers, use different paper settingsunidrivers 158Ctrl-D settings 189Current Progress screen (USBWindows installation) 101Current Progress screen (Windowsnetwork installation) 118Custom Installationchoosing 19custom paper sizesPCL unidrivers 155customer support 58Ddebugging <strong>HP</strong> ToolboxFX 62default Print Task Quick Setsunidrivers 150Destination Folder screen (USBWindows installation) 107, 124Device Configuration page, <strong>HP</strong>EWS 67, 223Device Configuration screen, <strong>HP</strong>ToolboxFX 28Device Found screen (USBWindows installation) 111Device Information page, <strong>HP</strong>EWS 70, 226Device Information screen, <strong>HP</strong>ToolboxFX 40Device Services, unidrivers 183Device Settings tab, <strong>HP</strong>ToolboxFX 39Device Settings tab,unidrivers 184Device Status page, <strong>HP</strong>EWS 66, 221Device Status screen, <strong>HP</strong>ToolboxFX 26diagnostics 182dialog boxes, printing-systemsoftware installationMac OS X 204dialog boxes, Windows installationCD Browser 99Change TCP/IP Settings(network) 133Check for recommendedinstallation updates (USBinstallation) 102Confirm Changing Setting(network) 132Confirm Settings(network) 131Congratulations <strong>Software</strong>installation complete(network) 135Congratulations <strong>Software</strong>installation complete(USB) 113Connect Your Device Now(USB) 110Connection Type(network) 126Connection Type (USB) 109Current Progress(network) 118Current Progress (USBinstallation) 101Destination Folder(USB) 107, 124Device Found (USB) 111<strong>HP</strong> Extended Capabilities(network) 123<strong>HP</strong> Registration 116<strong>HP</strong> Registration (network) 137<strong>HP</strong> <strong>Software</strong> LicenseAgreement (USB) 105Identify <strong>Printer</strong> (network) 127License Agreement(network) 122network 116<strong>Printer</strong> Found (network) 130Ready to Install (network) 125Ready to Install (USB) 108Restart your computer(Network) 134Restart your computer(USB) 112Searching (network) 128Sign Up Now 115Sign Up Now (network) 136Specify <strong>Printer</strong> (network) 129Test Page 114Test Page (network) 135Welcome (network) 117Welcome (USB) 100DIMMsslots, included 3DIMMs, fontsunidriver settings 187direct connections, MicrosoftWindowsinstallation 83directory structure, software CD-ROMMacintosh 199Windows 9disk space requirementsMacintosh 198Windows 5Document Optionsunidrivers 146, 174document preview imageunidrivers 164, 168, 180documentationlocalized versions 14operating systemssupported 7Print Task Quick Set for useguide, unidriver 152Readme 249uninstalling 241viewing 14, 19double-sided printingpaper specifications 248unidriver settings 174downloadingprinting-system software 8driversavailability by operatingsystem 7direct connections, MicrosoftWindows installation 83<strong>HP</strong> postscript level 3 emulationsupport 144included 19Macintosh 198network installation, MicrosoftWindows 94Plug-and-Play installation 84settings 139256 Index <strong>ENWW</strong>
standalone 6Windows 4Drum low threshold settings 50duplexingpaper specifications 248duplexing unitcustom paper sizes 156unidriver configuration 191unidriver settings 174Ee-mailalerts 25, 34troubleshooting File to E-mailutility 239EconoMode, unidrivers 165Effects tabunidrivers 166error messagesAuto continue settings 50constraint, unidrivers 143e–mail alerts 25pop-up alerts 24Receive Alerts for deviceevents 23Euro symbol 190Event Log page, <strong>HP</strong> EWS 69,225Event Log screen, <strong>HP</strong>ToolboxFX 31EWS (<strong>HP</strong> Embbedded WebServer )Advanced page 76, 232Bonjour page 76, 232Device Configurationpage 67, 223Device Information page 70,226Device Status page 66, 221Event Logpage 69, 225IP Configuration page 75,231Network Configurationpage 68, 78, 224, 234Networking tab 74, 230Paper Handling page 70, 227Paper Types page 73, 229Password page 79, 235PCL5e page 71, 228PostScript page 72, 228Print Info Pages 68, 224Print Quality page 72, 229Printing page 71, 227Service page 74, 230Settings 69, 225SNMP page 77, 233Status tab 65, 221Supplies Status page 66, 222System Setup page 74, 230Extended Capabilitiesuninstalling 241Extended Capabilities, <strong>HP</strong> 21,106, 123External Fonts settings, PCLunidrivers 187Ffeatures<strong>HP</strong> ToolboxFX 22model comparison 3File to E-mail utility 239Finishing tabunidrivers 173First Page paper settingsunidrivers 160FixErr1714 utility 240Flip Pages Upunidriver settings 177Font Substitution Table, PSEmulation Unidriver 186fontsDIMM settings, unidrivers 187Euro symbol 190External, PCL unidrivers 187<strong>HP</strong> postscript level 3 emulationsupport 144lists, printing 68, 224PS Emulation Unidriver 190substitution table,unidrivers 186Windows operating systemssupported 7Form to Tray Assignment,unidrivers 185formatternumber 28Front Cover settingsunidrivers 158fulfillment centers 8Full Installationchoosing 19full installationWindows 103fuser modes 45Ggrayscale settings, PS EmulationUnidriver 190guides. See documentationHhardware requirementsMacintosh 198Helpunidrivers 143helpMacintosh 203operating systemssupported 8Windows 4Help folder, <strong>HP</strong> ToolboxFX 35host-based drivernetwork installation, MicrosoftWindows 94How do I? folder, <strong>HP</strong>ToolboxFX 37<strong>HP</strong> Embbedded Web Server (EWS)Advanced page 76, 232Bonjour page 76, 232Device Configurationpage 67, 223Device Information page 70,226Device Status page 66, 221Event Log page 69, 225IP Configuration page 75,231Network Configurationpage 68, 78, 224, 234Networking tab 74, 230Paper Handling page 70, 227Paper Types page 73, 229Password page 79, 235PCL5e page 71, 228PostScript page 72, 228Print Info Pages 68, 224Print Quality page 72, 229Printing page 71, 227Service page 74, 230<strong>ENWW</strong> Index 257
Settings 69, 225SNMP page 77, 233Status tab 65, 221Supplies Status page 66, 222System Setup page 74, 230<strong>HP</strong> EWS, Macintoshabout 219<strong>HP</strong> Extended Capabilitiesuninstalling 241<strong>HP</strong> Instant Support 58<strong>HP</strong> Marketing Assistantuninstalling 241<strong>HP</strong> Photosmart Premieruninstalling 241<strong>HP</strong> postscript level 3 emulationsupport 144<strong>HP</strong> <strong>Printer</strong> Utility, Macintoshaccessing 220<strong>HP</strong> <strong>Software</strong> License Agreementscreen (USB Windowsinstallation) 105<strong>HP</strong> <strong>Software</strong> License Agreementscreen (Windows networkinstallation) 122<strong>HP</strong> Solution Centeruninstalling 241<strong>HP</strong> ToolboxFX.NET Frameworkdependencies 60About 58Advanced network settings 53Alerts folder 31Animated Demonstrationsscreen 38Auto continue settings 50browsers supported 23debugging 62device communication 61Device Configurationscreen 28Device Information screen 40Device Settings tab 39Device Status screen 26disabling or enabling 63e-mail alerts 25Event Log screen 31features 4, 22Help folder 35How do I? folder 37<strong>HP</strong> Instant Support 58IP Configuration settings 52Jam recovery settings 50Network Configurationscreen 29Network Configurationsettings 56Network Settings folder 51opening page 23operating systemssupported 7Order Supplies screen 59Paper Handling screen 41Paper Types screen 45Password settings 56PCL 5e screen 42pop-up alert messages 24PostScript screen 43Print Info Pages screen 30Print Quality screen 44Printing screen 42Product Registrationscreen 59Product Support screen 58Receive Alert messages fordevice events 23sections 22Service screen 50Set up E-mail Alertsscreen 34Setup Status Alerts screen 32SNMP Configurationsettings 54starting 22Status folder 25Supplies Status screen 27system requirements 23System Setup screen 49Troubleshooting folder 36troubleshooting knownissues 59uninstalling 241User Guide screen 39<strong>HP</strong> Web Jetadmindownloading 8, 80operating systemssupported 7IIdentify <strong>Printer</strong> screen (Windowsnetwork installation) 127information pages, print from <strong>HP</strong>EWS 68, 224information pages, printing 30Installable OptionsPS Emulation Unidriver 191installationAdobe Acrobat Reader 19Animated installation guide 97dialog boxes, Mac OS X 204dialog boxes, MicrosoftWindows 97File to E-mail utility 239hardware requirements forMacintosh 198Macintosh printing-systemsoftware 203Microsoft Windowssoftware 82, 83Plug-and-Play 84system requirements forWindows 5installersincluded 7new features 82Windows 18Instant Support, <strong>HP</strong> 58Internet Services, unidrivers 183IP Configuration page, <strong>HP</strong>EWS 75, 231IP Configuration settings 52IPX/SPX protocols 83Jjamsrecovery settings 50Job Timeout settings 190JPEG Passthrough 193Kknown issues 59Llandscape orientation settingsunidrivers 177, 180languagesCD-ROMs, Macintosh 200CD-ROMs, Windows 9languages, localized versionsdocumentation 14ordering CDs 8258 Index <strong>ENWW</strong>
Last Page settingsunidrivers 162Layout Optionsunidrivers 148license agreement (USB Windowsinstallation) 105License Agreement screen(Windows networkinstallation) 122Linux drivers 5, 6Linux operating systems 5Linux support 7local connections, MicrosoftWindowsinstallation 83localized CD-ROMsMacintosh 200Windows 9localized versionsdocumentation 14ordering CDs 8MMacintoshoperating systemssupported 23Macintosh operating systemscomponents, software 202dialog boxes, Mac OS X printingsystemsoftwareinstallation 204directory structure, software CD-ROM 199hardware requirements 198<strong>HP</strong> EWS 219install notes 203installing printing-systemsoftware 203localized software CDs 200Mac OS 9, not supported 198Mac OS X Classic, notsupported 198online help 203PDEs 202PPDs 202setting up devices with Mac OSX 214software components 198support 6uninstalling printing-systemsoftware 219manualslocalized versions 14operating systemssupported 7Marketing Assistantuninstalling 241media. See papermemoryDevice Configuration screen,<strong>HP</strong> ToolboxFX 28installation requirements forMacintosh 198installation requirements forWindows operatingsystems 5product, included 3PS Emulation Unidriversettings 189unidriver settings 191messagesalerts, receiving 23Auto continue settings 50constraint, unidrivers 143e-mail alerts 25pop-up alerts 24Microsoft Windowsdialog boxes, installation 97installation options 82installing software 83network softwareinstallation 94Plug-and-Play installation 84sharing, setting up 94minimum installationWindows 103, 120models, feature comparison 3Mopier settingsunidriver 191MSI error 1714 utility 240NNET Framework dependencies, <strong>HP</strong>ToolboxFX 60Network Configuration page, <strong>HP</strong>EWS 68, 78, 224, 234Network Configuration screen, <strong>HP</strong>ToolboxFX 29Network Configurationsettings 56Network Settings folder, <strong>HP</strong>ToolboxFX 51Networking tab, <strong>HP</strong> EWS 74,230networksAdvanced settings 53Configuration settings 56<strong>HP</strong> ToolboxFX settings 29<strong>HP</strong> Web Jetadmin,downloading 80installation dialog boxes,Windows 116IP Configuration settings 52Microsoft Windows softwareinstallation 94Password settings 56peer-to-peer, setting up 94SNMP settings 54number of copies, settingunidrivers 145, 192OO/S2 support 5online Help<strong>HP</strong> ToolboxFX 35unidrivers 143online helpWindows 4operating systemsavailability of softwarecomponents 7standalone drivers 6support 6Optimizations option, PCLunidrivers 146Order Supplies screen, <strong>HP</strong>ToolboxFX 59ordering software 8orientation settingsunidrivers 177, 180Other Pages paper settingsunidrivers 161Output Protocol settings, PSEmulation Unidriver 189PPage Order settingsunidrivers 148, 180<strong>ENWW</strong> Index 259
page orientation settingsunidrivers 177, 180pages per minute 3Pages per Sheet settingsunidrivers 179papercustom sizes supported 247custom sizes, PCL unidriversettings 155duplexing specifications 248fuser modes 45Pages per Sheet settings,unidrivers 179Paper Handling screen 41Print Document On settings,unidrivers 167Print on Both Sides settings,unidrivers 174Size is settings,unidrivers 154sizes supported 3, 245Source is settings,unidrivers 157Type is: settings,unidrivers 157types supported 245paper handling features 3Paper Handling page, <strong>HP</strong>EWS 70, 227Paper Handling screen, <strong>HP</strong>ToolboxFX 41Paper Optionsunidrivers 154Paper Types page, <strong>HP</strong> EWS 73,229Paper Types screen, <strong>HP</strong>ToolboxFX 45Paper/Output settings,unidrivers 145Paper/Quality tab, unidrivers 149part numbersdocumentation 14software CDs 8Password page, <strong>HP</strong> EWS 79,235Password settings, <strong>HP</strong>ToolboxFX 56PC 5e screen, <strong>HP</strong> ToolboxFX 42PCL 5e driver support 4PCL 6 traditional driveroperating systemssupported 7PCL 6 unidriverconstraint messages 143help 143PCL unidrivers% of Normal Size 168About tab 194accessing 141Advanced PrintingFeatures 146Advanced tab 144booklets 178Copy Count settings 145Device Services 183Device Settings tab 184Document Options 146, 174document previewimage 164, 168, 180duplexing 174Effects tab 166External Fonts settings 187features 139Finishing tab 173Flip Pages Up 177Font DIMM Installer 187Font Substitution Table 186Form to Tray Assignment 185Installable Optionssettings 191Layout Options 148Mopier settings 191Pages per Sheet 179Paper Options 154Paper/Output settings 145Paper/Quality tab 149Print Optimizations option 146Print Quality settings 164Print Task Quick Sets 150<strong>Printer</strong> Features 148Printing Preferences tab 141Properties tab 142Resizing Options settings 167Scale to Fit 167Services tab 182unidrivers 183Watermarks settings 169PCL5e page, <strong>HP</strong> EWS 71, 228PDEs (<strong>Printer</strong> DialogExtensions) 202PDF filesinstalling Adobe AcrobatReader 19PDF files, online help 4peer-to-peer networkingsetting up 94Percentage of Normal Size settingunidrivers 168Photosmart Premieruninstalling 241Plug-and-Playinstallation 84Windows 98 SE 85Windows Me 90pop-up alerts 24portrait orientation settingsunidrivers 177, 180portsspecifications 3Postscript Device Settings, PSEmulation Unidriver 188PostScript Options,unidrivers 146PostScript page, <strong>HP</strong> EWS 72,228PostScript Passthrough 192Postscript printer description (PPD)files 202PostScript screen, <strong>HP</strong>ToolboxFX 43PPD (postscript printer description)files 202PPDs, included 7preview image, documentunidrivers 180Print All Text as Blackunidrivers 148Print Document On settingsunidrivers 167Print Info Pages screen, <strong>HP</strong>ToolboxFX 30Print Info Pages, <strong>HP</strong> EWS 68,224Print on Both Sidespaper specifications 248unidriver settings 174Print Optimizations option, PCLunidrivers 146260 Index <strong>ENWW</strong>
Print Page Borders settingsunidrivers 179Print Quality page, <strong>HP</strong> EWS 72,229Print Quality screen, <strong>HP</strong>ToolboxFX 44Print Quality settingsunidrivers 164Print Task Quick Sets, unidriversabout 150custom 153defaults 150use guide 152printer control panel settingsunidrivers 139<strong>Printer</strong> Dialog Extensions(PDEs) 202<strong>Printer</strong> Features, unidrivers 148<strong>Printer</strong> Found screen (Windowsnetwork installation) 130printingsettings 42Printing page, <strong>HP</strong> EWS 71, 227Printing Preferences tabs 141Printing screen, <strong>HP</strong>ToolboxFX 42Product Registration screen, <strong>HP</strong>ToolboxFX 59Product Support screen, <strong>HP</strong>ToolboxFX 58Properties tabsunidrivers 142protocolsPS Emulation Unidriver 189protocols, network 83PS Emulation Driveroperating systemssupported 7PS Emulation Unidriver% of Normal Size 168About tab 194accessing 141Advanced PrintingFeatures 146Advanced tab 144booklets 178constraint messages 143Copy Count settings 145Ctrl-D settings 189Device Services 183Device Settings tab 184Document Options 146, 174document previewimage 164, 168, 180duplexing 174Effects tab 166features 139Finishing tab 173Flip Pages Up 177Font DIMM Installer 187font settings 190Font Substitution Table 186Form to Tray Assignment 185help 143Installable Optionssettings 191Internet Services 183JEPG Passthrough 193Layout Options 148Mopier settings 191operating systemssupported 7Output Protocol settings 189Pages per Sheet 179Paper Options 154Paper/Output settings 145Paper/Quality tab 149Postscript DeviceSettings 188Postscript Memorysettings 189PostScript Options 146PostScript Passthrough 192Print Quality settings 164Print Task Quick Sets 150<strong>Printer</strong> Features 148Printing Preferences tabs 141Properties tabs 142Resizing Options settings 167Scale to Fit 167Services tab 182timeout settings 190Watermarks settings 169Qquality settings<strong>HP</strong>ToolboxFX 44RRAMproduct, included 3Readme file 249Ready to Install screen (USBWindows installation) 108Ready to Install screen (Windowsnetwork installation) 125Receive Alert messages for deviceevents 23regional versions, CD-ROMsMacintosh 200Windows 9Registration 116Registration screen (Windowsnetwork installation) 137registration, product 59release notes 7removing softwarecomponent list 241methods 241Windows 2000 or XP 242Windows 98 SE or Me 244reports, printing 30Resizing Optionsunidriver settings 167resolution<strong>HP</strong> ToolboxFX settings 44Print Quality page, <strong>HP</strong>EWS 72, 229printing 3unidriver settings 164Restart your computer screen(Network Windowsinstallation) 134Restart your computer screen (USBWindows installation) 112restoring factory settings 50ROM, included 3SScale to Fit settingunidrivers 167Searching screen (Windowsnetwork installation) 128Send Ctrl-D settings 189serial number 28Service ID 28Service page, <strong>HP</strong> EWS 74, 230<strong>ENWW</strong> Index 261
Service screen, <strong>HP</strong>ToolboxFX 50Services tab 182Set up E-mail Alerts screen, <strong>HP</strong>ToolboxFX 34settingsDevice Configurationscreen 28overriding 139Print Task Quick Sets,unidrivers 150restoring factory 50Settings tab, <strong>HP</strong> EWS 69, 225Settings tab, <strong>HP</strong> EWS DeviceConfiguration utility 69, 225Setup Status Alerts screen, <strong>HP</strong>ToolboxFX 32sharingsetting up 94Sign Up Now screen 115Sign Up Now screen (Windowsnetwork installation) 136sizes, paper<strong>HP</strong> ToolboxFX settings 41Print on Both Sides settings,unidrivers 174supported 245unidriver settings 154SNMP page, <strong>HP</strong> EWS 77, 233SNMP settings 54software license agreement (USBWindows installation) 105software license agreement screen(Windows networkinstallation) 122software, ordering 8Solution Centeruninstalling 241Source is settingsunidrivers 157Specify <strong>Printer</strong> screen (Windowsnetwork installation) 129speedprinting 3standalone drivers 6status alerts screen, <strong>HP</strong>ToolboxFX 32Status folder, <strong>HP</strong> ToolboxFX 25status screen, <strong>HP</strong>ToolboxFX 26, 27Status tab, <strong>HP</strong> EWS 65, 221Supplies Status page, <strong>HP</strong>EWS 66, 222Supplies Status screen, <strong>HP</strong>ToolboxFX 27supplies, ordering 59support, product 58system requirements<strong>HP</strong> ToolboxFX 23Windows 5System Setup page, <strong>HP</strong>EWS 74, 230System Setup screen, <strong>HP</strong>ToolboxFX 49system-tray icon alerts 24TTBCP output protocol, PSEmulation Unidriver 189TCP/IP protocols 83Test Page screen 114Test Page screen (Windowsnetwork installation) 135text, printing all as blackunidriver 148timeout settings 190ToolboxFX. See <strong>HP</strong> ToolboxFXtrayscustom paper sizes 156custom paper sizessupported 247<strong>HP</strong> ToolboxFX settings 41Source is settings,unidrivers 157unidriver configuration 191unidriver Form to TrayAssignment 185troubleshootingAccessDeniedUtility.exe 239alerts, receiving for deviceevents 23Animated Demonstrationsscreen 38checklist 238constraint messages,unidrivers 143e-mail alerts 25File to E-mail utility 239FixErr1714 utility 240<strong>HP</strong> ToolboxFX 59pop-up alerts 24Services tab, unidrivers 182tools 238Troubleshooting folder, <strong>HP</strong>ToolboxFX 36TrueType font settingsPS Emulation Unidriver 190two-sided printingpaper specifications 248unidriver settings 174Type is settingsunidrivers 157types, paperfuser modes 45<strong>HP</strong> ToolboxFX settings 41Print on Both Sides settings,unidrivers 174supported 245unidriver settings 157typical installationWindows 120Uunidrivers% of Normal Size 168About tab 194accessing 141Advanced PrintingFeatures 146Advanced tab 144booklets 178constraint messages 143Copy Count settings 145Device Services 183Device Settings tab 184Document Options 146, 174document previewimage 164, 168, 180duplexing 174Effects tab 166features 139Finishing tab 173Flip Pages Up 177Font DIMM Installer 187font settings 187Font Substitution Table 186Form to Tray Assignment 185help 143Installable Optionssettings 191262 Index <strong>ENWW</strong>
Internet Services 183JPEG Passthrough 193Layout Options 148Mopier settings 191operating systemssupported 7Pages per Sheet 179Paper Options 154Paper/Output settings 145Paper/Quality tab 149PostScript Options 146PostScript Passthrough 192Print Quality settings 164Print Task Quick Sets 150<strong>Printer</strong> Features 148Printing Preferences tabs 141Properties tabs 142Resizing Options settings 167Scale to Fit 167Services tab 182Watermarks settings 169uninstallationMacintosh printingsystem 219uninstalling softwarecomponent list 241methods for 241Windows 2000 and XP 242Windows 98 SE or Me 244UNIX drivers 5, 6UNIX operating systemsWeb site for 5UNIX support 7USB port<strong>HP</strong> ToolboxFX issues 63specifications 3Windows installation dialogboxes 100Use Different Paper/Covers,unidrivers 158User Guide screen, <strong>HP</strong>ToolboxFX 39user guideslocalized versions 14operating systemssupported 7Watermarks settingsunidrivers 169Web sitesAdobe 144downloading software 8<strong>HP</strong> Web Jetadmin 8<strong>HP</strong> Web Jetadmin,downloading 80Linux drivers 6Linux product support 5Macintosh software 199software CDs 8UNIX drivers 6UNIX support 5Welcome screen (USB Windowsinstallation) 100Welcome screen (Windowsnetwork installation) 117WindowsAnimated installation guide 97components, software 4dialog boxes, installation 97drivers supported 4installation options 82installers 7installing software 83network softwareinstallation 94Plug-and-Play installation 84sharing, setting up 94uninstallation componentlist 241uninstallation methods 241uninstalling software from 2000or XP 242uninstalling software from 98 SEor Me 244Windows operating systemsavailability of softwarecomponents 7CD-ROM, print system 18directory structure, software CD-ROM 9support 6system requirements 5unidriver features 139WWait Timeout settings 190<strong>ENWW</strong> Index 263
264 Index <strong>ENWW</strong>
© 2007 Hewlett-Packard Development Company, L.P.www.hp.com