Bedienungsanleitung Mera - Klöber GmbH
Bedienungsanleitung Mera - Klöber GmbH
Bedienungsanleitung Mera - Klöber GmbH
- No tags were found...

You also want an ePaper? Increase the reach of your titles
YUMPU automatically turns print PDFs into web optimized ePapers that Google loves.
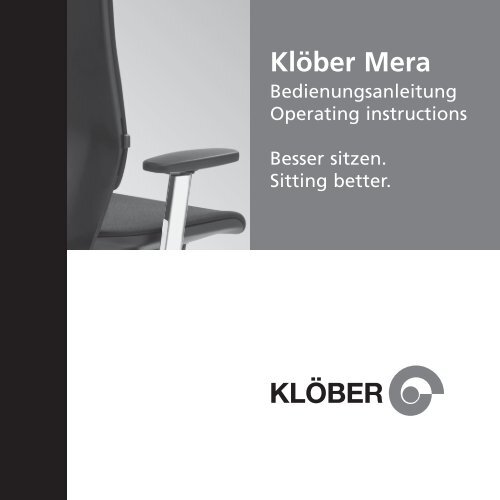
Klöber <strong>Mera</strong><strong>Bedienungsanleitung</strong>Operating instructionsBesser sitzen.Sitting better.
Sie haben sich für einen Klöber <strong>Mera</strong>entschieden.Herzlichen Glückwunsch dazu!deutschDie individuellen Anpassungsmöglichkeitendes Klöber <strong>Mera</strong> an Ihre persönlichen Sitzbedürfnissefinden Sie auf den folgendenSeiten.3
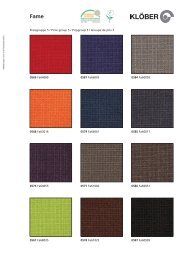
7. mer996.8.5
1. SitzhöhenverstellungDie Sitzhöhe Ihres Drehstuhls lässt sich durch eineGasdruckfeder stufenlos in der Höhe verstellen.Ziehen Sie dazu die Taste unter dem Sitz rechtsnach oben: die Sitzhöhe lässt sich verstellen.Wenn Sie den Sitz entlasten, geht der Sitz nachoben. Bei Belastung geht der Sitz nach unten.Taste loslassen: Sitzhöhe ist fixiert.Tipp!Sie sitzen richtig, wenn Ober- und Unterschenkeleinen Winkel von etwa 90° bilden.7
2. Einstellung auf das KörpergewichtAchtung!Die Körpergewichtseinstellung (Rückstellkraftder Lehne) erfolgt durch eine patentierteSchnellverstellung mit Hilfe eines Hebels rechtsunter dem Sitz. Hebel nach unten drehen: derGegendruck der Lehne wird stärker. Hebel nachoben drehen: der Gegendruck der Lehne wirdschwächer.Die Verstellung ist nur in der vorderstenLehnenposition (vollständige Entlastung derRückenlehne) möglich!Tipp!Wichtig für gutes Sitzen ist die richtige Einstellungdes Gegendrucks der Rückenlehne auf IhrKörpergewicht. Stellen Sie diesen Gegendruckso ein, dass Sie in jeder Sitzhaltung durch dieRückenlehne gut und bequem abgestützt werden.9
4. Sitztiefenverstellung mit integrierterBeckenstütze (optional)Zur Anpassung an unterschiedliche Körpergrößenund/oder Beinlängen können Sie die Sitztiefeeinstellen.Zum Verstellen ziehen Sie im Sitzen die Taste linksnach oben: jetzt können Sie den Sitz verschiebenund die Ihnen angenehme Sitztiefe wählen. Tasteloslassen: Sitz ist wieder arretiert.Die im Sitz integrierte Beckenstütze (nur beiModellen mit Sitztiefenverstellung), unterstütztdie aufrechte Sitzhaltung unabhängig von derSitztiefenverstellung, dadurch sitzen Sie immeroptimal abgestützt.Tipp!Zwischen Sitzkante und Kniekehle etwa eineFaustbreit Abstand lassen.13
- 4°+1°14
5. SitzneigungSie können die Sitzneigung selbst einstellen.Dazu den Sitz entlasten und den Hebel links unterdem Sitz nach hinten drehen: Die Sitzfläche neigtsich nach vorne. Den Hebel zurückdrehen: Diehintere Sitzkante neigt sich in die Ausgangspositionzurück. (Hebel rastet in den Endpositionen ein).Tipp!Für die aufrechte Sitzhaltung ist eine leicht nachvorne geneigte Sitzfläche ergonomischempfehlenswert. Die Wirbelsäule wird dadurchautomatisch in ihre natürliche Doppel-S-Formgebracht. Regulieren Sie auch hin und wieder dieSitzneigung auf +1° oder -4°, und trainieren Sieso unbewußt Ihre Muskulatur im Sitzen.15
16+
6. Lordosestütze (Tiefenverstellung optional)Die Lordoseunterstützung der Rückenlehne istin der Höhe und in der Tiefe (dies ist optional)stufenlos verstellbar und kann sich so der Rücken -form des Benutzers, insbesondere im Bereich derLenden wirbel, optimal und individuell anpassen.Zur Einstellung der Höhe schieben Sie die beidenseitlich an der Rückenlehne befindlichen Schiebergleichzeitig nach oben oder unten. Die Tiefe derLordosestütze stellen Sie durch das Schieben desHebels an der Lehneninnenseite unten rechts ein.Hebel nach rechts schwenken, Lordosestütze wölbtsich nach vorne, Hebel nach links schwenkendadurch lässt sich die Vorwölbung wieder redu -zieren.Tipp!Die Vorwölbung der Lordoseunterstützung sowählen, dass Sie sich im Bereich der Lenden -wirbel angenehm stabilisiert fühlen.17
7. Nackenstütze (mer99)Die Nackenstütze ist stufenlos höhenverstellbarund neigbar. Zur Höheneinstellung schieben Siedie Nackenstütze nach oben oder unten.Sie kann ebenso nach vorne bzw. nach hintenverstellt werden.Tipp!Beim Zurücklehnen muss Ihr Nacken durch dieNackenstütze komfortabel abgestützt werden.19
8. Klöber Armlehnen/Armsupports (optional)Die Klöber Armsupports sind generell werkzeuglosbreitenverstellbar. Dazu den Bedienhebel amArmsupport unter dem Sitz nach unten drücken,Armsupport in der Breite verschieben. Bedienhebelwieder nach oben drücken, Armsupport ist fixiert.Tipp!Die Armlehnen entlasten die Wirbelsäule, denSchultergürtel und die Armmuskulatur dannwirkungsvoll, wenn Ober- und Unterarm einenWinkel von etwa 90° bilden.21
1. 2.3. 4.22
Klöber Armlehnen /Armsupports (optional)HöhenverstellbareArmlehne3DArmsupports4FArmsupportsMFArmsupports1. Höhenverstellung10 cm10 cm11 cm11,5 cm2. Tiefenverstellung–Drehbare Armauflagebei180º je 1,5 cm5 cm8 cm3. Breitenverstellungje 3 cm**Drehbare Armauflagebei180º je 2/3 cm**je 2,5 cm(+3 cm)je 5 cm(+3 cm)4. rechts / linksschwenkbar–15º und 30º30º30º**Einstellung in der jeweiligen Position durch Drücken der Taste an derInnenseite der Armlehne, arretierbar.**Durch werkzeuglose Armlehnen-Breitenverstellung.23
Normen/ZertifikateGarantieWartung/Reinigung24Konstruktionsgrundlage der <strong>Mera</strong>-Serie sind Normenund Anforderungsprofile zeitgemäßer Sitztechnik.Die <strong>Mera</strong> Serie ist von der TÜV Rheinland LGAProducts <strong>GmbH</strong> geprüft und zertifiziert: “geprüfteSicherheit” (GS). Made in Germany.DIN EN 1335 1-3 Büro-ArbeitsstuhlTyp A (Ausführung mit Schiebesitz)Typ B (Ausführung ohne Schiebesitz)DIN EN 12529 Rollen für DrehstühleSicherheit für hohen ergonomischen Standard überDIN hinaus.Auf diesen Stuhl haben Sie 5 Jahre Garantie.Für technische Auskünfte wenden Sie sich bitte an denWerkskundendienst unter Tel. +49 (0) 7551/ 838-277.Alle mechanischen und beweglichen Teile sindwartungsfrei. Gelegentliches Säubern der Laufrollenvon Teppichflusen ist ratsam. Für die Reinigung derBezüge oder Leder, entfernen Sie zuerst den Staub.Flecken behandeln Sie mit einem weißen, weichenTuch (kein Microfaser). Bei hartnäckigen Flecken,Polster- oder Ledershampoo einsetzen. Leder zuerstreinigen dann pflegen. Sitz- und Rückenbezüge der<strong>Mera</strong>-Serie sind nutzerfreundlich wechselbar.
AnwendungRollenWichtigerHinweis!Klöber <strong>GmbH</strong>Dieser Bürodrehstuhl darf nur bestimmungsgemäßunter Beachtung der allgemeinenSorgfaltspflicht benutzt werden. Bei unsach -gemäßem Gebrauch (z.B. als Aufstiegshilfe,Sitzen auf den Armlehnen, extremenBelastungen) besteht Unfallgefahr.Serienausstattung mit Rollen für Teppichböden.Auf Wunsch weiche Räder für Hartboden,erkennbar am andersfarbigen Laufring.Aus sicherheitstechnischen Gründen mussein entsprechender Austausch der Rollen beiWechsel von Teppich- auf Hartboden undumgekehrt erfolgen.Gasfederaggregat nicht erhitzen und nichtgewaltsam öffnen! Arbeiten und Austausch anGasfedern nur durch eingewiesenes Fachpersonal.Hauptstraße 1, 88696 Owingen, Germanywww.kloeber.com, info@kloeber.comTel.: +49 (0) 7551/ 838-0Fax: +49 (0) 7551/ 838-14225
Leerseite
You have chosen a Klöber <strong>Mera</strong>.Congratulations!englishOn the following pages, you can findout the ways in which you can adapt theKlöber <strong>Mera</strong> to suit your own personalsitting requirements.27
1. Seat height adjustmentThe seat height of your swivel chair featuresinfinitely-variable gas lift adjustment. To adjust,pull the lever under the seat upwards and the seatcan be moved to a different height. Take yourweight off the seat and it will rise. Sit back downand the seat will sink. Release the lever to fix theseat height.Tip!You are sitting correctly if your thigh and calfform an angle of around 90°.29
30+
2. Body weight adjustmentBody weight adjustment (backrest return force) iscontrolled using a patented quick-acting adjustmentlever underneath the right-hand side of theseat. Push the lever down, and the counter-pressureis increased; lift the lever, and the counter-pressuredecreases.Note!Tip!The counter-pressure can only be adjusted withthe backrest in the fully-forward position (nopressure on the backrest)!It is important to set the backrest counter-pressurecorrectly for your body weight to ensure goodsitting. Set the counter-pressure so that thebackrest supports you comfortably and well inany sitting position.31
32STOP
3. Tilt limit / lock (seat and back)Occupational health specialists recommend a“dynamic” sitting position, i.e. frequent changesin posture.But if you prefer to work for long periods withoutchanging position, you can deactivate the“synchronised movement”. To do this, depress thelever underneath the left-hand side of the seat:the chair is locked in the desired sitting position.Pull the lever upwards, and the synchronousmovement is restored.Tip!Take advantage of the alternating positions ofdynamic sitting: leaning backwards, leaning sideways,and rotating. The discs in your spine willstay young longer.33
4. Seat depth adjustment with integral pelvissupport (optional)You can adjust the seat depth to suit differentbody sizes and/or leg lengths.To make the adjustment, while seated pull thelever on the left-hand side upwards: now you canslide the seat forward and choose the seat depthwhich you find comfortable. Release the lever,and the seat depth is locked once more.The pelvis support which is integrated into theseat (only on models with seat depth adjustment)supports an upright sitting position, regardless ofthe seat depth adjustment; in this way, you alwayshave the optimum support when sitting.Tip!Leave a gap approximately as large as yourfist between the edge of the seat and the backof the knee.35
- 4°+1°36
5. Seat forward tilt adjustmentYou can adjust the tilt yourself. To do so, take theweight off the seat and push back the lever underneaththe left-hand side of the chair. The seat padwill then tilt forward. When you reverse the levermovement, the rear edge of the seat returns tothe start position. (Lever locks into final positions).Tip!A seat with a slight forward tilt is recommendedby ergonomics specialists for an upright sittingposture. This automatically positions the spine inits natural double-S shape.Do change the tilt angle from time to time from+1° to -4°; without realising it, you will be givingyour muscles a workout while sitting.37
38+
6. Lumbar support (with optional depth adjustment)The lumbar support in the backrest is infinitelyvariable adjustable in height and depth (the latteris optional), so providing the best possible fit withthe user’s individual back shape, especially in thearea of the lumbar vertebrae.To adjust the height, push the two slides on thesides of the chair-back up or down. The depth ofthe lumbar support is adjusted by pushing thelever on the bottom right of the inner side of thebackrest. Turn the lever to the right, and thelumbar support curves further outwards; turn thelever to the left, and the curvature of the lumbarsupport is reduced.Tip!Set the forward curvature of the lumbar supportat the level where you feel pleasantly supportedin the area of the lumbar vertebrae.39
7. Neck support (mer99)The neck support is infinitely variable adjustablein height and tilt. To adjust the height, slide theneck support up or down in increments.It can also be adjusted front to back inincrements.Tip!Your neck should be supported comfortably bythe neck support as you lean backwards.41
8. Klöber armrests / arm supports (optional)All Klöber arm supports are width-adjustablewithout tools. Press down the lever on the armsupport under the seat, slide the arm supportinwards or outwards. Move the lever up again,and the arm support is fixed in position.Tip!The armrests take the strain off the spine, shoulderarea and arm muscles effectively if the upper andlower arm form an angle of around 90°.43
1. 2.443. 4.
Klöber armrests /arm supports (optional)Heightadjustablearmrest3D armsupports4F armsupportsMF armsupports1. height adjustment10 cm10 cm11 cm11,5 cm2. depth adjustment–Armrest top canbe rotated at180º by 1,5 cm5 cm8 cm3. width adjustment3 cm**Armrest top canbe rotated at180º by 2/3 cm**2,5 cm(+3 cm)5 cm(+3 cm)4. right/left swivel–15º and 30º30º30º** Lock the Arm Support in position by pressing the button on the insideof the armrest.**By tool-free armrest width adjustment.45
Standards/certificatesGuaranteeMaintenance/Cleaning46The <strong>Mera</strong> series is designed in compliance withthe standards and requirements of modern seatingtechnology. The <strong>Mera</strong> series is safety-testedand certified by LGA-Rheinland LGA Products<strong>GmbH</strong> and bears the „safety tested” mark (GS).Made in Germany.BS EN 1335 1-3 office task chairType A (with sliding seat)Type B (with fixed seat)BS EN 12529 Castors for swivel chairsAssurance of ergonomic standards in excess ofEN/BS requirements.This chair is guaranteed for 5 years.For technical information please contact thecustomer service department onTel. +49 (0) 7551/838-277.No maintenance is required on any mechanical ormoving parts. Occasional cleaning to remove carpetfluff from castors is advisable. To clean fabricor leather upholstery, you should first remove thedust. Treat spots with a soft, white cloth (nomicrofibres). On stubborn stains, use fabric orleather shampoo. With leather, clean it first andcare for it afterwards. The seat and back coverson <strong>Mera</strong> chairs are easily replaced by the user.
UseCastorsImportant!Klöber <strong>GmbH</strong>This office swivel chair may only be used for theintended purpose whilst observing the generalduty of care. Accidents can happen if the chairis not used in the proper manner (e.g. if used tostand on, sitting on armrests, extreme loads).The chairs are fitted with castors for carpetedfloors as standard. Soft wheels for hard floorsare available if required, which are identified by adifferent-coloured track ring. For safety reasons,the castors should be changed if a chair usedon carpeted floors is to be used on a hard floorinstead, and vice versa.Gas lift units must not be heated or opened byforce! Gas lifts should be maintained or replacedby trained specialists only.Hauptstraße 1, 88696 Owingen, Germanywww.kloeber.com, info@kloeber.comTel. +49 (0) 7551 / 838-0Fax +49 (0) 7551 / 838-14247
<strong>Bedienungsanleitung</strong>Operating instructions0 1 /201 2 91.22712.0 deutsch/english