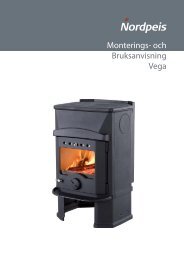
Nordpeis Vega
Nordpeis Vega
Nordpeis Vega
- No tags were found...

You also want an ePaper? Increase the reach of your titles
YUMPU automatically turns print PDFs into web optimized ePapers that Google loves.
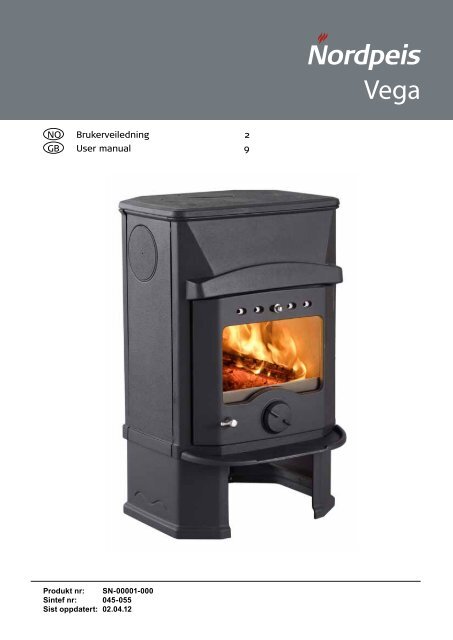
<strong>Vega</strong>NO Brukerveiledning 2GB User manual 9Produkt nr: SN-00001-000Sintef nr: 045-055Sist oppdatert: 02.04.12
Vi tar forbehold om trykkfeil og endringer.For sist oppdaterte versjon og mer utfyllende informasjonom brannmurer, pipetilkobling etc., se våre nettsiderwww.nordpeis.no2. Teknisk informasjonIldsteder fra <strong>Nordpeis</strong> har sekundærforbrenning oger rentbrennende. Ved sekundærforbrenning skjerforbrenningen i to trinn: Først brenner veden, deretterantennes røykgassene av forvarmet luft. Dette gjør atnye ildsteder har minimalt med utslipp av sotpartiklerog uforbrente gasser (for eksempel CO) og er bedrefor miljøet. Ved går under betegnelse fornybar ressurs/biobrensel. Rentbrennende ildsteder trenger lite ved forå oppnå god varmeeffekt. Fyr utelukkende med ren ogtørr ved.MaterialeStøpejernOverflatebehandling Varmebestandig LakkBrenselVed, Max 30 cmEffekt6,8 kWVirkningsgrad 73%CO % @ 13% O2 0,157TrekksystemOpptenningsventil ogfyringsventilForbrenningssystem Sekundærforbrenning(ren forbrenning)Oppvarmingsareal 30-120 m²RøykuttakTopp-, bak- og sideuttakRøykrørØ125 mmMulighet for stålpipe JaVekt ovn106 kgTemperatur røykgass 247 °CLuftbehov (m³/h) 21Ileggsmengde 1,8kgIleggsintervall 52 minLuftventilåpning 75%DriftsformIntermitterende**Med intermitterende forbrenning menes her vanlig bruk av et ildsted.Dvs at det legges i et nytt ilegg straks brenslet har brent ned til glør.3. SikkerhetsavstanderSørg for at angitte sikkerhetsavstander ikkeunderskrides (FIG 1).fabrikats monteringsanvisning. Overhold desikkerhetsavstandene montering av stålpipen krever.4. MonteringDu trenger følgende verktøy:• 4 mm Umbraco nøkkel• 10 mm fastnøkkel• Stjerneskrutrekker<strong>Vega</strong> leveres med løs røykstuss. For å montere sidebak-eller toppmontert stuss, gjør følgende:Bakmontering (FIG 2A - 2B)FIG 2 A: Skru av bakplaten.FIG 2 B: Skru på røykstussen bak.Sidemontering (FIG 3A - 3F)FIG 3 A: Skru av tettningslokket på siden.FIG 3 B: Vipp ut festebraketten til tettningslokket.FIG 3 C: Skru fast røykstussen på siden.FIG 3 D: Skru av bakplaten.FIG 3 E: Skru fast tettningslokket bak.FIG 3 F: Skru på bakplaten.Toppmontering (FIG 4A - 4D)FIG 4 A: Skru av bakplaten og tettningslokket på toppen.FIG 4 B: Skru på røykstussen på toppen.FIG 4 C: Skru fast tettningslokket.FIG 4 D: Skru på bakplaten bak.Montering av røykrørVed montering av røykrør gjør vi oppmerksom påat 125 mm røykrør skal utenpå røykstussen. Benyttovnskitt i skjøtene. For røykinnføring etc. – følgpipeleverandørens anbefaling.Kontroll av funksjonerNår peisovnen er oppstilt, kontroller at funksjonerfungerer lett og virker tilfredsstillende.Peisovnen leveres med kaldthåndtak. Feste tilkaldthåndtaket er plassert under ovnen.Opptenningsventil (FIG 5)VenstreHøyreFyringsventil (FIG 6)HøyreVenstreÅpenLukketÅpenLukketBrannmurslengder vist i FIG 1 er minimumskrav ihenhold til godkjente sikkerhetsavstander, dersomildstedet plasseres som vist i tegningen.Ved toppmontering til stålpipe henviser vi til respektiveDørHåndtaket til høyreHåndtaket til venstreÅpentLukketNorsk3
5. Første opptenningNår ildstedet er installert og alle forskrifter er overholdt,kan det tennes opp. Vær varsom med berøring vedinnfyring da det kan skade lakken. Dette gjelder barenår ildstedet er nytt og lakken ikke er varmeherdet.Unngå kraftige støt når det legges ved inn ibrennkammeret, for ikke å skade isolasjonsplatene.Vær oppmerksom på at fukt i isolasjonsplatene kan gien treg forbrenning de første opptenningene, dette villøse seg når fuktigheten fordamper. Fyr evt. med dørenpå gløtt de 2-3 første gangene. Sørg også for godutluftning ved første fyring, da lakken på innsatsenvil avgi røyk og lukt. Denne røyken og lukten er ikkehelseskadelig og vil forsvinne.OpptenningLegg inn tørr småved, tenn opp og la flammene få godttak i veden før døren lukkes. Når flammene er stabileog pipen er blitt varm, lukkes døren og lufttilførselenjusteres med ventilene.Når det er dannet et glødende kullag, kan ny ved leggesinn. Dra glørne frem når du legger inn ny ved, slik atden nye veden antennes forfra. Opptenningsventilenskal åpnes hver gang det legges i ny ved slik atflammene får godt tak. Bålet skal brenne med friskelivlige flammer.Svært lav forbrenningseffekt og forsøk på fyring døgnetrundt er uheldig da dette gir økt forurensning og øktfare for skorsteinsbrann. Fyr aldri slik at ildsted ellerrør blir rødglødende. Steng fyringsventilen hvis detteskjer. Optimal regulering av fyringsventilen krever litterfaring. Når du har fyrt i ildstedet en stund, vil du finneen naturlig fyringsrytme.NB ! Husk alltid å åpne både fyringsventilenog døren når det legges ny ved i et varmtbrennkammer. La veden få ordentlig fyr førventilinnstillingen reduseres.Ved lav trekk i skorsteinen og stengt ventilkan gassene fra veden bli antent med et smellsom kan forårsake skader på produktet ogomgivelsene.6. VedlikeholdRengjøring og inspiseringMinst en gang i løpet av fyringssesongen bør ildstedetinspiseres grundig og rengjøres (gjerne i forbindelsemed feiing av skorstein). Se til at alle sammenføyningerer tette, og at pakninger ligger riktig. Pakninger som erslitt eller deformert bør skiftes ut.AskeAsken må fjernes med jevne mellomrom. Væroppmerksom på at asken kan inneholde glør selv fleredøgn etter at ilden har opphørt. Det anbefales imidlertidå la det ligge igjen et lag aske i bunnen, da dette bidrartil å isolere brennkammeret. Bruk en beholder av ikkebrennbart materiale når du fjerner asken.Vær varsom med Thermotteplatene ved fjerning avaske, spesielt ved bruk av askespade.Thermotte isolasjonsplaterDe varmeisolerende platene (FIG 7) i brennkammeretbidrar til å gi høy forbrenningstemperatur, somfører til renere forbrenning av veden og høyerevirkningsgrad. Eventuelle sprekker i platene forringerikke isolasjonsevnen. Vær også oppmerksom på atplatene kan avgi farget støv ved berøring. Unngå å tapå ovnen med støv på fingrene. Har du fått støv påstøpejernsdeler fjernes dette med en tørr klut. Skulledet være behov for å erstatte eller bytte ut enkelteplater, kontakt din forhandler.Demonter platene i følgende rekkefølge:A. Venstre sideplateB. Venstre hjørneplateC. BakplateD. Høyre hjørneplateE. Høyre sideplateF. BunnplateMerk: Bruk av for lang ved vil kunne medføre ekstrabelastning som kan skade platene.Vær også oppmerksom på at Thermotteplatene kanavgi farget støv ved berøring. Unngå å ta på lakkerteflater med støv på fingrene. Kommer det støv på noenav ildstedets synlige overflater er hansken som følgermed godt egnet til å børste av med.Dør og glassDersom glassruten er sotete, kan det være nødvendig åpusse/rengjøre glasset. Bruk glassrens som er beregnetfor dette (NB! Vær forsikting, glassrens kan skadelakken på dørrammen). Brukes andre rengjøringsmidlerkan det skade glasset. Et godt tips til rengjøring er åbruke en fuktig klut eller kjøkkenpapir med litt aske frabrennkammeret. Gni asken rundt på glasset og tørk avmed et rent og fuktig kjøkkenpapir. NB! Rengjøring måkun gjøres når glasset er kaldt.Kontroller regelmessig at overgangen mellom glassetog døren er helt tett. Stram eventuelt til skruene somholder glasset på plass – men ikke for hardt, da dettekan føre til at glasset sprekker.Med jevne mellomrom kan det være nødvendig å skiftetetningslistene på døren for å sikre at ildstedet fortsatter tett og fungerer optimalt. Disse fås kjøpt i sett medkeramisk lim inkludert.Husk at ildstedet alltid må være kaldt før det inspiseres.4 Norsk
Advarsel: Pass på at produktet ikke bliroveropphetet – det kan føre til uopprettelig skadepå peisen. Slike skader dekkes ikke av garantien.Kilde: “Håndbok, effektiv og miljøvennlig vedfyring” av Edvard KarlsvikSINTEF Energiforskning as og Heikki Oravainen, VTT.http://www.eufirewood.info6 Norsk
Råd og tips ved problemer med forbrenningenFeil Forklaring UtbedringManglende trekk Pipen er tilstoppet Kontakt feier/ovnsforhandler for ytterligere informasjonRøykrøret er tilsotet, eller det er sotansamling pårøykvenderplatenRøykvenderplaten kan sitte galteller rens røykrør og brennkammerIldstedet rykerunder opptenningog driftIldstedet rykerinne når det ervind uteIldstedet varmerfor dårligUndertrykk i rommet der ildstedet står. For lite trekk,huset er for ”tett”Undertrykk i rommet - kjøkkenvifte og/eller sentraltventilasjonsanlegg trekker for mye luft ut av rommetRøykrør fra to ildsteder er tilsluttet skorsten i sammehøydeRøykrøret heller nedoverRøykrøret stikker for langt inn i skorstensløpetFeieluke i kjeller eller loft som står åpen og skaperfalsk trekkSpjeld/trekkventiler eller dører på ildsteder som ikke eri bruk som står åpne og skaper falsk trekkÅpent hull i skorstenen eller ildsteder som er fjernet ogskaper falsk trekkDefekt murverk i skorstenen, f.eks. utetthet rundtrørgjennomføring og/eller ødelagt skillevegg mellomrøykløp som skaper falsk trekkFor stort tverrsnitt i skorstenen gir liten eller ingentrekkFor lite tverrsnitt, klarer ikke å transportere allrøykgass utFor lav skorsten som gir dårlig trekkSkorstenen ligger for lavt i forhold til omkringliggendeterreng, bygninger, trær e.l.Turbulens rundt skorstenen pga. for flatt takIldstedet får for mye surstoff til forbrenningenpga lekkasje i underkant av ildstedet el. for storskorstenstrekk. Vanskelig å regulere forbrenningen ogveden brenner fort oppSjekkes ved å fyre opp med et åpent vindu i rommet.Hjelper dette, må det installeres flere/større ventilerSlå av/reguler kjøkkenvifte og/eller annen ventilasjon.Hjelper dette må det settes inn flere ventiler i rommetMonteres om. Høydeforskjell mellom røykrør bør væreminst 30 cmRøykrør må flyttes slik at det er stigende fra ildsted tilskorsten min. 10 grader. Evt. montering av røyksugerRøykrør må monteres om. Skal avsluttes 5 mm førskorstenens innervegg. Evt. montering av røyksugerFeieluker må alltid være lukket. Utette eller defektefeieluker må skiftesSteng spjeld, dører og trekkventiler på ildsteder somikke er i brukHull må mures igjenTett igjen og puss alle sprekker og utettheterSkorstenen må rehabiliteres, evt. montering avrøyksugerBytt til et mindre ildsted eller bygg ny skorsten medstørre tverrsnitt. Evt. montering av røyksugerØk skorstenshøydenForleng skorstenen. Evt. monter skorstenshatt ellermonter røyksugerØk skorstenshøyden og/eller monter skorstenshattEventueller lekkasjer må tettes. Skorstens-trekken kanreduseres ved hjelp av en trekkbegrenser eller evt.spjeld. Obs! En lekkasje på bare 5 cm² er nok til at 30% av den produserte varmluften forsvinner ”rett i pipa”For mye trekk Røykvenderplaten kan sitte galt Kontroller monteringen av røykvenderplaten - sebruksanvisningHvis du bruker ovnstørket tre, krever dette mindrelufttilførsel enn ved normal brenselSkru ned lufttilførselenGlassruten sotestilTetingsbåndene ved døren er nedslitte og trykket heltflatePipen er for storTreet er for våttLuftventilen er lukket for myeKontroller tetningsbåndene. Hvis disse er nedslitte,skiftes de ut som beskrevet i bruksanvisningenKontakt feier/ovnsforhandler for ytterligere veiledningDet bør kun brukes tørt tre med en maksimalfuktighet på 20 %Luftventilen åpnes så det tilføres mer luft tilforbrenningenHvitt glass Dårlig forbrenning (for lav temperatur i ovnen) Følg instruksjonene for riktig fyring som beskrevet idenne håndbokenFeil fyring (fyring med avfallstre, malt tre, impregnerttre, plastlaminat, kryssfiner o.l.)Sørg for å bruke rent og tørt brenselRøyk ut i stuennår døren åpnesDet oppstår en trykkutjevning i brennkammeret Lukk opp lufteventilen ca 1 min. før døren åpnes -unngå å åpne døren rasktDøren åpnes når det er ild i brennkammeretÅpne døren kun ved glødingHvit røyk Forbrenningstemperaturen er for lav Øk lufttilførselenTreet er for fuktig og inneholder vanndampSørg alltid for å bruke ren og tørr brenselSvart ellergråsvart røykUfullstendig forbrenningØk lufttilførselenNorsk7
KontrollskjemaSJEKKLISTE OG BEKREFTELSE PÅ UTFØRT KONTROLL AV ILDSTEDSMONTERINGEiendommens adresse Gnr Bnr TlfEiers navn Adresse Postnummer StedMontørens navn Adresse Postnummer StedIldstedstype og fabrikk Effekt i kW BrenseltypeSkorstenstype (Eks. tegl, type elemtskorsten) Dimensjon i cm² Ant. ildstederpå skorstenenInstallasjonen er kontrollert av Adresse Postnummer StedKvalifikasjonFølgende ble kontrollert av montør under installasjonen:Kontrollpunkt Ja NeiEr ildstedet montert etter monteringsanvisning?Er avstanden til brannmur kontrollert?Er avstanden til brennbart materiale kontrollert?Er avstanden til tak kontrollert?Er det plate under og foran ildstedet?Tåler gulvet vekten av ildsted med omramming?Er det feiemuligheter for ildsted og røykrør?Er ildstedet sikret nok tilførsel av forbrenningsluft via lufteventiler over vindu?Er røykrøret montert i skorstenen etter skorstensprodusentens anvisninger?Er skorstenen egnet for tilkobling av det aktuelle ildstedet?Har skorstenen passende dimensjon?Finnes produktdokumentasjon med monteringsanvisningen på byggeplass?Installert .................................................. ................................... ..........................................................................Sted Dato Montørens signaturKONTROLLERKLÆRINGInstallasjonen er kontrollert ved hjelp av:Utfylt sjekklisteVisuell kontrollVideokameraAnnet: .........................................................................................................................................................................................................................................................................................................................................................Installasjonen er kontrollert og funnet i orden:Kontrollert .................................................. ................................... ......................................................................Sted Dato Kontrollørens signaturDet er en stor fordel at bekreftelse på kontroll av installasjonen finnes. Sørg for at denne siden blir utfylt, og ta vare på den. Dette er etverdipapir for boligen. Husk at huseier plikter å melde fra til kommunen ved brann- og feiervesenet omat ildstedet er montert. Send gjerne en kopi av denne siden til det lokale feiervesen.8 Norsk
INDEX1. Prior to assembling the stove 10Chimney Draught 10Dimensional drawing 102. Technical Information 113. Distance to combustible material 114. Assembly 11Connection of the flue 11Operating control 115. Lighting the fire for the first time 126. Maintenance 12Cleaning and inspection 12Ashes 12Thermotte Plates 12Door and glass 127. Warranty 138. Advice on lighting a fire 13Some advice in case of combustion problems 151. Prior to assembling the stoveAll our products are tested according to the latestEuropean requirements and also to the Norwegianstandard NS 3058 and NS 3059, which includeparticle tests. However, several European countrieshave local regulations for installation of fireplaces,which change regularly. It is the responsibilityof the client that these regulations are compliedwith in the country/region where the fireplace isinstalled. <strong>Nordpeis</strong> AS is not responsible for incorrectinstallation.Important to check(please note that this list is not exhaustive):• distance from firebox to combustible/flammablematerials• insulation materials/requirements betweenfireplace surround and back wall• size of floor plates in front of fireplace if required• flue connection between firebox and chimney• insulation requirements if flue passes through aflammable wallChimney DraughtCompared with older models, the clean burning stovesof today put significantly higher demands on thechimney. Even the best stove will not work properlyif the chimney does not have the right dimensions oris not in good working order. The draught is mainlycontrolled by gas temperature, outside temperature,air supply as well as the height and inner diameterof the chimney. The diameter of the chimney shouldnever be less than that of the flue/chimney collar. Atnominal effect there should be a negative pressure of12 to 25 Pascal.The draught increases when:• The chimney becomes warmer than the outside air• The active length of the chimney over the hearthincreases• Good air supply to the combustionIt can be difficult to obtain the right draught conditionsin case the chimney is too large relative to the stove,as the chimney does not heat up well enough. Insuch cases you may want to contact professional forevaluation of possible measures. Draught that is toostrong can be controlled with a damper. If necessary,contact a chimney sweeper.Dimensional drawingThe illustrations indicate the approximate centreheight of the recess for the flue. Consider possibleinclination of the flue prior to perforating the chimney.Distortions in floors and walls may also influencethe height. Place the stove for accurate height andpositioning of the flue/chimney connection.For your own safety, comply with the assembly instructions.All safety distances are minimum distances. Installationof the stove must comply with the current rules and10English
egulations of the country where the product is installed.<strong>Nordpeis</strong> AS is not responsible for wrongly assembledstoves.Subject to errors and changes.For the latest updated version go to www.nordpeis.com.2. Technical InformationThe stoves from <strong>Nordpeis</strong> have secondarycombustion and are clean burning. The combustiontakes place in two phases: first the wood burns andthen the gases from the fumes are lit by the hot air.This ensures that these new stoves have minimalemissions of soot particles and unburnt gases (suchas CO) and are thus better for the environment. Cleanburning stoves require a small amount of wood inorder to obtain a good heat output. Use exclusivelyclean and dry wood. We recommend seasonedhardwood with a maximum moisture content of 20%.MaterialCast ironSurface treatmentdoor/doorframeHeat resistant varnishFuelWood logs, 30 cmOperating range 2-8 kWEfficiency 73%CO % @ 13% O2 0,157Draught systemIgnition and air ventcontrolsCombustion systemSecondary combustion(clean burning)Heating area 30-120 m²Flue outletTop, lateral and rearFlueOuter Ø 125 mmPossible to connectsteel chimneyYesWeight Stove 106 kgFlue gas temperature 247 °CAir supply21requirements (m³/h)Fuel charge1,8kgRefueling interval 52 minOpening of the air 75%vent controlOperationIntermittent** Intermittent combustion refers to normal use of a fireplace, i.e. newwood is inserted when the previous load has burned down to emberWhen connecting a steel chimney to the top outlet usethe security distances required from the manufacturer.4. AssemblyThe following tools are necessary:• 4 mm Allen key• 10 mm Wrench• Philips screwdriver<strong>Vega</strong> is delivered with separate flue outlet collar.Follow the correct instructions below depending onwhich outlet is used (top, lateral or rear):Rear outlet (2A-2B)FIG 2A: Unscrew the back plateFIG 2B: Fasten the flue outlet collarLateral outlet (FIG 3A-3F)FIG 3A: Unscrew sealing lid on the lateral outletFIG 3B: Bend out the fastening bracket belonging tothe sealing lidFIG 3C: Fasten the flue outlet collarFIG 3D: Unscrew the back plateFIG 3E: Fasten the sealing lid at the posterior outletFIG 3F: Fasten the back plateTop outlet (FIG 4A-4D)FIG 4A: Unscrew sealing lid on the lateral outletFIG 4B: Bend out the fastening bracket belonging tothe sealing lidFIG 4C: Fasten the flue outlet collarFIG 4D: Unscrew the back plateConnection of the FluePlease be aware when connecting the 125 mm flueto the smoke dome that the flue is placed insidethe flue outlet collar. Use stove cement in the joints.For the flue connection to the chimney, follow therecommendations from the chimney manufacturer.Operating ControlWhen the stove is in position, check that all functionsare easy to manoeuvre and appear satisfactory.Behind one of the front legs there is a hook for thecool handle.Ignition vent control (FIG 5)LeftRightAir vent control (FIG 6)RightLeftOpenClosedOpenClosed3. Distance to Combustible MaterialEnsure that the safety distances are respected(FIG 1).DoorHandle to the rightHandle to the leftOpenClosedEnglish11
5. Lighting the Fire for the First TimeWhen the stove is assembled and all instructionshave been observed, a fire can be lit. Be careful withtouching the stove the first few times it is used as itmay damage the varnish.Take care when inserting logs into the burn chamber,in order not to damage the Thermotte plates. Pleasenote that during the first few firings, the insulationspanels within the firebox will release moisturecontained within them from production. This will slowdown the burn rate slightly and could cause markingson the glass. These are easily removed with glasscleaner once the glass has gone cold. Possibly leavethe door slightly open the first 2-3 times that thestove is used. It is advisable to ventilate the roomwell when making the fire for the first time as thevarnish on the stove will release some smoke orsmell. Both the smoke and smell will disappear andare not hazardous.Lighting a fireInsert small dry pieces of kindling wood, ignite andensure that the flames have established beforeclosing the door. When the flames are stable and thechimney is warm, the door is closed and the air supplyis regulated with the vents.When there is a glowing layer of ash, new wood logscan be inserted. Remember to pull the hot emberforward in the burn chamber when inserting new logsso that the wood is ignited from the front. The ignitionvent control should be opened each time new logs areinserted so that the flames get established. The fireshould burn with bright and lively flames.IMPORTANT! Always remember to open theignition and air vent controls when new woodlogs are inserted into a hot burn chamber. Letthe flames get established on the wood beforethe draught is reduced.When the draught in the chimney is low andthe vents are closed, the gas from the firewoodcan be ignited with a bang. This can causedamages to the product as well as the immediateenvironment.Using the stove with low combustion effect increasespollution as well as the risk of a fire in the chimney.Never allow the stove or flue to become glowingred. Turn off the air vent control should this happen.Regulation of the air vent control takes someexperience, but after a little while a natural rhythm forthe fire will be found.6. MaintenanceCleaning and InspectionThe stove should be inspected thoroughly andcleaned at least once per season (possibly incombination with the sweeping of the chimney andchimney pipes). Ensure that all joints are tight andthat the gaskets are rightly positioned. Exchange anygaskets that are worn or deformed.Remember that the stove must always be cold wheninspected.AshesThe ashes should be removed at regular intervals.Be aware that the ashes can contain hot ember evenseveral days after the fire is finished. Use a containerof non-combustible material to remove the ashes. It isrecommended to leave a layer of ashes in the bottomas this further insulates the burn chamber. Takecare with the Thermotte plates when the ashes areremoved, particularly when using an ash shovel, so asnot to damage them.Thermotte PlatesThe insulating plates in the burn chamber (FIG 7)contribute to a high combustion temperature, whichleads to cleaner combustion of the wood and a higherrate of efficiency. Any fissures in the plates will notreduce their insulation efficiency.If new plates are needed, contact your dealer.In case the Thermotte plates need to be replaced,they are removed in the following orderA. Left side plateB. Left corner plateC. Back plateD. Right corner plateE. Right side plateF. Bottom platePlease note: Wood logs that are too long can causestrain and crack the plates, due to the tension createdbetween the side plates.Please also note that the Thermotte plates mayrelease coloured dust when touched. Avoid touchingany cast iron parts with dust on your fingers. Anyvisible dust on cast iron can be brushed off with theglove that is included.Door and GlassShould there be any soot on the glass it may benecessary to clean it. Use dedicated glass cleaner,as other detergents may damage the glass. (NB! Becareful, even dedicated glass cleaner can damage thevarnish on the door frame). A good advice for cleaningthe glass is to use a damp cloth or kitchen roll paperand apply some ash from the burn chamber. Rubaround the ash on the glass and finish off with a pieceof clean and damp kitchen roll paper. NB! Only cleanwhen the glass is cold.12English
Check regularly that the transition between the glassand the door is completely tight. Possibly tighten thescrews that hold the glass in place - but not too hard,as this can cause the glass to crack.Periodically, it may be necessary to change thegaskets on the door to ensure that the burn chamberis air tight and working optimally. These gaskets canbe bought as a set, usually including ceramic glue.REFRACTORYGLASS CANNOTBE RECYCLEDRefractory glass shouldbe disposed of as residualwaste, together withpottery and porcelainRecycling of the refractory glassRefractory glass cannot be recycled. Old glass, breakageor otherwise unusable refractory glass, must bediscarded as residual waste. Refractory glass has ahigher melting temperature, and can therefore not berecycled together with glass. In case it would be mixedwith ordinary glass, it would damage the raw materialand could, in worst case end the recycling of glass.It is an important contribution to the environment toensure that refractory glass does not end up with therecycling of ordinary glass.Packaging RecycleThe packaging accompanying the product should berecycled according to national regulations.7. WarrantyFor detailed description of the warranty conditions seethe enclosed warranty card or visit our website www.nordpeis.comThe stoves have SINTEF number 045-055. Completeproduct documentation can be downloaded at www.nbl.sintef.no. The CE mark is situated on the radiationshield.8. Advice on Lighting a FireThe best way to light a fire is with the use of lighteningbriquettes and dry kindling wood. Newspaperscause a lot of ashes and the ink is damaging for theenvironment. Advertising flyers, magazines, milkcartons and similar are not suitable for lighting a fire.Good air supply is important at ignition. When the flueis hot the draught increases and door can be closed.Warning: NEVER use a lighting fuel such aspetrol, paraffin, methylated spirits or similarfor lighting a fire. This could cause injury toyou as well as damaging the product.Use clean and dry wood with a maximum moisturecontent of 20% and minimum 16%. The wood logsshould dry for a minimum of 6 months after it is cut.Humid wood requires a lot of air for the combustion,as extra energy/heat is required for drying the humidwood and heat effect is therefore minimal. In additionthis creates soot in the chimney with the risk ofcreosote and chimney fire.Storing of WoodIn order to ensure that the wood is dry, the tree shouldbe cut in winter and then stored during the summer,under roof and in a location with adequate ventilation.The wood pile must never be covered by a tarpaulinwhich is lying against the ground as the tarpaulin willthen act as a sealed lid that will prevent the wood fromdrying. Always keep a small amount of wood indoorsfor a few days before use so that moisture in thesurface of the wood can evaporate.FiringNot enough air to the combustion may cause the glassto soot. Hence, supply the fire with air just after thewood is added, so that the flames and gases in thecombustion chamber are properly burnt off. Open theair vent and have the door slightly ajar in order for theflames to establish properly on the wood.Note that the air supply for the combustion also canbe too large and cause an uncontrollable fire thatvery quickly heat up the whole hearth to an extremelyhigh temperature (when firing with a closed or nearlyclosed door). For this reason you should never fill thecombustion chamber completely with wood.It is recommended to keep an even fire with a smallamount of wood. If too many logs are put on thehot ember, the air supply will not be sufficient forreaching the require temperature, and the gases willbe released unburnt. For this reason it is importantto increase the air supply just after adding the logs inorder to have proper flames in the burn chamber sothat the gases are burnt.Choice of FuelAll types of wood, such as birch, beech, oak, elm,ash and fruit trees, can be used as fuel in the stove.Wood species have different degrees of hardness -the higher the hardness of the wood, the higher theenergy value. Beech, oak and birch havest the highestdegree of hardness.NB! We do not recommend the use of fuel briquettes /compact wood in our combustion chambers, as theseproducts may develop significantly higher temperaturethan the combustion chamber can withstand. BurningEnglish13
iquettes / compact wood is at your own risk and cancause invalidity of the warranty.Warning:NEVER use impregnated wood, painted wood,plywood, chipboard, rubbish, milk cartons,printed material or similar. If any of these itemsare used as fuel the warranty is invalid.Common to these materials is that theyduring combustion can form hydrochloricacid and heavy metals that are harmful to theenvironment, you and the stove. Hydrochloricacid can also corrode the steel in the chimneyor masonry in a masonry chimney. Also, avoidfiring with bark, sawdust or other extremely finewood, apart from when lighting a fire. This formof fuel can easily cause a flashover that canlead to temperatures that are too high.Warning: Make sure the stove is not overheated- it can cause irreparable damage to the product.Such damage is not covered by the warranty.Source: “Håndbok, effektiv og miljøvennlig vedfyring” by EdvardKarlsvik SINTEF Energy Research AS and Heikki Oravainen, VTT.http://www.eufirewood.info14English
Some advice in case of combustion problemsError Explanation SolutionNo draughtThe stovereleasesmoke whenlighting thefire and duringcombustionThe stovereleases smokeinside whenit is windyoutside.The stovedoes not heatsufficiently.Too muchdraughtThe glass issootyThe chimney is blockedThe flue is sooty or there is accumulated soot on thesmoke baffleThe smoke baffle is wrongly positionedDowndraught in the room caused by no draught, that thehouse is too “air tight”.Downdraught in the room – caused by extractor and/orcentral ventilation system that pulls too much air out ofthe room.The flues from two fireplaces/stoves are connected tothe same chimney at the same height.The flue is in a declining position from the smoke dometo the chimney.The flue is too far into the chimney.Soot hatch in the basement or attic that is open and thuscreating a false draught.Damper/top draught vents or doors on fireplaces that arenot in use are open and create a false draught.An open hole in the chimney after that a fireplace hasbeen removed, thus creating a false draught.Defect masonry in the chimney, e.g. it is not airtightaround the flue pipe entry and/or broken partition insidethe chimney creating a false draught.The cross-section in the chimney is too large whichresults in no or very low draught.The cross-section in the chimney is too small and thechimney cannot carry out all the smoke.The chimney is too low and hence a poor draught.The chimney is too low in relationship to the surroundingterrain, buildings, trees etc.Turbulence around the chimney due to the roof beingtoo flat.The fireplace combustion receives too much oxygendue to a leakage under the lower border of the stoveor too strong chimney draught. Difficult to regulate thecombustion and the wood burn up too quickly.The smoke buffer is wrongly positioned.In case of using oven-dried wood, this requires less airsupply than when using normal wood.The gaskets around the door are worn and totally flat.The chimney is too large.Contact a chimney sweeper / dealer for more information or cleanthe flue, smoke baffle and burn chamber.Verify the assembly of the smoke baffle - see assembly instructions.Light the fire with an open window. If this helps, more/bigger ventsmust be installed in the room.Turn off/regulate extractor and/or other ventilation. If this helps,more vents must be installed.One flue must be repositioned. The height difference of the two fluepipes must be of at least 30 cm.The flue must be moved so that there is an inclination of at least10º from smoke dome to chimney. Possibly install a smoke suctiondevice*.The flue must be reconnected so that it does not enter into thechimney but ends 5 mm before the chimney inner wall. Possiblyinstall a smoke suction device*.Soot hatches must always be closed. Hatches that are not tight orare defected must be changed.Close damper, doors and top draught vents on fireplaces that arenot in use.Holes must be completely sealed off with masonry.Seal and plaster all cracks and sites that are not tight.The chimney must be refitted, possibly install a smoke suctiondevice*.Change to a smaller fireplace or build new chimney with a largercross section. Possibly install a smoke suction device*.Increase the height of the chimney and/or install a chimney cap/smoke suction device*.Increase the height of the chimney and/or install a chimney cap/smoke suction device*.Increase the height of the chimney and/or install a chimney cap/smoke suction device*.Any possible leakage must be sealed off. A draught regulator orpossibly a damper can reduce the chimney draught. NB! A leakageof only 5 cm2 is enough for 30% of the heated air to disappear.Verify the positioning of the smoke buffer – see assemblyinstructions.Turn down the air supply.Replace the gaskets, contact your dealer.Contact chimneysweeper or other professional for more details.The wood is too wet. Only use dry wood with a humidity of maximum 20%.The air vent control is closed too tightly.Bad combustion (the temperature is too low)Open the air vent control to add air to the combustion. When newwood logs are inserted all vent controls should be completelyopened or the door slightly opened until the flames have a goodtake on the wood.Follow the guidelines in this user guide for correct combustion.White glassSmoke isreleased whenthe door isopenedWhite smokeBlack or grey/black smokeUsing wrong material for combustion (such as: paintedor impregnated wood, plastic laminate, plywood etc)A levelling out of pressure occurs in the burn chamber.The door is opened when there is a fire in the burnchamber.The combustion temperature is too low.The wood is humid and contains water damp.Insufficient combustion.Ensure to use only dry and clean wood.Open the air vent control for about 1 min before opening the door– avoid opening the door too quickly.Open the door carefully and/or only when there is hot ember.Increase the air supply.Ensure to use only dry and clean wood.Increase the air supply.English*Electric top chimney fan15
<strong>Vega</strong> = mm23012545535063574512546516
FIG 1>600>600>600>600>100>100>600>600>100>1035>600>100>600>1115>1135>100>1135>600>600>158517
Bakmontering / Rear outletFIG 2 AFIG 2 BSidemontering / Lateral outletFIG 3 AFIG 3 B18
FIG 3 CFIG 3 DFIG 3 EFIG 3 F19
Toppmontering / Top outletFIG 4 AFIG 4 BFIG 4 CFIG 4 D20
FIG 5 FIG 6FIG 7BCDAEF21
24<strong>Nordpeis</strong> AS, Gjellebekkstubben 9-11, N-3420 LIERSKOGEN, Norwaywww.nordpeis.no