Plaster Masks.pdf
Plaster Masks.pdf
Plaster Masks.pdf
- No tags were found...

Create successful ePaper yourself
Turn your PDF publications into a flip-book with our unique Google optimized e-Paper software.
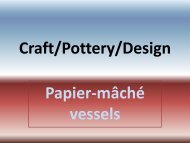
<strong>Plaster</strong> <strong>Masks</strong>Craft/Pottery/Design
Objectives:• Students will create a decorative, plaster maskusing plaster bandages.• Students will use an armature (selected byteacher) in making the mask. *our class will usea classmate’s face as the armature.• Students will understand various purposes formasks from different cultures.
Terms:• armature: support system for mask• appendage: An add-on. Supplemental addition• cast: to make a form from a mold• joint compound: (also known as drywall compound) is a whitesubstance similar to plaster used to seal joints between sheets ofdrywall, primarily in building construction. It is often referred to simplyas mud.• slake: adding warm water to plaster to create a chemical reactioncausing it to harden.• <strong>Plaster</strong> of Paris: crushed limestone• additive process: creating an artwork by adding materials instead ofcarving away to build up the form• embellish: to beautify or adorn with decorations or ornaments• decorative arts: art that is meant to be useful as well as beautiful, asceramics, furniture, jewelry, and textiles.
About <strong>Masks</strong>•Have been used throughout the world in all periods since the Stone Age.<strong>Masks</strong> have been used for:•celebrations•funerals•initiations•crop harvesting•war preparation•playsWhether used for work or play, protection or hiding your identity, a mask has
Materials Needed• <strong>Plaster</strong> bandage (yes, it's the same stuff used for castingbroken bones!) .• Petroleum jelly• Shower cap or clips to hold back hair• Dish or pan of warm water• Newspaper to protect work surface• Towel to protect clothing or old shirts• Facial soap, washcloth, make-up for afterwards• For Decoration:• High gloss clear coat• Hot glue gun and glue sticks• Paints and brushes• Joint compound/sand paper• Miscellaneous: beads, sequins, fake hair, eyelashes, feathers,ribbon, fur, raffia, cloth, dried flowers, leaves, chains, glitter, etc
Part IMaking the base mask on a face.• Cut the plaster bandage into strips approximately 1-2inches wide and long.• Tie back your partner’s hair and generously coat theface with Vaseline. Tear out small single layer bits ofthe Kleenex and place them over the eyelids/lashesand the eyebrows, using the Vaseline to stick them on.
Part II• Dip a piece of bandage at a time in the warm waterand place it on your partner's face, overlapping theedges slightly. Do not go too far under the chin, or themask will be hard to remove after it's dry.• As you work, smooth any rough bandage edges withyour wet fingers.• Avoid the nostrils, and if your partner is claustrophobicyou can also skip the mouth and/or eyes. Continuethe plastering process, overlapping each bandagepiece until the entire face is well covered.
Get Comfortable!
• The mask will slowly warm up over about 20minutes. After it does, it will harden. When it has,encourage your partner to flex his/her face by makingfunny faces or exaggerated chewing motions underthe mask, until it comes loose from the skin easily. Toremove the mask, gently lift the edges to break thesuction, then carefully lift the mask from the face. Ifpossible, especially if there is any hair caught in themask, have the “victim” do this part him/herself.Part III• Strengthen the mask by adding another layer ofplaster bandages, preferably in a cross direction to theprevious layer.
Pretendlike you’rechewinggum veryexaggerated
Part IV• Have your partner go wash up and get readywhile you clean up the supplies used.• *** NEVER pour your water down the drain!!!This will clog the sink. Pour your wateroutside in the grass.• Label the mask with your name.
Part V• Reinforce all edges with strips of plaster.• Decoration: You may add cardboard, newspaper,etc. to build up areas of your mask form. Coverthese attachments (appendages) with plaster stripsfor strength and unity.• Cover entire mask with a layer of joint compound.This can make your mask very smooth, highlytextured, or create areas of relief as it can becarved.• Sand entire mask if needed• Paint with acrylic paints and decorate to your liking.
Appendages orbuilt-up areashave been addedand entire maskhas been coveredin joint compound.
“C” work
No build-up
Not very smooth
Build-up but sloppypaint job
“B” work
Not a lot of build-up,but nicely paintedand adorned.
Mother Nature
High “B” or Low“A” due tocraftsmanship
“A” work
Obama
Solar Power
OwlCultural Tiger
Cat In the HatLeopard
Pig
Alien
Creature from the BlackLagoon
Cactus Man
Cultural
Rock-em Sock-em RobotMasquerade
Bunny
Cheshire Cat
Mouse
Queen ofHearts
The Mad Hatter
The Joker
Sunflower
Warrior Helmet
Bike helmet
Deer head
Demon Rabbit
Starry Night