
Create successful ePaper yourself
Turn your PDF publications into a flip-book with our unique Google optimized e-Paper software.
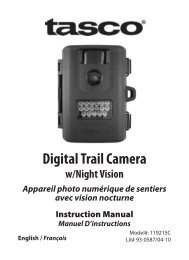
<strong>Spotting</strong> <strong>Scope</strong> Instruction <strong>Manual</strong>Model #: WC712060 L lit. #: 93-0563 / 08-101
BASIC INSTRUCTIONSCongratulations on the purchase of your Tasco ® spotting scope, aversatile high-performance spotting scope offering a wide range ofterrestrial viewing.MOUNTING THE SCOPE AND SETTING UP THE TRIPODRemove the spotting scope from its case. Spread out the tripod legsand place the tripod on a level surface. To extend the legs to thedesired height, open a leg lock lever, pull the leg section out, thenclose the leg lever back down to lock the leg position. The tripodwill be more stable if you extend the upper sections of the legs first,then use the lower leg sections as well if necessary. Once all the legsections are fully extended, if you need more height, extend thecenter column as well. To do this, loosen the elevation height lock,turn the elevation crank handle, then retighten the height lock.Press the quick mount latch forward as far as it will go and hold itopen. Lift the quick mount plate to remove it out of the mountingplatform, then release the latch. Lift the wingnut handle on thebottom of the quick mount plate so that it stands straight out.Attach the quick mount plate bolt into the scope using the wingnuthandle to turn the bolt until it is secure, but do not overtighten.Press the quick mount latch again and slide the quick mount plate(with scope attached) onto the tripod. Let go of the latch. If thelatch does not close, reorient the plate until the plate lies flat withinthe tripod base.CHANGING MAGNIFICATIONGrasp and rotate the zoom ring located at the base of the eyepieceto change the scope's magnifying power. When rotating this ring,the image appears to zoom in and out. It may be necessary tore-focus after the magnification has been changed.FOCUSINGRotate the focus knob located on the right side of the scope's body,in front of the eyepiece. By turning this adjustment, the image willsharpen until in focus.
BASIC INSTRUCTIONSUSING THE PAN ARM TO MOVE THE SCOPETo pan the scope side to side or up and down, first loosen the sideand/or vertical lock. Then unlock the pan arm by rotating itcounterclockwise and use it to move the scope as desired. To lockthe scope in place, rotate the pan arm clockwise and tighten theside/vertical locks.USING THE EYECUPIf you wear eyeglasses, fold down the rubber eyecup if you havedifficulty seeing the entire image. After use, return the eyecup tothe fully extended position before storing the scope to ensure thatthe rubber in the eyecup retains its normal shape and flexibility.CAREThe lenses of your spotting scope are coated for highest lighttransmission. As with any coated optics, special care must be takenin cleaning the lenses. Moisten the surface of the lens slightly andwipe dry using a circular motion starting at the center of the lens.Wipe or brush off any dirt or dust on the outside of the spottingscope.CAUTIONNever disassemble your spotting scope. Special tools and equipmentare required for service and irreparable damage can result fromrepair attempts by untrained persons. Unauthorized service mayalso void the warranty.CAUTION: DO NOT LOOK AT OR NEAR THE SUNTHROUGH THIS SPOTTING SCOPE, AS SEVEREDAMAGE TO YOUR EYES MAY RESULT !3
PARTS GUIDESunshadeSide TiltLockVerticalLockElevationHeightLockFocus KnobElevationCrankHandleZoom RingQuickMountPlateQuickMountLatchMounting Platformw/ bubble levelPan ArmCenter ColumnLeg LockLevers4
SPECIFICATIONSFinishLens CoatingPrism TypePrism SystemObjective DiameterExit Pupil (20x)Exit Pupil (60x)Field of View (20x)Field of View (60x)Eye Relief (20x)Eye Relief (60x)Close Focus (20x)Close Focus (60x)WeightLengthHeightTripod HeightOther AccessoriesRubber armor, blackFully coatedBK-7Porro60 mm3.0 mm1.0 mm115 ft @ 1000 yds52 ft @ 1000 yds18 mm13.5 mm19.5 ft.23.0 ft.28.0 oz.14.0 in.5.9 in.44 in.Carrying case,cleaning cloth5
LIFETIME LIMITED WARRANTYCongratulations on the purchase of your new Tasco ® product. Youhave chosen one of the finest values available today. This productcarries Tasco's LIFETIME LIMITED WARRANTY. This product iswarranted against original defects in material and/or workmanshipfor the length of time specified by this warranty, provided, however,that the unit has not been abused, taken apart or tampered with inany way whatsoever.This warranty is limited to the original purchaser and is nottransferable. This warranty applies only to products purchasedin the United States of America. Any return made under thiswarranty must be accompanied by the items listed below:1) A check/money order in the amount of $10.00 tocover the cost of postage and handling2) Name and address for product return3) An explanation of the defect4) Proof of Date Purchased5) Product should be well packed in a sturdy outsideshipping carton to prevent damage in transit, with returnpostage prepaid to the address listed below:SEND TO: TASCOAttn.: Repairs9200 CodyOverland Park, Kansas 66214Tasco shall not be liable for any consequential, incidental orcontingent damages whatsoever. Some states do not allow theexclusion of incidental or consequential damages, so the abovelimitation or exclusion may not apply to you. This warranty gives youspecific legal rights, and you may have other rights which vary fromstate to state.Non-warranty repairs or refurbishing of your Tasco product arealways provided at a reasonable cost.For products purchased outside the United States pleasecontact your local dealer for applicable warranty information.©2010 B.O.P Tasco, TM, ®, denote trademarks of B.O.P
8©2010 B.O.P. • TASCO, ®, TM denotes trademark of B.O.P