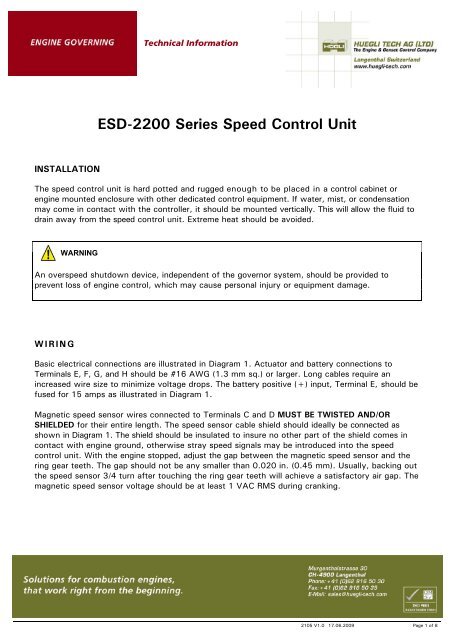
ESD-2200 Series Speed Control Unit
ESD-2200 Series Speed Control Unit
ESD-2200 Series Speed Control Unit
- No tags were found...
You also want an ePaper? Increase the reach of your titles
YUMPU automatically turns print PDFs into web optimized ePapers that Google loves.
Technical InformationSPECIFICATIONSPERFORMANCEIsochronous Operation/Steady State Stability ........................................... ±0.25% or better<strong>Speed</strong> Range/Governor .................................................................. 1K-7.5K Hz continuous<strong>Speed</strong> Drift with Temperature .................................................................... ±1% Maximum<strong>Speed</strong> Trim Range .................................................................................± 250 Hz. TypicalTerminal A Sensitivity ........................................130 Hz., ± 15 Hz / Volt @ 5.1K ImpedanceENVIRONMENTALAmbient Operating Temperature Range ..............................-40 to +180°F (-40° to +85°C)Relative .Humidity .........................................................................................up to 100%All Surface Finishes.................................................... Fungus Proof and Corrosion ResistantINPUT POWERSupply ................. -12; 8-20VDC, -24; 16-32VDC (Transient and Reverse Voltage Protected) *Polarity ............................................................................Negative Ground (Case Isolated)Power Consumption .............................................. 60 ma continuous plus actuator currentActuator Current Range @ 77°F (25°C) ...............................................10Amps continuous<strong>Speed</strong> Senior Signal ............................................................................. 0.5-50 Volts RMSRELIABILITYVibration .............................................................................................. 5G @ 20-500 HzTesting ....................................................................................100% Functionally TestedPHYSICALDimensions .............................................................................. See Outline (DIAGRAM 1)Weight ..............................................................................................12 oz. (347 grams)Mounting ........................................................................... Any Position, Vertical Preferred2105 V1.0 17.06.2009 Page 3 of 8
Technical InformationDIAGRAM 1. SYSTEM WIRING/OUTLINE5kSee specific actuator publication for proper wiring of actuator connector for battery voltage used.2105 V1.0 17.06.2009 Page 4 of 8
Technical InformationSYSTEM TROUBLESHOOTINGSystem InoperativeIf the engine governing system does not function, the fault may be determined by performing thevoltage tests described in Steps 1 through 4. Positive (+) and negative (-) refer to meter polarity.Should normal values be indicated during troubleshooting steps, and then the fault may be withthe actuator or the wiring to the actuator. Tests are performed with battery power on and theengine off, except where noted. See actuator publication for testing procedure on the actuator.Step Terminals Normal Reading Probable Cause of Abnormal Reading1 E(-) & F(+) Battery Supply Voltage (12, 24, or 32 VDC) 1. DC battery power not connected. Check for blown fuse2. Low battery voltage.3. Wiring error.2 A(+) & B(-) 0-3.9 with speed trim1. <strong>Speed</strong> trim shorted or miswired.7.1-7.9 without speed trim2. Defective unit.3 C(+) & D(-) 1.0 VAC RMS min. while cranking 1. Gap between speed sensor and gear teeth too great.Check gap.2. Improper or defective wiring to the speed sensor.Resistance should be between 30 to 1200 ohms.3. Defective speed sensor.4 H(-) & E(+) 0.8-1.5 V while cranking 1. Wiring error to actuator.2. Defective speed control unit.3. Defective actuator.Unsatisfactory PerformanceIf the governing system functions poorly, perform the following tests.Symptom Test Probable FaultEngine overspeed 1. Do Not Crank. Apply DC power to thegovernor system.1. Actuator goes to full fuel. Then disconnect thespeed sensor wires. If actuator still at full fuelspeedcontrol unit defective. If actuator atminimum fuel position erroneous speed signal.Check speed sensor cable.Actuator does not energizefully while cranking.Engine remains below desiredgoverned speed2. Manually hold the engine at the desiredrunning speed. Measure the DC voltagebetween Terminals H(-) & E(+) on thespeed control unit.1. Measure the DC voltage betweenTerminals H(-) & E(+) on the speedcontrol unit. Should be 0.8 to 1.5 volts.If not:2. Momentarily connect Terminal E to H.The actuator should move to the fullfuel position.1. Measure the actuator output, TerminalsG & H, while running under governorcontrol.1. If the voltage reading is 1.0 to 1.5 VDC,a) SPEED adjustment set above desired speed.b) Defective speed control unit.2. If the voltage reading is above 1.5 VDC, actuatoror linkage binding.3. Set point of overspeed shutdown set too low.4. If the voltage reading is below 0.8 VDC, defectivespeed control unit.1. Replace the battery if weak or undersized.2. Actuator wiring incorrect.3. If voltage is less than 1.5V, SPEED set too low1. Actuator or battery wiring in error.2. Actuator or linkage binding.3. Defective actuator.1. If voltage measurement is with 1.5 volts or moreof the battery supply voltage level, then fuelcontrol restricted from reaching full fuel position.Possibly due to mechanical governor, carburetorspring, or linkage interference.2. If not, increase speed setting.2105 V1.0 17.06.2009 Page 5 of 8
Technical InformationSYSTEM TROUBLESHOOTINGInsufficient Magnetic <strong>Speed</strong> SignalA strong magnetic speed sensor signal will eliminate the possibility of missed or extra pulses. Thespeed control unit will govern well with 0.5 volts RMS speed sensor signal. A speed sensor signalof 3 volts RMS or greater at governed speed is recommended. Measurement of the signal is madeat Terminals C and D.The amplitude of the speed sensor signal can be raised by reducing the gap between the speedsensor tip and the engine ring gear. The gap should not be any smaller than 0.020 in (0.45 mm).When the engine is stopped, back the speed sensor out by 3/4 turn after touching the ring geartooth to achieve a satisfactory air gap.Electromagnetic Compatibility (EMC)EMI SUSCEPTIBILITY - The governor system can be adversely affected by large interfering signalsthat are conducted through the cabling or through direct radiation into the control circuits.All GAC speed control sensors contain filters and shielding designed to protect the unit's sensitivecircuits from moderate external interfering sources.Although it is difficult to predict levels of interference, applications that include magnetos, solid sateignition systems, radio transmitters, voltage regulators or battery chargers should be consideredsuspect as possible interfering sources.If it is suspected that external fields, either those that are radiated or conducted, are or will affectthe governor systems operation, it is recommended to use shielded cable for all externalconnections. Be sure that only one end of the shields, including the speed sensor shield, isconnected to a single point on the case of the speed control unit. Mount the speed control to agrounded metal back plate or place it in a sealed metal box.Radiation is when the interfering signal is radiated directly through space to the governing system.To isolate the governor system electronics from this type of interference source, a metal shield or asolid metal container is usually effective.Conduction is when the interfering signal is conducted through the interconnecting wiring to thegovernor system electronics. Shielded cables and installing filters are common remedies.In severe high-energy interference locations such as when the governor system is directly in thefield of a powerful transmitting source, the shielding may require to be a special EMI class shielding.For these conditions, contact Huegli Tech for specific recommendations.2105 V1.0 17.06.2009 Page 6 of 8
Technical InformationInstabilityInstability in a closed loop speed control system can be categorized into two general types.PERIODIC appears to be sinusoidal and at a regular rate. NON-PERIODIC is a random wandering oran occasional deviation from a steady state band for no apparent reason.The PERIODIC type can be further classified as fast or slow instability. Fast instability is a 3 Hz. orfaster irregularity of the speed and is usually a jitter. Slow periodic instability is below 3 Hz., can bevery slow, and is sometimes violent.If fast instability occurs, this is typically the governor responding to engine firings. Raising theengine speed increases the frequency of instability and vice versa. In this case, cutting the jumperfrom E1 to E2 will reduce this tendency. In extreme cases, the removal of the E1 to E2 jumpermay not take all the jitter out of the system. A second jumper, E4 to E5, may be removed tofurther stabilize the system. Post locations are illustrated in Diagram 1. Interference from powerfulelectrical signals can also be the cause. Turn off the battery chargers or other electrical equipmentto see if the system instability disappears.Slow instability can have many causes. Adjustment of the GAIN and STABILITY usually curesmost situations by matching the speed control unit dynamics. If this is unsuccessful, the dead timecompensation can be modified. Add a capacitor from posts E2 to E3 (negative on E2). Postlocations are illustrated in Diagram 1. Start with 10 mfds. and increase until instability is eliminated.The control system can also be optimized for best performance by following this procedure.If slow instability is unaffected by this procedure, evaluate the fuel system and engineperformance. Check the fuel system linkage for binding, high friction, or poor linkage. Be sure tocheck linkage during engine operation. Also look at the engine fuel system. Irregularities withcarburetion or fuel injection systems can change engine power with a constant throttle setting.This can result in speed deviations beyond the control of the governor system. Adding a smallamount of droop can help stabilize the system for troubleshooting.NON-PERIODIC instability should respond to the GAIN control. If increasing the gain reduces theinstability, then the problem is probably with the engine. Higher gain allows the governor torespond faster and correct for disturbance. Look for engine misfiring, an erratic fuel system, orload changes on the engine generator set voltage regulator. If the throttle is slightly erratic, butperformance is fast, removing the jumper from E4 to E5 will tend to steady the system.If unsuccessful in solving instability, contact Huegli Tech for assistance.2105 V1.0 17.06.2009 Page 7 of 8
Technical InformationDeclaration of ConformityApplication to Council DirectivesStandard to which Conformity is DeclaredManufacturer's NameManufacturer's AddressImporter's NameImporter's AddressType of EquipmentModel NumberSerial NumberYear of ManufactureHeavy and Light Industrial ApplicationsEN55011, EN50081-2, and EN50082-2GOVERNORS AMERICA CORP.Agawam, MA 01001 USAElectronic <strong>Speed</strong> <strong>Control</strong> <strong>Unit</strong><strong>ESD</strong>-<strong>2200</strong> <strong>Series</strong>Above T104291999 and laterI, the undersigned, hereby declare that the equipment specified above conforms to the above Directiveand Standards.Place: Agawam, MA USA Full Name: Mr. William FerryDate: May 6,1999 Position: President and CEOIn order to be in compliance with the above directives, the installer is obligated to install theequipment in strict accordance with the following special instructions and guidelines.1. The speed control unit must be mounted against the metal ground plane with four bolts, whichmake positive electrical connections between the case and the back plane.2. The magnetic pickup must be connected to the speed control using shielded cable as shown inthe wiring diagram.3. All shielded cable connections to the speed control must be connected to the case at thecorner threaded connection per the wiring diagram.4. Shielded cable for the actuator is recommended to minimize the actuator’s slight movementduring fast high voltage transients. The installer’s choice of not using shielded cable may causethe actuator to move more than slightly during these transients. However, no failures should beexperienced.5. The installer must refer to the wiring diagram in the literature for proper electrical connections.2105 V1.0 17.06.2009 Page 8 of 8


