


Create successful ePaper yourself
Turn your PDF publications into a flip-book with our unique Google optimized e-Paper software.
<strong>Detailer's</strong> <strong>Handbook</strong>: Eighth <strong>Edition</strong>"Strive for perfection in everything.Take the best that exists and make itbetter. If it doesn't exist, create it. Acceptnothing nearly right or good enough."Sir Henry Royce, co-founder of Rolls-Royce
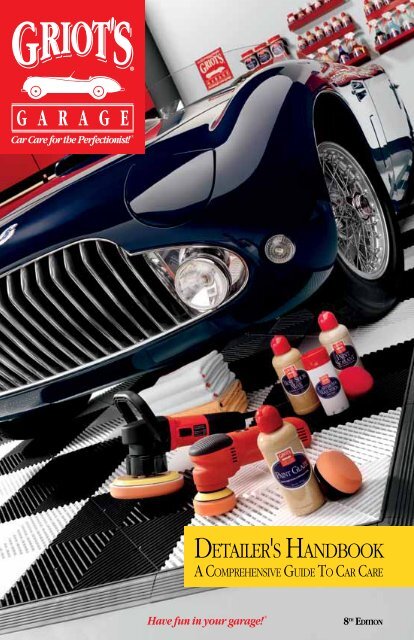
<strong>Detailer's</strong> <strong>Handbook</strong>All rights reserved. No part of this book may be used or reproduced in any form or by any method,or stored in an electronic storage system, without prior written permission from the publisher.Copying any part of this book for any purpose other than your own personal use is a violation ofUnited States copyright laws.This <strong>Detailer's</strong> <strong>Handbook</strong> was written and designed by Richard Griot and Mark Greene,with a little help from the Mother-In-Law!Many thanks to all of our customers and friends who donated the use of their wonderfulautomobiles for photographs used in this <strong>Handbook</strong>.© 2000, 2001, 2002, 2003, 2004, 2005, 2006, 2007, 2008, 2009, 2010, 2011 by Griot's Garage, Inc.Published by Griot's Garage, Inc.,3333 South 38 th StreetTacoma, WA. 98409Printed in the United States of America.CautionPlease read this disclosure statement before you start any project—it will make my attorneyhappy… The information contained in this <strong>Handbook</strong> should be used only as a guide and is not intendedto warrant or guarantee any results that you may experience with Griot's Garage, Inc. productsor anyone else's. Proper car care can be complicated due to the many different materials (bothinterior and exterior), types of paints, interpretations of our application methods or techniques, andincluding, but not limited to, chemical reactions with previous products you may have used. Youmay not experience the same results as me. When in doubt, always use common sense.The liability of Griot's Garage, Inc. shall not exceed the purchase price of this <strong>Handbook</strong>. Griot'sGarage, Inc. assumes no responsibility, expressed or implied, due to misuses or misinterpretationsof the information supplied in this <strong>Handbook</strong>; or for any injury that may occur due to the suggestionsand information offered in this <strong>Handbook</strong>.At Griot's Garage, we want you as a customer for life. Everything you purchase from us comeswith a lifetime guarantee against defect. We want you to enjoy our quality products for 180 days andhave fun with them! If you don't like it for any reason during this time, return it for a full refund orcredit. After that, you're covered with our lifetime guarantee against defect, in which we will eitherrepair it or replace it. If we are unable to repair or replace your product, we will credit your purchaseprice. Some items have a life span during normal use and they wear out. Our warranty doesnot include replacement of such items after normal use. Of course our guarantee doesn't coverabuse... But you already knew that. Customers for life. That's our guarantee.This <strong>Handbook</strong> is a collection of notes I've gathered from years of experience and you may dowith them whatever you please. I hope you enjoy it. Now go and…Have fun in your garage! ®Richard Griot
ContentsGetting Started 2Griotisms 6Surface Evaluation 8A Proper Cleaning 10Safe Drying 20Wheels & Tires 24Paint Cleaning Clay 32Polishing 34Waxing & Sealing 42Dressing & Details 48Glass Cleaning 50Interiors 54Engine Bay 58Clean Up 60Maintenance 62Motorcycle Detailing 66Around The House 74Index Of Products 76Car Care for the Perfectionist! ®1
Perfection Is In The DetailsGetting Started…There are many terms in the world of carcare. Most have been misused and misunderstooddue to exaggerated marketing effortsand misinformation. So that the descriptionsused in this <strong>Handbook</strong> are consistent and clear,here is a list of car care terms along with theirproper definitions.Acid RainChemicals in the air that are contained in moistureor rain. These chemicals normally resideas hydrochloric acid within a water droplet onyour paint's surface. As the water evaporates,the concentration of acid becomes greater andeventually etches your paint; leaving behind acircular mark. This mark, underneath a magnifyingloupe, will look like an etched crater. Leavingyour car unattended under intense sunshine aftera rain accelerates this process. Paint CleaningClay or polish should remove these marks. Somemarks, however, cannot be removed and mayhave penetrated the clear coat entirely; polishingand waxing will make them less visible.Brake DustBrake pads on your car slowly wear down dueto the friction against the rotors or drums. Thiscreates dust which sticks to the wheels. It usuallylooks black and is heavier on the front wheelsbecause this is where most of your braking effectivenessoccurs. This material is damaging to thefinish of your wheels and should be removedon a regular basis or it may permanently pitthe wheel's finish. Most wheels are painted andclear-coated and may be waxed or sealed tomake the cleaning process much easier.BuffTo wipe off excess polish or wax and bring asurface to its maximum appearance. The kindof shape you'll be in if you polish and wax a lotof vehicles.Car WashA cleaner used to remove surface contaminantsfrom your vehicle. Most car wash products usealkalies, detergents and/or sodium which canremove waxes, glazes and natural oils and mayaccelerate paint oxidation. Good car wash soapwill not contain any detergents and will be richin lubricants (which safely lubricate the dirt,allowing it to glide from the vehicles paint). To"feel test" your car wash, put a small amountbetween your finger and thumb and rub it backand forth. Better car washes will be more slippery.Griot's Garage Car Wash is pH balanced,contains no detergents and uses biodegradableingredients which release dirt and contaminants,then disperse them for easy removal.CarnaubaA naturally water-resistant substance derivedfrom the South American Copernica Ceriferaplant. May be used in a paste or liquid form andapplied by hand or machine. In its natural state,carnauba is rock-hard and needs petroleum distillatesto soften it so it is workable when appliedto the paint's surface.Clear Coat PaintMost vehicles today have clear coat paint. Thepaint on your car is a multi-layer paint comprisedof a primer, a base color/pigment coat and aClear Coat 2-3 milColor Coat 1-2 milPrimer 2 milMetal 20 milClear coats protectthe color coat. Carefulpolishing is required sodamage does not occurto the clear coat.clear coat. Clear coatprovides excellent brilliancebut is very easilyscratched. Once youscratch or rub througha clear coat, repairsinvolve re-painting,as the base color coathas no brilliance, shineor depth.2
Getting StartedCross-HatchA method of applicationusing backand forth, up anddown motions toapply or removeproducts. This issafer than the traditional,circular "waxWork in this patternto ensure you geton, wax off" motion complete coverage.and provides moreeven application and removal.Colored WaxesSince there are thousands of different colors forvehicles, there is no way to match a colored waxwith your paint color. Since most vehicles have aclear coat, the application of a colored wax on aclear paint creates an unnatural appearance.ContaminantsParticles of dirt, grime, bird droppings, acid rain,hard water deposits, calcium, tar, oil or any substancewhich adheres to your vehicle's surface.Sometimes these are invisible to the eye. If leftalone, they may permanently etch the paint.Remove with Paint Cleaning Clay or polish.DetailedUsed to describe a vehicle which has beencleaned, polished, waxed and dressed with aprotectant. Implies every part of the vehicle hasbeen cleaned and treated, including doorjambs,the engine compartment, wheels and the entireinterior space.Direct Drive PolisherDirect drive polishers and rotary buffers operateat high speeds and work well to remove layers ofpaint, orange peel and overspray. However, theyinduce high heat and can cut through paint veryfast, especially if used with wool or cotton bonnets.Most professional detailers use this methodfor fast detailing; however, it creates even moreswirl marks which are usually hidden with aglaze. Your first car wash will remove this glaze,so the swirl marks will become visible and you'llbe very disappointed. My rule of thumb: Neverlet anyone touch your car with a direct drive polisher,especially using a wool or cotton bonnet.You can polish paint better using our RandomOrbital, foam pads and Machine Polishes.GlazeA petroleum based liquid, usually made of carnaubawaxes and silicones that temporarilyfills and hides small surface scratches and swirlmarks. Glazes can be layered so the more coatsyou apply, the more you hide. We recommendusing a glaze when polishing is not an optiondue to time constraints or on older paint whereyou don't want to remove any more paint, evenif it is microns.GlossAn optical term that describes a surface's abilityto reflect light. High-gloss paint reflects light withminimal hazing or diffusion. Contaminants, oxidation,swirl marks, inferior polishes and waxesreduce gloss.Micro FiberA unique, man-made fiber that is several hundredtimes finer than a single strand of cotton.These strands are then specially woven to maximizetheir ability toabsorb moisture andpick up dust, polish andwax. There are manygrades and weaves ofmicro fiber. Our variousMicro Fiber Towels areultra-soft and speciallydesigned for use onyour vehicle.Micro Fiber vs.regular fiber.Car Care for the Perfectionist! ®3
Perfection Is In The DetailsGetting Started…Orange PeelA bumpy look to a painted surface, similar tothe skin of an orange, due to poor paint application.It can be removed by wet sanding ormachine polishing.Random Orbital (Dual-Action Machine)A machine, usually with variable speed settings,used to apply and/or remove polishes, glazes,waxes and cleaners. A dual-action polisherrotates in a random, circularmotion in addition tomoving back and forthin small incrementswhile orbiting. Thisprovides a safer applicationmethod than aRandom orbitals oscillateas they spin, providing asafer application of polishand wax.direct drive polishersince it does not generateas much heaton the paint's surface.Best if used with foam pads since wool and cottonterry bonnets could be harmful to your paint.OxidationDamage done to unprotected paint due to prolongedexposure to sun, acid rain and severeweather elements. The paint's appearance looksdull and chalky. In many situations, there is goodpaint underneath the oxidized surface that maybe exposed by polishing.Paint Cleaning ClayA soft, pliable bar of abrasives suspended ina clay used to remove contaminants from apainted surface. Clay must be used with a lubricantsuch as Speed Shine ® which allows it toglide smoothly over the surface. Some clay isvery abrasiveand will scratchpaint. Our PaintCleaning Clay isClay picks up contaminants extremely mild.that are stuck to the surface!Paint Sealants & Synthetic Waxes/PolymersA non-organic based wax used to seal paintwith a thin barrier. Sealants use polymers toprovide a longer lasting protective barrier comparedto organic wax. A polymer is a substancecomposed of molecules with large molecularmass composed of repeating structural units,or monomers, connected by covalent chemicalbonds. This allows the sealant to provide betterprotection than organic compounds like carnauba.Inferior sealants reduce color and clarity asthey buildup over time. Griot's Garage Paint Sealantand One-Step Sealant won't create a buildupof opaque protection. Unlike other silicone-ladenproducts, our sealants will enhance color andclarity while providing long-term protection.PolishAn abrasive liquid which removes thin layers ofpaint, smoothing out the surface and eliminatingswirl marks, scuffs, overspray, and light scratches.Polish may be applied by hand or machine.Pressure WasherGas or electric powered water sprayers whichprovide a very strong stream of water for cleaning.Never use a pressure washer on your vehicle.Too much pressure will damage paint andmay even remove paint and undercoating inwheel wells. Great for cleaning engines, however,cover electrical components and paper orvinyl decals. Beware of forcing water into areaswhere it won't drain.Rail DustSmall particles of ferrous metal created by railroadcar wheels running on the metal tracks.These particles become airborne and land onvehicles being transported via rail cars. Whenmoisture combines with these metal particles,the iron rusts, creating small rust spots visiblewith a magnifying loupe. Remove rail dust withPaint Cleaning Clay.4
Getting StartedRubbing CompoundA very harsh polish used to reduce the thicknessof paint, knock down major orange peel in paint,or remove heavy paint oxidation. Used by handor machine. Generally not safe for clear coats ormodern ultra-hard paints.Rotary BufferDirect drive buffers which typically rotate athigh, direct drive speed, unlike orbital buffers.Used to quickly remove layers of paint. Best leftto professionals because if used improperly, theycan burn through your paint.SiliconeA synthetic substance in the form of a heat andwater resistant oil. Used as a lubricant, waterrepellentcoating or additive. There are manyvariations of silicone. Superior grade siliconescan be beneficial to increasing a protective layerfor surface protection.Single Stage PaintA paint where the color coat is the final layer ofpaint. You can tell if your paint is single stage byrubbing a small amountColor Coat 1-2 milof polish on the paintPrimer 2 milwith a cotton cloth andMetal 20 mil seeing if paint colorshows up on the cloth.If no color appears, it's aSingle Stage Paint. clear coat.Spray-On WaxA liquid, protective wax or syntheticwax that leaves behind a thin layerof wax protection. Should be used inaddition to a wax or sealant as an "enhancer"and not as a primary protectant for your paint.May also be used to help buff dried-on wax.Swirl MarksSmall surface scratches created by rough or lowquality synthetic towels, abrasive cleaners andpolishes, buffers with the wrong type of polishingpad, automatic car washes and by wipingdirt across a dry painted surface. Sometimes alsoreferred to as spider webs. Swirl marks may beremoved by hand or machine polishing. Somewaxes may also help hide the appearance ofswirl marks.Teflon ®A synthetic formula sometimes sold as a paintprotective sealant. The maker of Teflon ® (DuPontChemicals) has issued the following statement:"The addition of a Teflon ® fluoropolymer resindoes nothing to enhance the properties of a carwax. We have no data that indicates the use ofTeflon ® is beneficial in car waxes." Griot's Garagedoes not use Teflon ® in any of our products.Water SpotsCalcium deposits, especially in hard water, actjust like acid rain to damage your paint. See AcidRain on page 2.Waterless Car WashA method of car washing designed to removesurface contaminants from your vehicle withoutusing a hose, bucket or water. These productsare rich in lubricants and designed to soften andlift the dirt from your paint so they can be wipedoff using a high-loft micro fiber towel. In mostcases waterless car washes are safe for cleaningyour paint, but if the vehicle is very dirty a traditionalcar wash should be used.WaxA protective substance, natural or synthetic,which provides a thin layer of protection overpaint, metal or wood. Wax can come as a paste,cream or liquid. Pure wax should containno abrasive.Car Care for the Perfectionist! ®5
Perfection Is In The DetailsGriotisms…For years our customers and associates haveheard many "isms" about Griot's Garage. Ourname, pronounced "Gree-oh's Garage" has lentitself to be used in what we've come to call "Griotisms".Here's a list of the most common ones wehear from our customers. Do you have a Griotism?Tell me about it. Enjoy!Griotesque(Gree-oh-esk) Adjective. Stemming from thephenomena of Griot's Garage. Very modernlooking; usually red, black or white in color.High quality, efficient and capable of lasting anentire lifetime.Griotage(Gree-ahge) Adjective. A garage designed andstyled after that of the Griot's Garage style.Grionnoyance(Gree-oh-noy-ence) Verb. Being anallypicky, insanely attentive to detail, almost to thepoint of annoyance to your car guy friends and/or your spouse.Griother Half(Gree-uther Haf) Noun. The spouse of a Griot'sGarage customer.Griotual(Gree-oh-choo-al) Noun. A ritual performedcustomarily or automatically that only aGriot's Garage customer would embrace.Example: To wash and squeegee one's garagefloor on a regular basis is a Griotual.Grecessive Compulsive(Gree-ses-iv Compuls-iv) Adjective. Specificallyobsessive about the finish of one'sautomobile paint.Griotcratic(Gree-oh-cratic) Adjective. Neither Democraticnor Republican and mostly a car crazy guy interestedin the politics of the automobile industry.The Griotcratic drinks motor oil for breakfast andbreathes exhaust fumes from the time they wakeup until the time they retire for the night. Andthen, they dream about racing.Grioted(Gree-ohd) Adjective. Someone devoted to theuse of Griot's Garage car care products.Griotllucinate(Gree-oh-loos-en-ate) Verb. To envision Griot'sGarage products in your garage.Griotfeit(Gree-oh-fit) Noun. Cheap copies of Griot'sGarage products. Fake. False. Phony. Usuallywithout guarantees.Griotation(Gree-oh-ta-shun) Noun. The life cycle ofwashing the auto, washing the wheels, drying,claying, polishing, waxing, detailing the undercarriage,interior and the engine bay. One fullcycle is a Griotation. For the most thorough ofGriotations, the wheels are removed, detailedand remounted for true textbook results.Griotus Interuptus(Gree-oh-tus In-te-rupt-us) Adjective. Someonewith multiple kids and a million things to do onany given weekend. They must always plan forthe "Griotus Interuptus" or having to drop everythingand tend to some other 'more urgent' matter.Griother halves just don't get it sometimes.Mr. Griogi(Gree-ah-gee) Noun. The sensei of car care.Often found teaching the cross-hatch method ofapplication instead of the incorrect, circular "waxon, wax off" method.6
Getting StartedThis incredible 800hp hot rod started as adriver/show car project and evolved intoan over-the-top custom hot rod which wenton to win a Great 8 Award at the DetroitAutorama in February, 2010.1934 Ford 3-Window High Boy CoupeCar Care for the Perfectionist! ®7
Knowledge Is PowerSurface Evaluation…Where do I start? A very common question Iam asked by many customers. First thingsfirst; walk around your vehicle and determine thelevel of cleaning and detailing you want to do.A fast cleaning with Speed Shine ® : fifteenminutes. A proper wash: thirty minutes. Alittle rubber, vinyl and tire dressing: ten minutes.To properly clean the paint, polish out swirlsand apply a protective coat of wax: one to threehours. Each involves a different requirement andtime dedication. Special situations like removingoverspray, cleaning off large amounts of tar,detailing the engine bay or dressing the interiorcan take minutes or hours depending on yourlevel of perfection. One thing is for certain; ourproducts will produce excellent results in theshortest amount of time. Whatever your commitment,begin with the paint. It's the largest areawith the most visual impact.Paint ConditionsHaving the proper tools to evaluate the conditionof your paint is very important.Good lighting and a loupe of at least 10x magnificationwill allow you to accurately evaluateyour paint's condition and what each of ourproducts does to correct the defects. Even if yourgarage is well lit, a handheld light will greatlyenhance your ability to find and correct defectsin your paint.I've diagramedseveral situationshere to help youevaluate yourpaint. Usually,you'll only have tocontend with paintwhich has surfacecontaminants andlight swirl marks,but some casesmay involve moreintense correctionwhen deeperscratches, etchingor oxidation arepresent. The carcare system I'vedeveloped wascreated to allowyou to integrate thecleaners, polishesand waxes to workin small increments,evaluatingas you go.Contaminants that are hardto remove with polish, yetvanish easily with PaintCleaning Clay.Swirl marks, small and evenmoderate scratches can beremoved using our MachinePolishes & Random Orbital.Learn to live with this deeperscratch. Removing it wouldmean reducing the thicknessof your paint.Very deep scratch that goesthrough to the primer. Usetouch up paint followed bypolishing and waxing.Surface ContaminantsIf you run your finger tips and palm gently overthe paint's surface you'll feel small bumps orroughness. These contaminants are made up ofthings like dirt, grease, road oil, tar, industrial falloutand bird droppings. (Bird droppings shouldalways be removed as soon as possible as theycontain highly acidic concentrations which willpermanently etch your paint, sometimes withinminutes.) These contaminants may be removedwith Car Wash, Speed Shine ® or, in more severecases, Paint Cleaning Clay. Your objective is tocreate a surface which is as clean and smooth aspossible before polishing or waxing. If you arecleaning your car in preparation for polishingor waxing, it is best to clay the paint to ensure allcontaminants have been removed.8
Surface EvaluationSwirl MarksThe next level of challenge involves minor surface scratches, swirlmarks, spider webs, scuffs and rock chips. These imperfections arecaused by automatic car washes (which I never recommend), wipingthe car down when dry (which drags dust and dirt across the surface),using harsh towels when drying the vehicle, leaving car covers on adirty surface under windy conditions or using harsh cleansers, abrasives,polishes and waxes. These conditions can usually be corrected withFine Hand Polish, but our milder Machine Polishes will provide thebest results. Using One-Step Sealant with our Random Orbital can alsoreduce or remove swirl marks. Several coats of Best of Show Wax ® orPaint Glaze can also "hide" these conditions if polishing may take moretime than you have or the paint is older and you don't want to removeany more, even if it is microns.Swirl marks can beremoved by polishingor hidden with severallayers of wax or glaze.Deeper ScratchesMore severe scratches, acid rain etching or oxidation will require agood cleaning, claying, polishing and waxing. The only way tocompletely eliminate scratches is to remove a thin layer of paint down tothe base of the scratch. This is not the best method as you always want tokeep as much paint on the car as possible. In many cases you don't needto get down to the base of the scratch. Simply rounding off the "V" of thescratch (see diagram at right) and filling the remaining crevice with Bestof Show Wax ® or Paint Glaze will reduce the visibility of the scratch substantially.Polishing out deeper scratches requires the use of our RandomOrbital and Machine Polishes, as hand polishing isn't an effective form ofremoving these more severe imperfections.Initial scratch before polishingand waxing.For deep scratches to beless noticeable, round offthe "V" and "fill" the crevicewith wax.Car Care for the Perfectionist! ®9Pneumatic or electricrandom orbitals area fun, fast and safeway to polish awayscratches in yourpaint. You can alsouse them to applywax for fast, evenapplication. With theright pad, they caneven be used to buffwax, which furthercuts down on yourdetailing time.PaintPrimerDeep scratch through to primer.PaintNothing you can do except PrimeruseDeep touch scratch up paint.through to primer.Nothing you can do except usetouch up paint.
Step OneA Proper Cleaning…If I can pinpoint one step that gives the greatestbenefit over an automobile's entire life, it'skeeping your car's surfaces, the glass, trim, paintand wheels clean. There are two types of cleaning.The first is a thorough wash to keep the surfacesclean and free of road grime, tar, oils, birddroppings, industrial fallout and other contaminants.The second is cleaning when you're inbetweenserious washings and don't want to getout all your supplies. Not being careful duringeither of these processes can create swirl marks,so using care when cleaning your car is alwaysimportant… but I didn't need to tell you that.Speed Shine ® is the productI use most often. It leaves a"just waxed" finish on anypainted surface.The Causes Of Swirl MarksEvery time you wipe down, dust off or washyour car, you run the risk of putting minutescratches (often referred to as swirl marks) intothe paint. When it comes to swirl marks, I ammost frequently asked where they come from,how to avoid them andhow to get rid of them.While swirl marks areinevitable, they aremore frequent on dailydrivers. However, I'veMicro fiber is nonabrasiveand safe onall paint surfaces.Micro fiber is alsoextremely absorbentand great for drying.seen terrible swirl markson the most cherishedgarage queens. Here'swhy: anytime you pushan object across a paintedsurface you'll inducemicro scratches. Smalldust and dirt particlesact like sandpaper. Evensome towels, if madefrom low quality polyesterfibers, will scratchpaint. Avoid some ofthese common swirlmark causes and you'llgreatly reduce the number of swirl marks in yourpaint. We'll cover removing any swirl marks youalready have in the Polishing section.Common Causes Of Swirl Marks• Car dusters, if used on very dirty surfaces orwith too much pressure.• Dragging a car cover over your car, especiallyif it's dusty or dirty (dirt on the car or the coverwill cause scratches).• Wiping down a dry car with a dry towel withthe intent of keeping it clean. This is the mostcommon cause of swirl marks.• Infrequent rinsing of your wash mittduring washing.• Using a dirty chamois or dry towel to drythe vehicle.• Using towels for drying and/or wipe downsthat are not suitable for paint finishes.• Not thoroughly rinsing the vehicle beforewashing it.• Not thoroughly cleaning the vehicle beforedrying it.• Using an automated car wash or drive-throughcar wash. Even "touchless" drive through carwashes will scratch because of high pressurewater jets.• Using harsh polishes, waxes and cleaners.• Direct drive polishers or poorly designedrandom orbital systems. 10
A Proper CleaningWashing Your VehicleWhen you are ready to begin washing,make sure the vehicle's surface is cool. Ifthe surface is too hot, the water or soapy waterwill dry on the paint and spot. If you've been outdriving, wait an hour or two and let the car cooldown since your engine heats up the metal surfacesaround it and the wheels and brake componentsget very hot during use. Never spraycold water on hot wheels and brake rotors as thismay damage them.Begin by placing one ounce of Car Washper two gallons of fresh water into your cleanUltimate Wash Bucket. It's important to use theproper amount of cleaner. Like all of our carcare products, less is more. Using more thanthe recommendedamount is wastefuland won't getyour vehicle anycleaner. The measuringcup in ourUltimate WashOur Foaming Sprayermixes and foams any of ourcleaners and regulates theamount applied perfectly!Bucket will ensureyou have the rightamount of CarWash. If you haveaccess to warm water, use it. The increased temperaturewill improve the cleaning ability of theCar Wash. Rinse the car thoroughly with a steadyflow of water; not a fine mist. I start with a strongblast into the wheel wells, then move to the topand work down, spraying the wheels last. Avoidrinsing with high pressure or strong pressurewashers as they can blast water into seals, undertrim and may even damage paint. The idea is toloosen dirt and rinse as much away as possible.Now, starting with the top and workingyour way down, begin cleaning. Saturate ourMicro Fiber Wash Mitt or Pad, Boar's Hair Brush,Sheepskin Wash Mitt, or Merino Wool Wash Mittwith lots of Car Wash by dipping it into yourbucket. For larger vehicles, use our Wash MopStick Kit or Round Boar's Hair Brush & Handleas they will allow you to easily reach the higherparts of the vehicle. When washing, work insmall areas. For instance, do half of the top andrinse off the soap. Then move to the other half.By concentrating on smaller areas you'll do amore thorough job and be able to focus on troublespots. Use gentle strokes in a straight, backand forth motion. With every rinsing, rinse yourbrush or mitt, too. If you are using a Micro FiberWash Mitt or Pad, a quick dip into the bucket anda shake will knock everything off.With our Car Wash, use our super-soft Micro FiberWash Mitts and Pads that are gentle on your paintand rinse freeof dirt witha quick shake!Car Care for the Perfectionist! ®11
Step One ContinuedA Proper Cleaning…If you notice large tar spots, bird droppings,bugs or any contaminant stuck on the paint,you've got a couple options for safe removal.First of all, be gentle. Saturate our Four-FingerMesh Mitten with full strength Car Wash andcarefully wipe the area using both sides of themitten. For stubborn tar, use our 3M AdhesiveRemover in the same manner. Remember, asyou break up these contaminants, they containminute bits of abrasive material that scratch paint.Even bird droppings contain sand and seeds thatwill scratch. If these processes don't work foryou, use our Paint Cleaning Clay as instructedlater in this <strong>Handbook</strong>. Allow the product tosoften the contaminant so you can gently wipeit from the surface without creating scratches orswirls. Never use lots of pressure to remove contaminantsfrom your paint.Clean the vehicle in this order: top, fronthood, front fenders, doors, rear deck, rear fendersand rear. This is usually going from the leastdirty parts to the dirtiest. If the car is very dirty,you may want to rinse your bucket half waythrough and add fresh Car Wash and water.Clean the wheels and tires last since they areusually the dirtiest areas. Step Three (on page 24)will cover the proper cleaning process for yourwheels and tires.When you do your final rinse, use a flatstream of water. You may even want to removeyour spray nozzle and let a nice broad stream ofwater flow over the surface. This leaves a lot lesswater on the surface and allows you to dry thevehicle faster, reducing water spots and towelusage. If you suffer from hard water in your area,try using our Portable Water Deionizer or In-LineWater Softener during your final rinse. Both filterout contaminants that cause water spots andstains should the water dry on your paint. Seea picture of our Water Deionizer on page 15nestled among the Vettes!A Sheepskin Wash Mitt picks up a lot of dirt anddistributes the cleaning agent evenly over thesurface of the paint. Rinse your mitt often.A Boar's Hair Brush is a safe and fast way toremove dirt. Boar's hair is much softer thanhorse hair or synthetic plastic fibers.Use a strong stream when first rinsing the vehicle.Use a flat stream when rinsing off soap, leaving lesswater on the paint.Our Multi-Pattern Hose Nozzle And Car WashDispenser is great for washing and rinsing!12
A Proper CleaningRemoving Old WaxIf you plan on doing a full detail, it may benecessary to remove old wax using Paint Prep.It is formulated to stripold wax so you mayproperly evaluate yourpaint condition. If you'veused other productswhich contain siliconeand sealants, our polishesand waxes maynot adhere to theseproducts or they mayappear hazy. Test a smallarea. If the polish orwax smears, hazes anddoesn't wipe off cleanly,there is probably a siliconeladen sealing producton your paint thatIf you've used otherproducts whichcontain silicone andsealants, our polishesand waxes may notadhere to your paintor will appear hazy.Use Paint Prep toclean the surface.you need to remove.Work in the shadeand with the paint surfacecool. Wash the carfirst. Leave the vehiclewet and spray PaintPrep in even layers.Wear gloves and avoidprolonged skin contact. Work in small areas,from the top down. Let it stand for 4-6 minutesand don't allow it to dry on the surface. Sprayadditional Paint Prep on areas that are drying.Once the old wax is dissolved, rinse the areawith water. You may use a wet micro fiber clothto wipe over the area before you rinse. If you seeany leftover wax residue, repeat the process andwipe dry. Your paint is now ready for evaluation.It's typical to see scratches or a blemishedsurface after the Paint Prep process. Thesemarks are imperfections that have been hiddenby waxes or glazes. Now is the time toproperly evaluate the surface and decide ifpolishing is necessary or if simply waxingwill suffice. Paint Prep won't removeall surface contaminants, so Paint CleaningClay is your next step. If you see swirl marksand scratches you need to polish. If the surfaceis free of swirl marks then waxing is inorder. Either way, you now have an untreatedsurface and may properly evaluate the truecondition of your paint.Massage The PaintWhen working with Paint Prep, ithelps to work the product into thesurface using your hands or oneof our Four-Finger Mesh Mittens.This is a gentle way to ensure youremove all the old wax from thesurface. Always wear Latex, Vinylor Nitrile Gloves to avoid the PaintPrep irritating your skin. Remember,keep the surface wet andrinse thoroughly when finished.1987 Porsche 930 & 1978 Porsche 911SCCar Care for the Perfectionist! ®13
Step One ContinuedA Proper Cleaning…Washing Your VehicleWithout WaterIf you're unable to wash your car using thetypical "water hose and bucket" method dueto water restrictions in your community, or if theweather is freezing but you still want to washyour vehicle, waterless car washing is a safe andeasy alternative to the traditional wash process.Our Spray-On Car Wash clings to your vehicle'spaint, allowing the lubricious emulsions to liftand dissolve dirt, oil, greases,bird droppings and grime soyou can gently wipe it awaywith a high-loftMicro Fiber CarWash Cloth. Inorder to reducethe possibility ofinducing scratches while cleaning, it is importantto follow these easy steps. Be especially carefulon surfaces coated with mud, sand and soil.Similar to washing your car with Car Wash,work in small sections from the top down, savingthe dirtiest portions of your vehicle for last.Begin by misting a moderate amount of Spray-On Car Wash onto a small section of the vehicleand allowing it to sit for 15 seconds (but do notlet it dry). An extra spray on areas with bird droppingsor that are heavily soiled is a good idea.Quarter fold a high-loft Micro Fiber Car WashCloth and gently wipe the area clean using aside-to-side, wipe and lift motion; not in circles.The quarter fold gives you 8 usable sidesto the towel so you can flip to a clean sectionas the towel gets dirty. Using asecond dry cloth, gently buffany remaining product fromthe surface. Depending onhow dirty your vehicle is, 3 to4 cloths will be necessary forcleaning. Again, always use lightpressure when wiping dirt fromyour vehicle as too much pressuremay cause swirl marks.Between WashesFor this, Speed Shine ® is the product I usemost often. Why? It allows you to clean yourentire car in about 15 minutes and leaves behinda deep shine that looks "just waxed". It's fast, funand won't harm glass, plastic or rubber trim.Simply grab your Speed Shine ® and a coupleMicro Fiber Speed Shine ® Cloths and clean thecar using the same method as described inthe previous section about waterless washing.While the process of cleaning is the same, quickdetail products, like Speed Shine ® , should notbe used on heavily soiled vehicles like waterlesscar washes. Speed Shine ® enhances yourpaint leaving the surface clean and brilliant. Youwon't believe the results. Great on boats, racecars at the track, as a final prep before a concoursjudging, painted cabinets, motorcycles, chrome,bicycles and any painted or clear coated surface.Our convenient Speed Shine ® Wipes areperfect for getting into those hard to reach areasto remove that final dusting before a concoursjudging. Each wipe is impregnated with SpeedShine ® , so you can simply pull out a cloth, gentlywipe your paint surface and buff the area drywith a clean Micro Fiber Speed Shine ® Cloth or100% Cotton Buffing Cloth. Don't leave homewithout them.14
A Proper CleaningIf you live in an area with hardwater and suffer from those hard toremove water spots, give our WaterDeionizer a try. Replaceable, saferesins remove contaminants.1954, '55, '56, '57 & '58 CorvettesCar Care for the Perfectionist! ®15
Step One ContinuedA Proper Cleaning…Convertible Top CareWhile being enormously fun, convertiblespose a whole set of challenges when itcomes to caring for their tops. Most tops aremade of a plastic vinyl or polyacrylic/polyestercanvas. On older vehicles the rear window is aclear vinyl, while recently manufacturers havebeen primarily using glass. Care for these materialsrequires some extra time and thought.Vinyl tops are easy to clean. Car Wash willremove most of the dirt and oils during yournormal wash process. Any spots may be treatedwith our Interior Cleaner. Use a soft brush or ourYellow Scrubbing Pads to agitate the stain. TheYellow Scrubbing Pads are ideal because theopen-cell foam is gentle on the vinyl while stillbeing aggressive enough to remove the stain,and they won't deteriorate when you have toughcleaning to do! For better control of the scrubbingpad during hand application, use our 3"Foam Pad Holder. To increase cleaning powerand reduce your effort, apply the pads to our3" Random Orbital and use speed 3-4. Oncethe stain has been removed rinse the area cleanwith warm water and allow it to dry. Follow upby misting a Blue Detail Sponge with our Vinyl& Rubber Dressing and applying a light coatingover the entire top. This will protect the vinylfrom damage caused be UV light and also give ita nice, uniform finish.If your black vinyl top has seen better days,you can dye your top back to its original colorin about 30 minutes. After cleaning the top,but before dressing, apply our Black Vinyl TopReconditioner. Apply the gel to the entire topwith the included sponge applicator. This is apermanent dye that will restore your drop-topback to drop dead gorgeous. Not for use oncanvas tops or on your interior.Canvas tops require more work. Dust anddirt settle into the weave of the fabric and, ifleft over time, will start to break down the fiber.Interior Cleaner is a safe choice as a cleanser.You have a couple options to choose from forworking the Interior Cleaner into the canvasand removing stains. Our Four-Finger Mesh Mittensor Yellow Scrubbing Pads work best forthe general cleaning due to their lint free andmildly aggressive nature. For tough stains useour Nylon Carpet and Upholstery Brush since itsstiff bristles can clean the fibers more thoroughly.Avoid using too much pressure or spending toomuch time on a stain when scrubbing as this cancause uneven wear on your convertible top. MistInterior Cleaner onto the top, gently agitate toloosen the dirt. Spend extra time on spots andstains and rinse thoroughly with water to removeall Interior Cleaner residue. Use our DimpledSynthetic Chamois to dry the top by laying itover the canvas and pressing down (avoid draggingit over the top). Do not use cotton towels oranything that will leave lint behind. Allow the topto air dry. Treat any rubber seals and fittings withVinyl & Rubber Dressing.There is a lot of misinformation about protectingconvertible canvas tops. If water beadson the surface it's able to repel stains, right? No.The water protection you get from a convertibletop comes from the butyl rubber core sandwichedbetween the outer canvas and the innerpre-shrunk cotton layer. So, for the life of the16
Safe DryingMicro Fiber Drying TowelsDrying your car with our Micro Fiber DryingTowel is simple. The waffle-wovenmicro fiber is super absorbent and its sewn-inhand pockets make it easy to navigate thelarge, 25" x 35" towel across yourpaint. Gently wipe thetowel across the paint,working from top tobottom, front to back.While one pass acrossThe waffle weavecreates additionalsurface area forincreased absorbency.the car usually does thetrick, I like to follow upwith a second dry towelto make sure I get everylast drop. The biggestmistake anyone can make when using a drytowel is rubbing hard on the paint to remove anydirt or sap they failed to remove during washing.If you run into any spots you missed, use a littleSpeed Shine ® or Spray-On Car Wash to safelyremove them from your paint. Make sure youare gentle as even bird droppings contain bits ofdirt, seeds and small rocks which, when rubbedover the paint, will scratch. Moisten the areawith Speed Shine ® or Spray-On Car Wash andgently wipe clean with the appropriate microfiber towel.out after every few passes. Our natural skin StaySoft Chamois is extremely absorbent and its softsurface is safe for your vehicle's paint. As its nameinfers, our Dimpled Synthetic Chamois has aunique dimpled finish that quickly and efficientlypicks up a lot of water, much more than smoothchamois. When it comes to care, keep all yourchamois clean by not using them on wheels andoily areas such as the rocker panels of the vehicle.Our Stay Soft Chamois is machine washableand should be stored dry. When drying, lay it flatand stretch it slightly back to its original shape,then allow it to air dry. Unlike a natural chamois,our Dimpled Synthetic Chamois should bestored moist, back in its container. Chamois aresafe for paint, glass and trim if they are kept cleanand stored properly, away from exposure to dustand dirt.Synthetic And Natural ChamoisIf you enjoy using a chamois, either naturalskin or synthetic, wet the chamois first in lukewarmwater before using it. The proper use ofSafe chamoisdrying dependson keepingyour chamoisclean.a chamois is to lay it out flatover the wet areaand pullit acrossthe paint,drying thec a r f ro mtop to bottom,front toback, wringingyour chamoisThe Flexible Water Blade clears water off your carquickly, greatly reducing drying time. The T-bardesign contours to every curve on your vehicle,making it almost spotless.Squeegees And Water BladesAnother safe and quick way to remove waterfrom the surface of your car is usinga squeegee. It's important to not use just anysqueegee, but one specifically designed for useon vehicle's paint. A soft, flexible blade is veryimportant! I've tested tons of these and finallyfound one that is safe and effective for dryingmy cars. Our Flexible Water Blade uses surgicalCar Care for the Perfectionist! ®21
Step Two ContinuedSafe Drying…grade silicon, and its ergonomically-designedhandle is flexible to form to almost any curveand features gripping ribs so it won't slip out ofyour hands. A small, yet absorbent drying towelis important to use along with your squeegeesince any squeegee that is safe for your paintwon't be able to remove 100% of the water. OurUltra Thick Micro Fiber Towel is the perfect companion.With our Flexible Water Blade in onehand and the Ultra Thick Micro Fiber Towel inthe other, I can dry my car in half the time, givingwater spots almost no chance of forming. Gentlywipe the blade across your paint, use your towelto dry the blade and dry any remaining spots offthe paint with your towel. Repeat this processuntil your entire car is dry.Don't Forget The DetailsDoorjambs and the gutters around your trunkand engine bay trap dirt and water that canruin your good drying towels since it is impossibleto effectively clean them during your regularwash. For these areas Igrab a bottle of SpeedShine ® or Spray-On CarWash and a Tim's DirtySpots Micro Fiber WipeDown Towel. A quickEasily clean doorjambs. mist of product and agentle wipe will easilyclean and dry theseareas while keepingyour good towels cleanand your paint scratchfree. Don't forget theunderside of yourDry water channels.doors, hood and trunk.And always finish witha quick wipe downof the engine sincethe cloth is damp andwill pick up more dirtand moisture.Safely dry wheels.Spray-OnWax TipAfter washingand rinsing thevehicle, spray theareas you are dryingwith a littleSpray-On Wax.Dry the area as younormally would.Using our FlexibleWater Bladehelps. Work fromthe top down andavoid oversprayon the windows.This will add tothe shine and giveyour vehicle a justwaxedappearance.It also makes it alittle easier to dry.Remember not toallow the Spray-OnWax to dry on thepaint surface as itcontains wax andwill appear dull. Ifthis happens, mistthe area again andbuff dry.Wash your vehiclewith Griot's Garage CarWash and rinse well.Use our Water Bladeto remove excesswater and spraySpray-On Wax overthe damp surface.Wipe dry using ourMicro Fiber Dry Toweland you're finished.22
Step ThreeWheels & Tires…If there is one thing that makes your vehiclelook great, it's clean wheels and properlydressed tires. This is usually the dirtiest area onyour vehicle, yet keeping them clean is a quickand simple process. We have several cleaningtools that will shorten your cleaning time.I recommend wearing a pair of our Vinyl,Latex or Nitrile Gloves when working aroundyour wheels. Brake dust and road tar is hard toremove from your fingers, nails and hands. Younever know what chemicals may be enteringyour skin. When I venture out of the garage, Ialso don't like my hands looking like I need apersonal grooming class. Plus, if it's cold outside,your hands stay warm.Cleaning The WheelWells And Tire RubberRinse out the wheelwells before you start,otherwise, as you randomlyspray the tires andwheels, you will invariablyloosen crud that will dripon to your freshly washedwheels. Use the strongestpressure and degree of wateryou have to knock out thedirt and crud that gets cakedup in the wheel wells. Spraythe wheel well with a degreaser,like our Oil & Grease Cleaneror our Rubber Cleaner and useour Wheel Well Brush to loosendirt, mud and tar, then rinsethoroughly. If possible, removethe wheels to gain better access(be sure the vehicle is safely situatedon jack stands).Next, move to cleaning yourtires. Tire cleaning is an easily forgotten step inthe detail process, but it is very important. Allthe grease, grime, brake dust and road dirt yousee on your wheels is getting built up in yourtires, too! Over time this will damage the rubberand it also takes away from the look, even whendressed with a tire dressing. With my regularwashing I always use Rubber Cleaner to removethe regular buildup and prepare the rubber forprotectants and dressings. Apply the RubberCleaner in a shaded area and make sure that therubber is not hot to the touch. Spray the cleanerdirectly onto the surface. Allow it to soak intothe rubber, but do not allow it to dry on thesurface. Agitate with a stiff bristle brush or ourTire Scrubbing Brush to pull contaminants outof the rubber. For more intense cleaning, agitateyour tires with our 3" Yellow Scrubbing Pad and3" Random Orbital. Try this! You'll be amazed athow much crud comes out and how great yourtires look. Finish by rinsing the tires and wheelwells with water.Oil & Grease Cleaner cleans up eventhe toughest grease and oil and isenvironmentally friendly.The 21" long, sturdy, plastic handle on our WheelWell Brush has a 20-degree bend in the perfectspot so you can get some leverage and really scrub.24
Wheels & TiresOn a less frequent basis, usuallyonce every other month, I liketo thoroughly clean my tires ofany silicones, sealants, waxes,oils or greases that are startingto build up. Rubber Prep is theperfect product for this. RubberPrep breaks down and removesthe silicones, sealants, waxes, oilsand greases without any scrubbing.(It'll even remove that "wet& sticky shine" you see on everydealership's used car lot!) Simply apply RubberPrep to the tire with a sponge and allow it toevaporate leaving your tire perfectly prepared forour Vinyl & Rubber Dressing, Long-Lasting TireDressing or Tire Rejuvenator. Wait to dress yourtires and wheel wells until after you've cleanedyour wheels.Cleaning Wheelsquestion I often hear is, "Richard, could youA make a wheel cleaner that I can just sprayon and hose off?" That would be nice. The onlyproblem is wheel cleaners that strong are alsostrong enough to etch or damage your rims; notto mention what they can do to the environment.Even though you have to use a sponge or wheelbrush to help break up the brake dust on yourrims, our Wheel Cleaner is completely safe forall wheel finishes. It will loosen road tar, grimeand brake dust making removal quick and easy.I added a special scent that makes it pleasurableto use, too.One of the challenges in designing our qualityWheel Cleaner was creating one that wasas safe to use on your wheels as on your skin.I've tested other wheel cleaners where the toxicsmells alone nearly required a respirator duringuse. Those cleaners usually have a pH level sohigh that if you used it on an anodized rim, likeon an older Porsche, the alkalis may etch therim. Our Wheel Cleaner is a non-toxic, environmentallysafe product that is properly pH balancedand cleans the dirtiest of wheels. Griot'sGarage Wheel Cleaner is also factory approvedby BBS, Dayton Wire Wheels and The TireRack ® ! I am very proud of this as these are someof the world's premier wheelmanufacturers and retailers.For those of you withchrome wheels, I developedChrome Wheel Cleaner justfor you. It is safe for cleaningall of today's chrome wheelsand your old school chromewire wheels. With this cleanerI took a natural approach andused the power of citrus oilto formulate apowerful cleanerthat's safe andeffective. Chrome Wheel Cleanerwill remove brake dust deposits,heavy road oils and other contaminantswithout damaging yourchrome wheel's surface.Getting into all the nooks andcrannies of your wheels createsanother challenge, so I've createdvarious tools to make thisjob easy. I always start with ourBoar's Hair Wheel Brush since thelong, soft bristles do a great jobWheel cleaning brushes makeyour cleaning fast, easy and fun.Car Care for the Perfectionist! ®25
Step Three ContinuedWheels & Tires…Lug Nut Brush.Foam Swabs.Lambskin Mitt.Three-Finger Detail Mitt.Wheel Scrubber Brush.breaking up the initialbrake dust andgrime on the rim.Often this, by itself,will clean the wheelvery well. For thoseof you that are reallypicky about cleaningyour wheels, like me,keep reading. I thenmove to cleaningaround the spokesand lips of the wheelswith our LambskinFour-Finger Mitt andThree-Finger DetailMitt. These are likemini wash mitts foryour wheels. Next,move to the barrelsand other tightareas with our WheelScrubber Brushes(use the long reachversion for deep dishwheels) and FoamSwabs. These allowyou to work aroundthe brake calipersand rotors reachingall the way back. Ifinish using our LugNut Cleaning Brush,which are designedto fit perfectly downinto the lug nut holeson your wheels.Don't use toothbrushes as the plasticbristles will scratchpolished and paintedsurfaces. And, Ialways like to remindpeople to never usethe same cleaningtool on yourwheels that youuse on yourpaint. You don'twant to contaminateyour paintwith the type ofgrease, grimeand dirt that's onyour wheels.Tim's Dirty Spots Dry Towelsoaks up the water and isdesigned for drying toughareas like wheels, doorjambsor trunk and engine bay rails.How To Use Wheel CleanersBefore applying Wheel Cleaner or ChromeWheel Cleaner, make sure the wheelsare cool to the touch. NEVER spray water orany type of cleaner to a warm or hot wheel asthis can damage your wheels finish and yourbrake rotors. When your rims are cool to thetouch, start by completely dousing them withwater. This will allow the cleaner to be carriedto remote areas that might not otherwise bereached by spraying on a dry wheel. I also thinkthe extra amount of water allows the cleaner topenetrate the brake dust and road grime easier.Next, work on one rim at a time and spray aneven amount of cleaner over the entire rim. Agitatethe cleaner right away with the cleaningtools of your choice. If the wheel begins to dryas you are scrubbing, apply more Wheel Cleanerand continue scrubbing. Occasionally heavybuildup may require a second cleaning. Oncethe wheel has been properly cleaned, rinse withwater until clear. Finish by drying your wheelsto avoid water spots damaging you finish, especiallyif you are working on a hot day in warmertemperatures. Since there always seems to besome brake dust that doesn't get completelywashed away, I like to use our Tim's Dirty SpotsMicro Fiber Wipe Down Towel. This will saveyour nice towels for another detailing session.26
Wheels & TiresA proper cleaning is crucial beforeyou clay, polish or apply a protectivewax or sealant.1949 Kurtis KK2000 Sprint CarCar Care for the Perfectionist! ®27
Step Three ContinuedWheels & Tires…Protecting And DressingWheel Wells And Tire RubberDetailing your wheel wells can be a toughjob. In addition to being a tight space, thereare tons of areas around the springs and framethat are nearly impossible to reach, which is whyI developed our Undercarriage Spray. Simplyspray a light mist around the wheel well andyou're done. It provides a nice look as if you'vespent hours cleaning the wheel well. Perfect forSUVs where the wheel opening is large and yousee a lot of this area. Be careful of the overspraymist as it makes garage floors very slippery! Putdown a drop cloth or newspapers to catch anyoverspray. Also, avoid getting the overspray onyour tires, wheels and paint. It won't harm paint,but it will smear and should be wiped away.The final touch to detailing yourwheels and tires is always tire dressing.Protecting and dressing tire rubber is aneasy process that will greatly enhancethe look of your car while keeping yourtires protected from cracking, fadingand hardening. First, apply the productonto your applicator sponge. I preferour Dressing Applicators for tires withgrooves and raised lettering on the sidewalls, but the Blue Detail Sponges alsodo the trick. Spread it in thin, even coatsacross the tire, ensuring you get in andaround all the grooves and lettering. Thincoats will give you a more even finishand help keep the dressing from flingingonto the side of your car. Do notbuff the dressing into the tire rubber. Usesmooth, clean strokes. The results shouldbe a heavier coat of dressing that will provide aglossier look to the tire rubber. Keep the dressingoff the tread. Second, wipe away any excessproduct from the wheels with a clean Tim's DirtySpots Micro Fiber Wipe Down Towel. Applicationof our different tire dressings is the same, buteach offers a different finish and longevity.Vinyl & Rubber Dressing is my favorite tiredressing. It provides excellent UV protection, iswater based and gives your tires a nice sheensimilar to when they were brand new. Whilethis dressing has the shortest life of any of ourdressings (1-2 weeks), the finish is worth it. Thesatin finish provides professional results andis the perfect accent to your wheels. Thedressing of choice at the Pebble BeachConcours d'Elegance.The Blue DetailSponge provideseasy and accurateapplication.The comfortableTire DressingApplicator appliesa smooth film ofdressing on the tire.28
Wheels & TiresVinyl & Rubber Dressing saturated pop-up wipes areideal for tires and all your rubber trim. They allowprecise application and deliver the perfect amountof dressing.Another easy way to apply Vinyl & RubberDressing is with our pop-up dispenser. I'vetaken a strong, cloth-like material and saturatedit with Vinyl & Rubber Dressing. This providesa very controlled method of application to tires.The strong material won't rip, tear or leave lint.It enables you to use your finger tips for preciseapplication near the rim. It also makes it easy todress the valve stem and keep it from cracking.Long-Lasting Tire Dressing is just that; longlasting. Longevity is one of the primary challengeswith tire dressings. Onerainy day drive or a car wash andyou need to reapply most dressings.Long-Lasting Tire Dressingis specifically designedto withstand tough weatherconditions. Being a superthick liquid, it's easy to apply,and unlike many dressings, itwon't fly off of tires and ontoyour wheels and paint. It isalso water repellent so it stilllooks great even after a rainApplies easily with ourBlue Detail Sponges.storm or a good wheel cleaning. As for gloss? It'sall up to you. Want a nice black, satin finish? Afterapplication, give a quick swipe with a disposabletowel and your tires will have a natural rubberlook. Want mega-gloss? Apply two coats anddon't touch it. For those of you that like a shinytire, this is the dressing for you.Tire Rejuvenator is a water-based black dyethat will provide a matte black tire with a lookthat will last for up to three months! Think aboutit, no more putting on tire dressing each andevery time you wash your car or drive throughinclement weather. Just apply the creamy tiredressing with the sponge (included) and withinminutes you have a perfect looking tire. Ourformula won't fly off, attract dust or make yourpants dirty if you accidentally come in contactwith your tire after it dries. Since this is a waterbasedblack dye, do not use Tire Rejuvenator onwhitewalls or tires with white lettering.Tire Dressing TipApply our Tire Rejuvenator as a base coat3-4 times per year. Then, on a more regularbasis, apply Vinyl & Rubber Dressingover the top. This will keep your tires lookinggood even when the Vinyl & RubberDressing wears away.Rubber Prep will leaveyou with a new surface,perfect to use beforeapplying your Tire Dressingor Tire Rejuvenator.Car Care for the Perfectionist! ®29
Step Three ContinuedWheels & Tires…Polishing And Waxing WheelsMost modern wheels have a painted, colorbase coat followed by two or three layersof clear coat. These types of wheels should betreated just like the paint surface on your car,which means you should polish and wax themon a regular basis. This provides maximum protectionand makes cleaning the wheels mucheasier. Since detailing wheels can be a bit of achore, I prefer using our Paint Sealant on mywheels (though our Best of Show Wax ® can beused as well). Paint Sealant provideslonger lasting protectionthat is more resilient against theintense conditions your wheelsexperience. Best of ShowWax ® and Paint Sealant aresafe to use on all wheels,including clear-coated,machined aluminum,anodized, chrome andnon-clear coated wheels.Polishes, waxes an sealantsshould be applied toyour wheels using thesame methods as youwould on your paint (covered inthe Polishing and Waxing sectionsof this <strong>Handbook</strong>). Here I'llgive you a few techniques that arebetter for application on wheels.Always start by thoroughly cleaningyour wheels and removingbuildup with Wheel Cleaning Clay.Clay is great on wheels sinceit can be formedto fit into allthe cracks,crevices andcorners. Shouldyo u r p a i n t e dwheels have smallsurface scratches and need polishing,use Fine Hand Polish andapply it using a 100% Cotton Buffing Cloth ora 3" Orange Foam Polish Pad. Work in smallareas and wipe the polish off before it dries. Forwax or sealant on larger surfaces, use our 3" RedFoam Wax Pads. In tighter areas, a 100% CottonBuffing Cloth works well to get down into crevicesand work your way between spokes. Allowit to cure and buff using a clean Micro Fiber WaxRemoval Cloth.Non-Clear Coated WheelsFor non-clear coated, aluminum and magnesiumwheels, you need to take specialcare when polishing out oxidation and otherimperfections. Our Metal Polish is perfect. Itremoves eventhe toughestoxidationfrom thesetypes of rimsand restores abright, factorypolished finish.Remember,the Metal30
Wheels & TiresPolish is for non-clear coated and non-anodizedwheels only! If you are not sure whether yourvehicle's rims are clear coated or not, consultwith the manufacturer of the rims or car dealer.If you've ever polished metal before, youknow it always leaves behind a messy, blackresidue that will ruin your good cloths. This iswhy I love our 100% Cotton Wipes. They aregreat because they provide the same performanceand softness of our 100% Cotton BuffingCloths, but are disposable so you can throwthem away when you are finished. Apply a verysmall amount of polish to the cotton wipe andrub it gently in a circular motion until blackresidue appears on the wipe and rim. Buff ofthe polish residue with a clean 100% cottoncloth or wipe, making sure not to let the polishdry on the rim.There are a couple of options when it comesto machine application. The best option is to useour Felt Polishing Cones with a variable speeddrill or die grinder. Wear eye protection! Wipe asmall amount of polish onto the cone and workin small areas, wipingoff the polish beforeit dries. If the polishsprays or splatters,you've putOur White PolishingPads also work well forMetal Polish application.on too much.Be careful aroundthe valve stem, lugFelt Polishing Cones on a pneumatic or electric drillmake for fast easy polishing. A die grinder, though,provides the best control. Always wear eye protection!nuts (if the wheel is still mounted) and along theedge of the tire. It's easiest to polish the wheelwhen it is removed and you can work on abench top. If your wheel has any large, flat areas,you can use our 3" Random Orbital and our 3"White Foam Metal Polish Pads. Just spread theMetal Polish on the pad like butter on bread andwork back and forth on the area until you see thepanel starting to shine. Buff off the polish residuewith a clean 100% cotton cloth or wipe, makingsure not to let the polish dry on the rim.Polish Removal TipThe black residue you see from polishingmetals, especially magnesium, aluminum,silver and copper will permanently stainfabric. Use our 100% Cotton DisposableWipes so you don't ruin your nice cloths.100% Cotton Disposable Wipes provide avery safe alternative to destroying yournice cotton towels when using Metal Polish!Car Care for the Perfectionist! ®31
Step FourPaint Cleaning Clay…Before Polishing Or Waxing,Remove Surface ContaminantsAfter you've washed your vehicle, run yourfingers over the paint. If it feels roughinstead of being totally smooth, or if you hear a"friction" sound, the surface has contaminantswhich need to be removed. Oils, dirt, brake dust,tar and acid rain deposits from the environmentform tiny particles which stick to your paint.Over time these particles build up and form aninvisible layer. (Although you can see it with a10x magnification loupe.) This is what you arefeeling and hearing when you touch the surface.Even though you've washed the car, these contaminantswon't come off. There are some polisheson the market advertised as "paint cleaners"that are a lot of work but still can't remove thesecontaminants! Before you polish or wax yourpaint, these contaminants must be removed.This will make polishing safer, easier and ensuremaximum clarity and longevity from your wax.Don't make the mistake of polishing or waxingover these contaminants. If you polish orwax without claying first, these contaminantscould get picked up into the pad and groundinto your paint potentially creating swirl marksand scratches. In addition these contaminants,on a microscopic level, look like volcanoes onyour paint and will not accept a wax barrierlike a smooth paint surface. These "contaminantvolcanoes" now act as a conduit for acid rainand take its harmful effects right to the base ofthe paint! If you don't remove them before youwax, you simply cover them up, leaving them toattack the paint. In all my years of testing productsthere is only one way to remove these contaminantssafely. (It also is the easiest!) Use ourPaint Cleaning Clay. This product is amazing.There are many different grades of clay. Someare very coarse and will scratch paint. Others aretoo dense and leave a hard-to-remove residueon your paint. Our clay is extremely mild andwill remove a variety of surface contaminantsincluding paint overspray, tree sap, bug residue,tar, dirt, oil, hard water deposits and brake dustwithout removing wax or scratching your vehicle'spaint. How does it work? The clay is pliableand sticky and acts like an exfoliate, lifting awaycontaminants. It must be used with a lubricant,allowing it to slide across the surface. Our SpeedShine ® is perfect as it not only contains a cleaner,but has high lubricity, too. I like to wear vinylaloe gloves when working with clay so it doesn'tstick to my skin or get under my fingernails.80 Grams100 Grams 100 GramsOur clay is verymild and willremove a varietyof surfacecontaminantsthat are difficultto remove anyother way.Size DOES matter!Our Paint Cleaning Clay is safe for all typesof paint and leaves no residue or scratchesbehind and we give you more, lots more!Griot's Garage226 Grams32
Paint Cleaning ClayHow To Use Paint Cleaning ClayStart by removing the plastic wrapper andtearing off about one quarter of the bar. Ifyour clay is cold and not pliable from beingstored in an unheated garage, try warming it inyour hands first. If that doesn't work, remove thelid from the container and place it in your microwavefor 10-20 seconds. Knead the clay into aball and pat it into a flat pancake shape about thesize of the palm of your hand.Speed Shine ® plays an integral part of theclaying process. It provides the lubricity the clayneeds to glide acrossthe paint. Working insmall areas, about 2'x 2', start by sprayingthe clay in your handAs the clay slides overyour paint, it picks upcontaminants that arestuck to the surface thateven polish can't remove!and then the two footsection with SpeedShine ® . Now, wipe theclay back and forthin a cross-hatch patternover the surface, making sure you keepyour speed up. You don't need to rub hard; theweight of your hand is usually enough pressure.A few passes will do it. If the clay starts to stick tothe paint, it's an indication that you need moreSpeed Shine ® on the paint. For larger specs of taror overspray you may need to make more passesand press down a little harder. As the surfacegets clean and the contaminants are removed,you'll feel the clay move more easily across thepaint. Wipe the area dry with a clean Micro FiberSpeed Shine ® Cloth. Now feel. Your paint's surfaceshould feel silky smooth! While doing anaverage size vehicle you will need three or fourcloths for wiping off the lubricant. Don't allowthe Speed Shine ® to dry on the surface. Workfrom the top of the car down, doing the lowervalances and the rear of the car last. These areastend to be the dirtiest. As you use the clay, thepatty will flatten out. After each two foot sectionknead the clay back into a ball and re-flatten.This keeps the contaminants suspended in theclay away from your vehicle's paint.Spray SpeedShine ® whilerubbing theclay overthe paintsurface.Clay showscontaminatesremoved.Your initial ball of clayshould do the entire car severaltimes unless your paint is verydirty. When the clay is lookingpretty grimy, discard it andtear off another piece. An eightounce bar should do your car10 to 15 times. If you see anylarge chunks of tar, dirt or sapin the clay, pick them out. Ifyou drop the clay, pick out thechunks and discard them sothey don't scratch the paint. Ifyou can't remove the grit, discardthat piece of clay. Whenyou store the clay, put it backinto its container, spray in a fewsquirts of Speed Shine ® to keepit moist, and seal the lid tightly.Paint Cleaning Clay can alsobe used with our 6" RandomOrbital using our Paint CleaningClay Pad. This allows you to get great resultswith less time and effort. The foam portion of thepad holds Speed Shine ® and the center has a cutoutfor the clay. Simply flatten out the entire claybar, place it in the cut-out, spray the pad, clayand the area on the car to be cleaned with SpeedShine ® . Place the pad in the machine and set iton the paint. Run the machine on a low speedsetting (1-2). It is important to keep plenty oflubrication on the clay and surface of the pad sothe clay moves freely over the paint. After eachsection, remove the clay, knead it and repeatthe process across the entire car. Again, work insmall areas and don't allow the Speed Shine ® todry on the surface. You may also use the pad byhand with our Adjustable 6" Foam Pad Holder.Paint Cleaning Clay works on any paintedsurface and is safe for all cured paints. You canalso use it on painted wheels, chrome bumpers,hard plastics and metal trim. Once you're donewith the clay you're now ready to polish out anyscratches or swirl marks you want to remove. Or,move on to waxing if the surface is scratch free.Car Care for the Perfectionist! ®33
Step FivePolishing…Our Versatile 10X Magnifier makes it possible to seecontaminants that are invisible with the naked eye.Examine Your PaintThere are many misconceptions regardingpolishing and what the term means. Simplyput, when you polish, you remove very thin layersof paint. To completely remove scratches, it isnecessary to remove thin layers of paint aroundthe scratch down to the same level as the baseof the scratch. In most cases you only need toremove microns of paint, which isn't even measurable.However, you need to be careful withthe polishes you choose since many polishes onthe market are more aggressive than you need.This is done to reduce the amount of effort toremove the scratch, which is never worth it whenrisking your paint. With our polishes, especiallyMachine Polish 3, the thickness of paint removedis not measurable, but you can see the scratchesdisappear! Polishes have varying degrees of verysmall particles which act like the sand on sandpaper.As the polish moves over a surface, theseparticles remove the material they are movingover. Ideally, you want a polish which is juststrong enough to eliminate or reduce the visibilityof the scratch. That's it. If your polish is tooaggressive, you remove more paint than is necessaryand risk putting additional scratches in thesurface. You don't have to worry about too much"paint removal" or "burning through" with ourentire product line.Our polishes are sold in various gradations.Machine Polish 1 is our most aggressive polish;however, it is about half the abrasiveness foundin other paint polishes. It's designed to removeheavy oxidation and scratches. Machine Polish 2is more mild than Machine Polish 1 and is usedfor moderate scratches and deeper swirl marks.Machine Polish 3, in most cases, is the mildestpolish you will need. It removes swirl marks,light scratches, towel marks, etc. I use MachinePolish 3 more than any other polish. If youFinger Tips And PalmUse your finger tips when evaluating thepaint surface. You have many more sensorynerves here than on the back of yourhand. If you have a lot of contaminants onthe surface, you will feel them and hear anaudible dragging noise from the paint.34
PolishingIf you've used otherproducts whichcontain silicone andsealants, our polishesand waxes may notadhere to your paintor will appear hazy.Use Paint Prep toclean the surface.Our Random Orbitals make short work of removinglight scratches and swirl marks; fast fun and easy!have dark colored paint, like black or red,Machine Polish 4 may be necessary to removethe minute swirl marks that are only visibleon those colors. It is the finest polish we offer(and the finest polish you will need). The abrasivenessof our Fine Hand Polish falls betweenMachine Polish 2 and Machine Polish 3 dueto the fact that your hand is not able to exertthe same pressure on the paint as an orbitalcan. You can vary the aggression you get whenhand polishing by using a Cotton Polish Pad(more aggressive) or a Orange Foam Polish Pad(less aggressive), but all of our Machine Polishesshould be applied using a Random Orbital andOrange Foam Polish Pad.Scratches are tiny grooves left in the surfaceof your paint and come from a variety of sources.Some of the sources are: dirt particles whichhave been dragged over the surface while wipingdown the car without the proper amount oflubrication; hard objects like articles of clothingrubbed against the paint; boxes left on the fenderor trunk; or the simple act of rubbing a fingerover a dusty dirty car. Inferior polishes, (trustme, I've tested many) when rubbed by hand ormachine, can put more scratches into the paintthan you originally had!35If the scratch is so deep that you can see theprimer paint or metal, or it goes through theclear coat on two stage paint, the only correctionis to use touchuppaint. If thescratch is not deepbut can be felt withyour fingernail, thebest way is to polishthe scratch in a perpendicularmotionto reduce the visibilityof the scratch.(Essentially it is notworth reducing theCar Care for the Perfectionist! ®Initial scratch beforepolishing and waxing.For deep scratches to beless noticeable, roundoff the "V" and "fill" thecrevice with wax.paint thickness to get down to the base of thescratch and eliminate it entirely.) If the scratchis less serious (swirl marks, toweling marks andautomatic car wash scratches), they are easy toremove. The idea is to remove enough paintaround the scratch so the bottom of the scratchis now level with the surface of the paint.PaintPrimerPaintDeep scratch through to primer.PrimerDeep Nothing scratch you can through do except to primer.useNothing touch up you paint.can do except usetouch up paint.
Step Five ContinuedPolishing…Our Random Orbitalsoperate in an orbitingmotion while alsospinning around.We also offer 3" and 6" Pneumatic Random Orbitalsfor those of you lucky enough to have a compressedair system in your garages.Why Machine Polishing?The best and safest way to polish out scratchesor remove oxidized paint is with a randomorbital machine. This is where many of youget scared. I know what you're thinking. Don'tmachines put those terrible swirl marks in mypaint? Yes, if you use the wrong machine andthe wrong polishes. I've developed a safe, fastand fun system that you can't mess up. But first,let's talk about polishing machines. The RandomOrbitals I sell are professional duty machines.They're perfect for the weekend user or the professionaldetailer. They have enough torque sothey won't bog down and stall like other randomorbitals, but they don't generate enough heat toburn through your paint. Direct drive polishers,on the other hand, are the ones you've heardall the horror stories about. They are normallyseen in paint shops and used by professionaldetailers. They rotate in a single action like adrill and operate under high heat and very highspeed conditions. Combine this with a heavypolish and/or a wool or cotton bonnet (evena foam pad!) and they will remove paint veryquickly and burn through the paint in thin areasand edges. You can also spot the work of oneof these machines by looking at the side of avehicle and seeing uniform buffing marks goingdown the side. The paint literally has uniformscratch marks everywhere. The owner neverreally sees these swirl marks when he picks upthe car after a detailing because they use fillersand glazes to cover them up. But after the firstwash the glazes and fillers are washed away andthe swirl marks appear!Our Random Orbitals operate in an orbitingmotion while also spinning around. Evenat the highest speed setting, the system I havedeveloped over the years is completely safe. YouOur Random Orbitals are a safe, fast and fun way toimprove the depth and clarity in your paint.36
Polishingcan still scratch paint with an orbital machine ifyou use the wrong bonnet and products. Withmy specially designed foam pads and my extragentlemicro polishes you can enjoy all the benefitsof machine polishing without the worry ofscratches or swirl marks. Less labor, better results.It is my opinion that there is no another method,by hand or machine that can perfect the paintto the level that our Random Orbital System canachieve. Period.Our high-quality 3" PneumaticRandom Orbital.Safe Machine PolishingCenter the foam pad on the orbital's backingplate and press down firmly so the pad issecured to the machine. Apply polish onto thepad and spread it around like you would buttera piece of bread. Cover the whole pad evenlywith a thin amount of polish. I like to use thedome cap on the bottle to spread my polish, butyour finger works as well. You don't need a lotof polish. If your polish is splattering when inuse, you've put way too much polish onto thepad. Place the pad on the paint surface, set themachine to speed 4 and turn on the machine.Starting in the upper left hand corner, spread thepolish across a2' x 2' sectionin a crosshatchpattern.The first passshould spreadt h e p o l i s hacross yourworking areaw h i l e a l s oWorking in this pattern ensures working someyou get complete coverage.Overlap the areas you are polishingso the results are even. into yourof the polishpad.Then, if necessary,increasethe speed to5. Polishingspeeds will varybased on thesurface condition,productand pad you areOur Orbitals have variablespeed motors. Polish at levelfour to five. Wax at two to three.using, so adjust accordingly to find what worksbest on your vehicle. I've found that in mostcases, speeds 4 and 5 are best for polishing.Continue polishing until the product has beenevenly distributed across the area and has almostdisappeared or if the polish starts to dry out andbecome chalky (you'll start to see a dust). This isusually between 6 and 8 total passes of the crosshatchpattern. Apply an even amount of pressureto the machine so the entire pad is touchingthe surface of the car. For the majority of yourpolishing you will only need a light amount ofpressure, but you may press down in areas thatneed more polishing. When you have finishedpolishing, turn off the machine while it is still onthe paint and lift off the paint as it slows down.Don't lift the machine off the paint without turningit off or you may spray product all over theplace or your foam pad may fly off the backingplate. Gently buff the excess polish off the surfaceusing a clean, Micro Fiber Polish RemovalCloth. These cloths are ultra soft and have a longnap so they lift and hold the polish away fromthe surface as you remove it. If the polish hasdried and is difficult to remove, do not use morepressure. A light misting of Pre-Wax Cleanser orSpeed Shine ® will soften it up to aid in removal.Choosing The Right PolishEven though my polishing system iscompletely safe, it is always best to only doas much polishing as necessary. This will avoidwasting product and time, as well as saving yourpaint from needless polishing. Begin with a verymild polish; I almost always start with MachinePolish 3. (The only exception is when I'm work-Car Care for the Perfectionist! ®37
Step Five ContinuedPolishing…Our Orange FoamPolish Pad is denseenough to hold thepolish close to the paintsurface while still being gentleenough as to not damage the paint.ing on a dark colored car with very few imperfections.Then I start with Machine Polish 4.)After your first application of Machine Polish3, examine the surface closely. If the scratchesaren't gone you may need another application,but always start with Machine Polish 3. It is thefinal polish that will remove many imperfections.If you would like to remove even more imperfections,use Machine Polish 3 one more time. It isthe most fool-proof way of polishing your paint.When you start with Machine Polish 3, it also letsyou evaluate what type of paint you have. Evenwith all of my years of experience, I never startoff with Machine Polish 1 or 2. Why? Becausepaints vary in hardness. Softer paints are easyto polish and you'll notice a dramatic improvementwith just one pass of Machine Polish 3 or4. Ultra-hard paints may require you to increasethe speed and bear down harder to remove swirlmarks.Sometimes you may need to use MachinePolishes 1 and 2 for deep scratches or heavilyoxidized paint. When using these products youmay see minute scratches in the paint causedfrom the granules of abrasive. This is normal.Remember, to remove a scratch, you have toget down to the bottom of the scratch, and thatmeans removing paint (microns at a time) inthe surrounding area. Too much polishing willeventually remove clear coats and/or base coatsso watch what you're doing, especially withMachine Polishes 1 and 2. After polishing withMachine Polish 1 or 2, always work in succession,finishing with either Machine Polish 3 or 4.For example, if you polish with Machine Polish1, follow up with Machine Polish 2, then MachinePolish 3.For new car finishes, or show cars that havetoweling marks and light swirls, Machine Polish4 is the polish to use. Machine Polish 4 has ultrafinepolish granules encapsulated into a formulawith more lubricity to polish any type of paint.Machine Polish 4 is the safest polish on the planetand was specifically designed for near flawlesspaint. You may also use it after Machine Polish 3,but in most cases it is really not necessary.After polishing, it is always necessary to followup with a wax or sealant. Polishing will perfectyour finish, but will not protect it from thefuture scratches or harmful elements. I prefer ourBest of Show Wax ® or our Carnauba Wax Stickfor incredible depth, color and clarity and ourPaint Sealant for long lasting protection. Continueon to the next section on Waxing to learnmore about these products and their application.Watch That CordWhen using a machine orbital polisher,drape the cord over your shoulder so asnot to drag it over your vehicle's paint.Keep both hands on the machine at alltimes and always start & stop the machinewith the pad on the paint surface.38
PolishingMachine BuffingFor years you’ve been asking me for a wayto buff polish from your paint’s surface bymachine. I’m happy to say this bonnet systemusing our Blue Support Pad and micro fiber PolishRemoval Bonnets works great. This systembuffs the excess polish from your surface easily,leaving your arm fresh for other things.Begin by placing the Blue Support Padonto your machines backing plate and wrapa Polish Removal Bonnet over the pad. Placethe machine onto your paint, set it to speed 4and turn it on. Work the bonnet across area toremove about 95% of the polish from the surface.For a final detail and to remove that last 5%,lightly mist Pre-Wax Cleanser or Speed Shine®and buff with a Micro Fiber Polish RemovalCloth. This will leave your paint clean and readyfor wax or sealant.Yo u r P o l i s hRemoval Bonnets canbe machine washedand cared for just likeall of your micro fibertowels. See the careinstructions onpage 60 of this<strong>Handbook</strong>.Polish Removal Bonnet fits over Blue Support Pad.Wax Removal Bonnet fits over Blue Support Pad.Blue Support Pad.Both Bonnets are easily removed for cleaning.Car Care for the Perfectionist! ®39
Step Five ContinuedPolishing…Hand PolishingIf you are still concerned about using an orbitaland you choose to hand polish the entire car,the process is the same. Use our Orange FoamPolish Pads for normal polishing or our CottonPolish Pad for more aggressive polishing alongwith our Fine Hand Polish. If you are workingon softer paint or a darker colored car, I alwaysrecommend using foam since cotton can bea bit too aggressive and may leave behindmicro scratches.Again, use the polish sparingly, work in smallareas and use the cross-hatch method. If youhave a deep scratch,the best way toremove it is to polishit out using perpendicularstrokesover the length ofthe scratch. Thechallenge with handpolishing is to keepOrange Foam Polish Pad.the pressure evenand the coveragethorough. As withmachine polishing, be careful around trim toavoid getting the polish in cracks, on rubber or inseals. As you work, the polish should almost disappear.If you're wiping off a lot, you are wastingproduct and making the job much too hard.Take your time when working by hand. It's hardwork and easy to get a bit tired, thus missingareas. Work in small sections. If you're workingon heavily oxidized paint, keep severalclean polishing pads handy and keep turningyour cloths, working with clean areas. Alwaysremove polishbefore itdries. Unlikewax, there isno reason toallow polishto dry. Therubbing iswhat doesthe work.Dry polish isCotton Polish Pads.very hard to remove. If it does dry, a light mistingof Pre-Wax Cleanser or Speed Shine ® will softenit up to aid in removal. You can get excellentresults by hand, but don'tthink you will removeevery swirl mark. The timeinvolved and the effort, isjust too great. There is stillno better way to a perfectfinish than with ourMachine Polishing System.Our 3" Orange Foam Polish Pad is perfectfor tight spaces and tricky curved areas.Clean and condition paintafter polishing and beforewaxing or sealing with ourPre-Wax Cleanser.40
PolishingSpecial Care For Clear Coat PaintMost new cars and many restored older carsare finished with a clear coat paint. In thepast, the final layer on cars was a pigmented,single stage, oil based paint. When polishing thiskind of paint you were working on the pigmentand saw it come off on your pads and polishingcloths. It gave you some working room and youcould see exactly what effect your polish washaving on your paint's finish.Newer technology paints are water basedfor environmental reasons and are muchColor Coat 1-2 milPrimer 2 milMetal 20 milSingle Stage Paint.Clear Coat 2-3 milColor Coat 1-2 milPrimer 2 milMetal 20 milClear coat protectsthe color coat. Carefulpolishing is required sodamage does not occurto the clear coat.harder. This is normallyreferred to astwo stage paint. Thefirst coat (on top of aprimer, of course), isthe color coat. This isprotected by a thickerlayer of clear polyurethaneor urethanepaint, providing protectionand gloss. Thecolor layer is verythin while the clearcoat is much thickerto provide the protectionwhile givingyour vehicle a glossylook. Many clearcoats contain a UVprotection to stop fading.While clear coats provide a great look, theyshow scratches more than a single stage finish.Why? Think of it like scratching a piece of glass.Every pit and scratch is noticeable, especiallyin black.If you don't know if your vehicle has clearcoat or single stage paint you can test by rubbingwith a white cloth and polish on an outof-the-wayarea. If color comes off, it's not clearcoated. The most important thing to rememberwith clear coats is to avoid strong abrasives. Thisincludes strong paint cleaners and absolutely norubbing compounds!Get your car care arsenal all lined up and readyto have some fun. No matter how old or new yourvehicle is, you can keep it in perfect condition andhave a ton of fun in the process.Paint GlazeGlazes are a product I avoided for a longtime because I'm of the mind-set that it isbetter to remove the imperfection than to coverit up. And, frankly, I couldn't find a glaze I liked.However, I finally developed a glaze that worksgreat and fills the void in your detailing arsenalfor older paints where you don't want toremove any more paint, even if it is microns, orfor times when removing scratches may takemore time than you have. Paint Glaze can beapplied with our Random Orbitals or by handusing our Orange Foam Polish Pads and buffedwith our Micro Fiber Polish Removal Cloths.The application process is similarto polishing. Apply it sparingly,but you can layer it in multiplecoats to hide more imperfections.Also, a glaze can beapplied before or after waxingor sealing. Just remember,glazes will wear awayafter a few washes, so onlyuse glaze when polishingisn't possible or as a finalprep before a show.Paint Glaze is designed to hidedeeper scratches and swirlmarks and is especially helpfulfor single-stage paint.Car Care for the Perfectionist! ®41
Step SixWaxing & Sealing…Carnaubawax flakesCarnauba WaxWaxing your vehicle is an important part ofpreserving its appearance. With propercare, there is no reason why original factorypaint can't last the entire life of your vehicle.The goal is to protect the paint's surface whileproviding color, depth and clarity so the paintlooks stunning.A carnauba based wax is still the best choice.But, if you only have time to wax your vehicleonce a year, a sealant is the better choice.Carnauba wax comes from the Brazilian plant,Copernica Cerifera, whichis farmed for its vegetablefat type of wax. Thiswax coats the leaves andactually swells when it getswet. This allows any moistureto roll off the leaf and bedirected down into the plant'sroot system. It also preservesany moisture within the leaf from evaporating.In its raw form, carnauba is as hard as a rockand needs naphtha, petroleum distillates andother oils to make it into a workable liquid orpaste form. Those that advertise "100% CarnaubaWax" are being less than truthful as that wouldeither come in the form of a brick (and as hardas one, too) or in the flake form. (The flakesare still rock hard and unable to be appliedto paint.)The barrier created by acarnauba based wax naturallyprotects your paint fromthe harmful UV rays from thesun, which is probablythe most harmful elementout there. Thoughnothing can create ashield against acid rainand toxic bird droppings, ourcarnauba based waxes do provideenough of a barrier for you to remove theseunwanted foreign deposits quickly before theycause damage to your paint. With its dense properties,the maximum amount of carnauba youcan put into a wax is about 50%. Any more andthe product becomes too hard to apply andbuff once it has dried. Our waxes contain themaximum amount of carnauba possible whileproviding excellent buffing characteristics.Easily apply our Carnauba Wax to your 3" or6" Red Foam Wax Pads.42
Waxing & SealingFor slight swirlmarks, One-StepSealant contains apolish. It lays downa protective sealantwhile it polishes.Paint Sealantprovides long-termprotection for youreveryday driver.Paint SealantCarnauba wax is oneo f n a t u re ' s m o s tcomplicated compounds. Itselements are so complex thatman, in his infinite wisdom,still has not been able toduplicate it. However, notall of us have time to waxour cars 3 to 4 times peryear as recommendedfor wax, so I developeda couple synthetic,polymer-based sealantsthat go on easy, look greatand last up to a full yearwithout needing to bereapplied. Paint Sealantprovides all the protectionyou need, yet stillprovides a high gloss finishthat you only have toapply once a year. It'seasy to apply by hand orwith our Random Orbitals,and even easier to takeoff with hardly any residue!One-Step Paint Sealant has asmall amount of polish toclean the paint and helpremove swirl marks.You won't believe thegloss you'll achieve andyour swirl marks will allbut vanish if you use itwith an orbital. Great forboats as well, since thesealant will withstandthe harsh weatheringmuch better than a carnaubawax.Wax Or Sealant?Which product shouldI select to protect myvehicles? Start by askingyourself some of thesequestions: Is this mybeloved weekend/show car/crazy in lovewith car, or is it my dailydriver that takes a lot ofabuse? Do I have timeevery quarter to waxmy car, or do I onlyhave just enough timeto wash and dry it onceor twice a month? Do Ipark outside most of thetime, or is the car parkedindoors at work and athome? Do I cheat and go through a car washevery once in a while, or do I hand wash myvehicles all the time? Do I expect the finish to beperfect, swirl-free with incredible depth, colorand clarity, or am I willing to have a glossy finishwith the majority of the swirl marks removed?Here's how to choose the best protection foryour situation.Select Best of Show Wax ® or ourCarnauba Wax Stick if you have timeevery quarter to wax, park the carindoors at home, use a car cover atwork and you never run it through anautomatic car wash. Best of Show Wax ® hasincredible depth, color and clarity. In addition,it also has a better filling capability than theCarnauba Wax Stick, so I prefer it for darkercolored cars. It will truly make your paintstand out in the crowd anywhere you go. OurCarnauba Wax Stick provides a bright shineand maximum protection while being veryeasy to apply and buff. Both are perfect waxesfor any show or concours event.Select Paint Sealant or One-Step Sealantif you park outdoors without a cover on thevehicle, only have time to wax your vehicleCar Care for the Perfectionist! ®43
Step Six ContinuedWaxing & Sealing…once a year, live in an area where industrial fallout is high and sometimes run it through a carwash. Both sealants provide comparable protection,but One-Step Sealant should be usedif you skipped the polishing stage and want toremove some light swirl marks while you applythe sealant. If you follow up with Spray-On Waxafter each wash you can relax, knowing thatyou're doing the right thing in terms of protectingyour paint for those daily driven cars andSUVs instead of ignoring them.I use our natural waxes, Best of Show Wax ®and Carnauba Wax for my cherished possessions.I use Paint Sealant with Spray-On Wax formy daily drivers that I still want to look awesome,but don't have the time to devote to their finish!Use both systems and enjoy the finest for yoursplit personality!One-Step SealantIf you plan on using our One-Step Sealant toprotect your vehicle, we recommend followingthe methods outlined in the Polishing sectionof this <strong>Handbook</strong>. Since One-Step Sealant has apolish property that removes light swirl marksas it seals, you will want to apply it with ourOrange Foam Polish Pad and buff with the MicroFiber Polish Removal Cloths. It does not need tosetup and dry like our waxes do, so you can buffimmediately after application.Clean and conditionpaint after polishingwith Pre-Wax Cleanser toremove all residue andprepare surface to acceptwax or sealant.Pre-Wax CleanserProfessional detailershave known foryears that you shouldclean and conditionthe paint after polishingand before applying wax or sealant. Minutepolish residue can remain on the paint surfaceand may be difficult to remove. I developed thisPre-Wax Cleanser so you can safely, quickly andeasily prepare the paint surface to accept waxor sealant. Made from a carefully blended combinationof citrus oil and surfactants, so it won'tharm the paint and is fast and easy to use. Simplyspray and wipe dry with our Micro Fiber PolishRemoval Cloths.Waxing With A Random OrbitalThere is not a better way to apply our waxesor sealants than with our Random Orbitals.The added depth, evenness of color and clarityare unsurpassed. Imagine being able to go overa particular area about one hundred times morethan doing it by hand. Applying wax by machineallows you to "burnish" the wax into every paintpore, so your wax protection will last at leasttwice as long.Start by centering a Red Foam Wax Pad onthe machine's backing plate and pressing it intoplace. Pour a nickle size amount of wax or sealanton the center of the pad (you don't needmuch). If you are using our Carnauba Wax Stick,spread a thin coat of wax across the bottom ofthe pad. If you apply too much product into yourpad it will be difficult to thin out during applicationresultingin unevena p p l i c a t i o nand difficultywhen buffing.Place the padonto the paintsurface, setthe speed to2 and turn onthe machine.Since you wantyour wax todry, you canWorking in this pattern ensuresyou get complete coverage. Overlapthe areas you are waxing sothe results are even.44
Waxing & Sealingbe sure to overlap the areas so you get completecoverage.By working the product into the panel andthinning it out, you won't be taking off as muchwith your towel and your elbow grease will bereduced substantially. Allow the wax to completelycure (usually about 3 hours) and buff theexcess with our Micro Fiber Wax Removal Cloth.If there are spots that are difficult to buff, don'trub hard. Instead, mist a little Spray-On Waxor distilled water on the area to help soften thedried wax and make removal easier.You can eliminate a lot of work by taking off thewax with our Wax Removal Bonnet and ourRandom Orbital. Use two or three bonnets duringthe process so not to allow too much wax to buildup on the bonnet.work in larger sections than you did when polishing.Normally, I start with half of a hood. Startin the upper left hand corner and work yourway across the area in a cross-hatch pattern.Your first pass is primarily to begin spreadingthe wax across the area. From there, I increasethe speed to 3 and continue working across thearea in the cross-hatch pattern until the wax hasbeen spread so thin you can barely see it. As youwork use a light amount of pressure allowing theweight and motion of the machine do the work.If you are having difficulty thinning the wax out,gradually increase the area you are working inuntil you are able to properly thin out the wax.Once you are finished, turn off the machinewhile it is still on the paint and lift it off the paint.Don't lift the machine off the paint without turningit off or you may spray product all over theplace or your foam pad may fly off the backingplate. Once you've finished applying waxwith your Random Orbital, you may still need tohand wax some tight areas where our 6" and 3"Random Orbitals cannot reach—like bumpers,grills, spoilers and around trim. When doing this,Machine BuffingYou can also use your orbital to buff wax!Our Wax Removal Bonnets are made witha high-loft micro fiber and work like attachingone of our Micro Fiber Wax Removal Cloths toyour orbital. Center a clean Blue Support Padon the orbital's backing plate and firmly pressinto place. Wrap the Wax Removal Bonnet overthe pad, set the orbital to speed 4, place themachine on the paint and turn on the machine.Work the machine back and forth and allowthe machine to remove nearly 90% of the waxresidue from your paint. You'll still need to followup with a light buffing by hand, but it will sig-Micro Fiber Wax Removal Cloths or 100% CottonBuffing Cloths work perfectly to buff wax.Car Care for the Perfectionist! ®45
Step Six ContinuedWaxing & Sealing…nificantly reduce the amount of work. Also, it isbest to have a bottle of Spray-On Wax or distilledwater close at hand since much of what is leftover is dried wax. A light mist and a quick buffwith your Micro Fiber Wax Removal Cloth willremove those spots with ease.Hand WaxingAgain, preparation is key to waxing. Youwant to be sure that you're applying wax toa clean surface. If you see anything other thanwax on your pad during application, you haven'tcleaned properly. Wash, clay and wax. In thatorder. If you need to remove swirl marks, thenpolish between the clay and wax steps.For hand waxing with Best of Show Wax ® ,our Carnauba Wax Stick or Paint Sealant, applywith a Red Foam Wax Pad. Cotton pads or cottoncloths work but these are more aggressive,soak up more product (creating waste) and mayactually induce small micro scratches. Be sureyour paint surface is dry and cool. Apply a smallamount of wax to your pad and wipe it on in athin coat using the cross-hatch pattern. A littlegoes a long way, so use sparingly. As you applythe wax, it should begin to disappear. If youare having difficulty thinning it out, graduallyincrease the section you are working on. Normally,each section should be about half of ahood. Allow the wax to setup and cure (usuallyabout 3 hours), then buff using a clean MicroFiber Wax Removal Cloth. For any areas that aredifficult to buff, mist the area with Spray-On Waxor distilled water to loosen up the dried wax.Foam applicator pads are the safest way to applywax, provide a nice even layer and waste less product,too.A 3" Red Foam Wax Pad is ideal for small areas andaround trim.Waxing Tips & TricksIf you are having a problem with hazing,smearing or a dull look after removing excesswax, here are some tips to help. Hazing usuallyhappens when you've applied too muchwax under a high humidity condition and themoisture is caught underneath the fast dryingcarnauba wax. The paint's temperature, beingcooler than the outside air, speeds up this processby allowing the top of the wax to hardenquicker. If this happens to you, you should letthe wax fully set up more before removing it.Another way to deal with it is to keep a bottleof Spray-On Wax or Speed Shine ® handy. Spritzthe surface and wipe it with a dry, clean MicroFiber Wax Removal Cloth. The excess wax willadhere to the droplets and be carried away withthe cloth. If neither of these tips work, it has beenmy experience that the paint has a paint sealantor a silicone based synthetic wax on it that iscausing a reaction with the natural carnaubabasedwaxes. If this occurs, you must strip off46
Waxing & Sealingthe old paint sealant or siliconebased synthetic wax with PaintPrep before applying one of ourwaxes or sealants. See the sectionon Paint Prep on page13 of this <strong>Handbook</strong>.If you want to enhancethe depth and clarity, applyseveral coats of wax. Alloweach coat to cure for at least12 hours. In preparation fora concours event, I once putsix coats of our Best of ShowWax ® on a finish. Anothertrick is to put a very thinlayer of wax on and let it setup for 3 hours. Then, without wiping it off, goback over the dry wax with another layer of wetwax by hand or with our Random Orbital. Allowit to haze, then buff. While this makes for a lot ofwork, the finish will be thick and rock hard.One of the most frequently asked questionswe get here at Griot's Garage is, "How doI remove dried on wax from my trim?" While itis best to avoidthis problemall togetherBeforeAfter a n d m a s kTakes the difficulty out ofremoving dried-on waxy o u r t r i mwith painter'smasking tapebefore youstart detailing,our Dried-On Wax Remover is specially formulatedto dissolve dried wax so you can easilywipe it away. Apply the product directly to thetrim using a cloth or sponge and wipe away witha clean, dry cloth. Heavy amounts of dried waxmay require multiple applications.Spray-On WaxSpray-On Wax is just that. It is meant to getyou from wash to wash with some additionalprotection and gloss. It is not meant to replaceyour normal wax or sealant. Think of it as a basewax enhancer. When used on a regular basisafter each wash, you will be able to extend thelife of your natural waxes and sealants. Applyit to a damp car that has just been washed. MistSpray-On Wax across the surface (the waterdroplets on the car will help carry it into allthe corners), then as you towel dry the car, thewax will be worked into the surface creating anadditional layer of protection.A slick wax removal trick!After using Best of Show Wax ® or CarnaubaWax on your vehicle's paint, let it set up.Then, once it's dry, spray a little Spray-OnWax onto the dried wax and easily wipeoff the excess.Car Care for the Perfectionist! ®47
Step SevenDressing & Details…Once you're done waxing, the next step is todress the vinyl, rubber and plastic trim andmake sure you haven't missed any of the easilyforgotten spots like the grooves in your grill orchrome trim. These tips will set you apart fromthe rest and put that final touch on your vehicle.Vinyl And Rubber DressingThe rubber seals around windows, doors,door handles and mirrors are exposed tothe environment and will be the first thing todeteriorate—long before your paint. The chalkywhite appearance or brown dulling of rubberindicates lack of care and attention. Our Vinyl &Rubber Dressing remains dry to the touch justminutes after application. Most other dressingswill remain greasy and attract dust and dirt forup to 24 hours! Our product is water-based andsafe for all rubber and plastic trim. Since mostof these places were cleaned during your carwashing step, I'll talk specifically about dressingtechniques. When applying any dressing, alwaysapply the product onto the applicator then usethat to apply it onto the trim. Never spray dressingsdirectly on the vehicle as this will result inuneven application and the dressing getting intounwanted areas.For large areas of hard plastic molding,trim, bumpers or grillwork, apply Vinyl & RubberDressing with a Blue Detail Sponge. Thesesponges hold the product on the surface toreduce waste and allow for perfect application.They've been sliced on the sides for better gripand control and keep dressing off your fingers,too! Tighter spaces require additional creativity. Agood option is our Detailing Stick System to usewith our detailing socks. Our pre-saturated Vinyl& Rubber Dressing Wipes are a great alternativeif you want to avoid using your good cloths forapplying dressing. If those options are still toobig for some of the nooks and crannies on yourcar, our Foam Swabs make a perfect applicator.Dip the swab directly into the Vinyl & RubberDressing and apply.Plastic Bumpers And TrimMany cars since the early 1980s have porousplastic bumpers and trim which dry outover time and can turn gray or chalky due tosun exposure, dirt, oils, silicone laden dressingsand/or grime. If Vinyl & Rubber Dressingdoesn't help, try our Bumper & Trim Recondi-Use Vinyl & Rubber Dressing on plastics, vinyl andrubber finishes. A little goes a long way and applicationis easy with our Blue Detail Sponge.Vinyl & Rubber Dressing Wipes are perfect for thecontrolled application of Vinyl & Rubber Dressingon window and door seals.48
Dressing & Detailstioner. This isa great productfor makingt heseBeforeareas looknew again.It works asa paint todarken theAfterplastic. Cleanthe area to be reconditionedwith our Paint Prep, dry andapply. The shoe polish applicatormakes it mess-free. Allowit to dry and you're done. Withsevere conditions, you mayneed to apply a second coat fora dark, even look. Maintain your reconditionedbumper with Vinyl & Rubber Dressing.With our 3" Metal Polishing Pads and 3" RandomOrbital, you can easily polish chrome and othermetal in preparation for a coat of wax.Caring For Chrome And Bare MetalWhen chrome comes back from the platersthere are absolutely no swirl marksin it. Yet, it's easy to put swirl marks in it withpolishes that are too abrasive. If your chrome isswirl-free and does not have any rust pits or corrosionsetting in, use Metal Polish. Its abrasivefreeformula cleans chemically to provide thesafest way to remove stubborn residue that a carwashing can't. Using a metal polish with abrasivewill leave swirl and buffing marks in otherwiseperfect chrome. Our Metal Polish also works torestore pitted chrome, remove rust specks and toCar Care for the Perfectionist! ®49Vinyl & Rubber Dressing is best applied with a BlueDetail Sponge or pop-up V&R Dressing Wipes.restore chrome that hasbeen neglected. To apply,clean the surface first withCar Wash. Use a WhiteFoam Metal PolishingPad, 100% Cotton Clothor 100% Cotton DisposableWipes. Apply MetalPolish and wipe gently, frequently turning yourcloth. Don't allow the polish to dry. Use a clean,dry cloth to remove any excess polish. Workin small areas. Use a horse-hairbrush to remove excess polishfrom cracks and seams. Followup with Best of Show Wax ® ,Carnauba Wax or Paint Sealantto protect the surface.Need to clean a very dirtymetal surface? Use our MetalCleaner. Simply spray onto thesurface, allow it to foam andwipe off with a clean cloth.Perfect for all metal surfaceson your vehicle like exhausttips and engine parts. In additionto cleaning, Metal Cleaneralso leaves behind a non-stickycoating that protects the surfacefrom fingerprints.
Step EightGlass Cleaning…Clean glass is something I've dedicated hoursof research and testing on to find the rightproducts and process to make this chore easywhile ensuring perfect clarity. In this section I'llgive you some tips and tricks for cleaning as wellas some great ways to remove water spots andother contaminants from your windows leavingyou with clear, haze-free glass.Cleaning GlassDirty, grimy, smudgy glass; it is a pet peeveof mine and, judging by many of the lettersI receive, it's your concern, too. Many of theplastics used in today's interior vent a stubbornchemical film which, combined with oils anddirt in the air, create a haze on the inside of glass.Besides being a driving hazard, it's just no funlooking through dirty glass.For crystal clear glass, start by sprayingWindow Cleaner on our Micro Fiber WindowCleaning Cloth or Lint Free Towel and saturatingit well. By spraying it on the towel, insteadof the window, you'll conserve product andthe mist won't fall on your newly dressed dash,doors and seats. Wipe the window with thesaturated towel to remove all the dirt, haze andother contaminants. Then, using a second, drywindow cloth, wipe the window dry removingany remaining window cleaner.For faster and safe glass cleaning use Glass PolishingPads on our Random Orbital.The exterior windows should be the lastthing you clean on the car. Spray Window Cleaneronto your window cloth, saturating it well.This will conserve product and keep the cleaneroff your paint and trim. Wipe the window cleanand follow up with a second, dry cloth just asyou did on the inside. When you are done cleaningyour windows, use the damp cloth, give it asquirt of Window Cleaner and wipe the edgesof your wiper blades. The rubber they are madeof is porous and traps oils, dirt and grime; smearingthem on your windshield. The WindowCleaner will remove this from your blades allowingthem to work better the next time it rains.This little tip will help keep your windshieldcleaner, keep your wipers clean and increasetheir life. I continue totest other formulas andmethods, but there isstill nothing better thanour Window Cleanercombined with ourMicro Fiber WindowCleaning Cloths andLint Free Towels.O u r W i n d owCleaner has no dyeor cover-up scent thatgets left behind onthe glass like otherwindow products. Inaddition, it does notcontain ammonia,so it won't damageyour tinted windows.Our crystal clearWindow Cleanerand Lint FreeTowels offer asolution forcleaning reallydirty windowsAlso available in ahandy pop-up wipe.50
Glass Cleaningour Micro Fiber Window Cloths I've used anultra tight weave to make it easy to remove all thewindow cleaner, dirt and haze without leavingstreaks behind. Neither of our towels will leavelint behind. Paper towels and newspaper (grandfather'sold way) are made with glues whichbreak down with cleaners and leave behind glueresidue and paper "lint". (Not to mention the inkfrom newspaper gets all over your hands.) If inkis getting on your hands you can bet it's leavingbehind a film on the glass as well. Make sureyou use proper window cloths when cleaningyour glass. It will give you better results, fasterand easier.Our crystal clear Window Cleaner and Micro FiberWindow Cloths offer the best combination for fast,easy window cleaning.Being alcohol-based it cleans effectively andevaporates residue helping to prevent hazingand streaks. And our Lint Free Towels? Theyare spun and woven from polypropylene, creatingan ideal window cloth that holds moistureand won't break down or rip. You alreadyknow the advantages of micro fiber, but withInside & OutWhen cleaning your windows, wipe in adifferent direction on the inside than youdo on the outside. I like to use side-tosideinside and up-and-down outside. Thatway, if there are any streaks left behind,you'll know which side of the glass theyare on.Cleaning Tinted GlassIf your windows are tinted with film (on theinside), use our Plastic Cleaner and a 100%Cotton Buffing Cloth. Even though our WindowCleaner is ammonia-free and safe for tint,our Plastic Cleaner is better because aftermarkettint film is made of Mylar, a plastic material.When cleaning tint, always wipe gently as theMylar film will scratch easily. Don't use any abrasiveproducts, like polish on your tint as it maydamage it.Window Cleaning ToolsYou and I both know window cleaning canbe a chore, soI developed acouple toolsto make thisjob easierfor all of us.Start by cleaningyour windshieldand rearwindow with ourWindow CleanerSet. This tool wasdesigned withOur WindowCleaner Setmakes it easier toclean all parts ofyour windows.Car Care for the Perfectionist! ®51
Step Eight ContinuedGlass Cleaning…a spade shaped head on the end of a handleto allow you to get all the "unreachable" areasof your windows. Those of us with tiny sportscars can finally clean our rear windows withease! The spade shaped head accepts microfiber bonnets for application and removal ofWindow Cleaner using the same process aspreviously recommended. Once all the hardto reach areas are clean, finish cleaning therest of your windows with Lint Free Towels andour Window Buddy.Glass Cleaning Clay removes contaminants androad film residue so you can achieve perfectlyclear glass.Just wrap a MicroFiber WindowCloth or Lint FreeTowel around ourWindow Buddy,then quicklyand easily cleanyour windows.Consistent, even pressure when wiping yourwindows is key to streak free glass. However, thisis something our hands just can't do. Wrap yourtowel around this useful tool and wipe your windowsclean. The soft, pliable backing will form tothe curves in your windows applying consistentpressure with every wipe. Two simple tools thatwill end your dirty window frustrations.Glass Cleaning ClayClay works great for cleaning any smoothsurface, so using clay to remove waterspots and other buildup from your windows isa no-brainer. Use our Glass Cleaning Clay alongwith Speed Shine ® just like you would on yourpaint. In addition to removing road films andwater spotting before it etches your glass, havingperfectly smooth glass will help your windshieldwipers last longer. After claying your glass,always follow up by cleaning it with WindowCleaner to make sure all residue is removed.What's that film?That smudgy film on the inside of yourwindows is from all the plastics used byautomobile manufacturers inside yourvehicle. Your body oils, over-application ofinterior cleaners and dressings, food andsmoke all evaporate and stick to the glass.Heat adds to the problem. Try keepingyour windows cracked often to reduce thisannoying problem.52
Glass CleaningPolishing GlassIf your windows have water spotson them, it is probably due to trace elementsof calcium and other minerals left behind afterwater evaporates. If left untreated too long theseelements can actually etch the glass permanently.I have a couple of solutions for you. Glass CleaningClay will remove mild water spots and pickupthe same contaminants that attach themselvesto your paint. If the clay didn't removethem completely our Glass Polish or Fine GlassPolish will do the trick.For small areas 3"Glass Polish Padsare available.Remove water spots and calcium deposits with ourglass polishes.You may apply either polish with a dampTerry Cotton Polishing Pad or, ideally, usingour Random Orbital and Glass Polishing Pads.Work in small areas and wipe the majority of thepolish off with a damp cloth, then use a drycloth for final buffing. A final pass with WindowCleaner should remove any remaining residue.The Glass Polishes work best when your applicatorpad is damp, as it is water-based. If yourglass is pitted or has deep scratches, these cannotbe removed with polish. I've yet to find aproduct which removes scratches in glass. GlassPolishes are safe for glass but should not be usedon tinting film which is applied to the inside ofwindows. Always test a small area first beforepolishing the glass entirely. There are somewindshields and mirrors that have a thin plasticcoating or a blue tinting that will come off orscratch. Glass Polish and Fine Glass Polish is foruncoated glass only!Window Cleaning TipAfter you've cleaned your windows use adamp cloth or towel and run it along yourwiper blade. It will remove contaminantsfrom the blade reducing any streakingwhen it's raining!Car Care for the Perfectionist! ®53
Step NineInteriors…Once you've finished the exterior, it's timeto move inside. The first step is a completevacuuming. Start with the headliner if it's a feltor fabric material. I don't vacuum the headlinerevery time, but it's worth doing a couple timesa year, if only toremove the headlice. Use a brushattachment tolightly pull outthe dust and dirt.Too much suctioncould causethe fabric to pullOur Yellow Scrubbing Padworks great on carpet &floor mats!or stretch. Don'tforget to cleanvents, dashes,consoles, andother nooks and crannies. The wood and plastictrim in most vehicles is covered with clear coat,lacquer or polyurethane, which is very easy toscratch. Our Boars Hair Detail Brushes will helploosen the dust from these areas before vacuuming.Working down, attack the seats next. Ifthe seats are leather or vinyl, use our soft Boar'sHair Detail Brush here as well to loosen the dirtand crumbs that aretrapped in the seams.For cloth seats, it'sbest to use the NylonCarpet Brush to getthe fibers raised sothe vacuum can pullout more dirt anddust. The floor matsshould be removed,shaken, and then thefibers roughed up aSoft Boar's Hair DetailBrushes make for perfectvent and crevice cleaningtools.bit with the Nylon Carpet Brush so the vacuumcan pull up debris deep down. If any stains orgrease spots exist, spray some Carpet Cleaneron them and scrub with the Nylon Carpet Brushor Yellow Scrubbing Pads. Wipe the spot witha damp towel to remove as much of the cleanerand foreign residue as you can. Continue toclean and dry the spot with a different, dry towel.I prefer to use our 100% Cotton Buffing Clothssince they are white so I can see how much ofthe dirt I am pulling up. Allow the floor mats andcarpet to air dry before returningthe mats to the vehicle.At this point use ourMicro Fiber Interior Clothsor Micro Fiber Cleaning Padsto completely wipe downthe rest of the interior. TheMicro Fiber Cloths workgreat for dashes, seat backsand doors, as they won'tleave behind any lint. TheSheepskin Wash Mitt alsomakes an excellent duster.The mitt doesn't just pushdust and dirt around butgrabs and holds onto it. Perfectfor the dash or rear windowshelf where it's hard toaccess the areas closest tothe windows.Everything you needto detail the interior ofyour car is in this greatInterior Kit!Cleaning And CaringConcentratedCarpet Cleaneris excellent forremoving stubbornstains.For Vinyl And PlasticsMost vehicles have some sort of vinyl andplastic in them. New vehicles have all sortsof different kinds of materials being used in the54
Interiorsinterior. While being very durable, these surfacesattract dust and dirt and hold on to oils fromyour skin and the environment. Thankfully, theyare very easy to clean. Always test a small areafirst as some of these new materials can react tocleaners. For example, the Nissan 350Z has a colorizedvinyl headliner, which, according to theowner's manual, cannot be cleaned. Always referto your owner's manualregarding cleaning interiorsurfaces.Saturate a cleancotton cloth with ourInterior Cleaner or betteryet, use our pre-saturatedInterior Cleaner Wipes.Wipe the surface, turningthe cloth frequently as you seethe cloth getting soiled. Removethe remaining Interior Cleanerwith a clean, damp cloth. Let thesurface air dry or wipe up theremaining moisture with a dryThe NylonCarpet Brushis perfect forfloor mats andcarpets wherea stiffer bristleis required.towel. Follow up by applying Vinyl & RubberDressing to all vinyl and plastic surfaces includingthe dash (on hard plastics, just clean and donot dress or dress very sparingly as these surfacesdo not allowthe dressing topenetrate). Useit sparingly andwork into thesurface so it hasa nice satin finish.You don'twant the vinylto appear wet orshiny. Especiallyon the dash as itWipes are ideal for cleaninginterior spaces, as they canbe used quickly and easily.will reflect lightonto the windshield,reducingvisibility. If youare slipping around on your seats, you've puttoo much dressing on. Avoid using dressing onpedals as they can become slippery and create ahazardous condition. Simply clean rubber pedalcovers with Interior Cleaner and allow themto dry.Caring For LeatherThere are two types of leather: vat-dyed andspray-on dyed leather. With vat-dyed leather,the color is obtained by immersing the hidein dye. With this process, the color penetratescompletely through the leather. With spray-ondyed leather, the color is "painted" on. While thisproduces a more even color, some of the naturalgrain of the hide is lost and the overall life of theleather is diminished. Normally a spray-on dyewill wear off at the stress points. (You may thinkthis is just dirt buildup, but on close inspection,the painted-on dye will be gone!) No matter howhard you try to clean these cracked areas, youcan't clean the area where the dye has crackedoff. If you own a European car most likely theleather is vat-dyed (yeah!). U.S. and Japanesemanufacturers tend to use the spray-on dyedleathers (boo!).Before treating any leather with Leather Careor Leather Rejuvenator, use Interior Cleaner onthe leather the same way you would on vinyl.In fact, Interior Cleaner is safe for all the surfacesinside your car. After you've cleaned the leather,examine it closely. If the leather is old, stiff,dry or cracking, our Leather Rejuvenator is yourbest solution. While it may temporarily darkenthe color, its penetrating formula will rejuvenateand soften the pores deep down in theWarm It UpOur leather care products will work betterif put in the microwave until warm.Likewise, warm the leather up, too. Thisopens the pores in the leather and allowsmore product to penetrate deeper. Let theheater run for a bit or park the car outsideto warm the leather.Car Care for the Perfectionist! ®55
Step Nine ContinuedInteriors…use very much; a little goes a long way. Allow theproduct to sit on the surface for several minutes.Using a clean cloth, wipe off the excess product.For a deep feeding of Leather Rejuvenator, applya liberal amount to the leather and let the productsoak in overnight, if possible. (SometimesI've found my hands work better as they keepthe product warm and I can massage it into theleather as well.) If you're not going to be drivingthe car soon, repeat the application of LeatherRejuvenator, if possible. You'll notice the leathergetting softer and softer with each application.Keep the windows cracked so any excess evaporatingproduct can escape.leather. After a few days the treated area willlighten a bit. Test a small area first to ensure youare OK with the look. If the leather is newer, useour Leather Care. Both products are applied thesame way. These products are different than thelanolin based leather products. First, our oils canpenetrate deeper than the lanolin-based leatherproducts, andif you haveany per foratedleatherour leatherp r o d u c t swon't leavebehind theMicro Fiber Interior Cloths aregentle on leather and fabric.white residuein all of theperforations.And don't worry about water getting on yourleather interior. It won't hurt it as most leatheris tanned in water. Apply Leather Care using aBlue Detail Sponge. Apply the product to yourapplicator and wipe the surface, rubbing theproduct into the leather. Another simple way toapply Leather Care is using our pre-saturatedLeather Care Wipes. They apply a nice amountof product in a controlled manner. Wear ourVinyl Aloe Gloves so the product doesn't get onyour skin. As with all our car care products, don'tCleaning FabricUse our Interior Cleaner on upholstery thesame way you would on vinyl and leather.It's safe to saturate the cloth and dab with a cleancotton towel. Avoid wiping back and forth. Formore aggressive cleaning our Nylon Carpet &Upholstery Brush should be used. Or, if youhave our 3" Random Orbital, our Yellow ScrubbingPads can be used. UseAvailable in a wipe-onor spray-on formula.56
Interiorson a low speed setting, like 3-4,to avoid creating uneven wear.You may use a wet-dry vacuum,a hair dryer or our Griot'sGarage Heat Gun on low settingto remove any excess moisture.Don't allow the fabric to get toohot. A final air drying is best.Keep the windows down allowingthe moisture to evaporate.vents. Or, pour some Leather InteriorCar Scent into a small plasticcontainer and let it sit in the carovernight. The next morningyou'll think Santa has left youa new car. If your interior issuffering from being a rollingfast food cafeteria and there isalways a lingering odor fromfrench fries, spilled milk, misplaceddiapers and wet pets,use Odor Exterminator ® . Thisproduct eliminates odors andeliminates musty, stale air. Iteven reduces noxious oil andgasoline fumes! It's non-toxic andenvironmentally safe. Tokeep odors down duringevery day use, placeone of our Stinky-Be-Gone ® bags under a seat.The granules in the bagsoak up smells keepingyour interior odor free.Wipe out any smellwith easy-to-use OdorExterminator ® .Leather Care Wipes are a convenient way to care foryour leather. They are pre-saturated with just the rightamount of product and they're easy to use.Oh, That Smell!If you like the smell of leather, try a few squirtsof our Interior Car Scent. Spray it under theseats after cleaning. Just a few squirts a weekwill keep your car smelling like new. I like tosaturate a small sponge or a piece of soft leatherand place it under the seats near the rear heaterStinky-Be-Gone ® will absorb any type of odor.Car Care for the Perfectionist! ®57
Step TenEngine Bay…Even if your vehicle is a 1970 Jeep, the engine canstill look spotless.clean and tidy engine lets you spotA developing oil and coolant leaks, allowsyour engine to run cooler and impresses theheck out of your mechanic. We have a greatassortment of cleaning products and tools for themany different finishes under your hood. I cantell you that a clean engine bay will ensure yourmechanic will take extra care when servicingyour vehicle. Additionally, a vehicle you're tryingto sell will sell faster and get you more money ifthe engine is spotless. With some regular attention,this needn't be a dirty, messy and time consumingtask.If you plan on doing an entire cleaning ofthe car, do the engine first and you won't have toworry about overspray onto your freshly detailedexterior. Our Engine Cleaner will remove waxfrom the vehicle's paint so protect those areasyou don't want affected or plan on rewaxing. Ifthe car is already clean, use painter's plastic tocover fenders, bumpers and the windshield.Cleaning The EngineStart by cleaning away any debris, leaves, pineneedles or stray rodents. Use compressed airif you have it or a brush. Protect sensitive partsin your engine from moisture by covering electricalconnections, distributors or carburetorswith plastic, using elastic bands to hold themin place. Clear plastic wrap works well, too, asit sticks to itself. Having the engine compartmentwarm makes the greases and oils softerand easier to remove during cleaning. If EngineCleaner steams up when applied, the engineis too hot. If it's too hot, cleaners and water willevaporate too quickly and may stain sensitiveplastics and painted metal parts. Not to mentionyou can burn yourself. If the underside ofyour hood is uncovered painted metal, you mayuse Car Wash or Engine Cleaner to clean it. Justremember to thoroughly rinse it well with waterwhen finished. If it has a sound deadening cover,brush the area off and wipe with a damp towel.Some under-hood coverings are almost felt-likeand attract dust. Use a vacuum brush attachmentand vacuum the surface.Spray the entire engine with Engine Cleanerand agitate the different surfaces with an appropriatebrush for that surface. Use a soft-bristlebrushfor painted areas and nylon for plasticparts. For areas that are really grimy, try our Oil &Grease Cleaner. It works wonders for removingyears-old gunk. Spray it on, let it sit, agitate andrinse. After the engine bay has been cleaned,gently flush with water. Do not use high pressurewhen rinsing as this can forcewater into areas where it doesn'tbelong. I remove my hosenozzle and allow the waterto gently flow. Once rinsed,blow dry with compressedair or a blower. If you don'thave compressed airor a blower, removethe plastic coveringsyou put on and dryall the accessibleparts with a cleanOil & Grease Cleanermakes short work ofremoving grease, gunkand grime .58
Engine Baytowel. Start the engine and allow the heat to aidin drying.Dressing The EngineYour car looks impeccably maintained on theoutside—why not do the same under thehood? When the engine is totally dry, and free ofgrease, spray Engine Bay Dressing on all plasticand rubber parts. It will leave a clear, thin, semipermanentcoating without yellowing that willgive all of your hoses and wiring looms a "factorynew" look and restore tired looking black plasticparts instantly. It makes multi-colored wiringlook incredibly vibrant! Engine Bay Dressingwill repel dust and make "engine wipe downs"a breeze. If you show your car, let this be yoursecret for a fabulous engine compartment.Vinyl & Rubber Dressing may also be usedon all rubber hoses, connectors and parts toenhance their appearance. However the look isnot as permanent as Engine Bay Dressing. Usethe same application method as the interior,spray a cotton cloth or Blue Detail Sponge andwipe. Our pre-saturated Vinyl & Rubber DressingWipes are a favorite of mine in the enginebay because they make dressing all of the varioussurfaces a breeze. You may opt to use onlyomit the Engine Bay Dressing application, usingonly Vinyl & Rubber Dressing, however, theEngine Bay Dressing will really make your oldfaded plastic parts and wires stand out.Wipes are ideal for precise, controlled application forcleaning and dressing.Cotton & Foam Detailing Swabs work incredibly wellwhen detailing those hard-to-reach areas.Our EngineDetailingKit will helpyou achievefantasticresults in yourengine bay.Car Care for the Perfectionist! ®59
After The DetailClean Up…Once you have finished cleaning up your car,you are usually left with a pile of dirty towels,pads saturated with product and overall dirtinessaround the garage from all the crud you justcleaned off your car. Proper care and clean up ofyour detailing supplies will help your productslast longer and leave everything ready for yournext detail therapy session.Towel CleaningDue to their unique properties, micro fibertowels require special care. Machine washyour micro fiber towels with liquid detergent. Donot include any bleach or fabric softeners. Add in2 to 4 ounces of Micro Fiber & Foam Pad Cleaner(for a 5 gallon load) to helpbreak down thepolish and waxbuildup. Donot wash microfiber with anyother fabrics;wash micro fiberonly with micro fiber.Perfectly suitedfor all types ofjobs around thegarage, shopand home.After washing, tumbledry on a high heatsetting without anydryer sheets. Following thisprocess will ensure yourtowels are properly cleanedand stay free of any buildup from other nonmicrofiber towels or cleaning agents.Pad CleaningThoroughly cleaning your pads after eachuse is very important. Old, dried polish, waxor sealant buildup will decrease the life of yourpads and may also become abrasive and couldscratch your paint if not removed from the padbefore its next use. It is always best to wash yourpads shortly after use; this will make the cleaningprocess much easier. If you aren't able to cleanthem right away, soak them in a bucket of warmwater mixed witha few ouncesof Micro Fiber& Foam PadCleaner. Cleaningis simple,spray MicroFiber & FoamPad Cleanerdirectly onto thesurface of thepad and massageit in withyo u r h a n d s .(I like to wearnitrile gloves tokeep my hands cleanand dry.) Rinse thoroughlyunder warmwater wringing theIncrease the life andrevitalize your MicroFiber Cloths and FoamPolish and Wax Pads.pad out until the water runs clear. Dry the pad bystanding it on its side. Don't store a wet pad in asealed bag as it will mold.Garage CleanupDetailing your car can create quite a messaround the garage, and having a cleangarage creates a nicer environment; it is also alot safer. A mess on the floor can make for someinteresting falls! I always start by putting everythingaway. All your towels and pads on dryingracks or in the cabinet, tools back in their drawers,garbage in the garbage can, etc. From there Imove to wiping down all my cabinets and worksurfaces with Surface Cleaner and our MicroFiber Value Cloths. Finish with the floor. Beginby sweeping the floor to rid it of any loose dirtand dust. In most cases you won't need to do afull mopping, but our Micro Fiber Mopping Systemalong with Surface Cleaner and Oil & GreaseCleaner (for any oil spots) is perfect for cleaningup any spots on your floor. A clean garageensures you always… Have fun in your garage! ®60
Clean UpWhether you have a small coupe, amotorcycle, or even a massive landyacht,you'll enjoy them all better ifthey look great... so get out there andhave some fun detailing!1954 Bel Air Station WagonCar Care for the Perfectionist! ®61
Keeping UpMaintenance…Tending to your car shouldn't stop after you'vewashed and waxed it. In fact, you can reducethe frequency of your washes and waxes byremoving dust, bird droppings and tree sap ona daily basis. I carry a small, 8 ounce bottle ofSpeed Shine ® and a Micro Fiber Speed Shine ®Cloth or 100% Cotton Buffing Cloth in my trunkfor emergency clean-ups. Bird droppings canetch your paint in a matter of minutes; so removethem fast. Spray some Speed Shine ® (or waterif you don't have anything else) on the droppingand allow it to loosen it up. Very gently,wipe away the mess. Birds eat seeds, sand andwho knows what, which may be great for theirbowel system, but these elements will scratchyour paint. I also carry a small bottle of WindowCleaner and some Lint Free Towels for fast, onthe-roadwindow care. Both Speed Shine ® andWindow Cleaner come in convenient pop-upwipe containers as well and are perfect for onthe-roadcleaning.Repairing Rock ChipsYou can repair those annoying rock chipsand deep scratches that have gone downto the primer. Here's how. Start by purchasingthe correct factory touch up paint from yourcar dealer. Most cars have a paint code insidethe engine compartment. Your dealer's partsdepartment can help you with this. Most touchuppaints come with a built in applicator brush.The problem is these brushes are more suited topainting your toenails than applying the properamount of paint to a small chip or scratch. Again,preparation is key.Clean the area, removing any oil, grease, dirtand old polish and wax. Use Paint Prep to stripaway old wax and grime. To fill in paint chipsand enjoy pinpoint accuracy and great paintflow, use our Touch-Up Paint Applicators. Youcan bend the plastic handle for hard to reachspots, or give you a better angle to apply paintto the chip. You'll even be able to soak up paintwith the tips if you've over-filled your chip. Dipthe end into your touch-up paint and touch thechip gently with the Applicator. If you over-fillthe chip, use a clean Applicator to dab up theexcess paint. If you have clear-coat paint, applythe pigment (color coat) first, let it dry and fol-Perfect paint application every time with ourTouch-Up Applicators.62
Maintenancelow up withthe clear coat.Try to avoiddriving yourvehicle for atleast 24 hoursafter makinga repair andwait aboutA Paint Syringe delivers theperfect amount of paint.two weeks before applying wax or polish. Wantto go to the next level of repair and create asmooth and almost invisible repair, read on.Scratch RepairDeep chips, nicks and scratches or to smoothout the above chip repair, requires a littlemore work. Prepare the surface as described inthe previous section on chip repair. Fill the areawell with paint so the repaired area is above thesurface of the good paint. Allow the paint tocure for 48 hours or more so it is completely dry.Don't hurry up the process with a hair dryer orheat gun. Now you'll want to level off the paintsurface.Purchase some 2500 grit wet/dry sandingpaper. Soak it in water overnight. Find an eraser.(The pink kind that is slanted on each endand is about 3 ⁄ 4 " x 2" long.) Place the sandingpaper around the eraser. Now wet the area to beworked with clean water. You can also use a bitof Car Wash for extra lubrication. Keep the areawell lubricated by flushing with clean water duringthe entire process. Start by gently going backand forth. What you are trying to do is bring theraised level of the chip repair down to the levelof the paint. Go slowly. Some of the surroundingpaint will begin to look dull. Don't worry, you'llbe able to correct this later. Try to work only onthe area you've touched up. Dry the area and feelit with your finger tip. If it's still raised, work somemore until it's flush.Finally, use our Fine Hand Polish or MachinePolish #3 to bring back the paint's luster. Followup with wax and your finish will look new again.Chip And Scratch PreventionThis clear, protective shield works excellentat protecting painted areas that are moreprone to chips and scratches. I cringe every timeI hear a rock glancing off my hood. I've had thisprotective shield on the front of my car for yearsnow, and I could peel it off at any time and thepaint would still look brand new. Use it on frontends, air dams, around tire wells, inside doorjambs,along door sills andon painted bumpers. Wealso sell a clear protectiveshield for headlights andfog lights.Simply clean and preparethe area to be protectedwith Paint CleaningClay and Fine Hand Polish.Cut the material to thelength required and warmit up with a hair dryer orthe Griot's Garage HeatGun. This makes it morepliable and easy to workwith. Spray the surface tobe protected with the PositioningSpray. This allowsyou to move the materialinto place. Avoid touchingthe adhesive backing as itis extremely sticky and theoils on your fingers willmake an imprint on thebacking. Use the squeegeewhich comes with thespray and smooth out thesurface. Any remainingbubbles or spray will disappearafter 24 to 48 hours.It's available in 2" or 4"widths, 12 mils thick. Nowyou can at least enjoy yournext ski trip without worryingthat every little rock youhear is damaging your paint.Easy applicationprotectsany paintedsurface fromrock chips andscratches.Car Care for the Perfectionist! ®63
Keeping Up ContinuedMaintenance…Quickly and easily fill and repairchips and cracks in your windowswith our Windshield Repair Kit.Window Chip RepairThere's nothing like driving down the roadwhen... "PANG!"... Followed by a few wordsyou wish your children didn't hear you say. Thedreaded rock chip in the windshield. To keeprock chips from becoming large cracks acrossyour windshield,theymust be dealtwith immediately.Evenwaiting a fewdays can betoo long. Havinga professionalrepairyour chip canbe expensive,and it is a verysimple process that you can do yourself. We sellan excellent Windshield Repair Kit that includessome simple, step-by-step instructions. Keepone in your glove box or garage so you canrepair chips immediately.Fuel System CareGenerally there are two schools of thoughtwhen it comes to preparing your vehicle'sfuel system for storage: 1) Fill the tank with freshgas, or 2) Run the car until the tank is nearlyempty. The problem with both of these lines ofthinking is they don't takeinto account your fuel lines.Fuel sitting in your systemfor longer than twomonths starts an oxidationprocess that willeventually turn into varnishand clog your fuelsystem. Griot's GarageFuel Preservative willchemically isolate theoxygen, preventing theoxidation process, and will also neutralize corrosivecompounds that can cause rust to form inyour fuel system.Cooling System CareThe prime ingredient inantifreeze is ethyleneglycol, which chemicallybreaks down over time andeats away at cooling systemcomponents. If old coolantis left sitting, the acidscan damage your coolingsystem and increasethe chances of leaks.Since many vehicles thataren't driven often don'tsee too many miles it isn'talways necessary to flushyour entire cooling system.Instead, you can addCorrosion Inhibitor to Untreated metal inyour cooling systemyour coolant to neutralize quickly builds upexisting acids and stabilize corrosion.your antifreeze.Battery CareSome of us have cars that don't get driven toooften and the last thing we want to hearwhen firing up your engine is the dreaded clickclick,but we've all found ourselves in that position.Ensuring that your battery stays chargedduring the storage will prolong the life of yourvehicle's battery. Battery management is especiallyimportant in modern vehicles that havesophisticated electronics (like navigation oralarm systems) that are constantly draining thejuice. But any car will benefit from keeping acharged battery. I skipped this step once andended up needing to replace my battery. Makesure you choose a battery management systemthat monitors the level of charge (to avoid over-64
MaintenanceProlong batterylife by using theBattery ManagerIV and enjoy easilystarting your lesserdriven vehicles.charging), which is something traditional tricklechargers don't do. The Griot's Garage BatteryManager IV works with 6 volt and 12 volt gel-cell(AGM) and standard (STD) lead-acid batteriesand has a simple "set it and forget it" design.Tire Care During StorageFlat spots can develop in your tires quickly,and expensive rubber is not somethinganyone wants to replace more than necessary.Avoiding the tha-dunk tha-dunk of flat spottedtires is easy. The traditional method of puttingyour car up on jack stands still works reallywell but can be a bit of ahassle if you ever needto move the car. This iswhy our Flat Spot Stopperramps were created.These ramps weredeveloped to cradleyour tires and distributethe vehicle's weightevenly when parked. Need to move the vehicle?Just drive right off! Well worth the investmentif you have a tight storage space or store yourcar often.Dealing With RustThere are two ways youcan approach rust;remove it or neutralize it. Ifpossible, it is always bestto remove the rust completely,and our RustRemover is perfectfor that. It canremove rust fromany metal surface.Immerse the rustypart, let it sit andrinse clean. Won'tharm copper, brass,aluminum, rubber,plastic or vinyl.Fast, simple and effective.If the rust is in an unnoticeablearea that will either beBeforeAfterImmerse the partin Rust Remover toclean off oxidation.covered up or painted (like theunderside of your vehicle) overand you cannot remove the partto soak it in Rust Remover, neutralizingit is your best option.Our Rust Converter quickly neutralizesand stabilizes rust so it can be painted.Just knock off any loose rust, apply with a brush,roller or sprayer and you're done. The barrierblocks oxygen and water from re-attacking thesurface, so the rust is stabilized and stopped. Itcan then be top coated with latex, epoxy, enamel,polyurethane or acrylic paint.BeforeAfterQuickly and easily stopsnew rust from forming,seals the metal andbecomes a clean, paintablesurface.Car Care for the Perfectionist! ®65
Fun In Your Garage WithMotorcycle Detailing…Motorcycles are fun to ride and a challengeto detail. They require an extensive line ofcleaners, degreasers, bug and tar removers, polishesand waxes as well as specialized (and notso specialized) cleaning tools. Serious motorcyclistsknow the importance of properly maintainingtheir bikes. Once a year, during the winter Igo out to the garage and spend a couple of dayscleaning and detailing my motorcycle from topto bottom. The levels of commitment can varydepending on the willingness and ability of thedetailer. For me, cleaning my motorcycle alsoprovides an opportunity to look for signs of wearand potential problems. It's a lot easier to checkfor leaks on a clean surface than a dirty one.I've broken down the different areas of cleaning:• Engine and Drive Chain• Tires, Wheels and Brakes• Frame, Suspension and Gauges• Seat and BodyworkWhere To StartFor this discussion our subject will be a modernsport bike. Most sport bikes use aerodynamicallydesigned body panels to help cutthrough the wind by covering the engine andframe. To start I like to remove all the bodypanels including the gas tank and seat. Neverattempt to perform service-related work on yourbike unless you have the knowledge and abilityto do it safely and properly. If you do notfeel comfortable removing your bodywork, youmay choose to skip this step. Because bodypanels are painted surfaces, care must be takento ensure that these pieces don't get scratchedor damaged during removal or cleaning. Ifremoved, these panels should be placed in asafe area away from the bike during cleaning. Iprefer to lay the panels on a shelf using a coupleof Micro Fiber Shop Towels to keep them fromgetting scratched. Make sure all the fasteners areproperly stored in a spill-proof container to keepthem from getting lost. I like using zip-lock bagsor magnetic trays. If needed, make notes or asmall drawing on fastener location.Engine And Drive ChainTypically the engine and drive chain getthe dirtiest. Oil leaks can easily spread tonooks and crannies. Chain lube can spread tothe engine, frame and bodywork. A clean andtidy engine lets you spot developing fluid leaks,allow your engine to run cooler and impress theheck out of your mechanic. I found that whenyou take your motorcycle in for service and thee n g i n e i sspotless, them e c h a n i ctakes extracare duringtheir service.It is bestto clean yourengine whenit is warm toGriot's Garage has products to helpyou detail all the various, intricatesurfaces on your motorcycle.the touch.This makesthe greasesand oils softerand easier to remove during cleaning. If thecleaner steams up when applied, the engine istoo hot. I start by spraying Engine Cleaner all66
Motorcycle Detailingaround the engine and lower frame and usingOil & Grease Cleaner in areas of heavy buildup.Use a soft brush or sponge to scrub large surfacessuch as engine cases, valvecovers and the lower part of theframe. Small brushes work greatin tight areas between coolingfins, around the carburetorsor throttle bodies andareas between the frameand engine. I really likeour Boar's Hair Brushand Detailing Stick Systemwith our Micro FiberSocks. Brass brushes workgreat at cleaning naturalaluminum parts and help remove corrosion.Be careful as many aluminum parts are clearcoated and the brass can scratch or remove thiscoating. After you agitate the Engine Cleanerwith a soft brush, gently flush the engine withwater. You may need to go back over heavilyLube That ChainMost people improperly lubricate thedrive chain by spraying the back of thesprocket down the middle in the area ofthe rollers. The chain rollers actually needvery little lubrication. Chain wear is thegreatest at the area where the pins holdthe inner & outer side plates together. It's"pin" wear that causes a chain to stretch!The correct way to lubricate a chain is tospray just above the chain at the bottom ofthe sprocket. This allows the lube to flowbetween the side plates and into the shaftof the pins. Make sure you spray both theinner and outer sides of the chain. It's bestto apply chain lube on the night before aride to allow enough time for the grease topenetrate into the roller. Excess chain lubeshould always be cleaned to prevent greasingup your motorcycle.Apply Engine Cleaner when the engine is warm tothe touch. This makes the greases and oils softer andeasier to remove during cleaning. For heavy build upuse Oil & Grease Cleaner.crusted areas with additional Engine Cleaner orOil & Grease Cleaner for really tough spots likedried chain lube or asphalt residue. Take careto avoid prolonged rinsing of electrical componentssuch as engine sensors and controlmodules as this could cause an electrical shortcircuit. Many bikes use weather resistant connectionswith special seals, however, it may benecessary to unplug connectors to help dry thecontacts. Avoid using pressure washers or highpressuresprayers as they can force dirt and waterinto seals, causing premature bearing wear orengine damage. Take care when spraying wateraround the air filter or air box. Once the engineis cleaned, I like to use our Air Blowers to removelarge areas of water. Compressed air works well,however, you need to be careful not to forcetoo much pressure around seals and gaskets.After air drying I like to finish by using our MicroFiber Cloths and Foam Swabs. For me this iswhere the fun really begins. I can spend hourscarefully cleaning every nook and cranny, makingsure every spec of dirt and grease is carefullyremoved from the engine. It's amazing howmuch surface area can be found on such a smallengine. Your level of commitment may differ.Many of the newer motorcycles today have lotsof plastic covers over engine parts. After you'vecleaned and dried them, wipe the plastic with alight coat of our Vinyl & Rubber Dressing. They'llCar Care for the Perfectionist! ®67
More Fun In Your Garage WithMotorcycle Detailing…look new and be easier to clean next time.During a ride it's not uncommon for somechain lube to fling out and stick to various partsof your motorcycle. This greasy substance canbe difficult to remove. Our Oil & Grease Cleanerworks great for cleaning this from all these areaslike around the sprockets, engine case, swingarm, exhaust or bodywork. This is also a goodtime to clean and service the chain. Avoid usingharsh chemicals like brake cleaner or carburetorcleaner as these products could damage theO-ring. I use an old toothbrush along with a100% Cotton Buffing Cloth to clean the chain,however, there are other aftermarket cleaningtools designed specifically for this task. Once thechain is cleaned it's a good opportunity to checkthe tension and adjust if needed. It's interestingto note that chains have a surprising numberof parts. The roller turns freely on a bushing,which is attached on each end to the sideplate. A pin passes through the bushing, and isattached at each end to the side plate. A qualitystreet bike chain uses O-rings between theplate and roller to help seal out moisture andcontaminants. Your typical chain lube comes inaerosol form. Solvents are mixed with specialgreases to help penetrate the O-ring and bushing.These solvents evaporate, leaving behindthe grease that lubricates the inside of the pinand roller. Properly applied, chain lube helpsmaintain the service life of your chain. Excesschain lube should always be cleaned to preventgreasing up your motorcycle. I prefer applyingchain lube on the night before a ride to allowenough time for the grease to penetrate intothe roller. Most people improperly lubricate thechain by spraying the back of the sprocket downthe middle of the chain in the area of the rollers.The chain rollers actually need very little lubrication.Chain wear is the greatest at the area wherethe pins hold the inner and outer side platestogether. It's "pin" wear that causes the chain tostretch! The correct way to get the lubrication tothe pins is to spray just above the chain at thebottom of the sprocket. This allows the lube toflow between the side plates to get to the shaft ofthe pins. Make sure you spray both the inner andouter sides of the chain. I also take a good lookat the sprockets, especially the rear sprocket. Ilook at the teeth and check to see if the crown ofthe tooth is starting to get sharp, indicating wearfrom a loose chain. If the root of the sprockettooth appears elongated, this indicates a chainthat's too tight. Always follow the manufacturerrecommendation on proper chain tension foundin the owner's manual.Proper RinsingAvoid using pressure washers or highpressuresprayers to clean your motorcycle.They can force dirt and water into seals,causing premature bearing wear or enginedamage. Take care to avoid prolongedrinsing of electrical components such asengine sensors and control modules asthis could cause an electrical short circuit.Many bikes use weather resistant connectionswith special seals however it may benecessary to unplug connectors to helpdry the contacts.68
Motorcycle DetailingTires, Wheels And BrakesTires and wheels come in close contact withthe road helping to pick up oil and debris,spreading it to your bike. In addition, the brakesgive off dust that collects on tires and wheels. Ifleft unattended, brake dust can etch the paintedor polished surface of your wheels and turn yourtires brown. Specialized cleaners are necessaryto remove dirt and road grime along with brakedust. I may be going alittle over the top, but Iprefer to remove thewheels to properlyclean them. A sturdyfront and rear wheelstand is a must if youremove your wheelsfor cleaning. Even ifyou keep your wheelsattached to the bike, aproper wheel standcan be used to helprotate the tires to gainaccess to all areas ofthe wheel. Start by rinsingthe wheel and tirewith water. This helps toWheelScrubbingBrushesmake great cleaningtools for your bike.float dirt and contaminants from the surface inpreparation for cleaners. I use Wheel Cleaner orChrome Wheel Cleaner to help remove brakedust and road grime from wheels. On paintedalloy wheels I use a combination of cleaningtools. For large areas I prefer our Three-FingerDetail Mitt. For tighter areas around brake rotorsand valve stems I use our Wheel ScrubbingBrushes. Rinse with plenty of water and drywith a Tim's Dirty Spots Micro Fiber Wipe DownTowel. On painted wheels I use Fine Hand Polishto help remove scratches and Paint Sealant toprotect the finish.To clean the tires I found our Rubber Cleanerand our Yellow Scrubbing Pads work welltogether. I go so far as to clean the tread. It's notuncommon to find bubble gum or cigarette filtermaterial stuck to your tires. Soapy cleaners alsohelp you spot air leaks from nails or screws.Make sure to flush the tires with plenty of waterto remove any cleaner residue. Once dry, useour Rubber Prep to remove any silicones, oilsor greases that have built up in the rubber. If notremoved, these can be dangerous when leaninginto a corner. I know the cruiser crowd likes touse rubber dressing on the sidewall. That's fine ifyou seldom lean the bike over when cornering.On a sport bike it's best to avoid tire dressing as itcan lead to adhesion issues followed by crashing!Brake calipers require careful attention.Avoid using harsh chemicals like brake cleaneras it can stain or remove paint from forks andwheels. I use our Wheel Cleaner and a WheelScrubbing Brush with plenty of water to helpclean and rinse. I even go so far as to removethe brake pads and calipers so I can clean anddetail every part for a show room finish. Thisalso allows me to check the pad thickness forThree-Finger Detail Mitts are soft, pliable and can getin to all those tight spots that a brush can't. Great foryour car's wheels and your bike's.Car Care for the Perfectionist! ®69
Motorcycle DetailingForks are more accessible however the areabetween the brake caliper mounts and axle canbe difficult to access. I found that these areastend to receive more brake dust buildup thanroad grime. For this reason I use Wheel Cleanerand a Wheel Scrubbing Brush with plenty ofwater to help clean and rinse the dirt away. Forbug stains and baked on bits I use 3M AdhesiveRemover on a towel or cloth. Metal Polish andour 100% Cotton Disposable Wipes can be usedon standard (non-coated) fork tubes. For coatedfork tubes (titanium nitride, etc.) I recommendonly using a clean dry cloth.The area around the handlebars and gaugestend to collect a fine film of dirt and road dust.I start by using Speed Shine ® along with MicroFiber Speed Shine ® Cloths to clean large areasRemove tar, grease, oil and adhesives quickly andsafely from any paint surface.of dust and dirt. Our Boar's Hair Detail Brusheswork great for the levers, switches, aroundthe wiring harness, headlight area and hard-toreachplaces behind the gauges. It's best to usethe Boars Hair Brush dry because it helps tokeep the bristles clean and prevents scratching.Once the dust is removed Plastic Cleaner is usedon windscreen and plastic gauge faces. I followup with some Plastic Polish to help removeswirl marks and fine scratches. Window Cleanerworks great on glass gauge faces. Vinyl & RubberDressing works great on black or natural plasticand rubber bits, but avoid using it on the grips. Iprefer cleaning the grips with Interior Cleaner.Road film dries leather. Keep it clean and conditionedfor years of use.Seat And BodyworkMany motorcycle seats are made from vinylor leather. I start by using Interior Cleaner.You'll be amazed at the dirt you remove. InteriorCleaner can remove aftermarket dyes, so test asmall, out of the way area to make sure it doesn'tdiscolor your seat.For leather I like using Leather Care becauseit's a highly concentrated liquid that penetratesdeep to replenish the natural oils of the leatherfibers. It works much better than the othergreasy, lanolin-based products on the market. It'seasy to use, and essential for a long, supple lifefor your fine leather. Use sparingly as a little goesa long way. Leather Care does contain a cleanerthat can remove aftermarket dyes.Brake Fluid ChangeMost motorcycle manufacturers recommendhaving your brake fluid replacedabout every two years and more often insevere riding conditions. Draining andreplacing your brake fluid helps to removecontaminants such as water and rust. It alsohelps to lubricate the metal and rubberparts in your brake system. Helping themlast longer and working properly.Car Care for the Perfectionist! ®71
More Fun In Your Garage WithMotorcycle Detailing…Test a small out of the way area to make sureit doesn't discolor your seat. For stock vinylseats Vinyl & Rubber Dressing is superior whenjudged against other vinyl protectants. It's waterbased, so it won't harm or dull the surface ofrubber and vinyl over time. It cleans and protectsin one step while leaving behind a non-greasysatin finish. If a raw natural finish is desired orextra grip is needed, avoid the use of dressingsall together.Our 3" Random Orbital is perfect for getting into tightspaces and works great for detailing motorcycles, too!Bodywork is most often painted and inmany cases vinyl decals are used to add color.These decals are often applied over the finishedsurface so care is needed when polishing orwaxing to keep them from lifting. Motorcyclesurfaces require the same attention to detail asan automotive finish. Painted surfaces use eithera single stage paint system (non-clear coat) ora multi-stage paint system (clear coat). Othersurfaces have the color molded into the plastic.For really dirty paint I like to start by using ourCar Wash soap with our Lambskin Four-FingerMitt. The first thing you'll notice is how slipperythe Car Wash acts between your wash mitt andthe paint. This is an important characteristic ofour Car Wash and contributes to its ability to liftaway contaminants while protecting the finishduring your "washing therapy". Many of themild scratching you see in your finish is fromaggressive cleaning. The dirt acts like sandpaper,scratching the finish while you're rubbing thesurface of your paint. Be gentle while washingand frequently rinse out your mitt during thecleaning process. Car Wash is gentle on yourwax, yet removes more dirt and road grime thanany other product we've tested. If your bodypanels have been removed, make sure you cleanthe inside as well as the outside. Often times theinside of the panel gets much dirtier and requiresadditional attention. On body panels I preferto work from the clean area to the dirty area sostart on the outside and finish on the inside. Thiskeeps the dirt on the inside from scratching yourpaint. For stubborn stains you may need to usesome Adhesive Remover on a towel or cloth.Make sure you go back over the area with CarWash and remember to use plenty of water torinse the panels clean. To dry the panels I useour Micro Fiber Dry Towel. This unique weavelessens the friction on your paint so it's kind andgentle, but still retains all the benefits of absorbingwater. Take care when wiping around decalsto avoid lifting them.Once the panels are clean and dry, you'reready for polish and wax. I prefer to do themajority of the polishing and waxing with thepanels installed on the bike. This helps to holdthe bodywork safely in place and reduces thechance of scratching. For this reason I save thepolish and wax step for the very end. Some areasare not easily accessible when the panels are inplace so it's best to work on those before installingthe bodywork. I give the bike one final checkto make sure everything has been cleaned,detailed, serviced and put back into place. If thecoolant or oil lines were removed you shouldrun the engine up to operating temperature andmake sure there are no leaks. Once the panelsare in place it can be difficult to spot a problem.If your bike doesn't have a center stand, a good72
Motorcycle Detailingrear wheel stand helps access the lower parts ofthe bodywork. For polishing I like to start withthe gas tank. I find the back of the tank tends toget scuffed from contact with my leather jacket.Often time these scratches can be removedwith Machine Polish 3 but sometimes I need touse Machine Polish 2. Our 3" Random Orbitalworks great for this! If there are vinyl decals onyour bike, be careful when polishing around theedges of the decal. I prefer to polish in the samedirection as the edge of the decal. If it ends ata point, polish towards the point to keep fromaccidentally lifting the decal. To buff the polishresidue I use our Micro Fiber Polish RemovalCloths. The non-abrasive, wedge shaped microfibers, lift and trap polish, getting the used polishaway from the paint. Next, I move to the tailsection and front fairing, finishing with the sidepanels and fenders. Once polished, I go backover the bodywork with Pre-Wax Cleanser anda Micro Fiber Polish Removal Cloth to make sureall of the polish residue has been removed.Waxing your motorcycle is an importantpart of preserving its appearance. With propercare there is no reason why original factory paintcan't last the entire life of your bike. The goal is toprotect the paint's surface while providing color,depth and clarity so the paint work looks stunning.See the Waxing & Sealing section of this<strong>Handbook</strong> on page 43 to choose the right productfor protecting your motorcycles finish. OurBest of Show Wax ® is my first choice for showbikes, and Paint Sealant is great for those of usthat ride more often. Be sure the paint surface iscool and dry before waxing. Apply wax to yourpad and apply it using the cross-hatch method,just as you did with your polish. When you applywax to your pad, spread it evenly over the entirepad. Remember a little goes a long way. The waxshould almost begin to disappear as you wipe iton. If you have to remove a lot of product whenyou wipe it off (look at your cloth) you are usingtoo much wax. Work in small areas one panelat a time. To buff the wax residue I use ourMicro Fiber Wax Removal Cloths. Once the bodypanels are completed I go to the windscreen.For this I start with our Plastic Cleaner to removeroad film followed by Plastic Polish and a CottonPolish Pad to remove light scratches. To buffthe polish residue I use our Micro Fiber PolishRemoval Cloths. Plastic Polish also works wellon polycarbonate headlight lenses as well asturn signal and brake light lenses. For the mirrorglass I like using our Window Cleaner Wipes.This helps to avoid spray fall out and allows meto concentrate my cleaner directly onto the glass.Once finished I go around the bike checking tosee any areas I may have missed or for any waxresidue left . A light misting of Speed Shine ® on aMicro Fiber Speed Shine ® Cloth helps to removestubborn wax residue.Keeping your motorcycle wellmaintained will help youenjoy them for many years!1968 BMW R69/SBMW R50/2Car Care for the Perfectionist! ®73
Every DayAround The House…Afellow automotive enthusiast, Susan, tells meshe's constantly borrowing her husband'sGriot's Garage Car Care products and using themaround the house. She cleans everything fromwindows to mirrors, carpets, leather furniture,counter tops, floors, clothes, bathrooms, kitchens…virtually every room in her house gets theGriot's Garage treatment. "Why don't you marketto the homemaker?" she asked me. "I like qualitycleaning products as much as my husbanddoes for his cars!" Well Susan, you're right. I'vebeen using them in the house, too, and it's timeI came in from the garage to the house. I want toshare with you the many home uses our cleaningproducts can provide for you. As with anycleaning product, always test a small, indiscretearea first to be sure it won't discolor or stain thesurface. Now when our <strong>Handbook</strong> shows up inthe mailbox, your spouse will smile like you do!Surface CleanerSurface Cleaner captures the cleaningpower of natural orange cleaner.You can use Surface Cleaner ona wide range of surfaces aroundyour home including ceramics,stone, painted surfaces like gutters,doors, window frames and metal.Hand CleanerOur Hand Cleaner has a freshorange scent with a bit of solublegrit to remove the toughest dirt,oil, grease and grime. I've evenused it as a shampoo to removepaint in my hair! Leaves yourhands soft and supple. Keep abottle next to the kitchen or bathroomsink, and in your tool box.Metal CleanerMetal Cleaner removes unsightlyfingerprints and smudges quickly,and leaves behind a non-sticky coatingthat stops new fingerprints fromappearing! Simply spray on andwipe with a clean cloth. Great for useon stainless steel, bare steel, brass,even dull aluminum and chrome.Ideal in the garage and on all stainlesssteel appliances in the home.Carpet CleanerCarpet Cleaner removes oil, grease,dirt, blood, wine, coffee and mostsubstances that stain or get yourautomobile, trunk or home carpetdirty. Pure as the driven snow,it contains no dyes or perfumesthat can transfer color. Works greataround the house.Micro Fiber & FoamPad CleanerOver time, micro fiber towelscollect and hold on to wax residue,polishes and other detailproducts that can decreasetheir effectiveness. Micro Fiber& Foam Pad Cleaner releasesand removes these residues.74
We make it. We teach it. We guarantee it. Here in the U.S.A.We Make It.Some companies buy car care products from massproducers, slap their label on the bottles, and call them their own. Notat Griot's Garage! We develop, manufacture and bottle our Car Careproducts right here in the U.S.A. to ensure everything you put on yourtreasured vehicles is of the finest quality.We Teach It.Our job doesn't end when you receive your order. Proper application is just as important asquality products, so education is a Griot's Garage priority. Our customer service associatesare friendly and extensively-trained. When you call or email with a question, we'll be able tohelp! There are also free resources available on our website and blog; videos, articles, techsheets... all at your fingertips!We Guarantee It.Because we know it's stressful to have tools or products fail, we've taken to heart the wordsof Sir Henry Royce (shown on title page) and created the finest line of Car Care and garageproducts available. Because of our strict standards and extensive knowledge, we covereverything we sell with a 100% Satisfaction Guarantee and Lifetime Guarantee againstdefect. With our products you can rest easy and always...Have fun in your garage! ®Our Car Care Products & The Environment.Ever since I introduced the first Griot's Garage car care productsI've developed, tested and bottled our products to ensure qualityand care is taken from the start. Protection of the environment isimportant to all of us at Griot's Garage. That's why many of ourproducts are environmentally thoughtful, toxic-free and biodegradable.Plus, to reduce waste, we use quality sprayers and bottlesthat are not only recyclable, but also reusable. Enjoy the best!Car Care for the Perfectionist! ®75
Index Of Products…Products mentioned in this <strong>Handbook</strong> are listed below with their product numberand can be ordered by calling 800-345-5789 or by visiting www.griotsgarage.com. WhenI mention a product within this <strong>Handbook</strong>, I capitalize the first letter of the product'sname so you can tell it is a product we sell. An example is: Speed Shine ® or Blue DetailSponges. Have fun with the finest car care products available.Product Name Product #Adhesive Remover, 8 Ounces 15901Adjustable 6" Foam Pad Holder 112041⁄ 4 " Anti-Jam Coupler (Female) 84060A1⁄ 4 " Anti-Jam Coupler (Male Plug) 84060BAloe Coated Vinyl Gloves, 100 Gloves 23302Best of Show Wax ® , 16 Ounces 11171Black Disposable Nitrile Gloves, 100 Gloves 23314Black Vinyl Top Reconditioner, 8 Ounces 15570Blue Detail Sponges, Set of 2 112056" Blue Foam Support Pad 11574Boar's Hair Brush 66073Boar's Hair Detail Brushes, Set of Two 15516Brass Quick Disconnect Set 84022Bug Off!, 35 Ounces 12980Bumper & Trim Reconditioner, 4 Ounces 11183Car Care Pressurized Spray Bottle 77568Car Wash, 16 Ounces 11102Car Wash, 8 Ounces 11160Car Wash, One Gallon 11103Carnauba Wax Stick, 3.5 Ounces 11085Carpet Cleaner, 35 Ounces 11270Carpet Cleaner, 8 Ounces 11268Carpet Cleaner, One Gallon 11272Chrome Wheel Cleaner, 35 Ounces 11030Chrome Wheel Cleaner, One Gallon 11032Collapsible Wash Bucket/Pop-Up Trash Can 66002Compact Detailing Cart 92520Concrete Cleaner, One Gallon 11284Convertible Top Cleaning Kit 11089Corrosion Inhibitor, 35 Ounces 11181100% Cotton Buffing Cloths, Set of 10 14600Cotton Polishing Pads, Set of 4 11835Cotton Swabs, 1000 Count 15703100% Cotton Wipes, 100 Count 55543Detailing Stick System 10219Dimpled Synthetic Chamois 1540076
Index Of Products…Leather Care Spray, 8 Ounces 11040Leather Care Spray, One Gallon 11055Leather Care Wipes, 100 Wipes 11202Leather Care, 16 Ounces 11142Leather Care, 8 Ounces 11143Leather Rejuvenator, 8 Ounces 11141Leather Scent, 4 Ounces 11150Lint Free Towels, 150 Count 14910Long Handle Boar's Hair Wheel Brush 92547Long Reach Wheel Scrubber Brushes, Set of 3 15736Long-Lasting Tire Dressing, 16 Ounces 11044Long-Lasting Tire Dressing, 8 Ounces 11200Lug Nut Cleaning Brush 15597Machine Polish 1 (Medium Polish), 16 Ounces 11161Machine Polish 2 (Mild Polish), 16 Ounces 11162Machine Polish 3 (Very Mild Polish), 16 Ounces 11163Machine Polish 4 (Finest Polish), 16 Ounces 11091Machine Polishing and Waxing DVD 10216Merino Wool Wash Mitt 10203Metal Cleaner, 17 Ounces 20249Metal Polish, 2.5 Ounces 11238Micro Fiber & Foam Pad Cleaner, 16 Ounces 11056Micro Fiber & Foam Pad Cleaner, 35 Ounces 11078Micro Fiber & Foam Pad Cleaner, One Gallon 11067Micro Fiber Cleaning Pads, Set of 3 11242Micro Fiber Cloth Value Pack, Set of 50 14330Micro Fiber Detailing Socks, Set of 4 10221Micro Fiber Drying Towel 11117Micro Fiber Interior Cloths, Set of 4 11080Micro Fiber Polish Removal Cloths, Set of 3 11115Micro Fiber Refill Bonnets, Set of 3 90263Micro Fiber Speed Shine ® Cloths, Set of 3 11231Micro Fiber Spray-On Car Wash Cloths, Set of 3 11269Micro Fiber Wash Mitts, Set of 2 10268Micro Fiber Wash Pads, Set of 2 11290Micro Fiber Wax Removal Cloths, Set of 3 11116Micro Fiber Window Cloths, Set of 4 11096Micro Fiber Wipe Down Towels, Set of 12 11057Multi Fluid Extractor 10115Multi-Pattern Hose Nozzle And Car Wash Dispenser 92526New Car Scent, 4 Ounces 11149Nylon Carpet & Upholstery Brush 15585Nylon Mesh Refill Bonnets, Set of 3 90237Odor Exterminator ® 1104878
IndexOil & Grease Cleaner, 35 Ounces 11046Oil & Grease Cleaner, 8 Ounces 11045Oil & Grease Cleaner, One Gallon 11047One-Step Sealant, 16 Ounces 11075One-Step Sealant, 8 Ounces 110623" Orange Foam Polish Pad 10632A3" Orange Foam Polish Pad & Holder 106323" Orange Foam Polish Pads, Set of 3 112416" Orange Foam Polish Pad 106266" Orange Foam Polish Pads, Set of 3 11254Paint Cleaning Clay Pad 10631Paint Cleaning Clay, 8 Ounces / 226 Grams 11153Paint Glaze, 16 Ounces 11041Paint Prep, 35 Ounces 11135Paint Prep, One Gallon 11083Paint Sealant, 16 Ounces 11088Paint Sealant, 8 Ounces 11086Paint Touch Up Kit 50861Plastic Cleaner, 8 Ounces 11185Plastic Polish, 8 Ounces 111863" Pneumatic Orbital 109776" Pneumatic Orbital 10415Polish Removal Bonnets, Set of 3 11518Portable Water Deionizer 37201Positioning Spray, 4 Ounces and Squeegee 77896Pre-Cut Headlight & Fog Light Shields 10232Pre-Wax Cleanser, 35 Ounces 11038Pre-Wax Cleanser, One Gallon 110393" Random Orbital 10739Professional Water Hose, 100' 94730Professional Water Hose, 50' 94758Protective Shield, 2" Wide 77890Protective Shield, 3 ⁄ 8 " Wide 77633Protective Shield, 4" Wide 778923" Red Foam Wax Pad 10629A3" Red Foam Wax Pad & Holder 106293" Red Foam Wax Pads, Set of 3 112636" Red Foam Wax Pad 106286" Red Foam Wax Pad & Holder 112126" Red Foam Wax Pads, Set of 3 11271Replacement In-Line Water Filter37244ARetractable Blue Water Hose and Black Reel 10503Rolling Shop Cart 92578Round Boar's Hair Brush & Handle 10238Car Care for the Perfectionist! ®79
Index Of Products…Rubber Cleaner, 35 Ounces 11136Rubber Cleaner, 8 Ounces 11069Rubber Cleaner, One Gallon 11137Rubber Prep, 16 Ounces 11071Rubber Prep, 8 Ounces 11050Rust Converter, 1 Quart 11043Rust Remover, 35 Ounces 11217Rust Remover, One Gallon 11228Set Of Swabs 15701Set of Three Male Ends 84520Sheepskin Dust & Wash Mitt 10222Short Handle Boar's Hair Wheel Brush 92546Six-Piece Micro Fiber Cloth Set 11001Speed Shine ® Wipes, 100 Wipes 11188Speed Shine ® , 35 Ounces 11146Speed Shine ® , 8 Ounces 11144Speed Shine ® , One Gallon 11148Spray-On Car Wash, 35 Ounces 11065Spray-On Car Wash, 8 Ounces 11064Spray-On Car Wash, One Gallon 11066Spray-On Wax, 35 Ounces 11098Spray-On Wax, 8 Ounces 11084Spray-On Wax, One Gallon 11097Stay Soft Chamois 11101Stinky Be Gone ® , 2 Pounds 11059Stinky-Be-Gone ® , Set of 3 92218Storage Desiccant Bag, One Pound 92011Storage Desiccant Bags, Set of 3 One Pound Bags 92035Surface Cleaner, 35 Ounces 15939Surface Cleaner, 8 Ounces 15937Surface Cleaner, One Gallon 15941TDS Meter 33480Terry Micro Fiber Refill Bonnets, Set of 3 90246The Finest Water Hose Nozzle 92548Three Sets of Disconnects 84097Three-Finger Detail Mitts, Set of 2 11838Thumb Control Hose Nozzle 50043Tim's Dirty Spots Micro Fiber Wipe Down Towel 11239Tire Rejuvenator, 8 Ounces With Blue Detail Sponge 15532Tire Scrubbing Brush 15540Touch and Flow Valve 82067Traveling Car Care Bag 92539Ultimate Car Wash Bucket 67260Ultra Thick Micro Fiber Towel 1102380
IndexUndercarriage Spray, 35 Ounces 11138Undercarriage Spray, 8 Ounces 11061Undercarriage Spray, One Gallon 11139Vanilla Scent, 4 Ounces 11151Versatile 10X Magnifier 13098Vinyl & Rubber Dressing Wipes, 100 wipes 11193Vinyl & Rubber Dressing, 35 Ounces 11169Vinyl & Rubber Dressing, 8 Ounces 11173Vinyl & Rubber Dressing, One Gallon 11175Wax Removal Bonnet 11536Wax Removal Bonnets, Set of 3 11256Wheel Cleaner, 35 Ounces 11106Wheel Cleaner, 8 Ounces 11164Wheel Cleaner, One Gallon 11107Wheel Scrubber Brushes, Set of 3 15220Wheel Well Brush 15502Wheel Cleaning Clay 110353" White Foam Metal Polish Pads, Set of 3 10635White Wax Applicator Pads, Set of 2 10237Window Buddy, Set of 2 90211Window Cleaner Set 90247Window Cleaner Wipes, 100 wipes 11192Window Cleaner, 35 Ounces 11108Window Cleaner, 8 Ounces 11168Window Cleaner, One Gallon 11110Windshield Repair Kit 902013" Yellow Scrubbing Pads, Set of 3 106706" Yellow Scrubbing Pad 10676Car Care for the Perfectionist! ®81
Remember To Have Fun…Working on cars is meant to be fun andrelaxing. For me, it lets me escape from life'sdaily demands, focus entirely on the taskat hand and bring tranquility back to anotherwise demanding world. Should youread this <strong>Handbook</strong> and still have questions,remember we're here to help. I wantto make sure when you're using any of ourproducts, that you always have fun in yourgarage. Keep sending me your thoughts,ideas and comments so I can continue toimprove our products. Now, go and enjoyyour precious free time and…Have Fun in Your Garage! ®Richard Griot82
Car Care DVDKeep it handy!If you have our Instructional RandomOrbital DVD, store it in this handy sleeveso you'll always know where it is. If youdon't have it, get one and keep it here!Car Care for the Perfectionist! ®
Have fun in your garage! ®For answers to your car care questions orto request a free catalog please contact us at:800-345-5789www.griotsgarage.comGriot's Garage, Inc.3333 South 38 th Street, Tacoma, WA, 98409